Keep reading this tutorial if you want a little more detail and an example of how to use a sheet within a slightly more complete app.
In this tutorial you will learn how to use a sheet within an app that uses the MVVM design pattern – it will work as demonstrated in this video:
NOTE
The colour of the sheet is configurable; yellow is used here just to make it plainly obvious where the sheet is, as compared to the view behind the sheet.
Model
The model for this app is fairly straightforward.
The Student data type is defined as follows:
Several instances of the Student data type are also created for testing purposes.
The currentGrade stored property is an instance of the Grade data type.
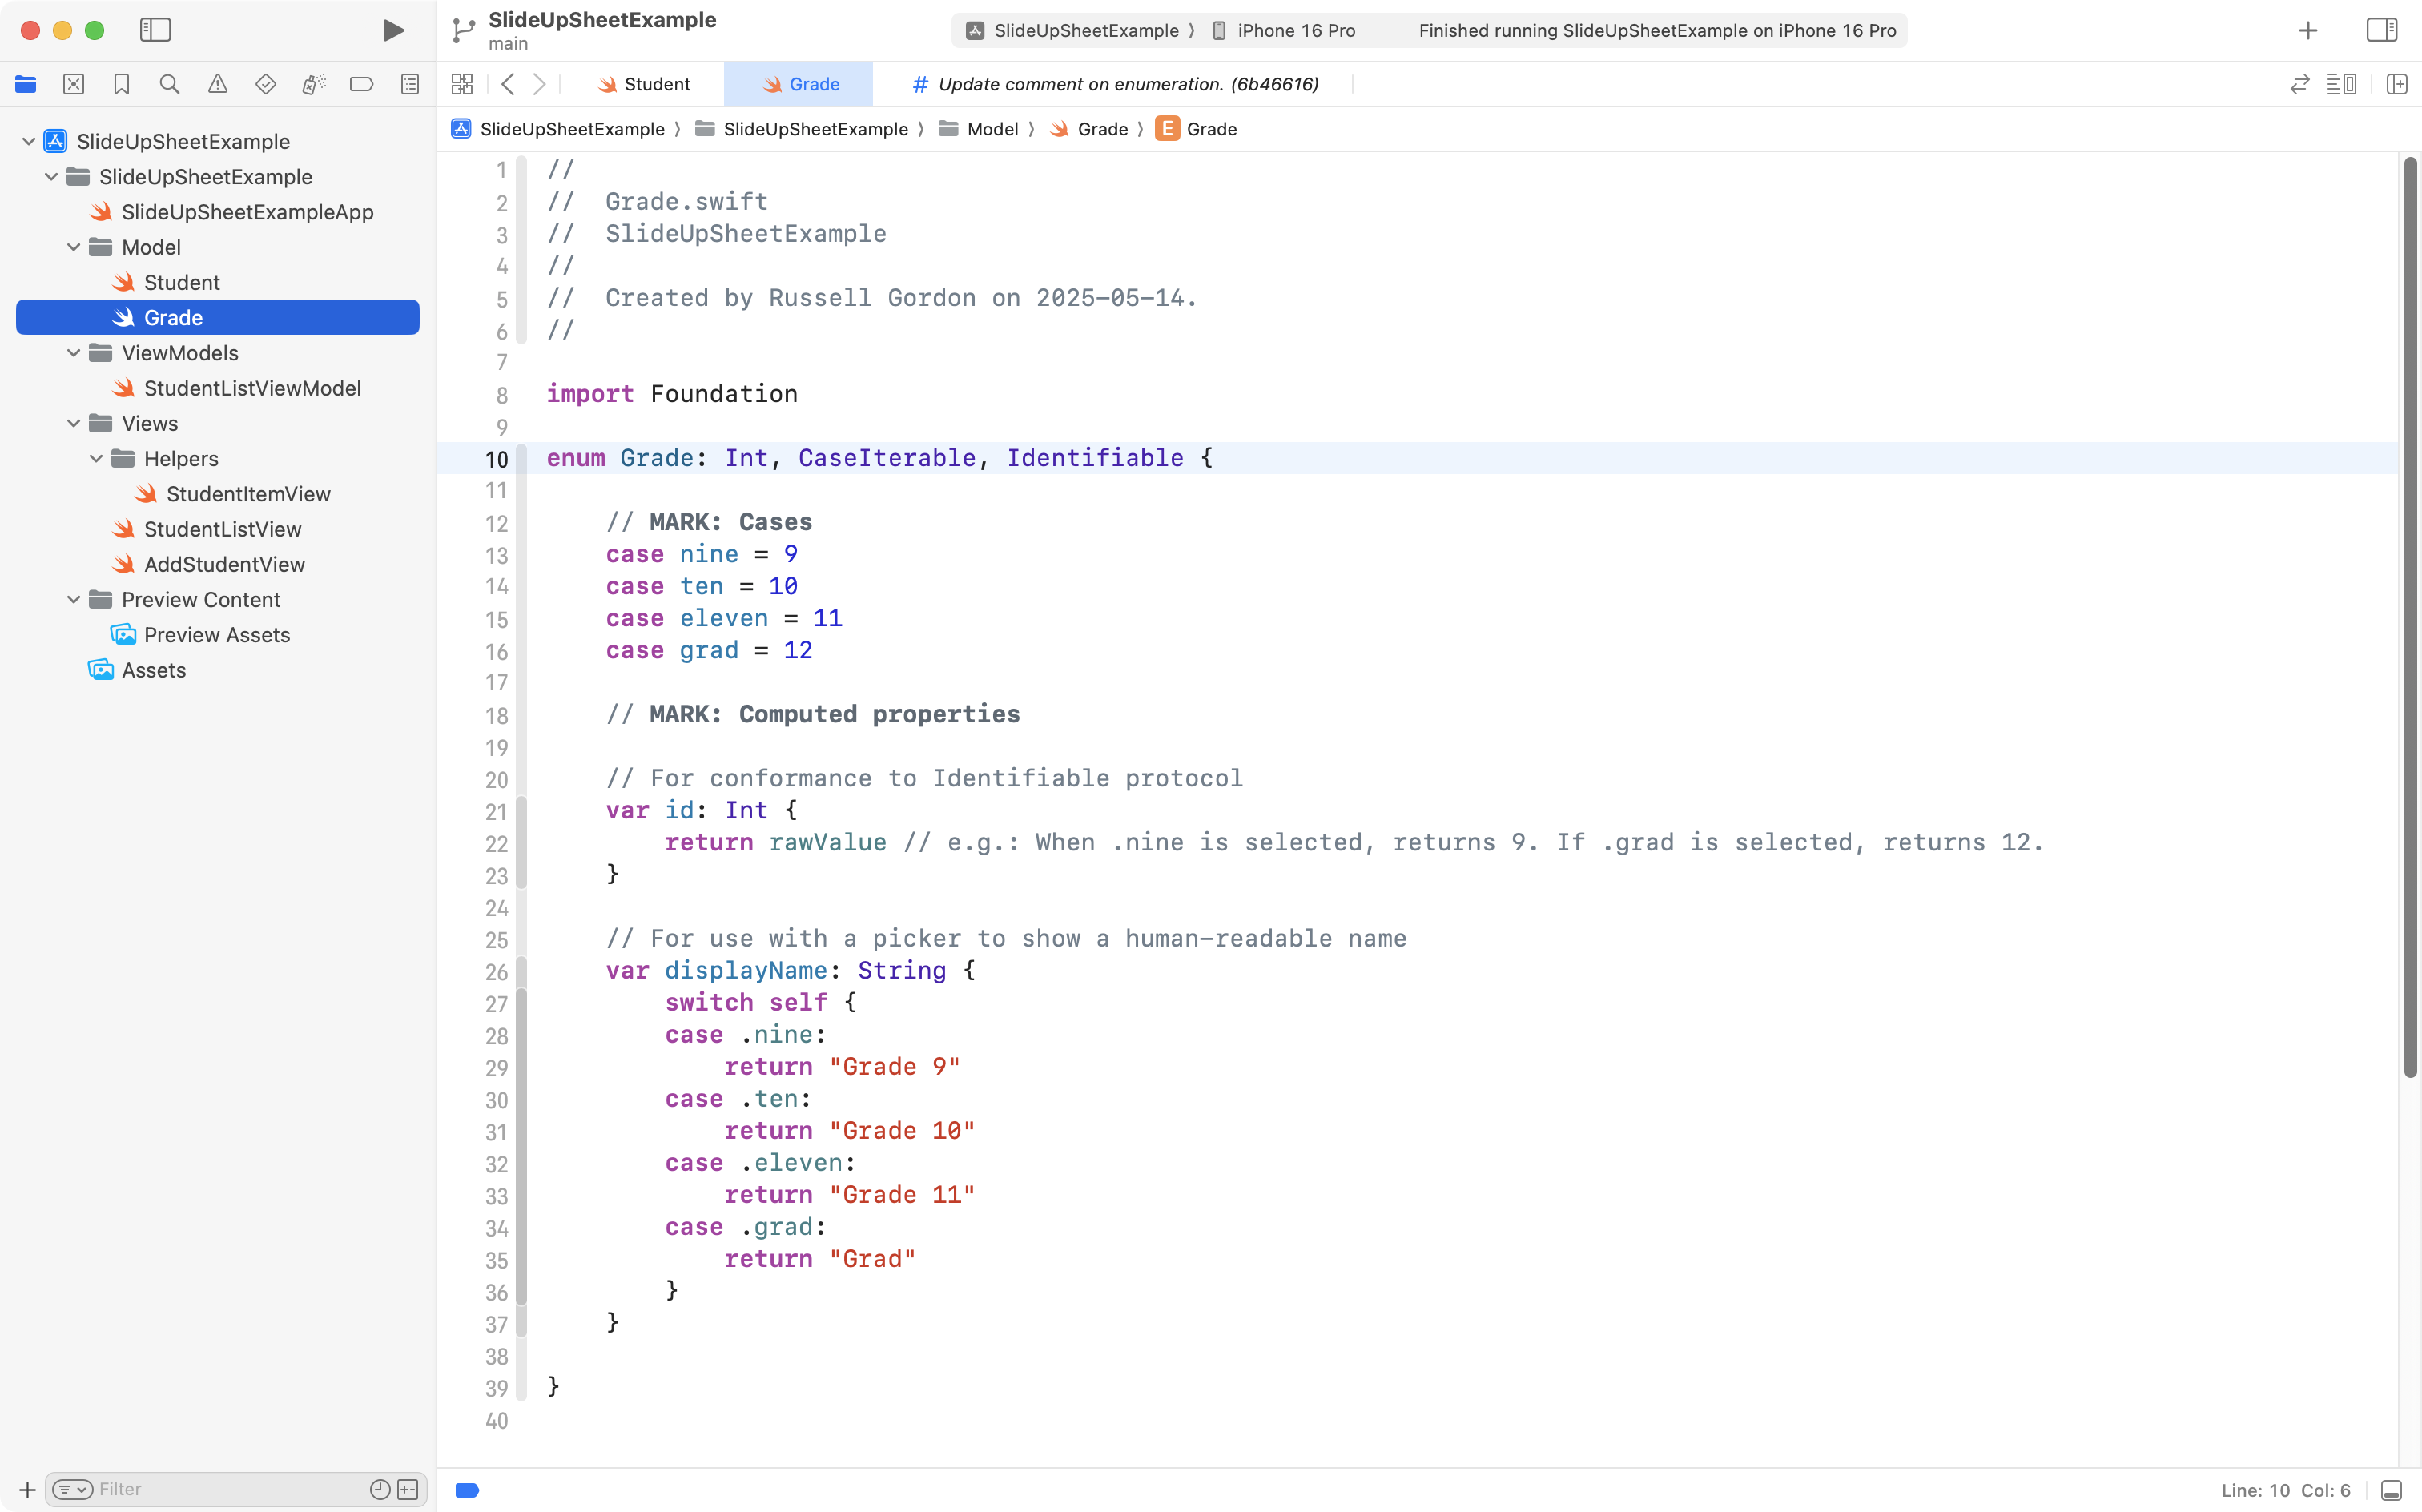
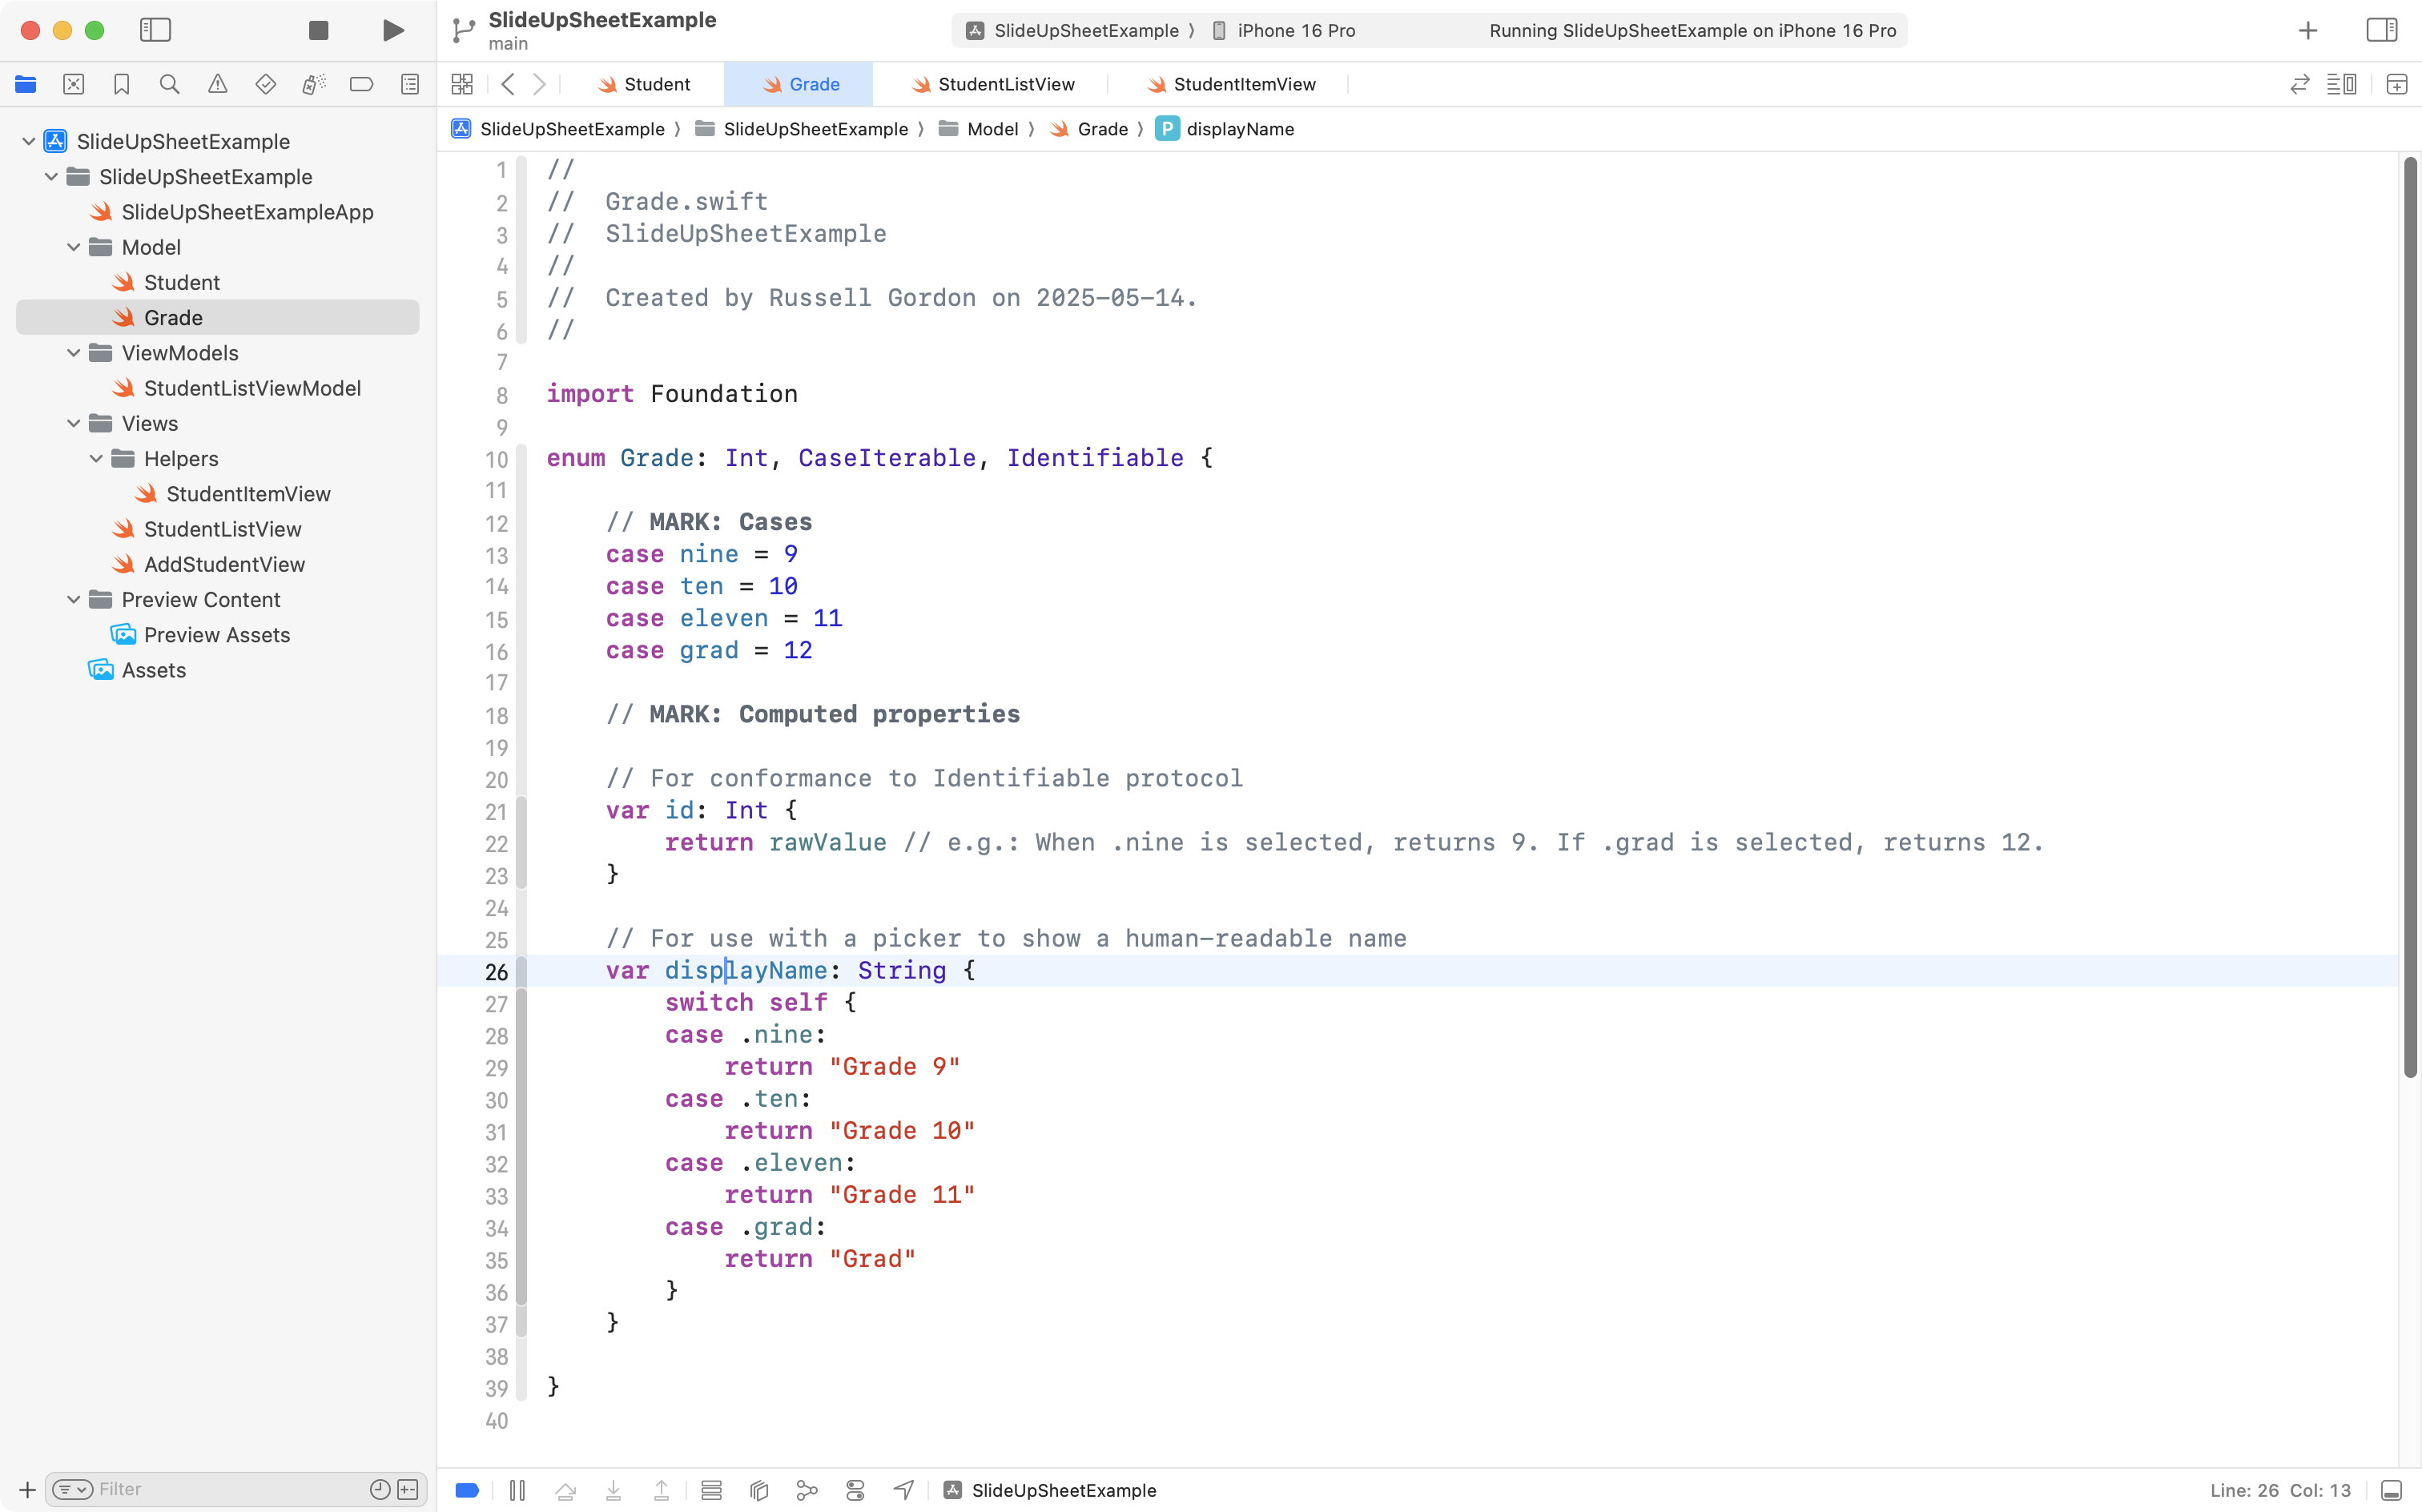
Here is the definition of that Grade data type:
The Grade data type was defined to avoid having the user be able to type in any given number for the grade of a student – they can only select from one of the four options defined in that enumeration. An enumeration works well with a Picker structure – we will examine how the Picker works in more detail later.
View model
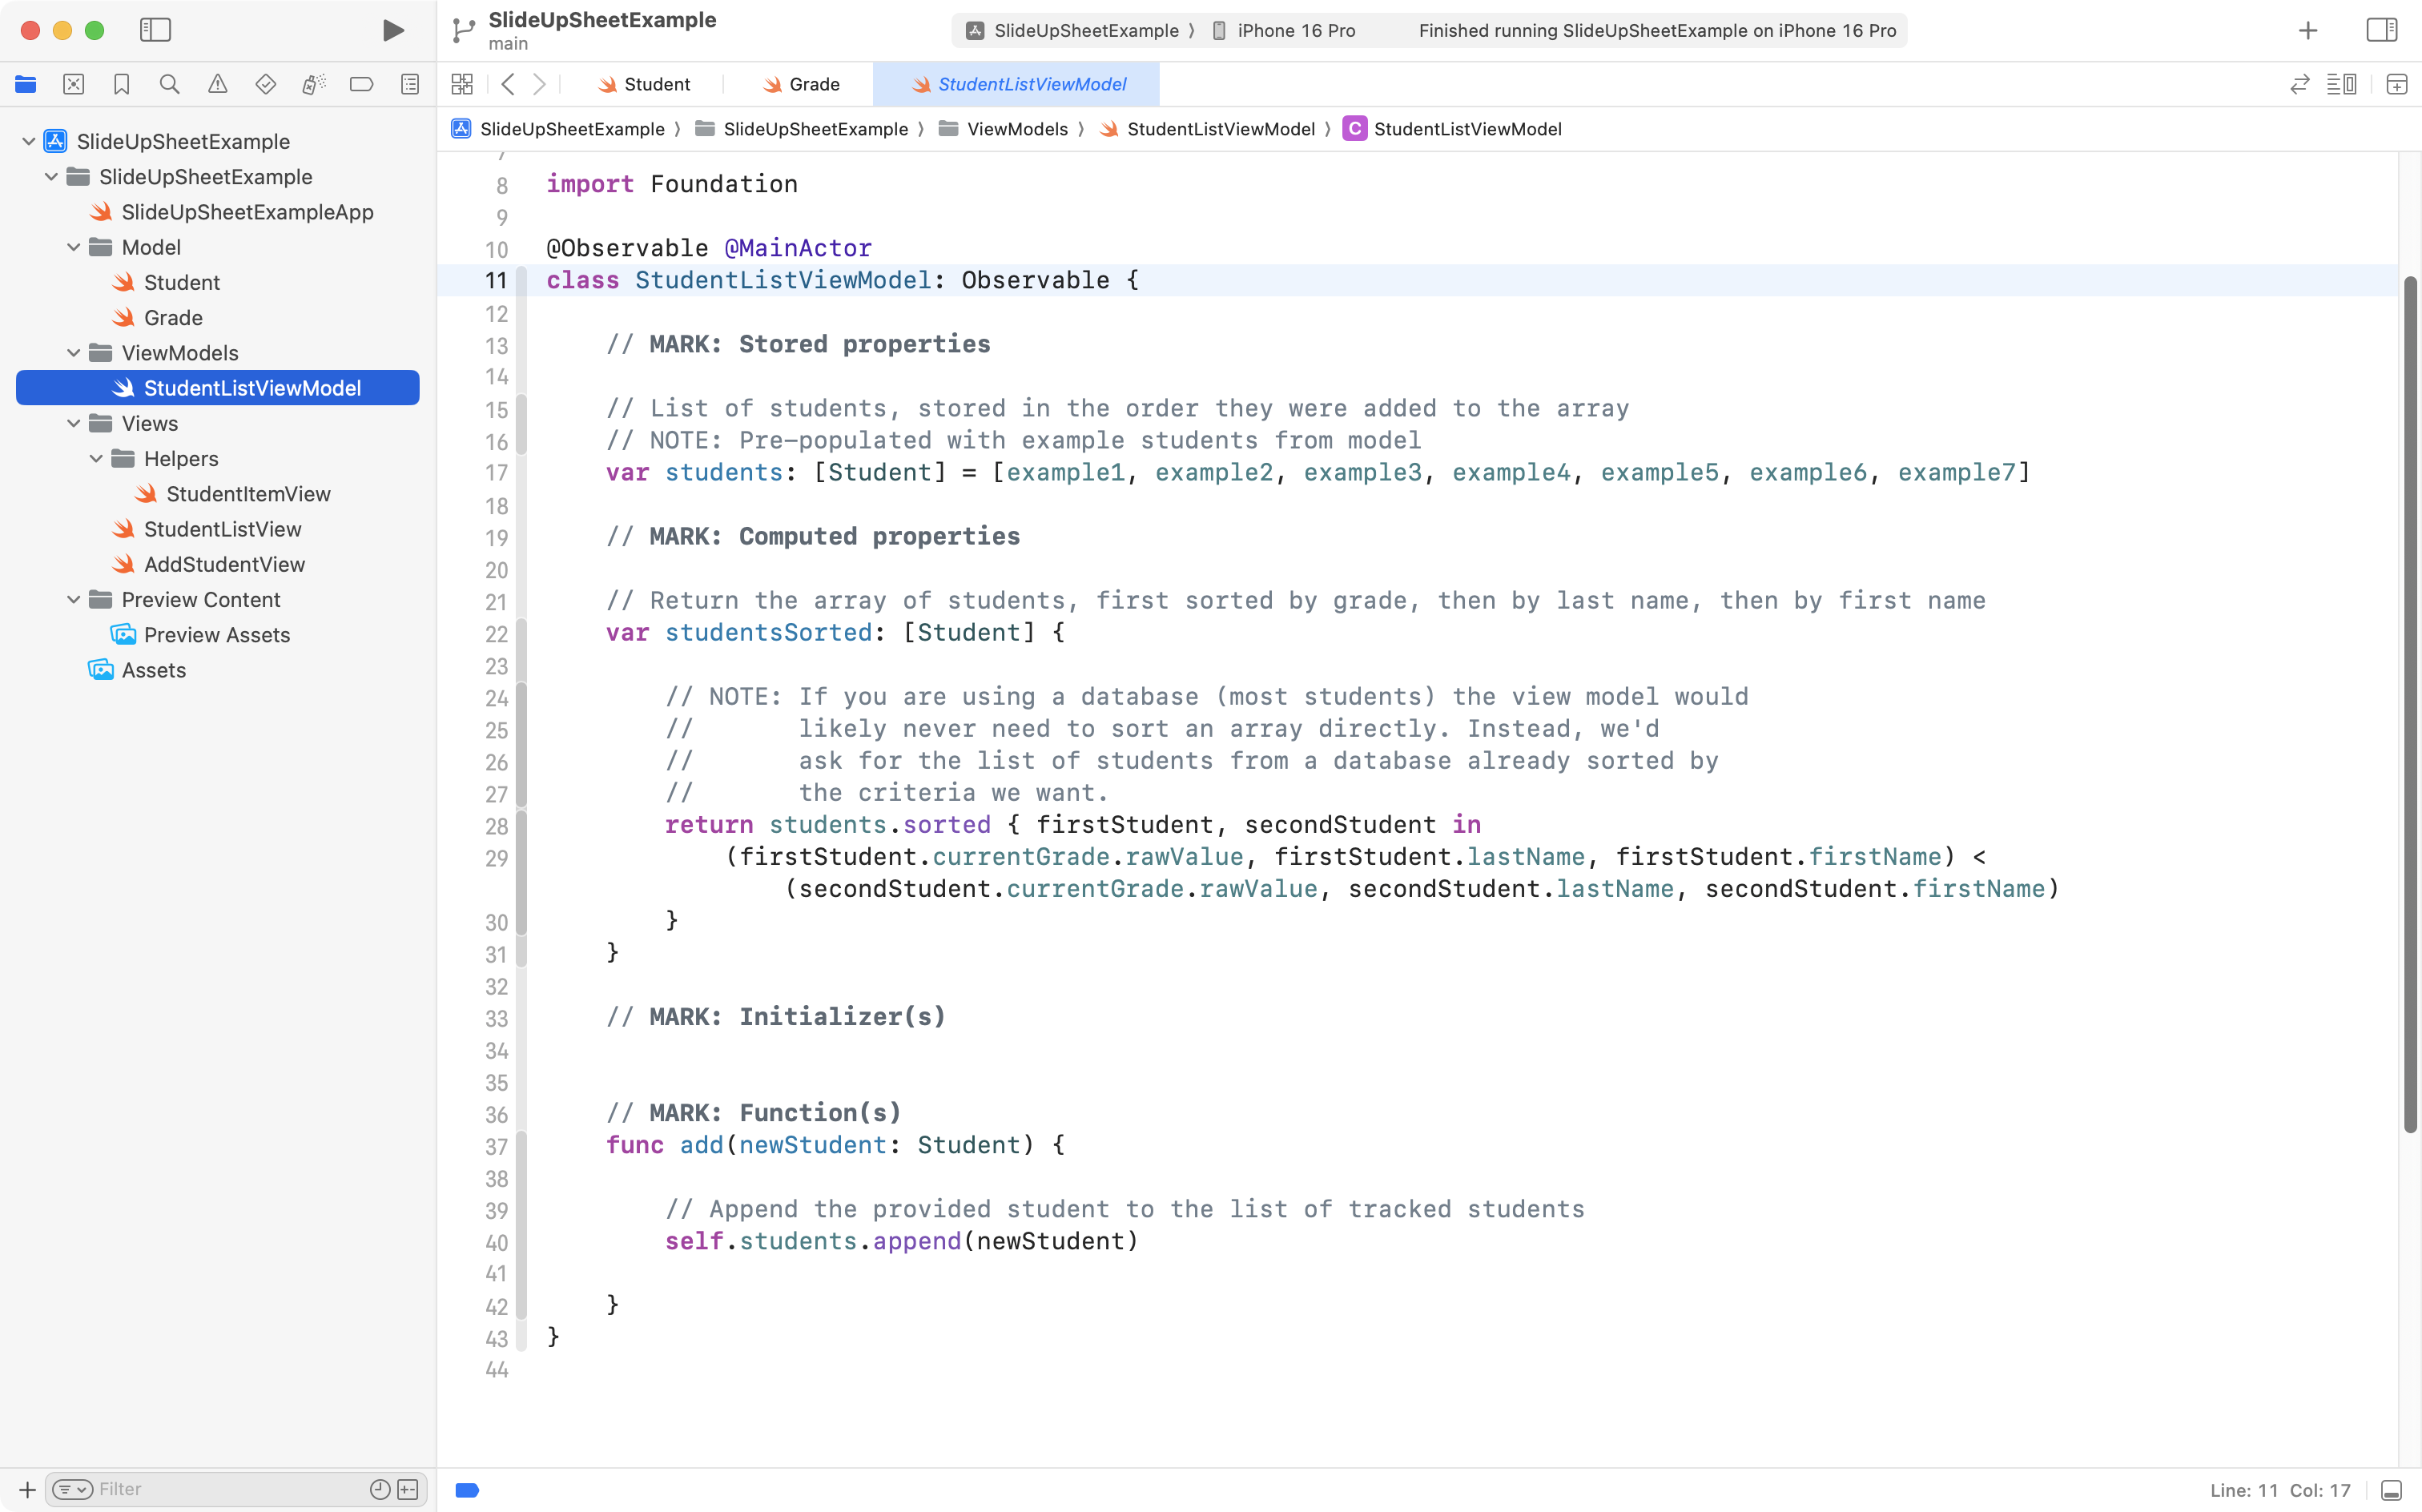
The view model for this app is very basic:
It is an observable class that runs on the main thread (line 10). The class will be observed from the view – the view will react (update) when changes occur to the data in the class.
There is one stored property – a list (array) of students (line 17).
There is a function that allows for the addition of a new student (lines 37 to 42). This function will be invoked by the view shown in the slide-up sheet.
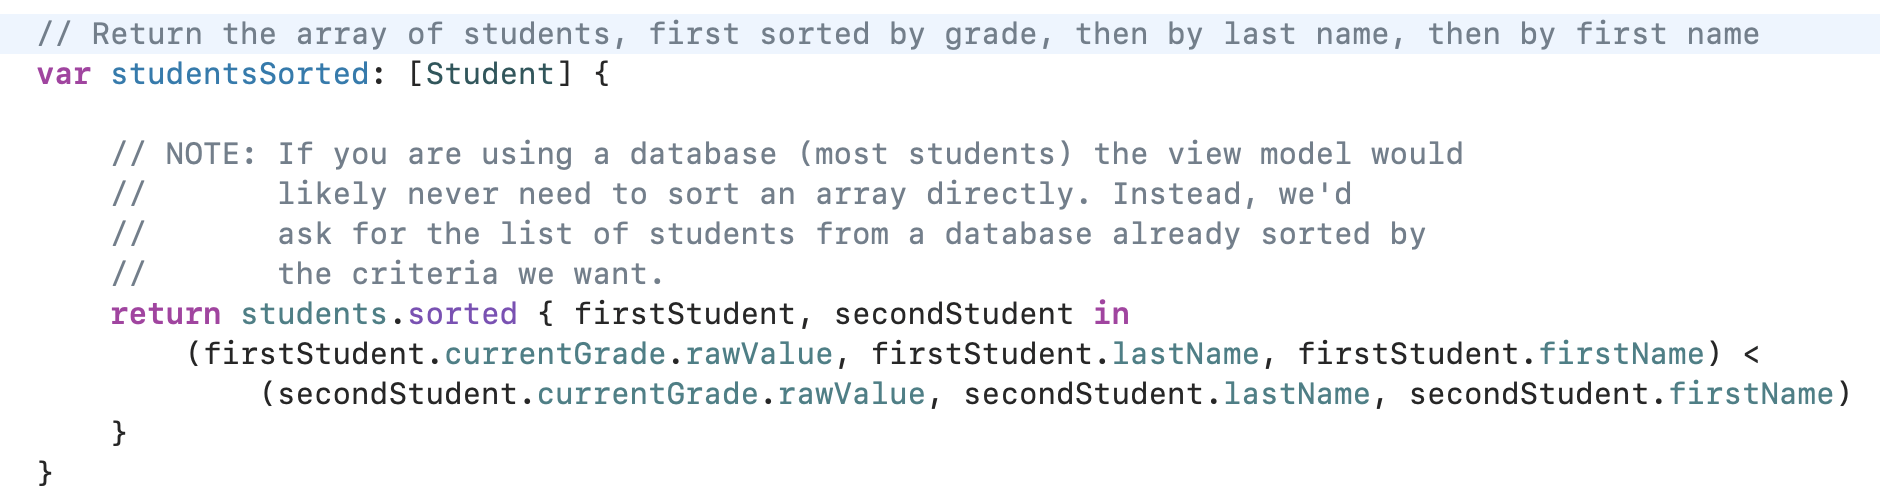
The only novel part of this view model is the computed property, studentsSorted. This is used to present the list of students in a sensible order. The students array contains students in the order they were added to the array. studentSorted is a computed property that returns the same information, but sorted according to the following rules:
first by grade
next by last name
finally, by first name
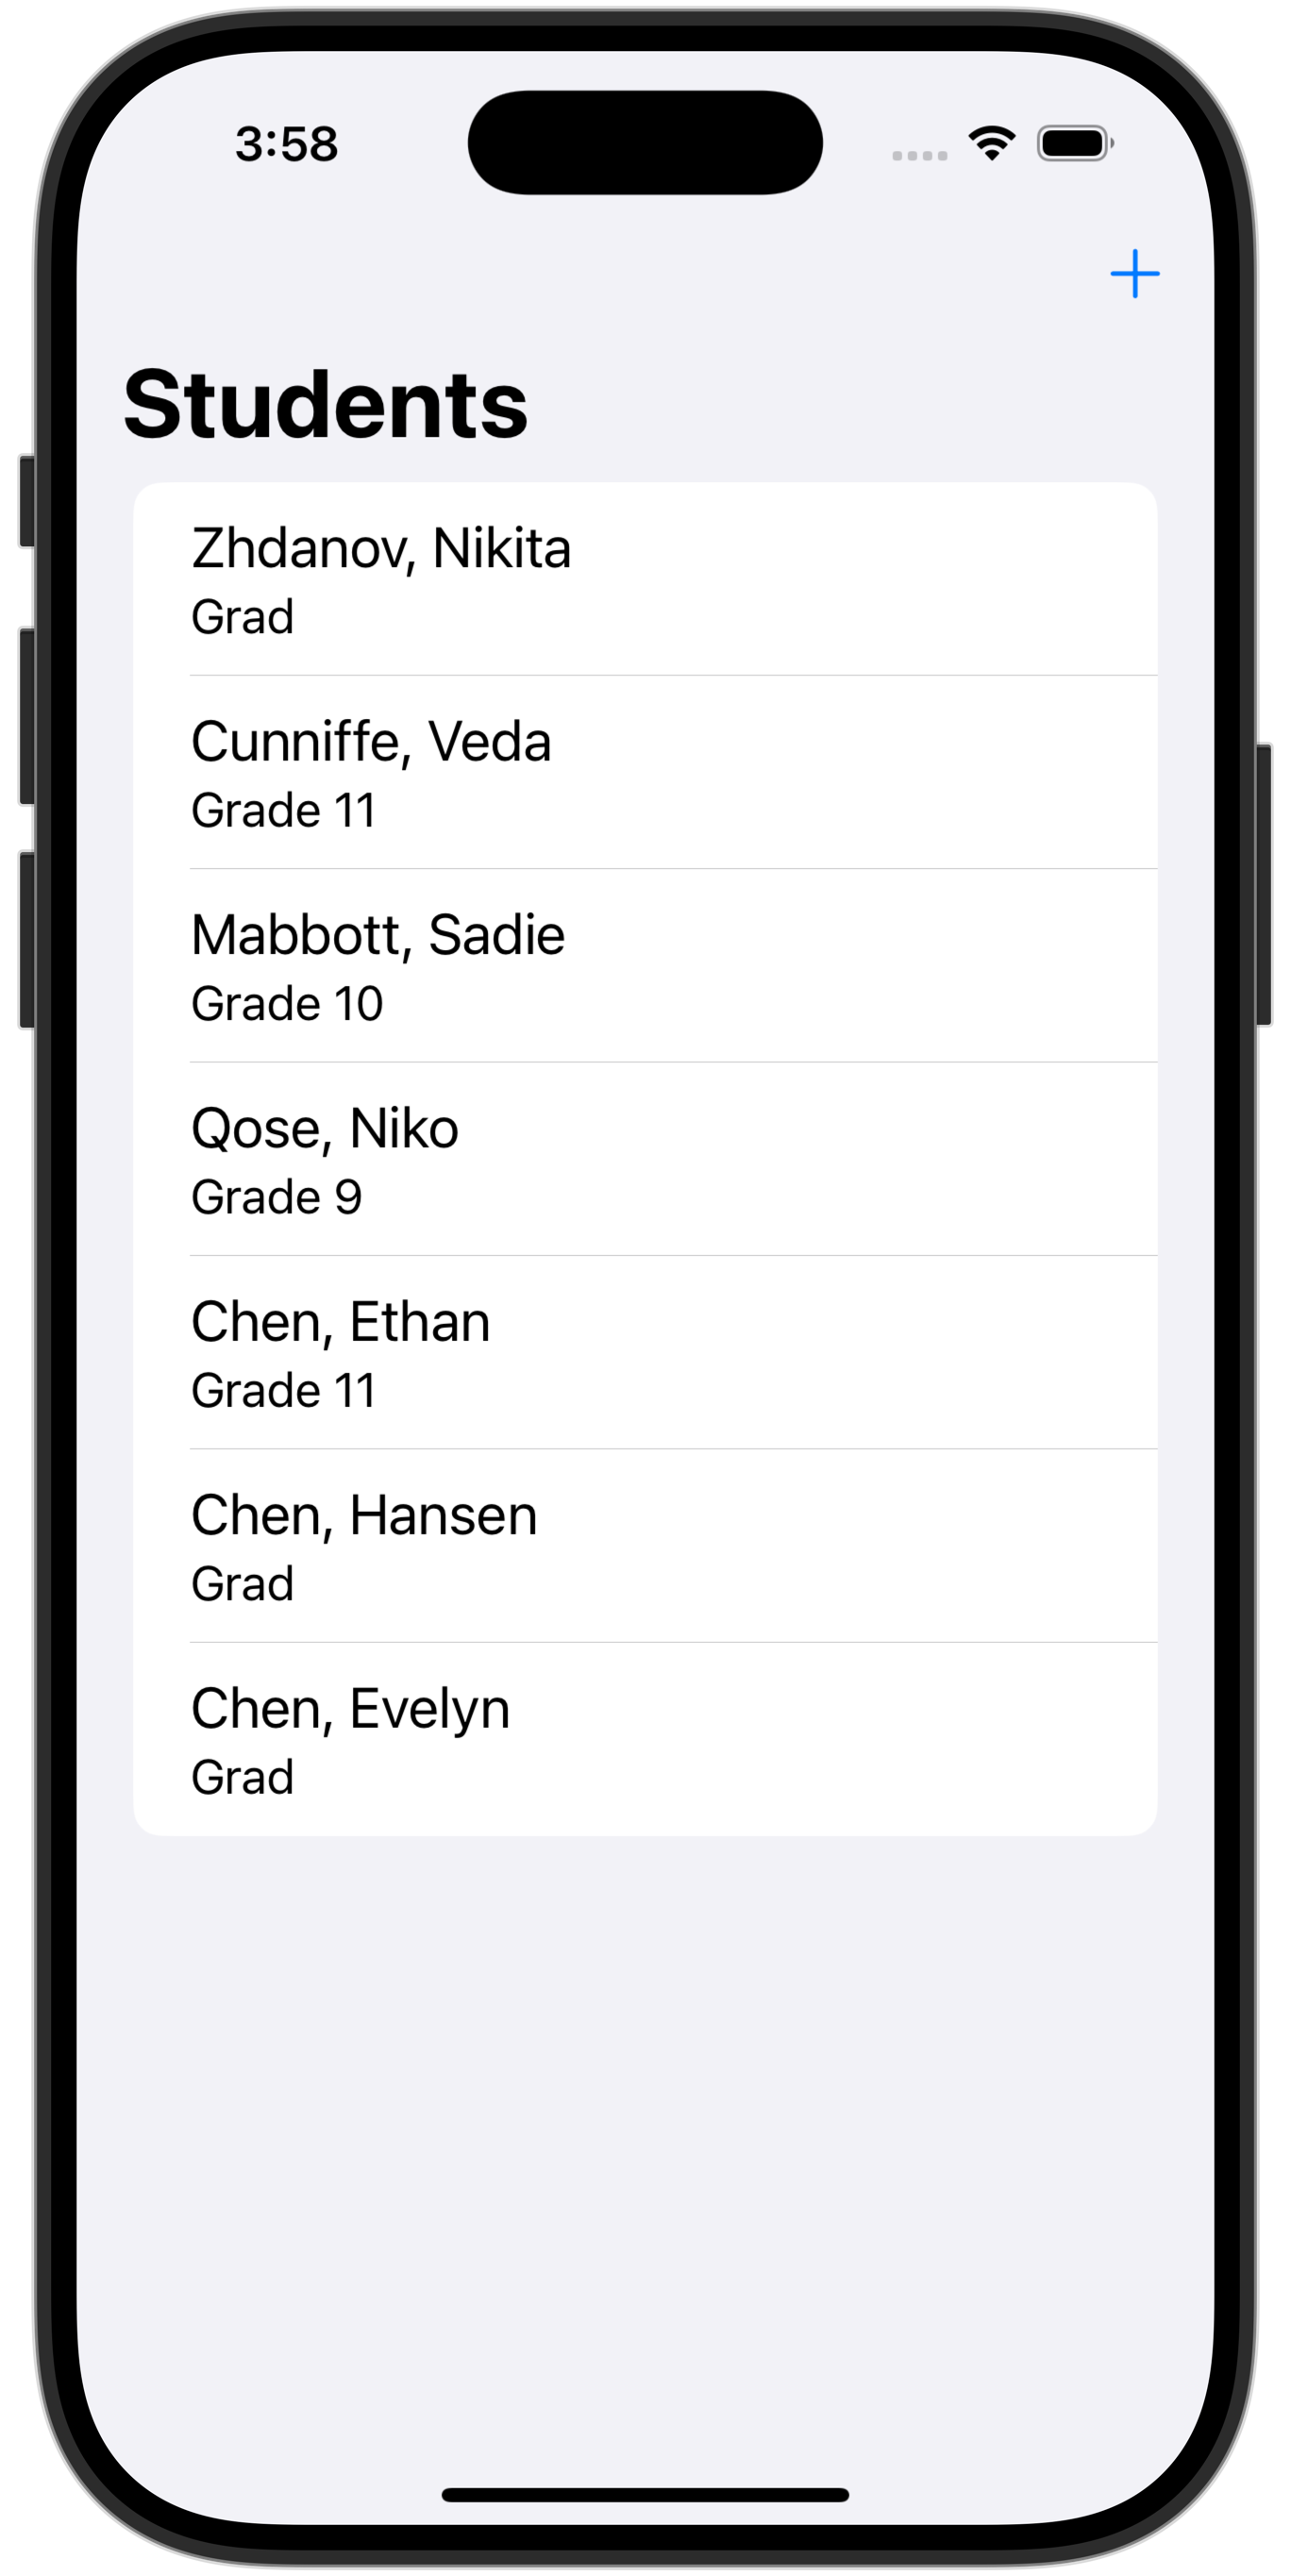
If we presented the data in the students array in the order that data was actually added to the array, the list of students would look like this:
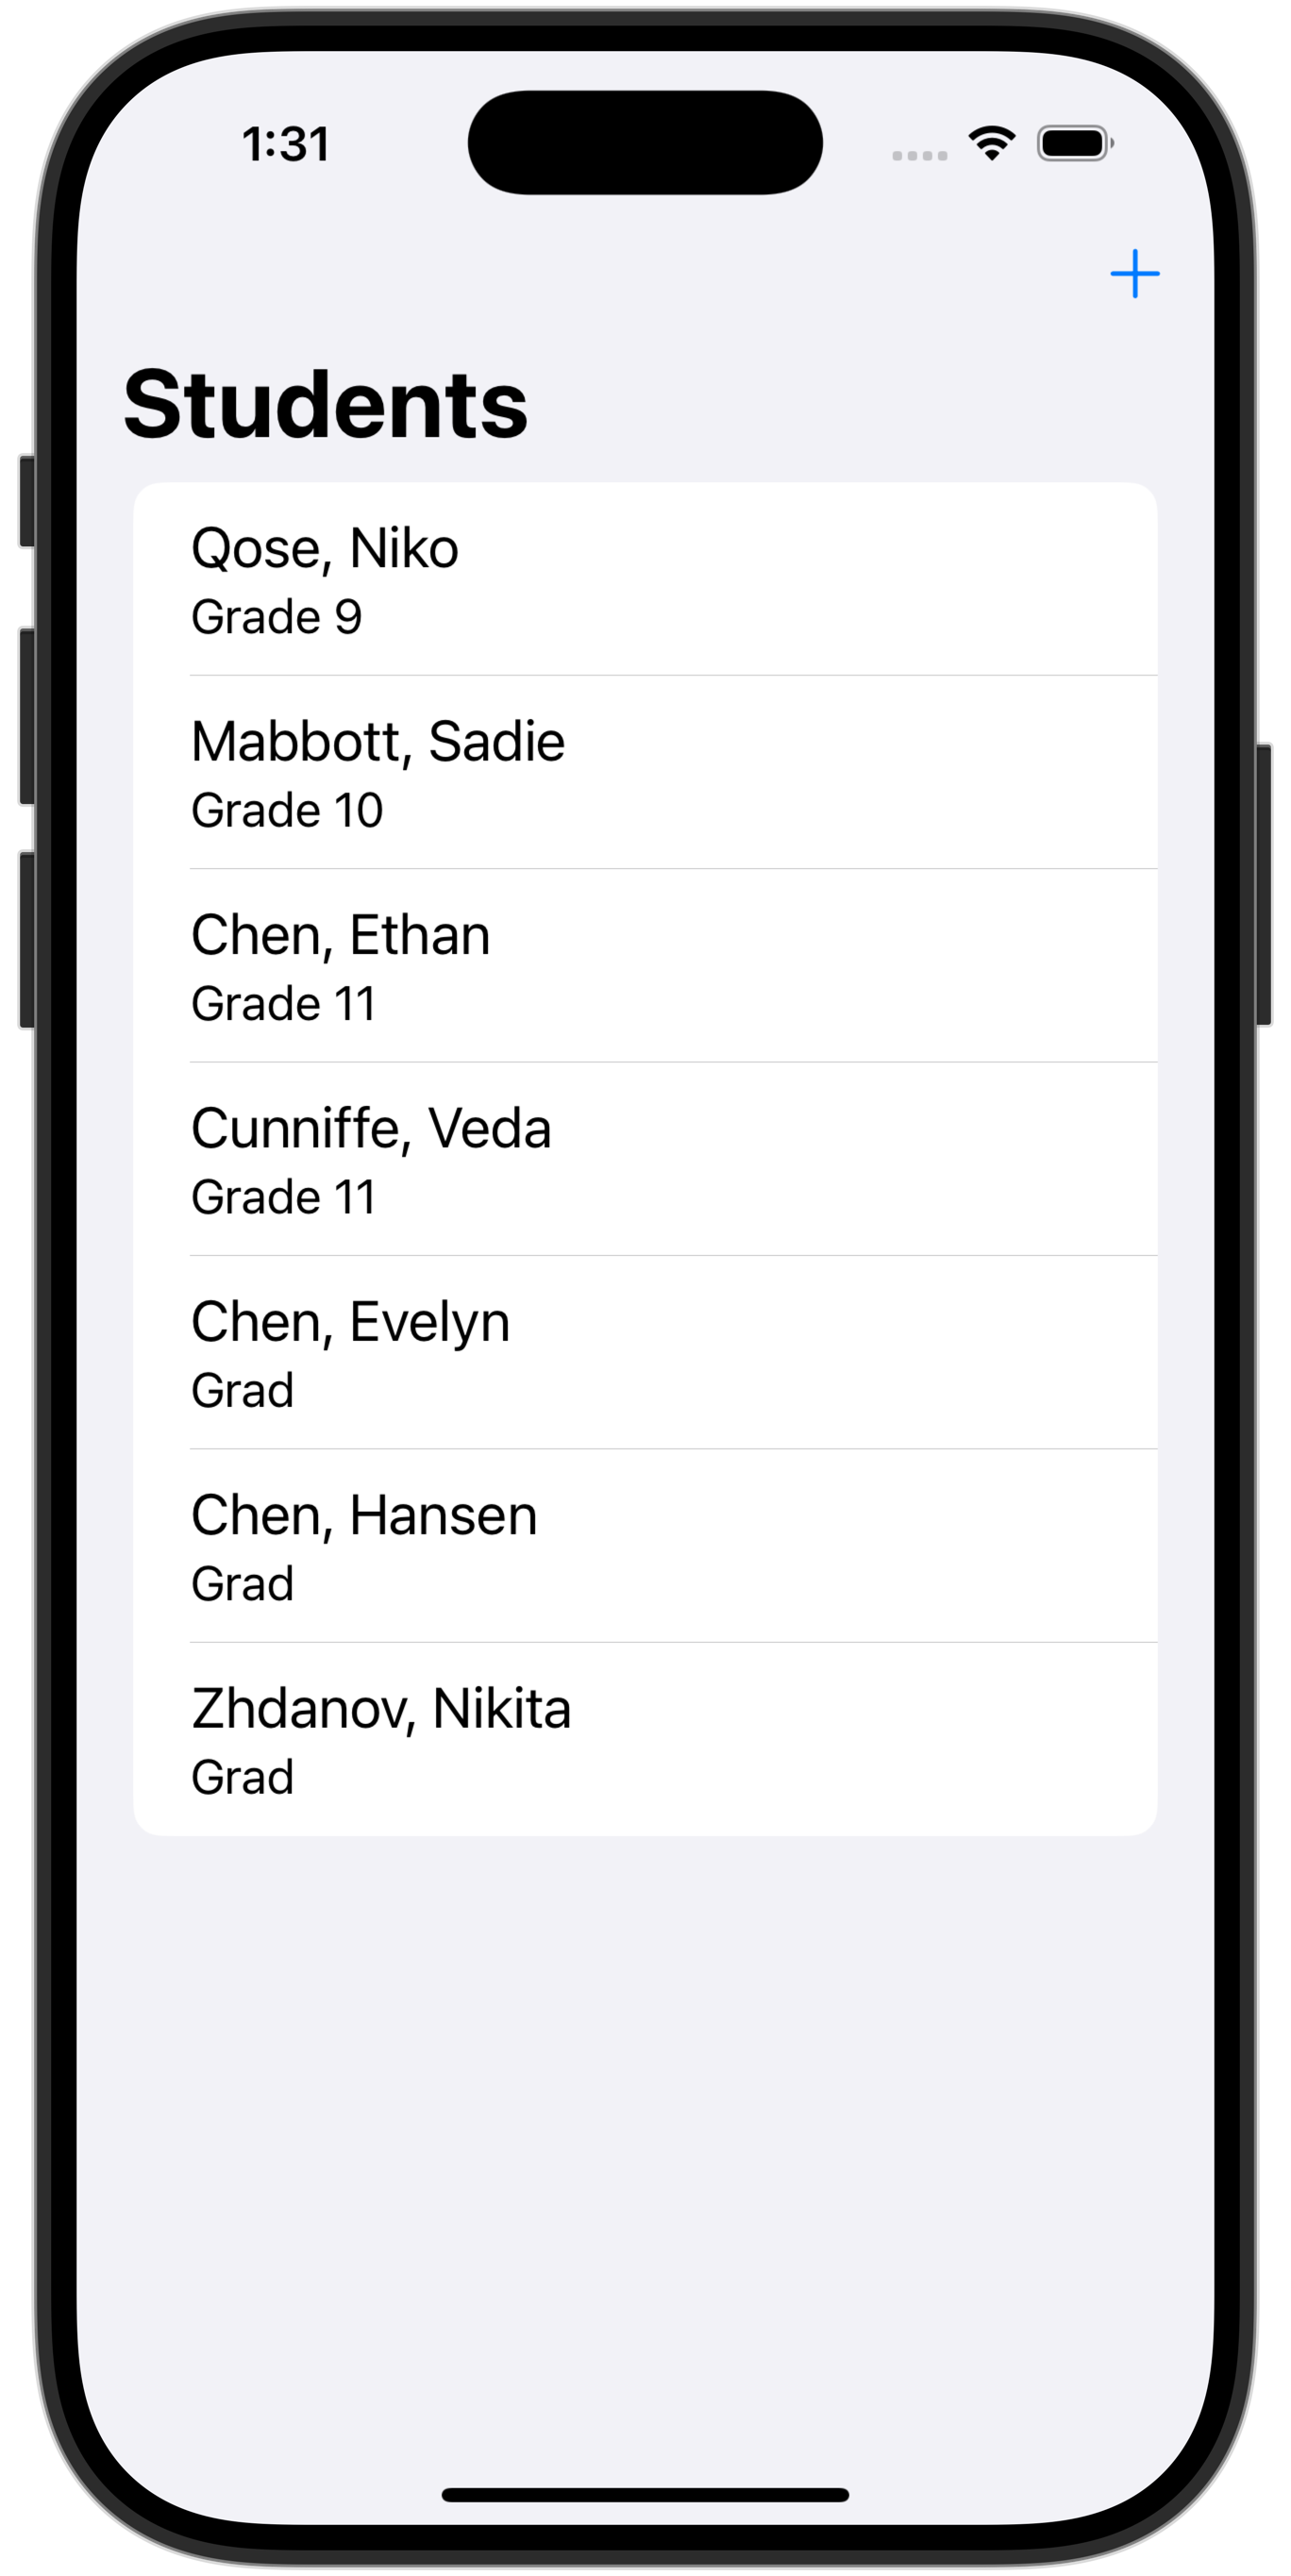
If we instead present the data in the studentsSorted array, the list of students will look like this:
Note how students are ordered first by grade, then by last name, then by first name.
TIP
Using Swift to make a computed property that returns a sorted array, like this:
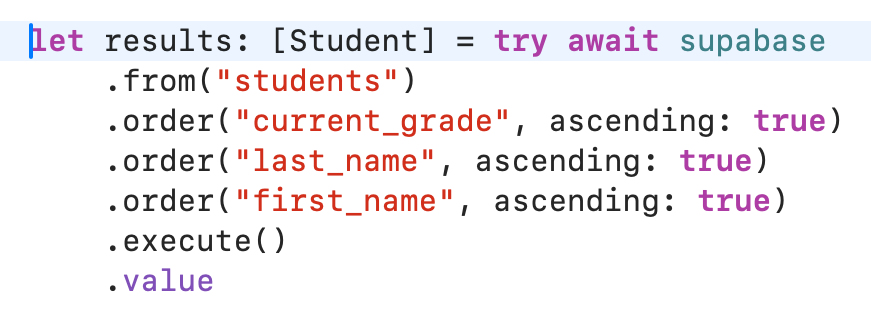
… is equivalent to writing raw SQL that looks like this:
… or using the Supabase framework to retrieve an array of students, something like this:
In a real app, you would probably just fetch the results from the database using the Supabase framework above.
For this example app (focused on explaining how to use a sheet) the students array is sorted using pure Swift code to avoid the complexity of adding a database to this tutorial.
Views
Showing one student
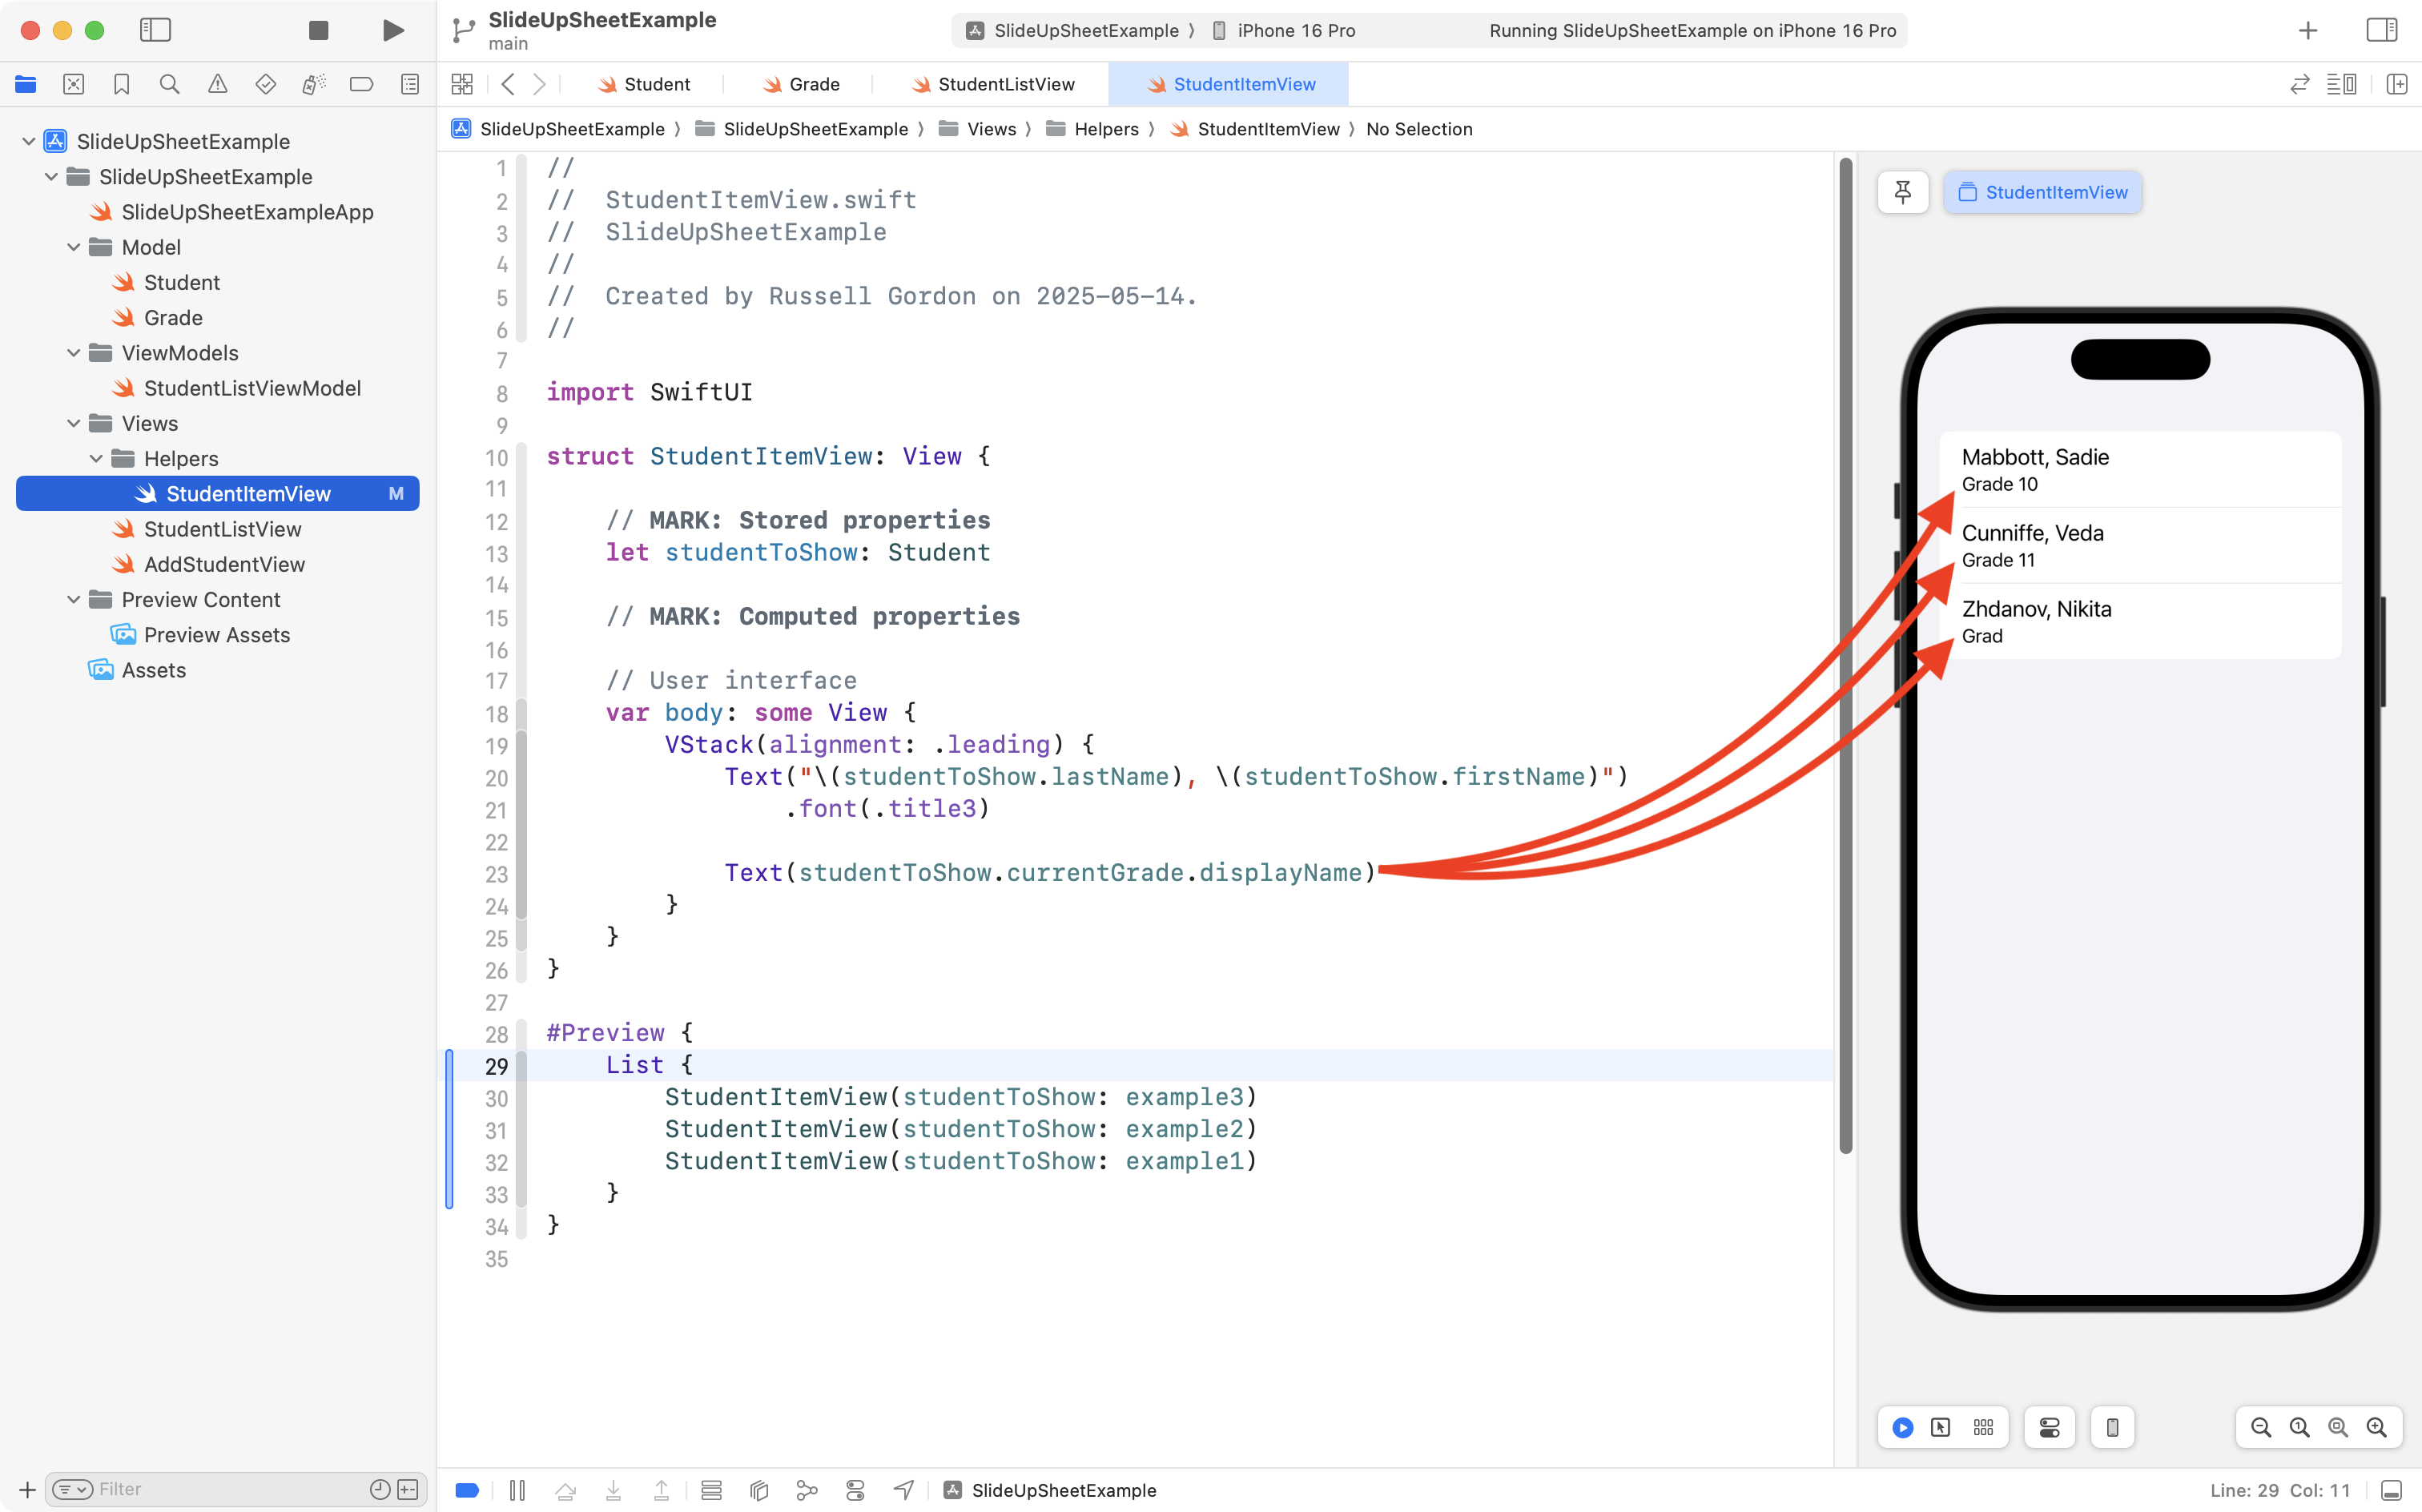
StudentItemView is a helper view designed to show just a single student.
Here, the Preview has been adjusted to show three instances of StudentItemView within a scrollable list (since this is how StudentItemView will be used later on):
Notice how we make use of the displayName property of the student’s currentGrade property.
currentGrade is an instance of the Grade type, and the displayName computed property that is part of the Grade type supplies the text that shows up. For example, per LCS tradition, a student in Grade 12 is referred to as a Grad:
Listing students
The view that displays the list of students is shown here:
Let’s break this code down a little bit.
DISCUSSION
A connection to the view model is established.
We use a scrollable list to iterate over the studentsSorted array from the view model, passing a reference to each student in turn to the StudentItemView helper.
Shows a title of Students for this view.
Initializes a stored property named showingAddStudentView to control whether the slide-up sheet is shown or not. It begins as false so that the sheet does not show at first.
Adds the + button in the toolbar (lines 31 to 40). This button causes the showingAddStudentView stored property to become true. This will trigger the appearance of the slide-up sheet.
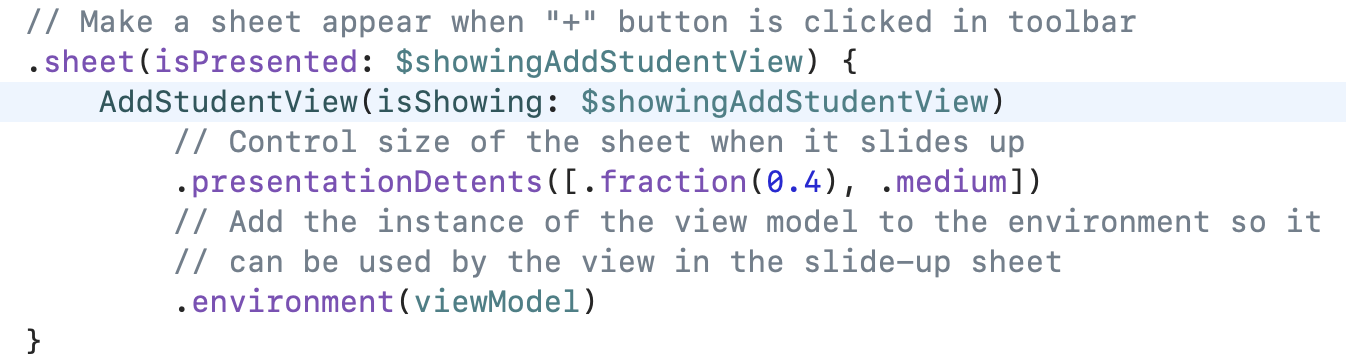
This is the view modifier that is used to cause a sheet to appear. The isPresented parameter is bound to the showingAddStudentView stored property. When the + button makes that stored property become true, the sheet appears and presents AddStudentView.
The .presentationDetents view modifier accepts an array of sizes to present the sheet with. In this code, the sheet is presented such that it occupies 40% of the available height on the device. The user can optionally expand the size of the slide-up sheet to “medium” which is roughly half the available height of the device.
A reference to the view model is inserted into the environment so that the view that allows for the addition of a student can use the view model.
Adding a student
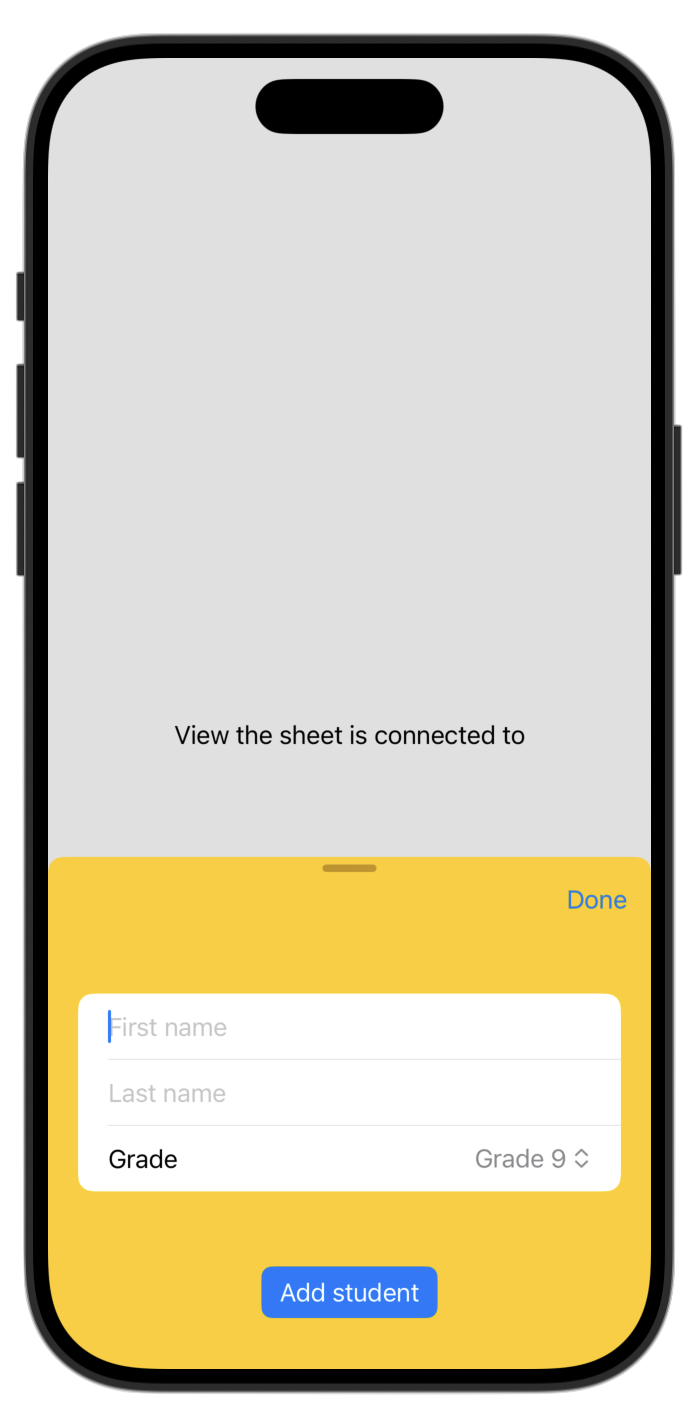
The view to add a student (the part in yellow) looks like this, when previewed:
The complete code for the view to add a student looks like this:
There’s a lot there, so let’s break this down, bit-by-bit.
First, let’s remember the code that causes AddStudentView to appear in the first place – it’s back on StudentListView:
The showingAddStudentView boolean is passed in as an argument to the isShowing parameter, as shown in the highlighted line above.
That is a binding to the following stored property in AddStudentView:
// Tracks whether this view is showing in a sheet or not@Binding var isShowing: Bool
So, the toolbar button labelled Done, when it is pressed:
// Add toolbar to allow form to be dismissed.toolbar { ToolbarItem { Button { // Dismiss this sheet isShowing = false } label: { Text("Done") } }}
… causes the isShowing binding to change back to false.
In turn, showingAddStudentView back on StudentsListView also becomes false, causing the sheet to disappear, like this:
If you want to stop reading here, that’s pretty much it for how a sheet is shown. A boolean variable is used as described above, together with the .sheet view modifier, to show or hide a sheet.
However, if you’re curious about how the rest of the code in the view to add a student works… keep reading!
These stored properties keep track of the information a user enters regarding a new student:
// Holds information related to the new student being added@State private var firstName: String = ""@State private var lastName: String = ""@State private var grade: Grade = .nine
Those first two properties are bound to two text fields:
The Picker allows the user to select one of four possible grade levels. The Text views inside the Picker presents the text that shows up to list available options. The .tag values are what gets placed in the grade stored property when the user selects something. For example, if the user selects Grade 11, then a value of Grade.eleven or just .eleven goes into the grade stored property.
Here’s a little video to explain:
This is the stored property that retrieves a reference to the view model from the environment:
// Access to view model to be able to add a new student@Environment(StudentListViewModel.self) var viewModel
… and the following code:
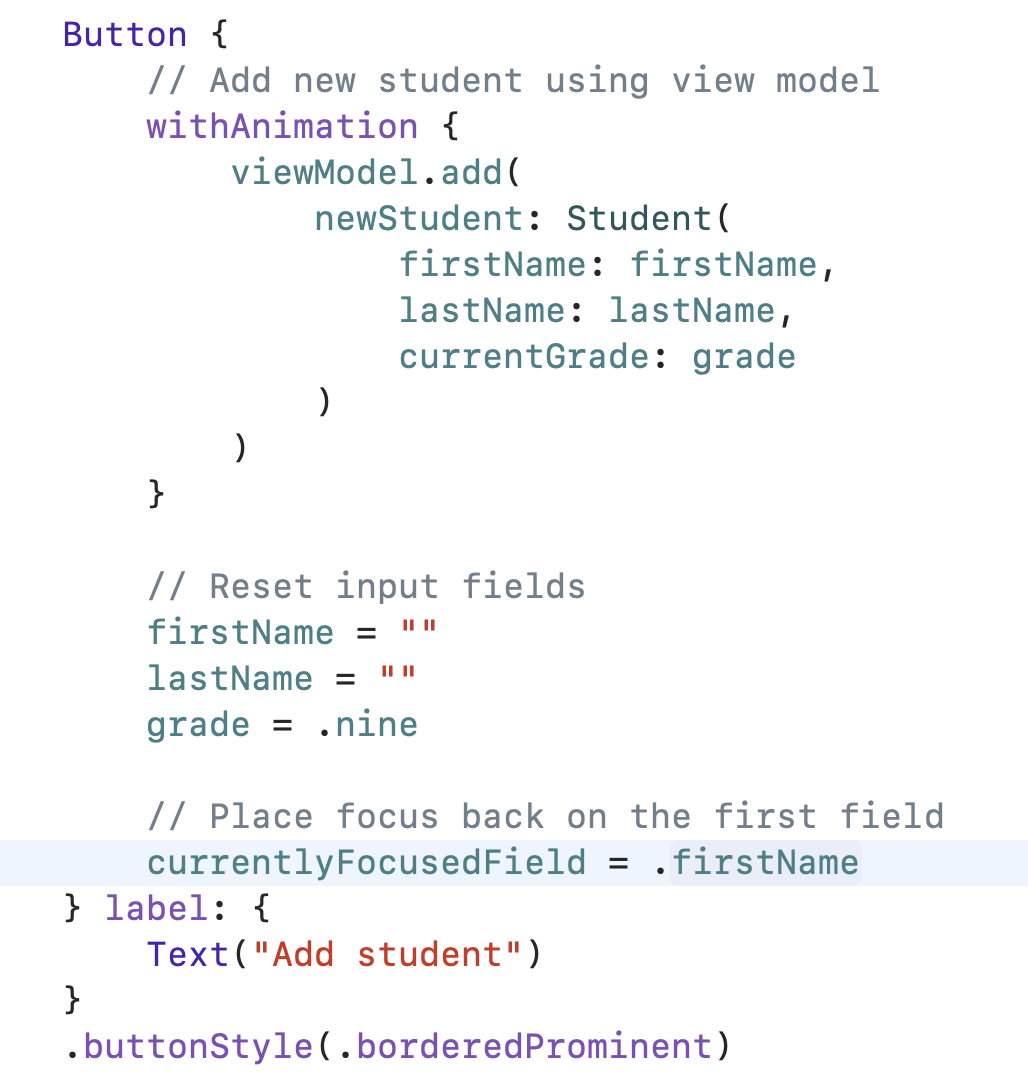
Button { // Add new student using view model withAnimation { viewModel.add( newStudent: Student( firstName: firstName, lastName: lastName, currentGrade: grade ) ) } // Reset input fields firstName = "" lastName = "" grade = .nine // Place focus back on the first field currentlyFocusedField = .firstName} label: { Text("Add student")}.buttonStyle(.borderedProminent)
… uses the add function that exists on the view model to add a new student, and then reset the input fields so that another new student can be added.
The only other part that needs explanation is this enumeration:
// NOTE: Technique used to set default focus based on this tutorial...// https://www.hackingwithswift.com/quick-start/swiftui/how-to-make-a-textfield-or-texteditor-have-default-focusenum FocusedField { case firstName case lastName case grade}
The enumeration provides a list of fields that can have the focus of the cursor.
This special stored property keeps track of which field currently has the focus – that is – which field the cursor is in:
// Tracks which field has the focus (cursor)@FocusState private var currentlyFocusedField: FocusedField?
The first text field, for example, has a .focused view modifier attached to it:
What that view modifier does is… it puts the cursor in that text field when currentlyFocusedField contains .firstName.
As the user moves between different fields while typing in data for a new student, currentlyFocusedField will change to reflect whatever field currently has the cursor in it.
When the Add student button is pressed, this key line of code (highlighted):
… automatically puts the cursor back into the text field for the first name.
This is a convenience feature. It’s not strictly necessary, but it makes it faster for a user to be able to add many students in a row. 🚀