Introduction
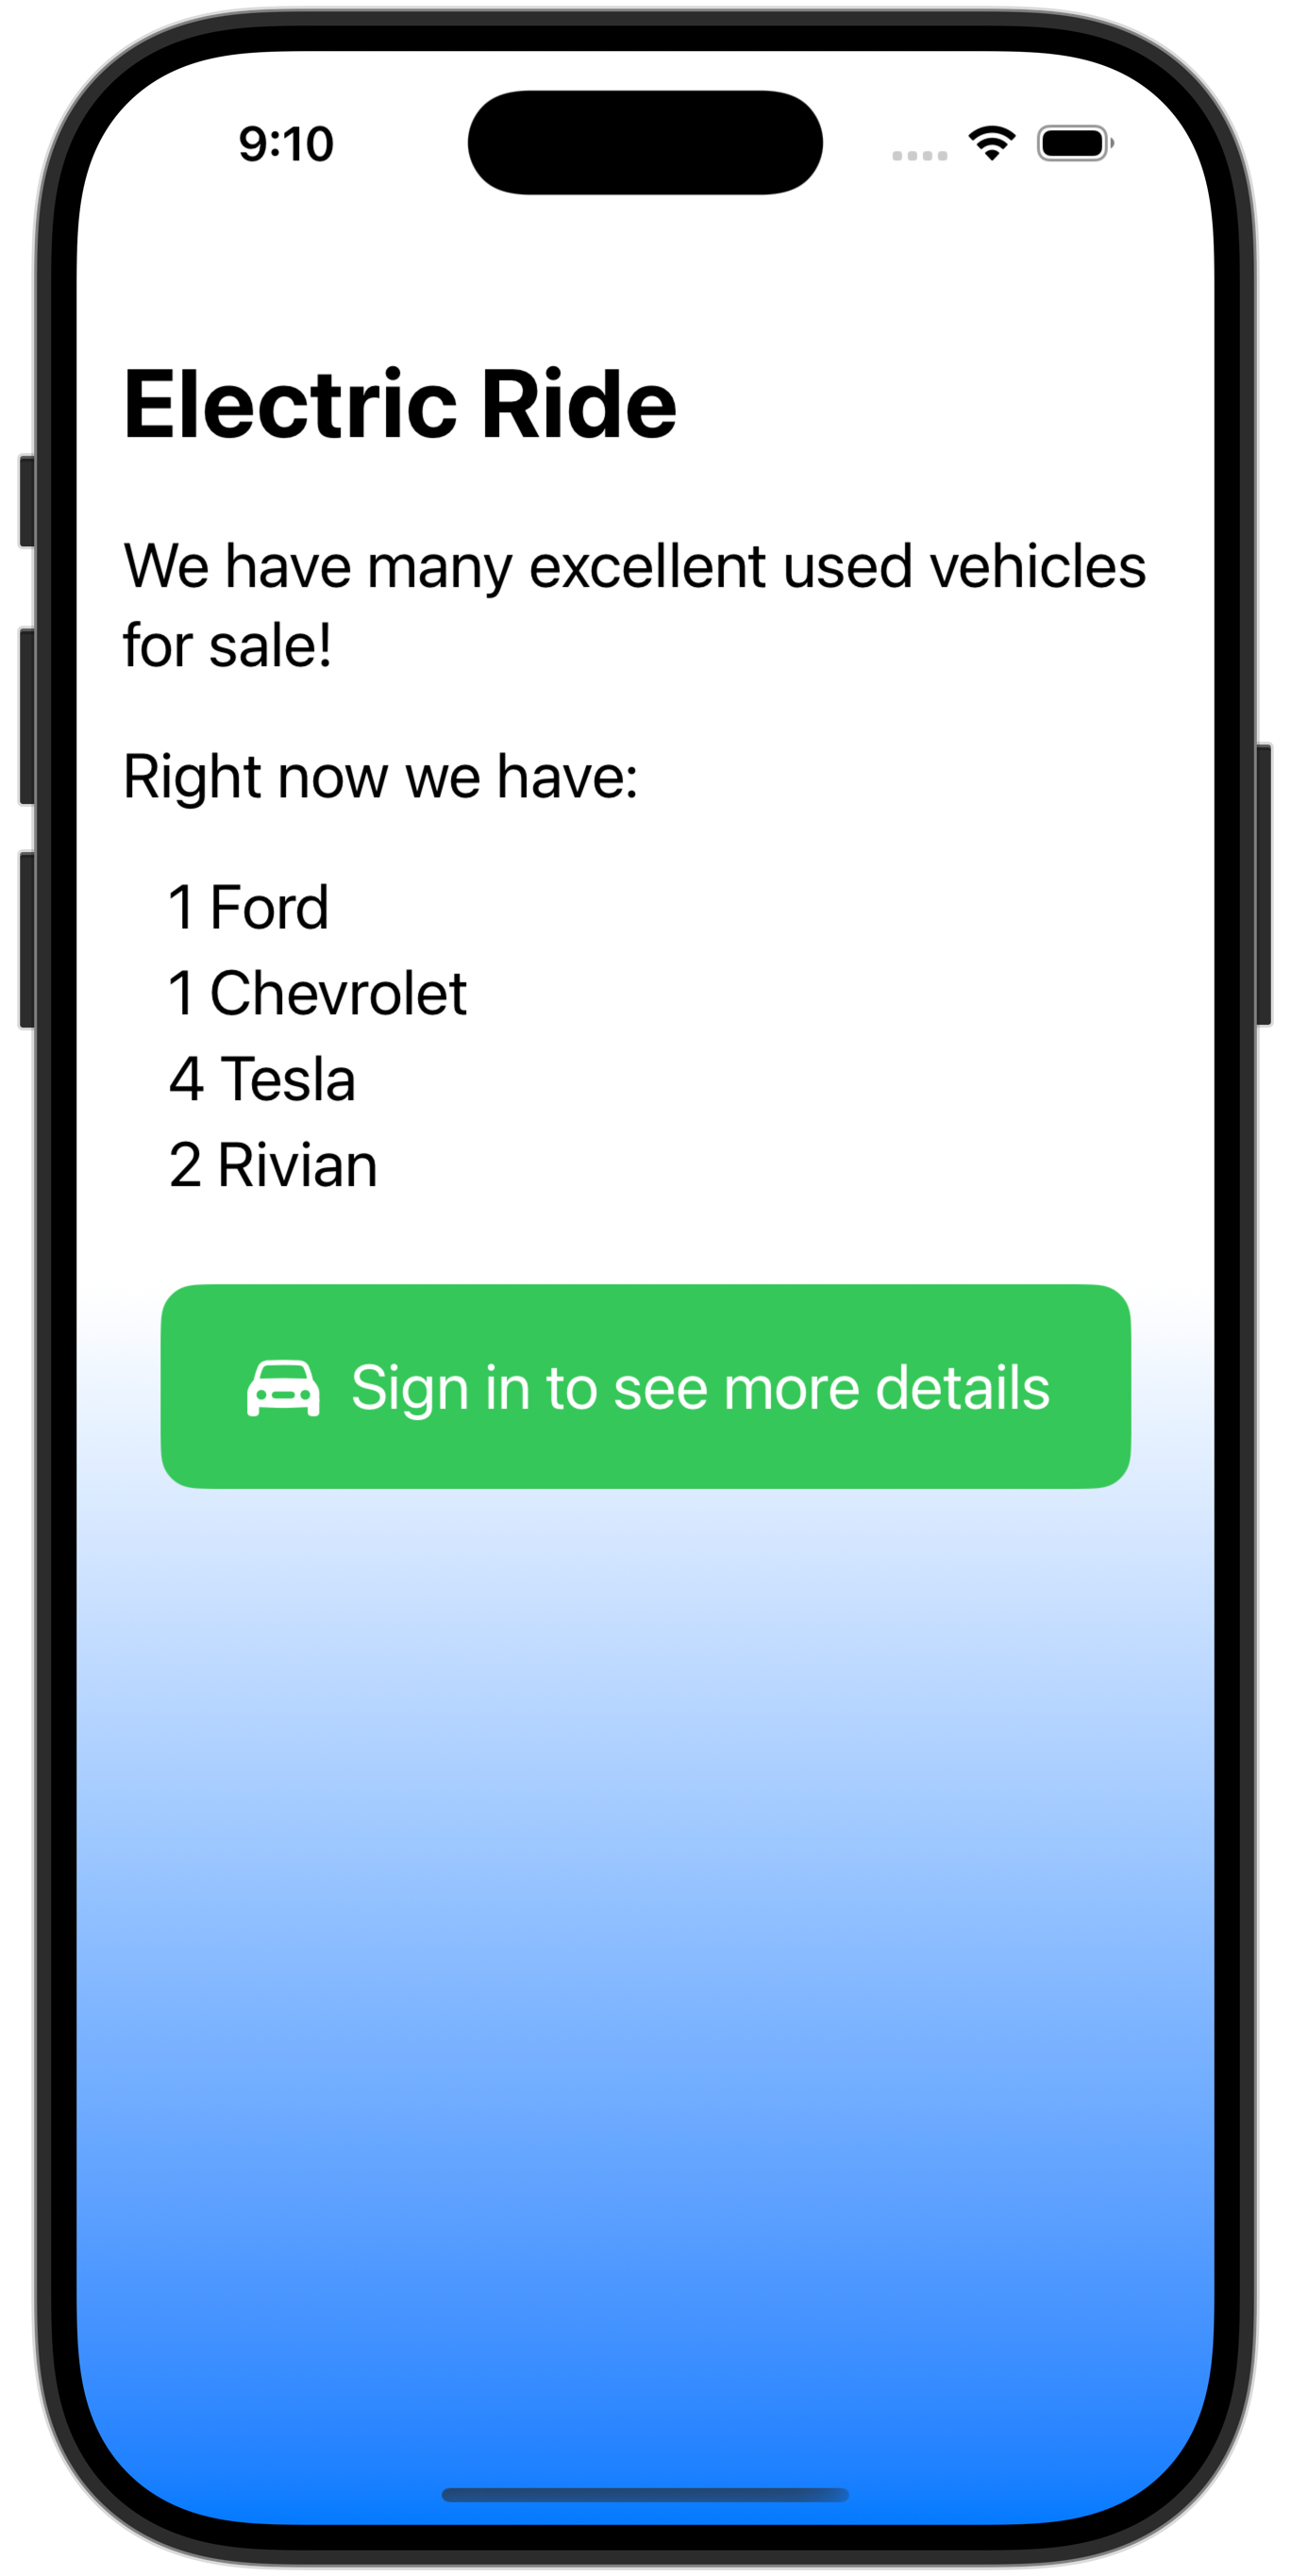
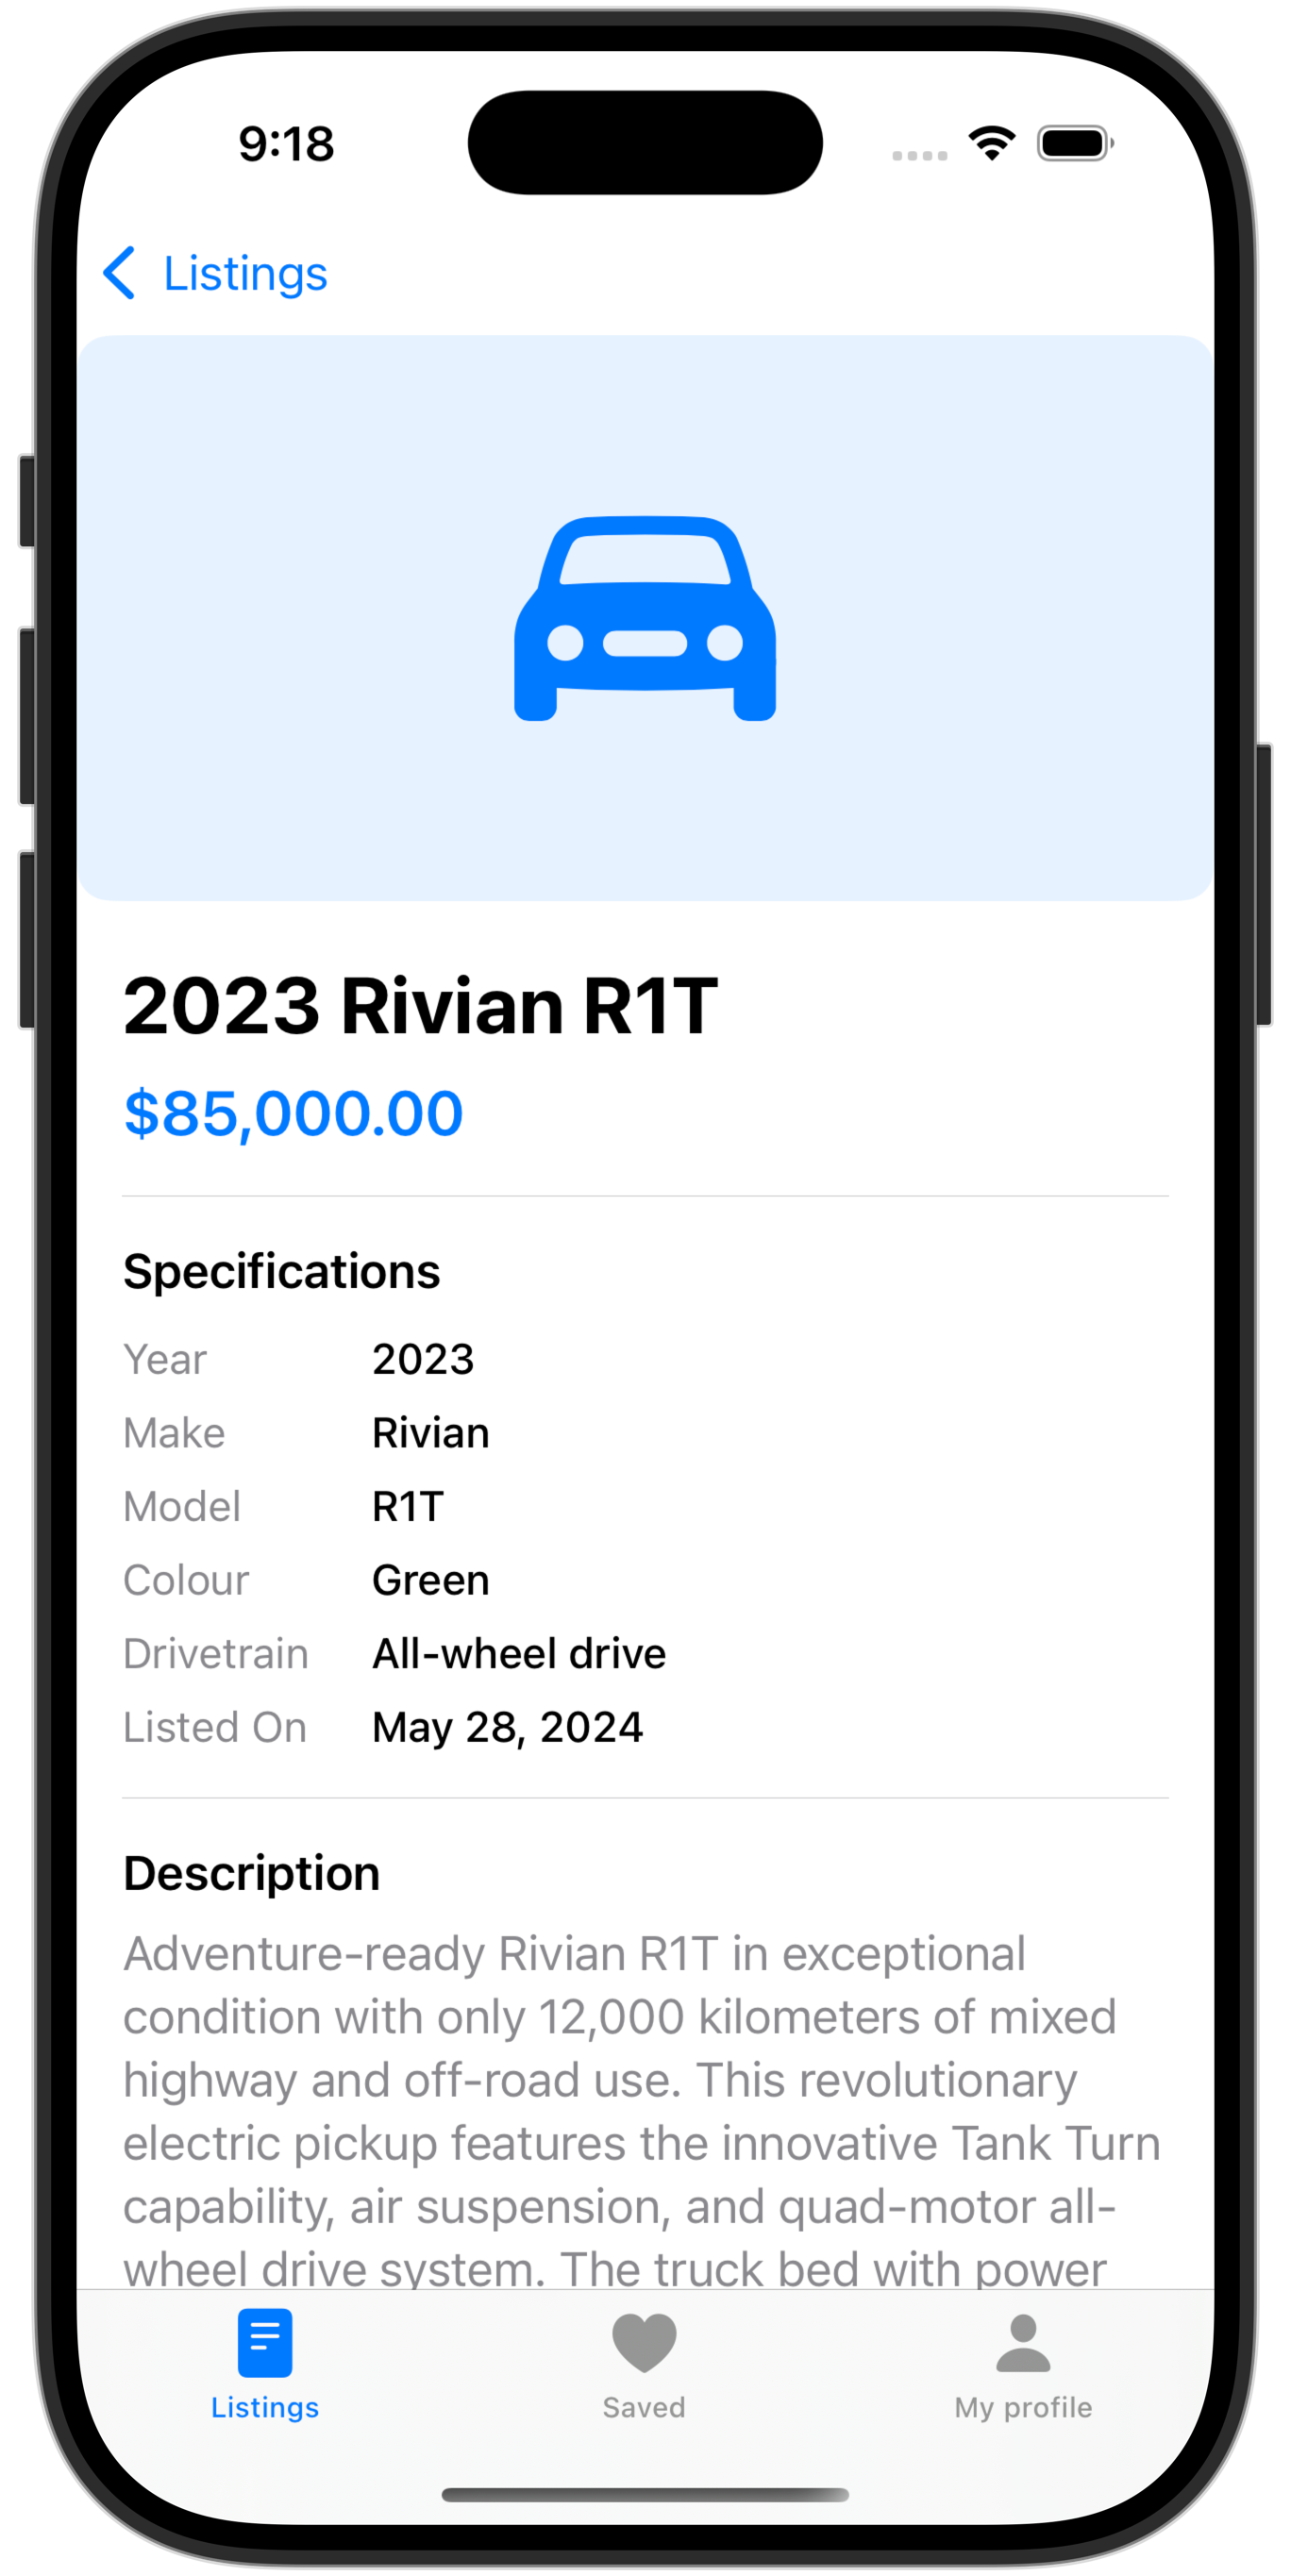
Consider the following app, which was built to allow owners of electric vehicles to browse and post listings for the private sale of used vehicles:
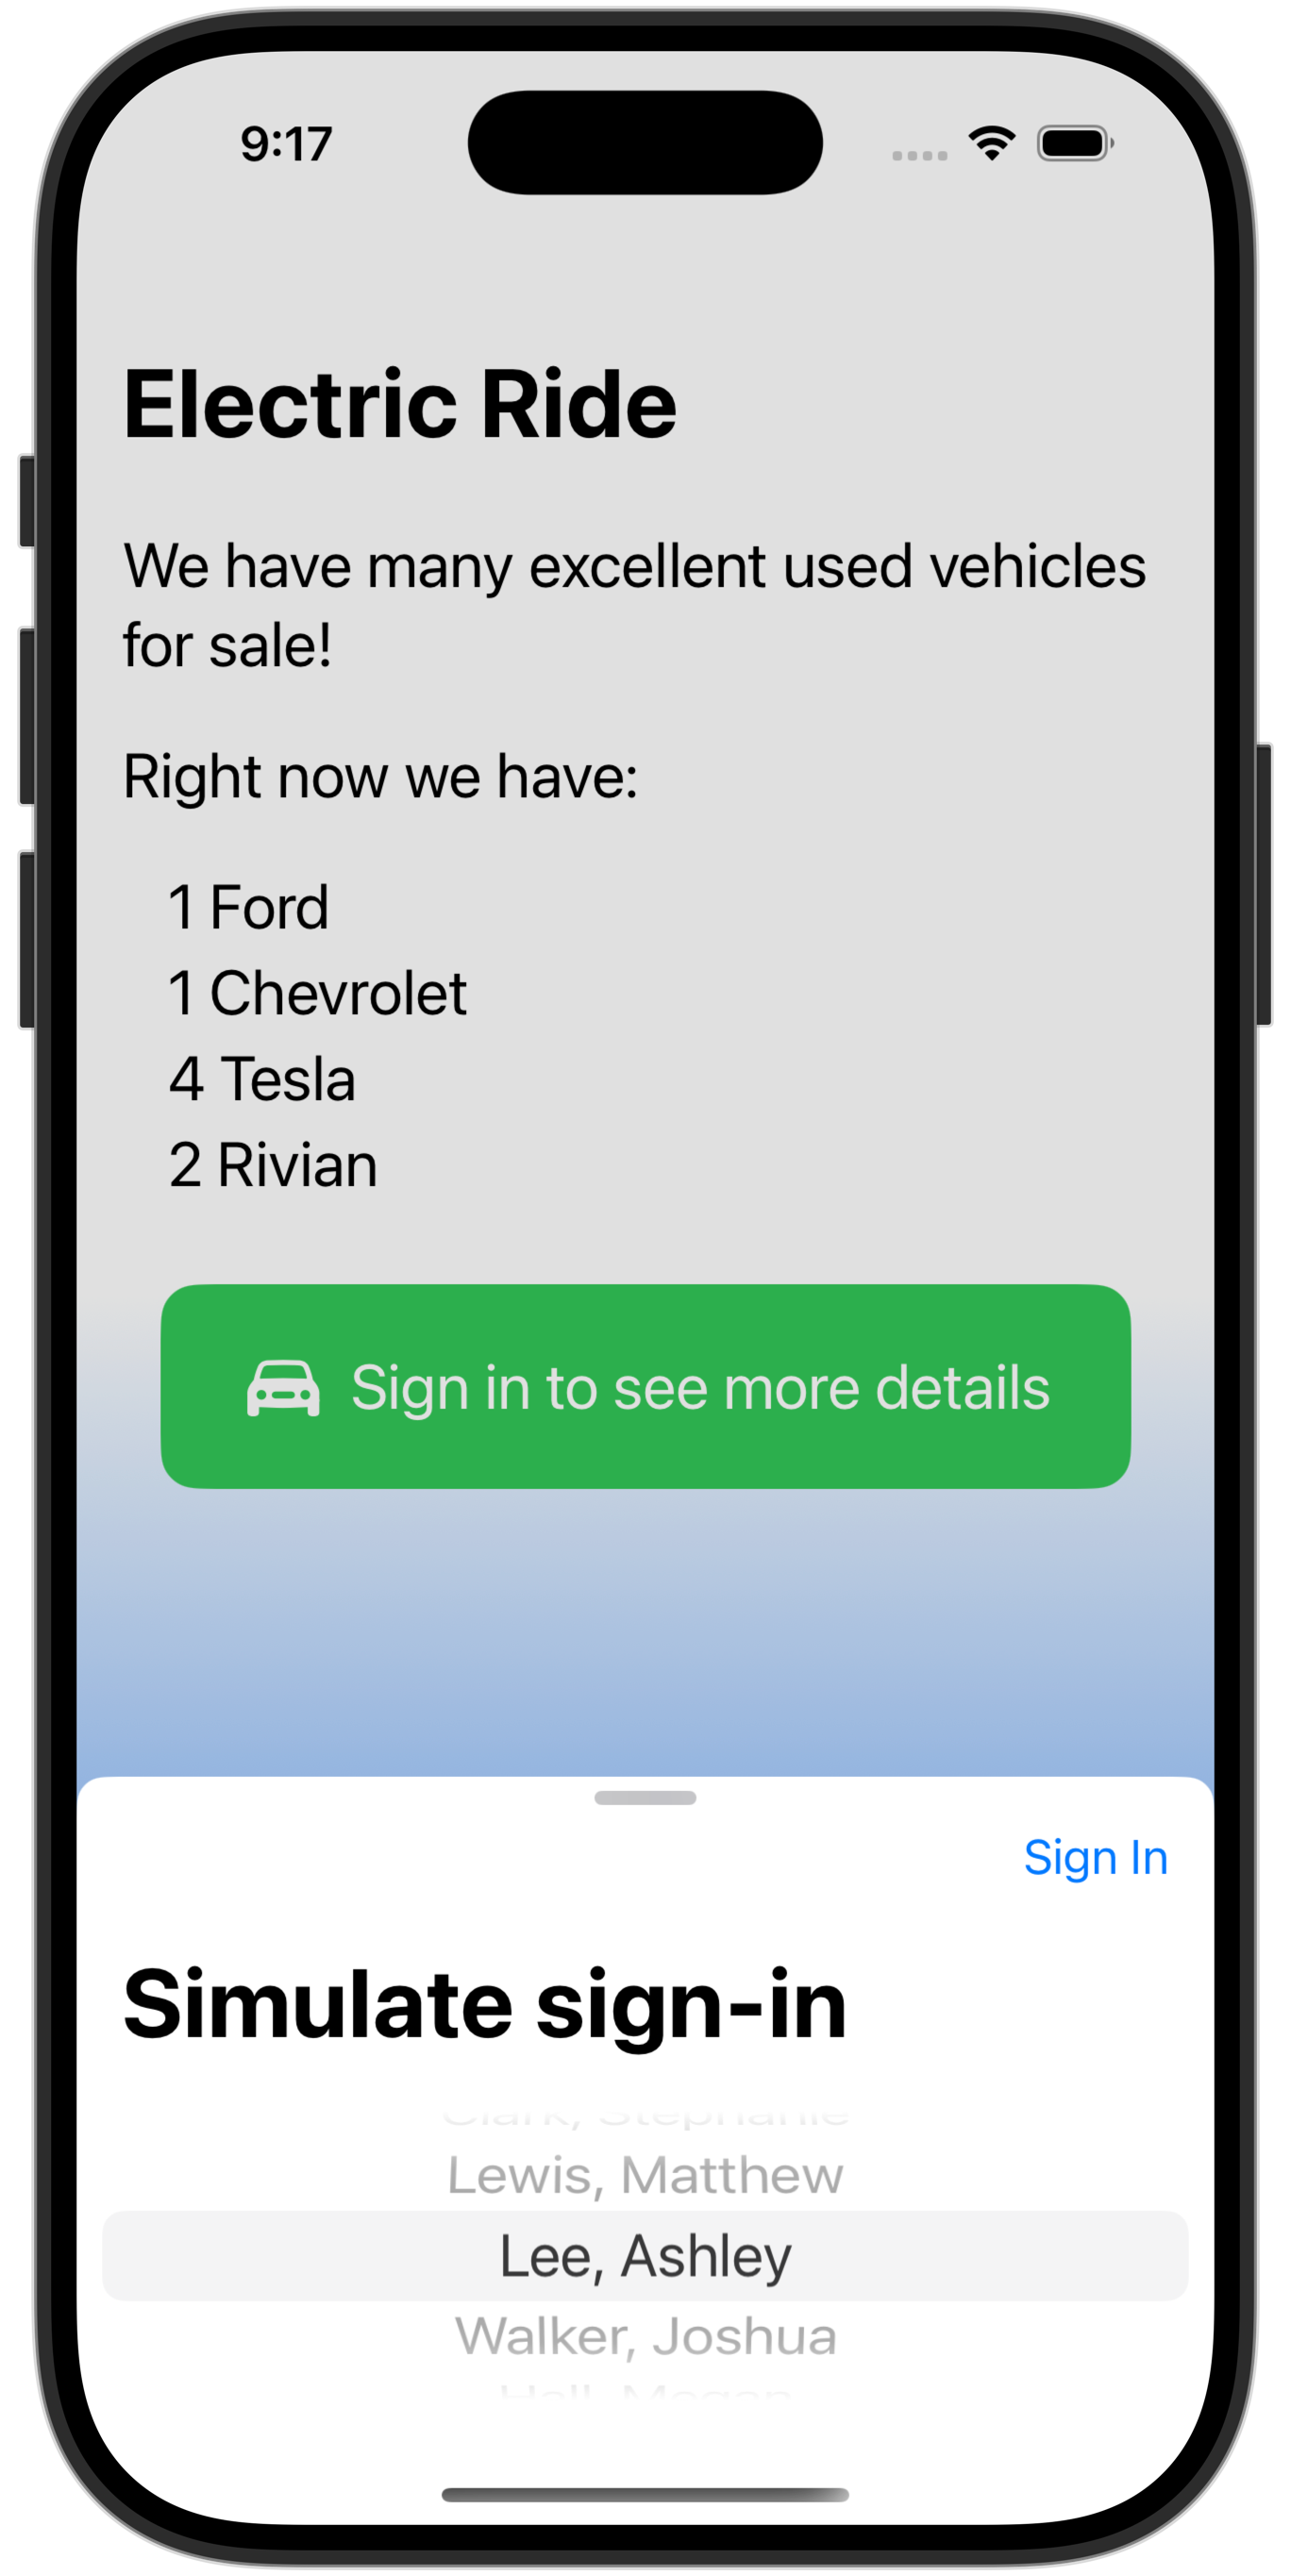
This article will explain how to move an app from using simulated sign-in (as shown above) to using a social login provider.
Background
If you are interested in reviewing how this example app was developed – specifically the database and app code, you can read about that here.
You are welcome to browse the complete source code for Electric Ride here.
Access levels
Public
When the user opens the app, if they are not signed in, they see only a summary page that shows how many vehicles are available for sale, but without providing the details of each vehicle:
Requires authentication
Once the user signs in:
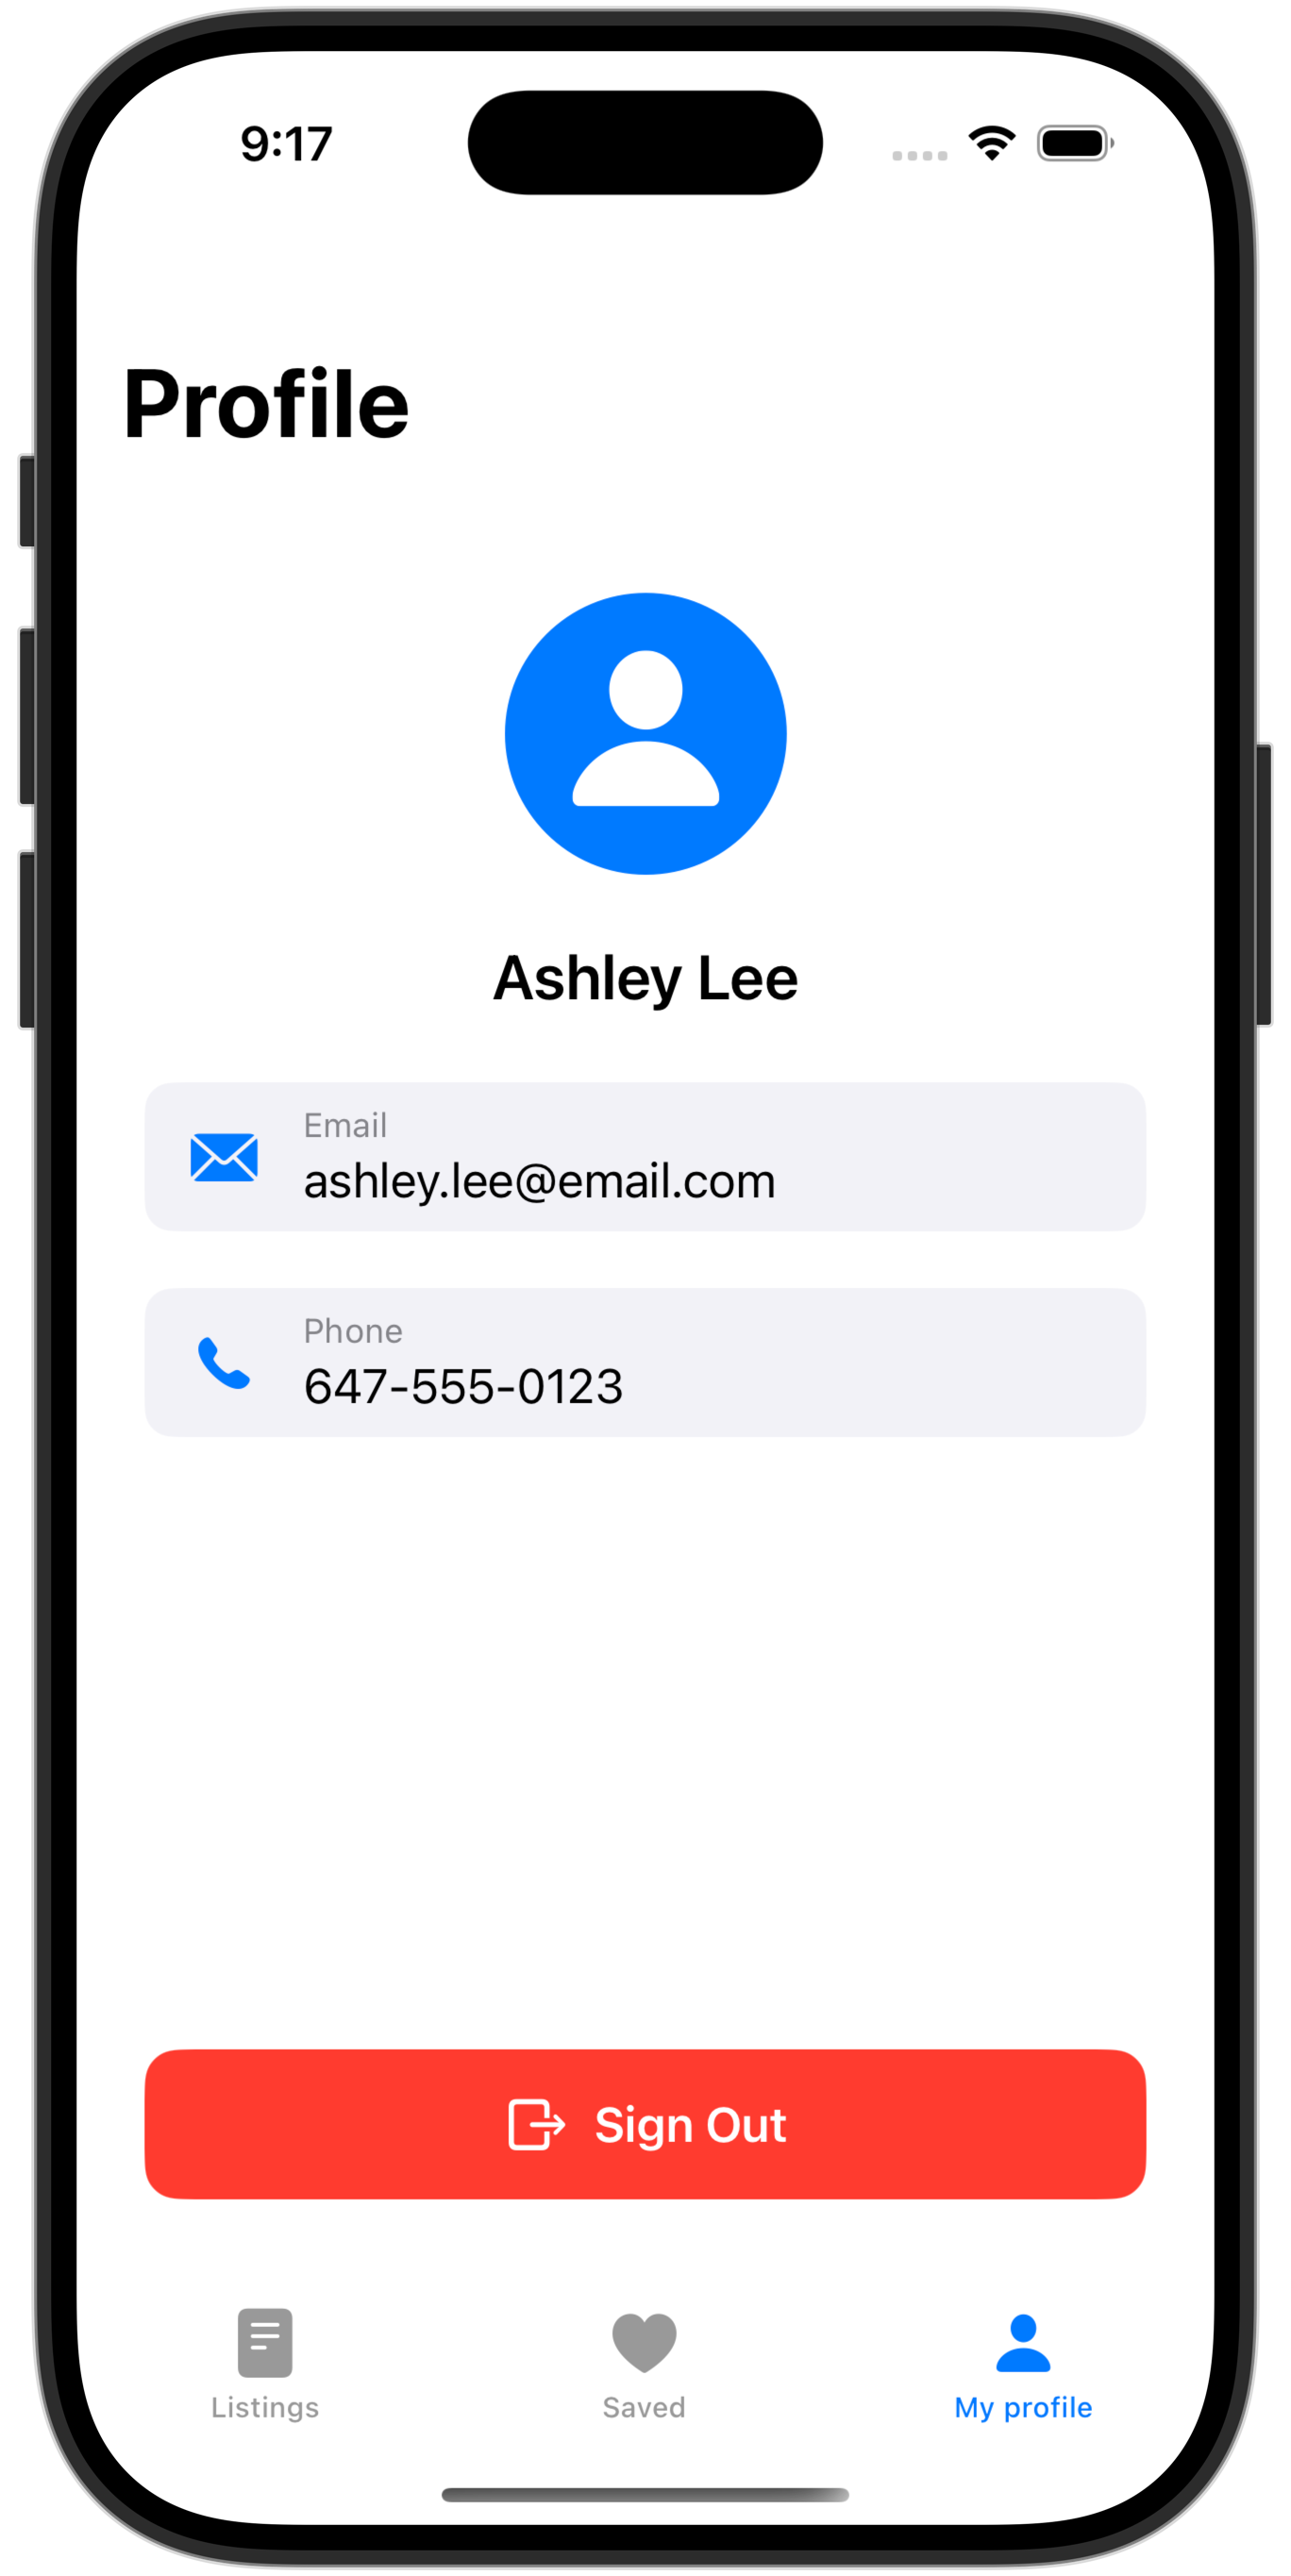
They can view their profile page:
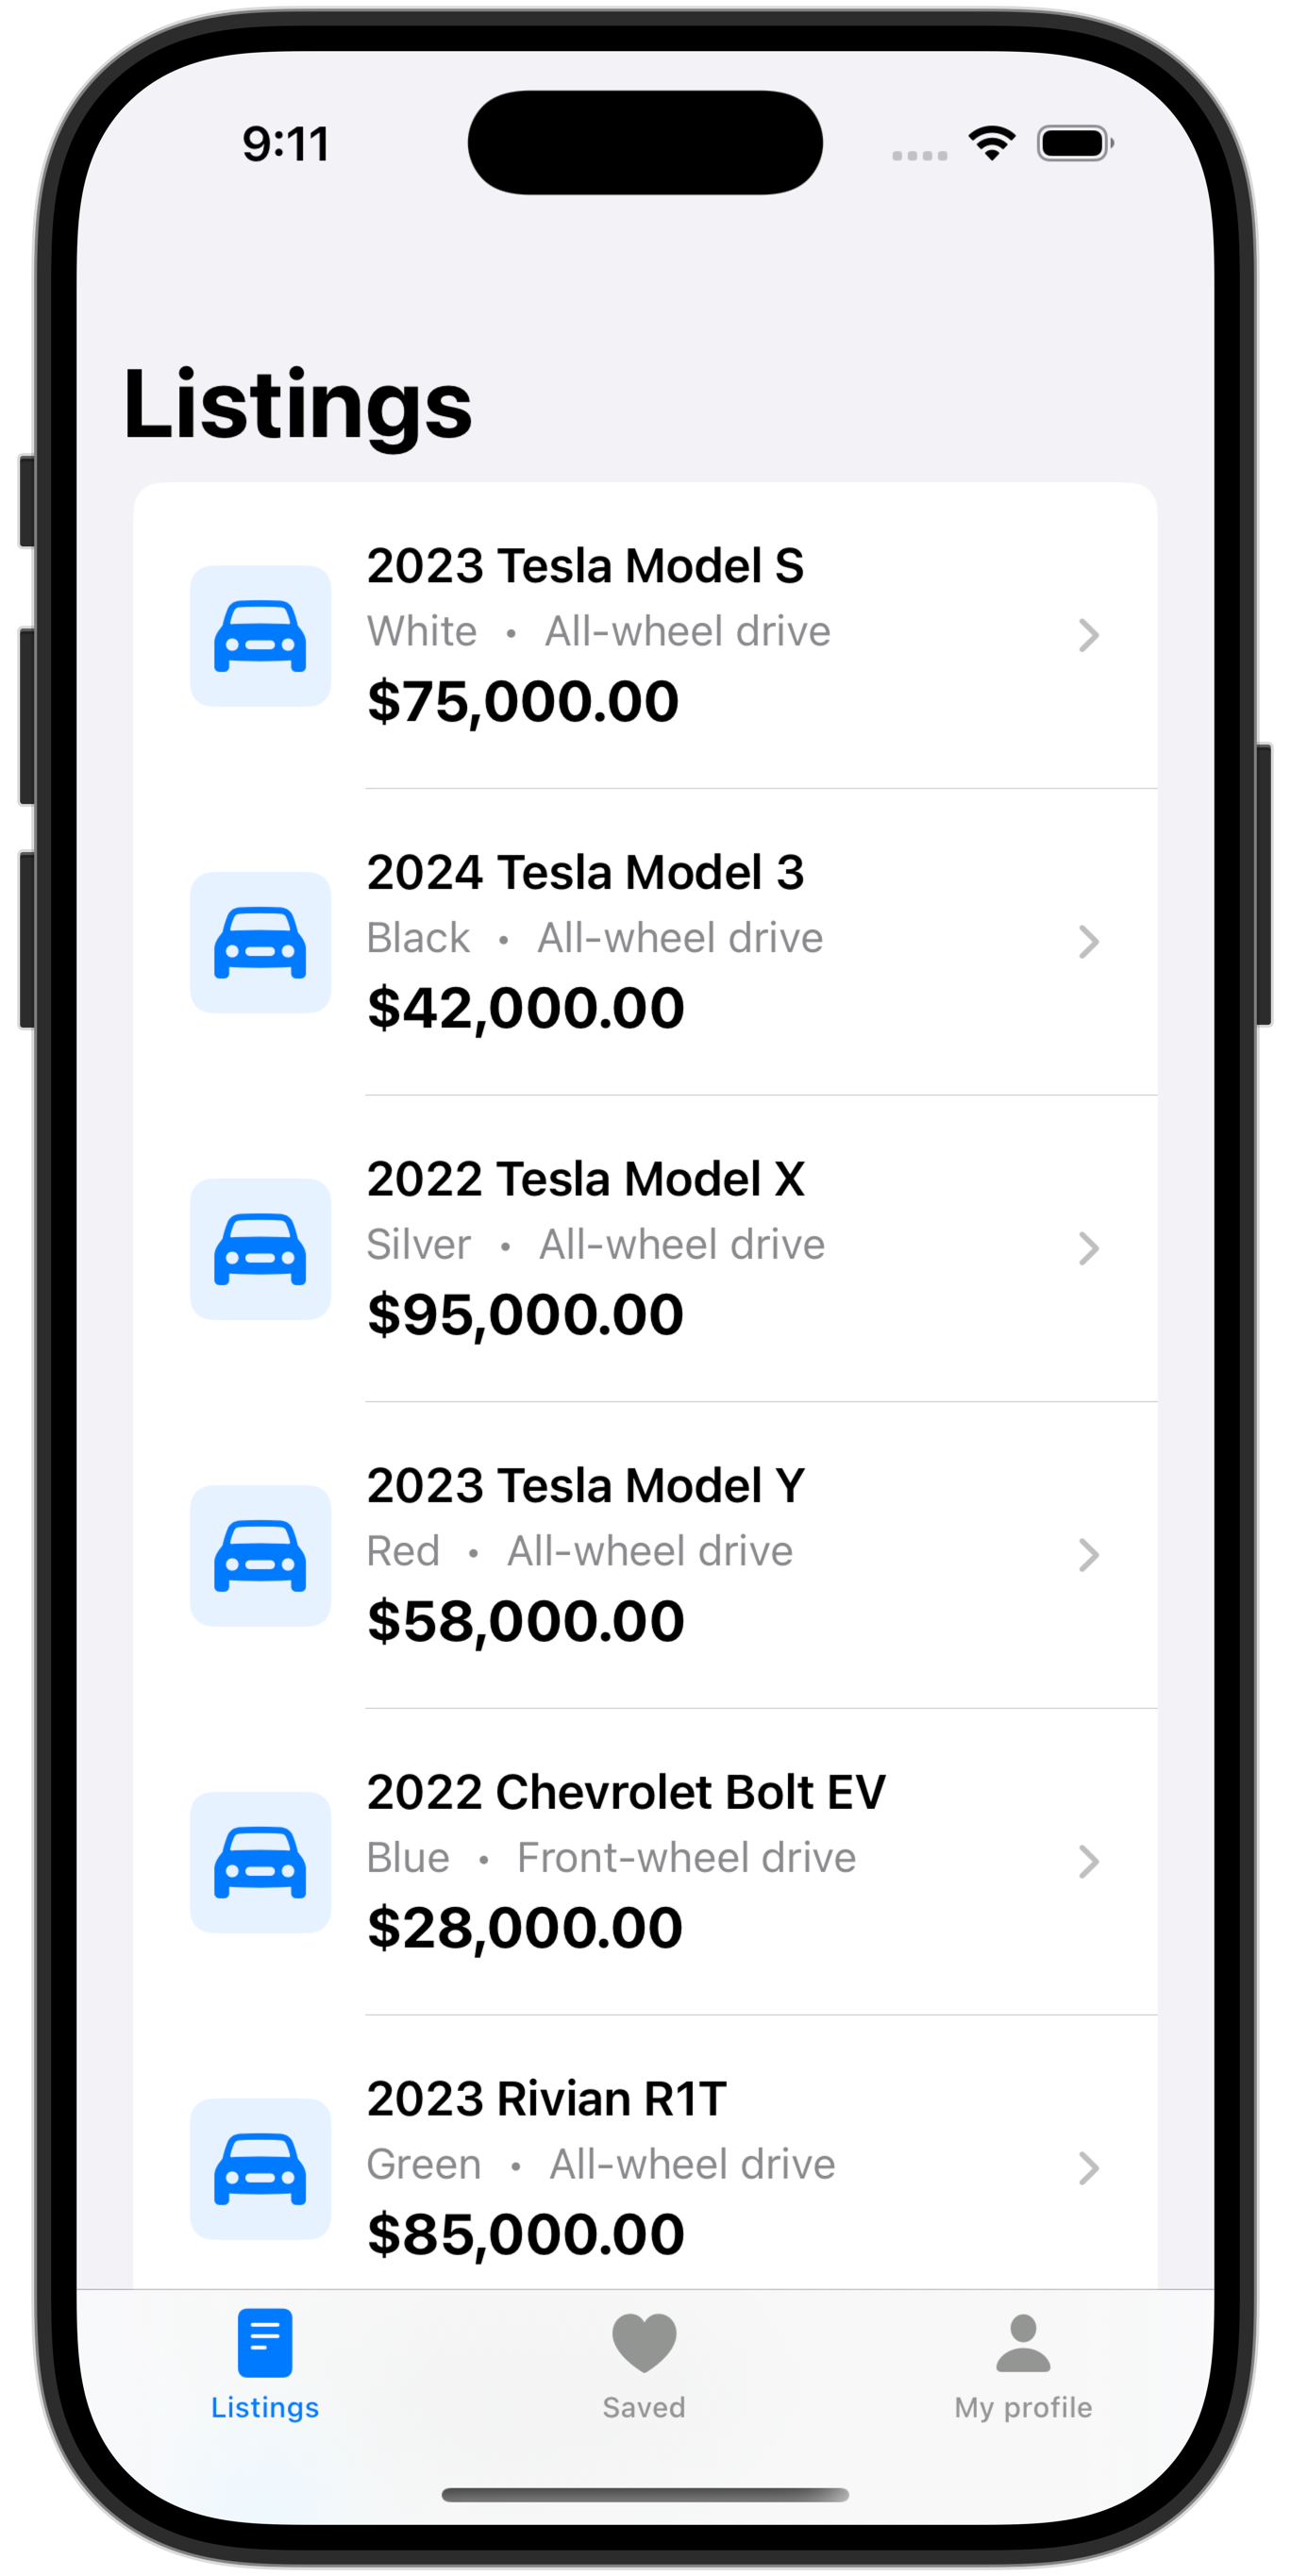
Browse listings:
Review details of a listing:
And save listings they are interested in:

When we author an app, we must have a clear idea in our mind about what information in our database:
- anyone can see
- any signed in user can see
- a specific user can see
In this app:
WelcomeViewcan be seen by anyone, signed in or notDetailedListingViewcan be seen by any signed in userFavouriteListingViewshould be available only to signed in users, and should show them only listings that they themselves marked as a favourite
About authentication
Authentication means the app “knows” a secret that the user must provide to prove their identity.
Apps can handle authentication in several ways.
Some apps handle authentication entirely on their own – these are the types of apps where a user would need to create a new account to use that app or service.
Other apps choose to use a third-party sign-in service. The third-party service handles authentication using an account the user has already created (at Apple, Google, Facebook, or other similar services). The third-party verifies that the user knows the secret (typically a password or a biometric identifier such as fingerprint scan or face scan) then re-directs the user back into the app.
In most cases, when building apps for use within LCS, we can authenticate users using the Sign in with Google service.
Why? We know that everyone at LCS already has an email address hosted by Google.
So, the rest of this tutorial will explain how to:
- Set row-level security on each table so that we are following our access plan.
- Set up authentication using Sign in with Google in a Supabase project.
Specific to Electric Ride – which has data that should be visible to users who are not signed in – Mr. Gordon will then also explain how to fix security settings so that the welcome page showing a count of vehicles available by brand still works:
Remember, data on that page should be visible to anyone – publicly available – without signing in.
Row-level security policies
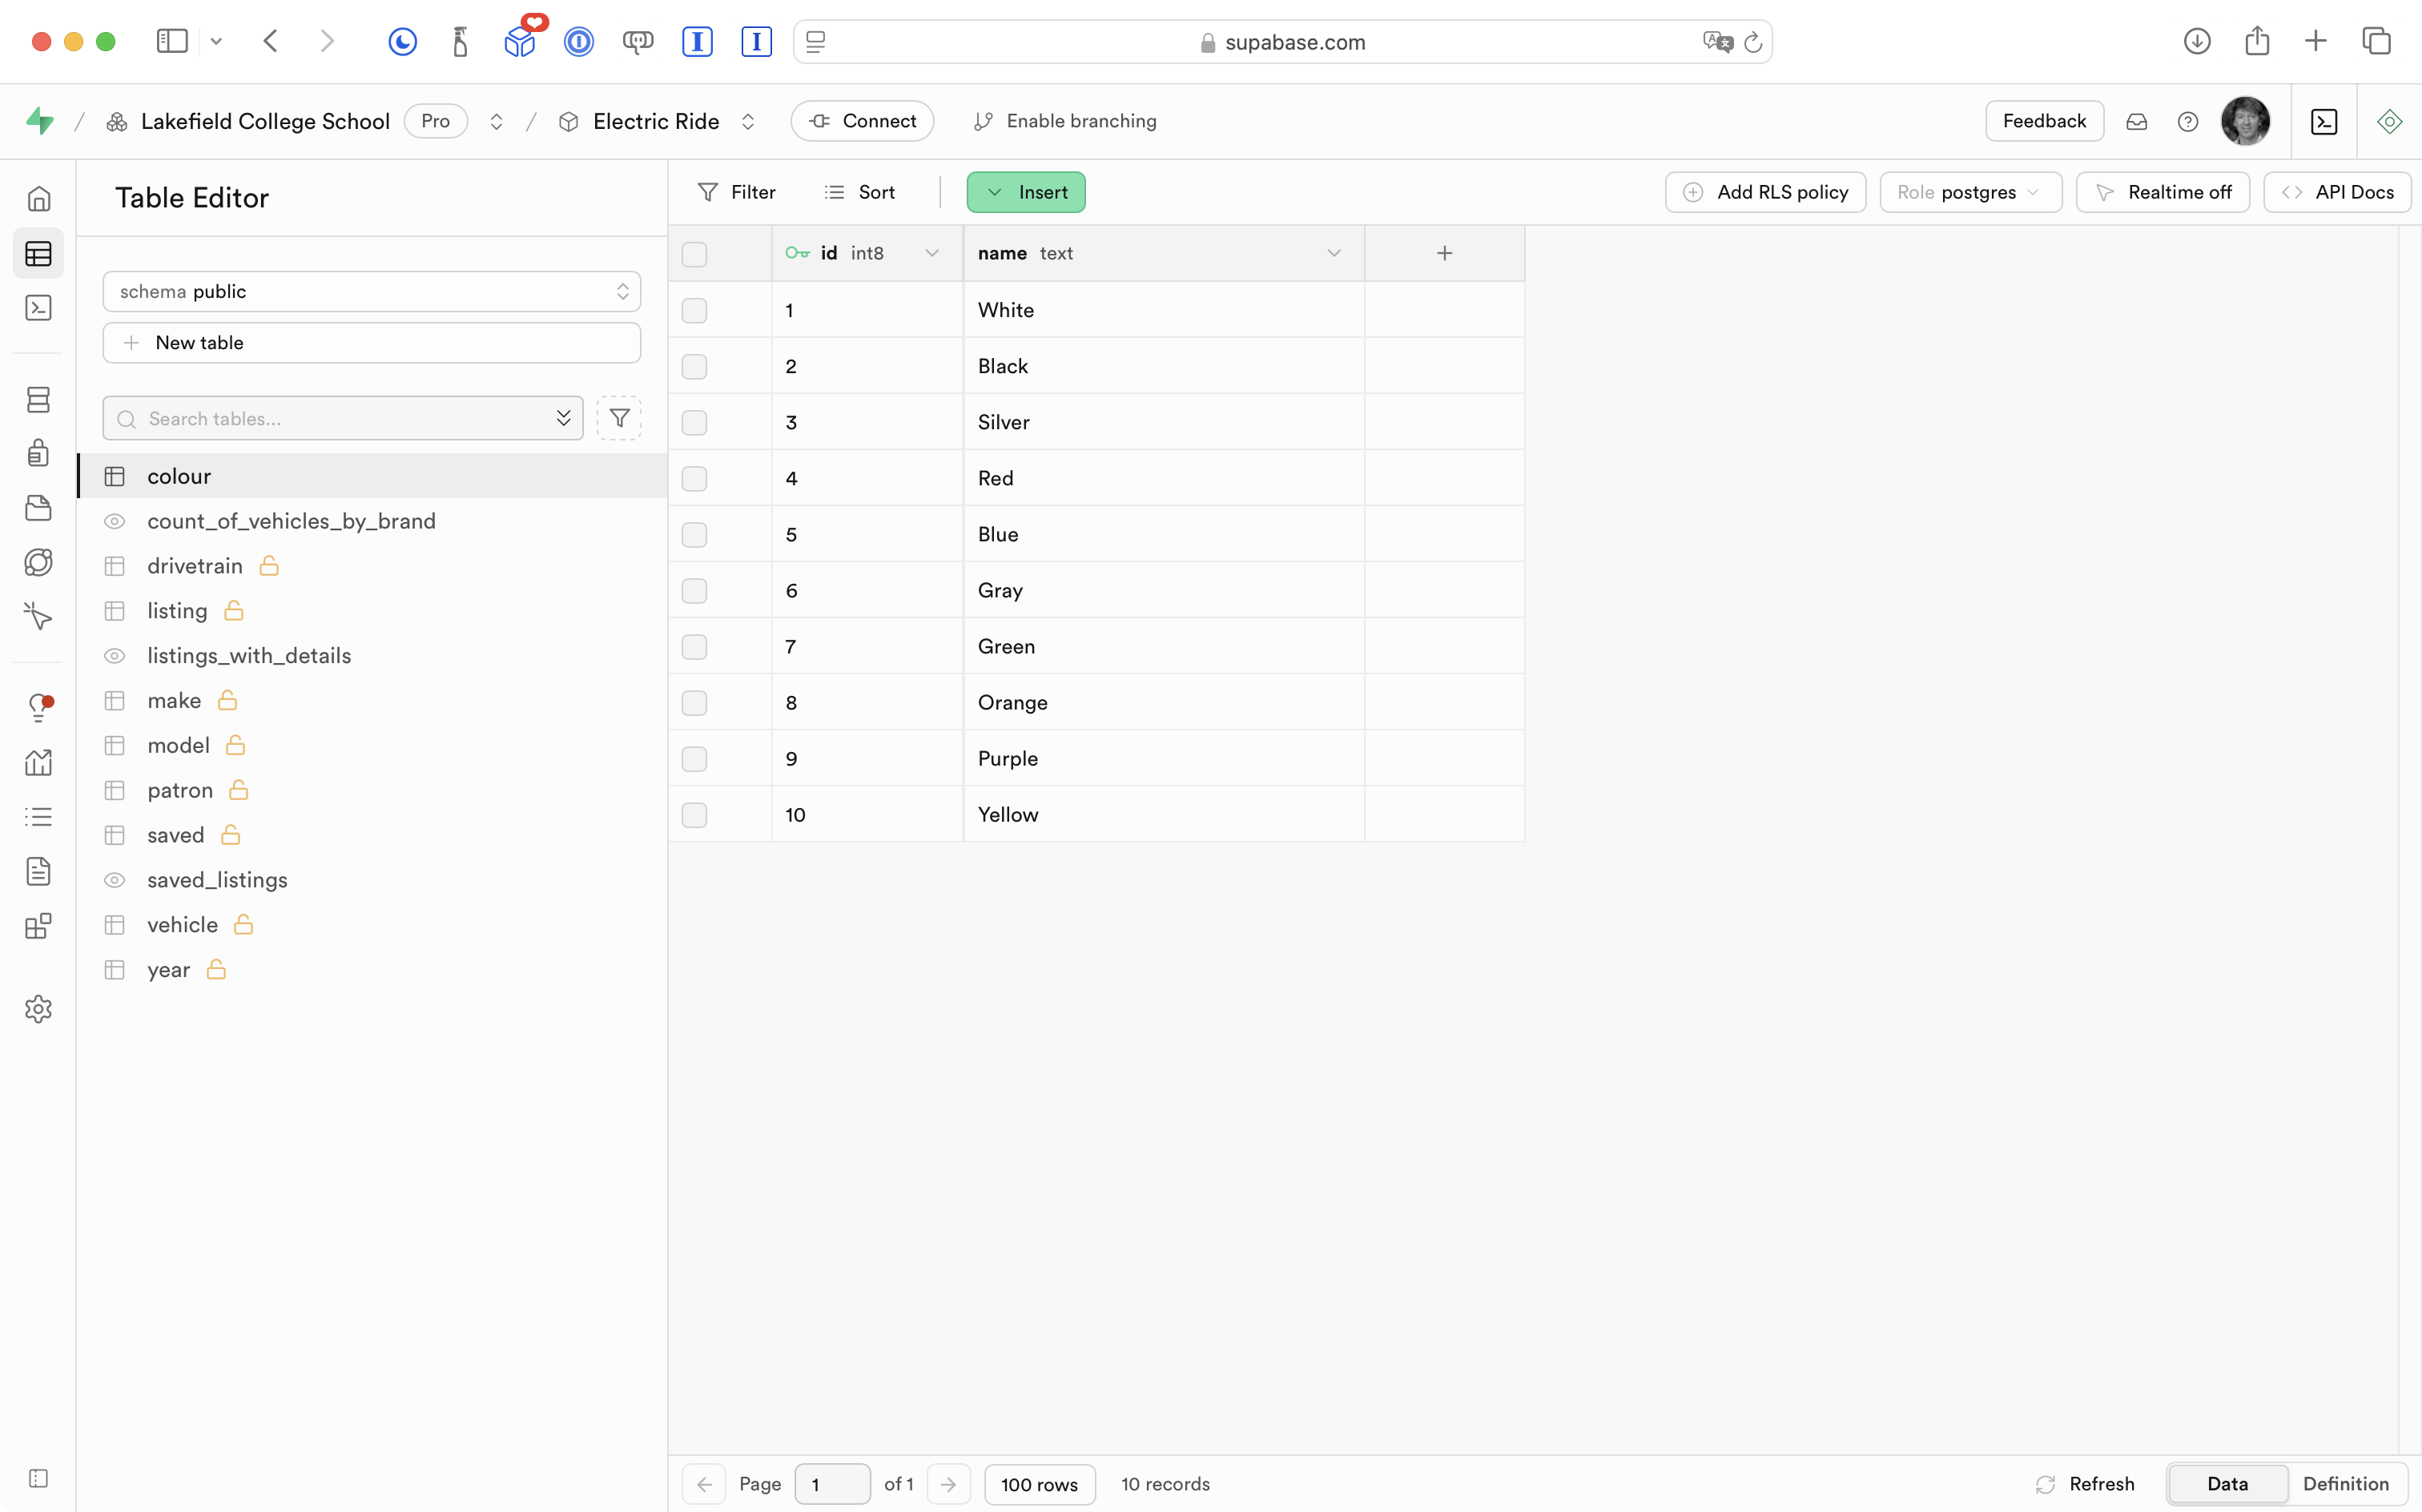
Right now in Mr. Gordon’s database for Electric Ride, none of the tables have row-level security (RLS) policies defined:

TIP
Students who have completed the to-do list tutorial series will have already read a bit about RLS policies.
This means that any person that knows our database URL and API key:
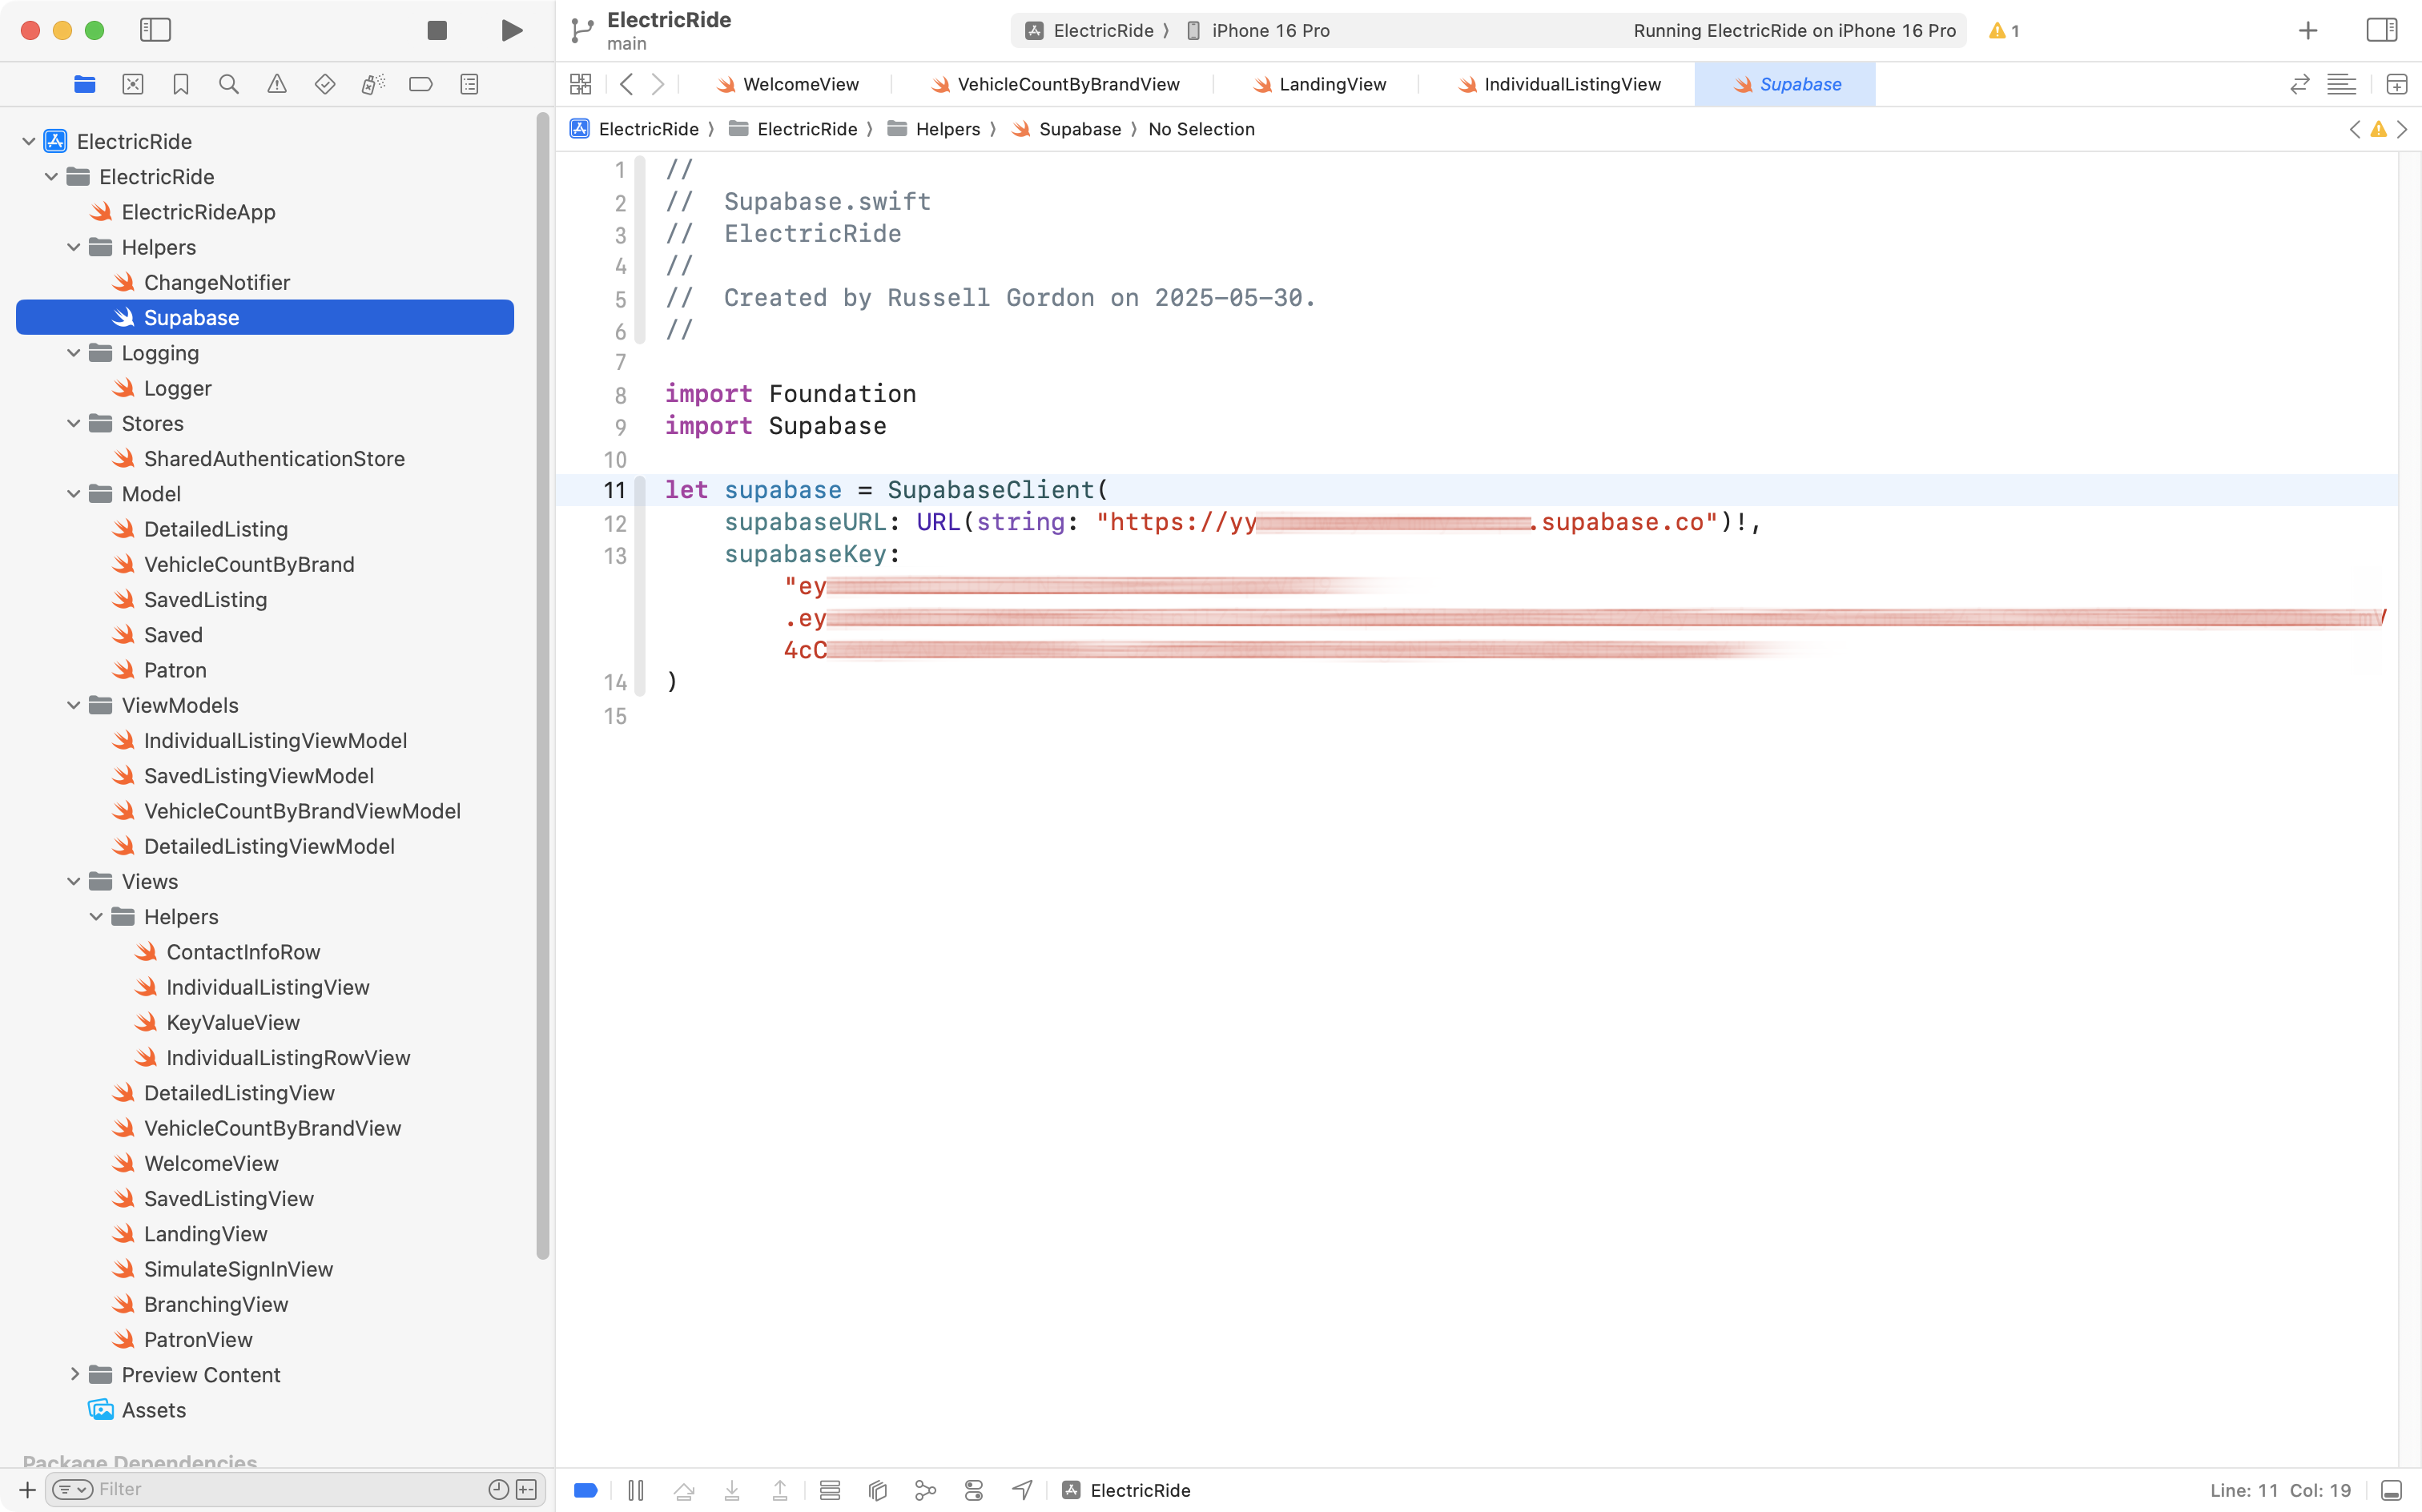
… can theoretically write an app to interact with our database and its tables – adding, deleting, or otherwise changing the data without our permission.
TIP
This is why, when using Supabase within an Xcode project, we should set our GitHub remote to private. We want to avoid exposing our database secrets to anyone who happens to look through our repositories on GitHub (which until now, we’d left open with public access).
Enable RLS
In his Supabase project’s dashboard, Mr. Gordon will now move through each table in turn, and enable row-level security (RLS).
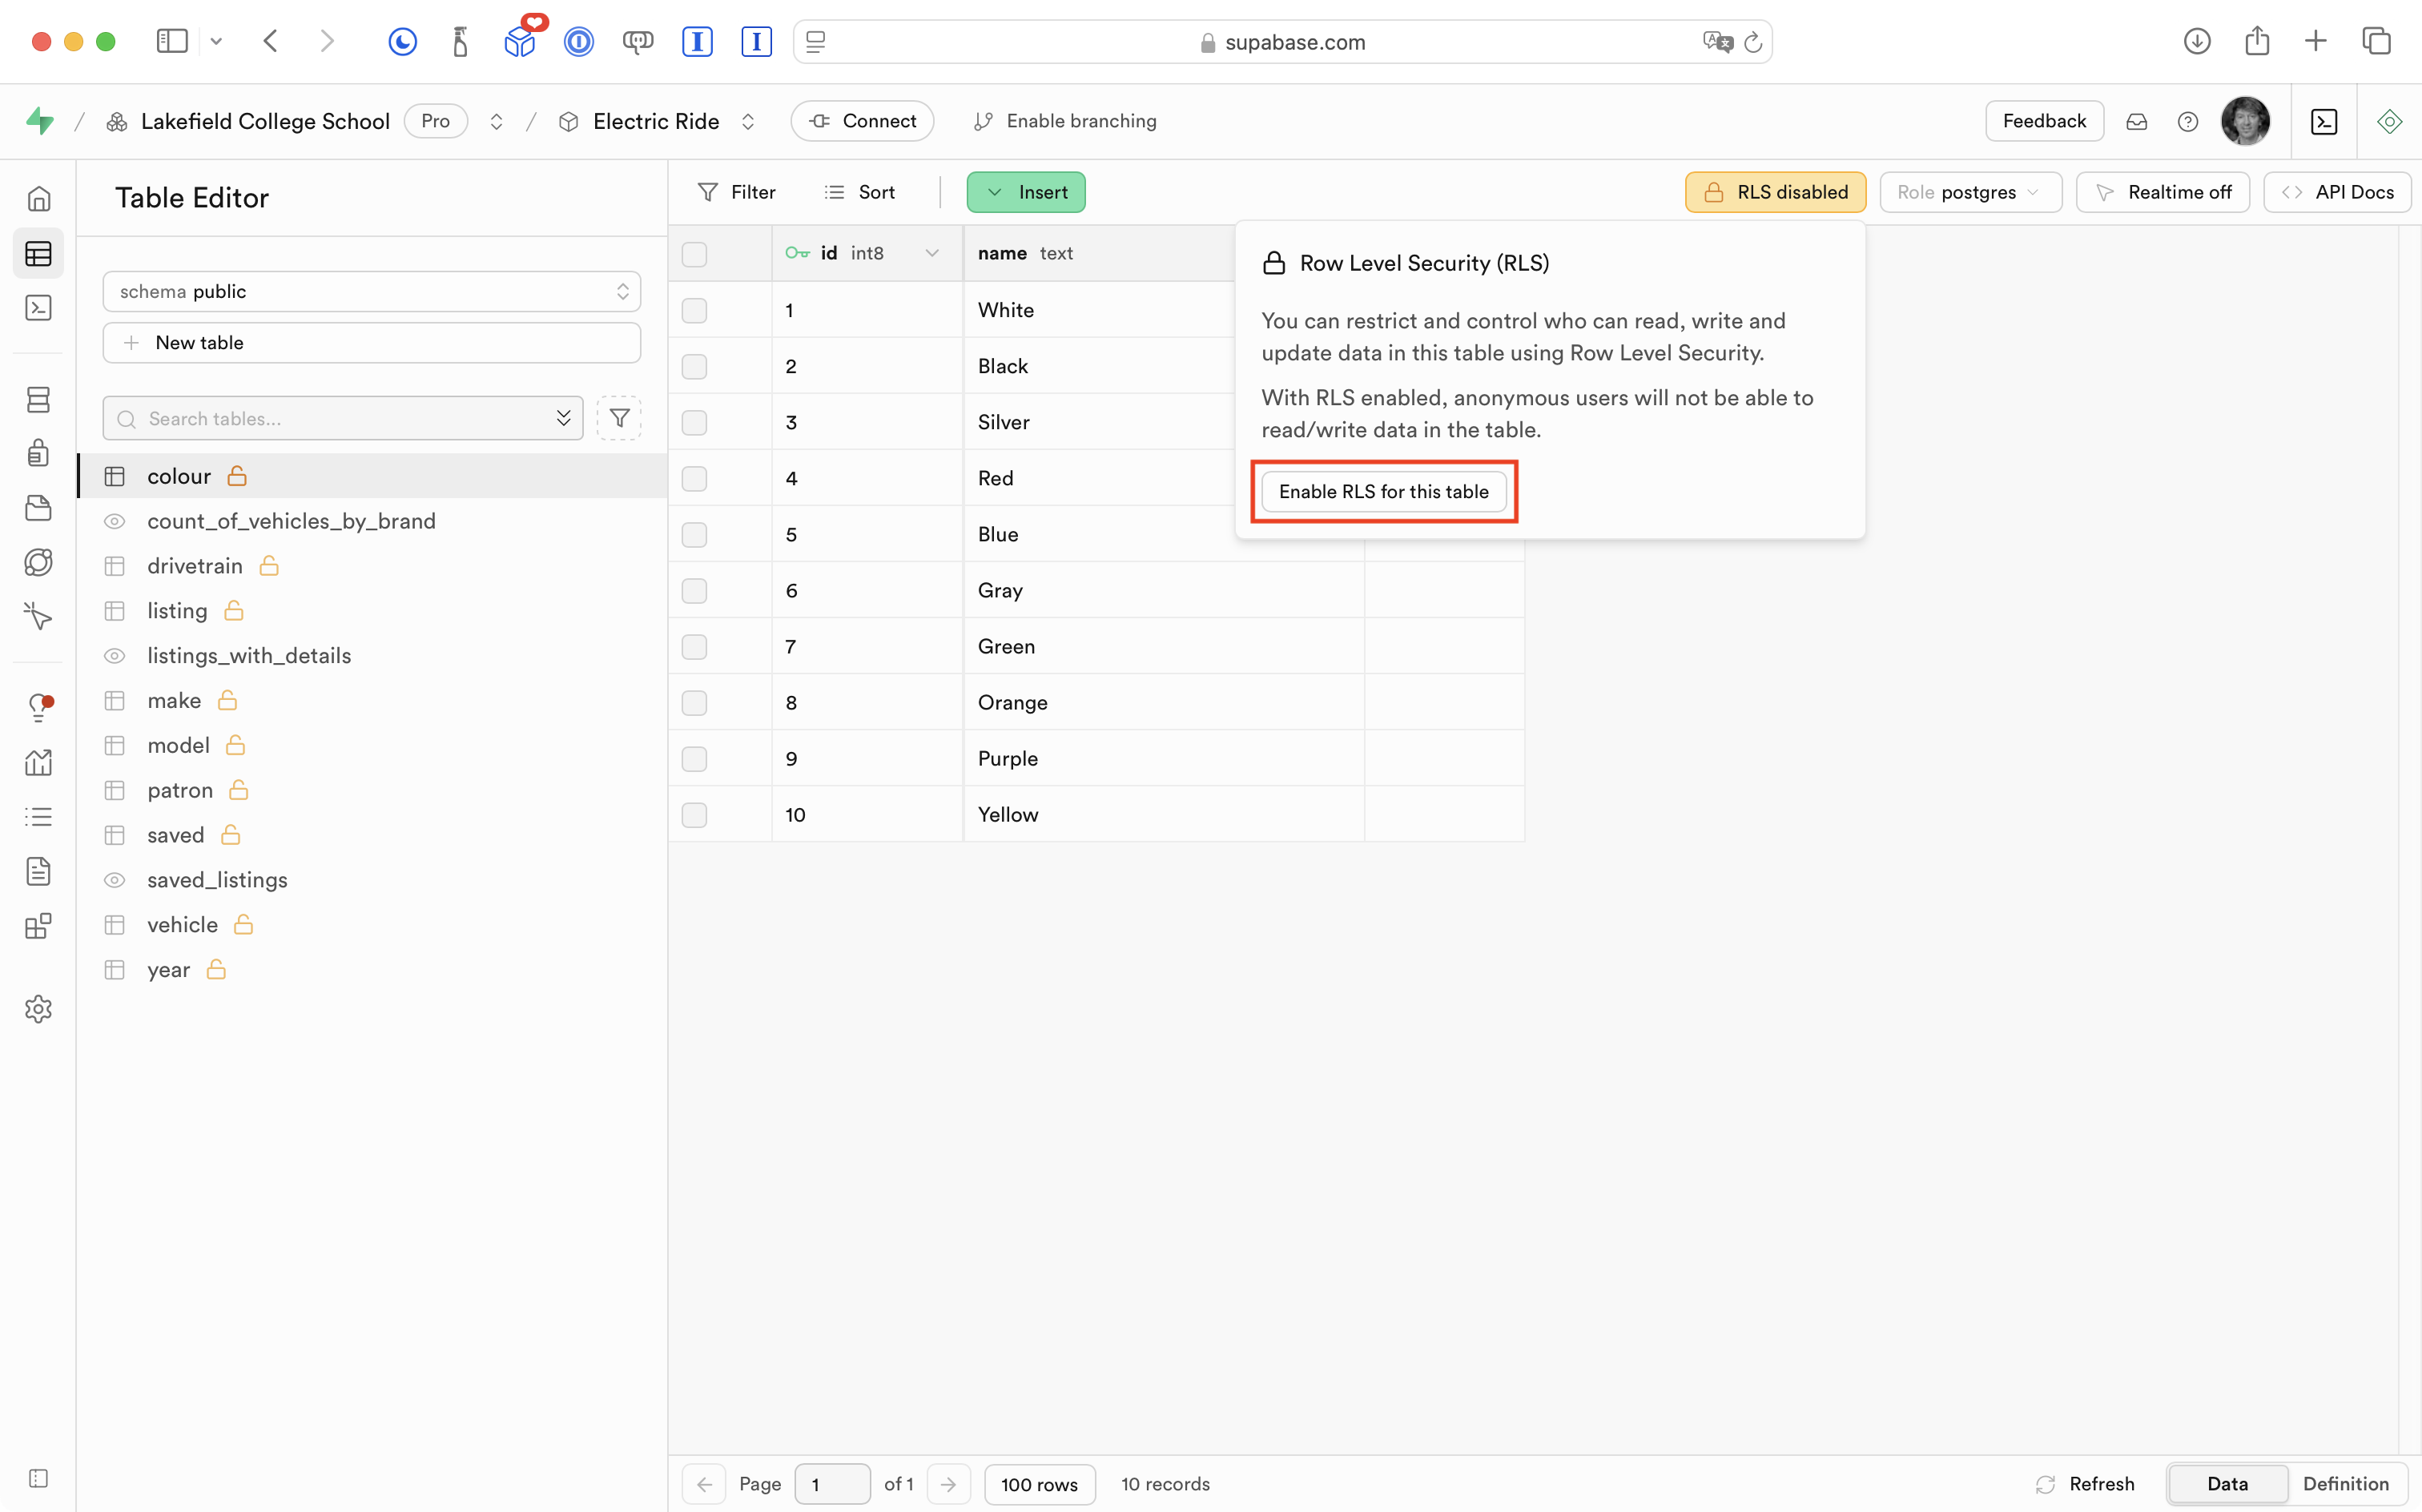
First, he clicks the button shown here for the colour table:

Then, he continues and presses the Enable RLS for this table button:
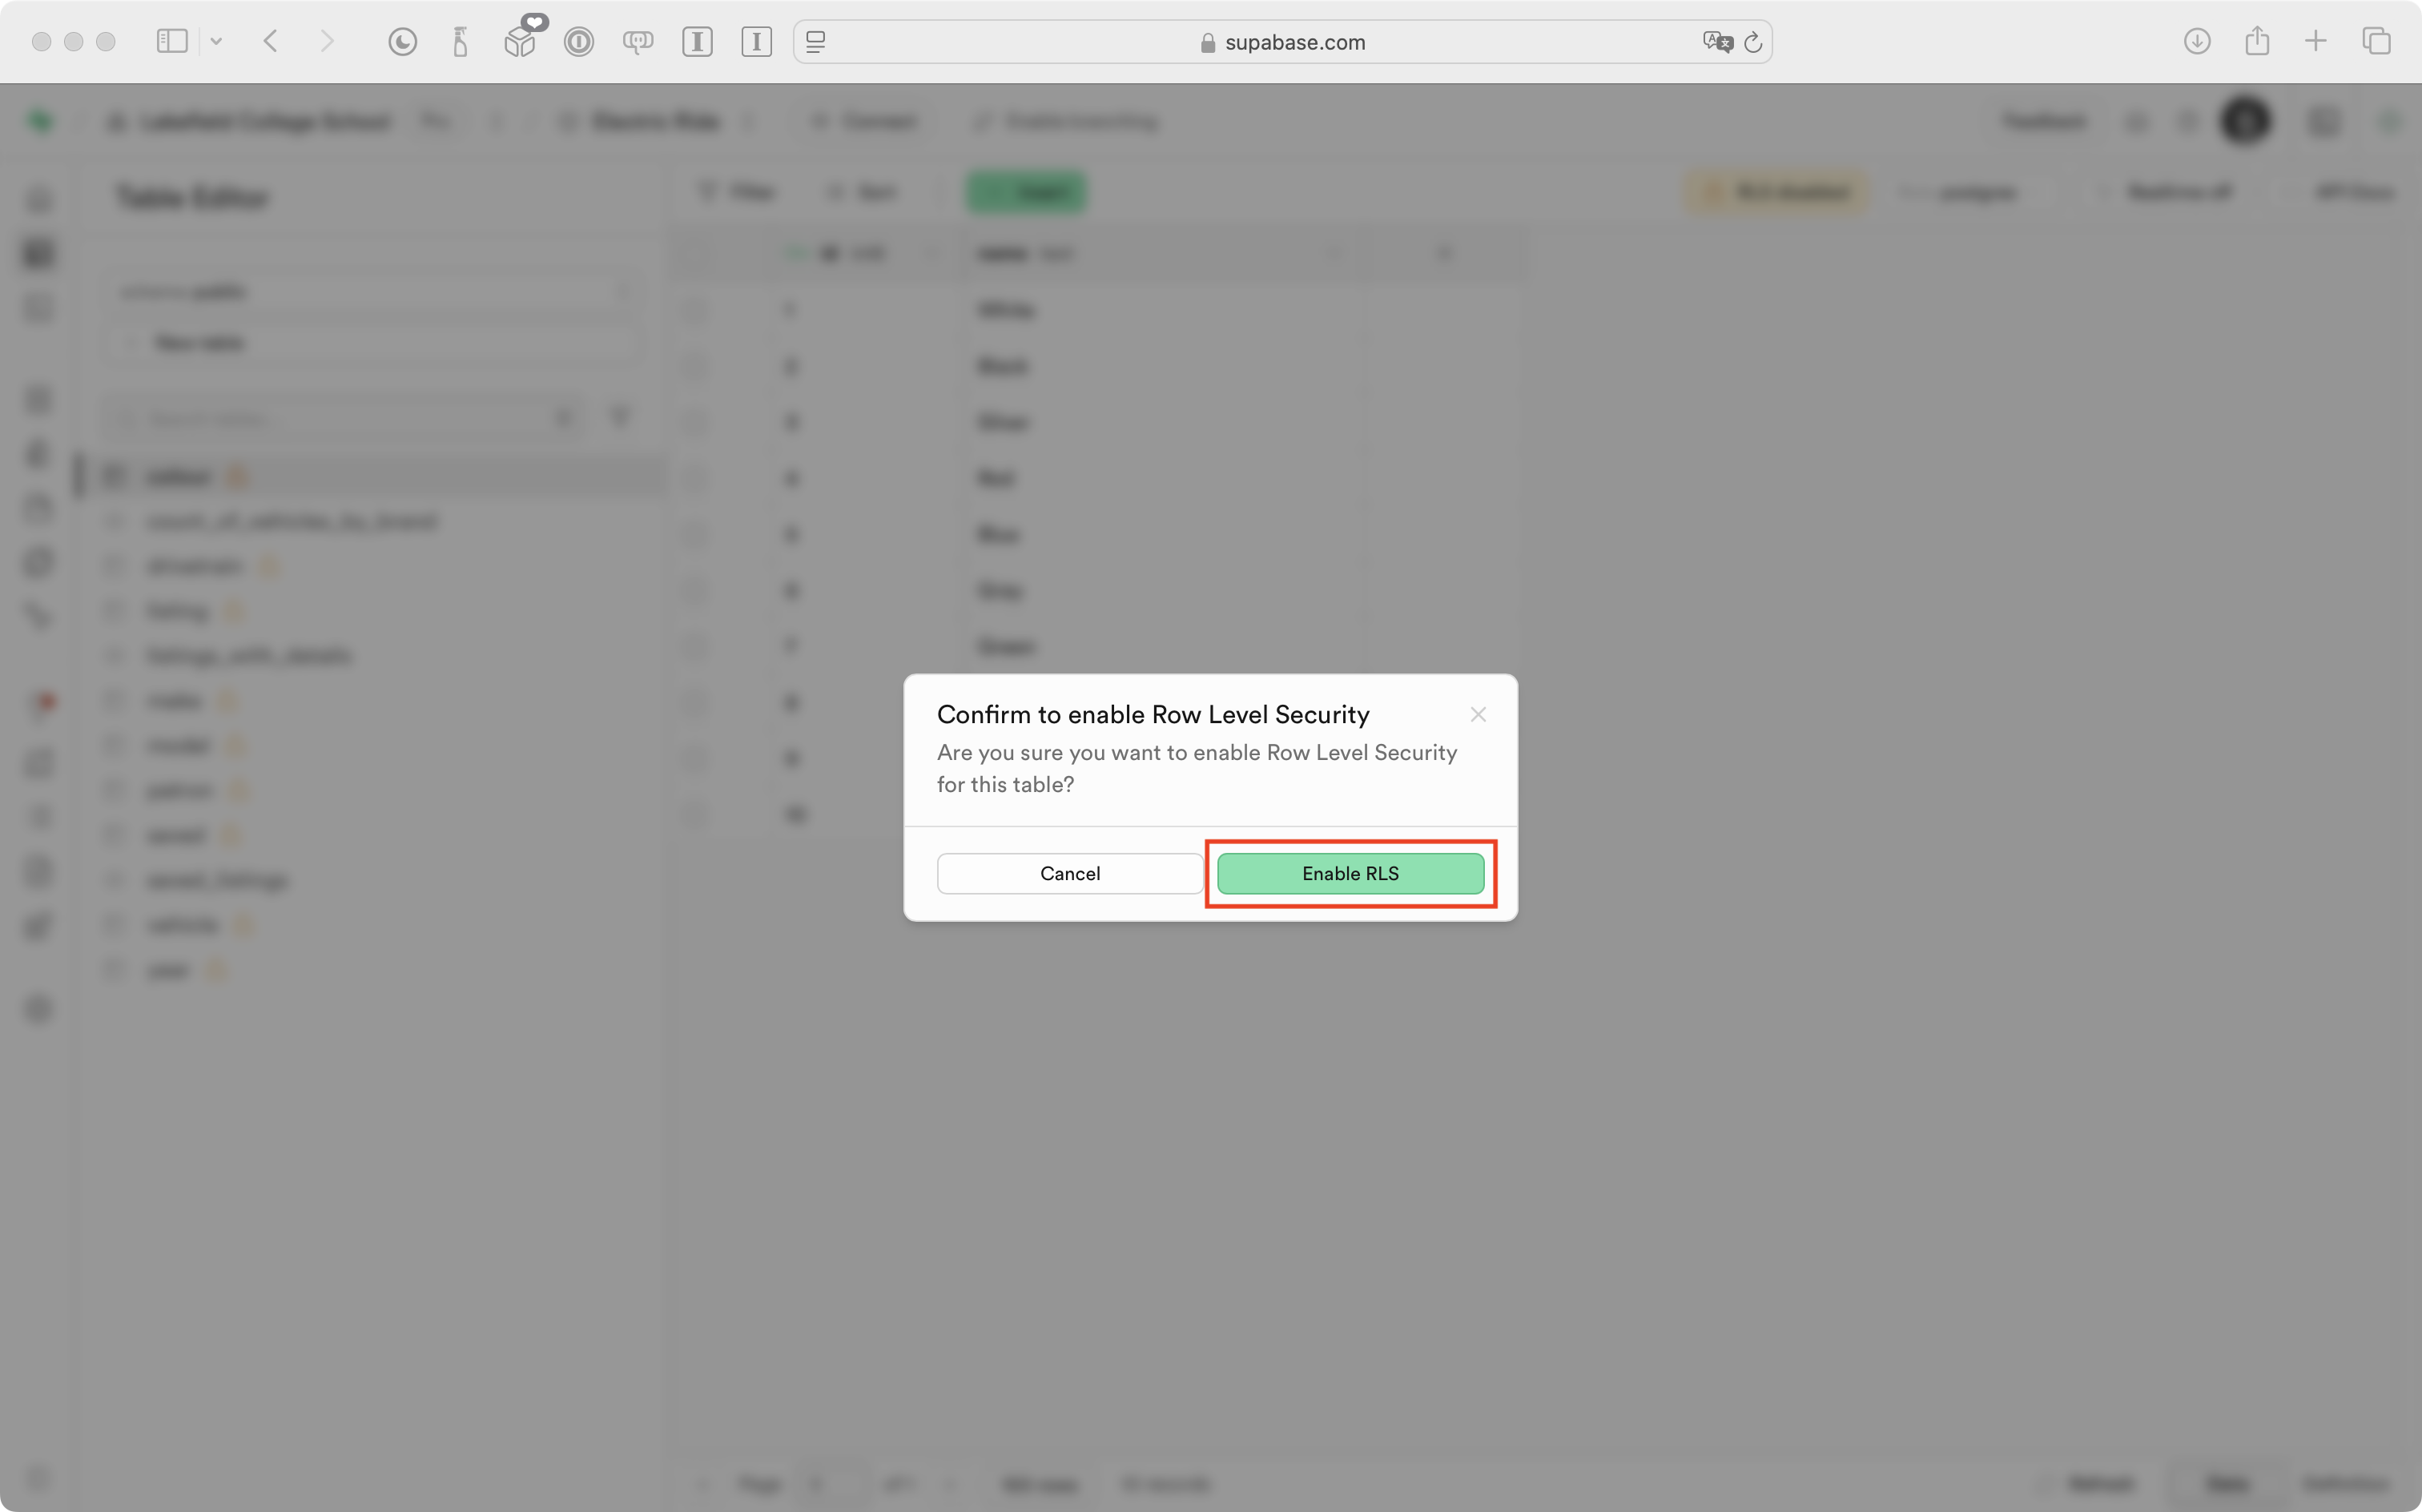
Finally, he confirms that he wants to enable RLS for the table:
After a moment, the “open lock” icon beside the colour table disappears:
TIP
After enabling RLS on just one table –
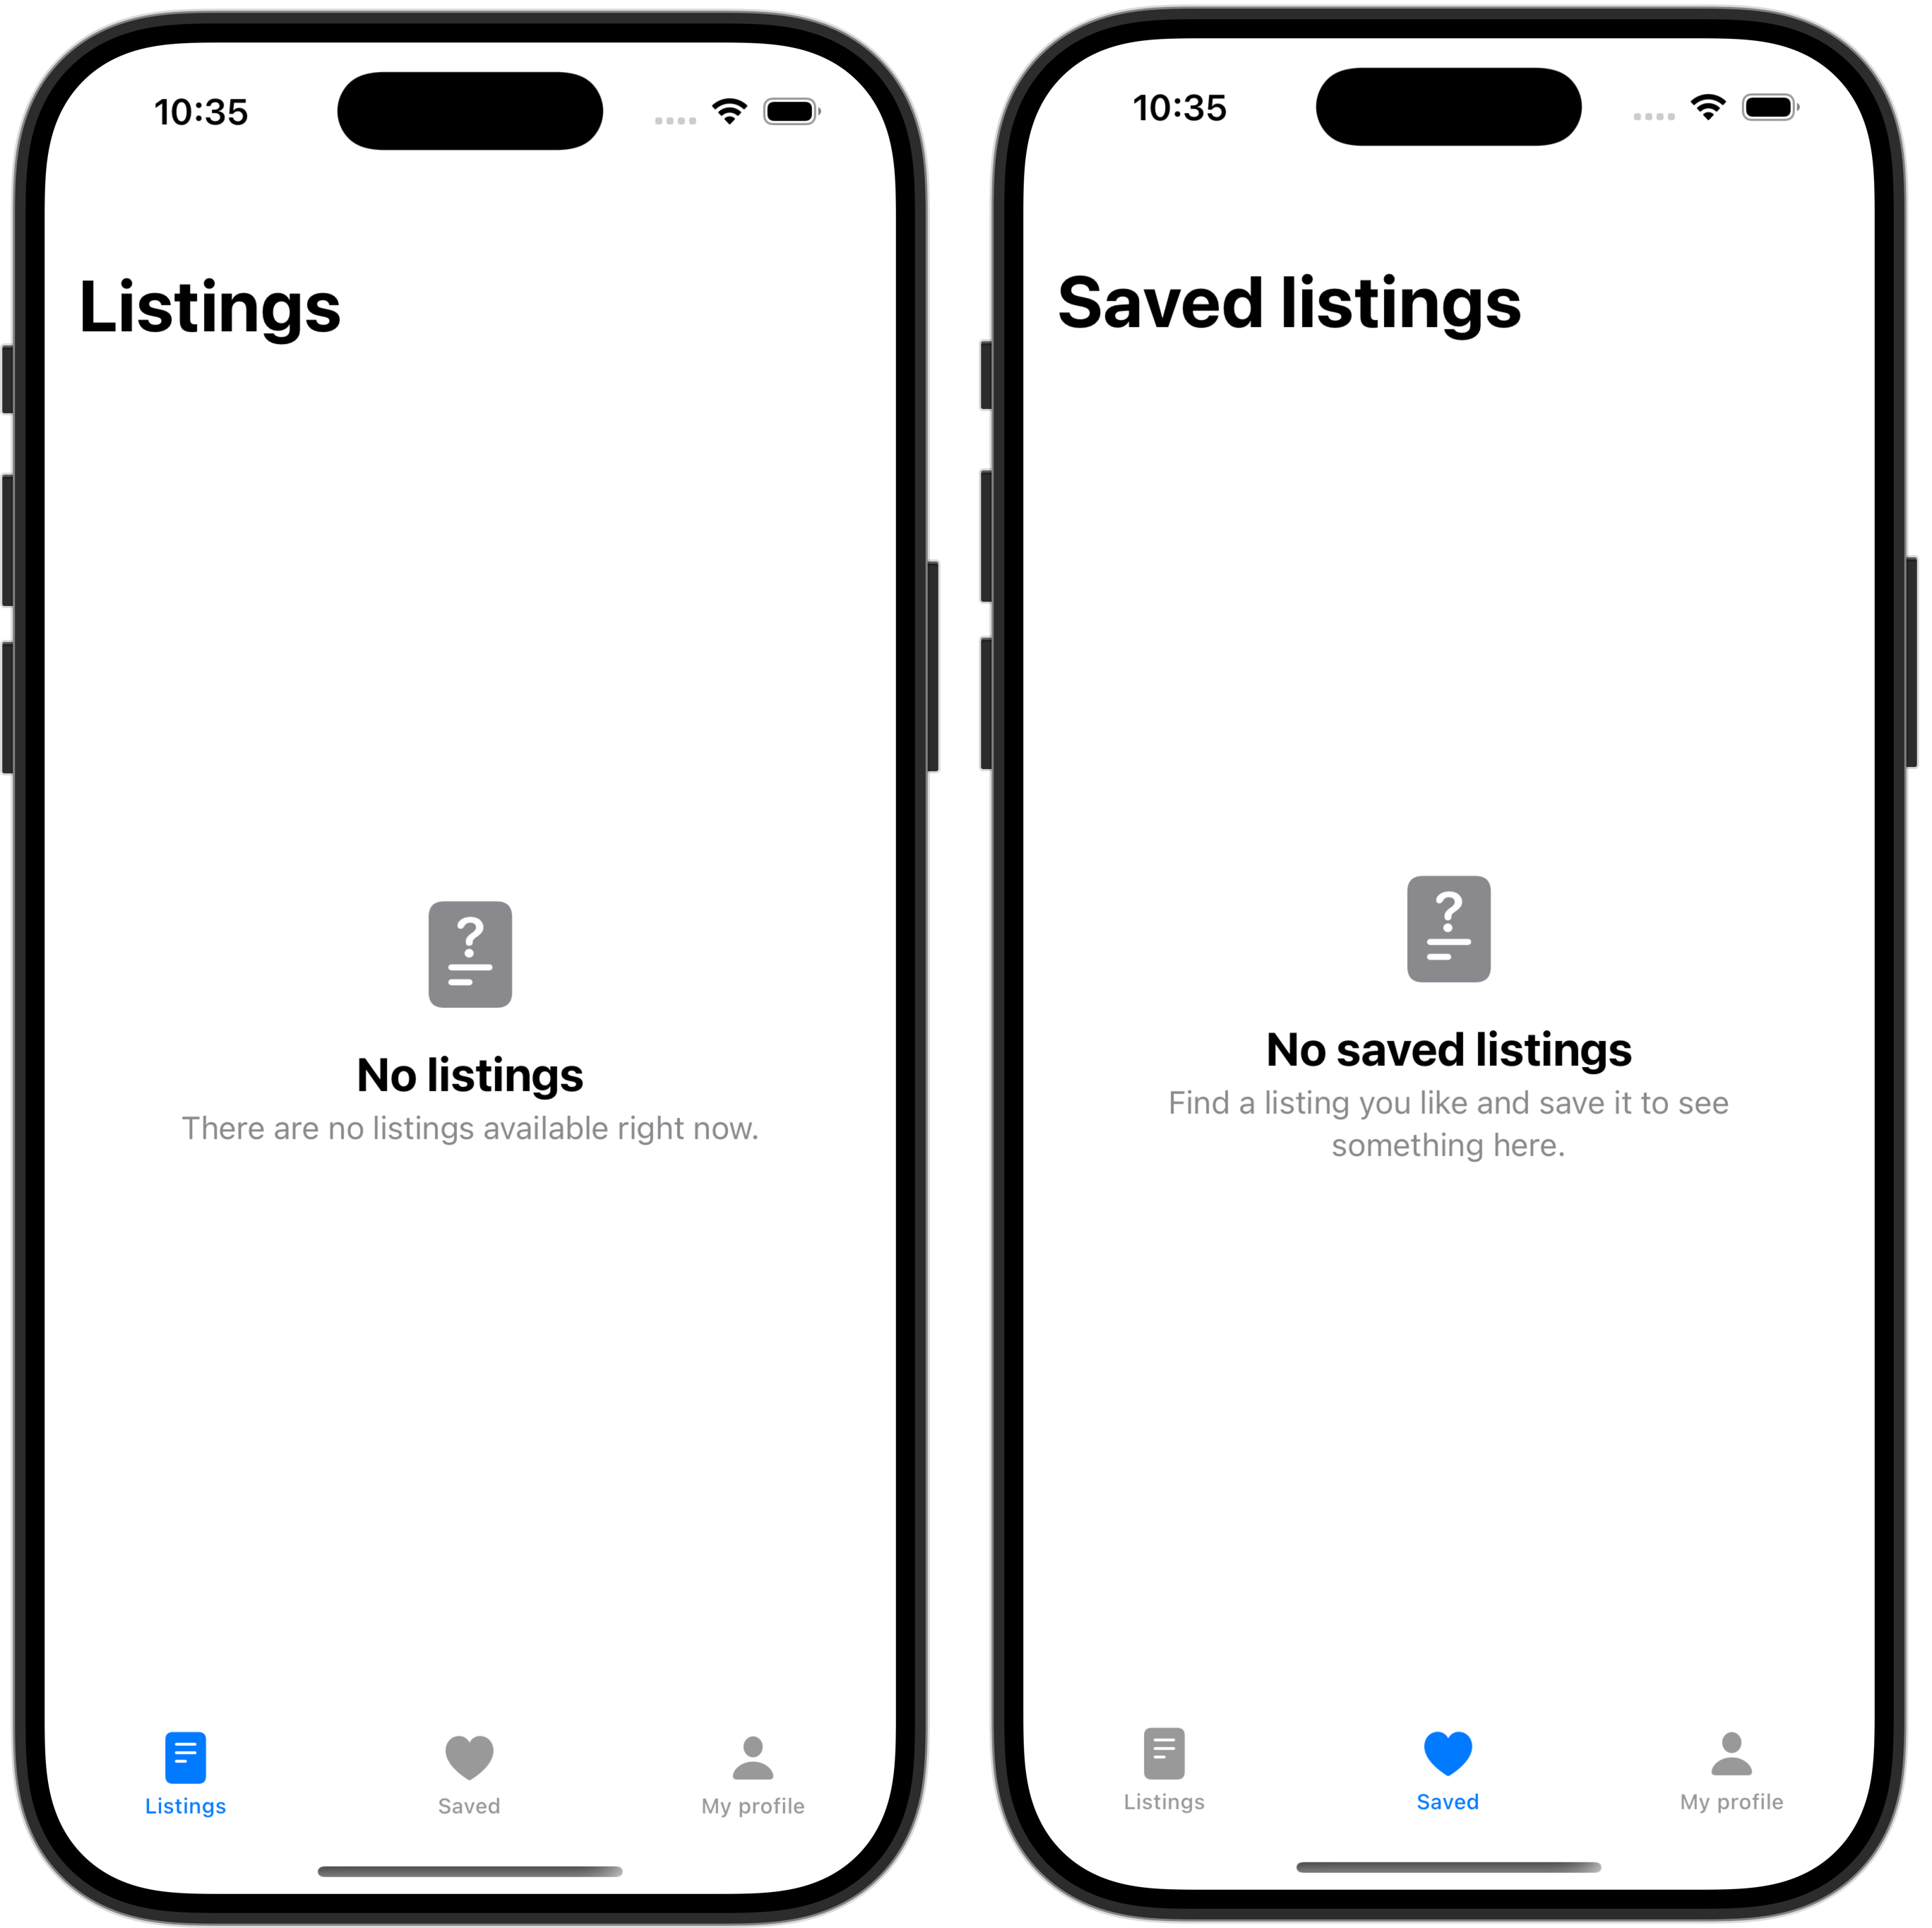
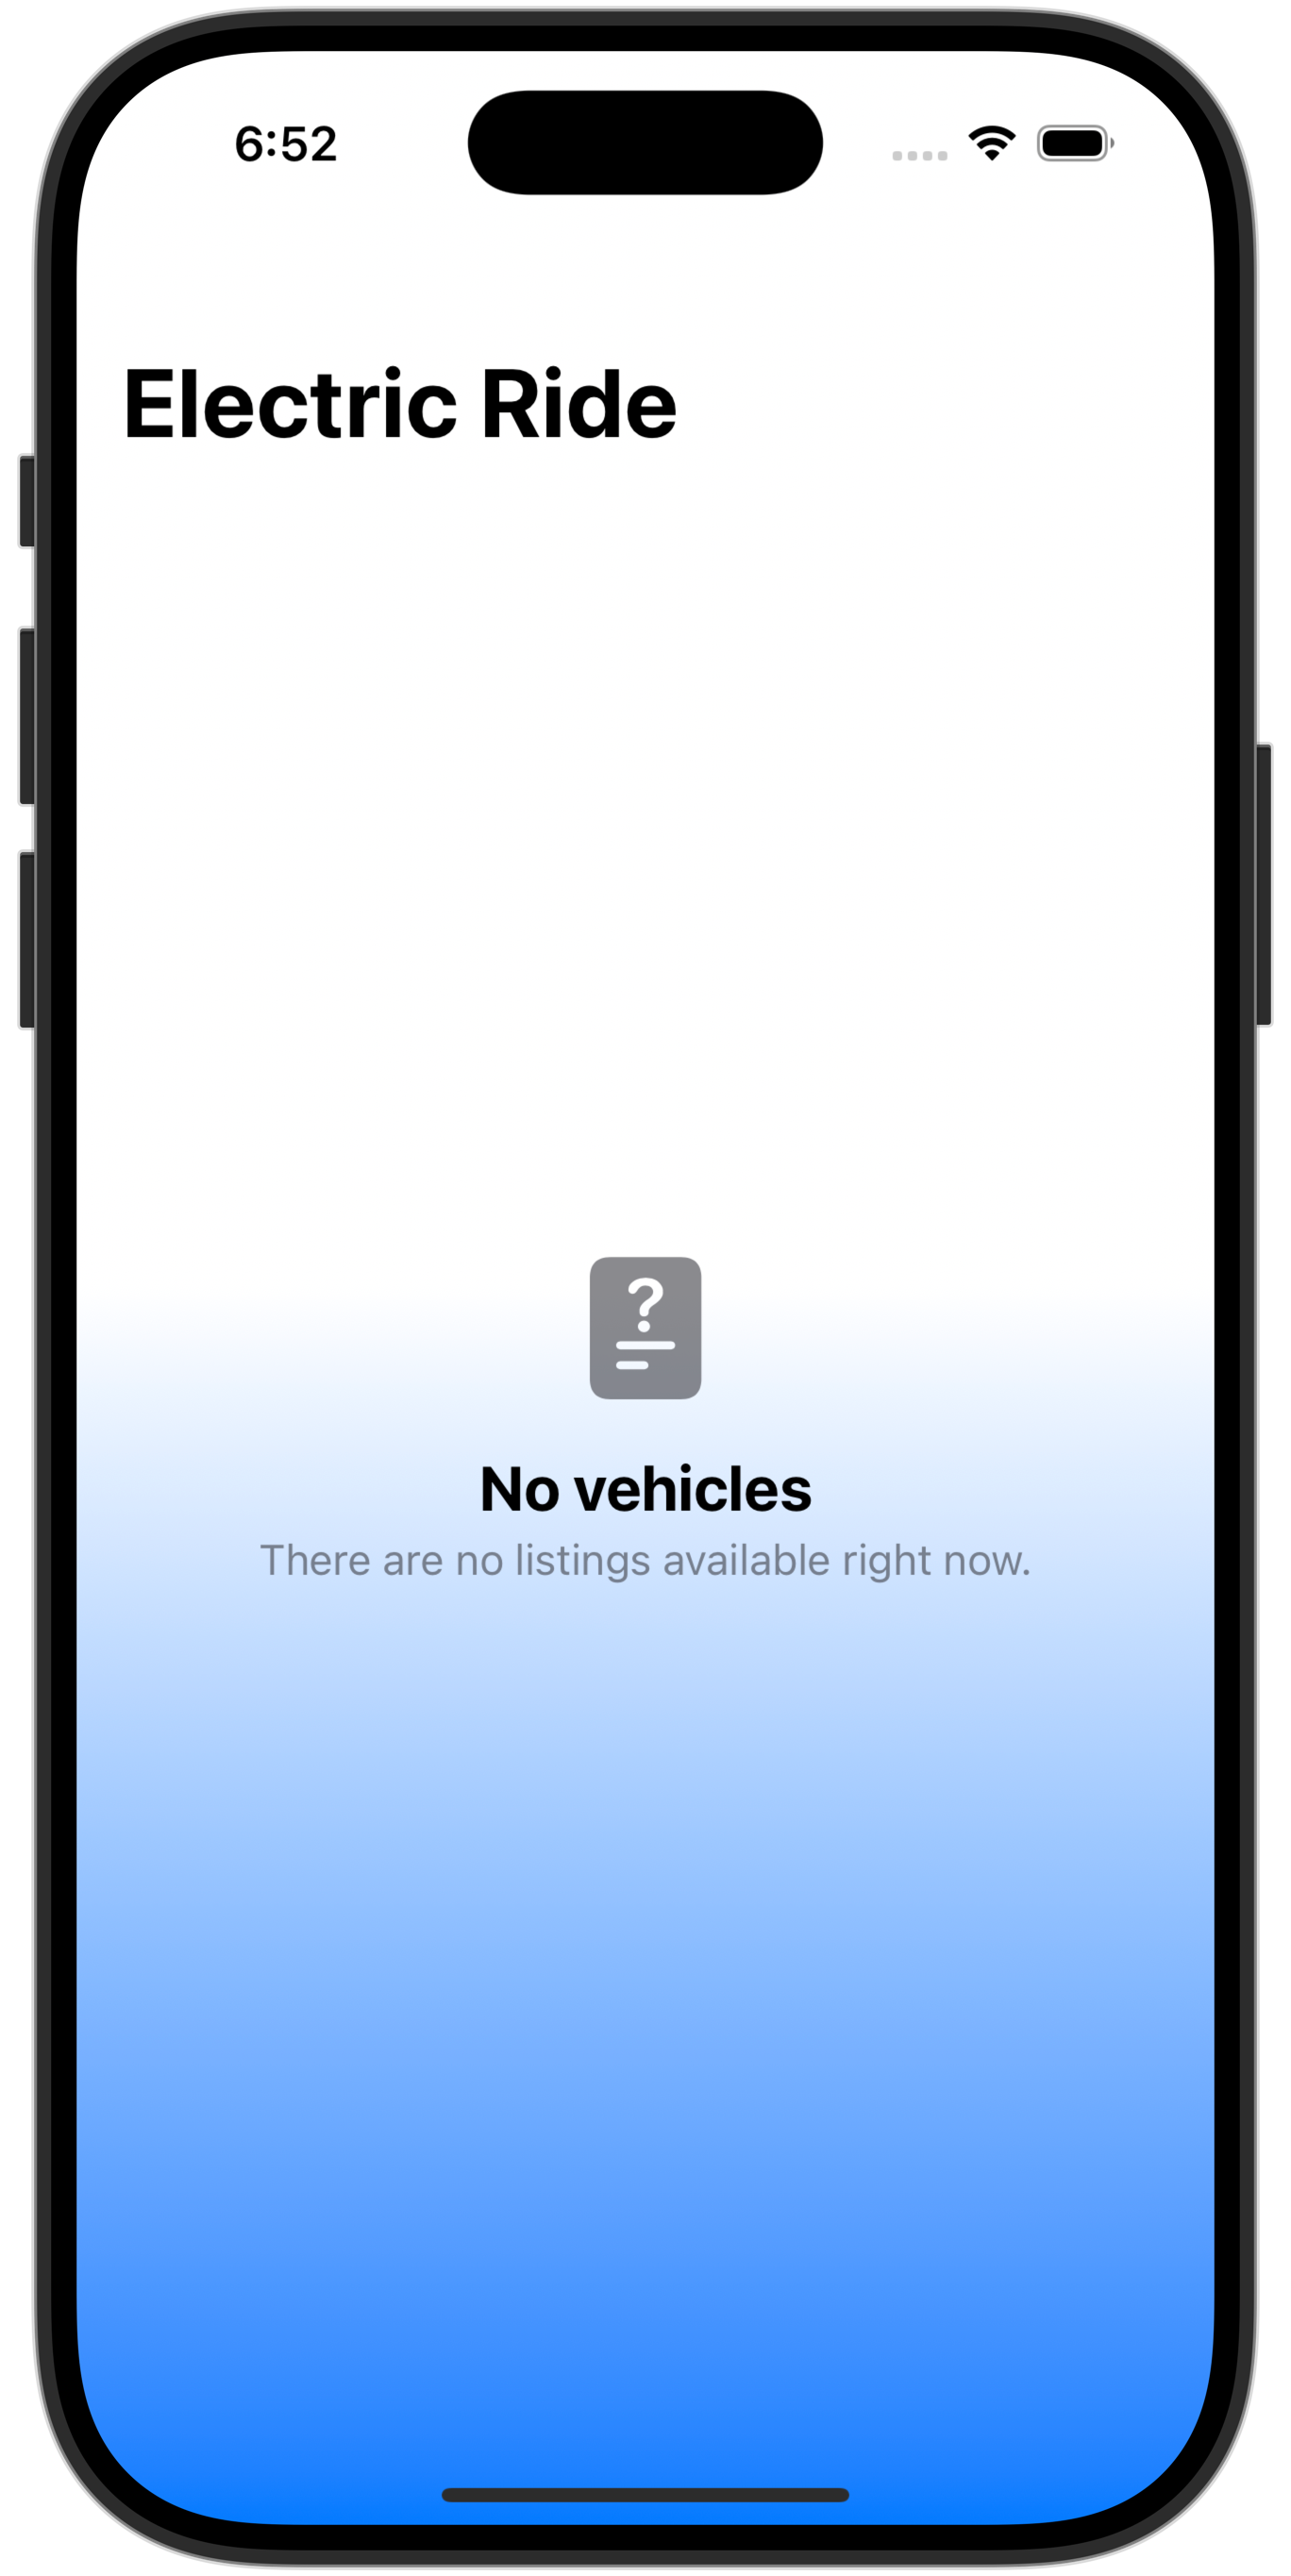
colour– in the database for Electric Ride, now, when running the app, queries that used to work no longer work – they show no data. For example, theWelcomeViewscreen that is supposed to show a summary of cars available by brand shows instead that there are no listings available:
Further, if a simulated sign-in is completed, it appears that no vehicle listings are available, and that no saved listings exist:
This is expected behaviour.
The data required for that screen to show its information is built upon a couple of database views that join several tables together to obtain results.
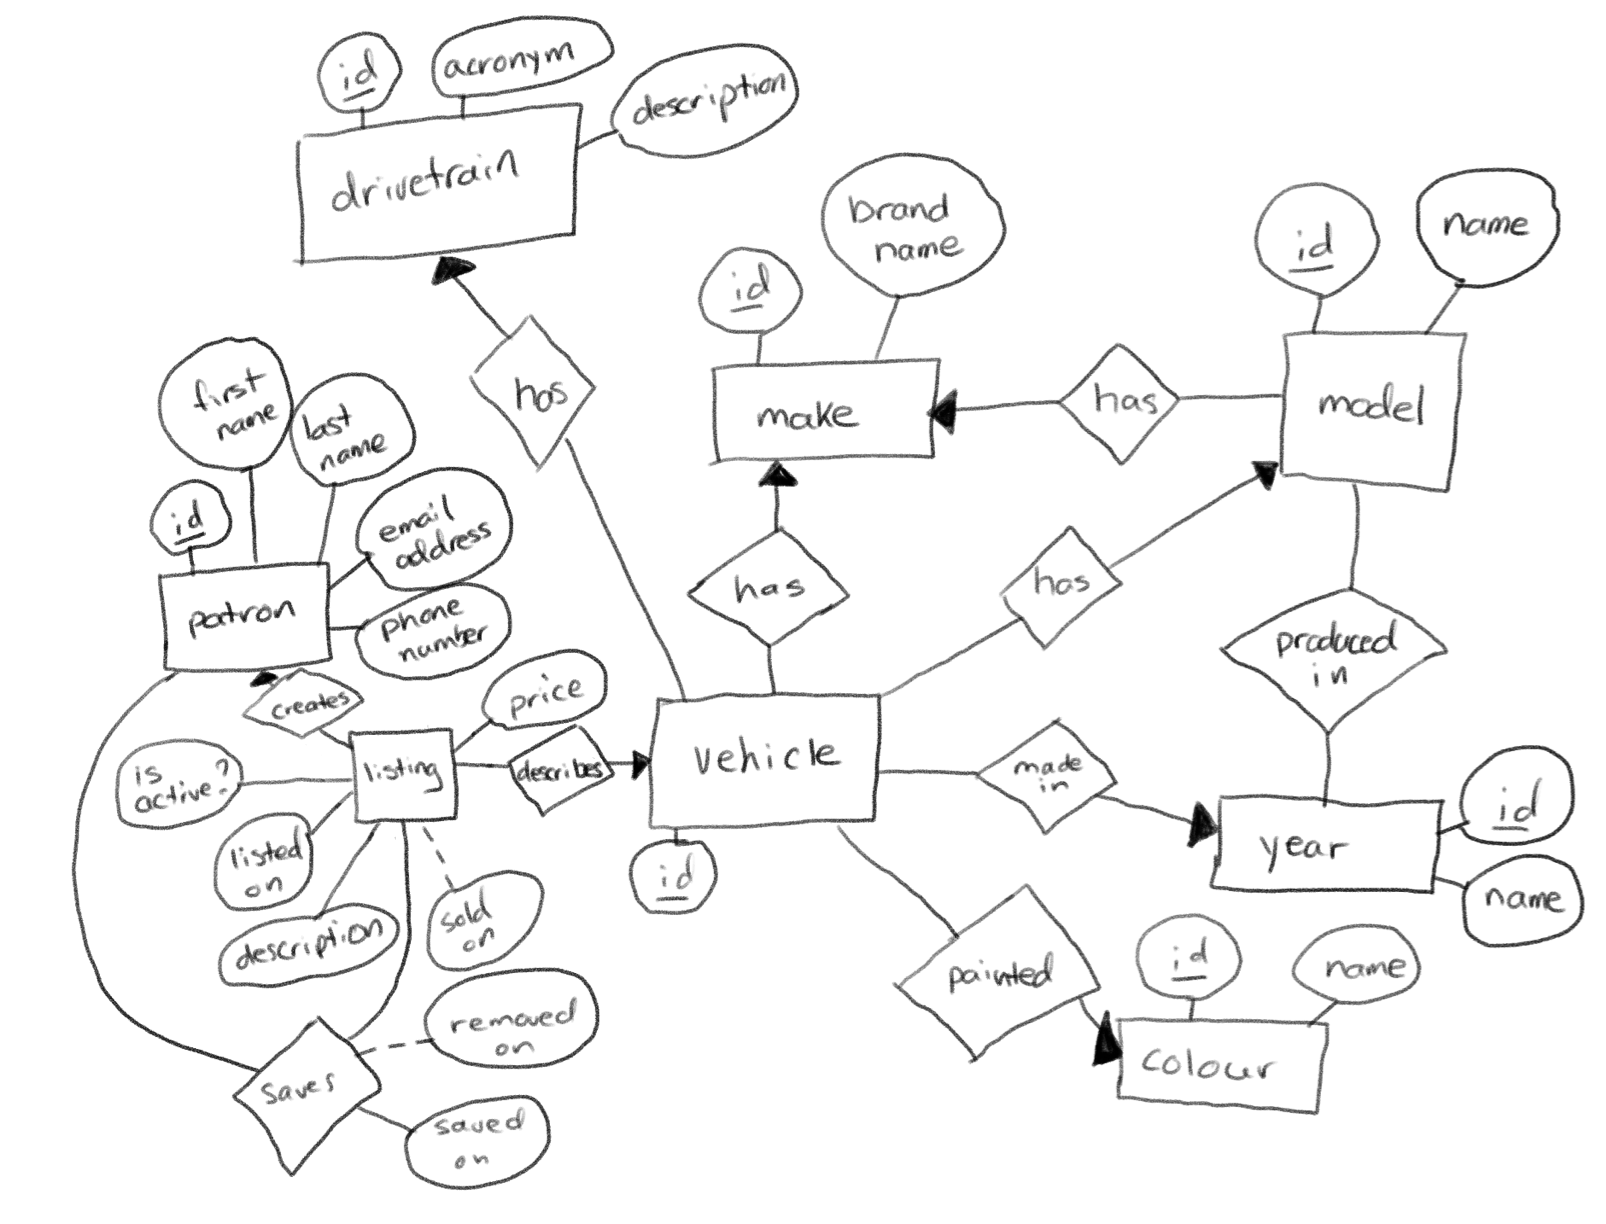
Remember, there are many entities in the entity-relationship diagram, or overall data model, for Electric Ride:
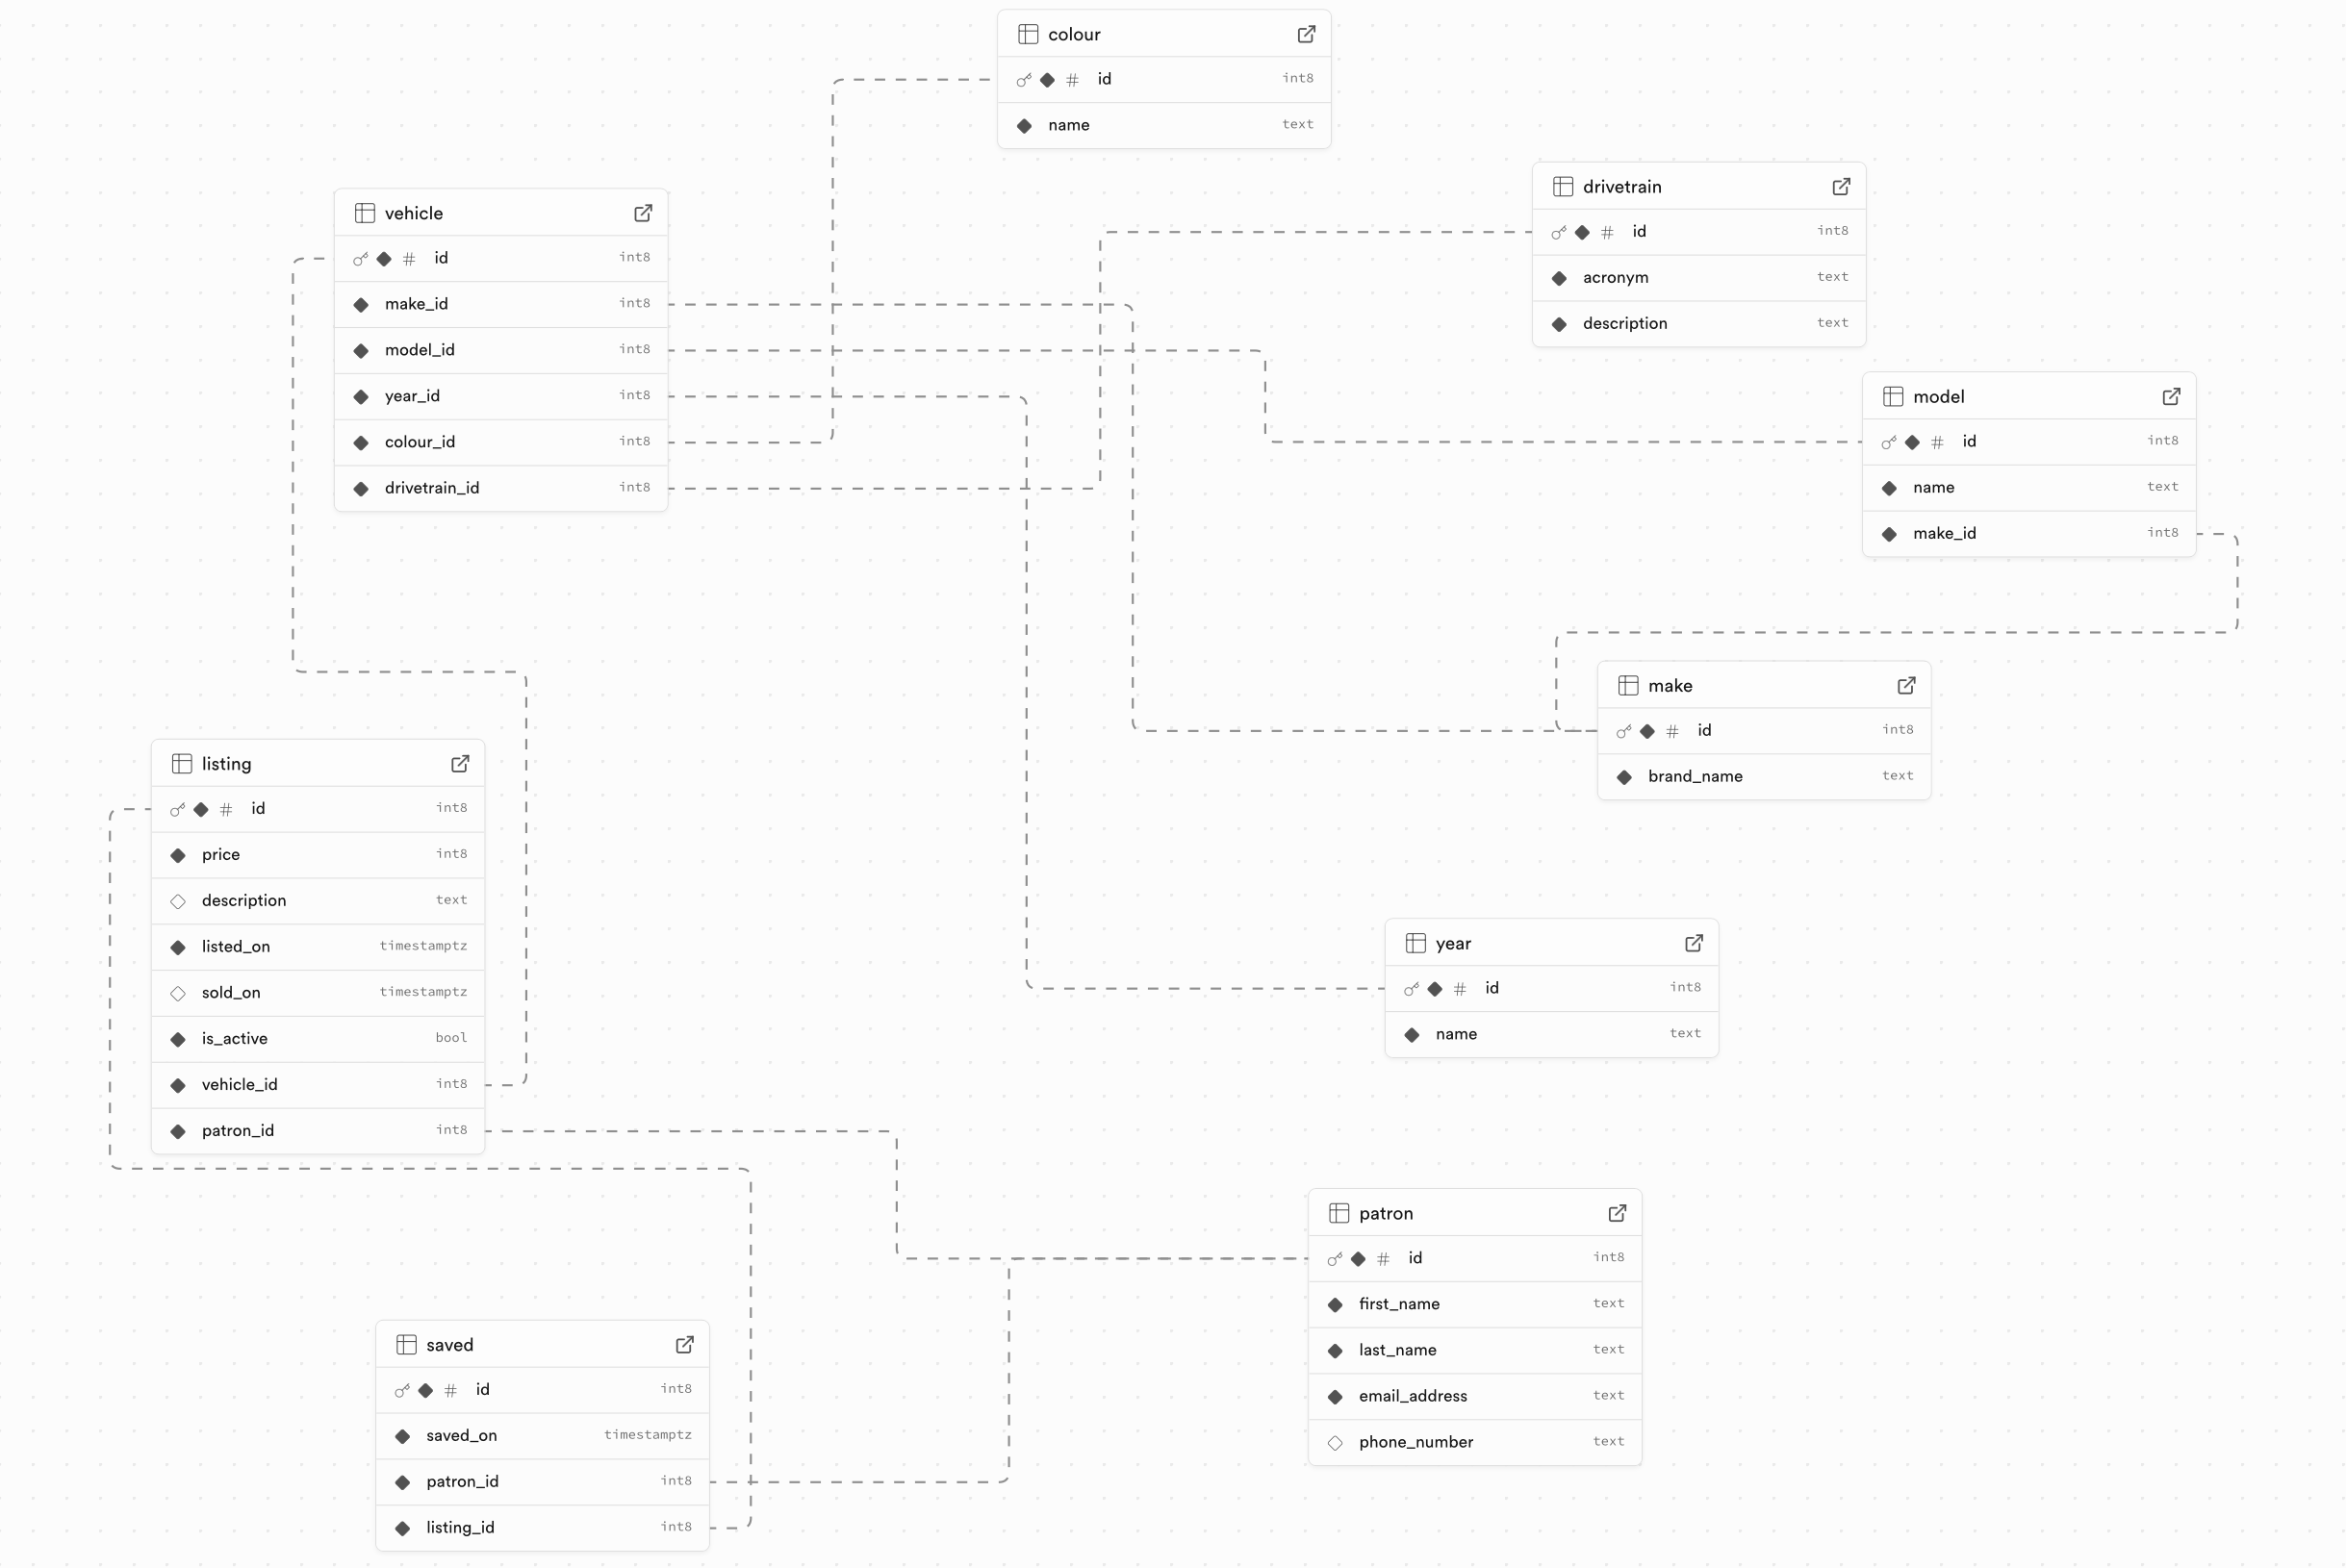
That ER diagram results in many tables that reference each other’s data based on unique identifiers (primary keys and foreign keys):
Since access to one table –
colour– is now restricted – the database views that join thecolourtable together with other tables to show detailed listings and a summary of cars available by brand no longer work.They will start to work again once we get authentication enabled in the app.
.png)
Mr. Gordon then enabled RLS on all the remaining tables in his database:
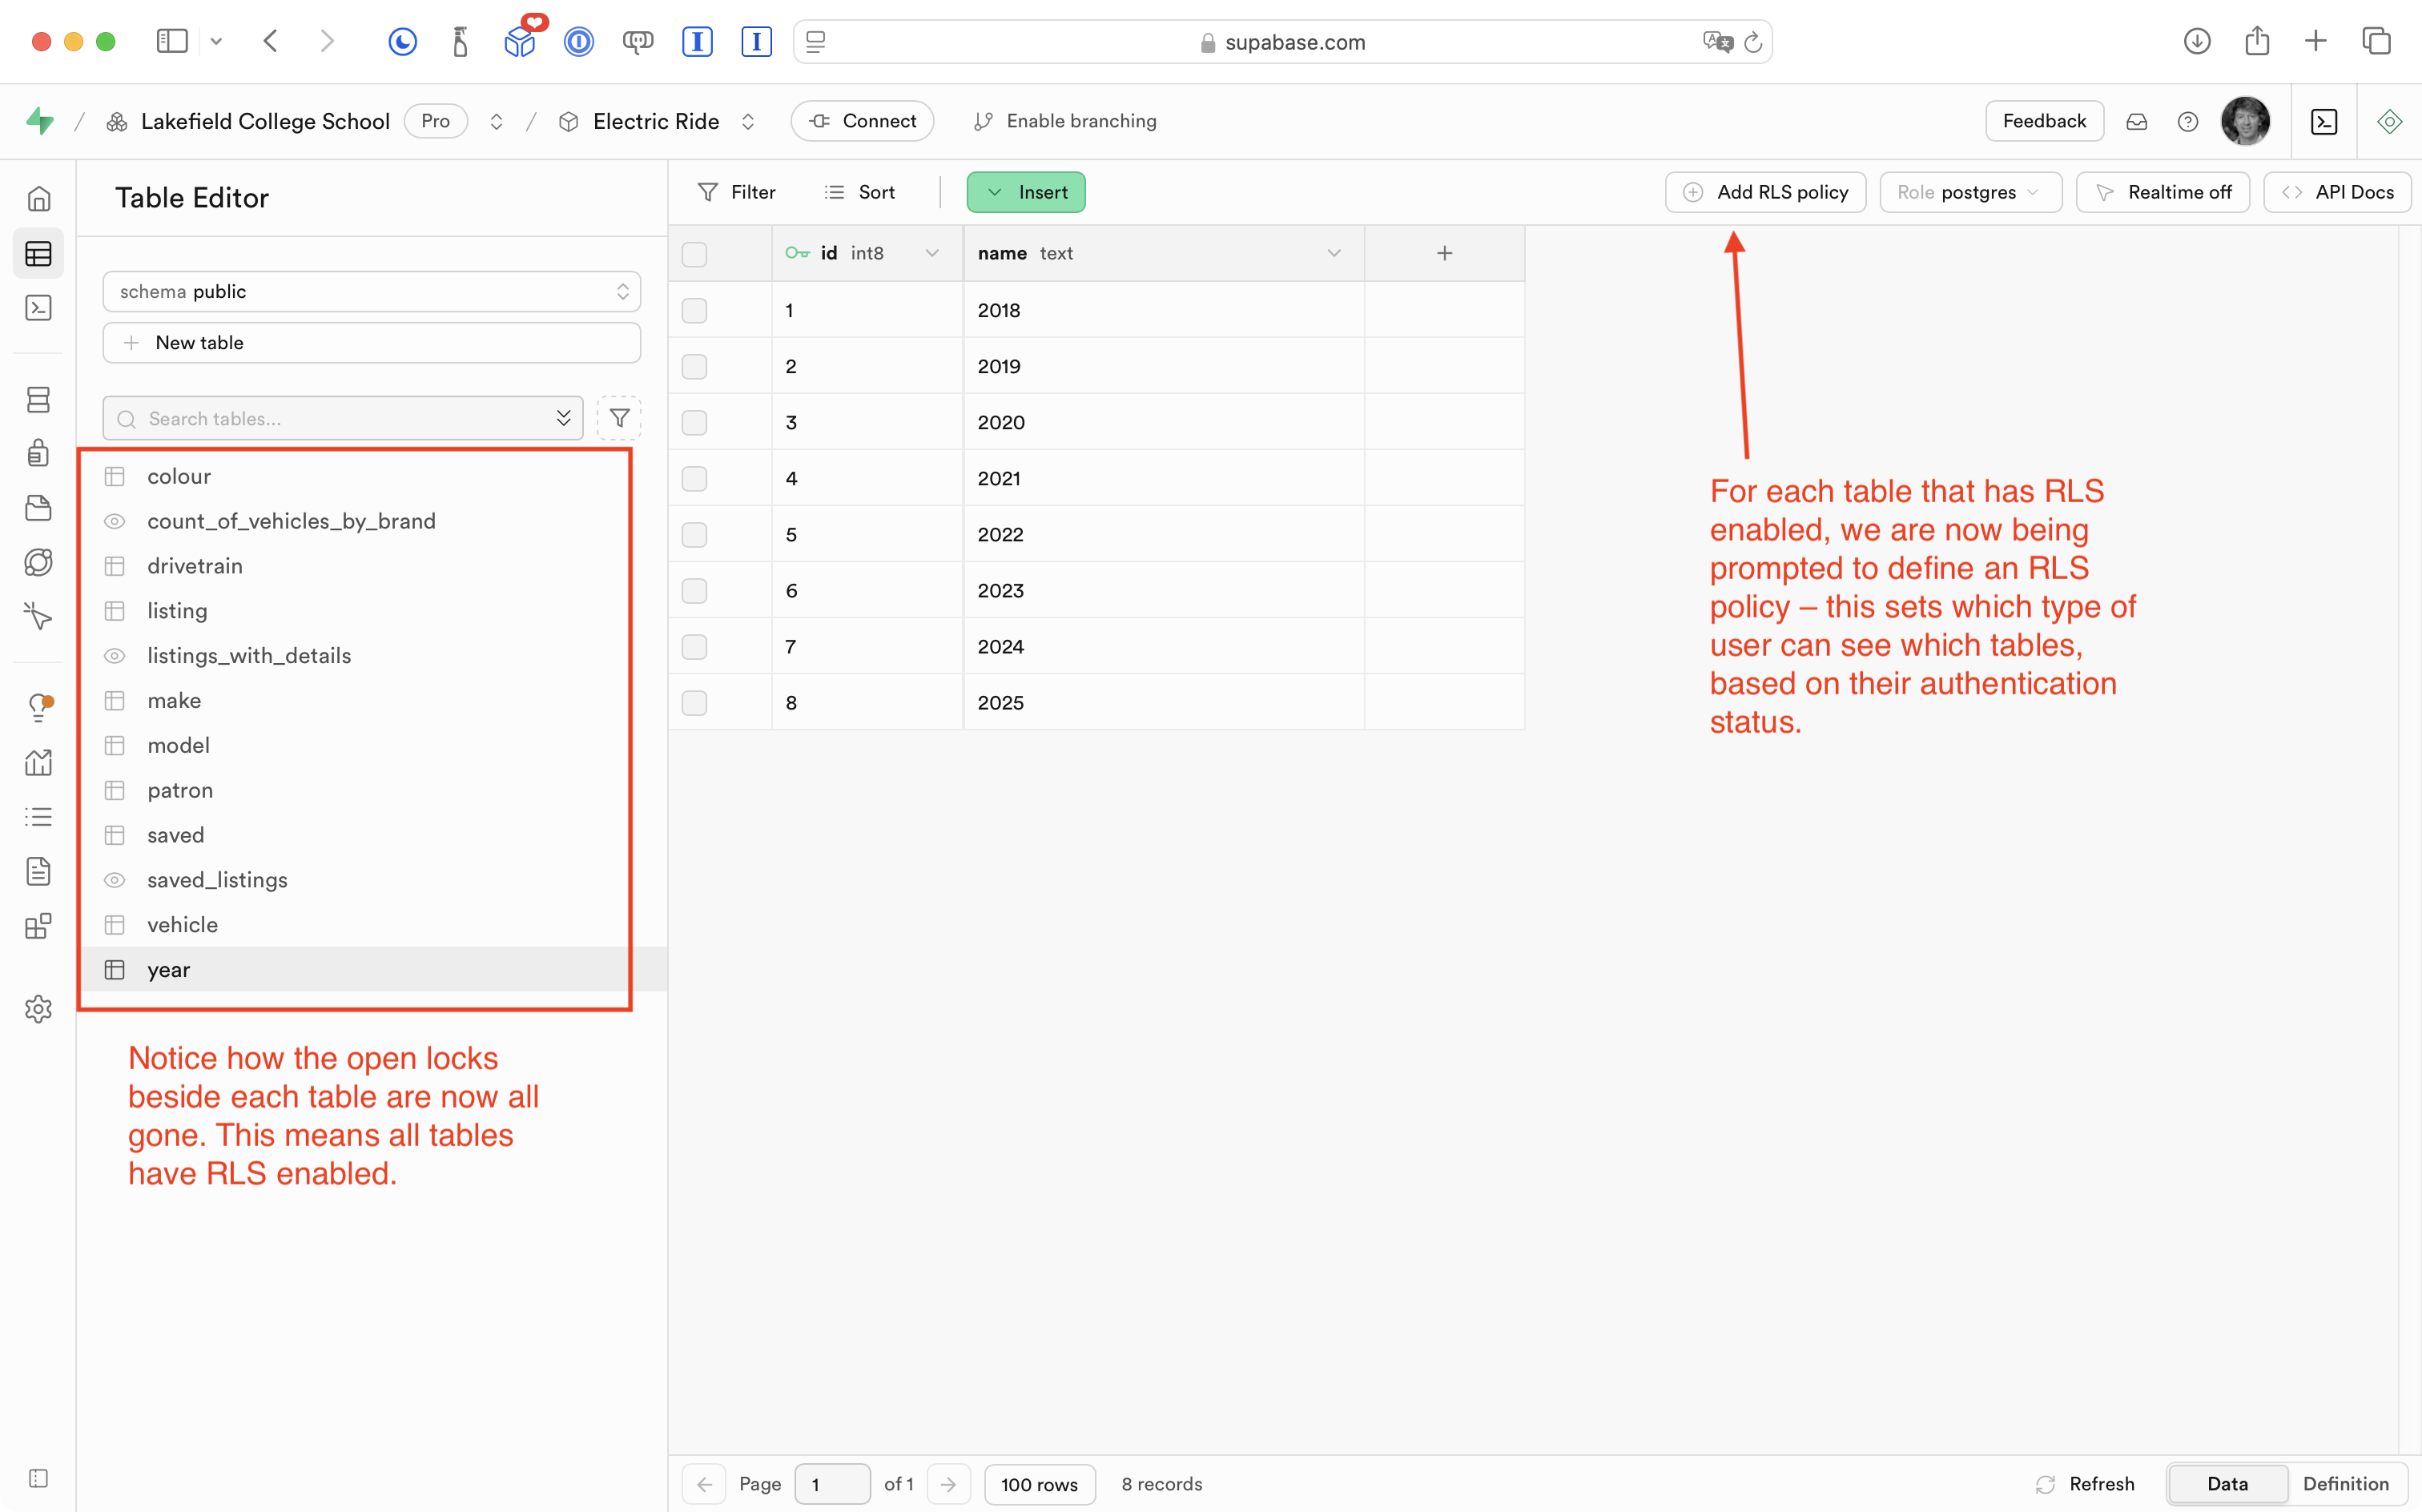
Note that it’s no longer even possible to use the app:
Again, this is expected behaviour.
We have locked down the database by enabling row-level security, but we have not yet:
- defined RLS policies (which let us control when a user can see a given table, based on whether they are authenticated – whether they have signed in yet, or not)
- added the ability to authenticate using Sign in with Google
Define RLS policies
To understand how RLS policies work, let’s first enable read-only access for all users on each table.
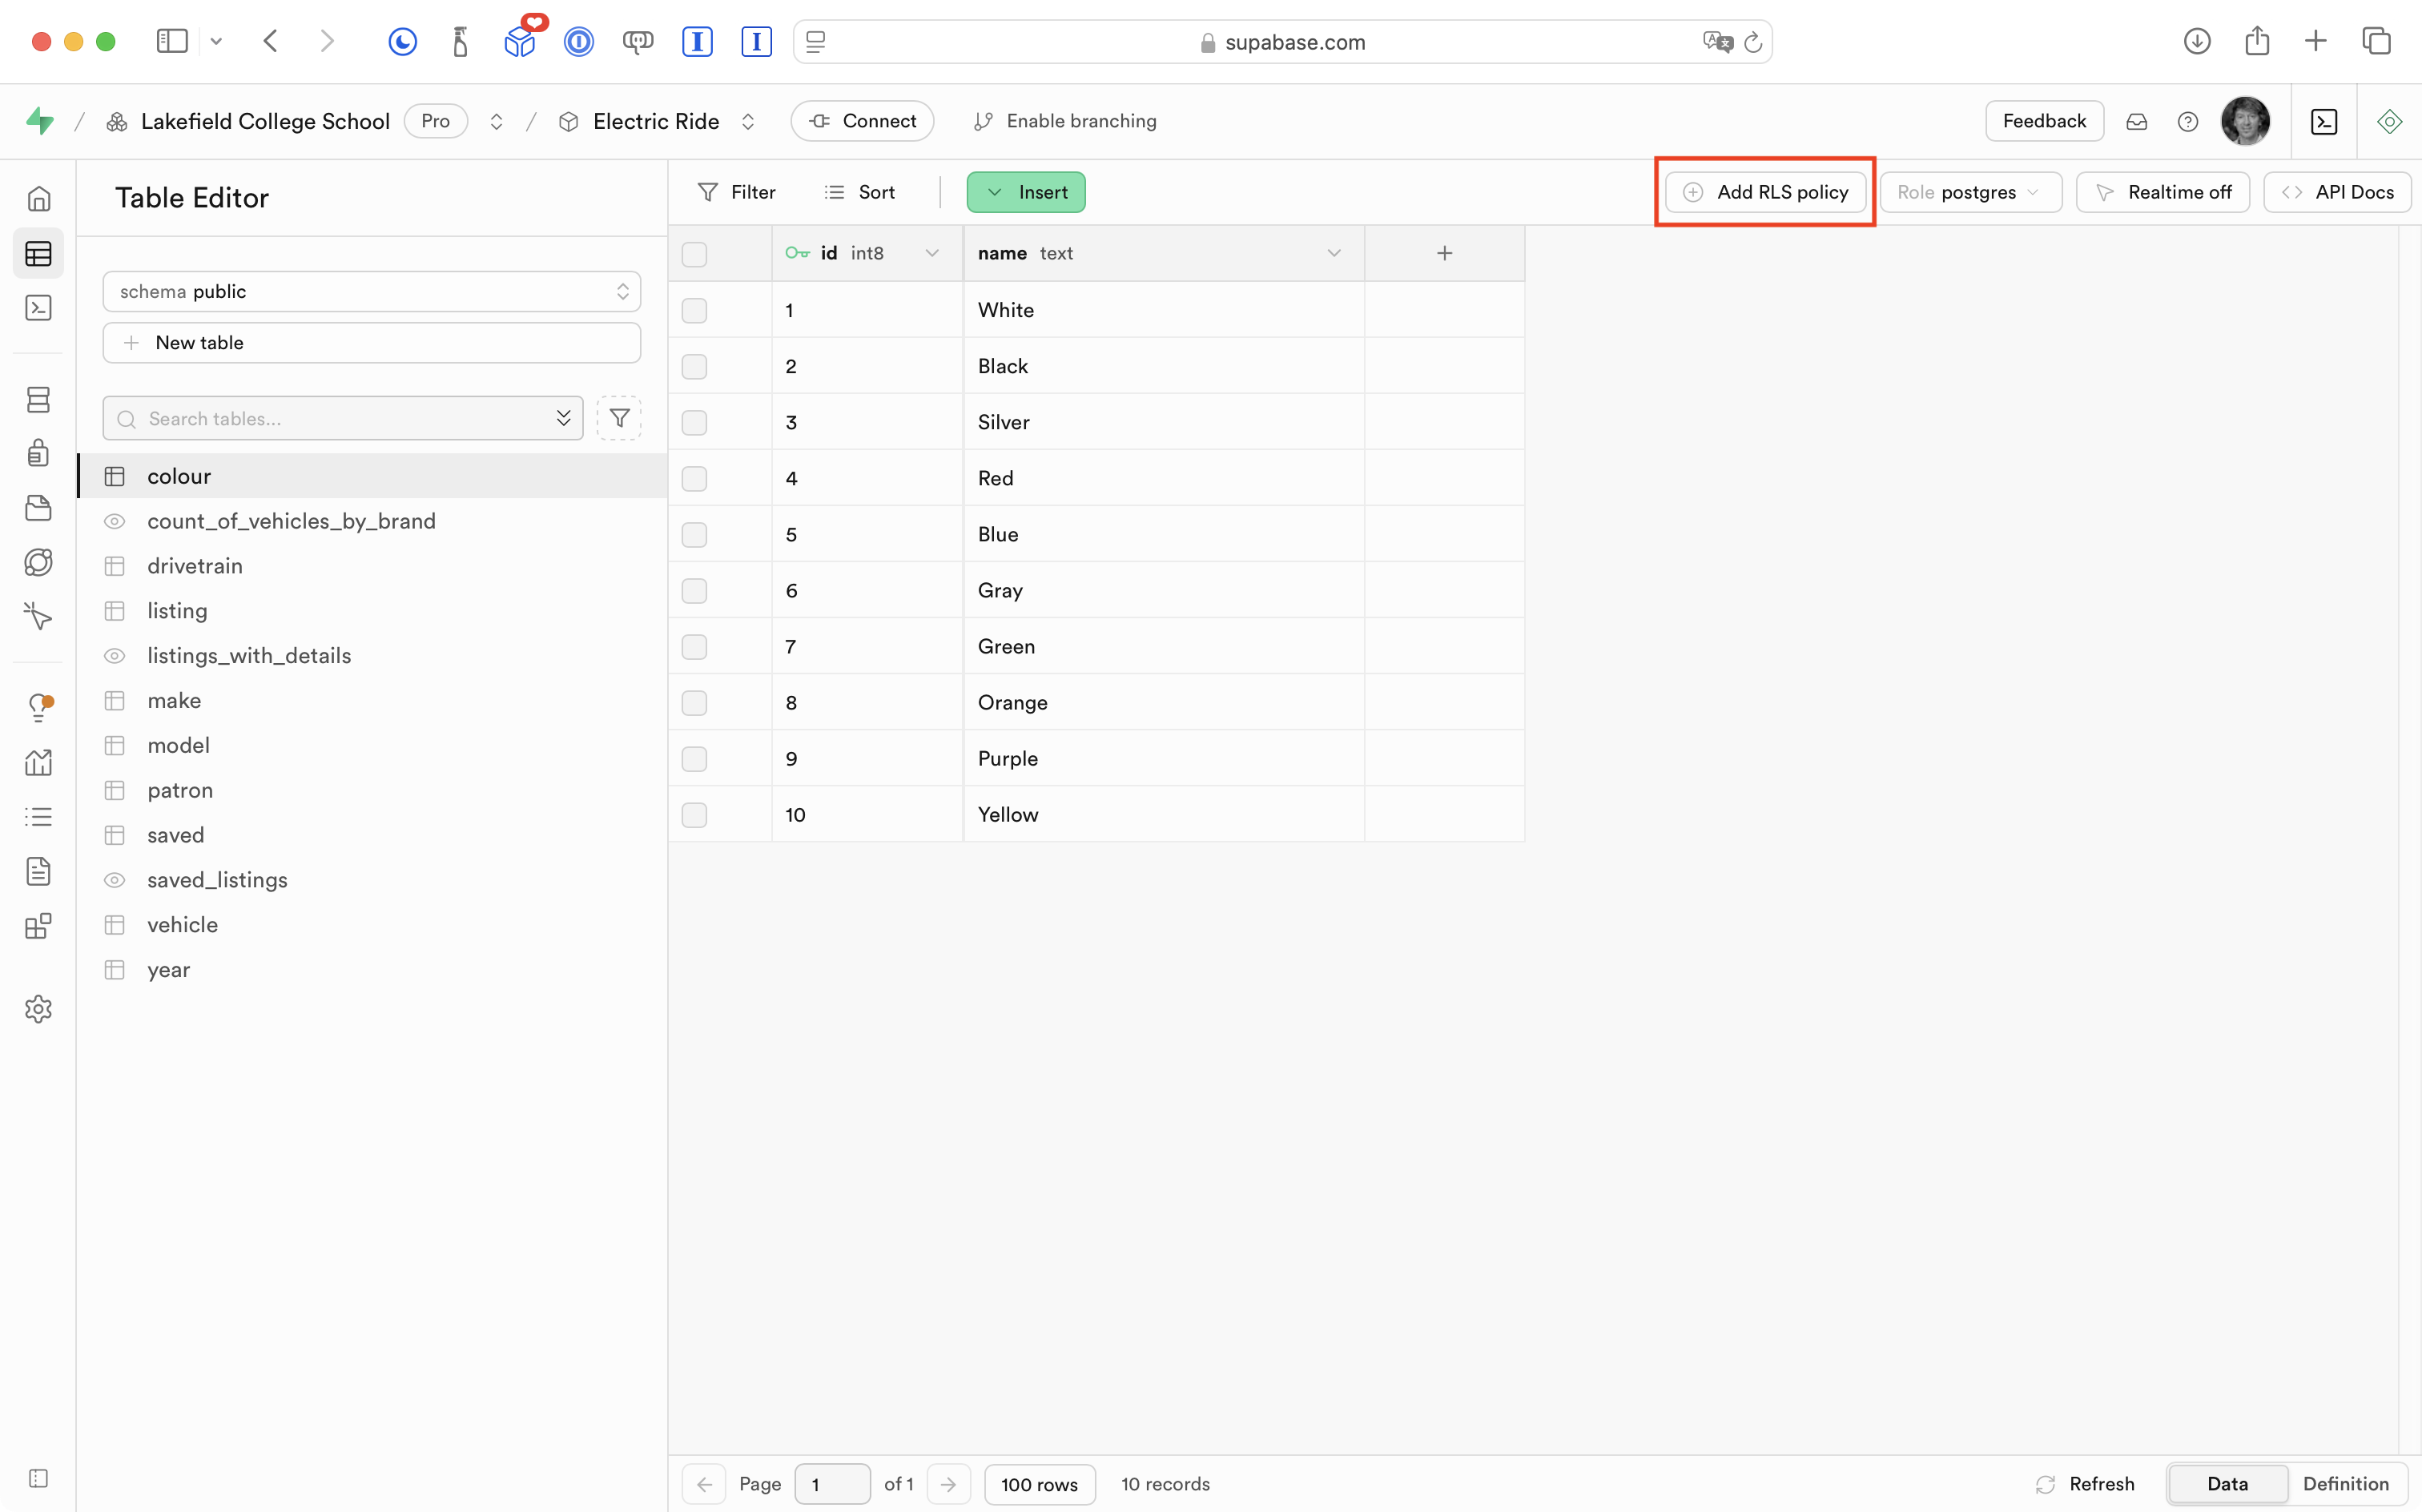
Starting with the colour table, Mr. Gordon can do this by pressing the Add RLS policy button:
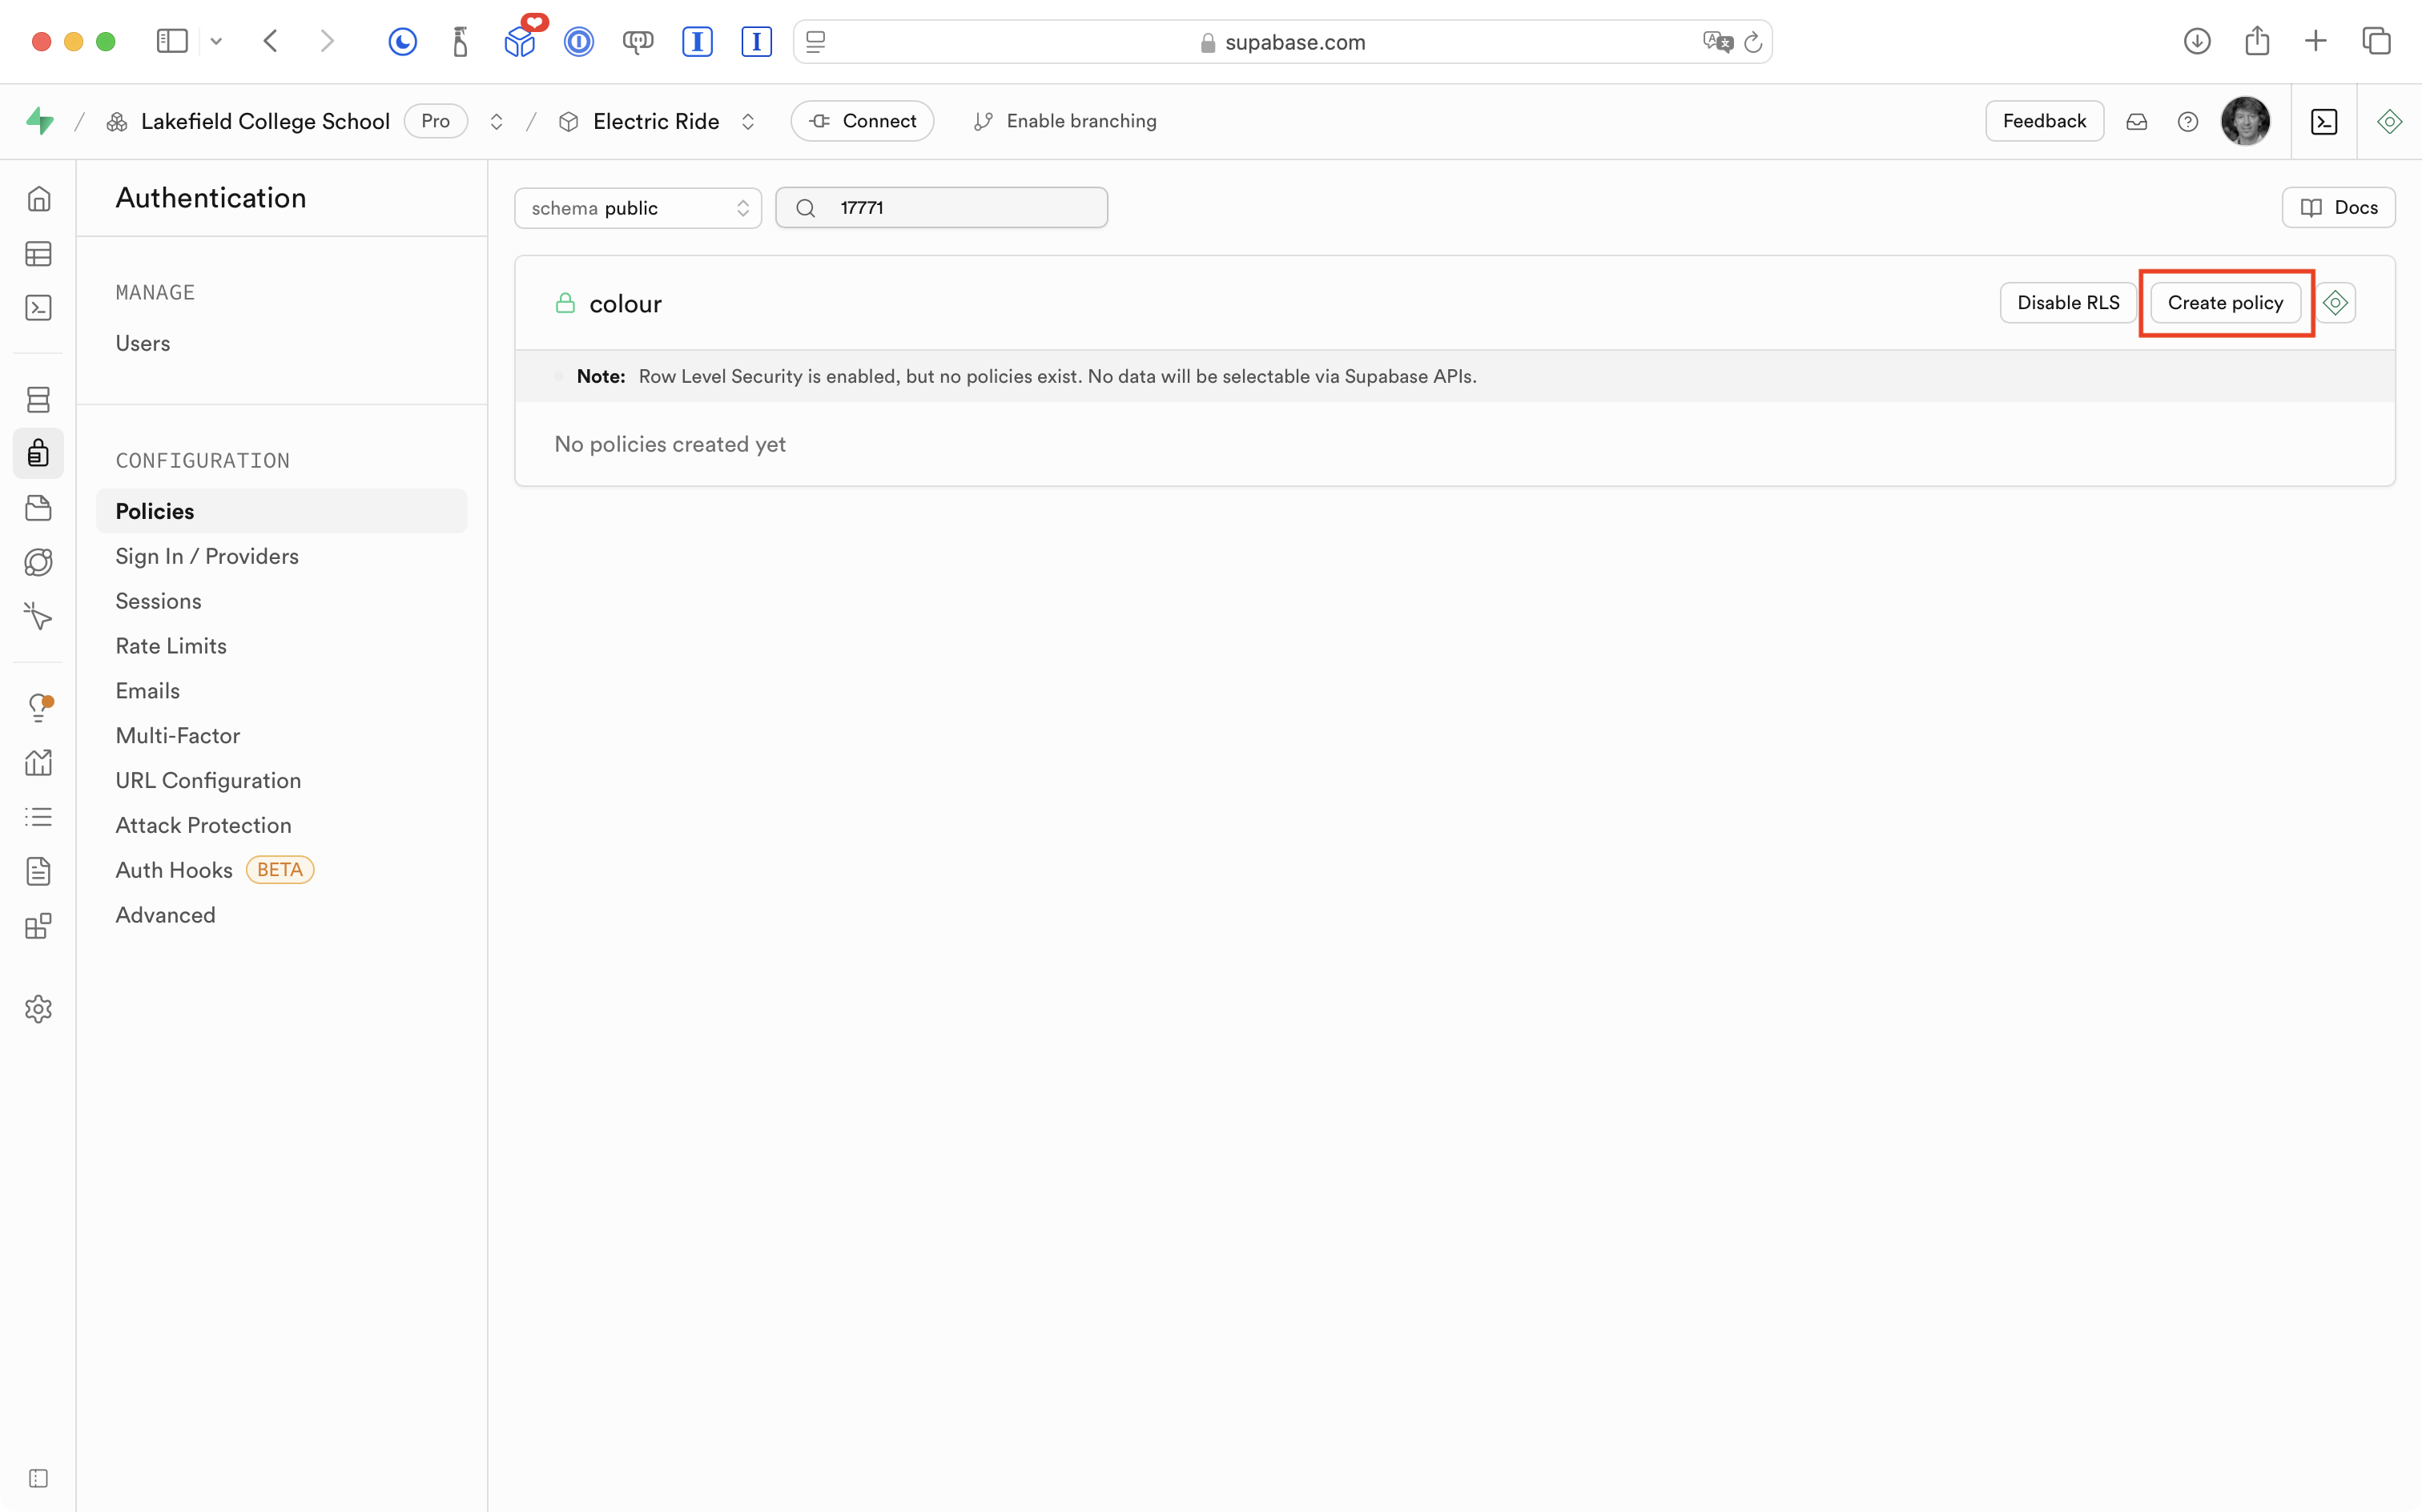
On the next screen, he presses the Create policy button:
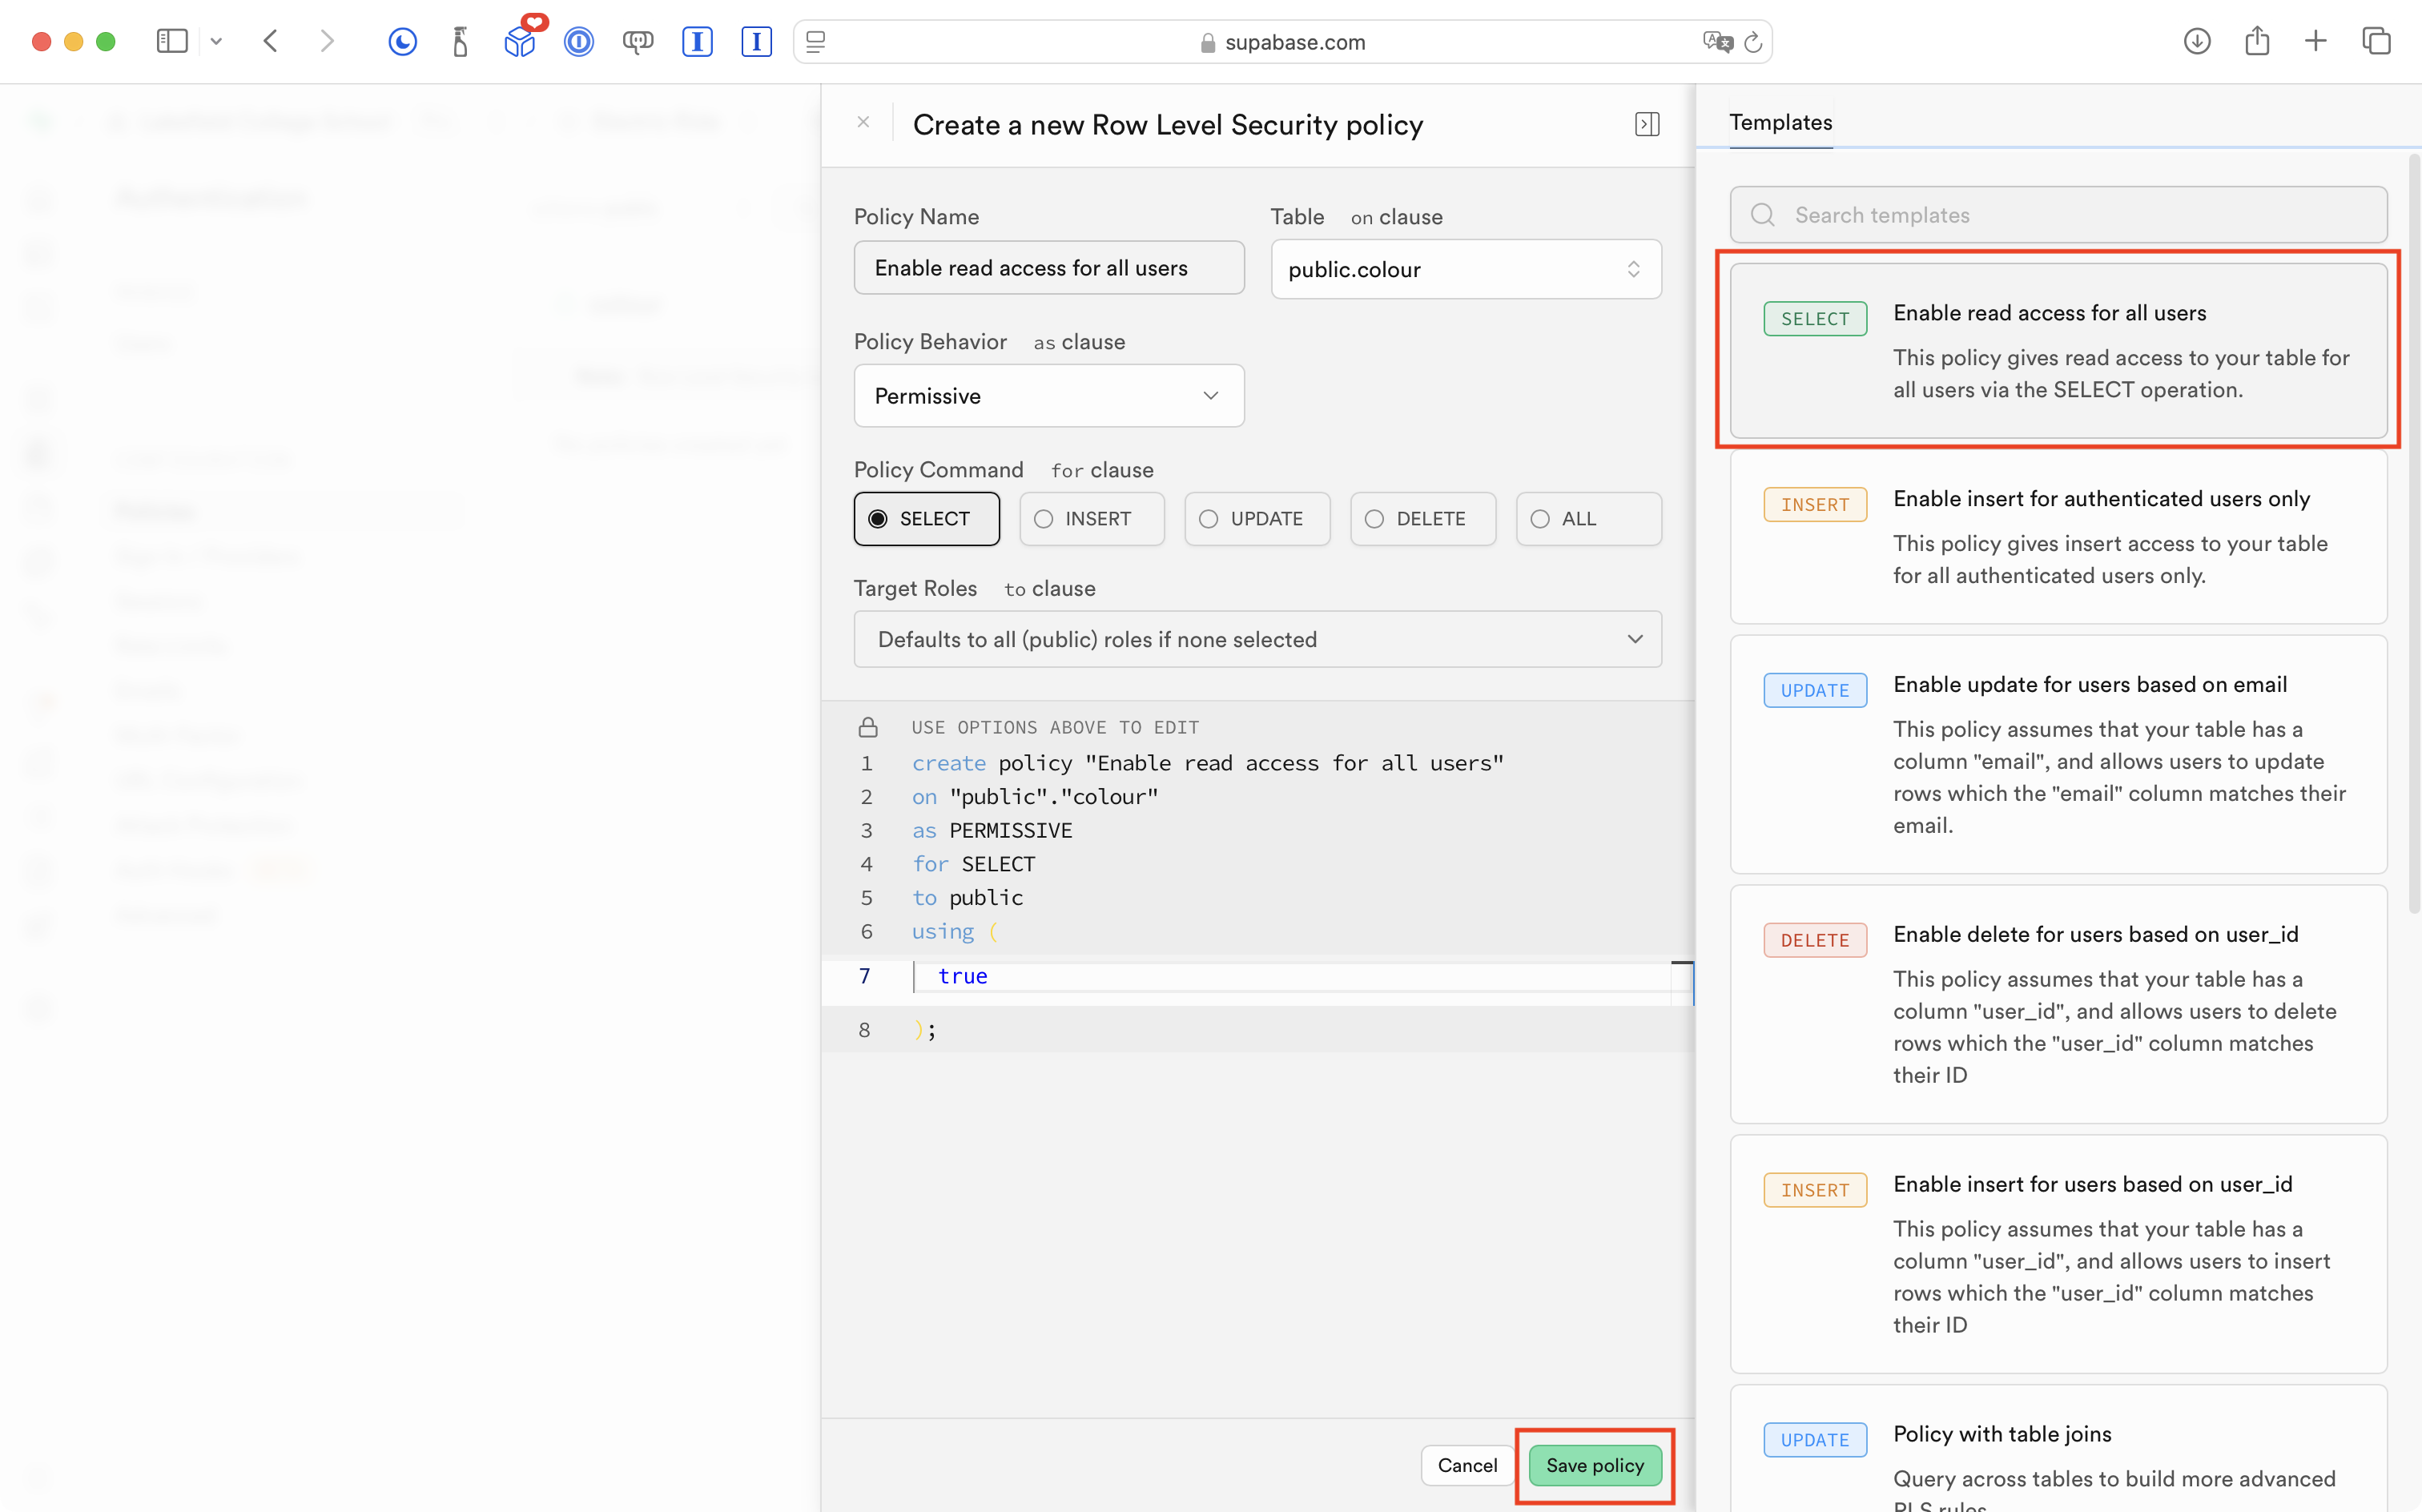
Supabase provides a variety of pre-set policies that will meet most of our needs. For now, Mr. Gordon chooses the Enable read access for all users option then presses the Save policy button:
After a moment, he sees this screen indicating the policy was created:
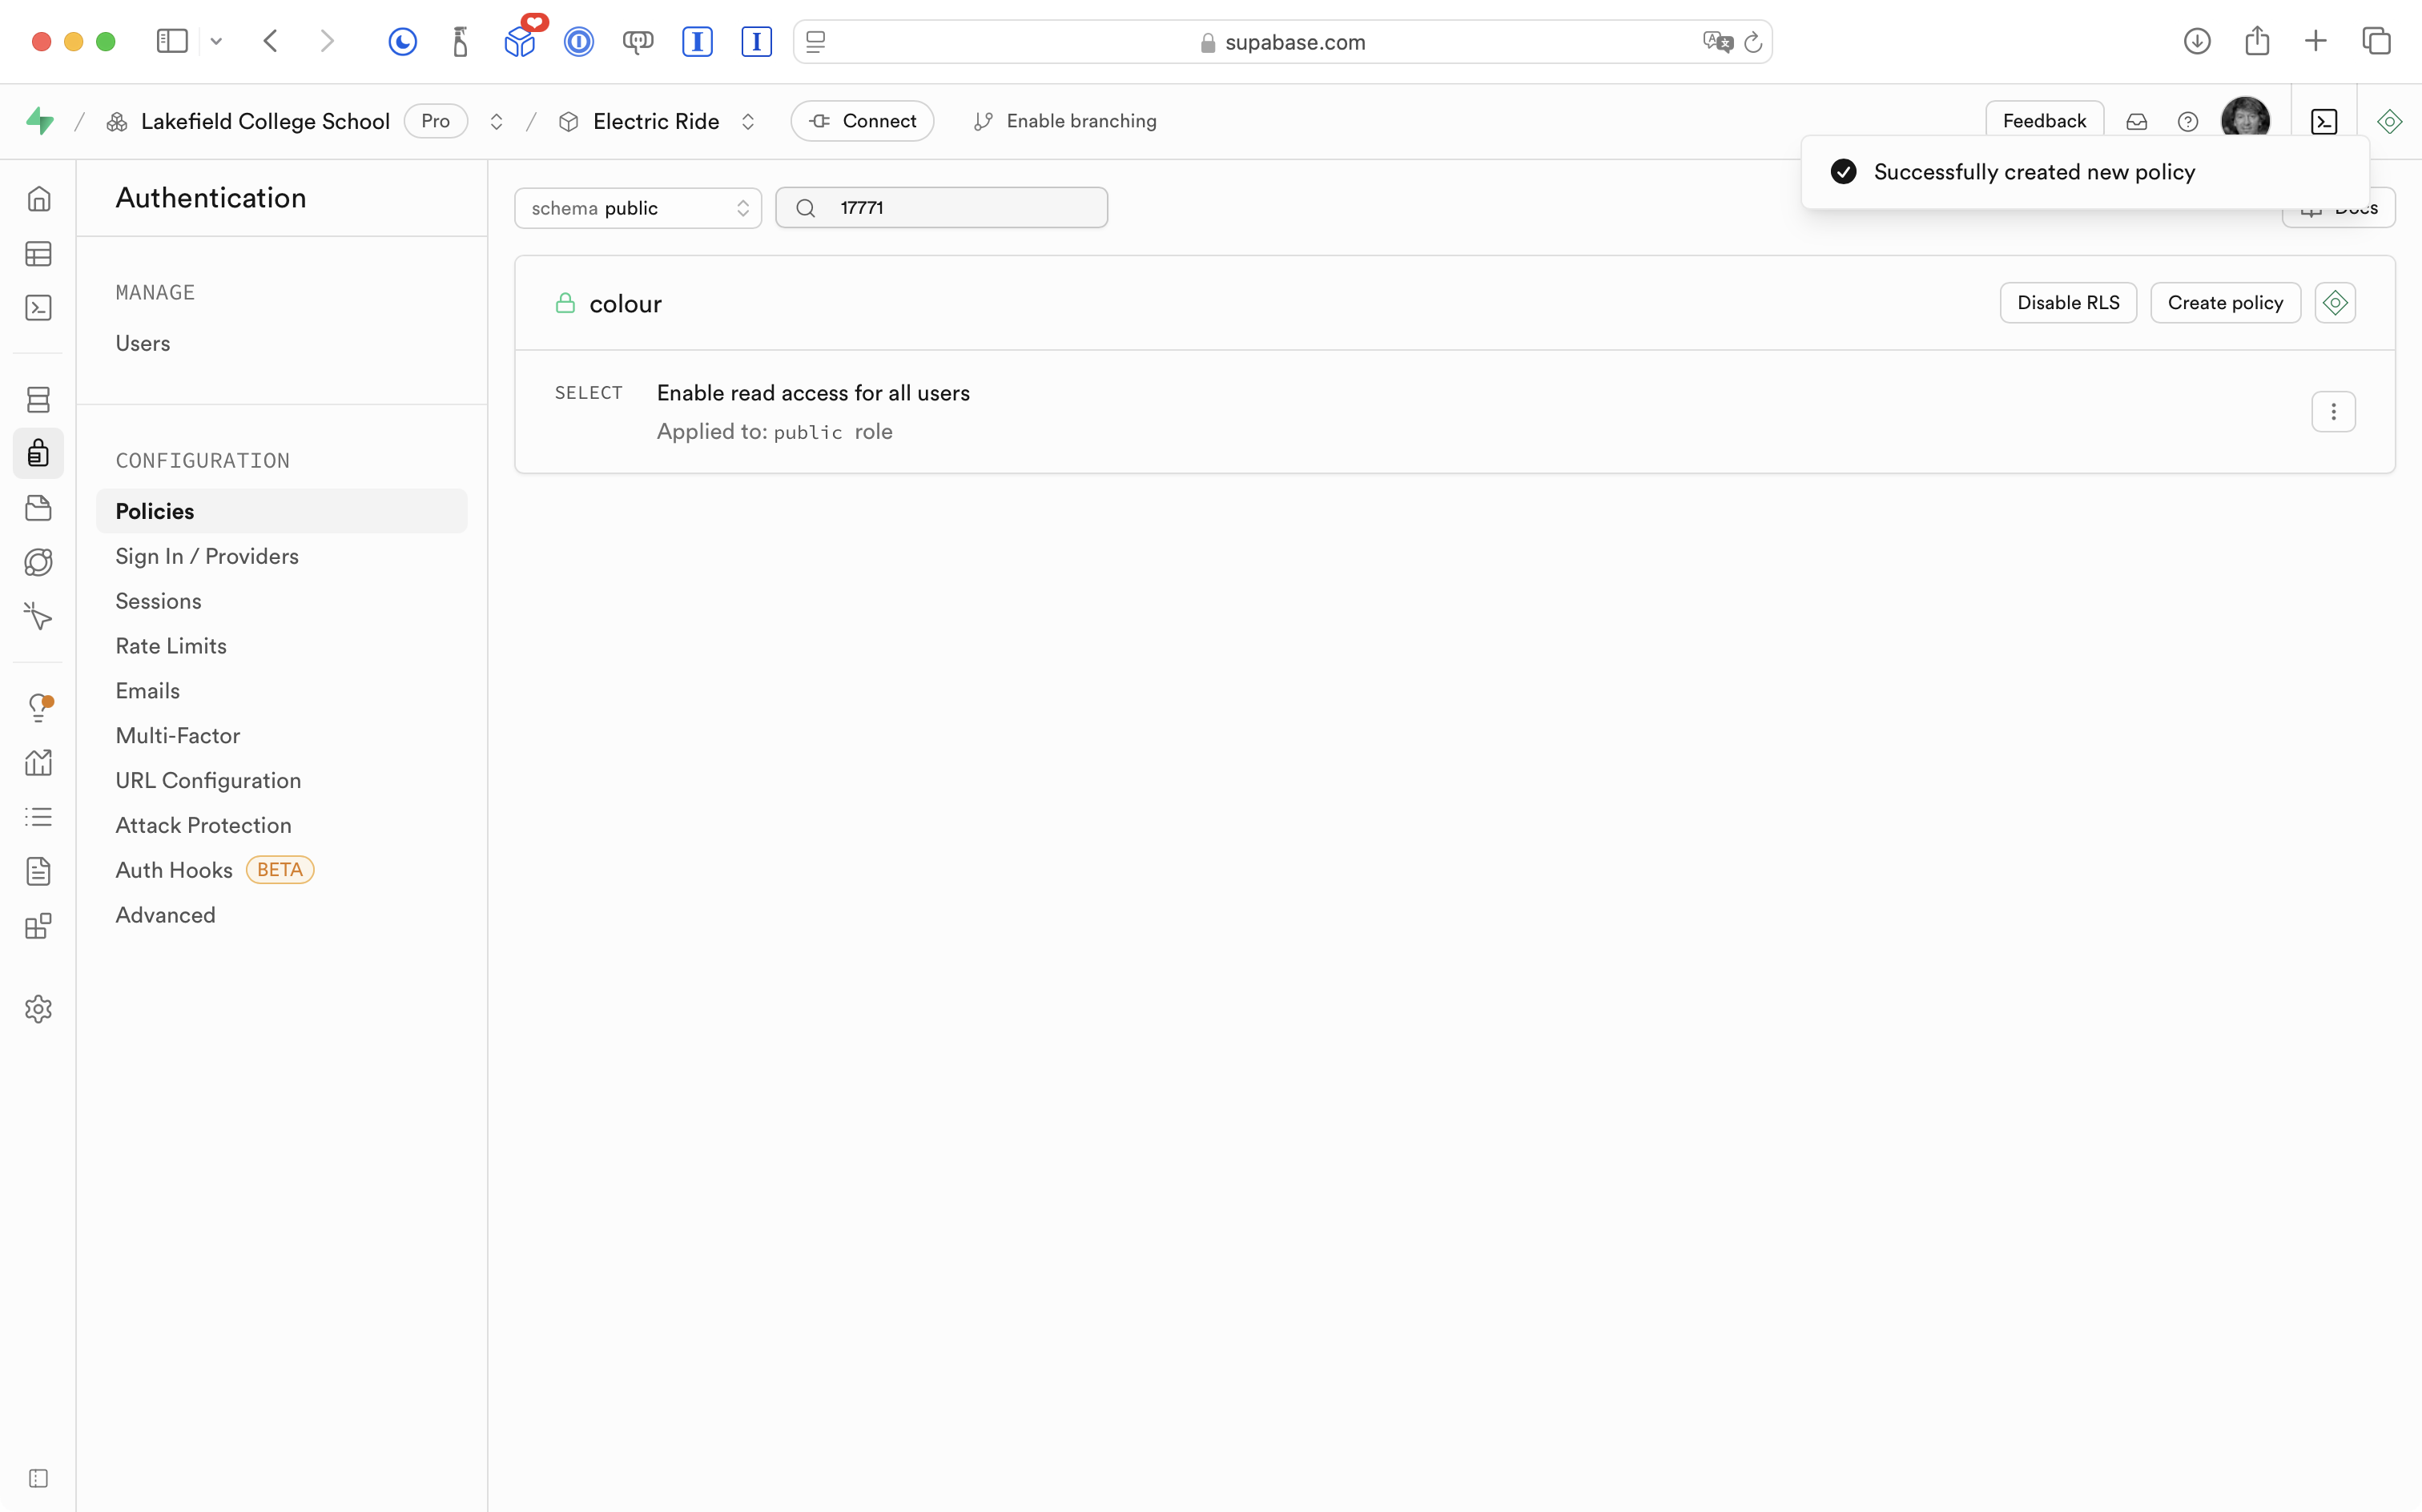
Mr. Gordon has enabled read-only access to just the colour table in his database.
Back on the Table Editor page, Mr. Gordon can verify that the colour table does have an RLS policy defined:

He then repeats that process – enabling a read-only access policy for all (public) users – for all of the remaining tables in his database.
What this means is that the app now functions again as before – mostly:
In that very brief video, we are now able to see (read) information again.
However, when a user tries to save a listing, in Xcode (behind the Simulator) we see a message from Supabase indicating that information could not be saved:
.png)
We can read information from the database because we allowed this for public (non-authenticated) users on all tables in the database:
We cannot write (save a listing) to the saved table because we set up the RLS policy to be read-only.
Of course, the way the RLS policies have been defined so far is not what we want.
Right now, public users (users who are not authenticated) can again read information from the database.
For the most part, we want to restrict the ability to read data to users who are authenticated (have signed in).
However, what we have now is still an improvement over not having row-level-security defined at all. At this point, even if someone had our database URL and API key – they can now no longer delete or create data.
Refine RLS policies
It’s really important to grasp how RLS policies work before enabling authentication within your app.
So let’s examine this a bit further.
Read/write for public roles
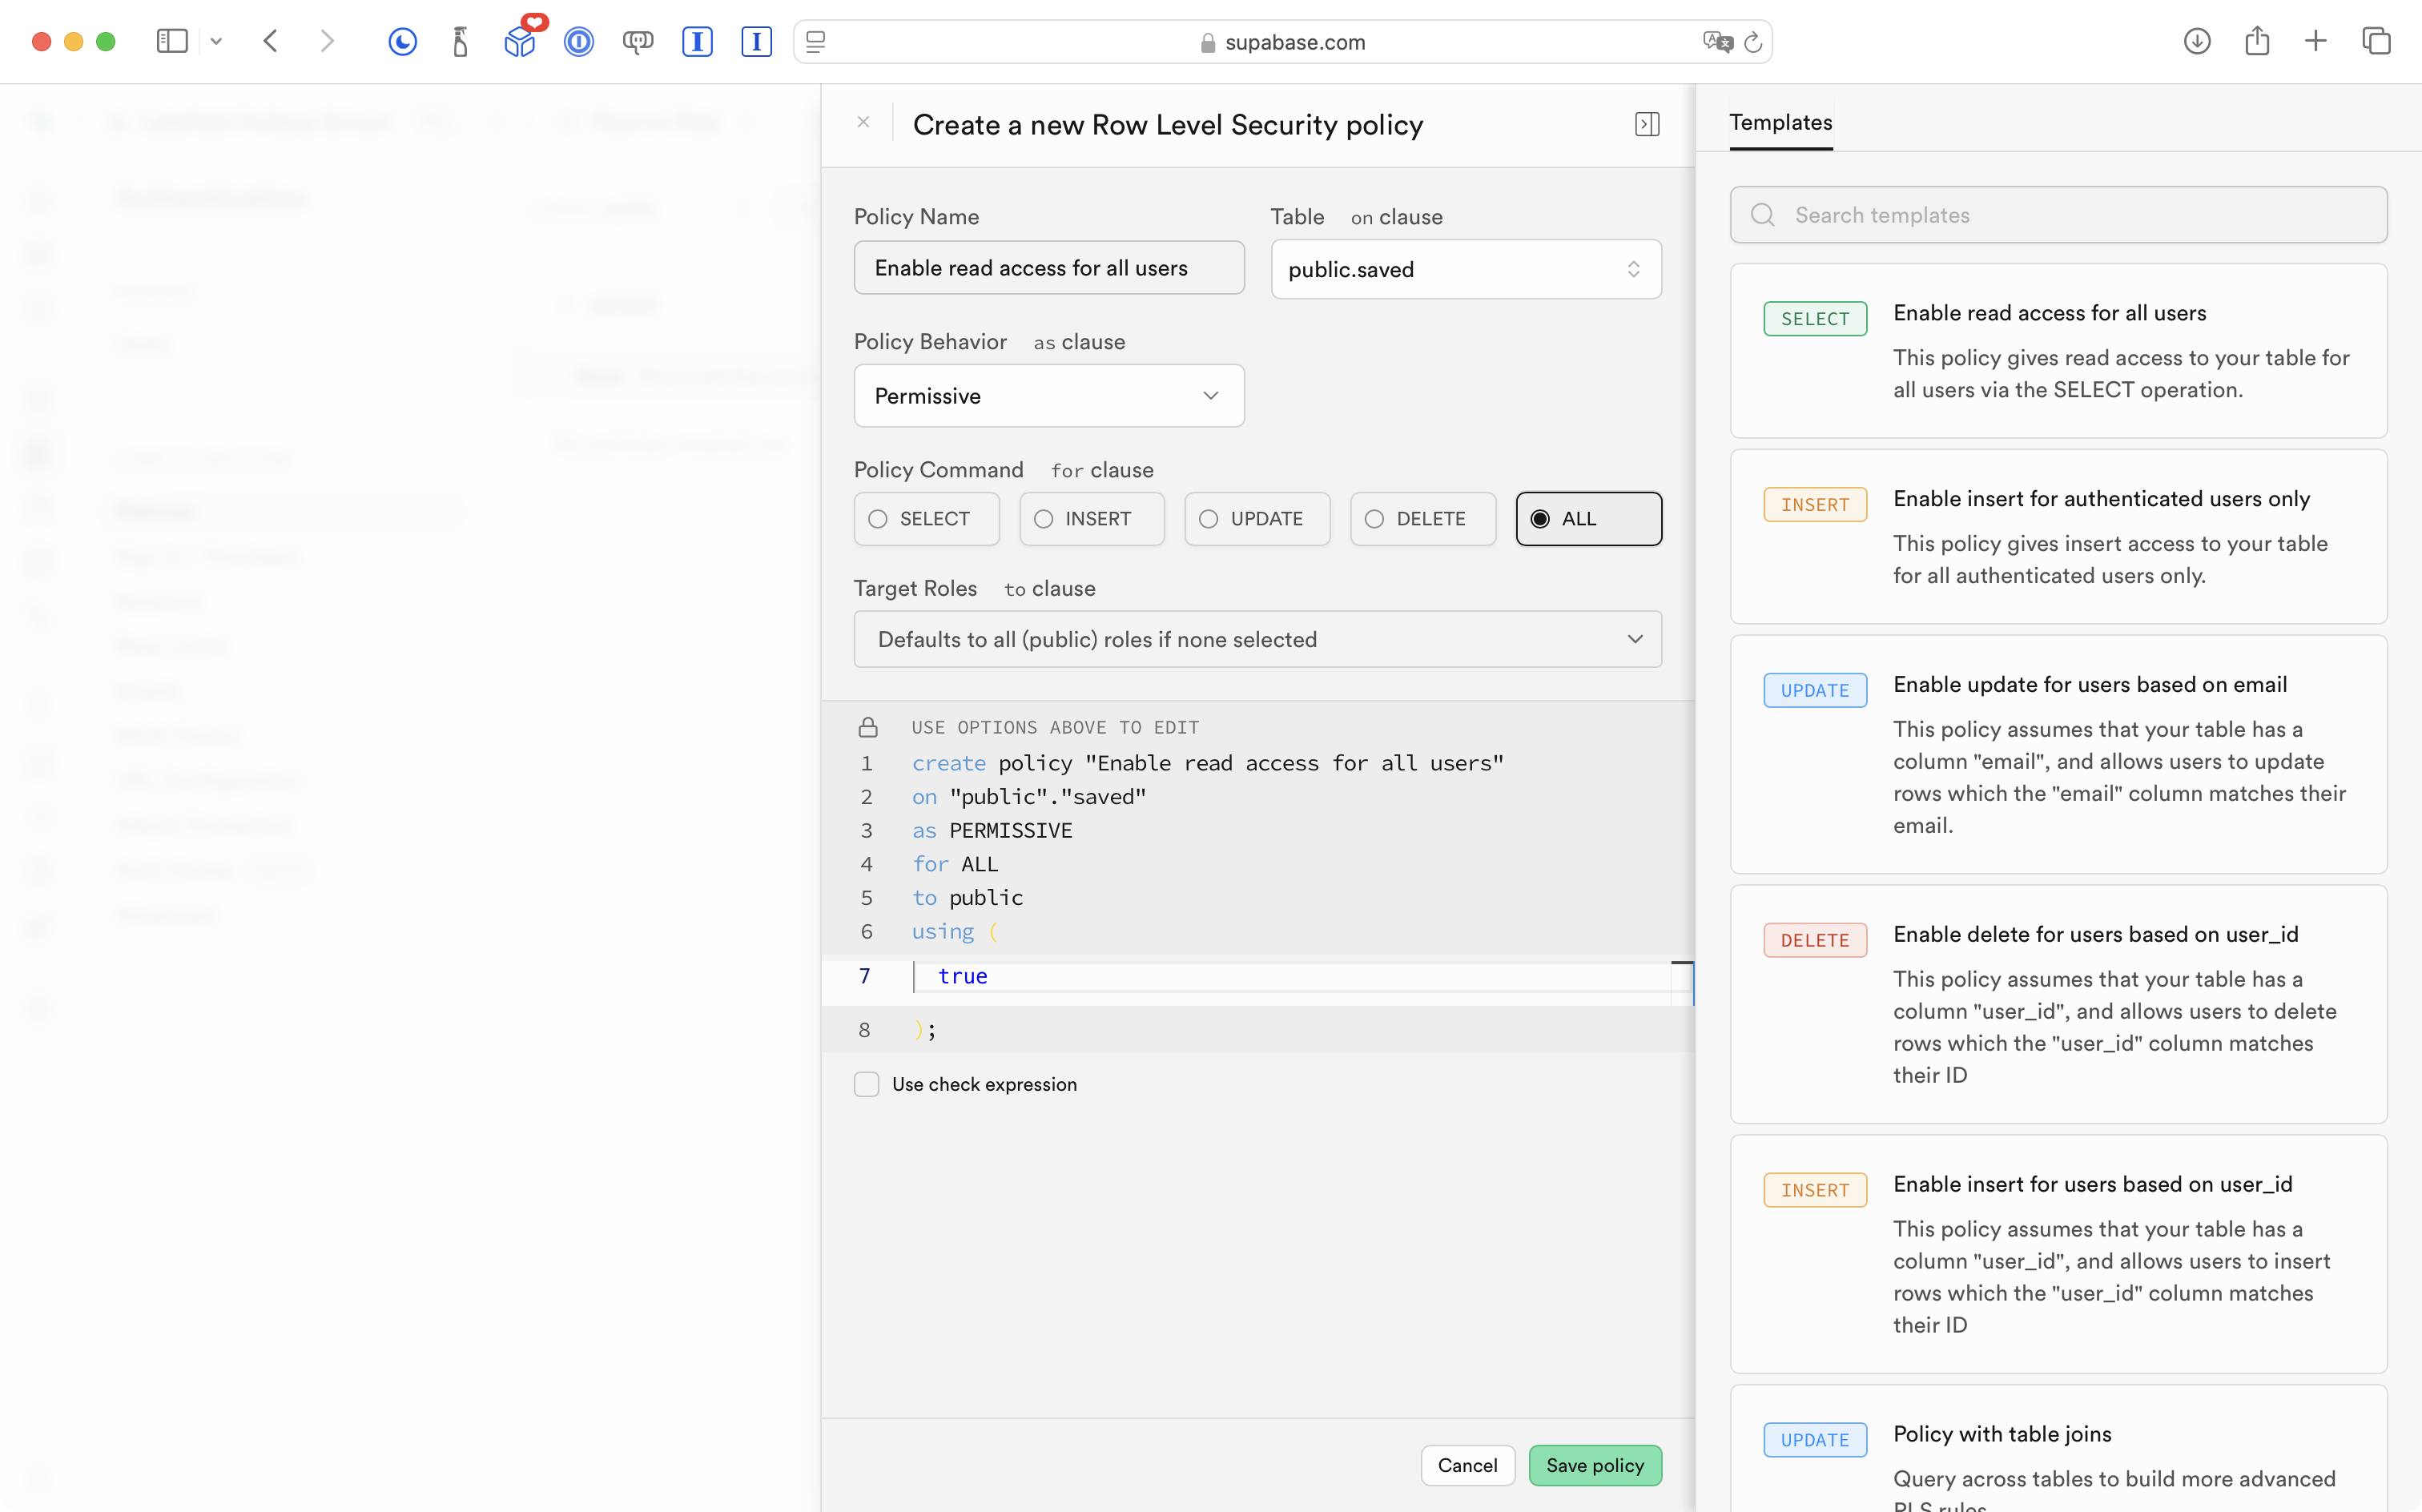
Mr. Gordon deleted the existing RLS policy for the saved table which tracks listings that users have saved for future reference.
He then created a new policy that allows all row-level operations:
SELECTINSERTUPDATEDELETE
… to users who are not authenticated – public users:
This means the app “works” again:
… but it is still not what we want.
We’ve restricted access to most tables so that it is read-only, and made it possible for non-authenticated users to add (insert) data into the saved table.
Of course, what we really need is for all of these policies to apply not to non-authenticated users, but to instead apply to authenticated users.
Put another way, users shouldn’t be able to see much of anything in this app until they have signed in.
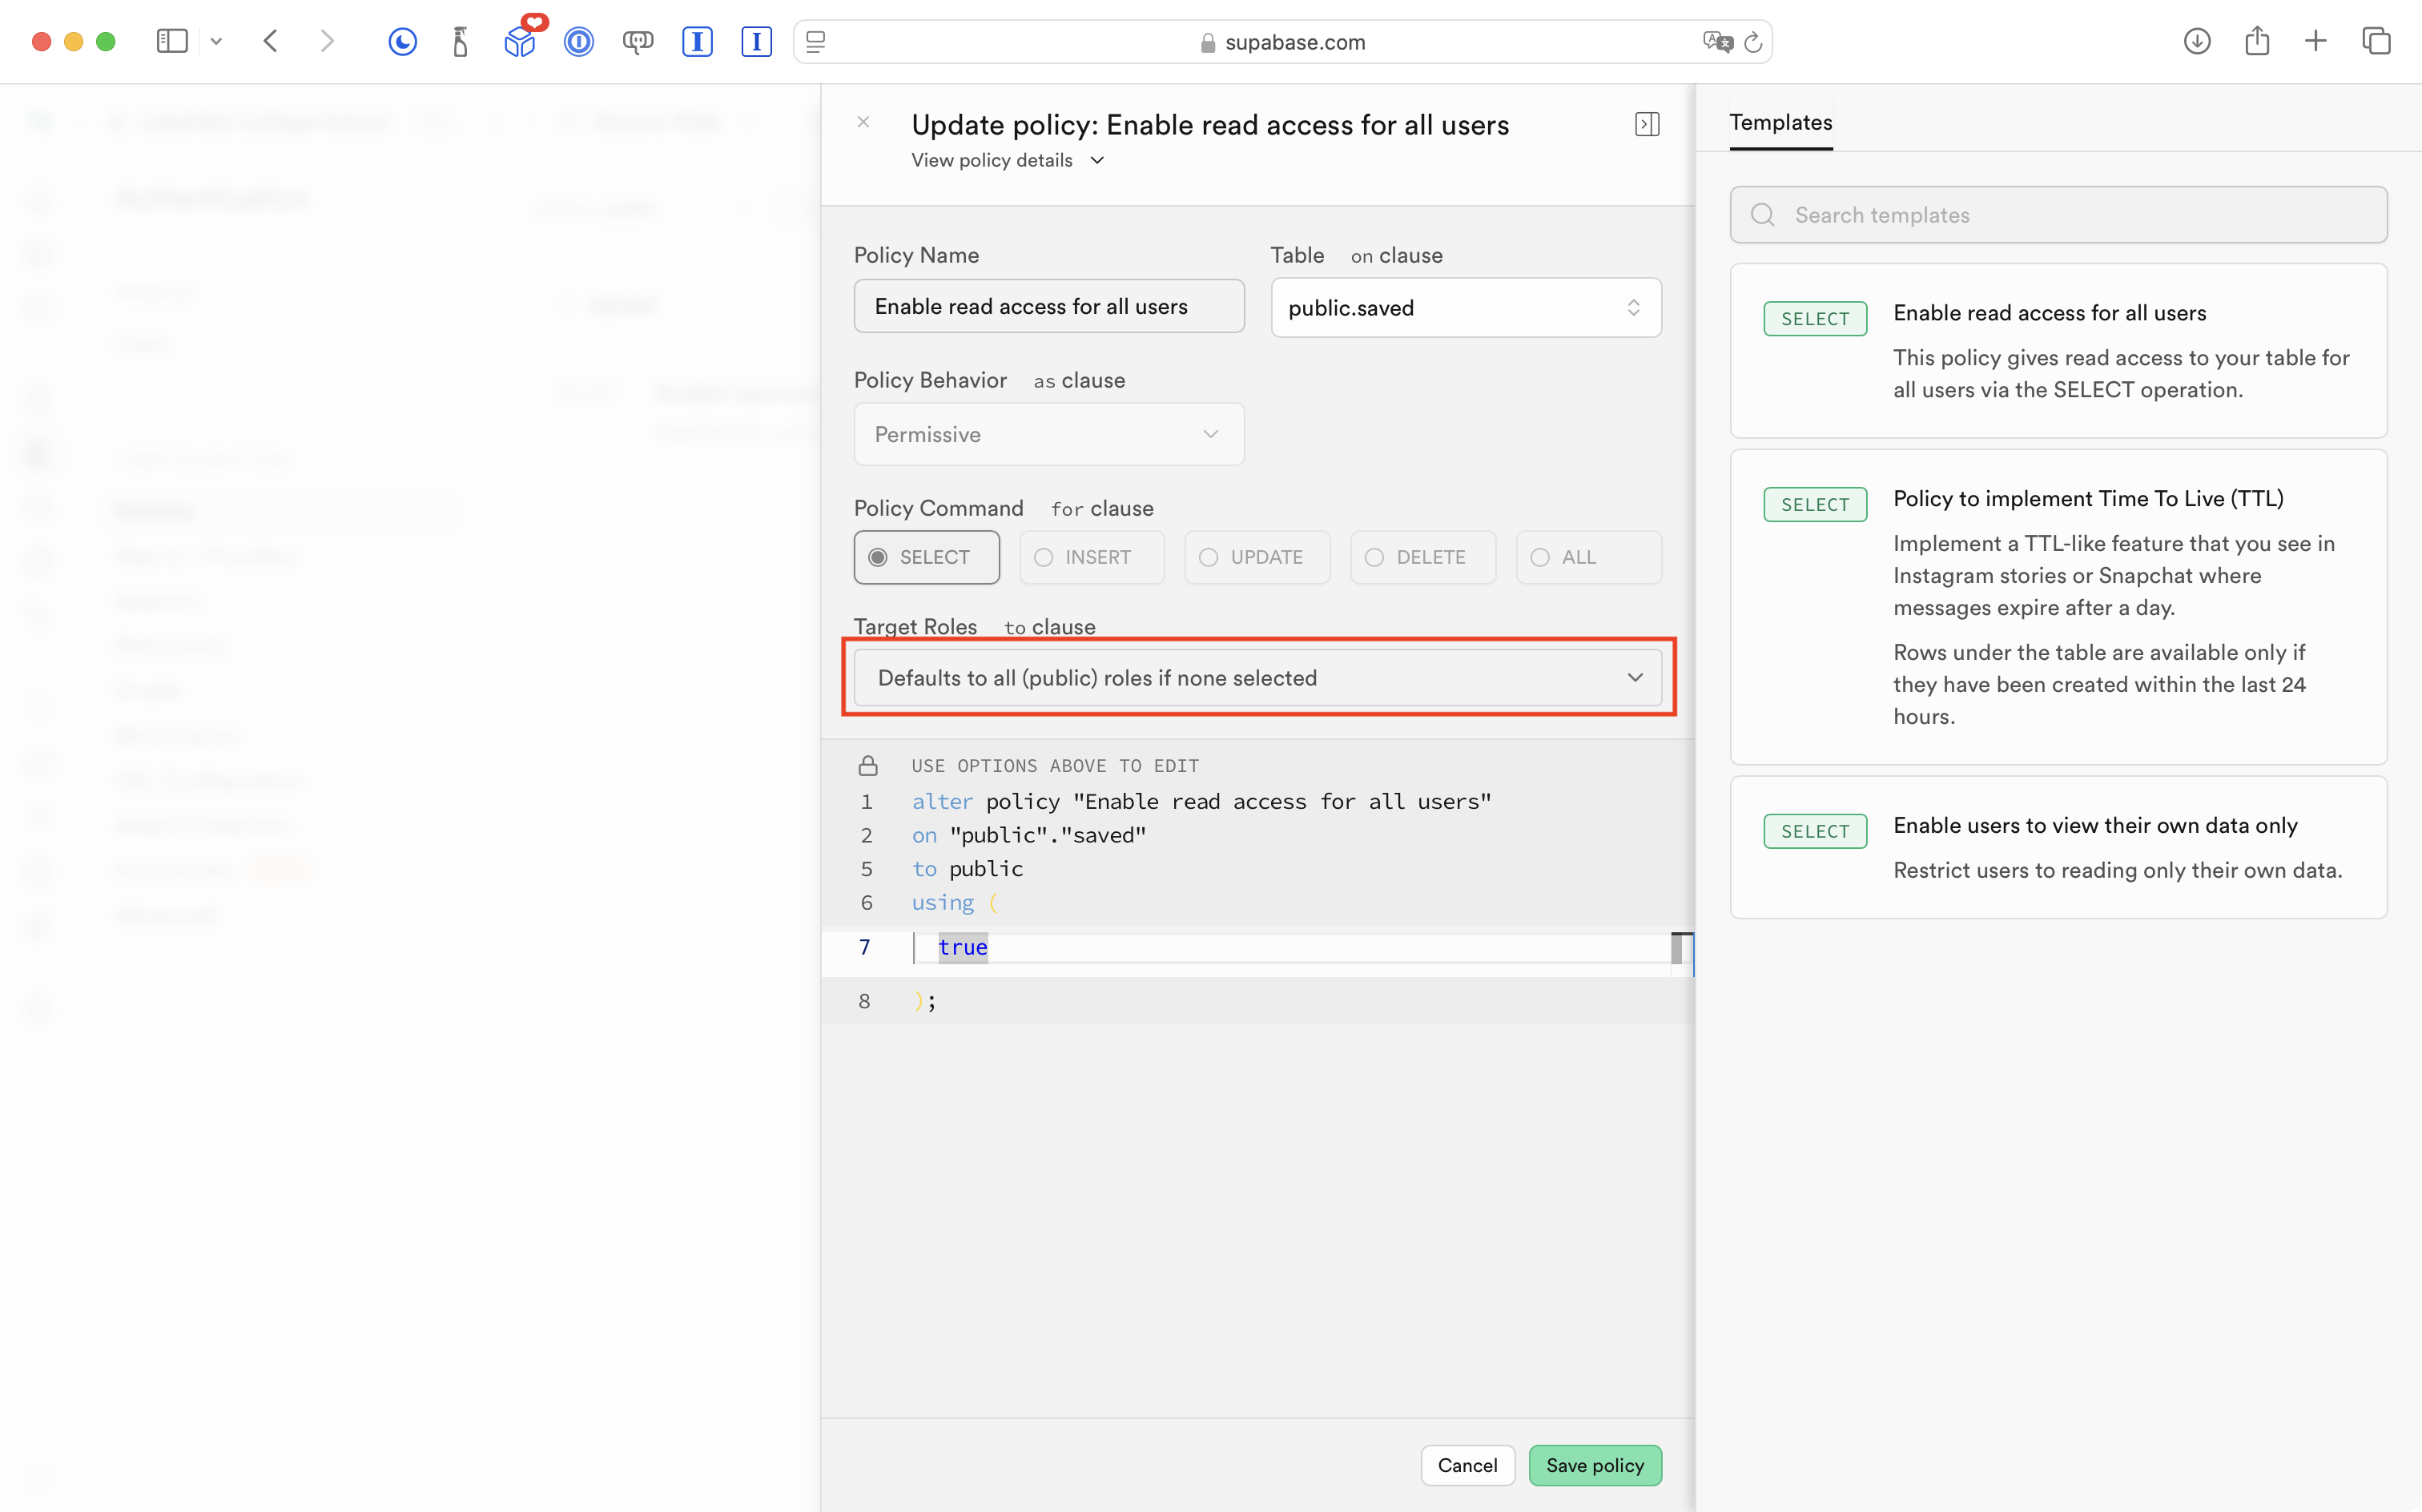
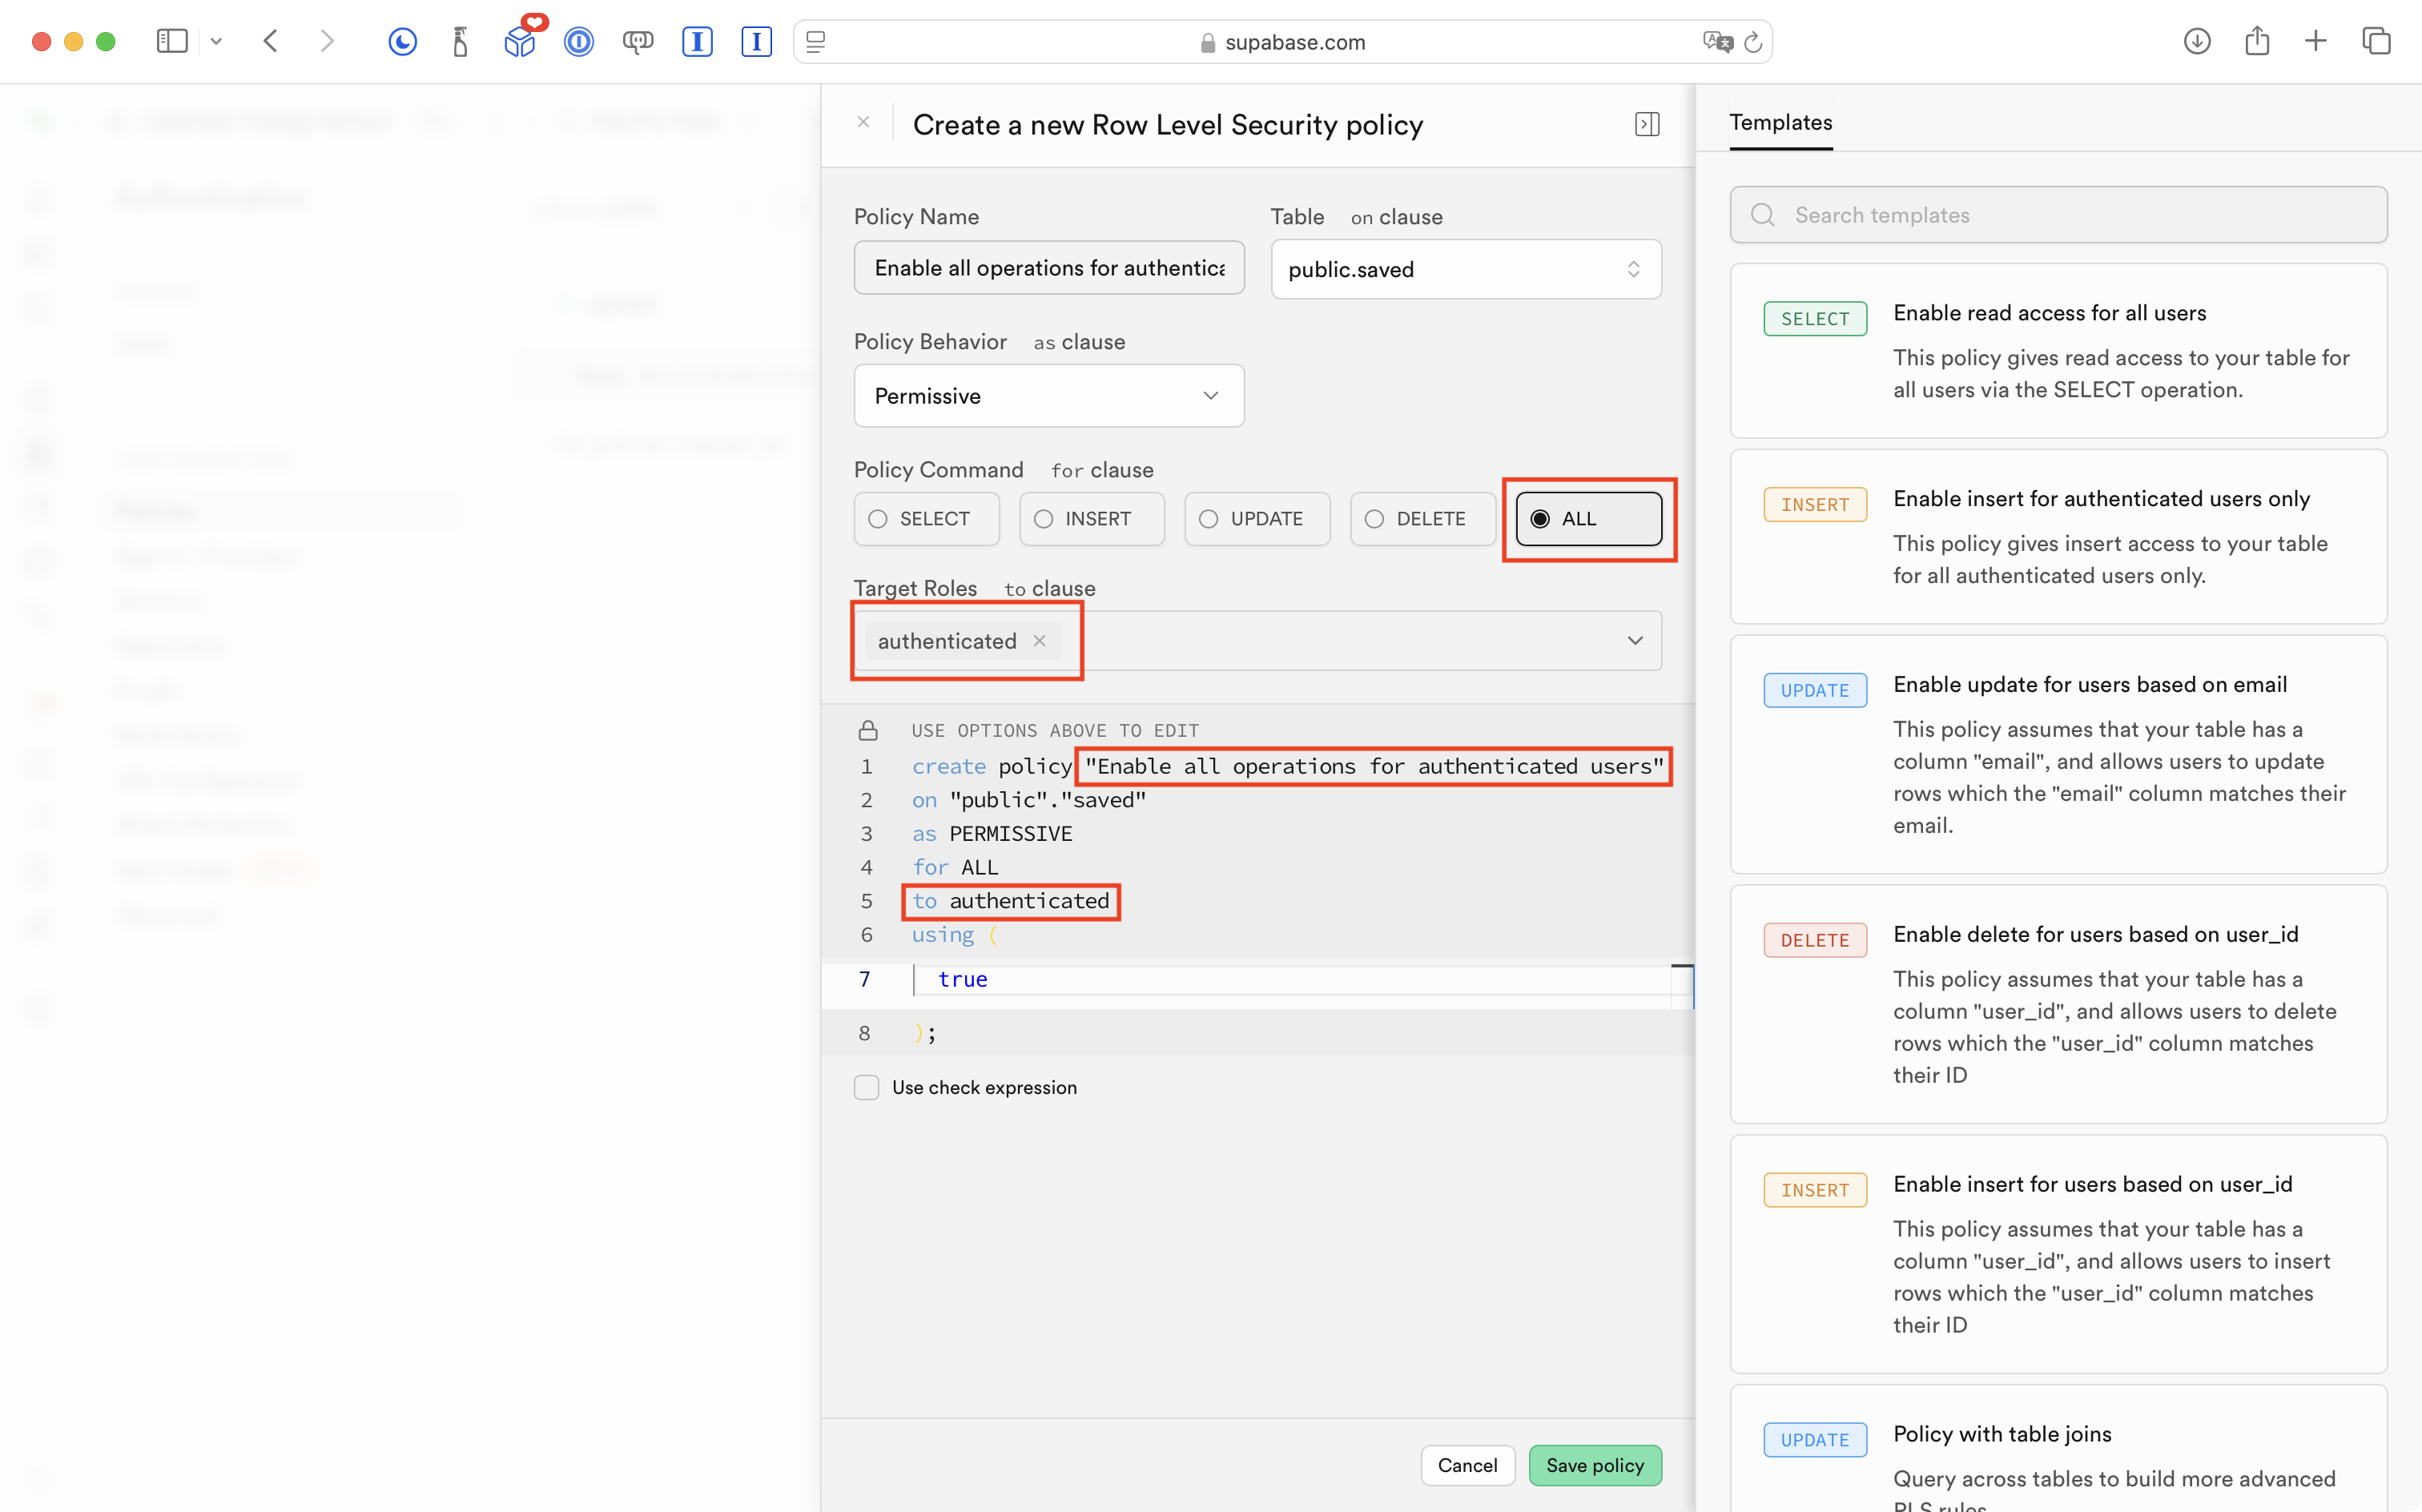
Restrict to authenticated roles
Mr. Gordon deleted the existing policy on the colour table and changed it to the following – it is the same as before – read-only access – but restricted to authenticated users only:
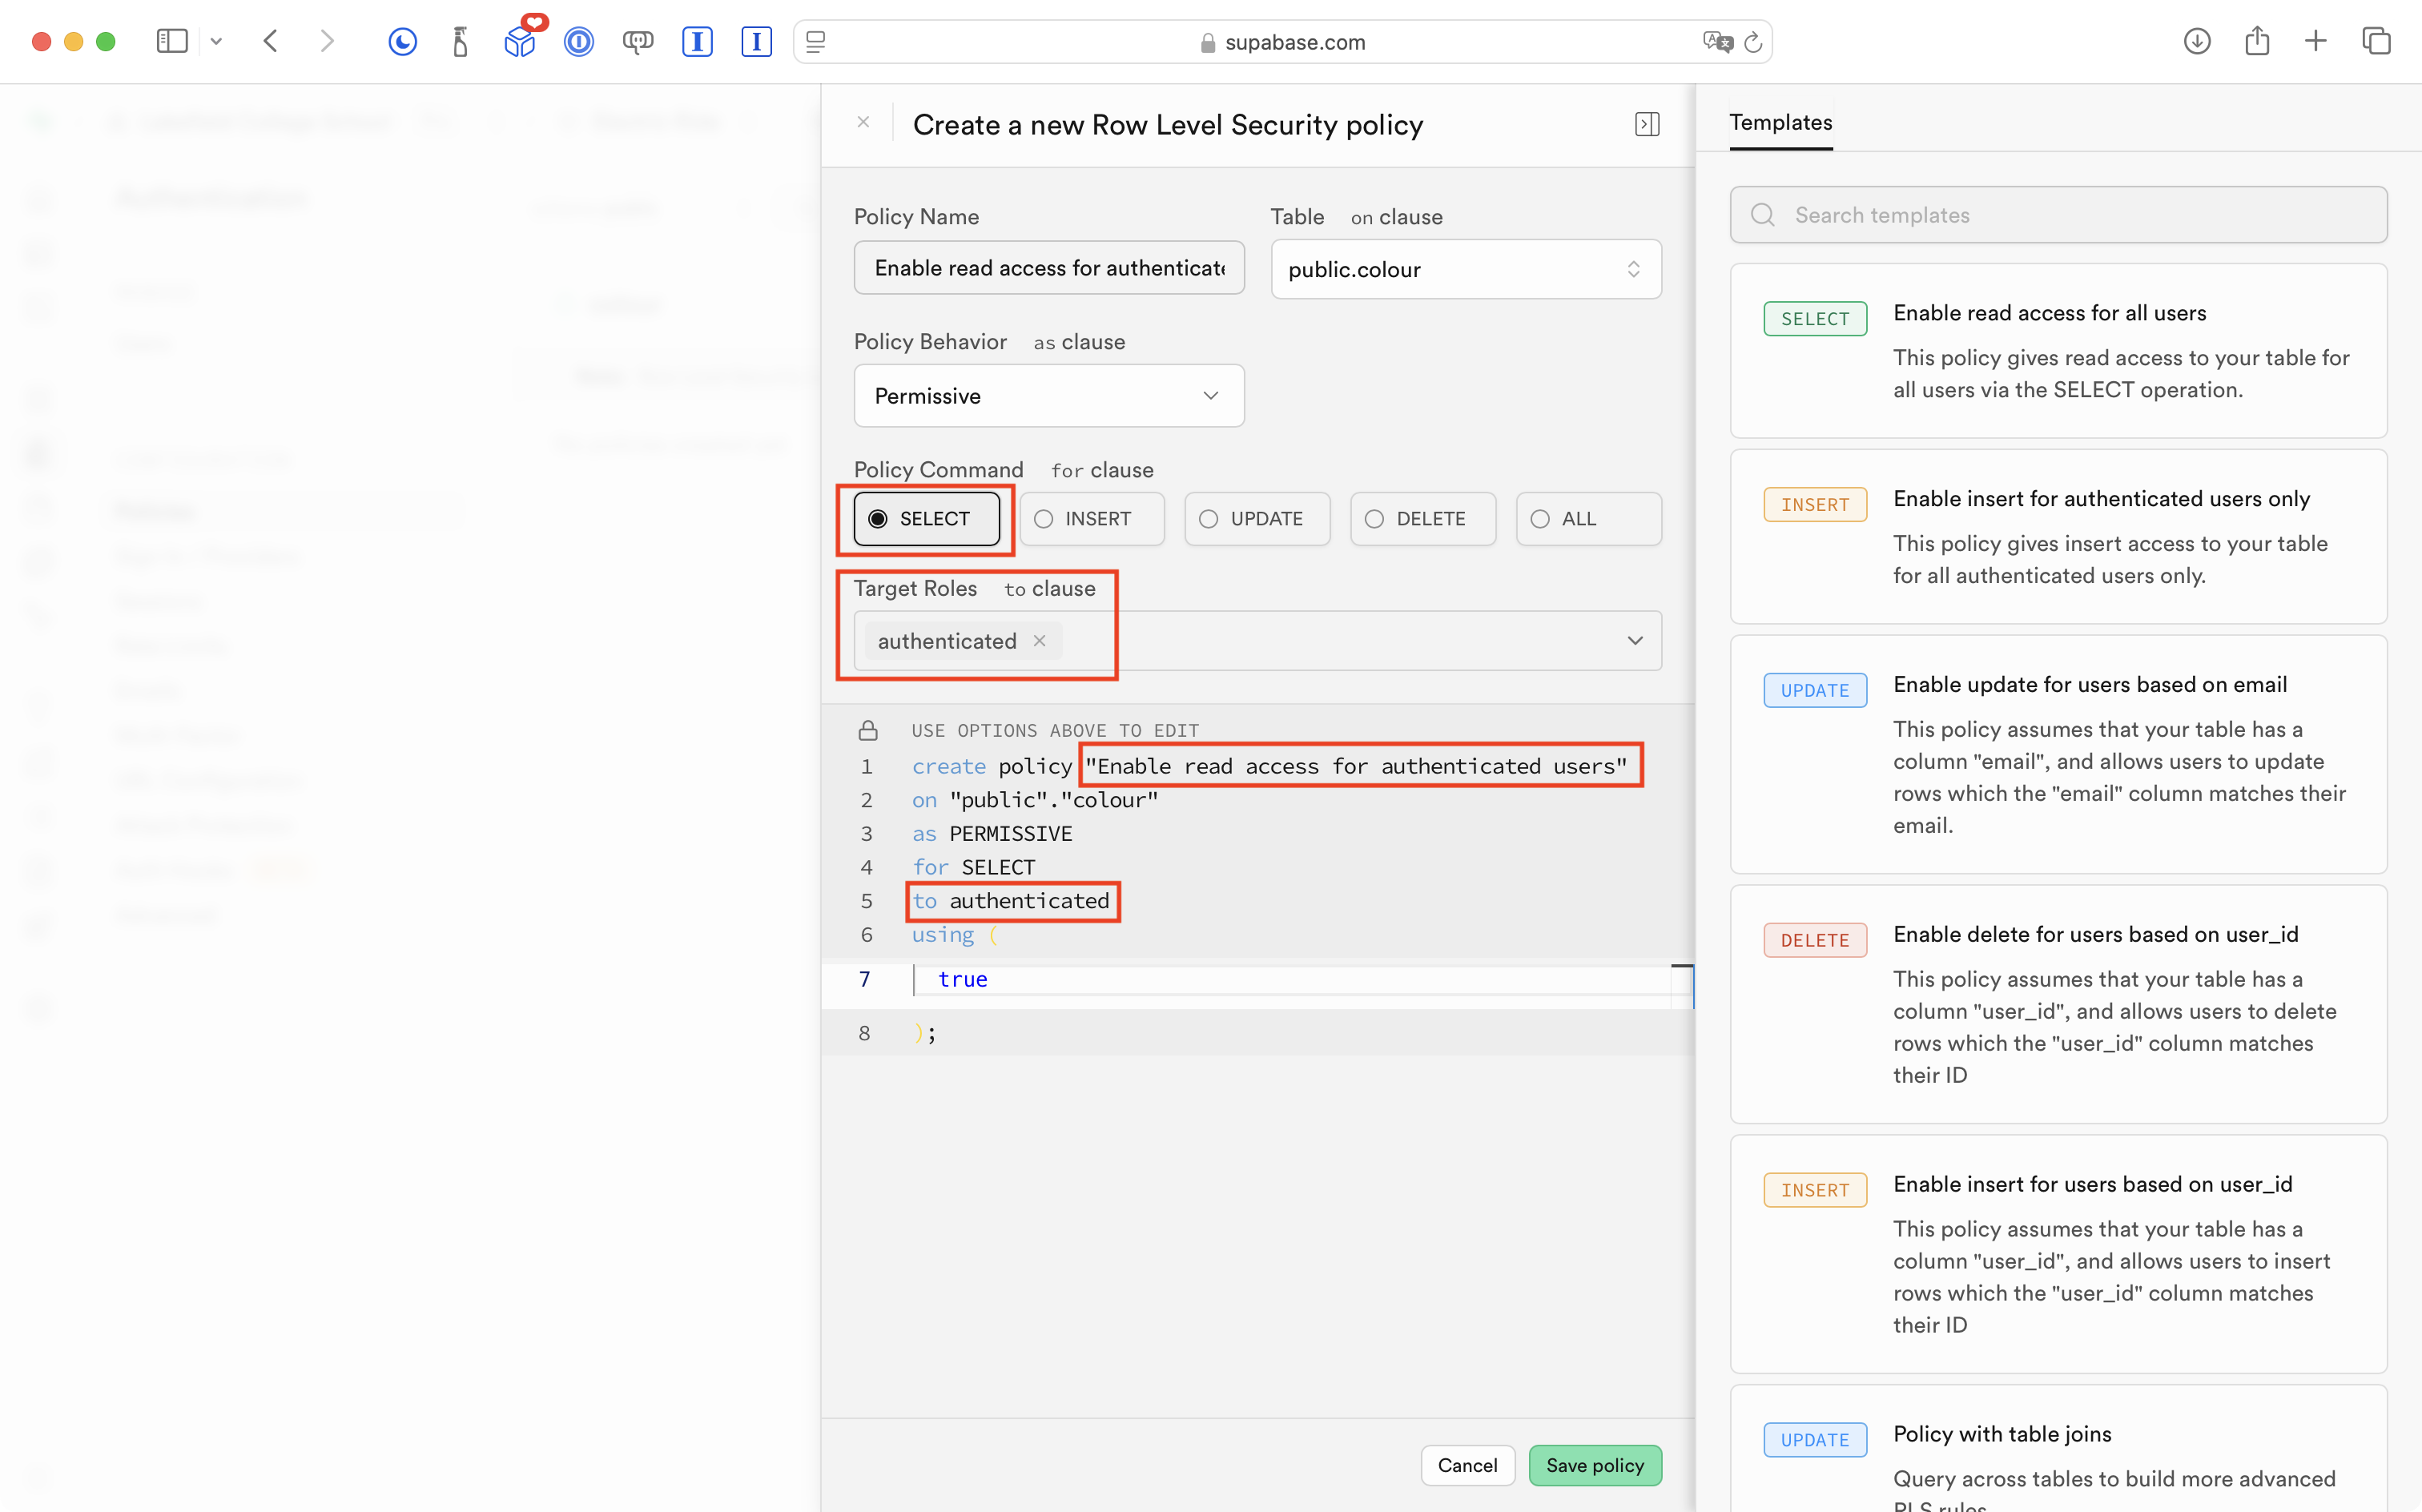
He changed the RLS policies on all the other tables the same way – read-only access – restricted to authenticated users.
The exception was the saved table upon which he made it possible for authenticated users to perform all operations, not just reading information:
As expected, this means that we cannot use the app at all at the moment, because users have no way to authenticate themselves to Supabase:
So, it is time to add authentication to this app, using the Sign in with Google third-party service.
Adding social sign-in
We will use the third-party Sign in with Google social sign-in service to authenticate users to our database, hosted at Supabase.
Create a Google project
We must first create a project in the Google Cloud service.
IMPORTANT
The following steps may not work for your LCS email address, which is hosted by Google.
If that is the case for you, please try temporarily using a personal Gmail account.
That will be fine for the purposes of your culminating task.
If your app gets to the point where it is used publicly and published on the App Store, we will re-configure social sign-in for your app so that it is not tied to your personal email address, but instead, to an account connected to LCS.
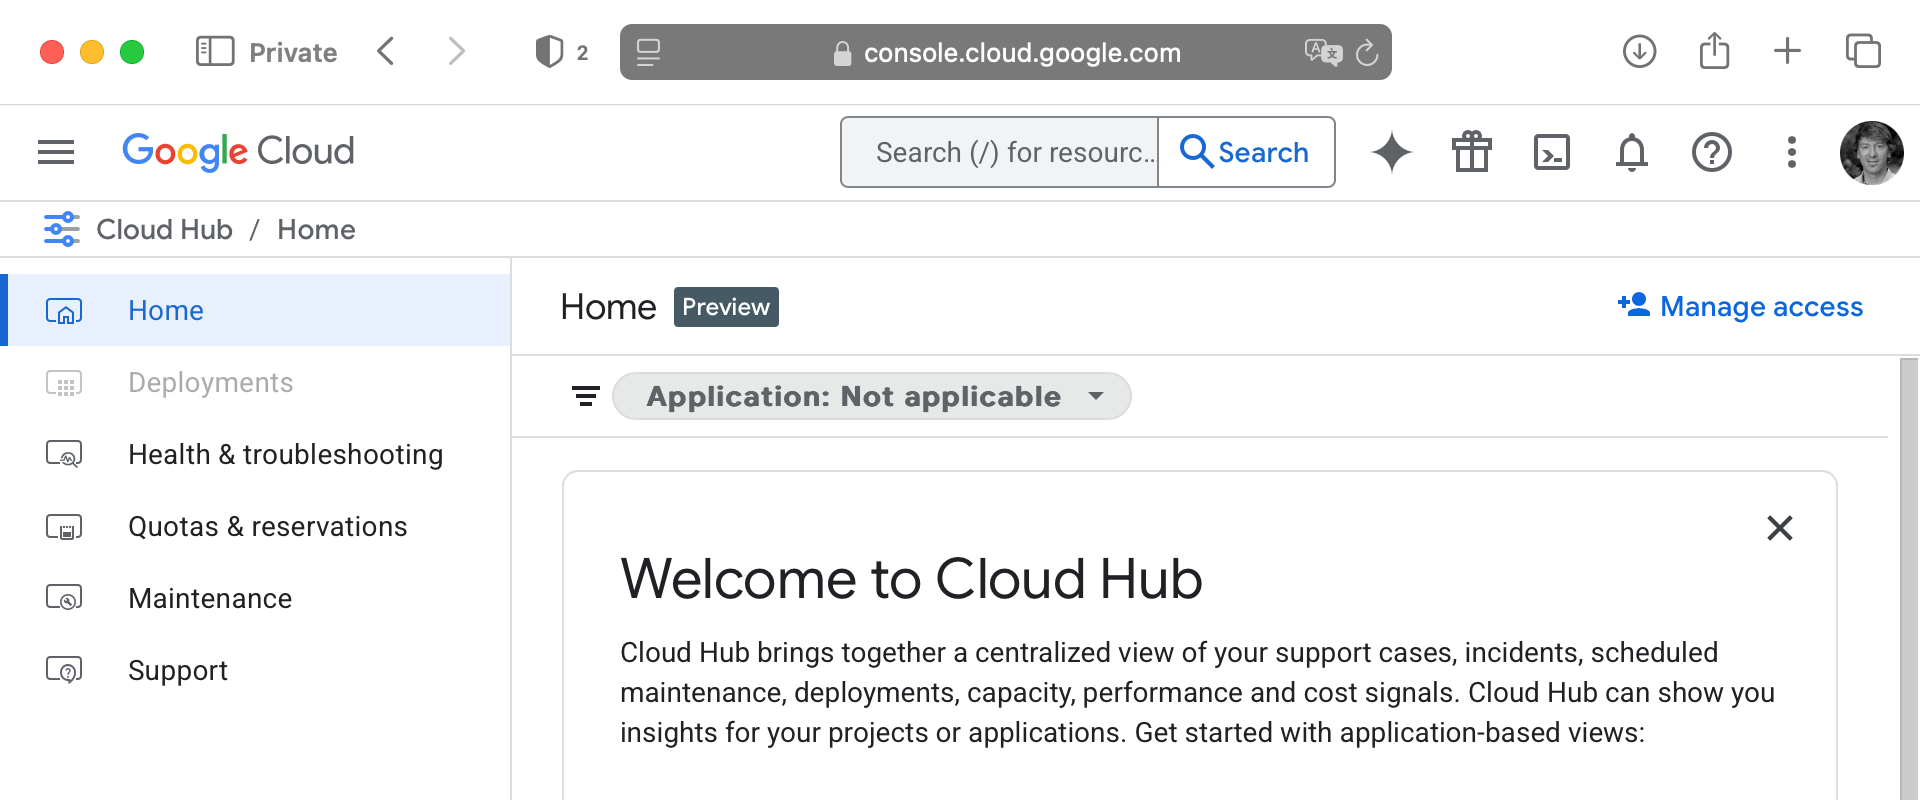
First, sign in to Google Cloud.
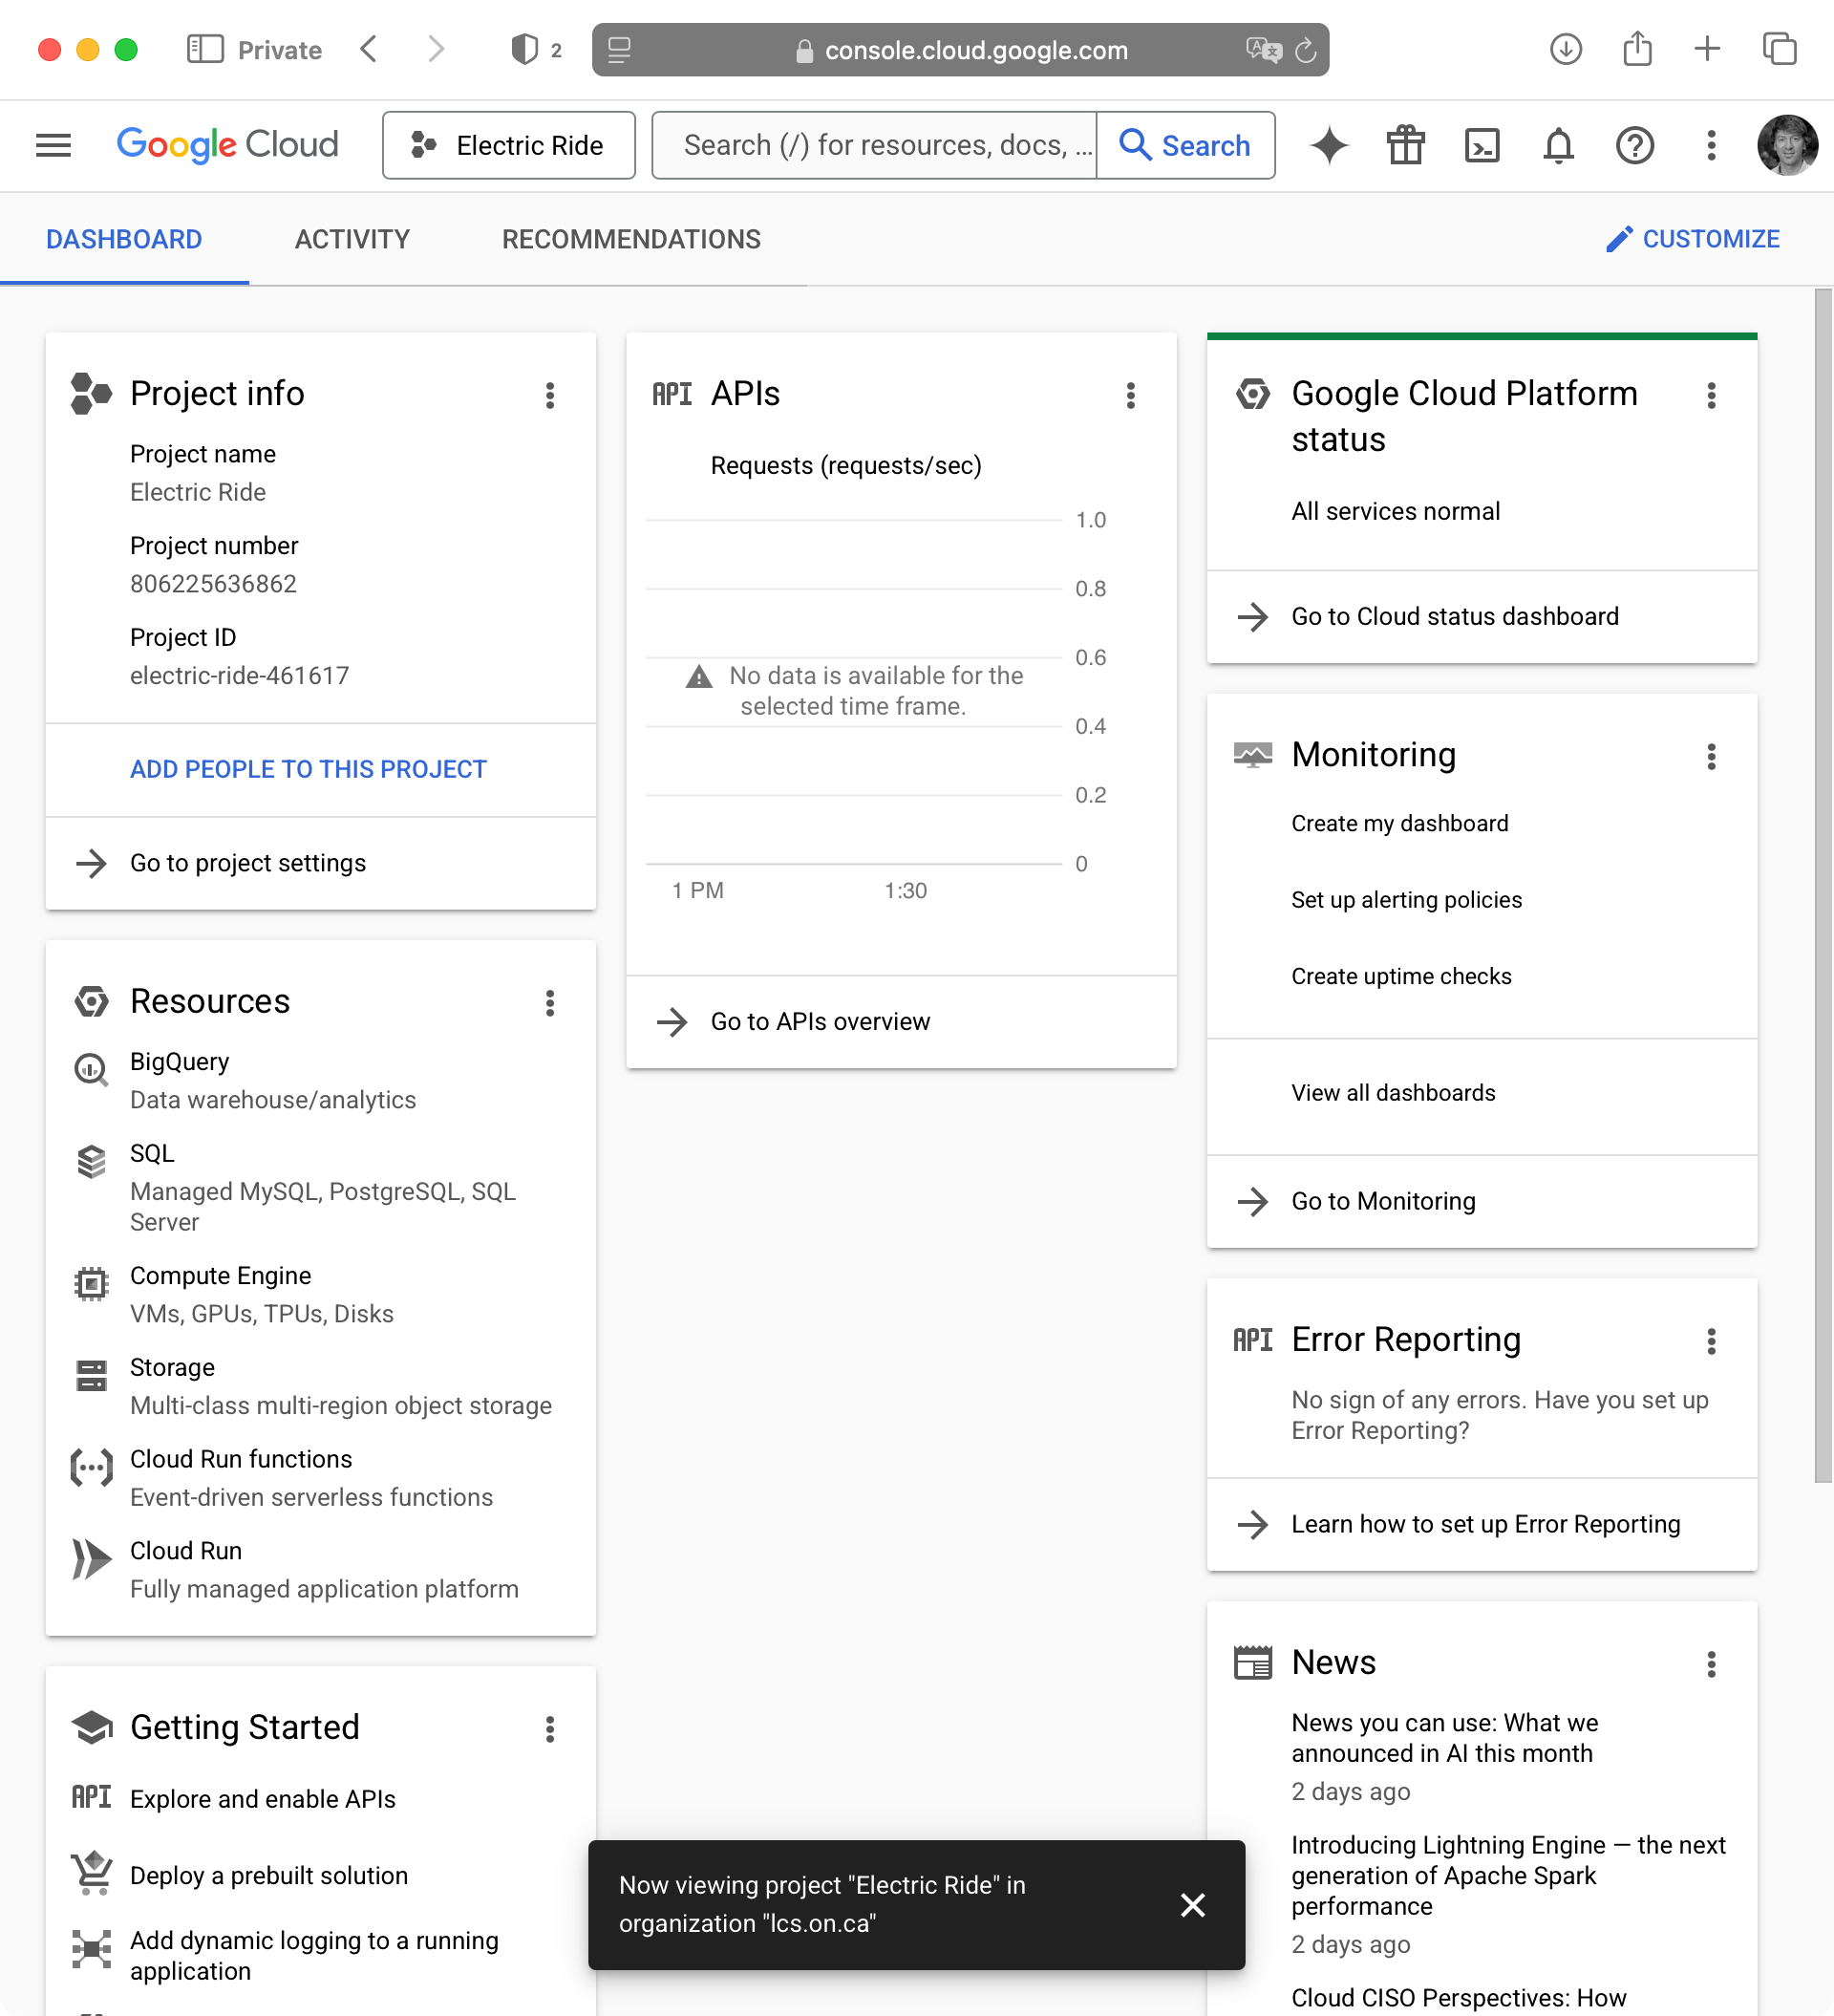
After signing in, you will probably see something like this (what page appears after sign-in seems to vary):
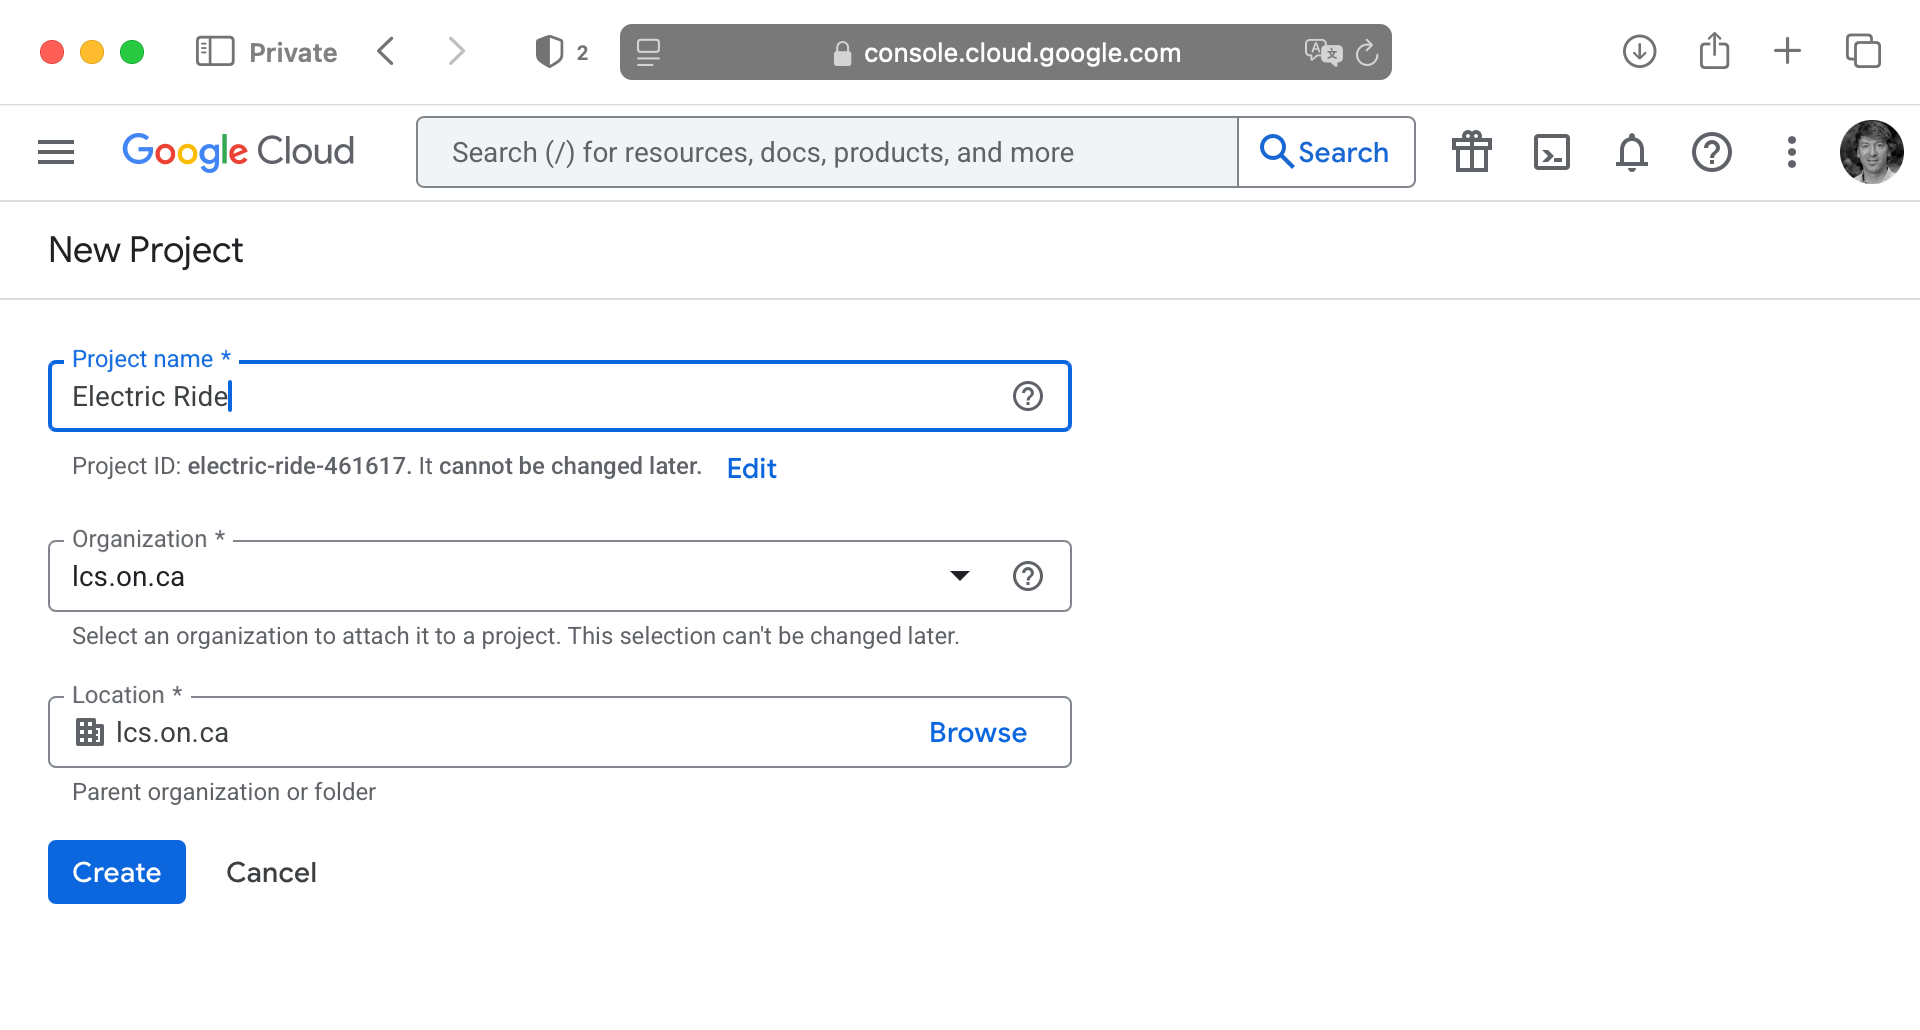
Regardless of what appears after signing in, please next follow this link to create a new project.
You will be asked to provide a name – base this on your app’s name – then click Create:
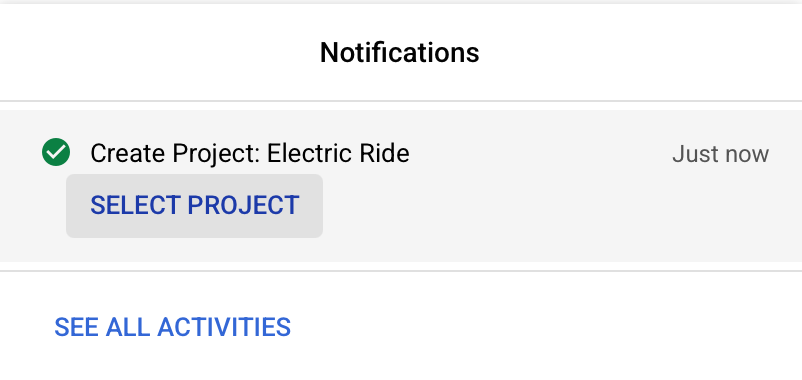
After a moment, you should be able to select the new project:
You should then see a page that looks something like this:
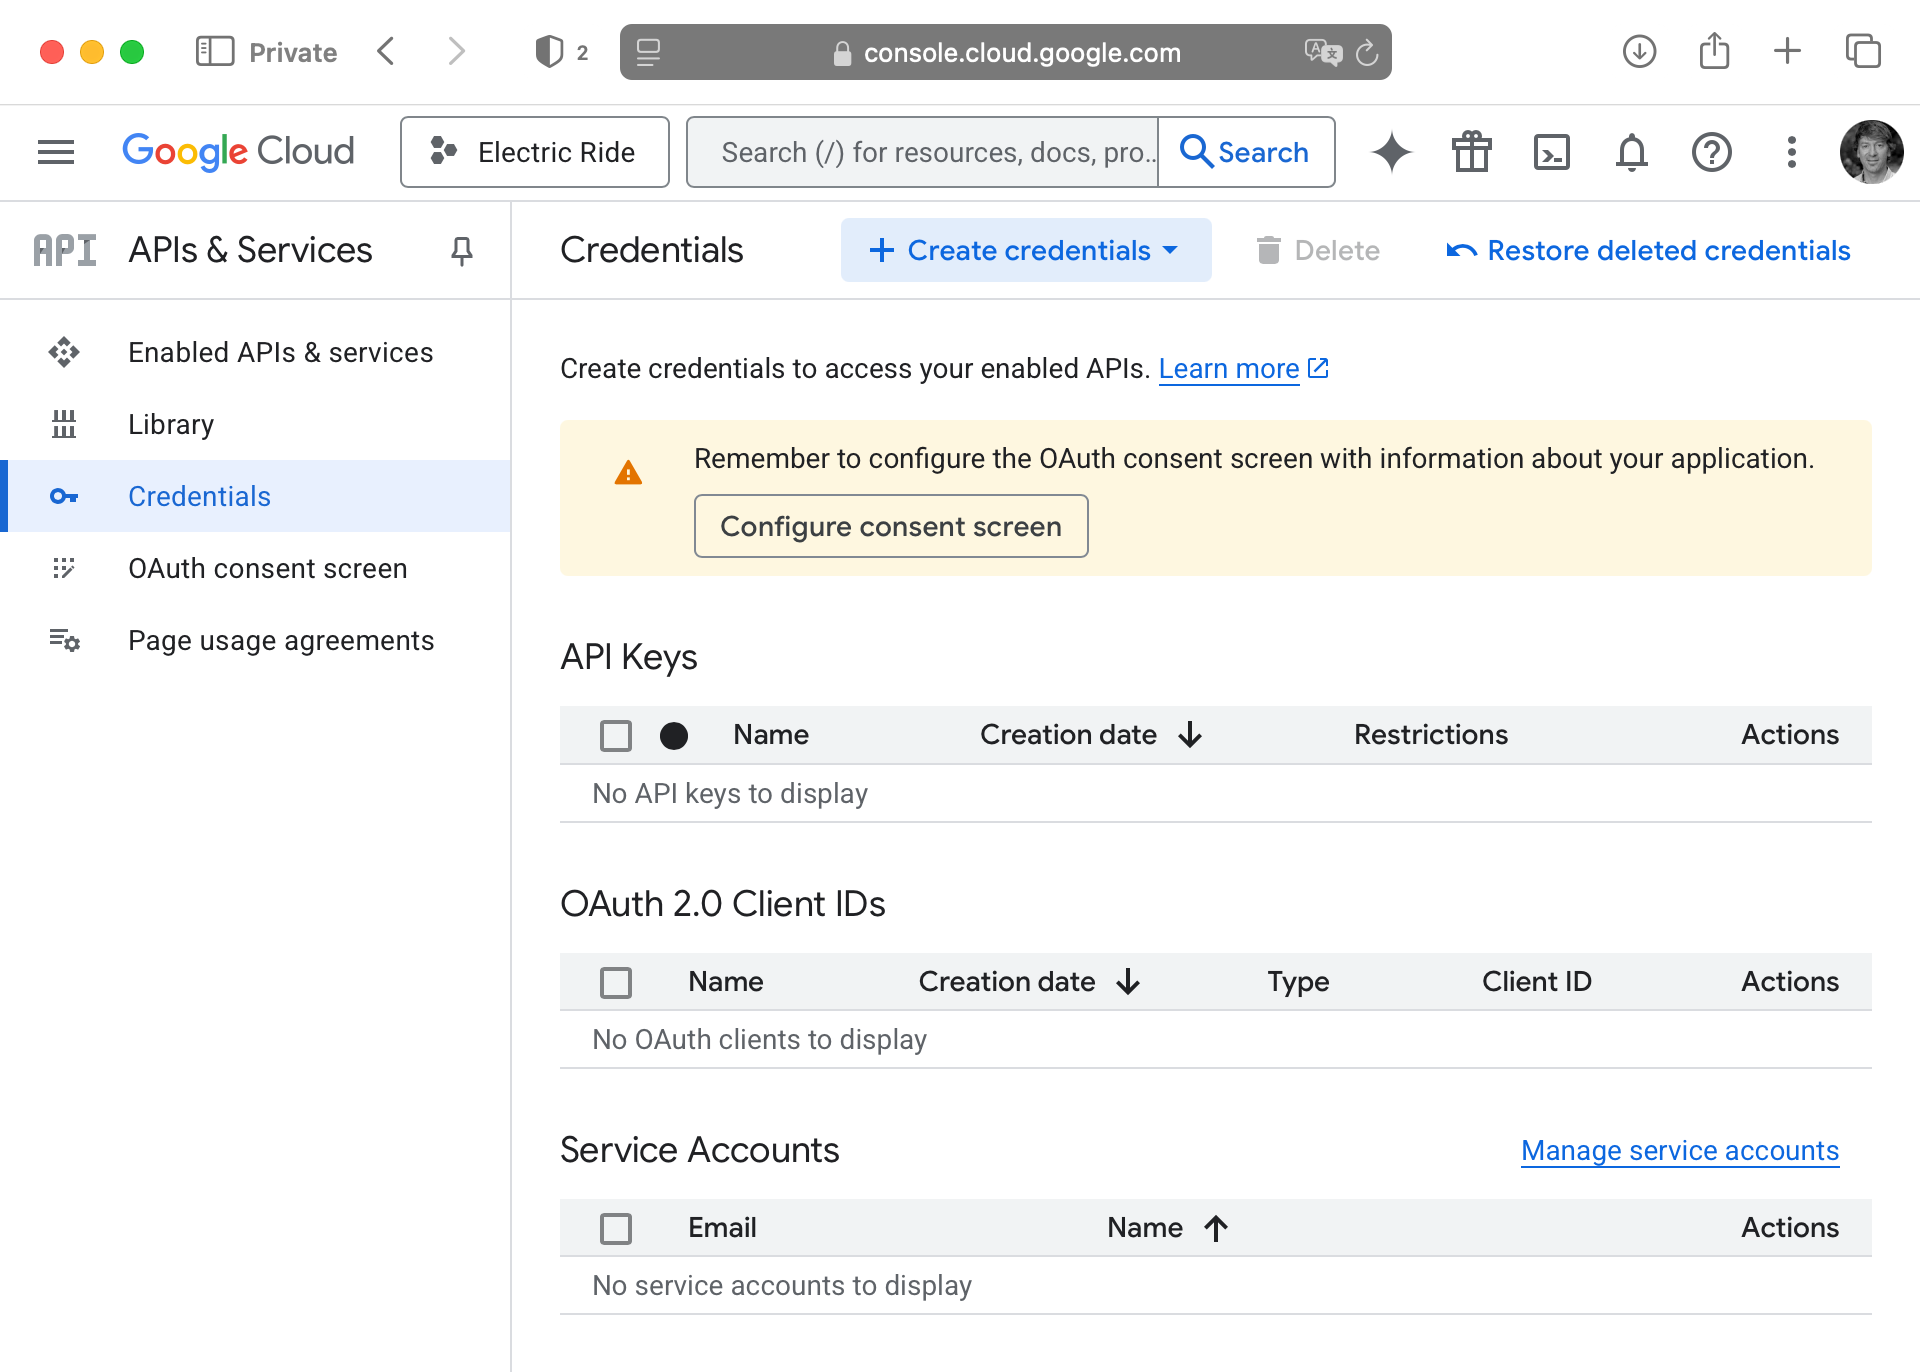
Now go to the Credentials page for your Google Cloud project:
Configure consent screen
We need to configure “open authentication” or OAuth.
What is OAuth? It’s beyond the scope of this tutorial or course to explain in much detail, but OAuth is a standard that allows third-party providers to offer social sign-in services.
By configuring the OAuth consent screen, we are going to set up the information that shows up when a user signs in to their Google account to use our app. It helps the user decide whether to trust your app – you have probably seen OAuth consent screens in the past when signing in to existing apps that you already use.
So, again, please visit this page to configure your Google Cloud project’s OAuth consent screen. You will see a page like this:
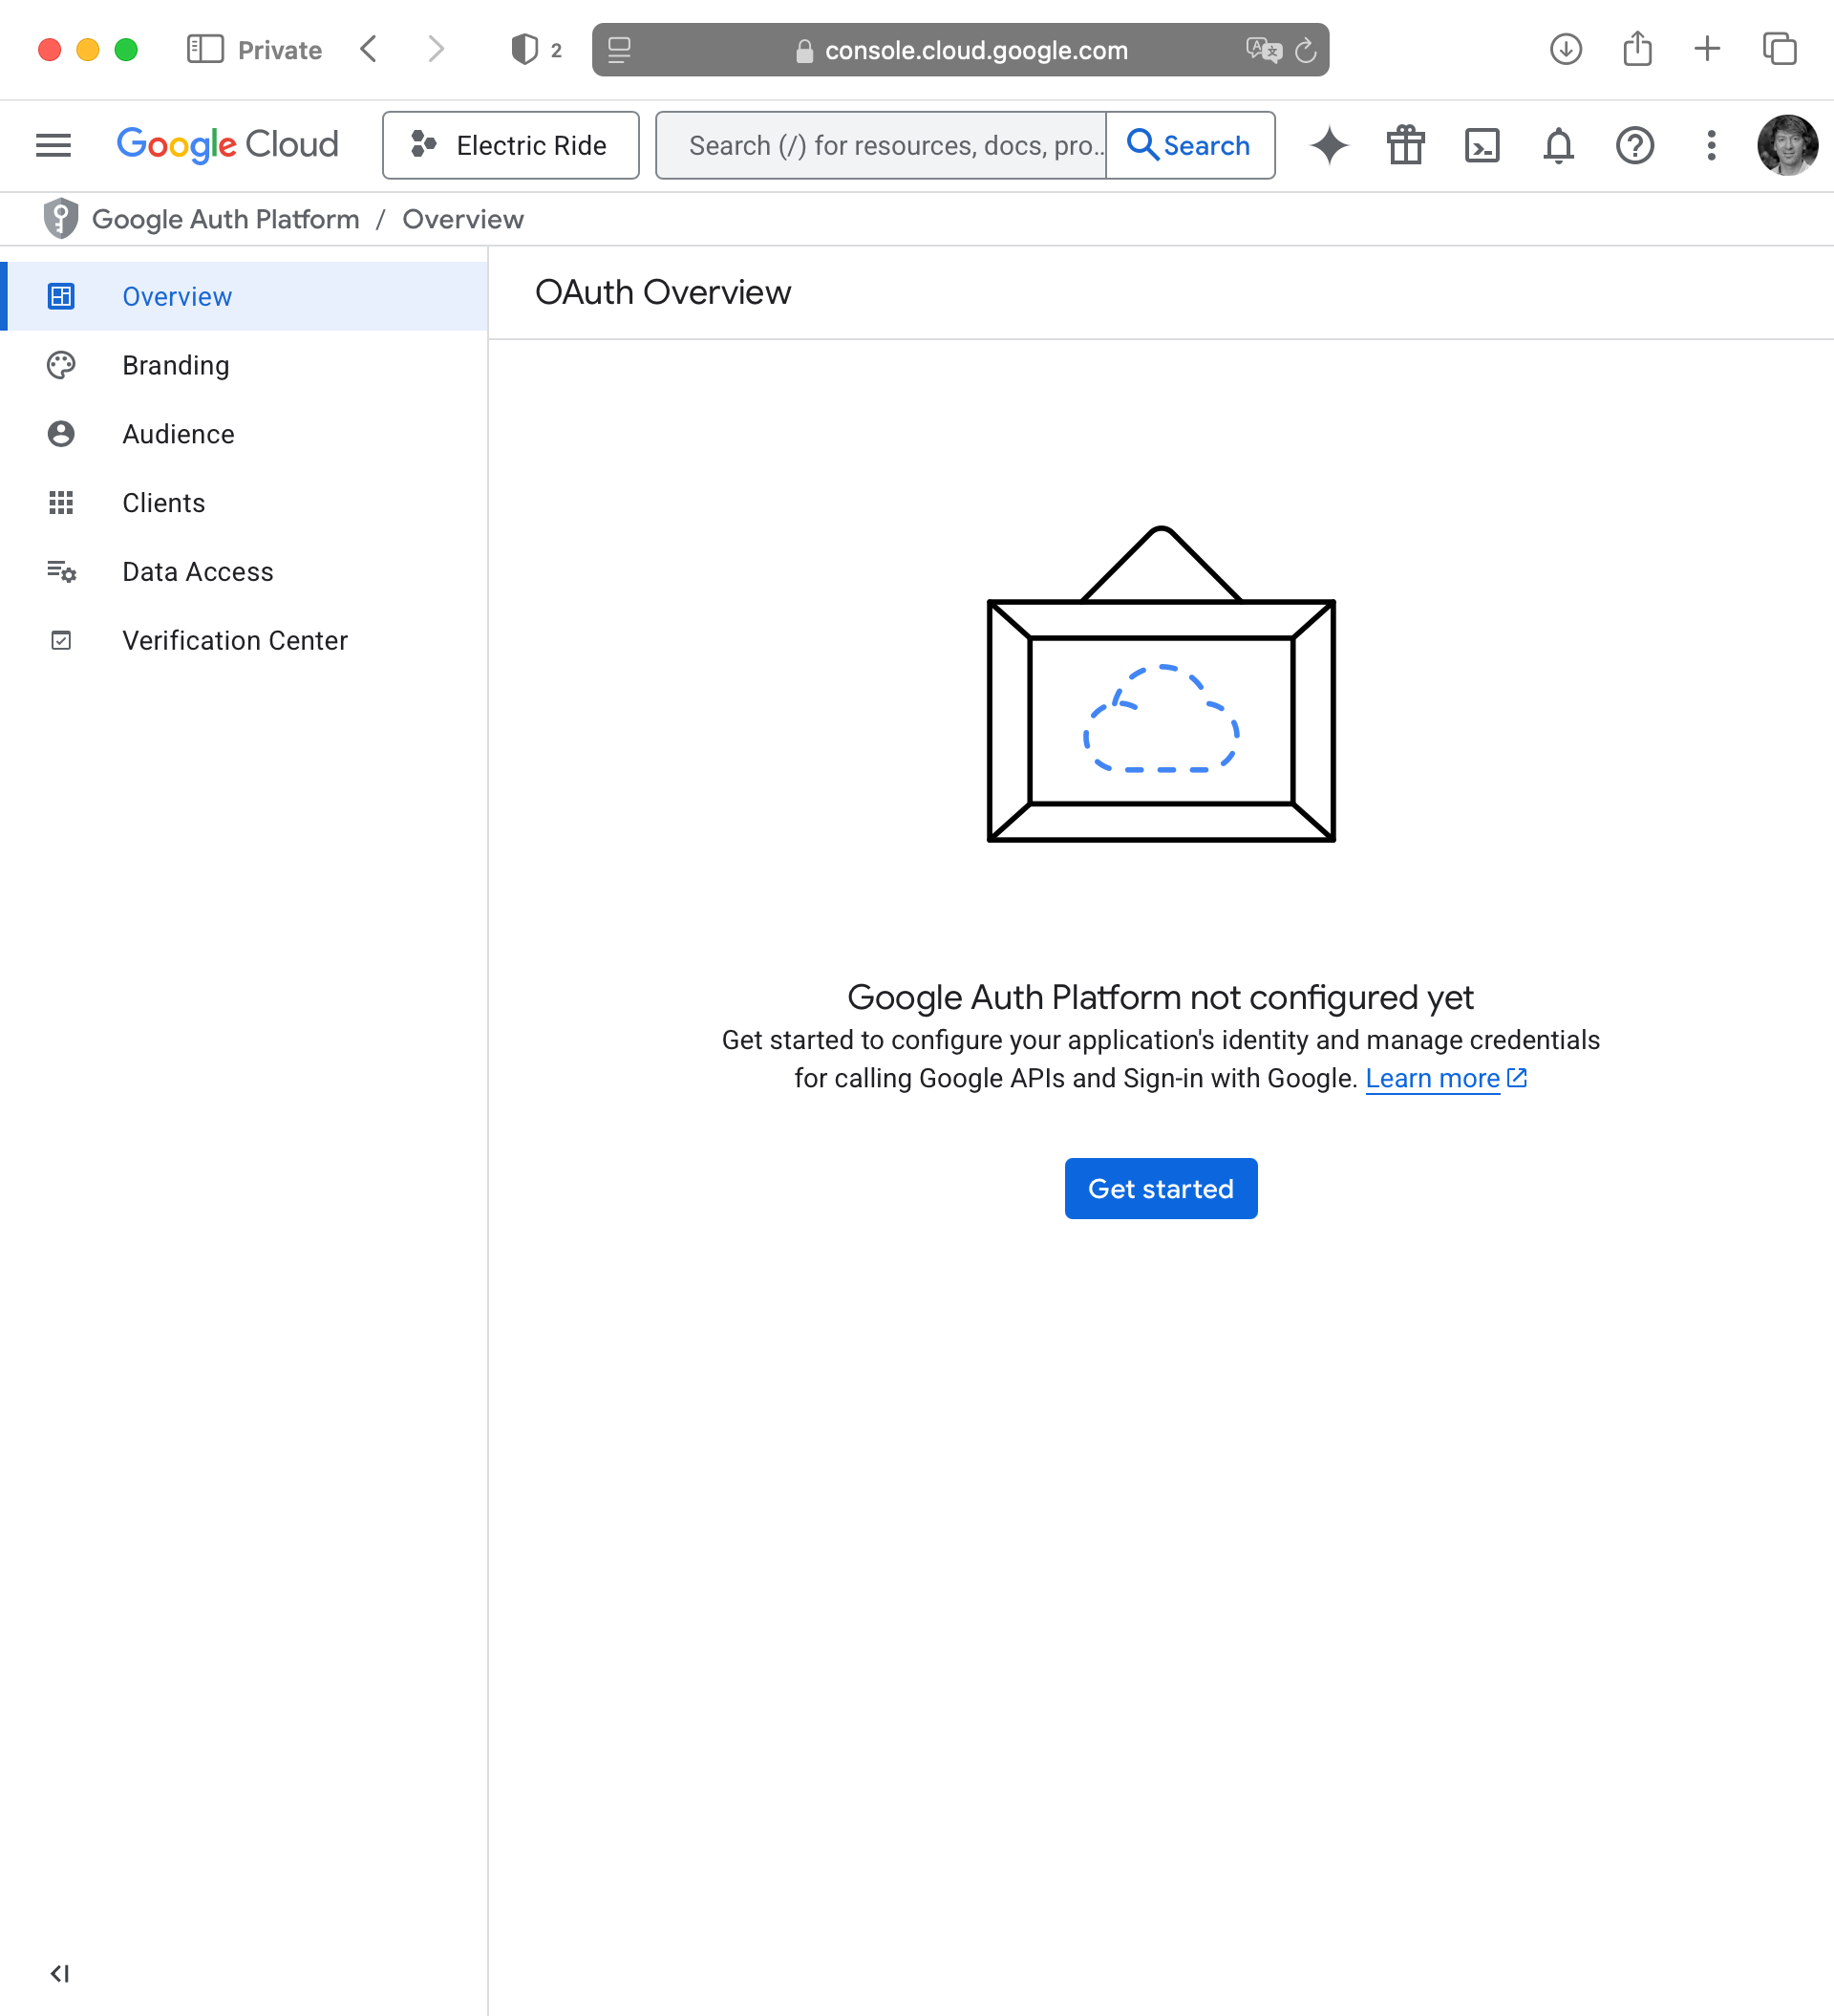
Press the blue Get started button in that screen above.
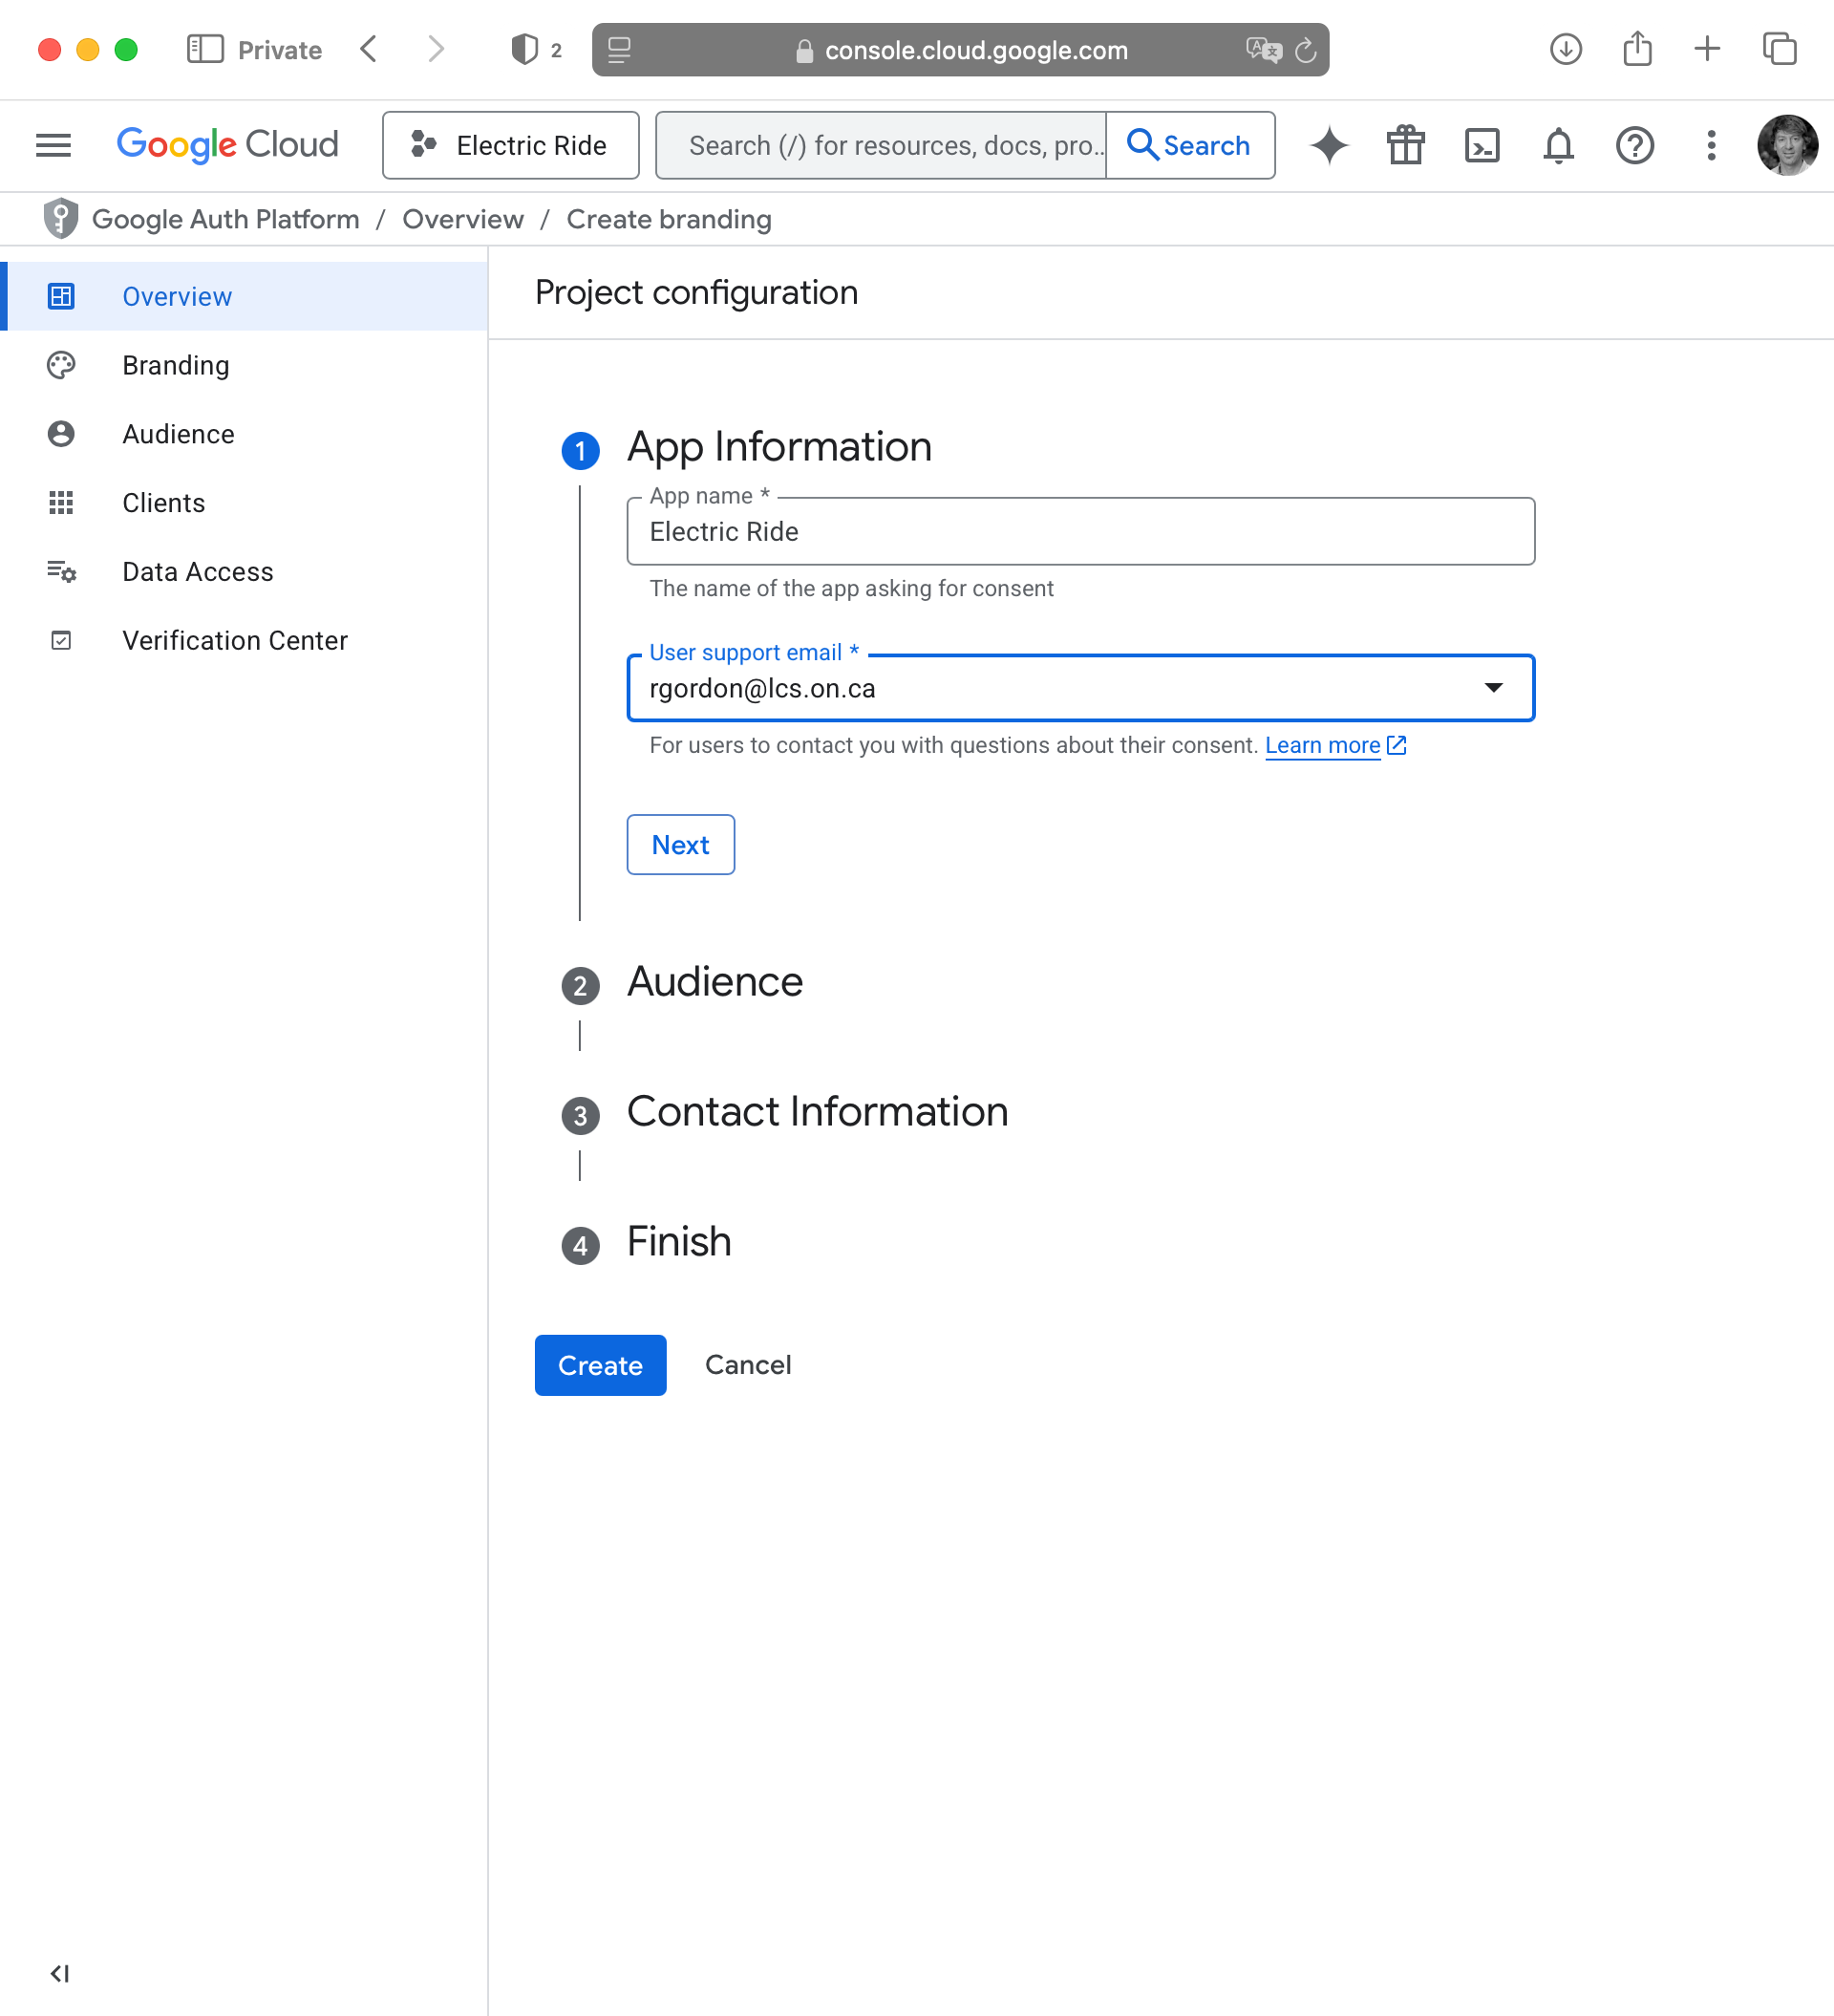
In the App Information step that appears, provide your app information and user support email address, then press Next:
For the Audience step, choose Internal then press Next:
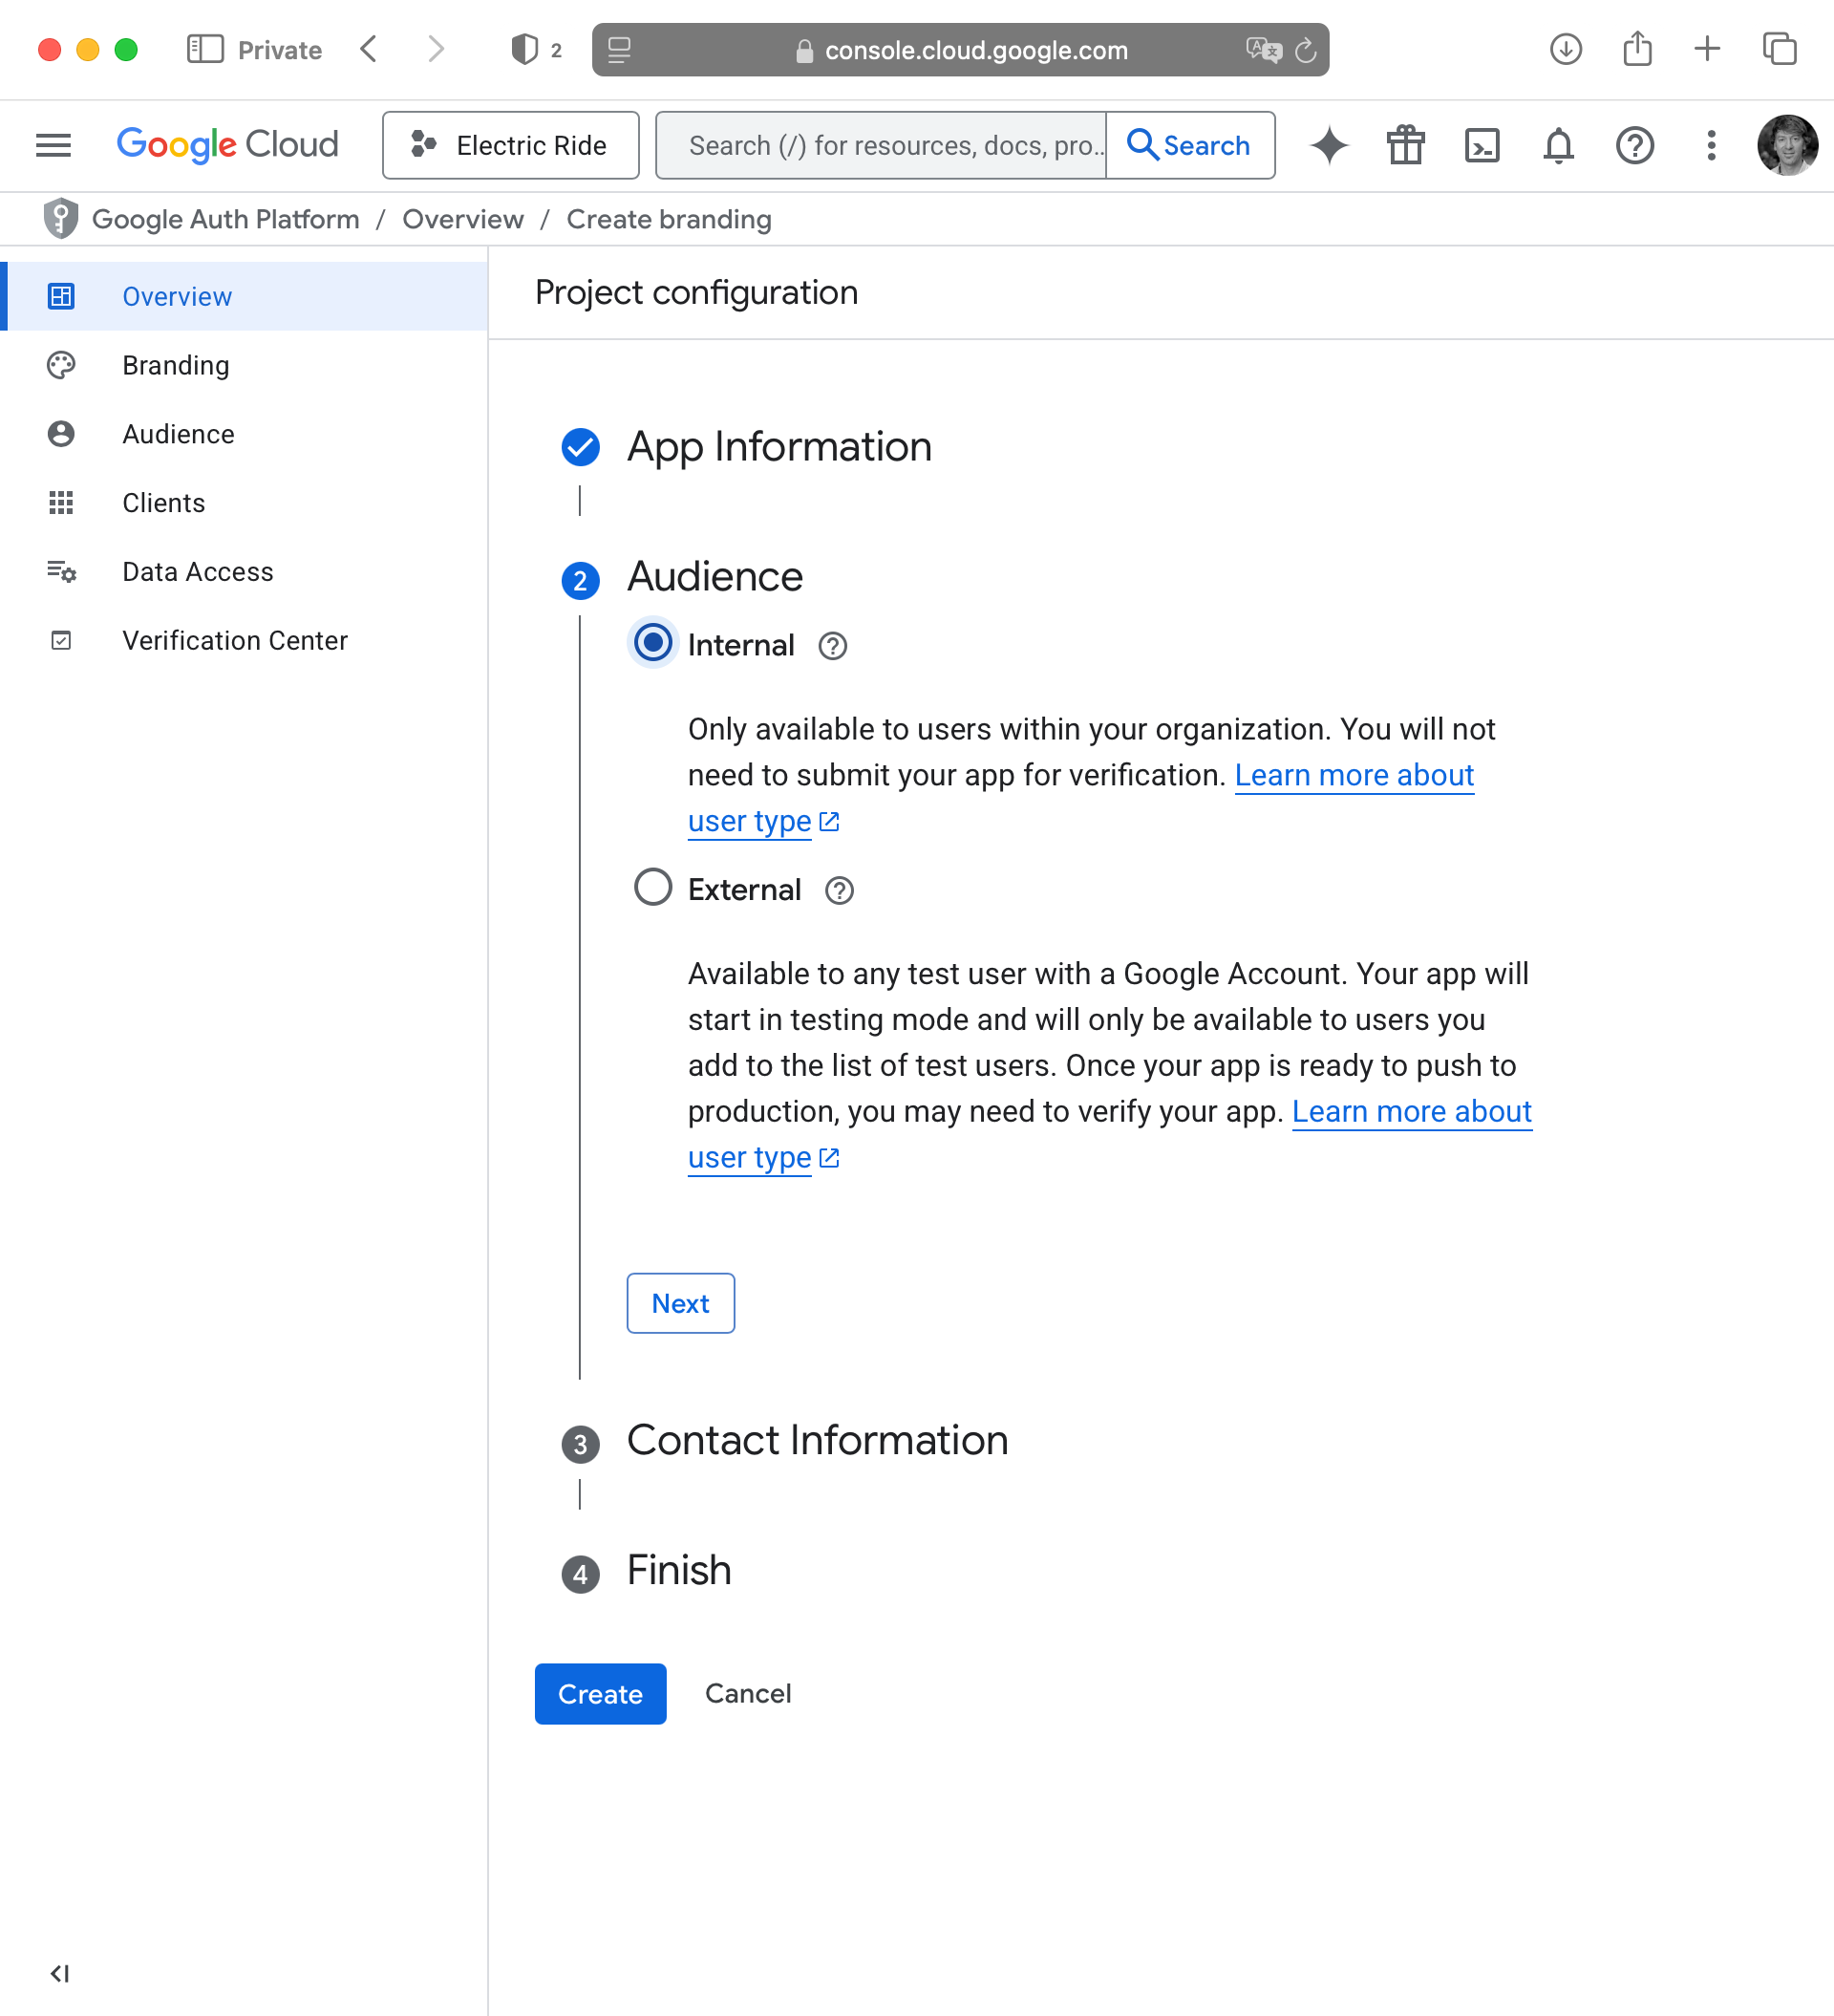
NOTE
This means that (for now) only users with LCS email addresses will be able to sign in to your app.
If your app is later published to the public App Store, we will revisit these settings and ensure that sign-in for your app is able to be used by anyone with any email address.
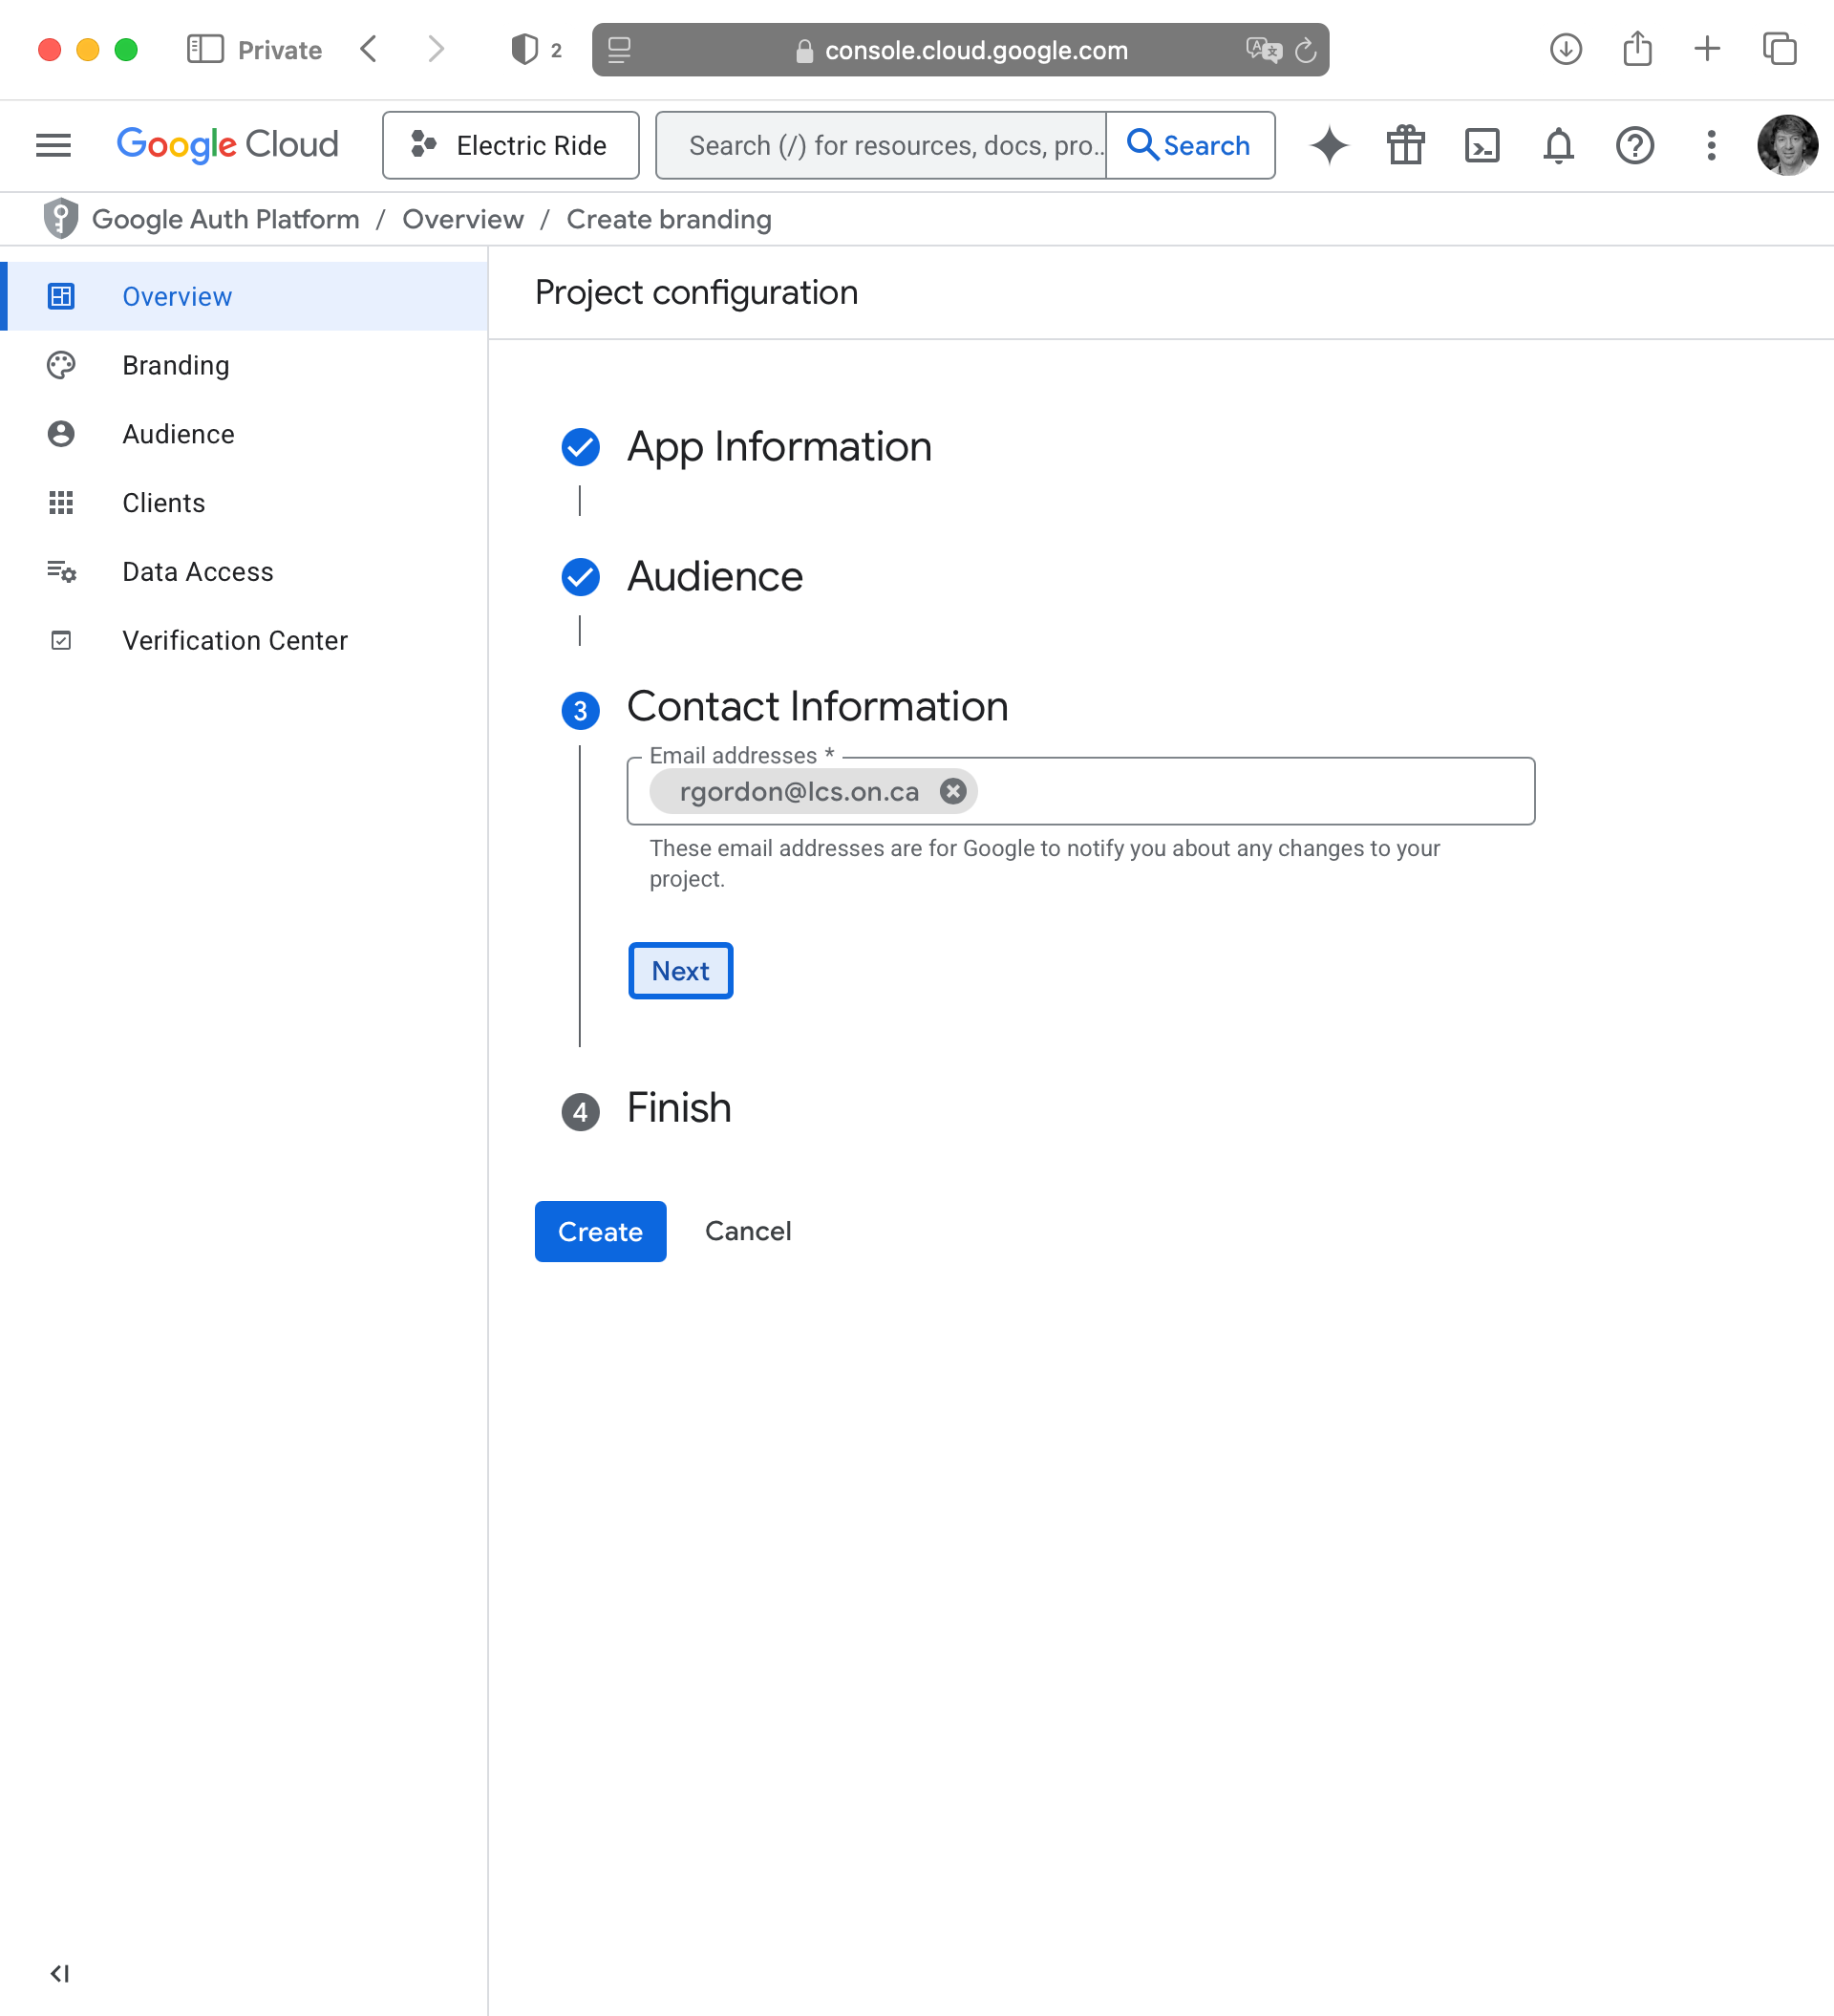
For Contact Information provide your LCS email address, then press Next:
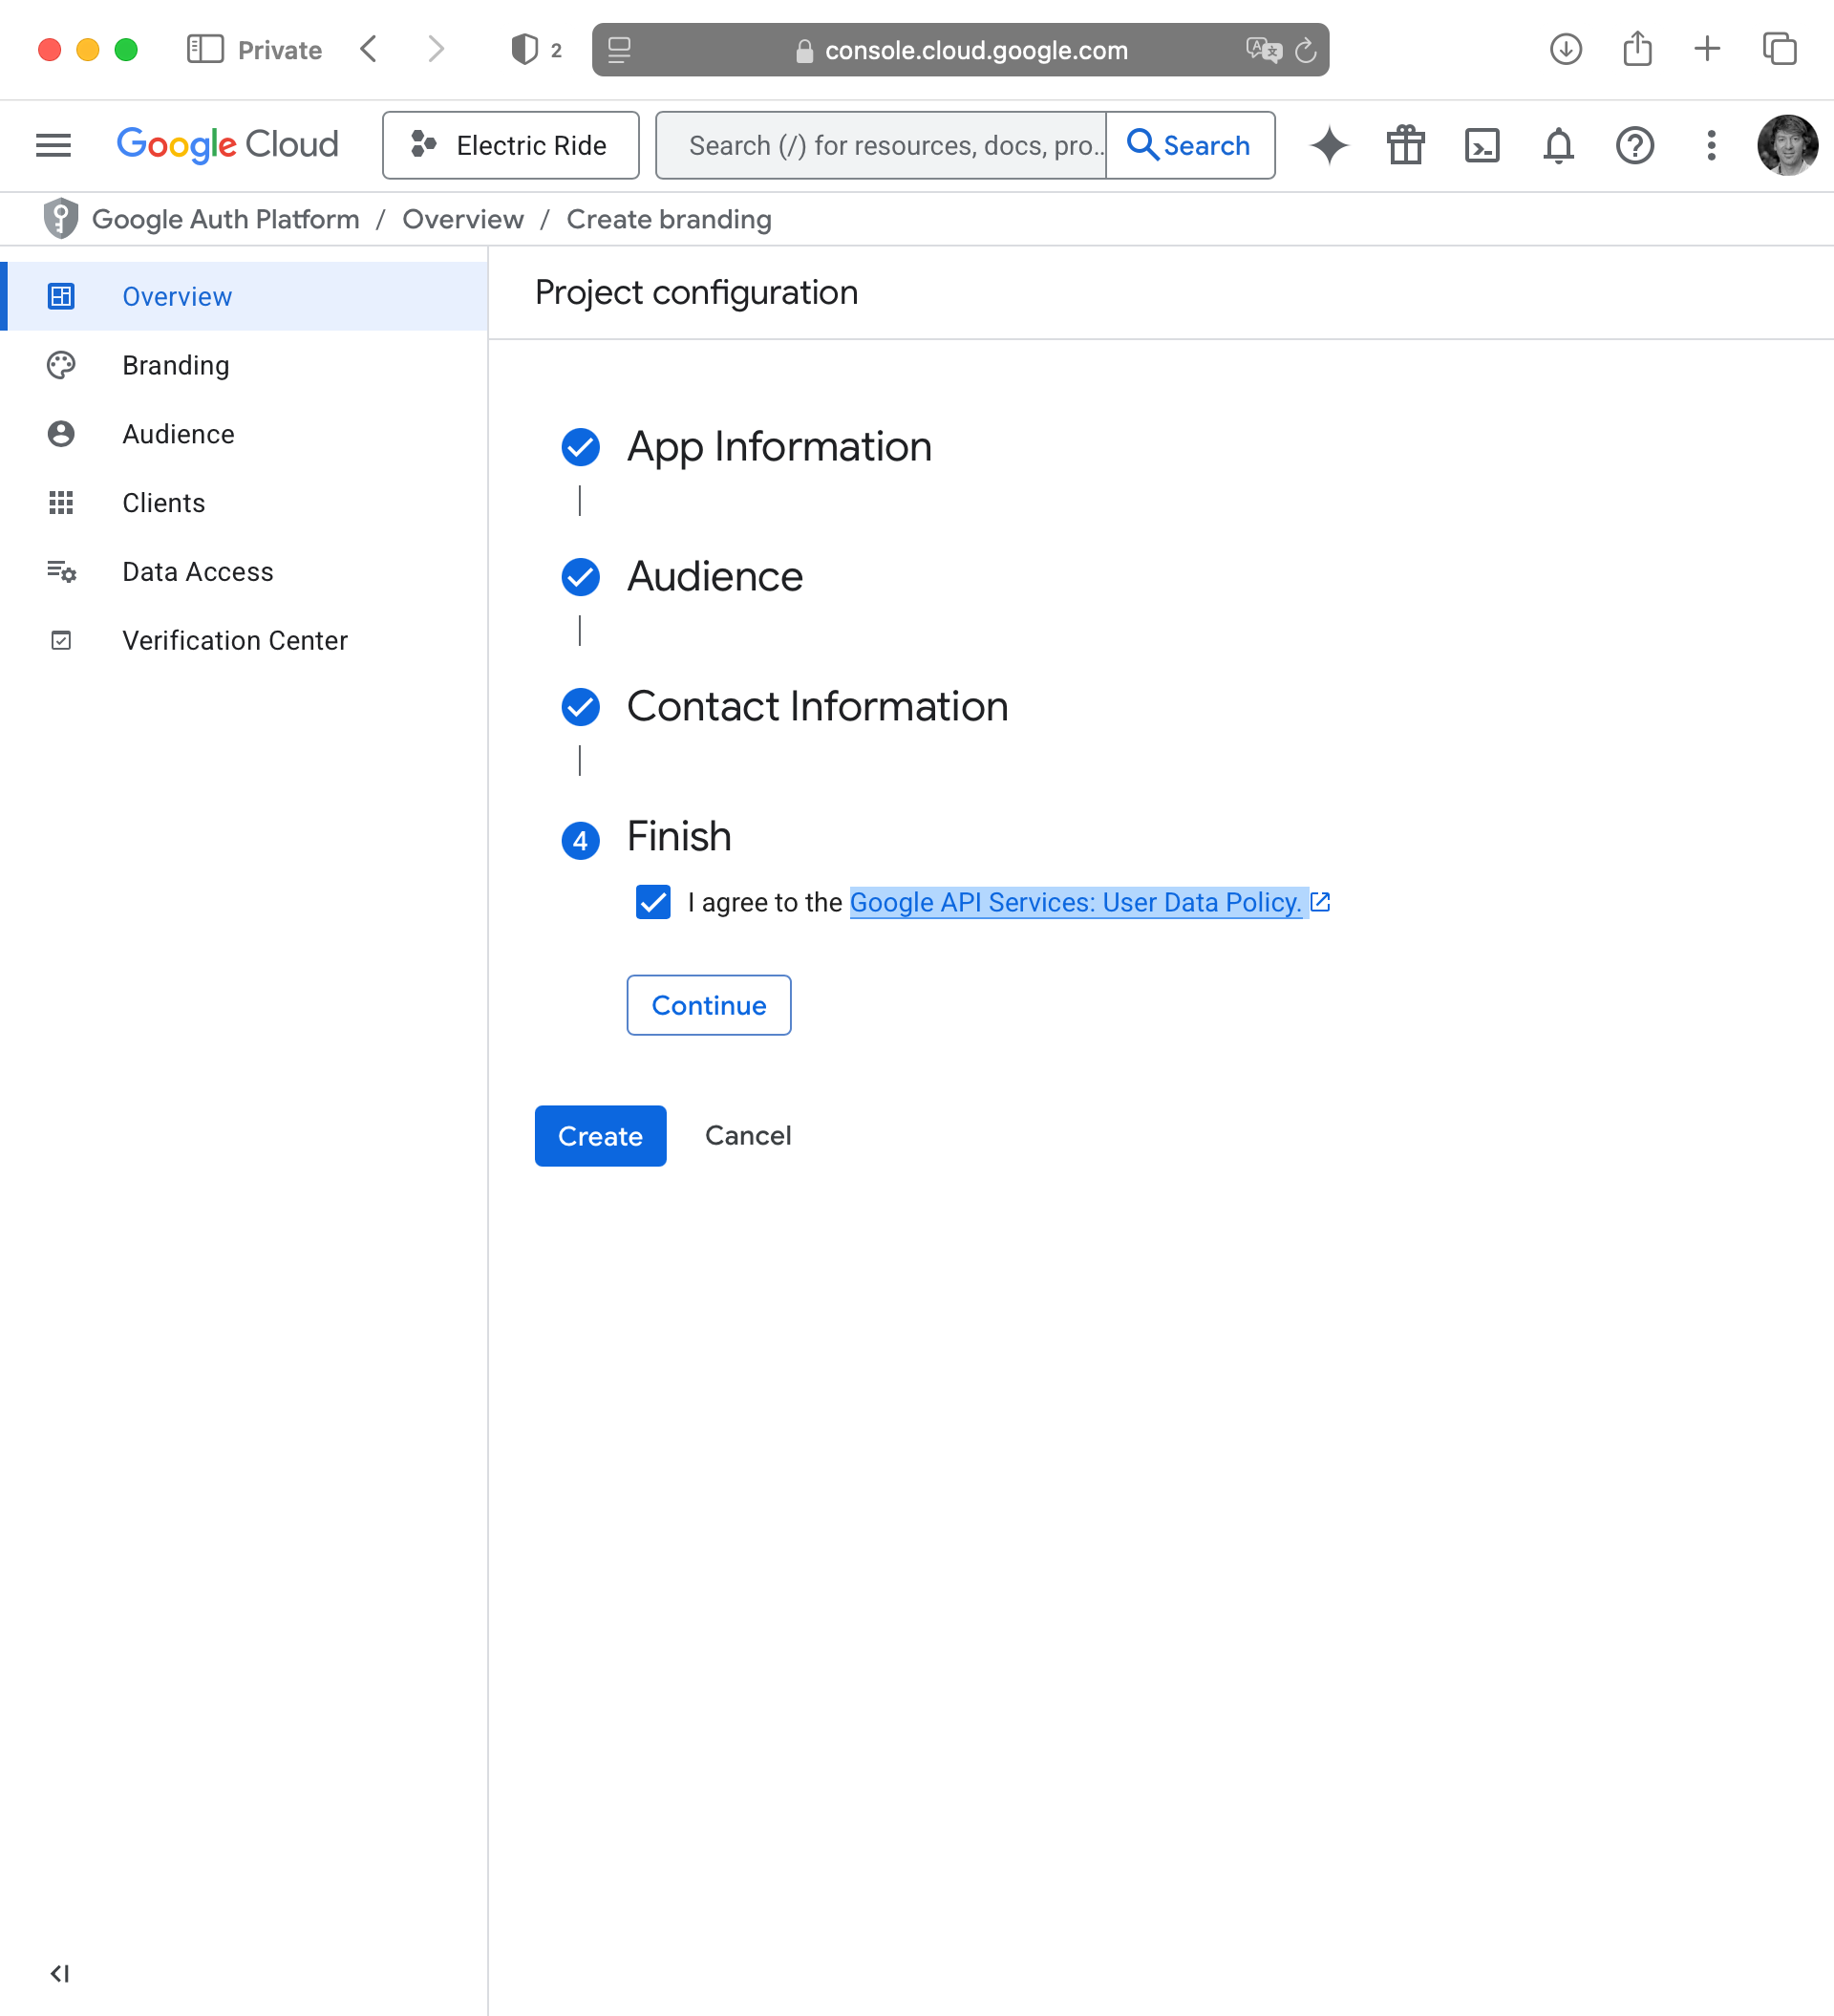
Finally, on the Finish screen, check the box to agree to the Google API Services: User Data Policy then press Continue:
Finally, press the Create button:
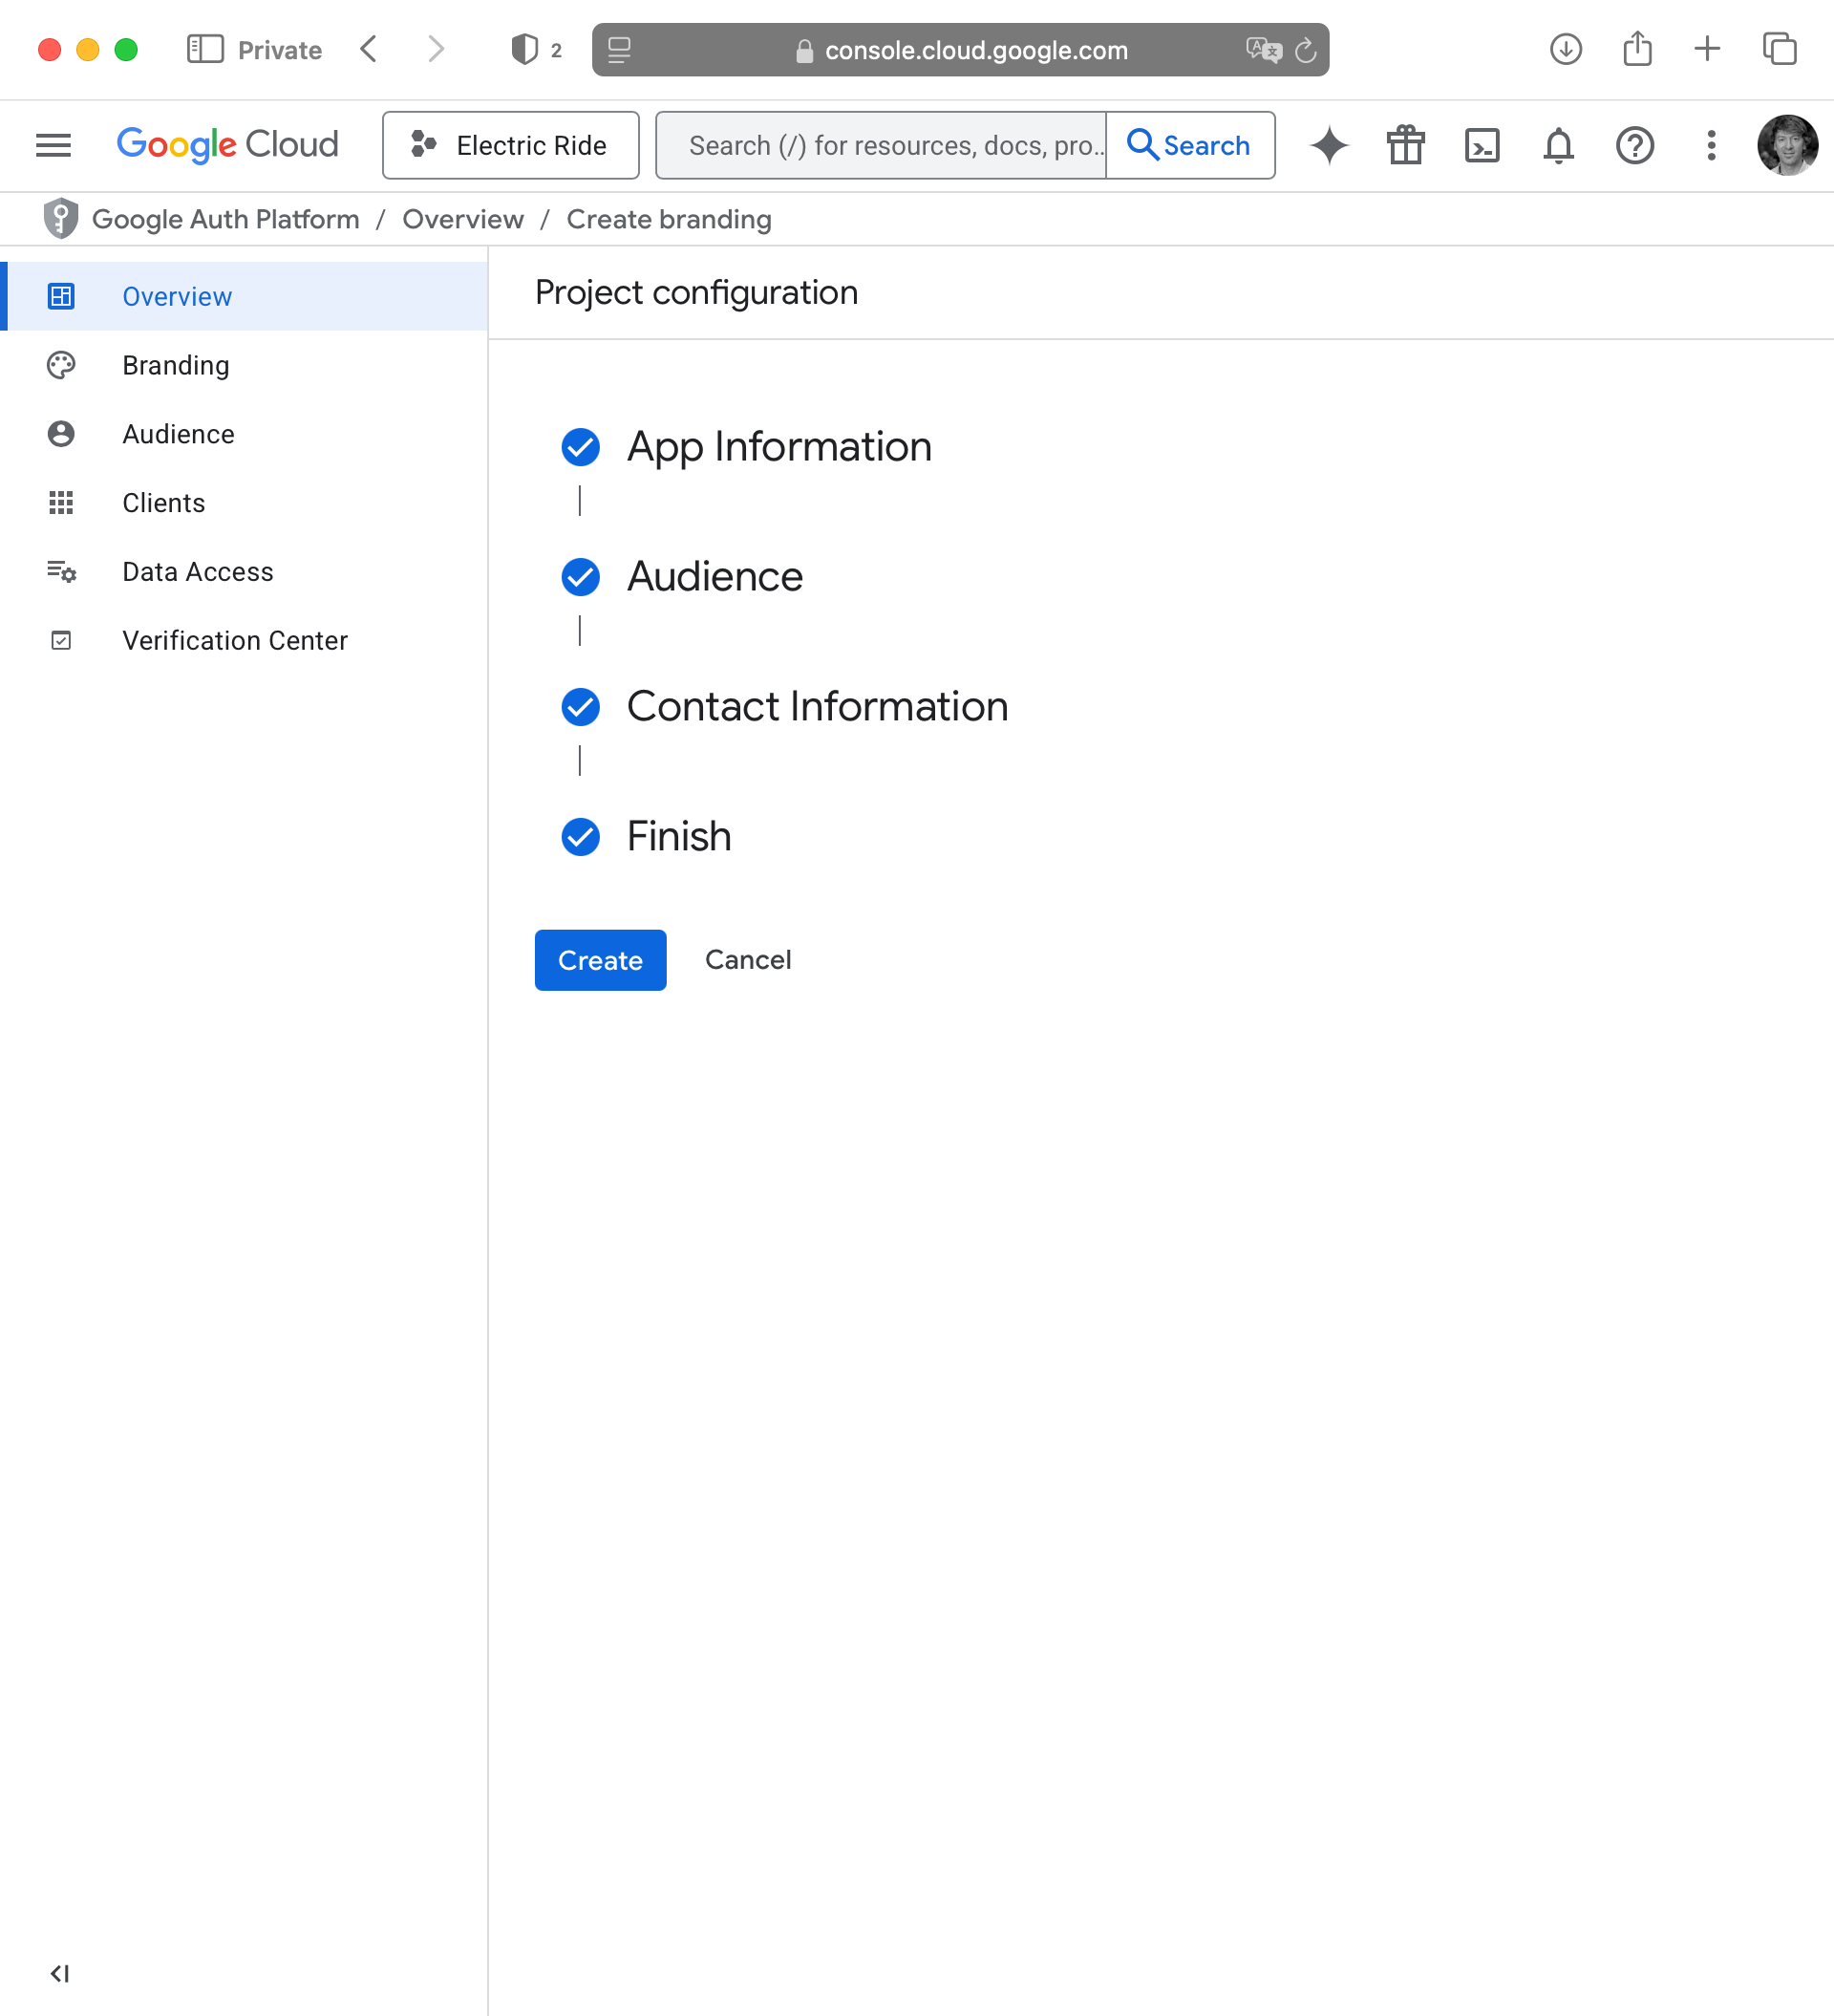
After a moment, you will see the following:
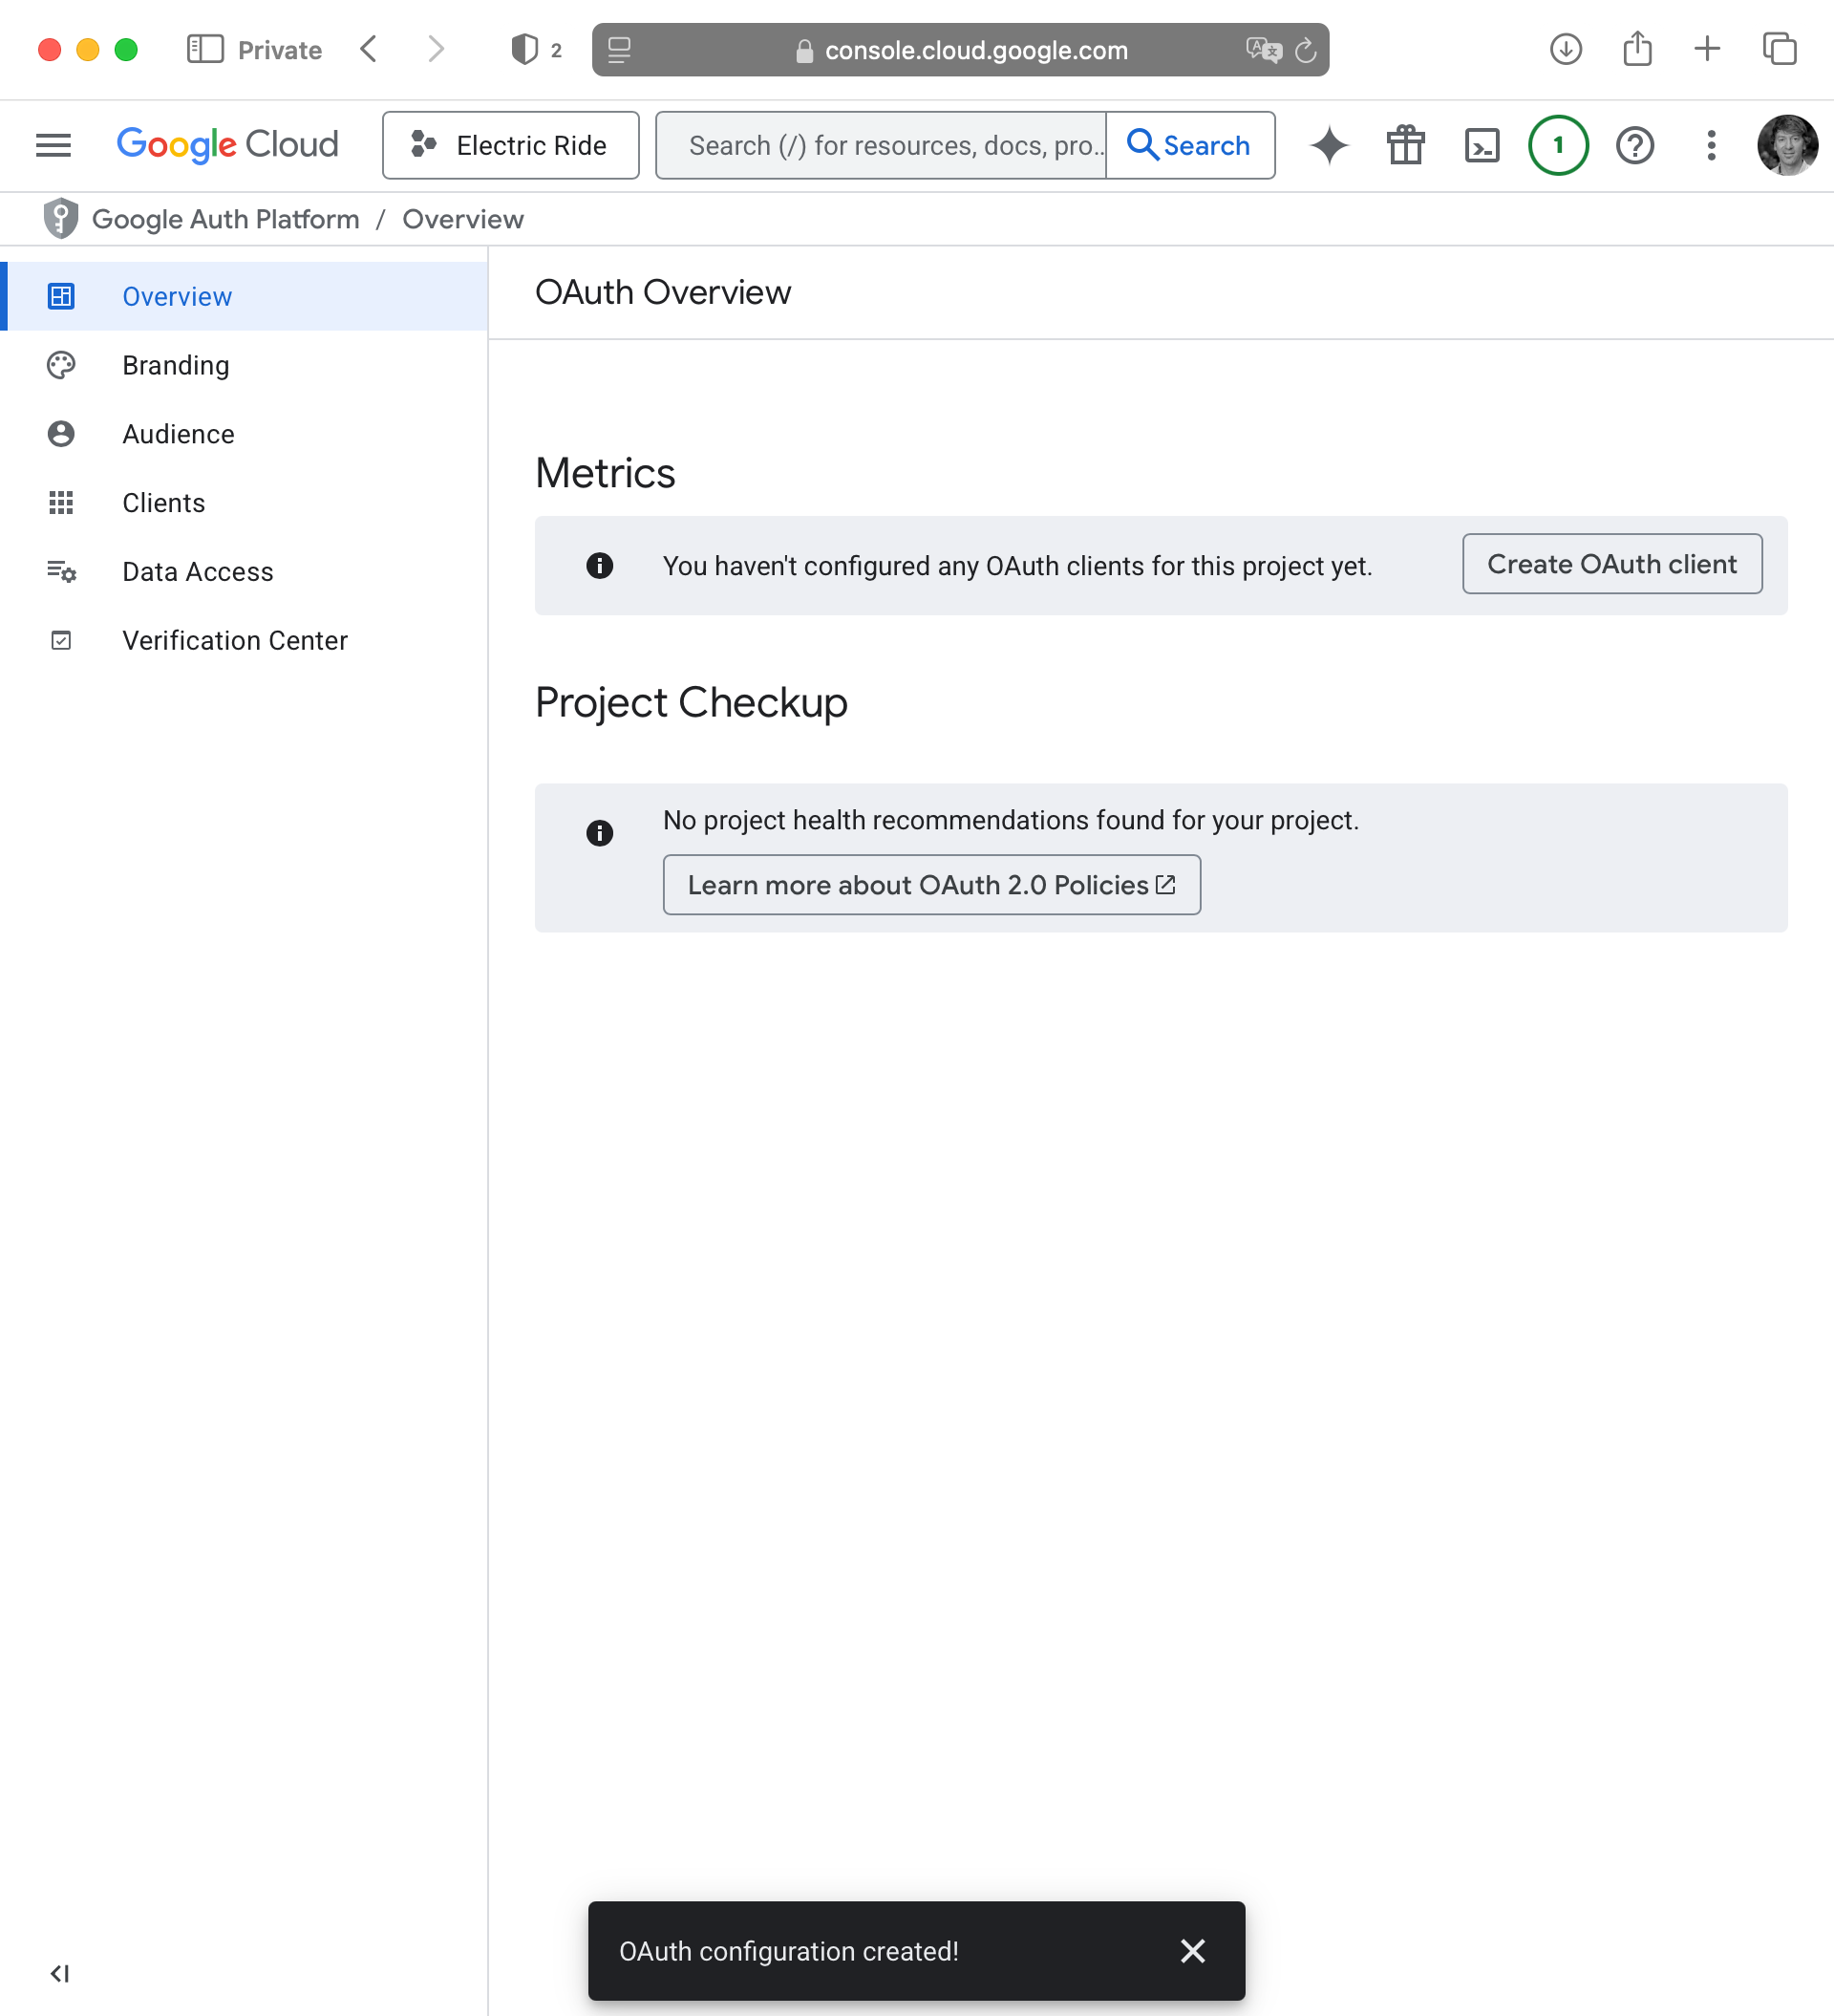
Create OAuth client ID
Next, we need to create an OAuth Client ID. This is what ties your app to your Google Cloud project. Please follow this link to create your OAuth Client ID. You should see the following:
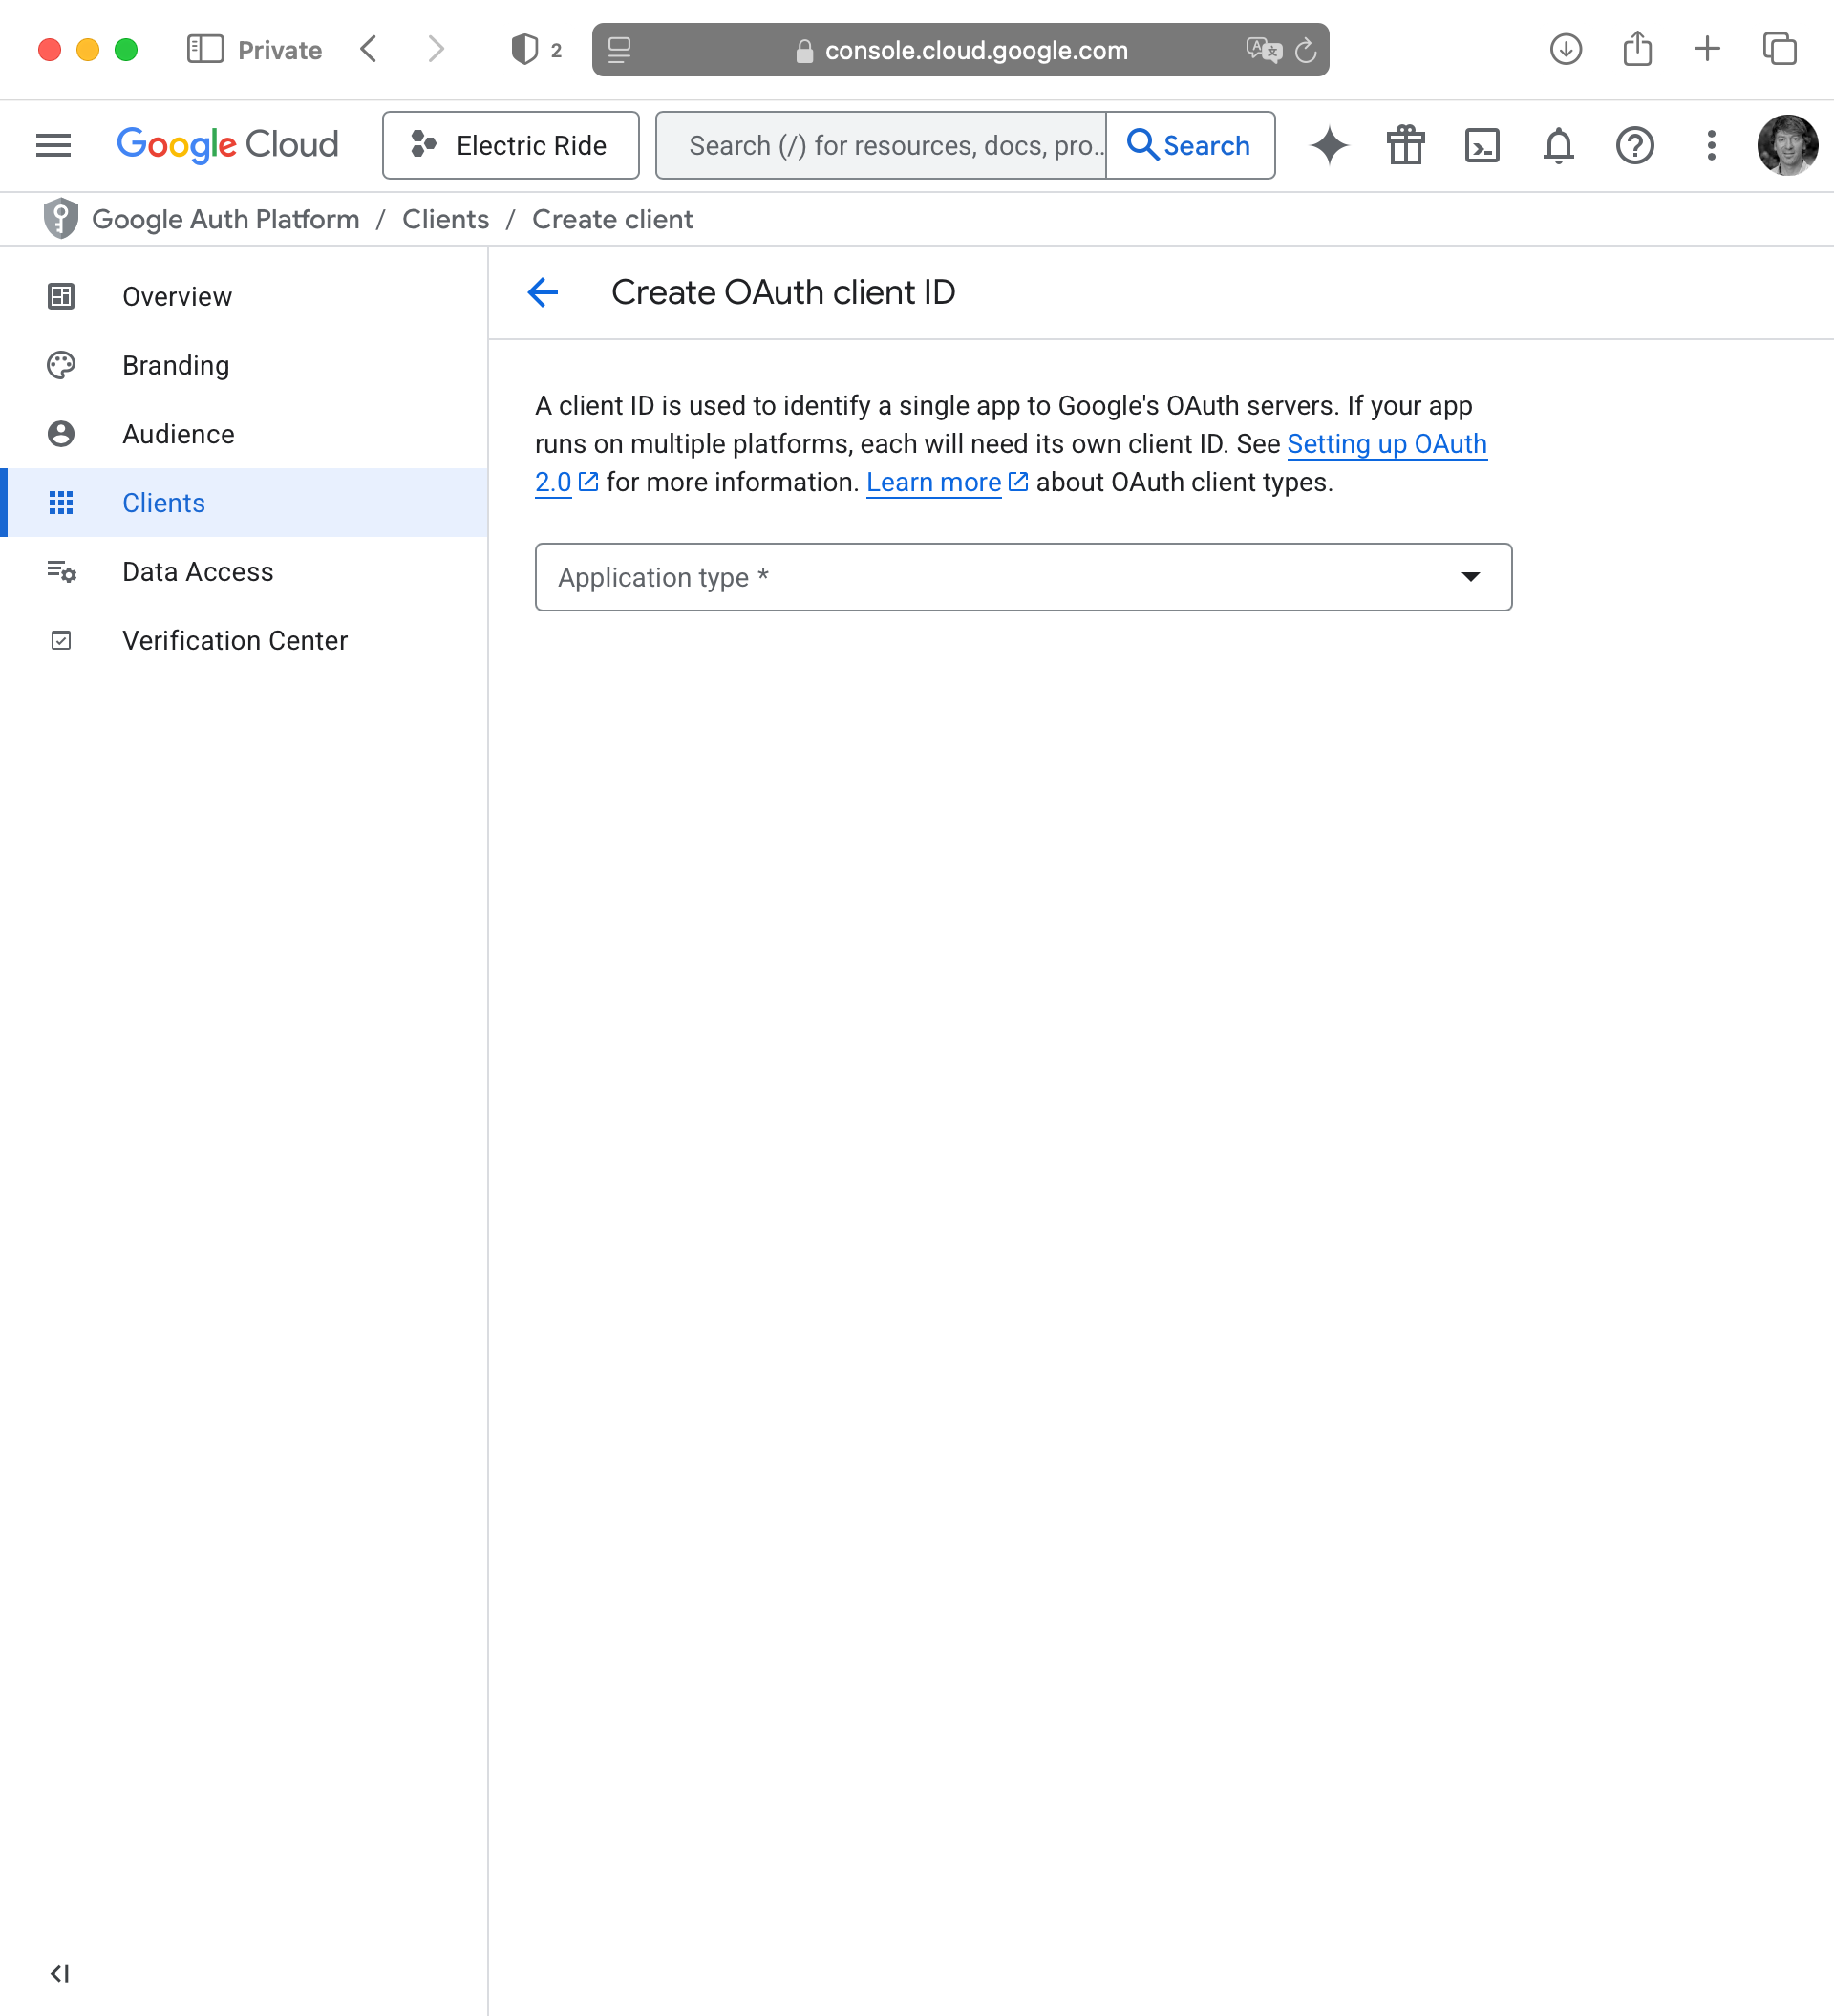
For the Application type select iOS, then provide a reasonable name, based on your app name:
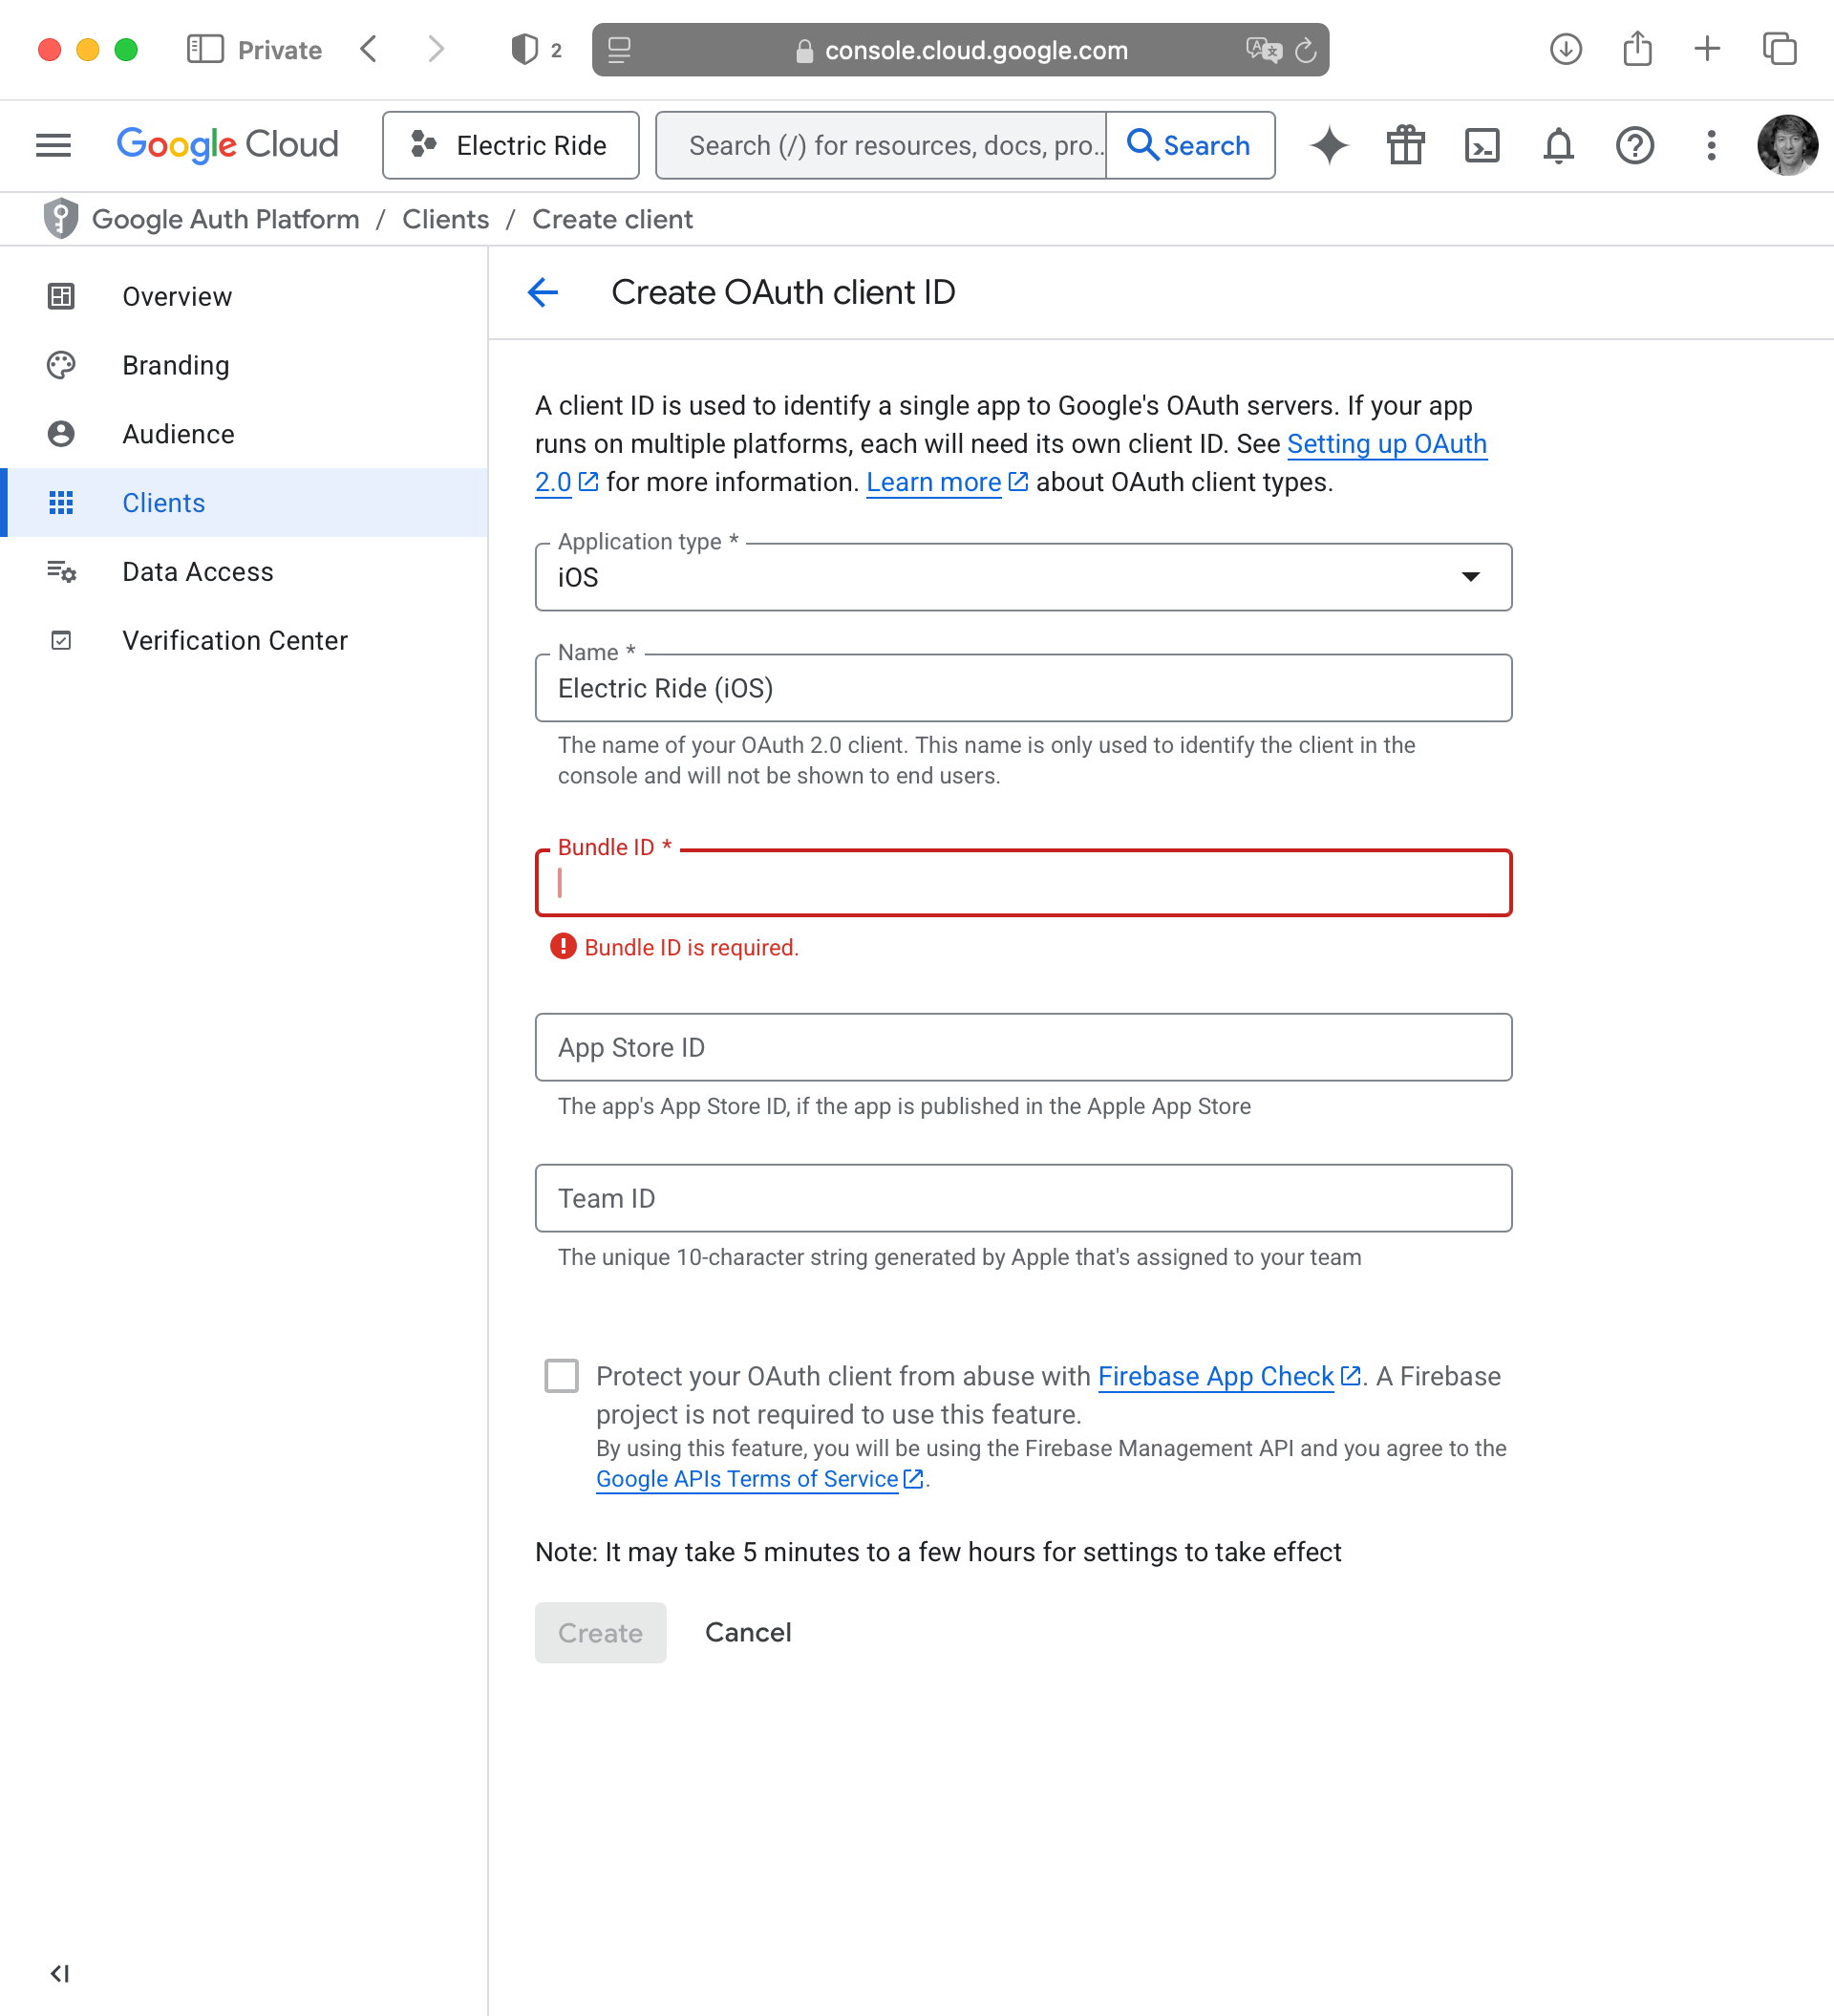
The bundle ID can be found in your Xcode project. Please watch this super short video to learn where to find this:
Paste your bundle ID into the appropriate field then press the Create button:
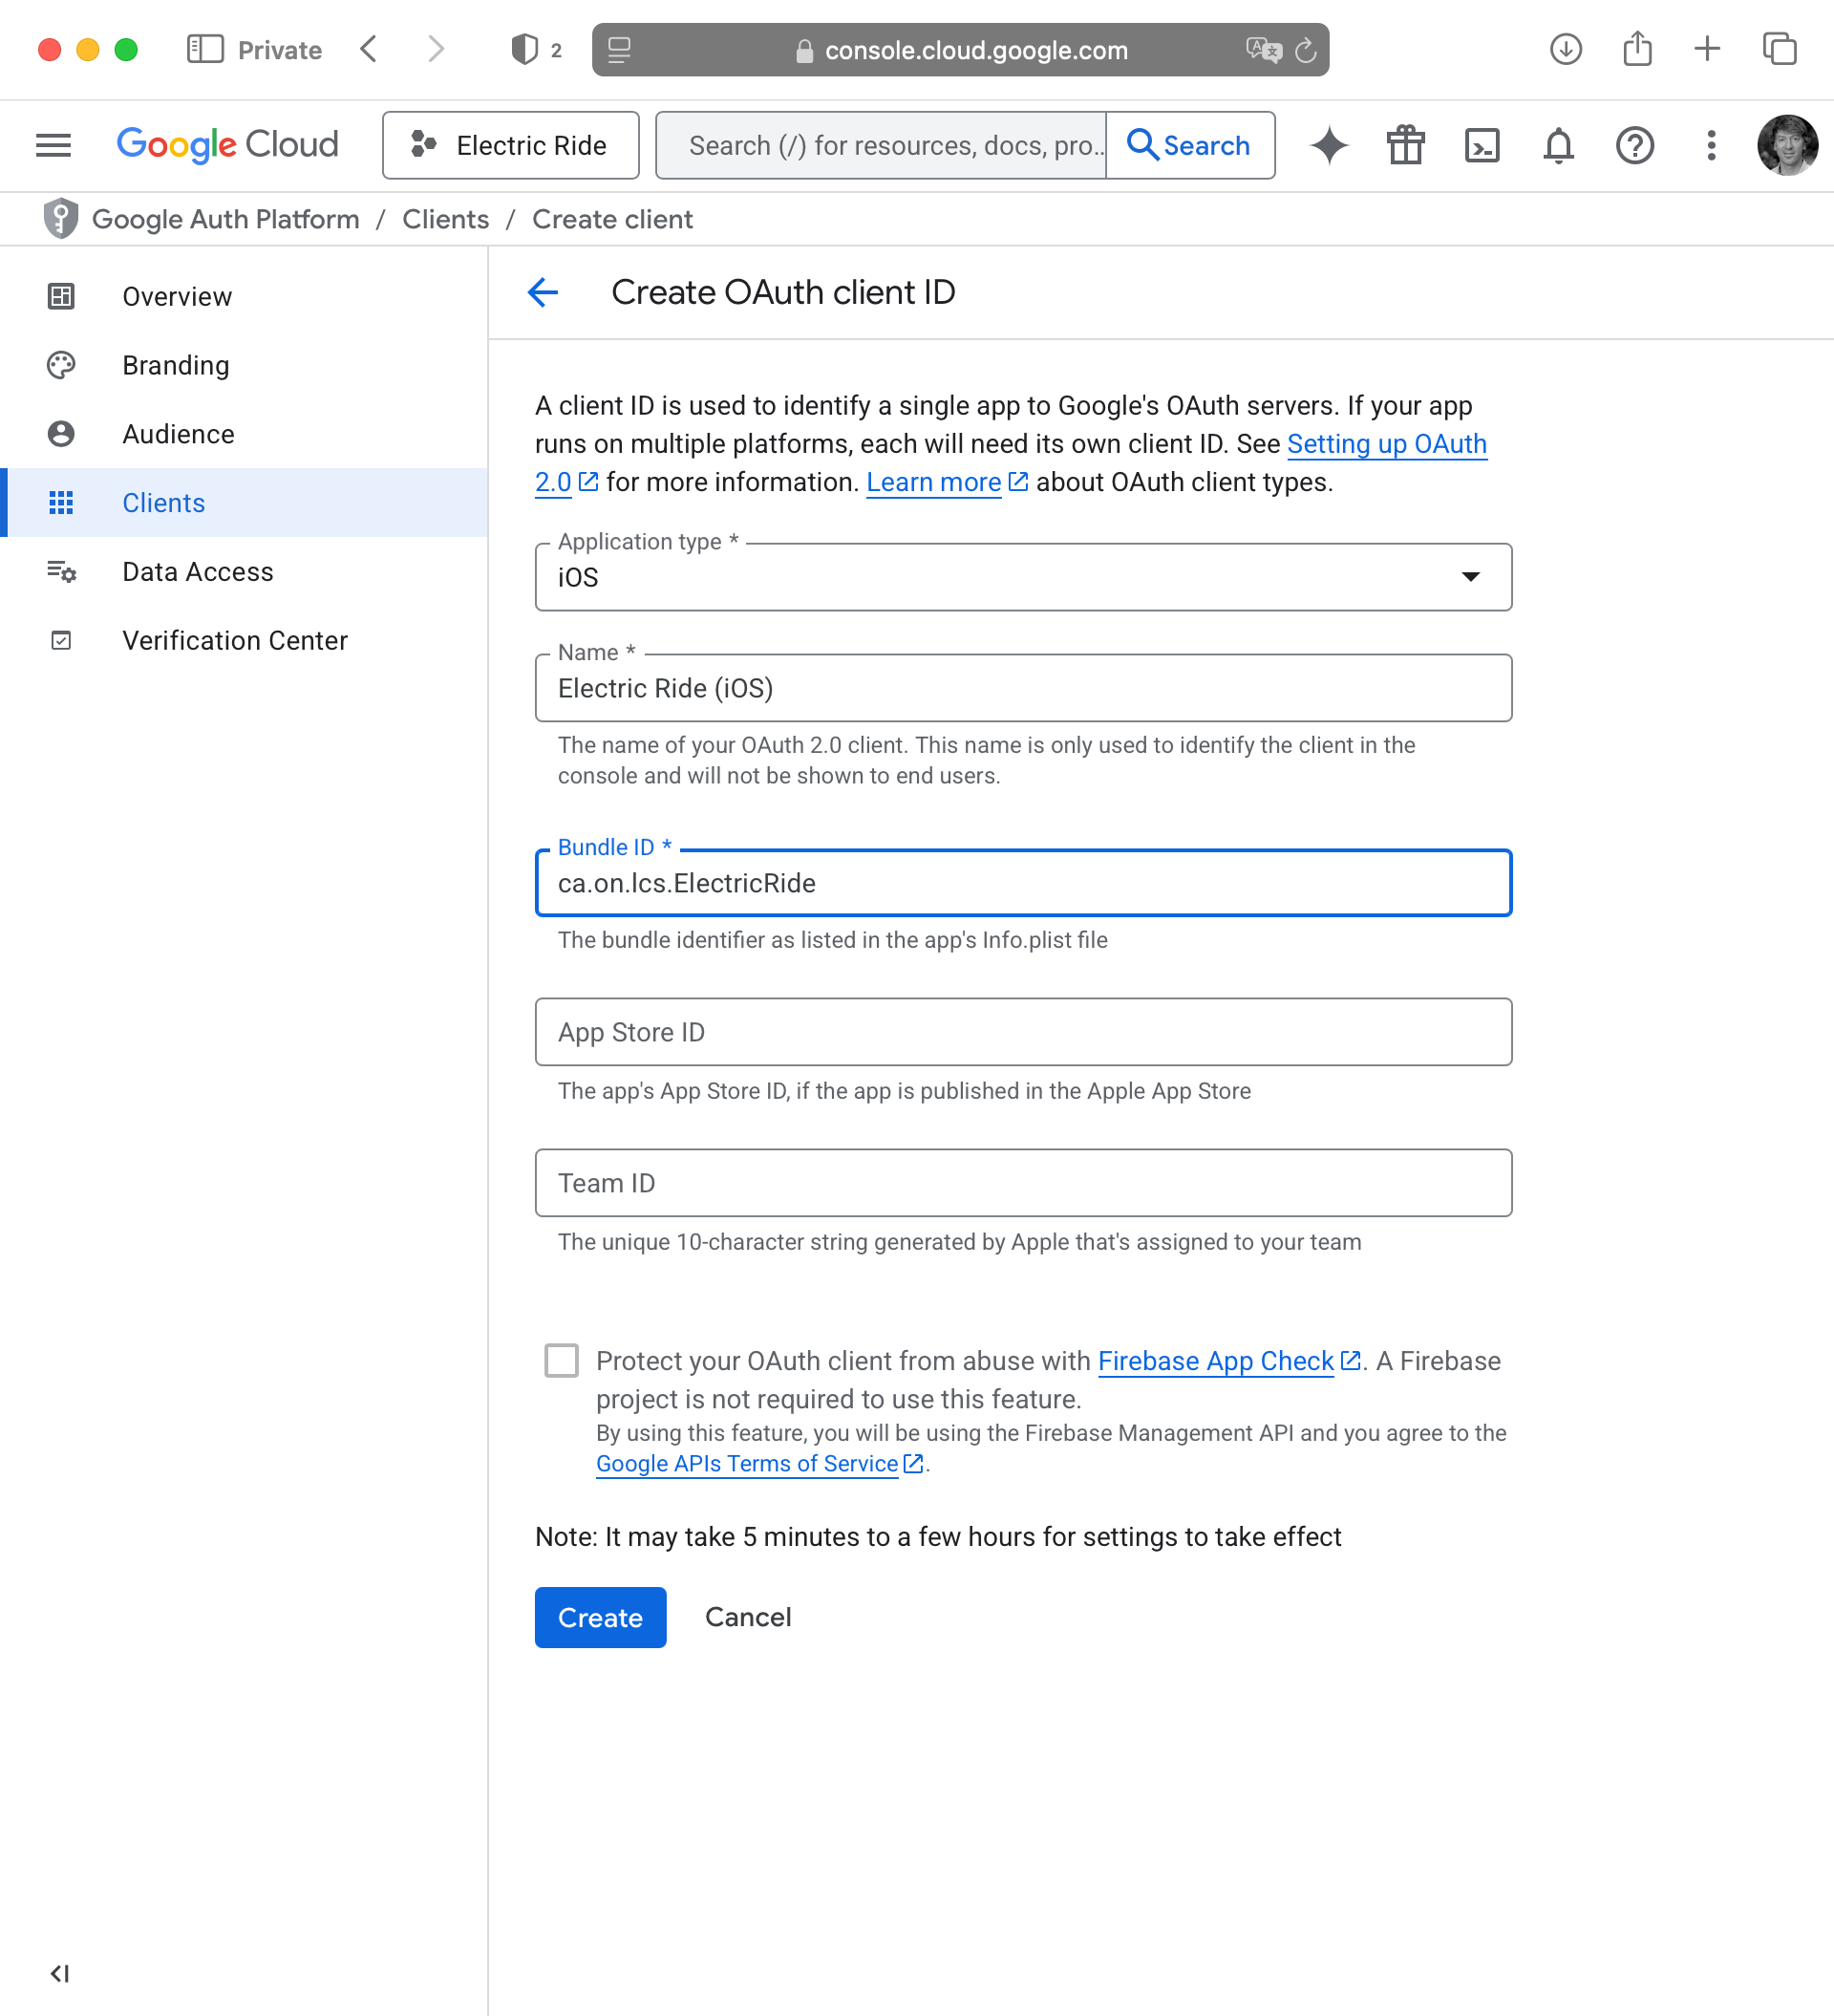
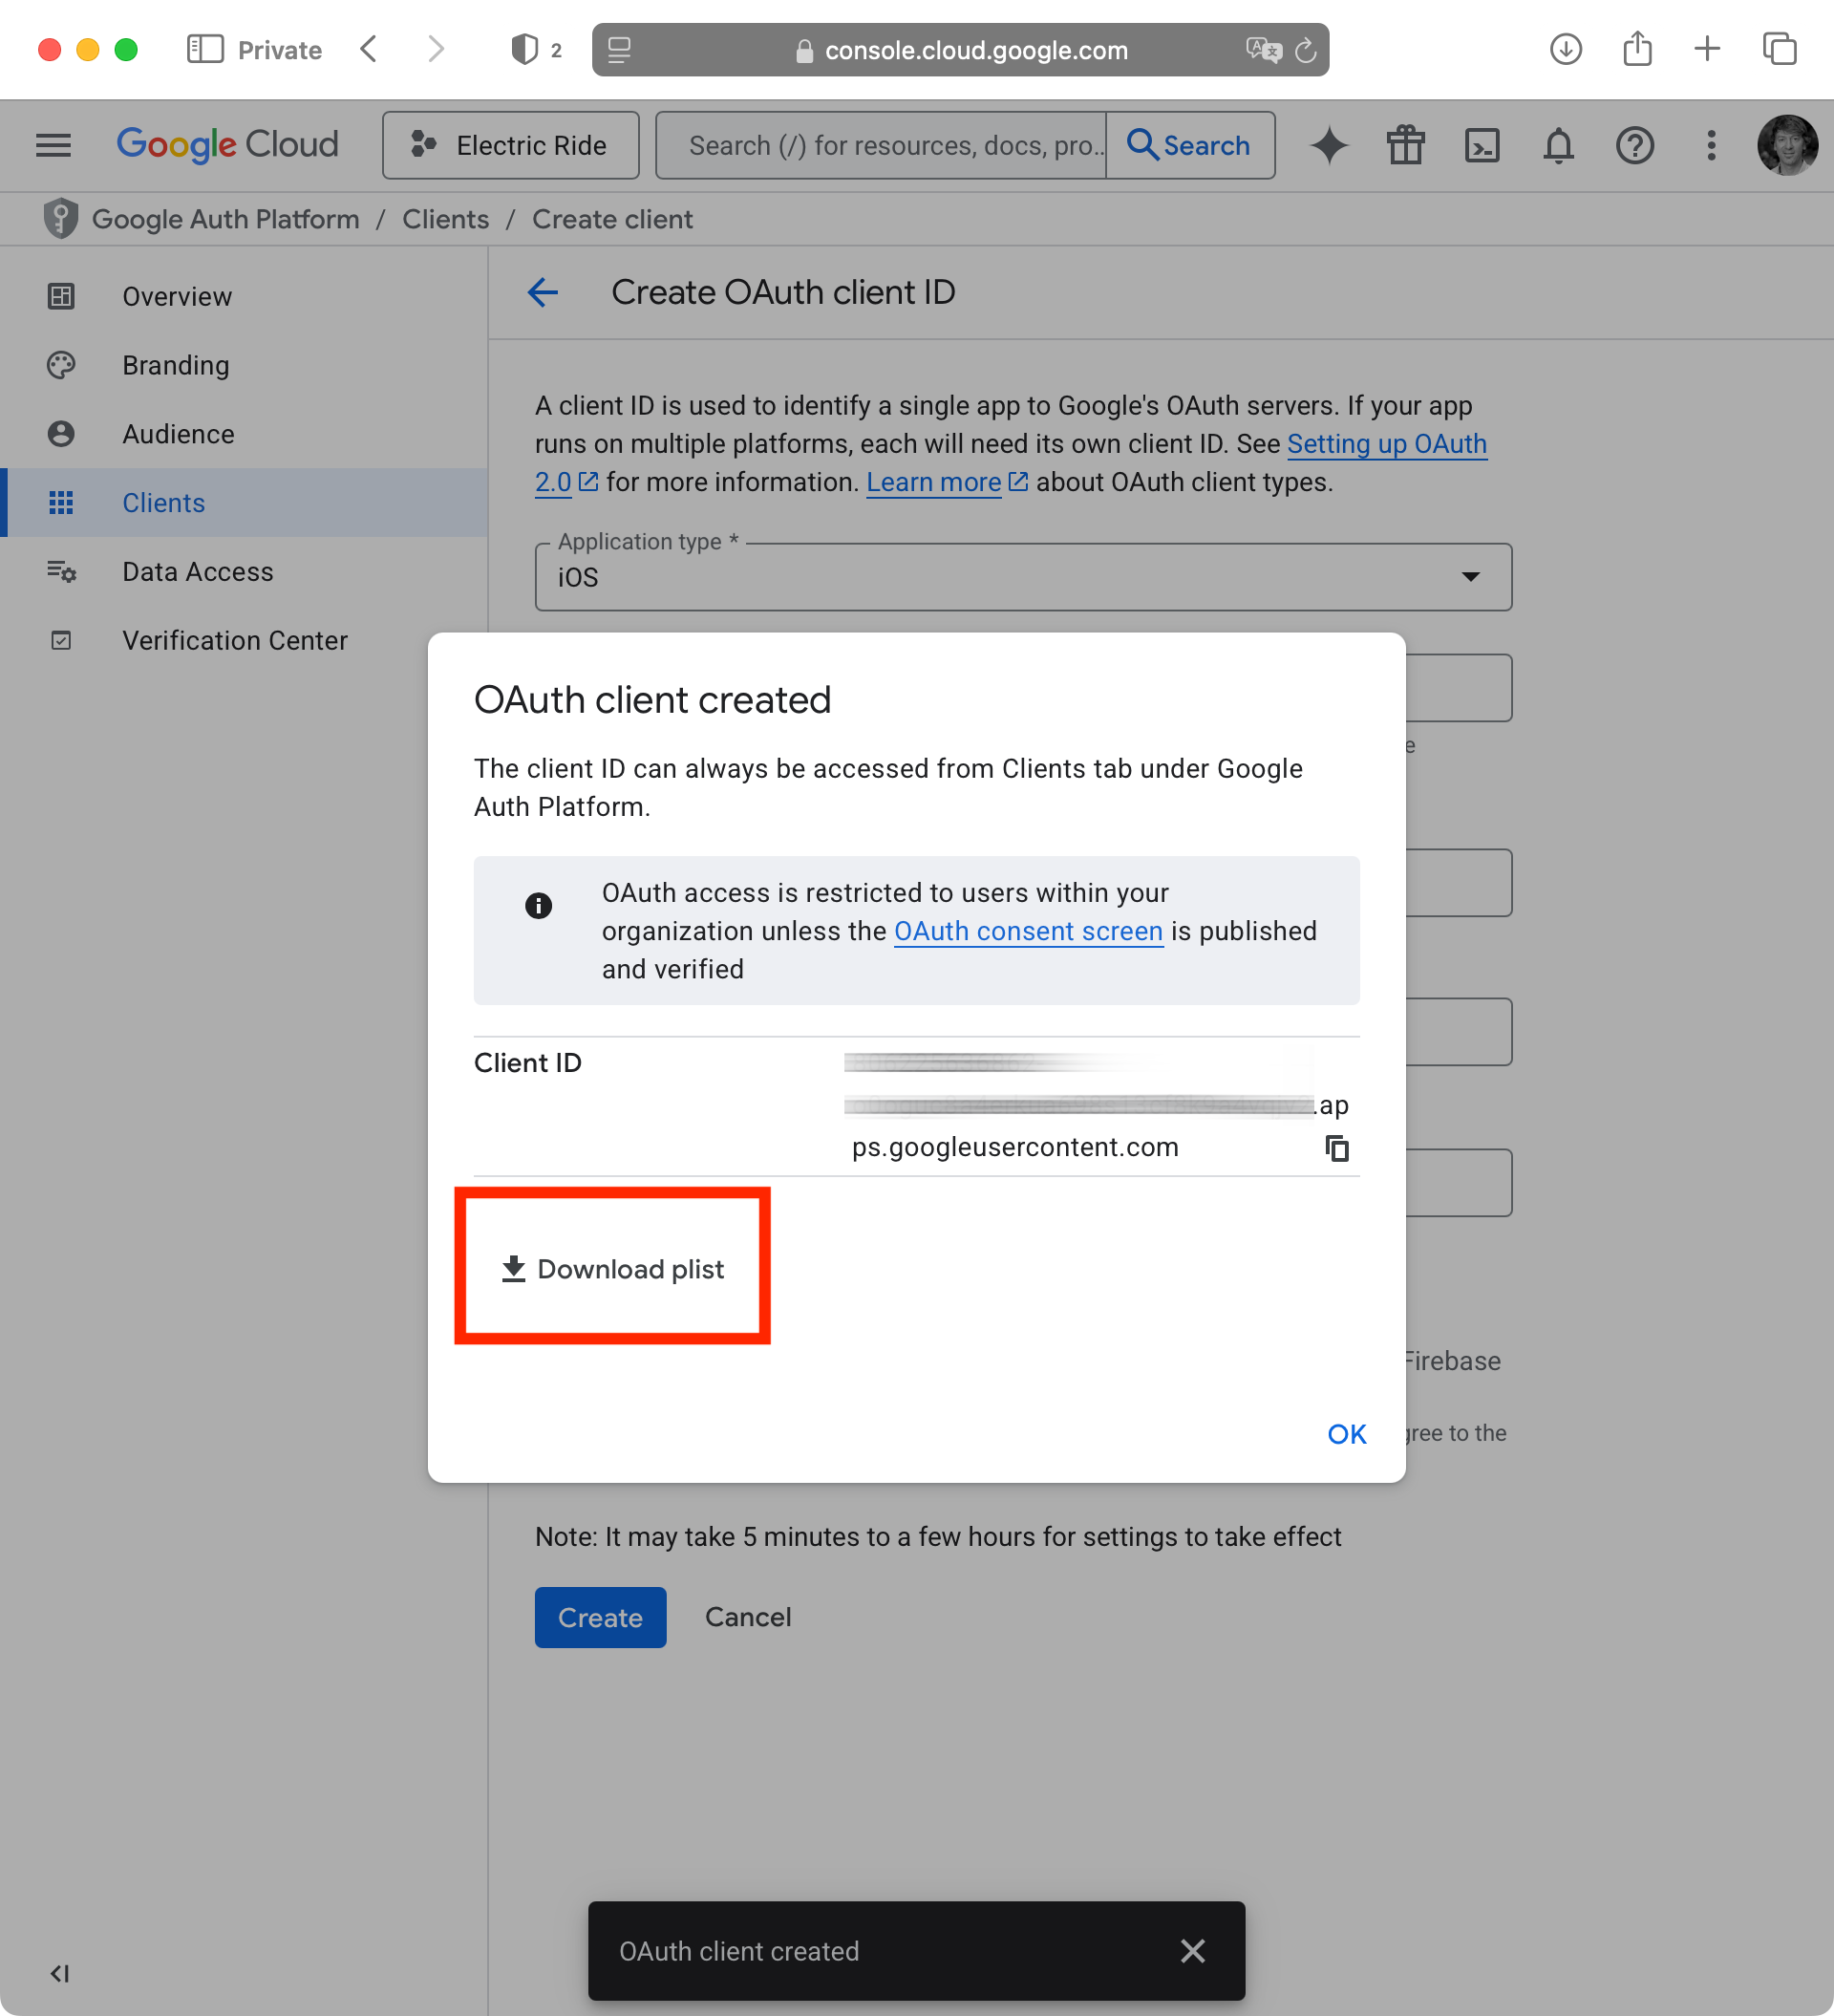
After a moment, you will see something like the following:

IMPORTANT
It’s vital that you copy the client ID to a location on your computer where you will be able to find it later on. We will need it to finish setting up social sign-in with Google.
After you have copied the client ID to a safe place on your computer for future reference, be sure to download the property list file as well – this will also be needed later on:
Add Google sign-in package
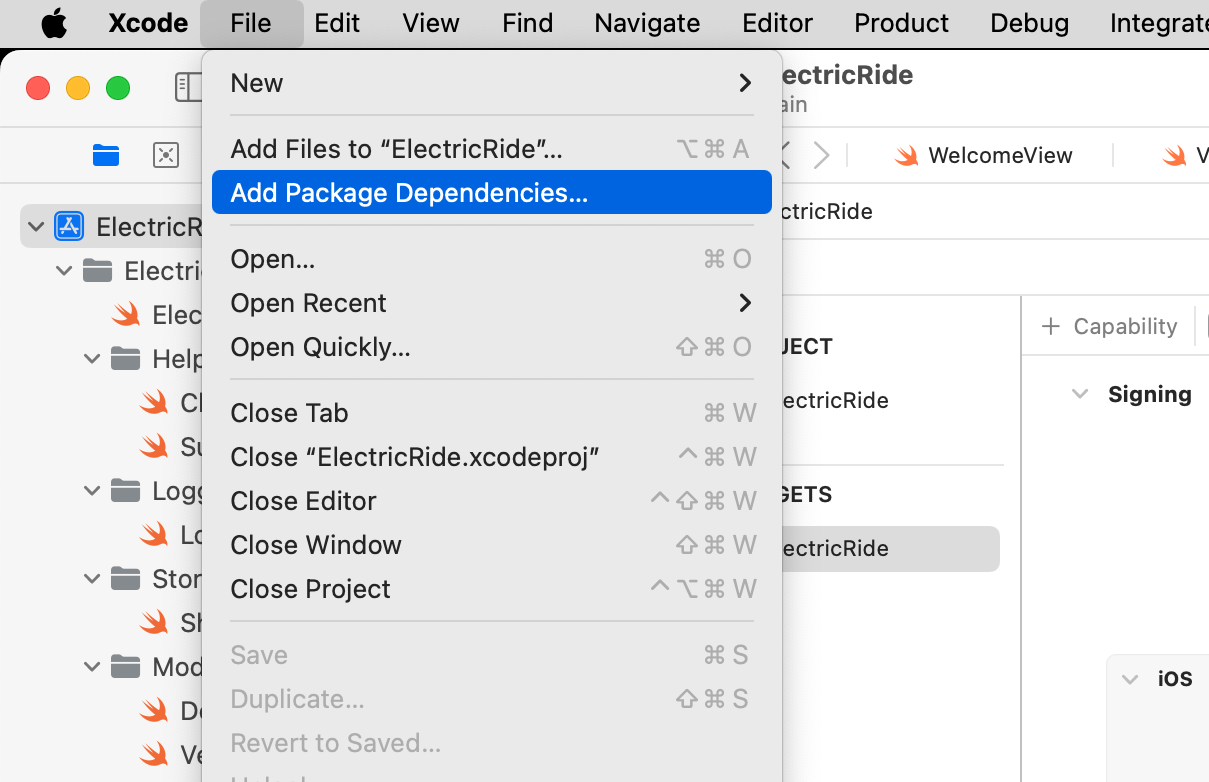
Now we need to switch back to the Xcode project for our app, and add the third-party code that Google provides to allow sign-in to occur using their service.
Begin by choosing File > Add Package Dependencies…:
Paste this address in the top-right corner of the dialog that appears:
https://github.com/google/GoogleSignIn-iOS
After a bit of time for things to load over the network, you should see the following:
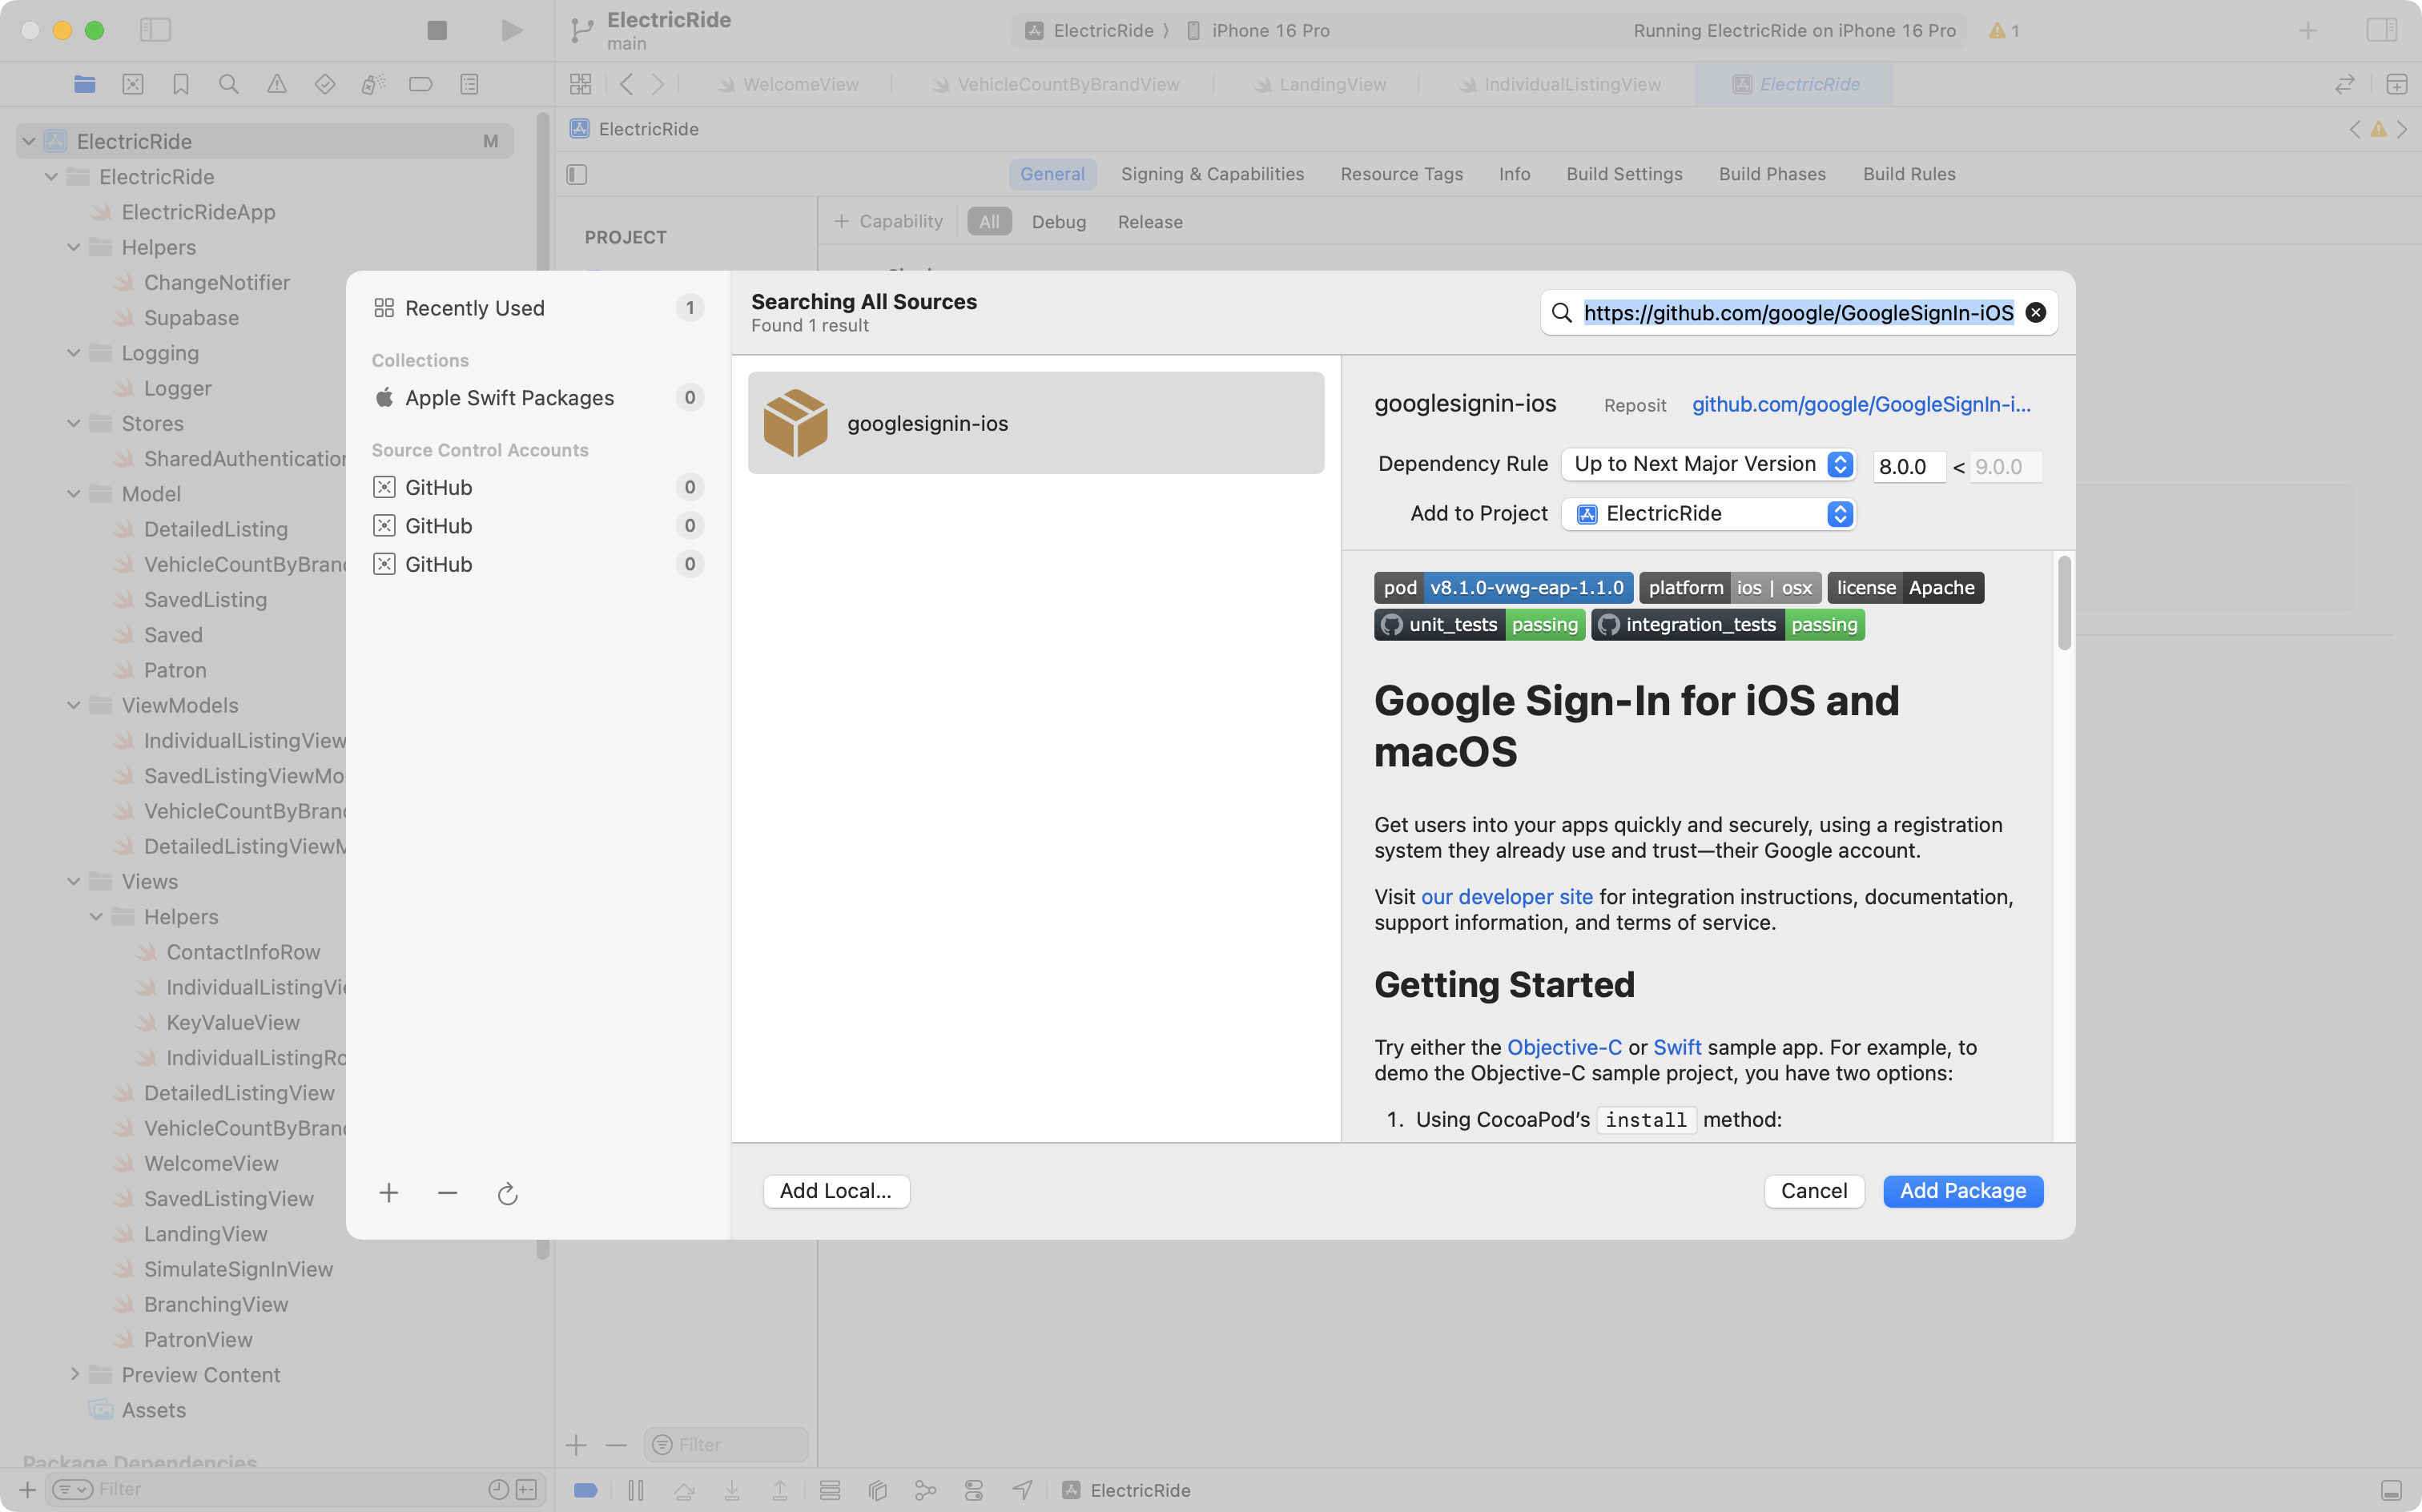
Select Add Package and then you will see this for a little while, depending on how fast your Internet connection is:
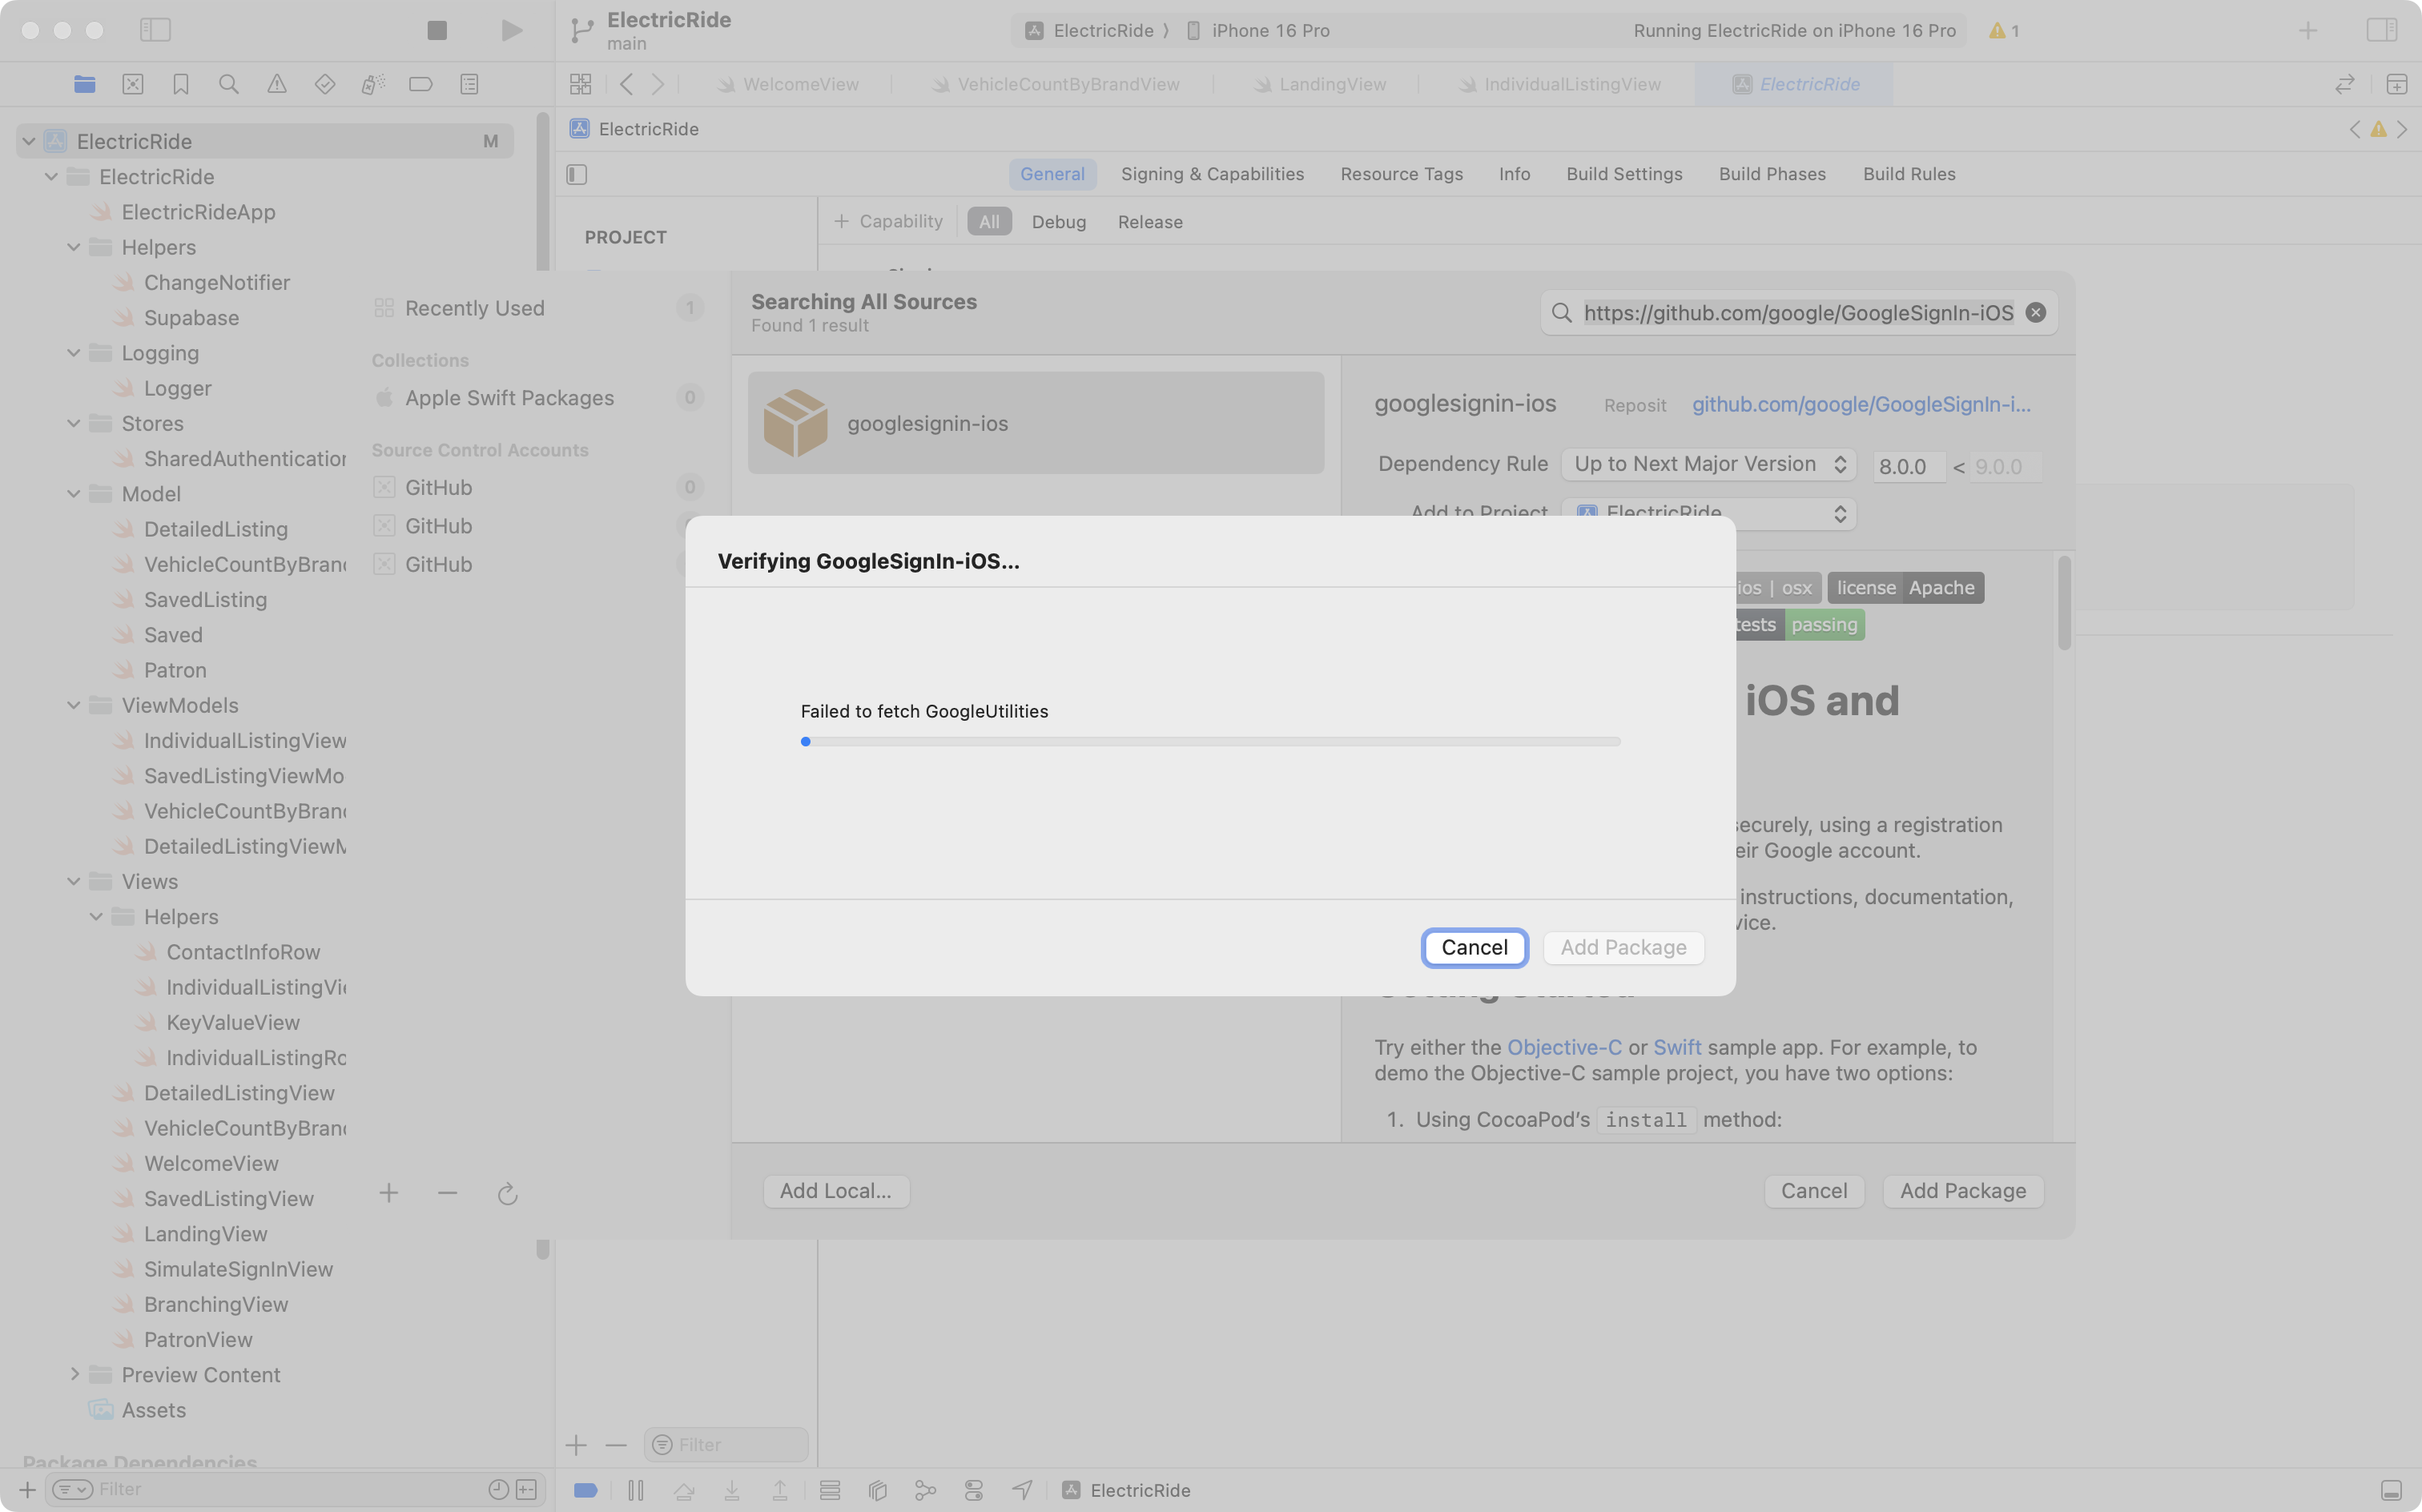
After a moment, you will see this dialog:
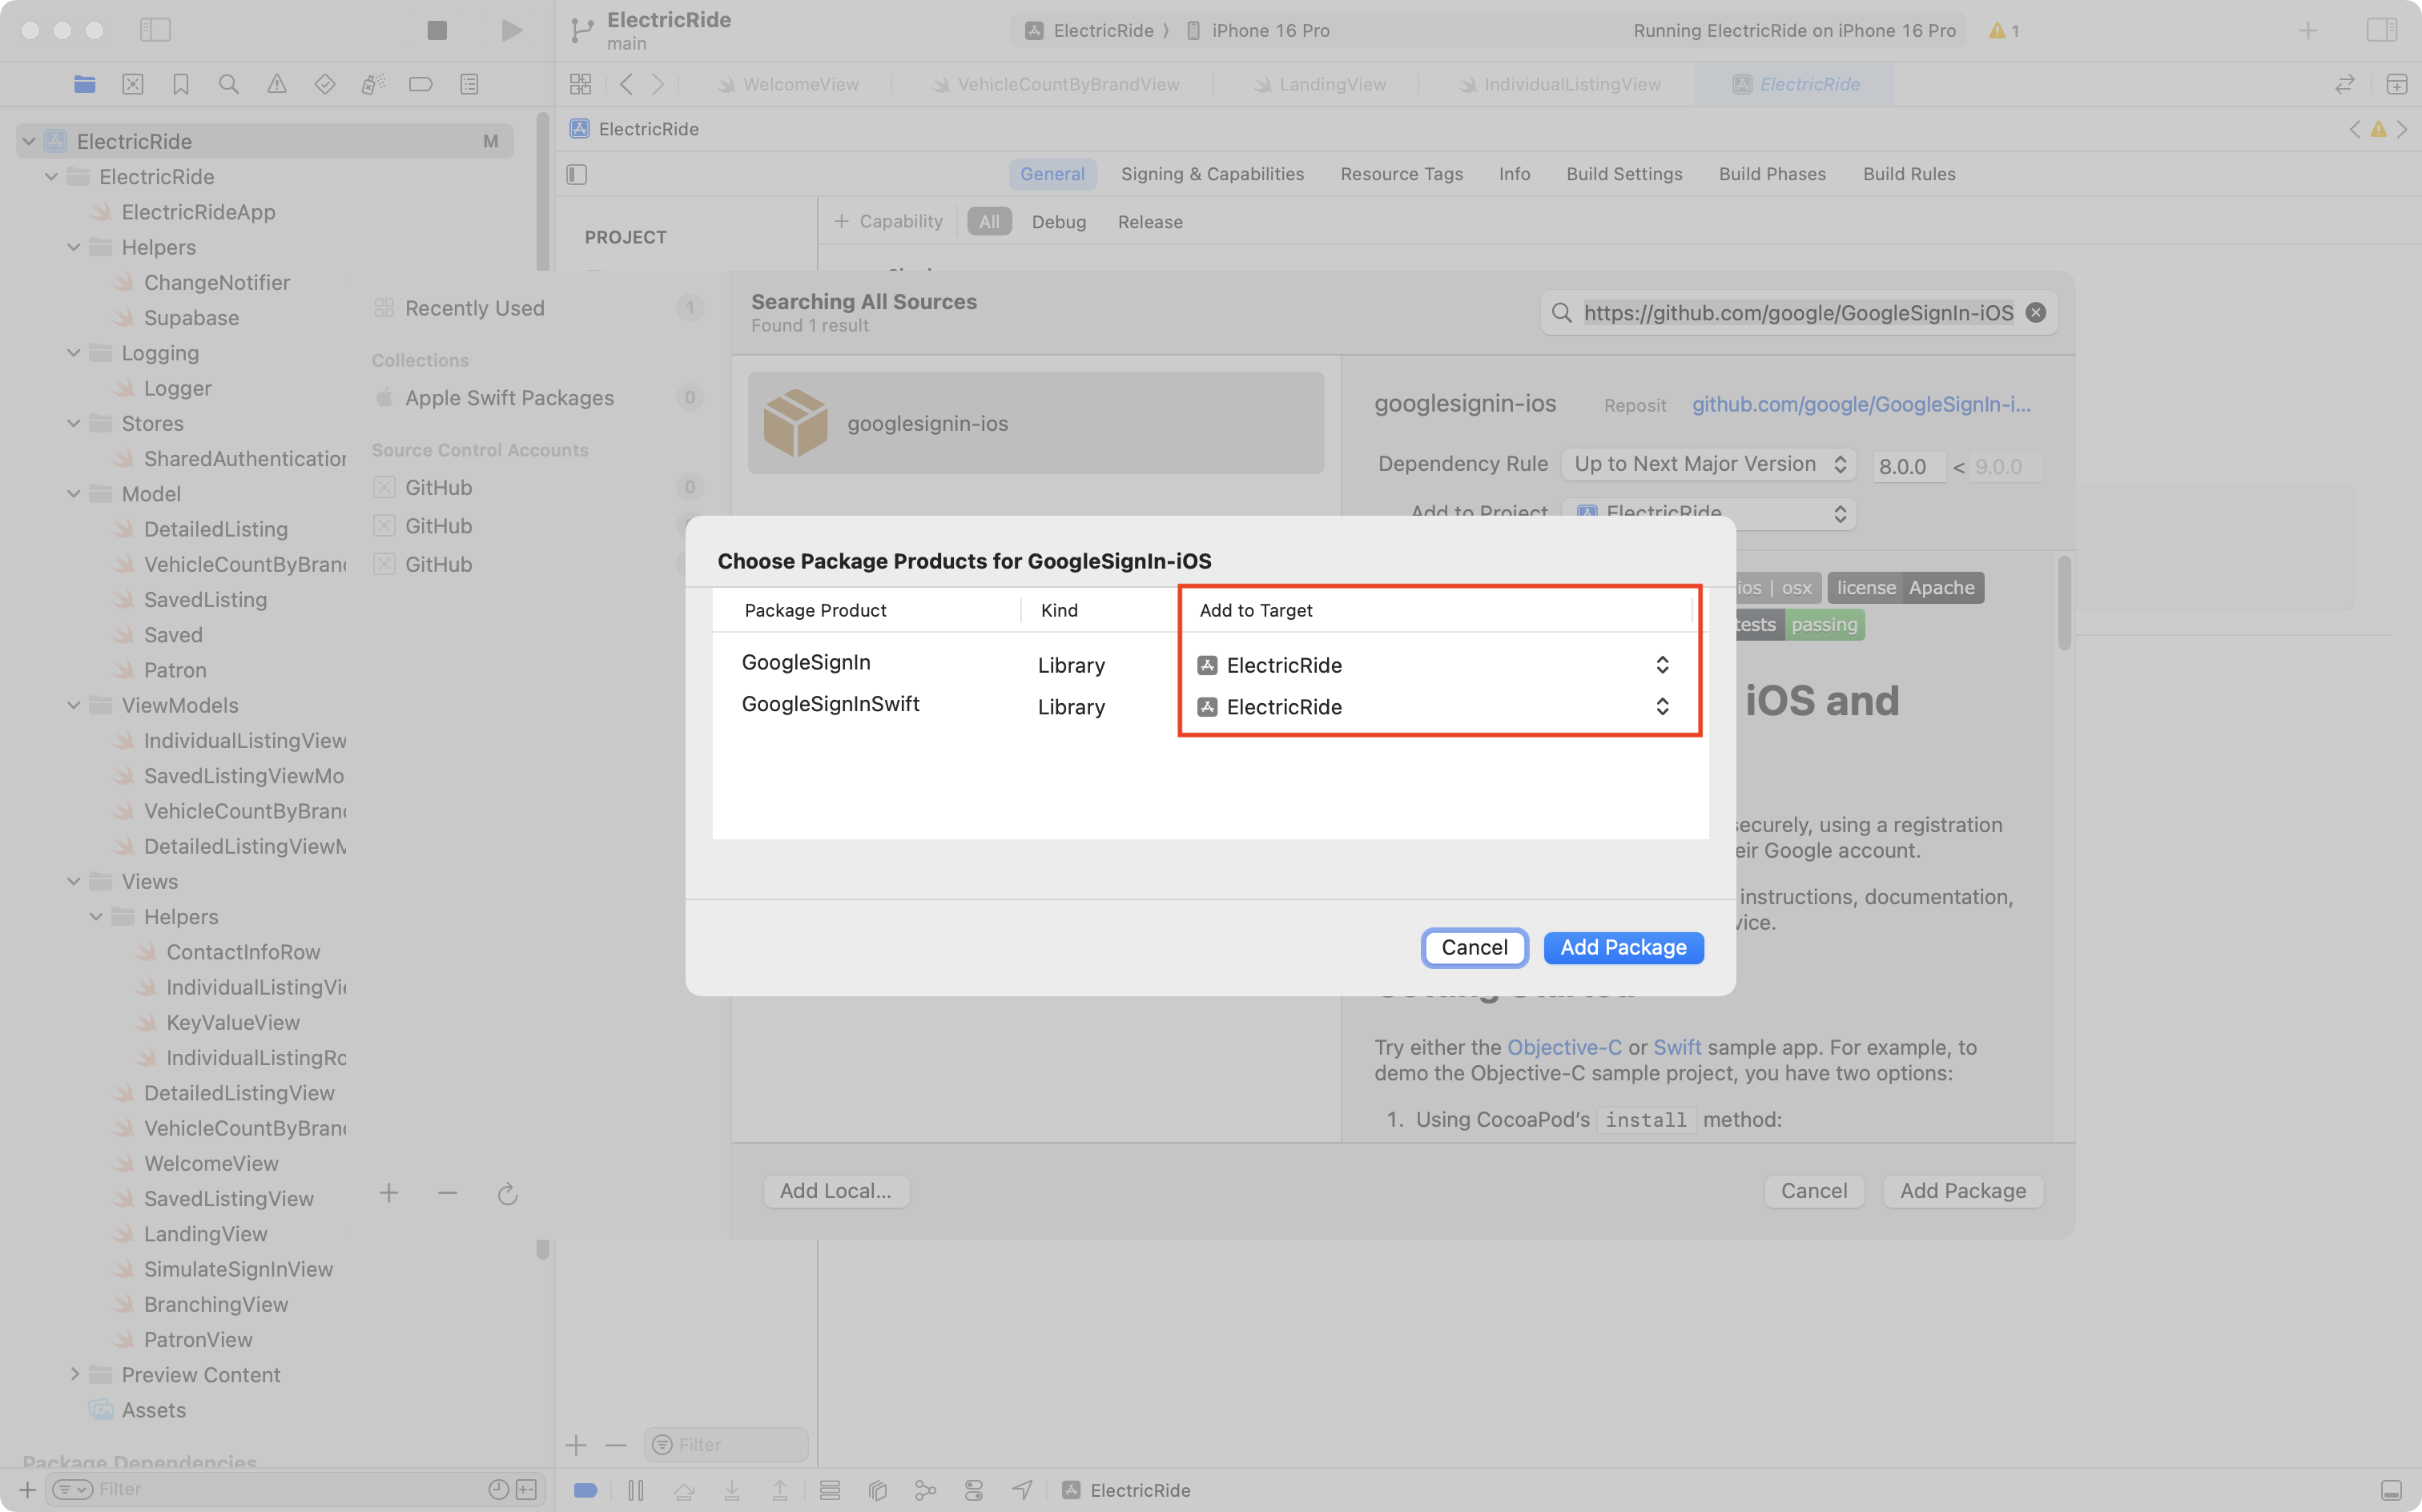
Be sure that both package products are being added to the target for your app (highlighted in red) then press Add Package again.
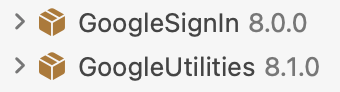
If all goes well, in the Package Dependencies section shown in the bottom left corner of the Project Navigator in Xcode, you should see these two dependencies, along with a few others:
Connect app to Google project
Now we need to take a few steps to connect our app to the Google project that we just set up.
Please watch and follow along with this short video:
Add Google sign-in to Supabase
Next we need to tell Supabase that our app will be using Google sign-in.
Please watch and follow along with this short video to do this:
Add code to use social sign-in
Finally, we need to add code to our project that uses the Google frameworks we added earlier to make a sign-in happen.
The gist of this part is:
- Remove the simulated sign-in code.
- Add the new code to facilitate using the Google frameworks for sign-in.
- After a successful sign-in with Google, link the email address provided by that process to the email address of an existing patron in the Electric Ride database.
- Based on the email address, if no patron exists in the Electric Ride database, then we have a new patron, so we need to create a new row in the
patrontable in the database.
- Based on the email address, if no patron exists in the Electric Ride database, then we have a new patron, so we need to create a new row in the
- Adjust the view that decides whether to show the
WelcomeView(for signed out users) orLandingView(for signed in users) to watch for changes in authentication status.
Remove simulated sign-in
In SharedAuthenticationStore there is no longer any need to store a list of patrons, since we are not selecting a patron to simulate a sign-in for.
Mr. Gordon removed this section of code (the part in grey):
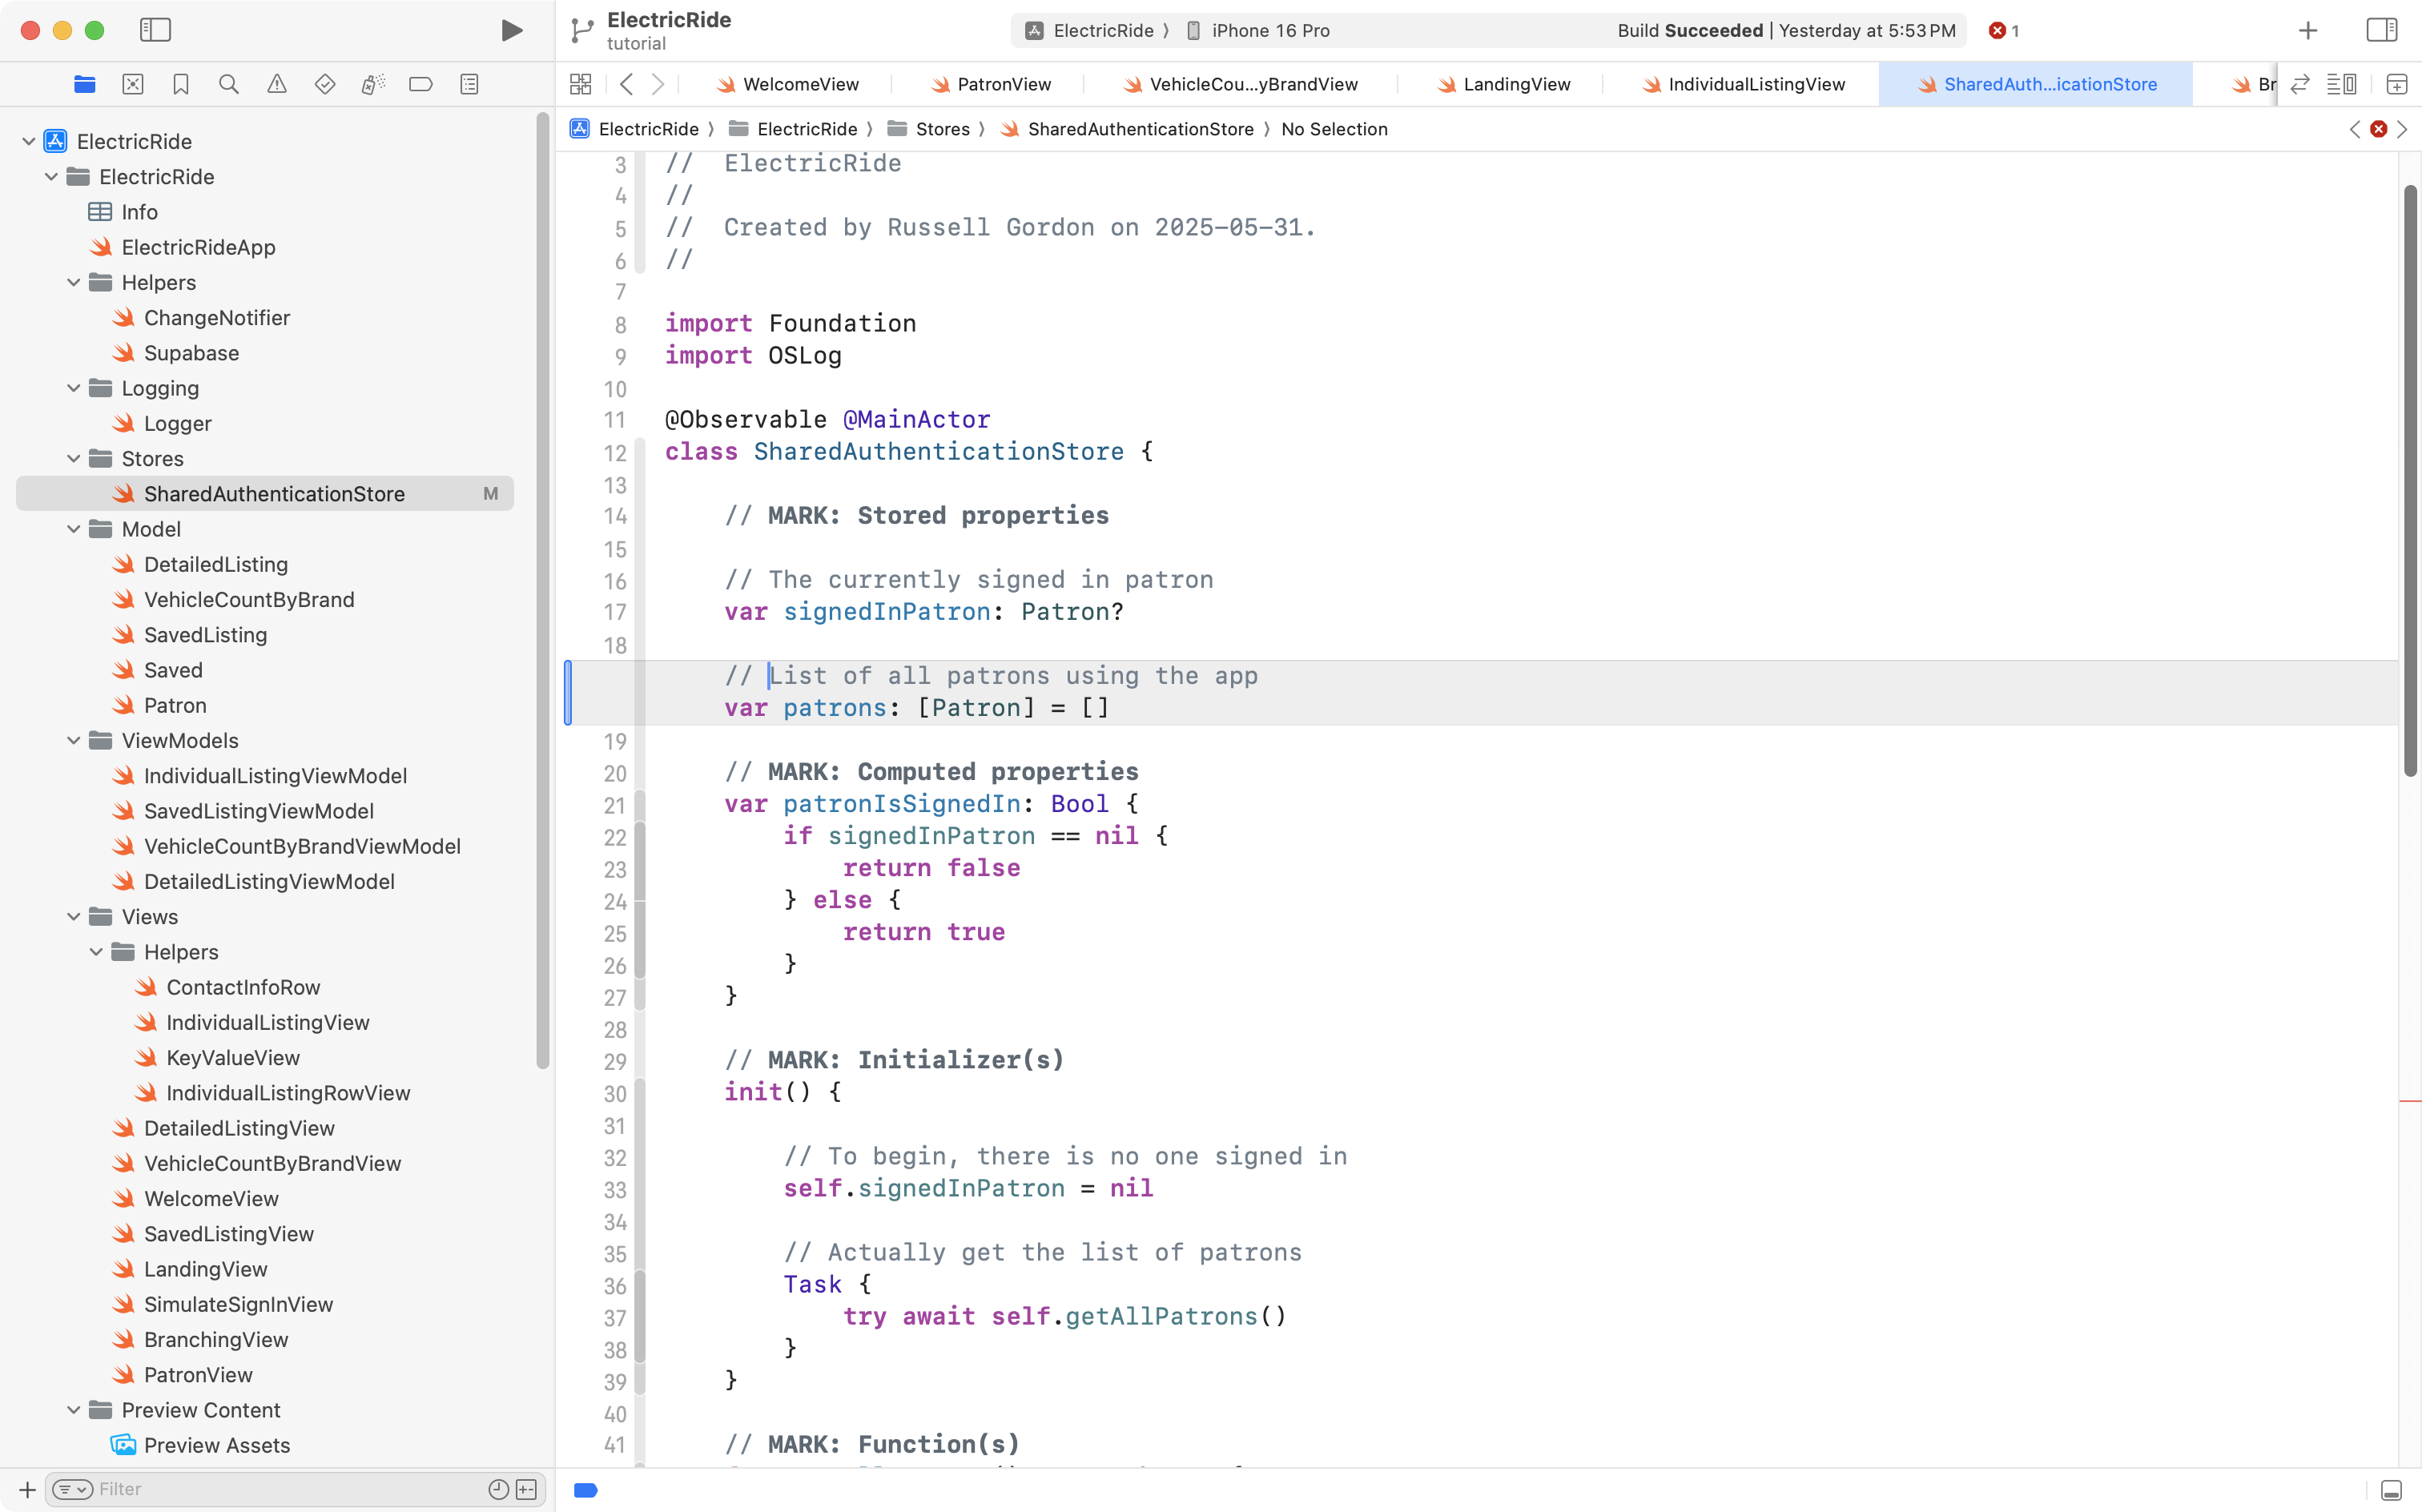
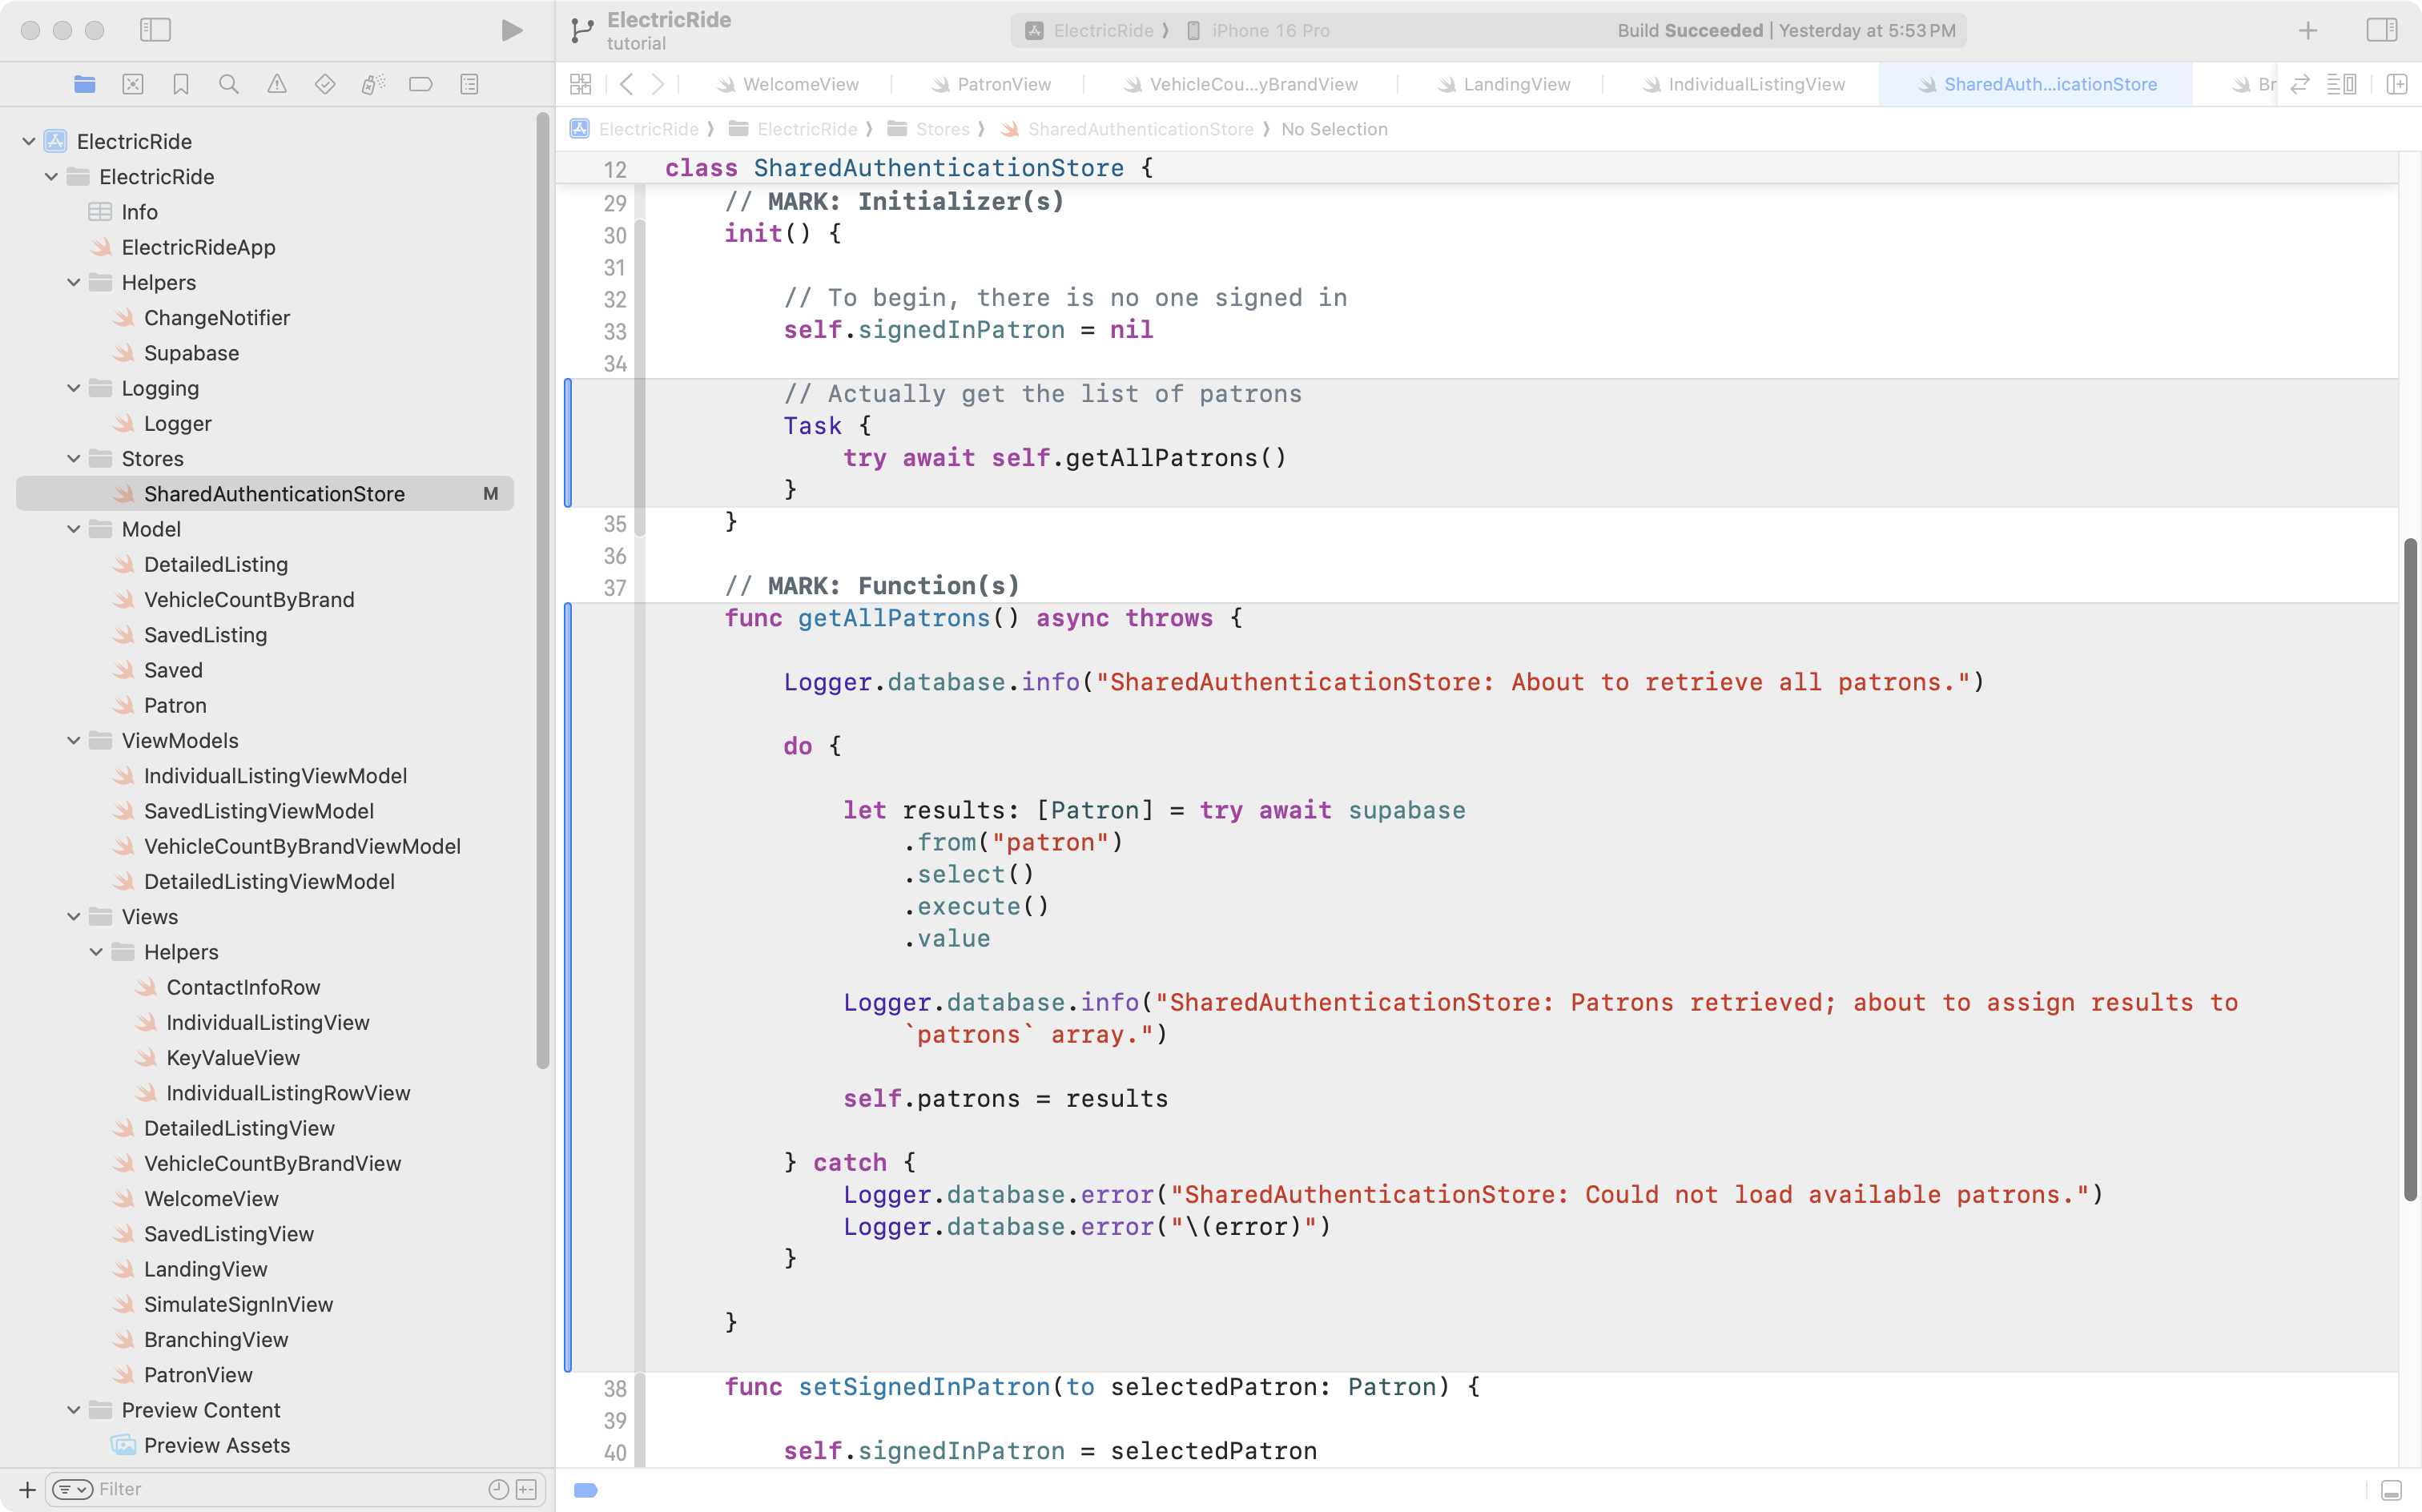
This also means the getAllPatrons function and the block of code in the initializer that invoked the function can be removed (removed code is in grey):
The SimulateSignInView file was deleted entirely:

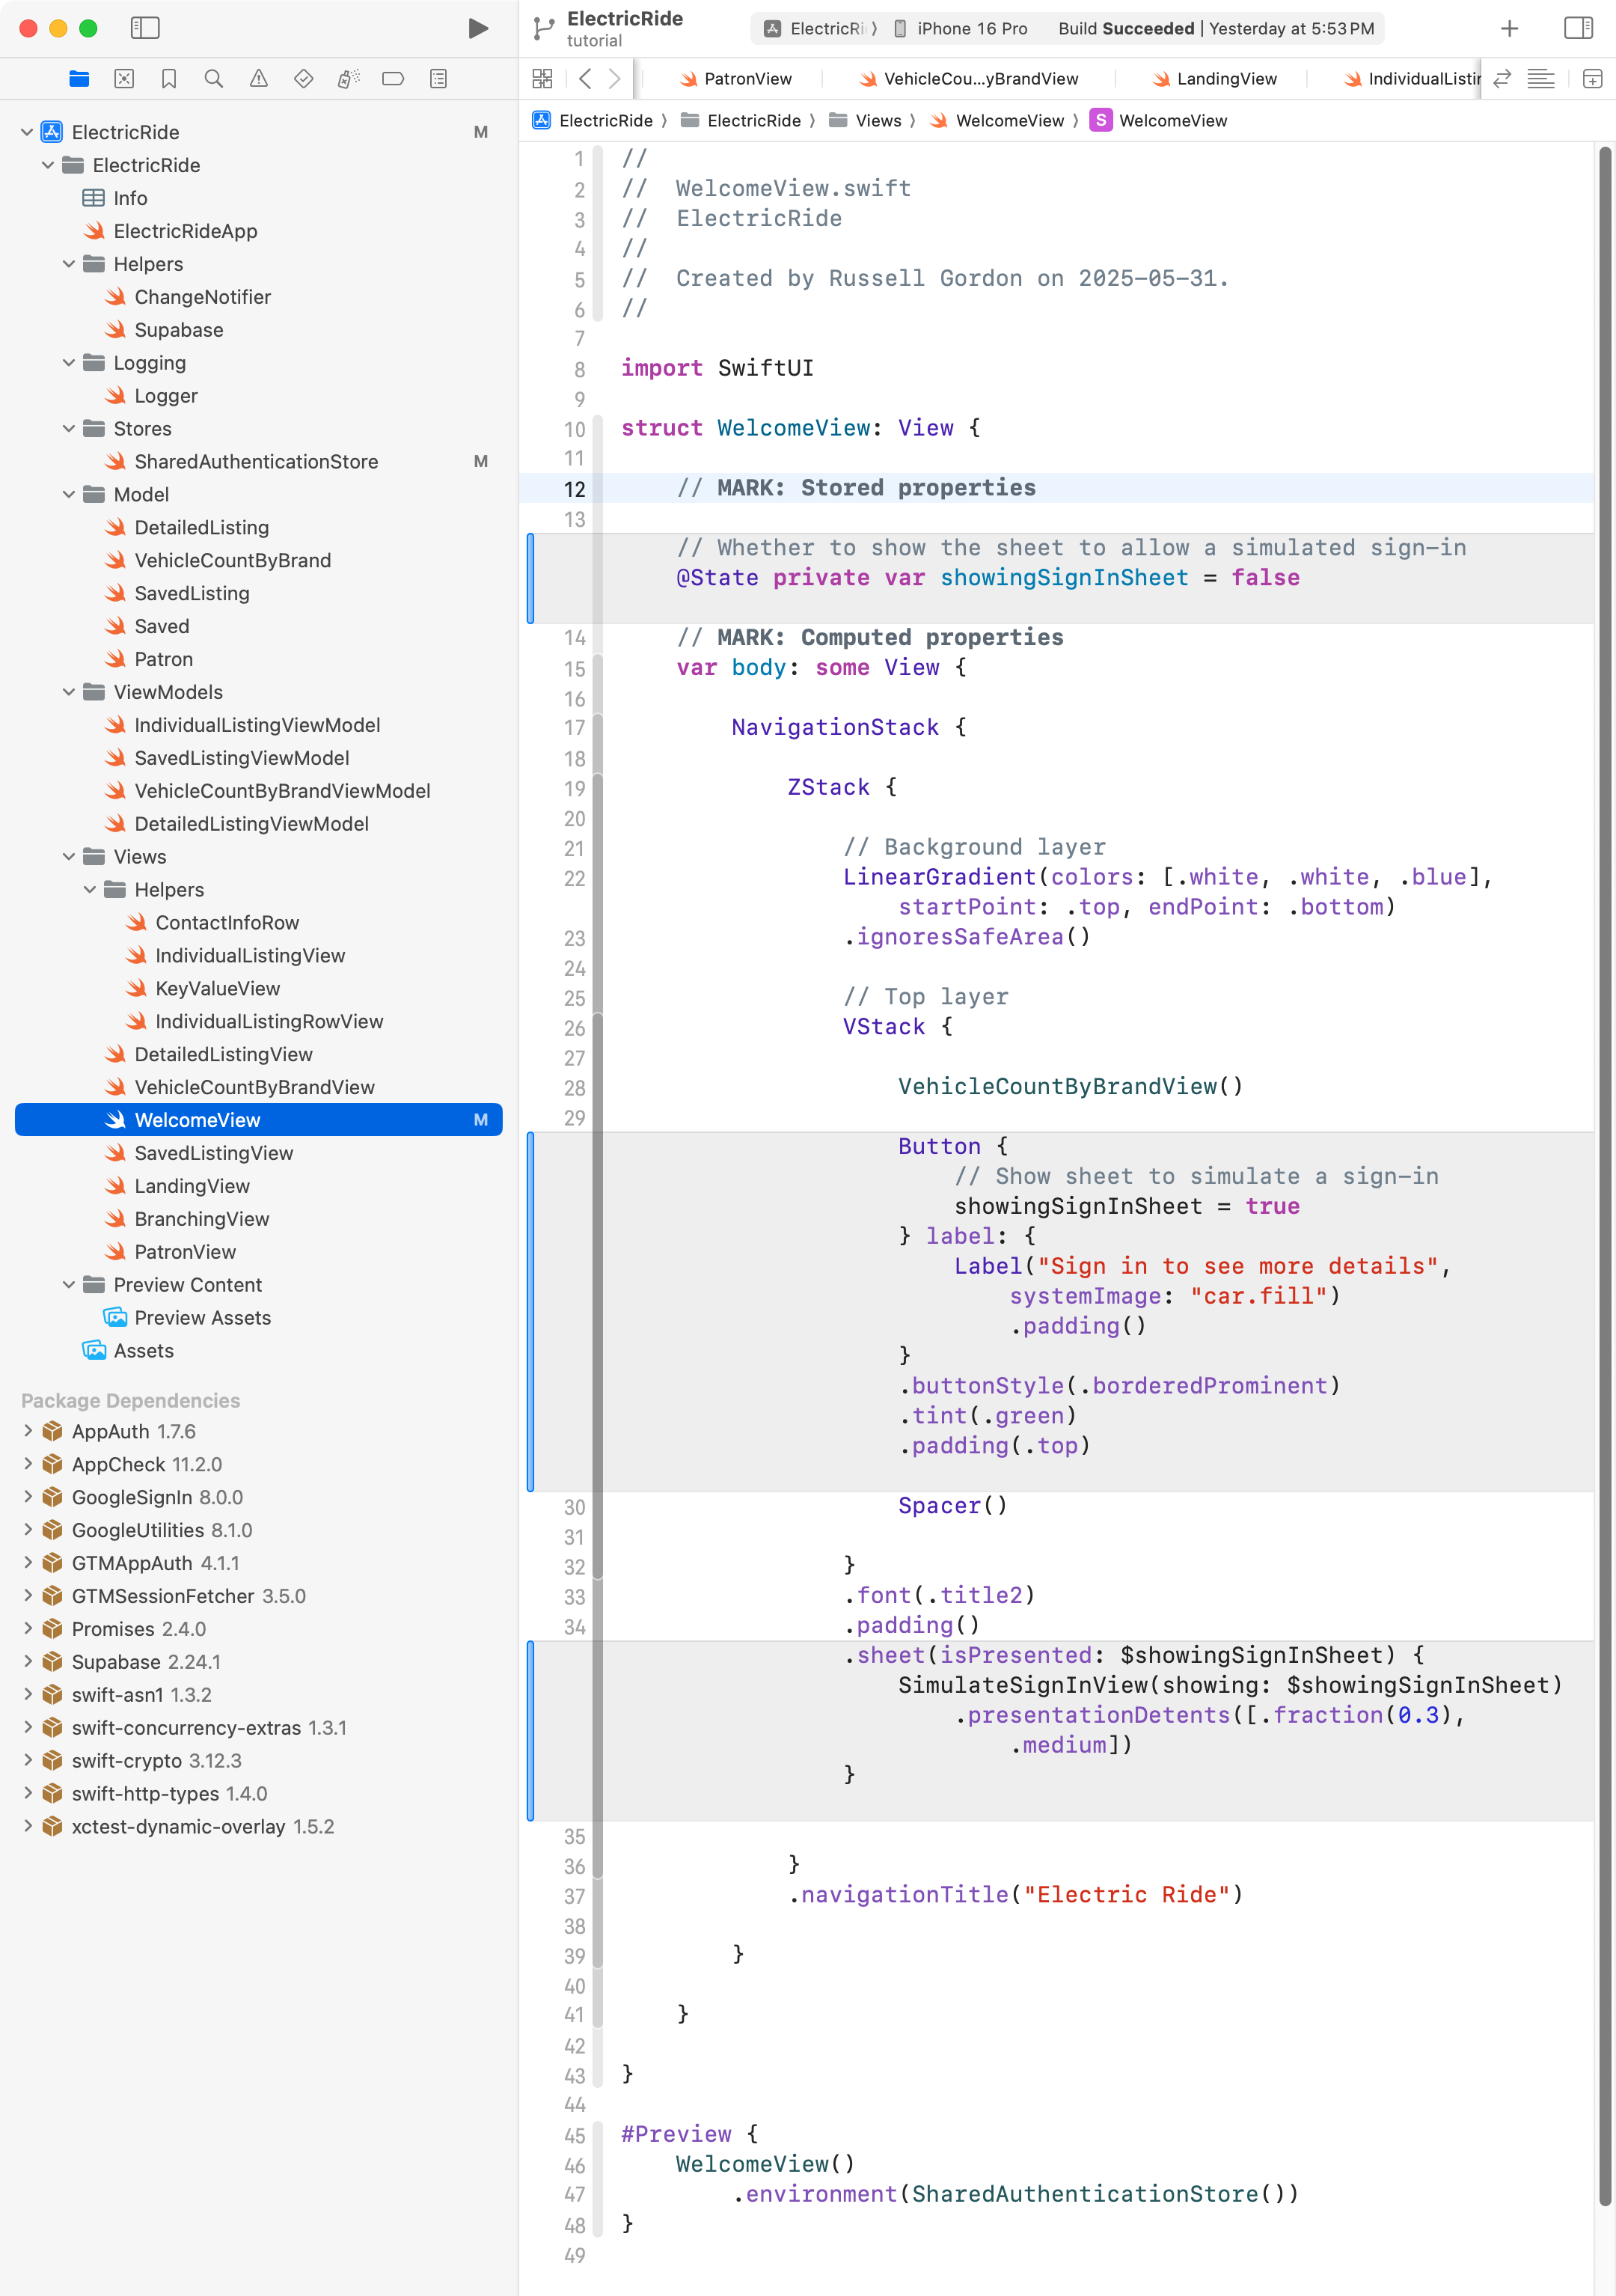
Then, on WelcomeView, Mr. Gordon removed the code that was used to show SimulateSignInView within a sheet (removed code shown in grey):
Running the app at this point works, but as expected, there is no way to sign in – simulated, or real:
Add social sign-in
Since a few new files related to signing-in users would be needed, Mr. Gordon created an Authentication group and moved the Stores group that holds SharedAuthenticationStore into it:

Next, there are three files that provide enumerations that let us keep track of what’s happening when someone signs in.
Remember, an enumeration is like a Bool – there are a set number of possible values – but we can define those possible values within the enumeration.
If you are following along here to add social sign-in to your own app, you can copy and paste these three blocks of code into your own project.
First, AuthenticationError:
import Foundation

enum AuthenticationError: Error {
    case nameMissing
    case emailMissing
    case authenticationObjectMissing
    case emailMatchesMultiplePatronRecords
}
… like this:
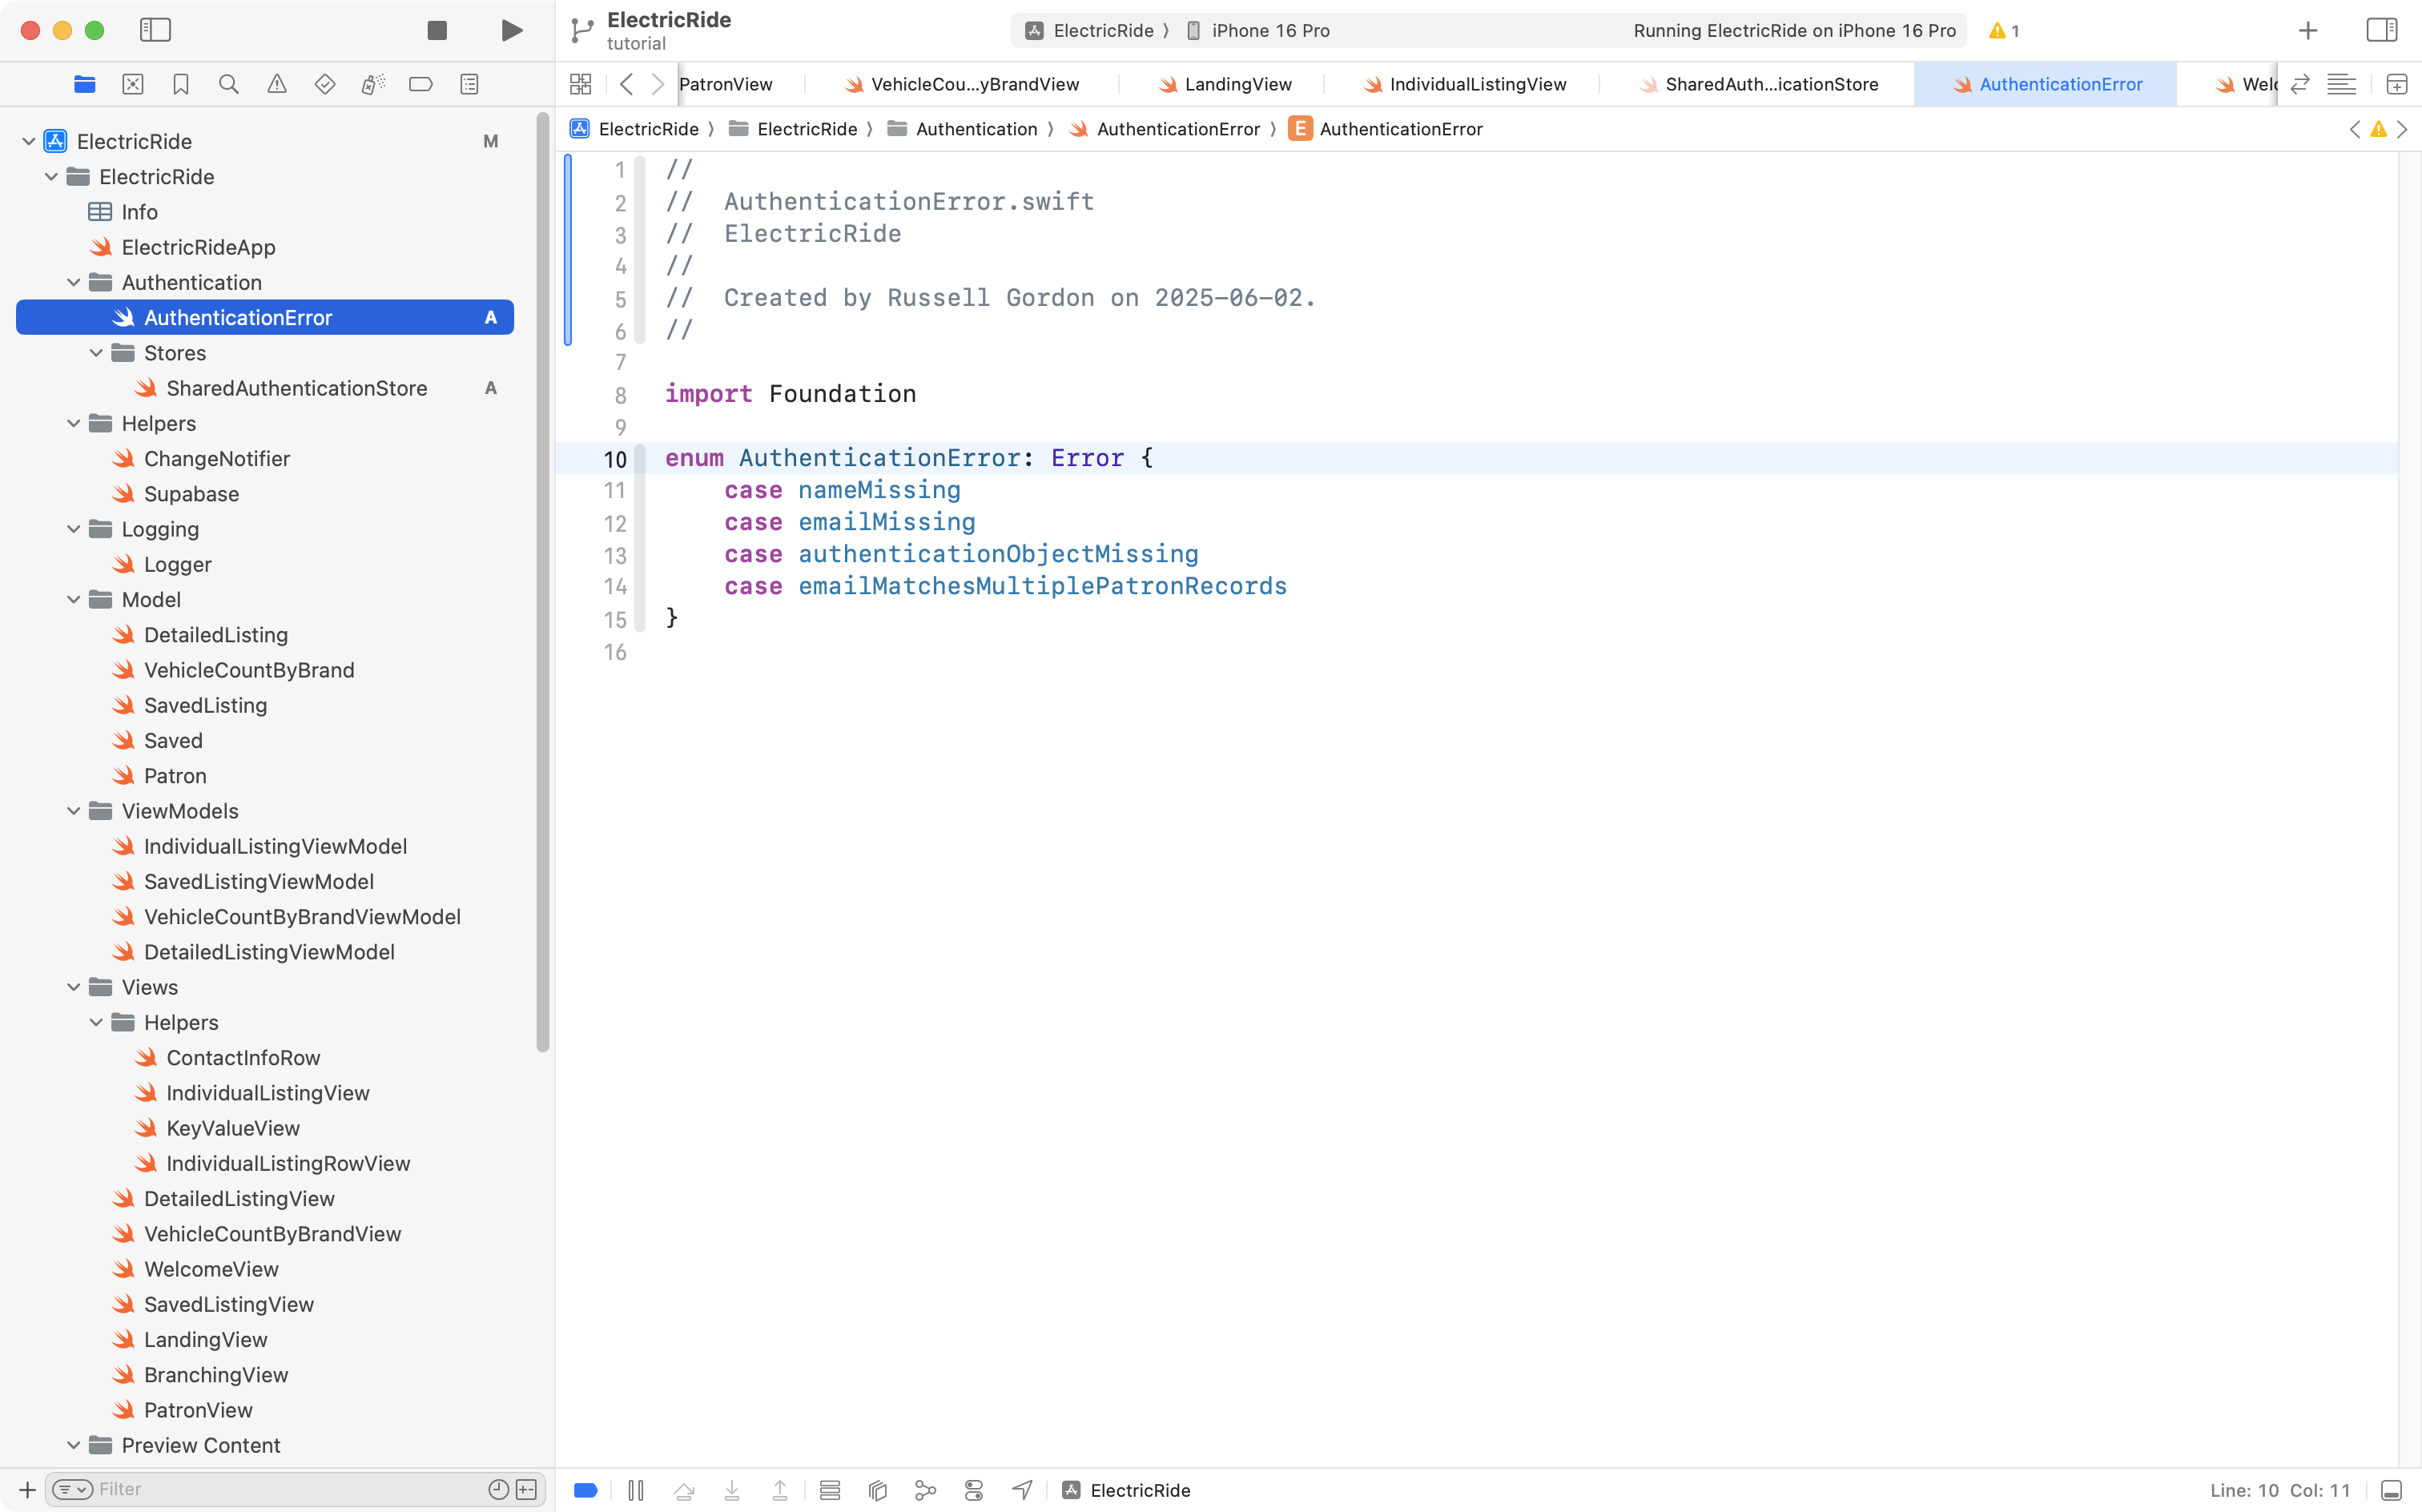
That enumeration lets us keep track of possible error states during sign-in.
Next, AuthenticationService:
import Foundation

enum AuthenticationService: String {
    case apple = "Apple"
    case google = "Google"
    case undetermined = "Undetermined"
}
… like this:
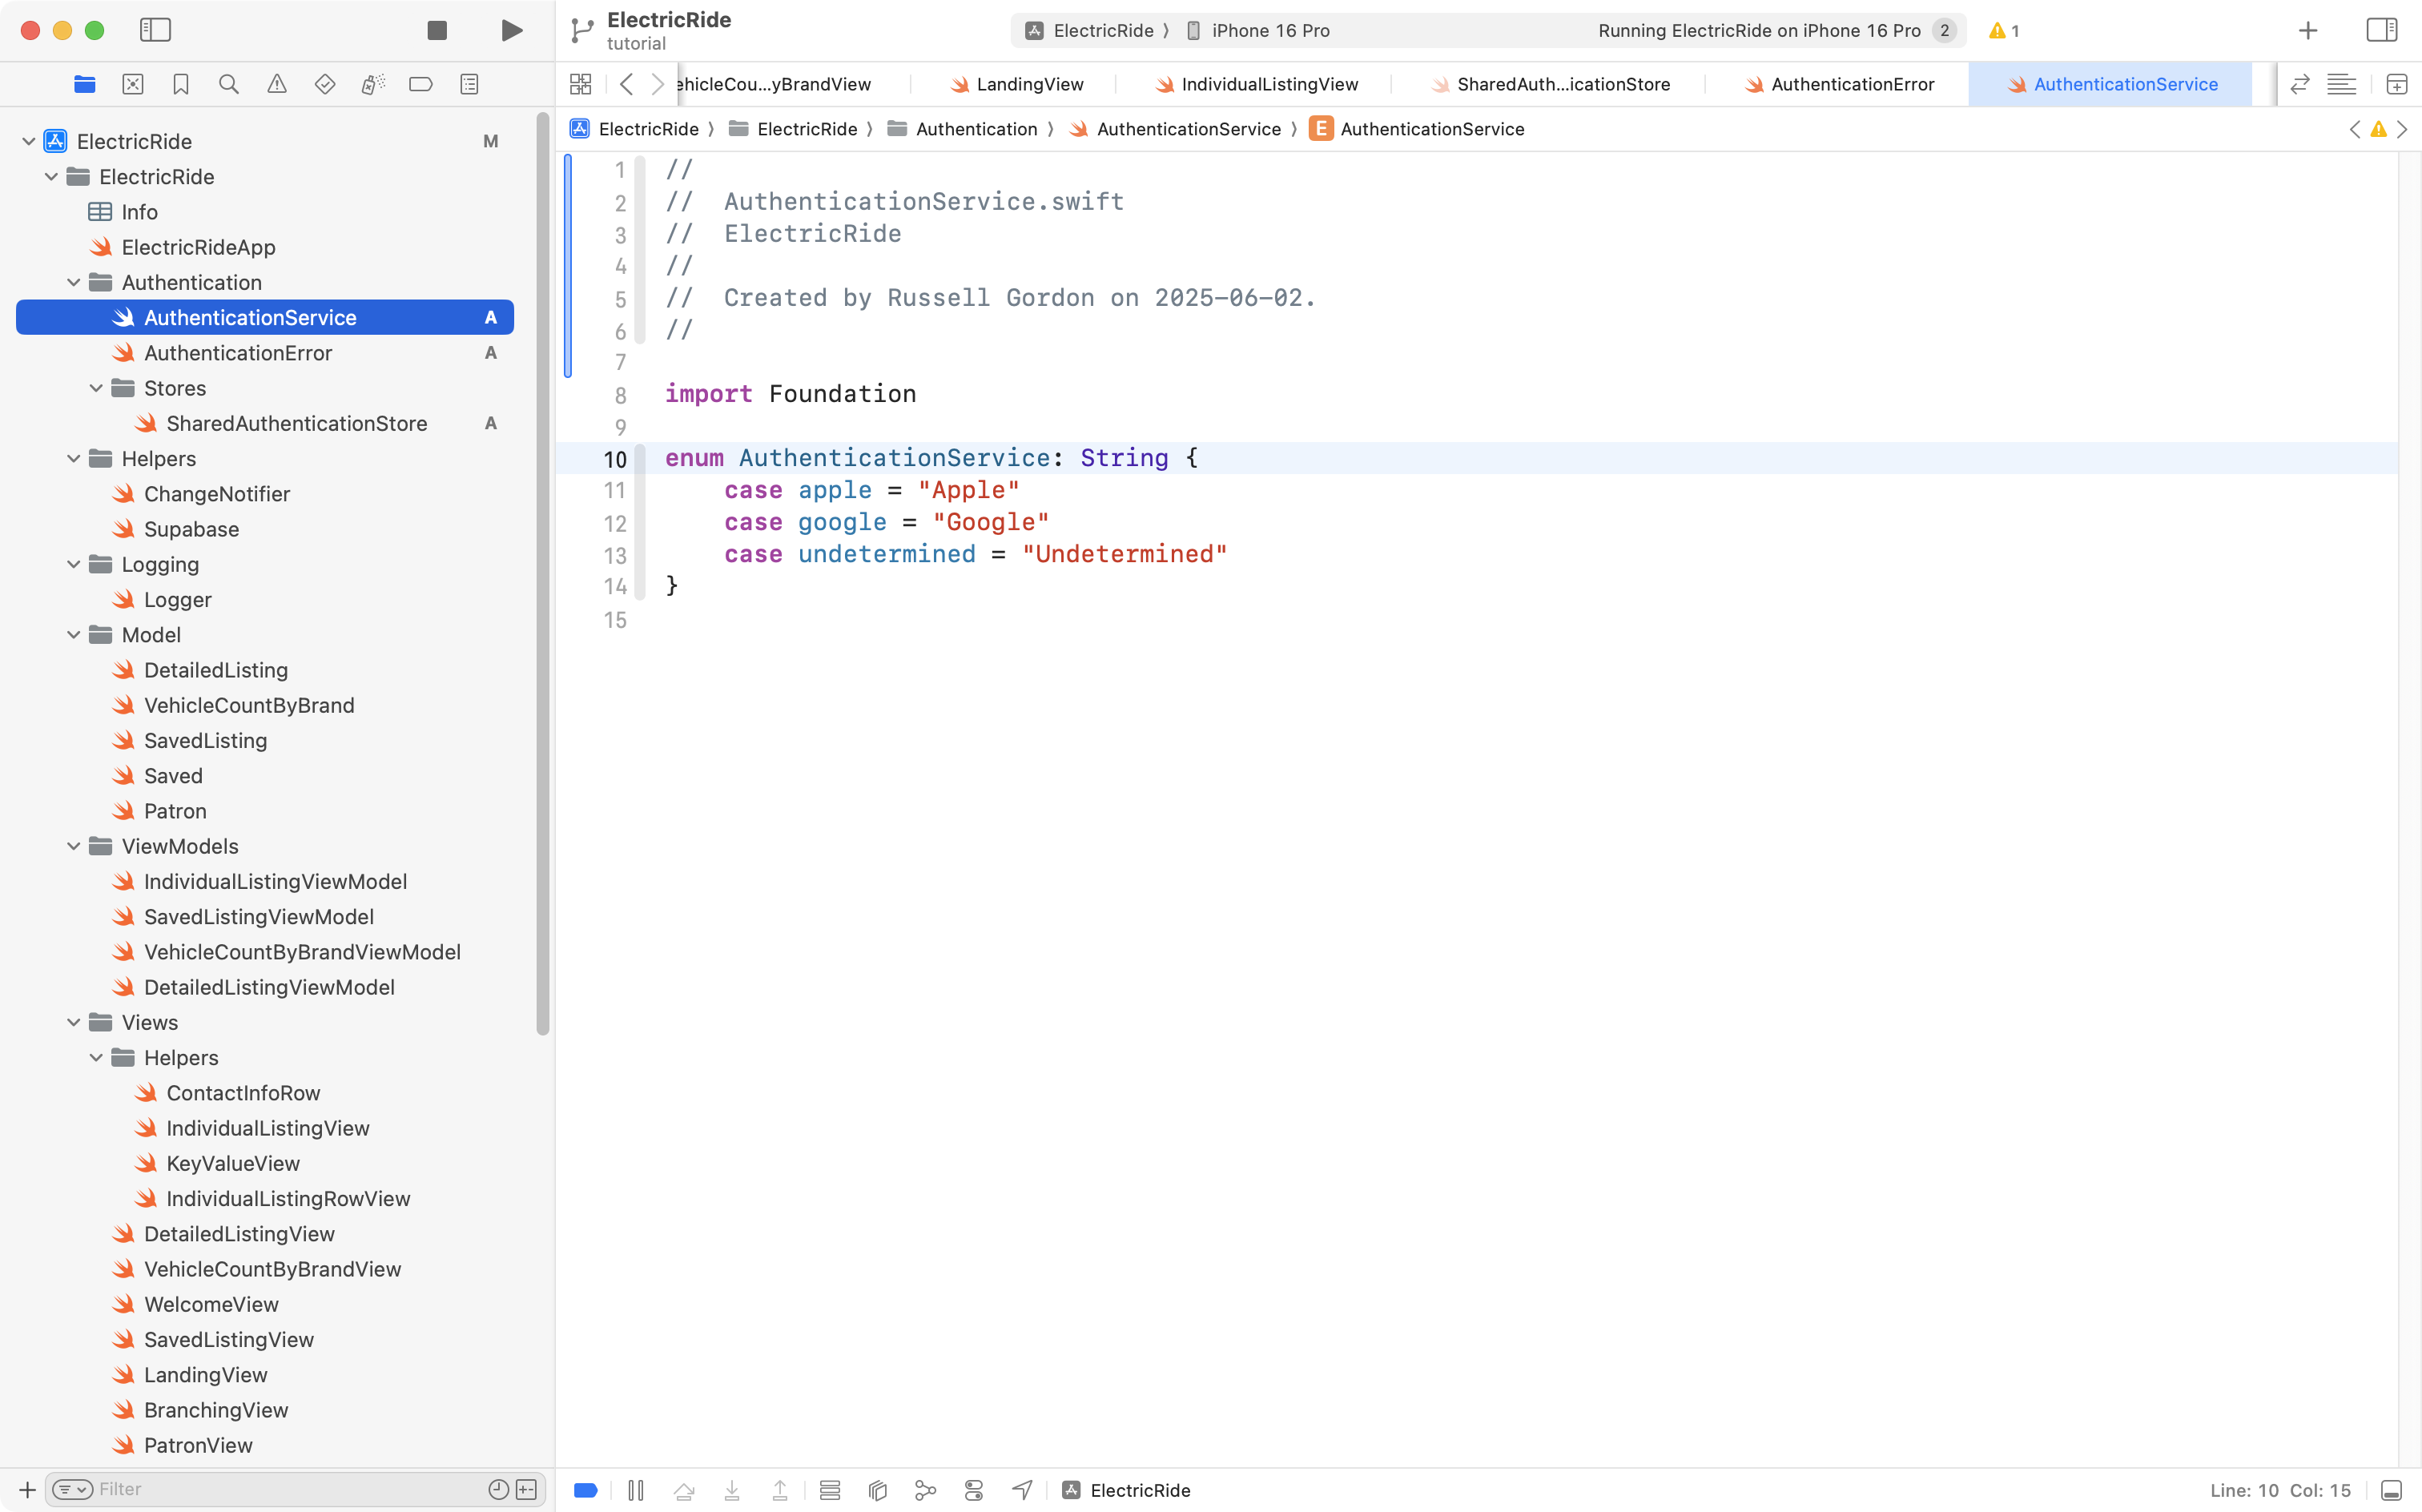
That enumeration lets us keep track of what third-party service a user signed in with (planning for future functionality).
Finally, AuthenticationState:
import Foundation

enum AuthenticationState {
    case undetermined
    case signedIn
    case signedOut
}
… like this:
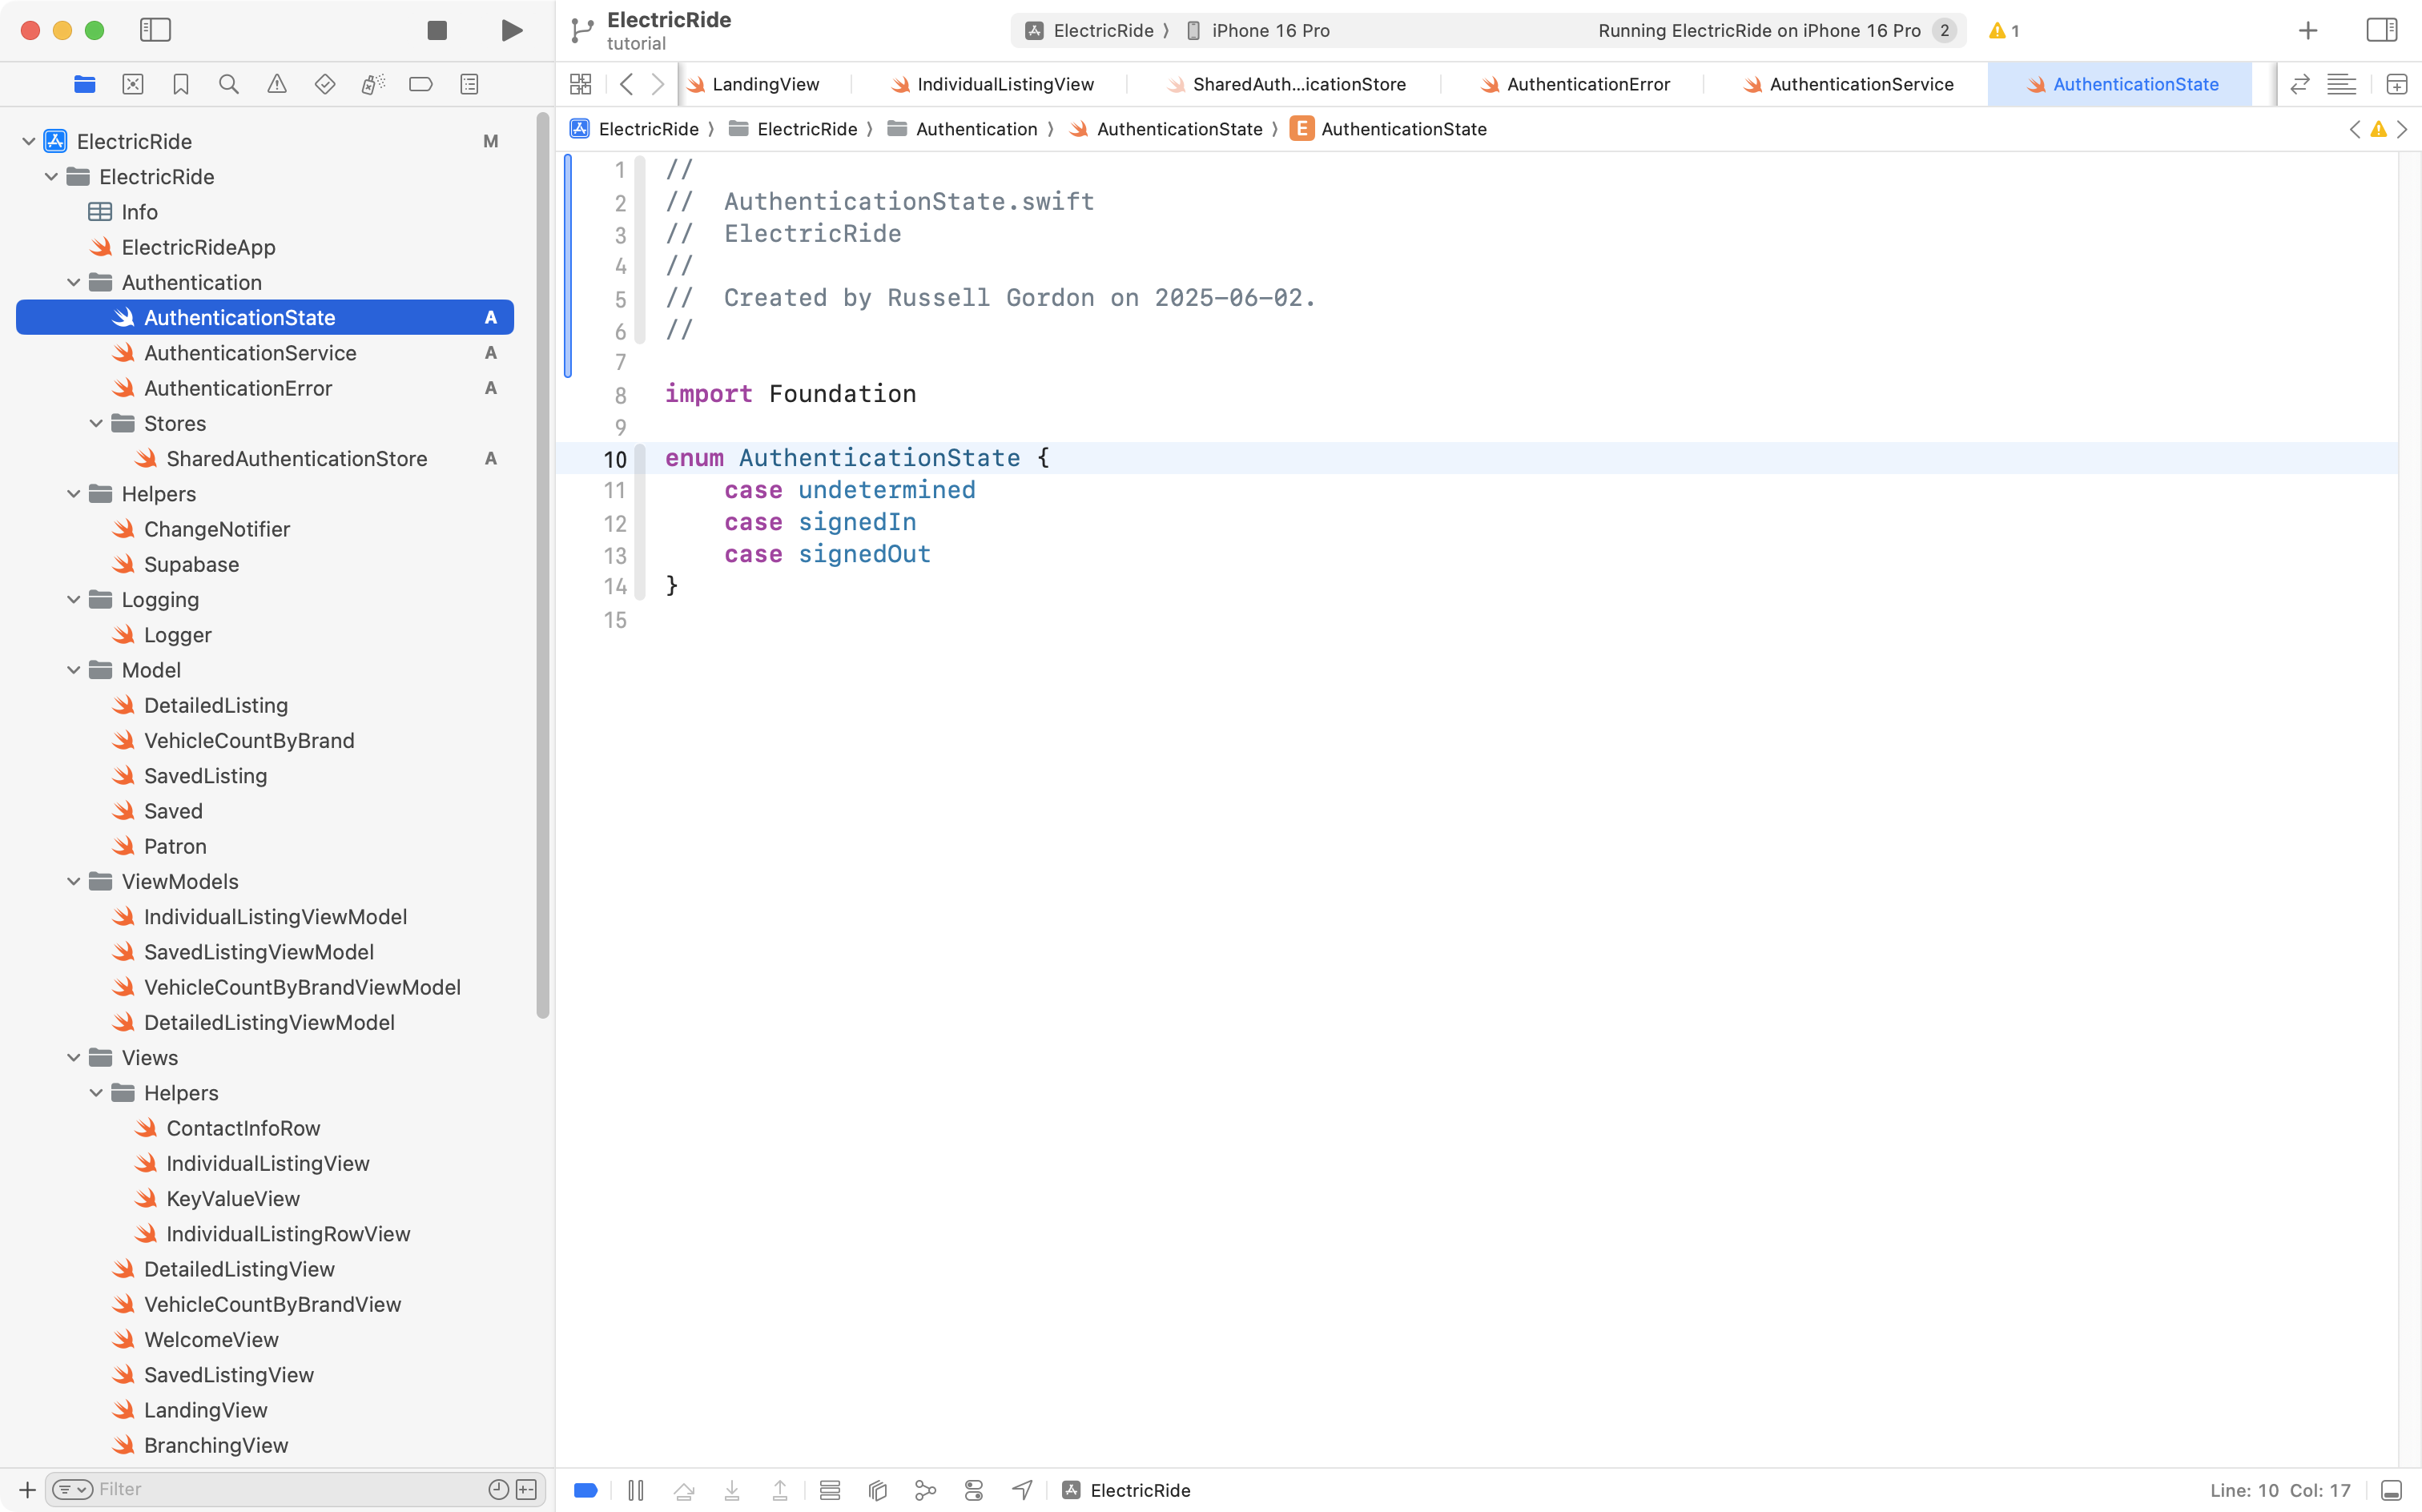
That enumeration, as it’s name suggests, tracks whether the user is signed in or not, or is in some other indeterminate state.
Now a series of additions are needed to SharedAuthenticationStore. These changes will:
- Add stored properties to:
- keep track of which service the user signed in with (
loggedInWithService) - hold an error message that may need to be presented if there is a problem during sign in (
authenticationException) - track the status of a user’s sign in, so we know when they have moved from being “signed out” to being “signed in” (
authenticationStatus)
- keep track of which service the user signed in with (
- Add functions to:
- get and set the user’s name and email address (
setNameAndEmail) - check whether the user signing in represents a new patron or an existing one (
checkWhetherPatronExists) - monitor the authentication state, watching to the
supabase.auth.authStateChangesstream, and handling those scenarios (monitorAuthenticationState) - allow a user to be signed out (
signOut)
- get and set the user’s name and email address (
- Adjust the initializer so that it invokes
monitorAuthenticationState.
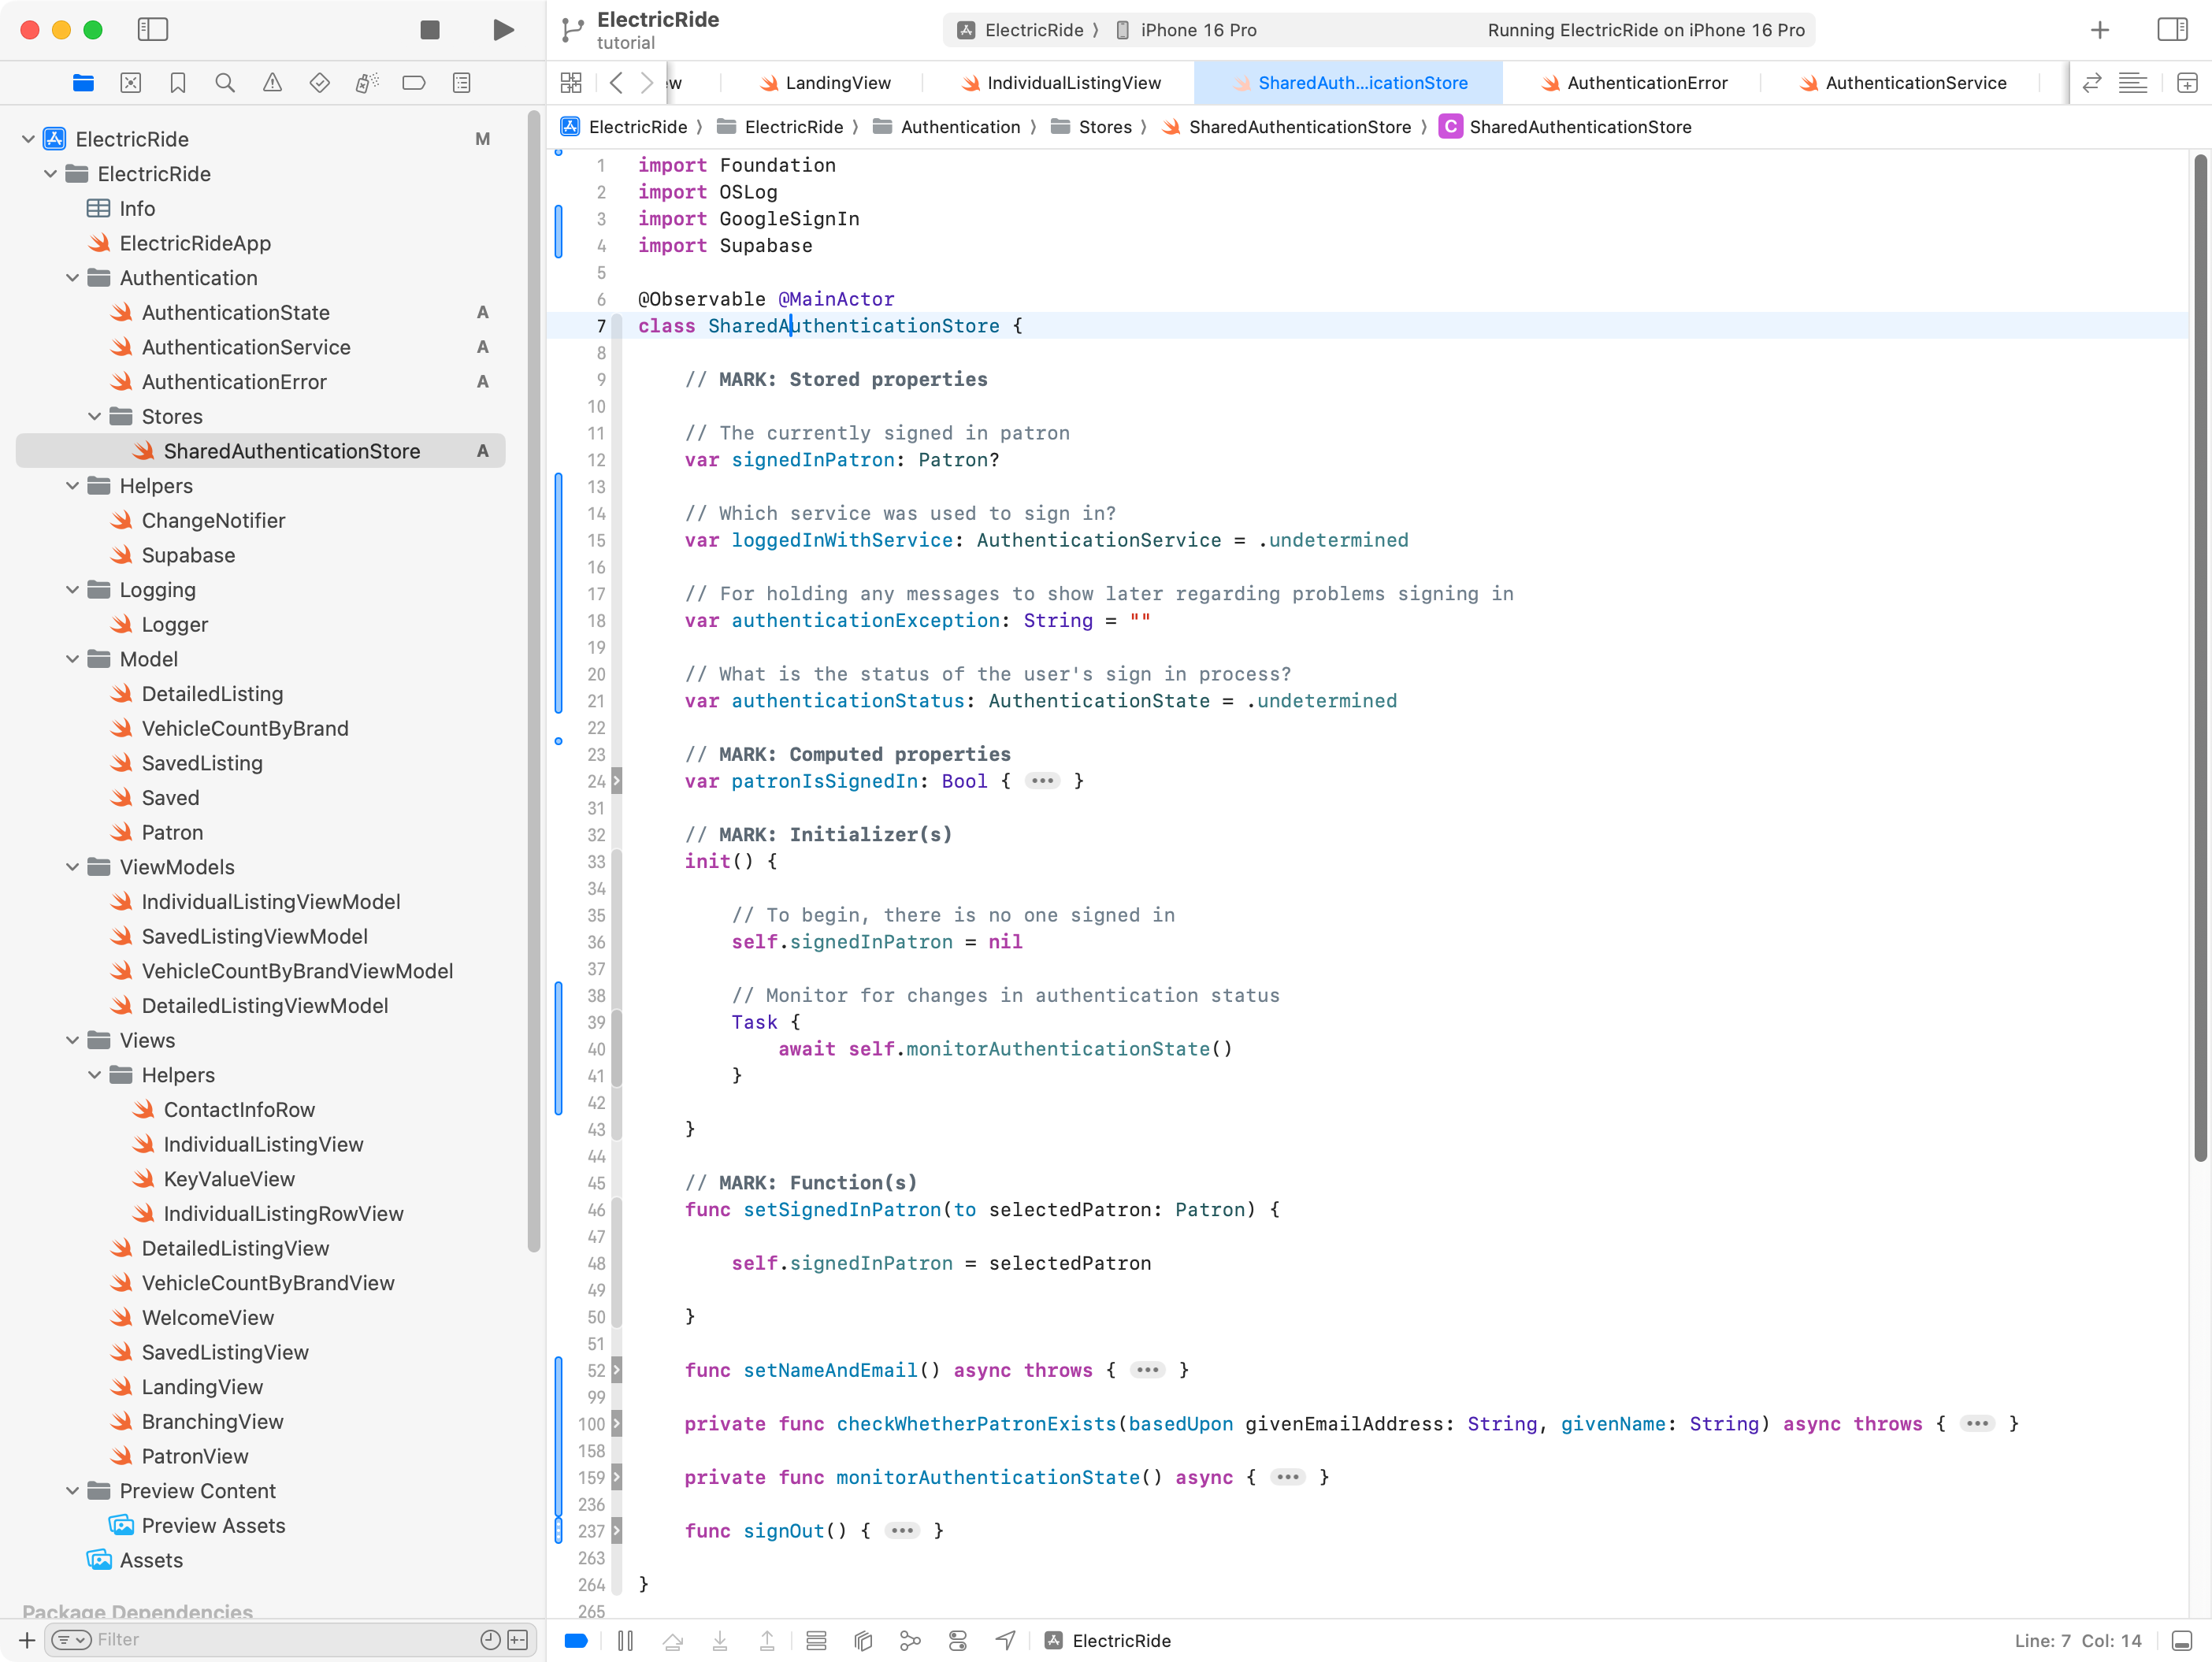
There’s a lot of code there, and if you are following along to adjust your own copy of SharedAuthenticationStore it is going to be easier to just copy and paste all of this code below into your own copy of the file:
import Foundation
import OSLog
import GoogleSignIn
import Supabase

@Observable @MainActor
class SharedAuthenticationStore {

    // MARK: Stored properties

    // The currently signed in patron
    var signedInPatron: Patron?

    // Which service was used to sign in?
    var loggedInWithService: AuthenticationService = .undetermined

    // For holding any messages to show later regarding problems signing in
    var authenticationException: String = ""

    // What is the status of the user's sign in process?
    var authenticationStatus: AuthenticationState = .undetermined

    // MARK: Computed properties
    var patronIsSignedIn: Bool {
        if signedInPatron == nil {
            return false
        } else {
            return true
        }
    }

    // MARK: Initializer(s)
    init() {

        // To begin, there is no one signed in
        self.signedInPatron = nil

        // Monitor for changes in authentication status
        Task {
            await self.monitorAuthenticationState()
        }

    }

    // MARK: Function(s)
    func setSignedInPatron(to selectedPatron: Patron) {

        self.signedInPatron = selectedPatron

    }

    func setNameAndEmail() async throws {

        Logger.authentication.info("SharedAuthenticationStore: About to set name and email from authentication object.")

        // Holds the metadata object we are given after a social sign-in occurs
        var retrievedResult: [String: AnyJSON]?

        do {

            // Get the metadata object for the logged in user
            retrievedResult = try await supabase.auth.session.user.userMetadata

        } catch {

            Logger.authentication.error("SharedAuthenticationStore: Could not get the metadata object for the signed in user.")
            Logger.authentication.error("SharedAuthenticationStore: \(String(describing: error))")

        }

        // Ensure that the metadata object could be retrieved
        guard let result = retrievedResult else {
            Logger.authentication.error("SharedAuthenticationStore: Metadata object for logged in user could not be unwrapped.")
            throw AuthenticationError.authenticationObjectMissing
        }

        // Pull the name and email from the metadata object
        Logger.authentication.info("SharedAuthenticationStore: Metadata object contains...\n\n\(result)")
        let email = String(describing: result["email"] ?? "")
        let name = String(describing: result["name"] ?? "")

        // Ensure that the email is not an empty string
        guard email.isEmpty == false else {
            Logger.authentication.error("SharedAuthenticationStore: Email address was missing from metadata object.")
            throw AuthenticationError.emailMissing
        }

        // Ensure that the name is not an empty string
        guard name.isEmpty == false else {
            Logger.authentication.error("SharedAuthenticationStore: Name was missing from metadata object.")
            throw AuthenticationError.nameMissing
        }

        // Is this person someone who has used the app before?
        Logger.authentication.info("SharedAuthenticationStore: About to check whether user has signed in to this app before...")
        try await checkWhetherPatronExists(basedUpon: email, givenName: name)

    }

    private func checkWhetherPatronExists(basedUpon givenEmailAddress: String, givenName: String) async throws {

        // Look up patron(s) who have this email address
        let results: [Patron] = try await supabase
            .from("patron")
            .select()
            .eq("email_address", value: givenEmailAddress)
            .limit(1)
            .execute()
            .value

        // Should be either 0 or 1 elements in array...
        // When there is one row returned, we found that the email of the
        // logged in user matches one of the emails in the "patron" table
        // in the database, which means this user has signed in to the app
        // before...
        if results.count == 1 {

            Logger.authentication.info("SharedAuthenticationStore: Email address already in database, this is an existing user of the app.")

            // Set the active patron record
            self.signedInPatron = results[0]

        } else if results.count == 0 {

            Logger.authentication.info("SharedAuthenticationStore: Email address not yet in database, this is a new user of the app.")

            // Create a new Patron instance
            //
            // NOTE: Google social sign-in doesn't provide first and last names seperately.
            //       To work around this we just place the user's entire name in the firstName field.
            let newPatron = Patron(
                id: nil,
                firstName: givenName,
                lastName: "",
                emailAddress: givenEmailAddress,
                phoneNumber: ""
            )

            // Add user to the patron table, then immediately retreive the new patron
            let confirmedNewPatron: Patron = try await supabase
                .from("patron")
                .insert(newPatron)
                // Now get back the newly created row (this will have an id assigned)
                .select()
                .single()
                .execute()
                .value

            // Set the active patron
            self.signedInPatron = confirmedNewPatron

        } else {
            Logger.authentication.error("SharedAuthenticationStore: Email address of user signing in matches multiple patron records.")
            throw AuthenticationError.emailMatchesMultiplePatronRecords
        }

    }

    private func monitorAuthenticationState() async {

        // Monitor authentication state
        Logger.authentication.info("SharedAuthenticationStore: About to begin watching for authentication state changes.")

        // Essentially a loop that activates whenever authentication state change is detected
        for await state in supabase.auth.authStateChanges {

            Logger.authentication.info("SharedAuthenticationStore: Supabase authentication state change, it is now: \(String(describing: state.event)).")

            switch state.event {
            case .initialSession:
                Logger.authentication.info("SharedAuthenticationStore: Auth state event is INITIAL_SESSION")
            case .signedIn:
                Logger.authentication.info("SharedAuthenticationStore: Auth state event is SIGNED_IN")
            case .signedOut:
                Logger.authentication.info("SharedAuthenticationStore: Auth state event is SIGNED_OUT")
            case .tokenRefreshed:
                Logger.authentication.info("SharedAuthenticationStore: Auth state event is TOKEN_REFRESHED")
            case .userUpdated:
                Logger.authentication.info("SharedAuthenticationStore: Auth state event is USER_UPDATED")
            case .passwordRecovery:
                Logger.authentication.info("SharedAuthenticationStore: Auth state event is PASSWORD_RECOVERY")
            case .mfaChallengeVerified:
                Logger.authentication.info("SharedAuthenticationStore: Auth state event is MFA_CHALLENGE_VERIFIED")
            case .userDeleted:
                Logger.authentication.info("SharedAuthenticationStore: Auth state event is USER_DELETED")
            }

            // If the user has been signed in, signed out, or if this is their
            // initial session with Supabase, the code block below will run
            if [.initialSession, .signedIn, .signedOut].contains(state.event) {

                // isAuthenticated set to true when the user has a session
                // Otherwise, it is set to false
                Logger.authentication.info("SharedAuthenticationStore: About to check whether an authenticated session exists.")
                if state.session == nil {
                    Logger.authentication.info("SharedAuthenticationStore: There is no existing authenticated session to restore; setting authentication status to 'signed out'.")
                    self.authenticationStatus = .signedOut
                } else {
                    Logger.authentication.info("SharedAuthenticationStore: An authenticated session exists; setting authentication status to 'signed in'.")
                    self.authenticationStatus = .signedIn
                }

                if self.authenticationStatus == .signedIn {

                    // Obtain the name and email address for this user
                    do {

                        // Reset authentication information message
                        self.authenticationException = ""

                        // Try to get authentication information (name and email address of this user)
                        try await self.setNameAndEmail()

                    } catch AuthenticationError.emailMissing, AuthenticationError.nameMissing {

                        Logger.authentication.error("SharedAuthenticationStore: Name or email address is missing, so we are signing out this user.")

                        do {
                            // IMPORTANT: Only logout from the current session, not ALL sessions the user has with our application.
                            // SEE: https://supabase.com/docs/guides/auth/signout?queryGroups=language&language=swift
                            try await supabase.auth.signOut(scope: .local)
                            Logger.authentication.info("SharedAuthenticationStore: Could not obtain name or email address after session restoration occurred.\n\nPlease take a screenshot of this occurrence and contact the application owner.")
                            self.authenticationException = "SharedAuthenticationStore: Could not obtain name or email address after session restoration occurred.\n\nPlease take a screenshot of this occurrence and contact the application owner."
                        } catch {
                            Logger.authentication.error("SharedAuthenticationStore: Name or email was missing; also could not sign out from authenticated session.")
                        }

                    } catch {
                        Logger.authentication.error("SharedAuthenticationStore: \(String(describing: error)).")
                    }

                }
            }
        }
    }

    func signOut() {

        Task {
            do {

                Logger.authentication.info("SharedAuthenticationStore: About to sign out patron with id \(self.signedInPatron?.id ?? 0) and email address \(self.signedInPatron?.emailAddress ?? "").")

                // IMPORTANT: Only logout from the current session, not ALL sessions the user has with our application.
                // SEE: https://supabase.com/docs/guides/auth/signout?queryGroups=language&language=swift

                try await supabase.auth.signOut(scope: .local)

                self.authenticationStatus = .signedOut

                self.loggedInWithService = .undetermined

                Logger.authentication.info("SharedAuthenticationStore: Patron with id \(self.signedInPatron?.id ?? 0) and email address \(self.signedInPatron?.emailAddress ?? "") has been signed out.")

            } catch {

                Logger.authentication.error("SharedAuthenticationStore: Error signing out user, details: \(String(describing: error))")

            }
        }

    }

}
… like this:
TIP
If you are following along to make similar changes to your own app, don’t worry if errors start to appear. You are in the middle of making significant edits. Take stock of where you are at once you are finished adding and adjusting the code in your app by following along here.
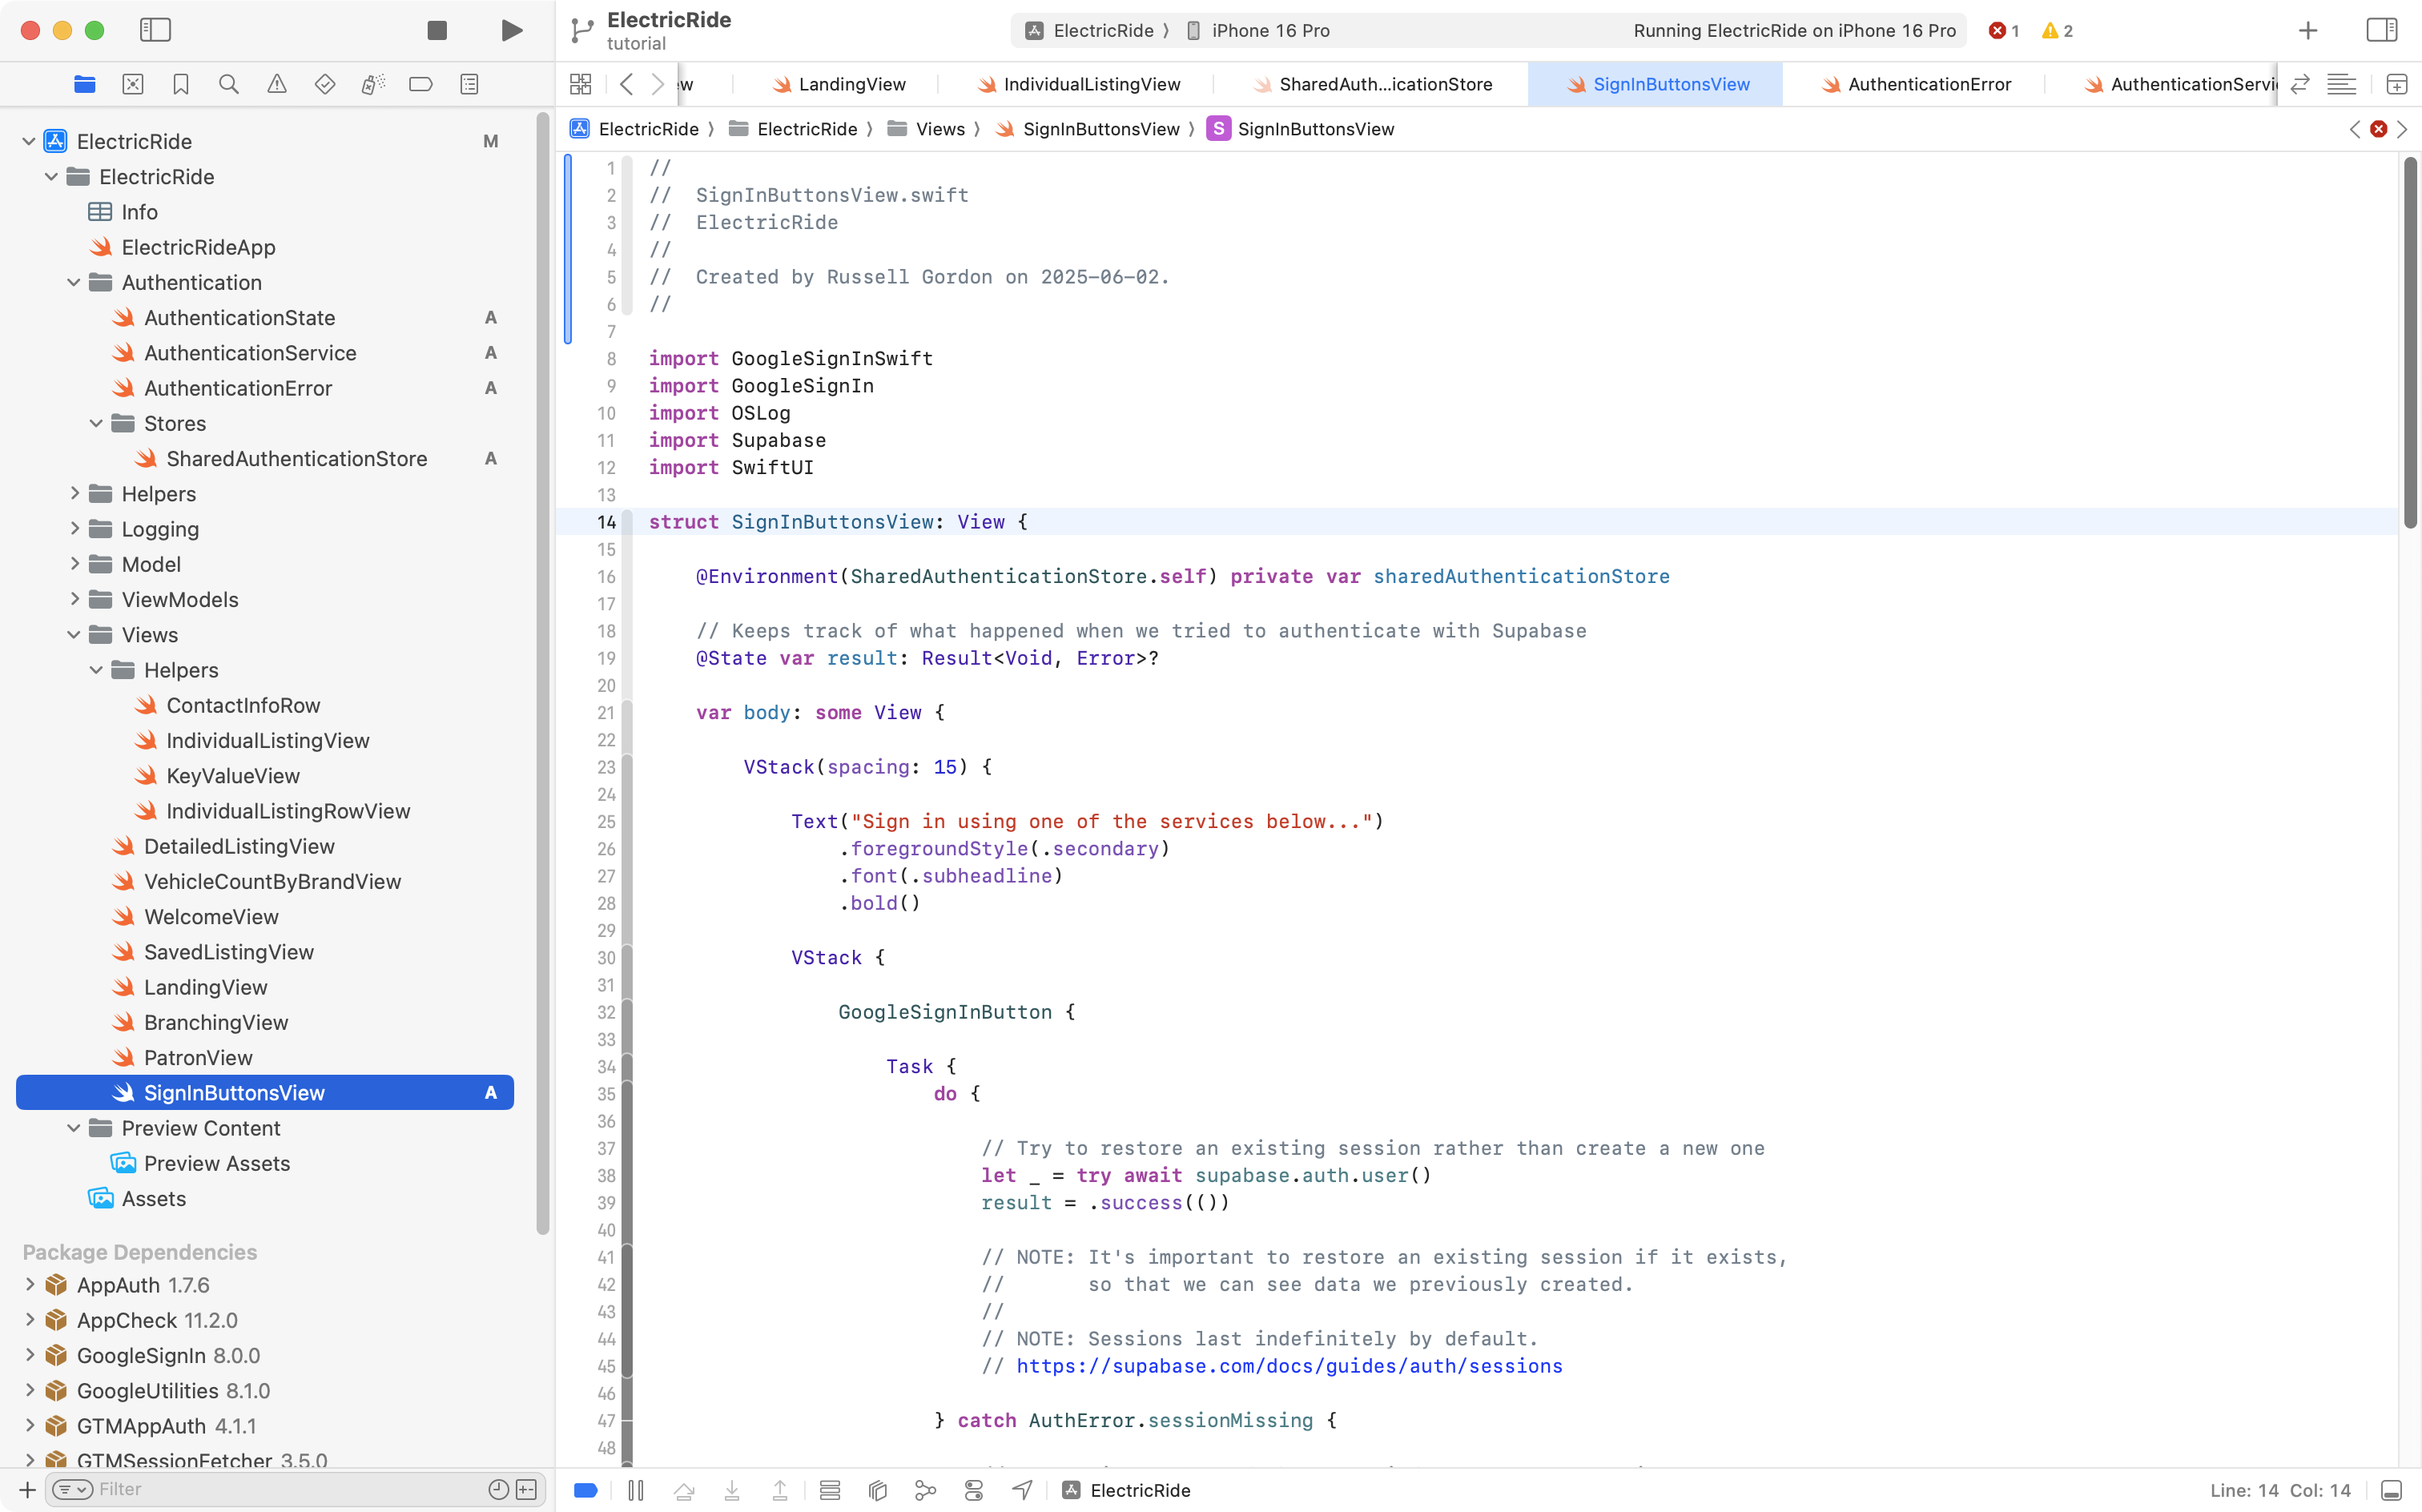
Next we need a view to present the Sign in with Google button.
This is also a large chunk of code, and is commented pretty heavily.
Copy and paste this code:
import GoogleSignInSwift
import GoogleSignIn
import OSLog
import Supabase
import SwiftUI

struct SignInButtonsView: View {

    @Environment(SharedAuthenticationStore.self) private var sharedAuthenticationStore

    // Keeps track of what happened when we tried to authenticate with Supabase
    @State var result: Result<Void, Error>?

    var body: some View {

        VStack(spacing: 15) {

            Text("Sign in using one of the services below...")
                .foregroundStyle(.secondary)
                .font(.subheadline)
                .bold()

            VStack {

                GoogleSignInButton {

                    Task {
                        do {

                            // Try to restore an existing session rather than create a new one
                            let _ = try await supabase.auth.user()
                            result = .success(())

                            // NOTE: It's important to restore an existing session if it exists,
                            //       so that we can see data we previously created.
                            //
                            // NOTE: Sessions last indefinitely by default.
                            // https://supabase.com/docs/guides/auth/sessions

                        } catch AuthError.sessionMissing {

                            // No session was found when we tried to restore a session.
                            // So, we need to sign in with Google
                            do {


                                // SEE: https://github.com/WesCSK/SwiftUI-Firebase-Authenticate-Using-Google-Sign-In
                                // ... for source of how to obtain the root view controller for GIDSignIn use
                                guard let screen = UIApplication.shared.connectedScenes.first as? UIWindowScene else {
                                    return
                                }

                                guard let root = screen.windows.first?.rootViewController else {
                                    return
                                }

                                // Attempt to sign in with Google
                                let result = try await GIDSignIn.sharedInstance.signIn(withPresenting: root)

                                // Now referring to:
                                // https://supabase.com/docs/guides/auth/social-login/auth-google?queryGroups=platform&platform=swift#configuration

                                guard let idToken = result.user.idToken?.tokenString else {
                                    Logger.authentication.info("SignInButtonsView: No idToken found.")
                                    return
                                }

                                let accessToken = result.user.accessToken.tokenString
                                Logger.authentication.info("SignInButtonsView: Access token obtained, it is: \(String(describing: accessToken))")
                                let refreshToken = result.user.refreshToken
                                Logger.authentication.info("SignInButtonsView: Refresh token obtained, it is: \(String(describing: refreshToken))")

                                try await supabase.auth.signInWithIdToken(
                                    credentials: OpenIDConnectCredentials(
                                        provider: .google,
                                        idToken: idToken,
                                        accessToken: accessToken
                                    )
                                )

                                sharedAuthenticationStore.loggedInWithService = .google

                                // Reset authentication information message
                                sharedAuthenticationStore.authenticationException = ""

                                // Obtain the name and email address for this user
                                try await sharedAuthenticationStore.setNameAndEmail()

                            } catch AuthenticationError.emailMissing, AuthenticationError.nameMissing {

                                Logger.authentication.error("SignInButtonsView: Name or email is missing, signing out.")

                                do {
                                    // IMPORTANT: Only logout from the current session, not ALL sessions the user has with our application.
                                    // SEE: https://supabase.com/docs/guides/auth/signout?queryGroups=language&language=swift
                                    try await supabase.auth.signOut(scope: .local)
                                    sharedAuthenticationStore.authenticationException = "SignInButtonsView: Could not obtain name or email address after new authentication flow was completed.\n\nPlease take a screenshot of this occurrence and contact the application owner."
                                } catch {
                                    Logger.authentication.error("SignInButtonsView: Name or email was missing; also could not sign out from authenticated session.")
                                }

                            } catch {

                                // Report any other error encountered when signing in
                                result = .failure(error)

                            }

                        } catch {

                            // Report any error encountered when trying to find an existing session
                            Logger.authentication.error("SignInButtonsView: \(String(describing: error))")
                            result = .failure(error)

                        }
                    }

                }
                .frame(width: 300)
                .padding()

                // Based on what happened during authentication, show an appropriate
                // message
                // NOTE: Unlikely this will ever be seen by the user, since a successful
                //       sign-in will trigger BranchingView to reload and direct
                //       user to the main view of the app
                if let result {
                    switch result {
                    case .success:
                        // We had a successful sign-in, show BranchingView
                        let _ = print("SignInButtonsView: Switching on 'result' and had successful sign-in.")
                        BranchingView()
                    case .failure(let error):
                        // This should really never happen... 😬
                        let _ = print("SignInButtonsView: An error occured. Details are: \(error.localizedDescription)")
                        Text(error.localizedDescription).foregroundStyle(.red)
                    }
                }

            }

            Spacer()

        }
        .onAppear {
            Logger.viewCycle.info("SignInButtonsView: View has appeared.")
        }

    }

}
… into a new file named SignInButtonsView, like this:
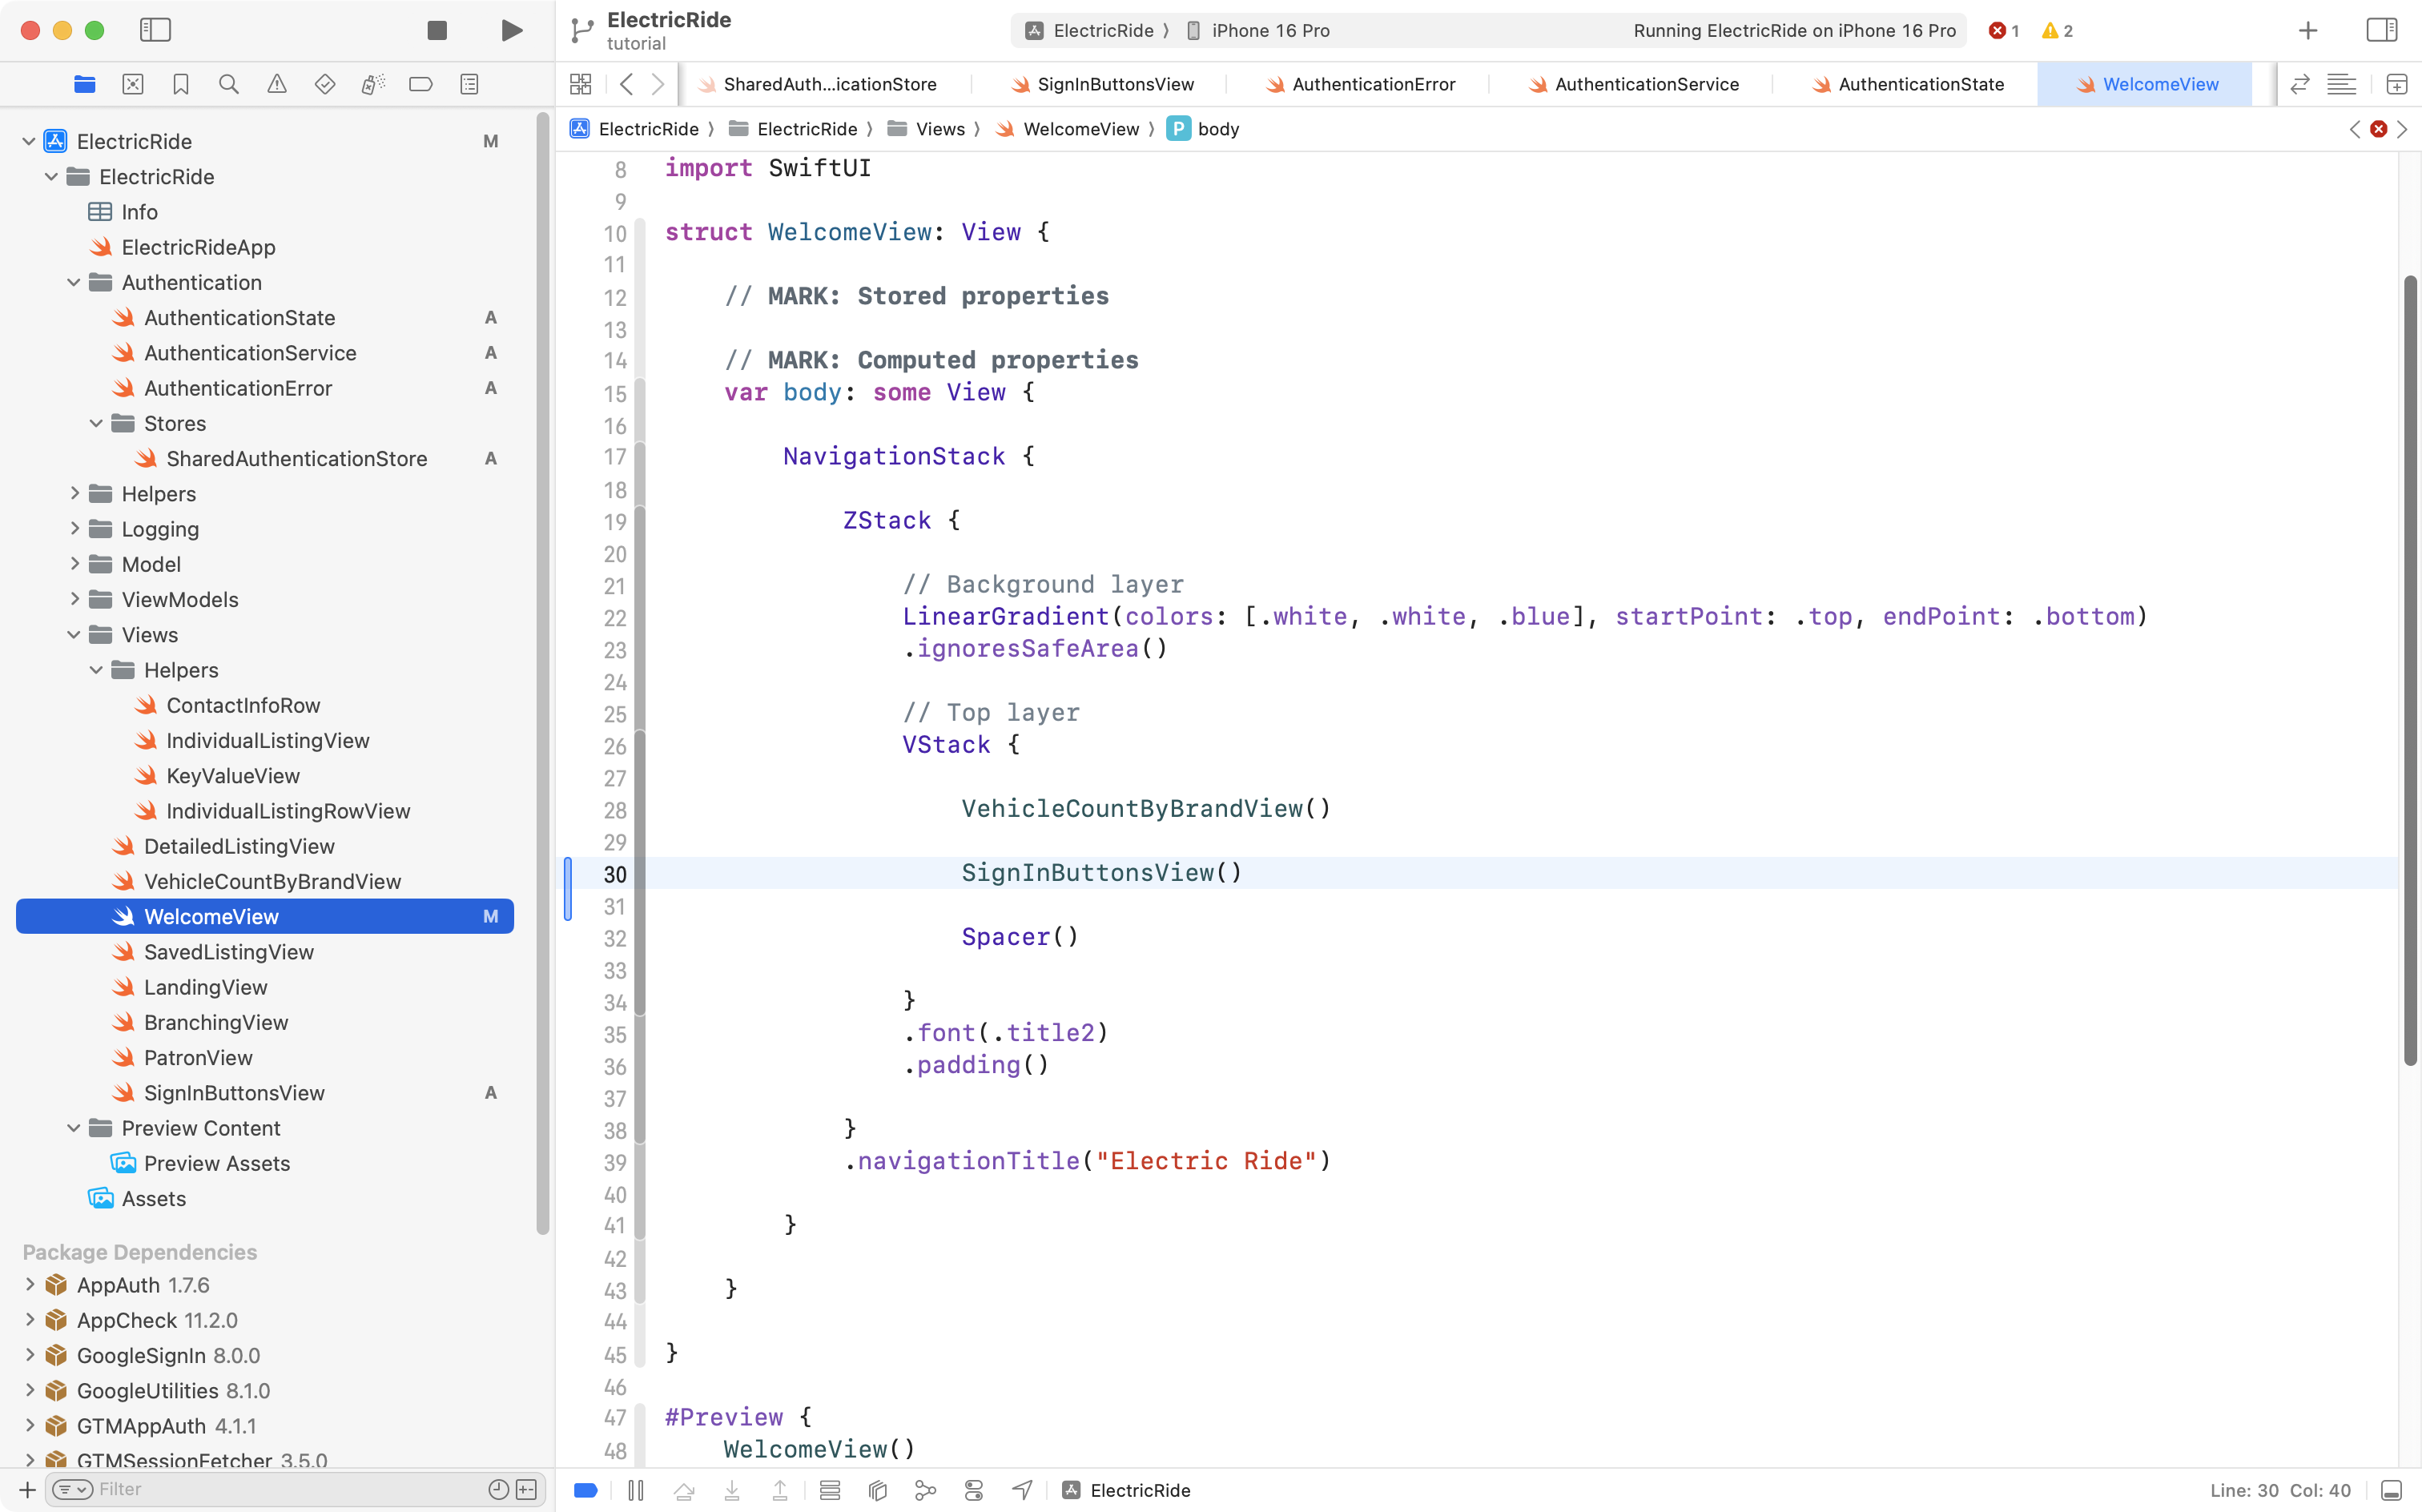
WelcomeView is the view in Mr. Gordon’s app that shows when a user is not signed in:
As you might guess, our next step is to make SignInButtonsView appear on this screen. So, please add that code to WelcomeView, like this:
Handle adding a new patron
Since we will potentially be adding a new patron to the database, Mr. Gordon adjusted the row-level security policy on the patron table to allow an authenticated user to not just read rows, but create (insert) rows in that table:

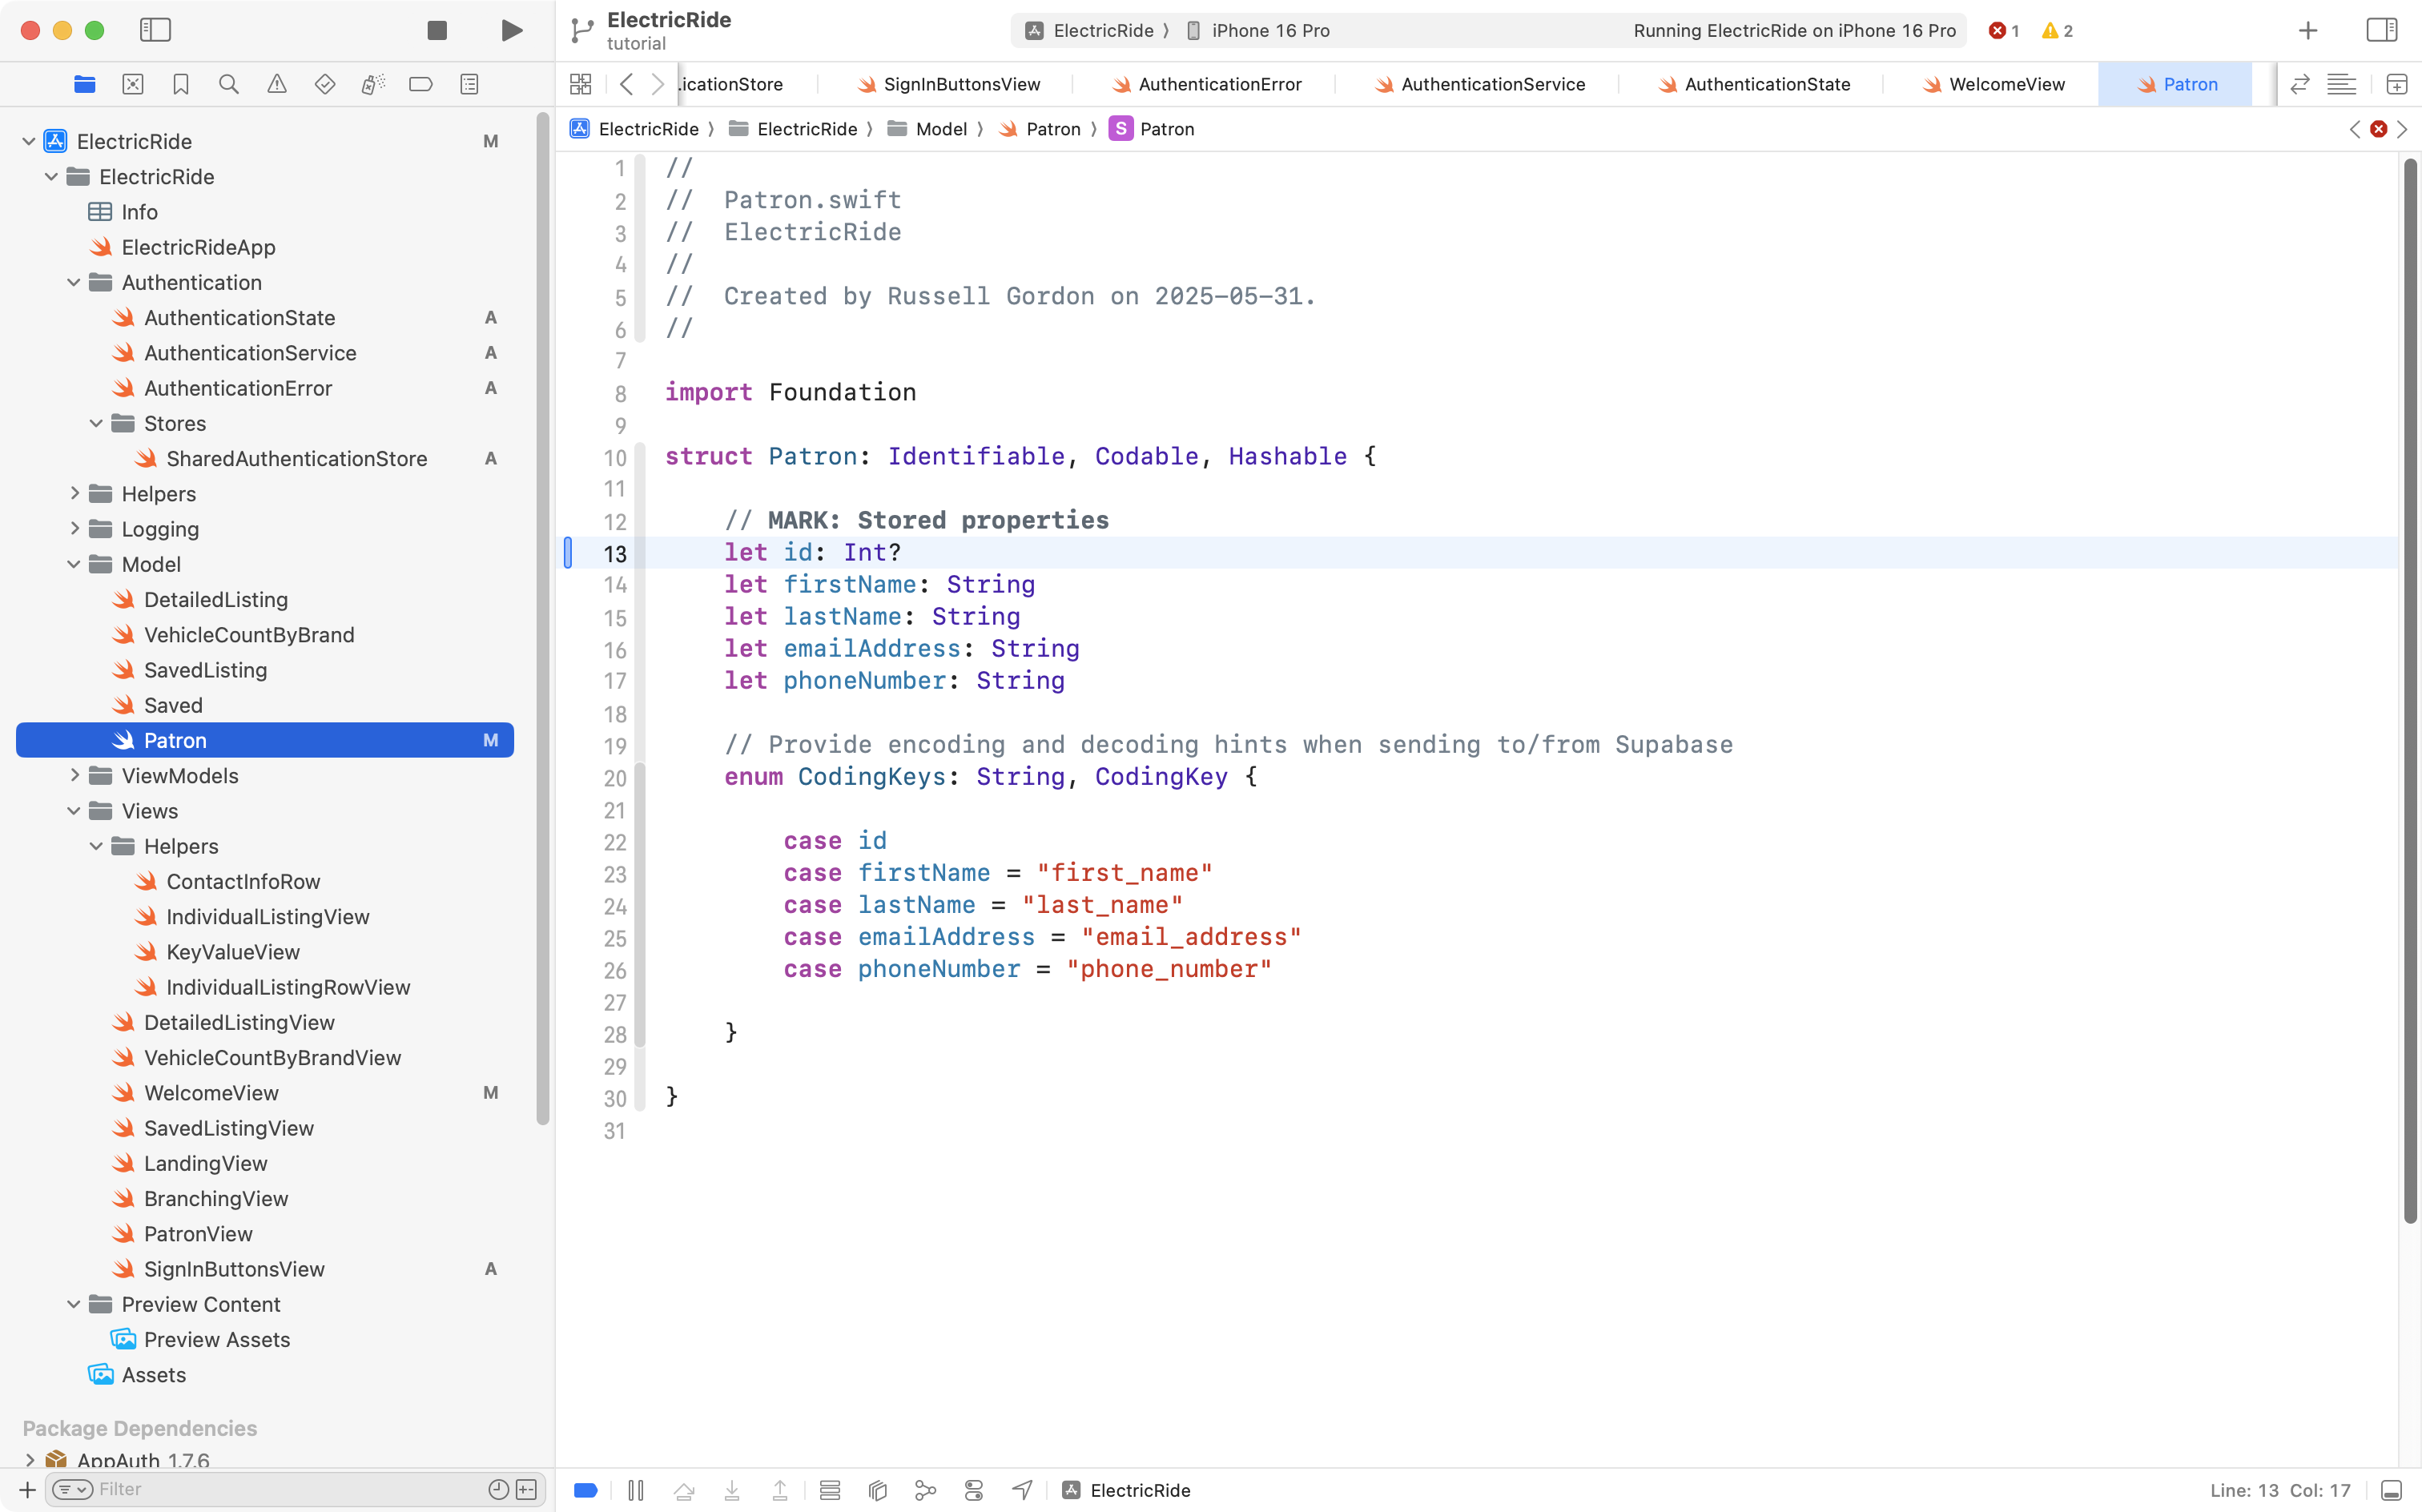
Adding patrons (rather than simply reading a list of existing patrons from the database) means a change is needed to the Patron data type.
When a new patron is added, at first, we won’t know what id that patron will be assigned in the database. So, we need to make that property optional, like this:
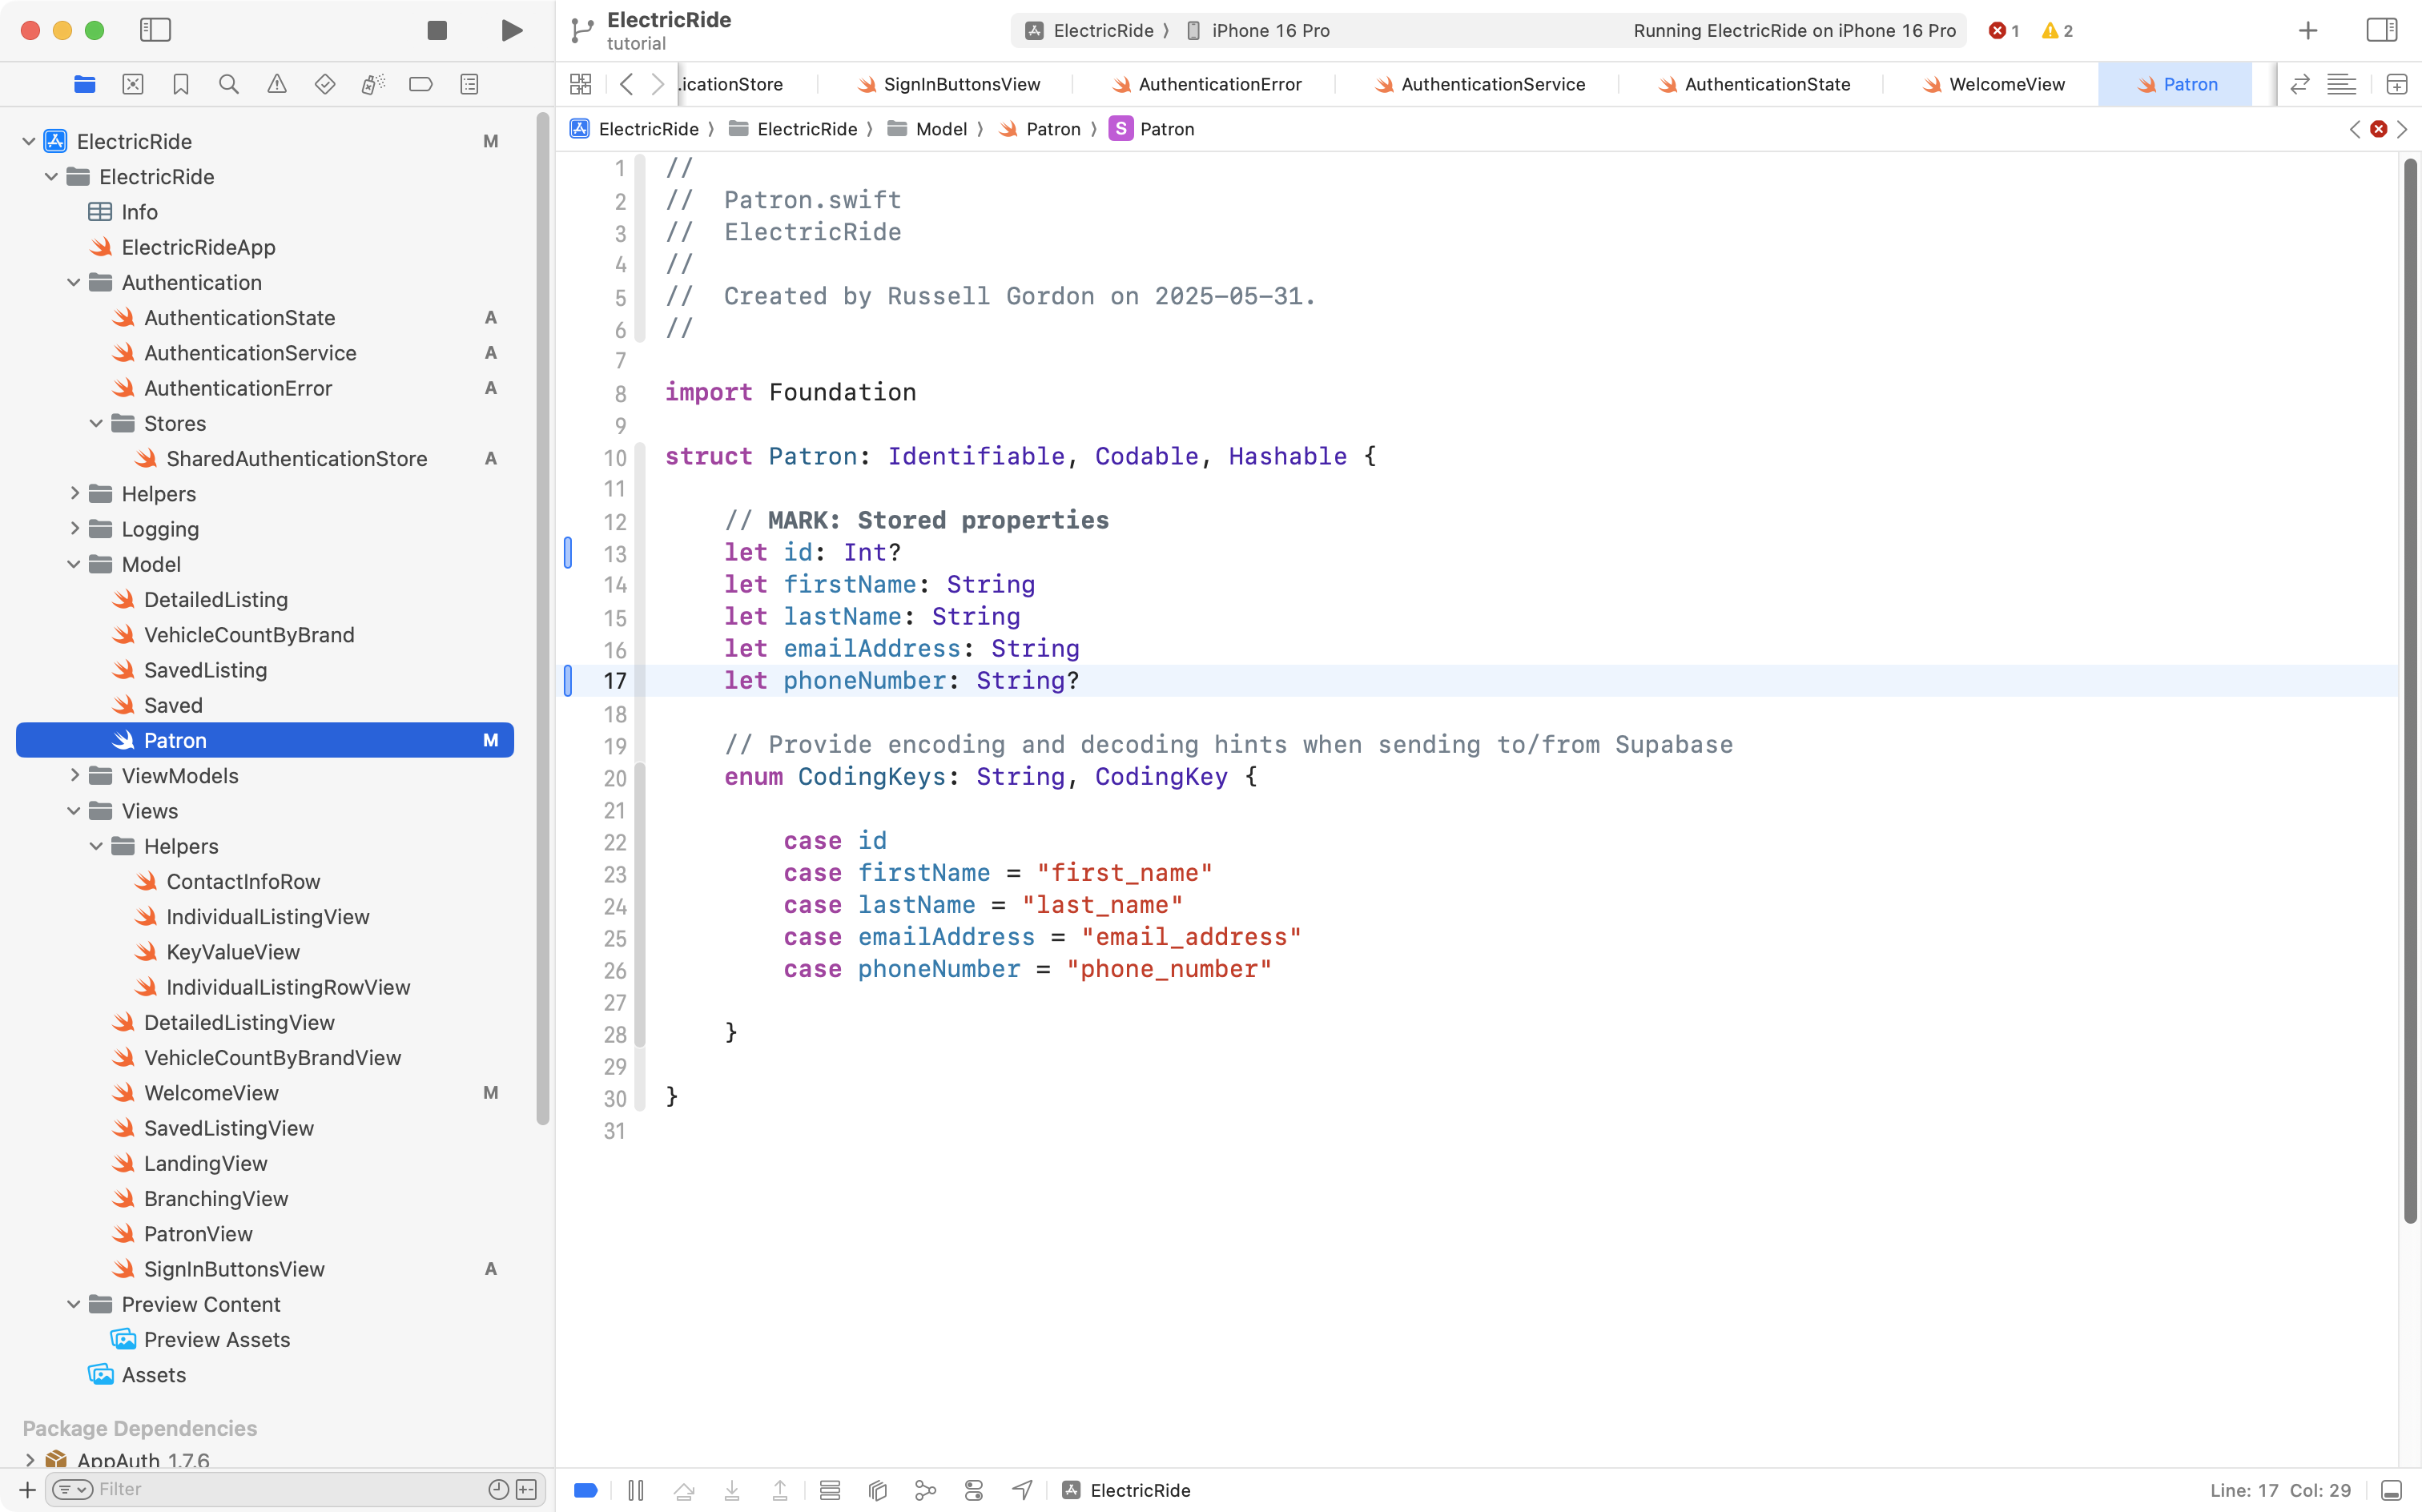
While we are here, the phone number should also be made optional, as a new user signing in from Google may not have provided their phone number to Google (meaning we won’t be able to access that information when they sign in):
Making Patron have an optional id and phone number means there are some modest changes needed elsewhere in Mr. Gordon’s exemplar to handle those optional properties.
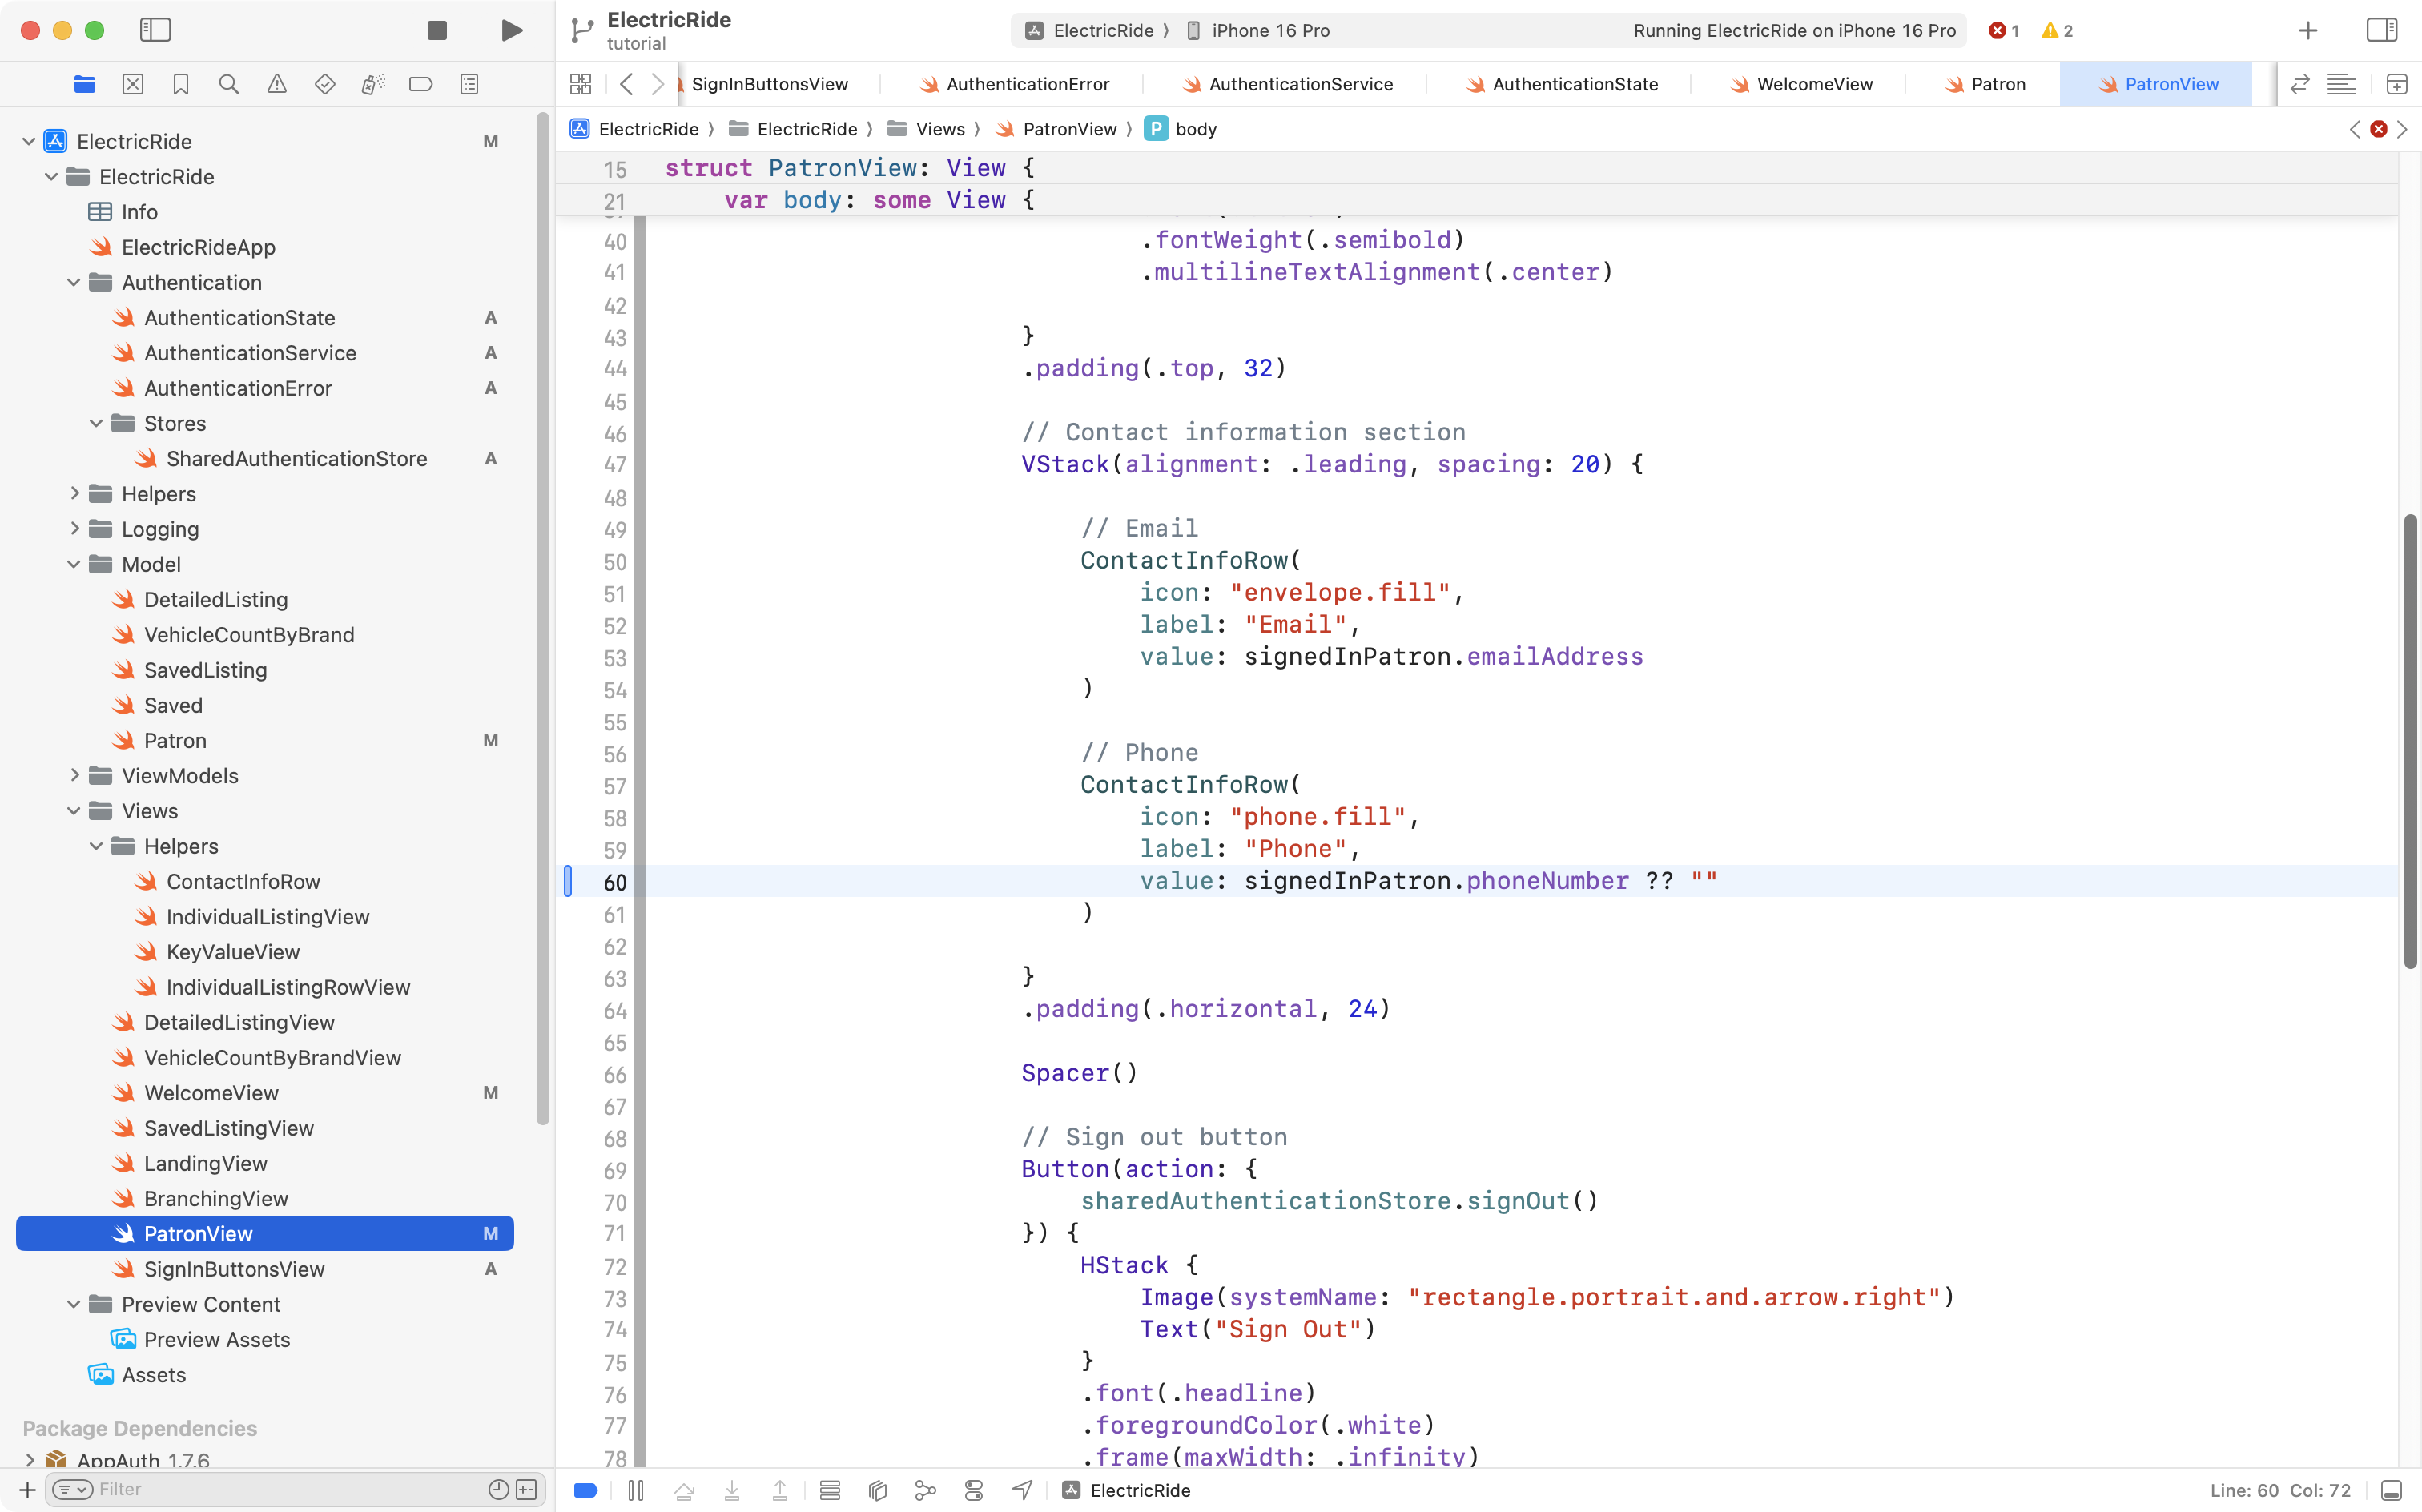
First, on PatronView, if a phone number doesn’t exist, a default value of an empty string will be shown instead:
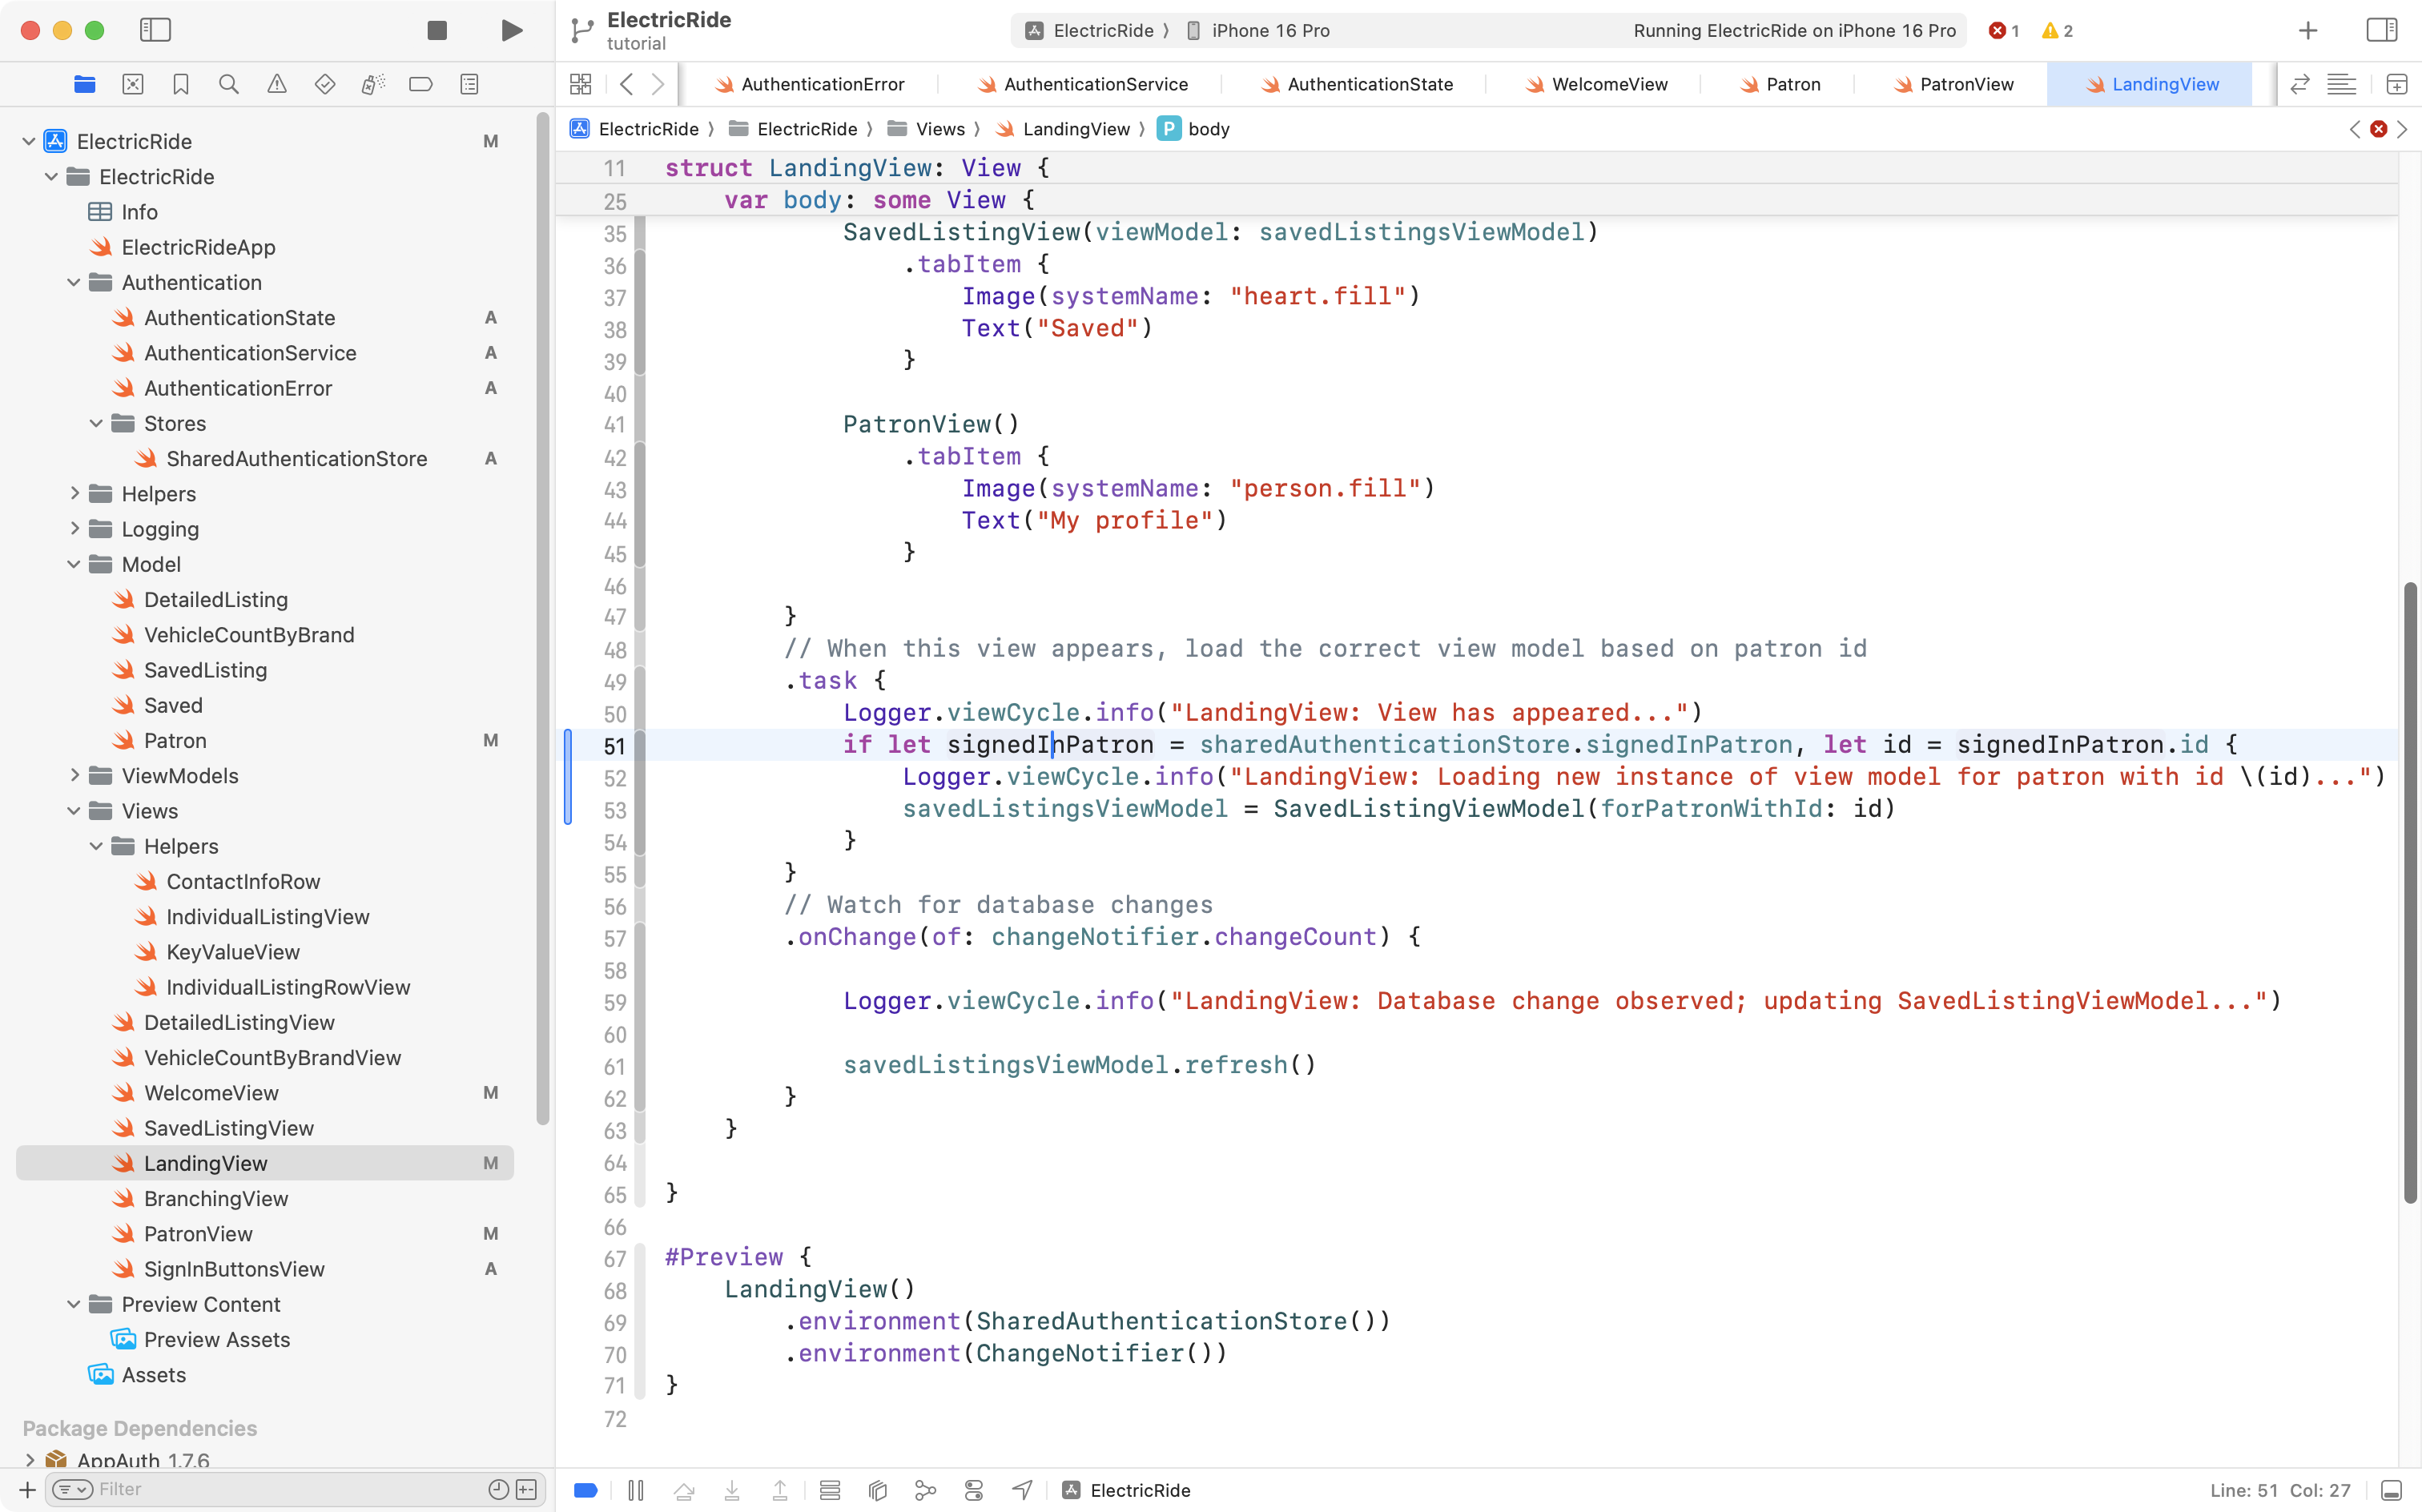
Next, on LandingView, Mr. Gordon has some code that loads the view model that contains saved car listings for a given user:
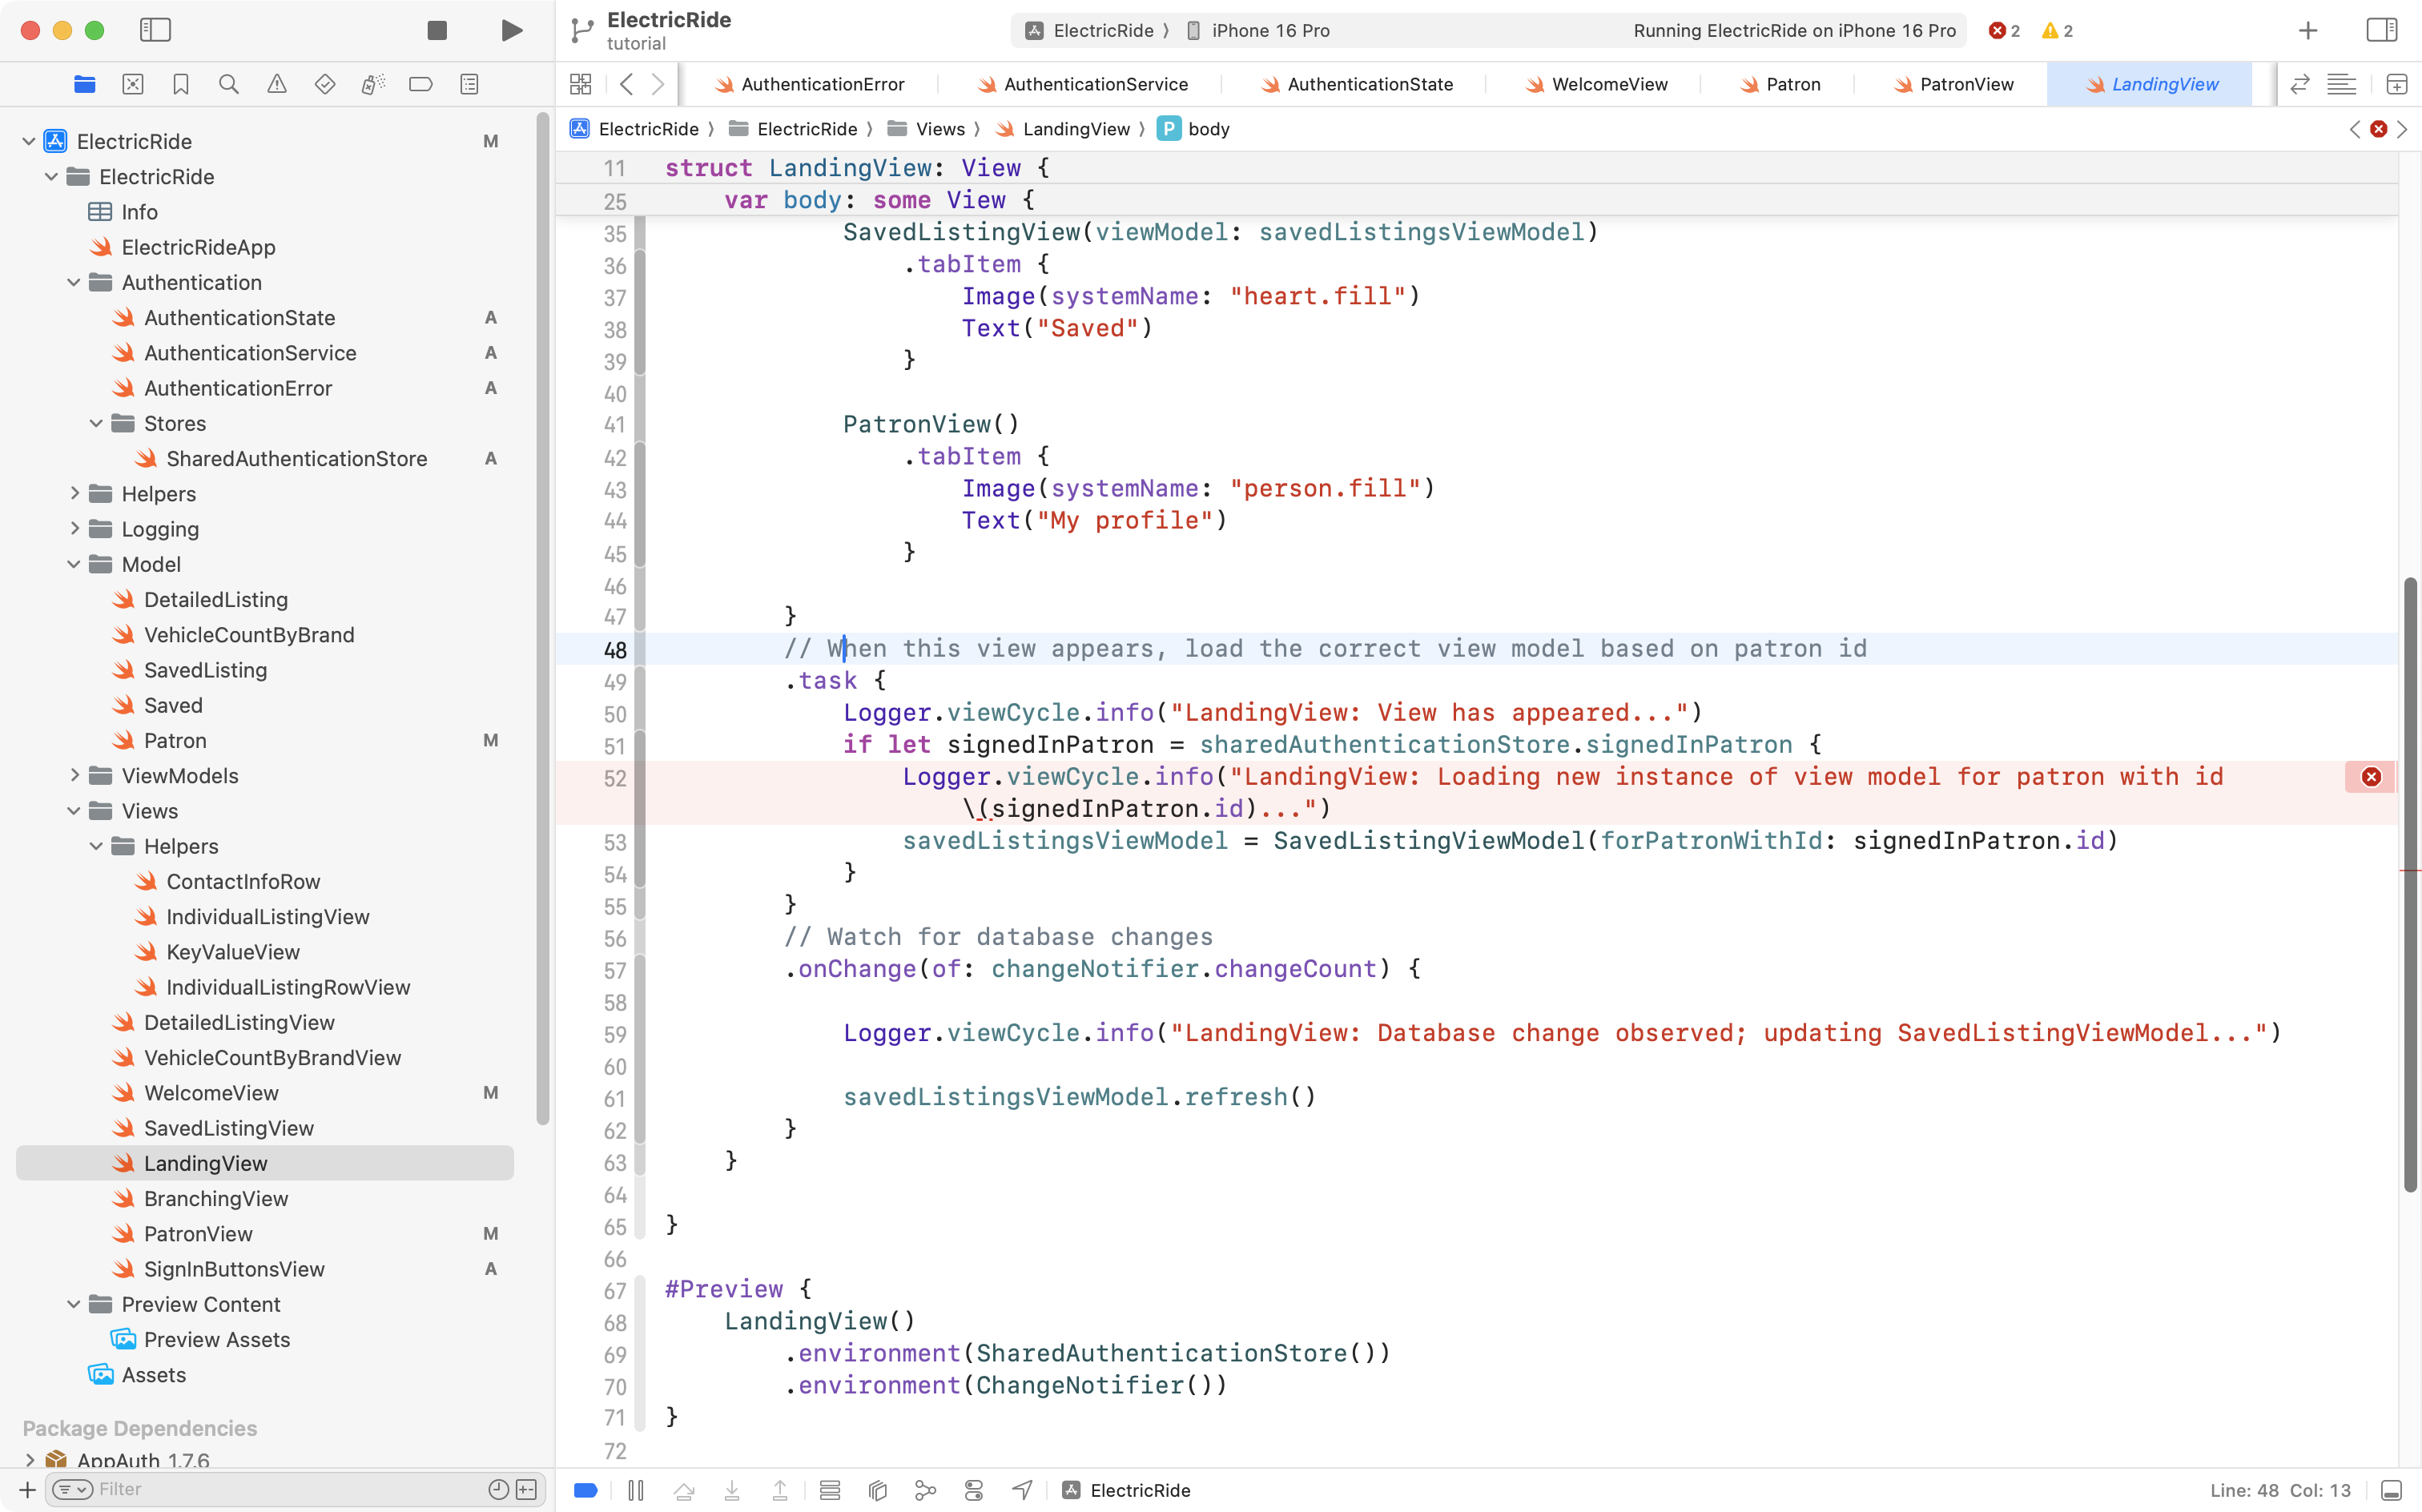
The problem is that he is trying to print a message that users the id property of a signed in patron – but that id is now optional, and the log message code doesn’t know how to handle that optional id. So, Mr. Gordon changed the code to unwrap the optional value first, like this:

Adjust the branching view
The final change is to make BranchingView watch for changes in sharedAuthenticationStore that signal when a user has signed in.
This is what that code looks like right now:
Here is what the code will change to:
//
//  BranchingView.swift
//  ElectricRide
//
//  Created by Russell Gordon on 2025-05-31.
//

import SwiftUI

struct BranchingView: View {

    // MARK: Stored properties

    // Get a reference to the authentication store
    @Environment(SharedAuthenticationStore.self) var sharedAuthenticationStore

    // Whether to show an alert with an authentication error or not
    @State private var showingAlert = false

    var body: some View {

        VStack(spacing: 0) {

            // Show a different view depending on whether user is signed in
            switch sharedAuthenticationStore.authenticationStatus {
            case .signedIn:
                // User is authenticated – show main view of our app
                LandingView()
            case .undetermined, .signedOut:
                // User not authenticated
                WelcomeView()
                    .alert("Authentication Error", isPresented: $showingAlert) {
                        Button("OK", role: .cancel) {
                            // Do nothing
                        }
                    } message: {
                        Text(sharedAuthenticationStore.authenticationException)
                    }
            }

        }
        // Ensures a smoother transition between views when authentication state changes
        .animation(
            Animation.easeInOut(
                duration: 1
            ),
            value: sharedAuthenticationStore.authenticationStatus
        )

    }
}

#Preview {
    BranchingView()
        .environment(SharedAuthenticationStore())
}
It looks like this when added to the project:
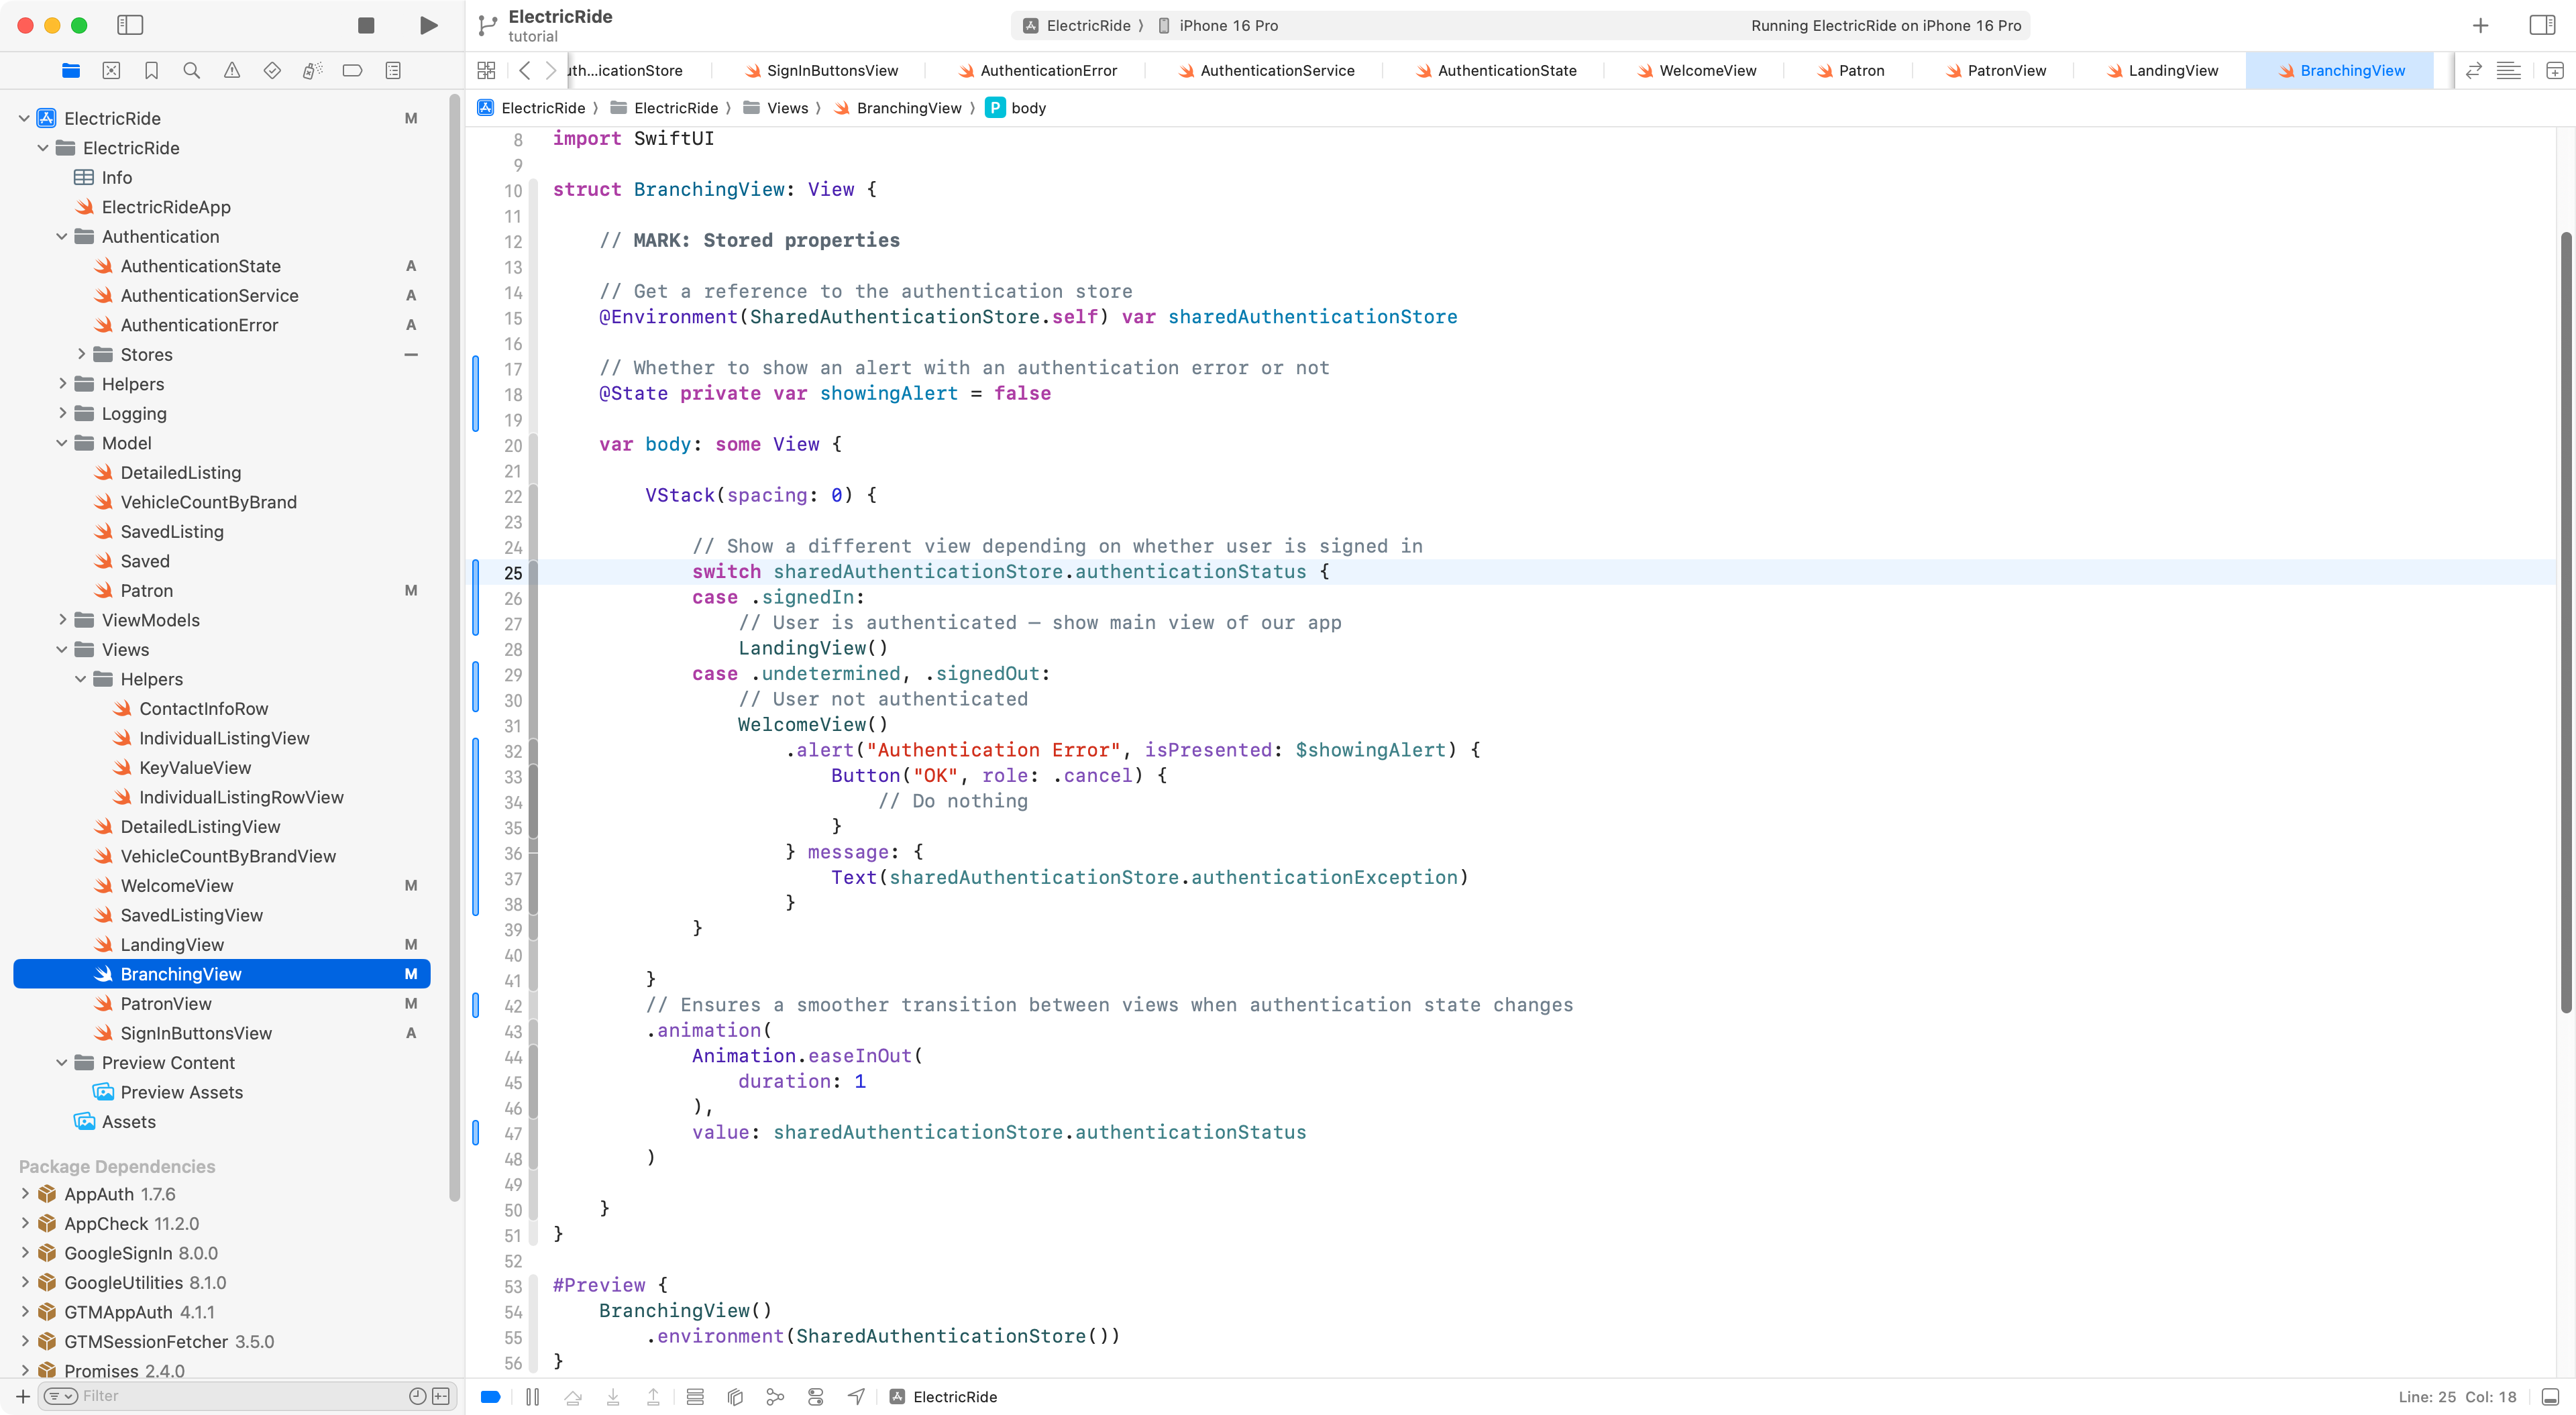
Essentially, the same thing is happening when this view is loaded, but instead of using an if statement to decide what view to use, based on the patronIsSignedIn property of sharedAuthenticationStore, it uses the new authenticationStatus property instead.
Additionally, there is a small amount of code added to present an alert with an error message, in case there was any unexpected problem when signing in.
With all of those changes in place, we can now Sign in with Google to the Electric Ride app:
TIP
These were a lot of code changes. Don’t hesitate to approach Mr. Gordon to ask for assistance while implementing this.