Objective
Create your own unique set of hobby cards that have the look and feel of these broader examples of hobby cards for sports, board games, video games, or other areas of interest.
Purpose
An opportunity to demonstrate your understanding of the following concepts:
- defining structures to group related information
- abstraction using helper views
- arrays (lists)
- navigation or tab views
- custom shapes
Success criteria and exemplar
-
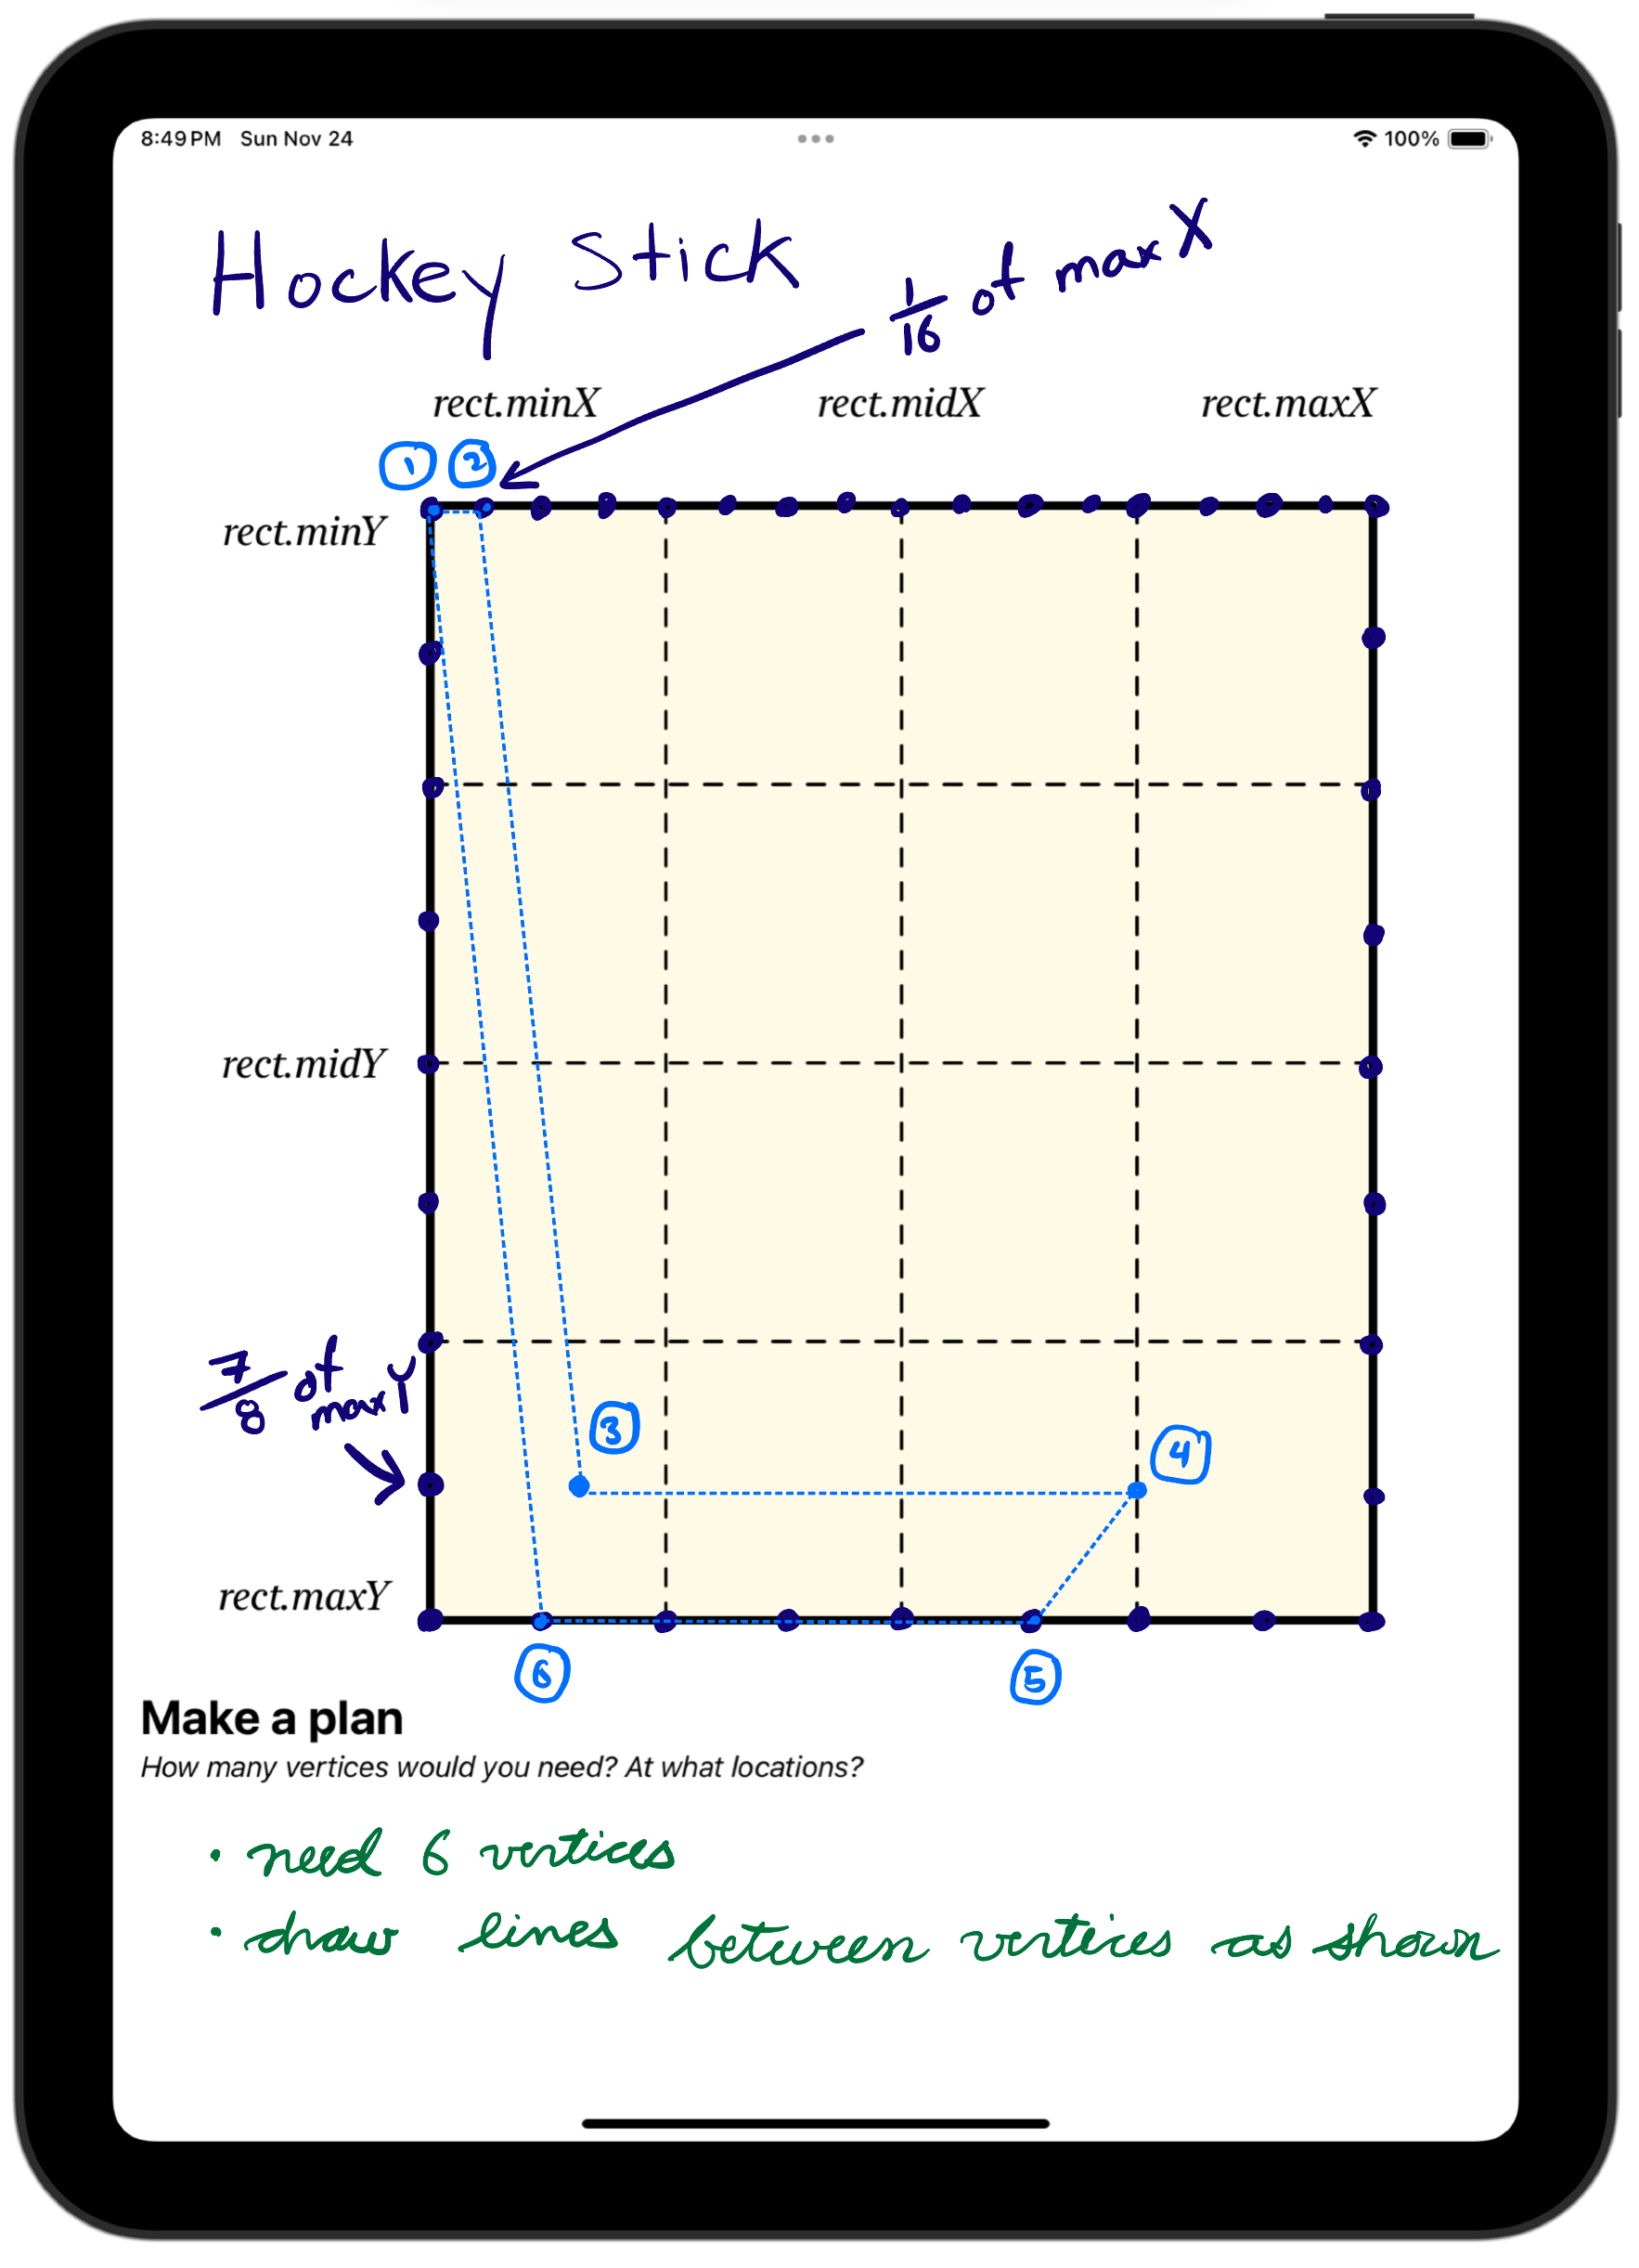
To exceed expectations, make a plan for, and then implement, a custom shape that you will define and use in your new and improved hobby card.
Use this template.
For example:
-
Then make a plan on paper for at least some element of the design of your hobby card.
For example:
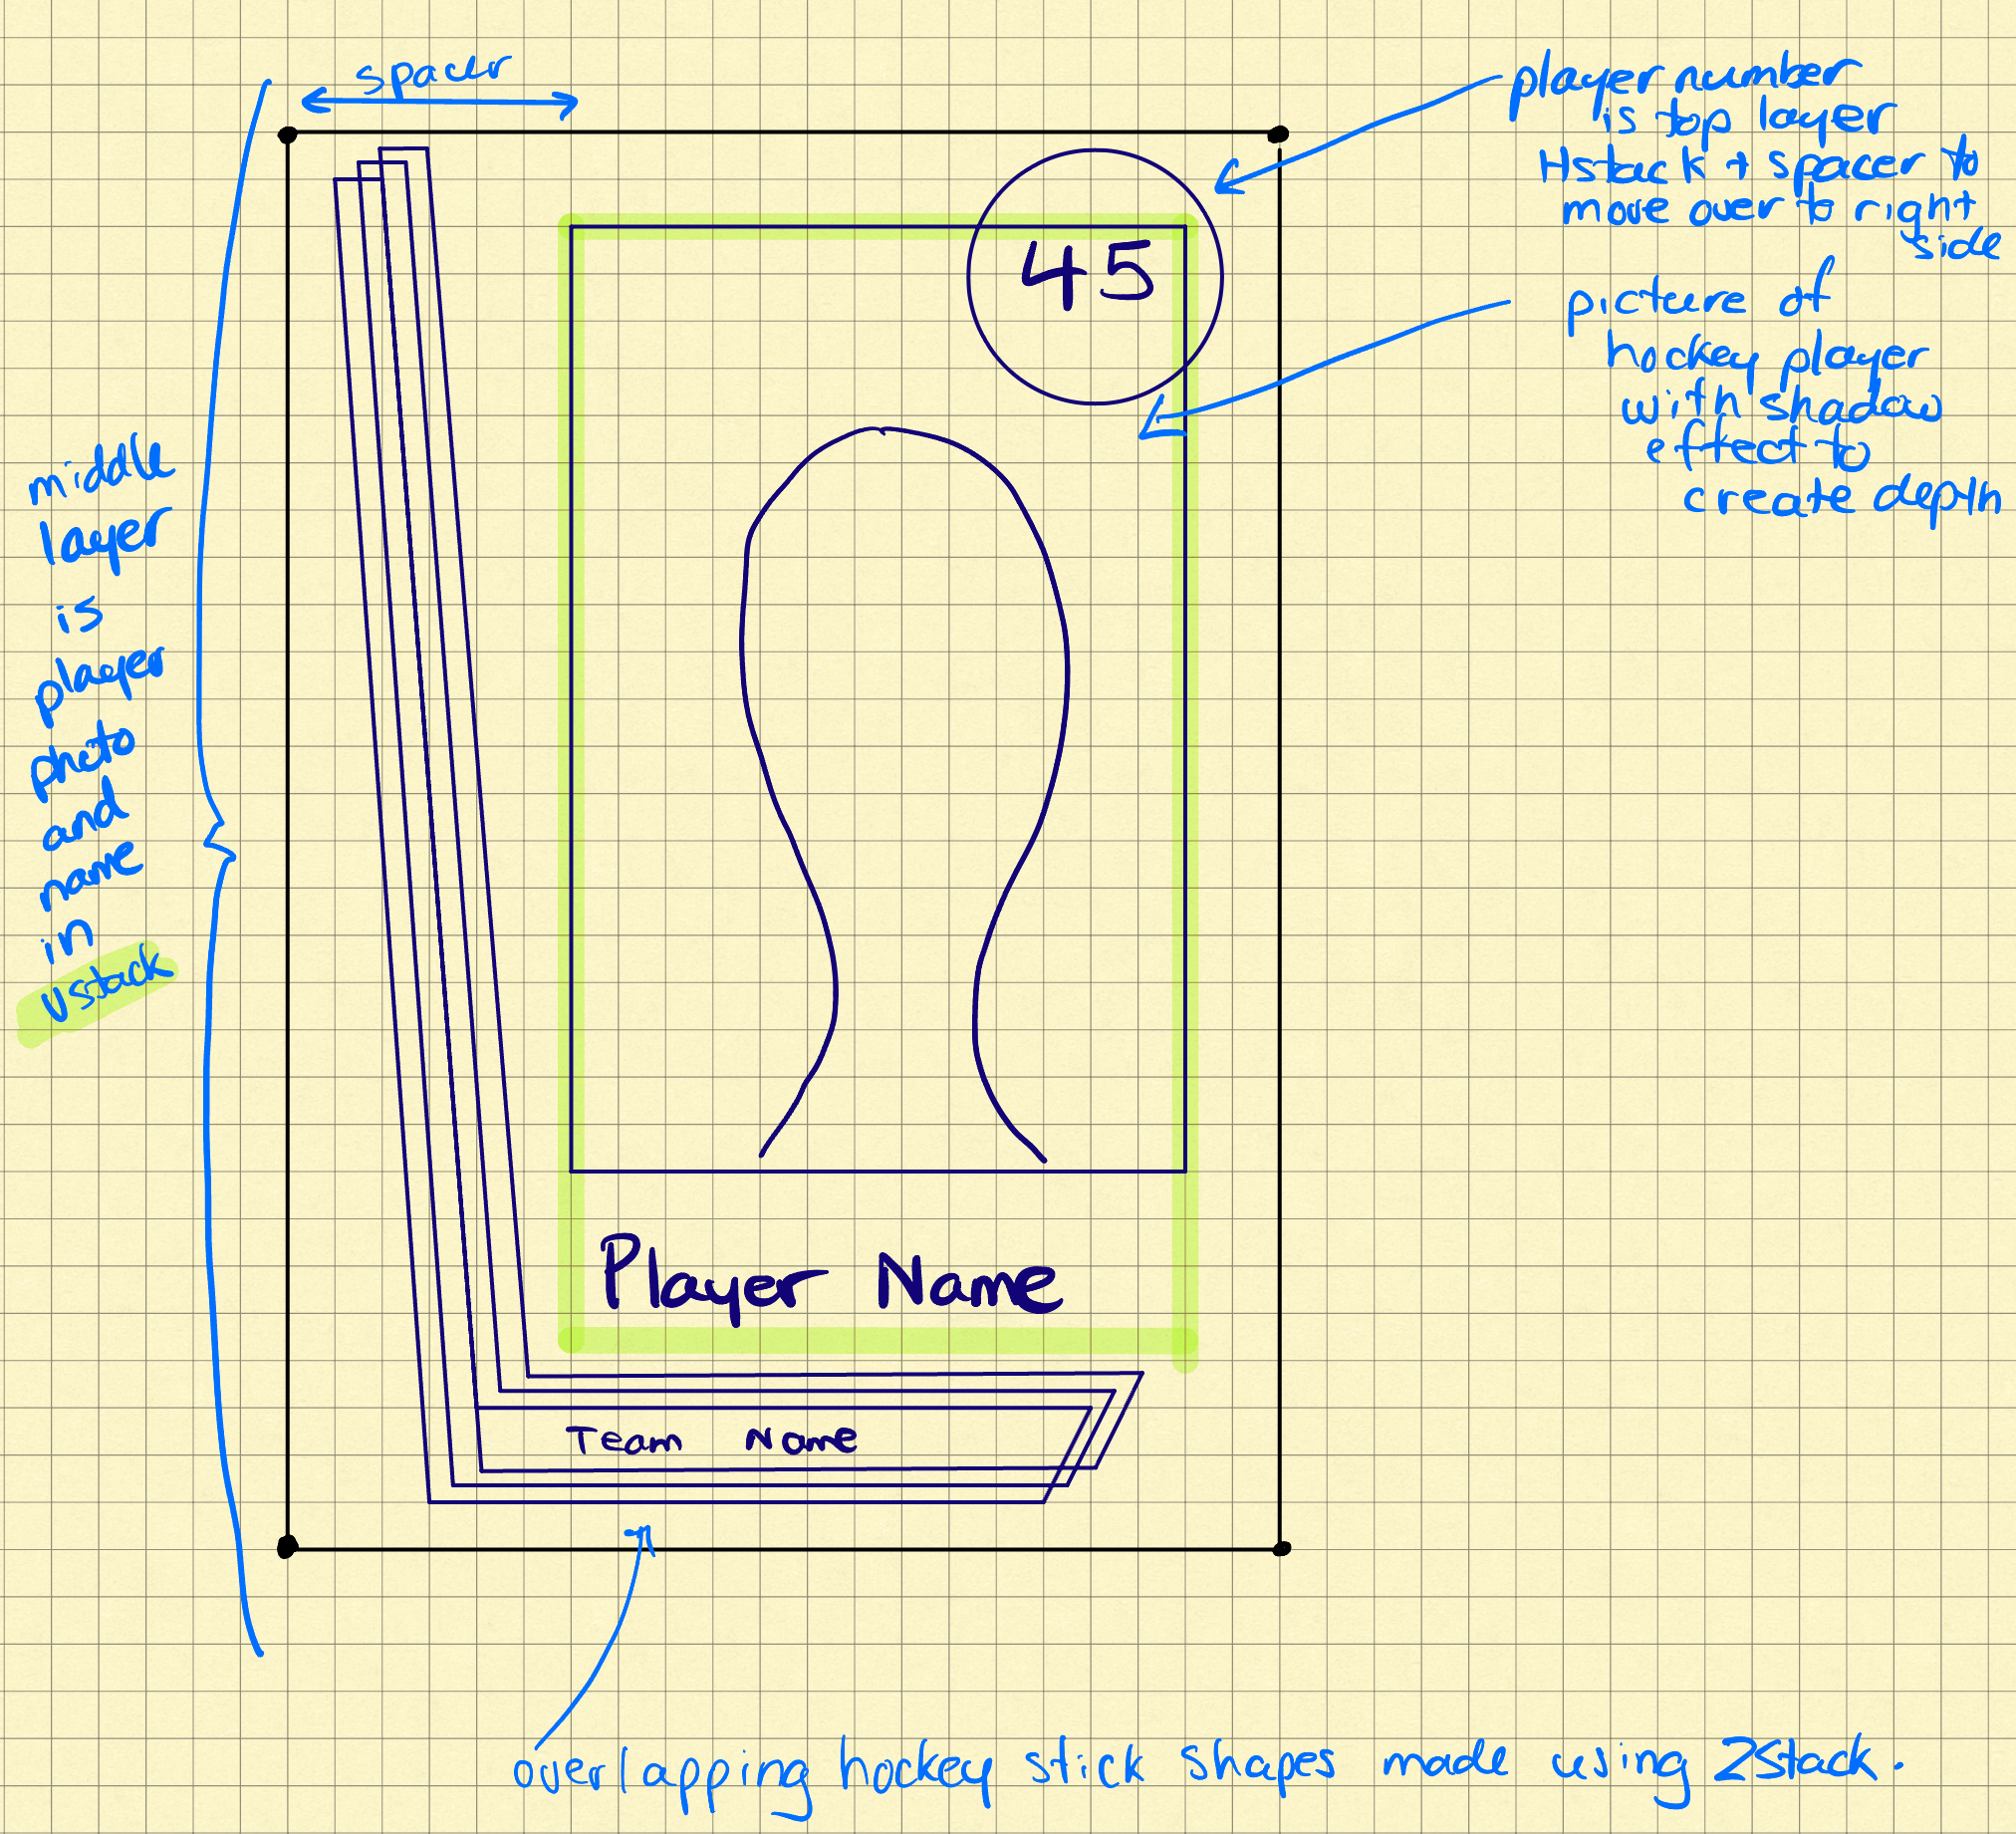
-
Then organize an Xcode project using the techniques we have learned (e.g.: use of folders to organize files) and create your cards – it is OK if your final design varies from your plan – that will happen sometimes as part of the creative process:
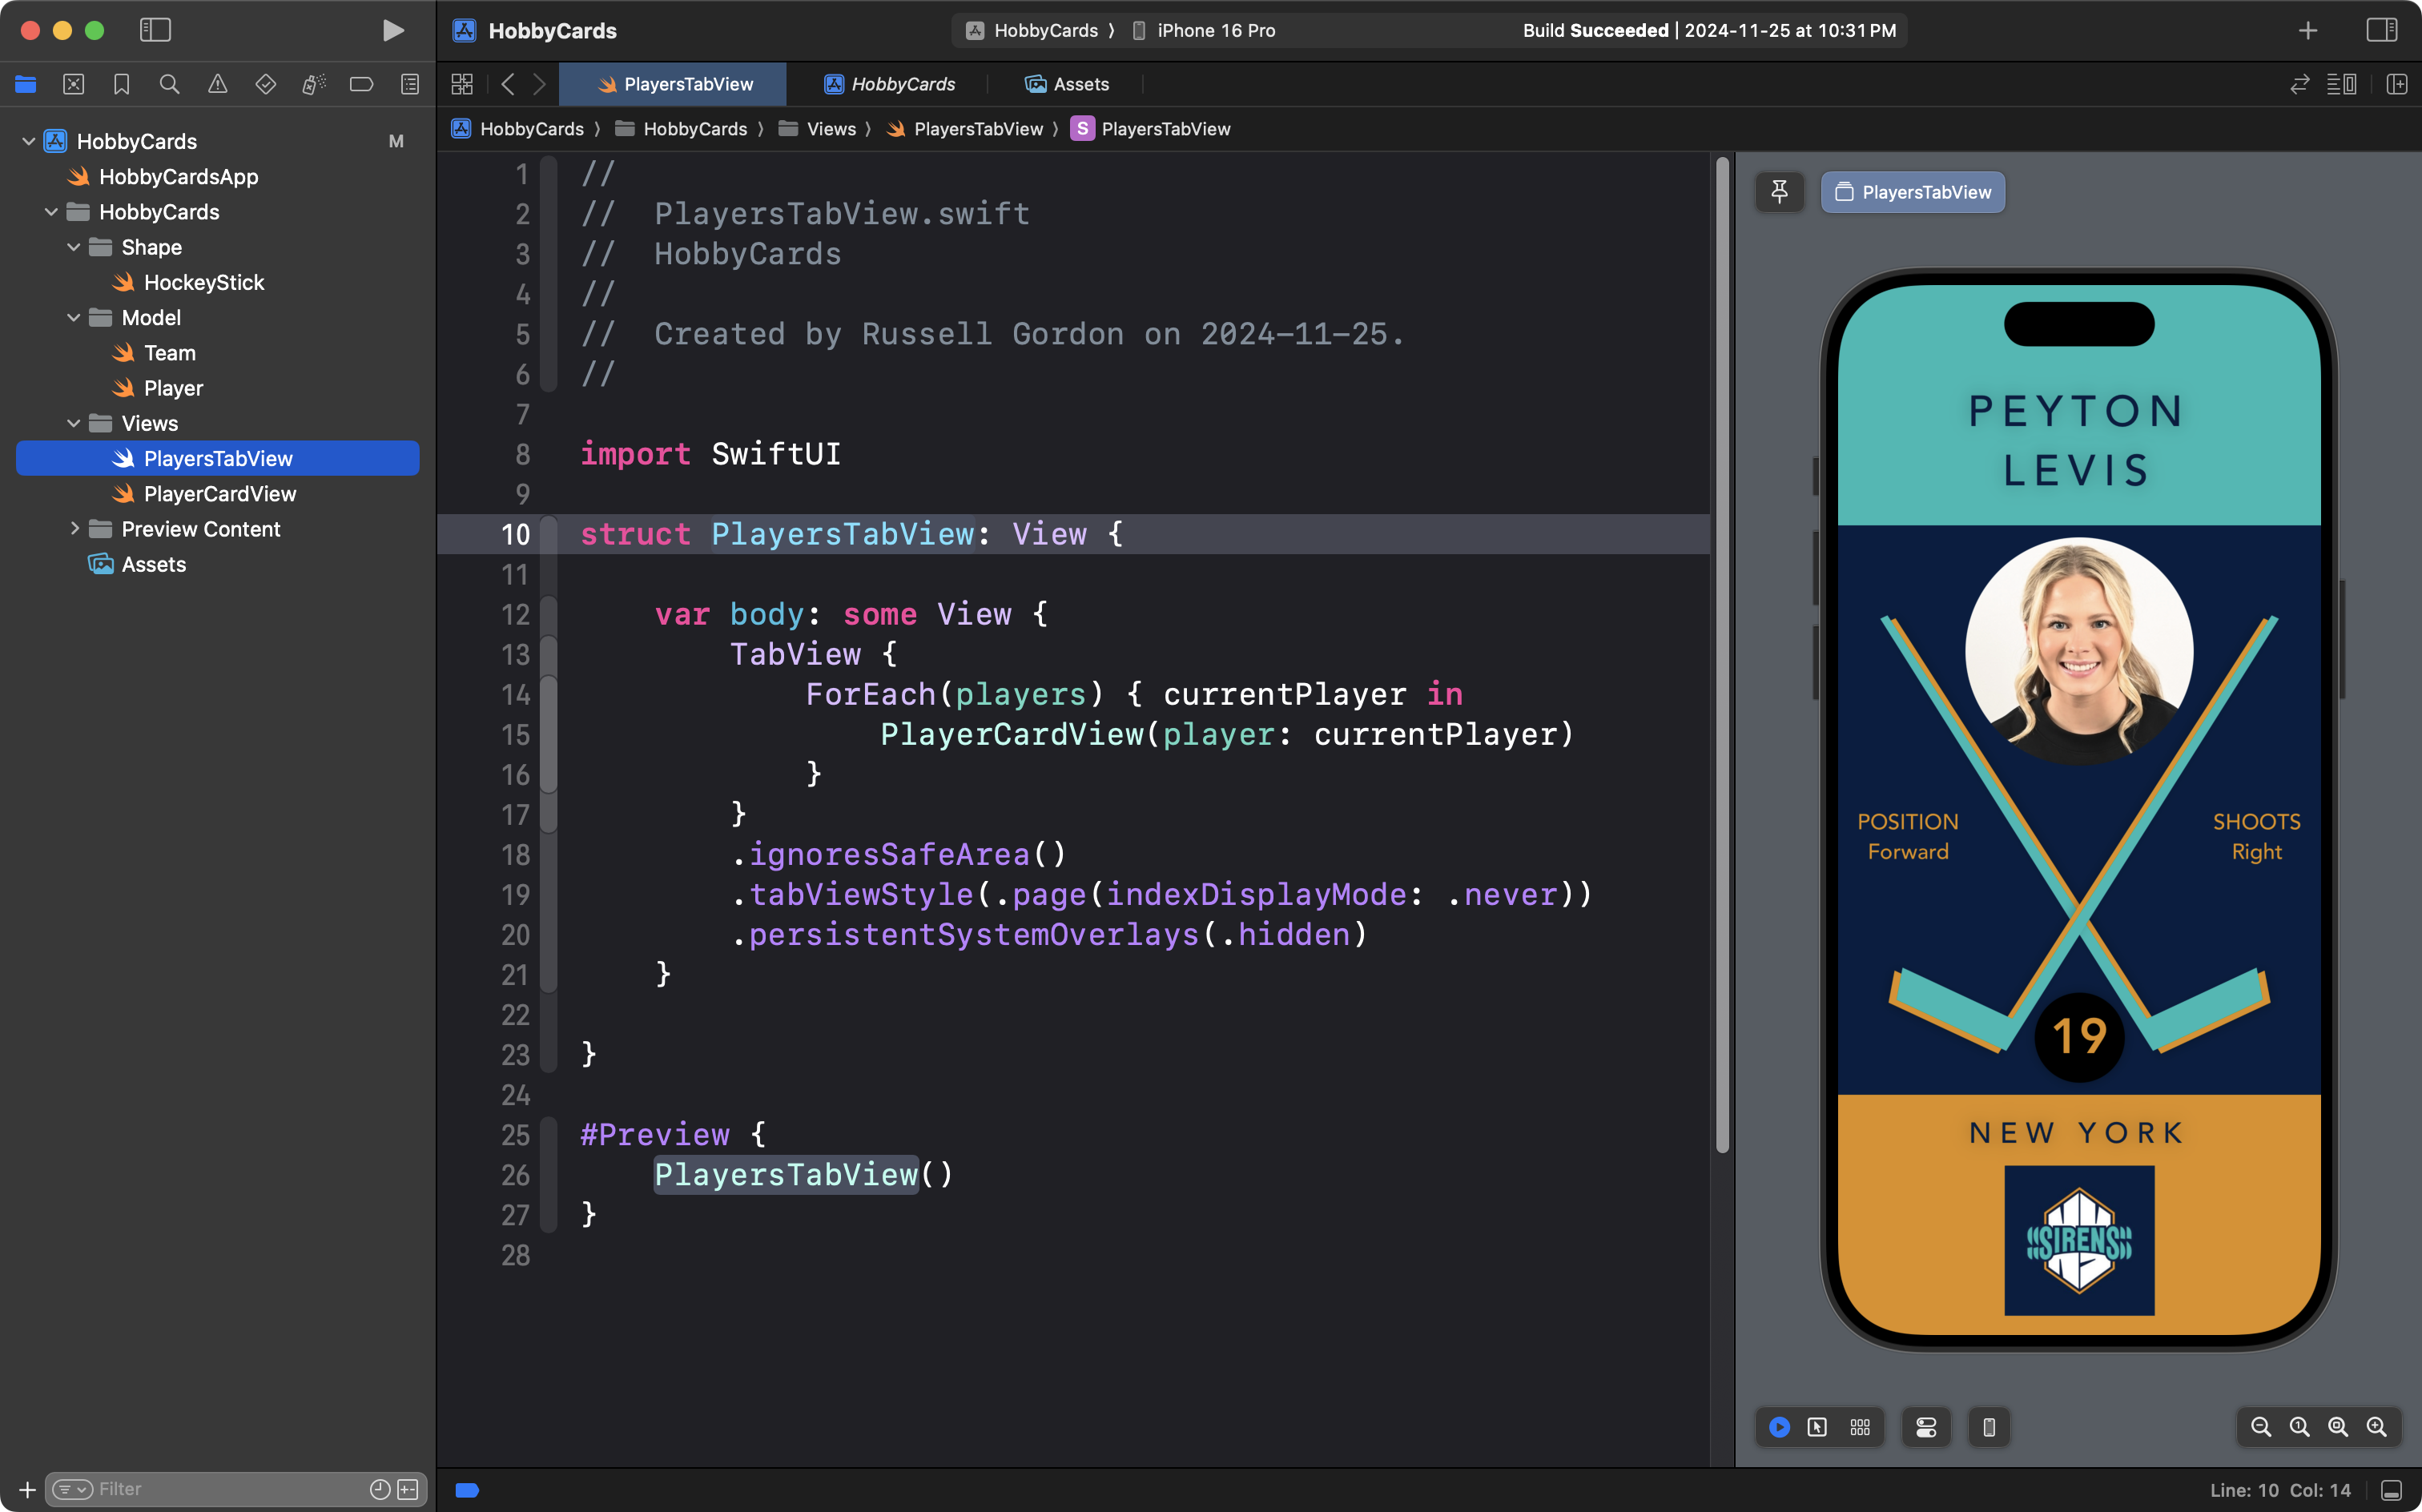
-
Create at least three different cards that the user of your app can navigate between, using either a list and navigation links, or a paged tab view – the code to produce a paged tab view is shown in the screenshot above:
_10.9_2024-11-24_20.49.40.png)
-
Be sure to write code that follows established style conventions.
-
Use source control well by committing and pushing your work to a remote on GitHub at regular intervals. This is a must – you cannot meet expectations without using source control in this manner:
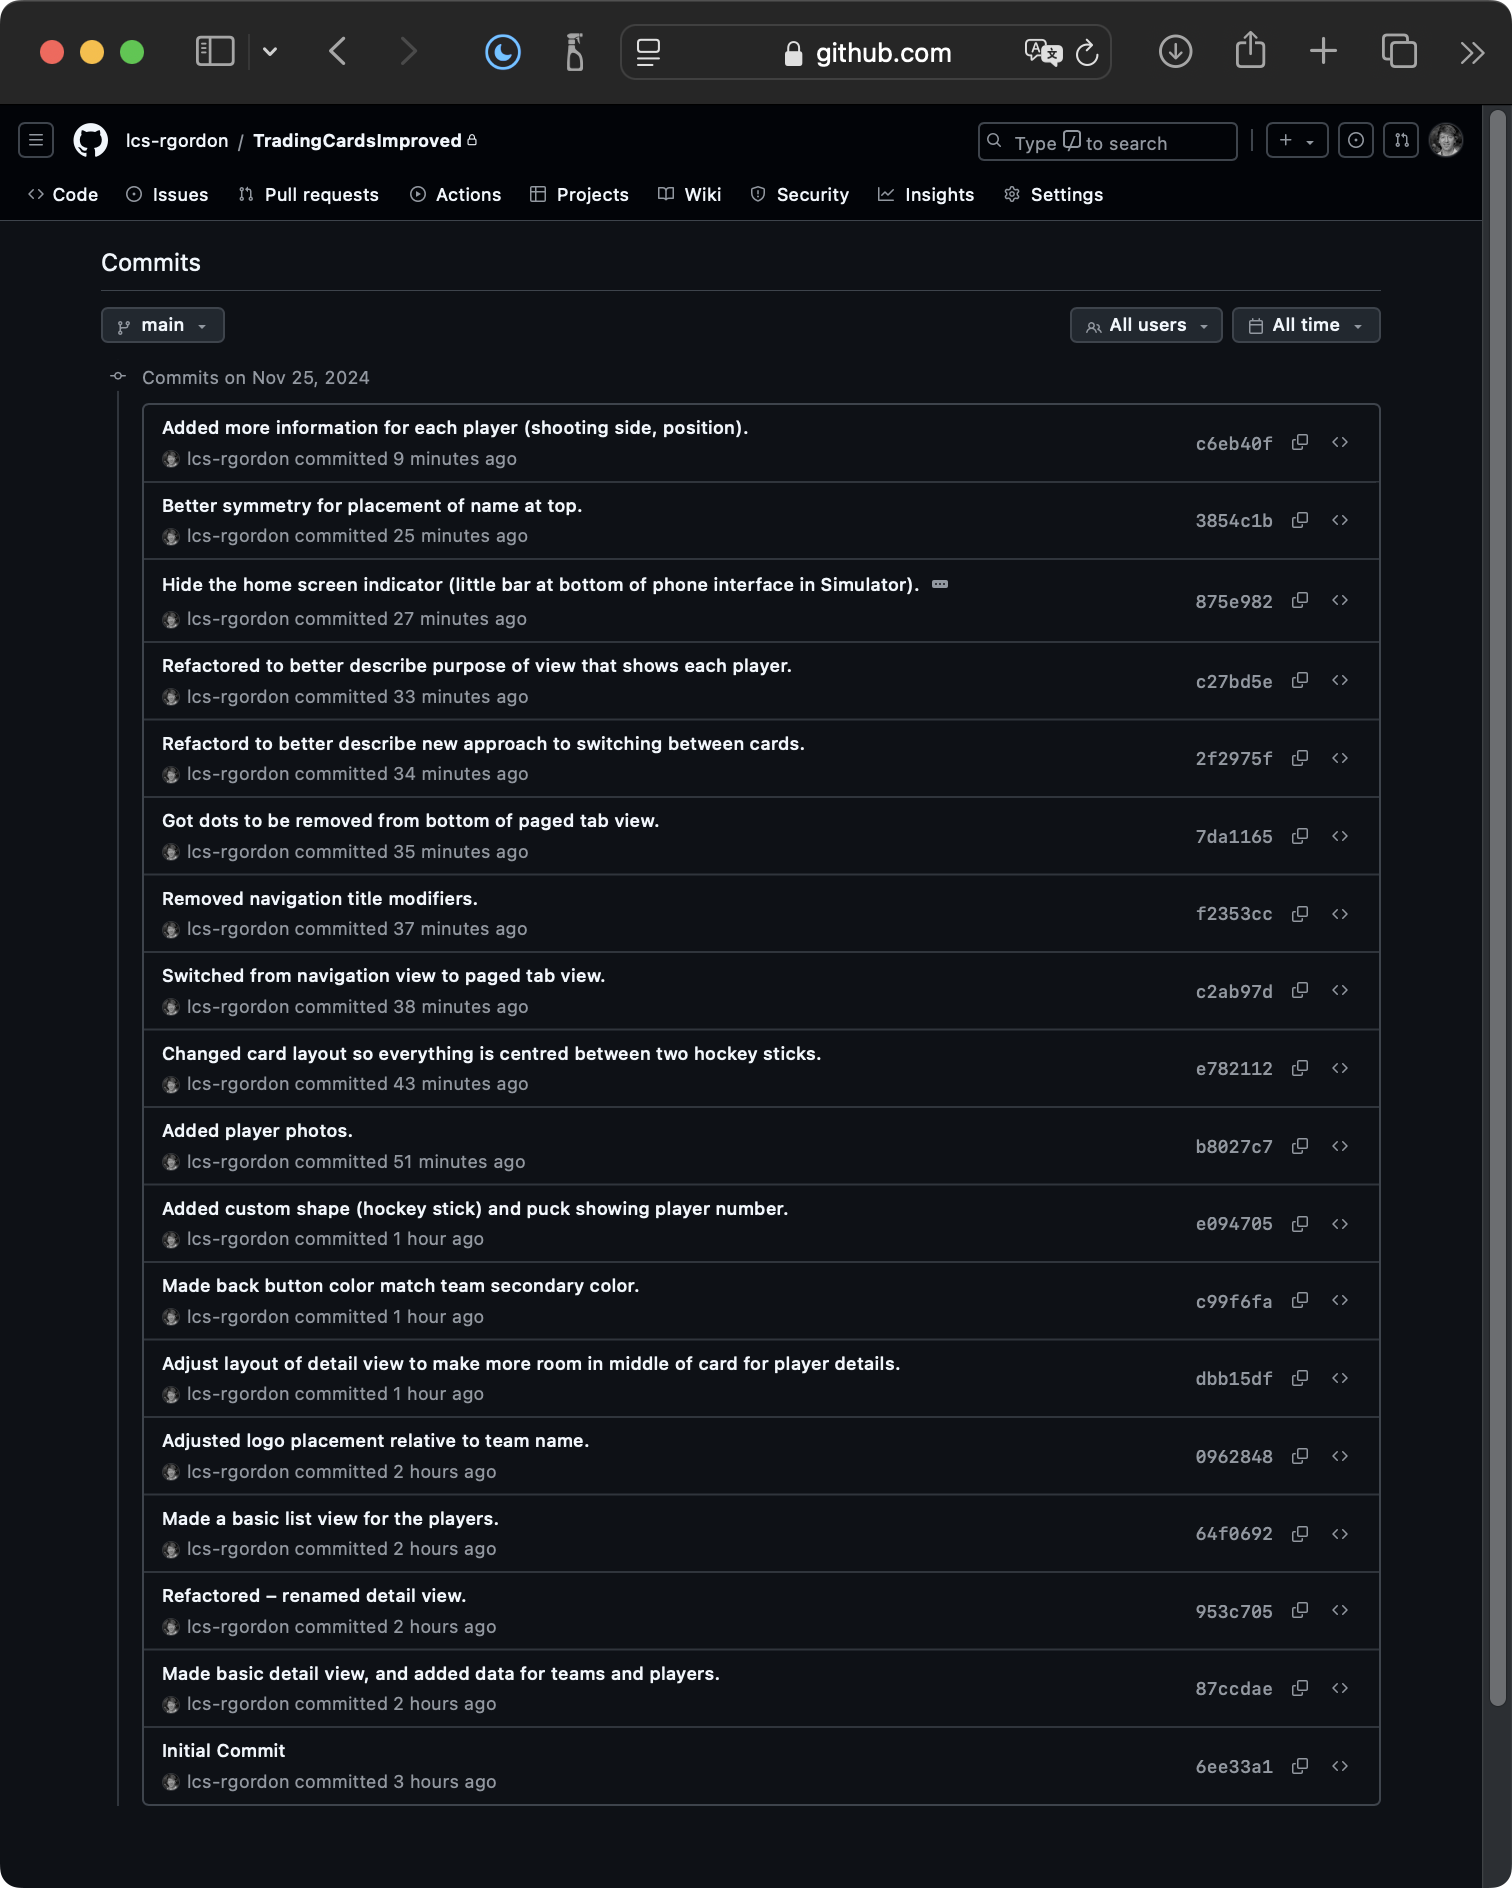
-
Finally, check the Tips section below. The more ways you can extend and “spice up” your design by trying out some new view modifiers, the more you are demonstrating how you have exceeded the core expectations of this task.
What you’ll need to begin
- Xcode
- the SF Symbols App installed on your computer, also for reference
- your copy of SwiftUI Views Mastery, downloaded to your computer, so you can look up examples as needed
Progress and due date
The task is due no later than 11 PM on Wednesday, December 18, 2024.
NOTE
Ideally, you will be well on your way to completing this task during our final class of the module on December 18, since you will be having a brief portfolio review conversation with Mr. Gordon on that day.
As you make progress with this task, on Notion, be sure to:
- Share progress regularly (here is how Mr. Gordon’s design evolved)
- Include screenshots
- Be sure to post the address of your GitHub remote at some point
NOTE
Your work is not considered as handed in until the GitHub remote has been shared and you have committed and pushed all your work.
Further examples
Here are some examples of possible layouts that you could aim to reproduce, or use as inspiration for a similar layout:
.png)
.png)
.png)
.png)
.png)
.png)
.png)
.png)
.png)
Tips
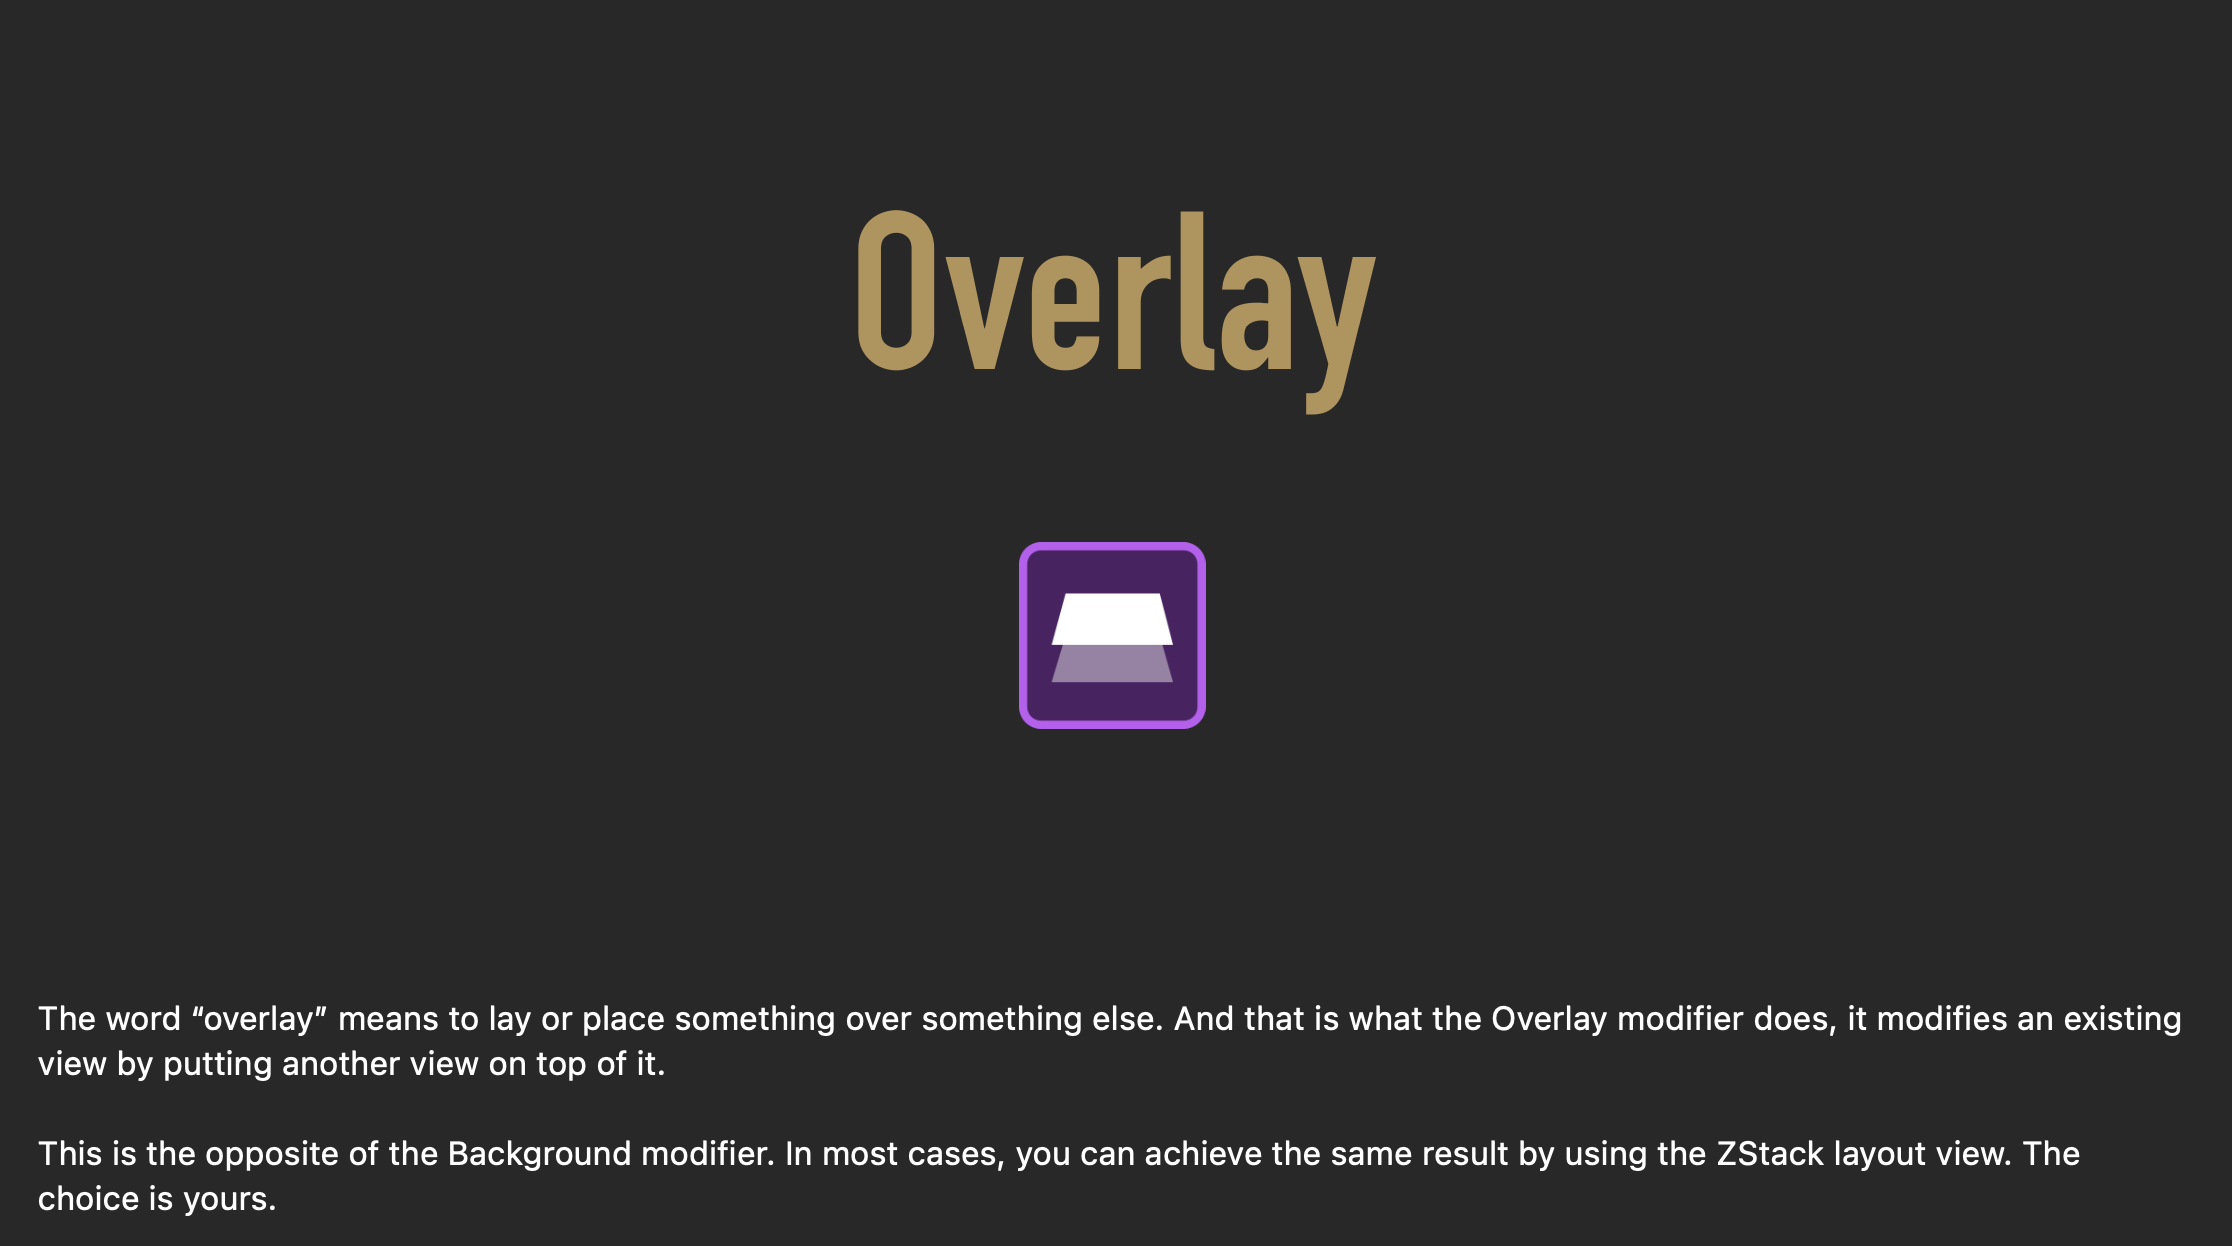
Overlays
The .overlay view modifier is a convenient alternative to using a ZStack and may be useful depending on your needs – you are strongly recommended to consult pages 801 to 804 in SwiftUI Views Mastery:
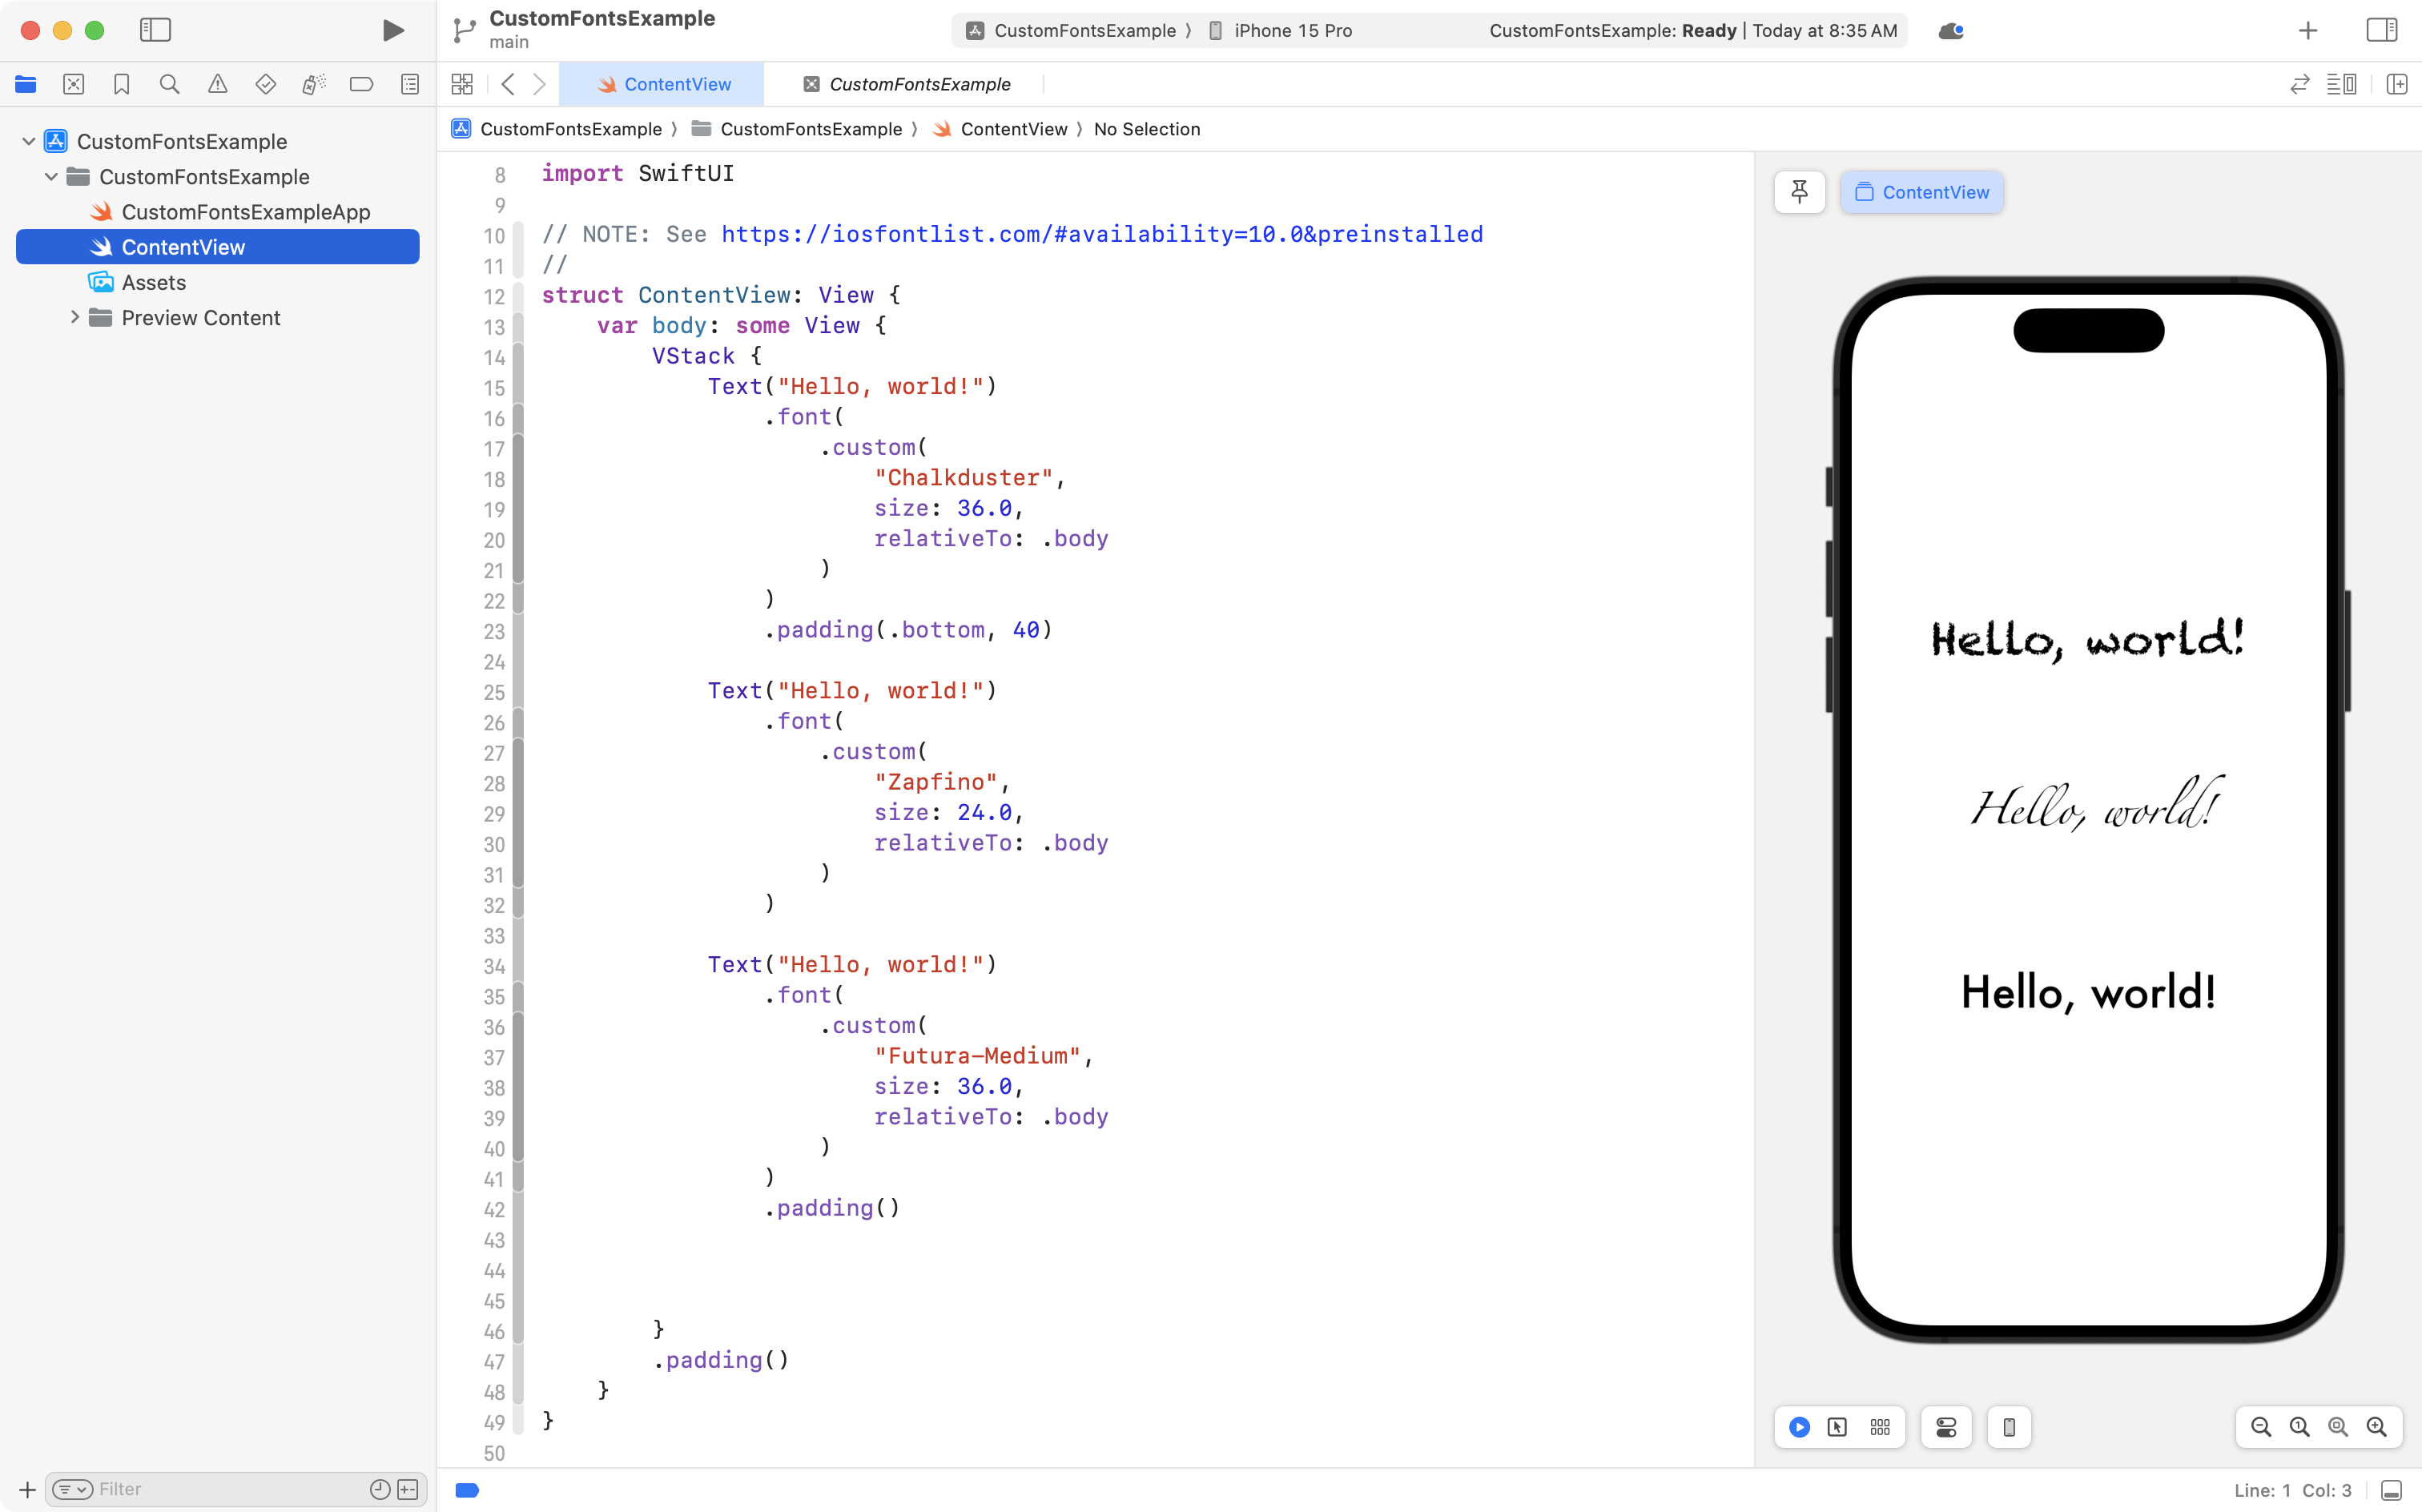
Typefaces
You can use other typefaces in iOS applications.
Consult the iOS Fonts website for a quick reference.
TIP
Page 478 in SwiftUI Views Mastery has examples of how to use custom fonts, as well.
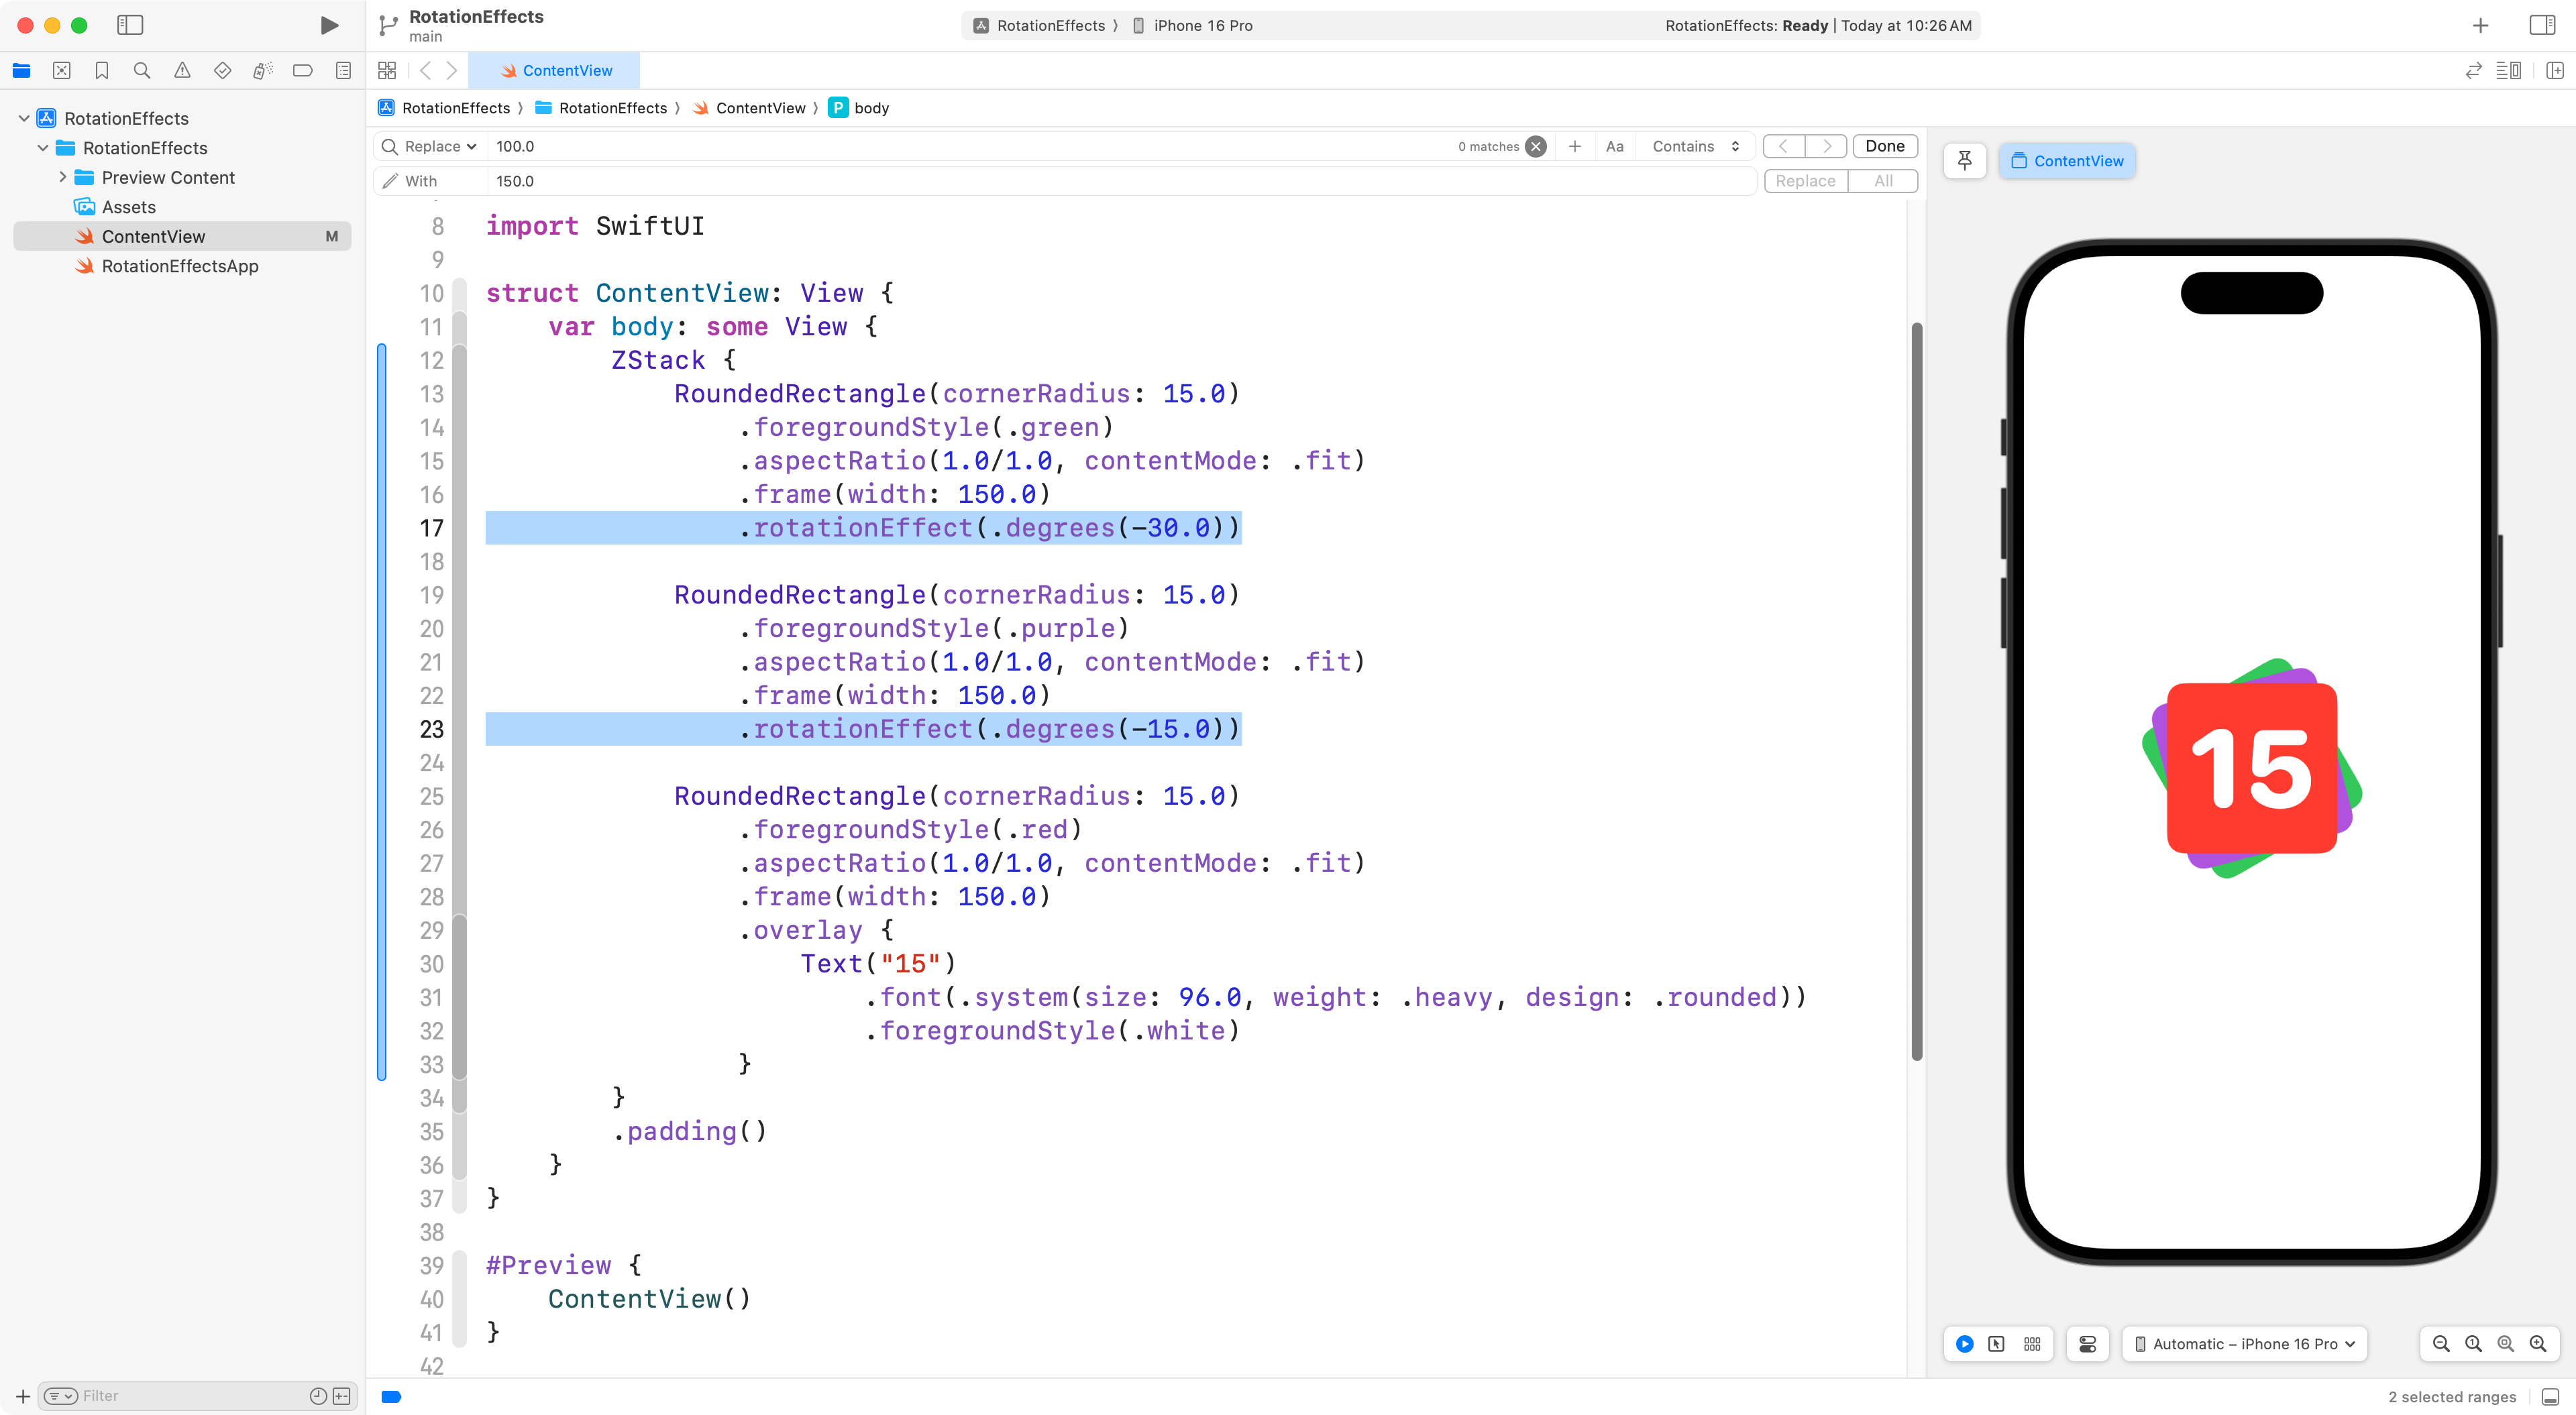
Rotation (2D)
Any view in SwiftUI can be rotated using the .rotationEffect view modifier.
Here is a short example of how rotation of views might be used to create a nice effect – find a way to use rotation in your own project, without using this exact example:
TIP
Read more about rotating views in two dimensions on page 901 of SwiftUI Views Mastery.
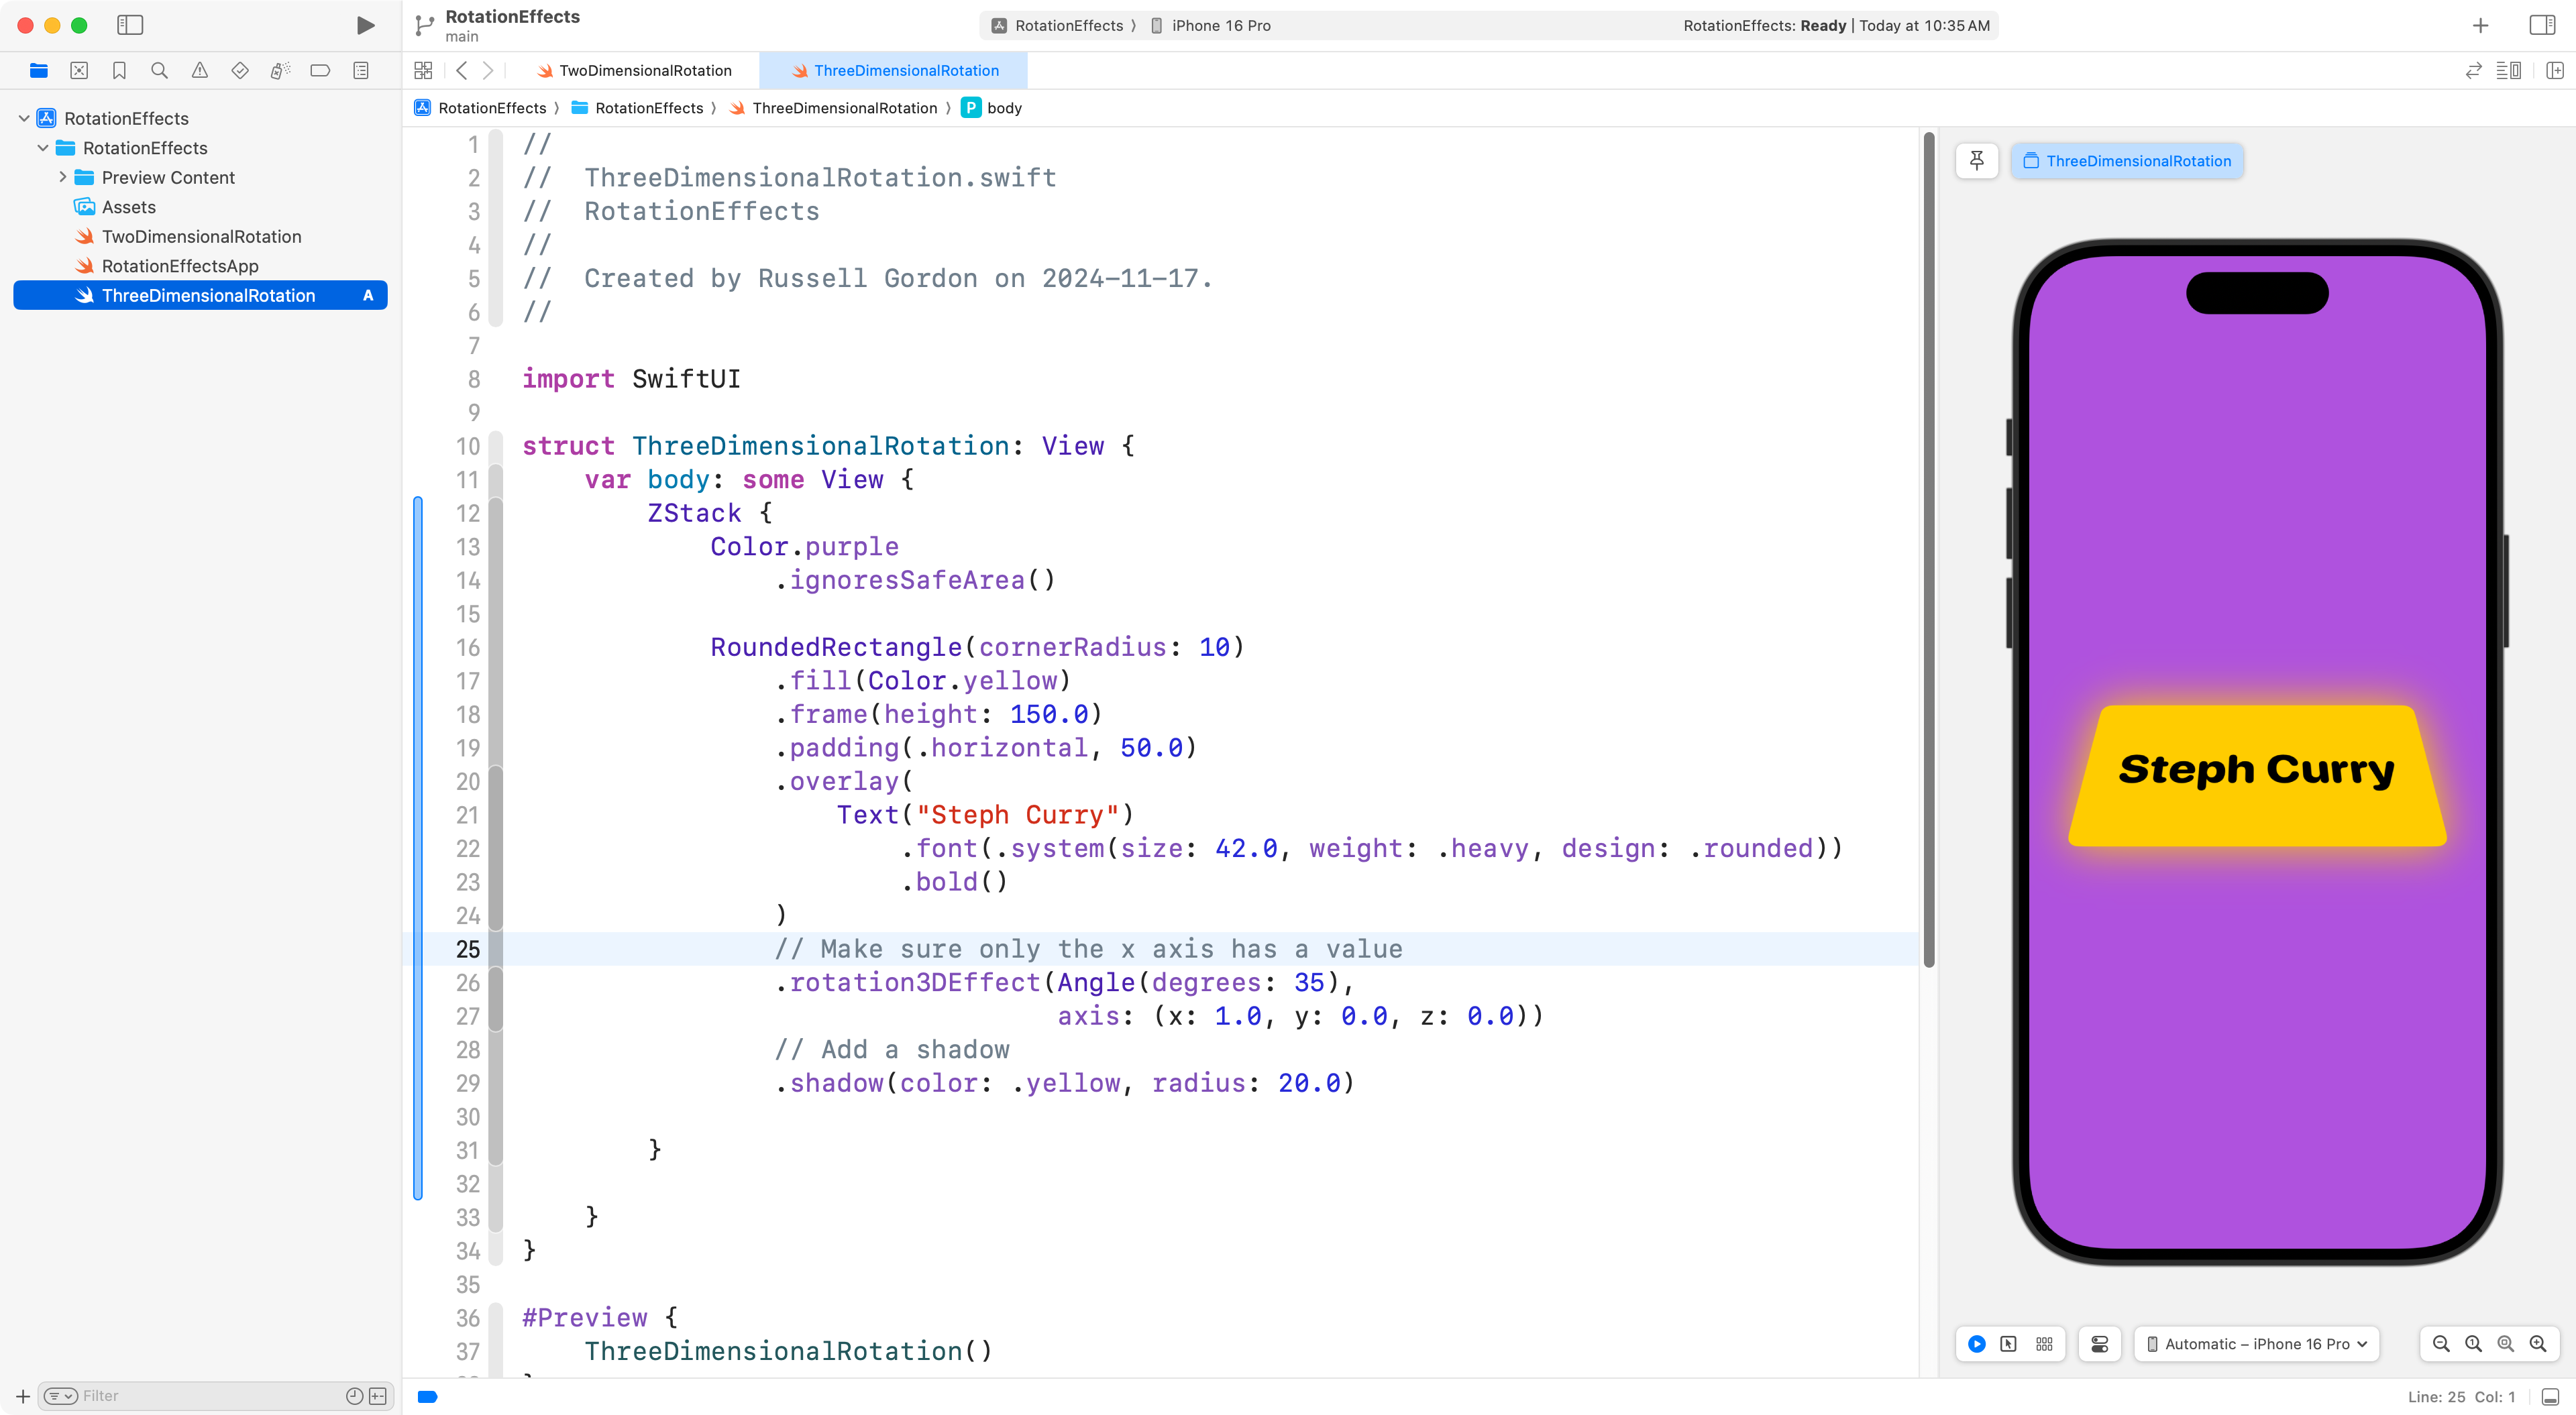
Rotation (3D)
There is also a .rotation3DEffect view modifier.
Here is a short example of how this might be used to create a nice effect:
TIP
Read more about rotating views in three dimensions on page 904 of SwiftUI Views Mastery.
Custom colours
You can create custom colours (or clone colours from existing apps or webpages).
Here is a mini-tutorial on how to create custom colour sets.
-1.png)
Gradients
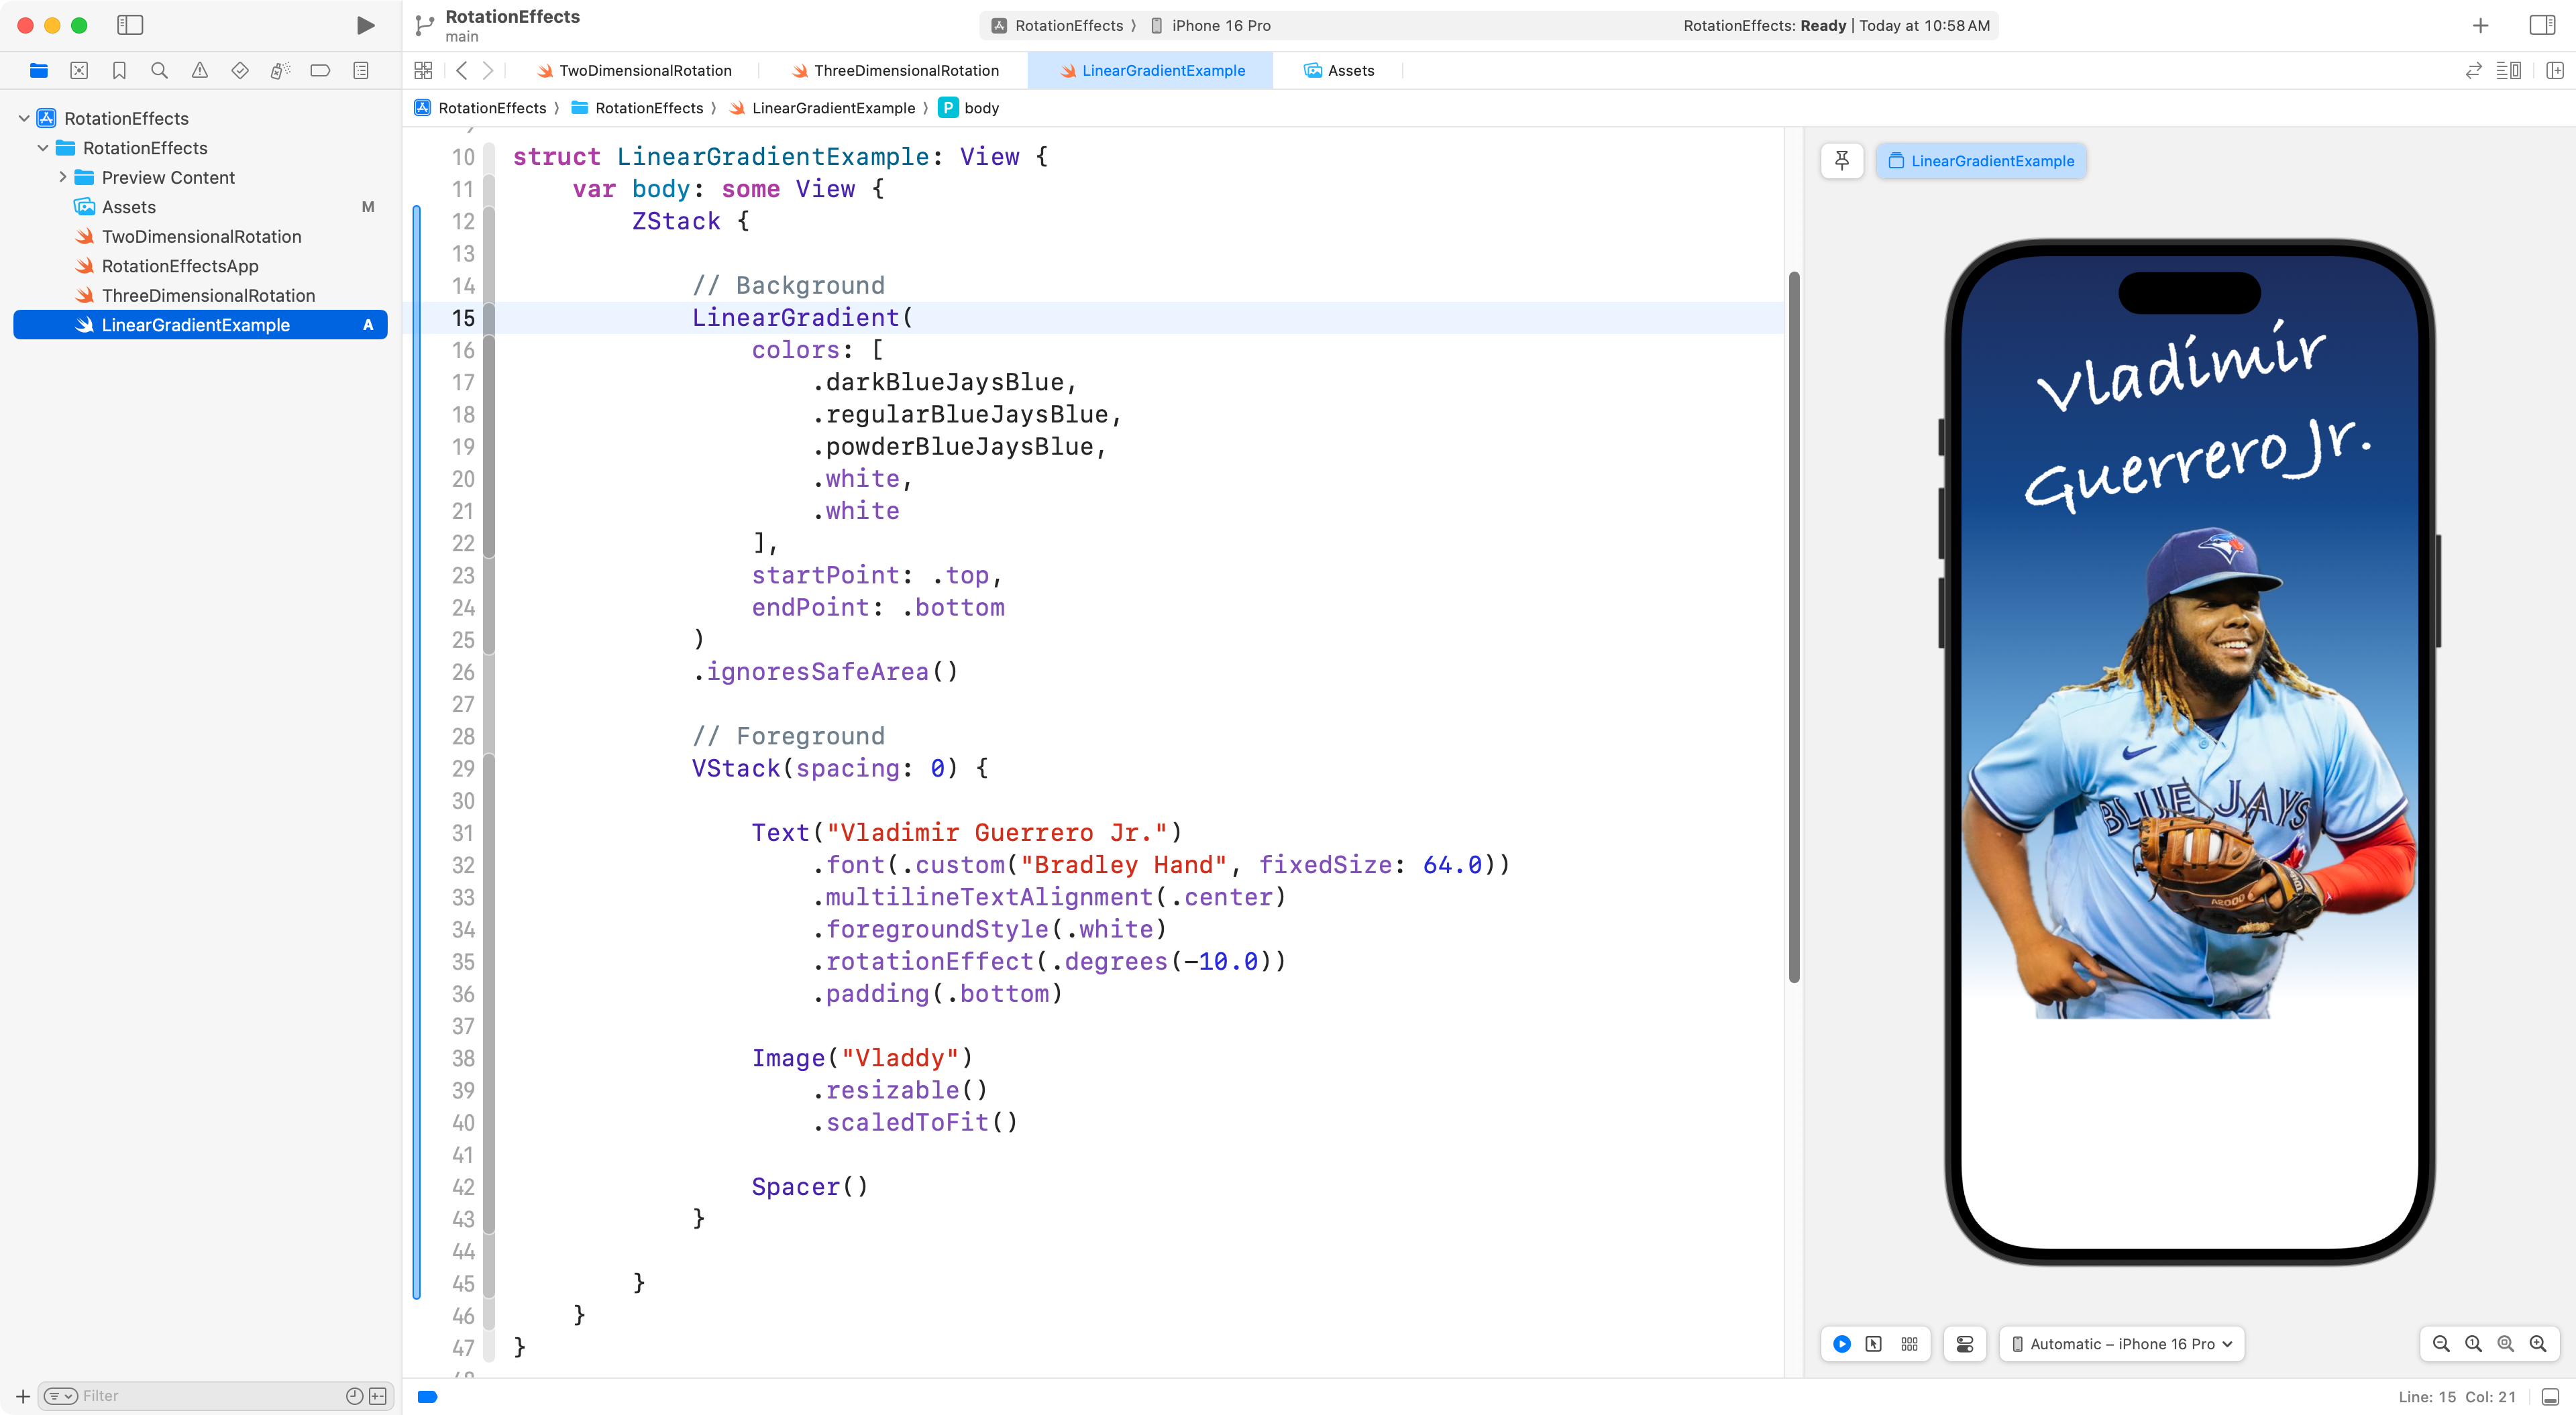
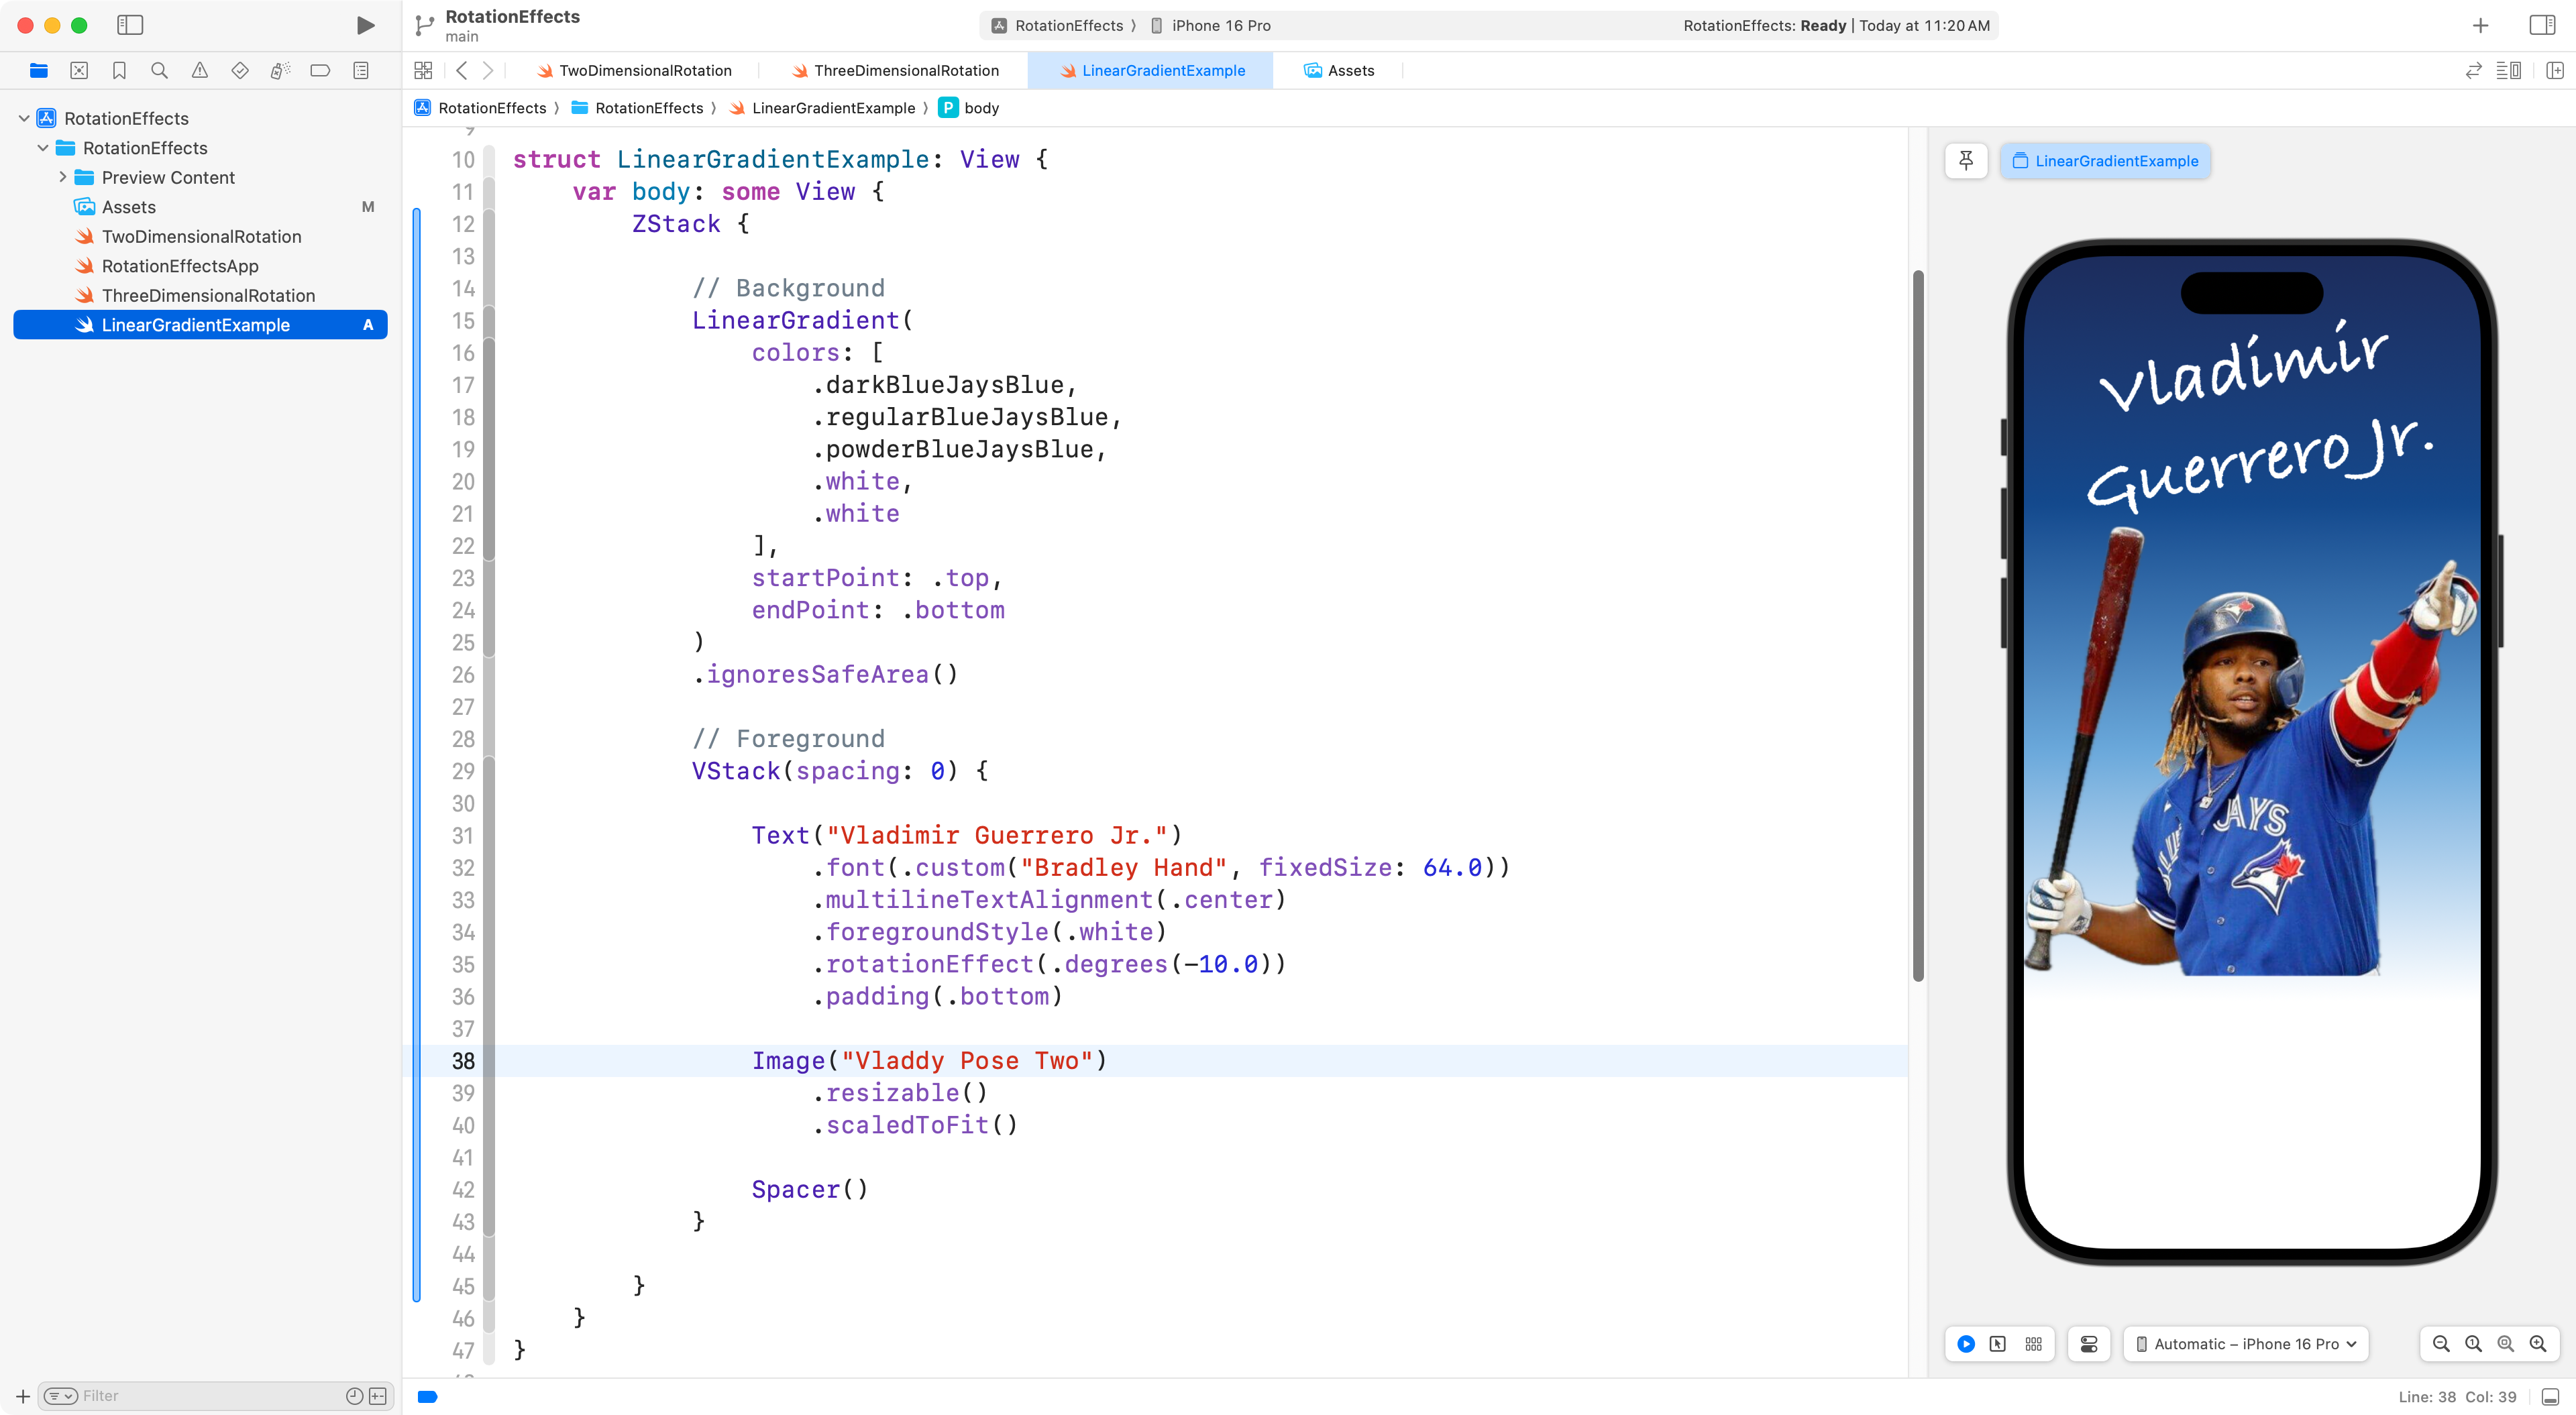
We can use gradients to fill a shape or as a background – a gradient is a transition from one colour to at least one other colour.
Here is an example of what this might look like, using a Blue Jays theme and some custom colors:
TIP
Read more about linear gradients on page 654 of SwiftUI Views Mastery.
There are other types of gradients you can use too (see page 639).
Image Editing
Sometimes it’s nice to be able to extract an image from a photograph, to use it in our apps:
Read this mini-tutorial to learn how to extract the subject of a photograph from it’s background.
NOTE
It’s only acceptable to copy images like this from the Internet for an academic exercise like this one. Were you looking for images to use in an actual app you wish to release to the public, you would need to either purchase the rights to use that image, or find an image that is licensed for the uses you need.
Final advice
IMPORTANT
Do not use frames for positioning. Your layout should work well on multiple screen sizes.
Put another way, use frames only to size the width or height of an image, but not both.