Introduction
The purpose of this lesson is to build upon what was demonstrated in the Retrieving Data from a Remote Endpoint lesson, by learning how to:
- share information between multiple screens within an app
- add swipe gestures to either discard a joke (swipe left) or save a joke (swipe right)
- persist (permanently save) information
- use a share link to send a joke to a friend
- delete an item from a list
Between today’s lesson and the lesson available in our next class, you will have an app that looks like this:
Let’s begin.
Saving jokes
This part of the lesson is not very different at all from what you did in prior lessons to save an instance of a data type.
First, in our view model, we need a place to save favourite jokes.
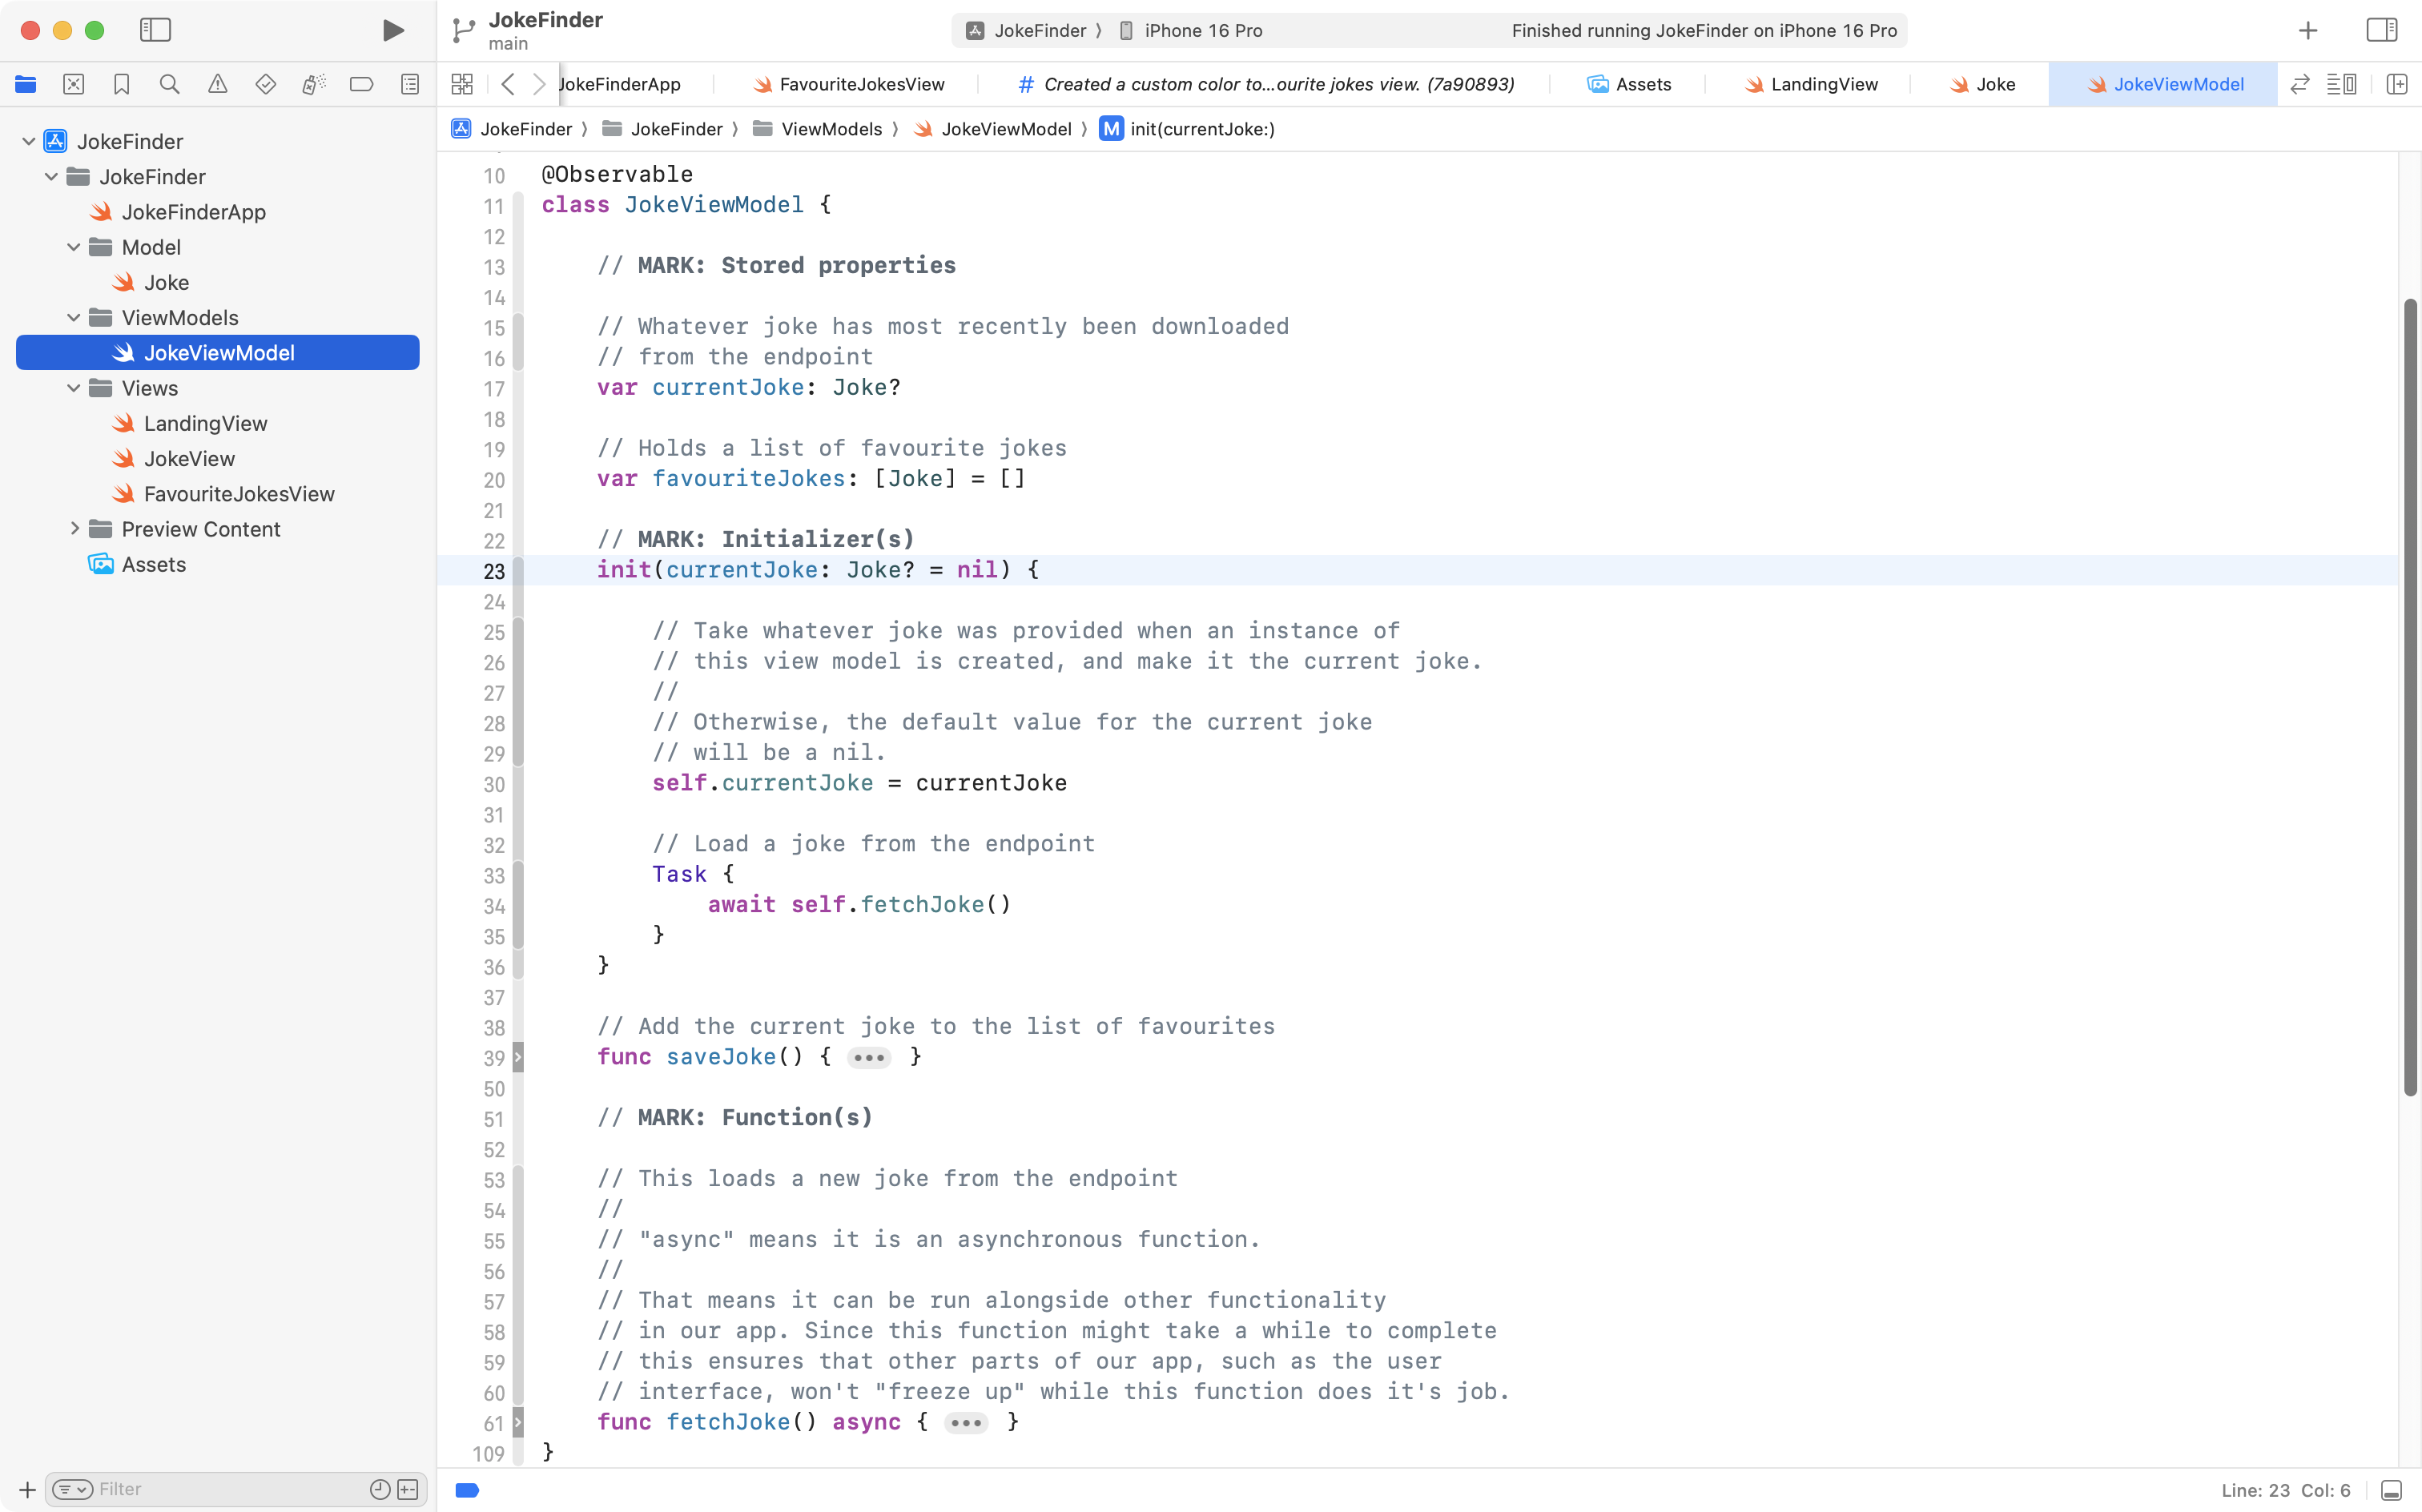
So, take this code:
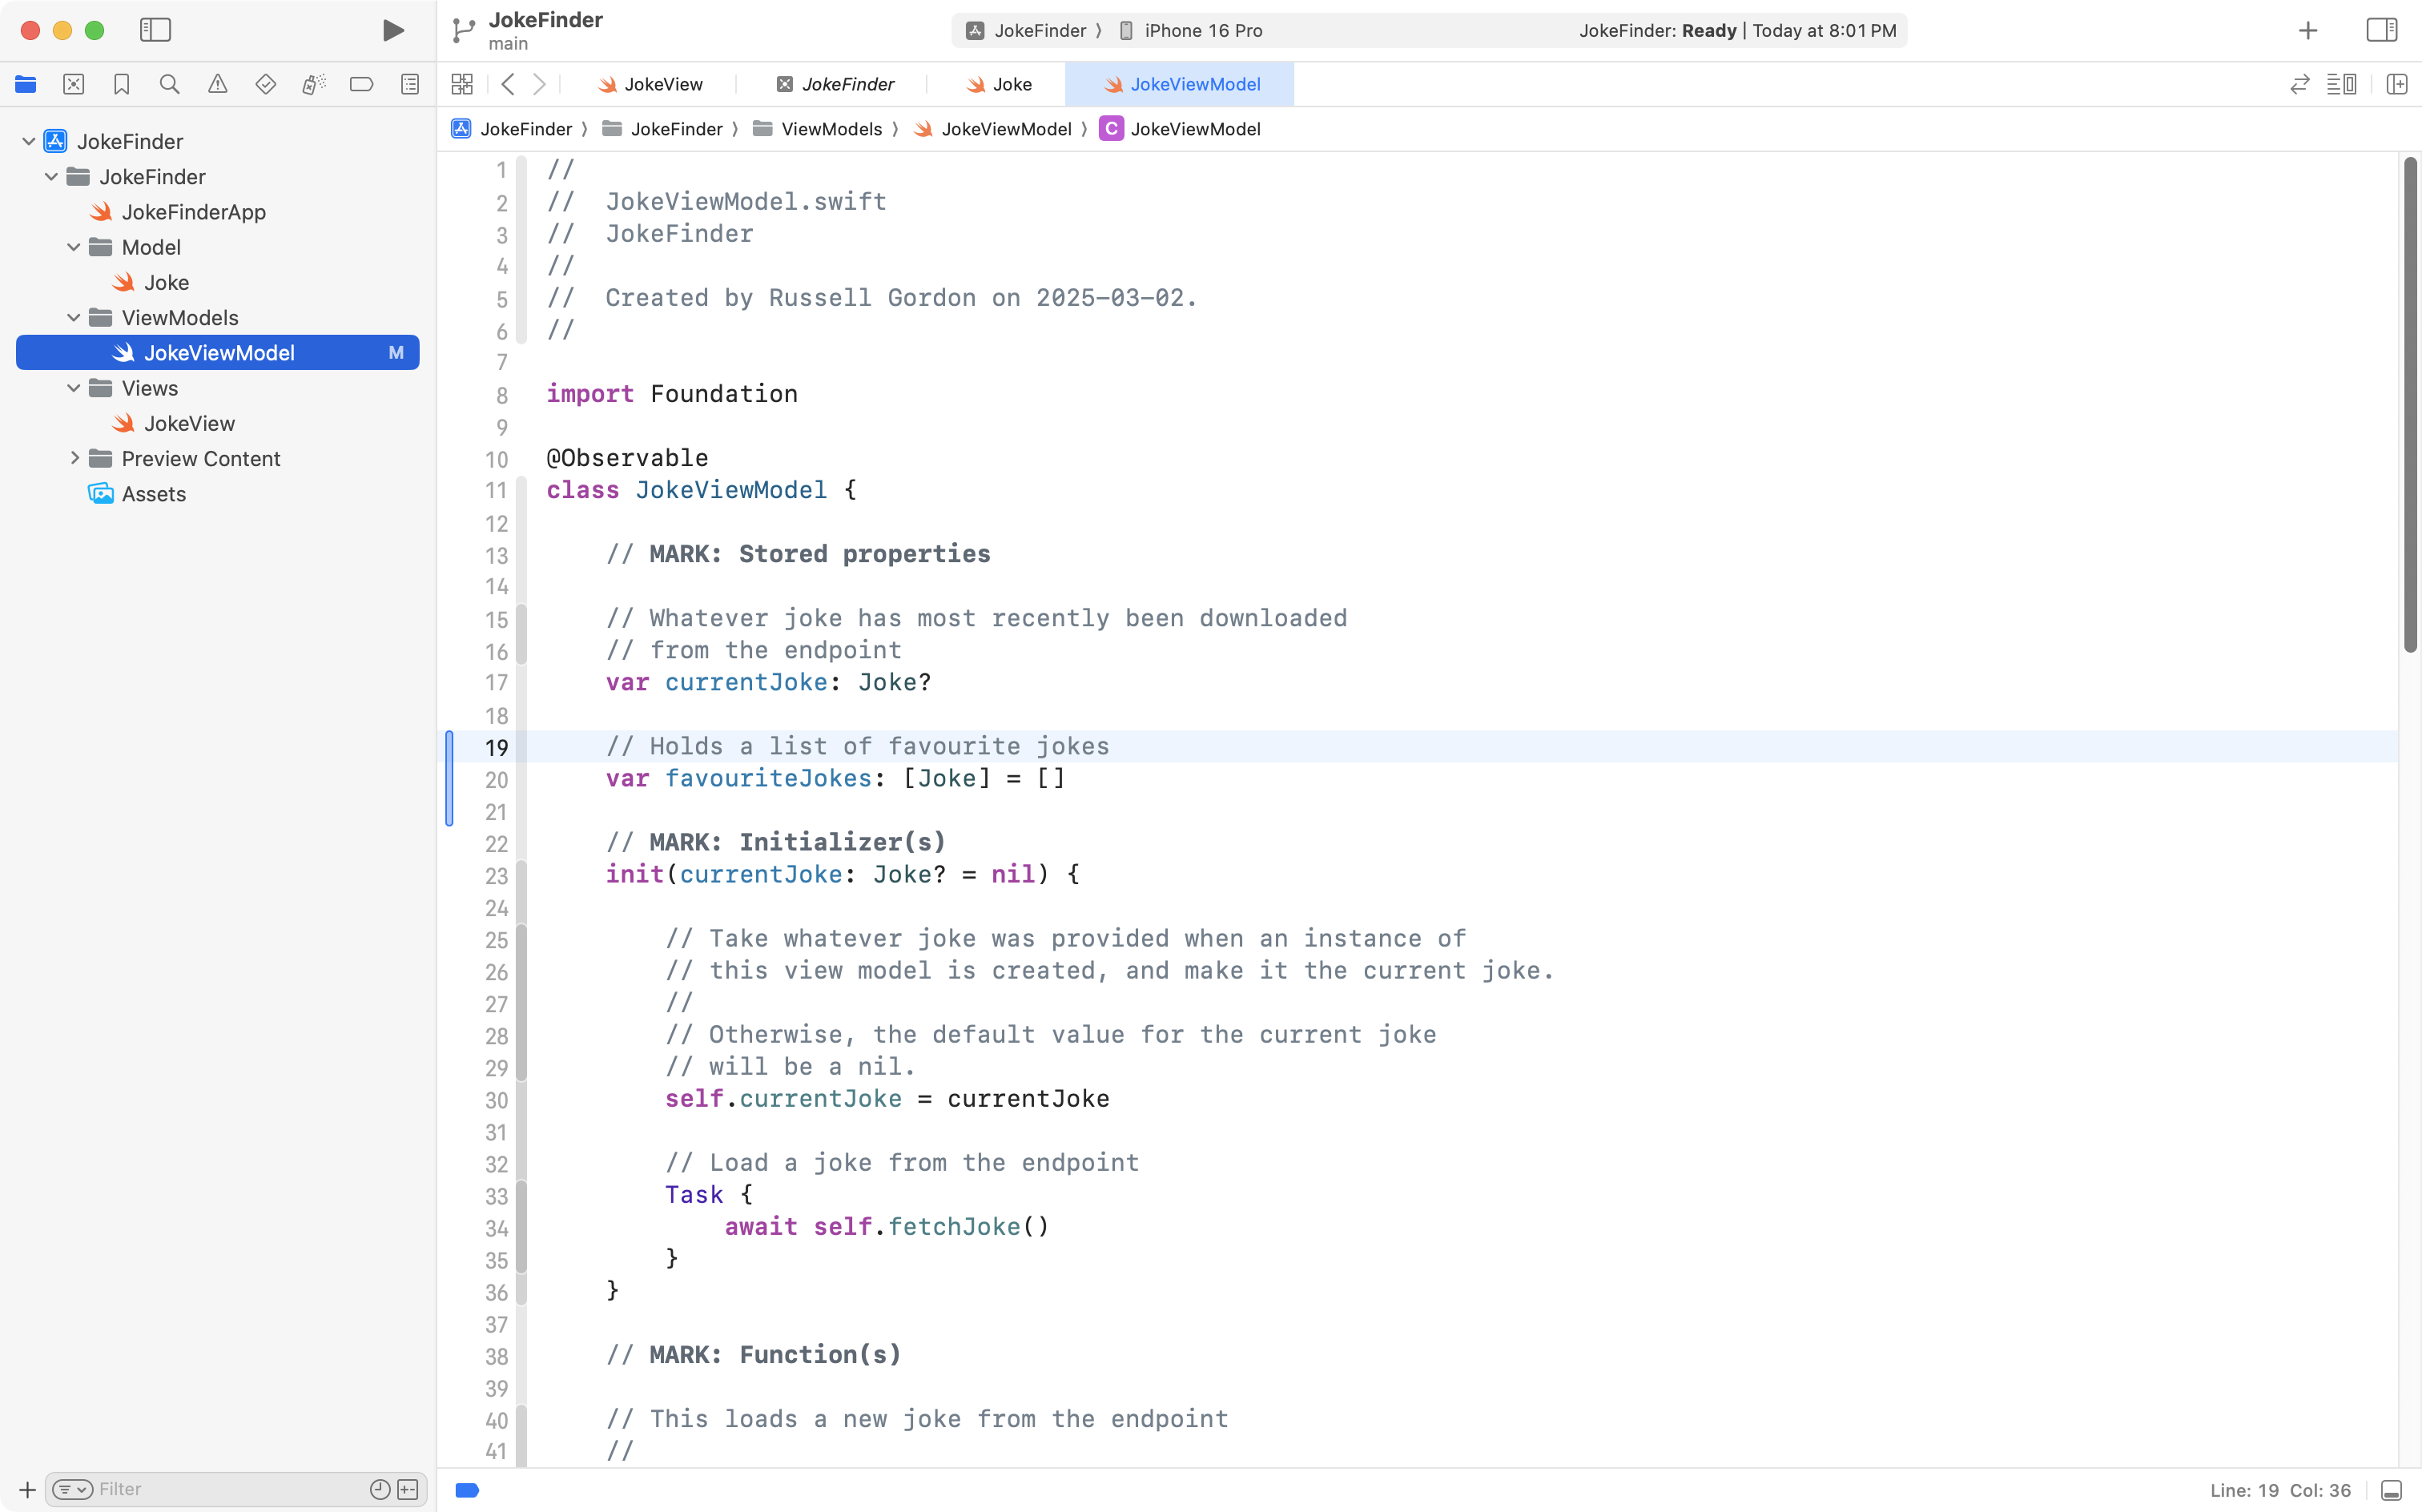
// Holds a list of favourite jokes
var favouriteJokes: [Joke] = []
… and add it to the stored properties section of the view model, like this:
That code creates a list (array) named favouriteJokes that holds instances of the Joke data type. The array is empty by default.
Next we need a function within the view model that can be invoked to add the current joke into the array. Copy this code into your clipboard:
// Add the current joke to the list of favourites
func saveJoke() {

	// Save current joke
	if let currentJoke = self.currentJoke {
		favouriteJokes.insert(currentJoke, at: 0)
	}

	// How many saved jokes are there now?
	print("There are \(favouriteJokes.count) jokes saved.")

}
Then add it to the view model, just below the initializer, like this:
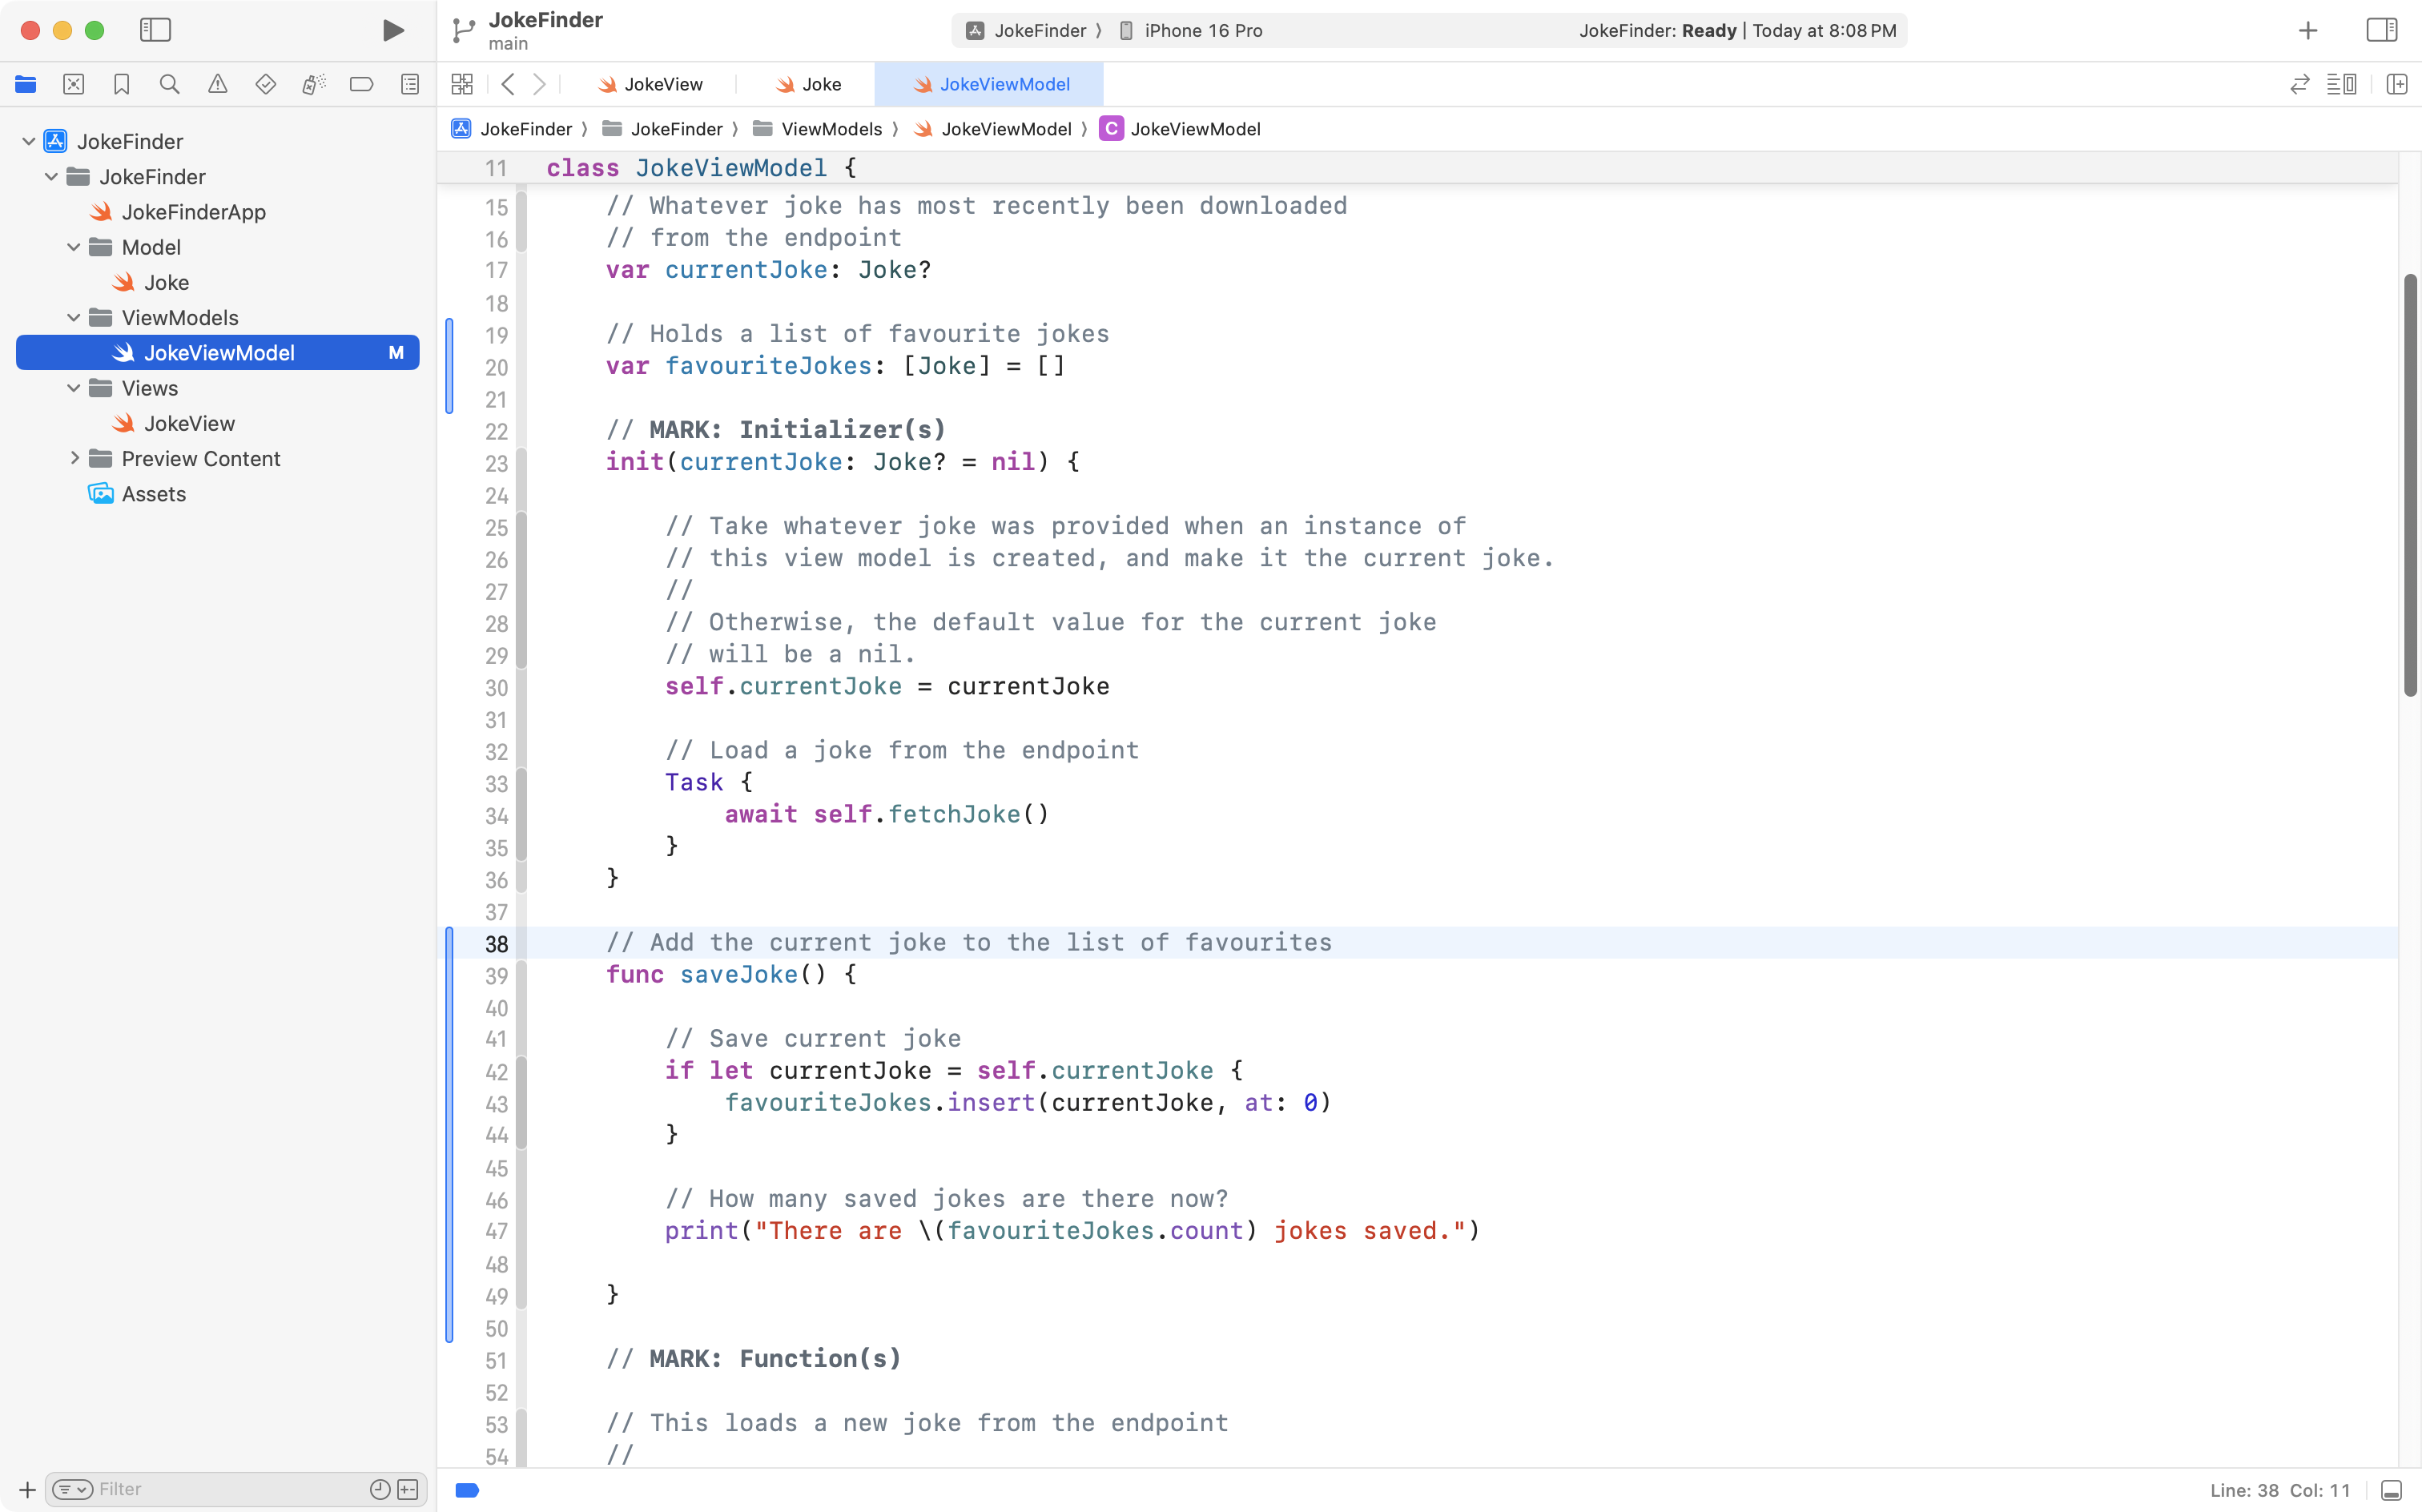
This code inserts the current joke at the start of the array that holds favourite jokes, then, prints a debug statement to the console so that we can see how many elements are in the favouriteJokes array. We will try this function out in a moment.
Now we need a way to invoke, or call, this function from the view. For now, we will do this using a button.
Switch to JokeView, and copy this code into your clipboard:
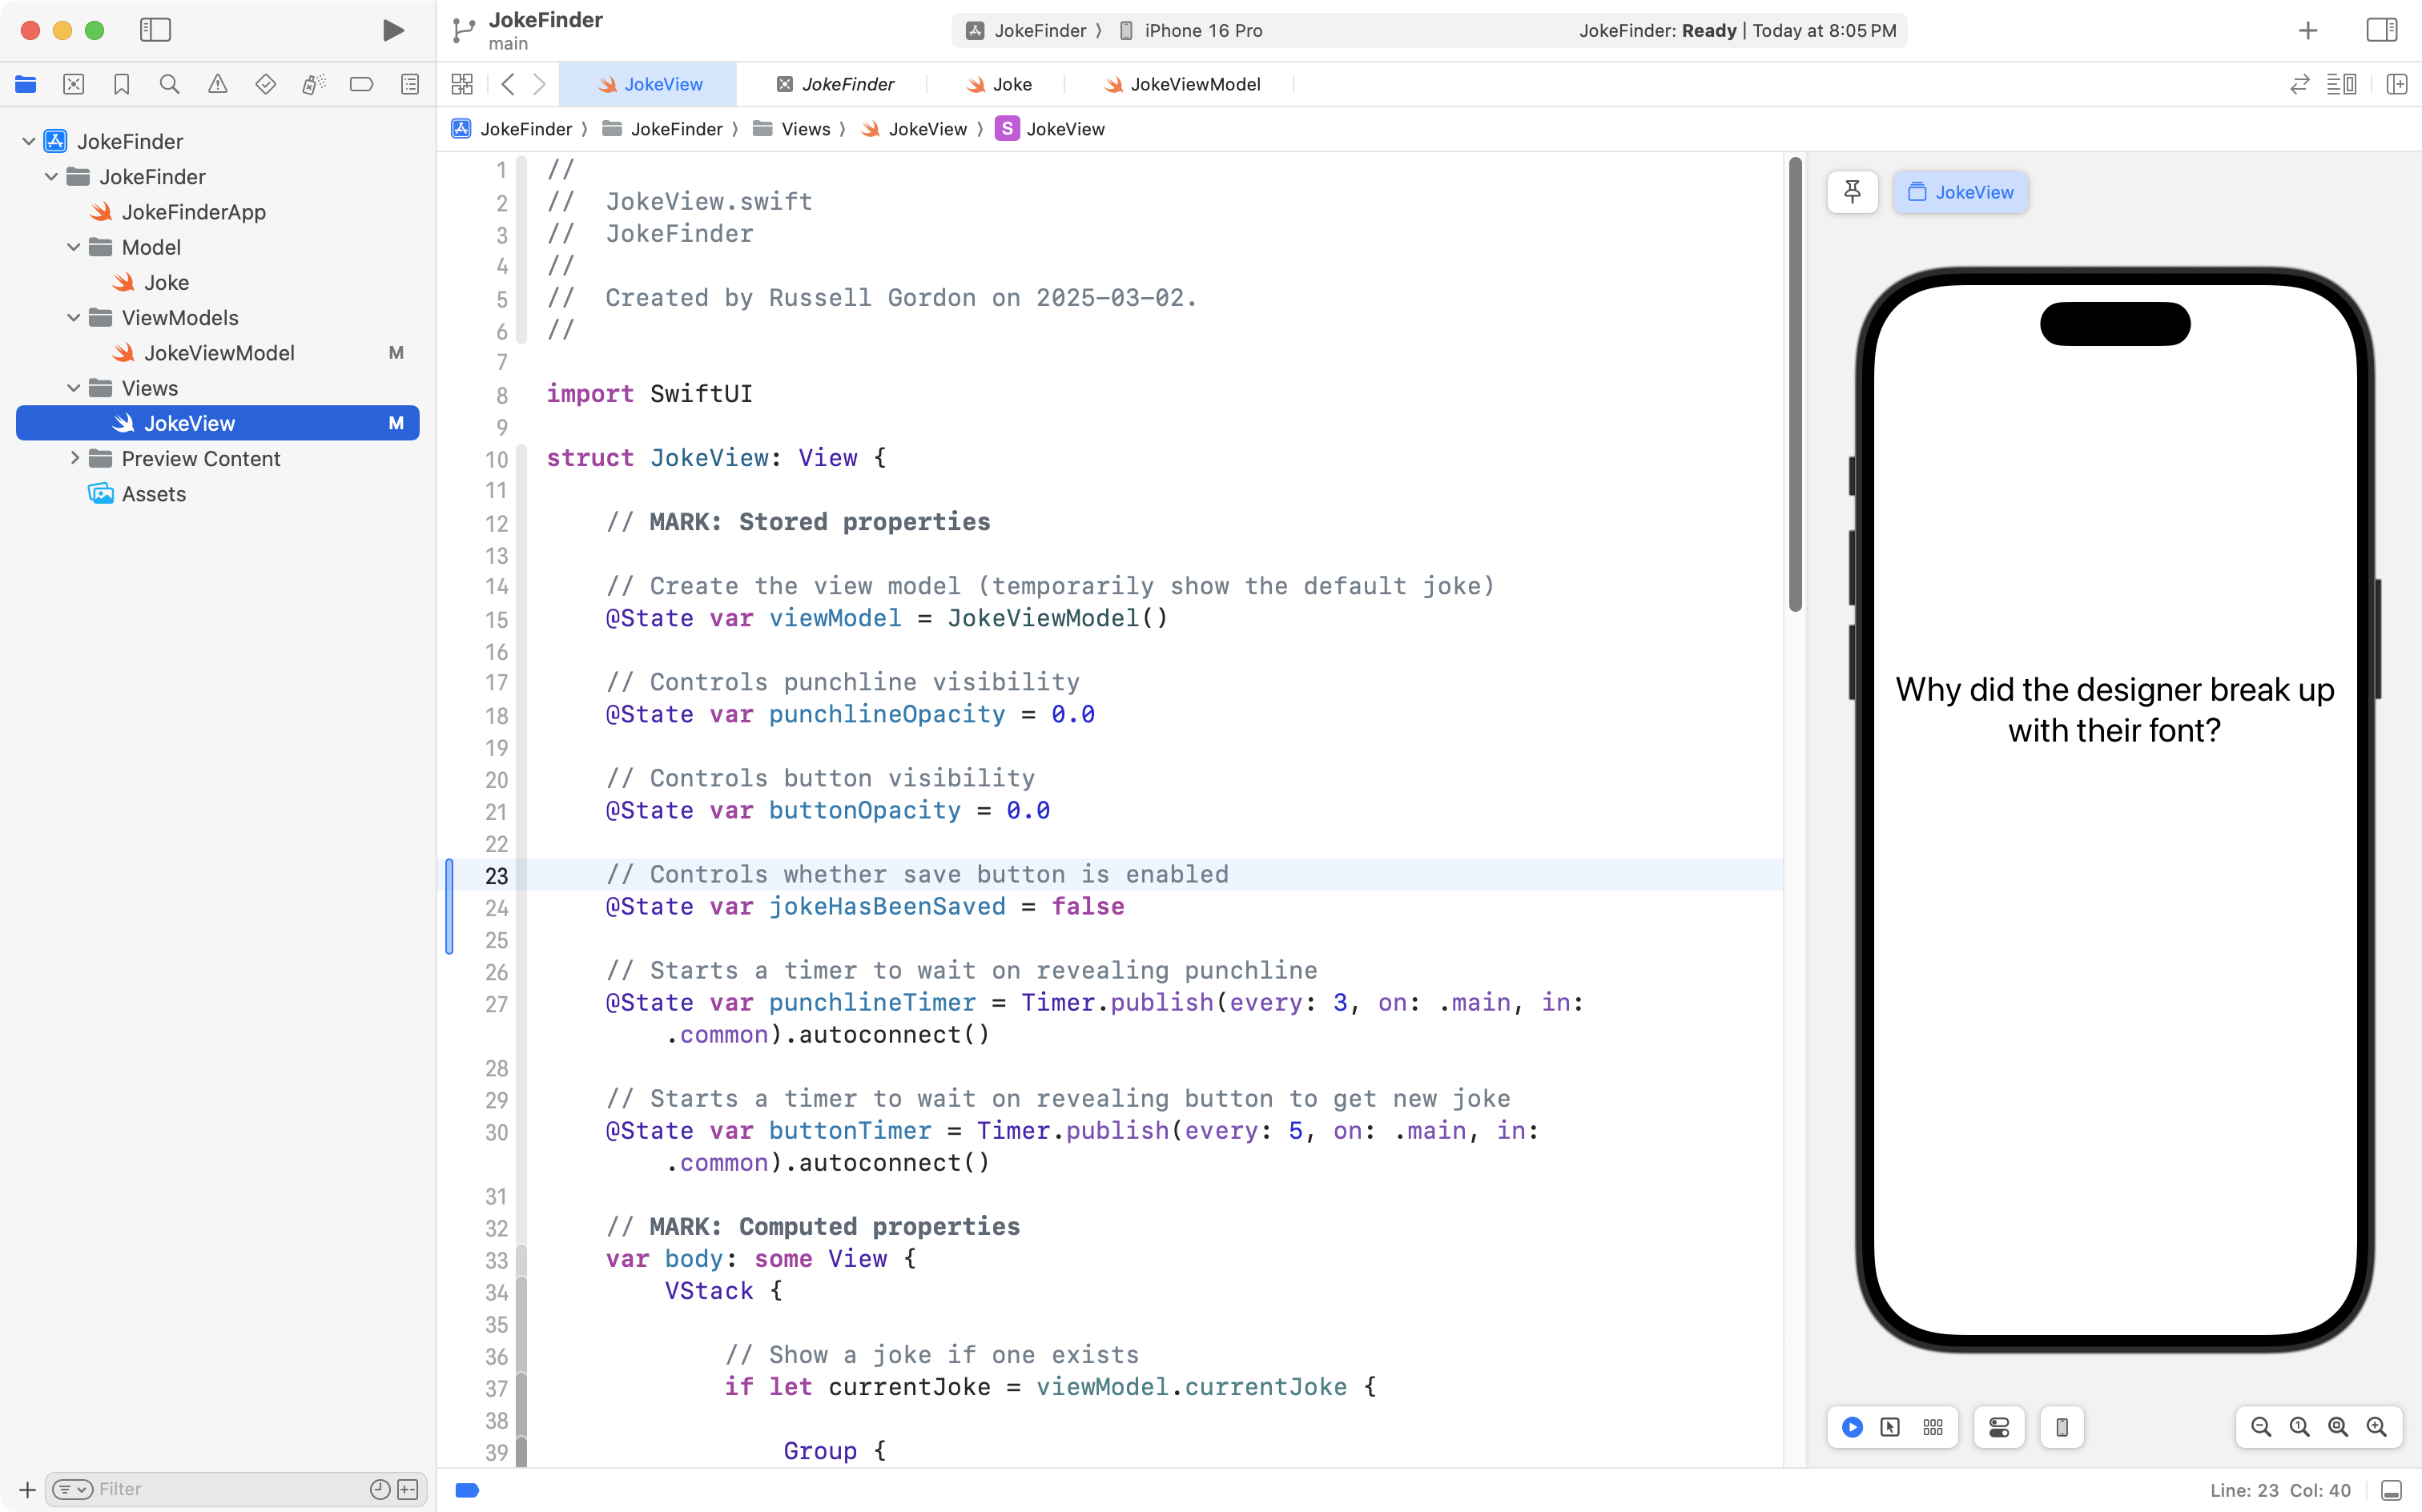
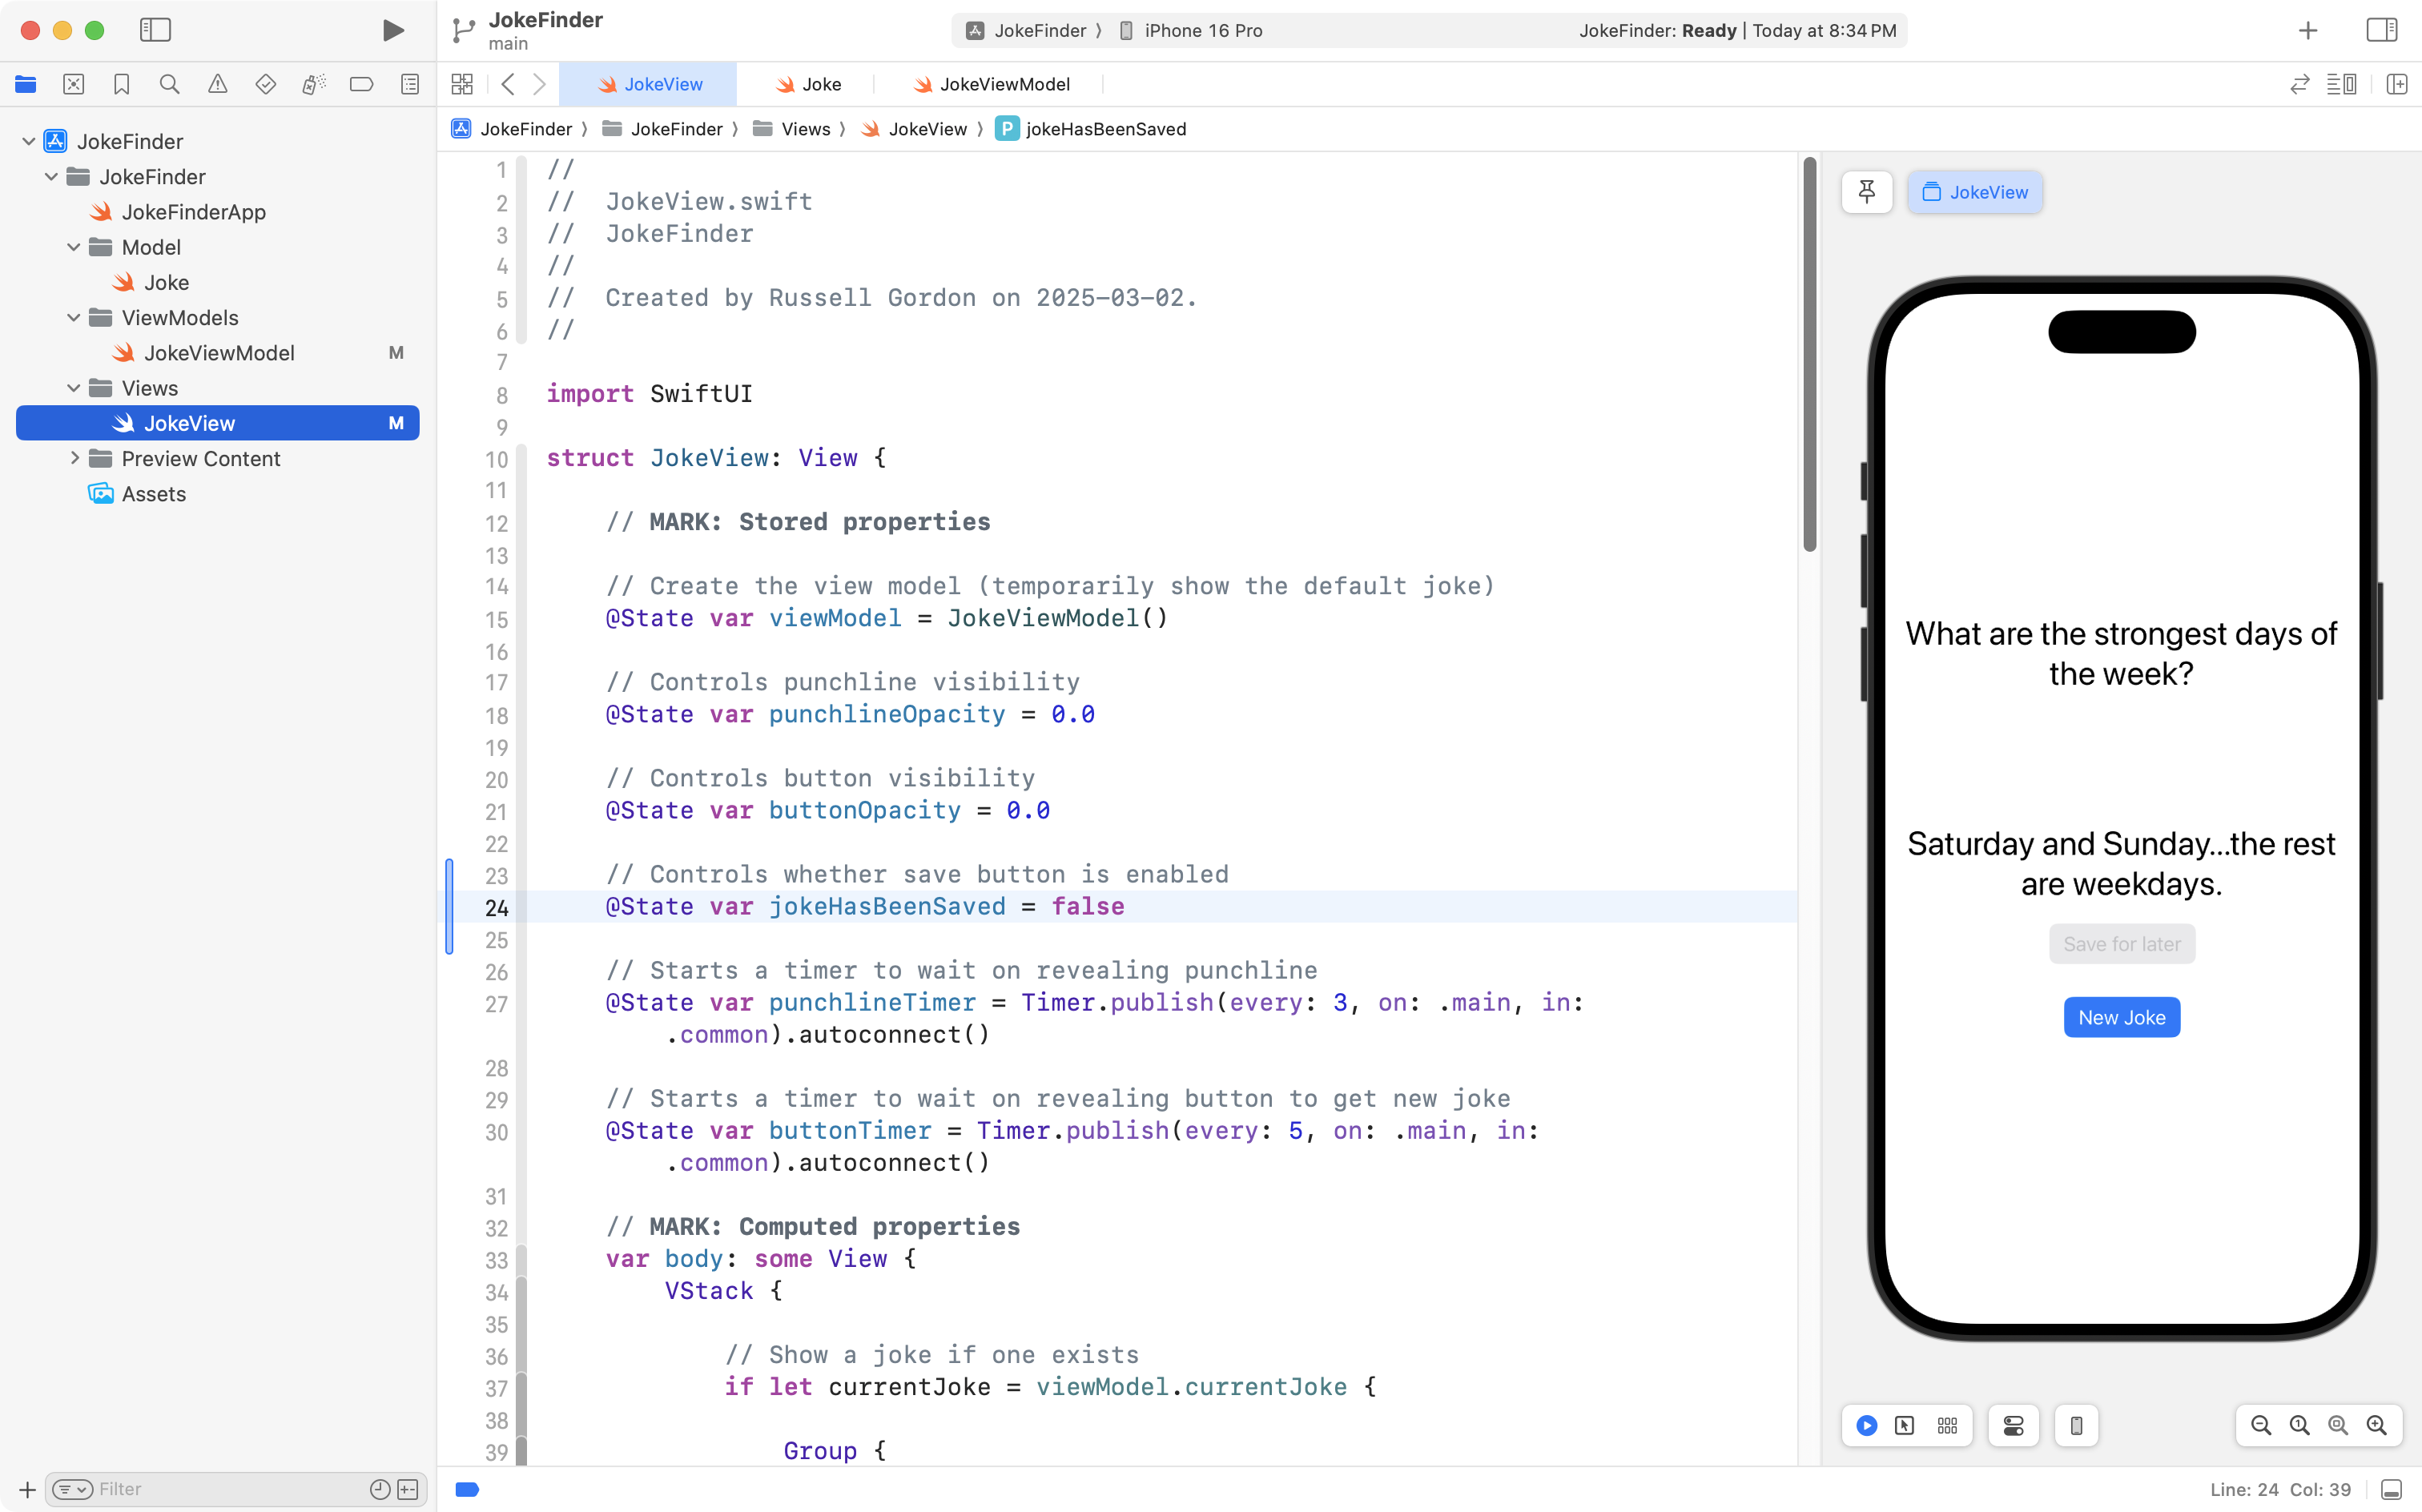
// Controls whether save button is enabled
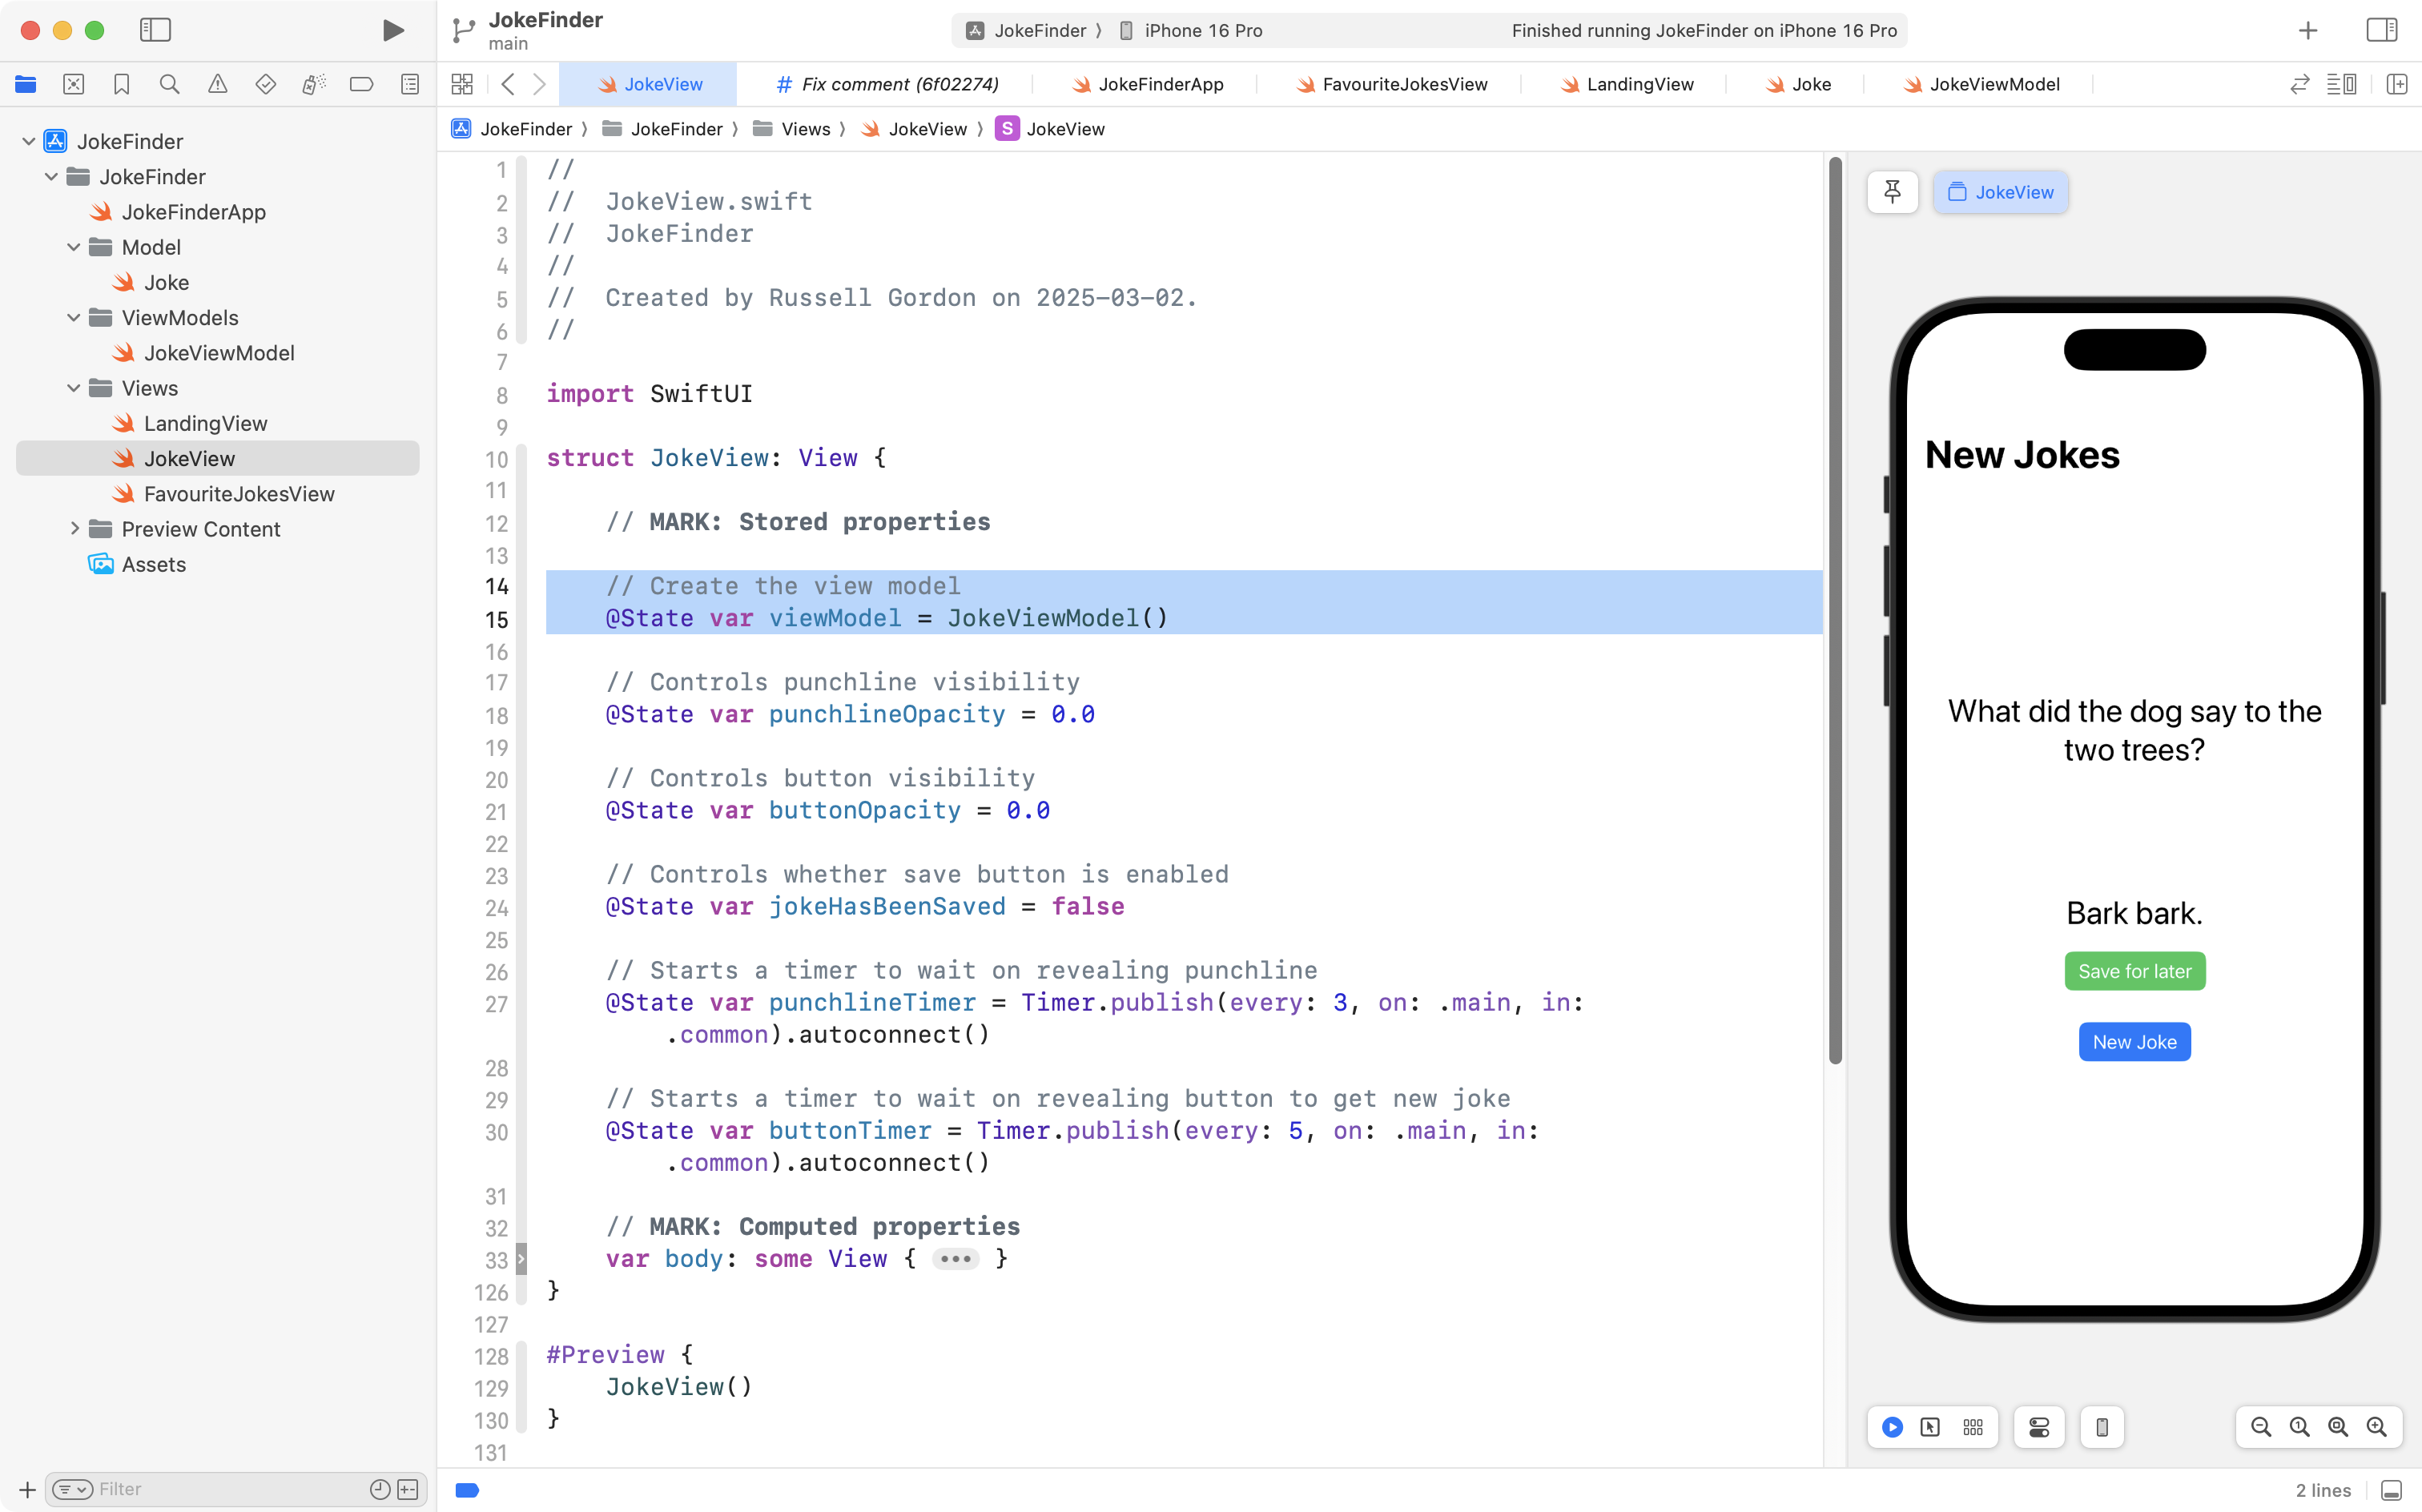
@State var jokeHasBeenSaved = falseAdd that code to the stored properties section of the view, like this:
Now copy this code into your computer’s clipboard:
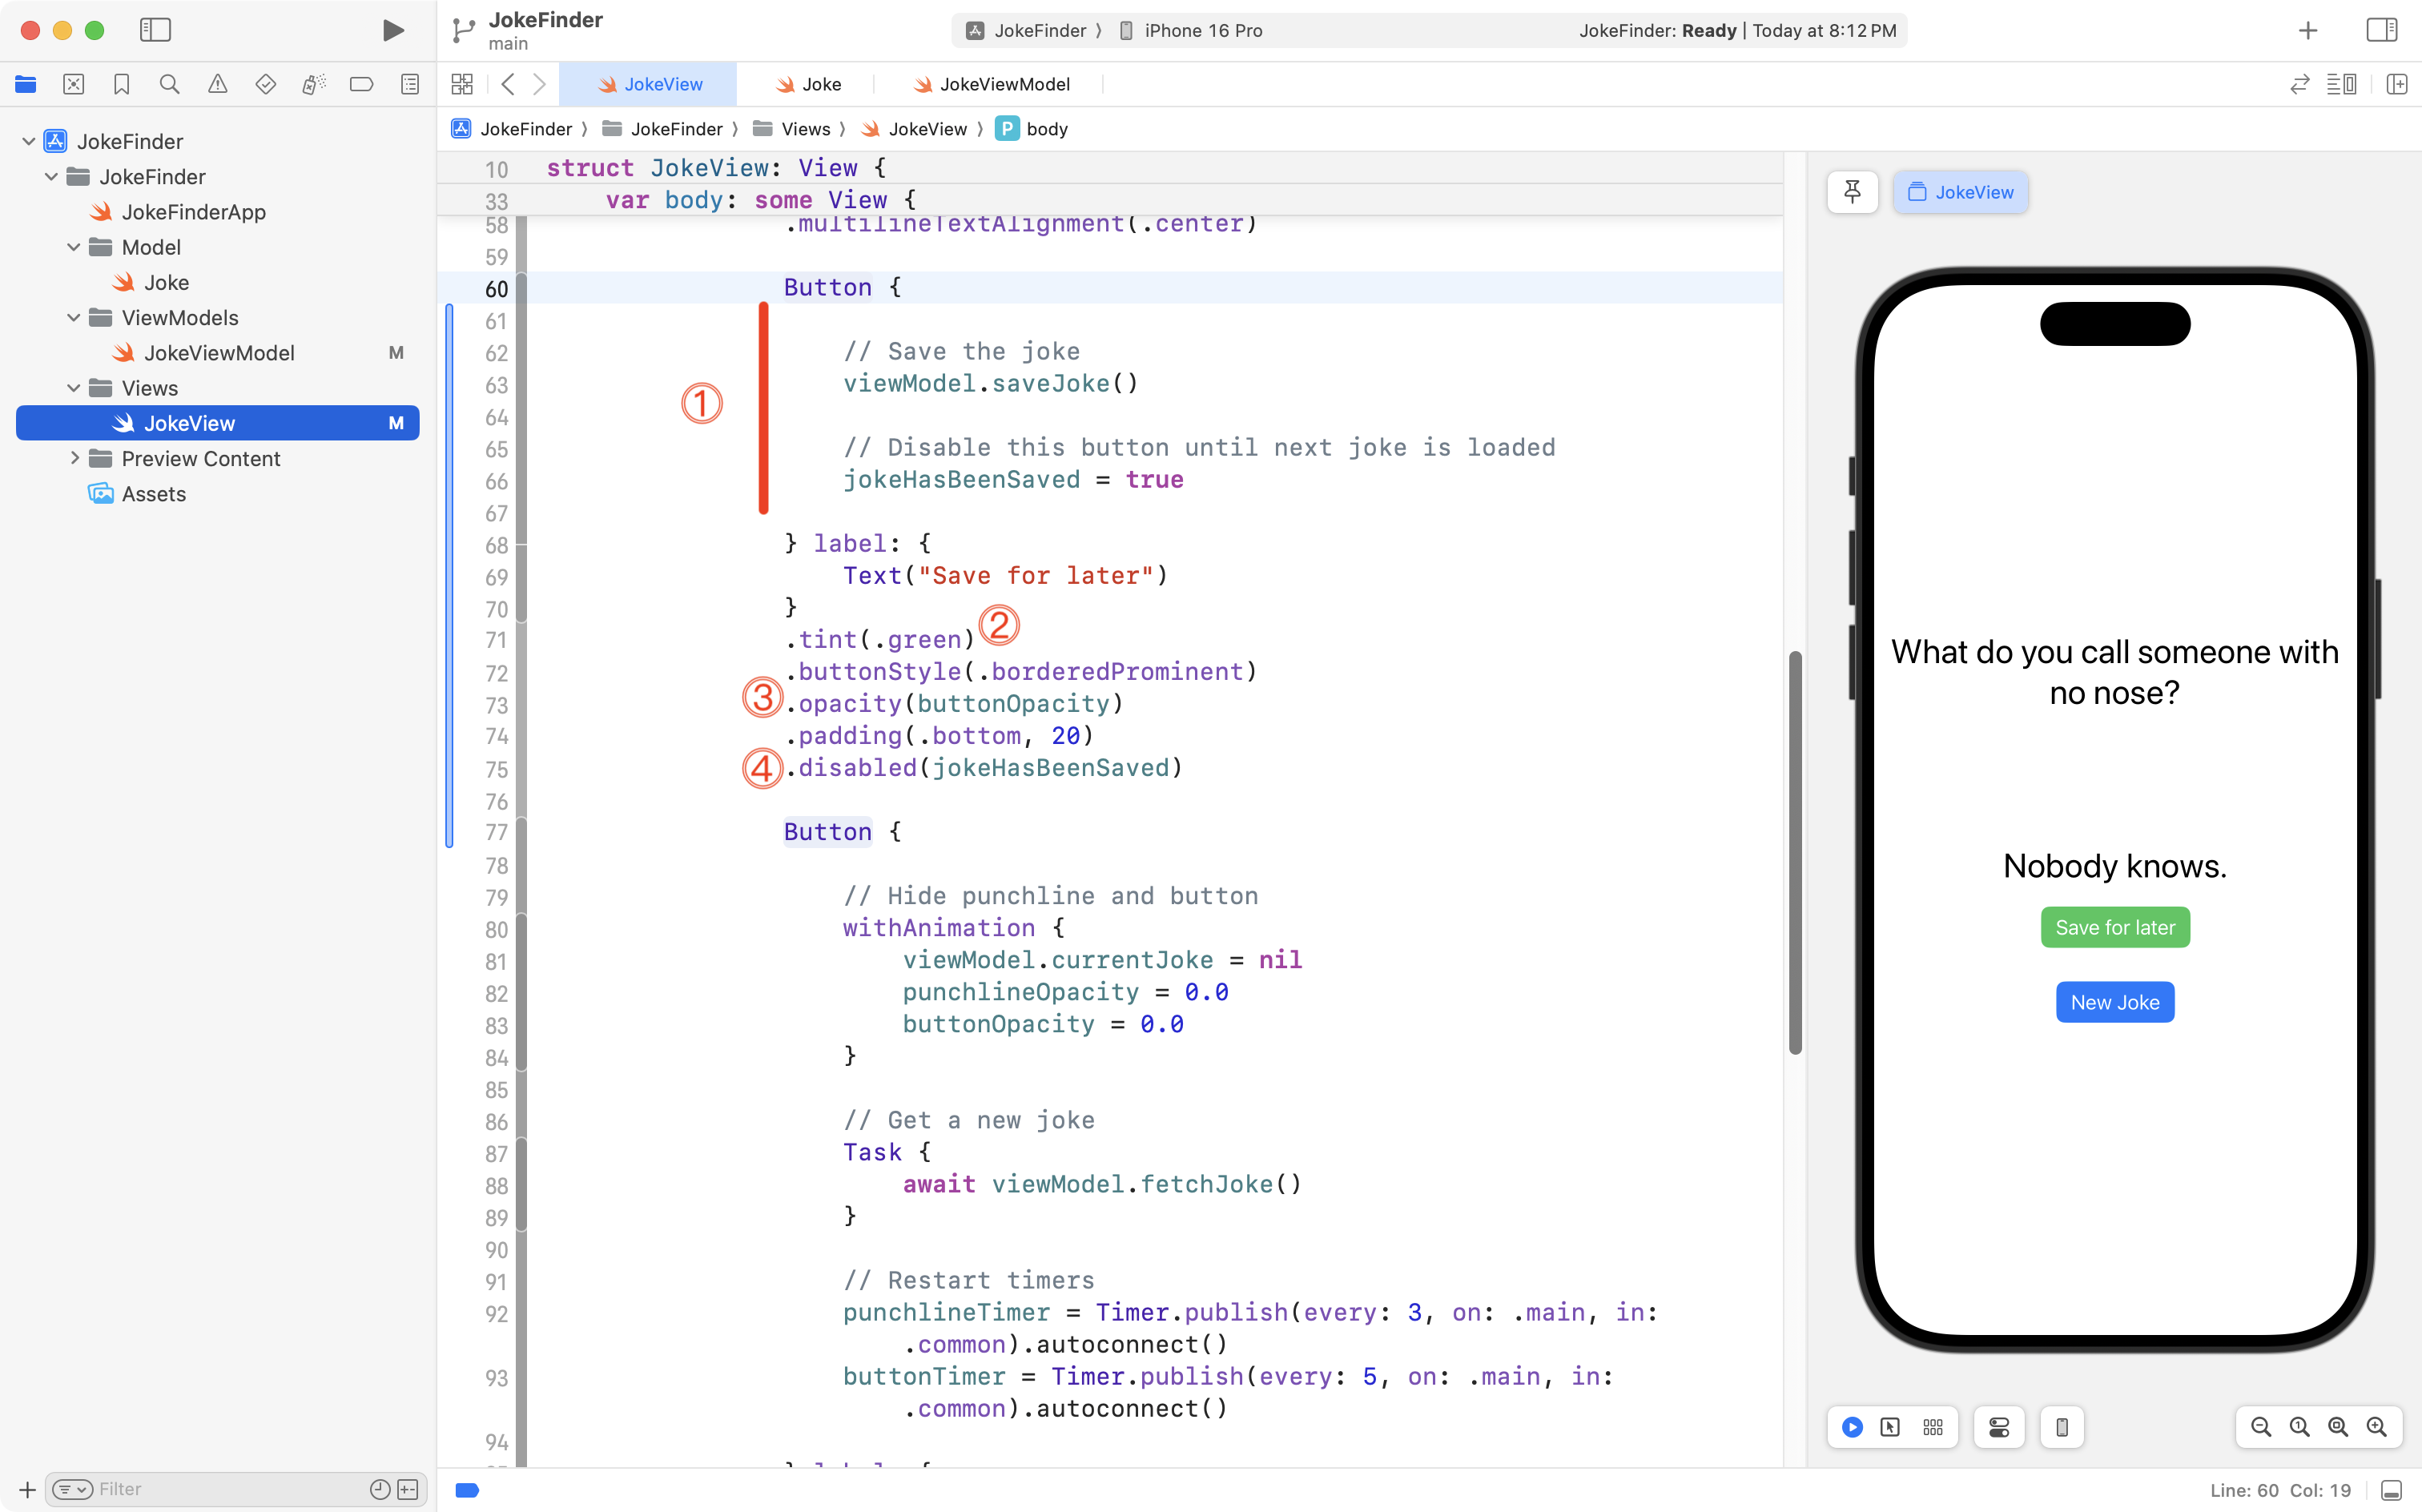
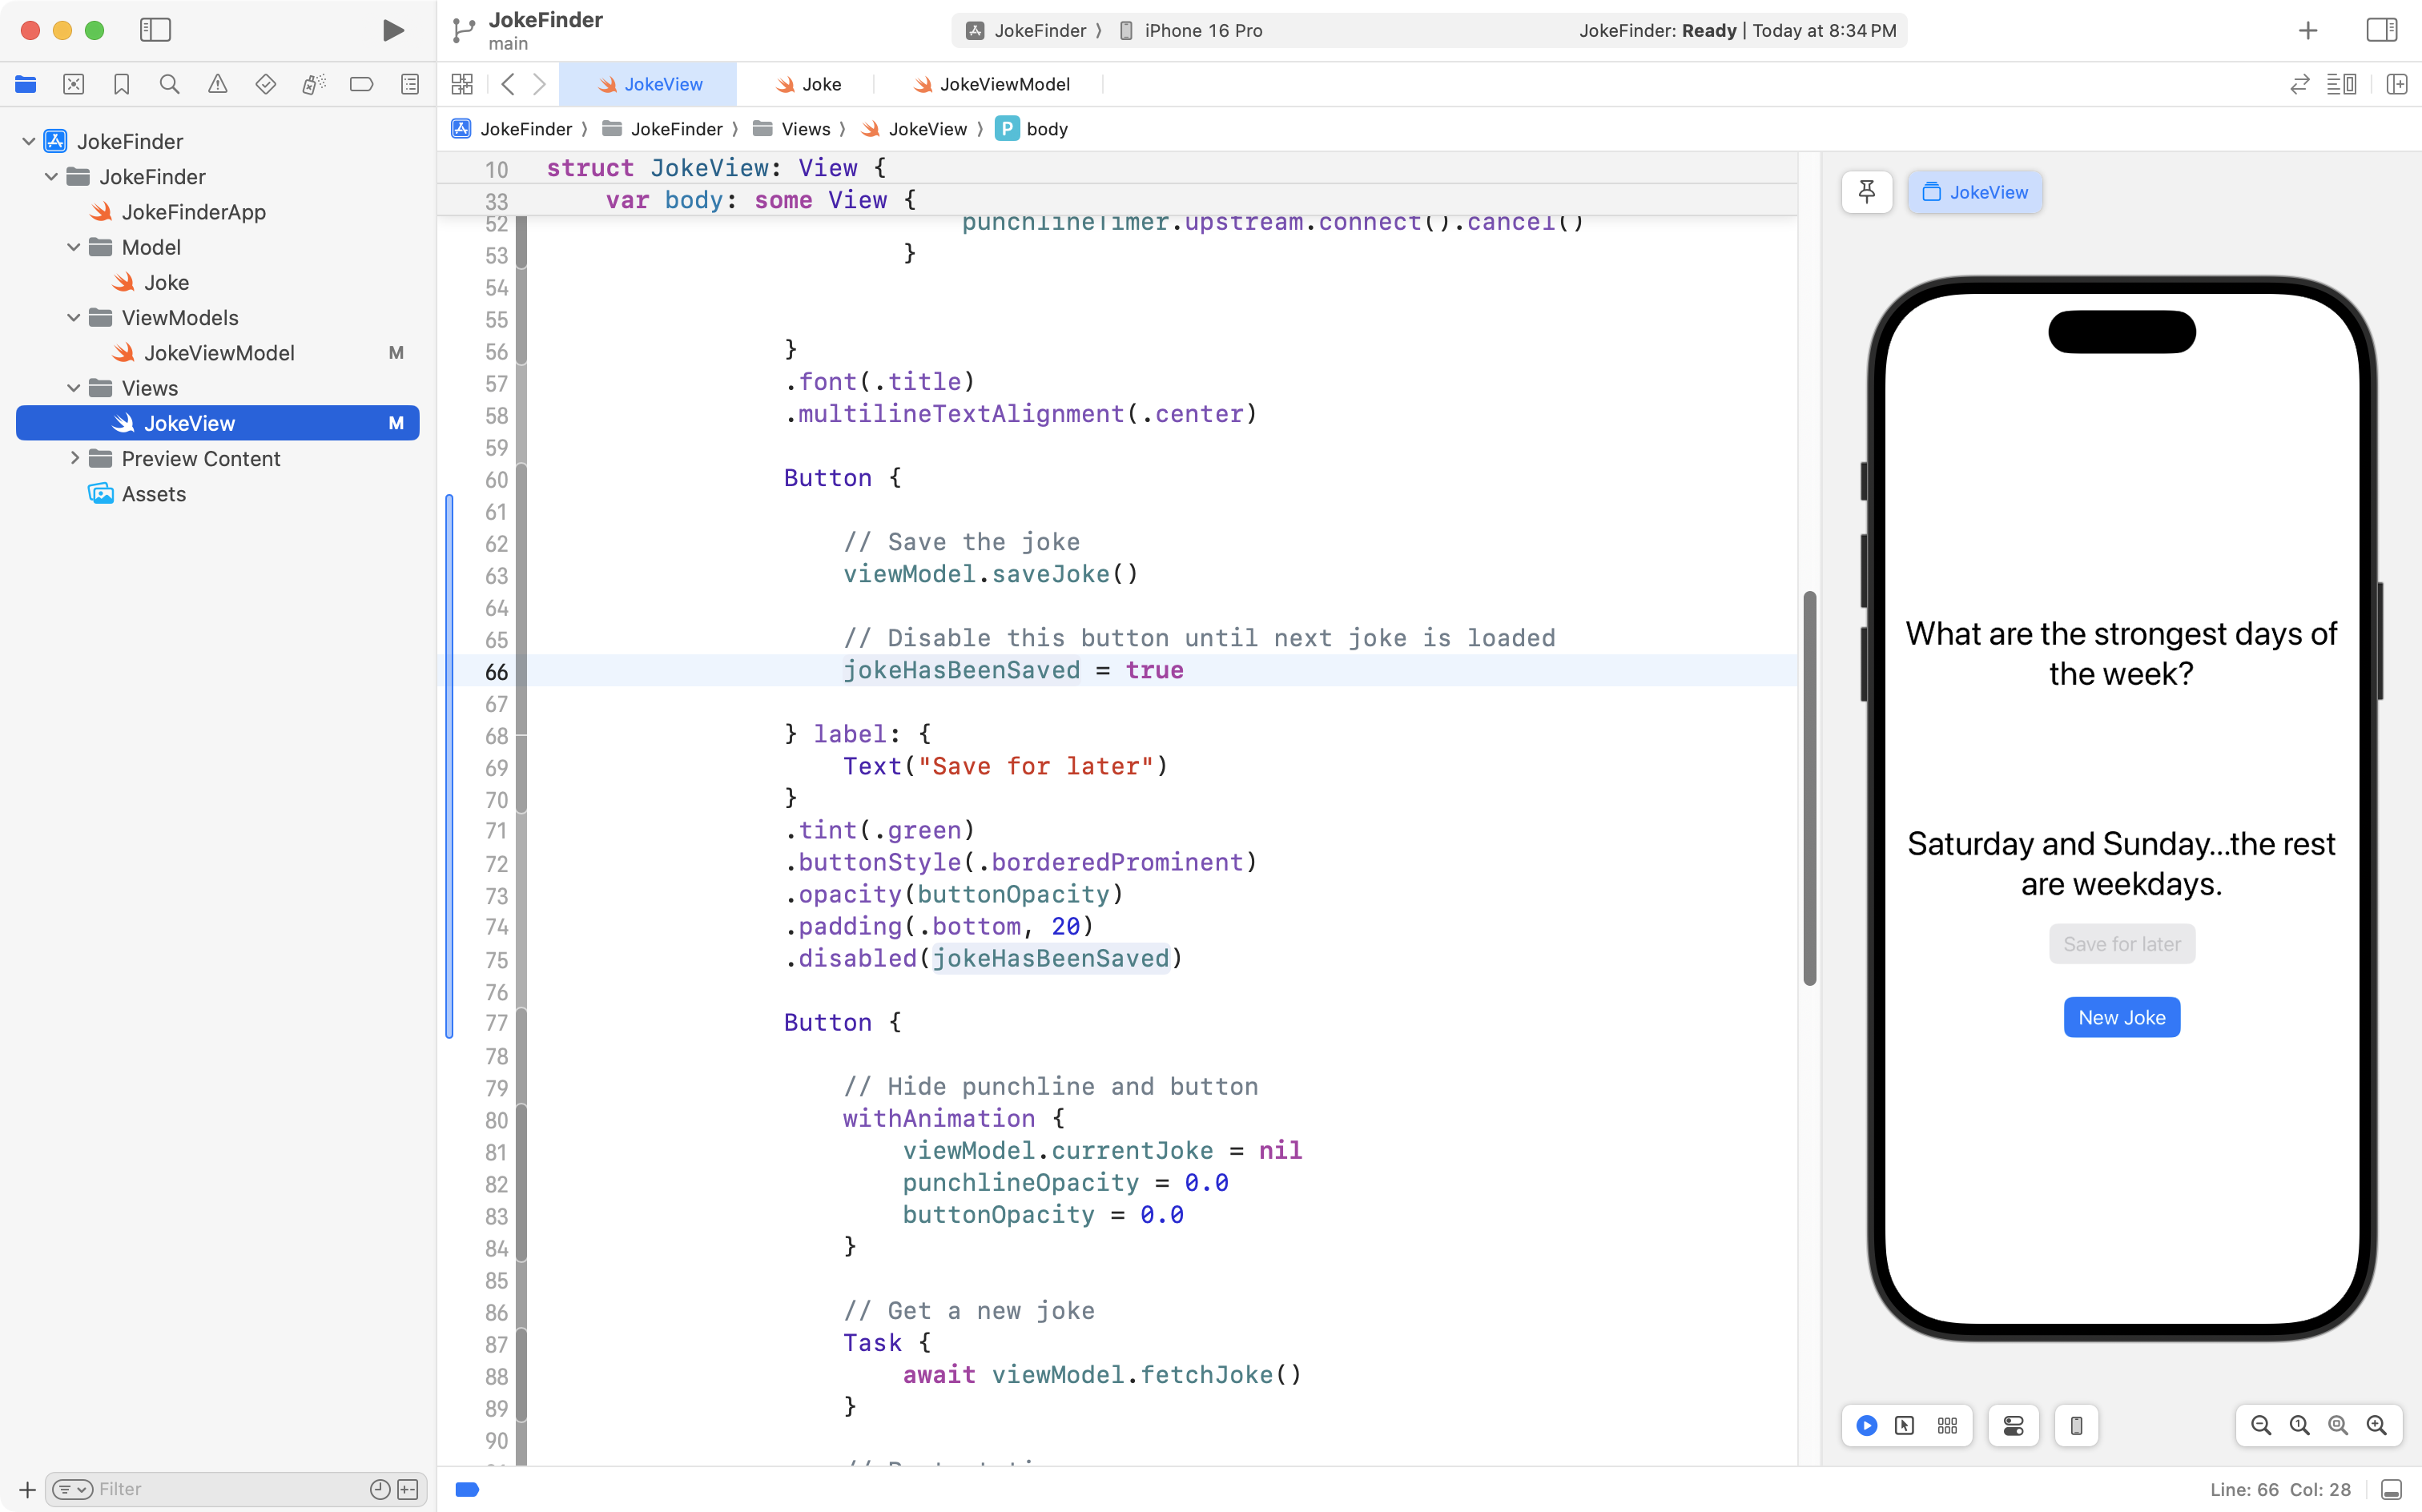
Button {
// Save the joke
viewModel.saveJoke()
// Disable this button until next joke is loaded
jokeHasBeenSaved = true
} label: {
Text("Save for later")
}
.tint(.green)
.buttonStyle(.borderedProminent)
.opacity(buttonOpacity)
.padding(.bottom, 20)
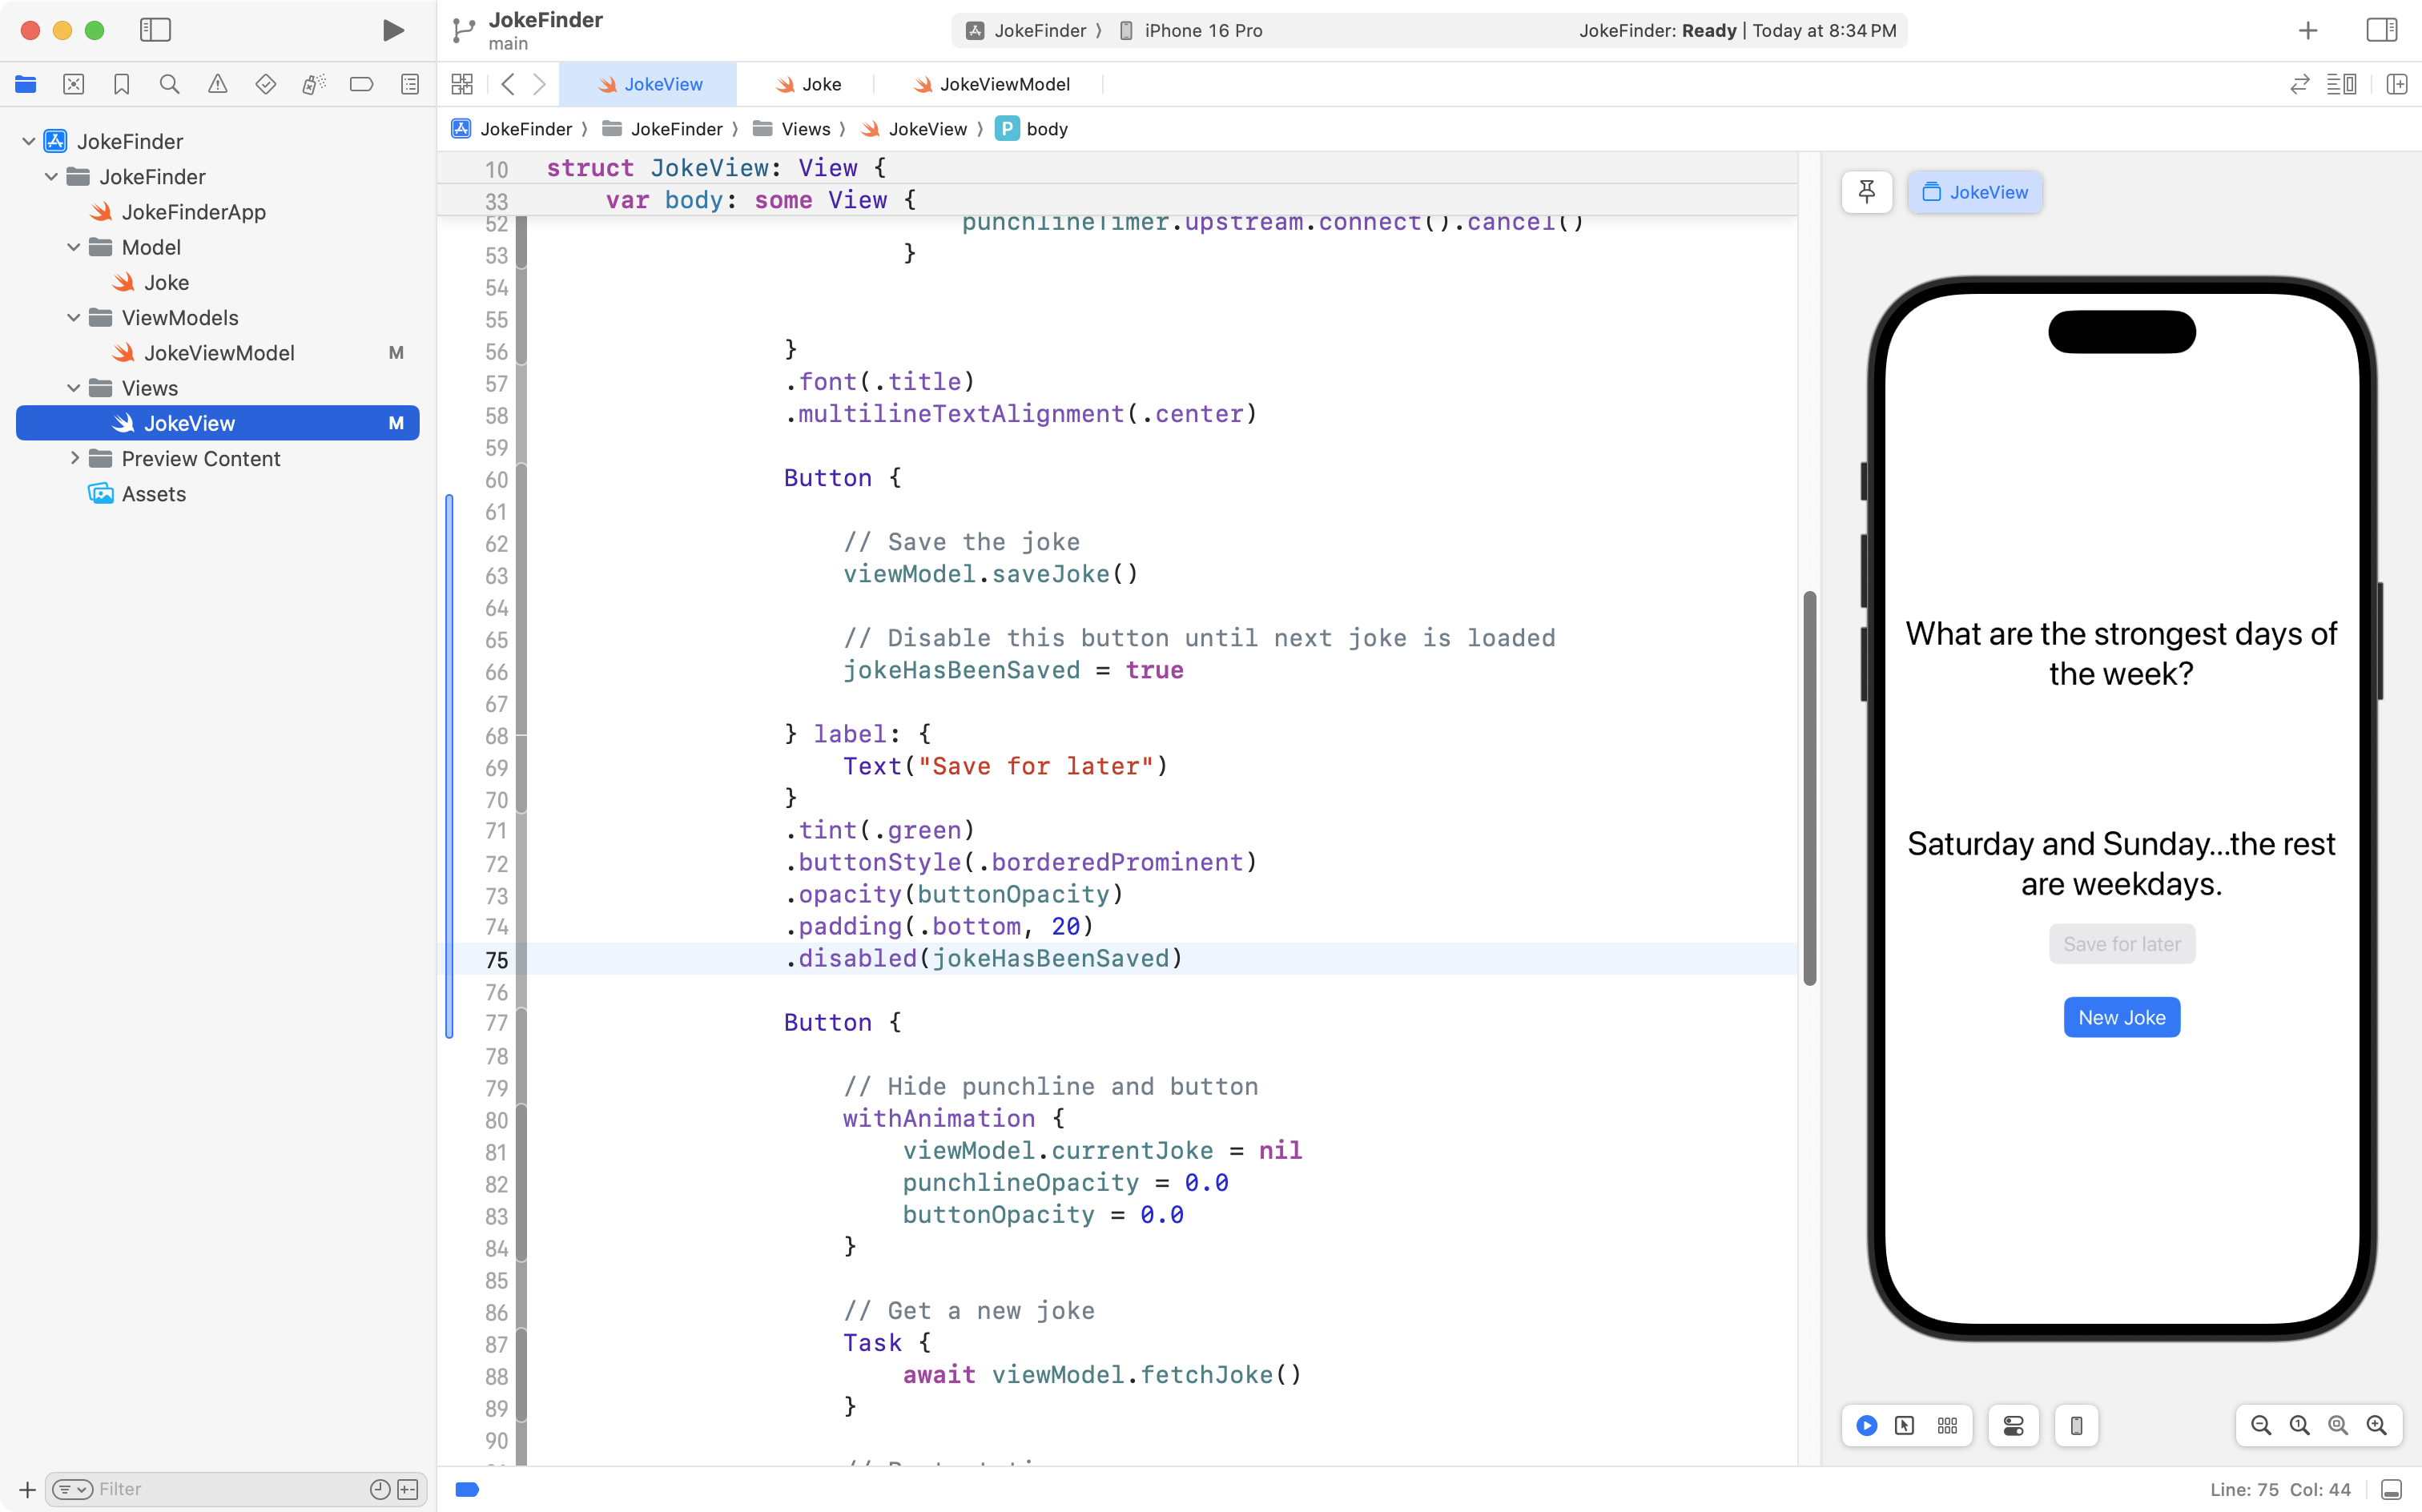
.disabled(jokeHasBeenSaved)… then scroll down to around line 60, and place it just above the existing button, like this:
Now, let’s examine what is happening with this code.
DISCUSSION
- When the button is pressed, the
saveJokefunction we just added to the view model is invoked. Additionally, a boolean value on the view,jokeHasBeenSaved, is set totrue– more on why this was done in a moment.- We adjust the colour of the button to green so it stands out from the default blue colour of the existing button.
- We piggyback on the work done in the prior lesson – this new button to save a joke will appear and disappear at the same time as the button for loading a new joke.
- Once this button has been pressed, it will be disabled. This is to prevent the same joke from being saved twice. The
.disabledview modifier allows a button to be “turned off” if a value oftrueis passed to it.
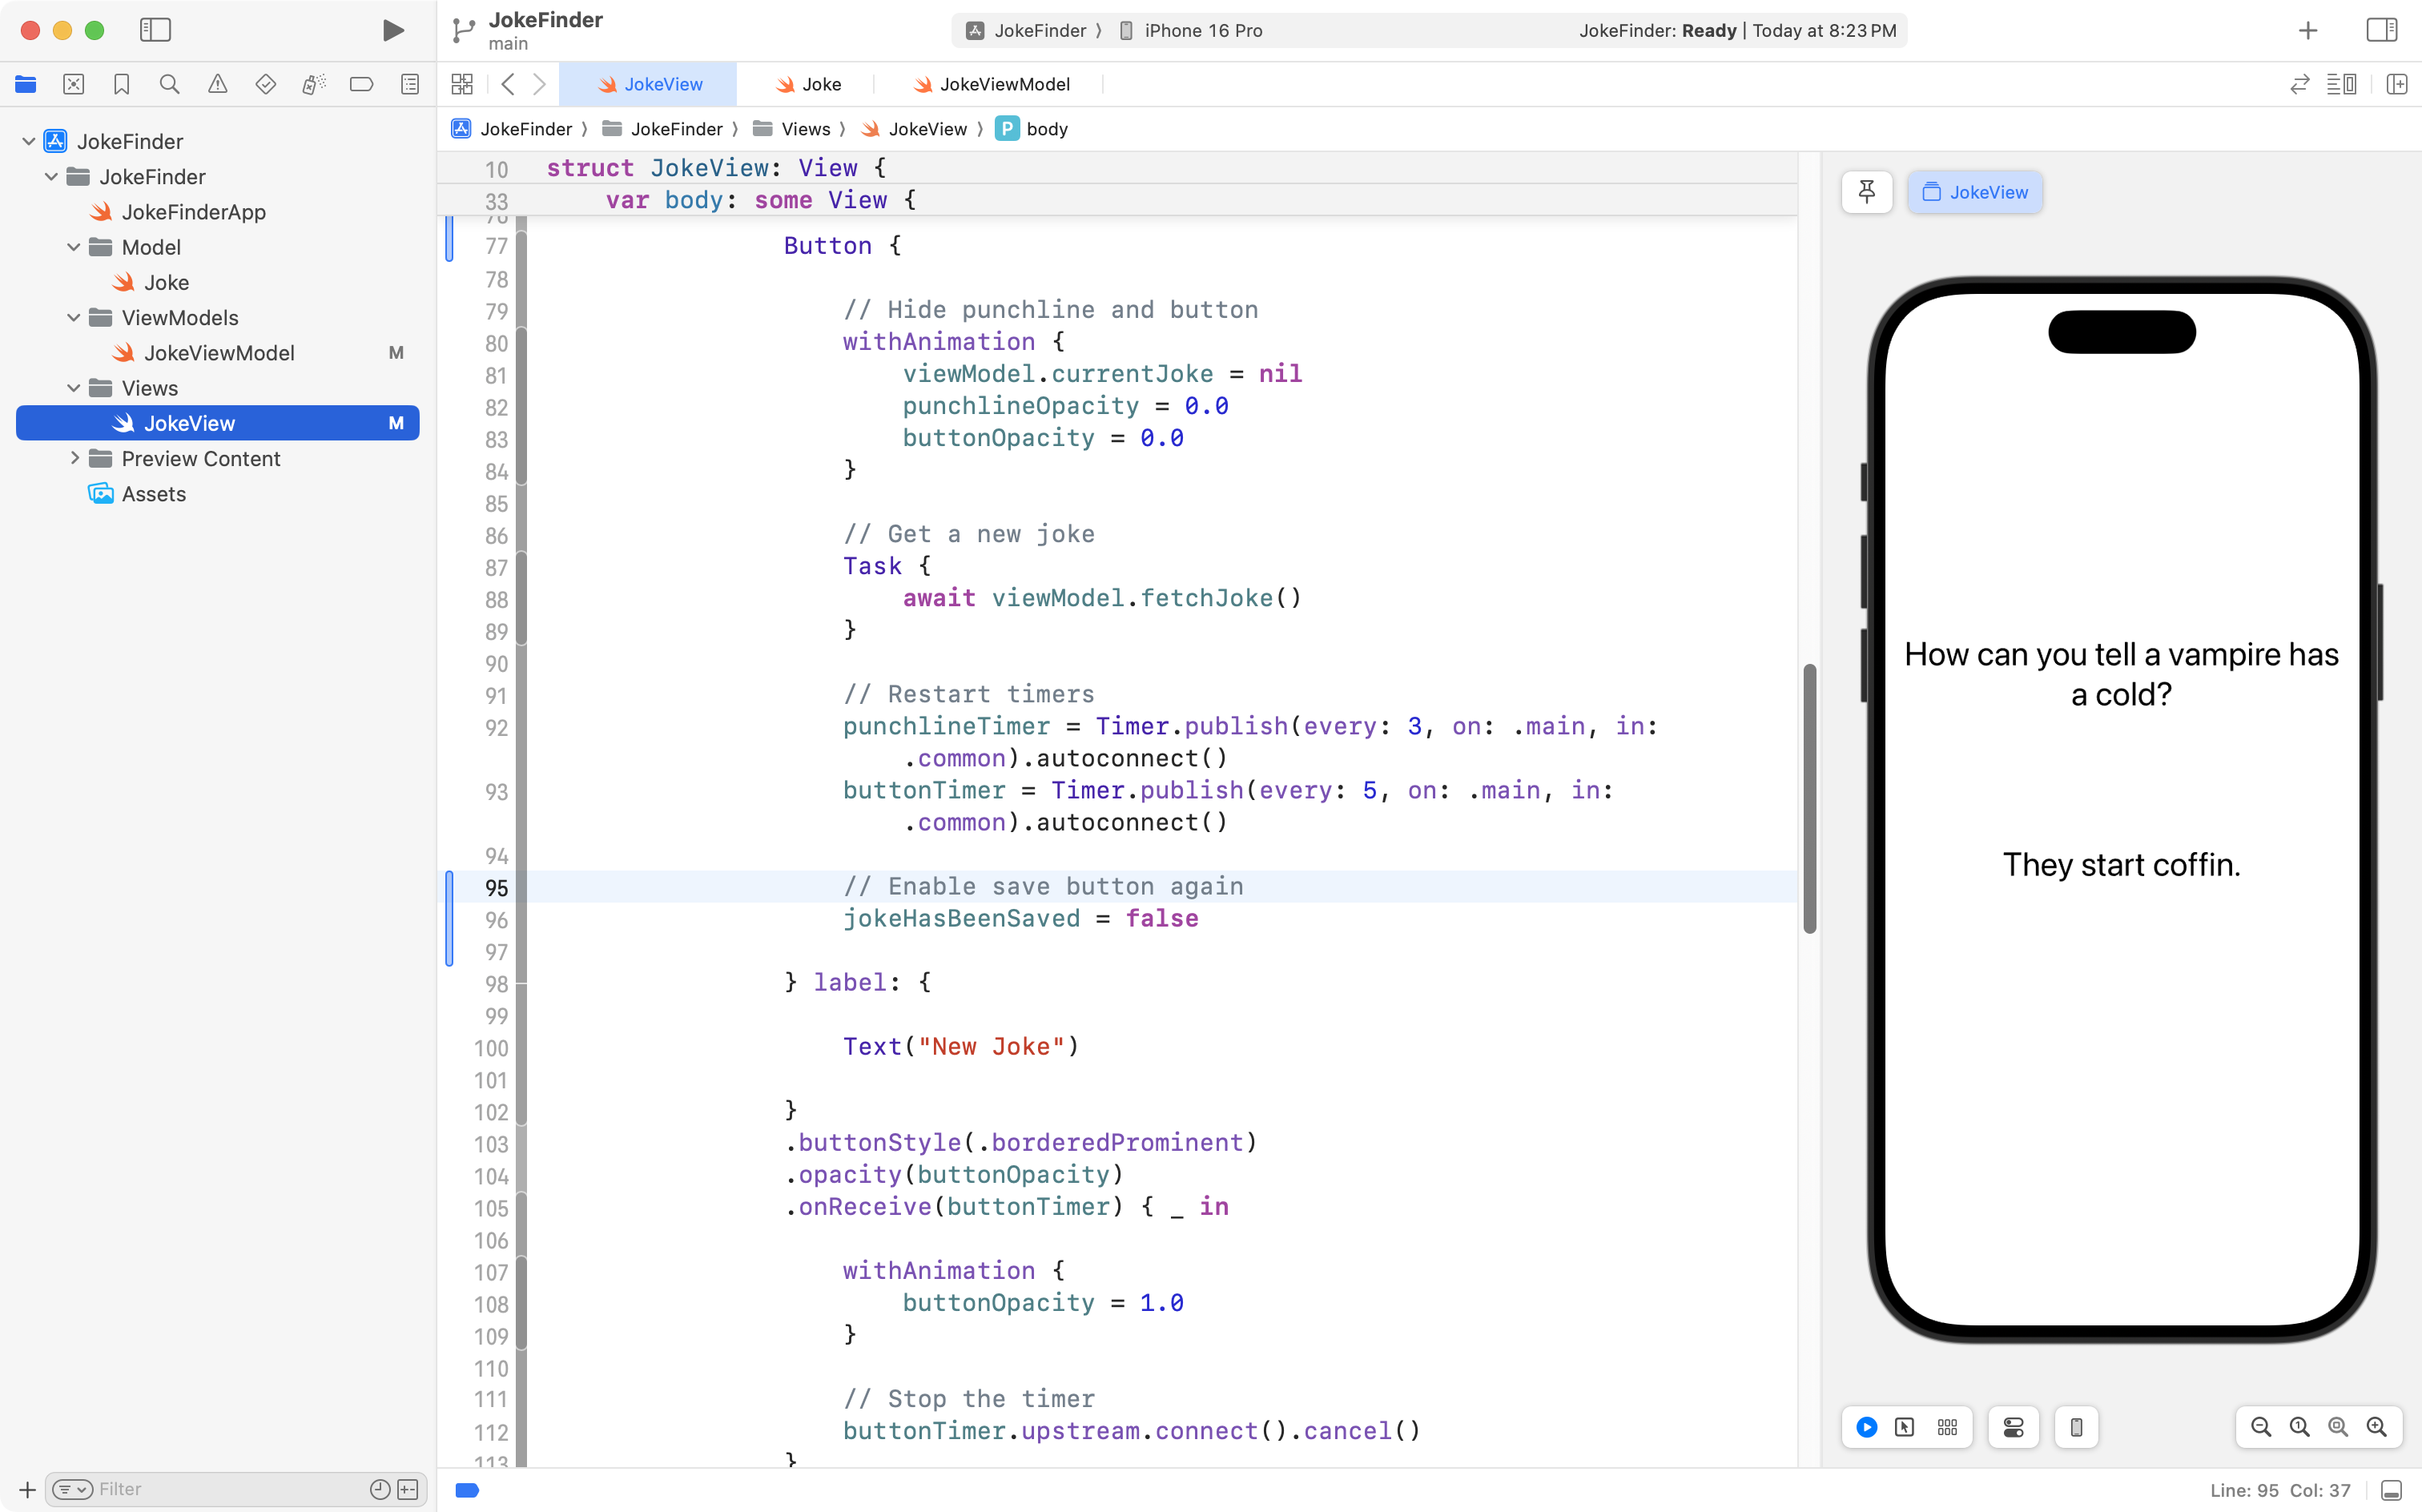
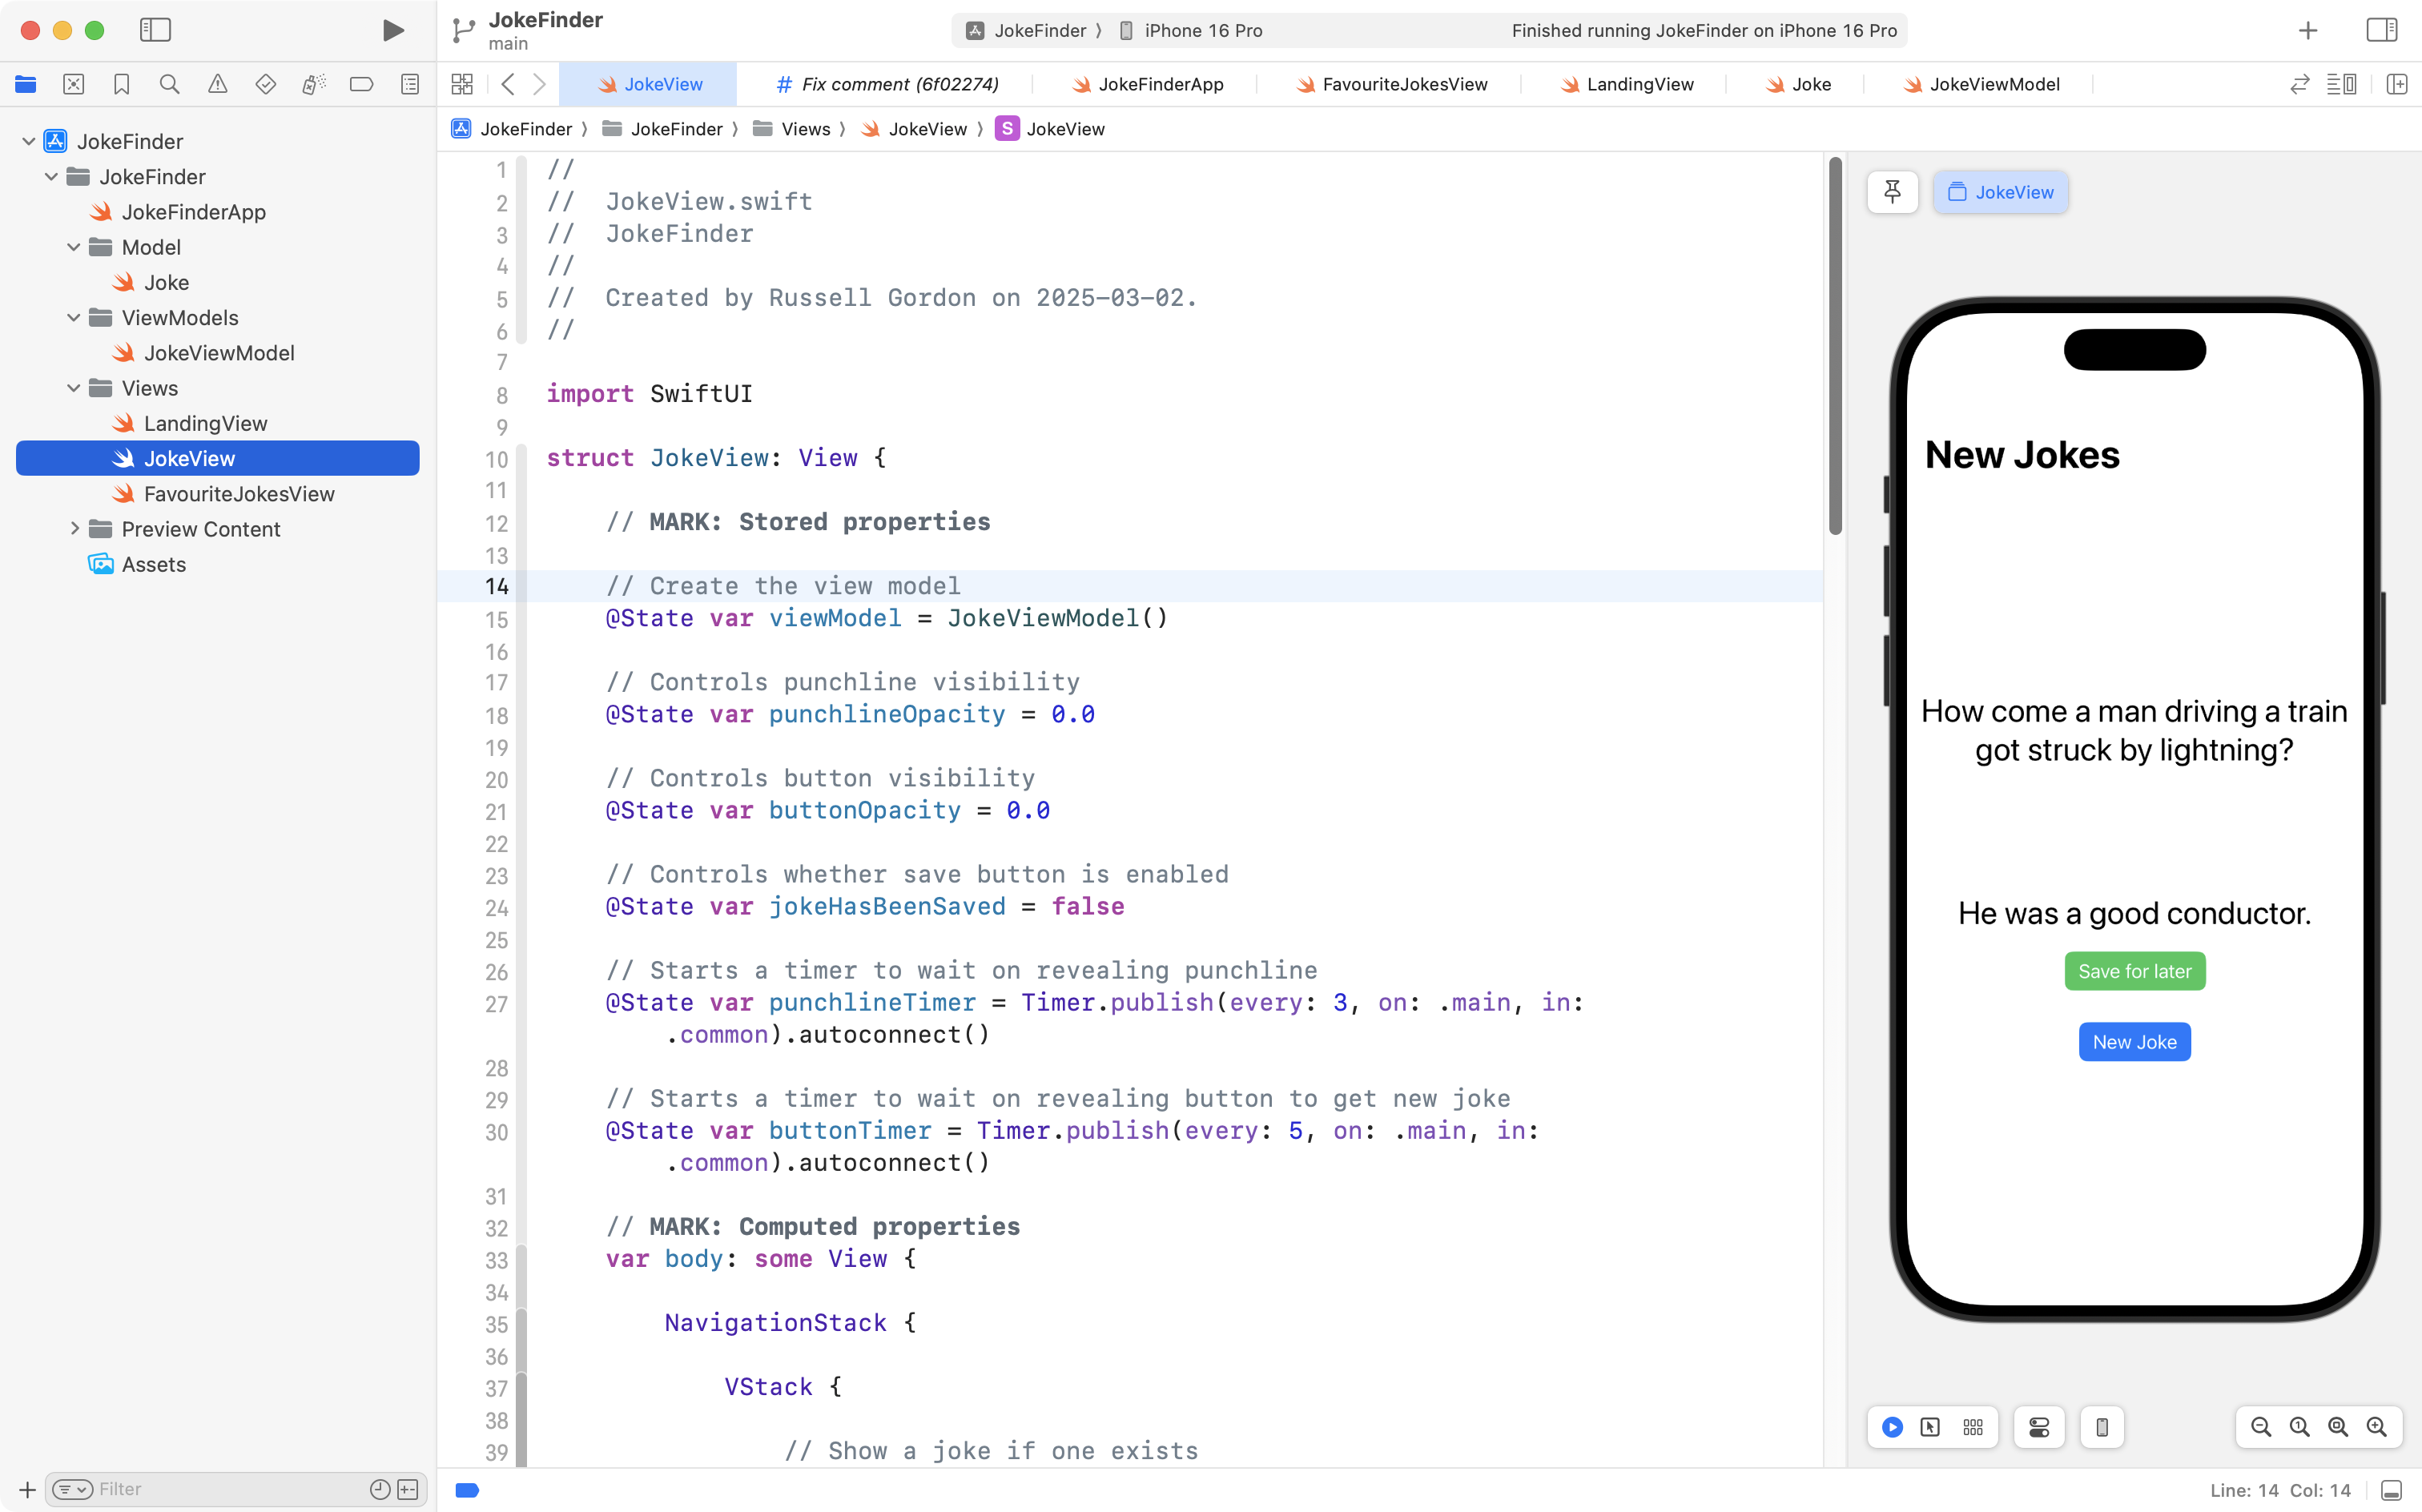
If you try out the code added so far, you should see something like this:
First, the good part – when we press the green Save for later button, we see that there is 1 element in the favouriteJokes array in the view model.
Now, the bad part – when we choose to load a new joke, the green Save for later button remains disabled. We can currently use it only once, which is obviously not ideal.
We can fix this easily. Copy the following code to your clipboard:
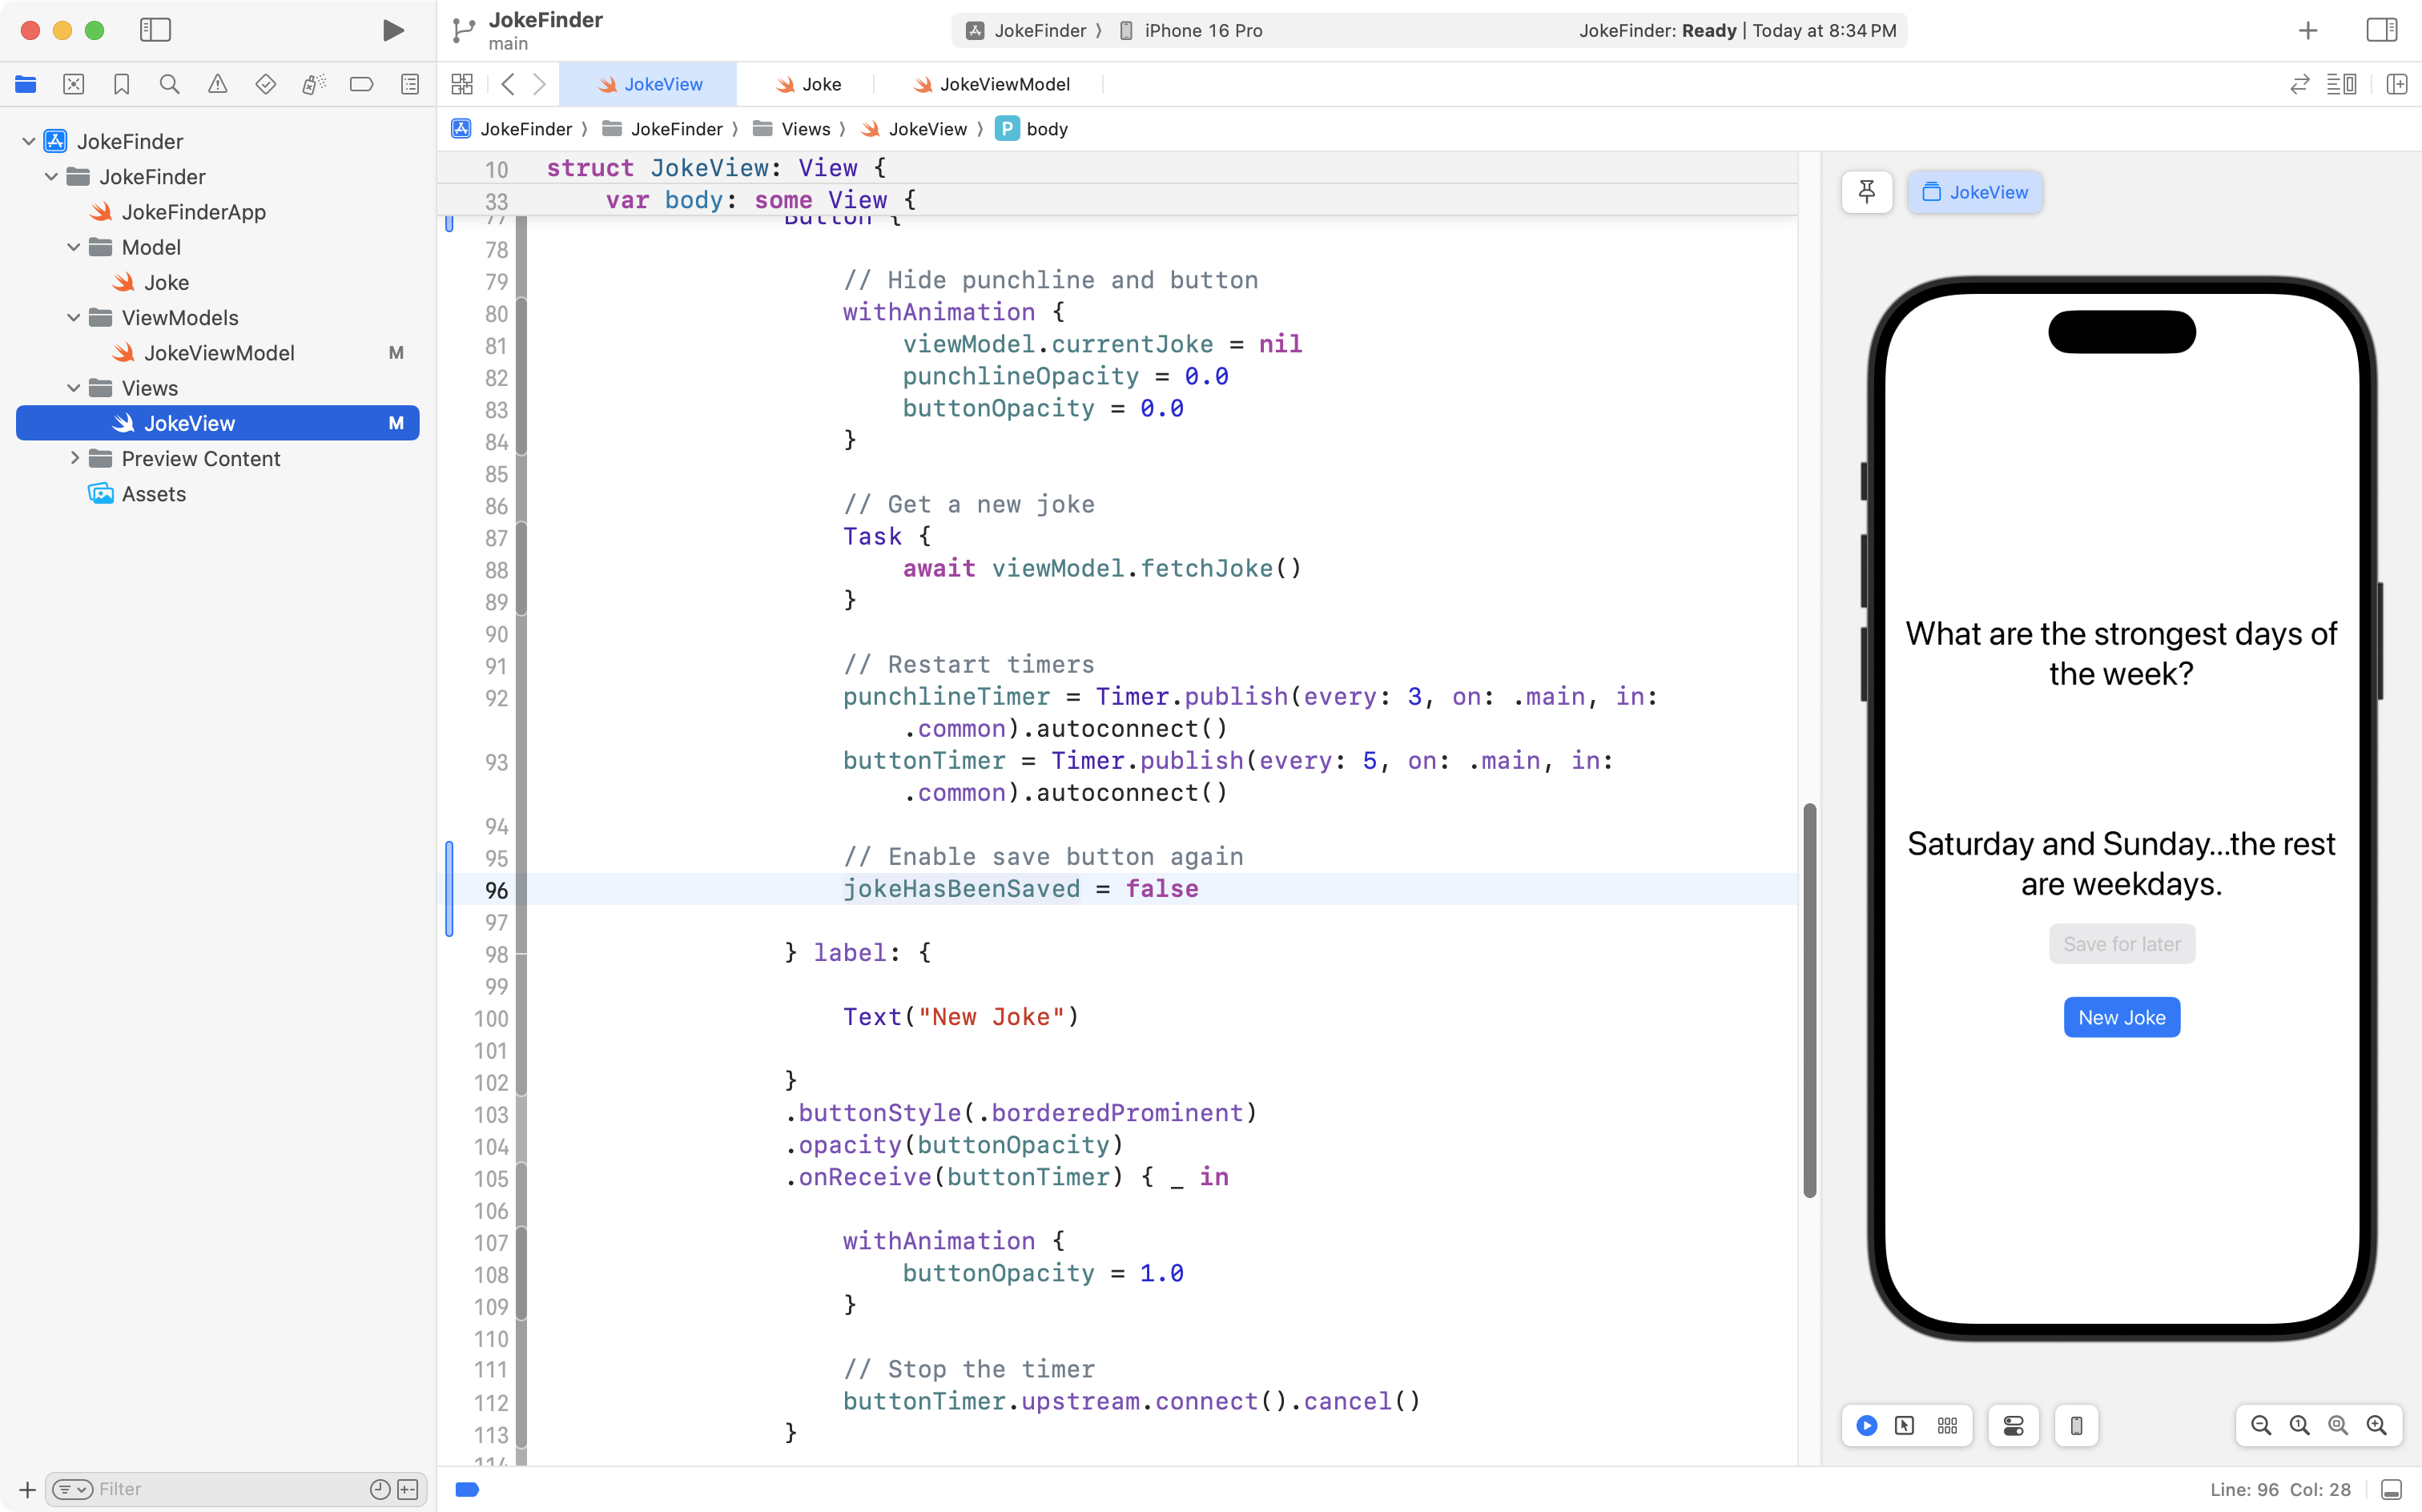
// Enable save button again
jokeHasBeenSaved = false
Then add it to the block of code that is run when the New Joke button is pressed, right after the code that restarts the timers:
Now try your program again – if you save a joke, then load a new joke, you should see that the green button to save a joke is enabled and able to be used again:
Let’s recap how that works.
First, when the view first loads, the boolean jokeHasBeenSaved is set to a default value of false:
Second, when we save a joke, that same boolean is set to true:
That causes the button to be disabled (greyed out) because we included this view modifier on the button:
Finally, when a new joke is loaded, we reset jokeHasBeenSaved back to false so that the green button to save a joke can be used to save the next joke, if the user so desires:
Commit and push your work at this point with the following message:
Modified view model and view so that a joke can be saved.
Add a tab view
Next we will add a second view, where the user can review favourite jokes.
To allow for movement between the first view (where new jokes are loaded) and the second view (where favourites are seen) we will use a tab view.
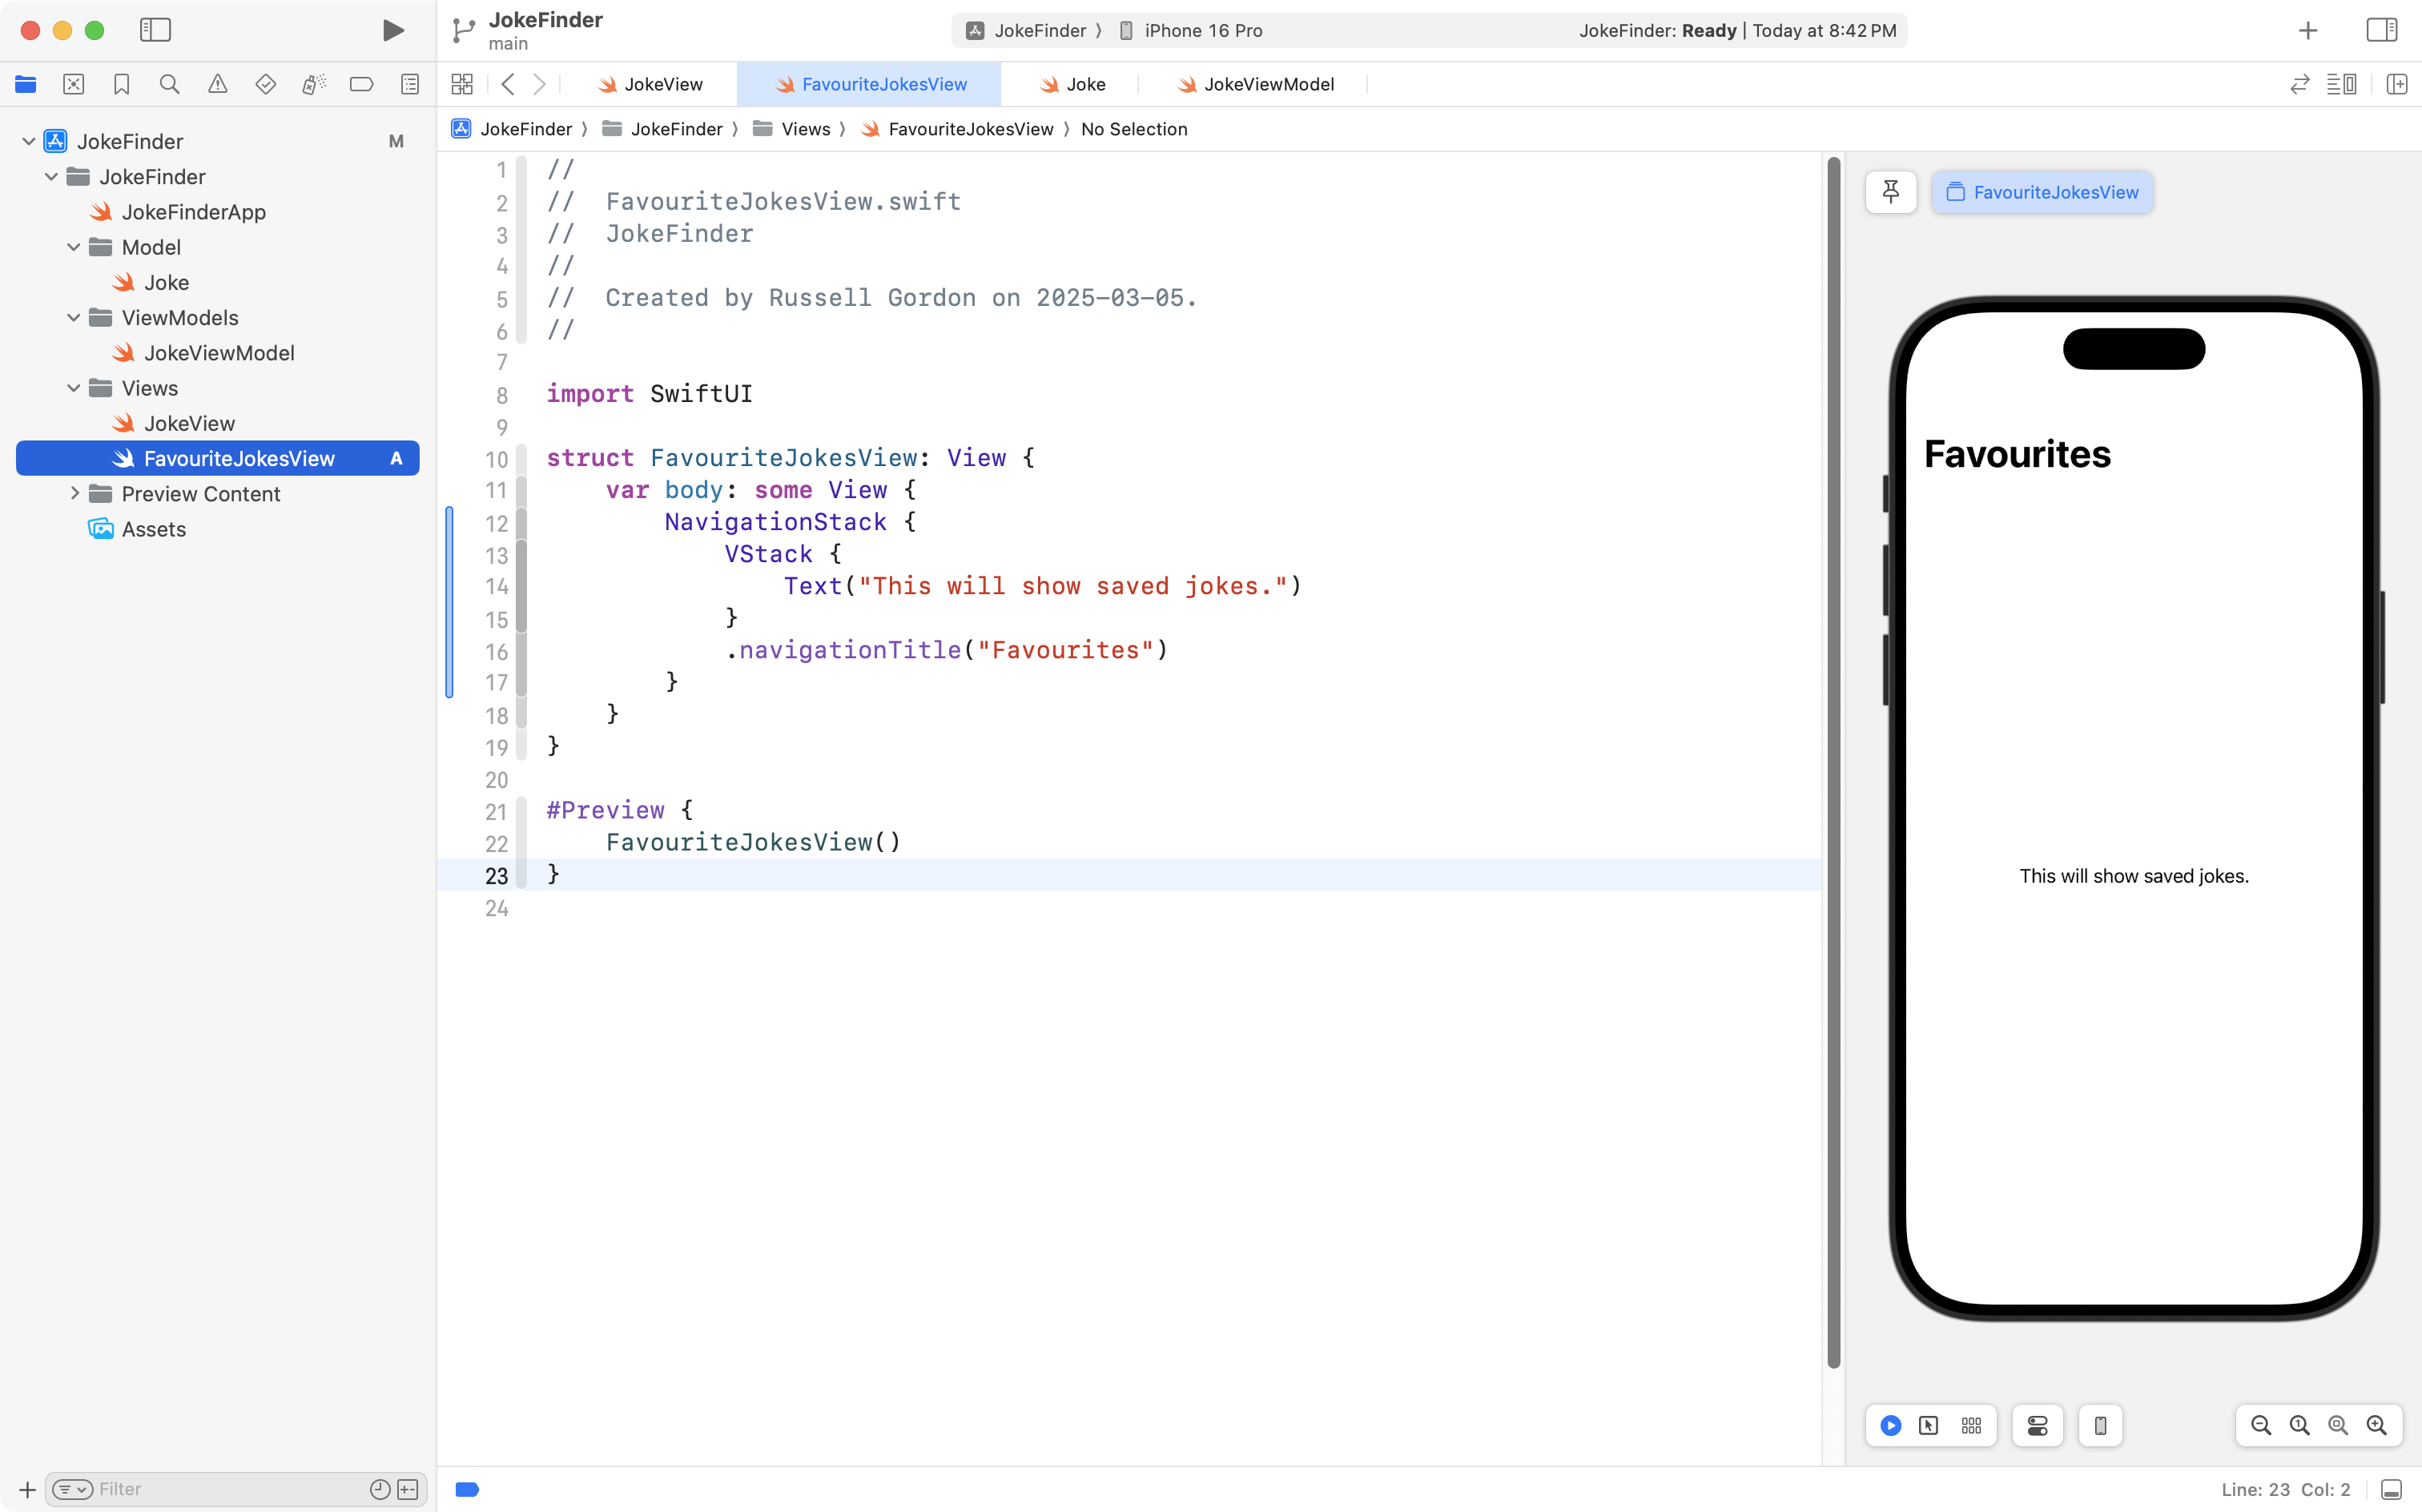
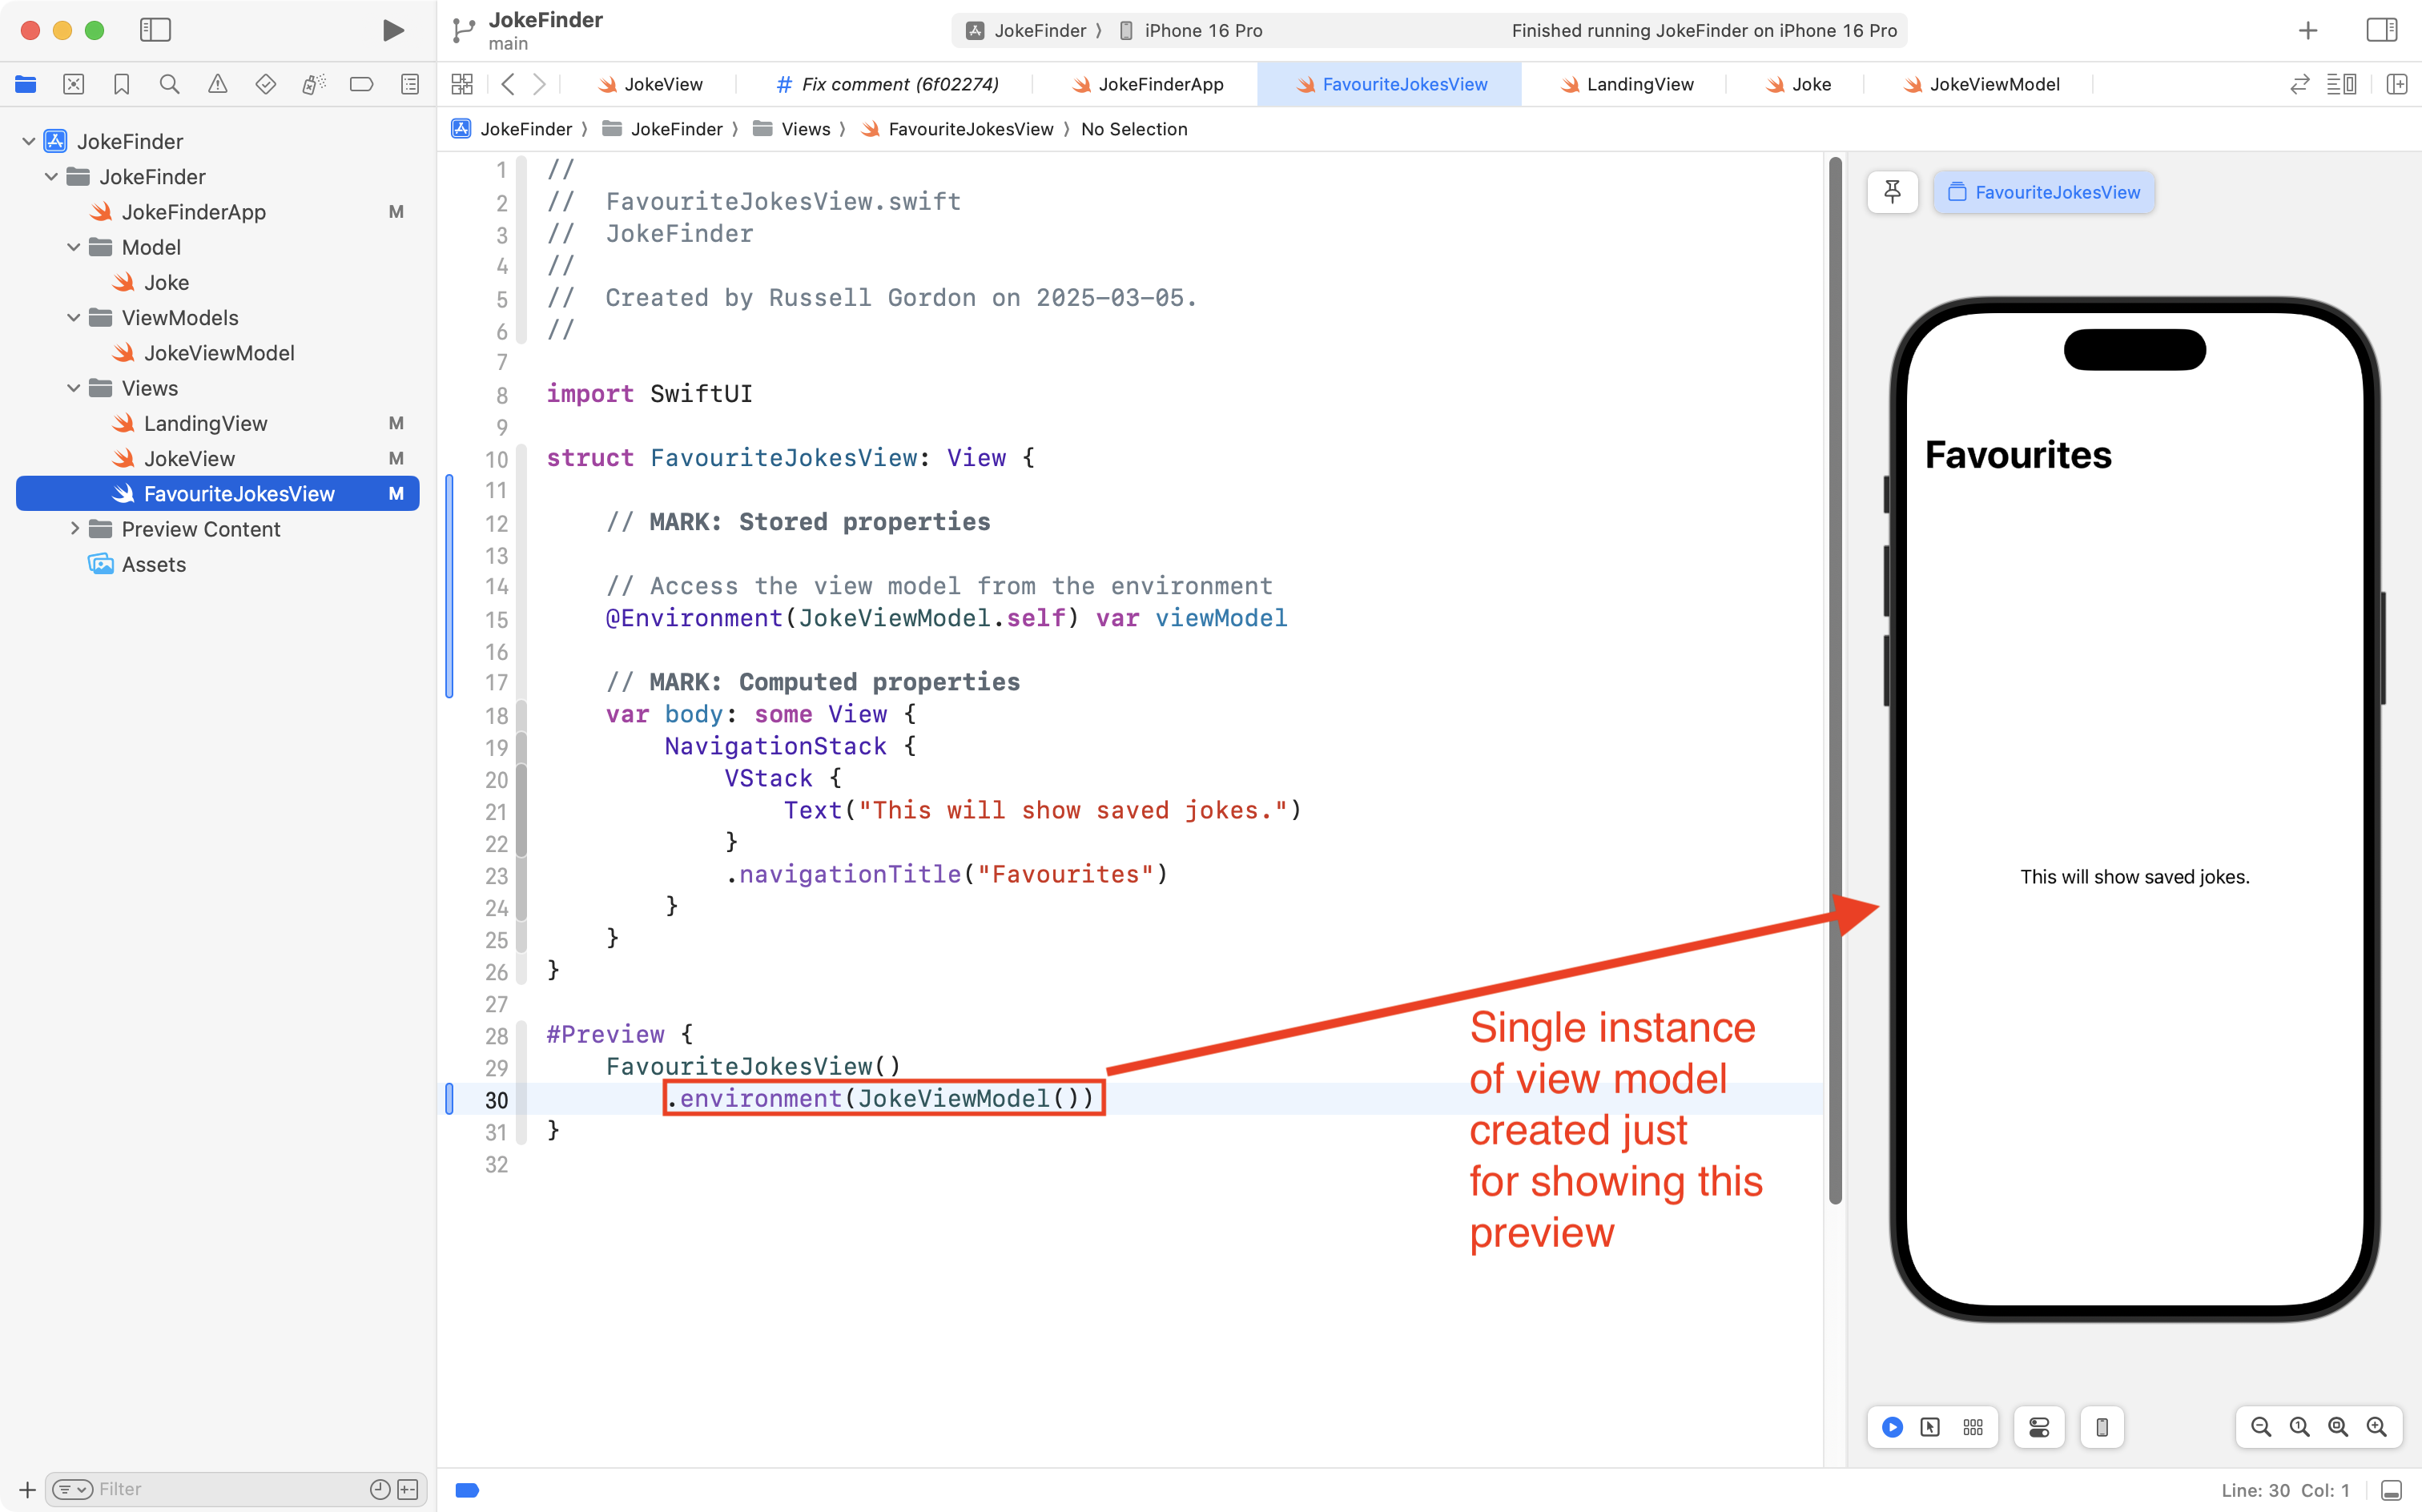
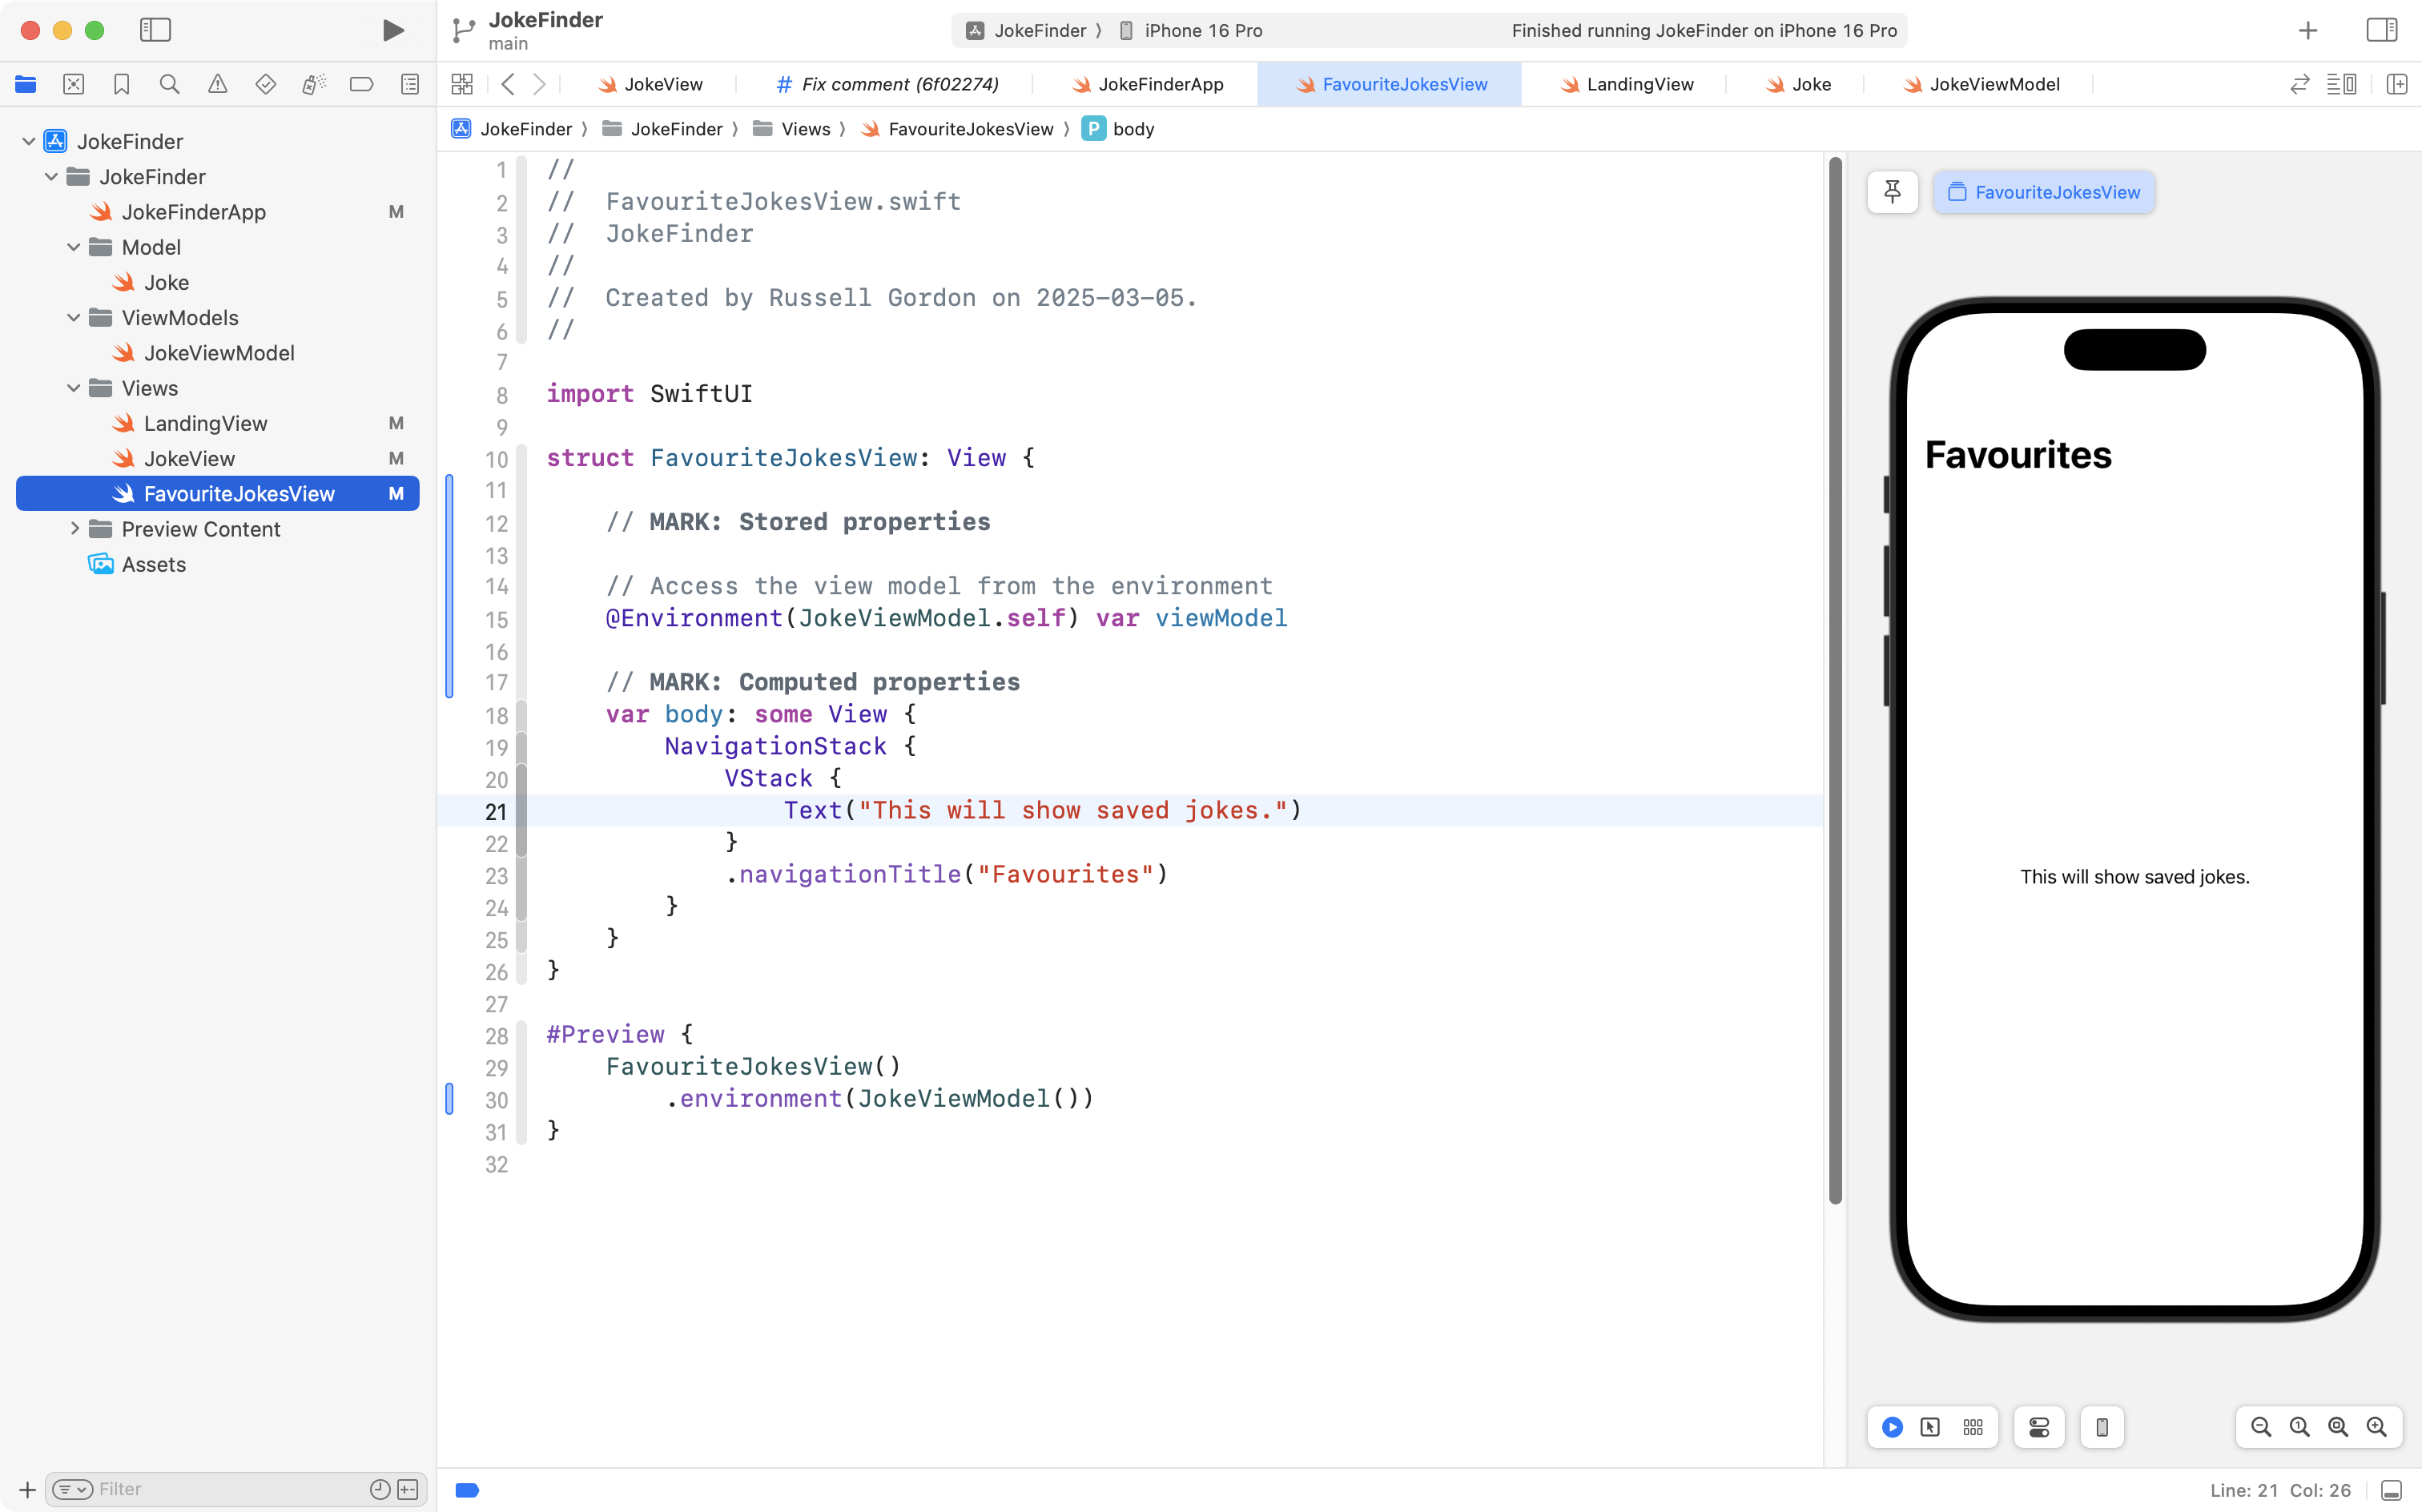
First, let’s create that second view. Copy this code into your clipboard:
import SwiftUI
struct FavouriteJokesView: View {
var body: some View {
NavigationStack {
VStack {
Text("This will show saved jokes.")
}
.navigationTitle("Favourites")
}
}
}
#Preview {
FavouriteJokesView()
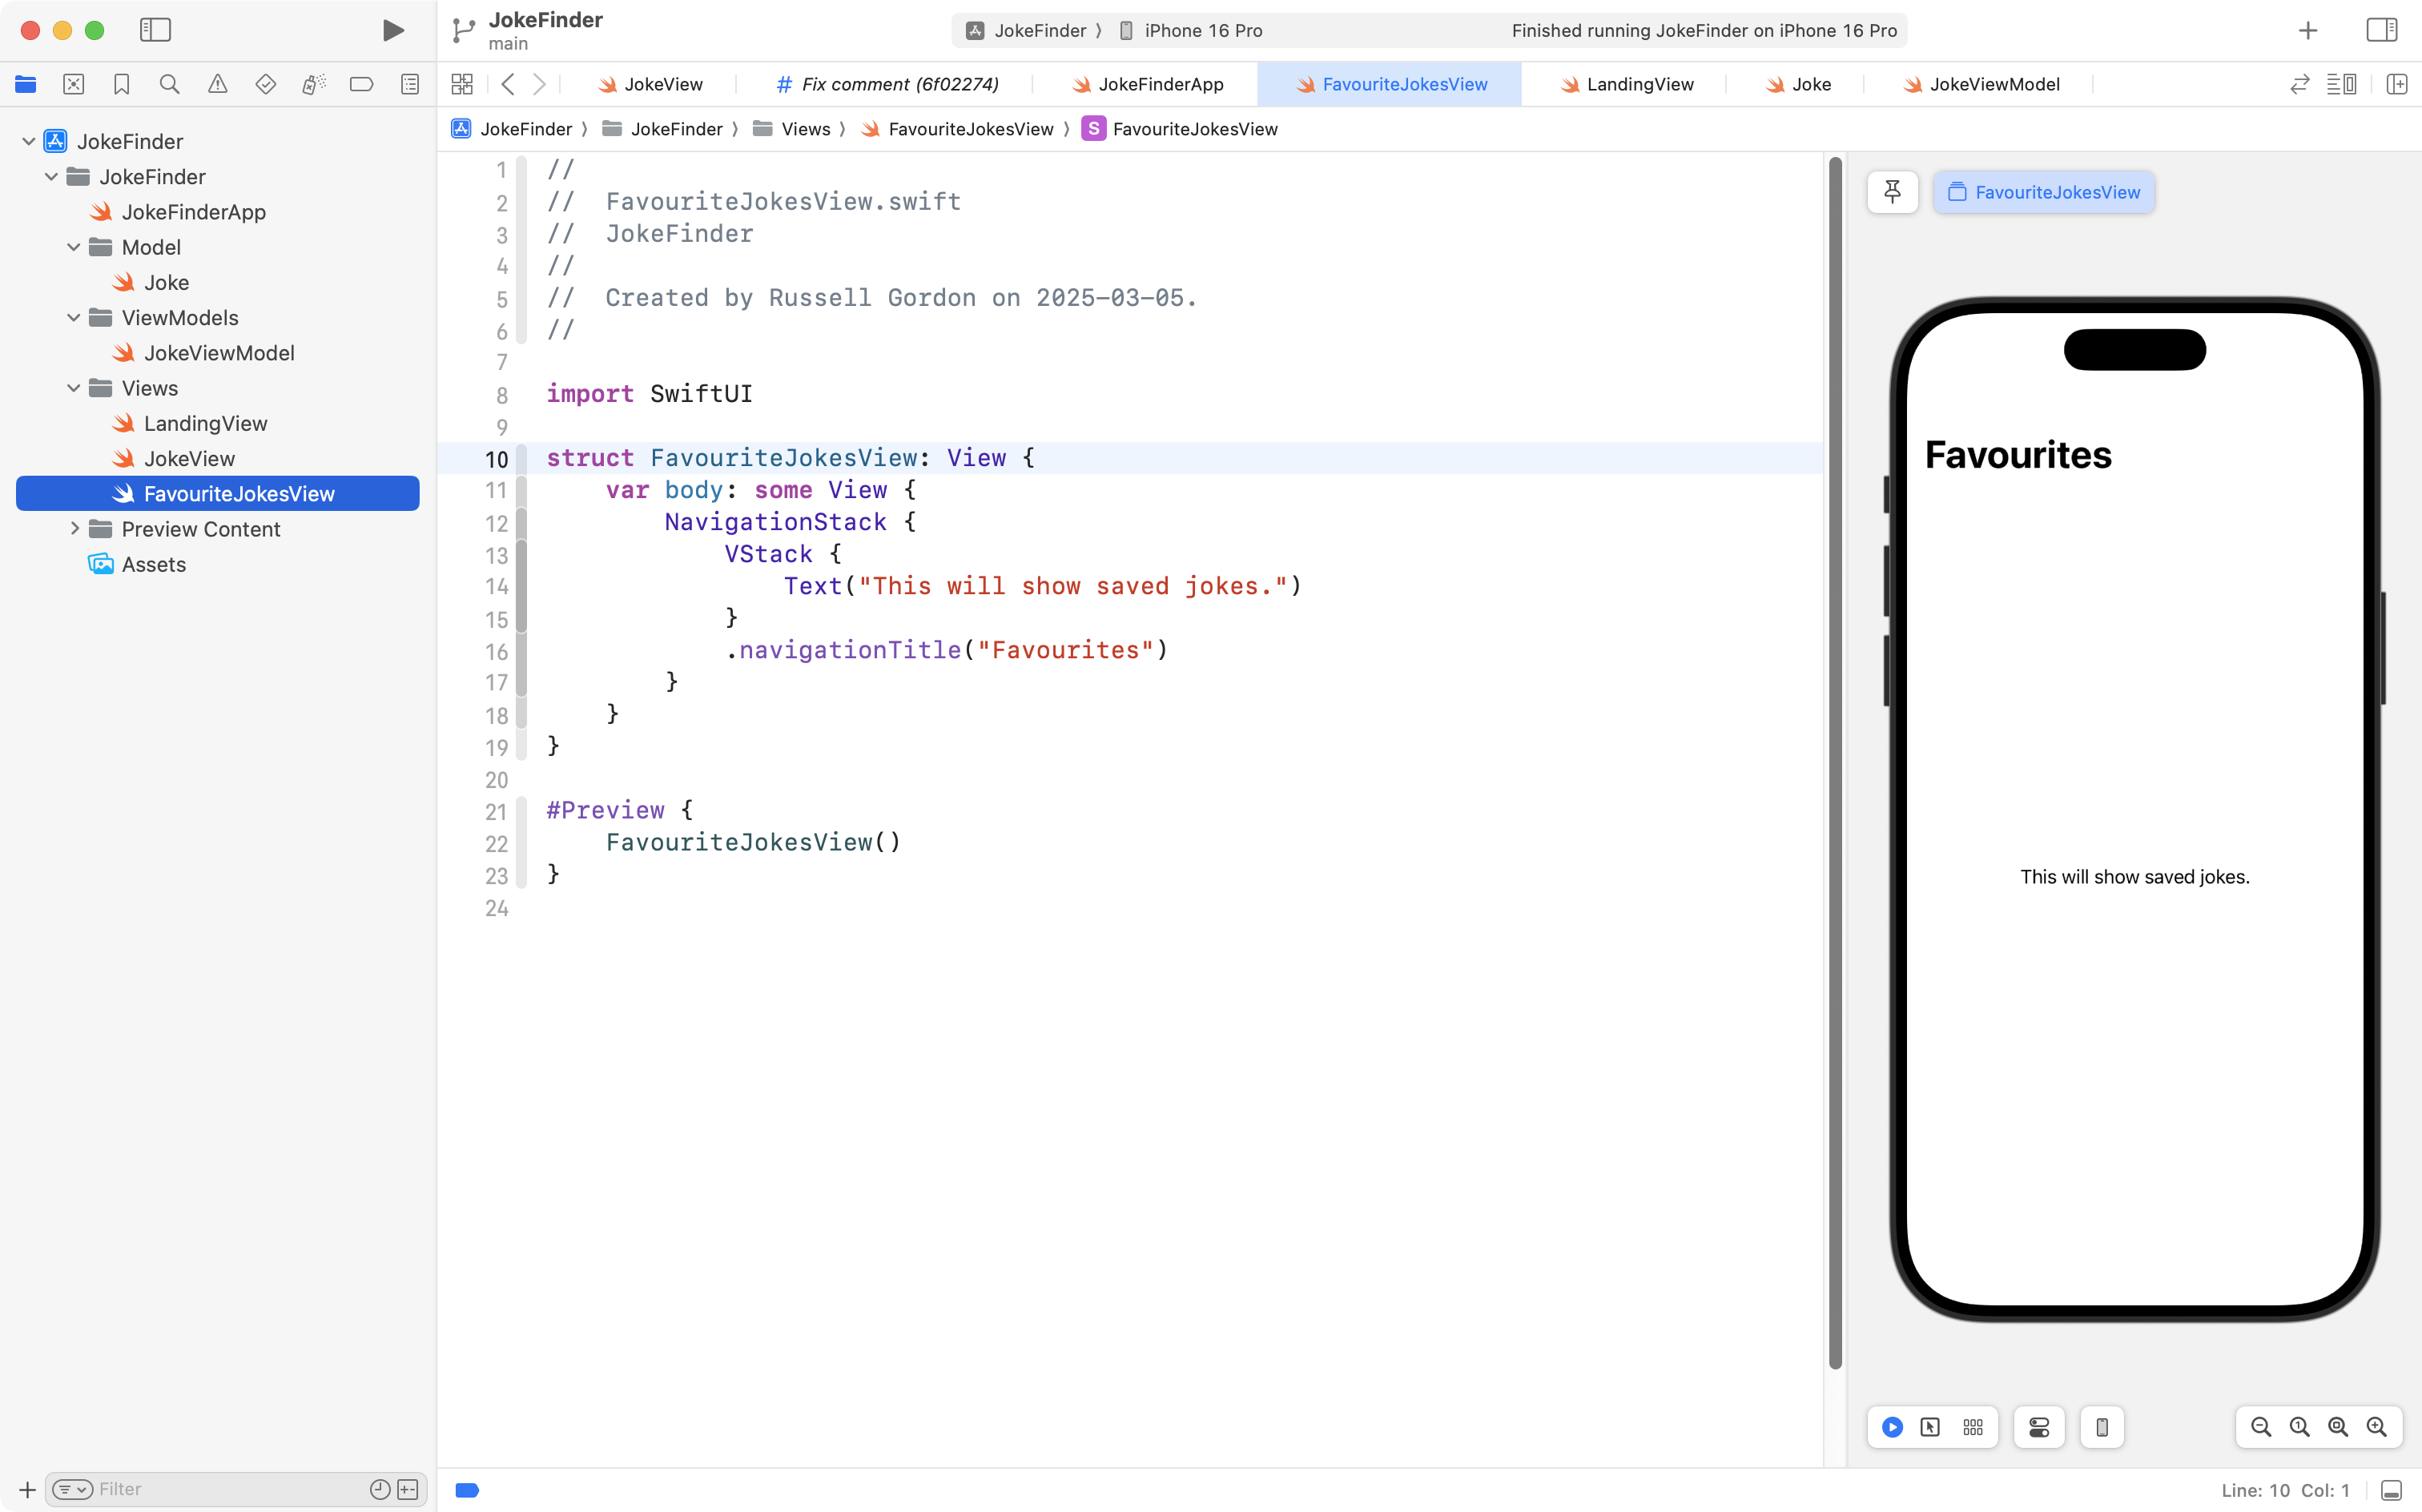
}Create a new file named FavouriteJokesView in the Views group in your project, and paste this code into it, like this:
There is nothing new there, so next, please copy this code into your clipboard:
import SwiftUI
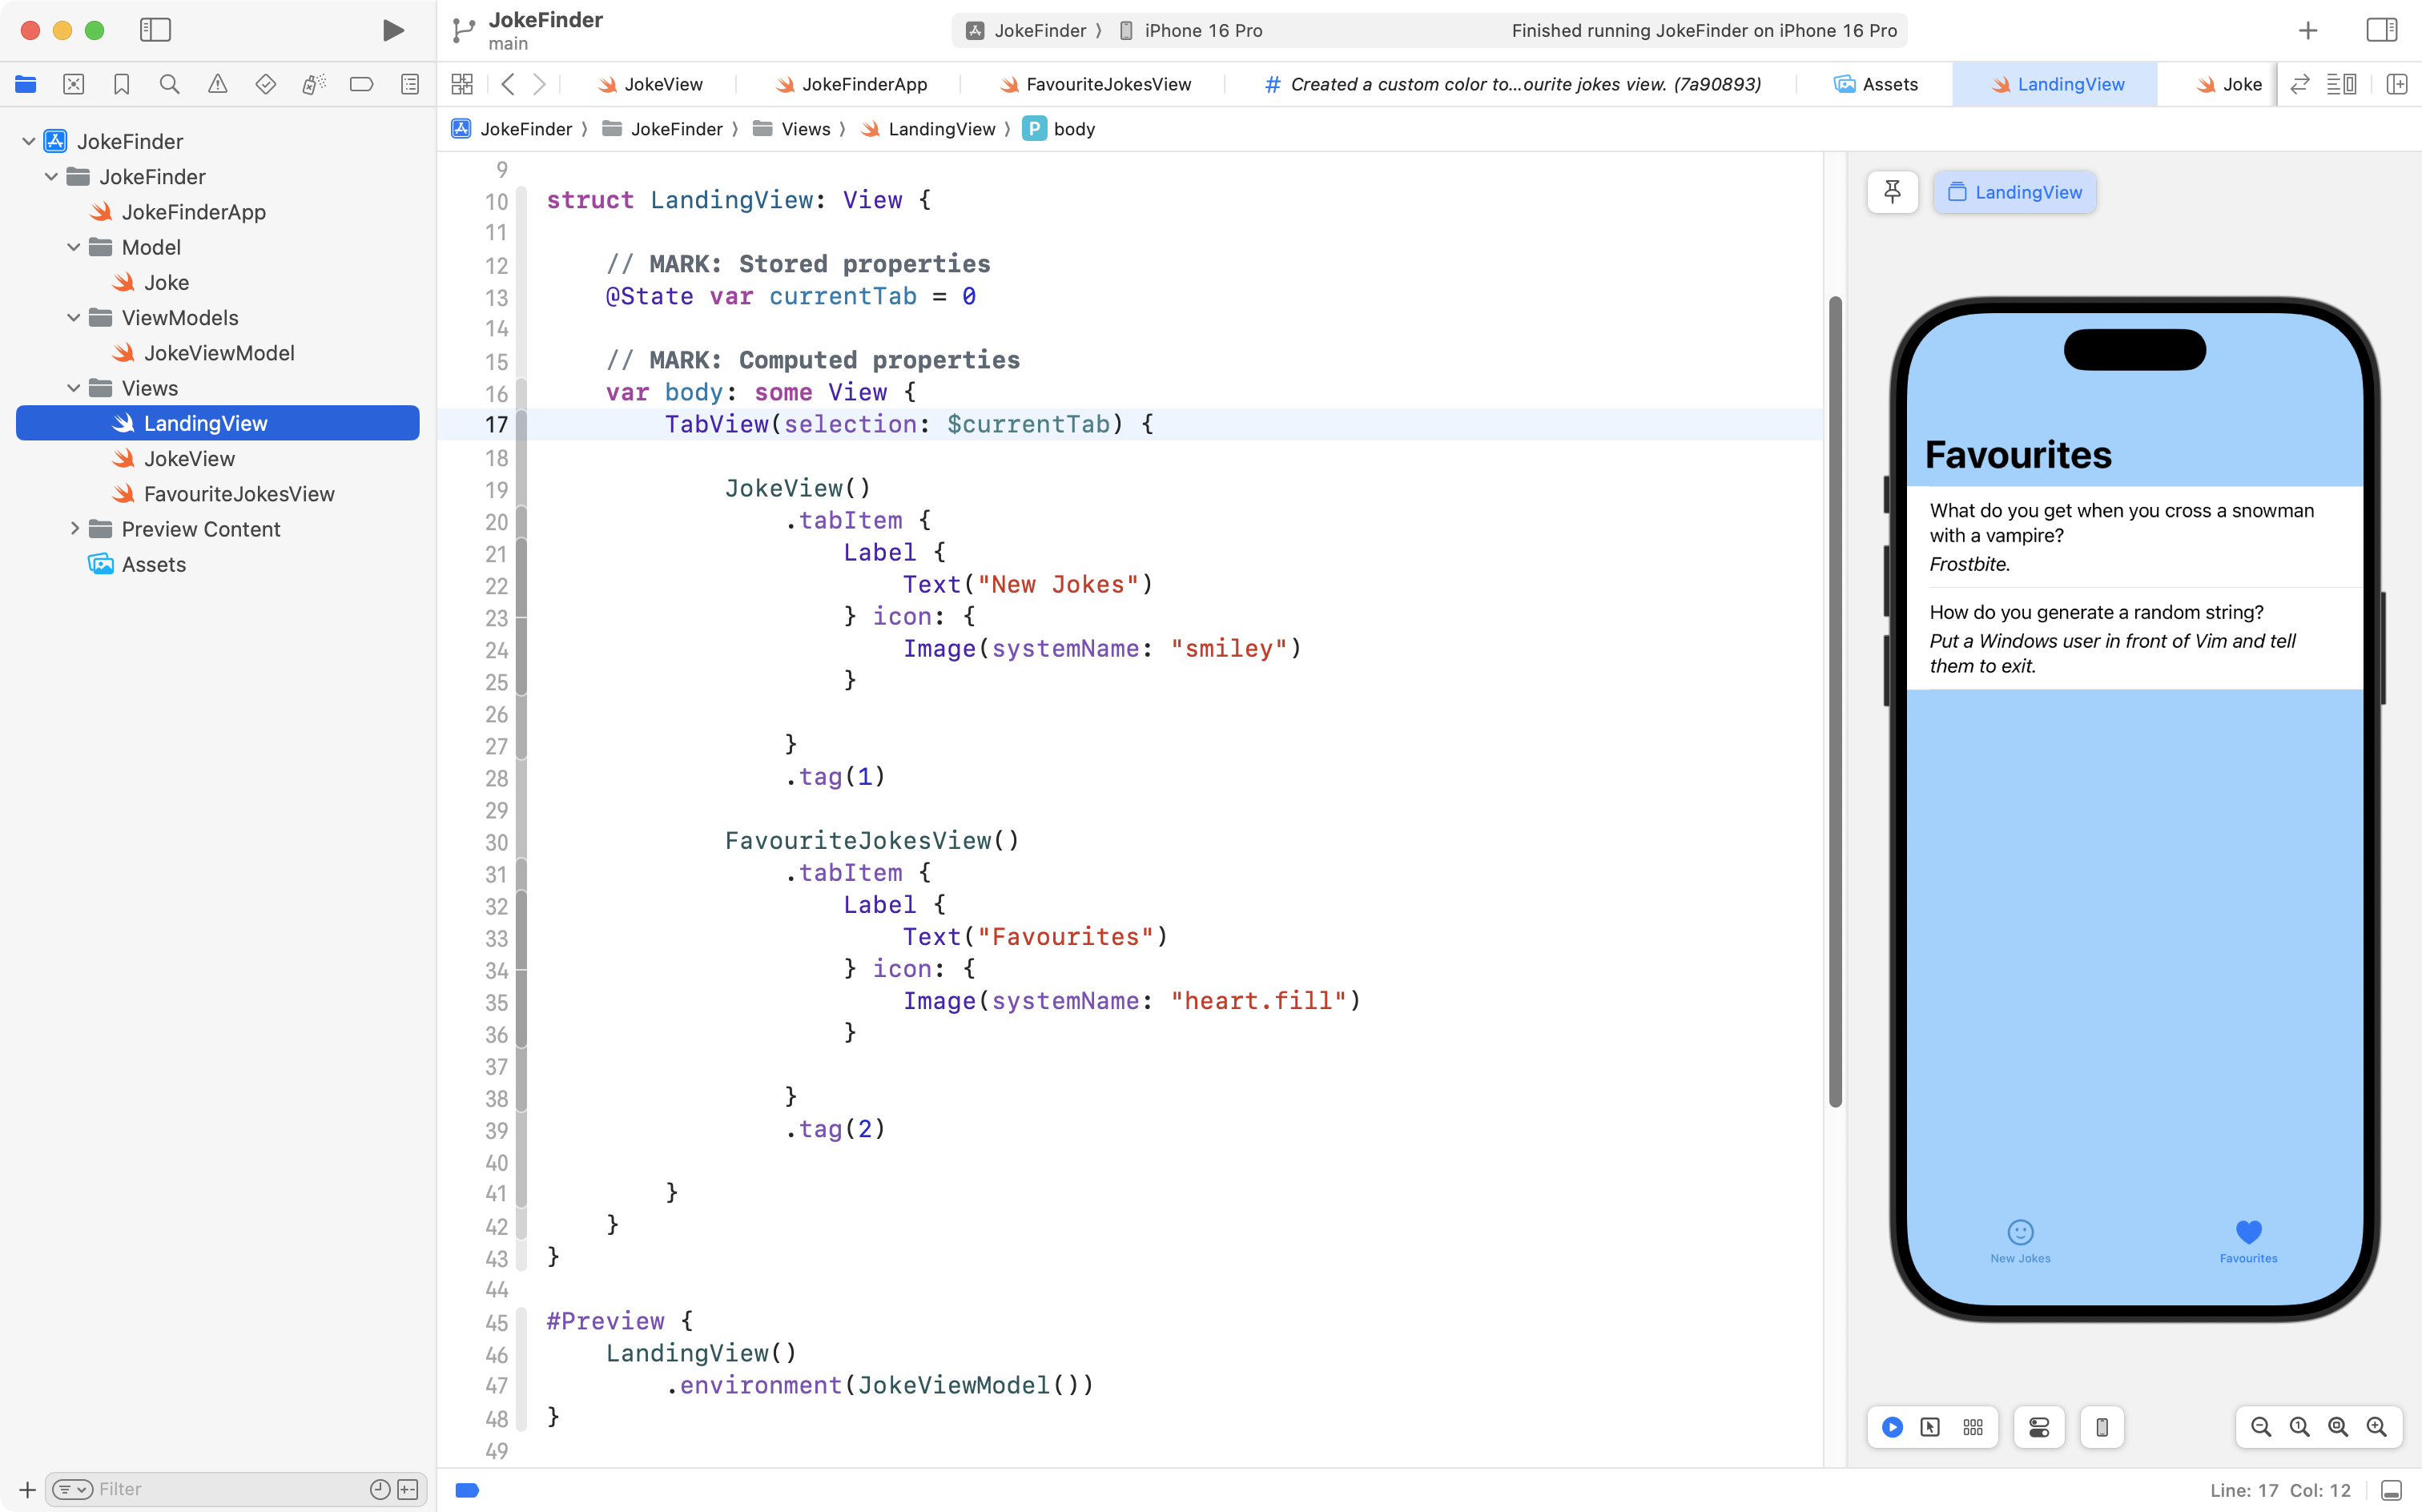
struct LandingView: View {
// MARK: Stored properties
@State var currentTab = 0
// MARK: Computed properties
var body: some View {
TabView(selection: $currentTab) {
JokeView()
.tabItem {
Label {
Text("New Jokes")
} icon: {
Image(systemName: "smiley")
}
}
.tag(1)
FavouriteJokesView()
.tabItem {
Label {
Text("Favourites")
} icon: {
Image(systemName: "heart.fill")
}
}
.tag(2)
}
}
}
#Preview {
LandingView()
}Create another new view named LandingView in the Views group, then paste that code into it, like this:
We’ve learned about tab views before, but not looked at how we can keep track of which tab is selected. Let’s examine that more closely…
DISCUSSION
- We add a stored property to keep track of which tab has been selected by the user. This ensures that when
LandingViewis reloaded, it will “stay” on whatever tab the user last selected. Otherwise, each timeLandingViewis loaded, it would default to the first tab.- The
tagview modifiers assign a unique identifier to each tab.- The
TabViewhas a binding to thecurrentTabstored property, so that when a new tab is selected, the stored property is updated.
If you try out your app right now, it should look something like this:
Do you notice an inconsistency?
There is a navigation title for the view shown by the second tab, but there is no navigation title on the first tab.
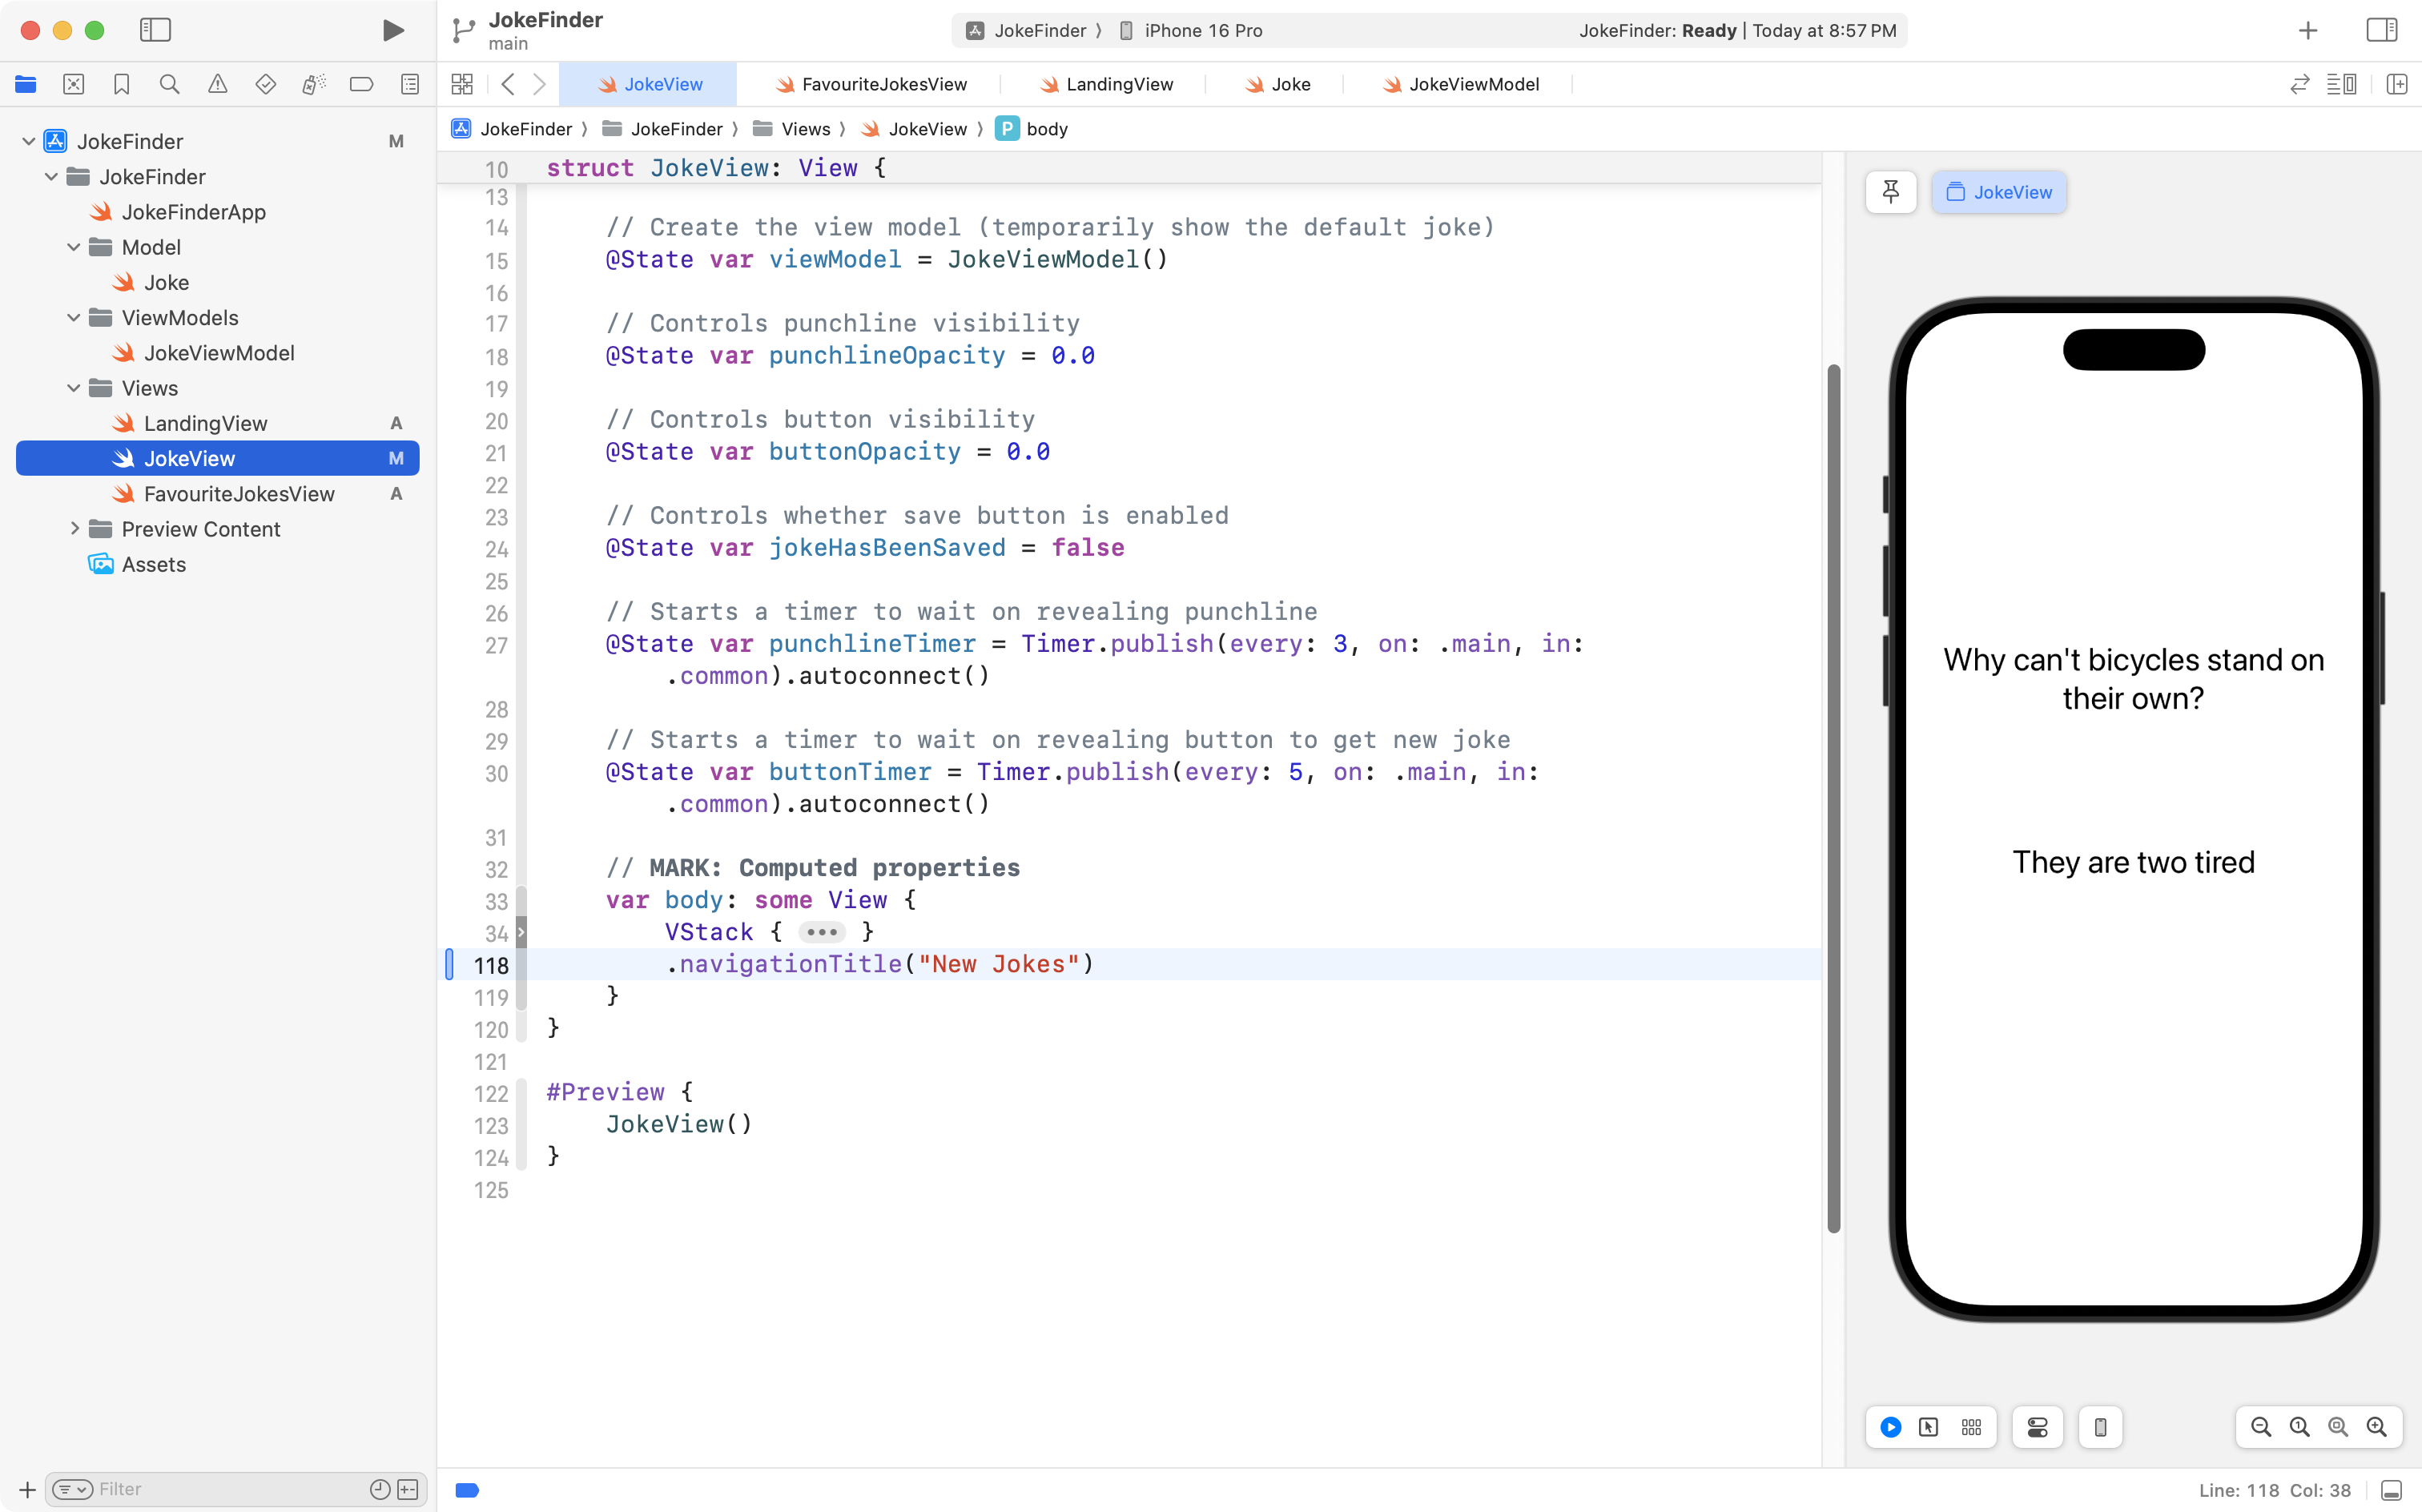
To fix this, open JokeView, find the VStack that is the top-level view inside the body property, and use code-folding to hide the details:
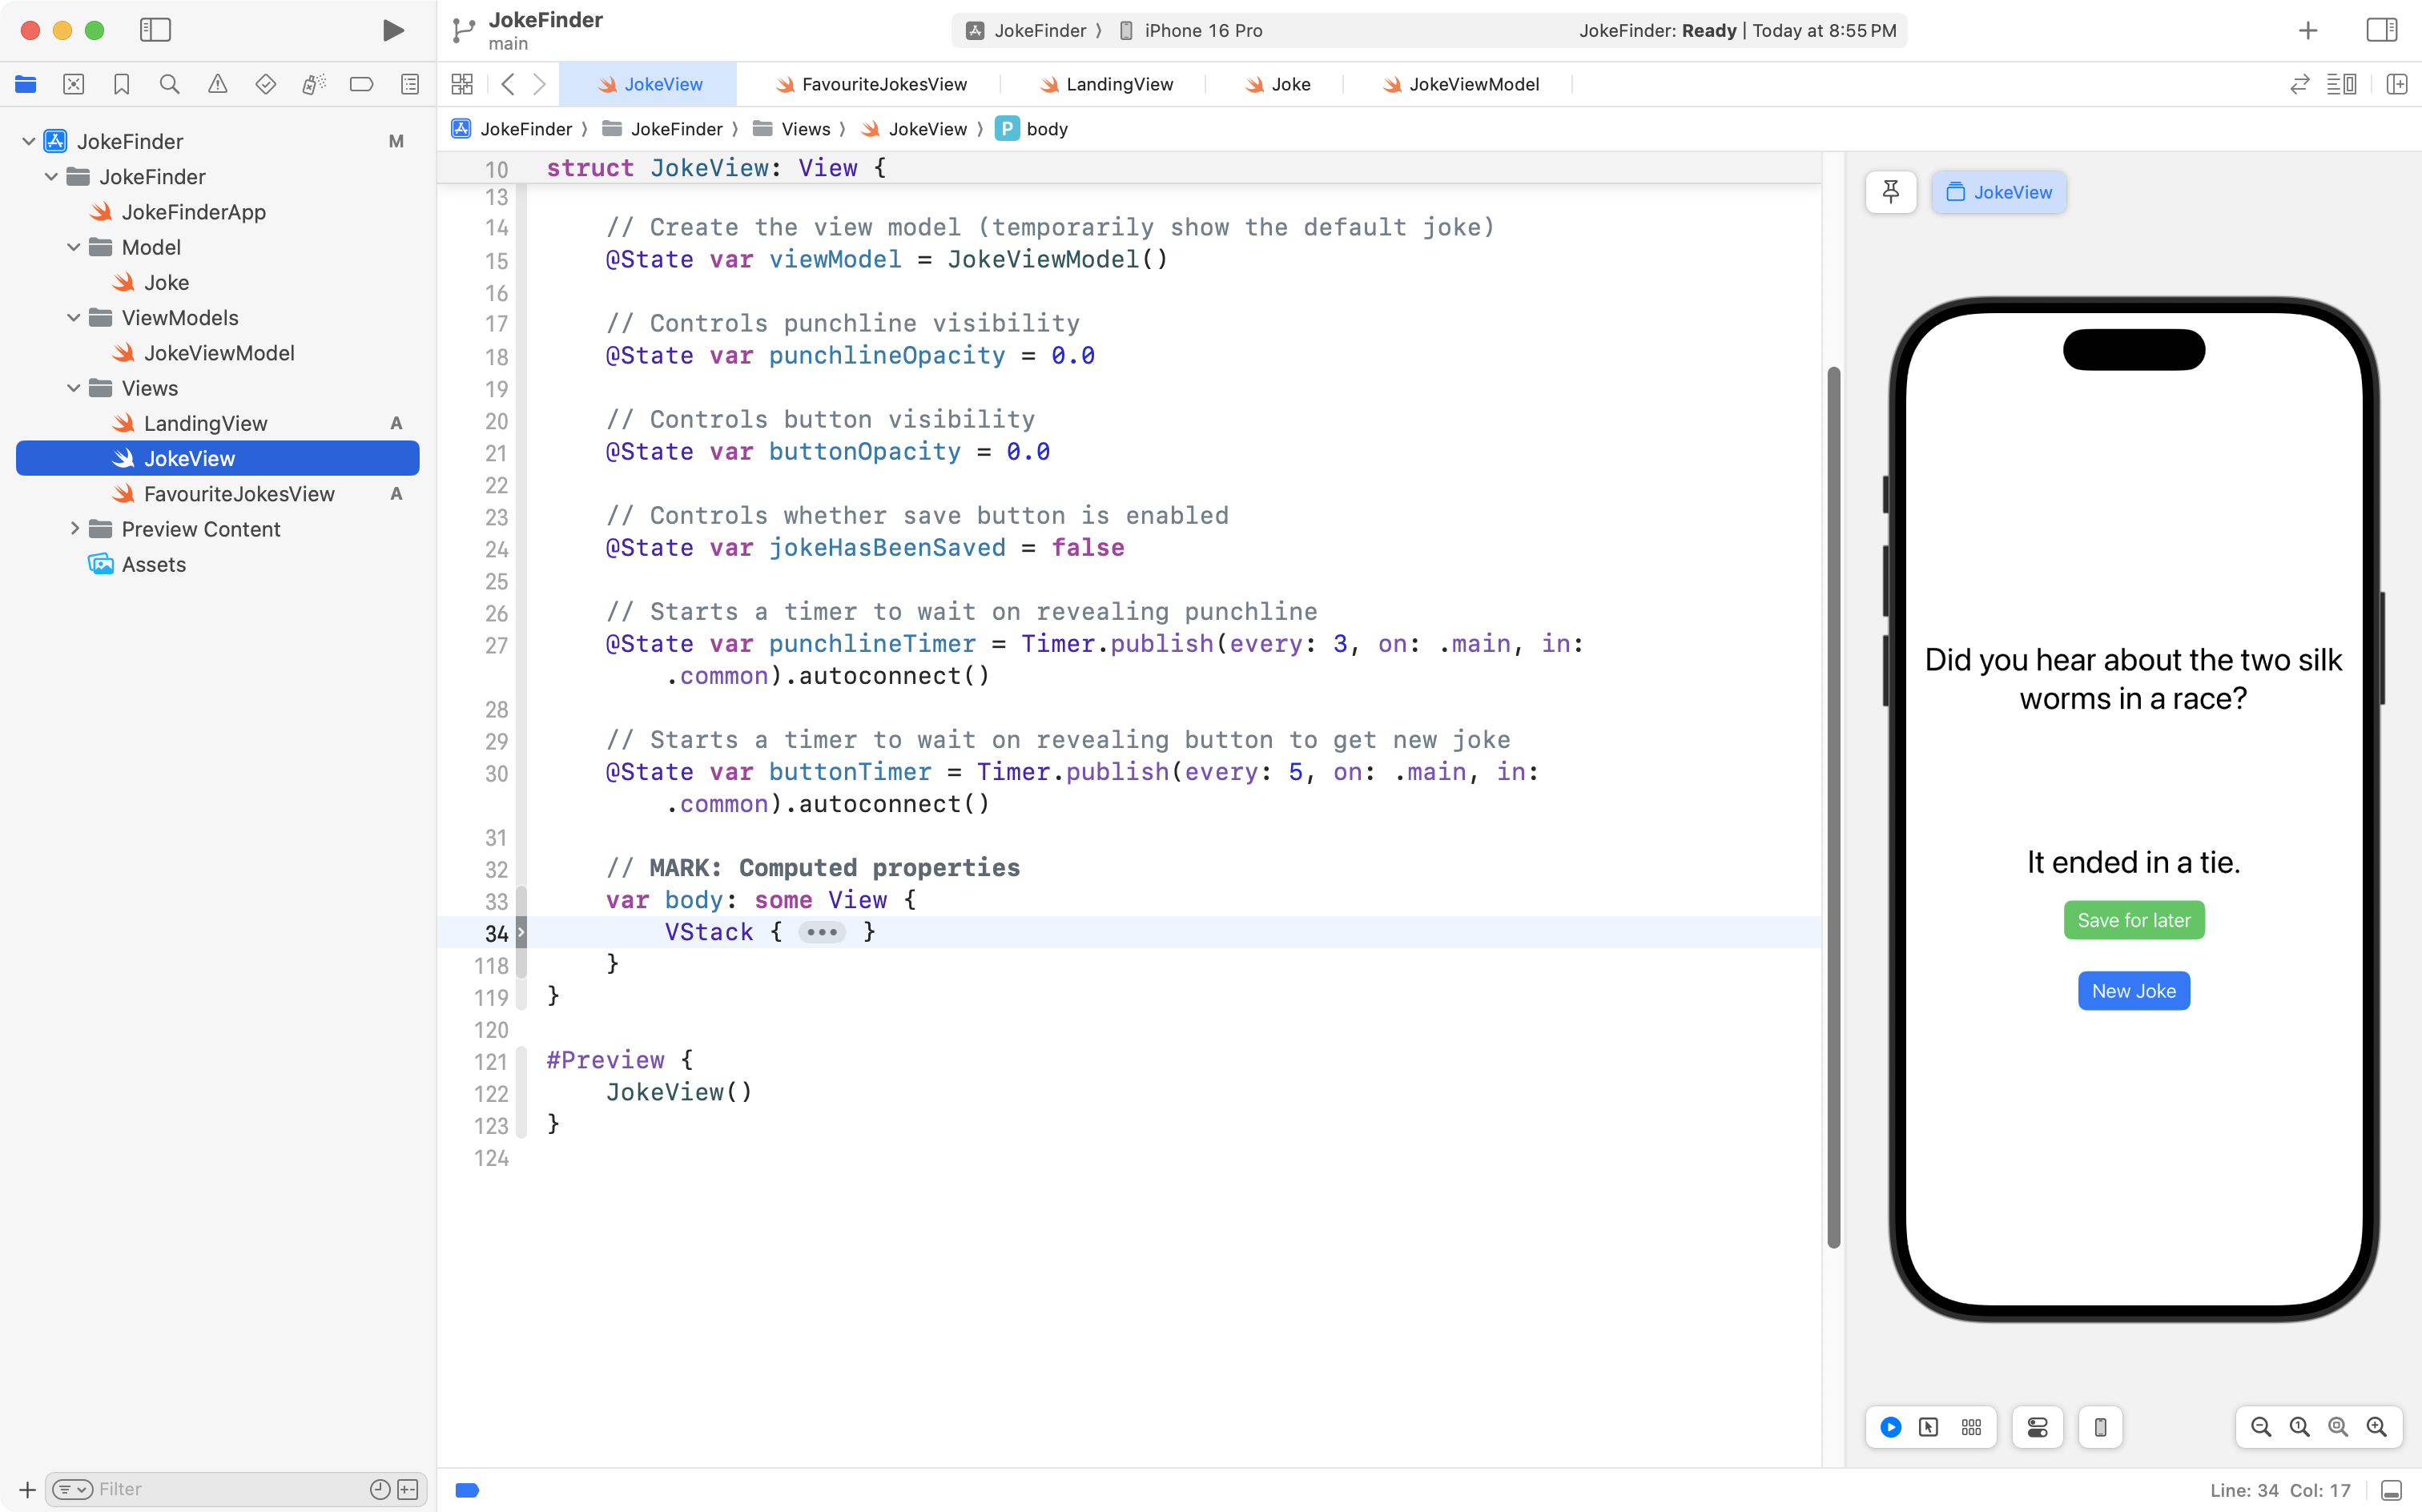
Add the following code:
.navigationTitle("New Jokes")… after the VStack, like this:
Then add a few blank lines above the VStack, like so:
… and in that space, add a NavigationStack:
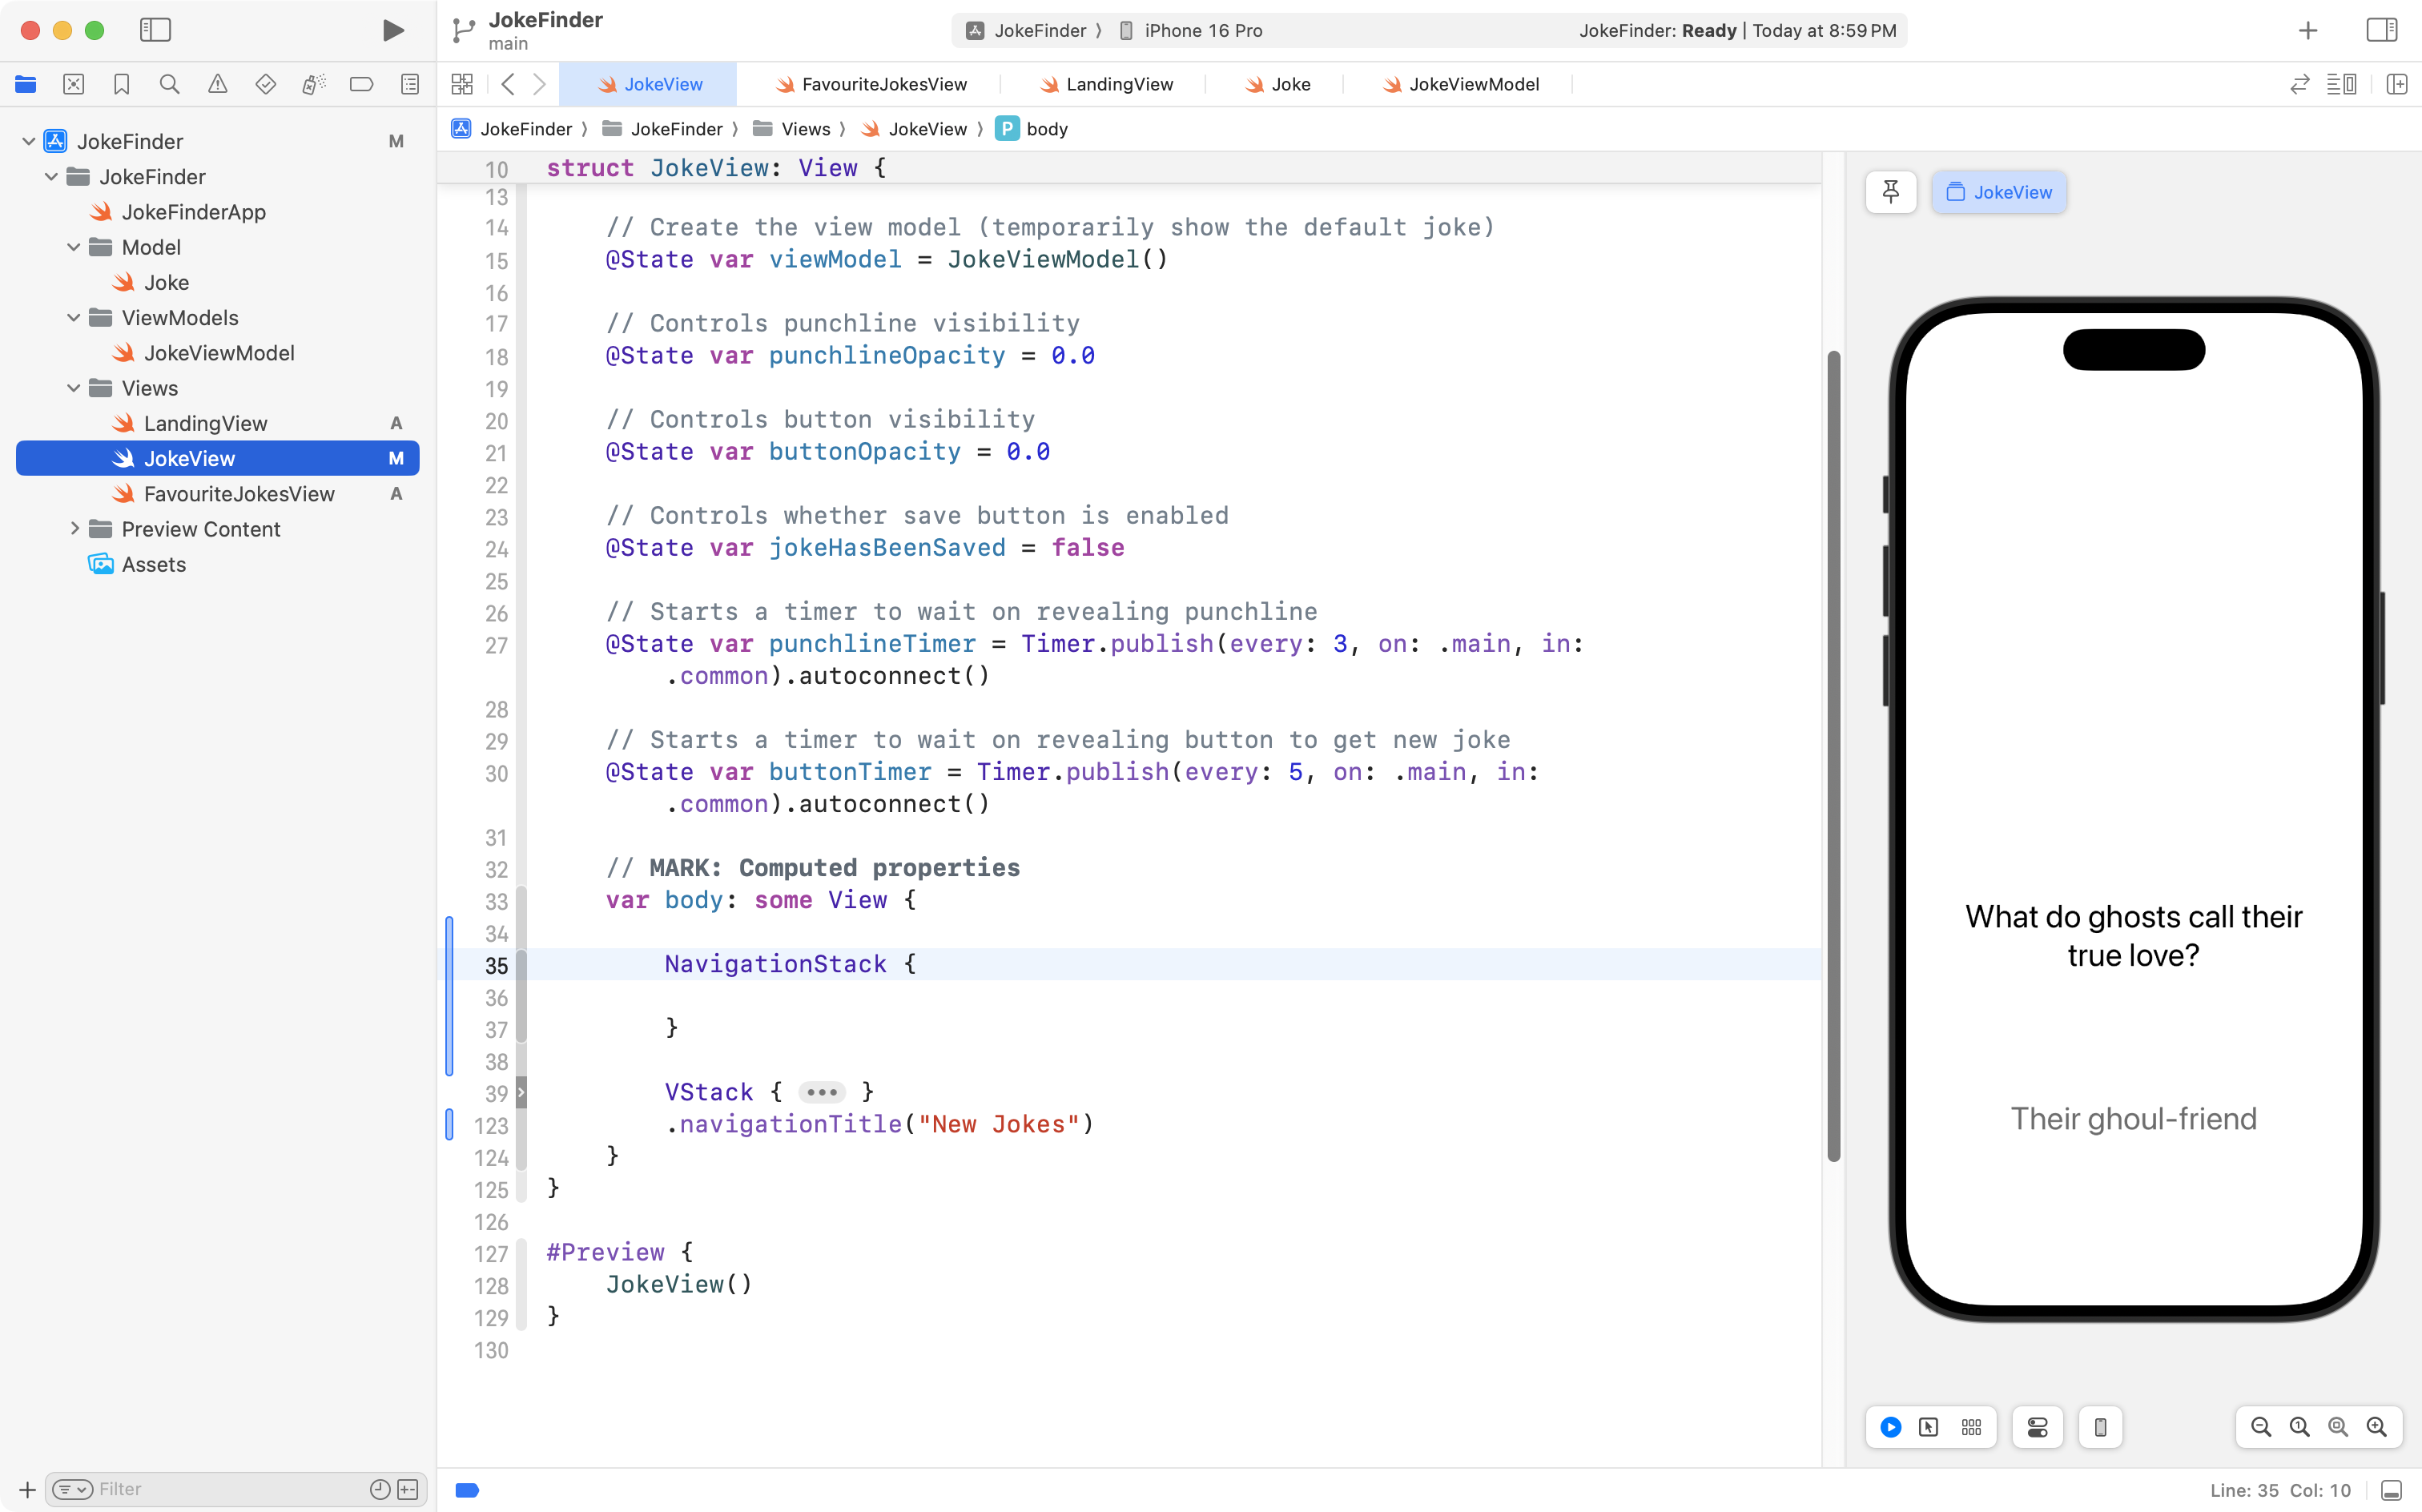
Finally, move the VStack inside the NavigationStack – you can highlight the VStack, cut it using Command-X, and then paste it inside the NavigationStack using Command-V.
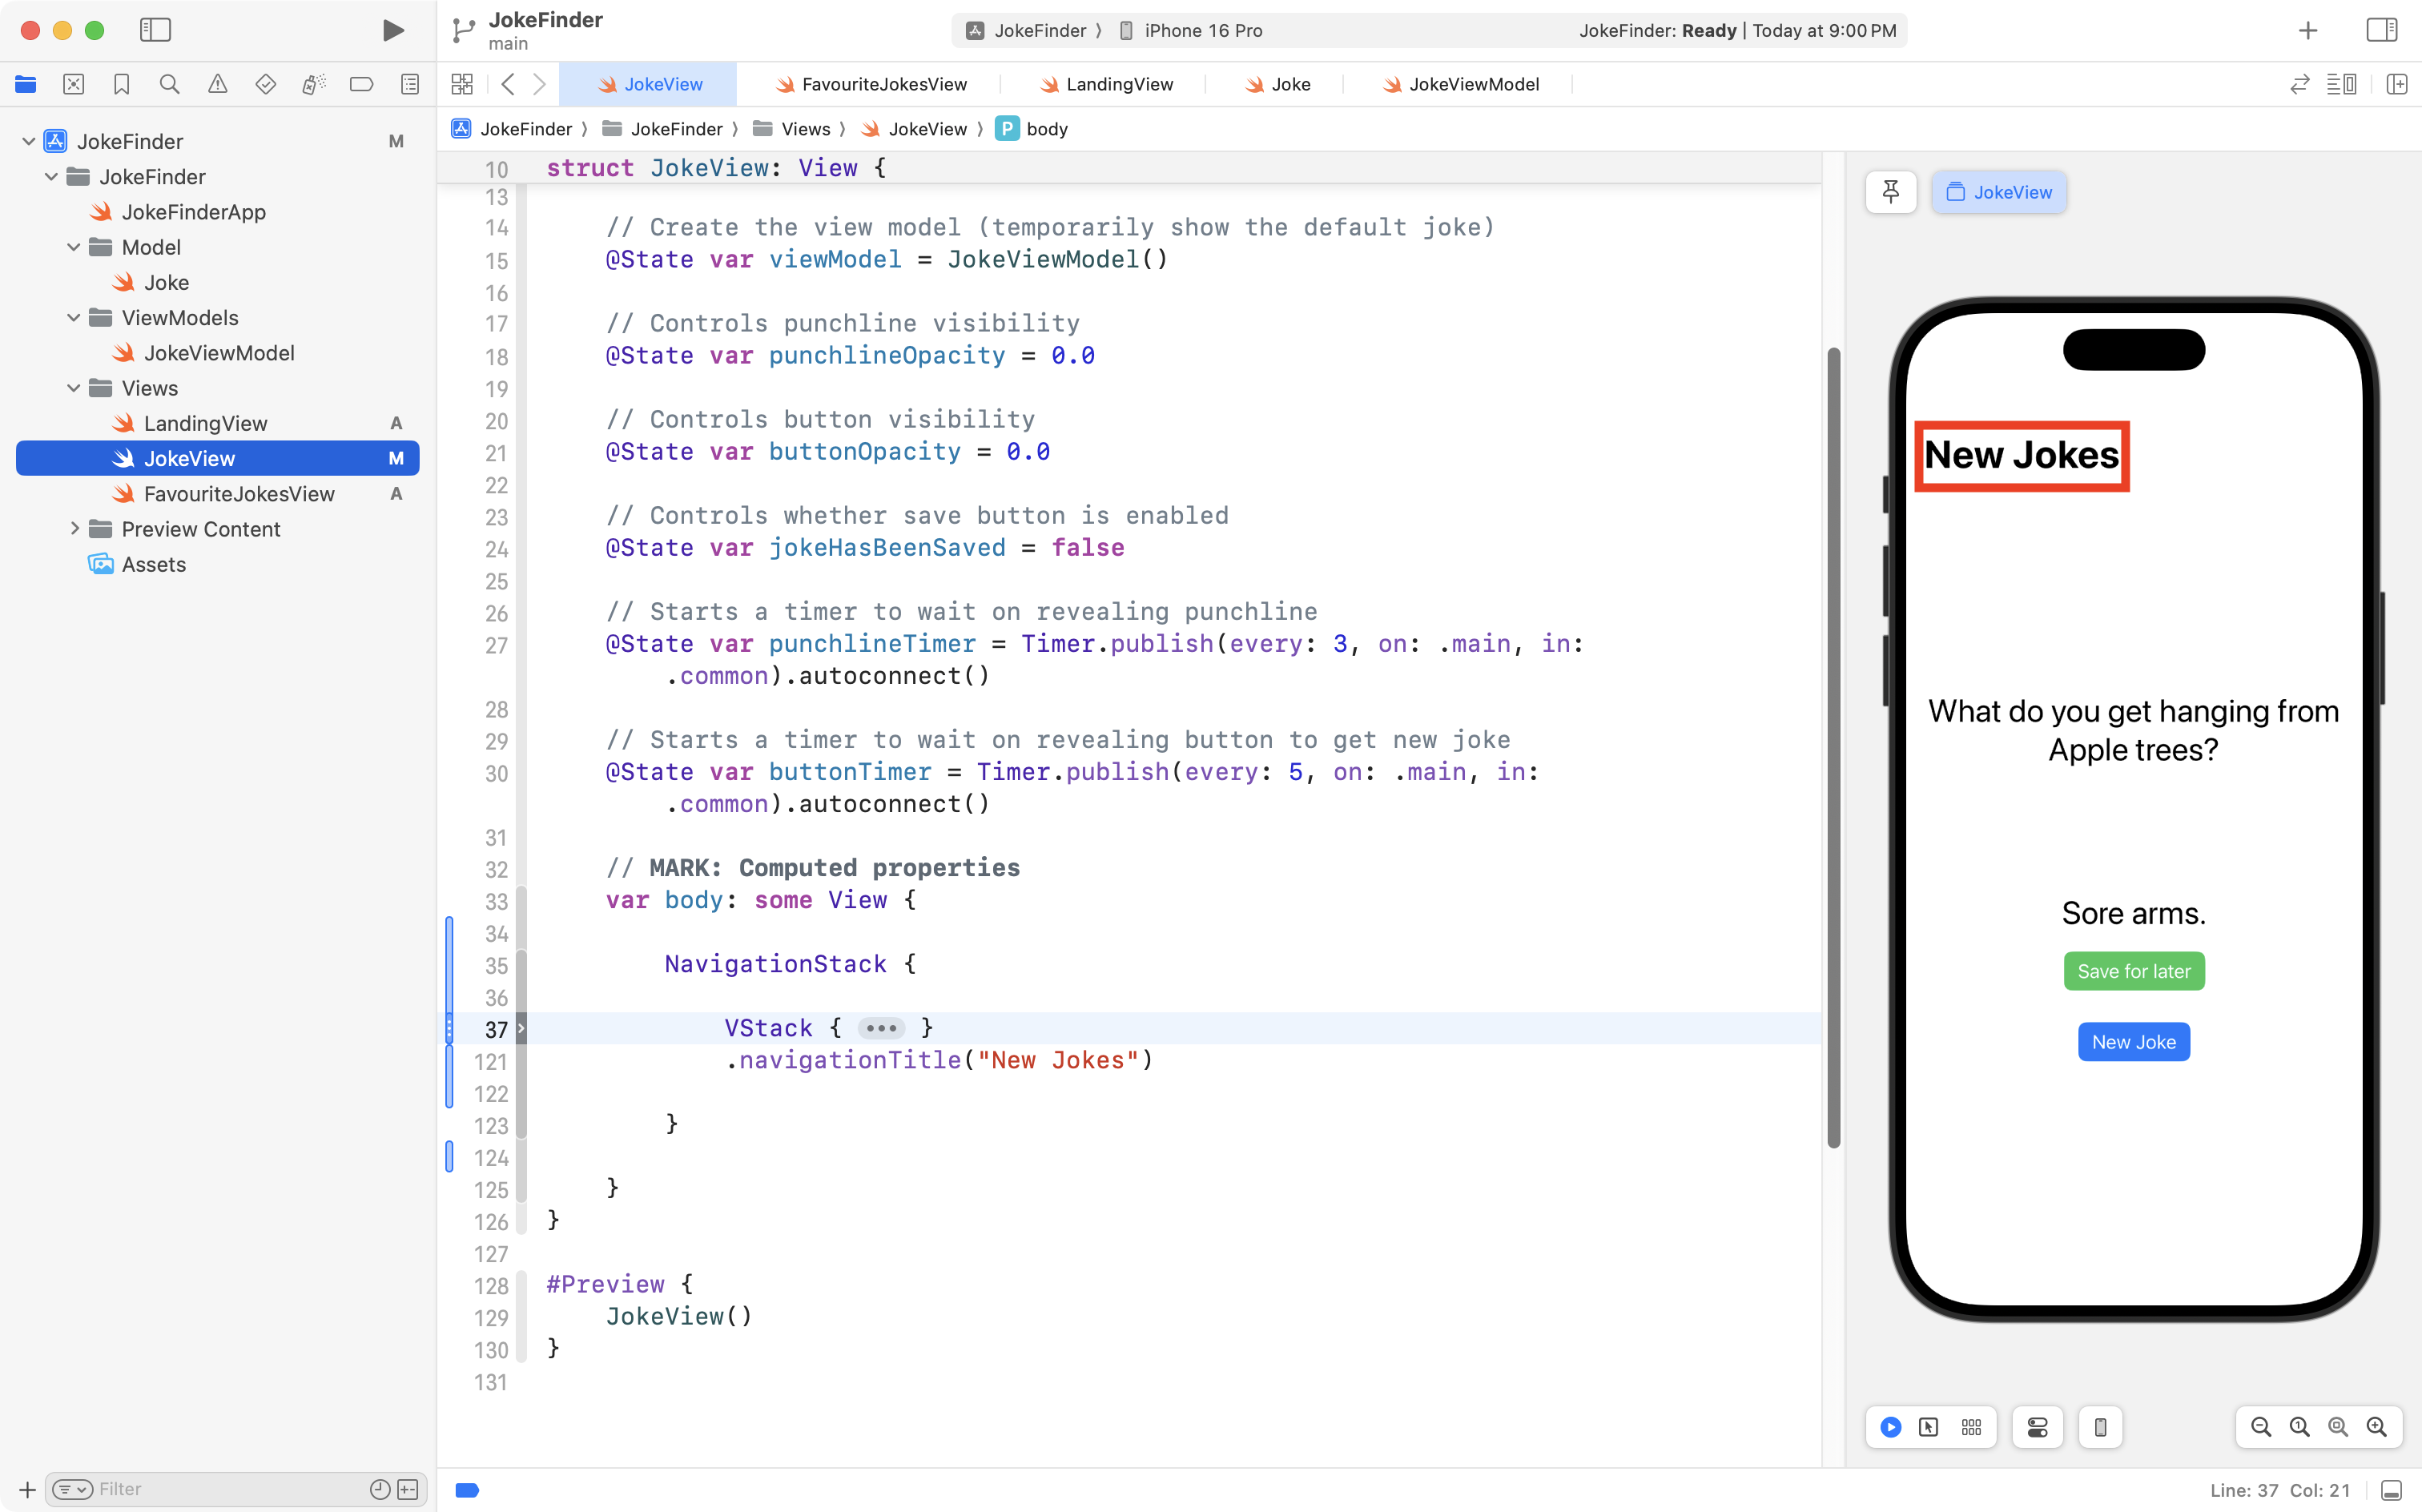
If you fold up the VStack again after pasting it in, your code should look like this – notice that in the Xcode Previews window at right, we now see the New Jokes title showing up:
There is one last step to adding a tab view – remember that the app entry point file:
… determines what view is shown if we run our app within the full iPhone Simulator.
We need to make the following adjustment to the code in the app entry point:
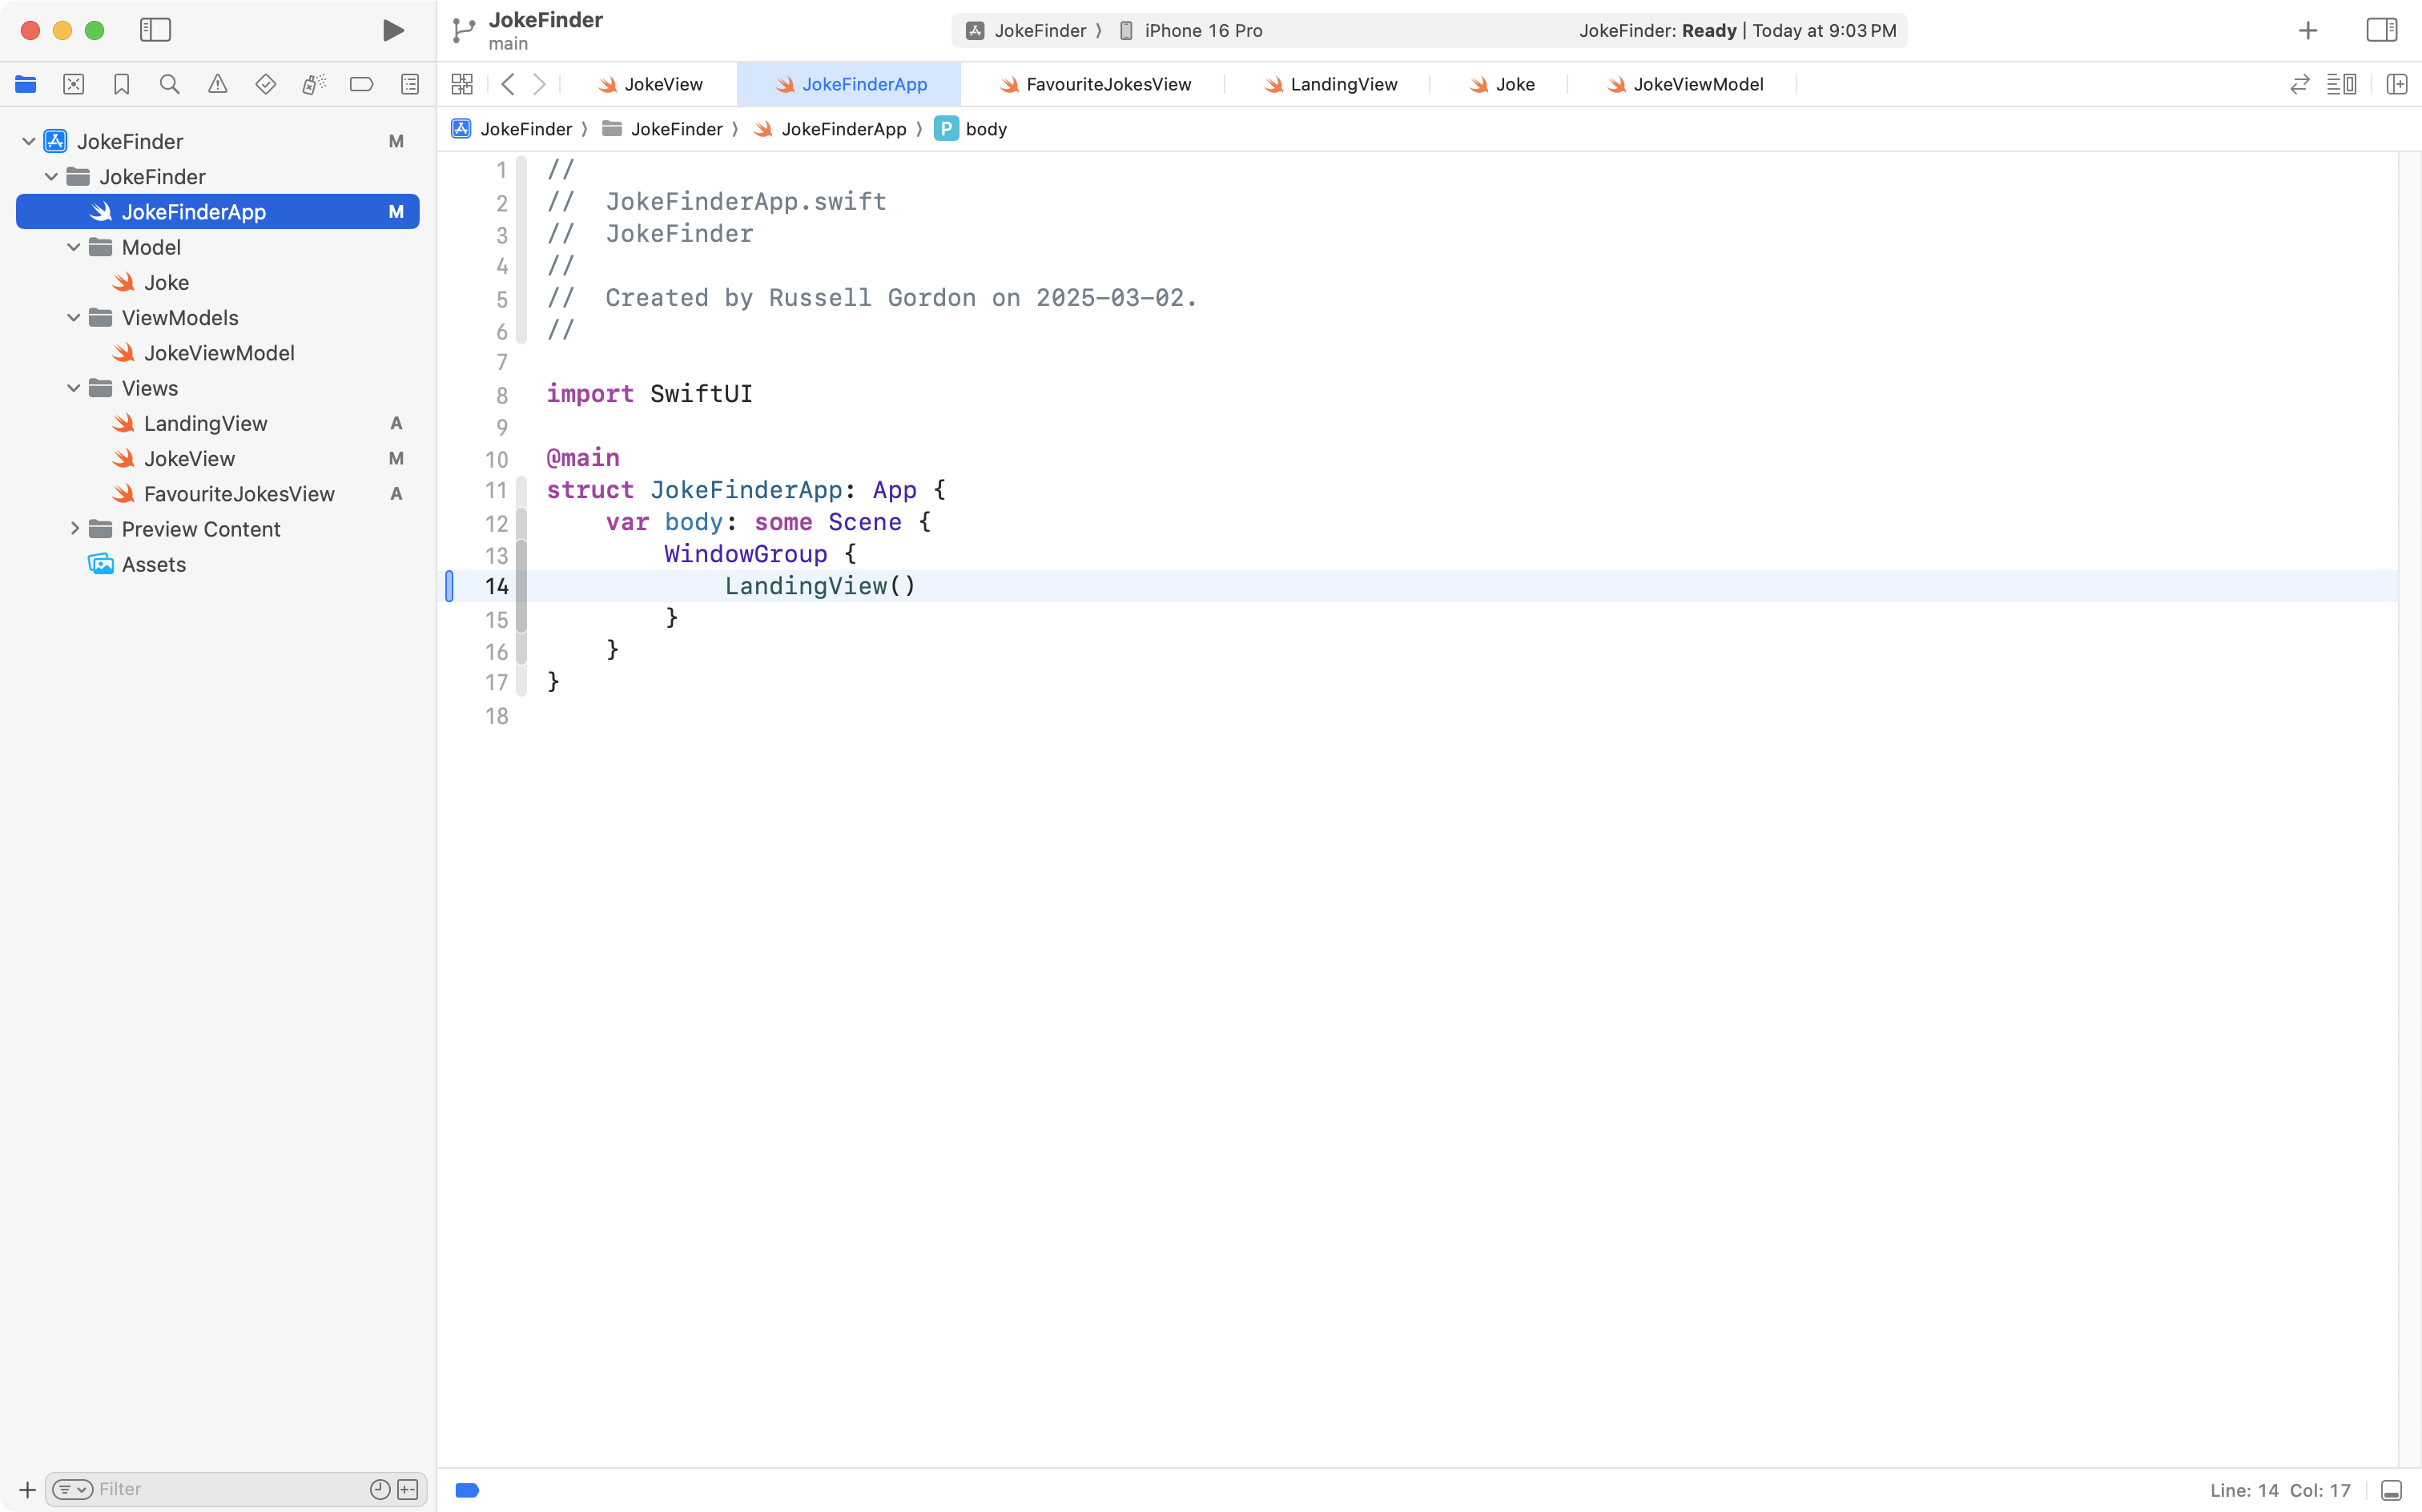
That is, we change the code so that instead of showing JokeView when the app is run in the simulator, we load the LandingView file, which contains our tab view.
You don’t have to test this out yourself (since loading the Simulator can take a long time on some computers) but if you did, you should see the app works like this now – we can switch between tabs within the app:
We’ve made some nice progress here, so let’s commit and push our work with this message:
Added a tab view to switch between getting new jokes and reviewing favourites.
Sharing data
Right now, an instance of the JokeViewModel, the view model, is created within JokeView:
This means the view model is within the scope of JokeView alone. It can only be accessed from within JokeView:
However, we need to access the information held within the view model on a second view – FavouriteJokesView – which is intended to show the list of saved jokes:
How can we make this happen?
There are multiple approaches to doing this – we will learn about one of them today.
Single source of truth
One idea that might occur to you – and is perhaps reasonable at first glance – why not just create a second instance of JokeViewModel inside FavouriteJokesView, like this?
Please, don’t do this!
The problem with this approach – creating an instance of JokeViewModel inside each view that needs to access the view model – is that these are different instances. Like this:
flowchart LR
subgraph aep[" "]
direction TB
id1["<b>JokeView</b>"]
id2[("<b>JokeViewModel</b><br/><em>Observable class</em>")]
end
subgraph ae[" "]
direction TB
id3["<b>FavouriteJokesView</b>"]
id4[("<b>JokeViewModel</b><br/><em>Observable class</em>")]
end
id1-.creates instance of.->id2
id3-.creates instance of.->id4
aep~~~ae
In this scenario, nothing is shared between the two different instances of JokeViewModel.
That scenario breaks the cardinal rule of app development with SwiftUI:
Use a single source of truth.
Using a single source of truth means that data must be created and held in one location.
Data can be shared between views but there should never be two or more copies of the same data.
This relates back to the cardinal rule of this course!
Remember?
Don’t Repeat Yourself
If it’s still not clear to you why we can’t just create two instances of the view model, think a bit more about what the view model does.
JokeViewModel retrieves a joke from a remote endpoint – a website on the Internet.
If we create an instance of the view model within each view that needs it – separate instances will retrieve different jokes.
The view model also holds our array, or list, of favourite jokes.
If we use a second instance of the view model within FavouriteJokesView, it will be a different array than the instance of the view model created within JokeView.
So, we need to share data. How can we do that?
Use the environment
One way to share data between views in SwiftUI is to use the environment:
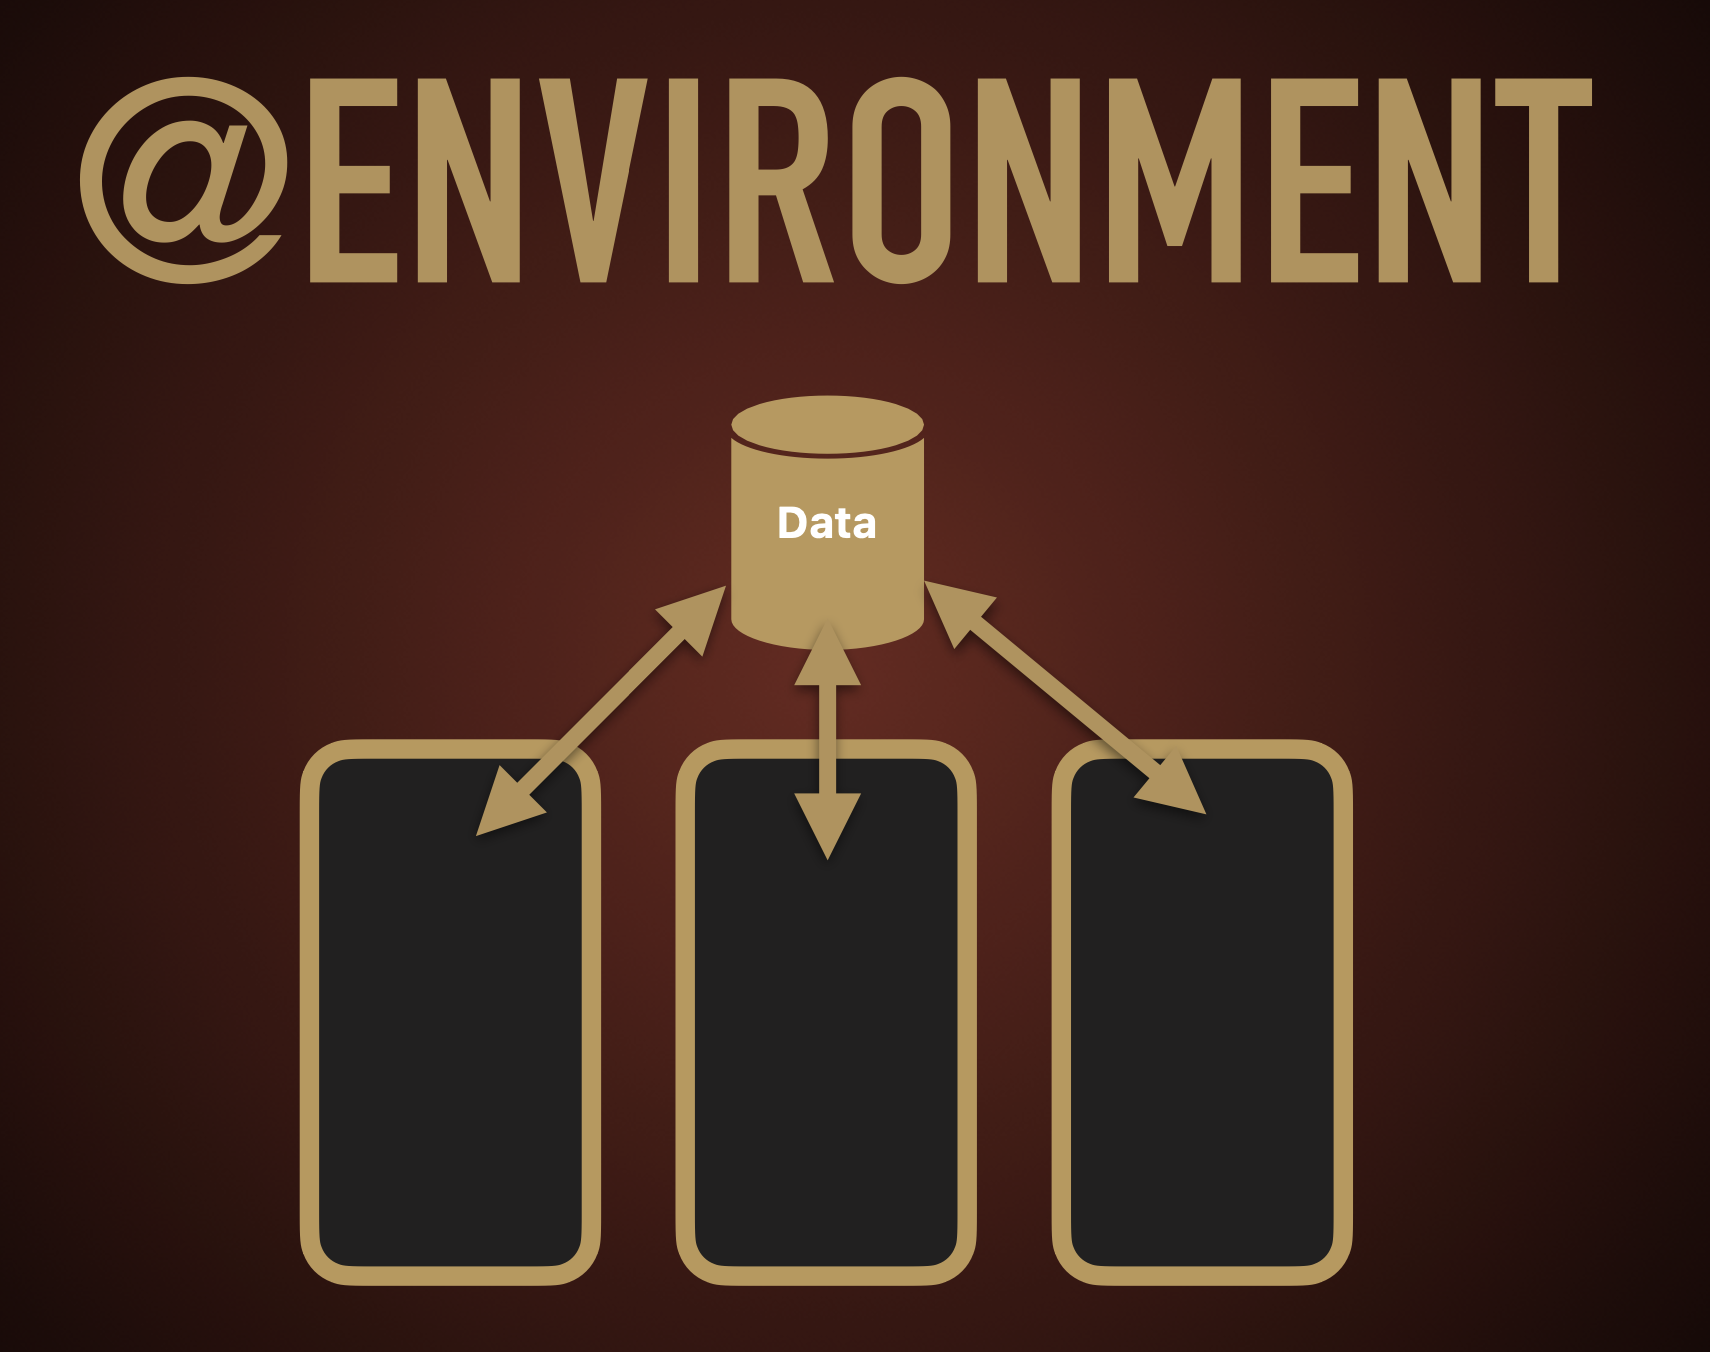
With more detail, here is what that looks like as a concept:
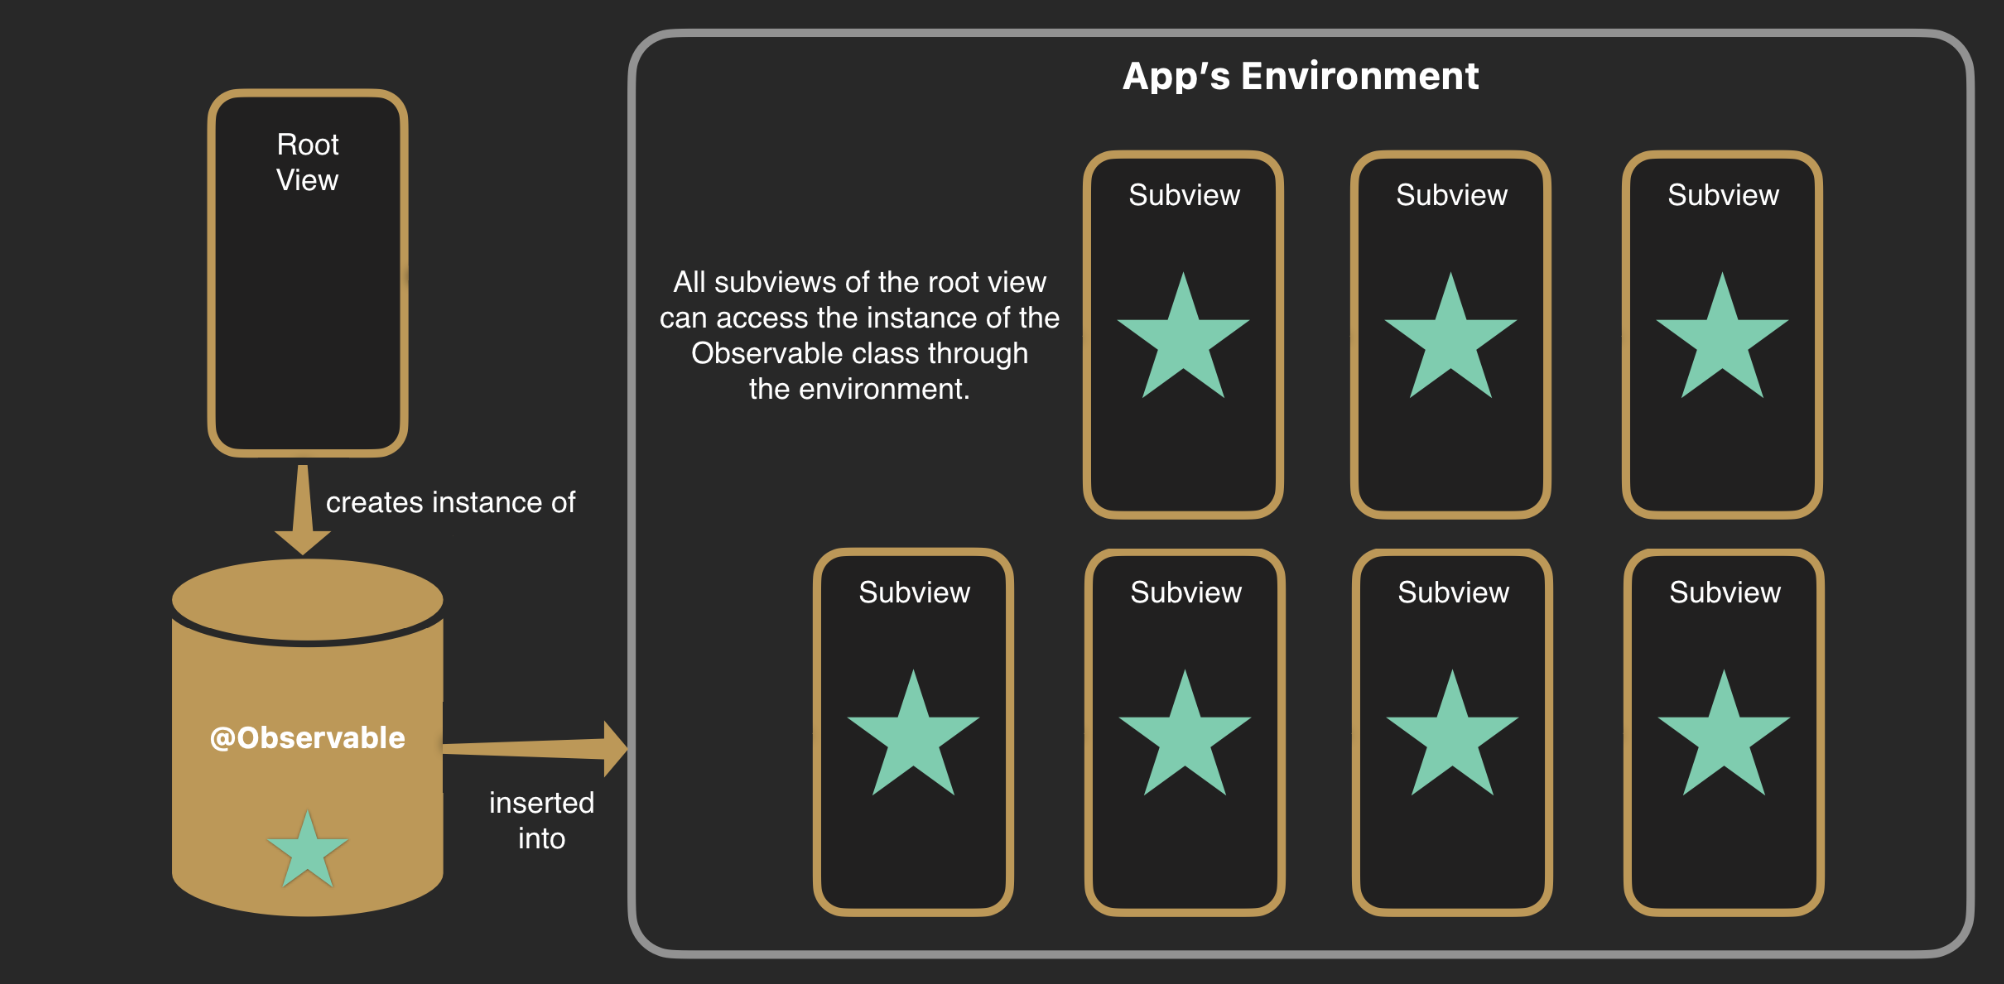
Here is what that will look like within the app we are writing today:
flowchart LR
subgraph aep[" "]
	direction TB
	id1["<b>App Entry Point</b>"]
	id2[("<b>JokeViewModel</b><br/><em>Observable class</em>")]
end
subgraph ae["<b>App's Environment</b>"]
	direction LR
	id3["<b>JokeView</b>"]
	id4["<b>FavouriteJokesView</b>"]
end
id1-.creates instance of.->id2
aep-- inserted into -->ae
id3~~~id4
id3~~~|All subviews<br/>can access<br/>the view model<br/>via @Environment<br/>property wrapper|id3
Let’s get started on this.
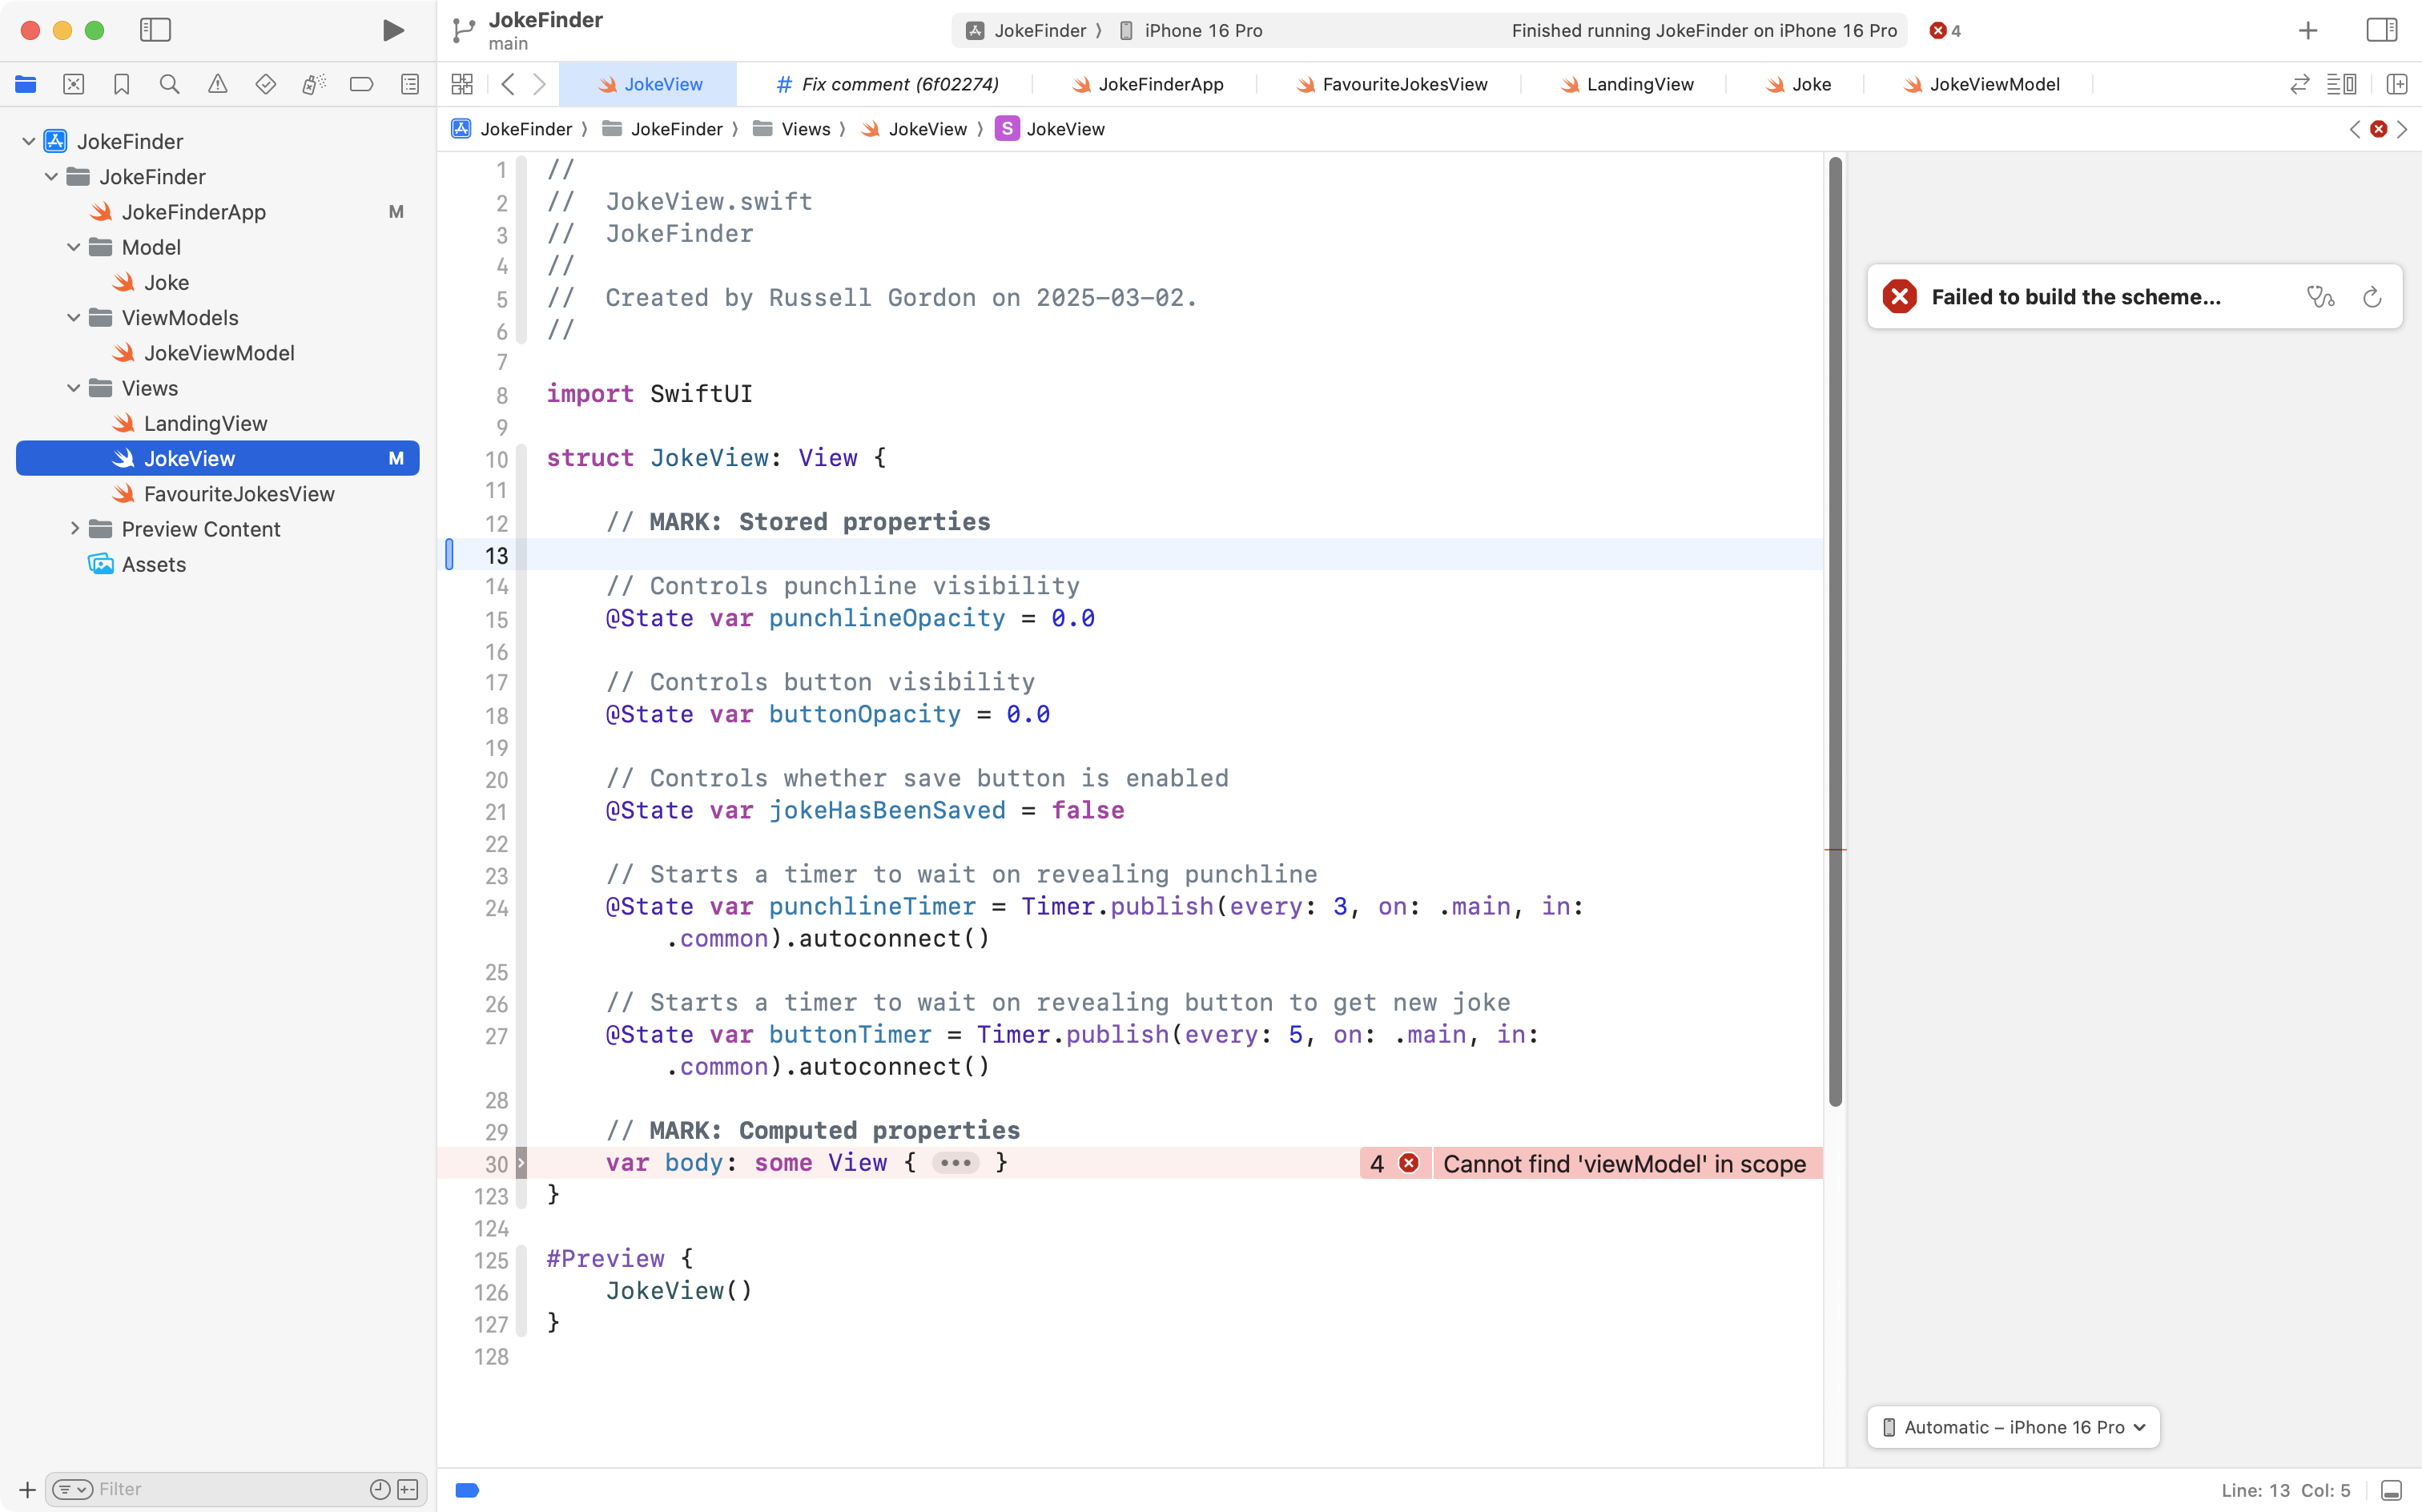
First, navigate to JokeView and locate where the view model is currently created:
Delete that code, like this:
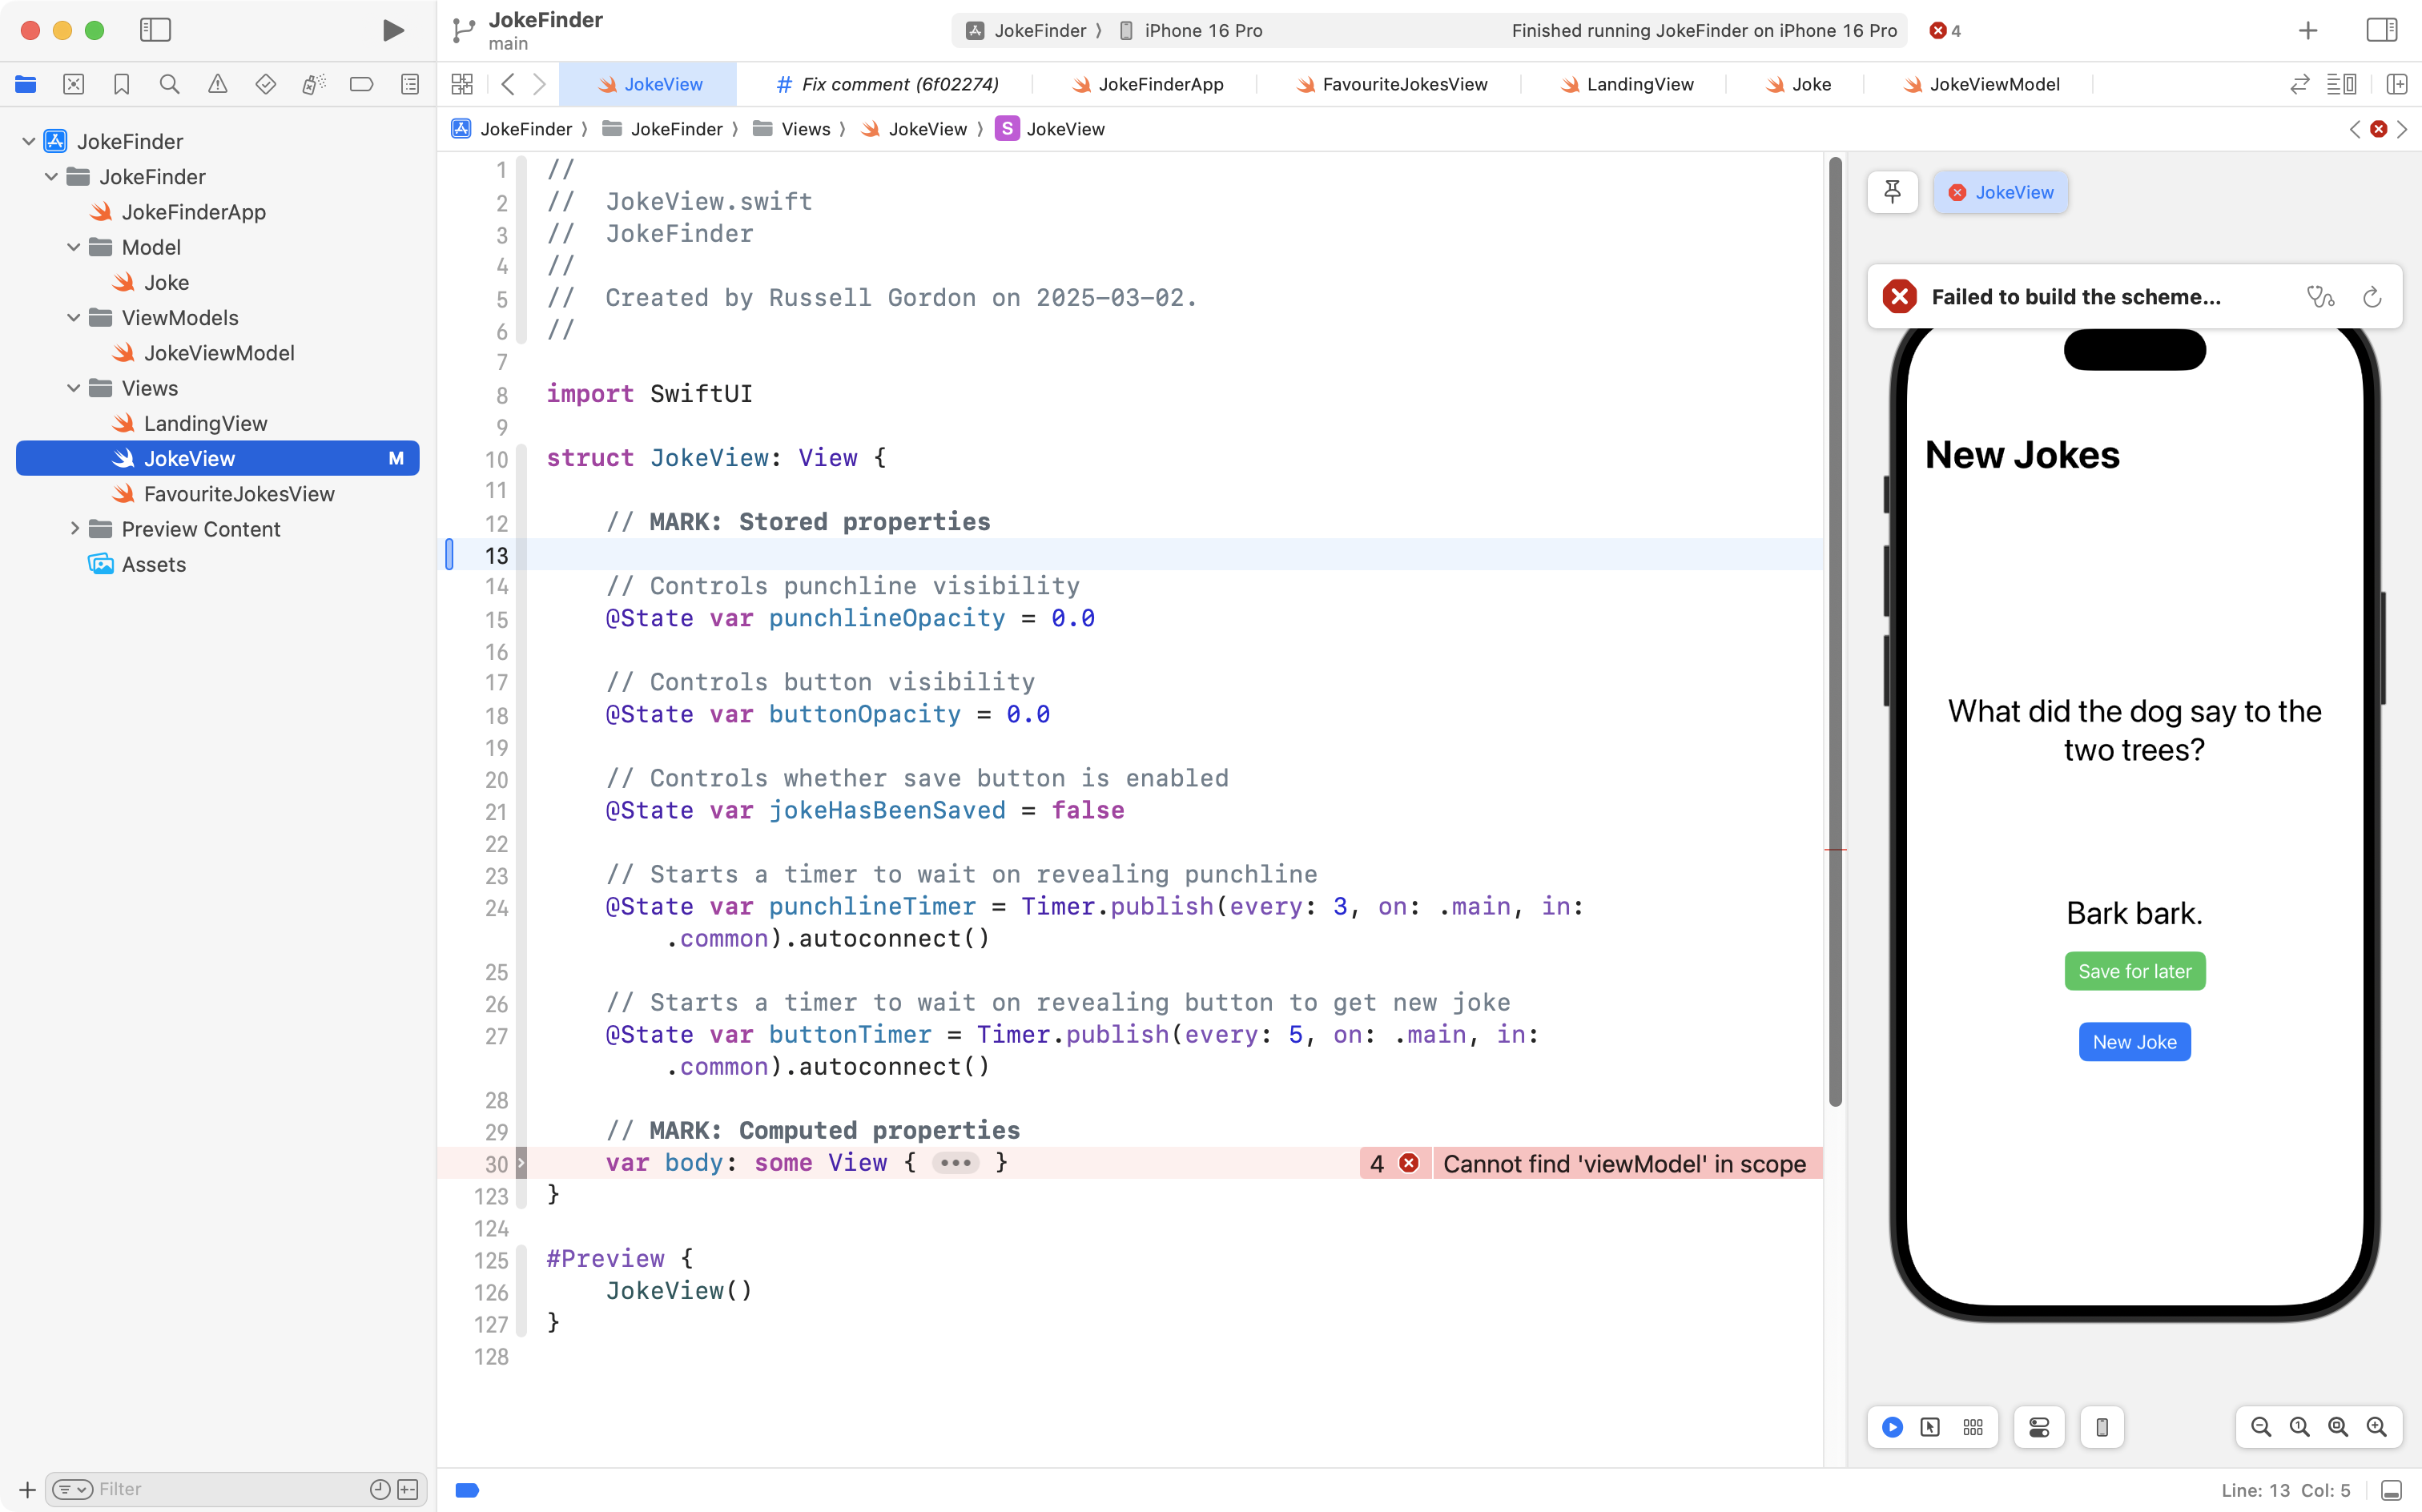
Some errors will be created. Don’t worry – this is temporary.
Next, navigate to the app entry point file:

Copy this code into your clipboard:
import SwiftUI

@main
struct JokeFinderLessonApp: App {

    // MARK: Stored properties

    // Create the view model
    @State var viewModel = JokeViewModel()

    // MARK: Computed properties
    var body: some Scene {
        WindowGroup {
            JokeView()
                .environment(viewModel)
        }
    }

}
… and replace the code in the app entry point file, like this:
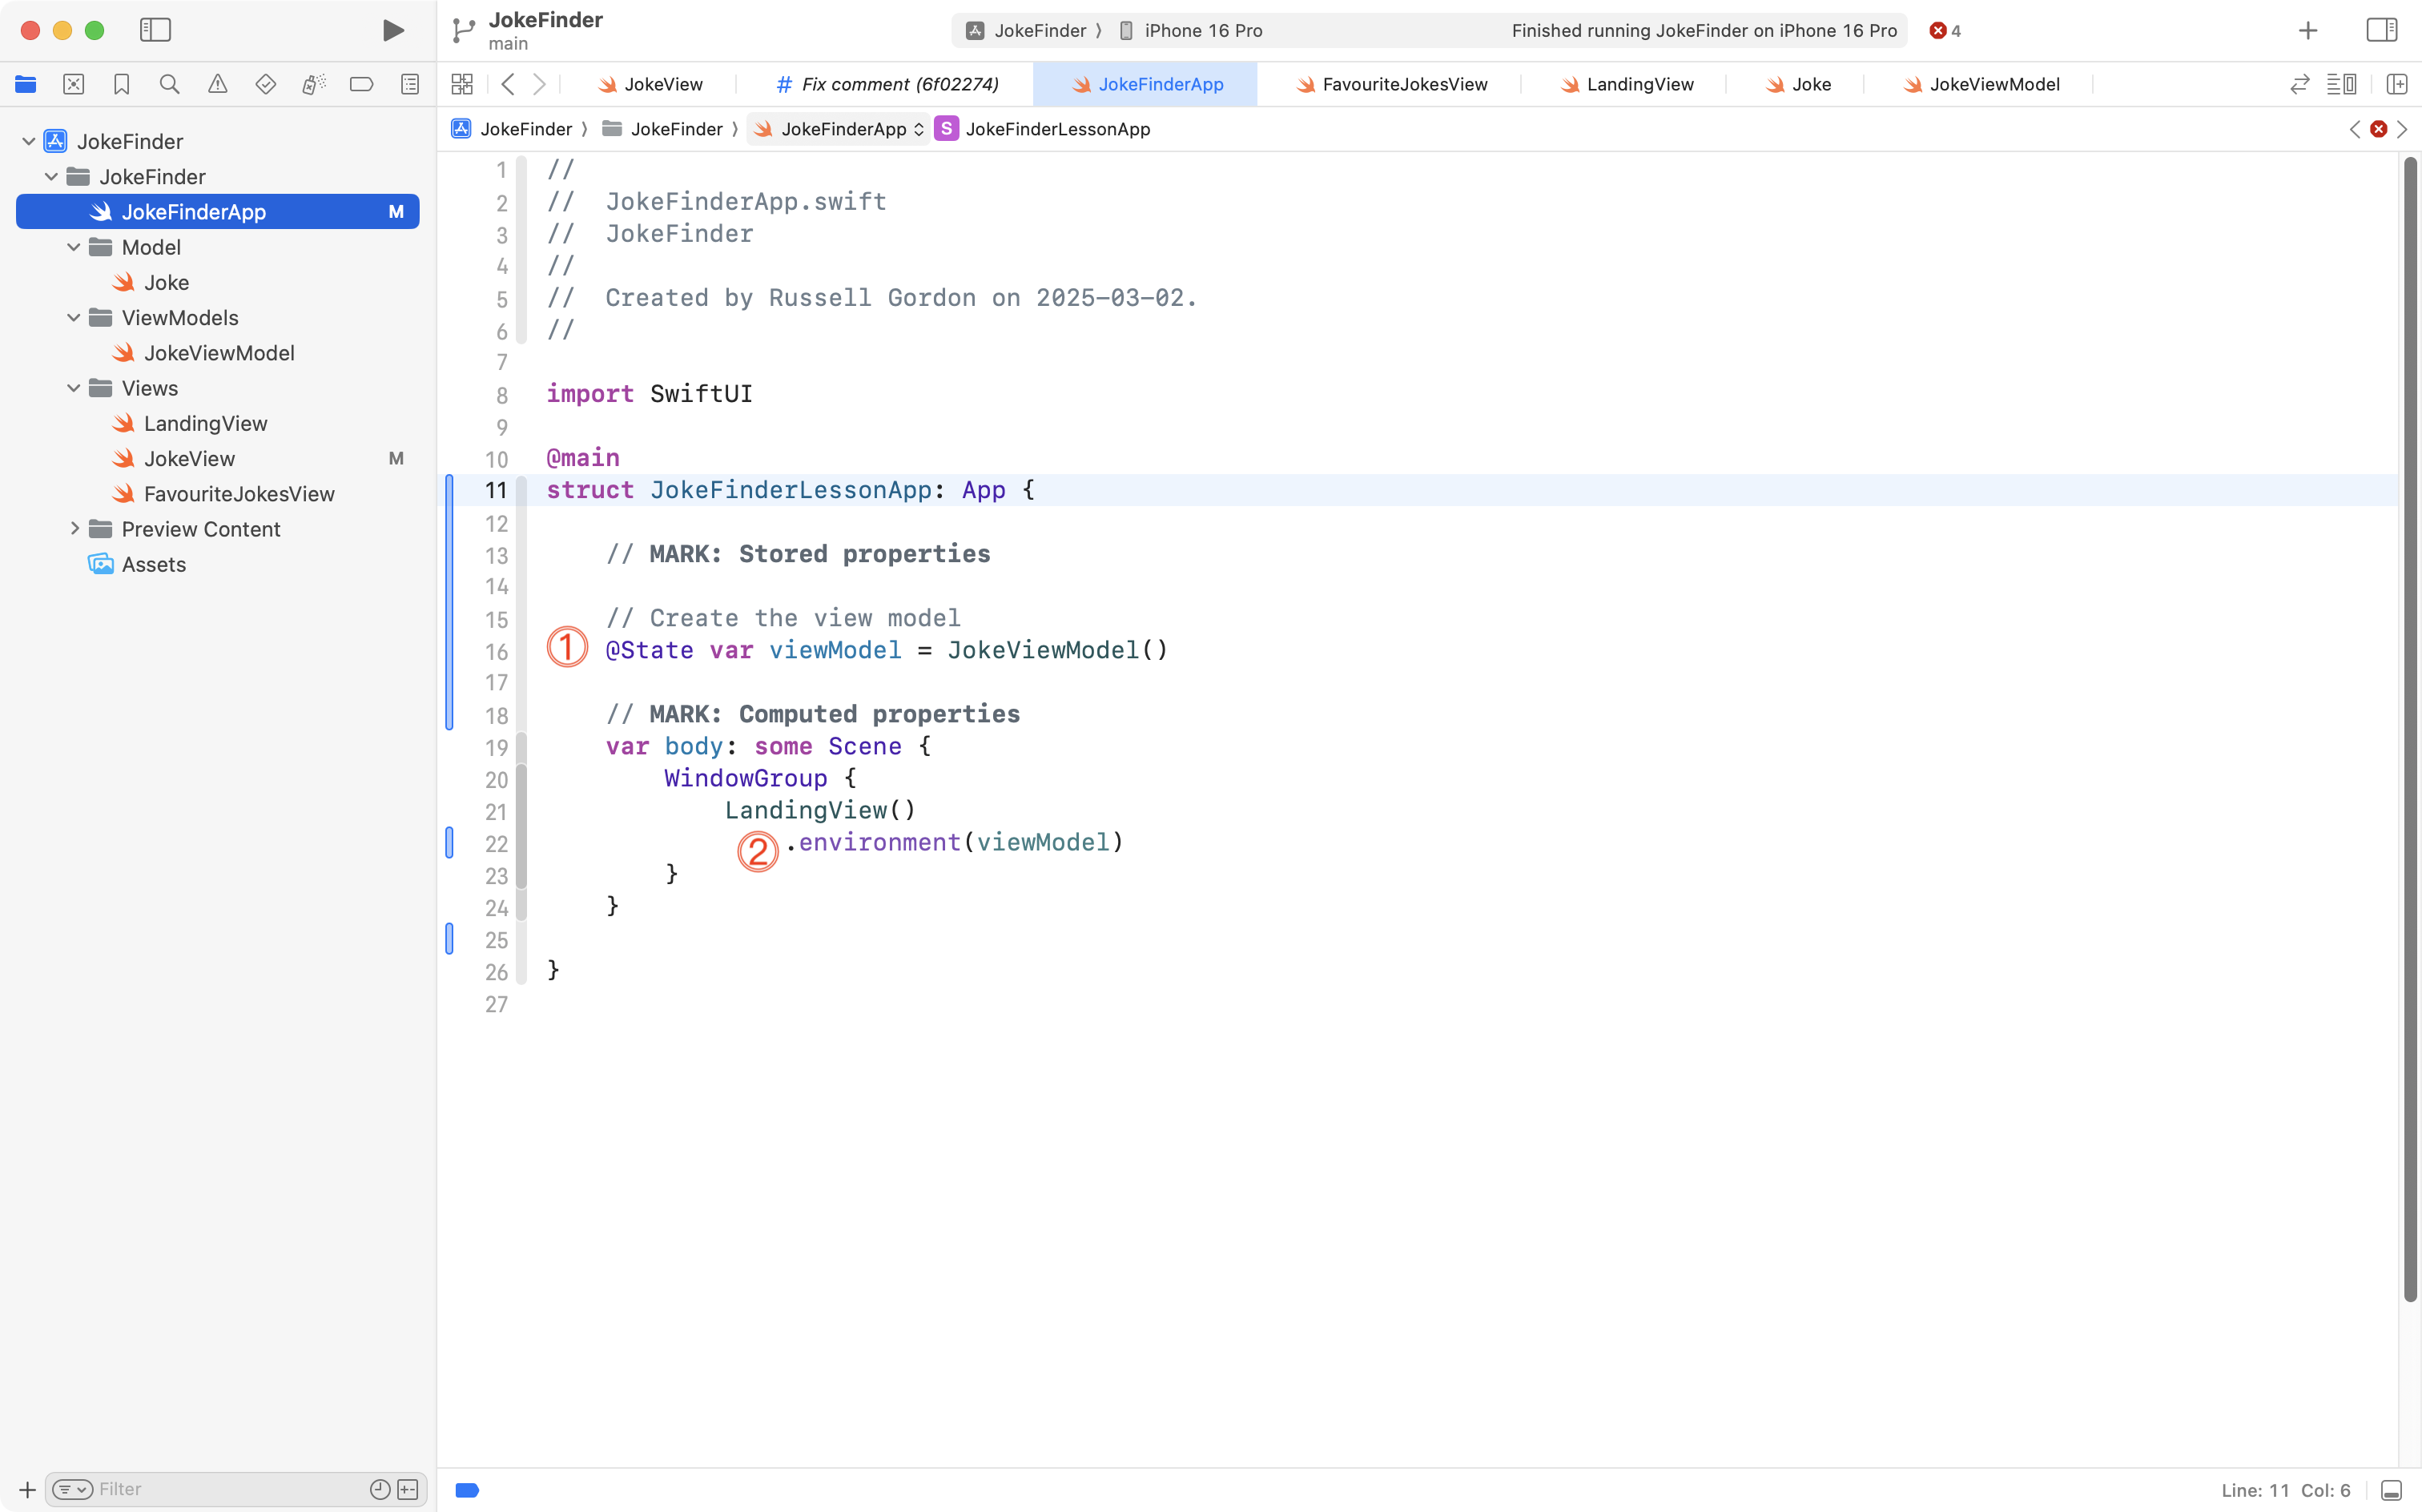
Let’s examine that code.
DISCUSSION
- An instance of the view model is now created as a stored property right within the app entry point.
- We insert this instance into the environment using the
.environmentview modifier, attached toLandingView. The view model instance can now be shared with other views, through the environment.
Next, we need at “reach into” the environment and access the view model from other views.
Navigate back to JokeView:
Copy this code into your clipboard:
// Access the view model from the environment
@Environment(JokeViewModel.self) var viewModel
… and paste it into JokeView:
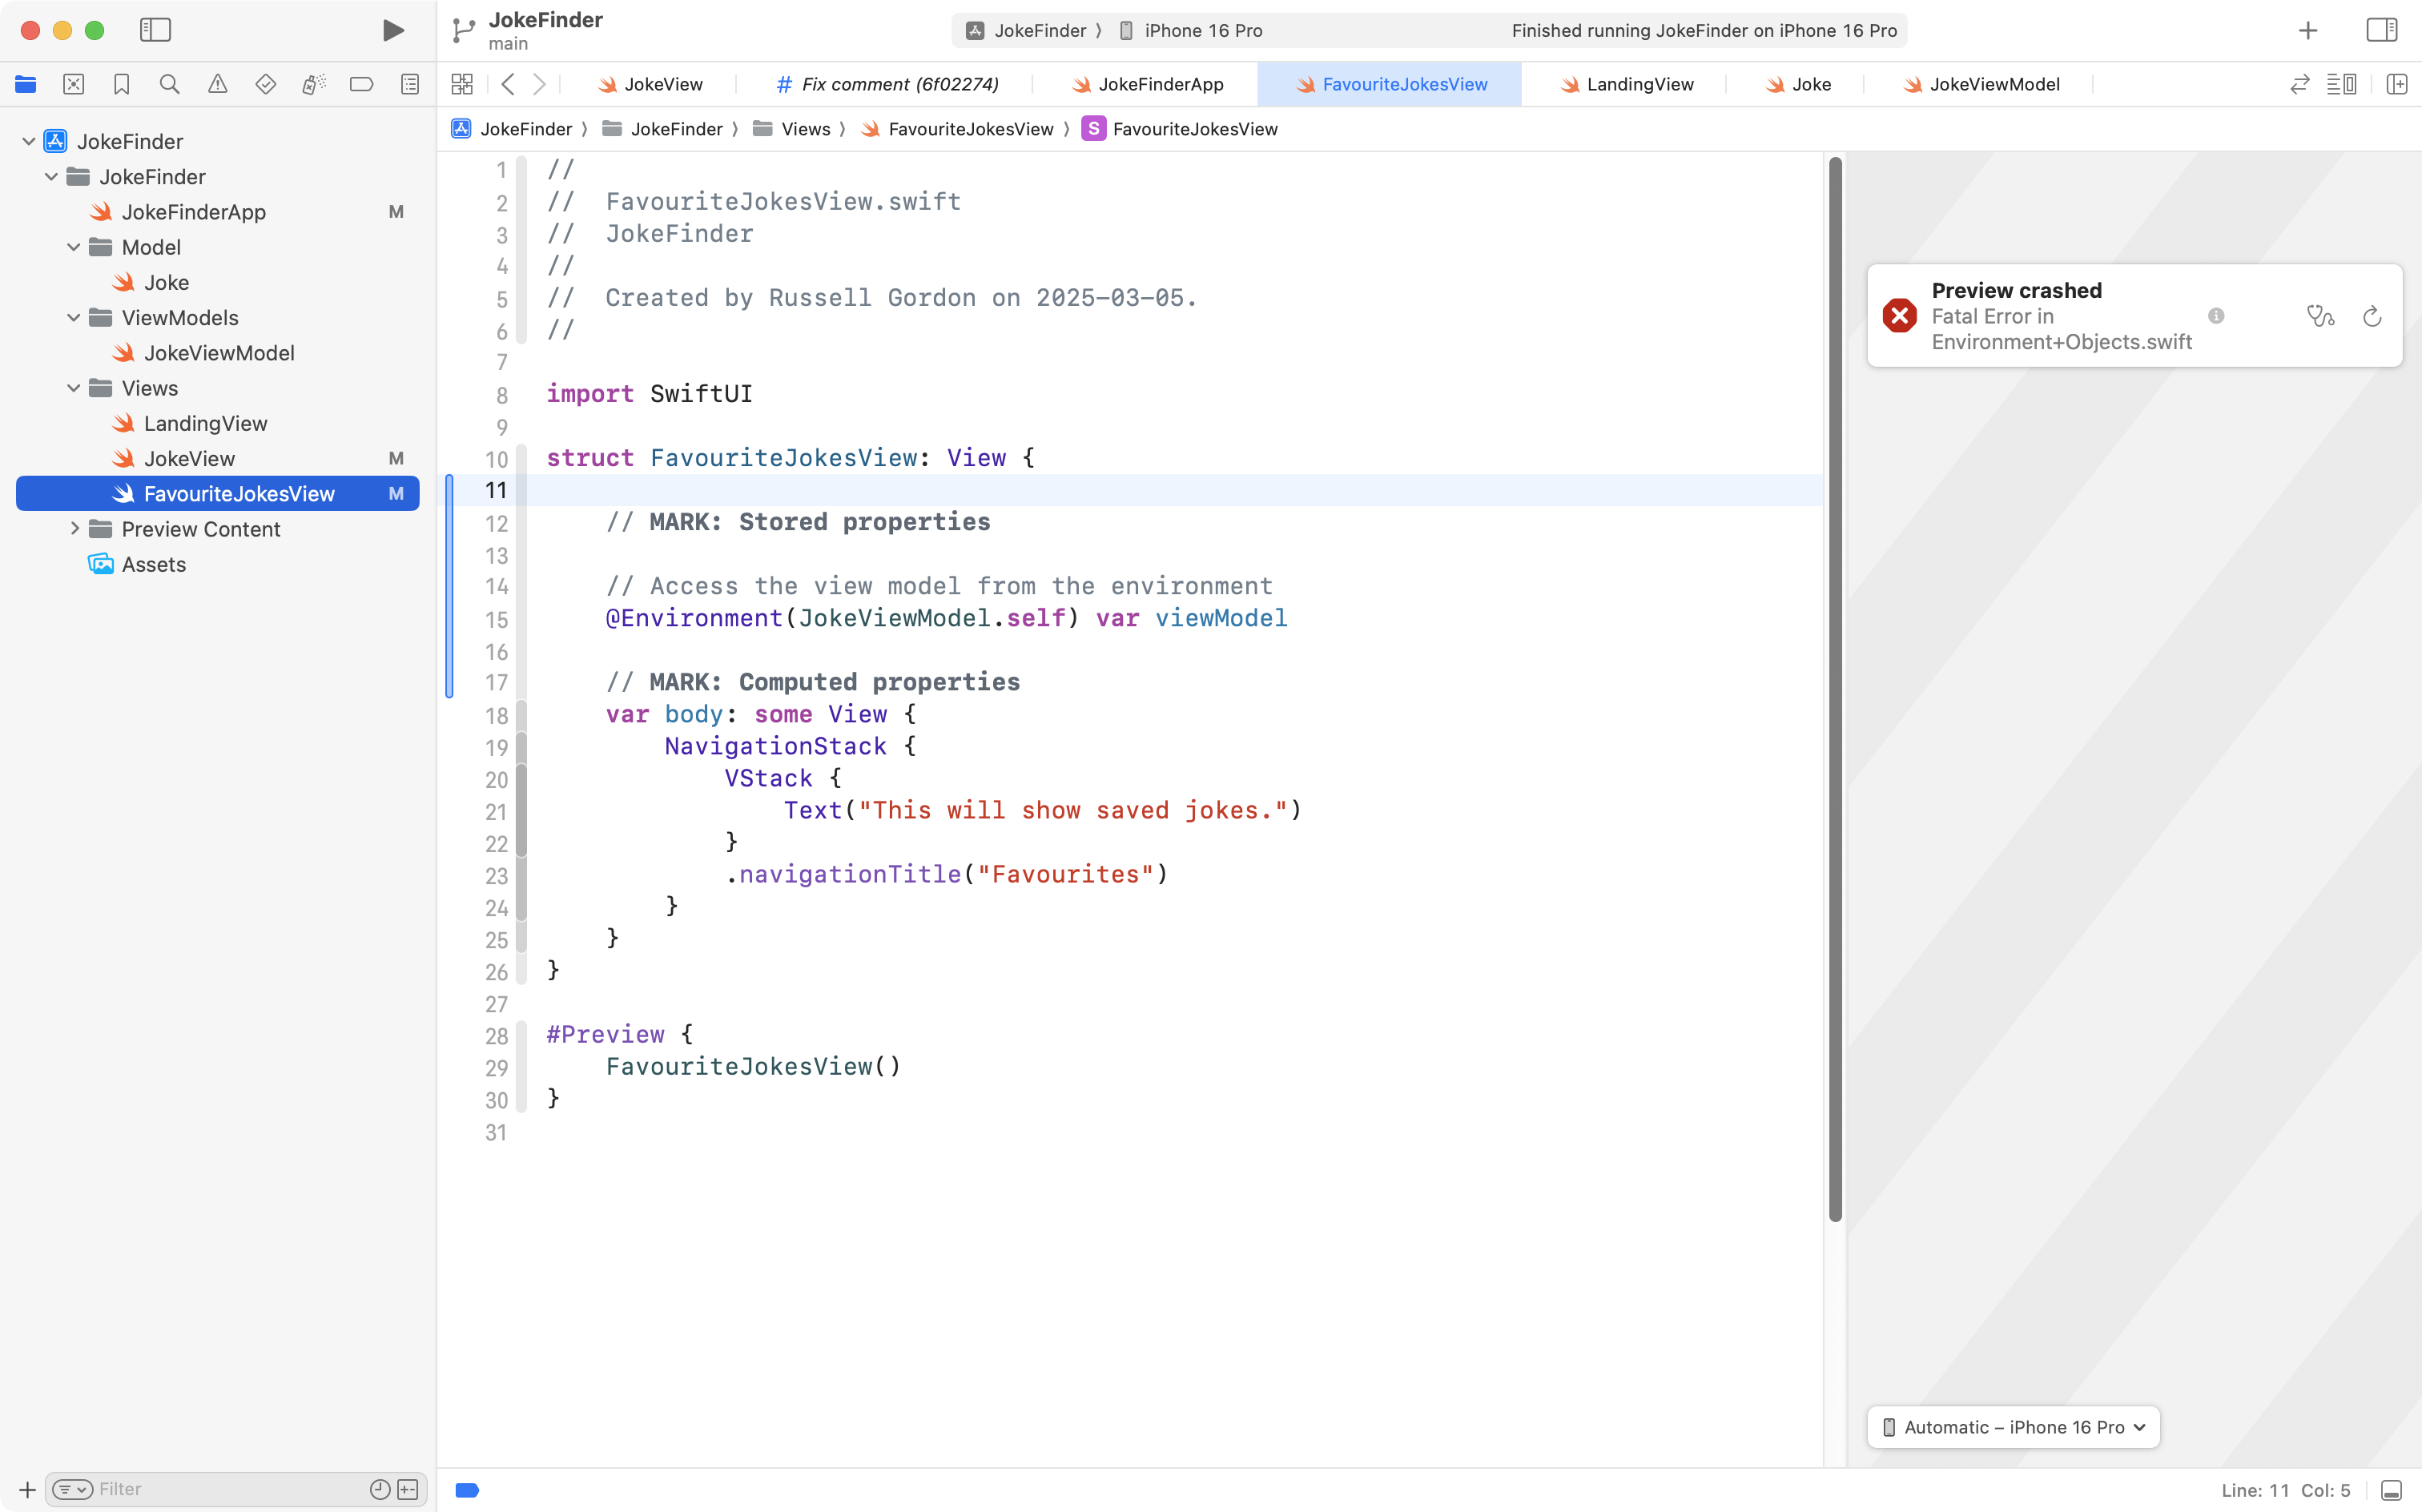
Your app will almost immediately crash! Don’t worry. We will fix this soon.
We need to access the view model from FavouriteJokesView as well.
So, please take this code:
// MARK: Stored properties

// Access the view model from the environment
@Environment(JokeViewModel.self) var viewModel

// MARK: Computed properties
… and add it to FavouriteJokesView, like this:
Now the two views that need to access the view model through the environment are “reaching into” the environment to do just that. Recall the theory of what we are doing:
flowchart LR
subgraph aep[" "]
	direction TB
	id1["<b>App Entry Point</b>"]
	id2[("<b>JokeViewModel</b><br/><em>Observable class</em>")]
end
subgraph ae["<b>App's Environment</b>"]
	direction LR
	id3["<b>JokeView</b>"]
	id4["<b>FavouriteJokesView</b>"]
end
id1-.creates instance of.->id2
aep-- inserted into -->ae
id3~~~id4
id3~~~|All subviews<br/>can access<br/>the view model<br/>via @Environment<br/>property wrapper|id3
However, there is the small matter of our app crashing. Why is this happening?
Well, remember that when using Xcode, there are two ways to run an app’s code:
- We can run our app on a physical device or in the Simulator; in this case, the app entry point code is run.
- We can preview each individual view within the Previews window at right.
It’s because of the second way that our code is run that our Jokes app is currently crashing.
JokeView and FavouriteJokesView both, now, reach into the environment in an attempt to get a reference to the shared instance of the view model.
The problem with the Previews window is that within the preview of each view, on their own… there is no instance of the view model to get a reference to.
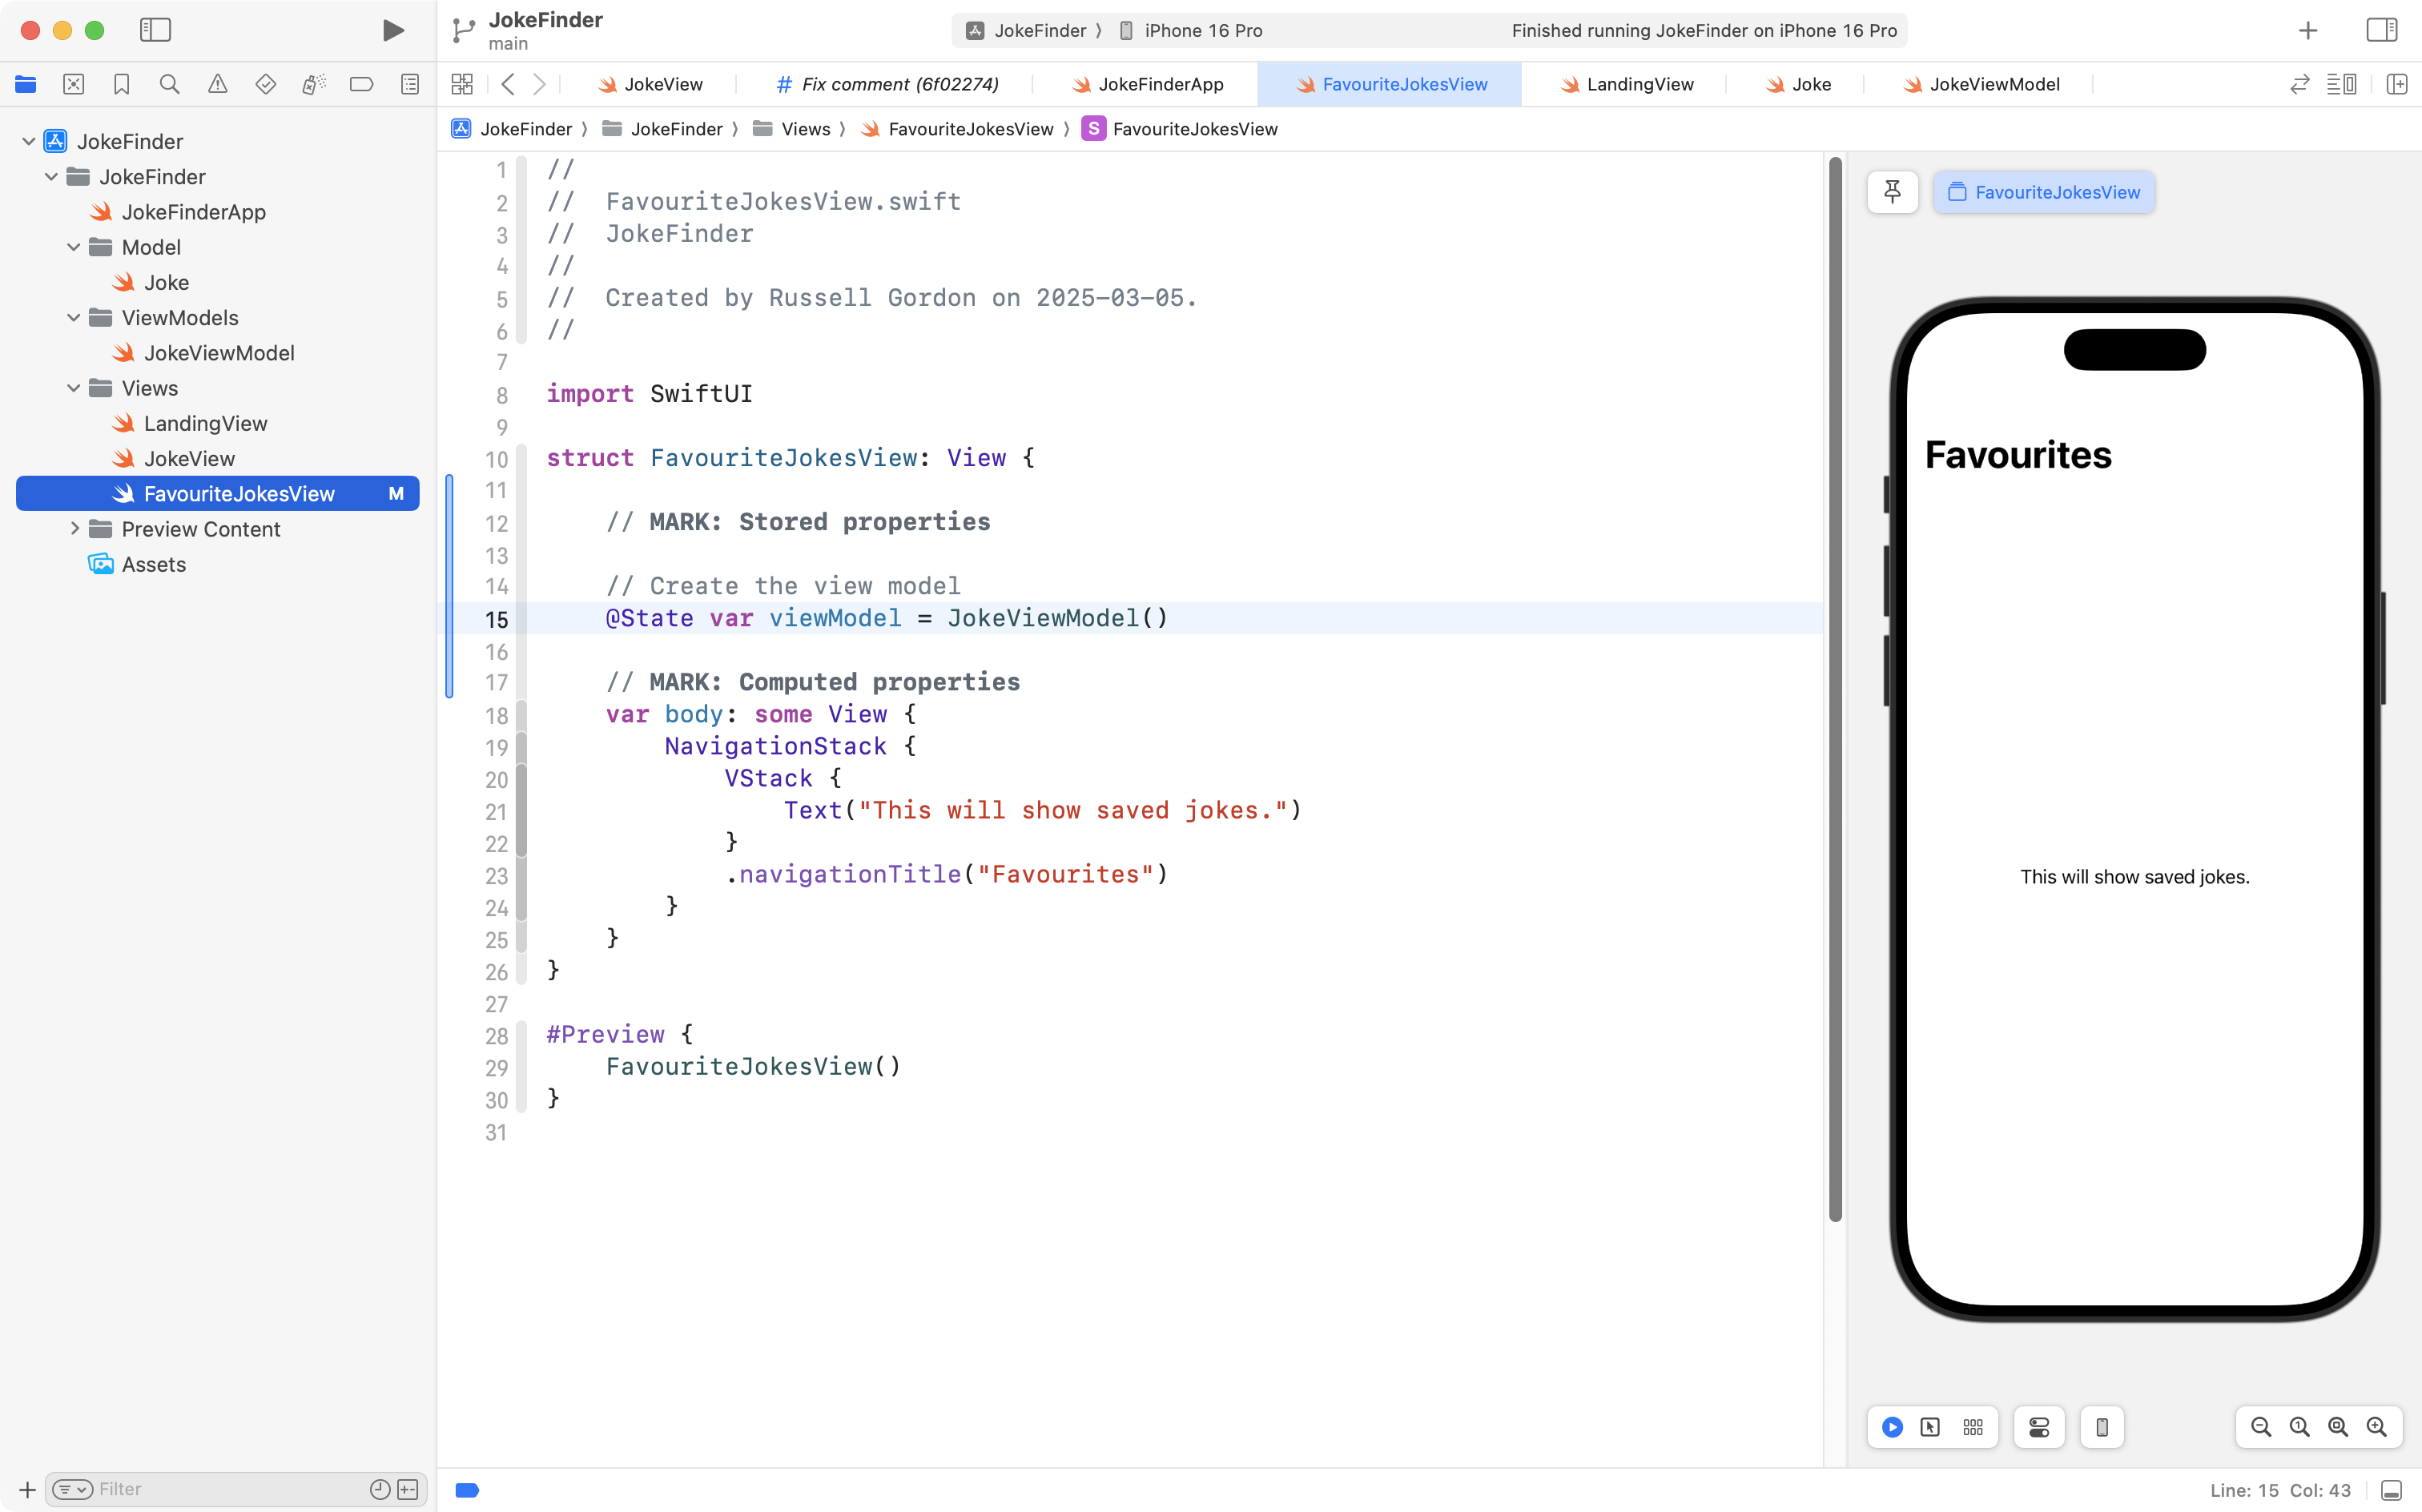
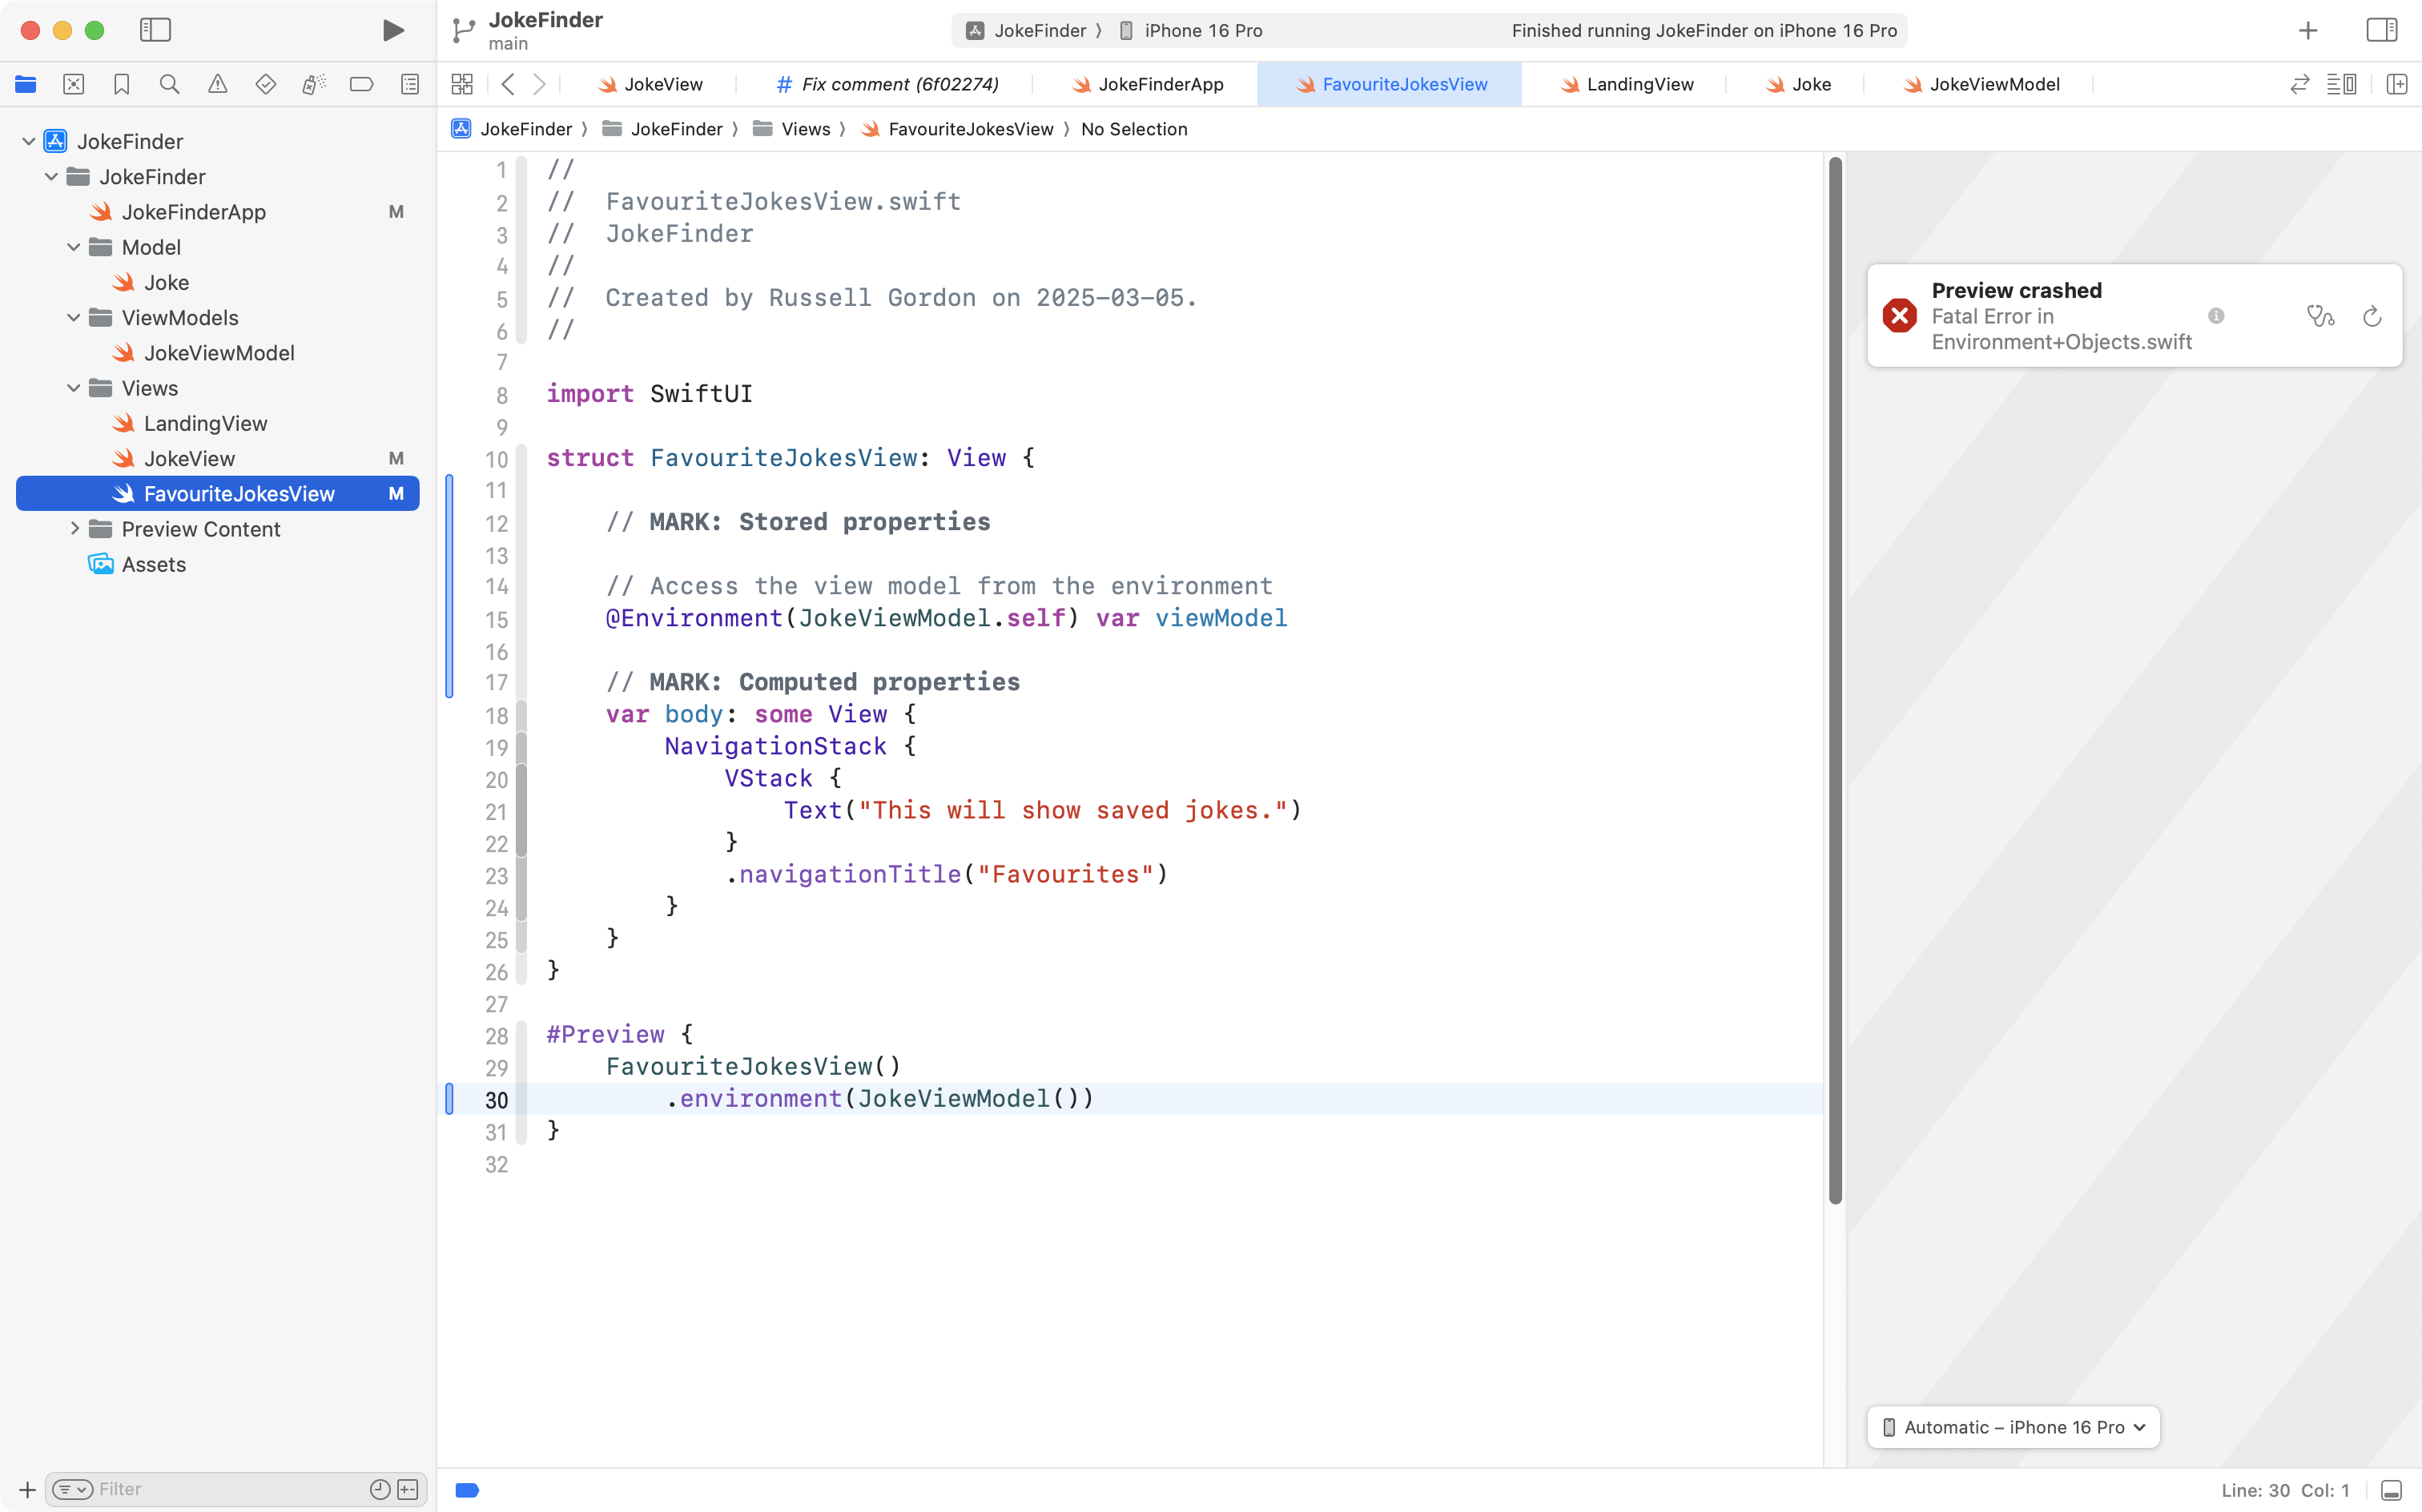
To see a preview of each view on their own, we need to make a temporary, individual instance of the view model, just for the purpose of using the Preview window, like this – please add this code as shown on line 30 in FavouriteJokesView:
And like this – please add this code to JokeView, around line 130:

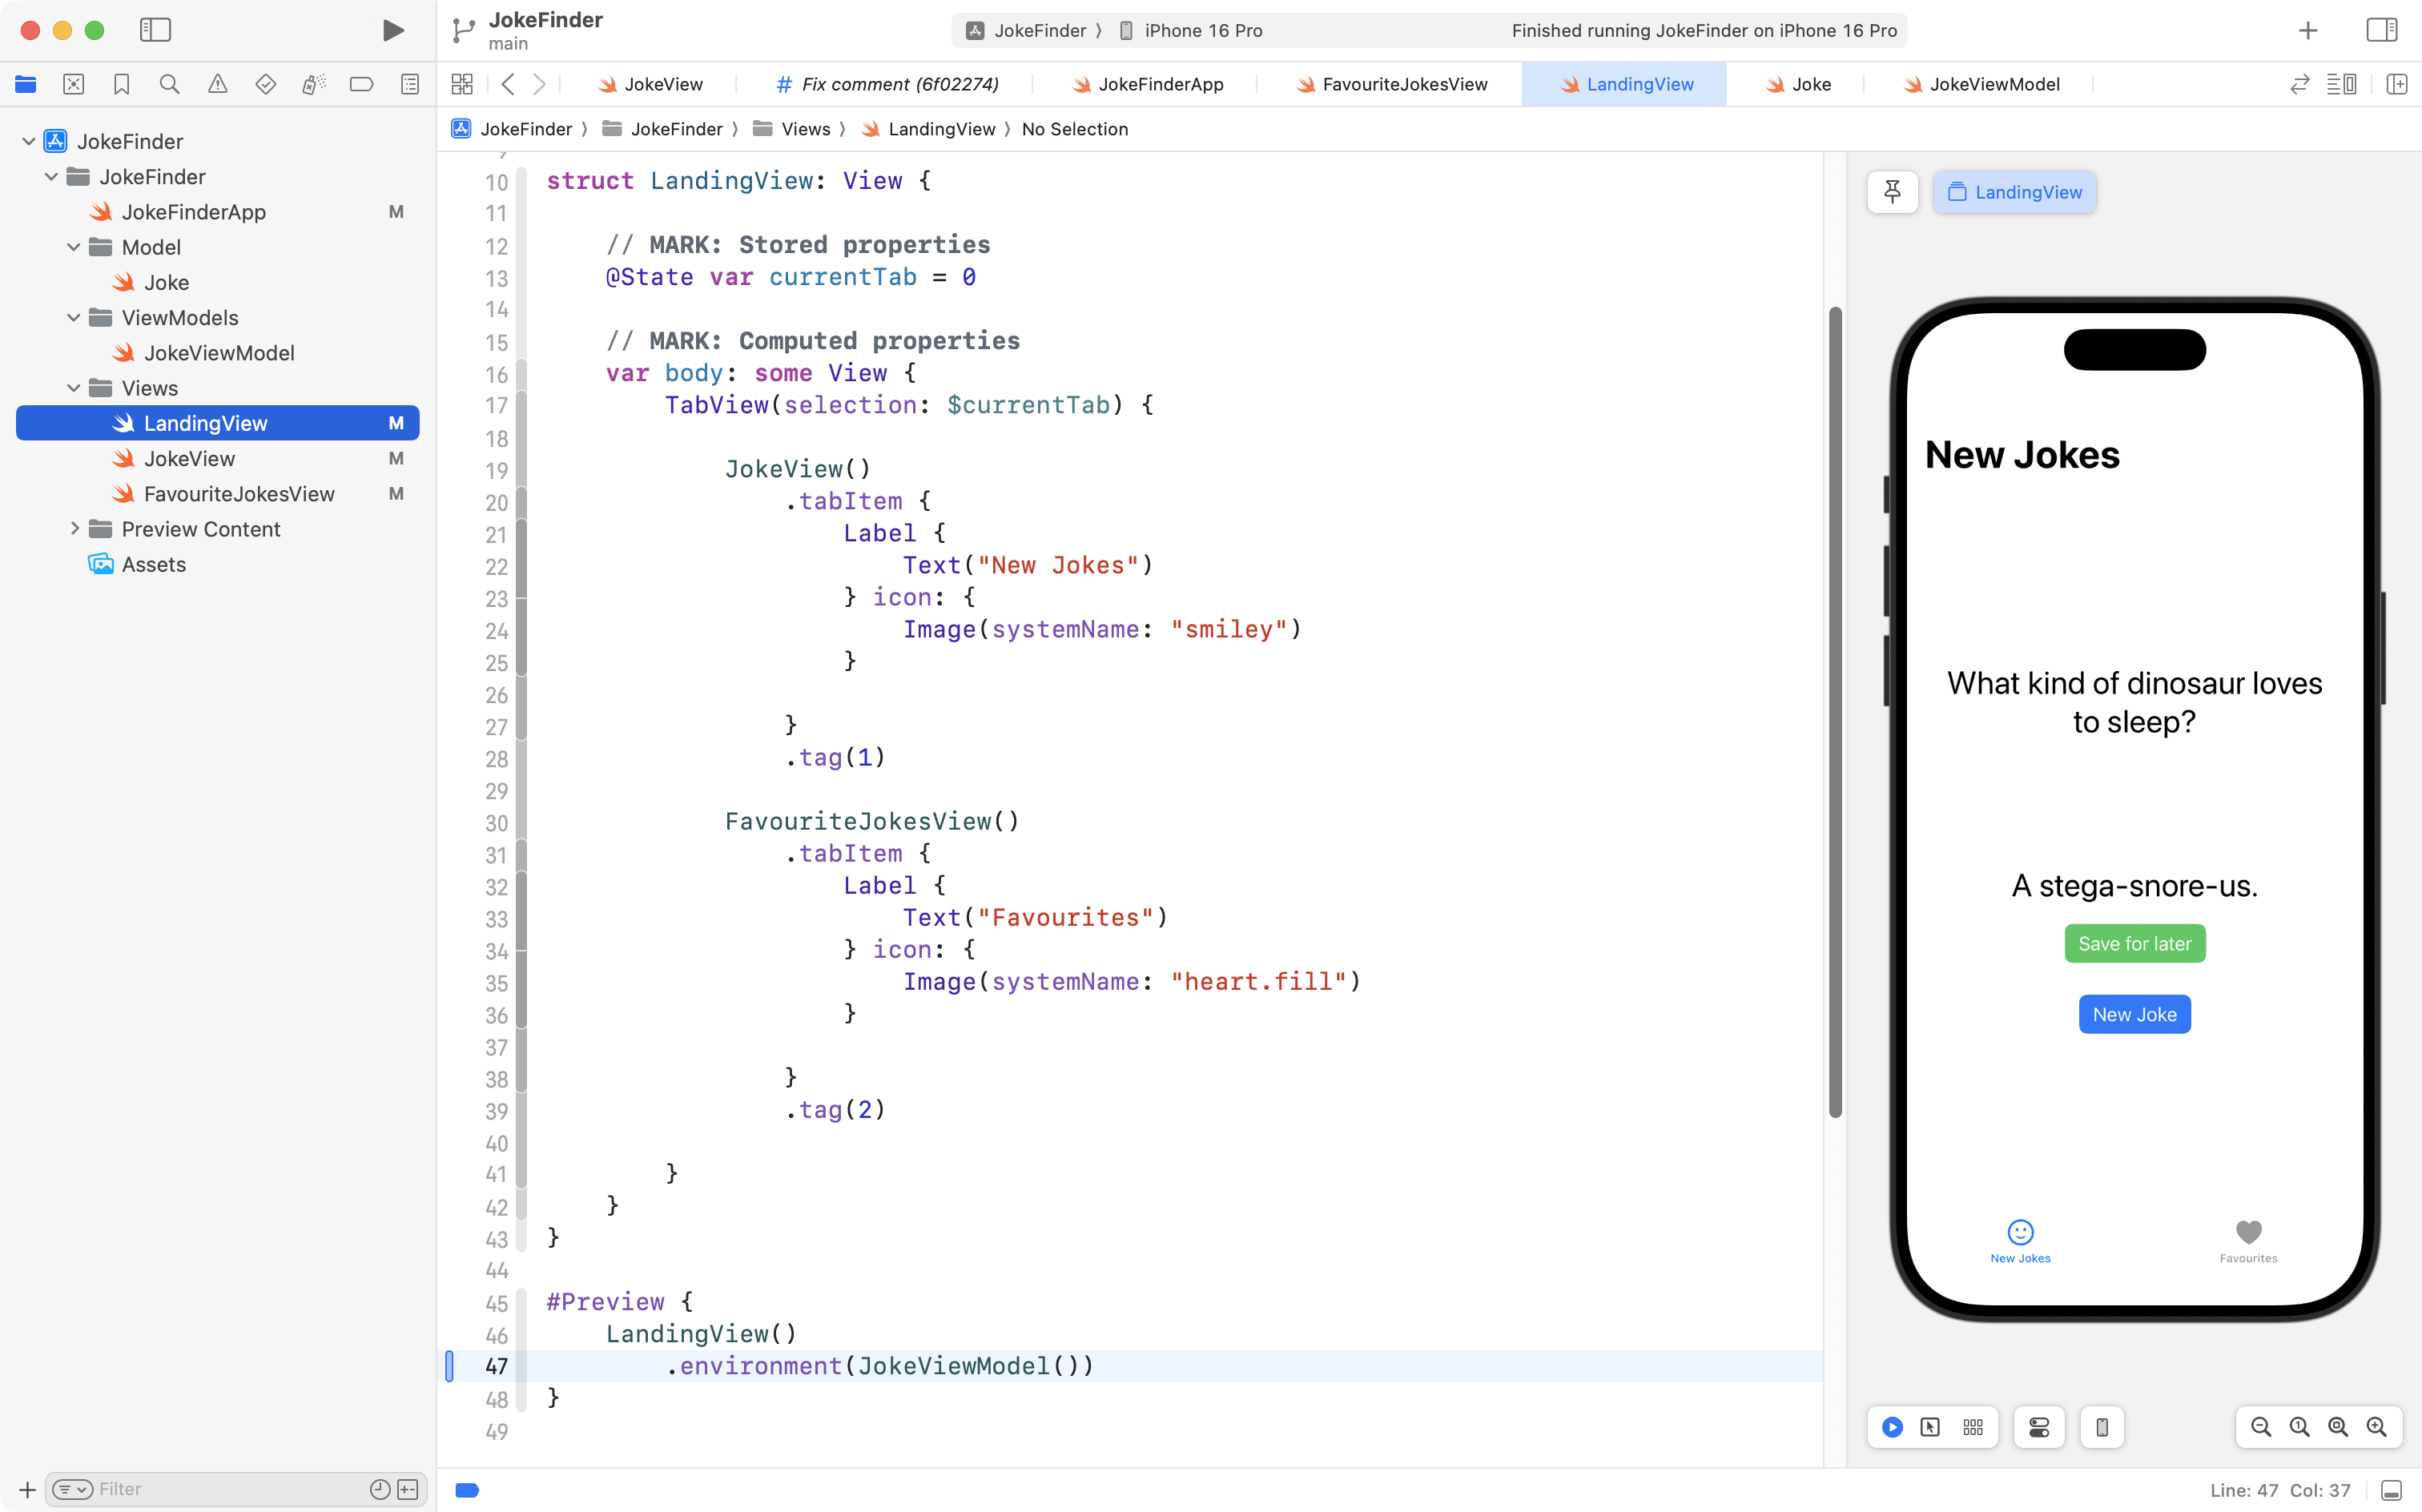
And finally, since LandingView in turn creates instances of JokeView and FavouriteJokesView, we need to add code to LandingView as well, like this, around line 47:
You should now be able to re-start the Previews window on any of these three views, using the Option-Command-P keyboard shortcut, and see each view working as before.
However, at this point, you might be getting a little frustrated with Mr. Gordon:
“Didn’t he just tell me that there should only be a single source of truth and that we should only create one instance of the view model and share it between views?”
Well, yes, he did – and that’s true – we must only have a single source of truth – one instance of the view model – to be shared among views when running on a device or in the Simulator.
We must also have a single source of truth when using the Previews window – and – we do! Remember, the Previews window lets us examine each view, one at a time, completely independent of any other views in our app.
When we preview LandingView, it has just one instance of the view model:
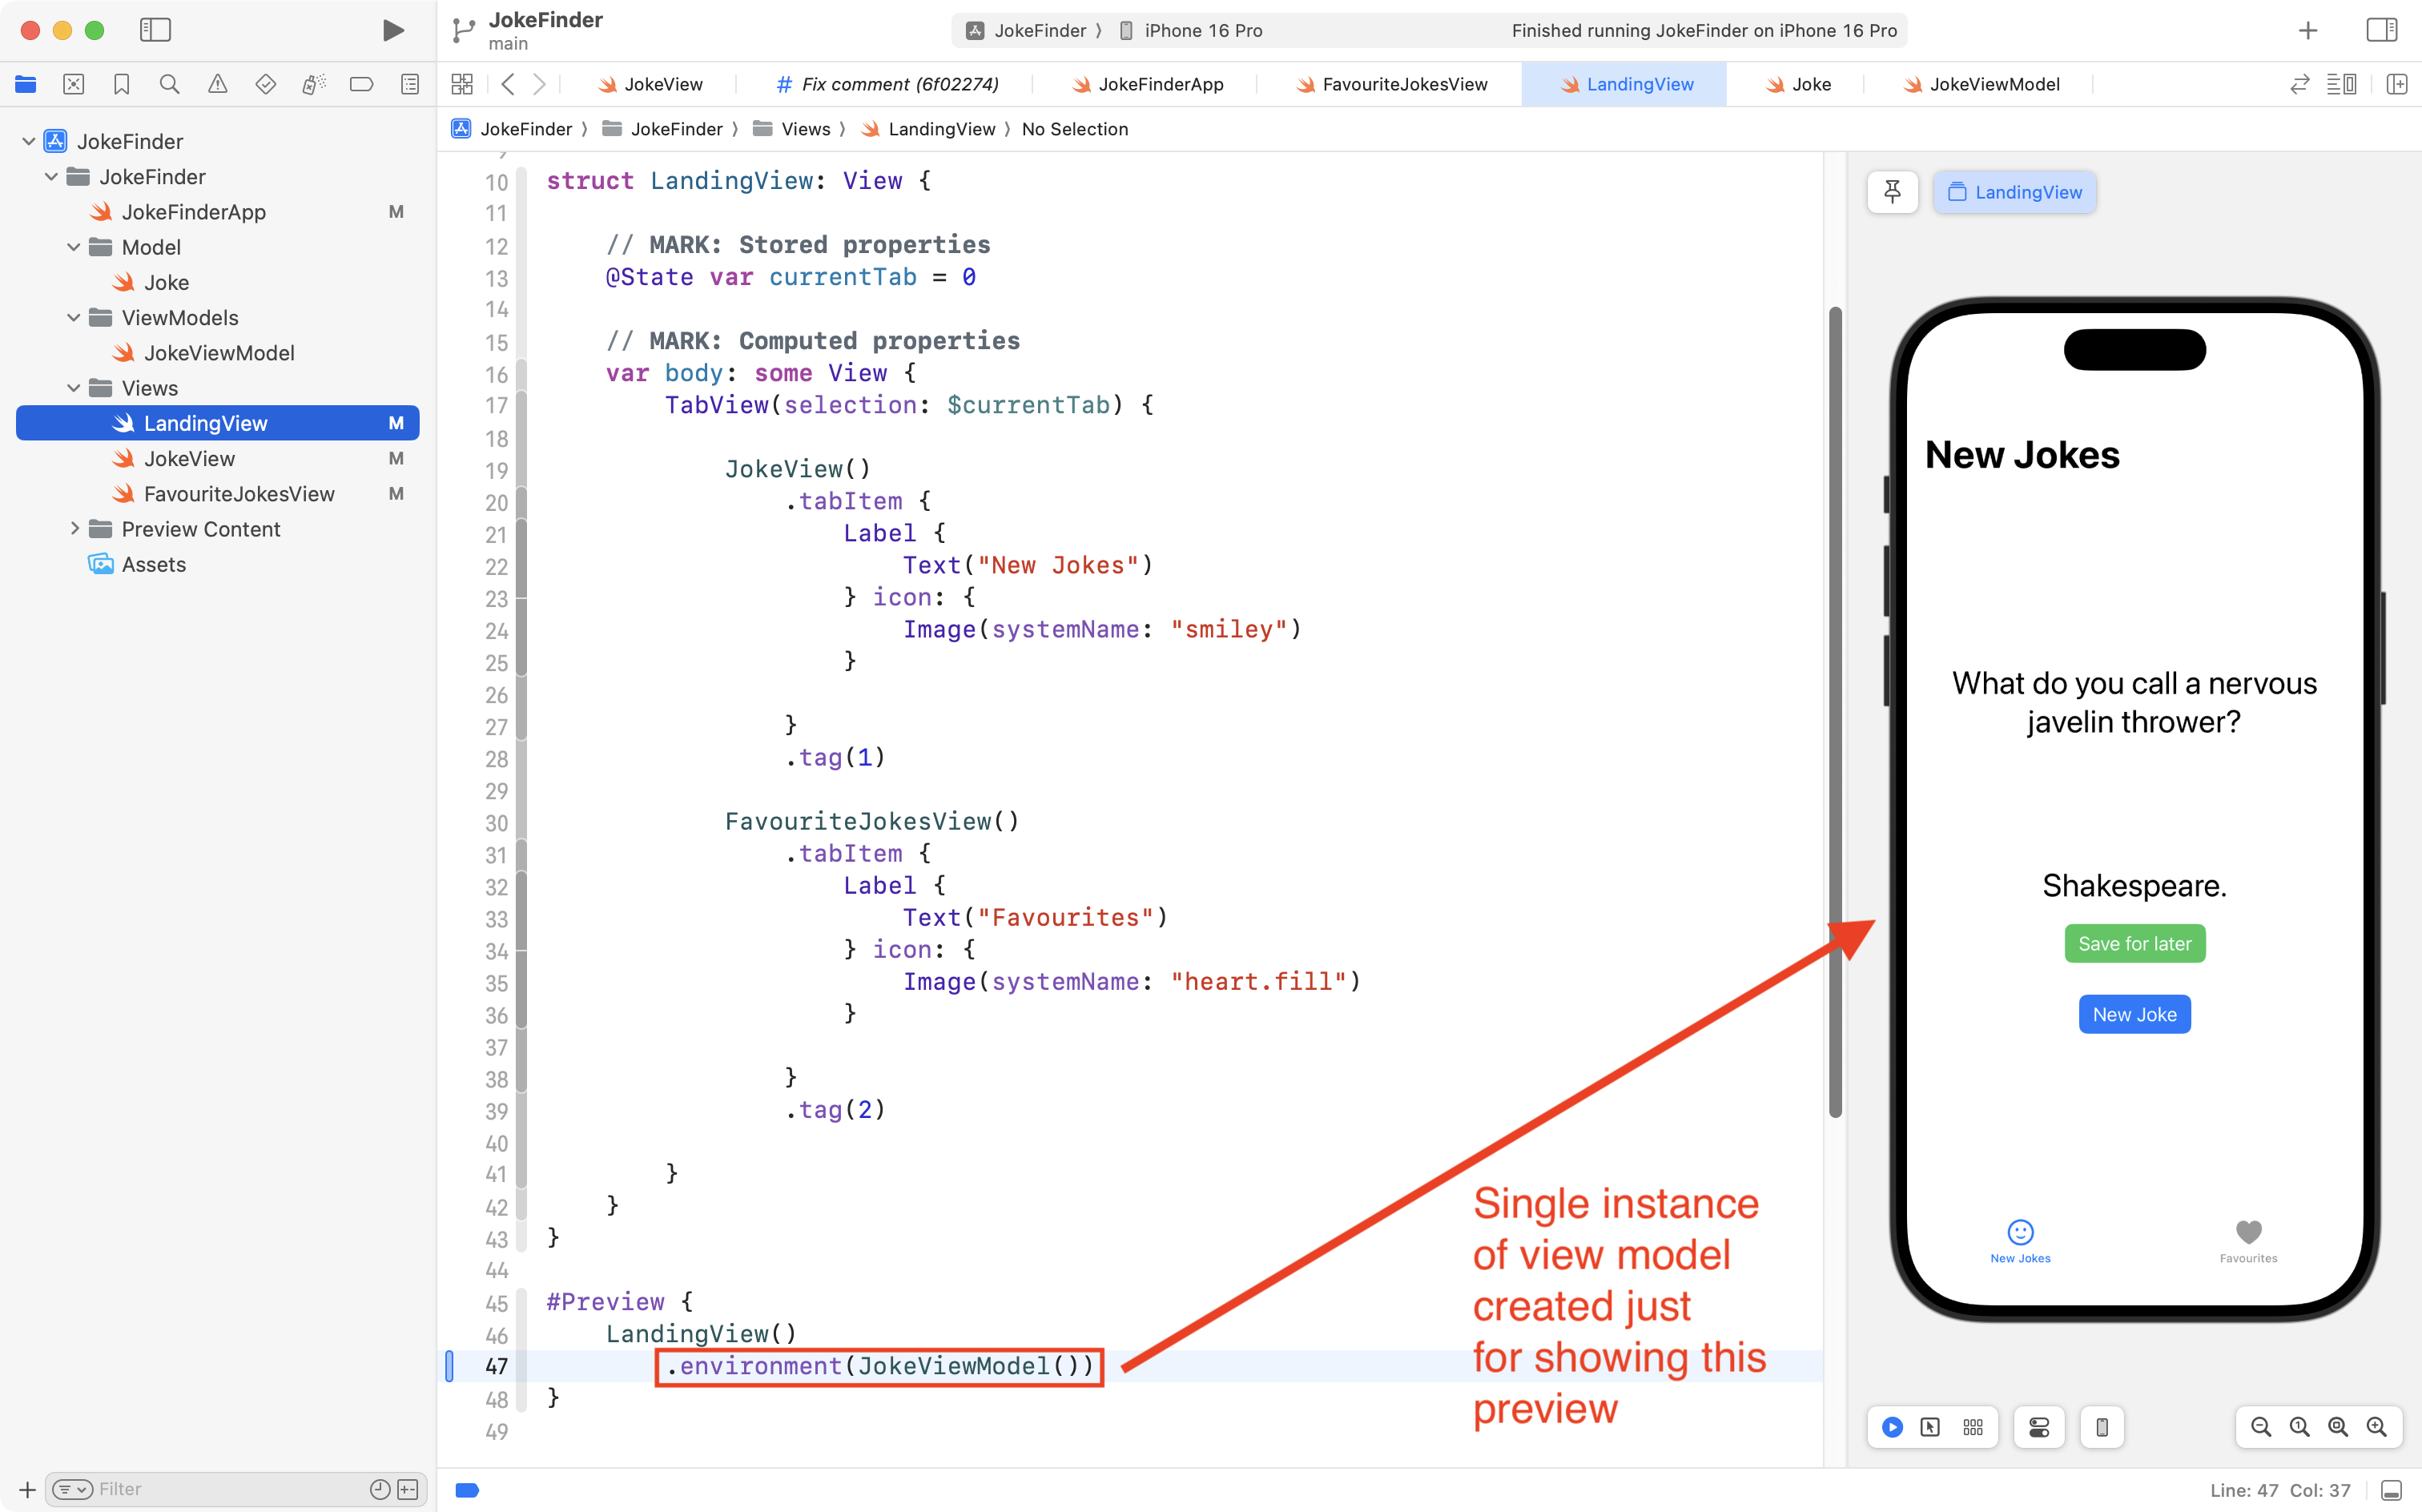
When we preview JokeView, it has just one instance of the view model:
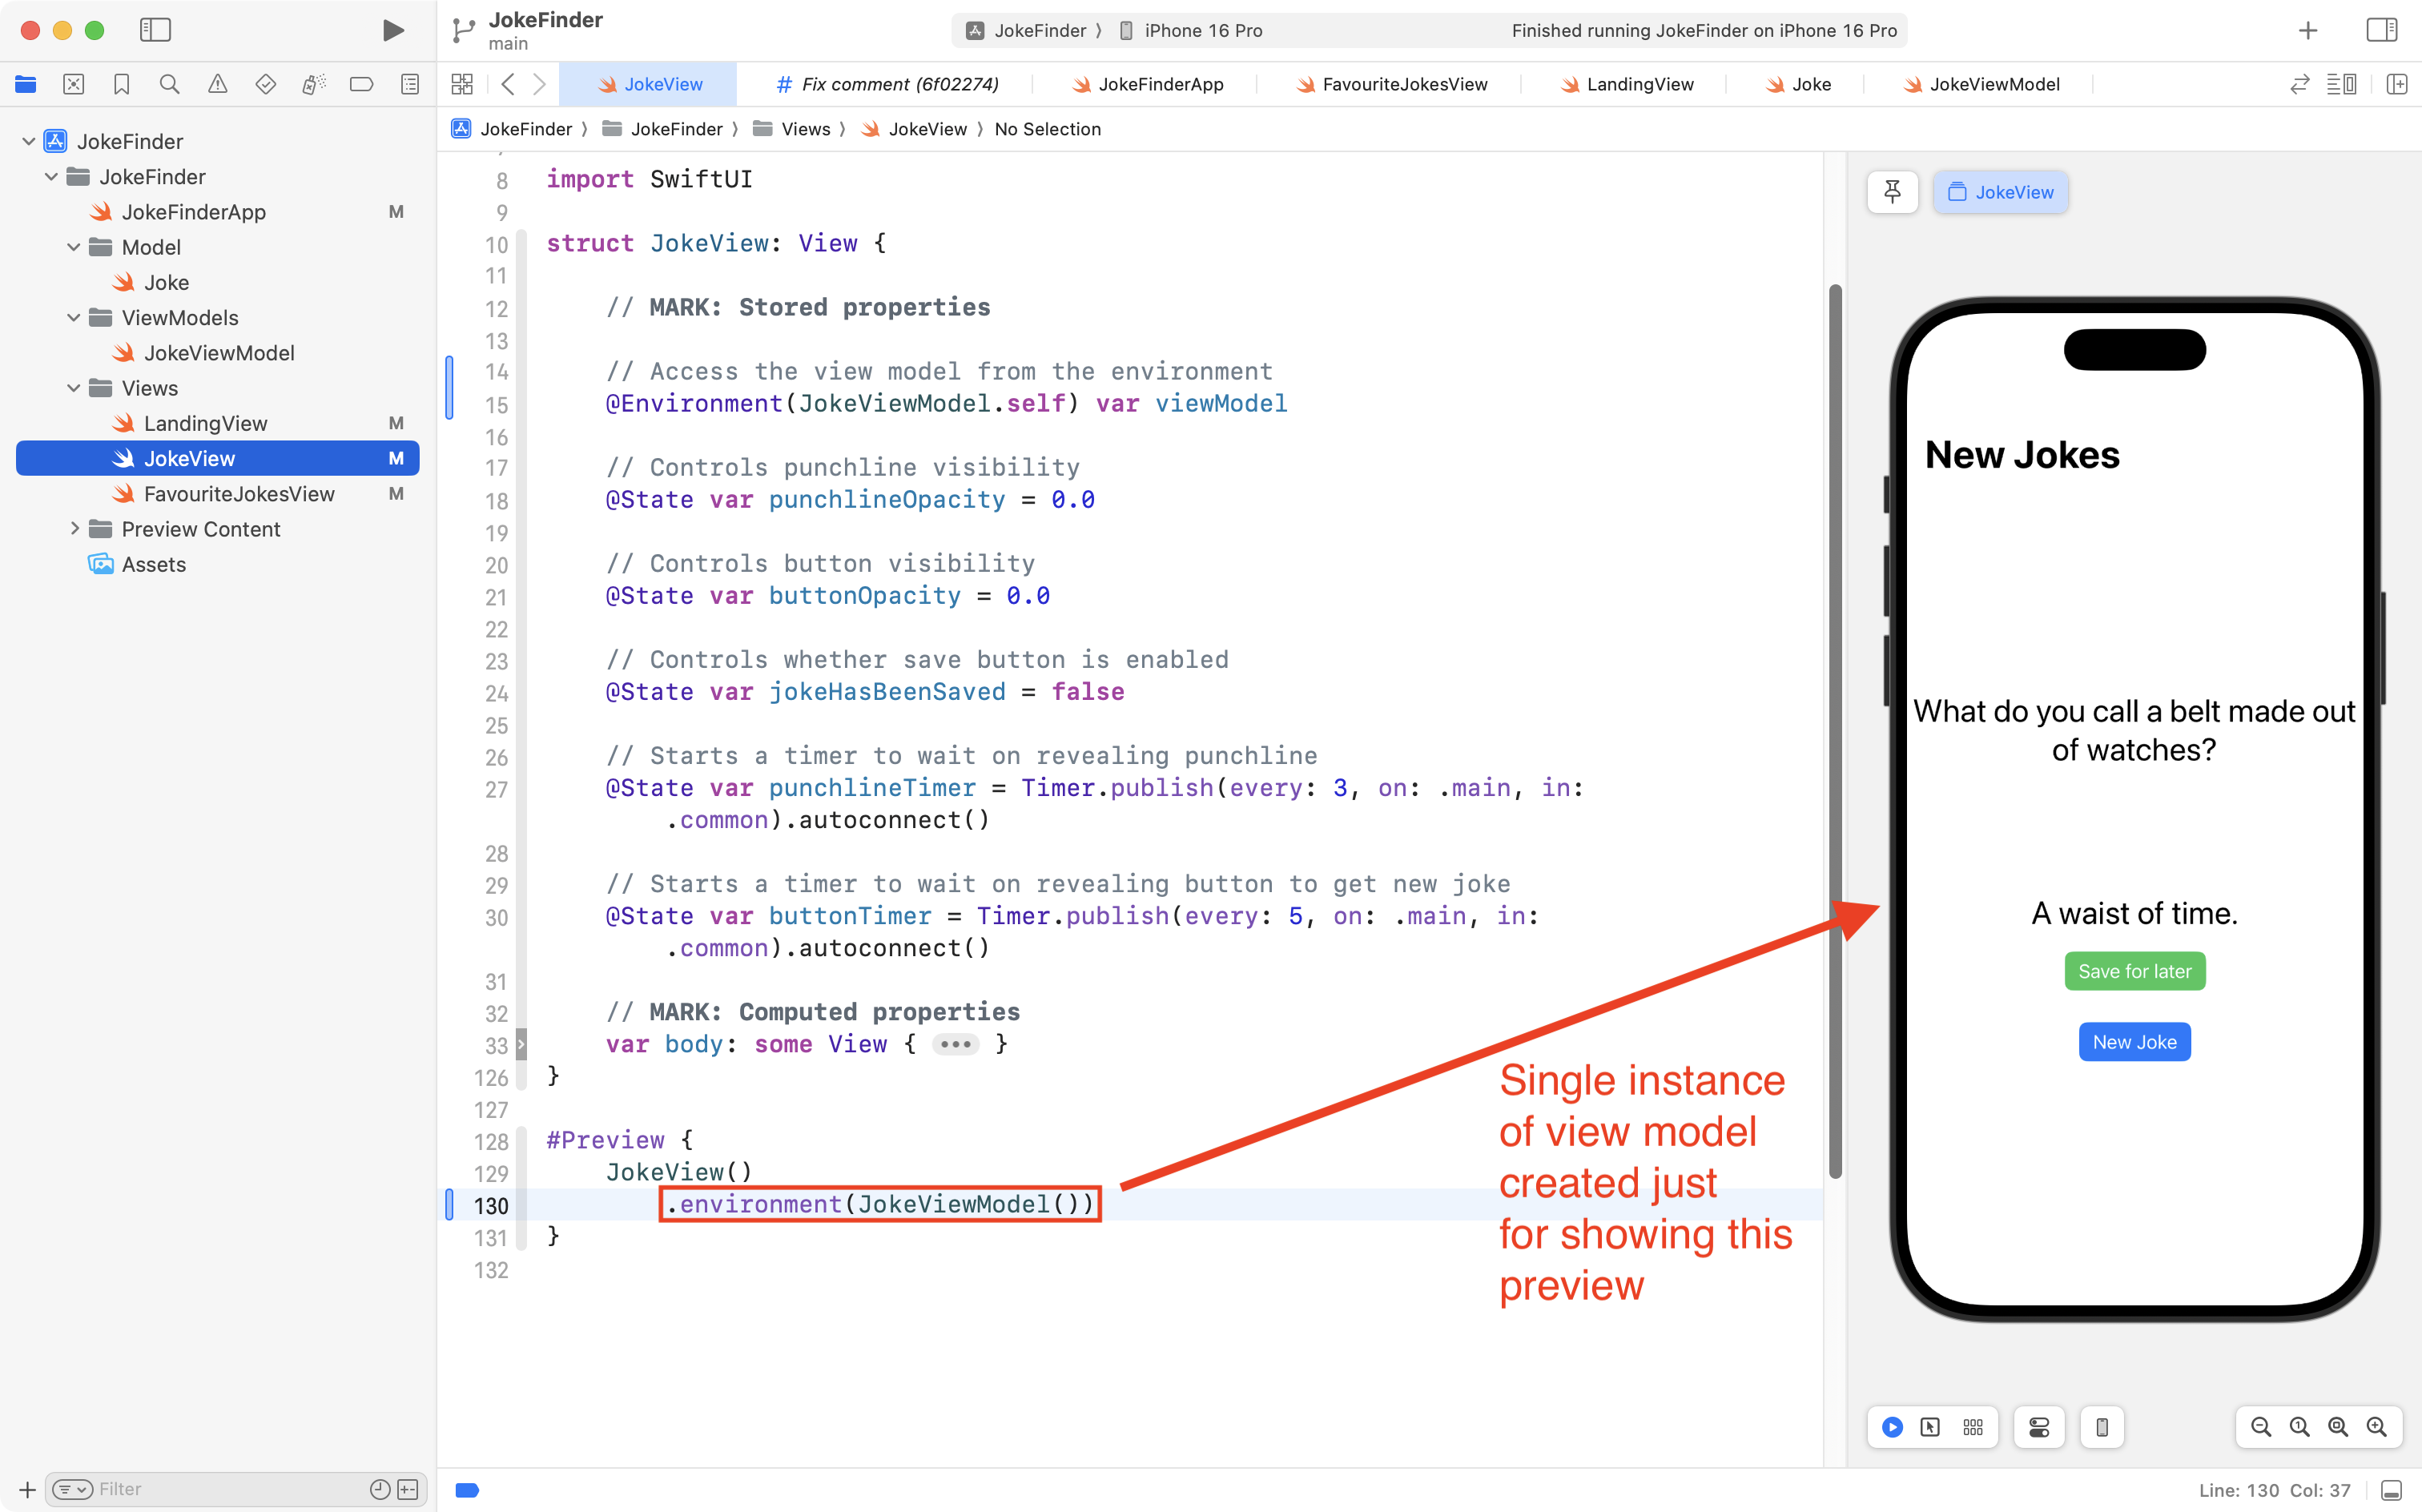
Finally, when we preview FavouriteJokesView, it has just one instance of the view model:
IMPORTANT
Running an app on a device, or in the Simulator, is done within a totally different space than when using the Previews.
Each view that is seen from the Previews interface runs separately from any other view.
Even though we now have code that creates an instance of
JokeViewModelin four places within our app’s source code… we are not breaking the single source of truth rule when our app’s code is run… because our code is running within four spaces that are completely independent from one another.
Phew. 😮💨
OK, with that important conceptual understanding out of the way, now, we can actually use the view model’s data from multiple views within our app.
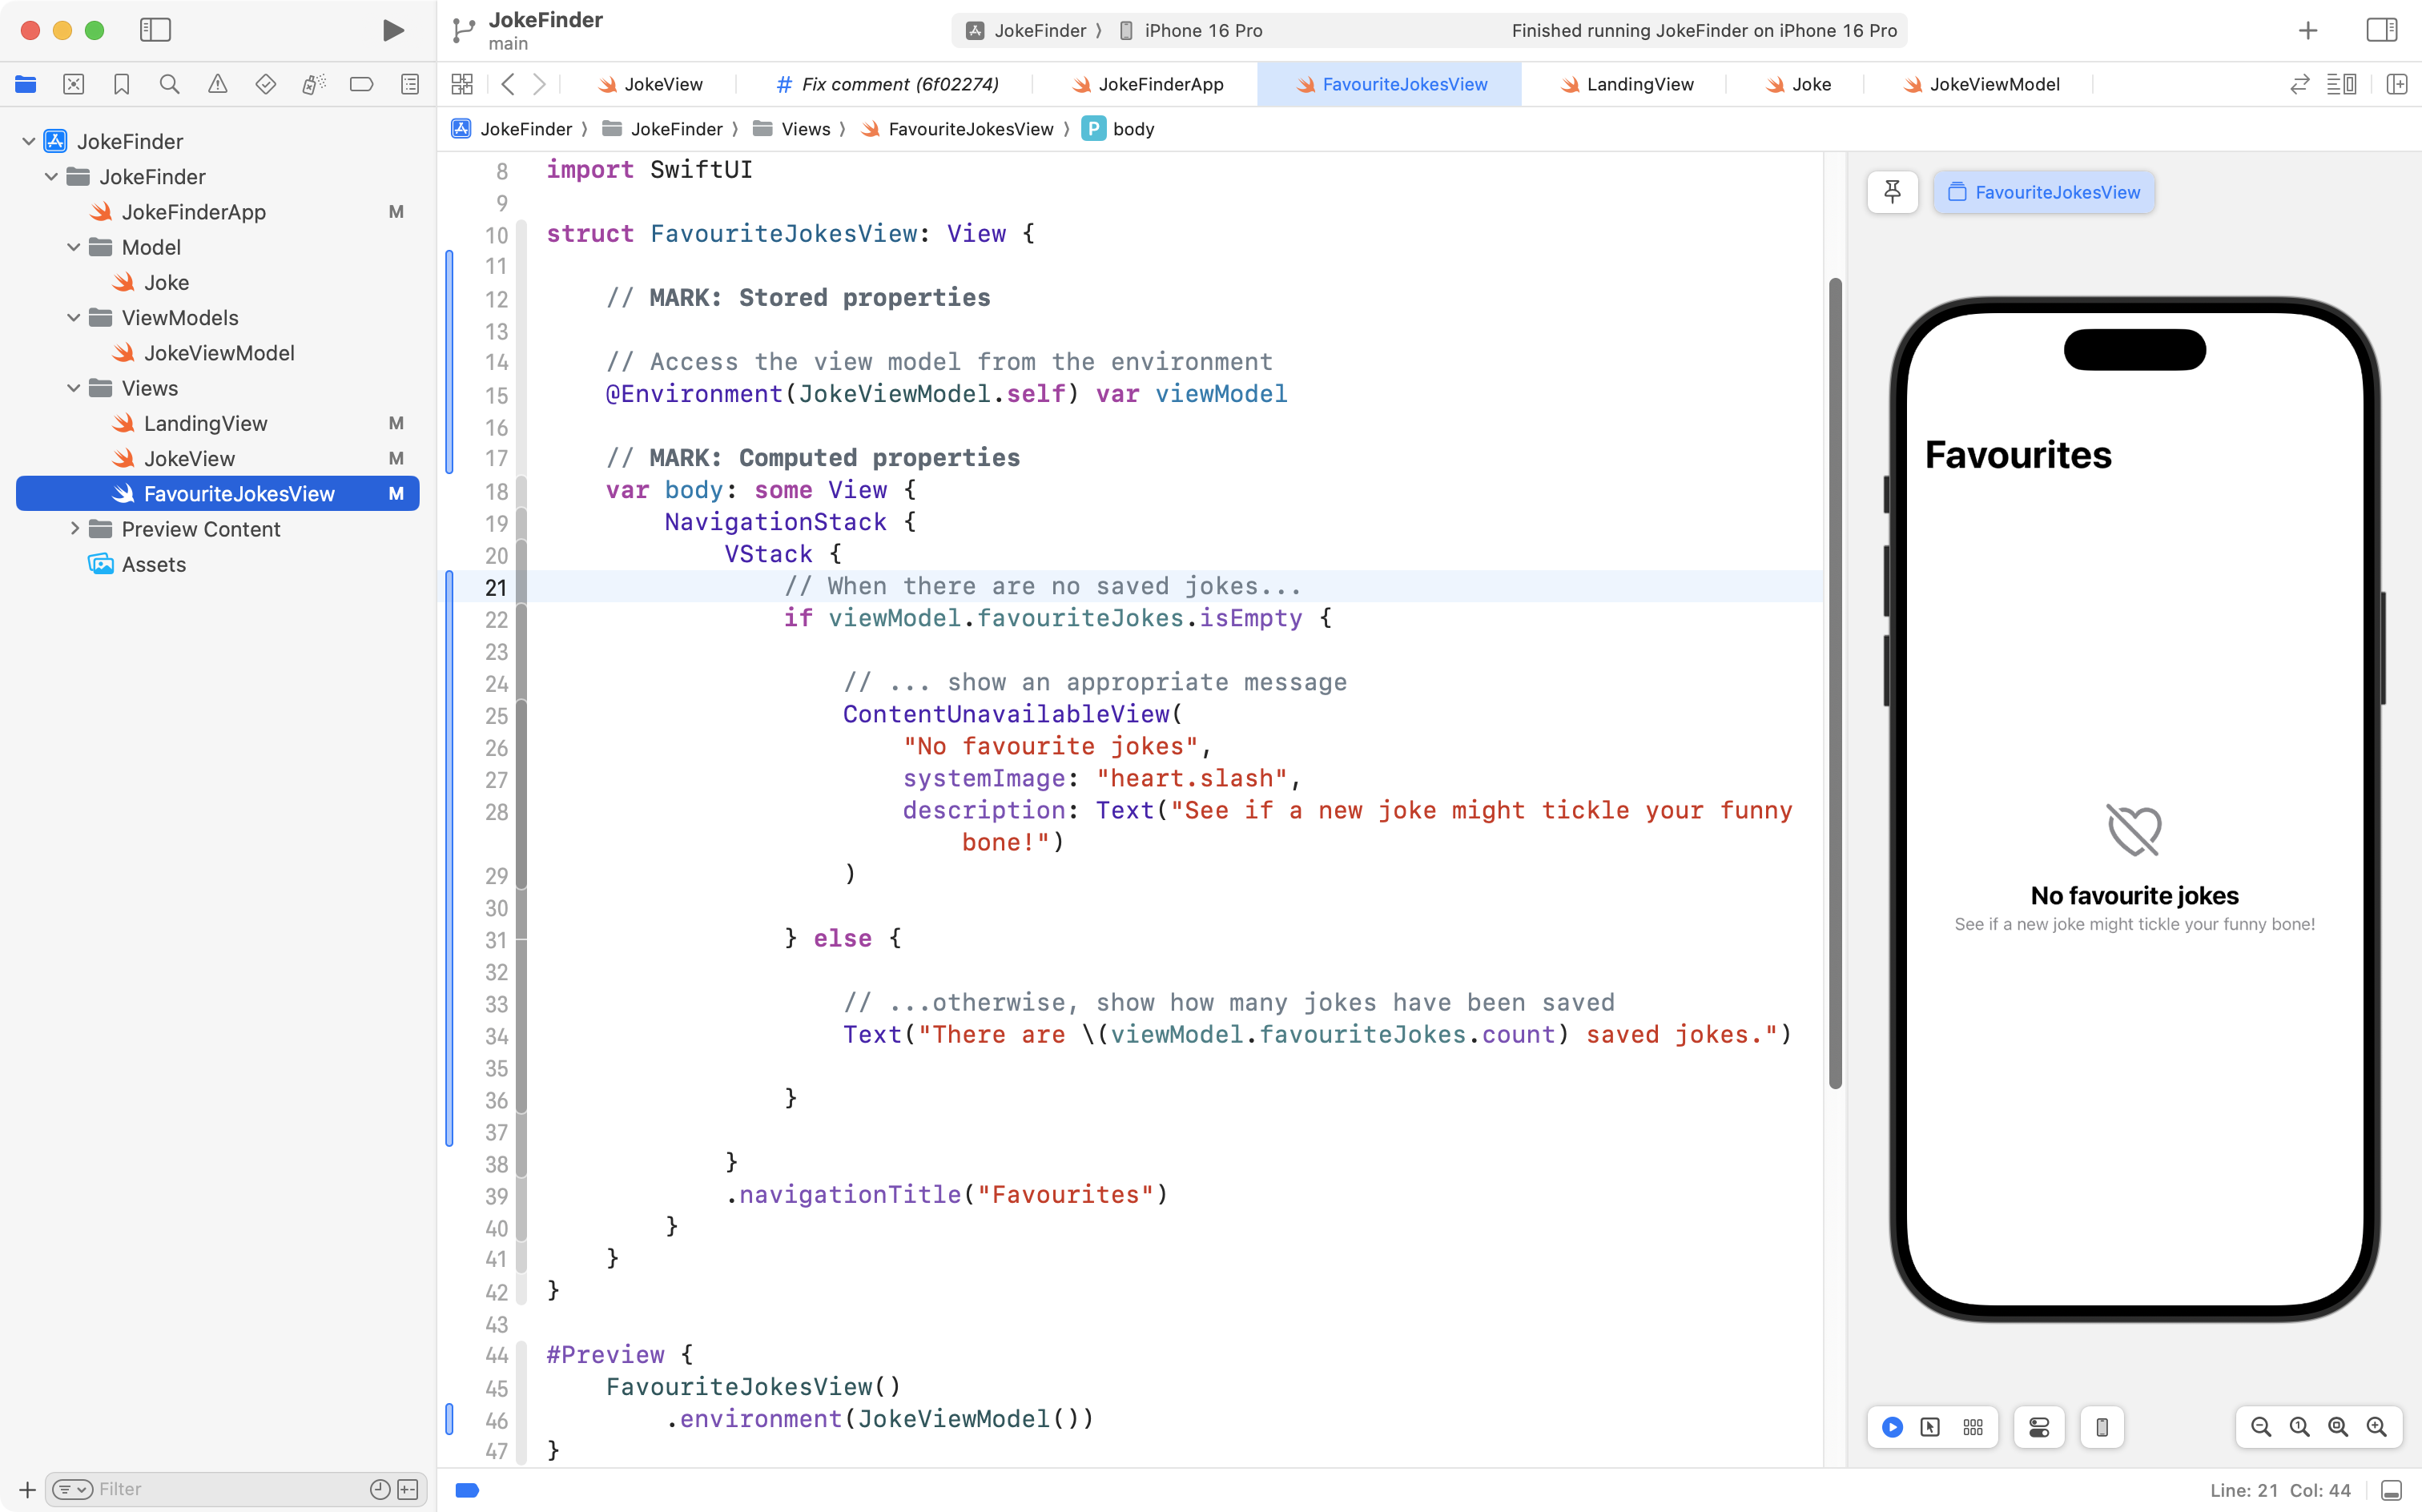
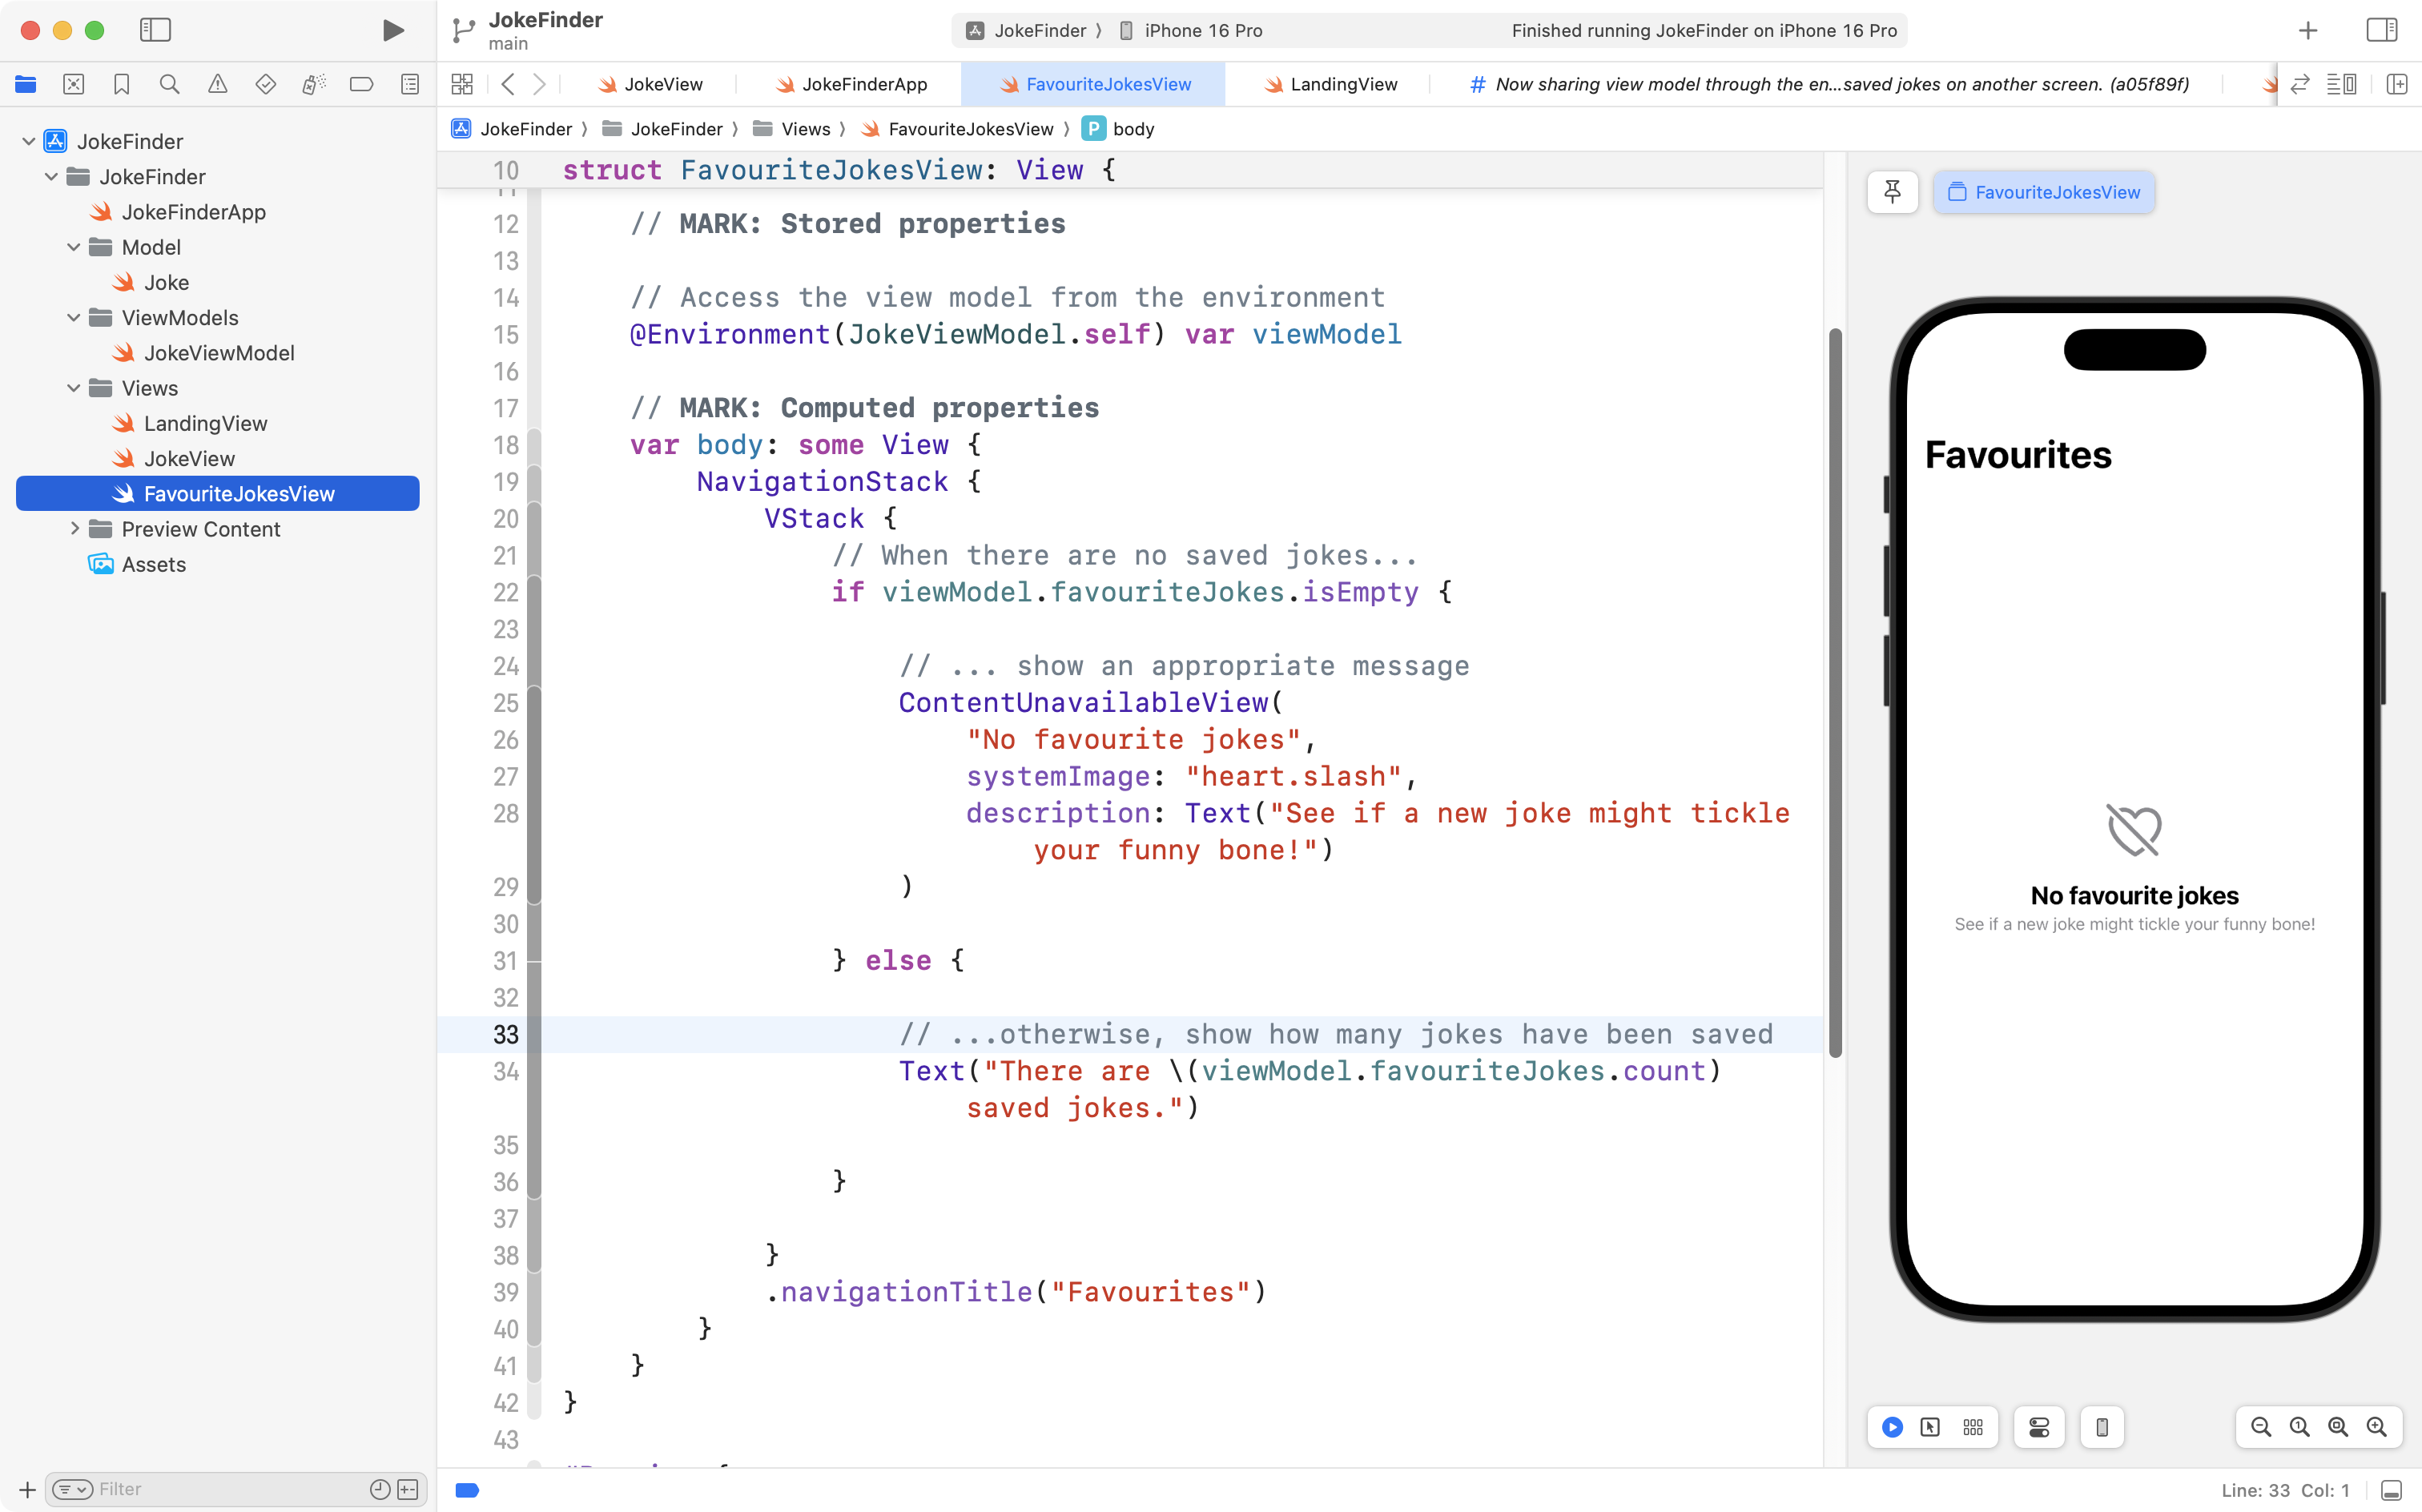
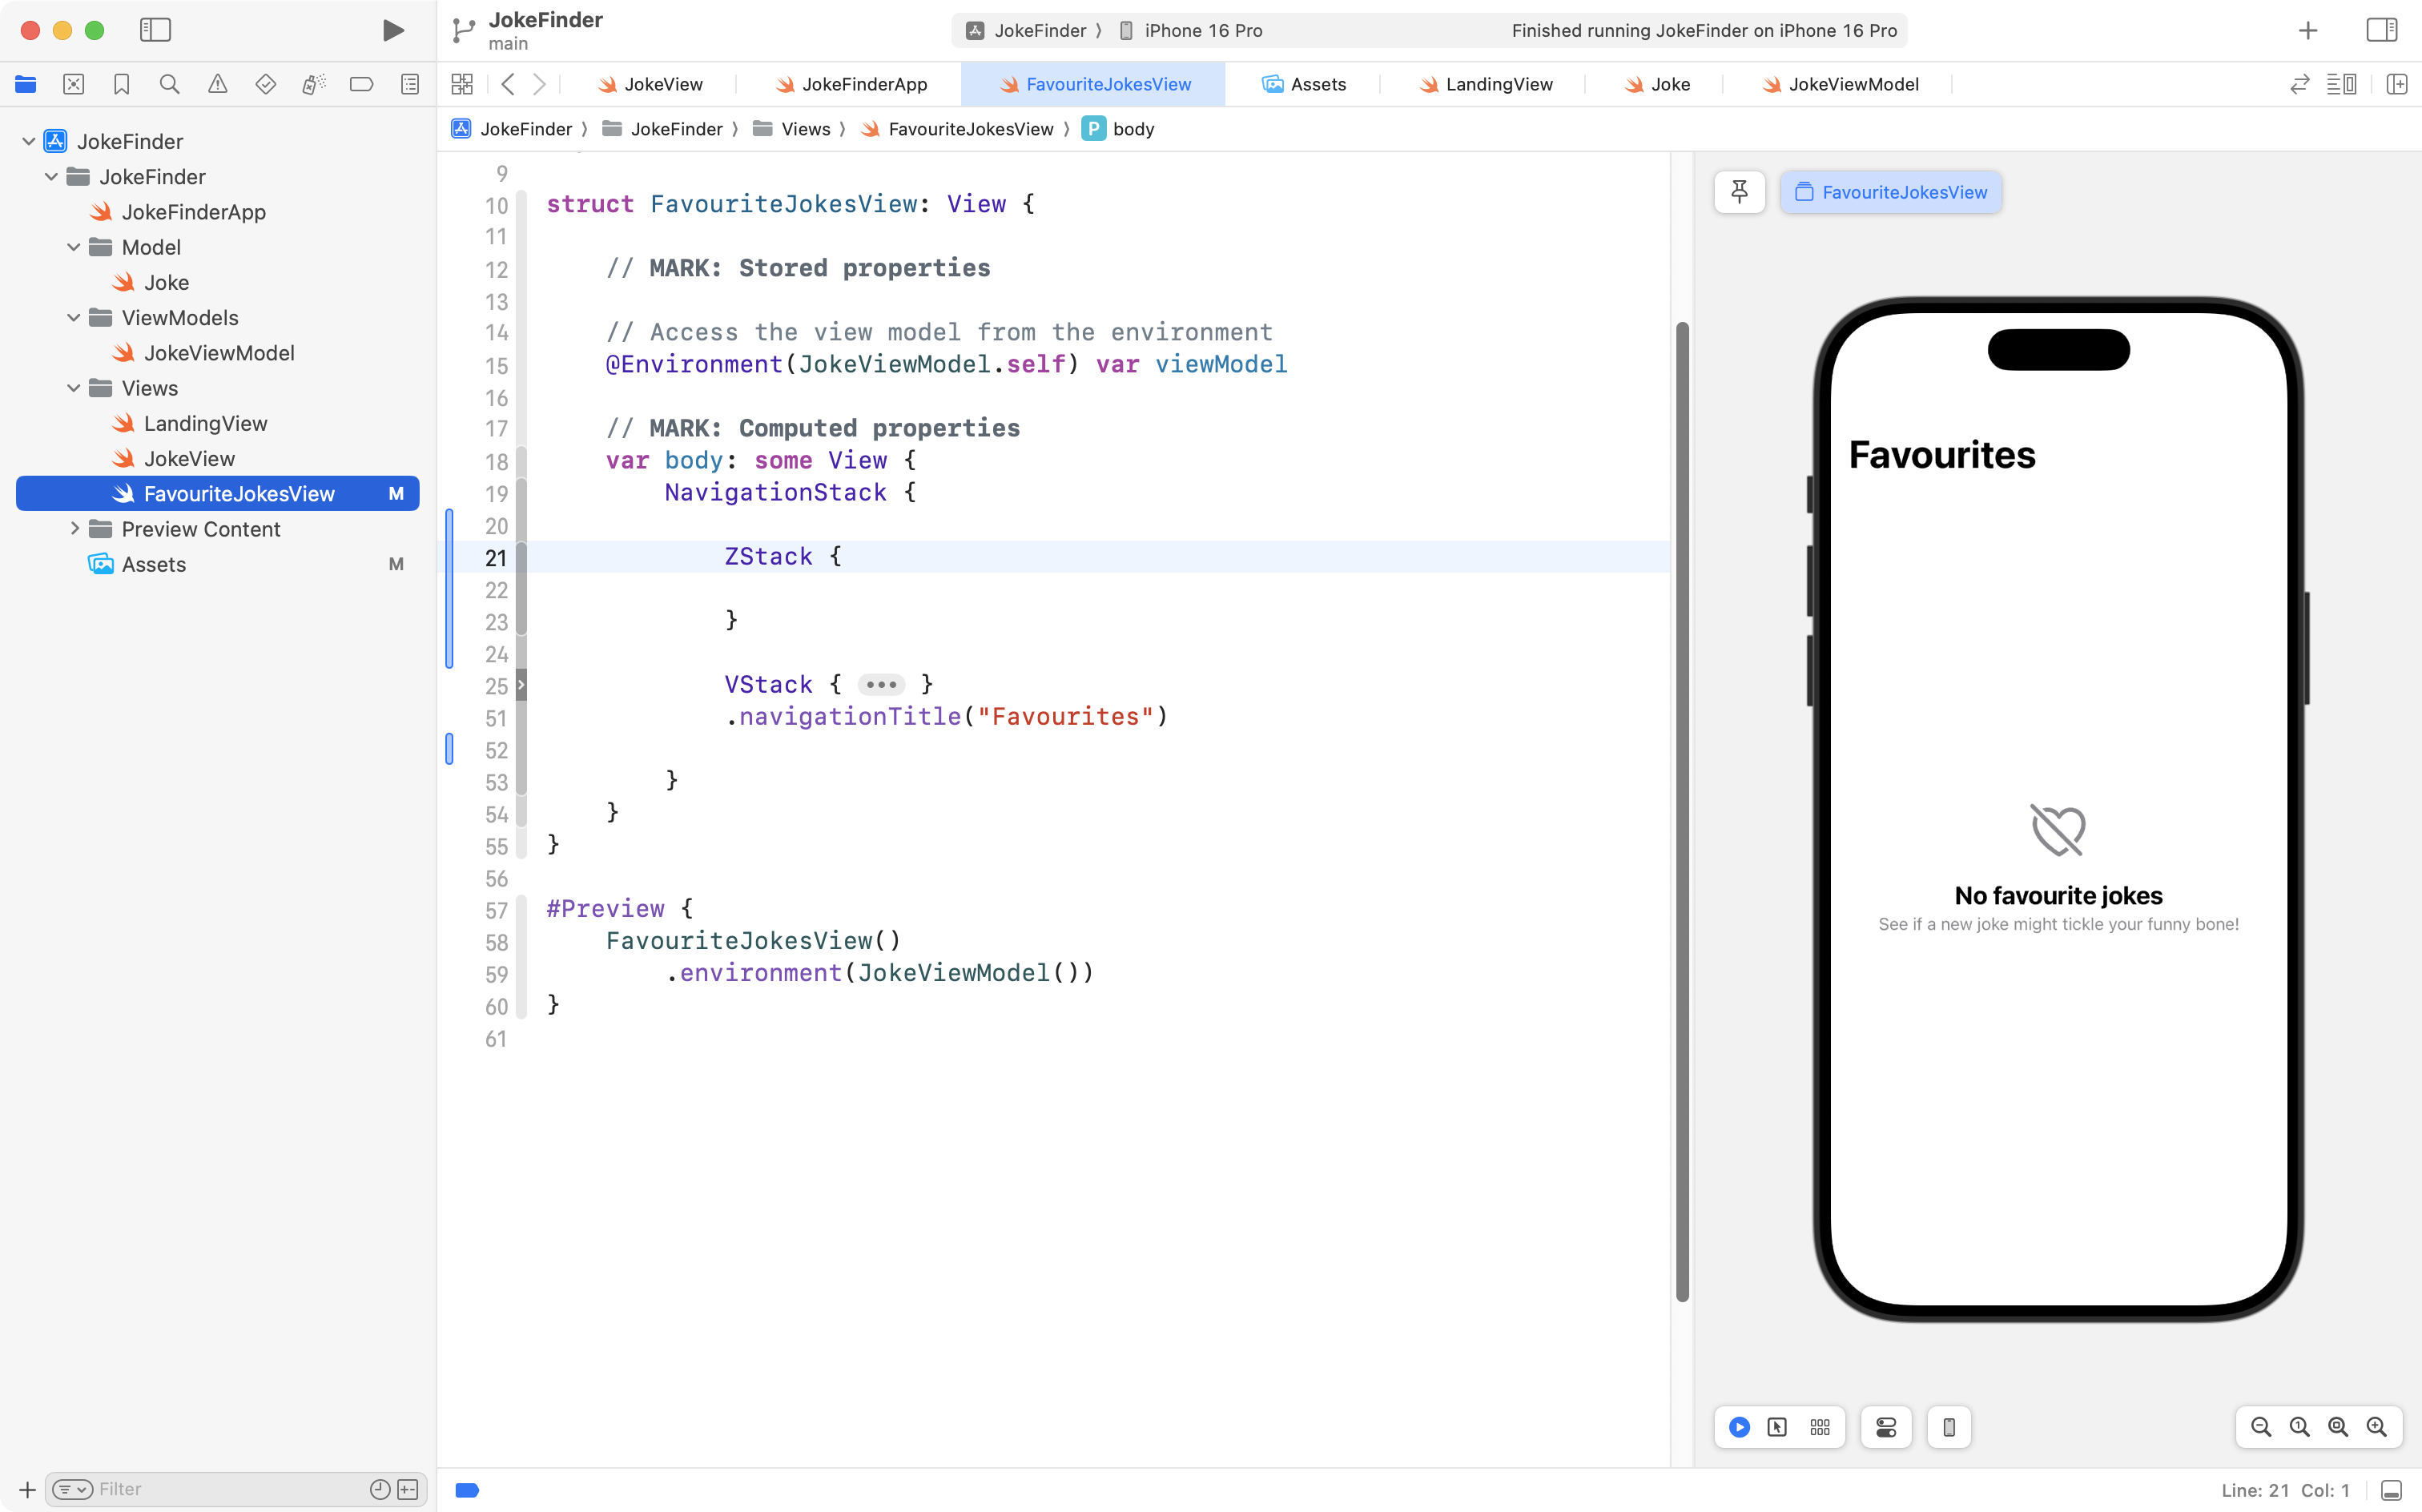
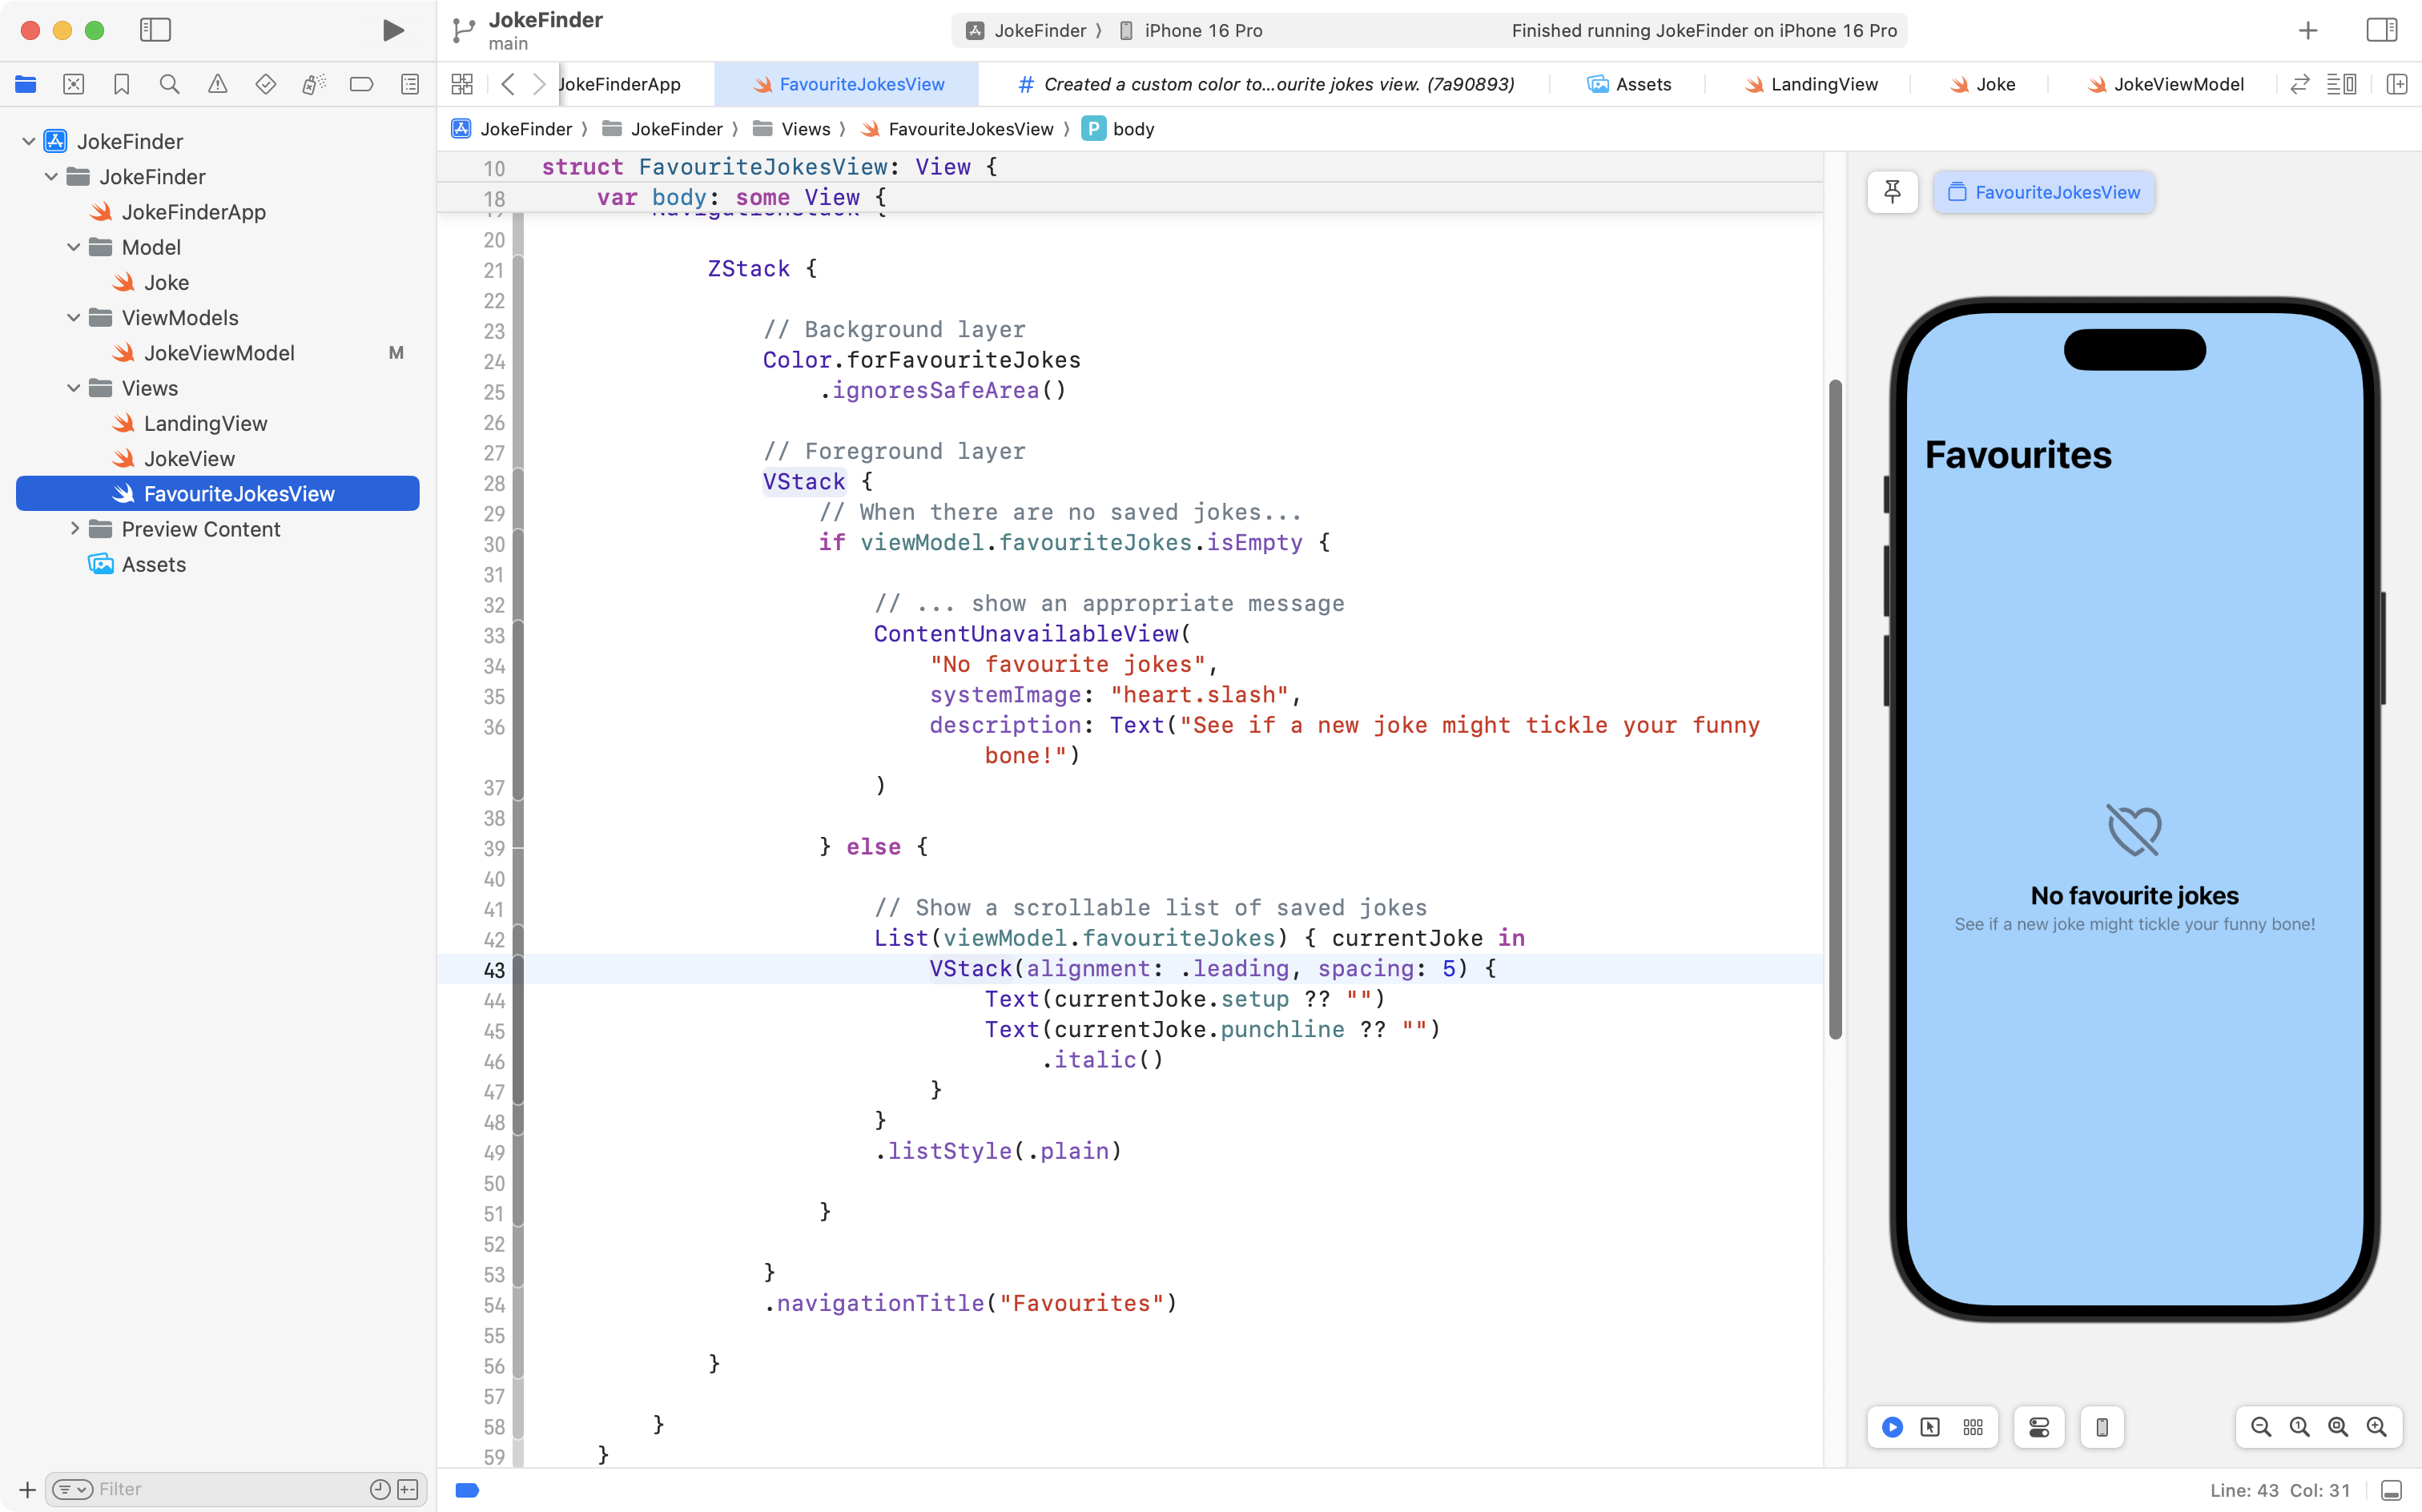
Navigate back to FavouriteJokesView and find this line of code, which was a placeholder we created earlier – it may be around line 21:
Copy this code into your clipboard:
// When there are no saved jokes...
if viewModel.favouriteJokes.isEmpty {

	// ... show an appropriate message
	ContentUnavailableView(
		"No favourite jokes",
		systemImage: "heart.slash",
		description: Text("See if a new joke might tickle your funny bone!")
	)

} else {

	// ...otherwise, show how many jokes have been saved
	Text("There are \(viewModel.favouriteJokes.count) saved jokes.")

}
… and replace the existing placeholder code, like this:
Now to test this code out, navigate to LandingView, and try out the app – you should find that jokes we save on the New Jokes screen are now accessible on the Favourites screen within the app:
At this point, be sure to commit and push your work with the following message:
Now sharing view model through the environment so that we can access saved jokes on another screen.
Showing jokes in a list
Now that we can access the view model on FavouriteJokesView, it is trivial to actually show the list of saved jokes.
Copy this code into your clipboard:
// Show a scrollable list of saved jokes
List(viewModel.favouriteJokes) { currentJoke in
VStack(alignment: .leading, spacing: 5) {
Text(currentJoke.setup ?? "")
Text(currentJoke.punchline ?? "")
.italic()
}
}
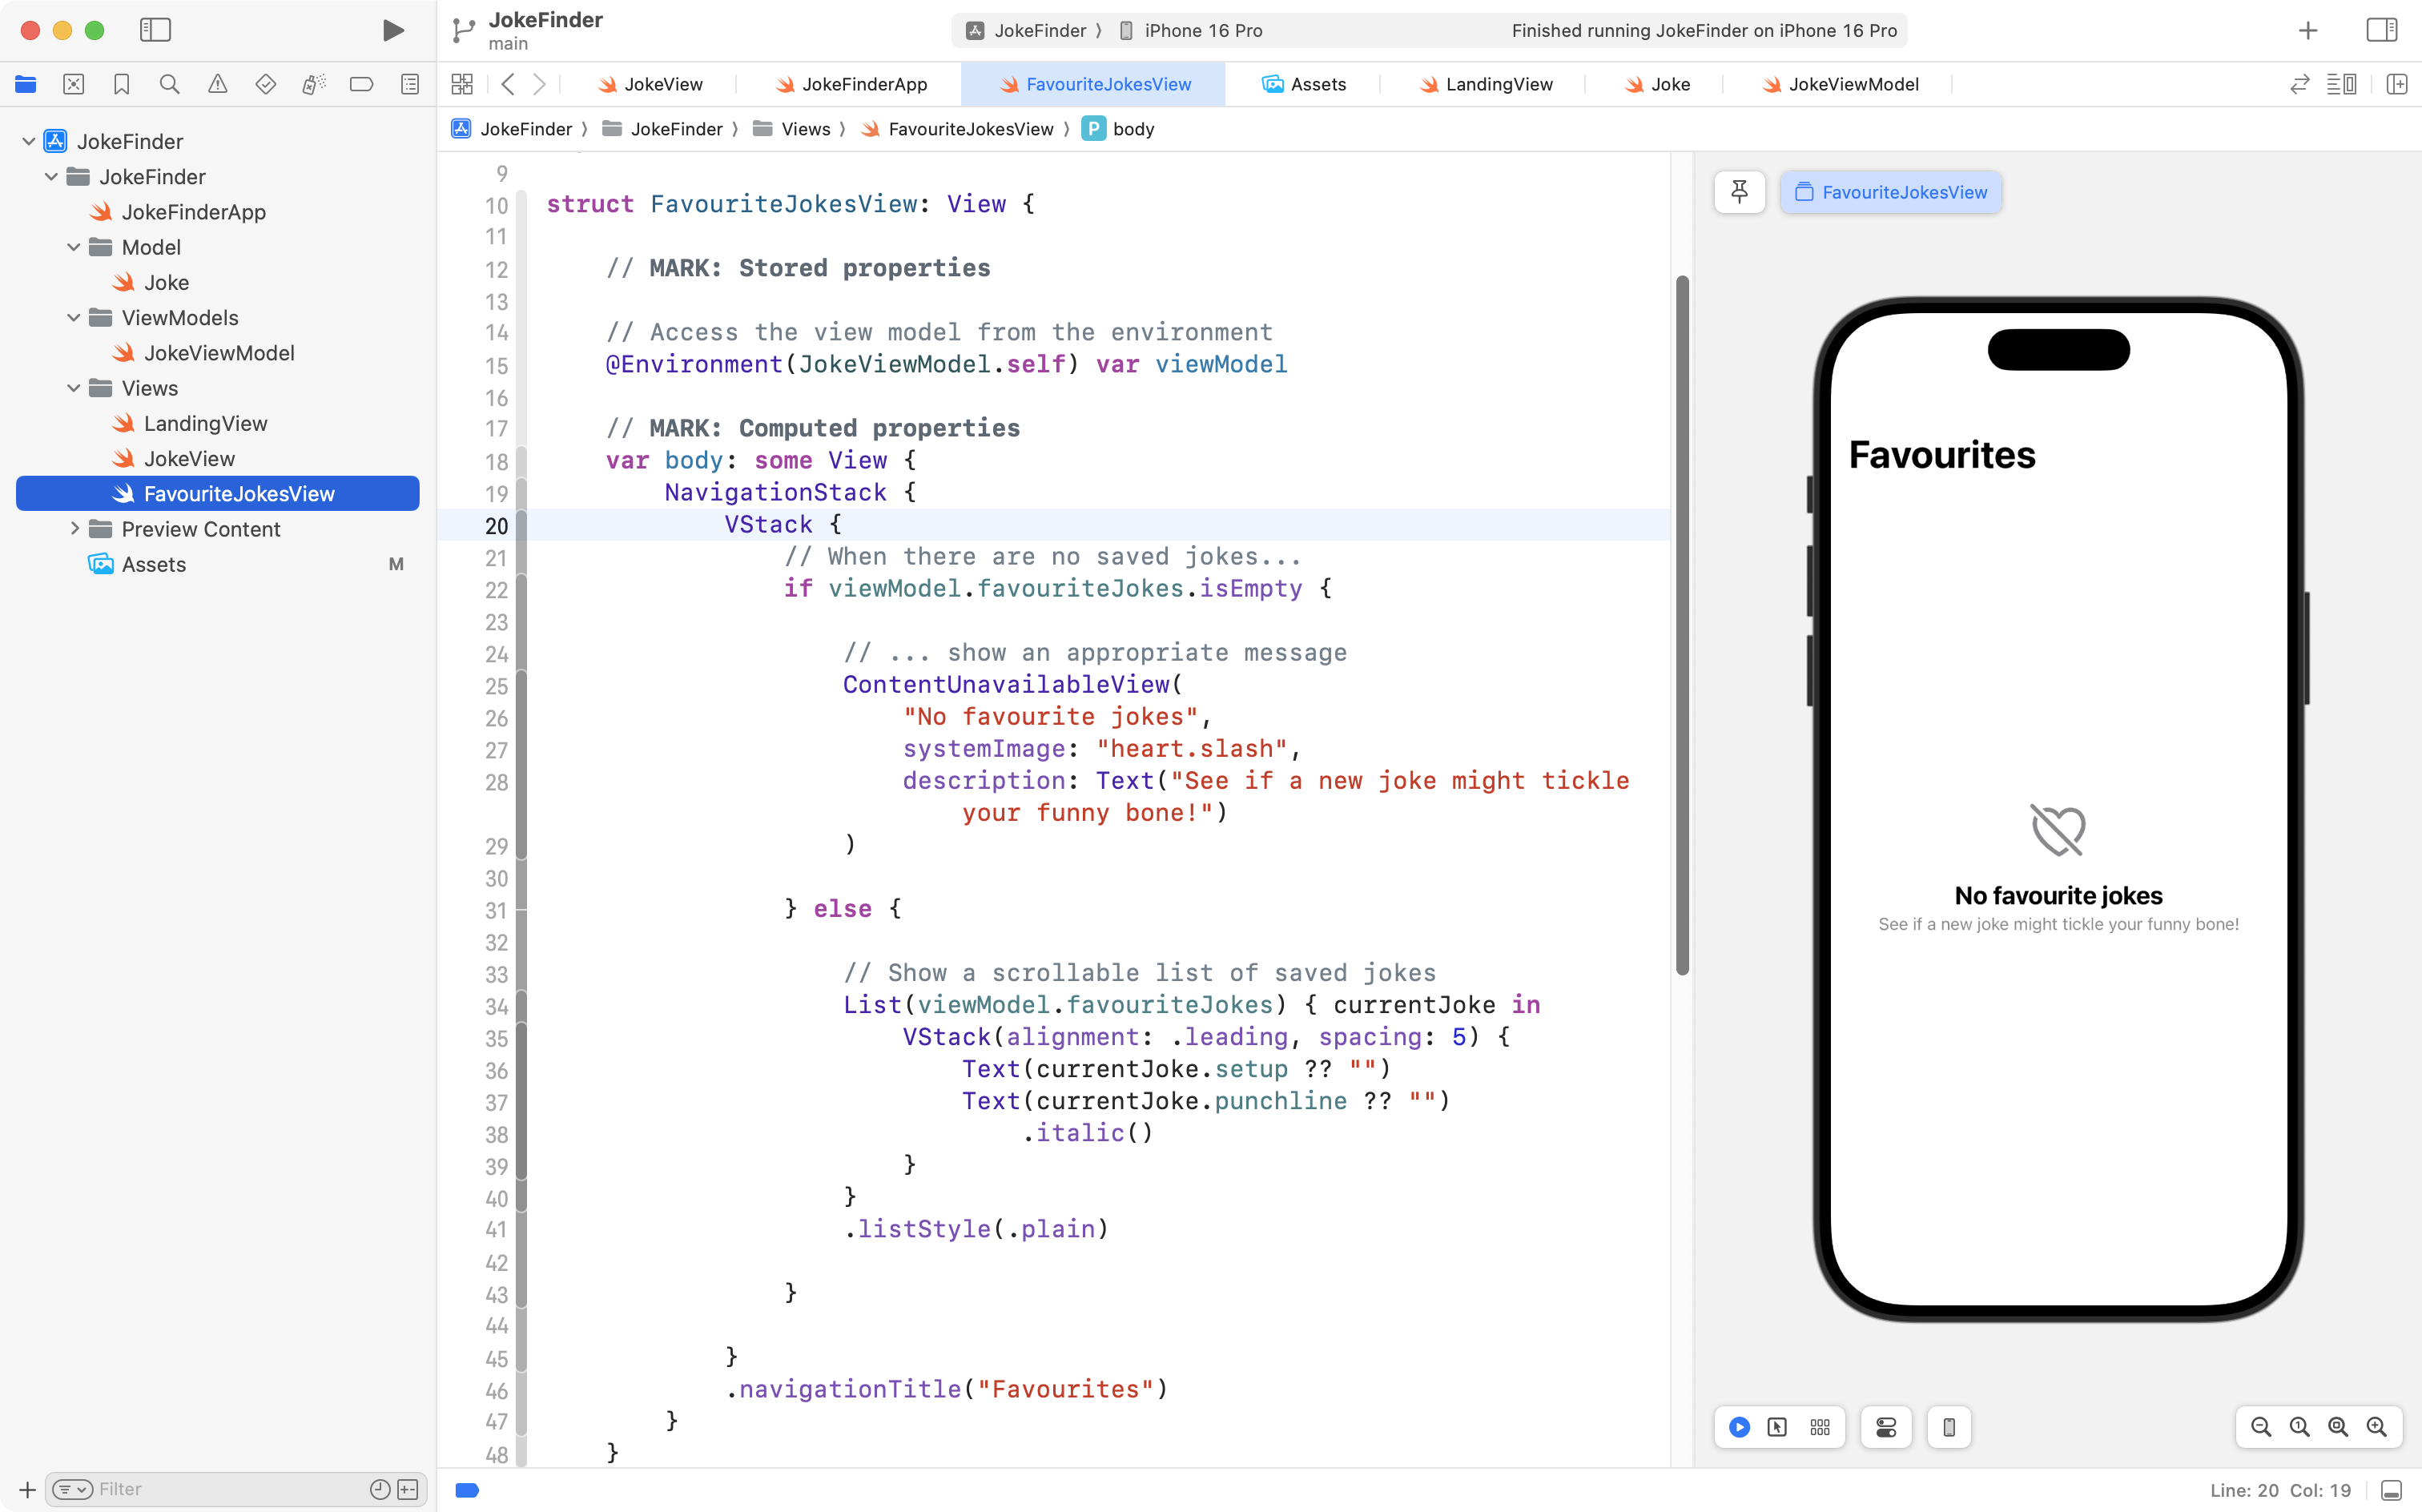
.listStyle(.plain)Navigate to FavouriteJokesView and find the code that displays how many jokes have been saved:
Replace that code with the code from your clipboard, like this:
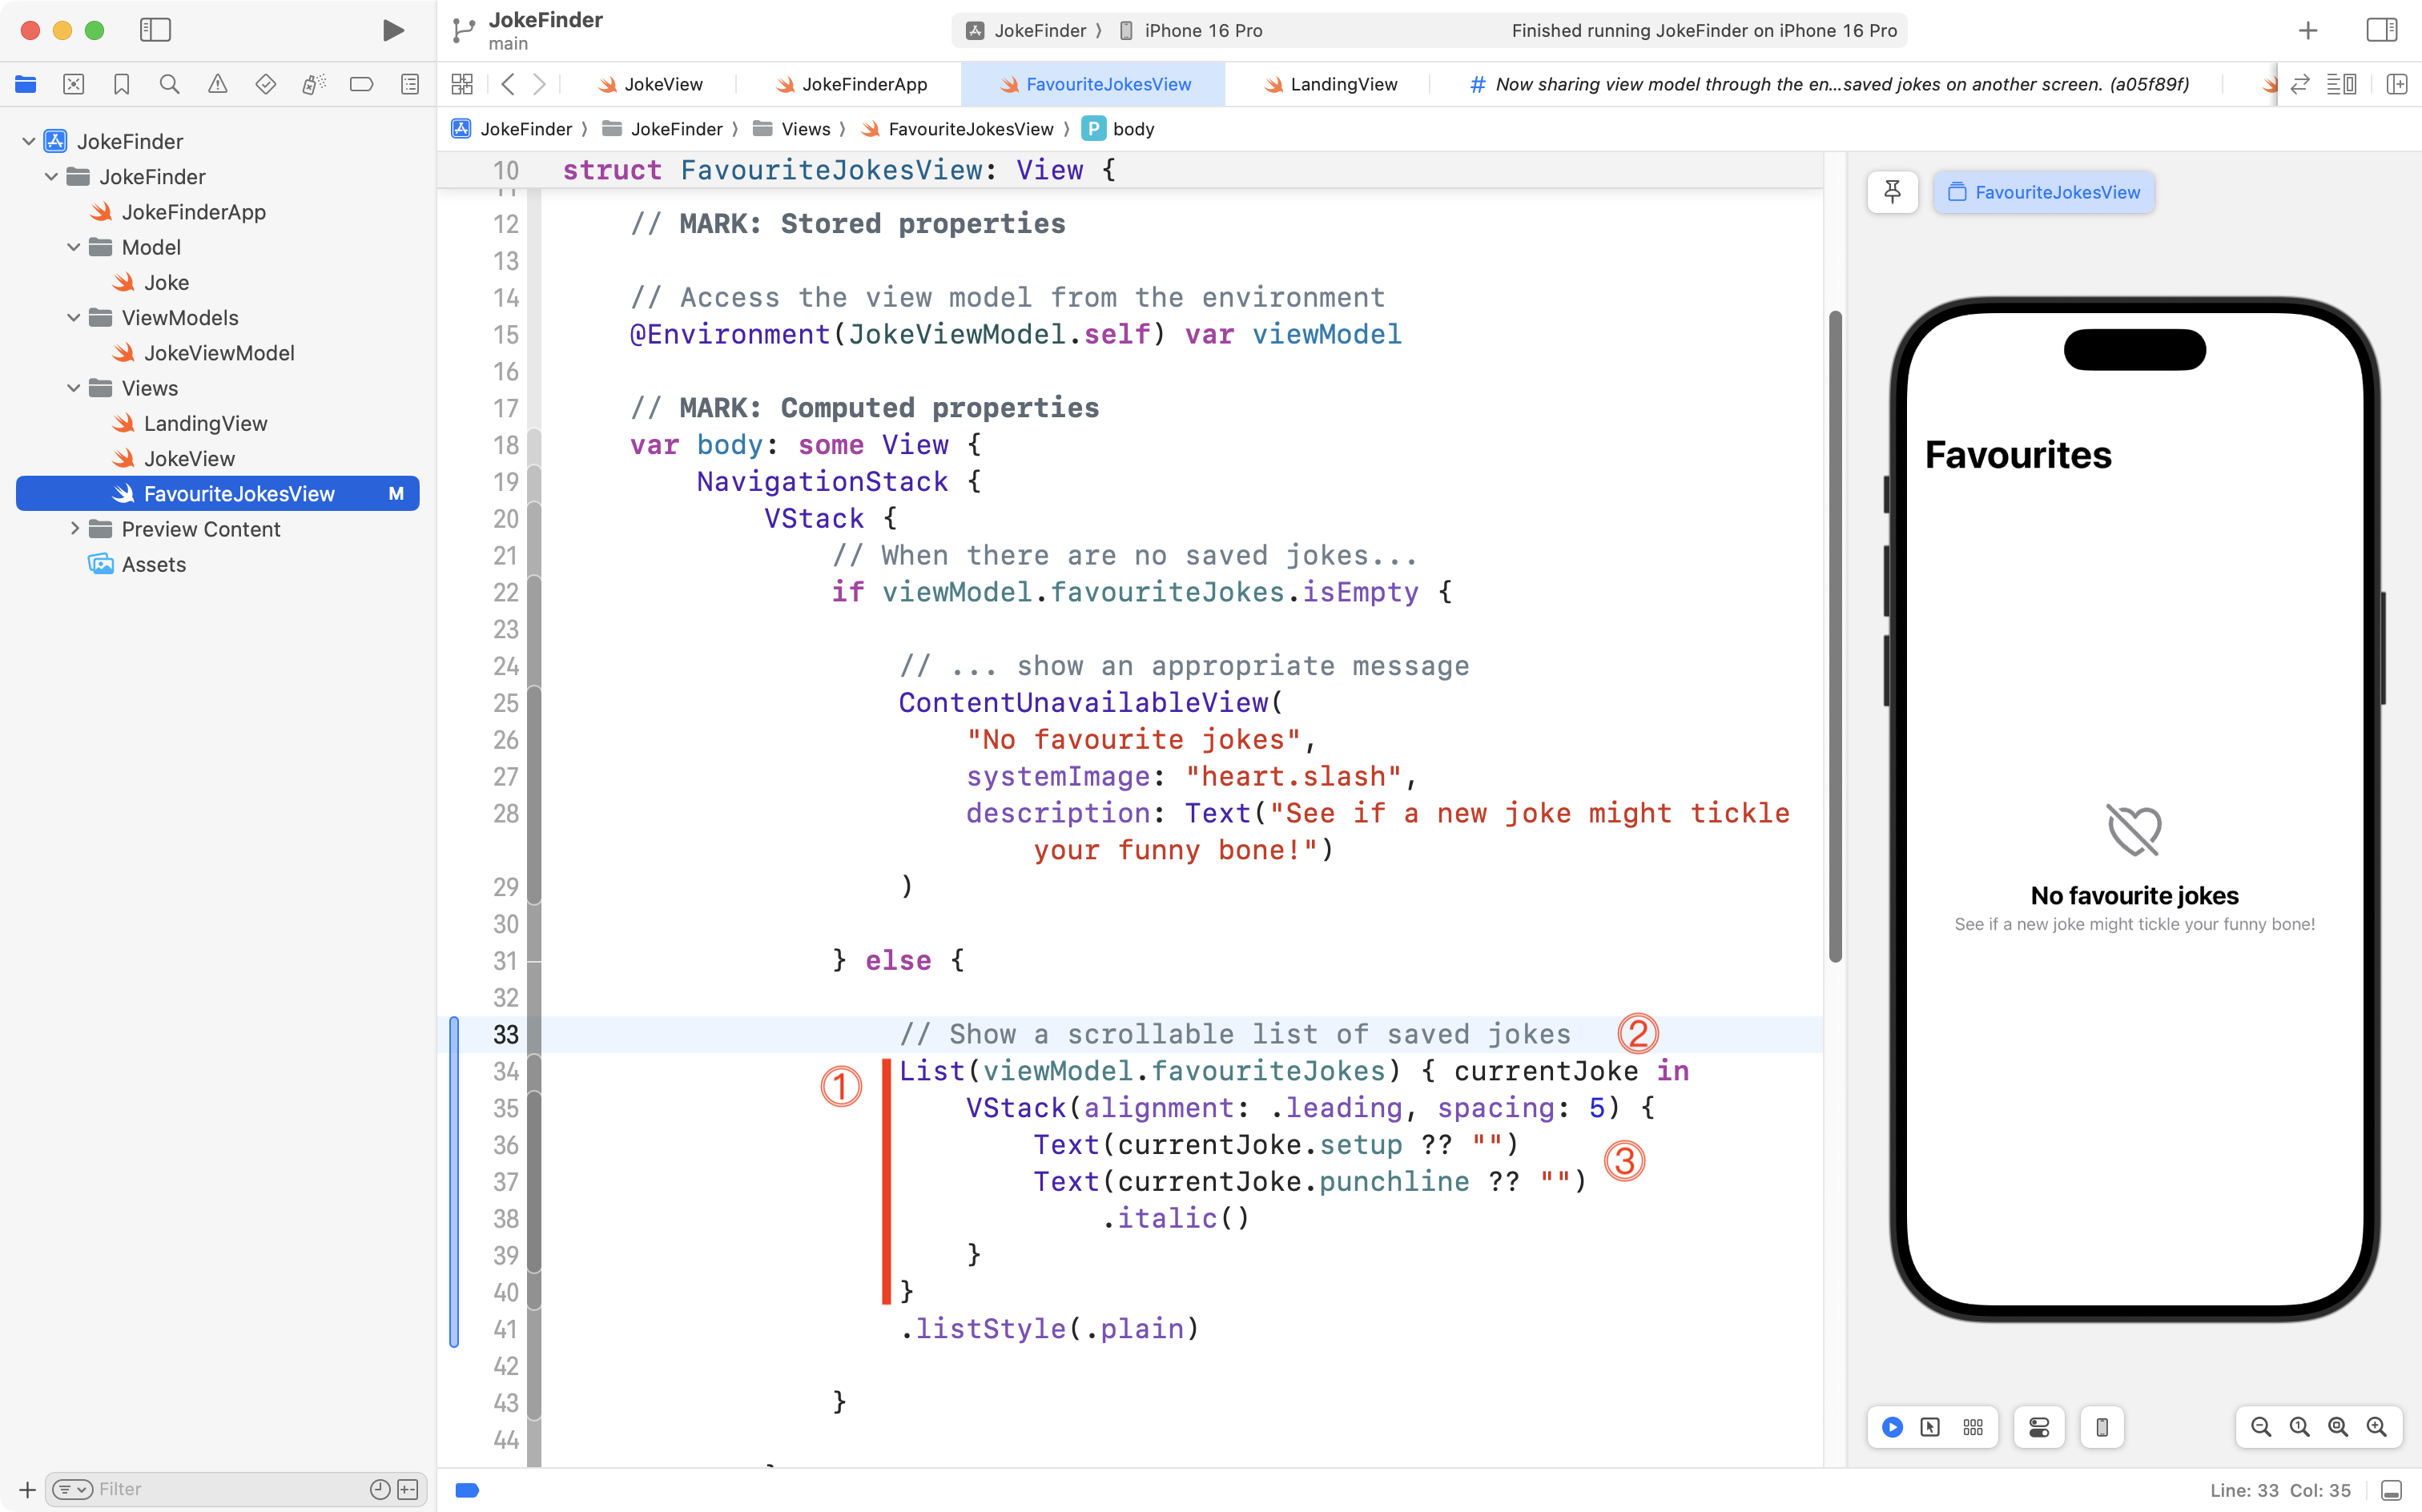
Let’s examine that code.
DISCUSSION
- We iterate over the array
favouriteJokesfrom the view model.- Each element of that array is made available, one by one, using the
currentJokereference.- We use the
currentJokereference to show the setup and then the punchline. We italicize the punchline so it stands out a bit from the joke’s setup. Finally, we make use of the nil coalescing operator to provide a default value of an empty string, sincesetupandpunchlineboth have a data type of optionalString, from ourJokemodel structure.
If you try out the app again, you should be able to review your list of saved jokes:
Please now commit and push your work with this message:
Now showing favourite jokes in a scrollable list.
Custom colors
Our app is coming together, but it’s looking rather plain.
We can fix this by making judicious use of color.
Let’s create a custom color, then use that as the background layer for FavouriteJokesView.
Here is a video showing how to create the custom color – it’s a bit hard to describe this in writing – please make your own custom color after watching this brief video:
In order in that video, we:
- create a new custom color named
ForFavouriteJokes - we open the Attributes inspector, and then the Color panel
- we create a new color for light mode / light appearance
- we copy the existing color to the dark mode / dark appearance color well
- we reduce the brightness of the color a bit, so it is appropriate for use in dark mode
Next, navigate back to the FavouriteJokesView code:
Fold up the VStack:

Add an empty ZStack above the VStack:
Cut and then paste the VStack so it is inside the ZStack – if you fold up the VStack afterwards, it will look like this:
Then, add the following code:
// Background layer
Color.forFavouriteJokes
	.ignoresSafeArea()

// Foreground layer
… above the VStack, but inside the ZStack:
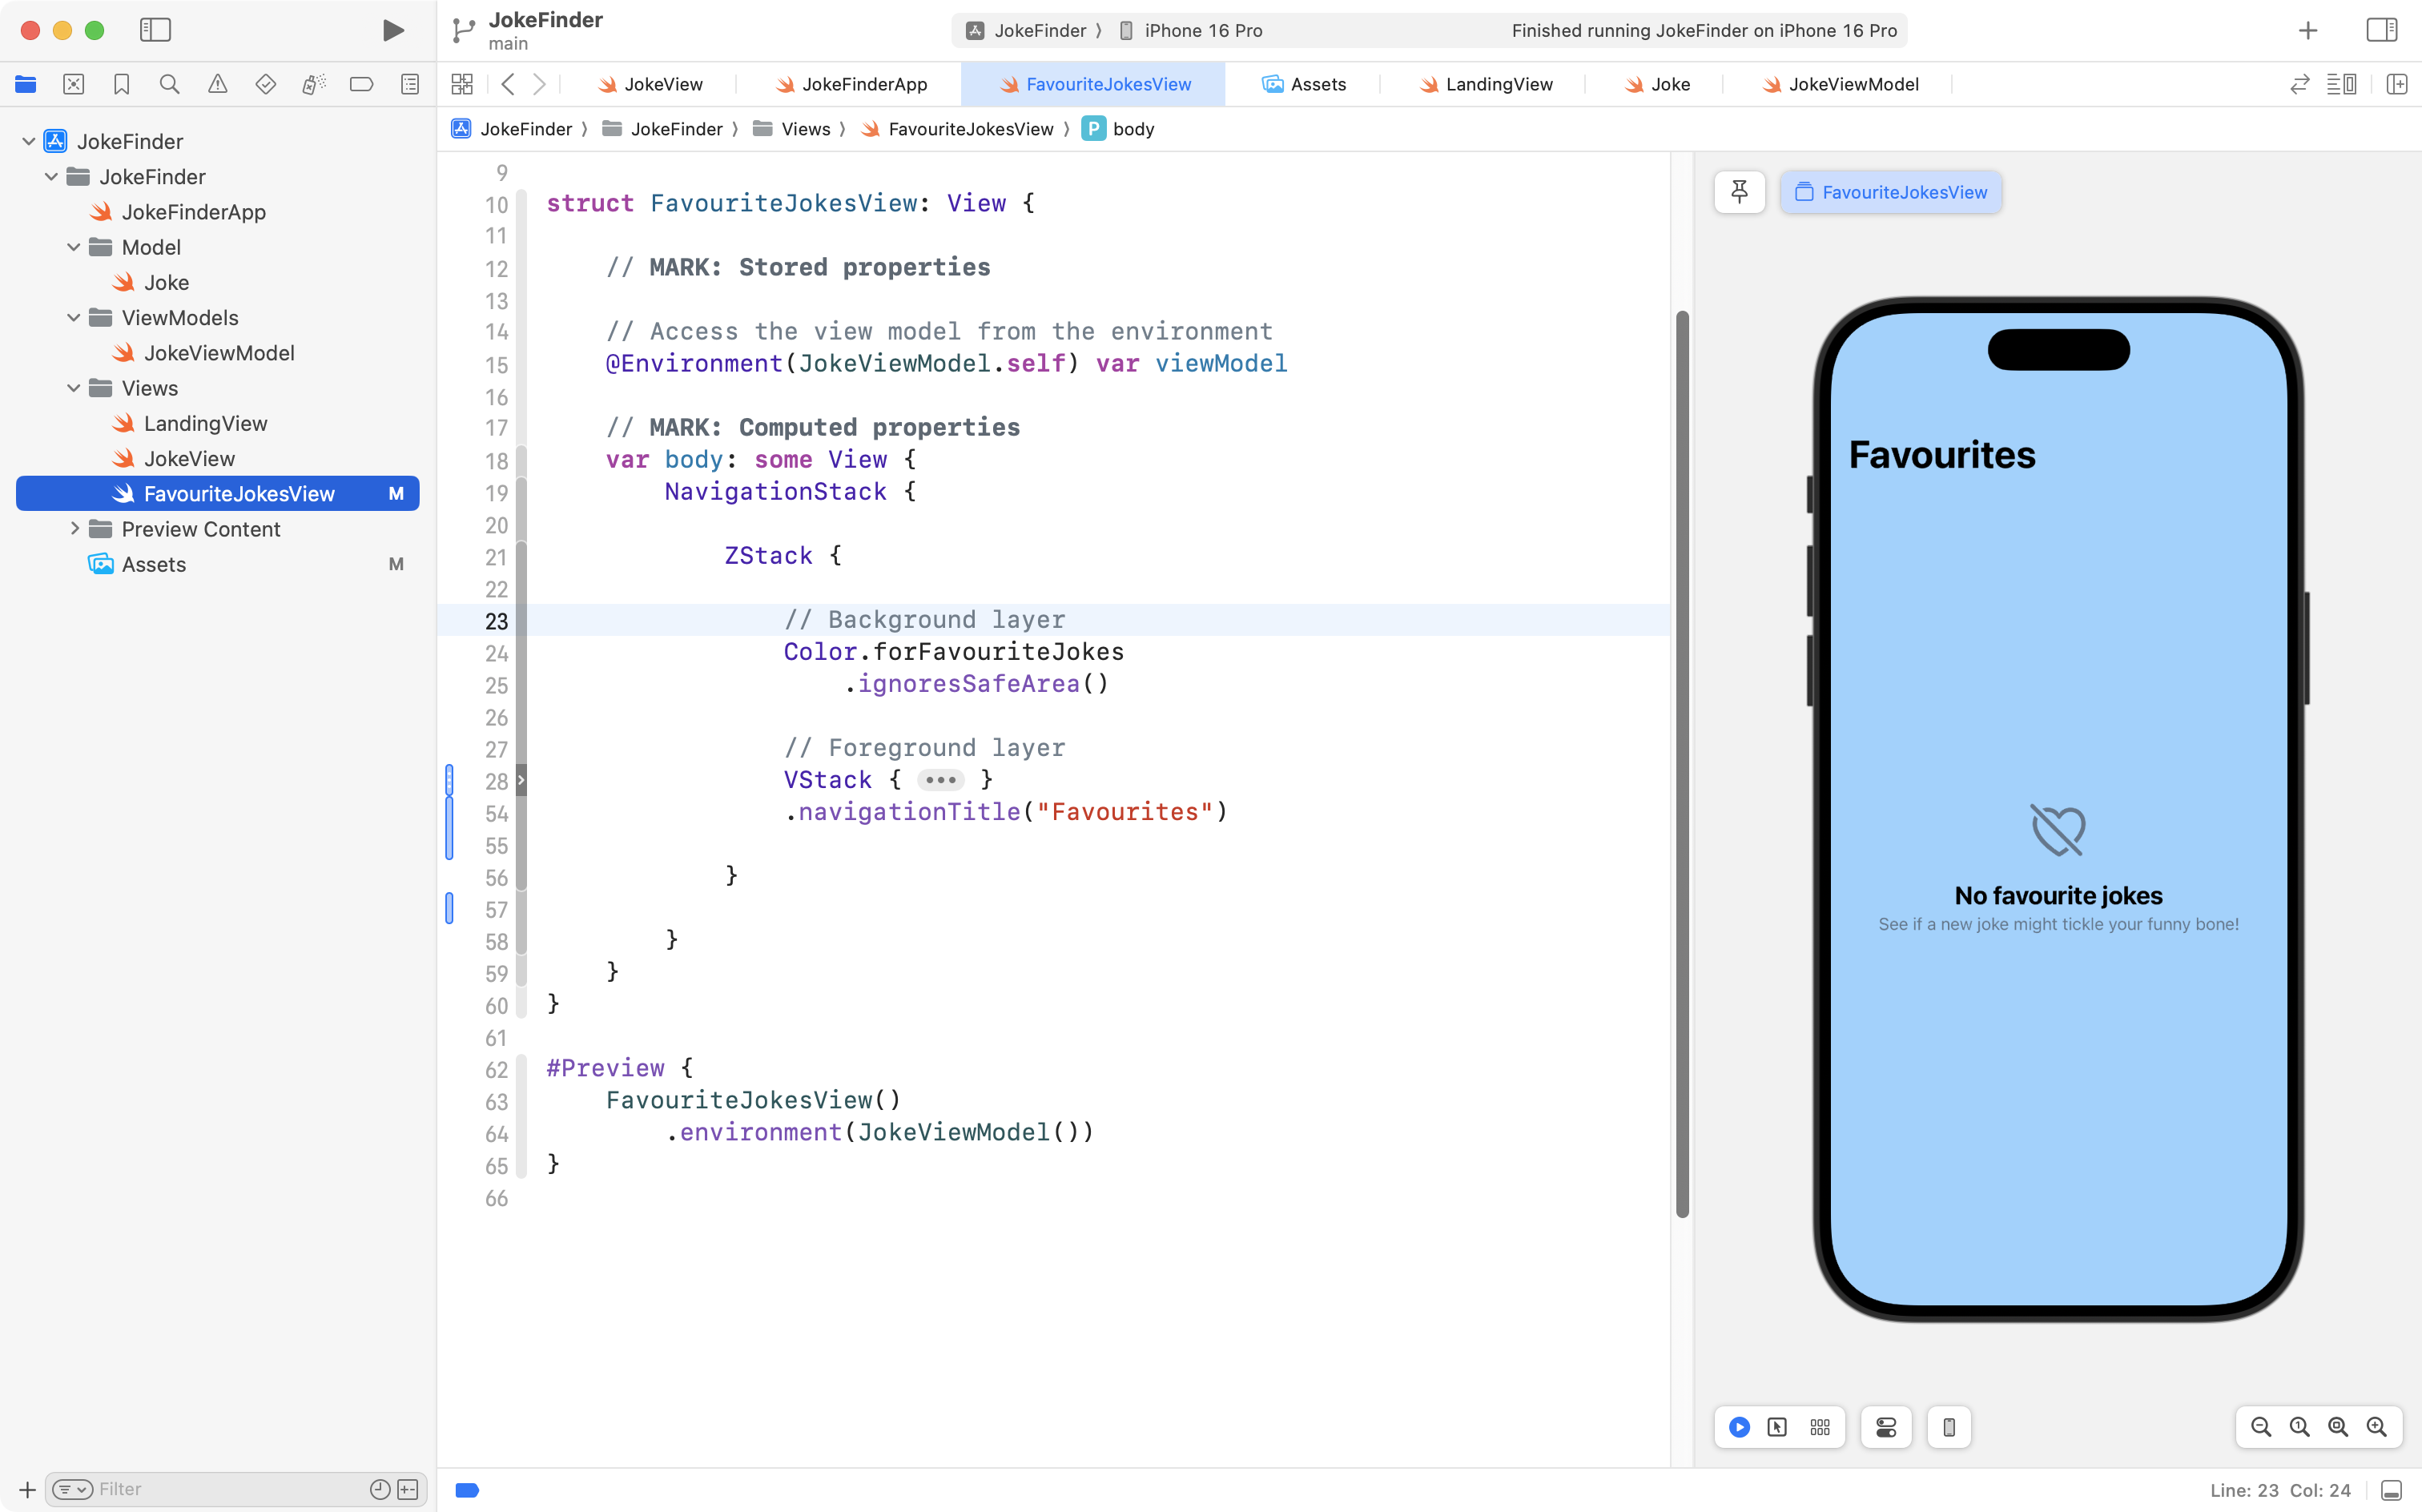
Since Color structures are “greedy” or push-out views, and since we added the ignoresSafeArea view modifier, the background layer of the ZStack pushes out to the edges of the phone’s screen.
The foreground layer is the VStack which contains the earlier code that we wrote.
Commit and push your work now with this message:
Created a custom color to use with the favourite jokes view.
Deleting jokes
After saving a joke, we may find later on that when we try it out on friends, it’s not landing well:
As such, we may want to delete a saved joke from our list of favourites.
To do this, we need to make one adjustment to our view model – remember, the view model’s job is to handle all tasks related to the state of data within our app. Since we are deleting data, the logic to do that should go into the view model.
Then, we need to invoke the new code that we add to the view model from the view – so that the user can actually delete a saved joke.
First, navigate to JokeViewModel:
With code folded up, it’s pretty simple right now.
There are stored properties to hold the current joke and the list of favourite jokes.
There is an initializer that fetches a new joke when the view model is created.
Finally, there are functions to save a joke, and to fetch another joke from the endpoint.
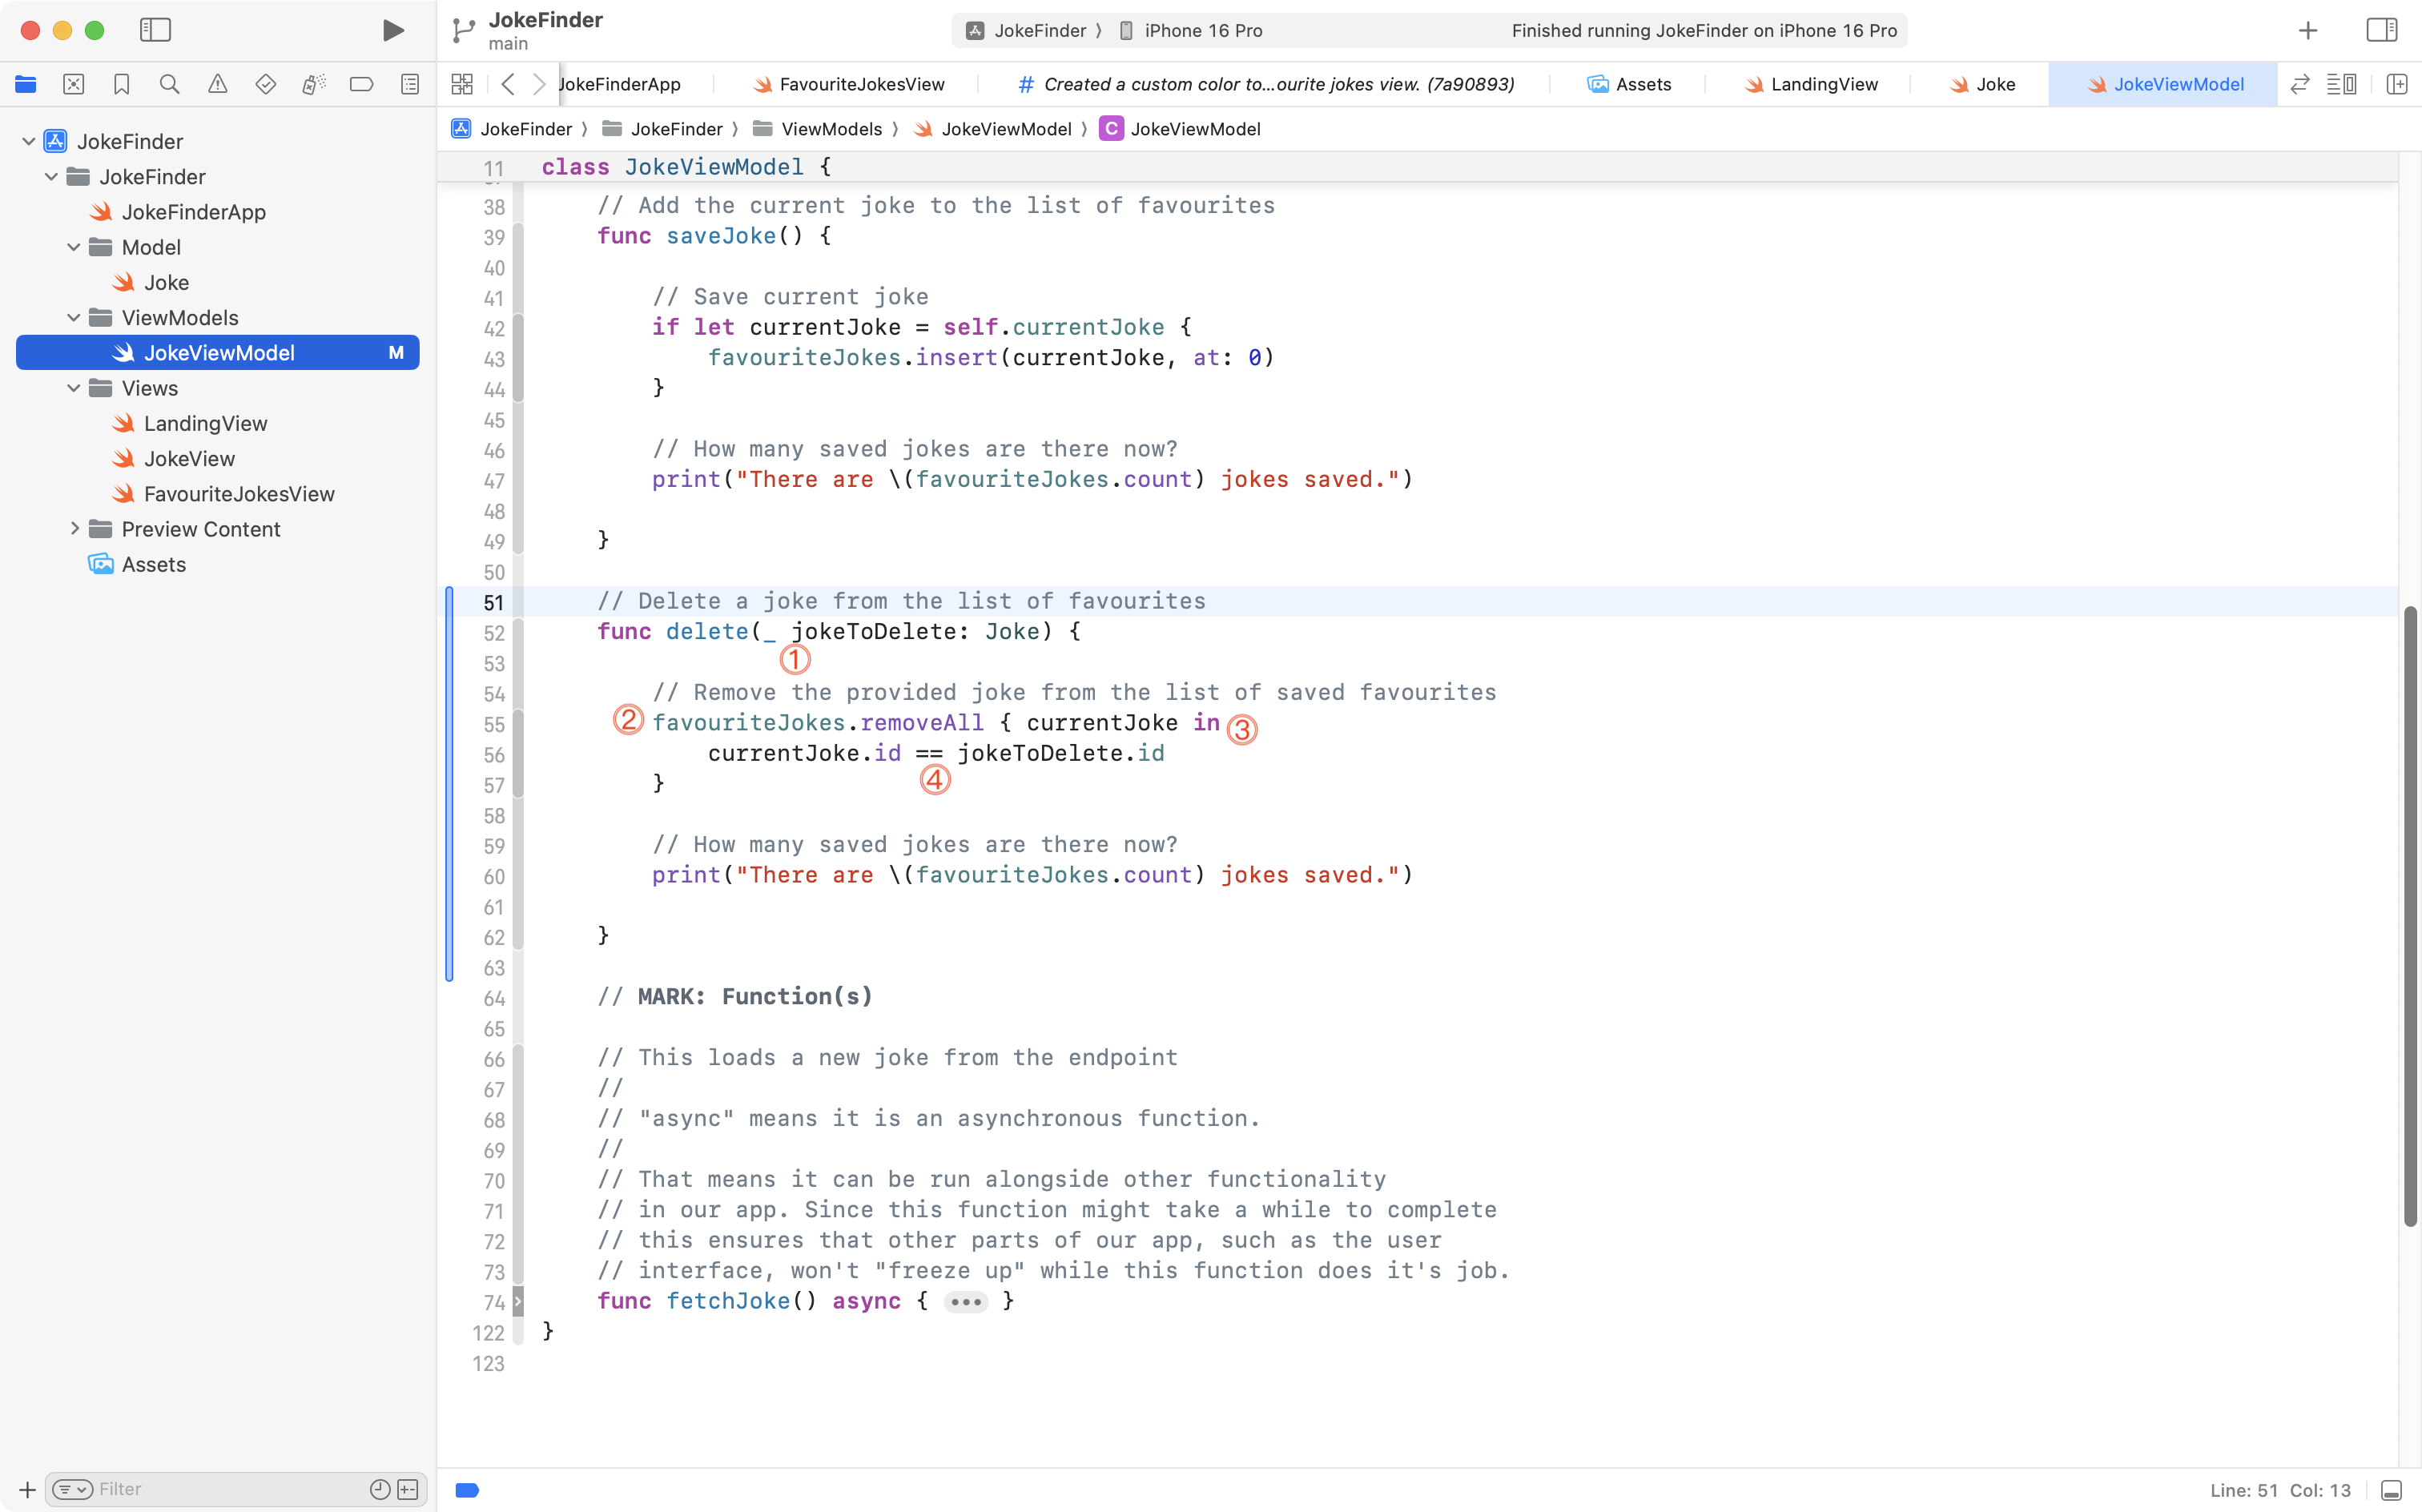
Copy this code into your clipboard:
// Delete a joke from the list of favourites
func delete(_ jokeToDelete: Joke) {

	// Remove the provided joke from the list of saved favourites
	favouriteJokes.removeAll { currentJoke in
		currentJoke.id == jokeToDelete.id
	}

	// How many saved jokes are there now?
	print("There are \(favouriteJokes.count) jokes saved.")

}
… and add it below the function that saves a joke, like this:
Let’s examine that code.
DISCUSSION
- The function is named
deleteand it needs one piece of information – what joke is meant to be deleted. The function receives that information in thejokeToDeleteargument.- Arrays in Swift come with a built-in function named
removeAll. This function accepts a closure – a block of code – that must provide a condition that will evaluate totrueto indicate what element(s) should be removed from the array.removeAlliterates over the elements of the array, and as it does so, we place each element of the array, temporarily, in a reference namedcurrentJoke.- As we iterate over the array’s elements, we compare each joke’s unique identifier to the unique identifier of the joke we want to delete. When these match, the condition in the block of code evaluates to
trueand the matching element is removed from the array.
Now that we have code in the view model to delete a joke, we need a way to invoke, or call it, from the view.
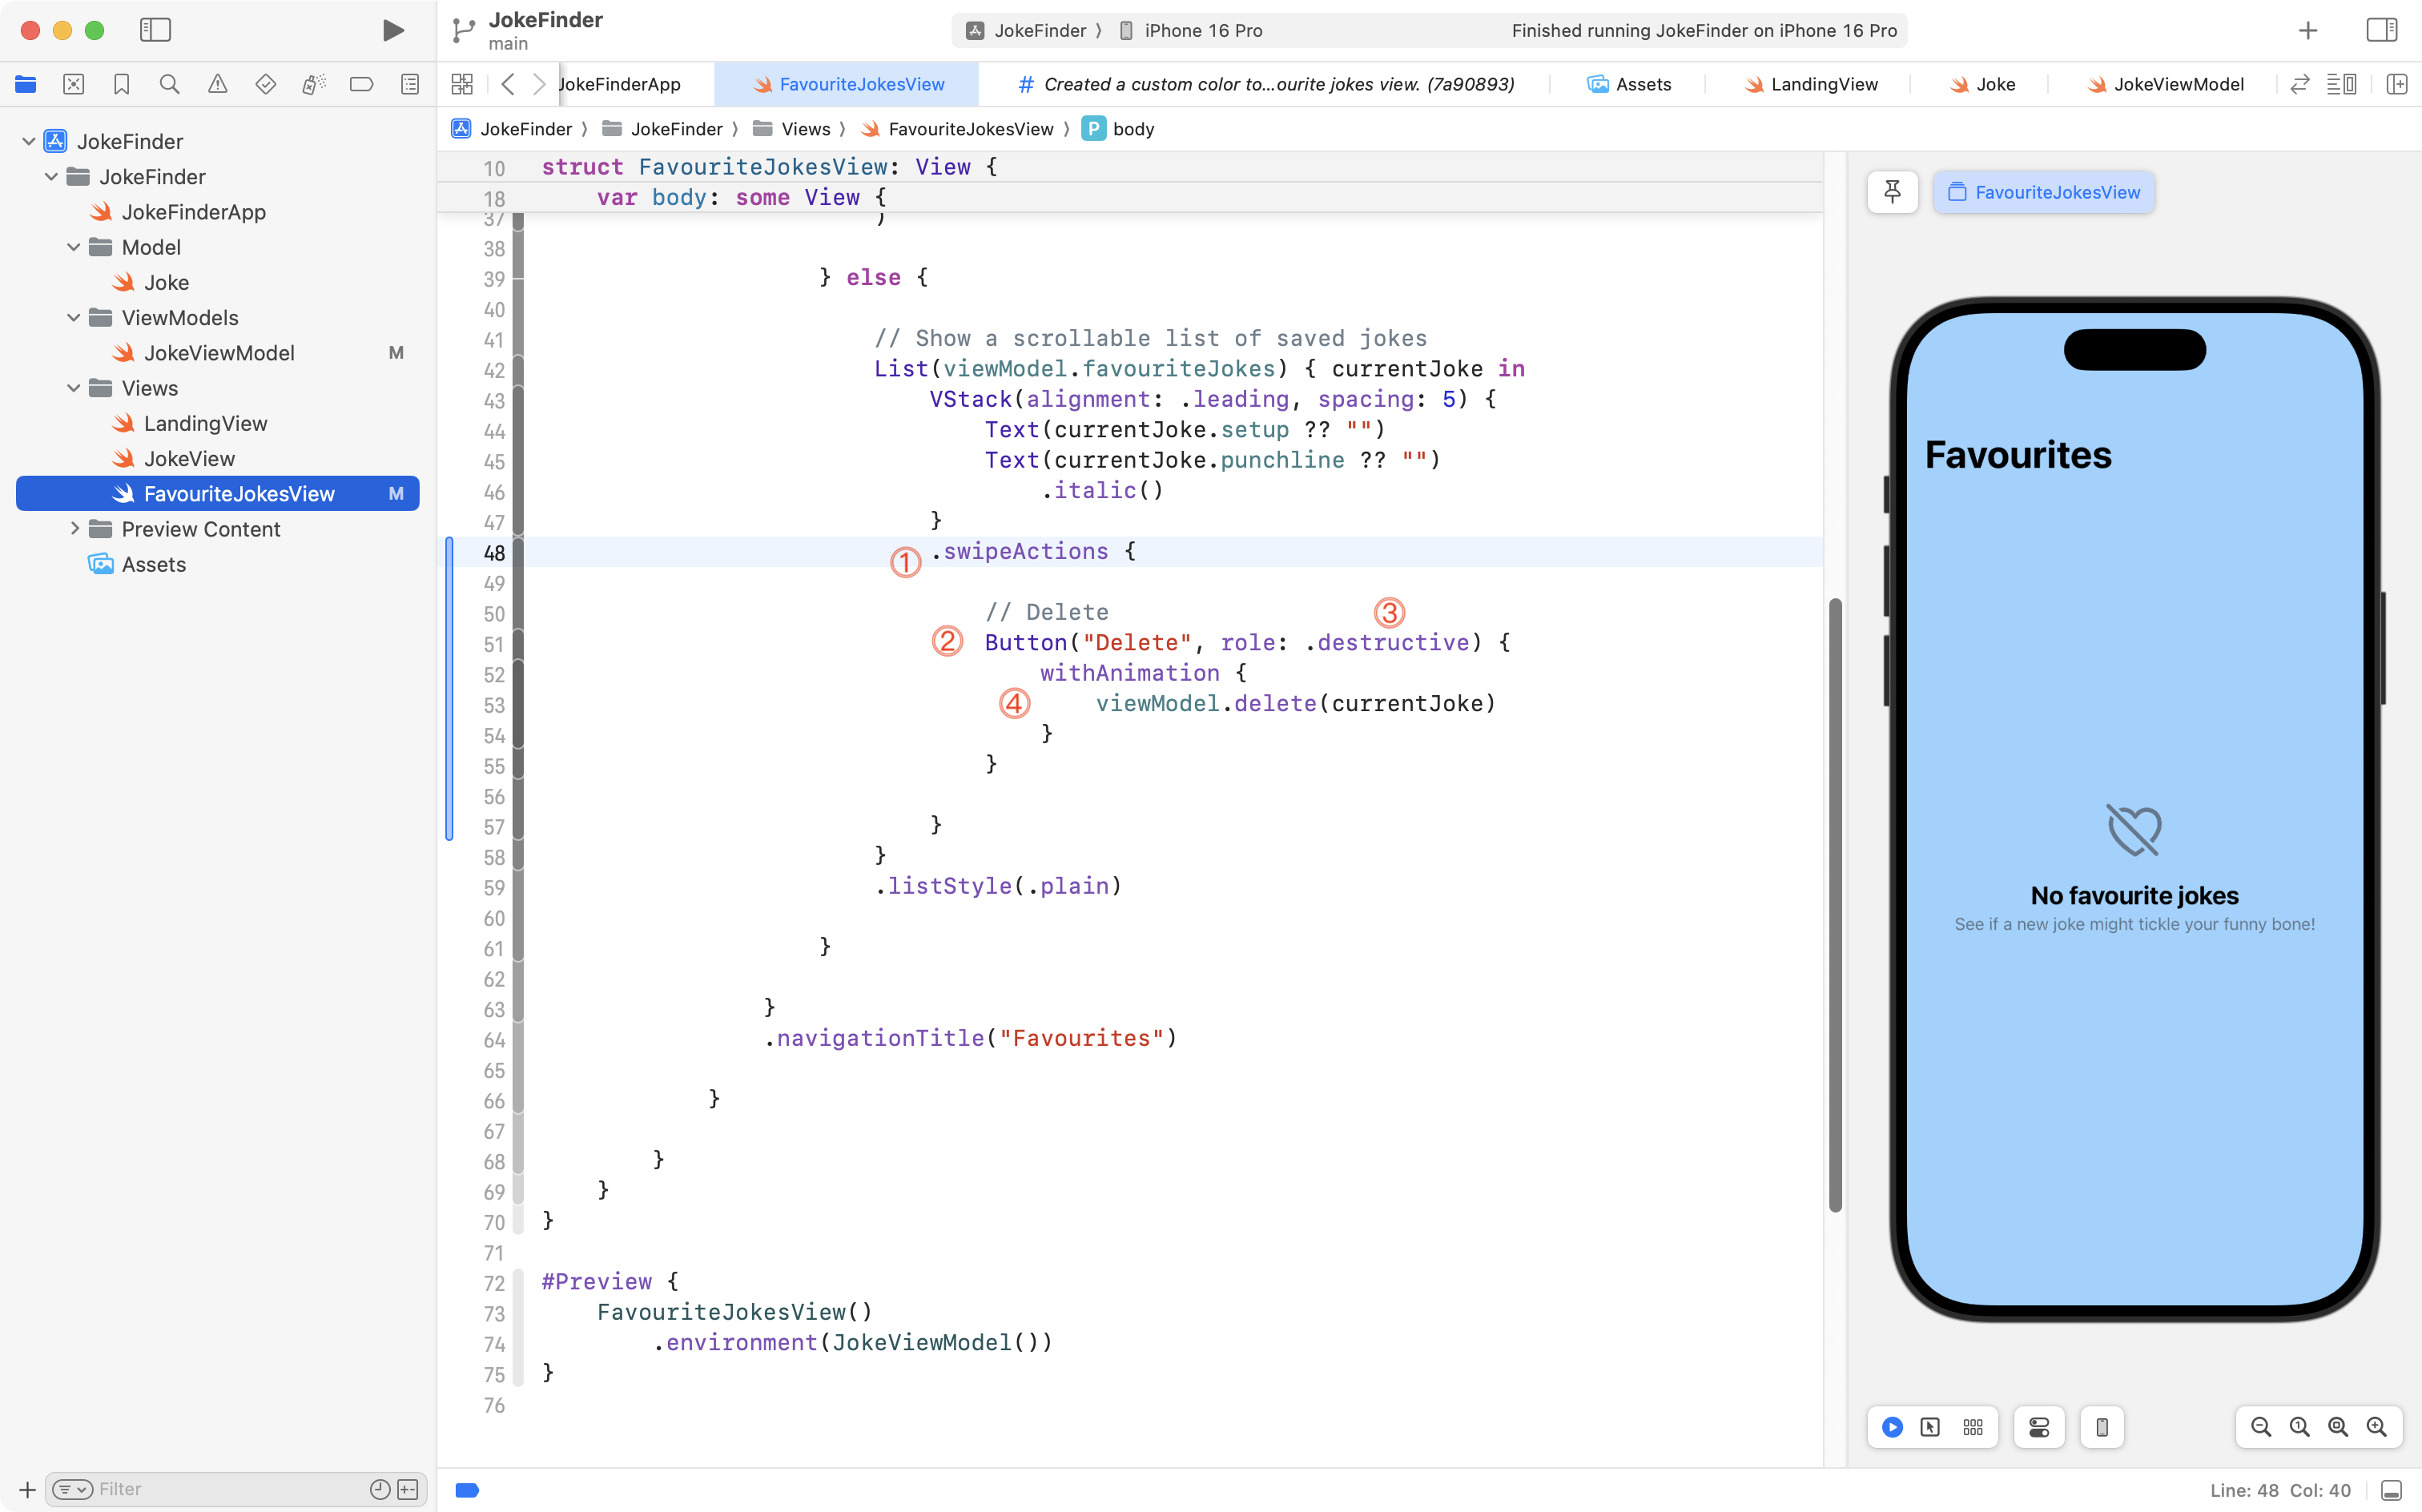
Navigate to FavouriteJokesView and find the VStack inside the List structure:
Copy this code into your clipboard:
.swipeActions {

	// Delete
	Button("Delete", role: .destructive) {
		withAnimation {
			viewModel.delete(currentJoke)
		}
	}

}
… then attach it to the VStack, like this:
Let’s review that code.
DISCUSSION
- The
.swipeActionsview modifier makes it possible to swipe on a list item to take an action of some kind. You will see this demonstrated in a video in a moment.- We add a
Buttoninside the.swipeActionsview modifier.- This button is labeled
Deleteand by providing theroleparameter with an argument of.destructiveSwiftUI will know to make the button red – this is a standard way for iOS apps to communicate that taking an action will result in data being removed.- The block of code run when the button is pressed invokes the
deletefunction that we just added to the view model. We pass in thecurrentJoketo indicate that when it is swiped, it is the one that should be deleted. By wrapping this action inwithAnimationSwiftUI will animate the change in state when an item is removed from the list.
Try out the app. You should see that it works like this now:
Please commit and push your changes with this message:
Can now delete saved jokes.
Add an app icon
We’re getting close to having a complete app. As you create apps that you find useful, it’s nice to add a bit of polish.
Let’s take a break from writing code, and make an app icon!
Download and install Bakery to your computer. This is an app written by Jordi Bruin, who started out as a graphic designer, and then got into writing apps that solve simple problems for others. If he sounds familiar, that’s because he also wrote Cibo, the visual menu translation app that we discussed at the start of the school year!
Here is a video showing how you can create an app icon. You’ll need to use drag and drop to get the icon into Xcode, so be sure you are not running it in full screen mode.
Have a look, then try doing the same steps:
Notice how Bakery takes care of making app icons in all the various required sizes and formats to be used with different Apple devices. This is a huge time saver!
To see the app icon, you’ll need to run your app either in the full Simulator, or on a device.
Please now commit and push your work with this message:
Added an app icon.
Sharing a joke
Next we’ll make it possible to share a joke with a friend. This is done using the ShareLink structure provided by Apple as part of SwiftUI.
There are multiple ways to use ShareLink but we will use it to share the text of a joke.
First, to make the share sheet show a nice icon, we need an image to show within the share sheet.
We can use one of the images from our app icon.
Please watch this video to see how this is done:
Next we will make a small addition to the model for a given joke – navigate to the Joke structure:
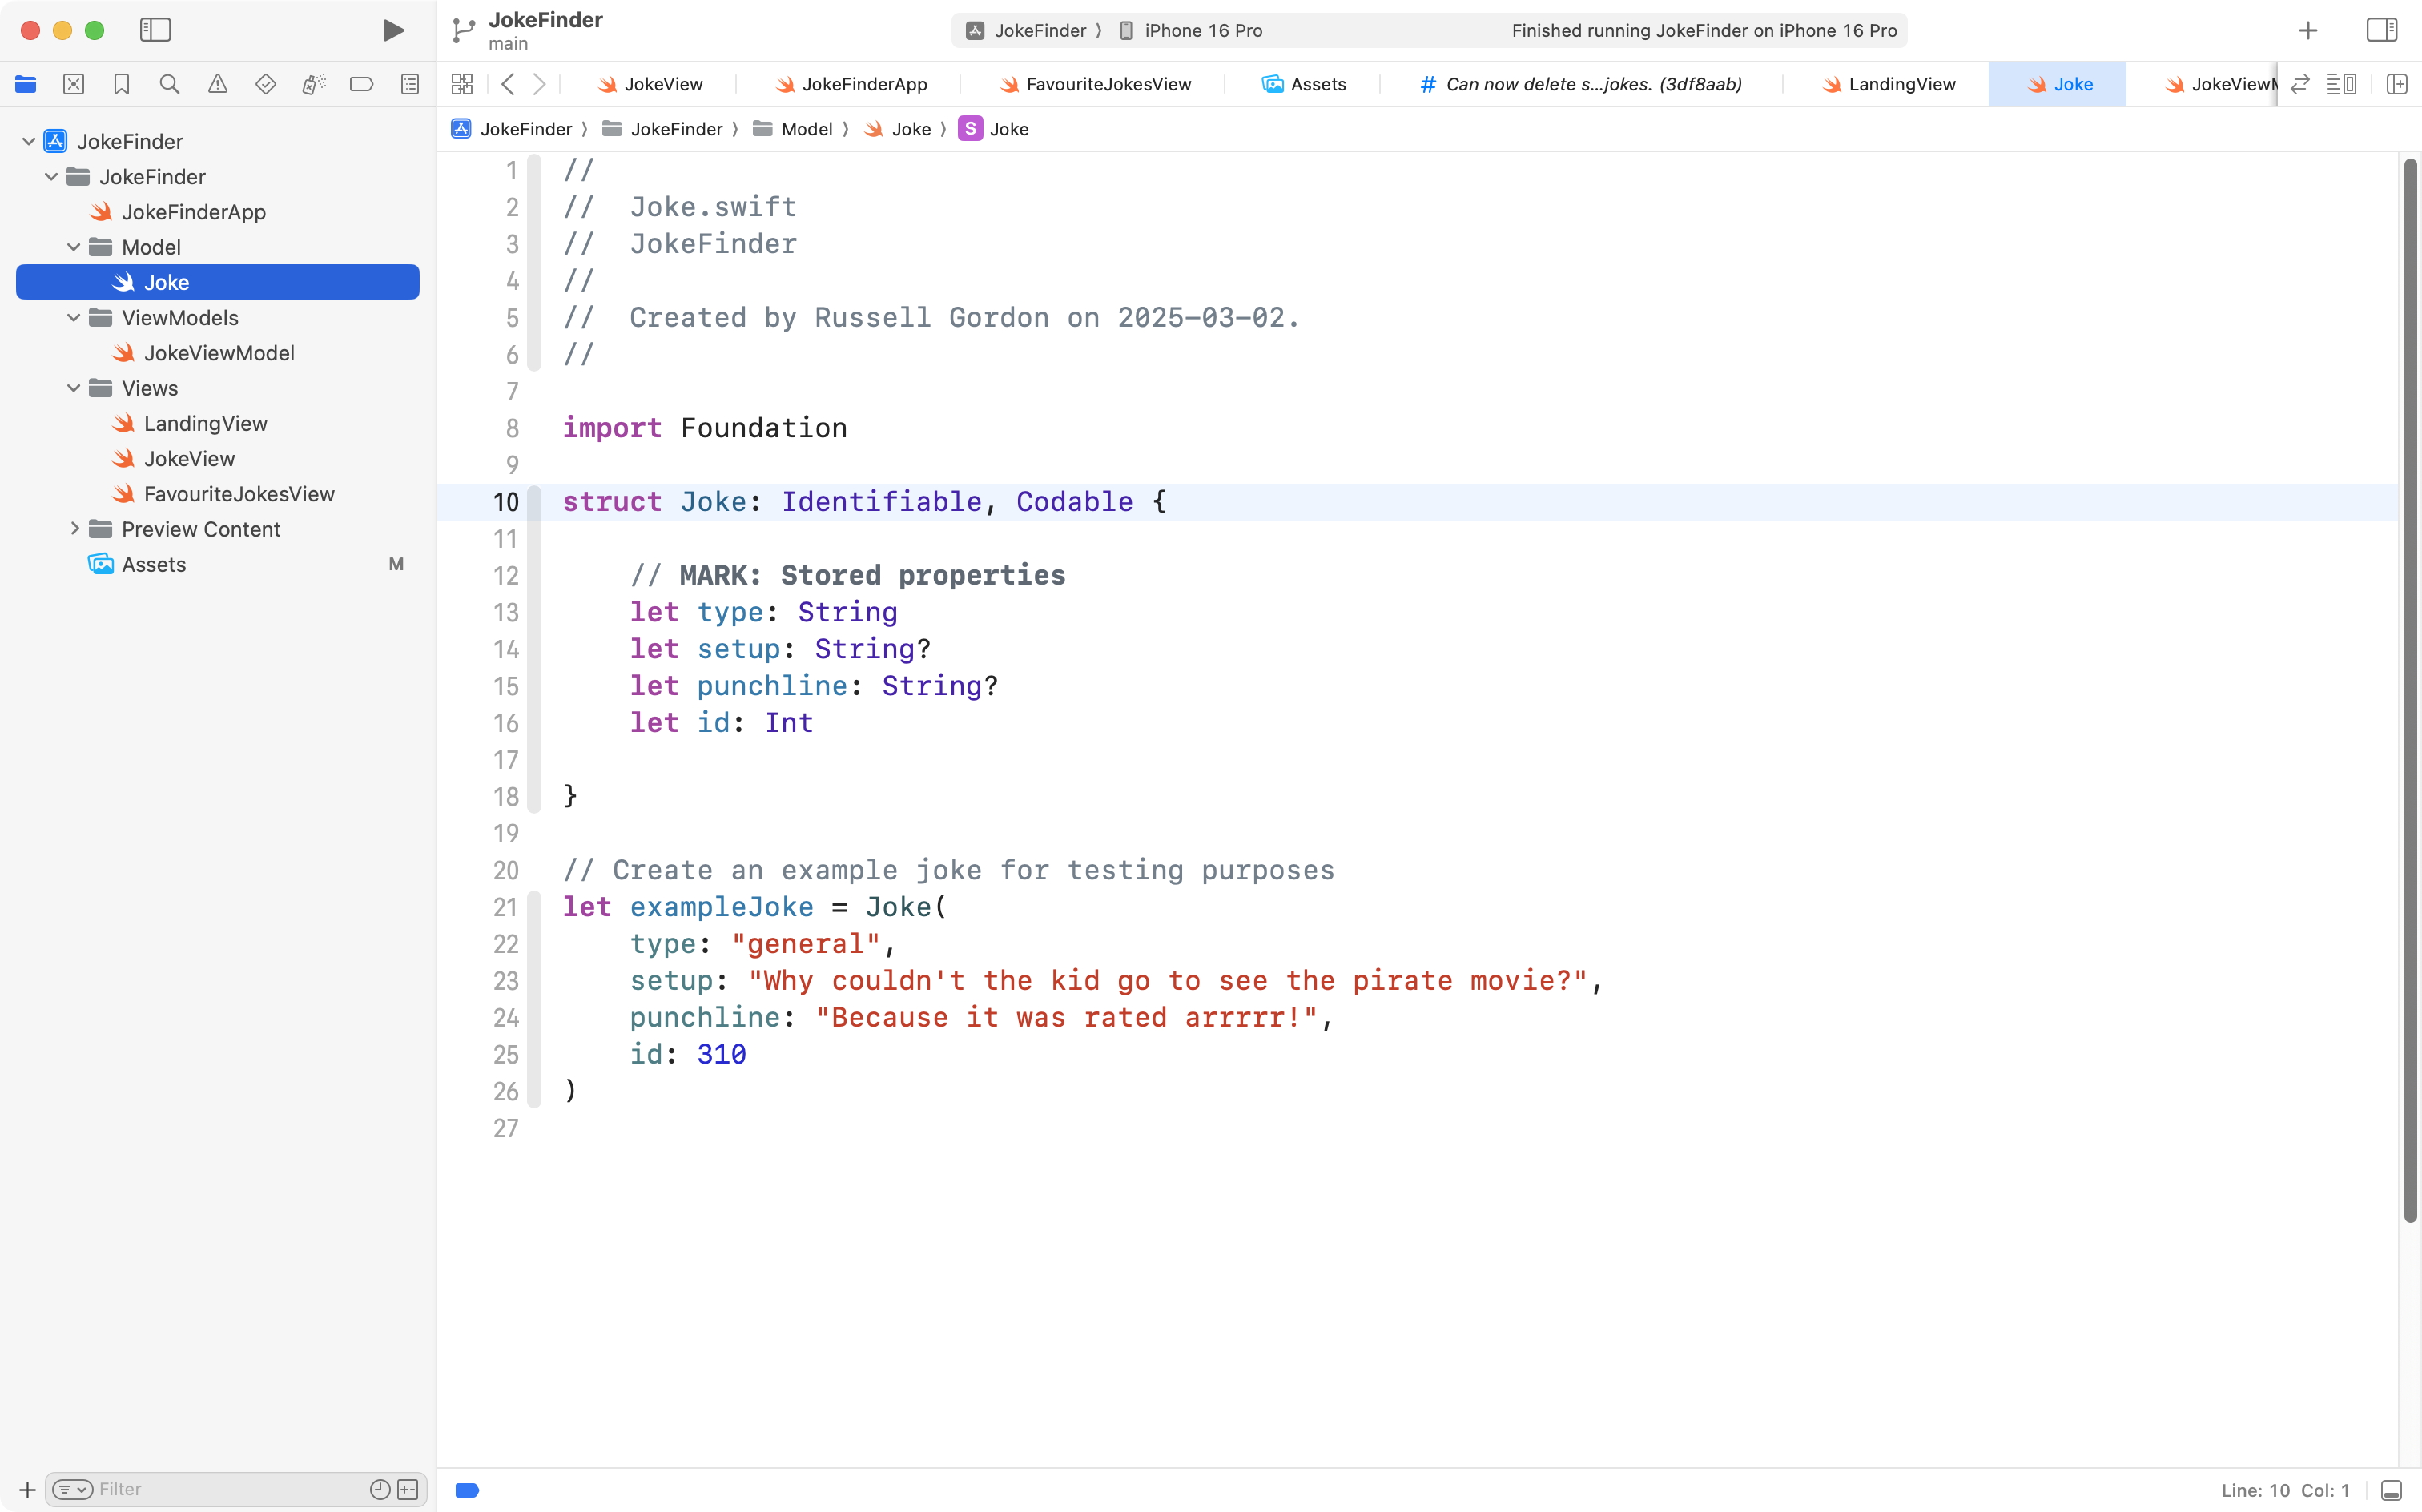
Copy this code into your clipboard:
// MARK: Computed properties

// Return setup and punchline (for sharing via text message)
var setupAndPunchline: String {

	if let setup = self.setup, let punchline = self.punchline {
		return "\(setup)\n\n\(punchline)"
	} else {
		return ""
	}

}
… and add it to the Joke structure like this:
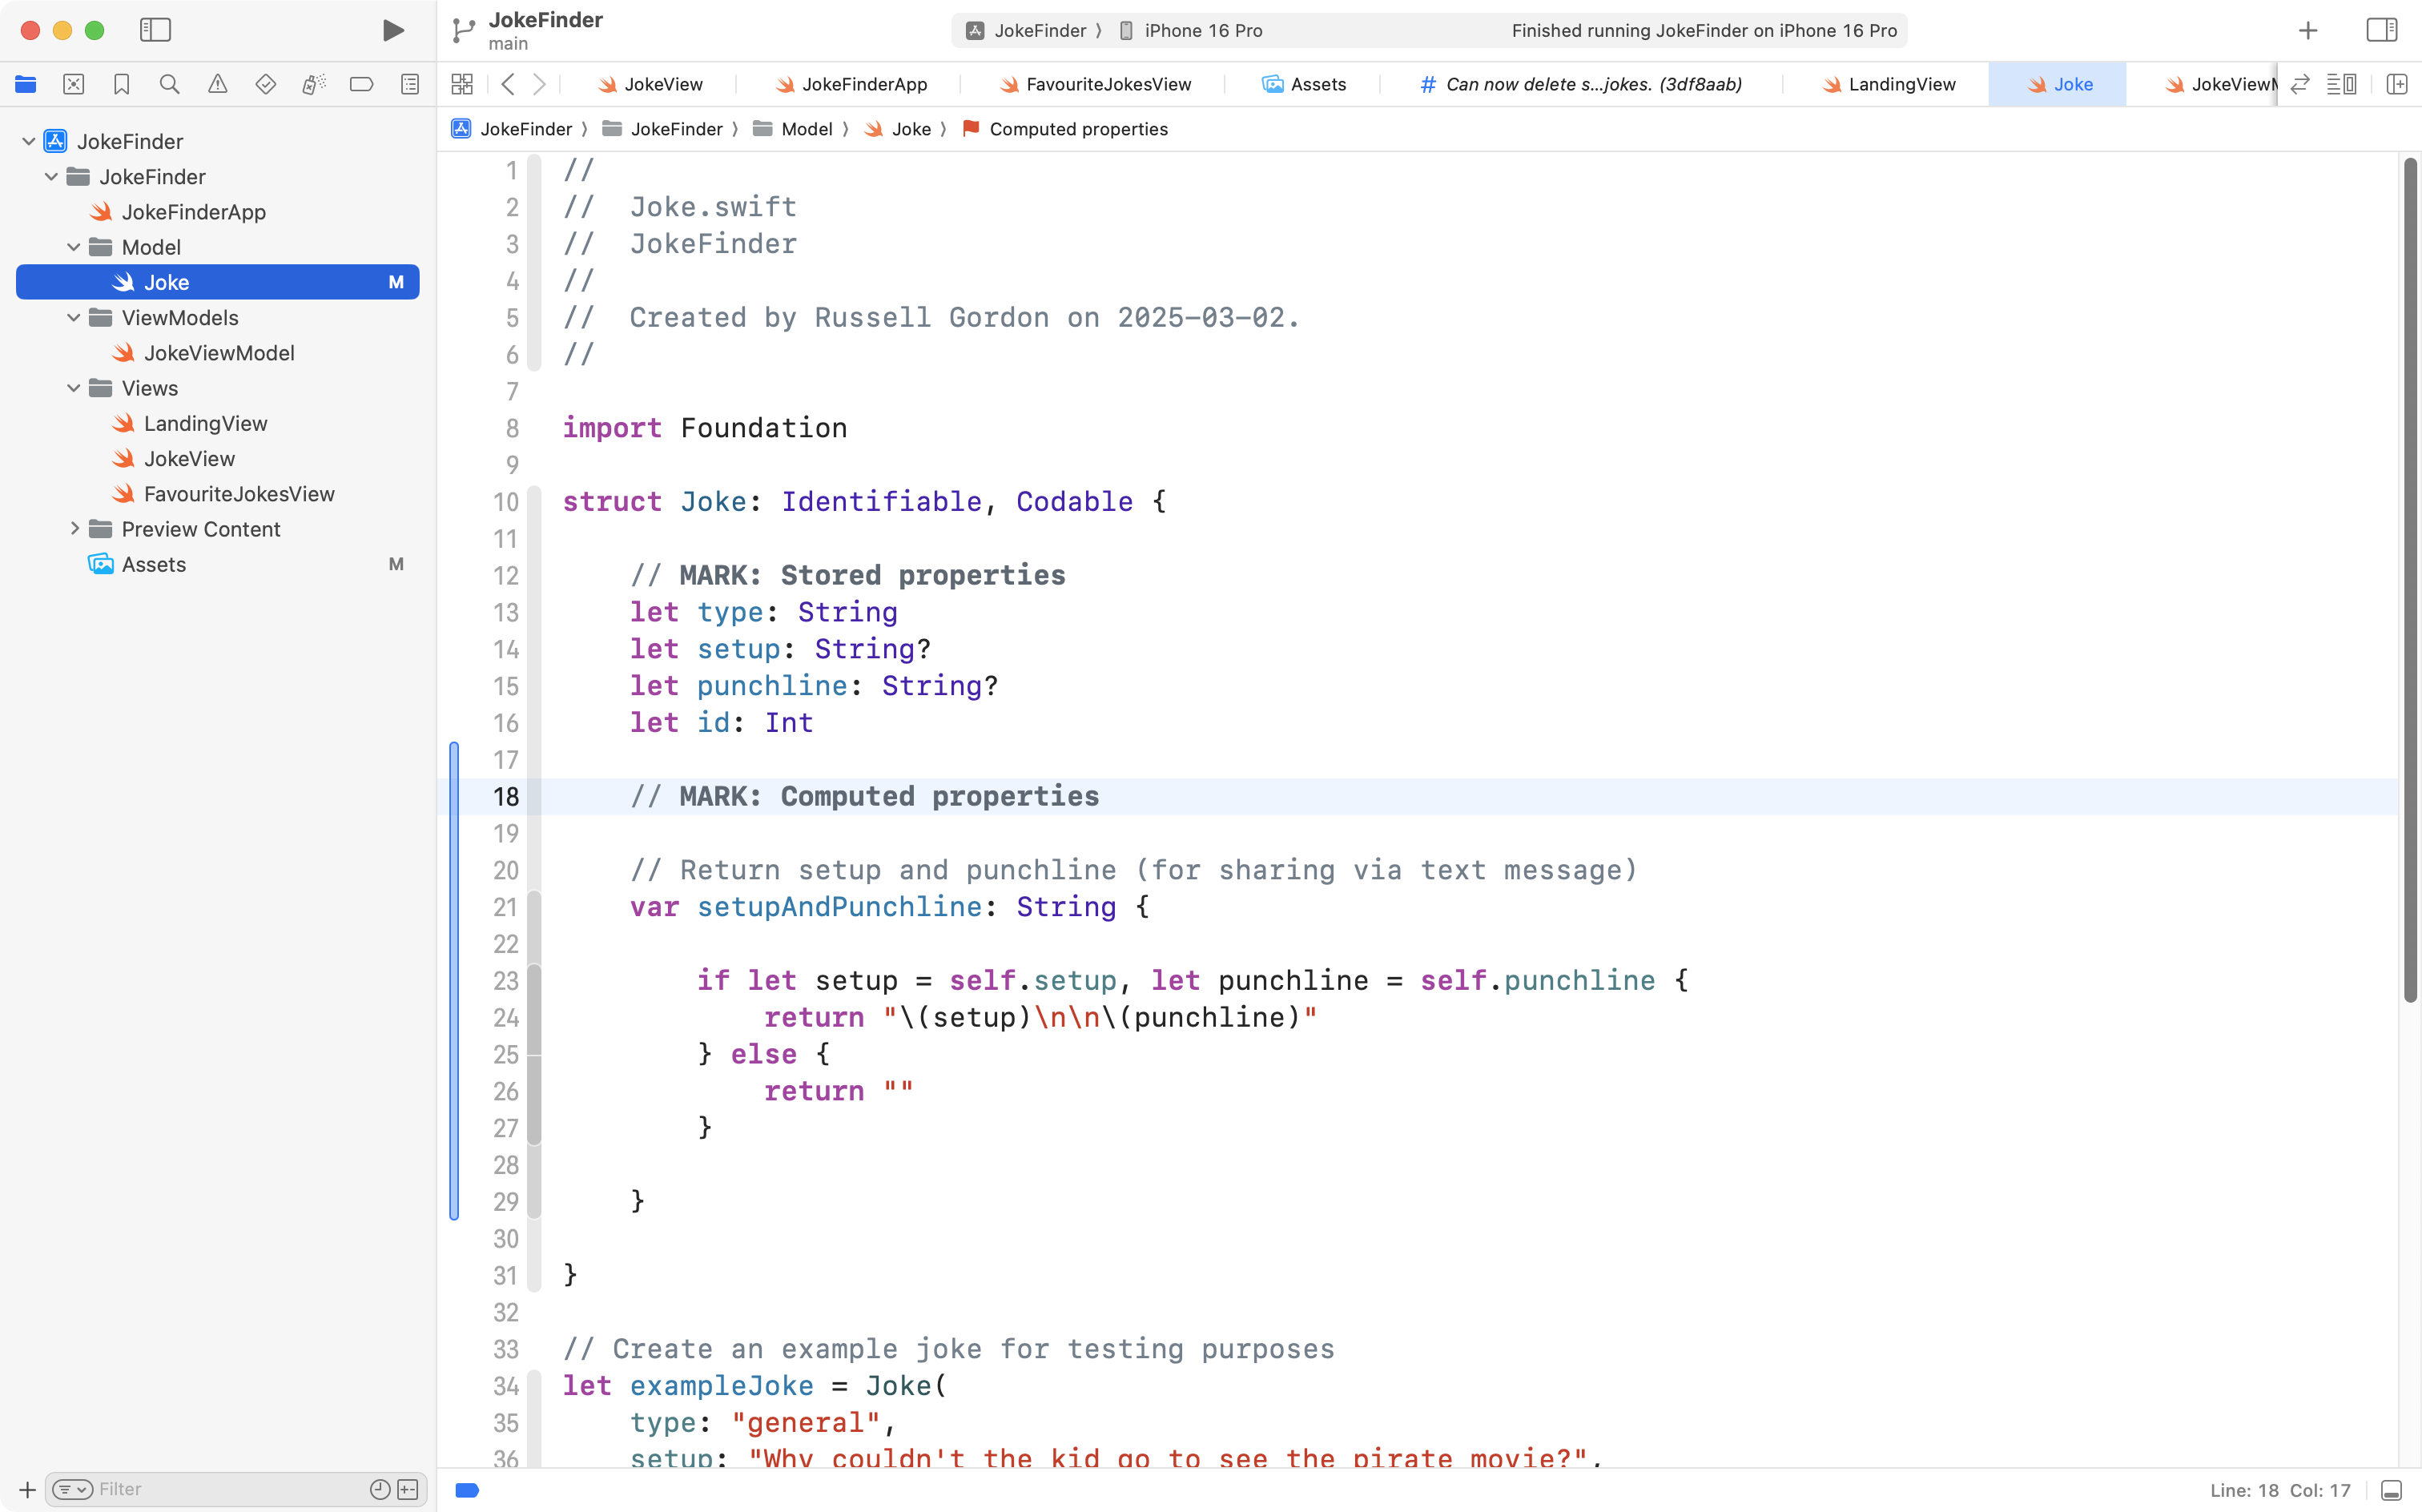
The new computed property named setupAndPunchline combine the existing stored properties named setup and punchline into a single string, which we will use with the share link in a moment.
Navigate to FavouriteJokesView and find the .swipeActions view modifier:

Copy this code into your clipboard:
// Share
ShareLink(
	"Share",
	item: currentJoke.setupAndPunchline,
	preview: SharePreview(
		"Share Joke",
		image: Image("ShareJokeImage")
	)
)
Now, after the first button (that allows jokes to be deleted), add that code:
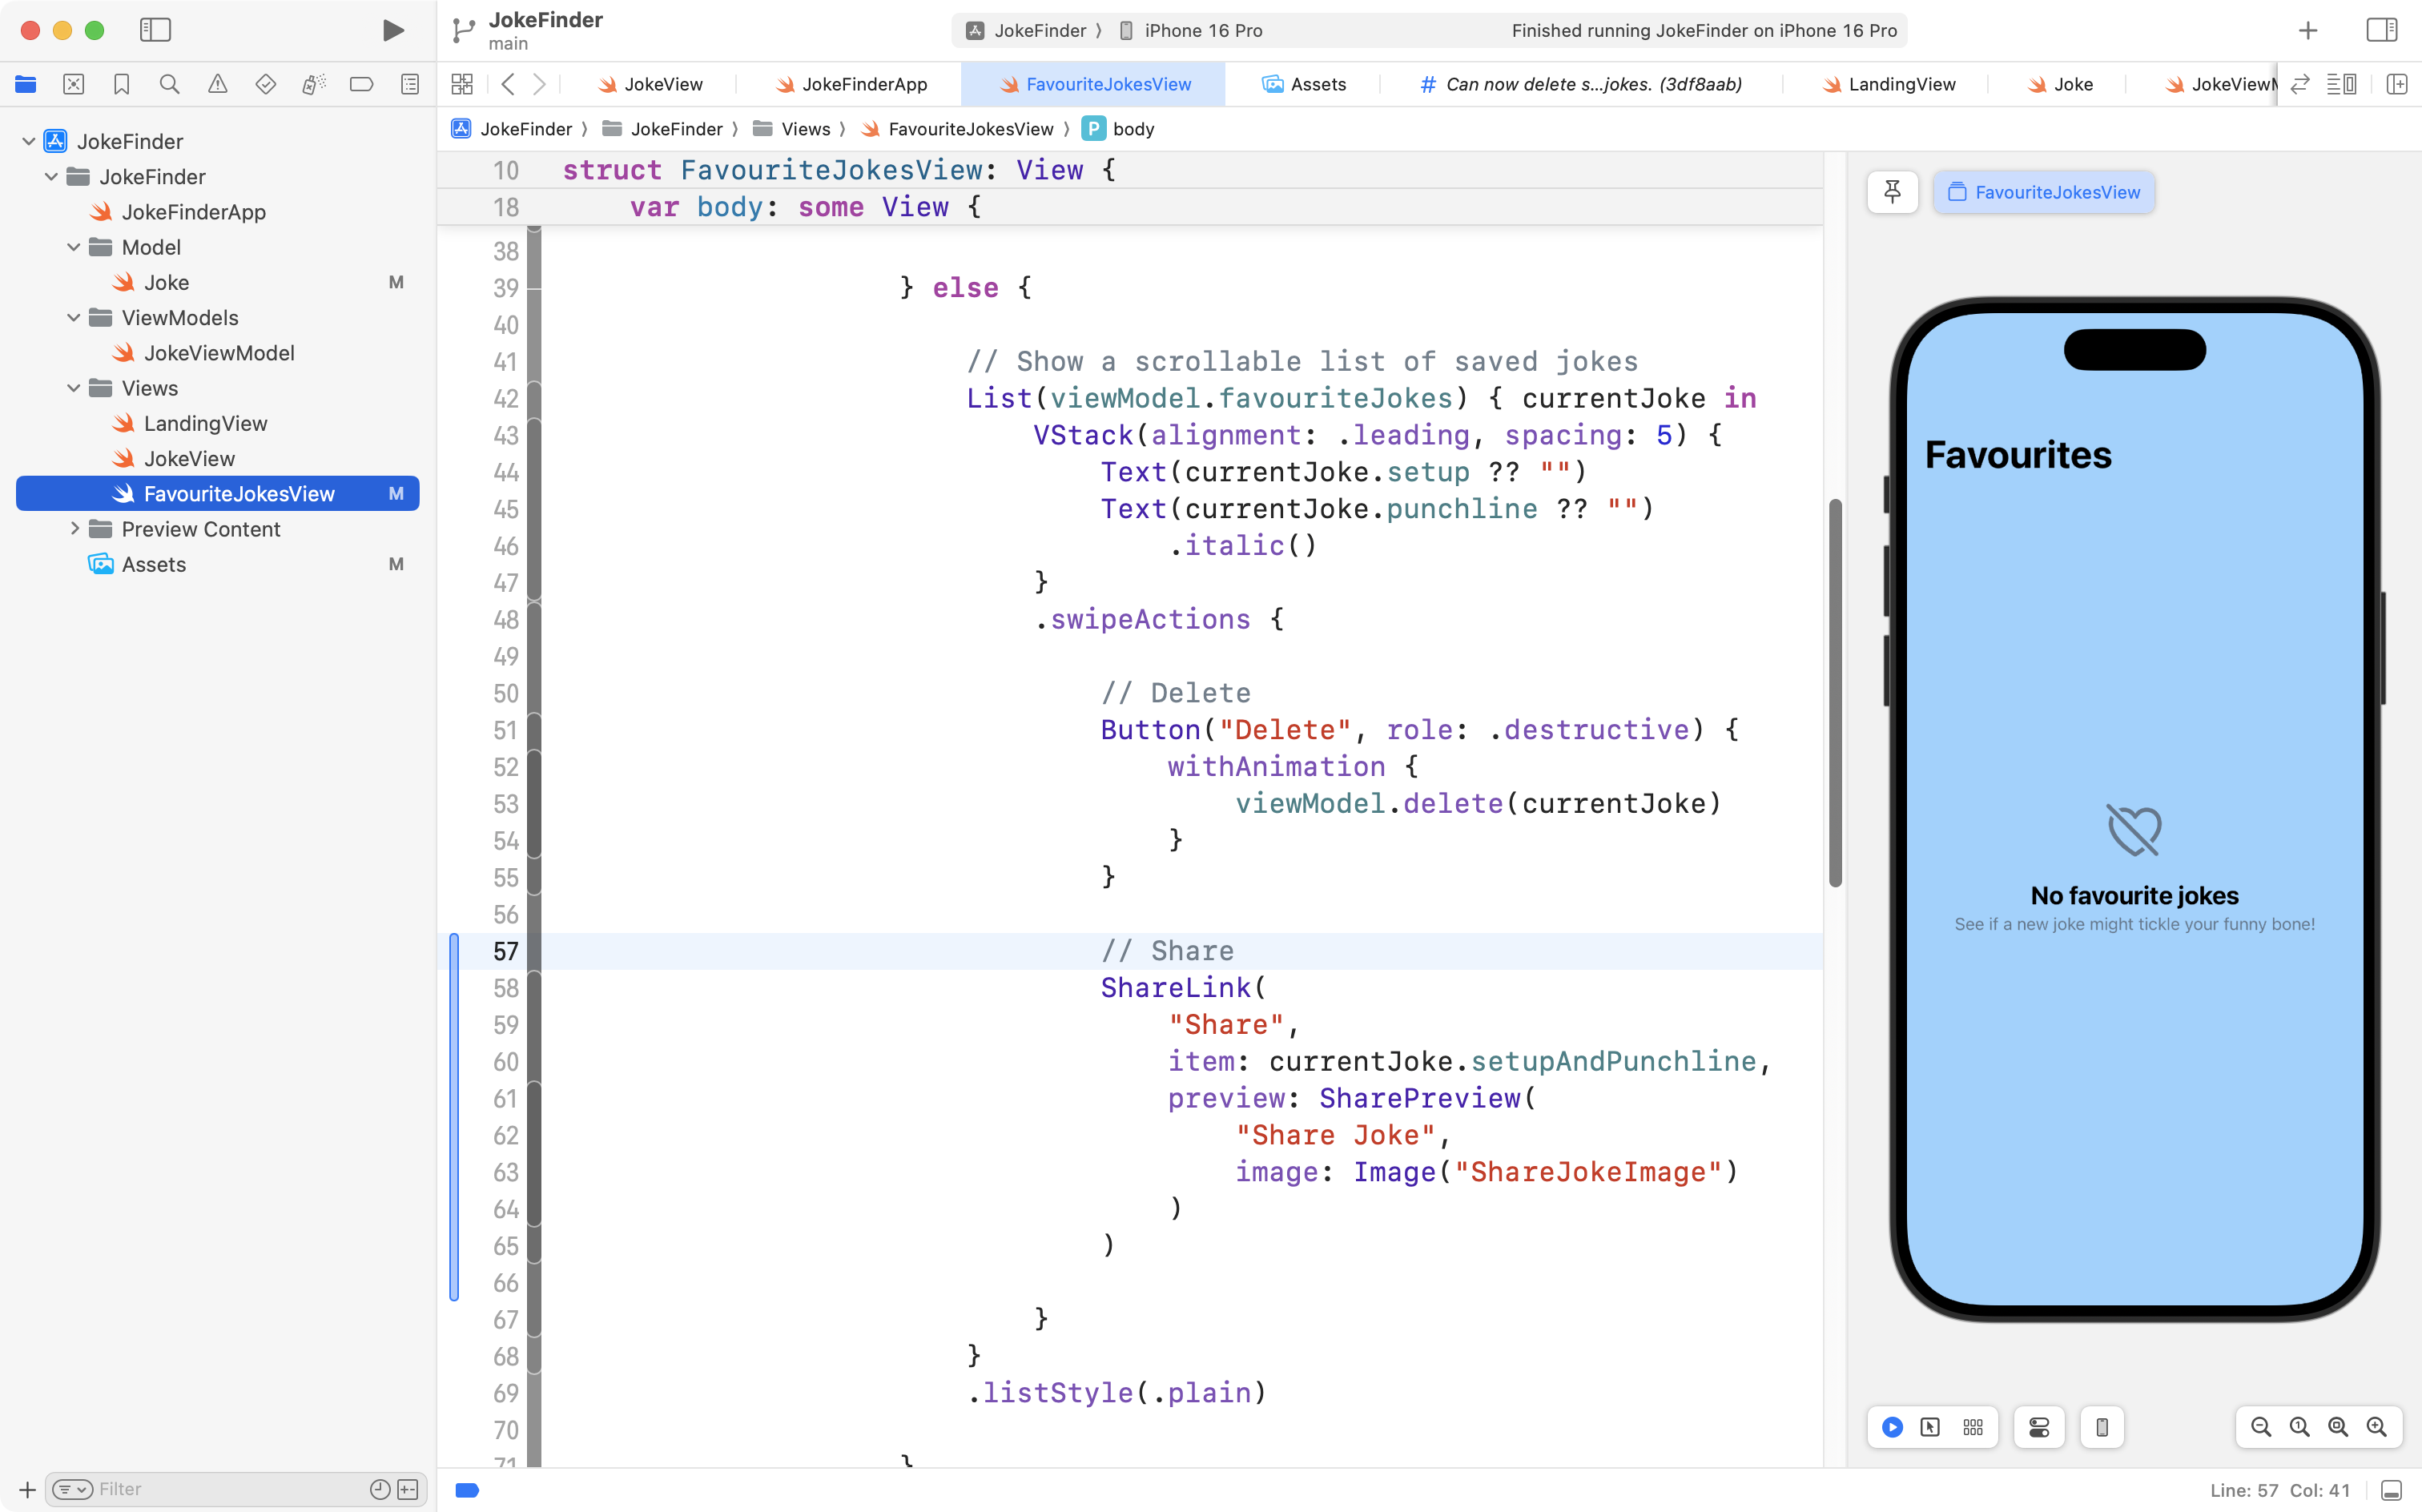
That ShareLink code uses the computed property we just added, along with the ShareJokeImage asset that we added a moment ago.
To really test this code out, you need to run it on a device. When you swipe on a saved joke, you will be able to press the “share arrow” icon and send a joke to a friend using a text message.
Please now commit and push your work with this message:
Made it possible to share a saved joke.
Persisting jokes
Finally, this app is, overall, not super useful unless jokes we save are still there the next time we open the app.
This is called persisting data, or data persistence.
There are many ways to persist data – one way is to use a database, which we are starting to learn about.
Another way, when the data that needs to be persisted is pretty simple, is to simply write the information to a plain text file formatted as JSON.
That is what we will do for this app. Whenever a joke is either saved or deleted from our list of favourites, we will write a JSON file to the internal storage of the phone. When the app opens, we read from this same file.
To do this, first create a new group named Shared in your project, like this:
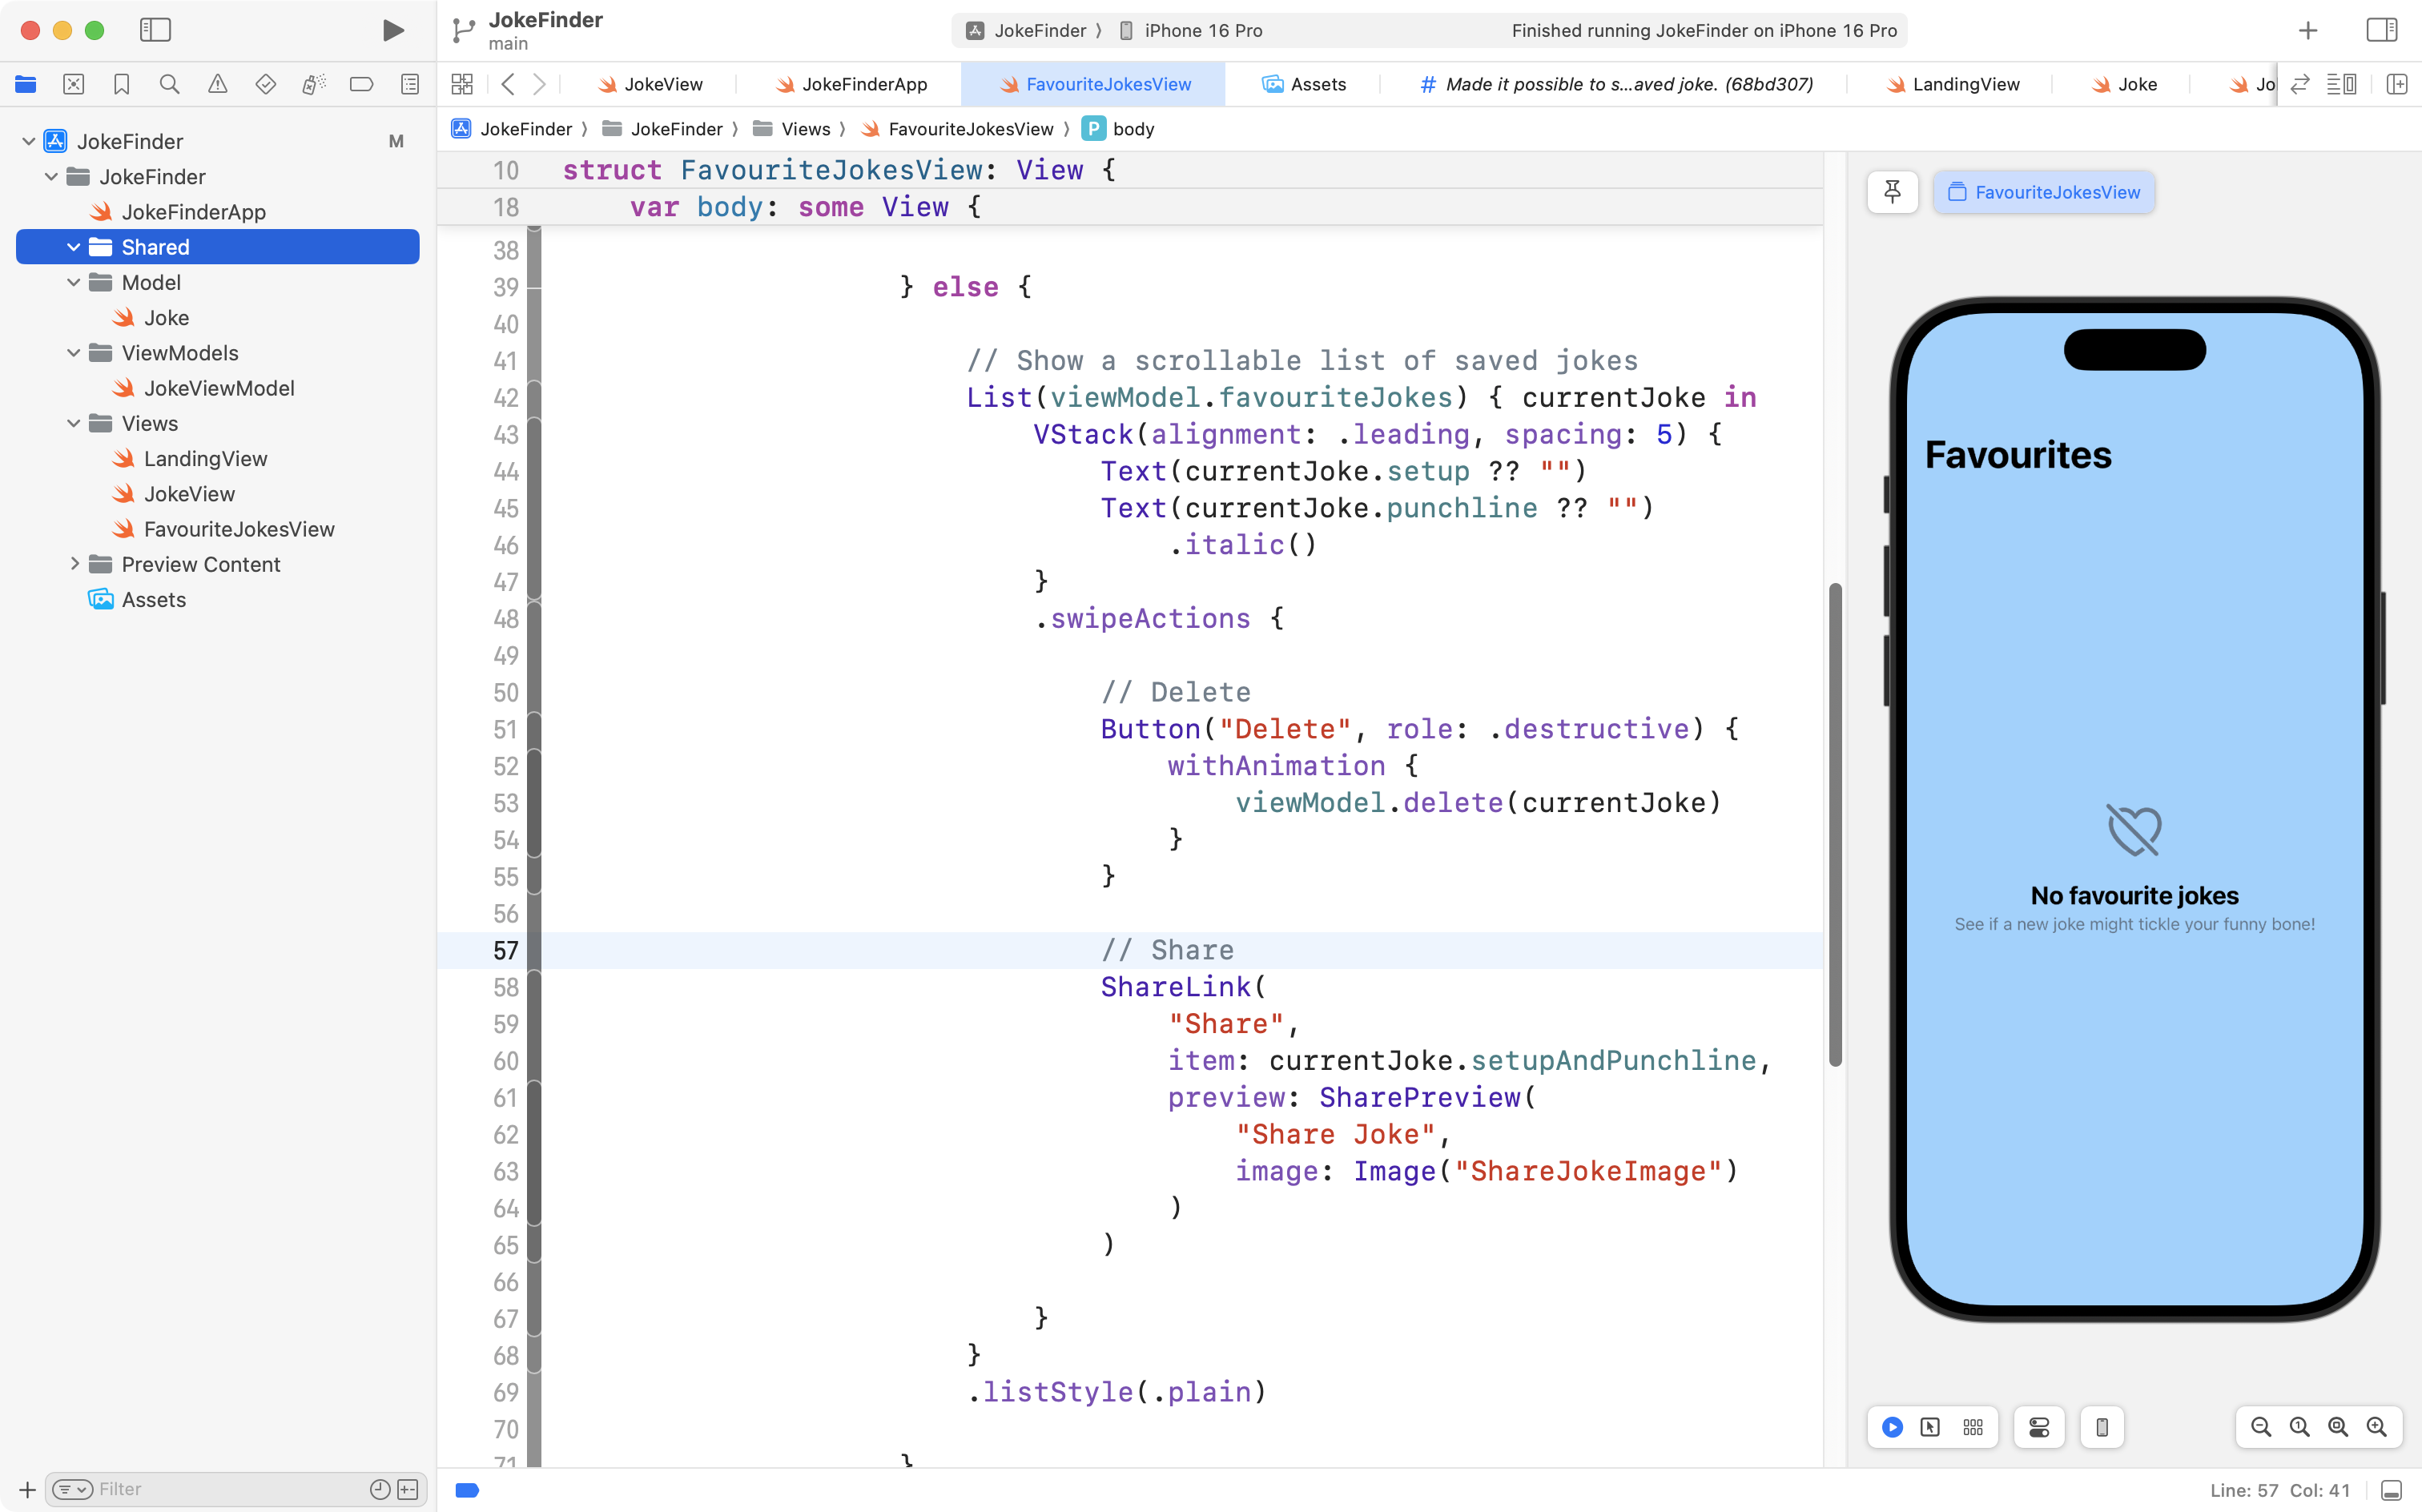
Then create a new empty file named SharedFunctionsAndConstants, like this:
Now copy this code into that new file:
import Foundation

// Return the directory that we can save user data in
func getDocumentsDirectory() -> URL {
    let paths = FileManager.default.urls(for: .documentDirectory, in: .userDomainMask)
    return paths[0]
}

// Identify the file that data will be saved to in Documents directory
let fileLabel = "FavouriteJokes"
This is some helper code that uses Apple frameworks to find the folder that we can save our data to.
It also creates a constant with the name of the file we will save our data to.
Next, to save a bit of time with editing, please simply copy and paste all of this code into your clipboard:
import Foundation
@Observable
class JokeViewModel {
// MARK: Stored properties
// Whatever joke has most recently been downloaded
// from the endpoint
var currentJoke: Joke?
// Holds a list of favourite jokes
var favouriteJokes: [Joke] = []
// MARK: Initializer(s)
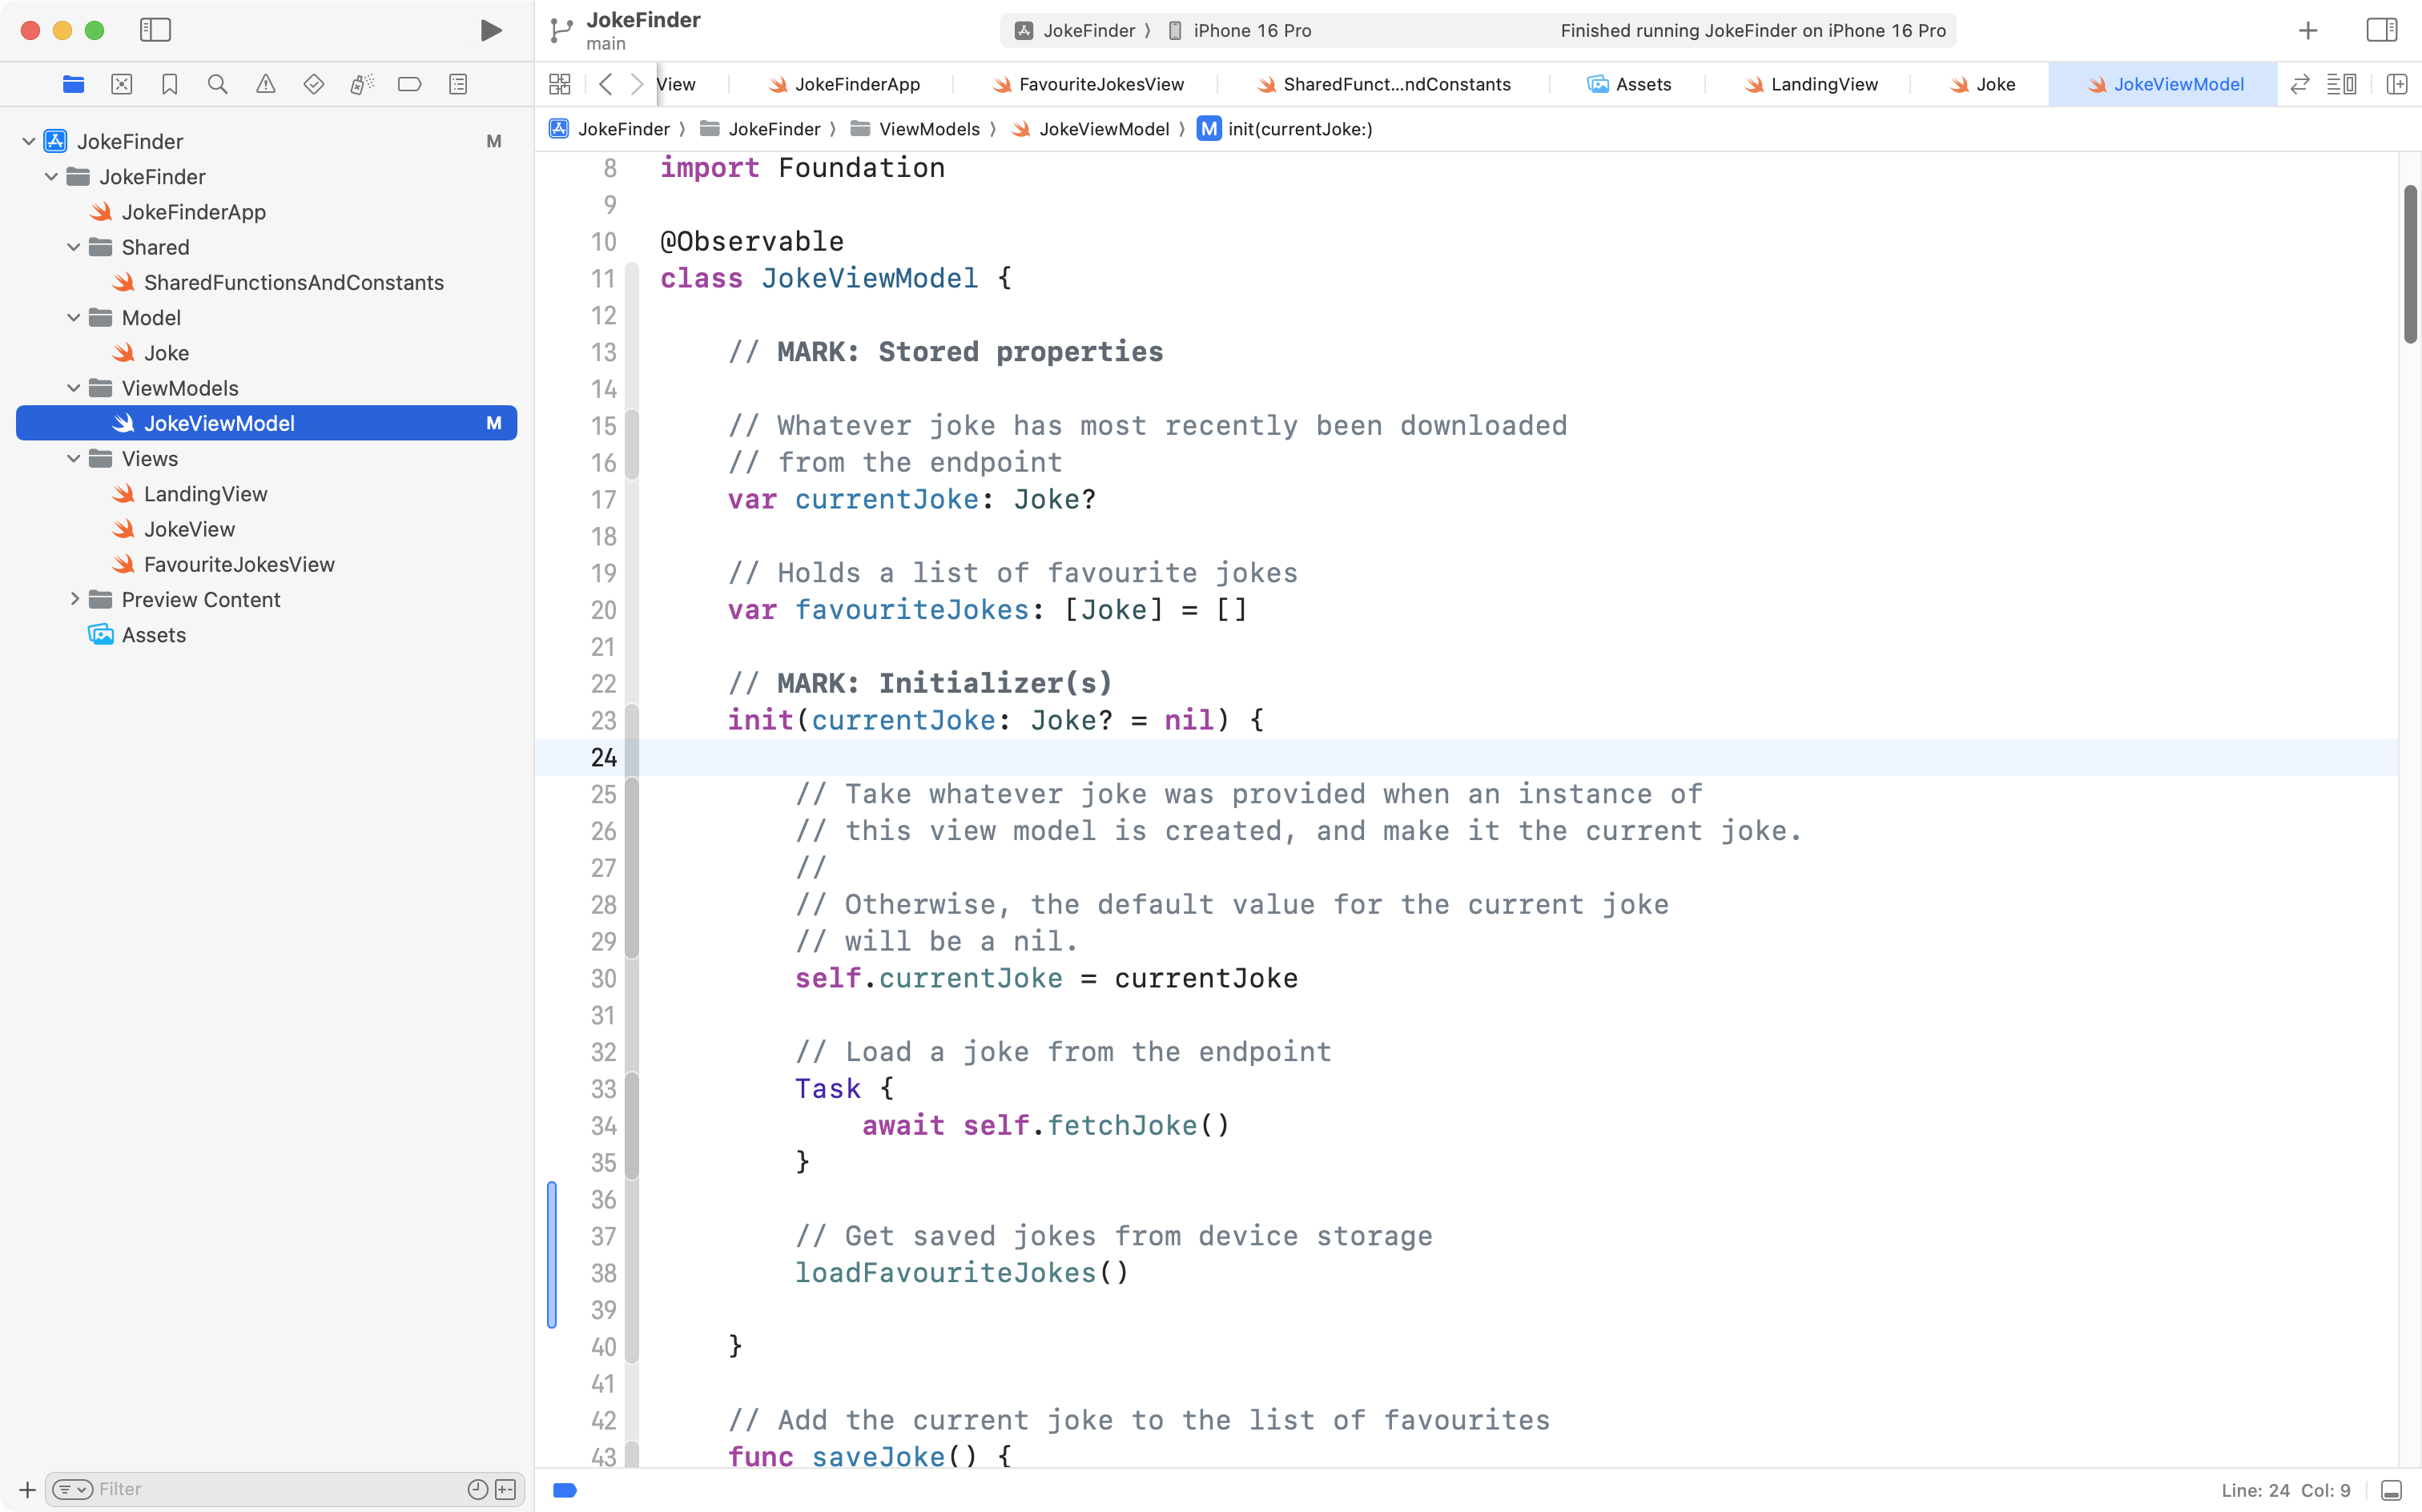
init(currentJoke: Joke? = nil) {
// Take whatever joke was provided when an instance of
// this view model is created, and make it the current joke.
//
// Otherwise, the default value for the current joke
// will be a nil.
self.currentJoke = currentJoke
// Load a joke from the endpoint
Task {
await self.fetchJoke()
}
// Get saved jokes from device storage
loadFavouriteJokes()
}
// Add the current joke to the list of favourites
func saveJoke() {
// Save current joke
if let currentJoke = self.currentJoke {
favouriteJokes.insert(currentJoke, at: 0)
}
// How many saved jokes are there now?
print("There are \(favouriteJokes.count) jokes saved.")
// Write the updated list of jokes to the JSON file stored on device
self.persistFavouriteJokes()
}
// Delete a joke from the list of favourites
func delete(_ jokeToDelete: Joke) {
// Remove the provided joke from the list of saved favourites
favouriteJokes.removeAll { currentJoke in
currentJoke.id == jokeToDelete.id
}
// How many saved jokes are there now?
print("There are \(favouriteJokes.count) jokes saved.")
// Write the updated list of jokes to the JSON file stored on device
self.persistFavouriteJokes()
}
// MARK: Function(s)
// This loads a new joke from the endpoint
//
// "async" means it is an asynchronous function.
//
// That means it can be run alongside other functionality
// in our app. Since this function might take a while to complete
// this ensures that other parts of our app, such as the user
// interface, won't "freeze up" while this function does it's job.
func fetchJoke() async {
// 1. Attempt to create a URL from the address provided
let endpoint = "https://official-joke-api.appspot.com/random_joke"
guard let url = URL(string: endpoint) else {
print("Invalid address for JSON endpoint.")
return
}
// 2. Fetch the raw data from the URL
//
// Network requests can potentially fail (throw errors) so
// we complete them within a do-catch block to report errors
// if they occur.
//
do {
// Fetch the data
let (data, _) = try await URLSession.shared.data(from: url)
// Print the received data in the debug console
print("Got data from endpoint, contents of response are:")
print(String(data: data, encoding: .utf8)!)
// 3. Decode the data into a Swift data type
// Create a decoder object to do most of the work for us
let decoder = JSONDecoder()
// Use the decoder object to convert the raw data
// into an instance of our Swift data type
let decodedData = try decoder.decode(Joke.self, from: data)
// If we got here, decoding succeeded,
// return the instance of our data type
self.currentJoke = decodedData
} catch {
// Show an error that we wrote and understand
print("Count not retrieve data from endpoint, or could not decode into an instance of a Swift data type.")
print("----")
// Show the detailed error to help with debugging
print(error)
}
}
// Load saved jokes from file on device
func loadFavouriteJokes() {
// Get a URL that points to the saved JSON data containing our list of favourite jokes
let filename = getDocumentsDirectory().appendingPathComponent(fileLabel)
print("Filename we are reading persisted jokes from is:")
print(filename)
// Attempt to load from the JSON in the stored file
do {
// Load the raw data
let data = try Data(contentsOf: filename)
print("Got data from file, contents are:")
print(String(data: data, encoding: .utf8)!)
// Decode the data into Swift native data structures
self.favouriteJokes = try JSONDecoder().decode([Joke].self, from: data)
} catch {
print(error)
print("Could not load data from file, initializing with empty list.")
self.favouriteJokes = []
}
}
// Write favourite jokes to file on device
func persistFavouriteJokes() {
// Get a URL that points to the saved JSON data containing our list of people
let filename = getDocumentsDirectory().appendingPathComponent(fileLabel)
print("Filename we are writing persisted jokes to is is:")
print(filename)
do {
// Create an encoder
let encoder = JSONEncoder()
encoder.outputFormatting = .prettyPrinted
// Encode the list of people we've tracked
let data = try encoder.encode(self.favouriteJokes)
// Actually write the JSON file to the documents directory
try data.write(to: filename, options: [.atomicWrite, .completeFileProtection])
print("Wrote data to file, contents are:")
print(String(data: data, encoding: .utf8)!)
print("Saved data to documents directory successfully.")
} catch {
print(error)
print("Unable to write list of favourite jokes to documents directory.")
}
}
}
Replace all of the code in your JokeViewModel file with the new code, like this:
You will notice that not many lines of code actually changed. Take a close look at what did change, and read the comments to understand how the code works.
Then, run your app in the Simulator or on a device. Watch the debug output in Xcode to see what is happening as you use the app.
Please commit and push your work with this message:
Saved jokes are now persisted to a JSON file kept on device.
Swipe left or right
NOTE
Coming soon. As this lesson was getting a tad long, Mr. Gordon decided that adding swipe left and swipe right gestures deserves its own lesson!