Introduction
NOTE
This tutorial was adapted from a tutorial authored by Paul Hudson on this topic.
To quote Paul Hudson:
iOS has a framework called UserNotifications that does pretty much exactly what you expect: lets us create notifications to the user that can be shown on the lock screen. We have two types of notifications to work with, and they differ depending on where they were created: local notifications are ones we schedule locally, and remote notifications (commonly called push notifications) are sent from a server somewhere.
Remote notifications require a server to work, because you send your message to Apple’s push notification service (APNS), which then forwards it to users. But local notifications are nice and easy in comparison, because we can send any message at any time as long as the user allows it.
To send notifications to a user on the lock screen of their device, we must receive their permission first.
Once a user has authorized notifications, we can schedule a notification to occur:
- seconds from now
- at a specific date and time
- at a specific location
Let’s look first at the simplest approach – putting the notification code directly in the view, and scheduling a notification for a few seconds in the future.
Then we’ll consider a more sophisticated approach that adheres to separation of concerns – we’ll create a NotificationController class to manage notifications within an app, and learn how to cancel a notification when necessary.
Simple approach
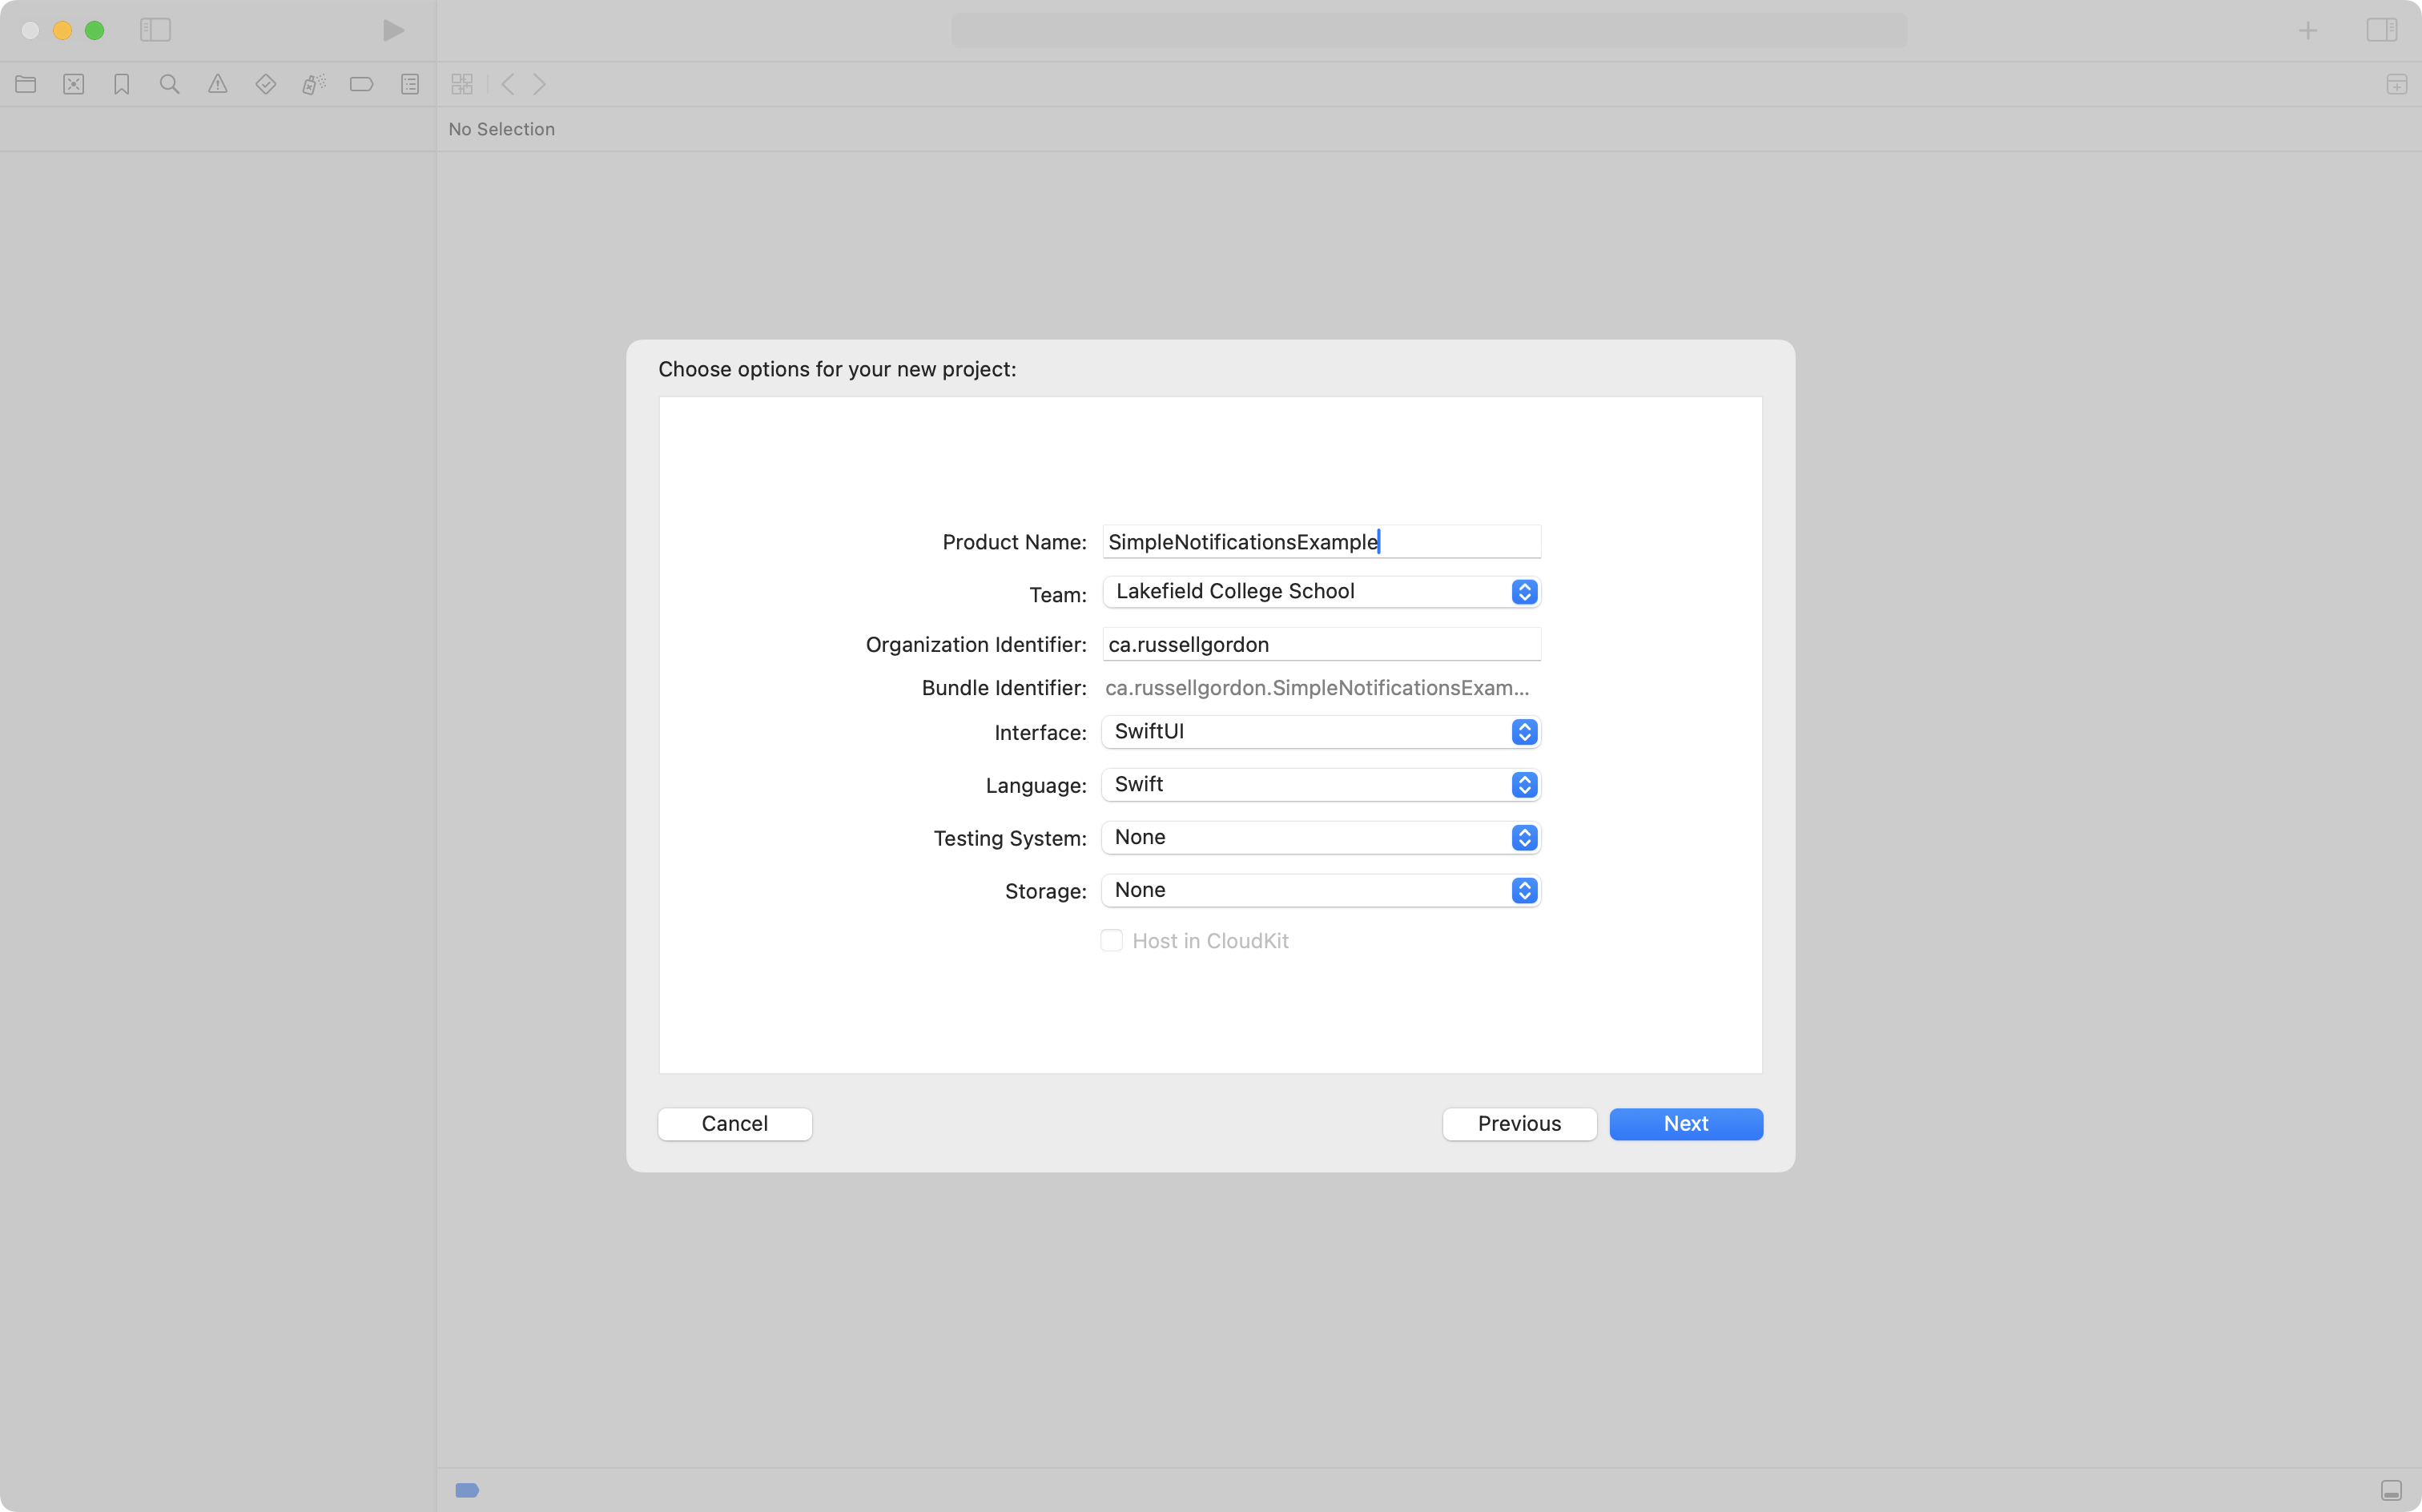
Create a a new iOS project named SimpleNotificationsExample:
Like this:

Then replace the ContentView structure with the following code:
struct ContentView: View {

    // MARK: Stored properties
    @State private var secondsFromNow = 0

    // MARK: Computed properties

    // The user interface
    var body: some View {
        VStack(spacing: 30) {

            Button("Request Permission") {
                // first
            }
            .buttonStyle(.borderedProminent)

            Stepper("Schedule notification in \(secondsFromNow) seconds", value: $secondsFromNow, in: 0...Int.max)

            Button("Schedule") {
                // second
            }
            .buttonStyle(.borderedProminent)

        }
        .padding()
    }
}
… like this:

Request permission
Let’s quote Paul Hudson again:
OK, that’s our setup complete so let’s turn our focus to the first of two important pieces of work: requesting authorization to show alerts. Notifications can take a variety of forms, but the most common thing to do is ask for permission to show alerts, badges, and sounds – that doesn’t mean we need to use all of them at the same time, but asking permission up front means we can be selective later on.
When we tell iOS what kinds of notifications we want, it will show a prompt to the user so they have the final say on what our app can do. When they make their choice, a closure we provide will get called and tell us whether the request was successful or not.
Replace the // first comment with:
UNUserNotificationCenter.current().requestAuthorization(options: [.alert, .badge, .sound]) { success, error in
    if success {
        print("All set!")
    } else if let error {
        print(error.localizedDescription)
    }
}
There are several kinds of notifications that can be scheduled. We’ll stick with requesting permission to show alerts, badges (numbers in the corner of an app’s badge or icon), and to play sounds.
Create the request
Quoting Paul Hudson again:
If the user grants permission, then we’re all clear to start scheduling notifications. Even though notifications might seem simple, Apple breaks them down into three parts to give it maximum flexibility:
- The content is what should be shown, and can be a title, subtitle, sound, image, and so on.
- The trigger determines when the notification should be shown, and can be a number of seconds from now, a date and time in the future, or a location.
- The request combines the content and trigger, but also adds a unique identifier so you can edit or remove specific alerts later on. If you don’t want to edit or remove stuff, use
UUID().uuidStringto get a random identifier.
Please replace the // second comment with:
let content = UNMutableNotificationContent()
content.title = "Feed Piper"
content.subtitle = "She's always hungry"
content.sound = UNNotificationSound.default

// show this notification "x" seconds from now
let trigger = UNTimeIntervalNotificationTrigger(
	timeInterval: Double(secondsFromNow),
	repeats: false
)

// choose a random identifier
let request = UNNotificationRequest(
	identifier: UUID().uuidString,
	content: content,
	trigger: trigger
)

// add our notification request
UNUserNotificationCenter.current().add(request)
Test in Simulator
To test this code, you must run it in the full Simulator app. Use the keyboard shortcut Command-L in the Simulator to lock the device and show the home screen, like this:
That’s all the code you need to show a notification in its simplest form. 🚀
However, it’s common that within a real application, you’d want to change a scheduled notification, or even remove a notification you previously set up.
Keep reading to learn how to manage notifications in a more sophisticated manner.
Advanced approach
Imagine a reminders app that allows users to set a notification to help them remember to complete a task:
Using notifications within a larger app is usually going to involve scheduling a notification to occur at a specific date and time.
To do this, we should use a helper class named NotificationController whose job it will be to create, delete, or revise notifications that we ask iOS to show to the user.
Technically, we could put all of that code into the view where a reminder is created, however, that is not a good approach – it is better to separate concerns.
The view should only do the work involved in showing a user interface. The notification controller can do the work involved in sending notifications to iOS, to be seen later by the user.
Tracking notifications
Your app needs to provide a way for the user to indicate that they want a notification to appear as well as when the notification should show up.
Then, your app needs to keep track of, or store, that information somewhere.
The Reminders app already has all of that user interface and model code already written.
Here is what that looks like – note the log messages appearing at left as the app is used:
It is beyond the scope of this lesson to explain how the existing code in the Reminders app works, although Mr. Gordon is happy to speak in person about the mechanics of that app’s code with anyone who is interested.
This lesson will explain the new code needed that actually does the job of asking iOS to present notifications to the user.
If you are interested in following along to add the new code that is described in this lesson, you can download a copy of Reminders app here.
Define a controller
The code to handle creating, modifying, or removing notifications on a user’s device should not be part of the view, as previously mentioned.
We are going to write a controller class named NotificationController.
We will create a single instance of this class at the app entry point, and then share a reference to that instance through the environment. In this way, any view within our app that needs to deal with notifications can use that one instance of NotificationController.
There are four main functions this class will need to contain:
addNotificationis called from the view; it requests permission from the user to set notifications. If permission is given, a notification is actually placed. If permission is not given, an error is shown by the view.removeNotificationremoves a notification that is tied to a reminder.requestNotificationsis a private method (used only by the controller class itself) that handles asking the user for permission to create notifications.placeNotificationis another private method (meaning it will only be called from within the controller class, and never from a view or any other external code) that handles actually getting iOS to show the notification to the user.
The code for NotificationController can go into a new group in the project, like this:
Here is what the class looks like, at a high level, with each of those four functions folded up:
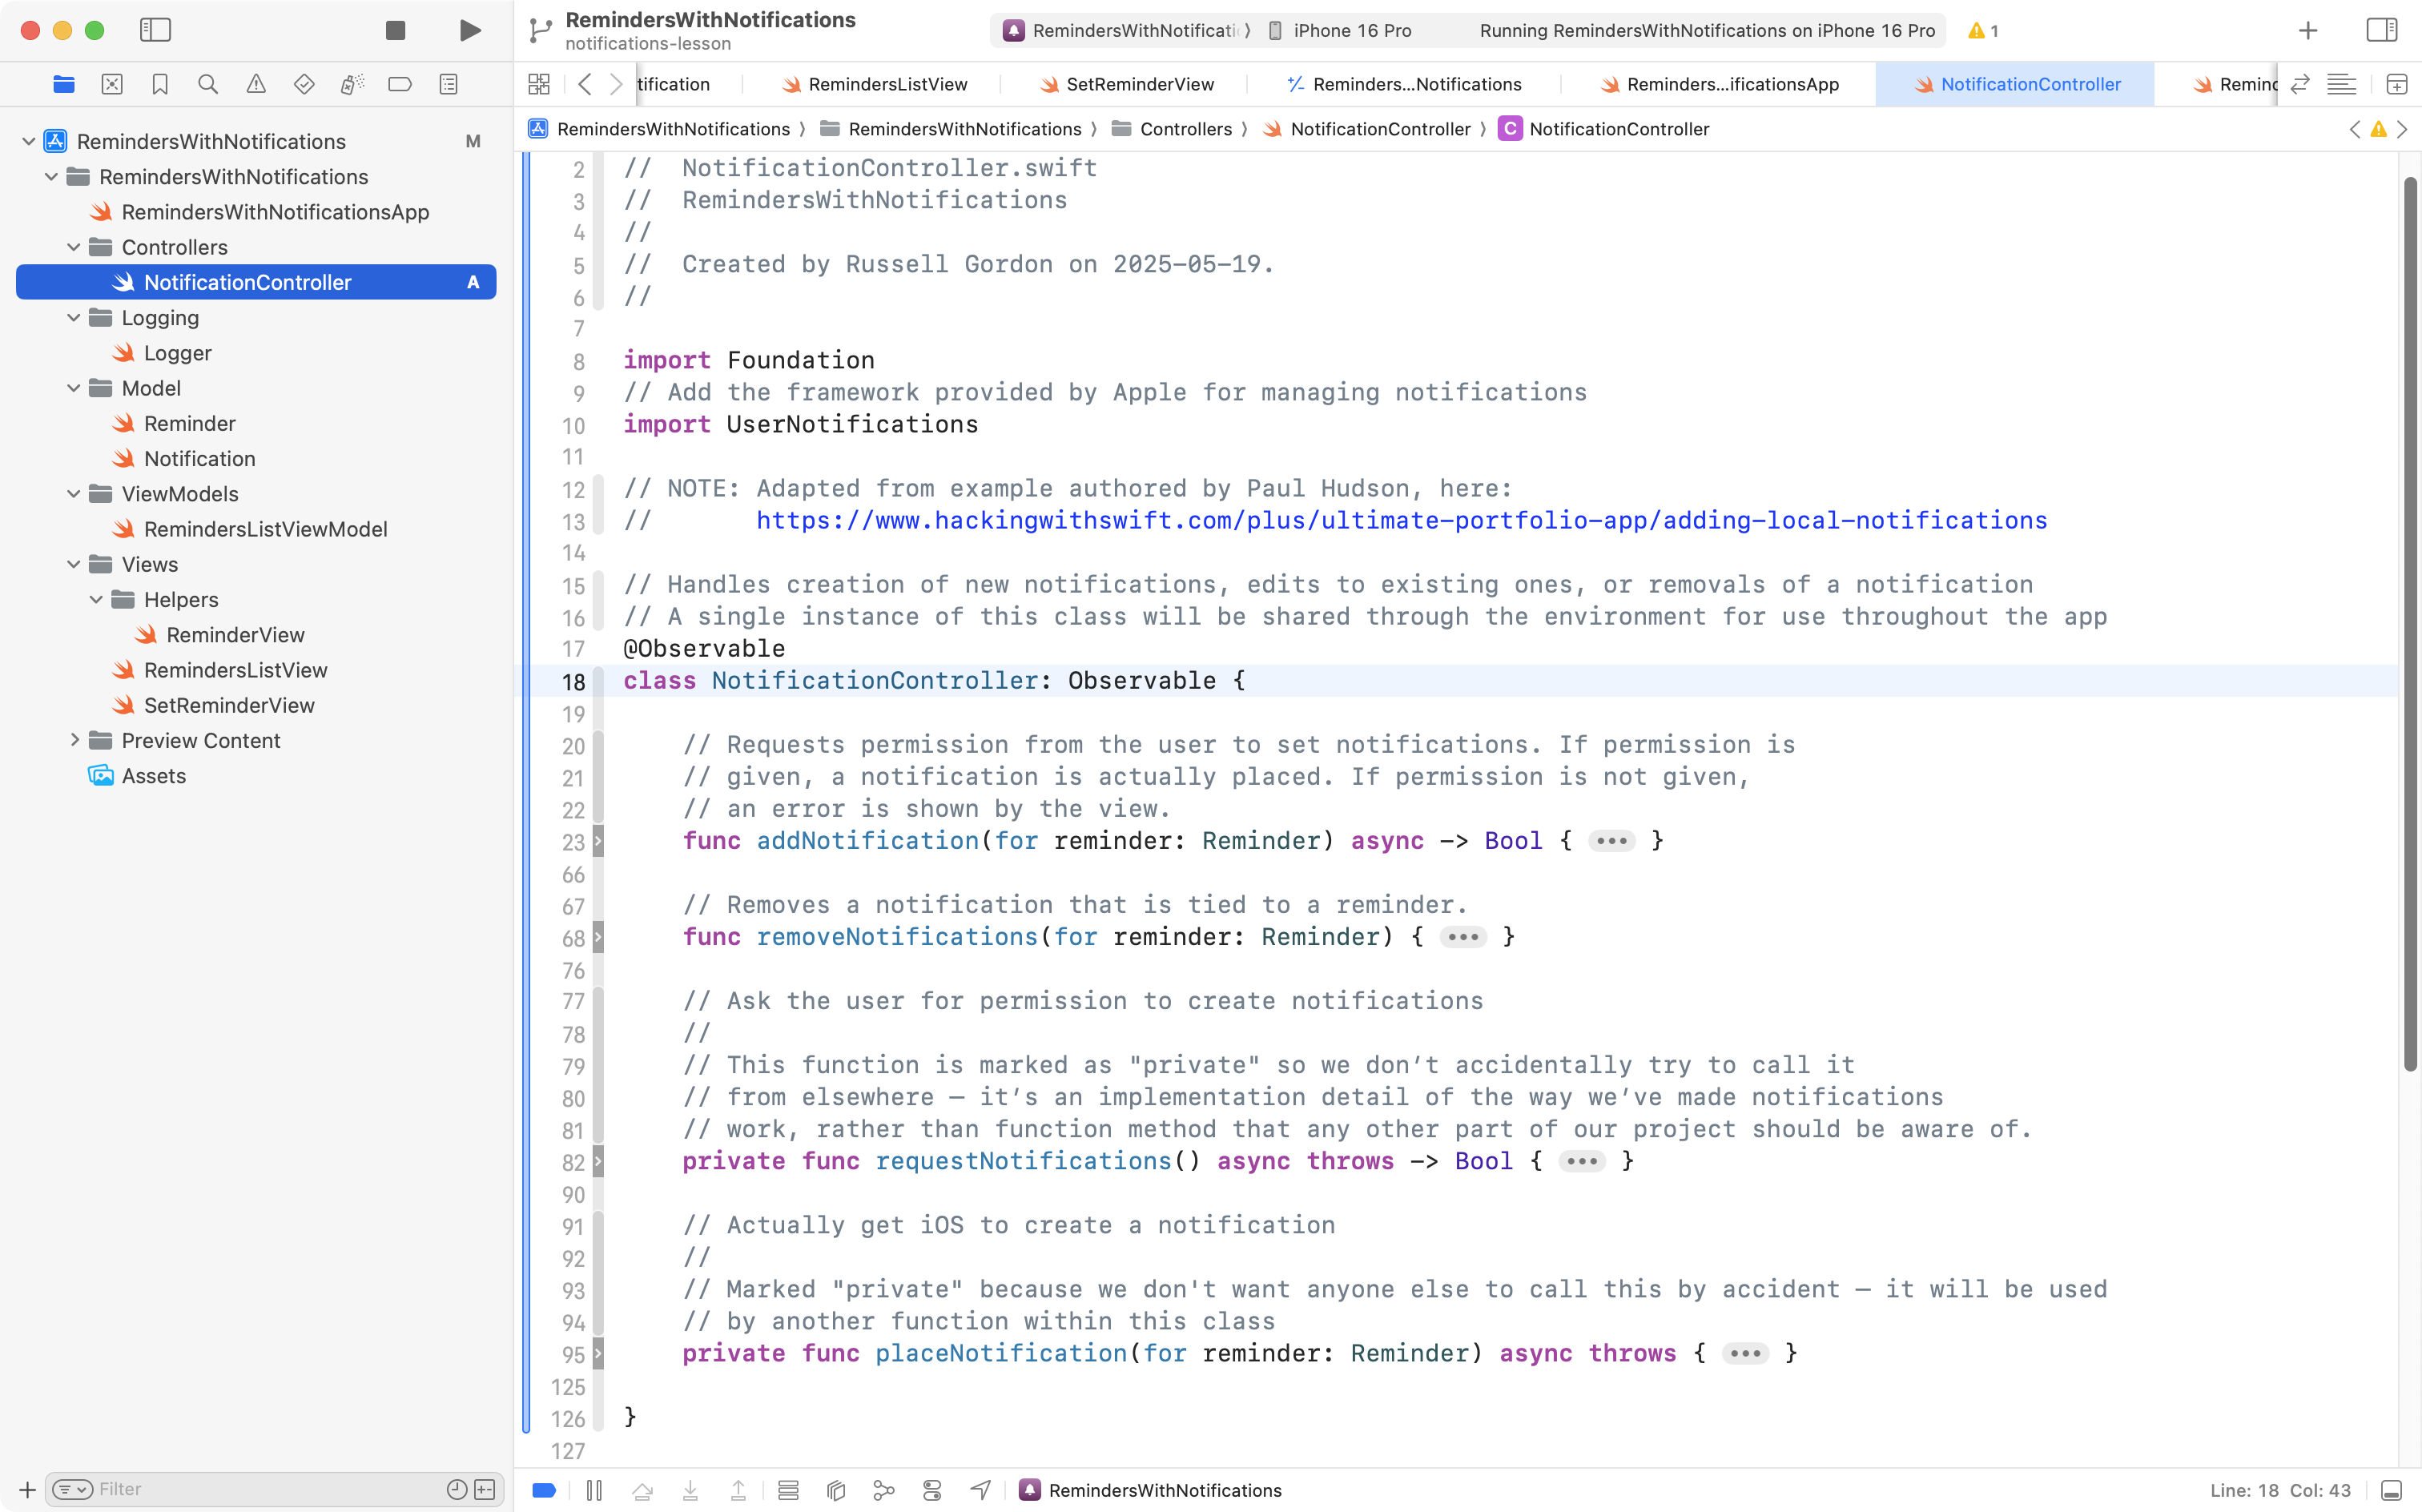
The complete code for the class is here, and can be copied in to the NotificationController class you just created, if you are following along:
//
//  NotificationController.swift
//  RemindersWithNotifications
//
//  Created by Russell Gordon on 2025-05-19.
//

import Foundation
// Add the framework provided by Apple for managing notifications
import UserNotifications

// NOTE: Adapted from example authored by Paul Hudson, here:
//       https://www.hackingwithswift.com/plus/ultimate-portfolio-app/adding-local-notifications

// Handles creation of new notifications, edits to existing ones, or removals of a notification
// A single instance of this class will be shared through the environment for use throughout the app
@Observable
class NotificationController: Observable {

    // Requests permission from the user to set notifications. If permission is
    // given, a notification is actually placed. If permission is not given,
    // an error is shown by the view.
    func addNotification(for reminder: Reminder) async -> Bool {

        do {

            // Get a reference to the iOS notifications hub
            let center = UNUserNotificationCenter.current()

            // What are the current settings for notifications for this app?
            let settings = await center.notificationSettings()

            // Take different actions depending on current authorization status
            switch settings.authorizationStatus {
            case .authorized:
                // We are already authorized to create notifications, so place one
                // for the provided reminder
                try await placeNotification(for: reminder)
            case .notDetermined:
                // Not yet authorized to place authorizations, so, ask for
                // permission to send the user notifications.
                let success = try await requestNotifications()

                if success {
                    // Permission granted, place a notification for this reminder
                    try await placeNotification(for: reminder)
                } else {
                    // User did not grant permission, return 'false' (view will
                    // show an error message)
                    return false
                }
            default:
                return false
            }

            // If we've arrived here, a notification was succesfully placed with iOS
            return true

        } catch {

            // Something went wrong above, so return 'false' (view will show an error)
            return false
        }

    }

    // Removes a notification that is tied to a reminder.
    func removeNotifications(for reminder: Reminder) {

        // Get a reference to the iOS notifications hub
        let center = UNUserNotificationCenter.current()

        // Remove the notification for the provided reminder
        center.removePendingNotificationRequests(withIdentifiers: [reminder.id.uuidString])
    }

    // Ask the user for permission to create notifications
    //
    // This function is marked as "private" so we don’t accidentally try to call it
    // from elsewhere – it’s an implementation detail of the way we’ve made notifications
    // work, rather than function method that any other part of our project should be aware of.
    private func requestNotifications() async throws -> Bool {

        // Get a reference to the iOS notifications hub
        let center = UNUserNotificationCenter.current()

        // Returns true if user provided permission for this app to show notifications
        return try await center.requestAuthorization(options: [.alert, .sound])
    }

    // Actually get iOS to create a notification
    //
    // Marked "private" because we don't want anyone else to call this by accident – it will be used
    // by another function within this class
    private func placeNotification(for reminder: Reminder) async throws {

        // Get a reference to the iOS notifications hub
        let center = UNUserNotificationCenter.current()

        // 1. Create content of the notification to be shown
        // NOTE: We could add a subtitle to the notification, but there's no need for that within this app
        let content = UNMutableNotificationContent()
        content.sound = .default
        content.title = reminder.title

        // 2. Set the trigger for the notification
        // NOTE: This could be set "x" seconds from now, at a specific time, or using a geofencing trigger
        //       that causes the notification to appear when the user enters or leaves a specific location
        //       We will use the datetime the user selected for when to be notified.
        let components = Calendar.current.dateComponents([.hour, .minute, .day, .month, .year], from: reminder.notification!.scheduledFor)
        let trigger = UNCalendarNotificationTrigger(dateMatching: components, repeats: false)

        // 3. Set the ID for the notification. This MUST be stable.
        //    This is why we will use the UUID created when a notification
        //    date was selected by the user.
        let id = reminder.notification!.id.uuidString

        // 4. Create the request
        let request = UNNotificationRequest(identifier: id, content: content, trigger: trigger)

        // 5. Now send the request to add the notification off to iOS
        return try await center.add(request)

    }

}
Please carefully read through the code, and the included comments, from top to bottom, to gain an initial understanding of what is happening.
Create and share controller
Next we need to create an instance of NotificationController and share that with the rest of the app through the environment.
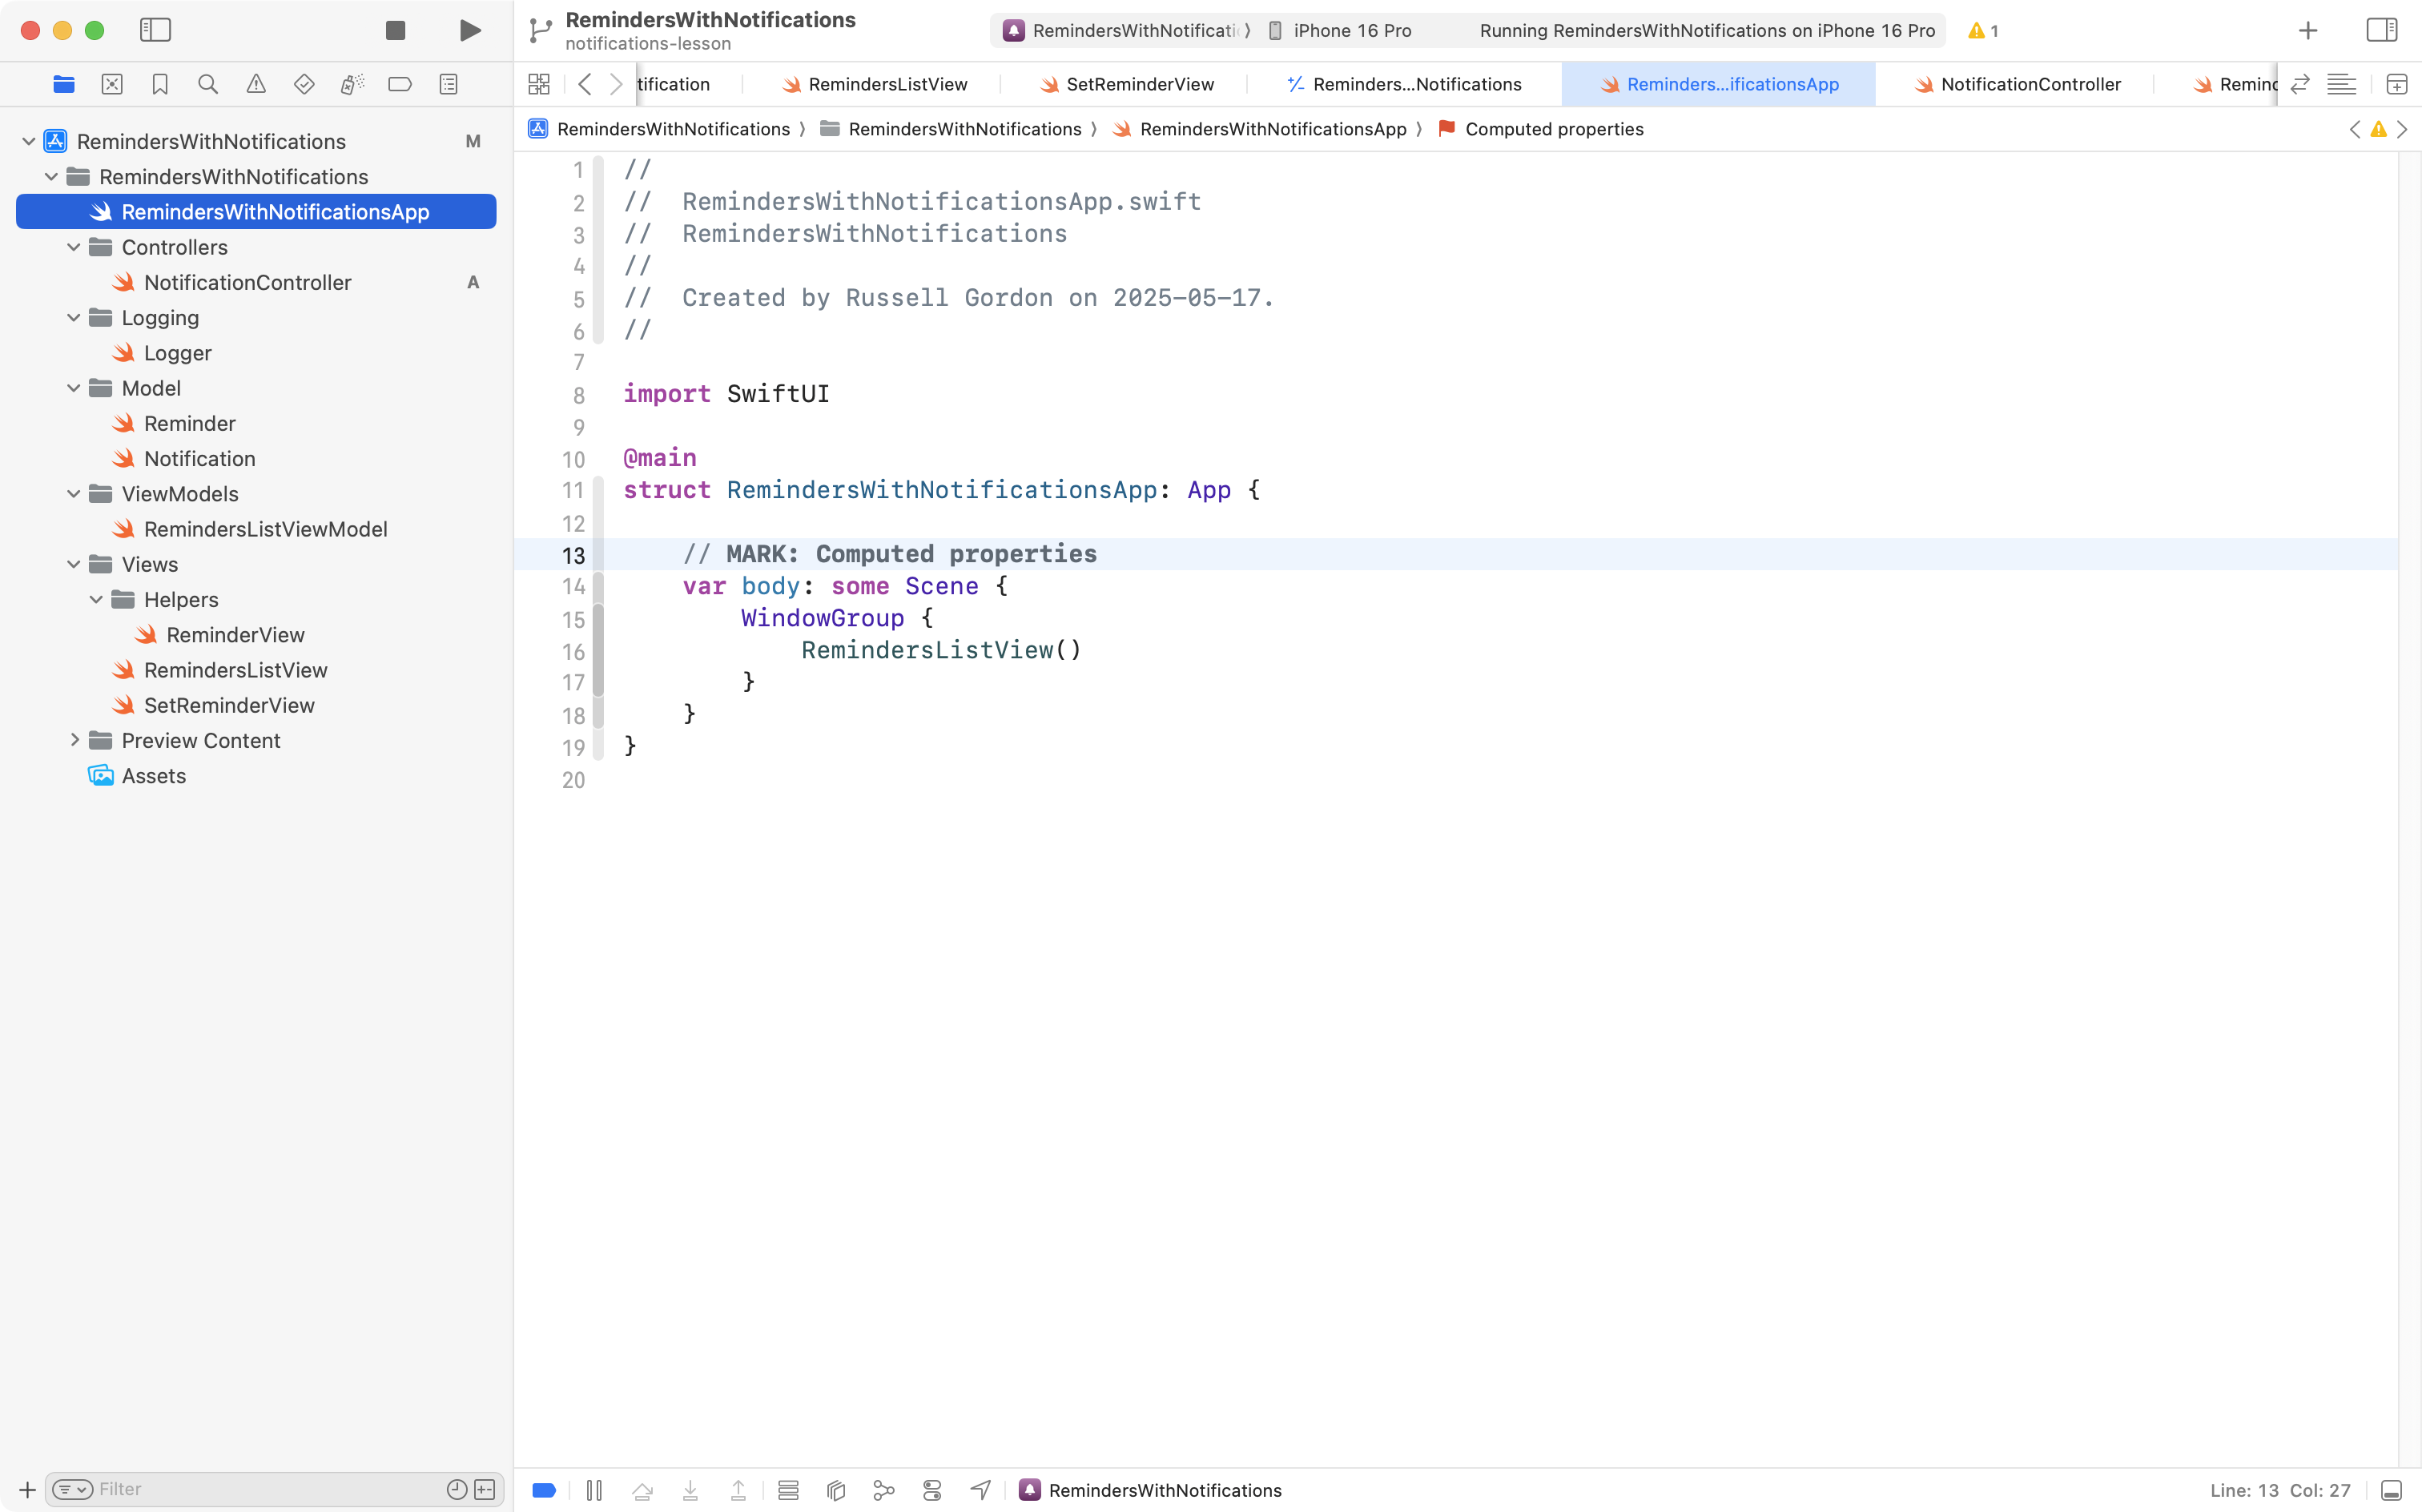
Here is what the app entry point looks like now:
Simply make the edits shown here:
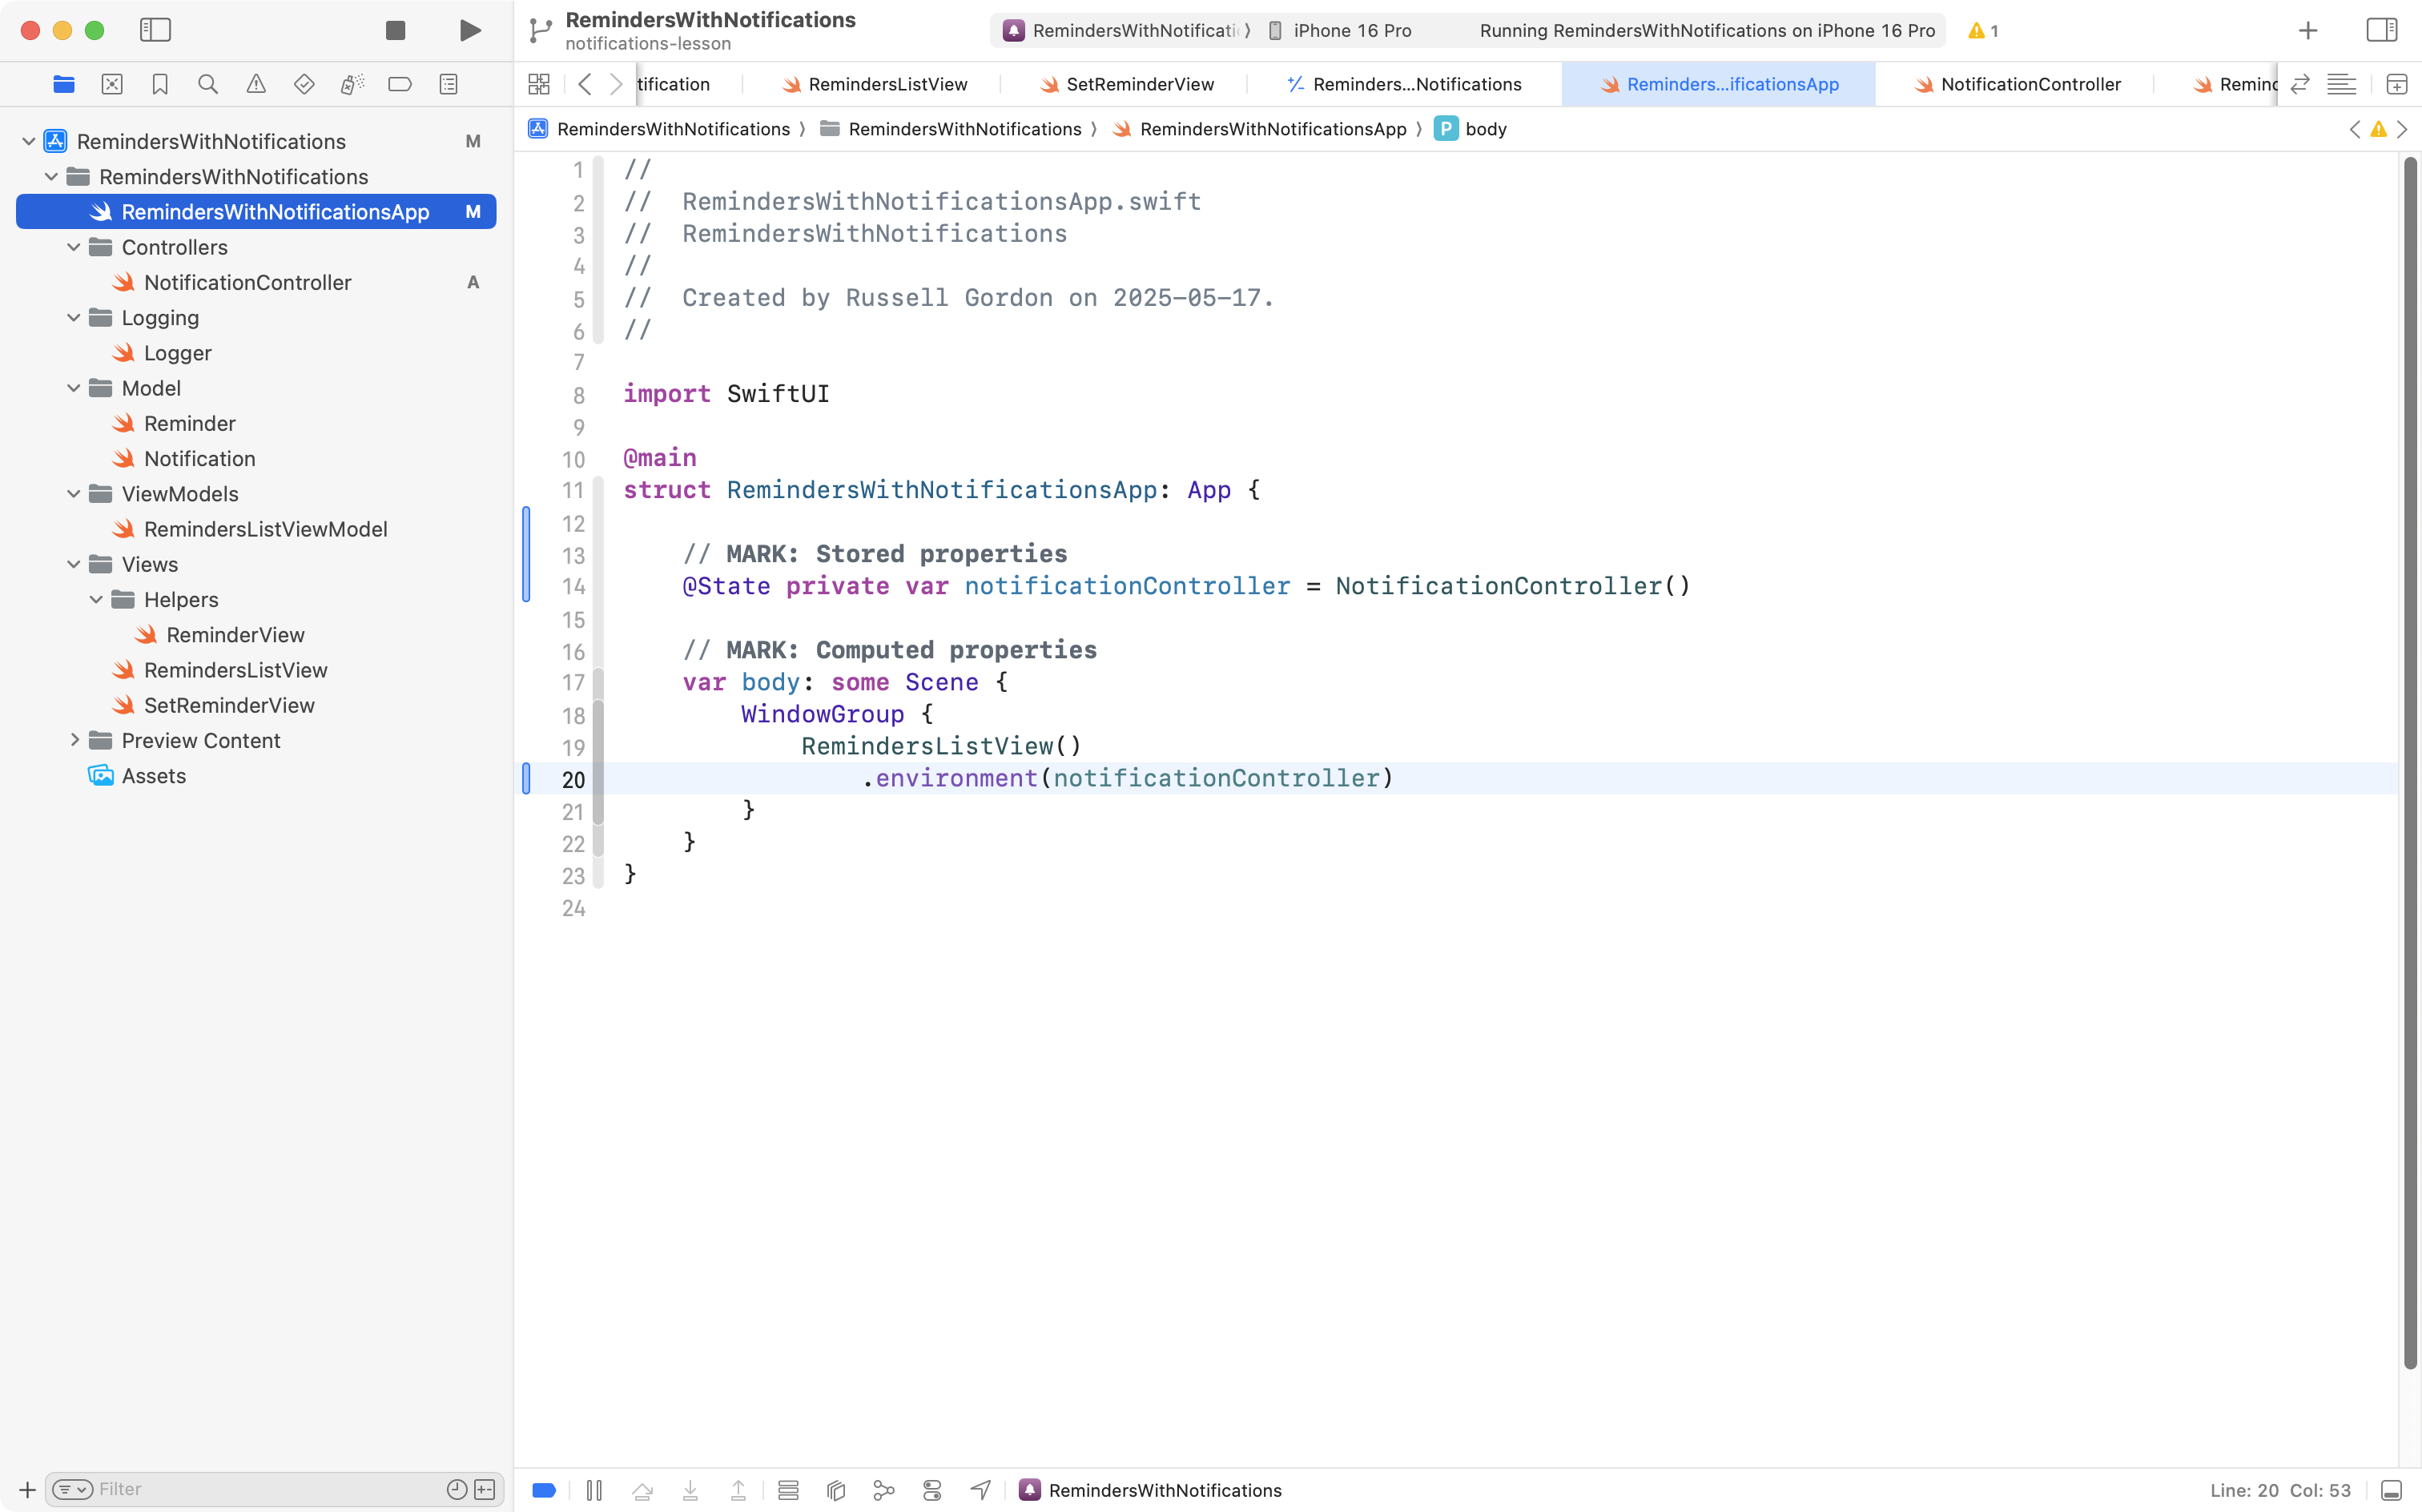
… to create the controller instance and insert it into the app’s environment.
Access controller from view
SetReminderView is the view within this app that handles creating a reminder, and, optionally, attaching a notification to that reminder.
We need to access the instance of NotificationController from the environment. We do that with the following code:
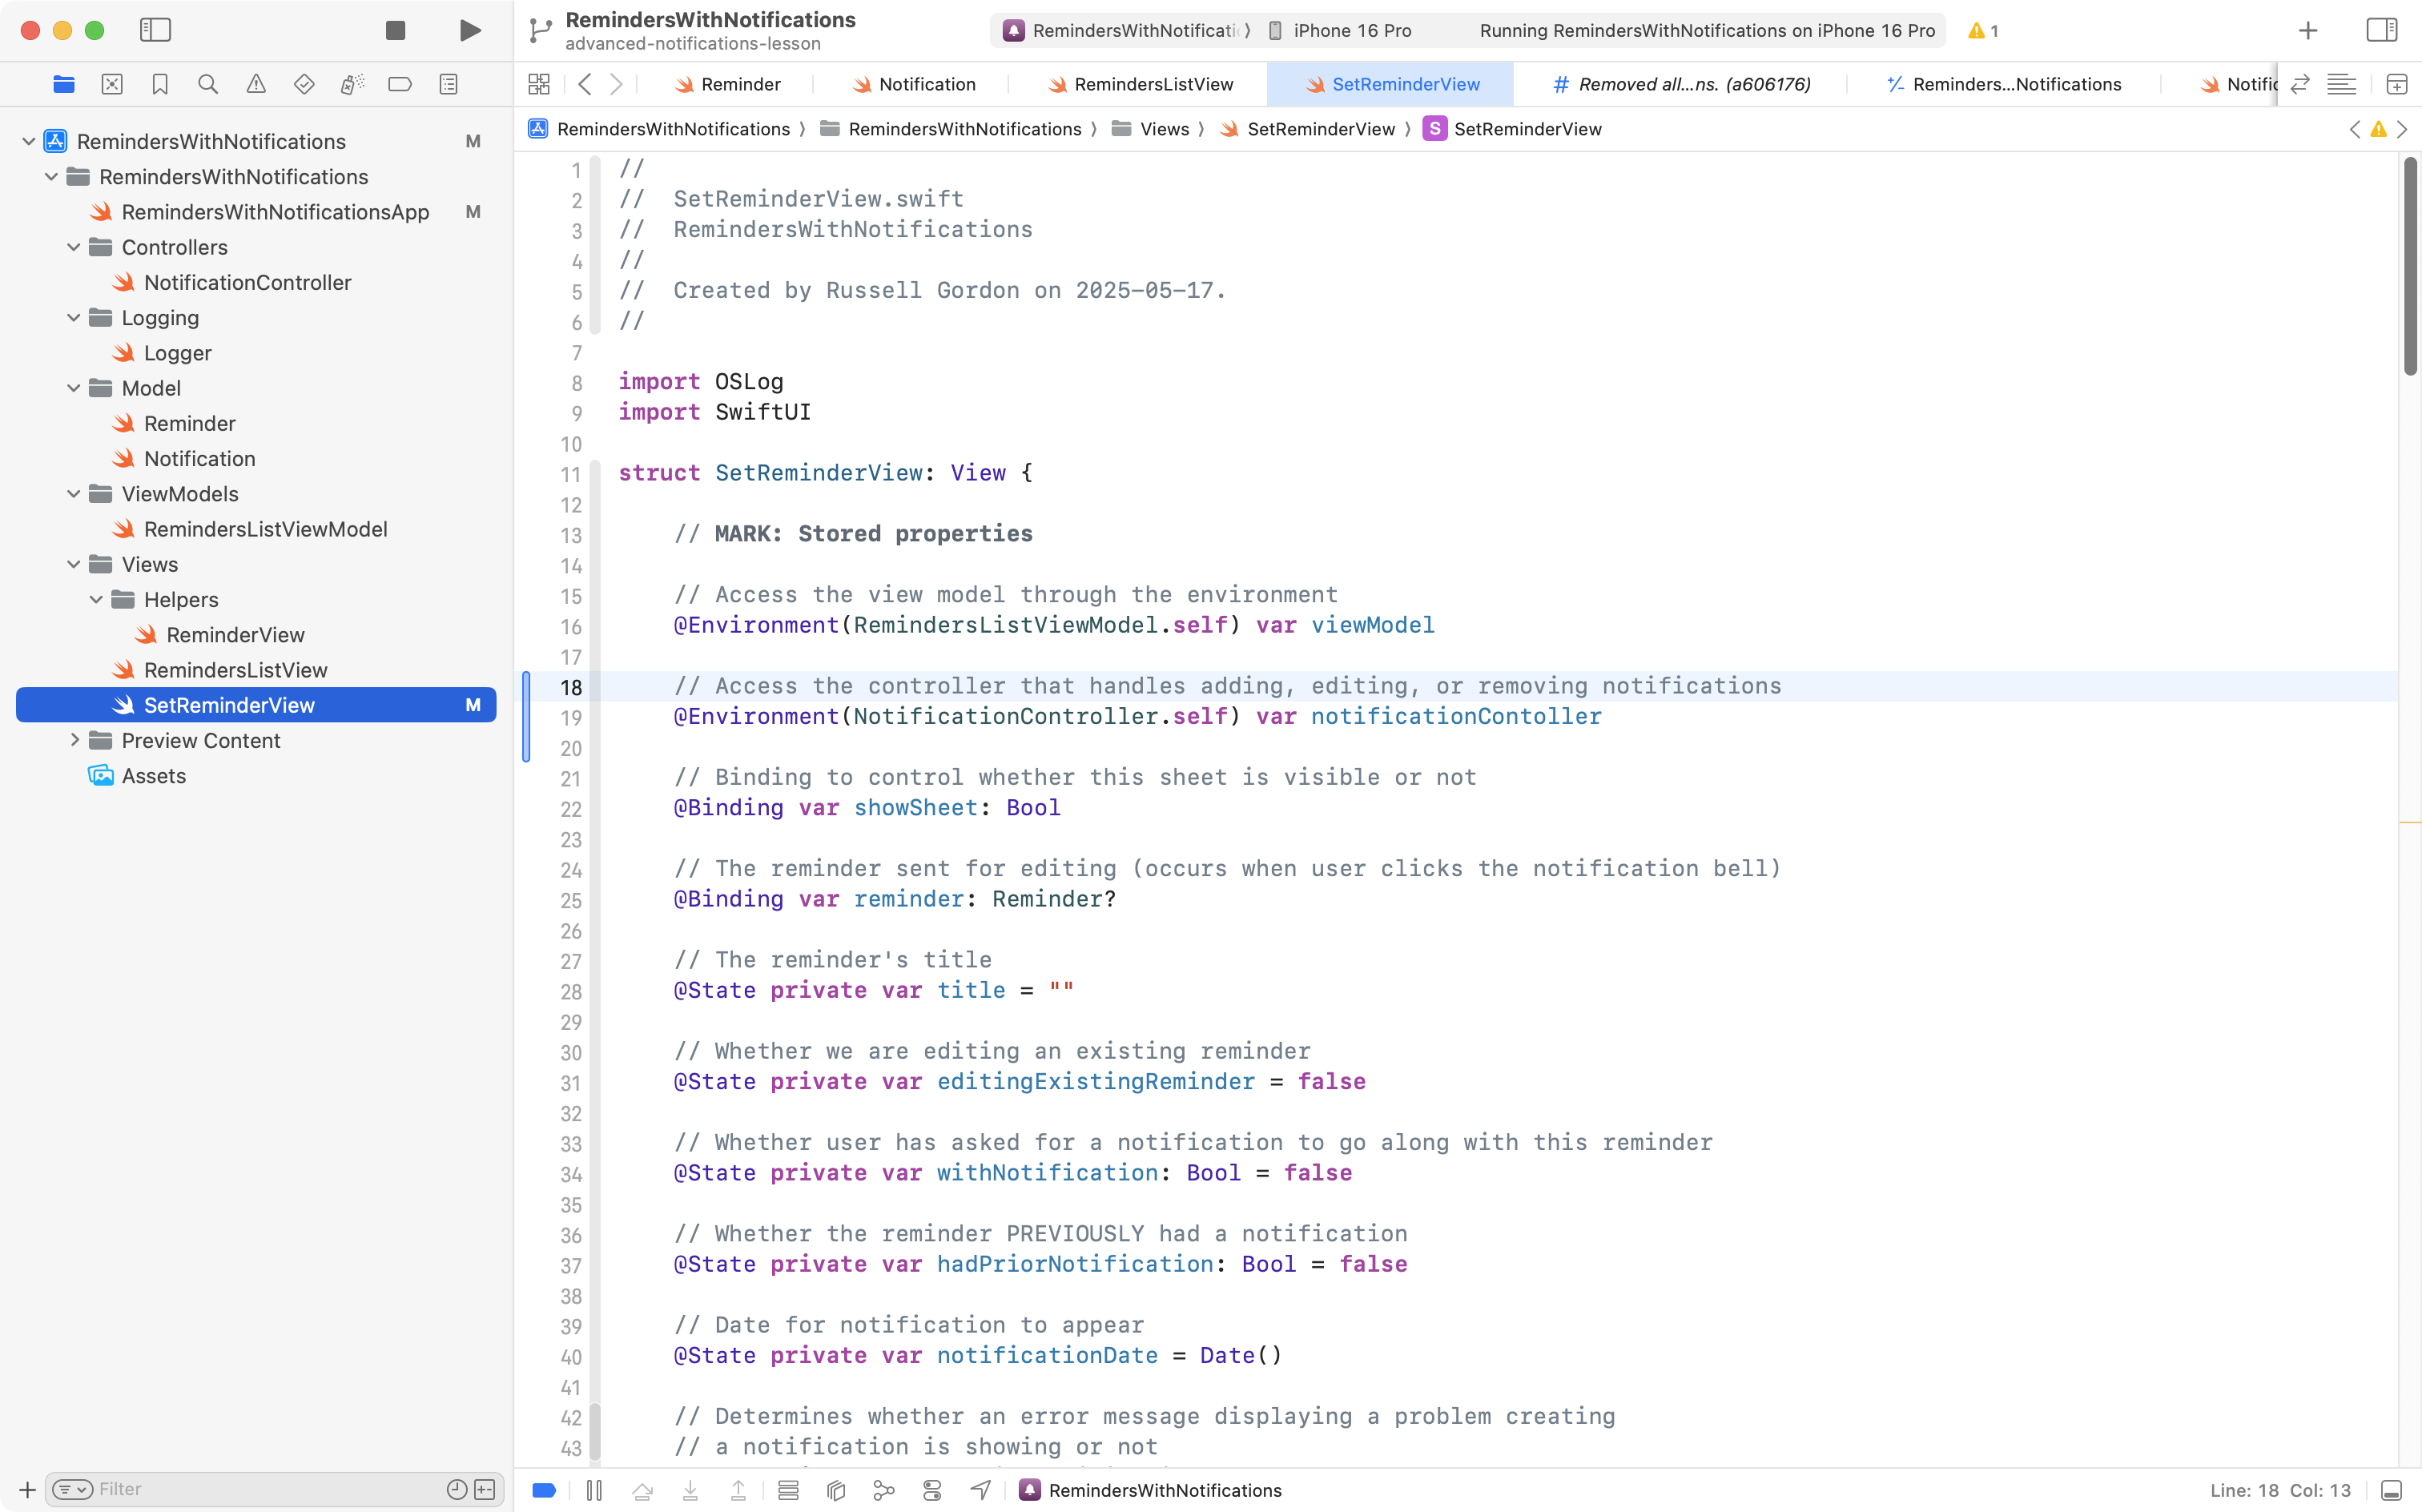
IMPORTANT
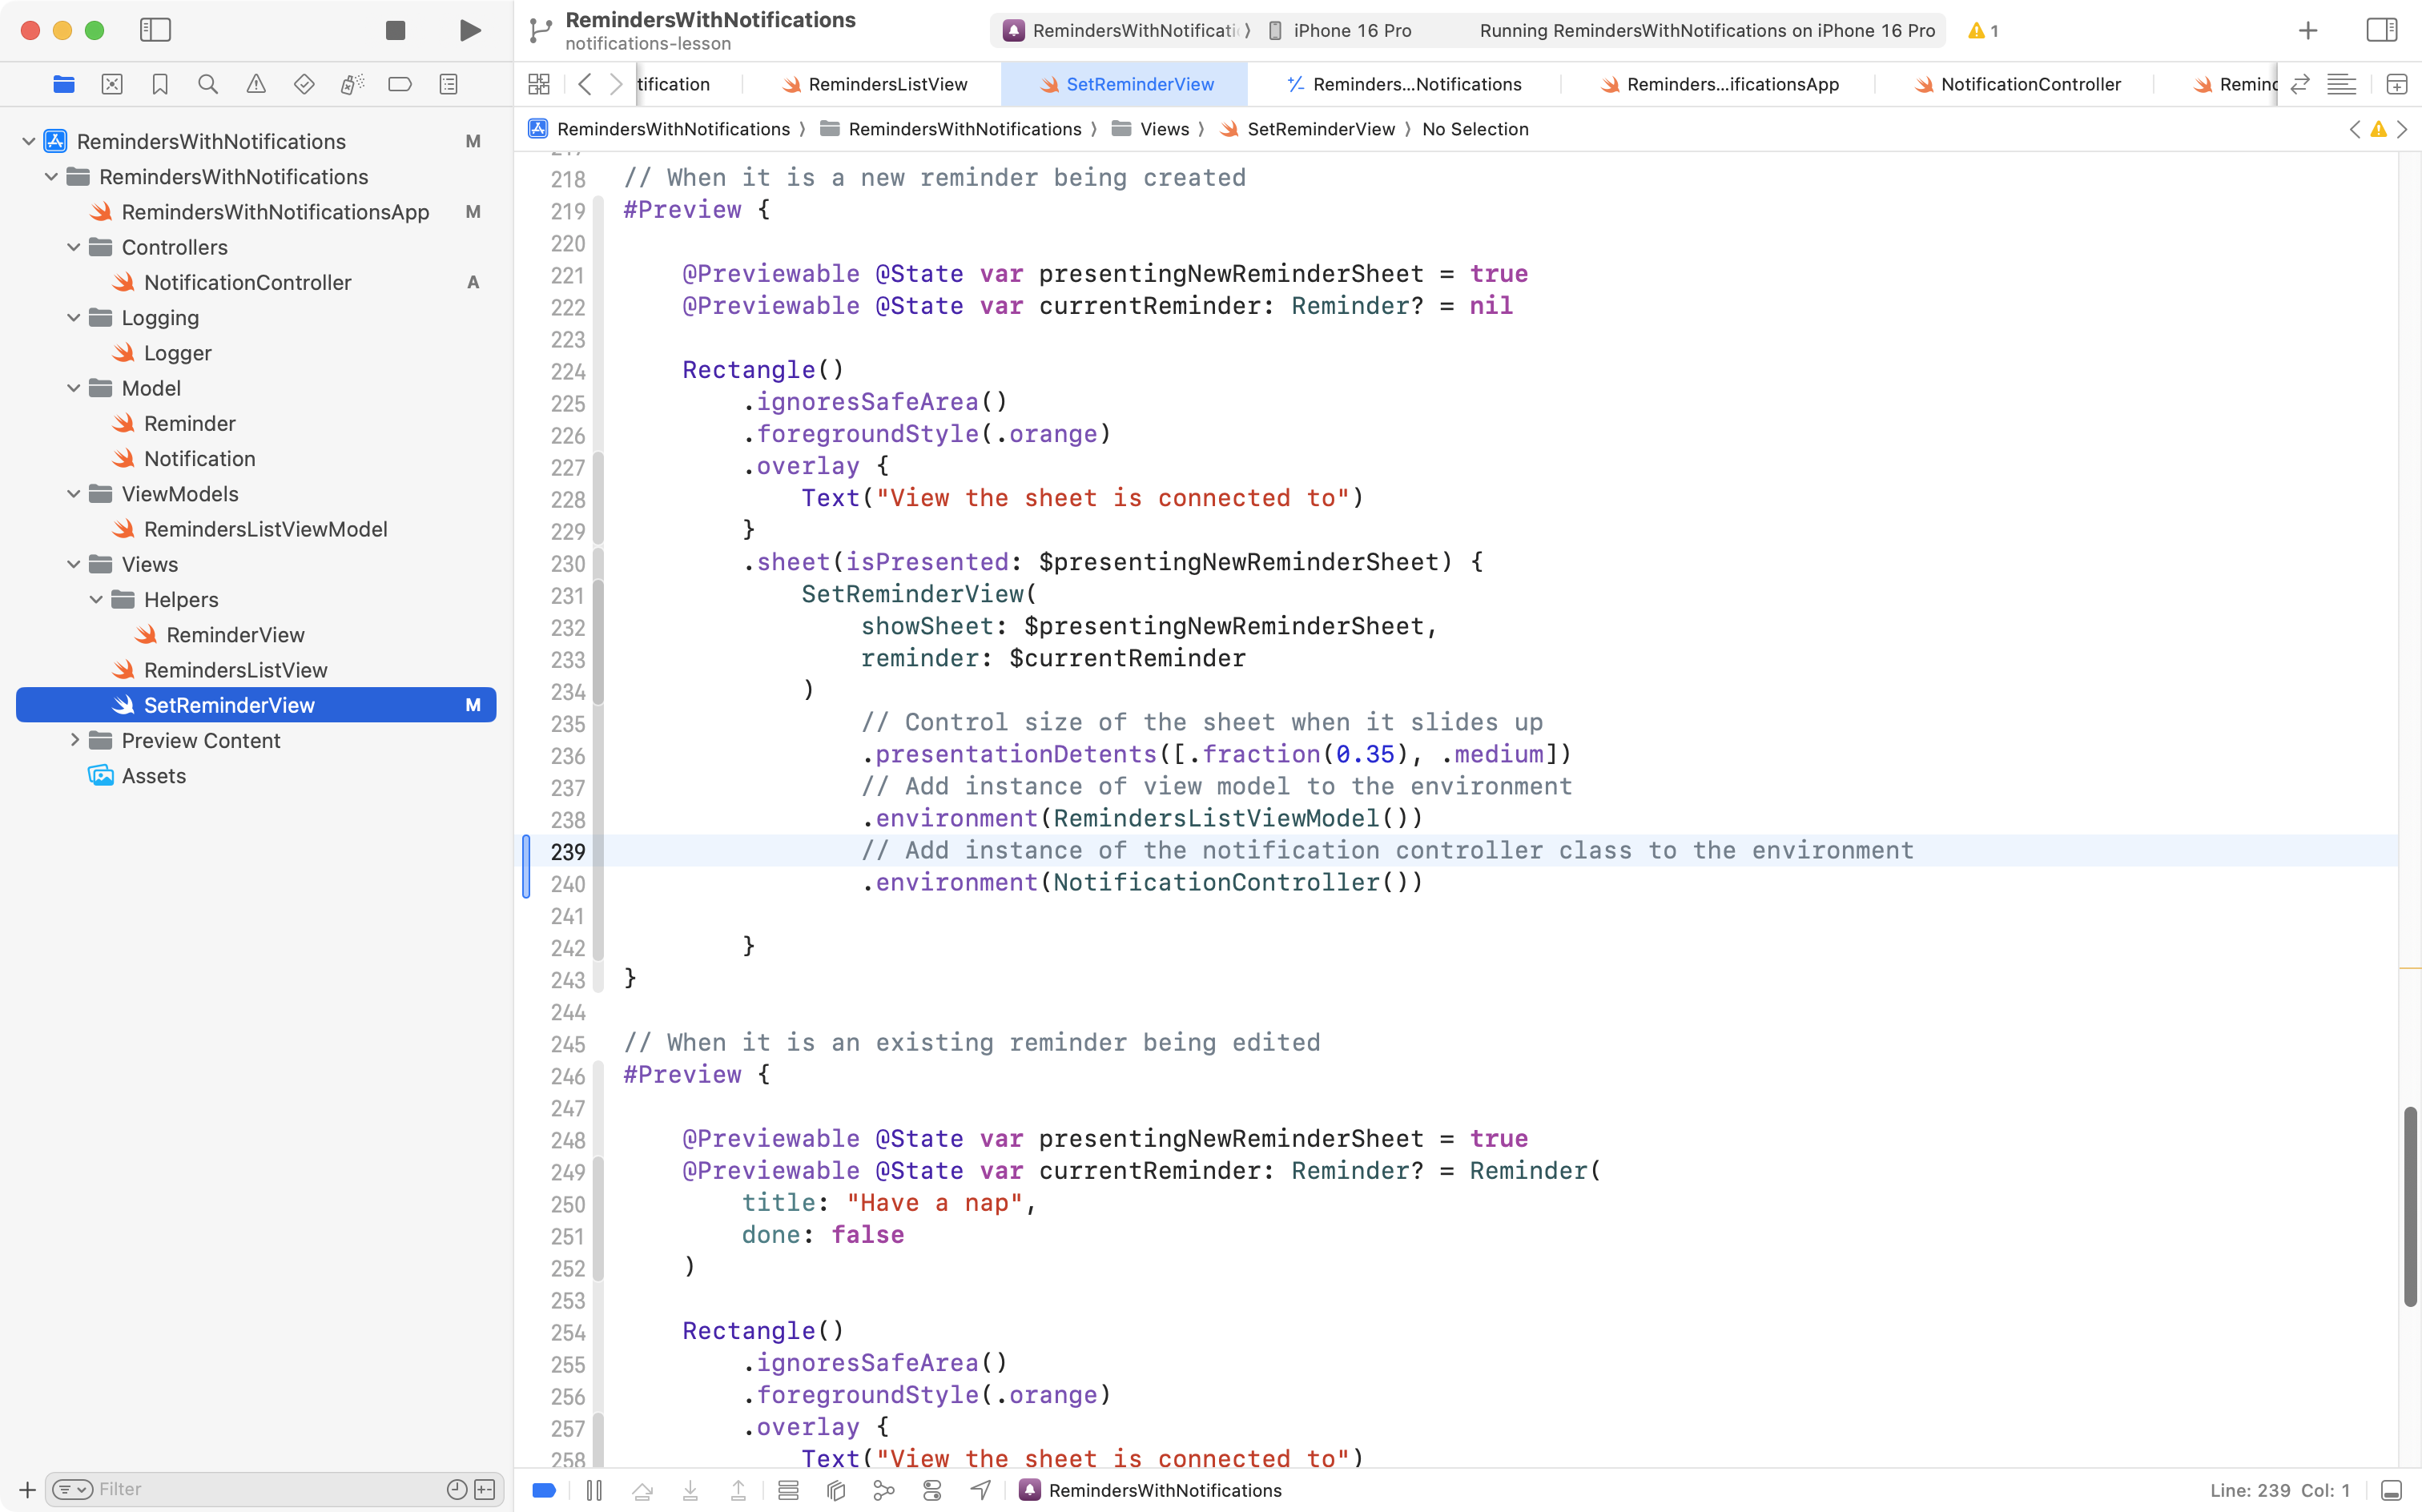
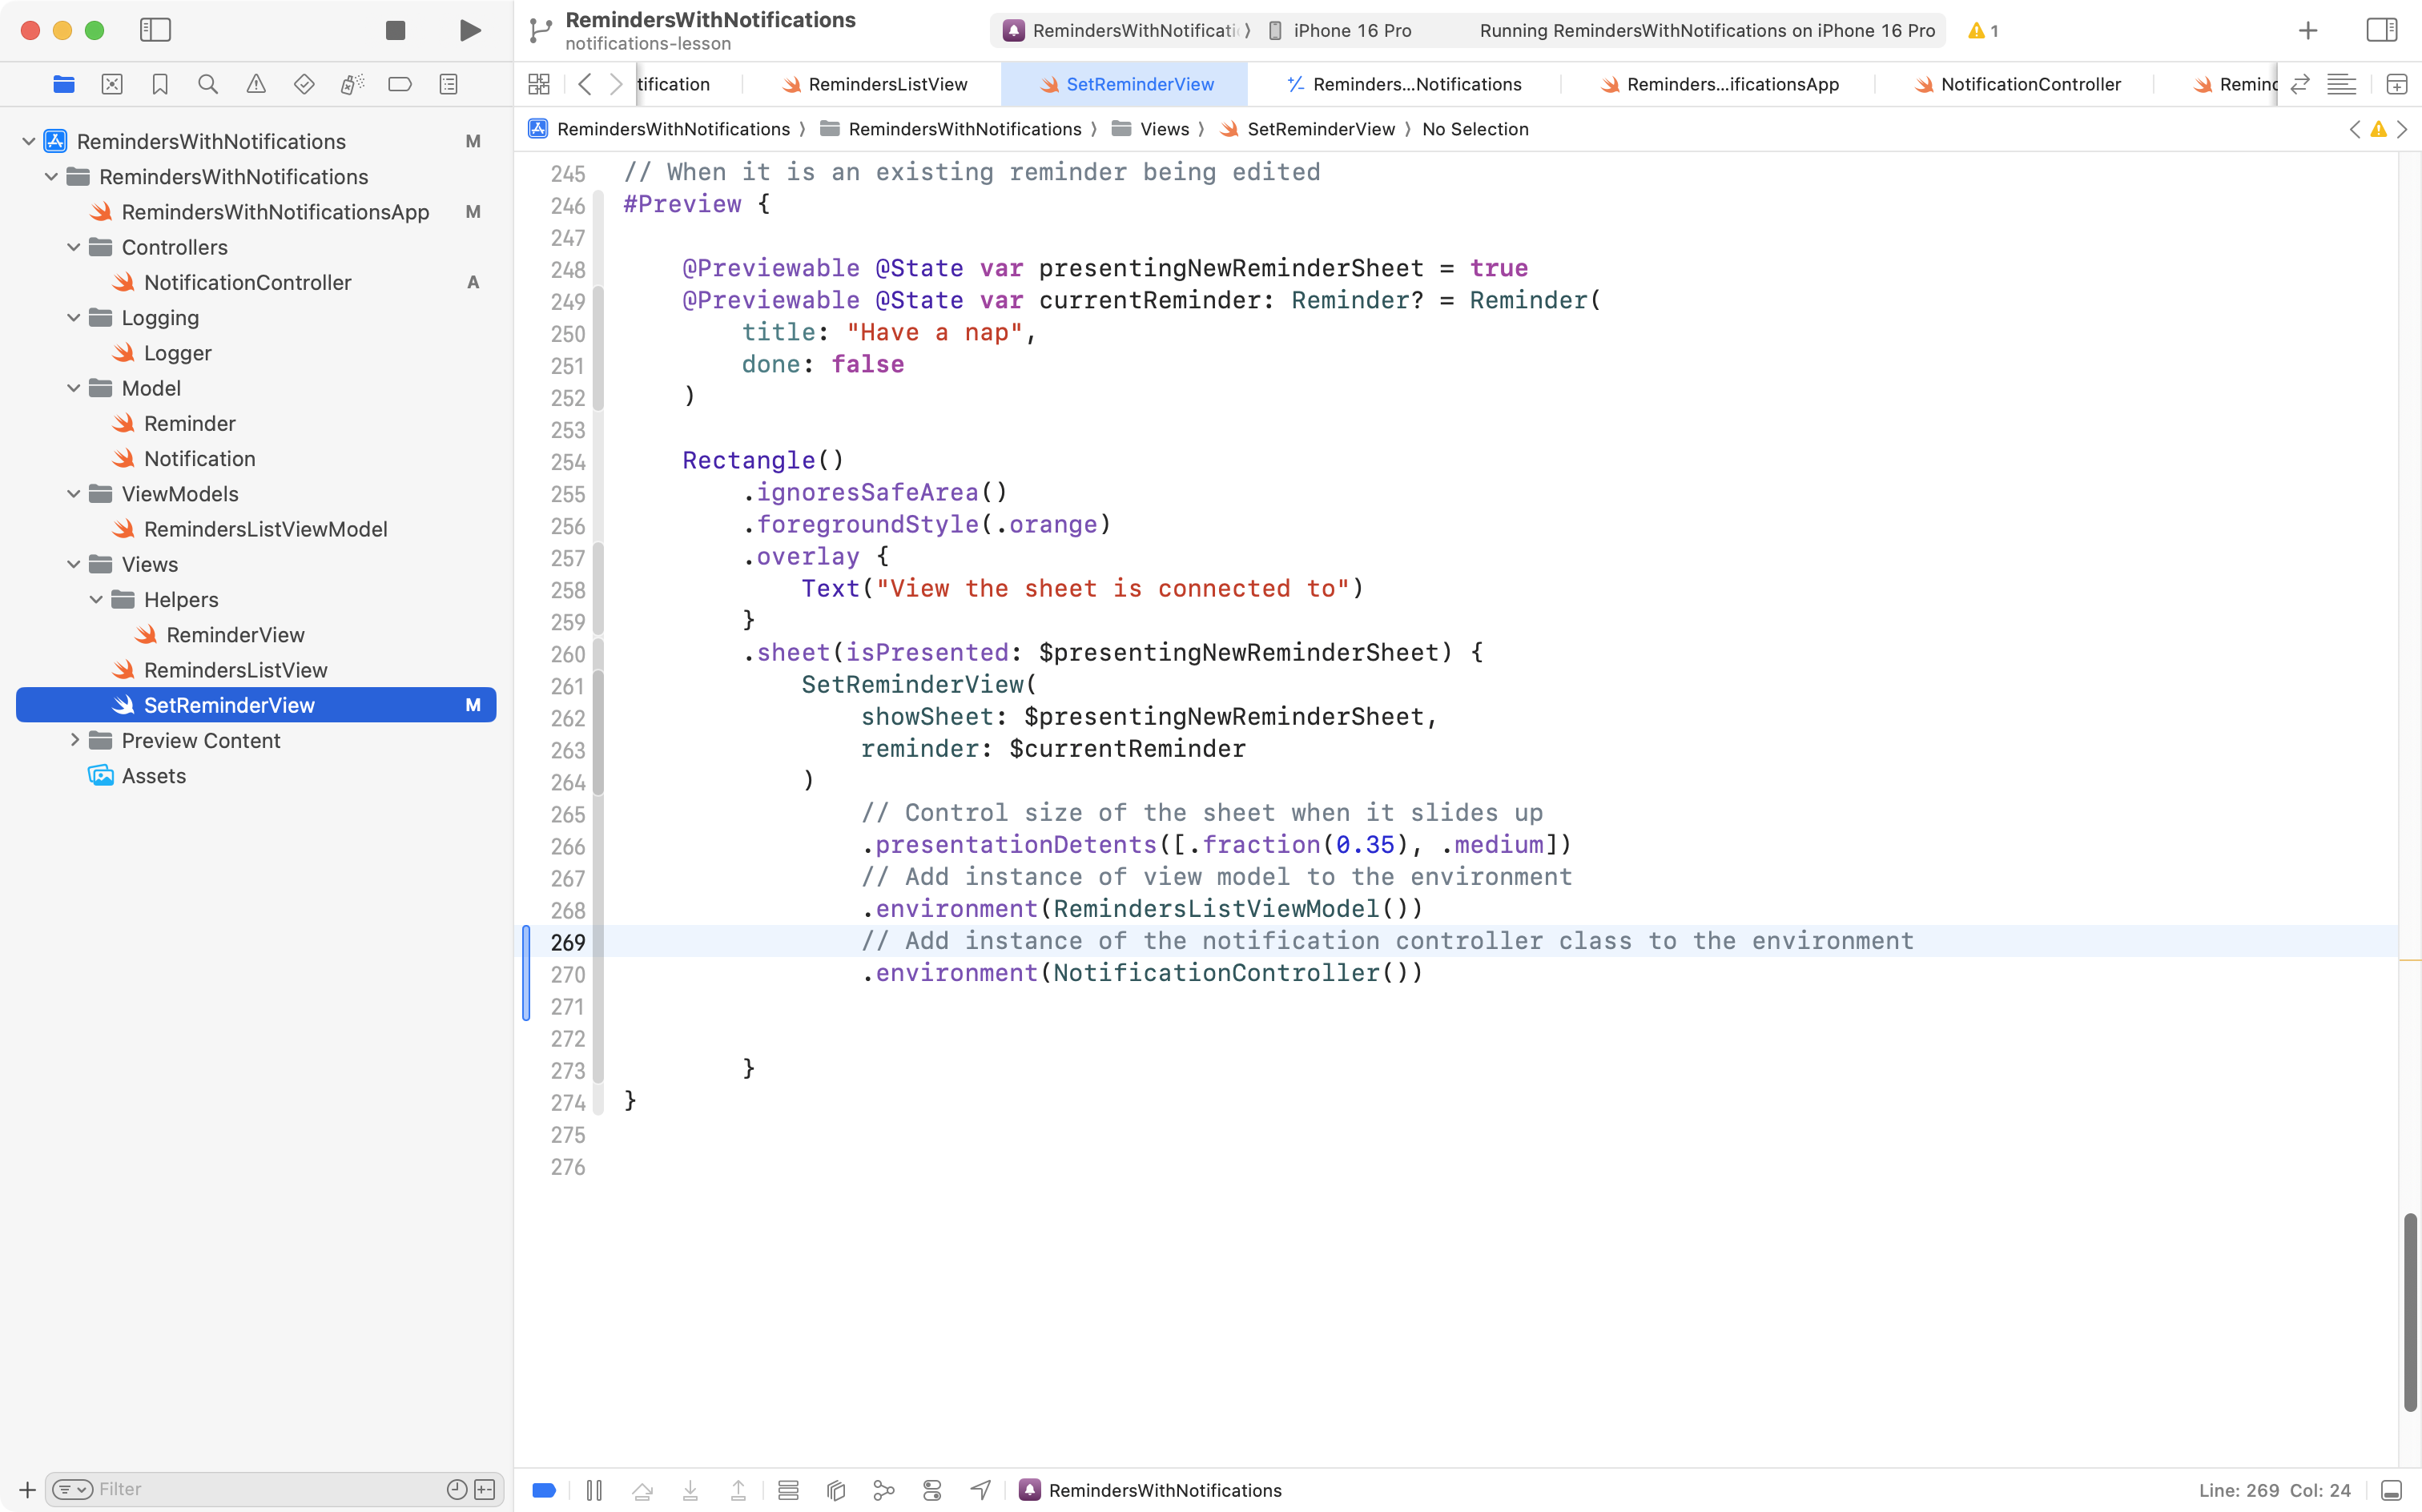
When a view pulls an instance of a class from the environment, it needs to be there.
A common error (Mr. Gordon does this frequently) is to forget that the Previews window in Xcode needs to insert an instance of a class required by a view into the environment.
We need to do that now for
SetReminderView, like this:
… and this:
If we forget to do this, the preview of the view will crash when it attempts to pull something out of the environment that is not there.
The setReminder function in SetReminderView handles the logic involved when adding a reminder together with (optionally) a notification.
There are then several possibilities when setting a reminder – what we need to do with the notification in each case in noted in bold:
- we could be editing an existing reminder
- … that previously had no notification
- … but now it does (add)
- … and still has no notification (do nothing)
- … that previously had a notification
- … and still has a notification (edit)
- … but now it doesn’t (delete)
- … that previously had no notification
- we could be adding a new reminder
- … with a notification (add)
- … without a notification (do nothing)
We do not distinguish between adding a new notification or editing an existing notification. Either way, we will delete the existing notification iOS my have previously scheduled for us, then schedule a new notification with a revised date and time, or new text. To do this, we use the following function:
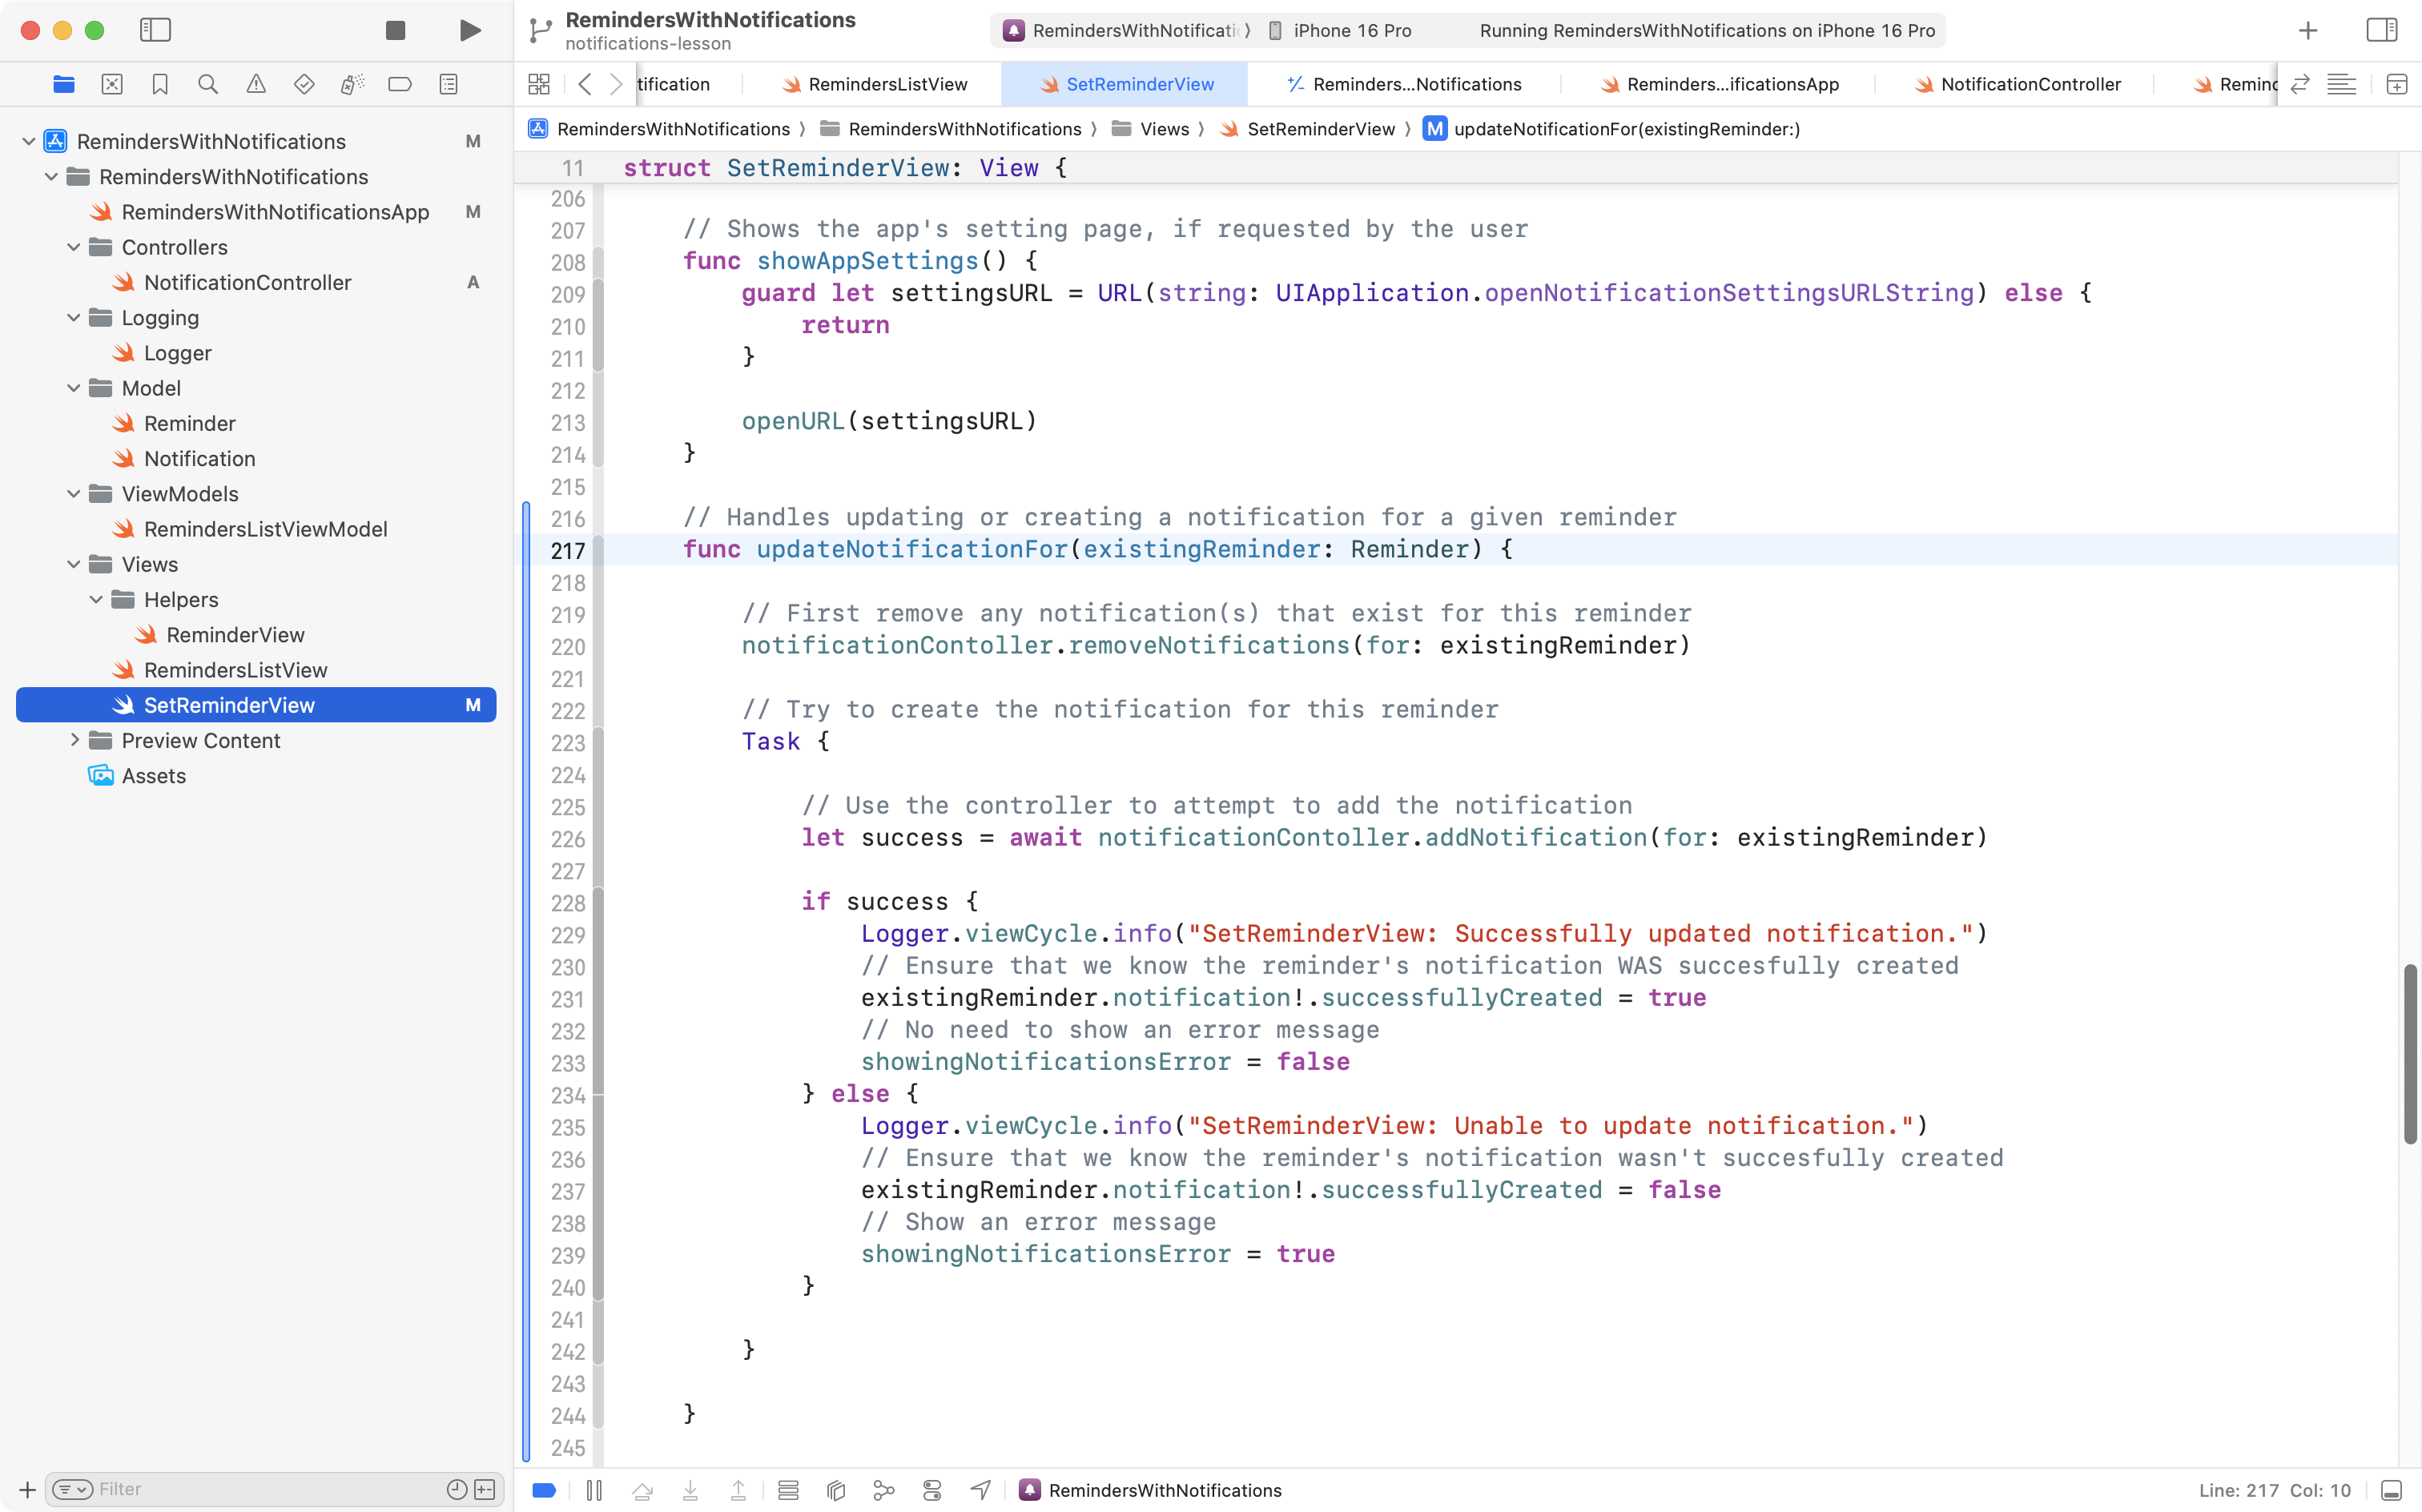
If you are following along, you can copy the code into your project from this block:
// Handles updating or creating a notification for a given reminder
func updateNotificationFor(existingReminder: Reminder) {

	// First remove any notification(s) that exist for this reminder
	notificationContoller.removeNotifications(for: existingReminder)

	// Try to create the notification for this reminder
	Task {

		// Use the controller to attempt to add the notification
		let success = await notificationContoller.addNotification(for: existingReminder)

		if success {
			Logger.viewCycle.info("SetReminderView: Successfully updated notification.")
			// Ensure that we know the reminder's notification WAS succesfully created
			existingReminder.notification!.successfullyCreated = true
			// No need to show an error message
			showingNotificationsError = false
		} else {
			Logger.viewCycle.info("SetReminderView: Unable to update notification.")
			// Ensure that we know the reminder's notification wasn't succesfully created
			existingReminder.notification!.successfullyCreated = false
			// Show an error message
			showingNotificationsError = true
		}

	}

}
Next we need to modify setReminder so that it uses the controller as needed to implement the possibilities outlined a bit earlier.
The easiest way to do this will be to delete the entire setReminder function that you currently have (if you are following along) and replace it with this code:
func setReminder() {

	if editingExistingReminder {

		// Save the changes to the existing reminder's title
		reminder!.title = title

		Logger.viewCycle.info("SetReminderView: Updating existing reminder.")

		if !hadPriorNotification {

			Logger.viewCycle.info("SetReminderView: Existing reminder did NOT previously have a notification.")

			if withNotification {

				// Add new notification
				Logger.viewCycle.info("SetReminderView: Notification requested; about to schedule NEW notification.")
				reminder!.notification = Notification(scheduledFor: notificationDate)
				updateNotificationFor(existingReminder: reminder!)
				hadPriorNotification = true

			} else {

				// Do nothing
				Logger.viewCycle.info("SetReminderView: No notification requested, doing nothing.")

			}

		} else {

			Logger.viewCycle.info("SetReminderView: Existing reminder previously had a notification.")

			if withNotification {

				// Editing existing notification
				Logger.viewCycle.info("SetReminderView: We are editing details of existing notification.")
				updateNotificationFor(existingReminder: reminder!)

			} else {

				// Removing existing notification
				Logger.viewCycle.info("SetReminderView: We are removing notification.")

				// First remove any notification(s) that exist for this reminder
				notificationContoller.removeNotifications(for: reminder!)
				reminder!.notification = nil

			}

		}


	} else {

		// Adding new reminder...
		if withNotification {

			Logger.viewCycle.info("SetReminderView: About to create NEW reminder WITH a notification.")

			let newlyCreatedReminder = viewModel.createReminder(
				withTitle: title,
				andNotificationAt: notificationDate
			)

			Logger.viewCycle.info("SetReminderView: New reminder created, now about to try scheduling its notification.")

			// Try to create the notification for this reminder
			updateNotificationFor(existingReminder: newlyCreatedReminder)

		} else {

			Logger.viewCycle.info("SetReminderView: About to create NEW reminder WITHOUT a notification.")

			let _ = viewModel.createReminder(withTitle: title)

		}

		// Reset input fields
		title = ""
		withNotification = false
		notificationDate = Date()

	}

}
After you do that, you will see there are actually only a few places where edits to setReminder were made:
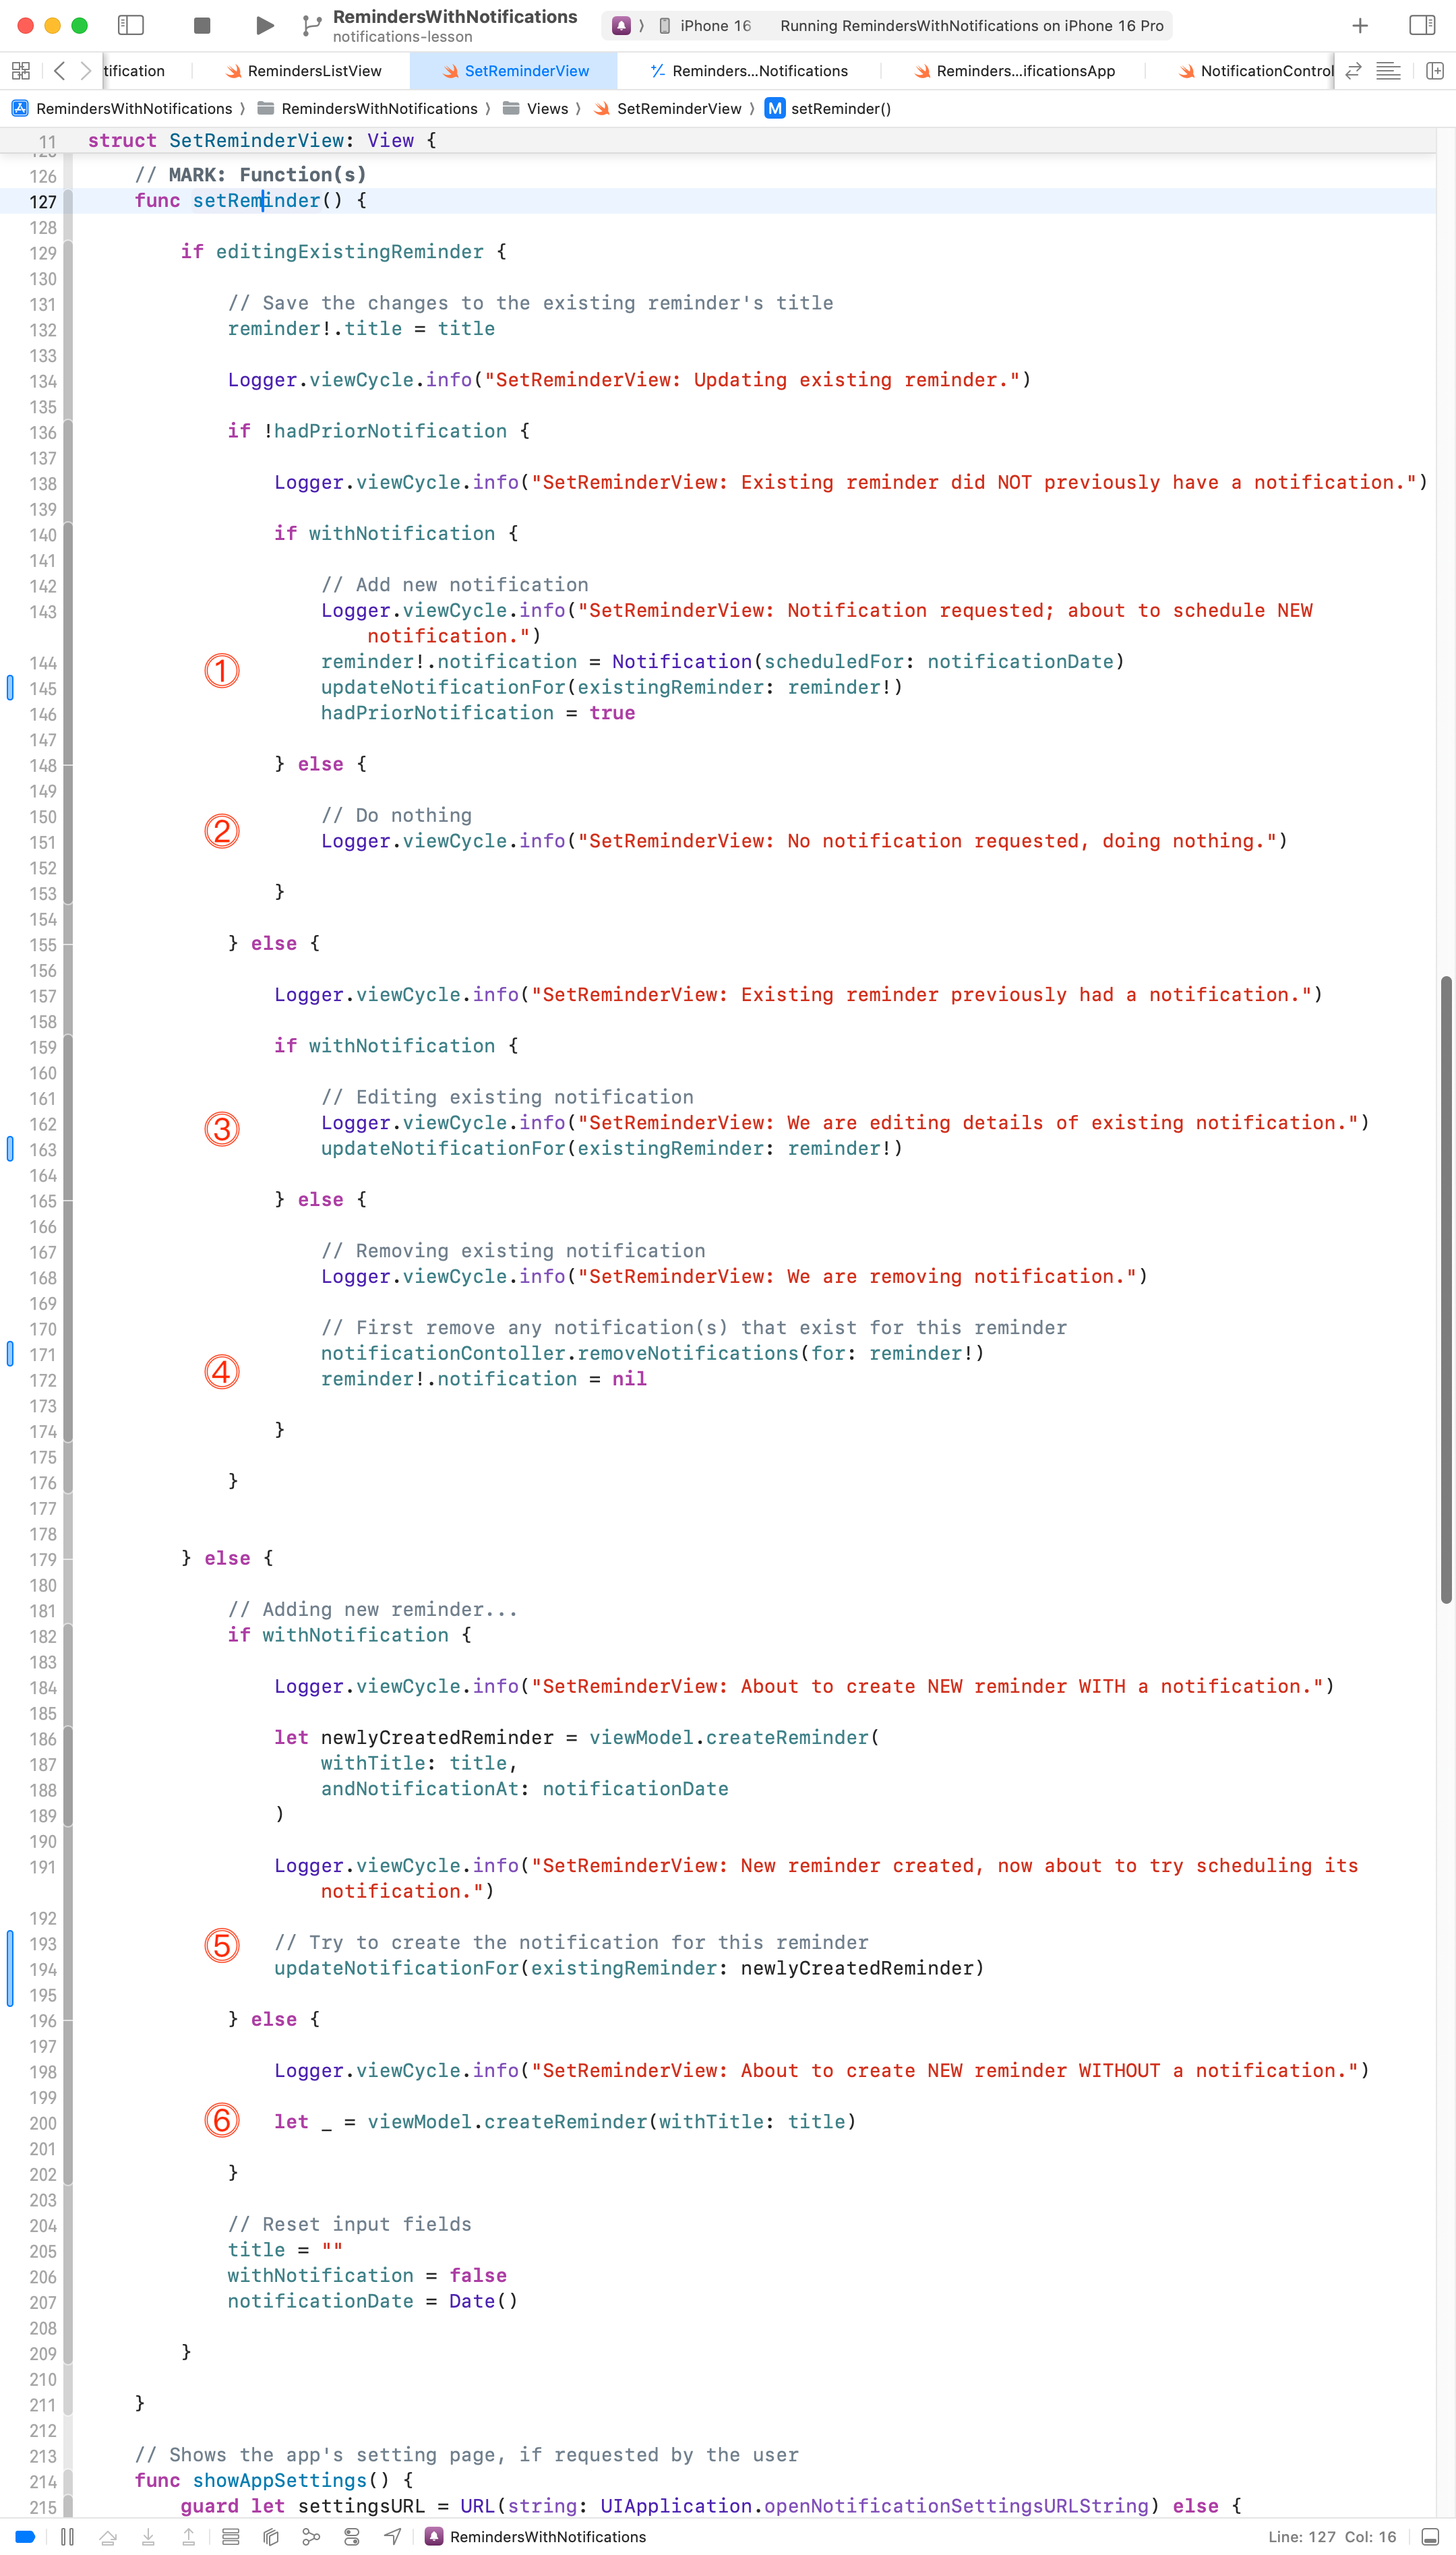
Examining where the changes were made, as outlined before:
DISCUSSION
- Existing reminder, no previous notification set, now there is a notification – so we add one.
- Existing reminder, no previous notification set, still no notification – do nothing.
- Existing reminder, with a prior notification, still has a notification – we edit the existing notification.
- Existing reminder, with a prior notification, now there is no notification – we delete the prior notification.
- New reminder, with a notification, so we add a new notification.
- New reminder, no notification, so we do nothing.
Handling errors
Finally, SetReminderView needs a way to show an appropriate error message when the user does not give permission to show notifications. Here is the code that does that (it already existed in the provided project):

Here is what it looks like, when all is said and done:
Conclusion
The precise way that you end up adding scheduled notifications to your project may vary somewhat at the user interface level.
However, this approach – using a shared notification controller – is very likely to be the best way to handle notifications within your app.