Xcode is a large application that serves several purposes for software developers.
Many different types of projects can be created for different Apple platforms.
This short tutorial will show you how to create a project that runs on iOS.
Create the project
To create a playground, make sure that Xcode is in the foreground on your computer by clicking it’s icon in the Dock:

From the menu bar at top left, choose File > New > Project…:

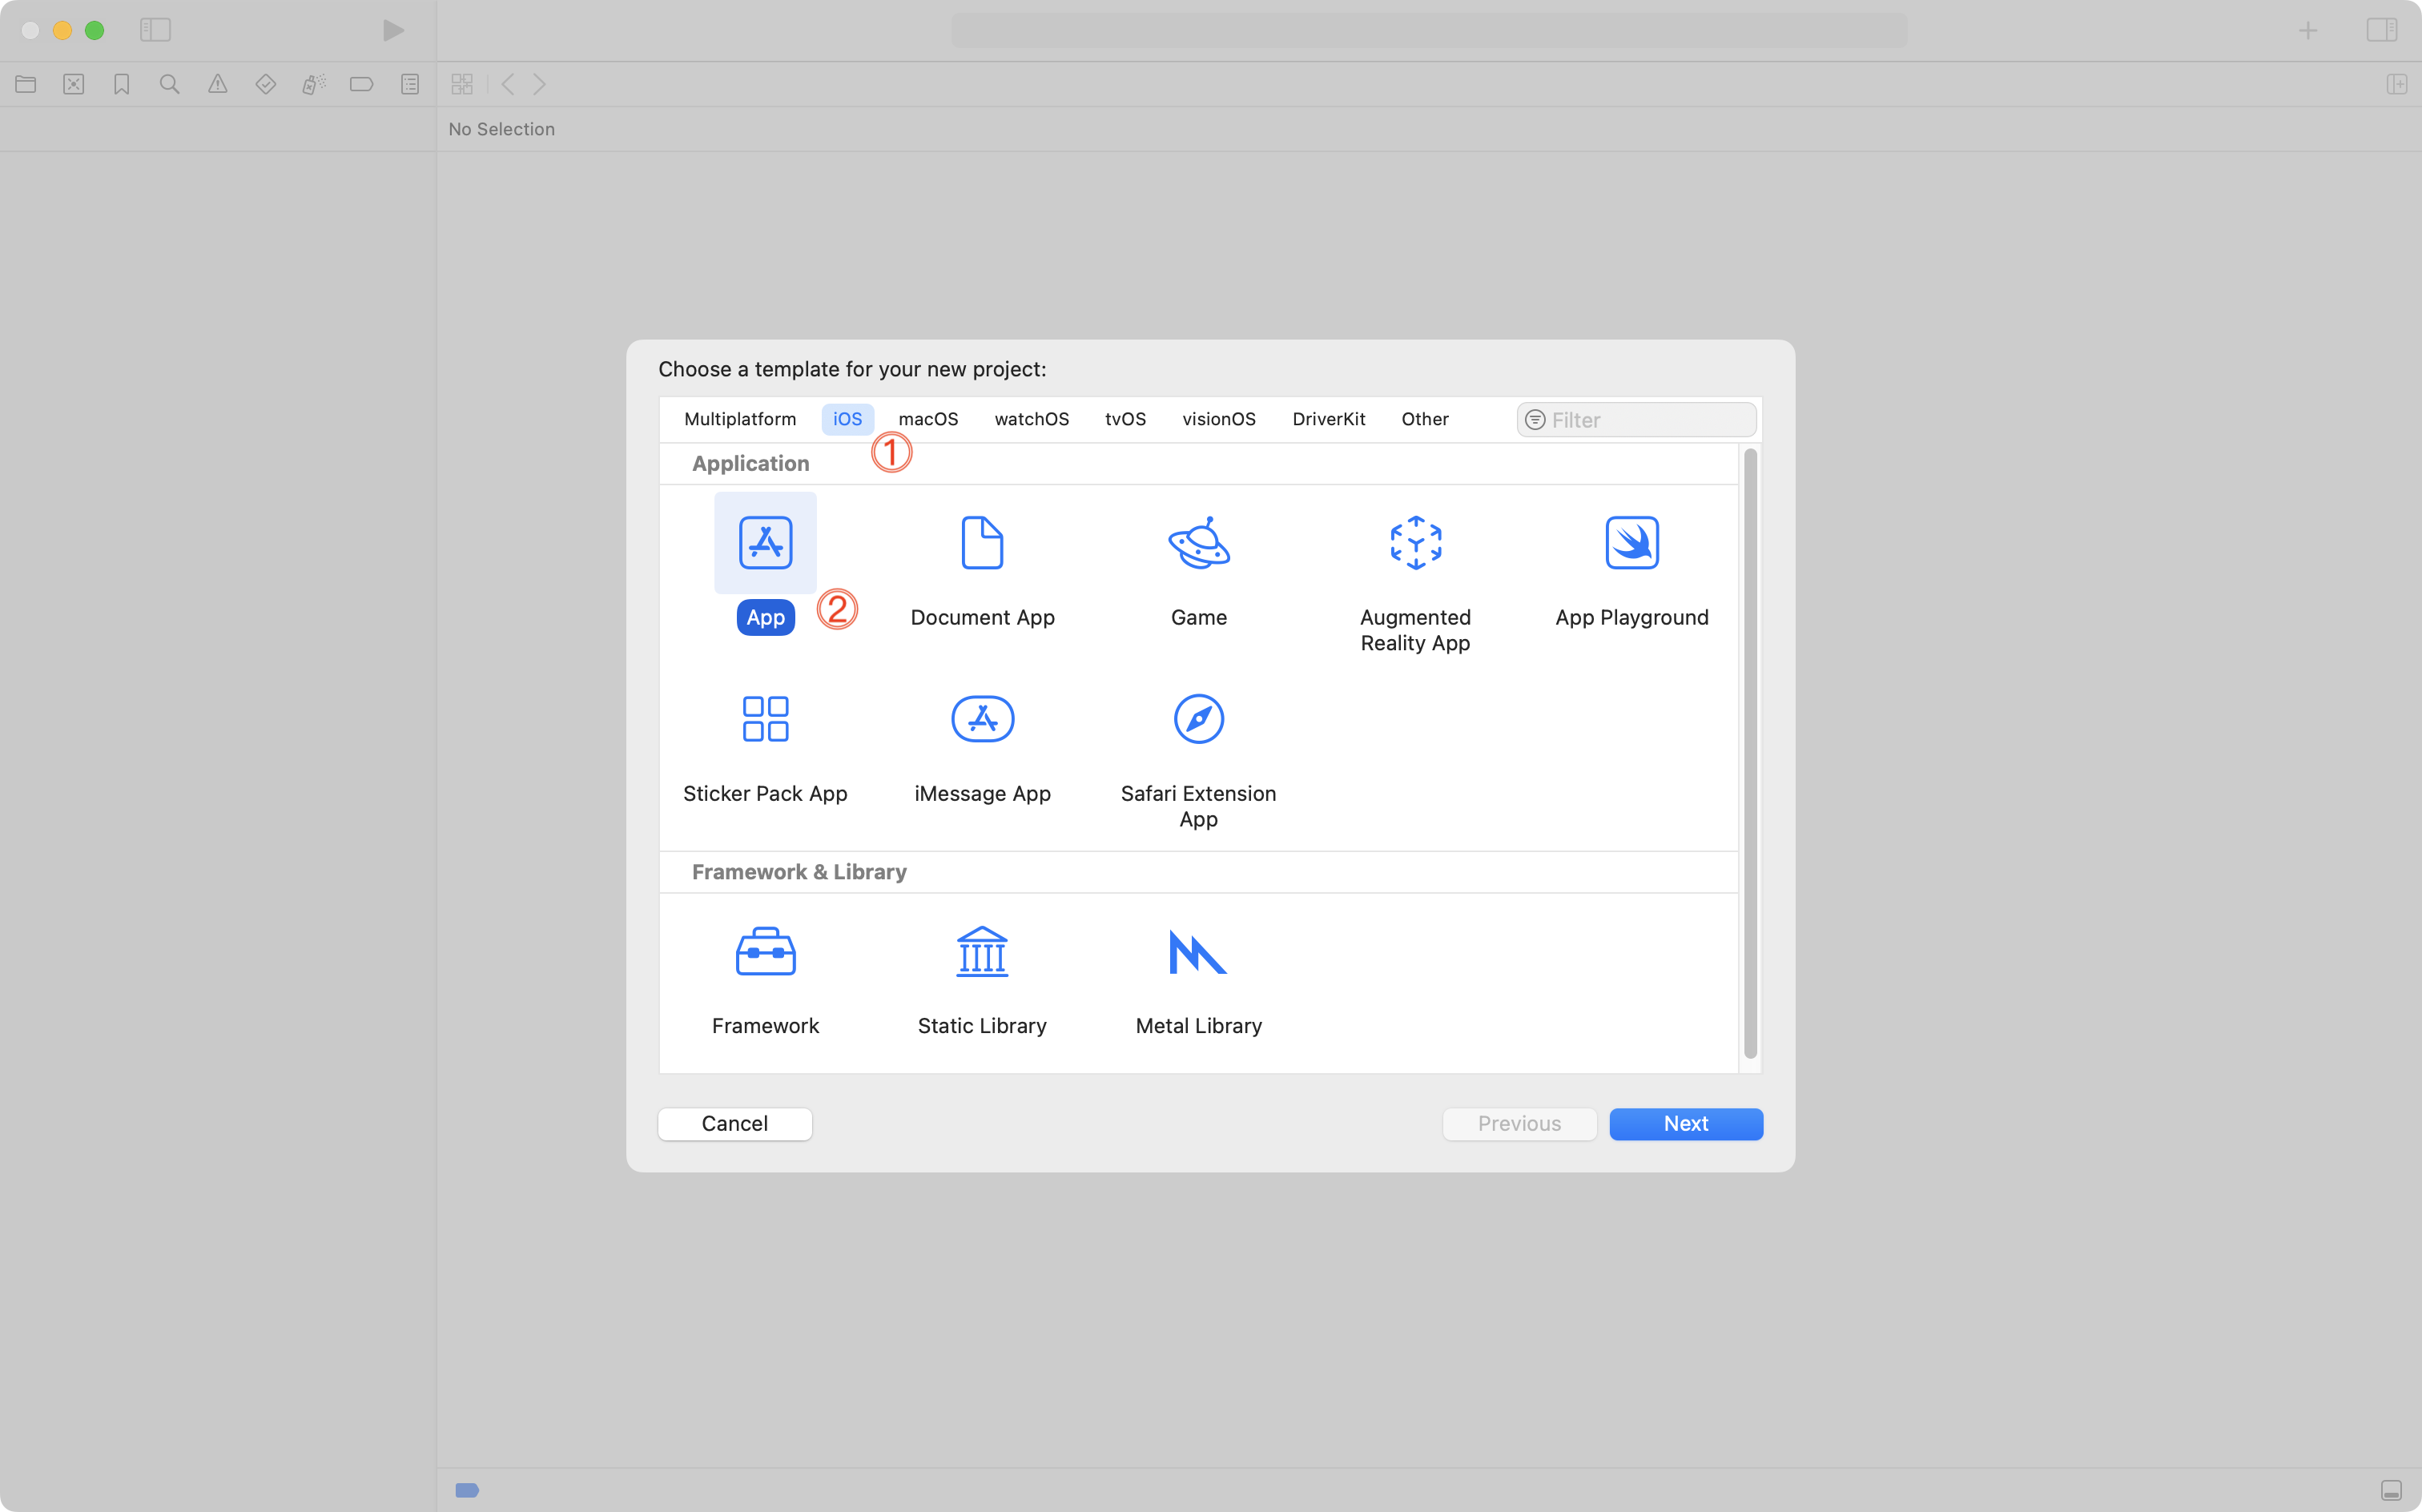
You will see the following window – here, choose the iOS tab, then App, and then Next:
On the following screen, give your project:
- a descriptive name, based on what idea you are exploring
- select your team
- NOTE: Log in with the Apple ID tied to your LCS email address, if necessary.
- provide an organization identifier
- NOTE: If your name is Stephanie Laroux, use
ca.stephanielaroux
- NOTE: If your name is Stephanie Laroux, use
- interface should be SwiftUI
- language should be Swift
- testing system should be None
- storage should be None
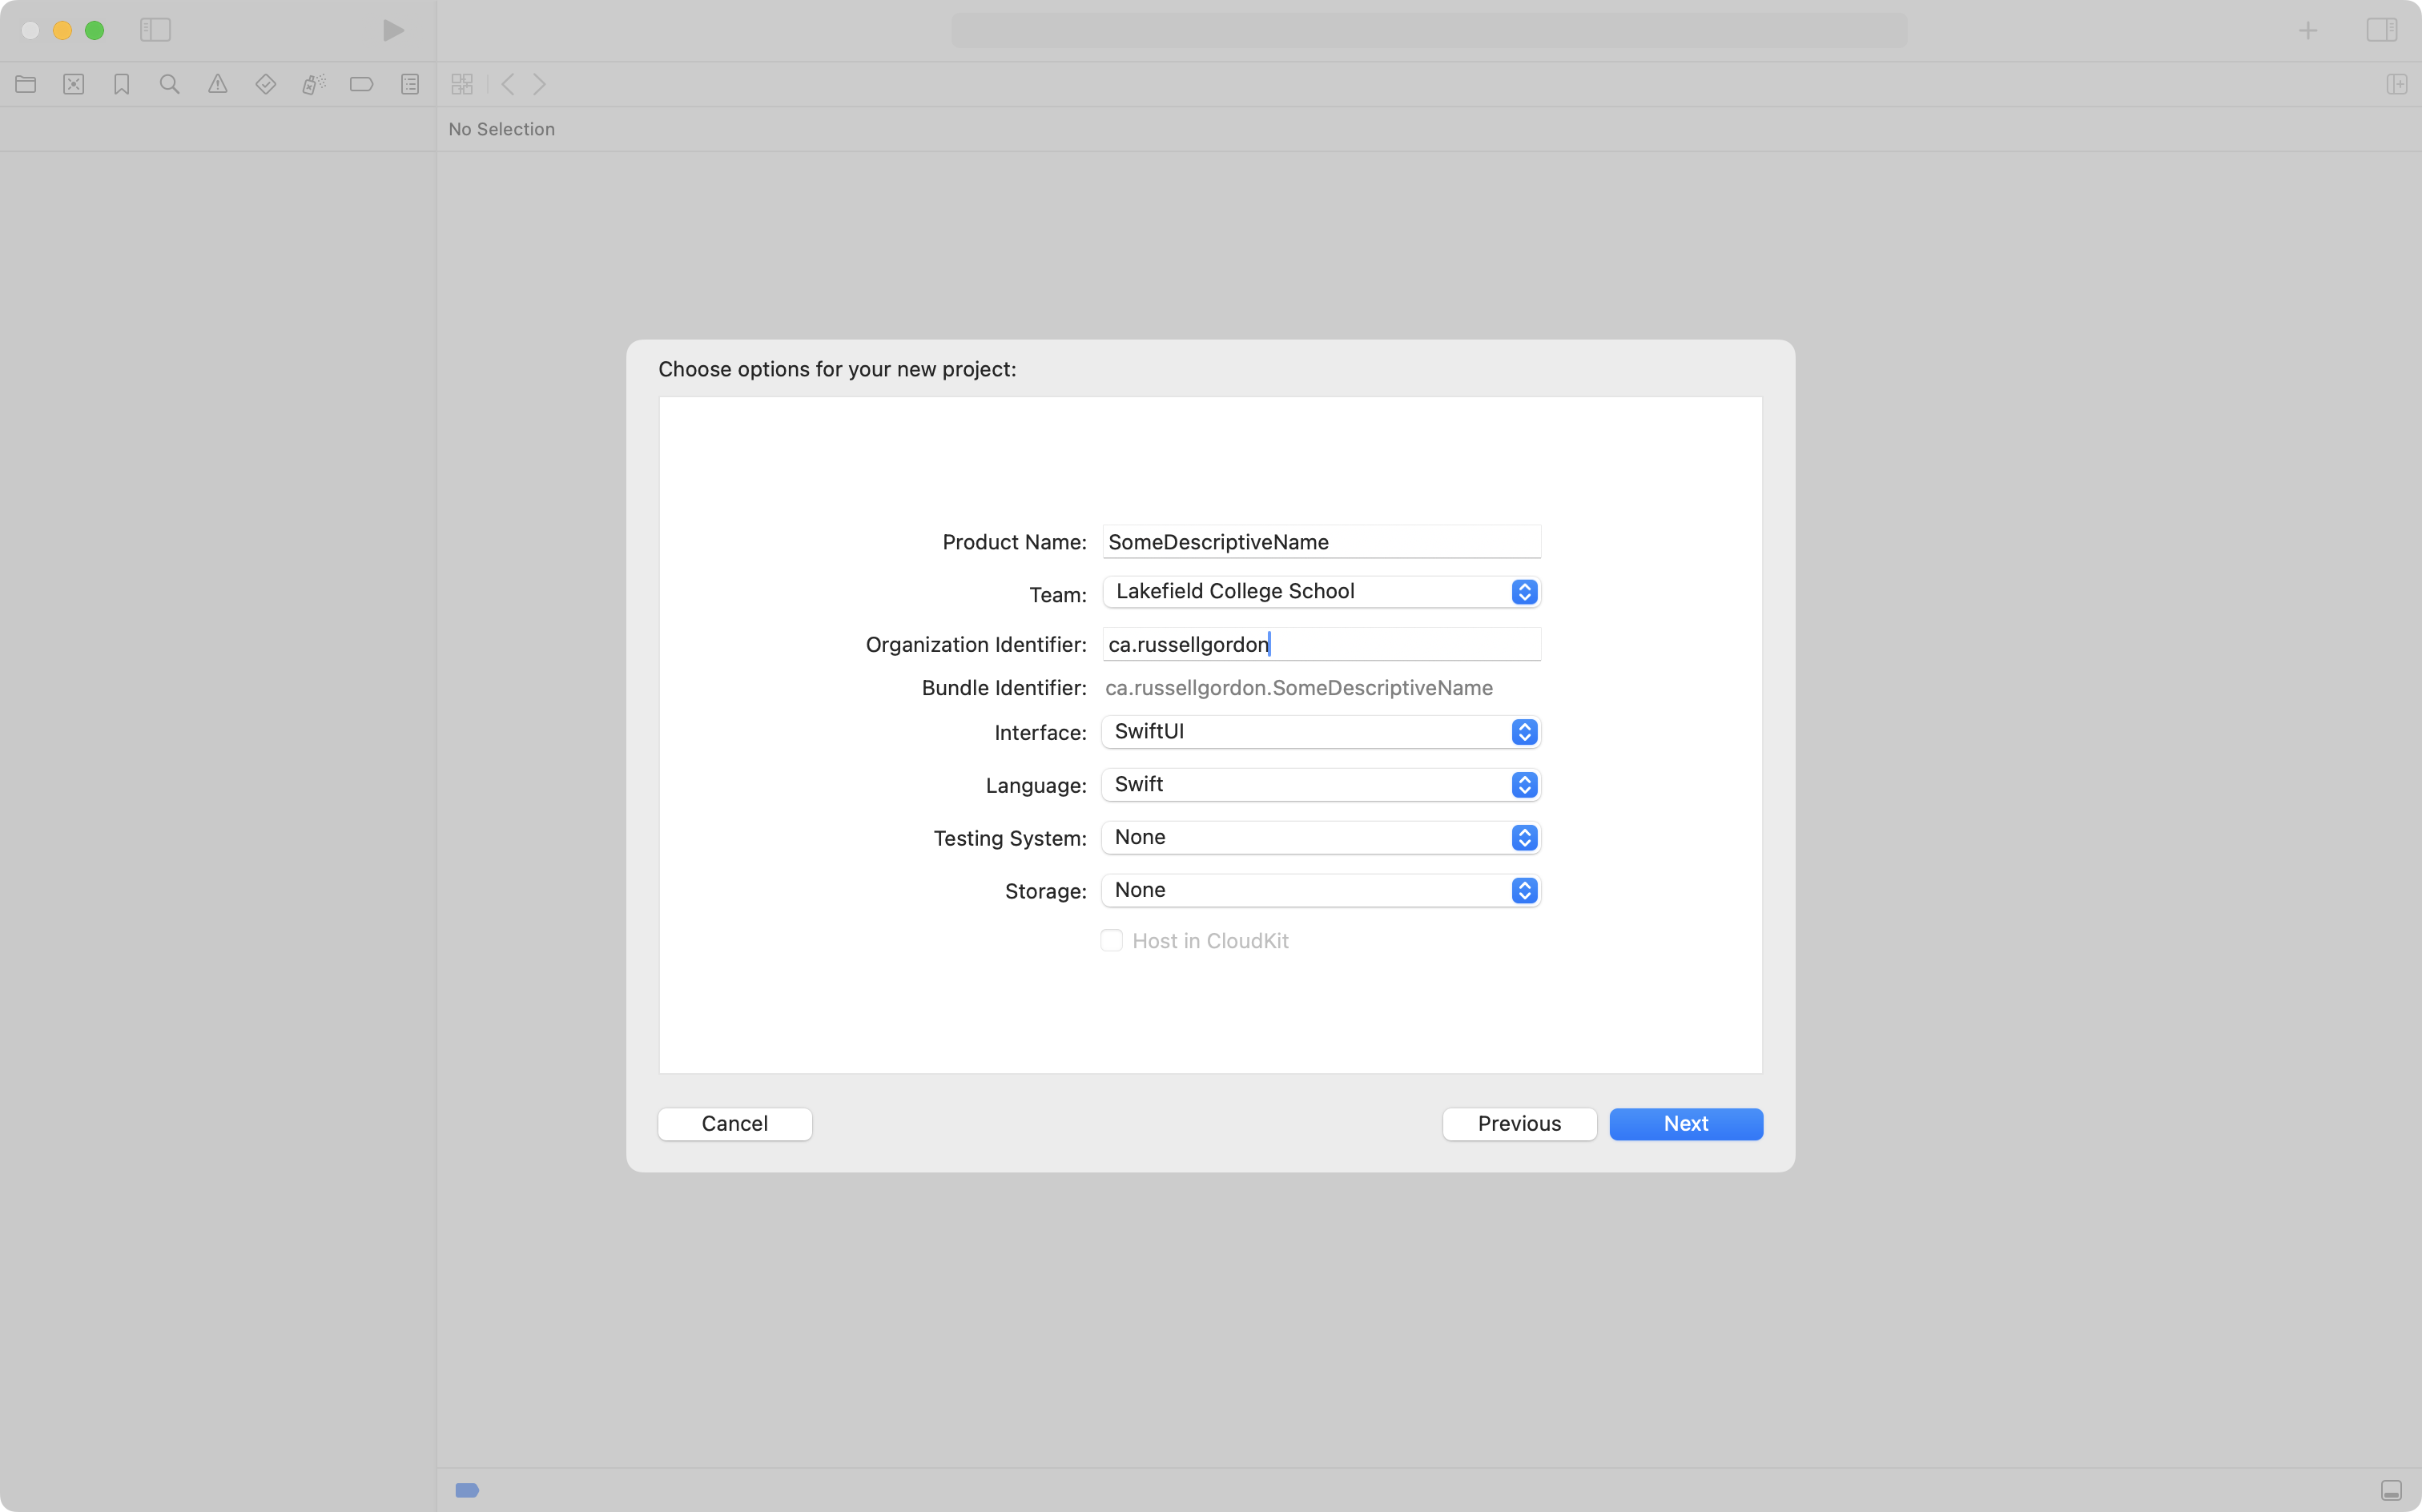
Then press the Next button.
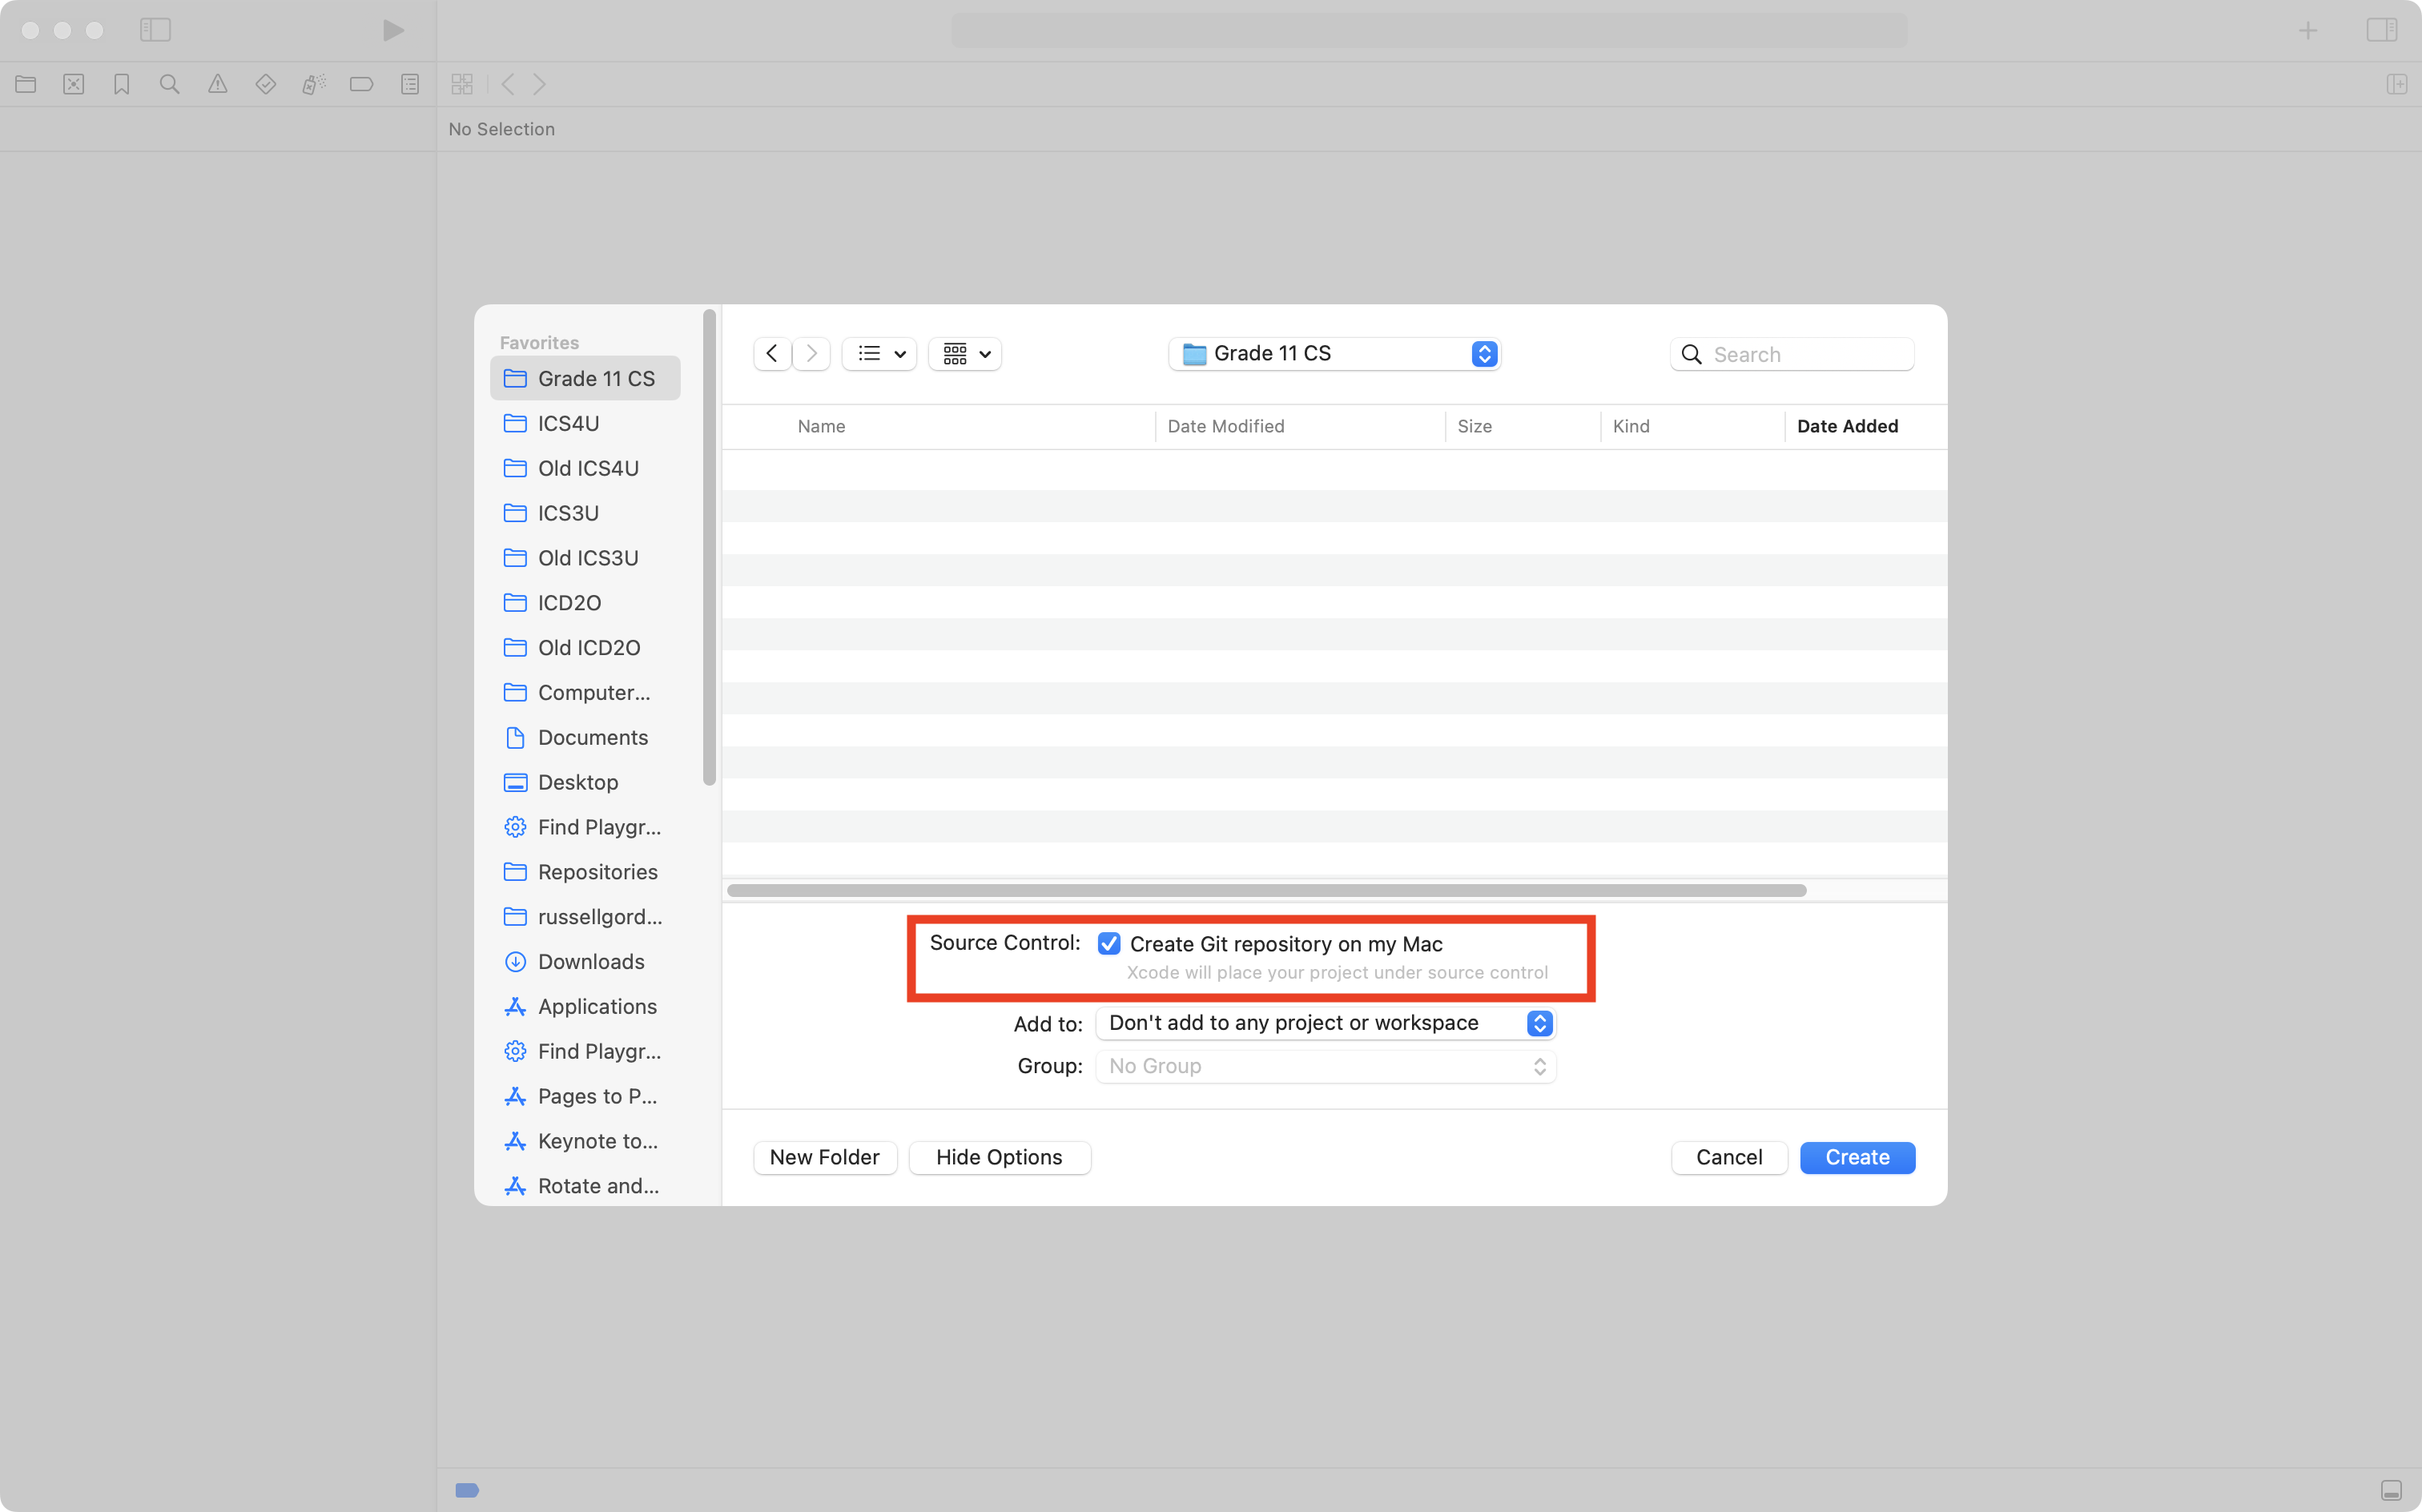
On the following screen, choose where to save your project – be sure that source control is enabled:
Create a remote
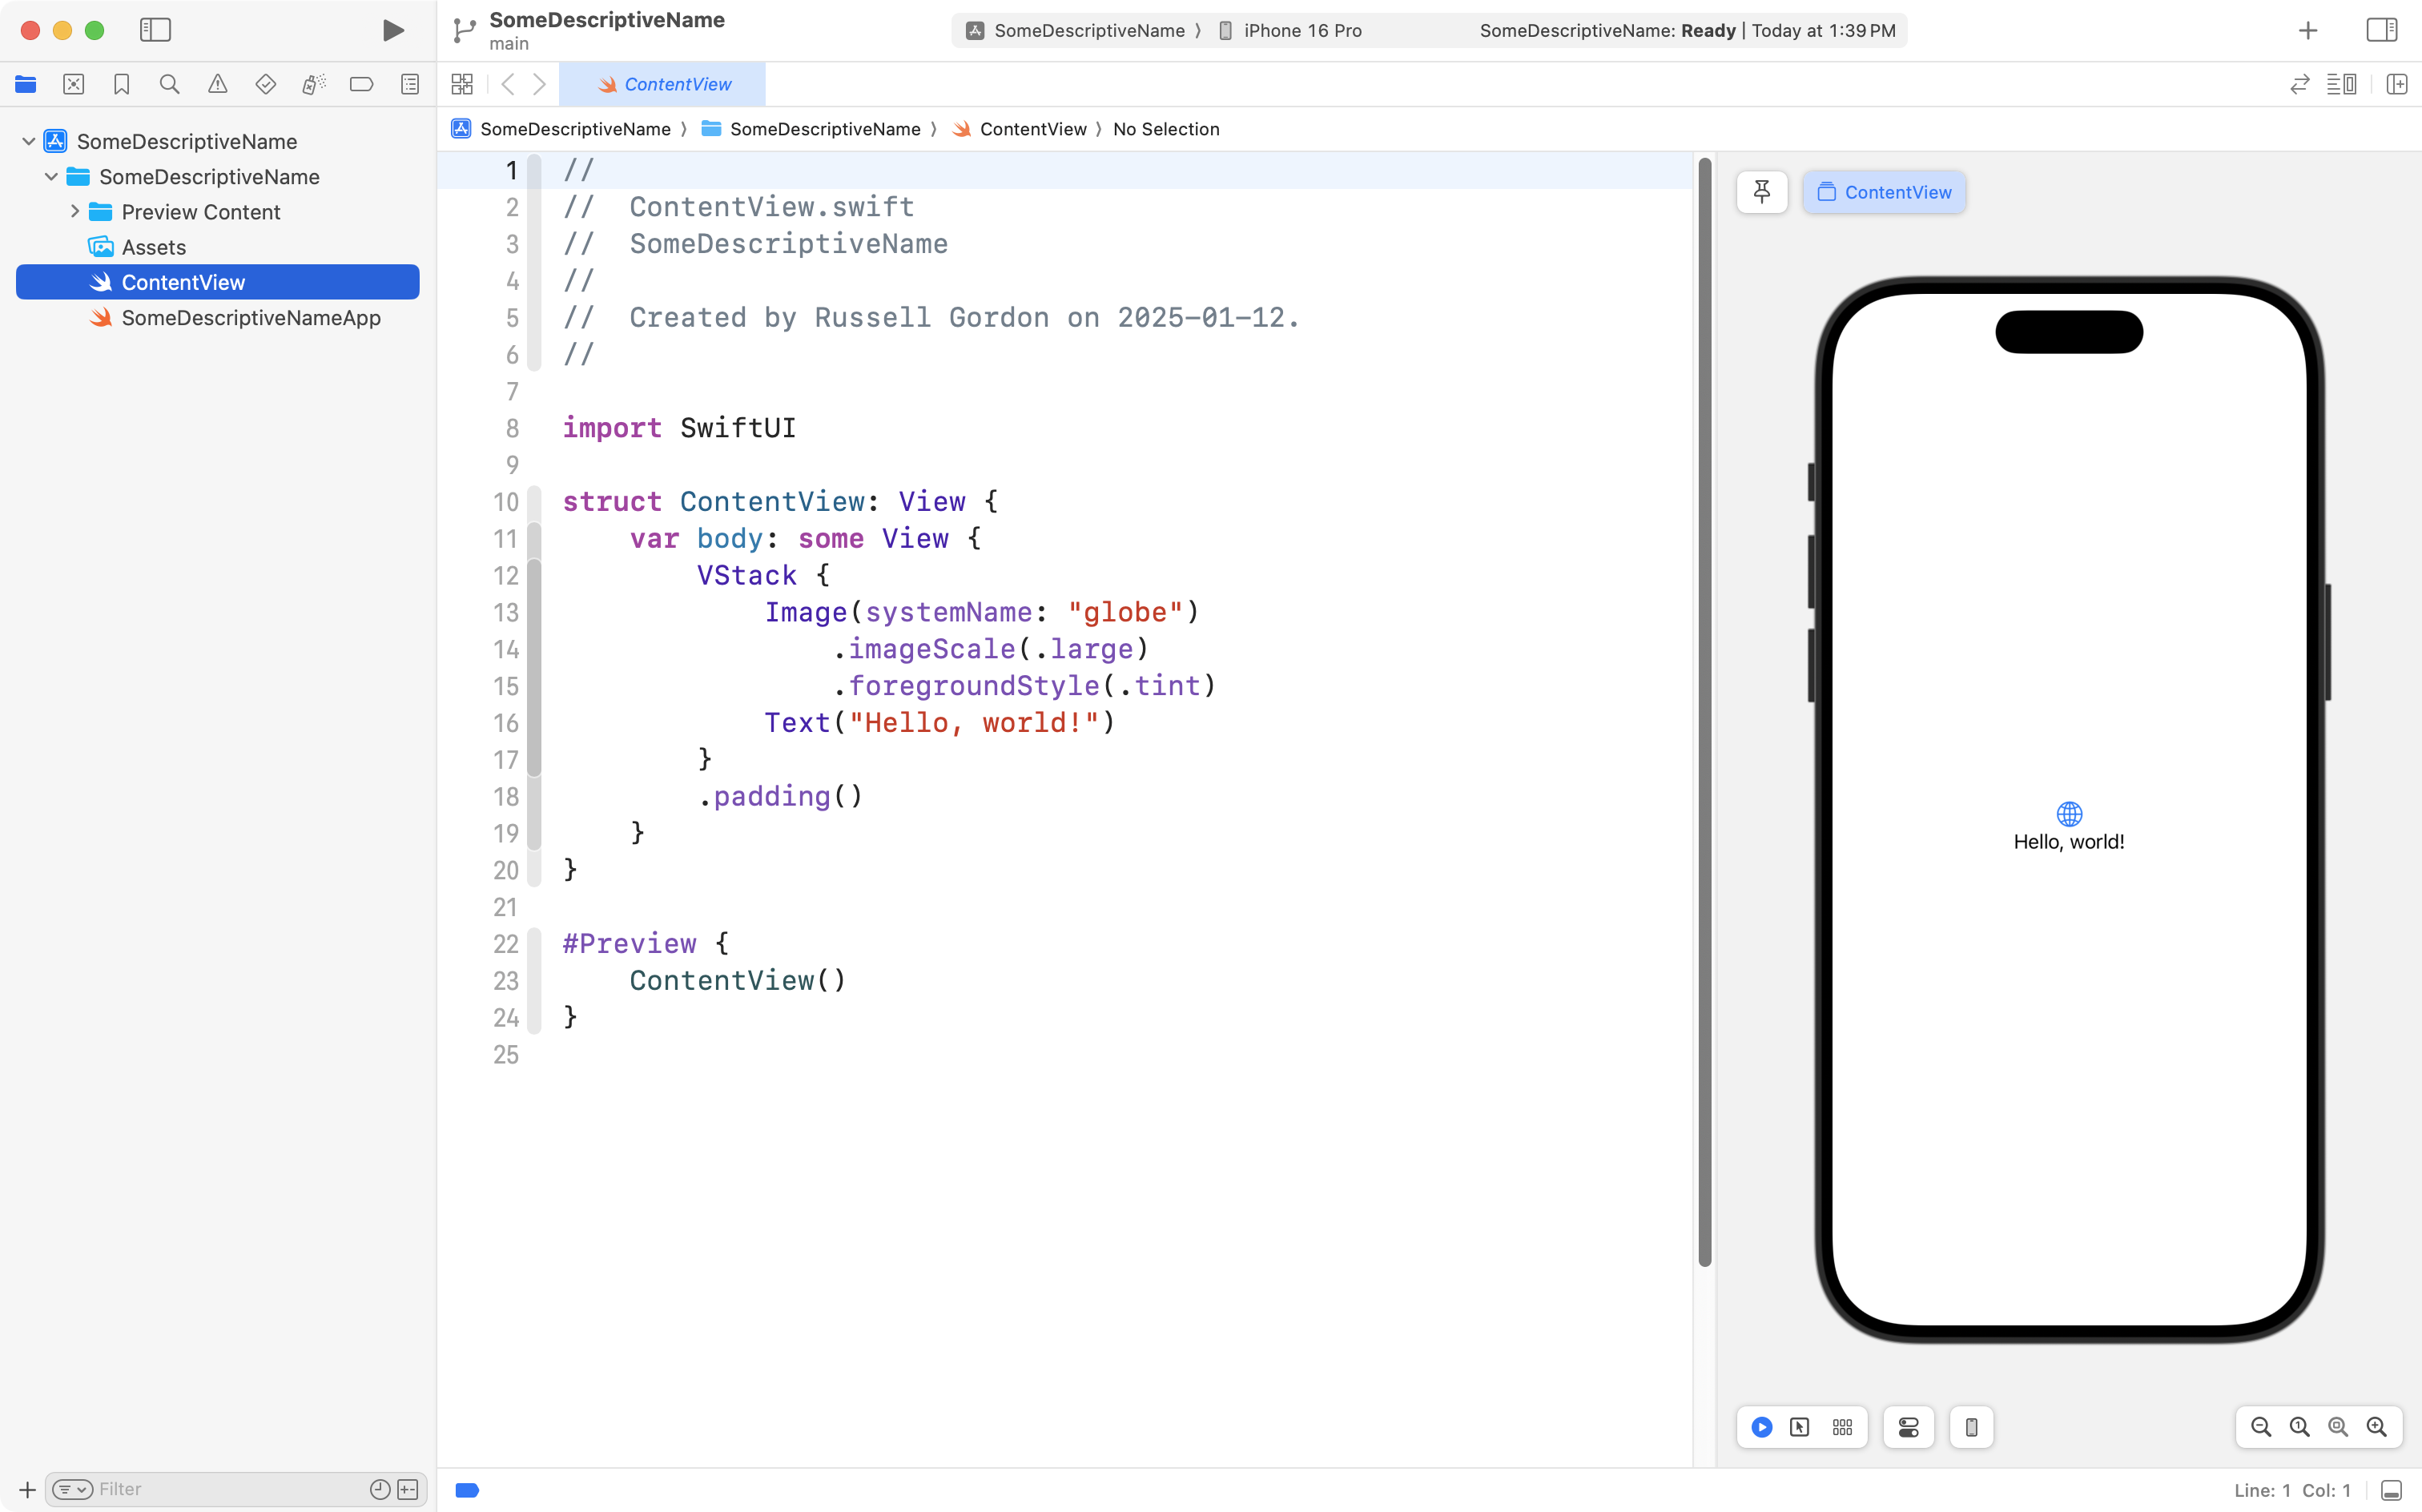
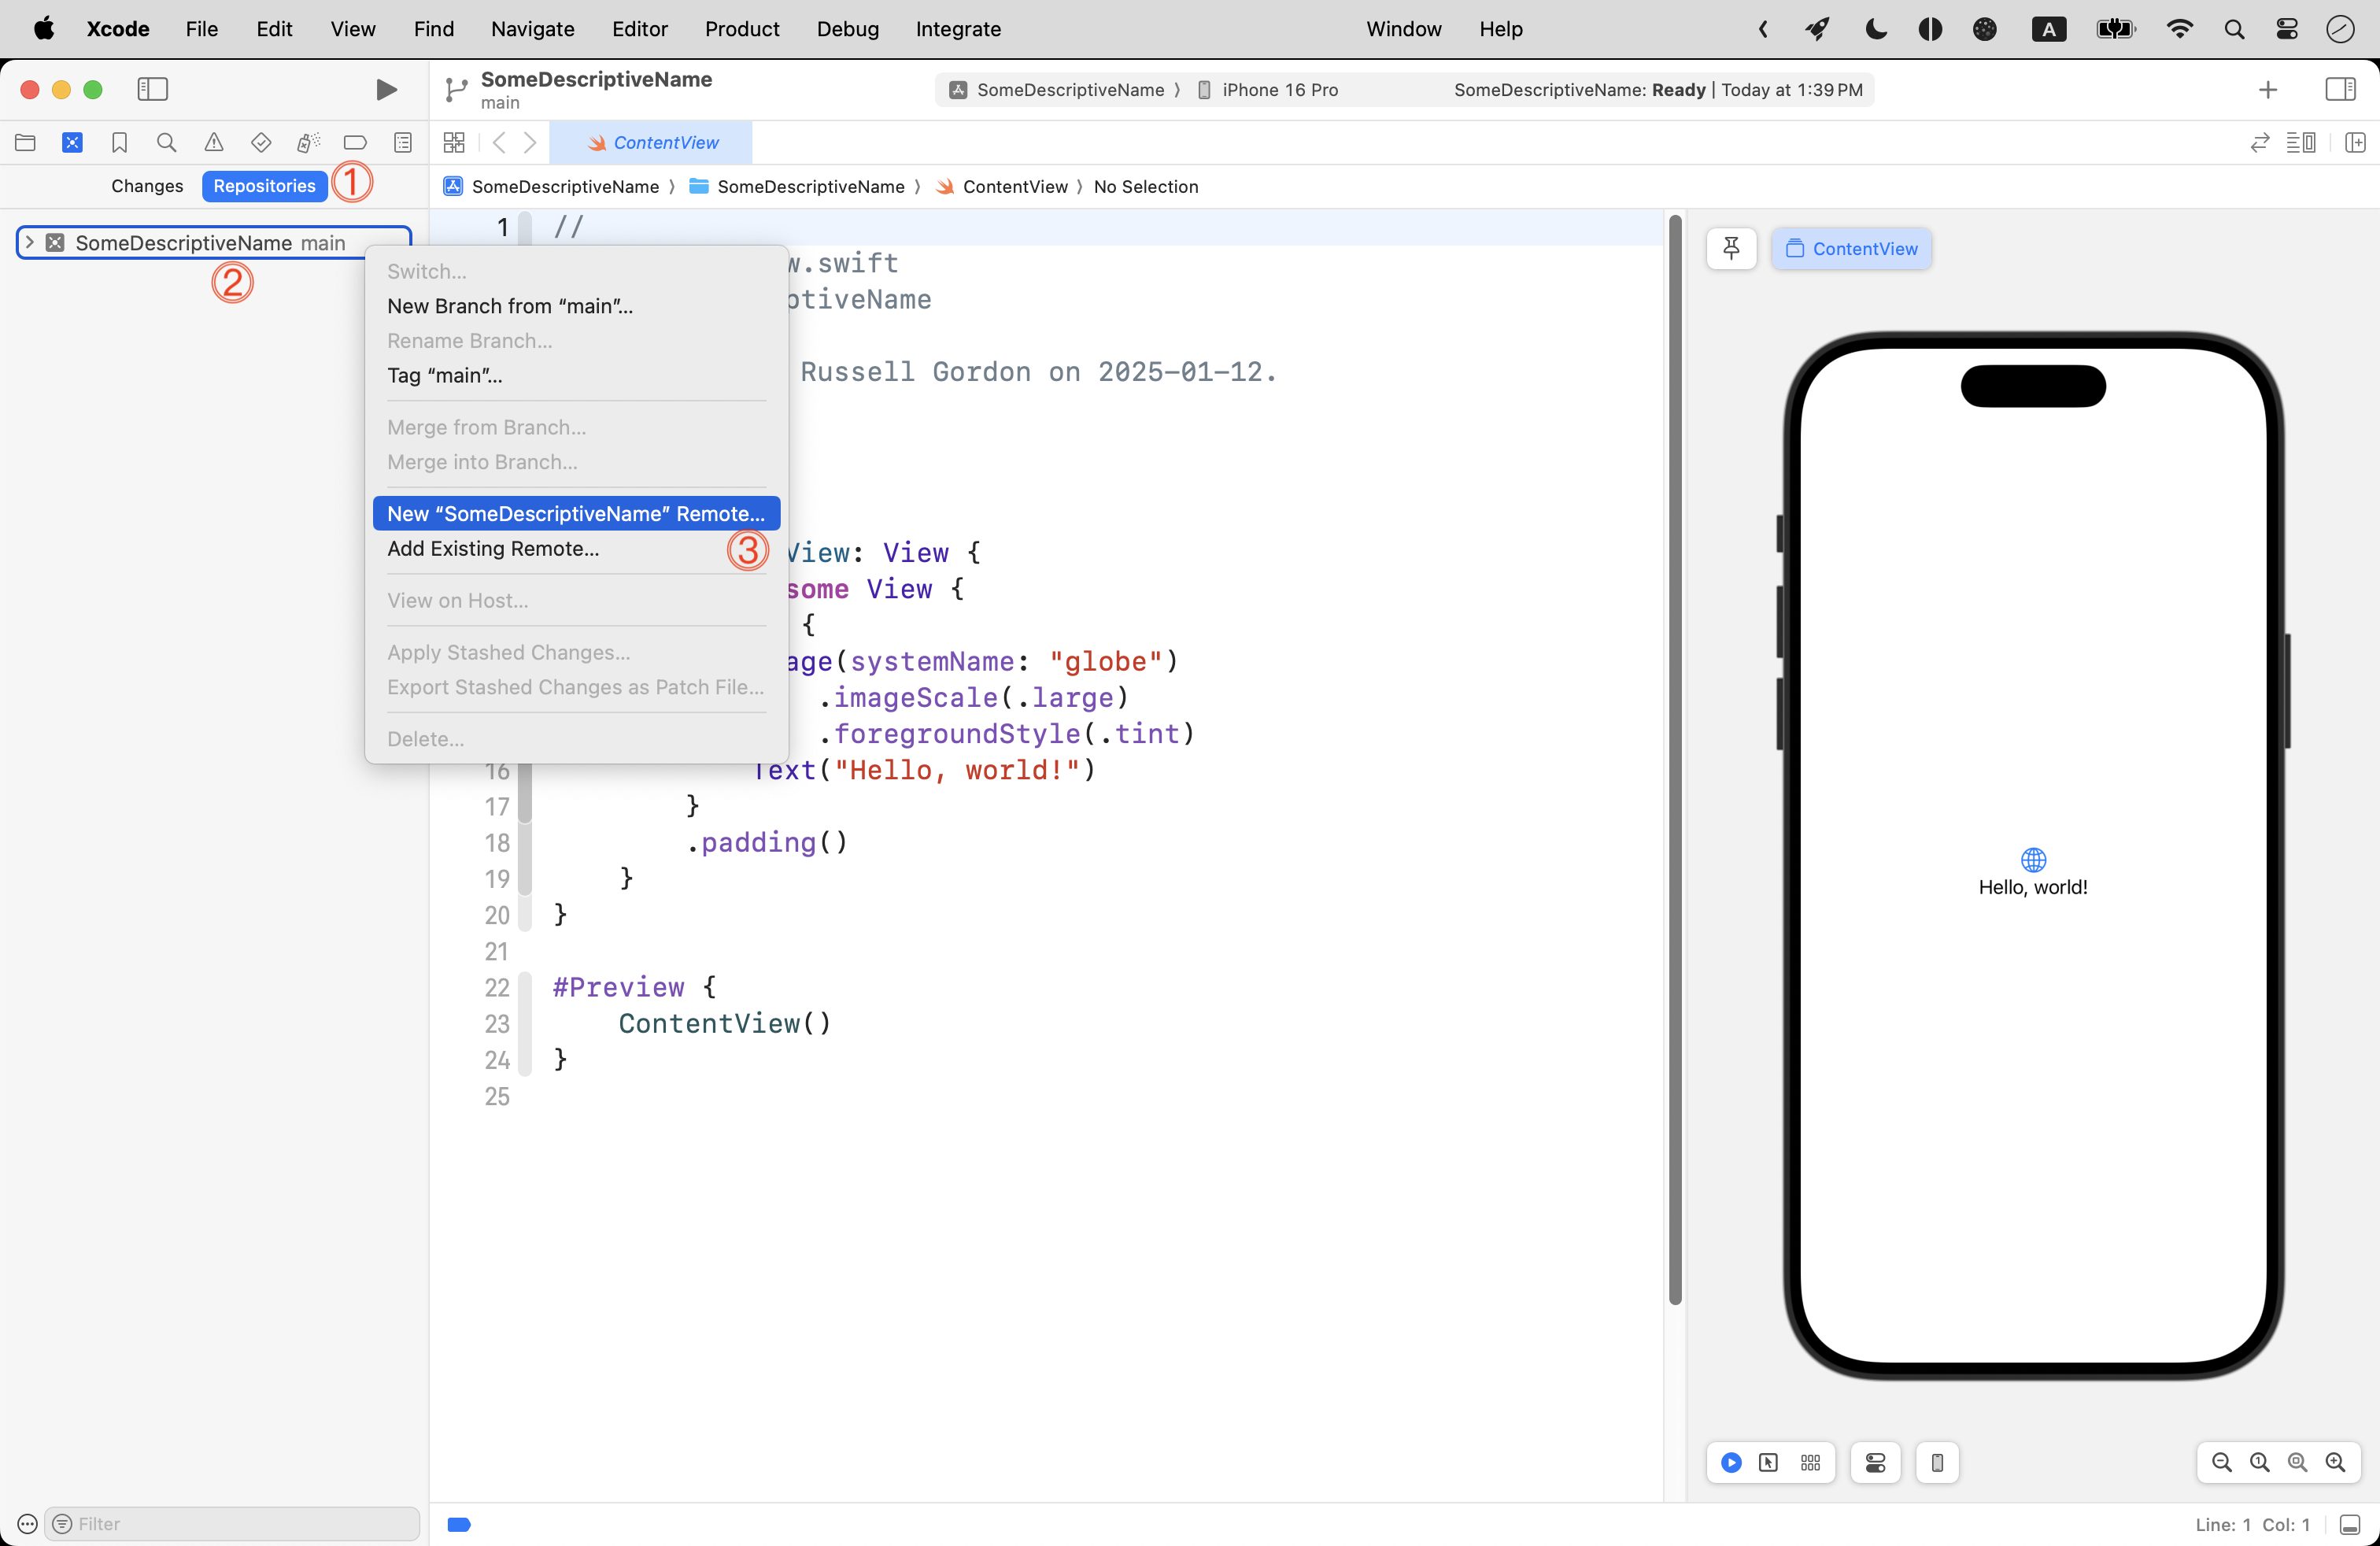
You will see the following when your project first opens:
Press Command-2 to switch to the source control navigator, then tap the Repositories tab, then right-click on the local repository to create a remote:
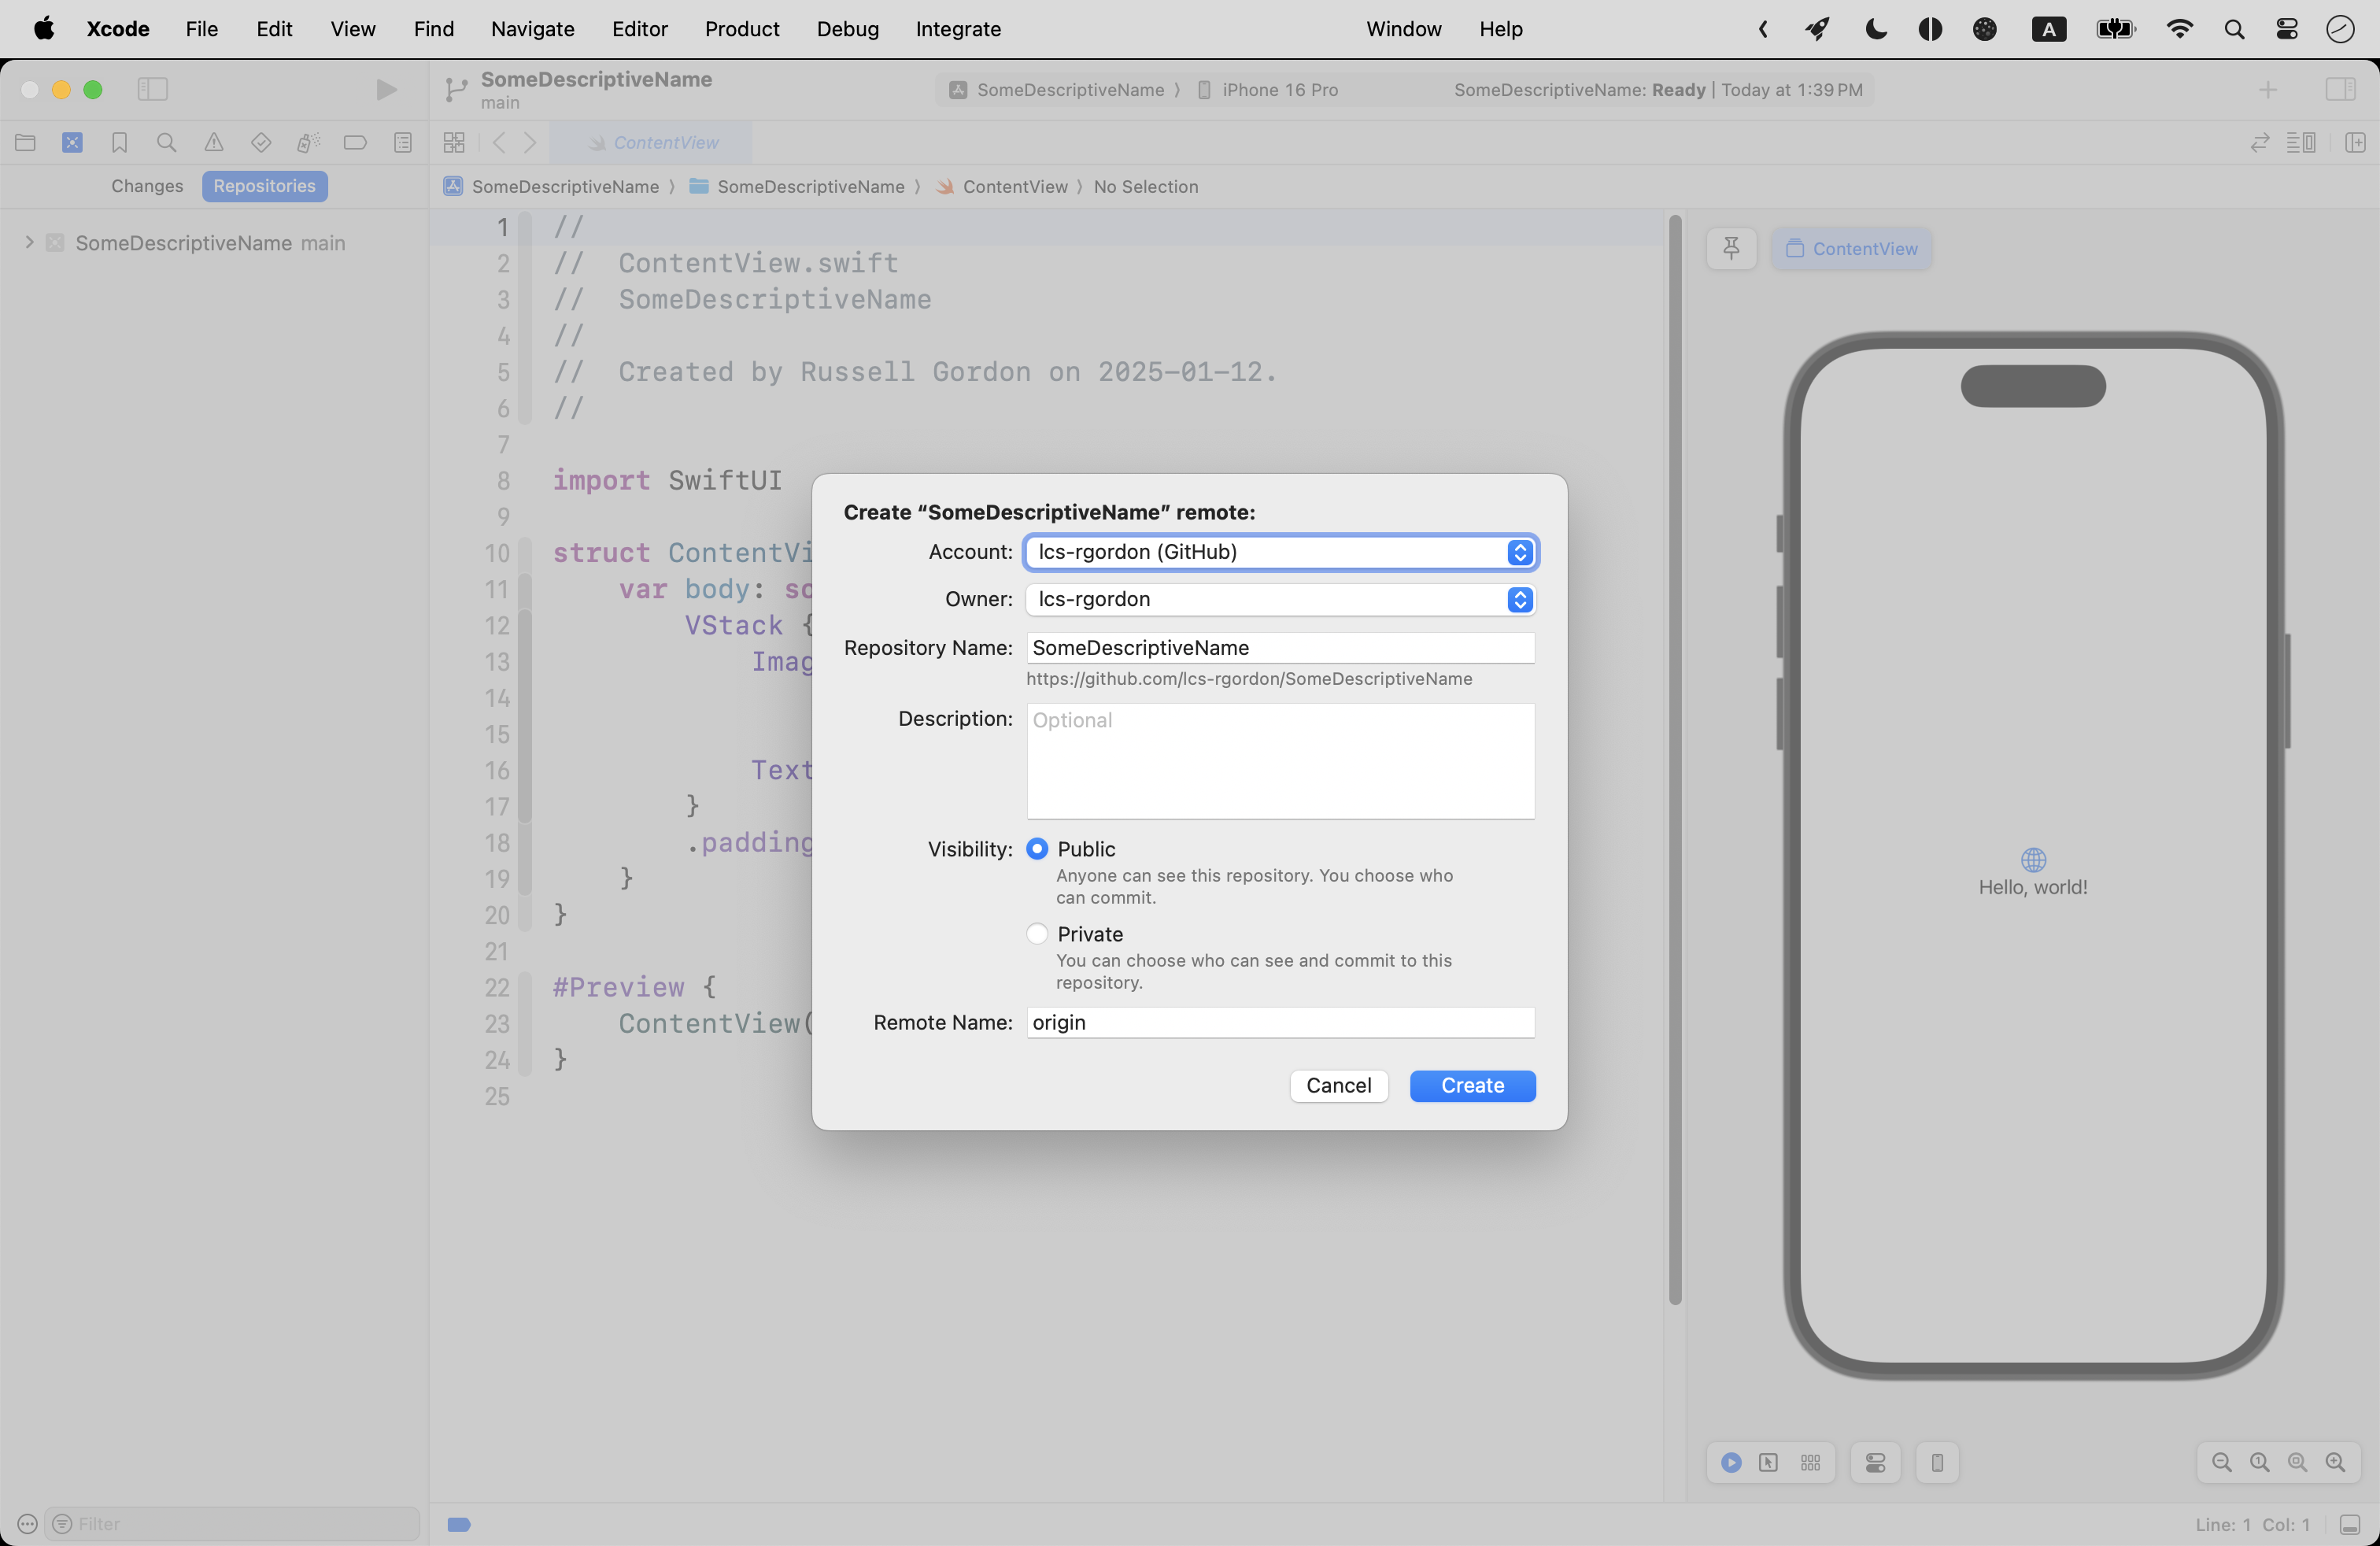
Accept the default values by pressing the Create button:
Now press Command-1 to return to the project navigator:

You are ready to begin coding!