Introduction
Electric Ride is a used car marketplace for electric vehicles.
If you keep reading, you will see a recap of how to:
- define an ER diagram
- translate that ER diagram into a database
You will learn new techniques, such as how to:
- use database views to obtain data from many joined tables
- insert new information into a database
- structure an app to keep track of which user is signed in
- simulate user sign-ins
If you apply what you learn by reading this tutorial to your own app, it will then be very straightforward to later “drop in” real authentication using Sign in with Google or a similar service.
Put another way, it’s not really possible to go straight to adding Sign in with Google to your app before setting up simulated sign-ins as described in this tutorial.
ER diagram
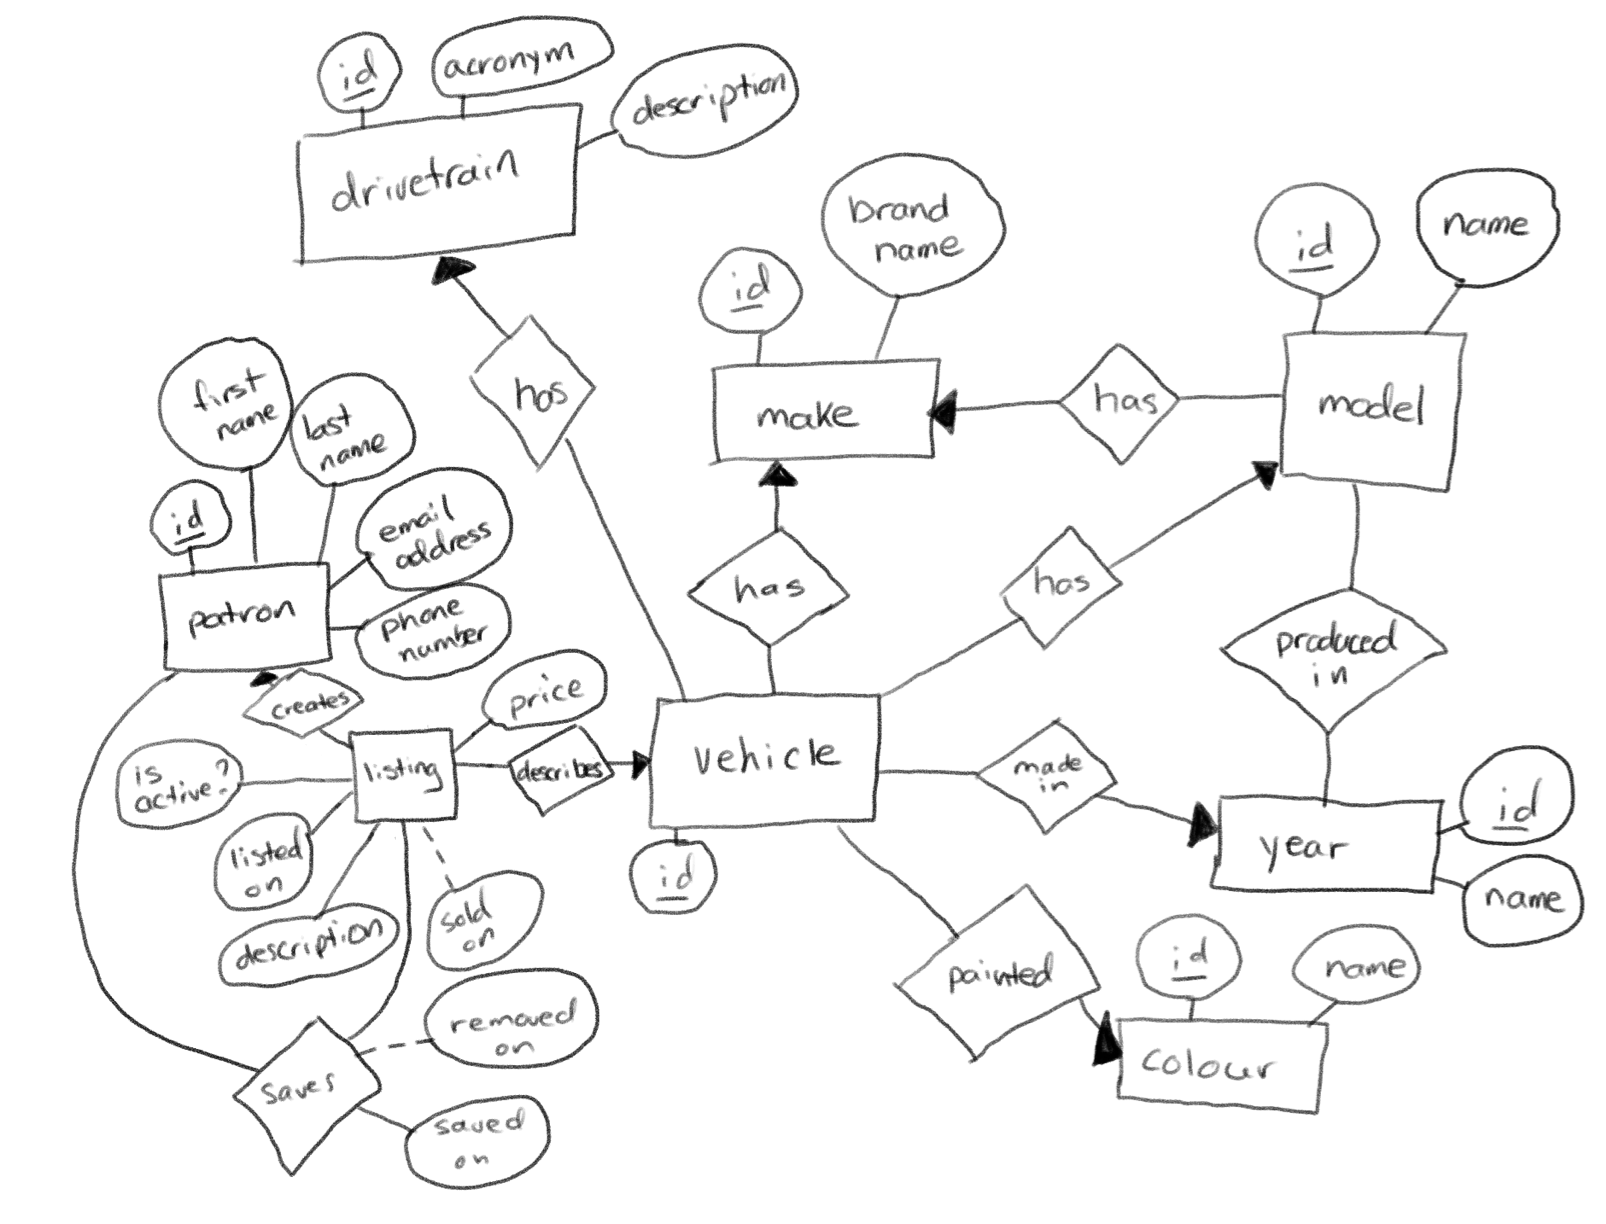
Mr. Gordon started by writing out the following entity-relationship diagram to consider how the data the app requires are related:
He then used the following prompt with the Anthropic AI service using the Claude Sonnet 4 model:
This is an image of a hand-drawn conceptual entity-relationship diagram.
The diagram describes the data that will facilitate the operation of a used vehicle buy-and-sell app, but for electric vehicles only.
Please convert this image into valid SQL that will create database tables with columns, primary keys, and foreign keys where appropriate based on the cardinality described in the diagram. Do your best to infer data types for table columns based on the name of attributes given for each entity.
Any columns that will contain text data should have a datatype of “text”. Any columns that contain integer data should have a datatype of “int8”. Any columns that will contain a date or time should have a datatype of “timestamptz”.
Ensure that primary key columns are defined as an identity so that the database will automatically assign a sequential unique number to the column when a new row is added to a table.
Be certain that the SQL you generate is compatible with the PostgreSQL database software (the database will be hosted at Supabase).
Table and column names should always be lowercase. Use snake_case to represent table and column names with multiple words.
Here is some additional context.
First, note that dotted lines leading from an entity to an attribute denote an attribute that can hold a null or optional value.
The database does not need to track the particulars of a transaction for the sale of a car, just the date that a listing was completed through a sale (which will be noted by the date the vehicle was sold on).
If a car has been listed but not sold, the listing will be made inactive, and have a NULL “sold on” date.
A given patron can both list a car for sale, or save listings describing cars they might be interested in purchasing.
Then, could you please create some reasonable sample data?
Please ensure that you include vehicles that have electric motors only. This can include extended range electric vehicles like the Chevrolet Volt, or, fully electric vehicles like the Rivian R1.
Please include sample data in the following quantities:
- at least five makes (or brands)
- each brand with at least two models
- at least 20 vehicles with at least as many listings and a variety of colours
- drivetrains should include both RWD (rear-wheel drive), AWD (all-wheel drive), and FWD (front-wheel drive)
- there should be some listings that are active (have a “listed on” datetime) and some that are inactive and unsold (have a “listed on” datetime and no “sold on” datetime) and some that are inactive and sold (have a “listed on” datetime and a “sold on” datetime)
- forty different patrons, some of whom have only listed vehicles for sale, some of whom who have only saved a few listings, and some who have done both
Finally, put everything together into a single downloadable SQL file.
Thank-you in advance for all of your effort!
Here is the artifact that Anthropic created.
Explanation
Anthropic provided the following context to describe what it generated:
Database structure
Tables Created:
drivetrain- RWD, AWD, FWD optionsmake- Vehicle brands (Tesla, Chevrolet, Rivian, Ford, BMW, Nissan, Hyundai)model- Specific models for each brand (2+ per brand)year- Model years from 2018-2025colour- 10 different color optionspatron- 40 different usersvehicle- 25 electric vehicles with varietylisting- Vehicle listings with different statusessaved- Many-to-many relationship for saved listings
Key features
- Primary Keys: All tables use auto-incrementing identity columns
- Foreign Keys: Proper relationships between all entities
- Data Types: Following your specifications (text, int8, timestamptz)
- Naming: All lowercase with snake_case
- Nullable Fields: Phone number is optional as shown in your diagram
Sample data highlights
- Electric Vehicles Only: Includes pure EVs (Tesla Model 3, Nissan Leaf) and extended-range EVs (Chevrolet Volt)
- Listing Statuses:
- Active listings (currently for sale)
- Inactive unsold (removed from market)
- Sold listings (completed transactions)
- Patron Variety:
- Some only list vehicles for sale
- Some only save listings they’re interested in
- Some do both activities
- Drive Types: Mix of RWD, AWD, and FWD vehicles
- Performance Indexes: Added for common query patterns
The SQL file is ready to run on PostgreSQL/Supabase and will create a fully functional database with realistic sample data for testing your electric vehicle marketplace application.
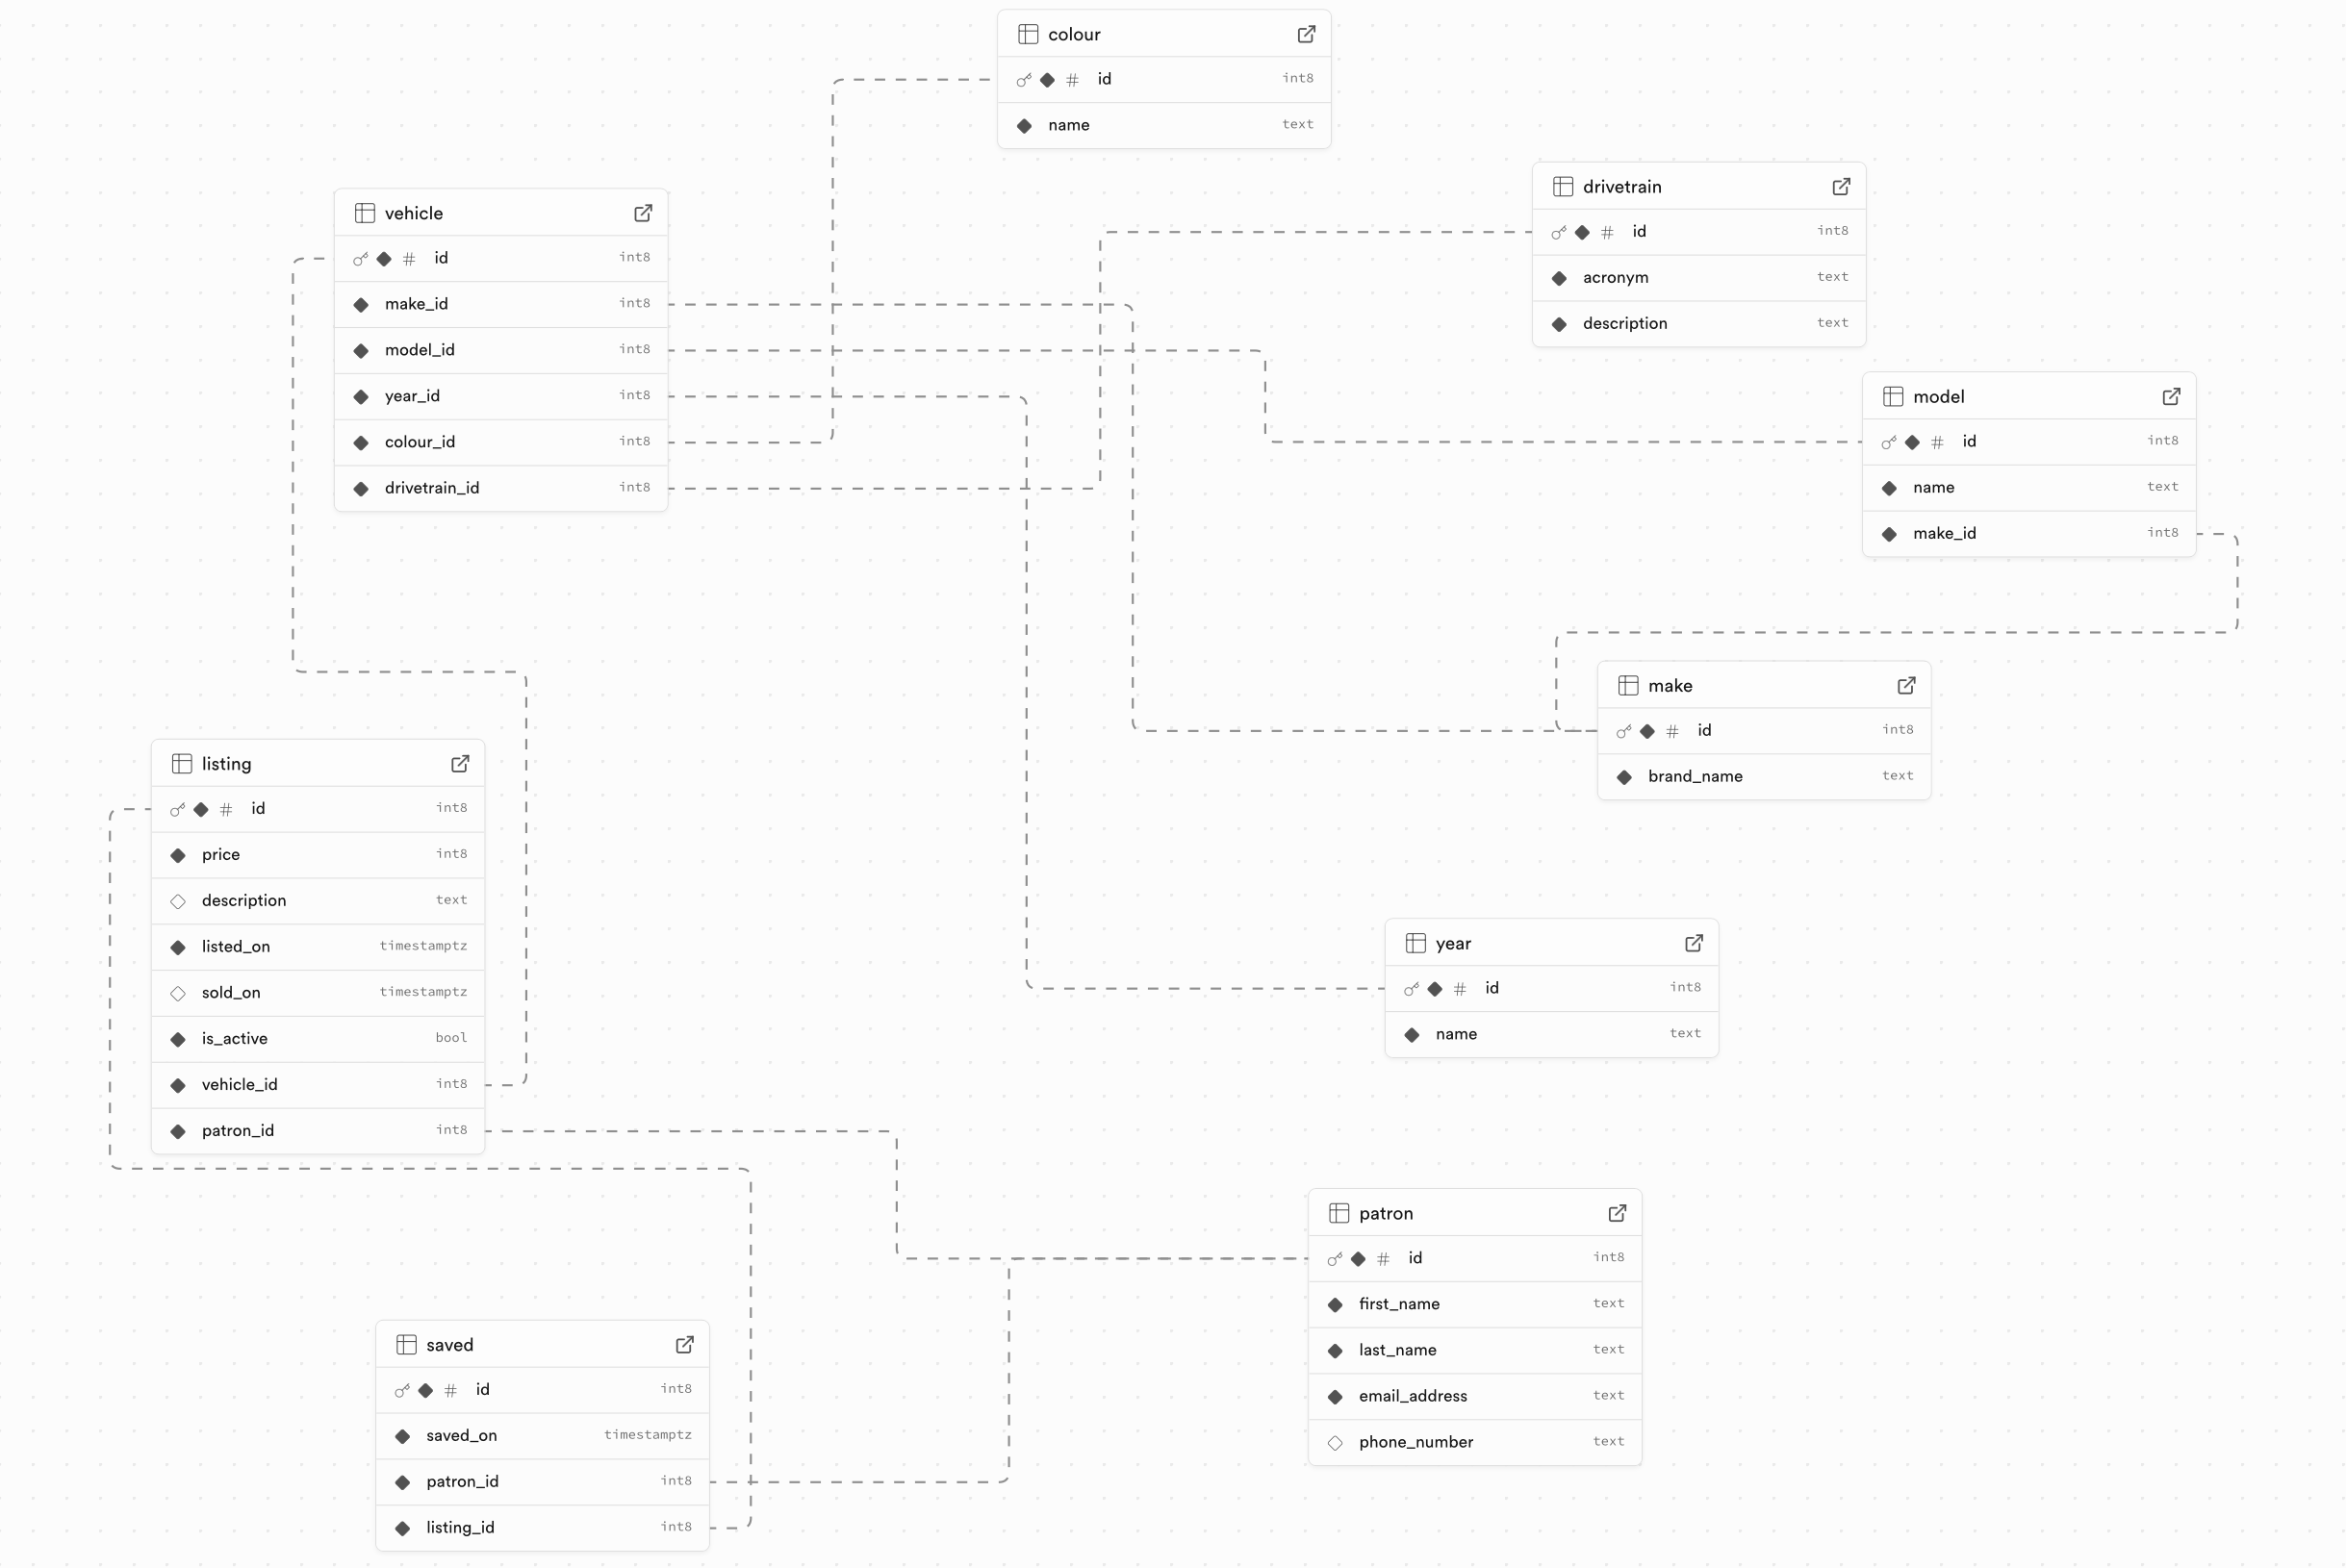
Create the database
After creating a new project at Supabase, Mr. Gordon ran the SQL file provided by Anthropic, and the following schema was successfully created, matching the ER diagram shared earlier:
Database views
A view (in the context of a database) is a way to define a query, one that is often complex, but one that will be used often.
Vehicle listings
In order to see all available listings, we could do a simple query like this:
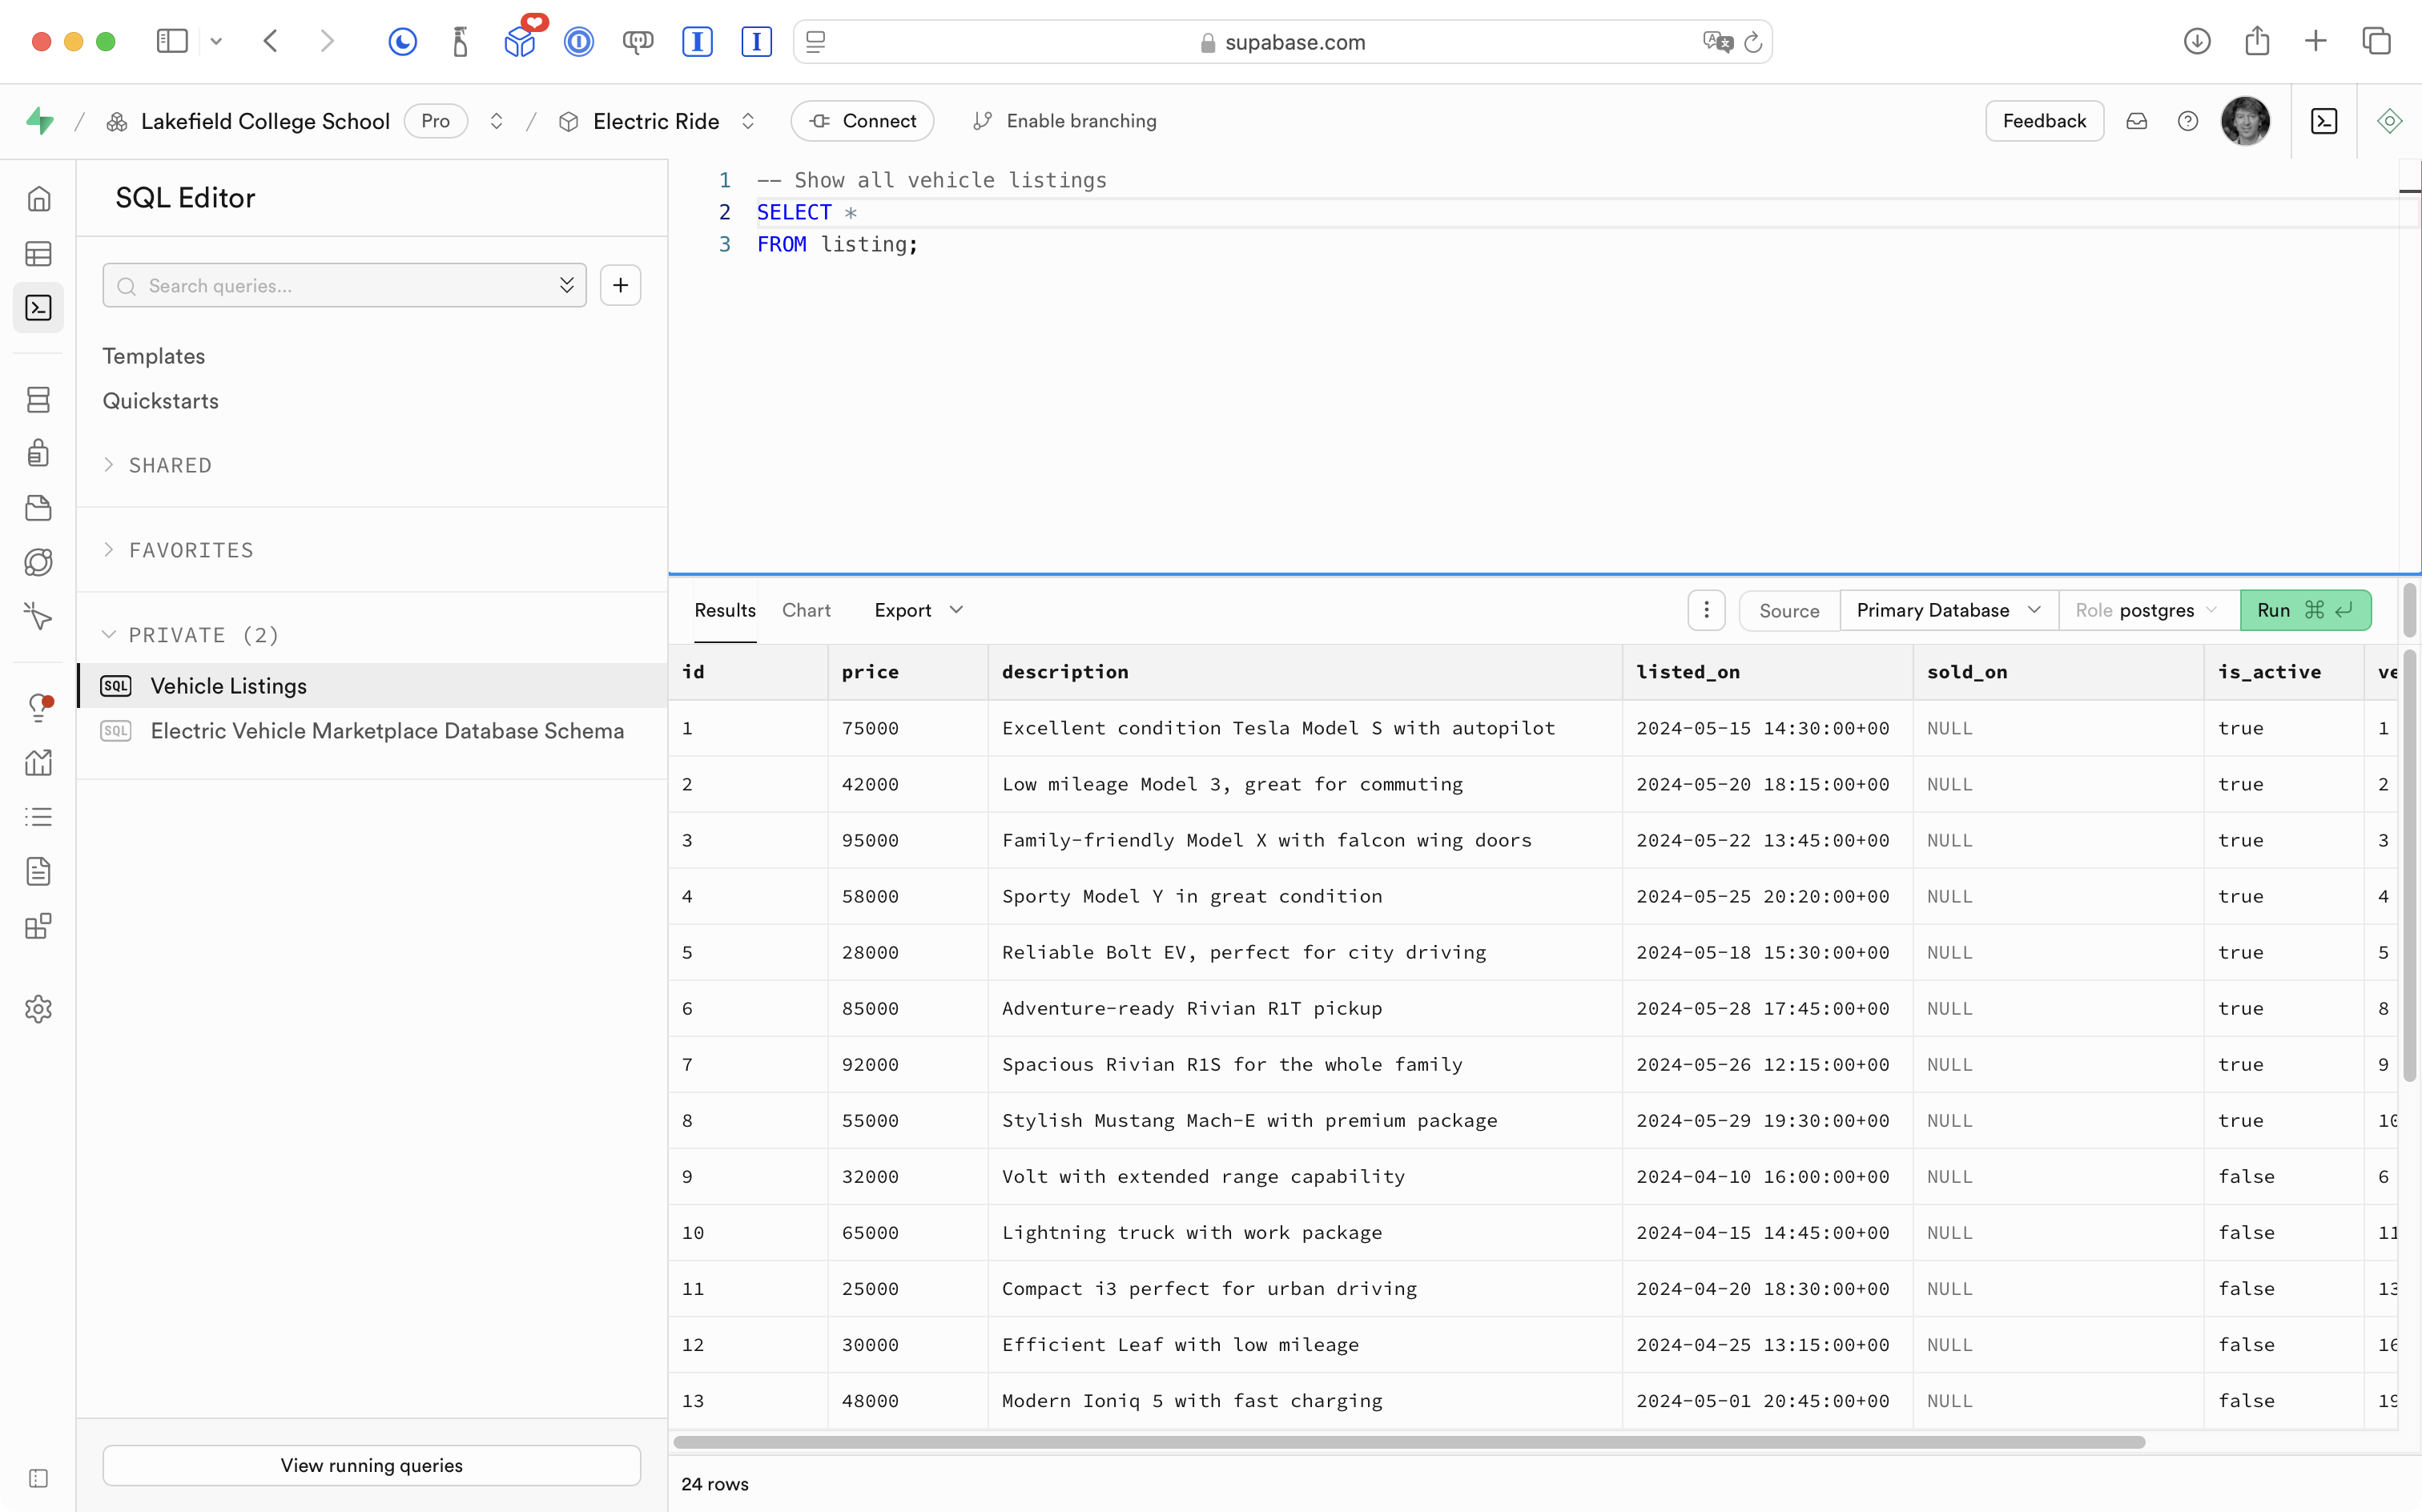
However, outside of a brief description, we don’t get very much information that is useful to a human being with that query.
We need to join those results to other tables to get human-readable information about the vehicle in question.
So, we might revise the query as follows:
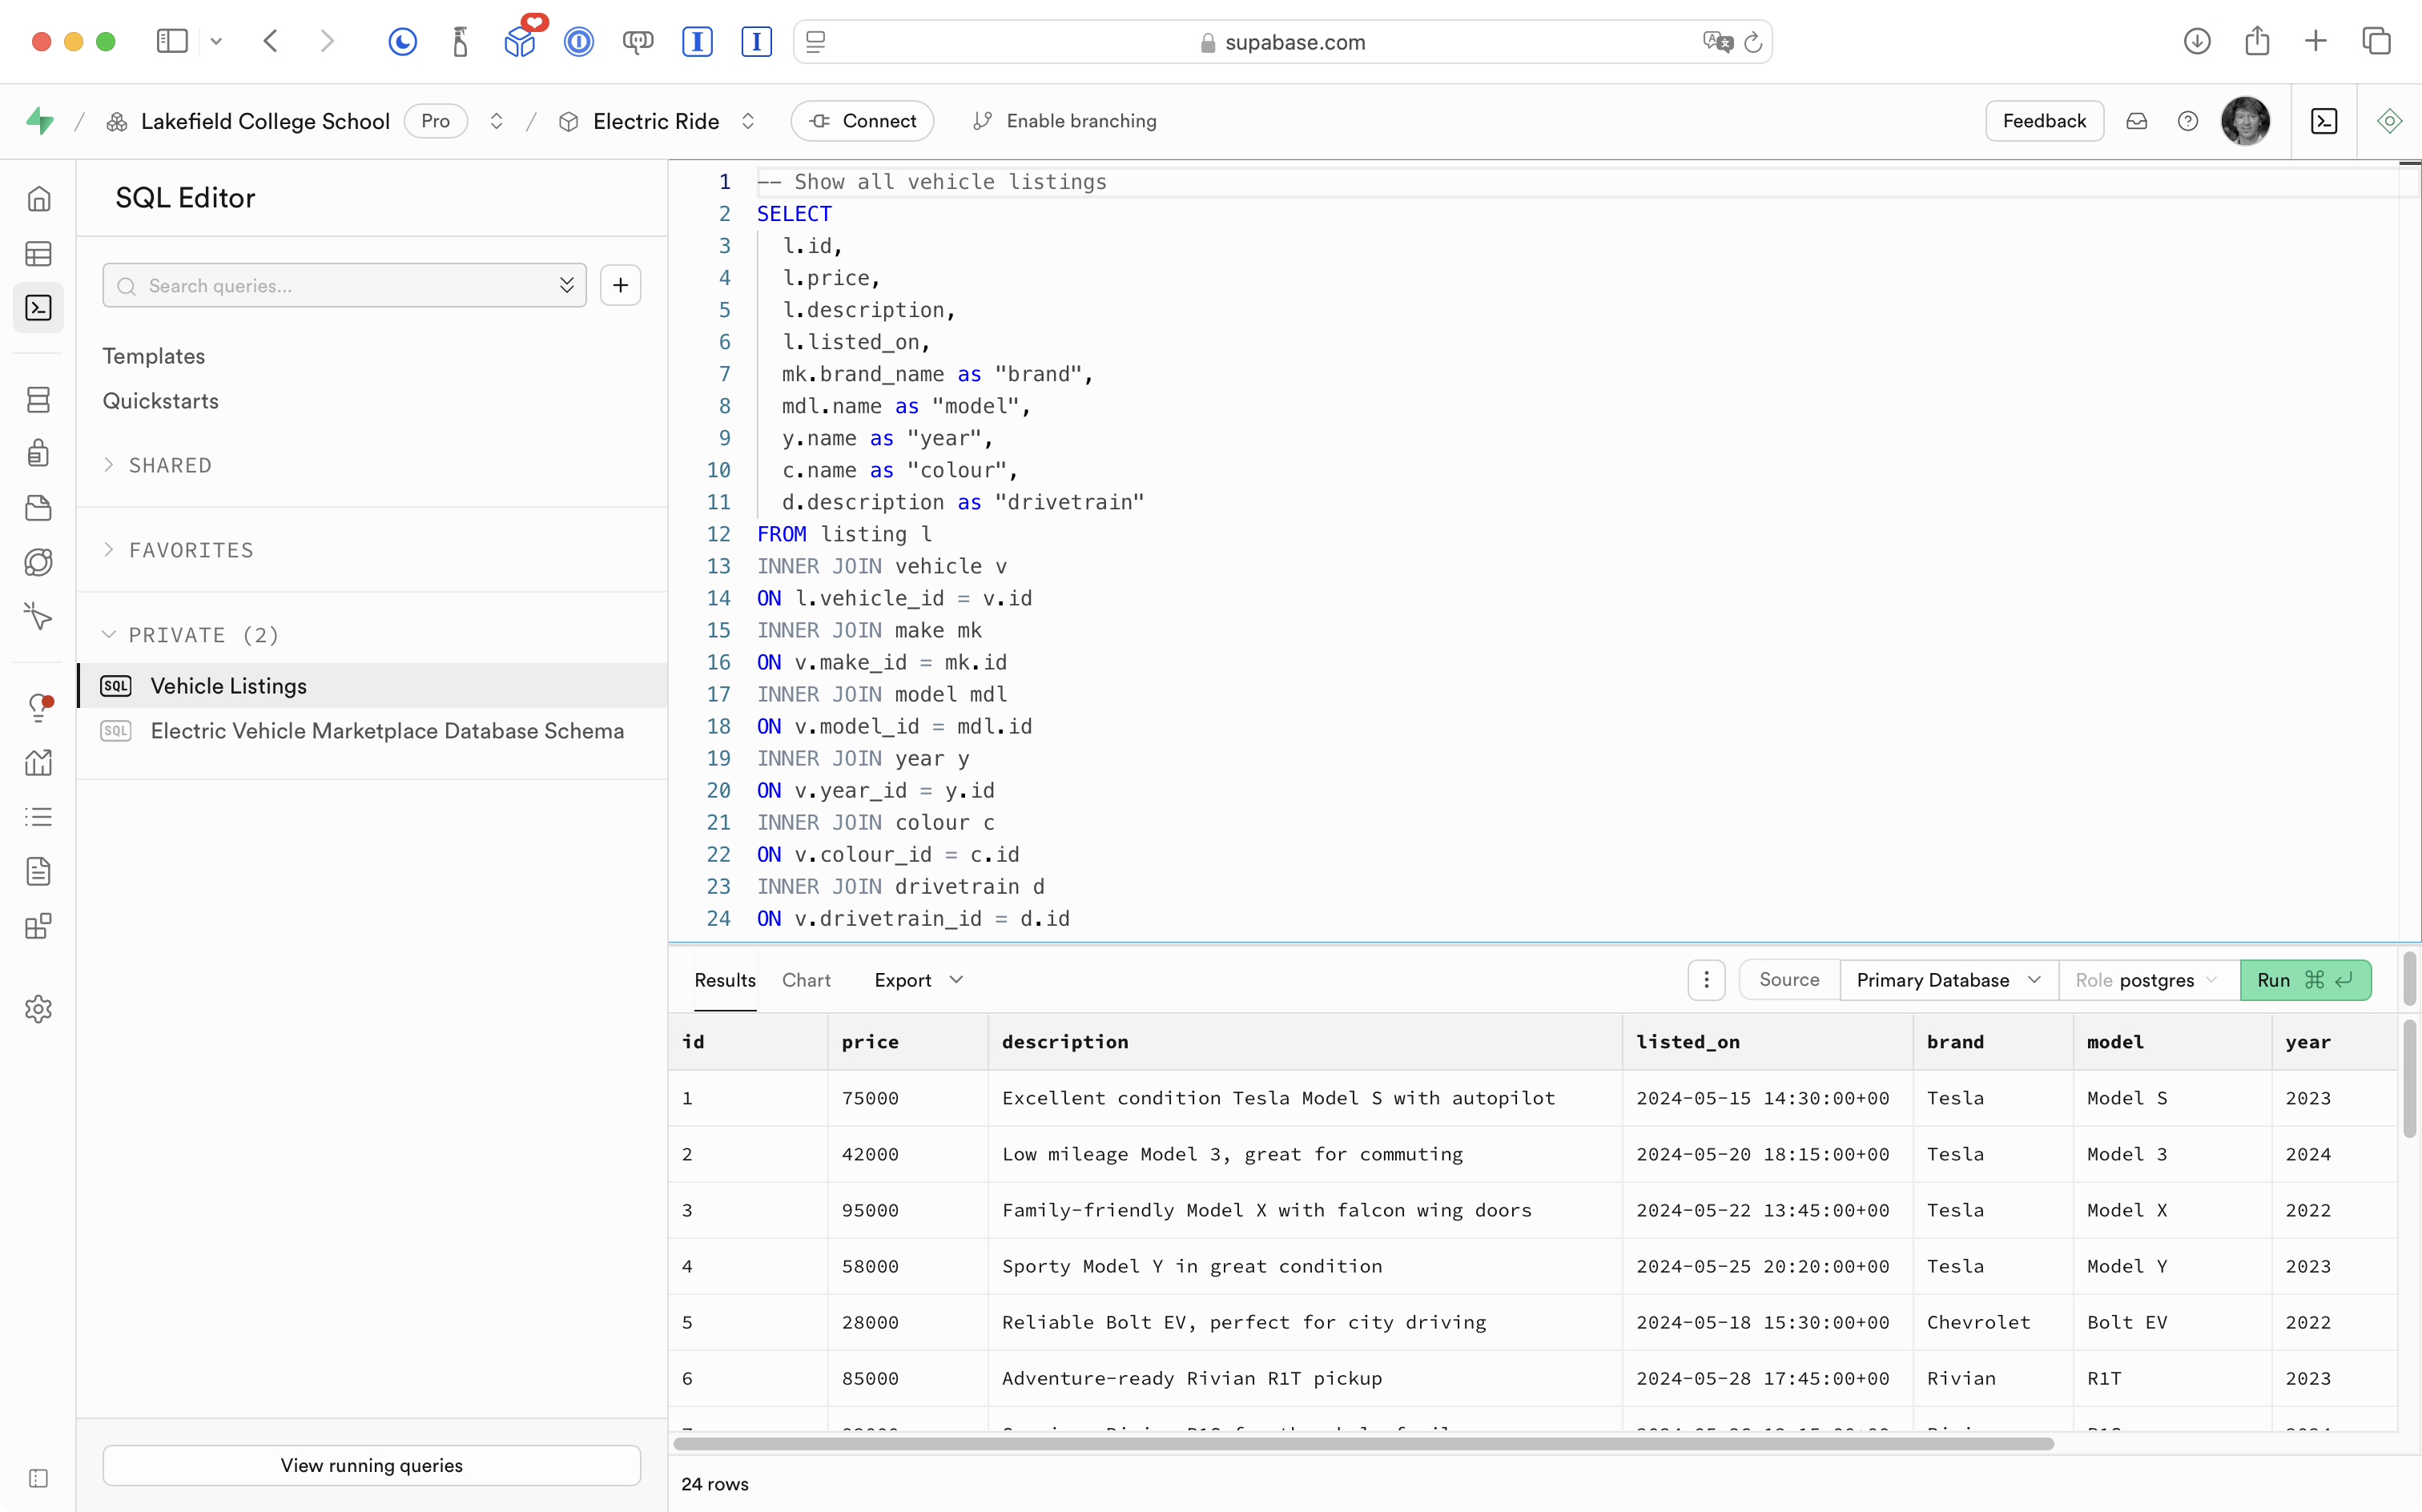
Now you can see that we get much more useful information.
TIP
Not sure what just happened? Read up on how to join tables in a database.
The query shown above would be extremely cumbersome to run using the Supabase Swift API. Joining two tables through that API is easy enough, but joining multiple tables is a chore.
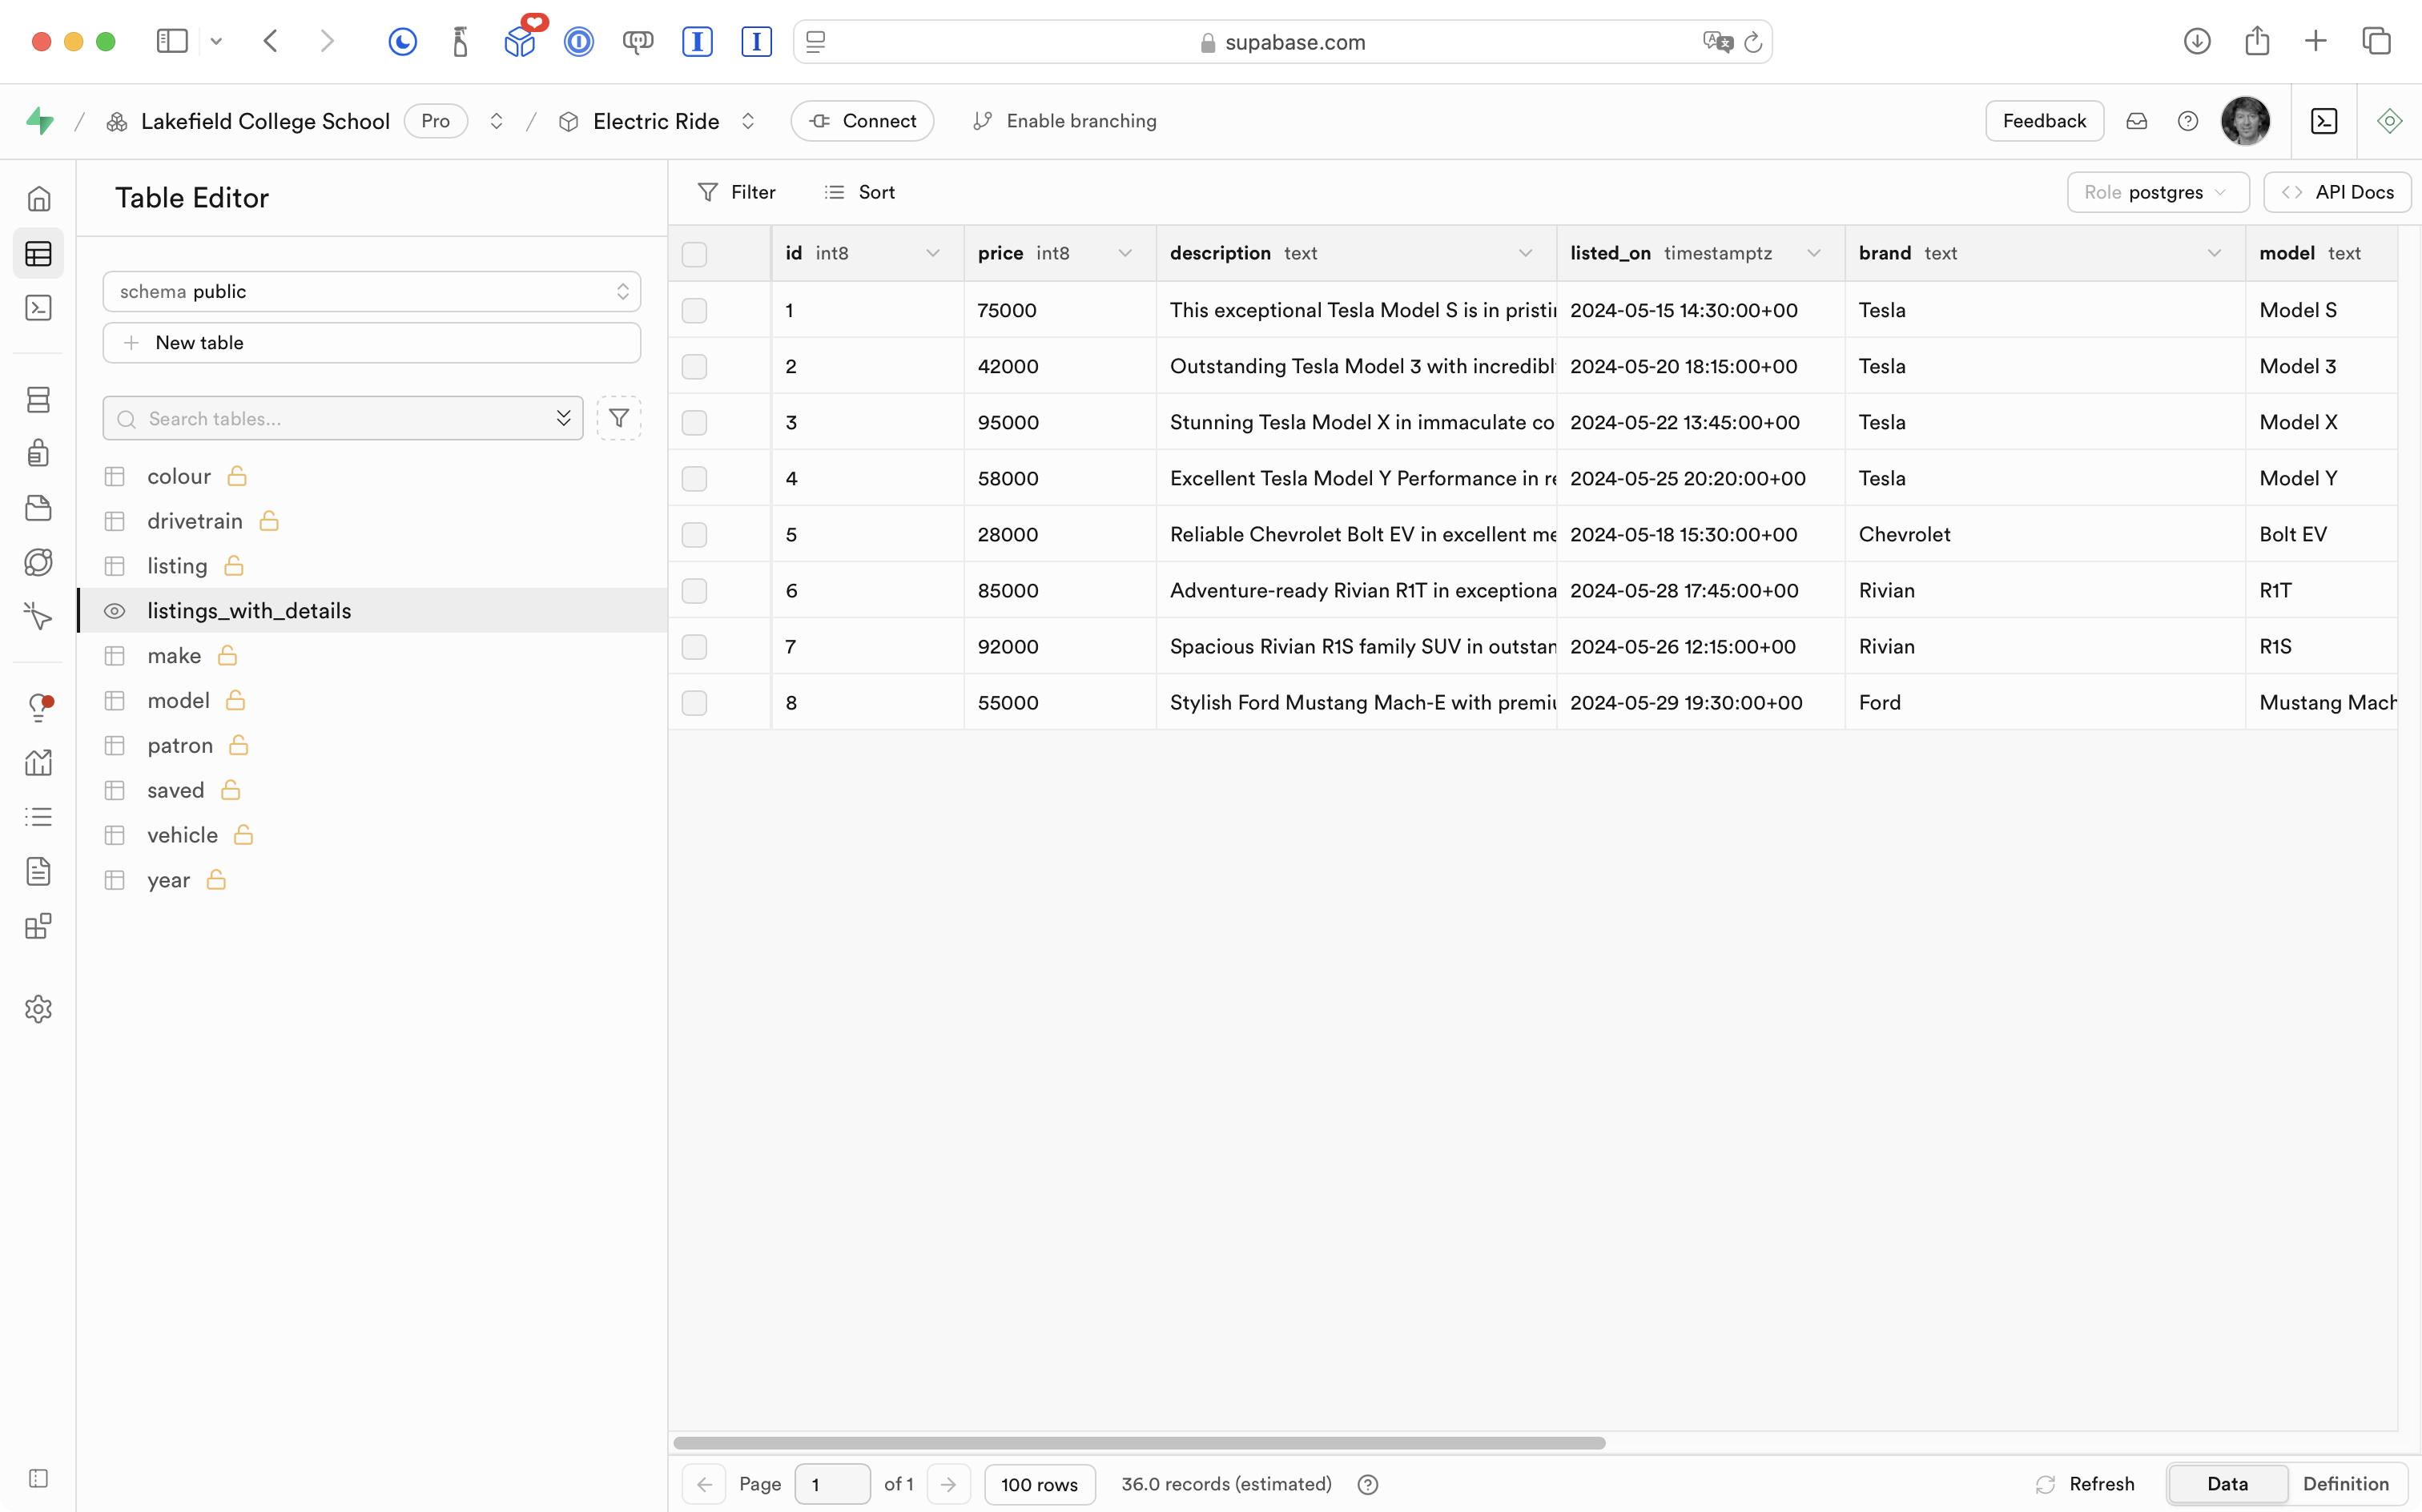
So what we can do instead is define a database view, which essentially takes a raw SQL query that we have authored, and makes it available just like a table would be:

Now we can create a new SQL snippet, and query that view just like a table:
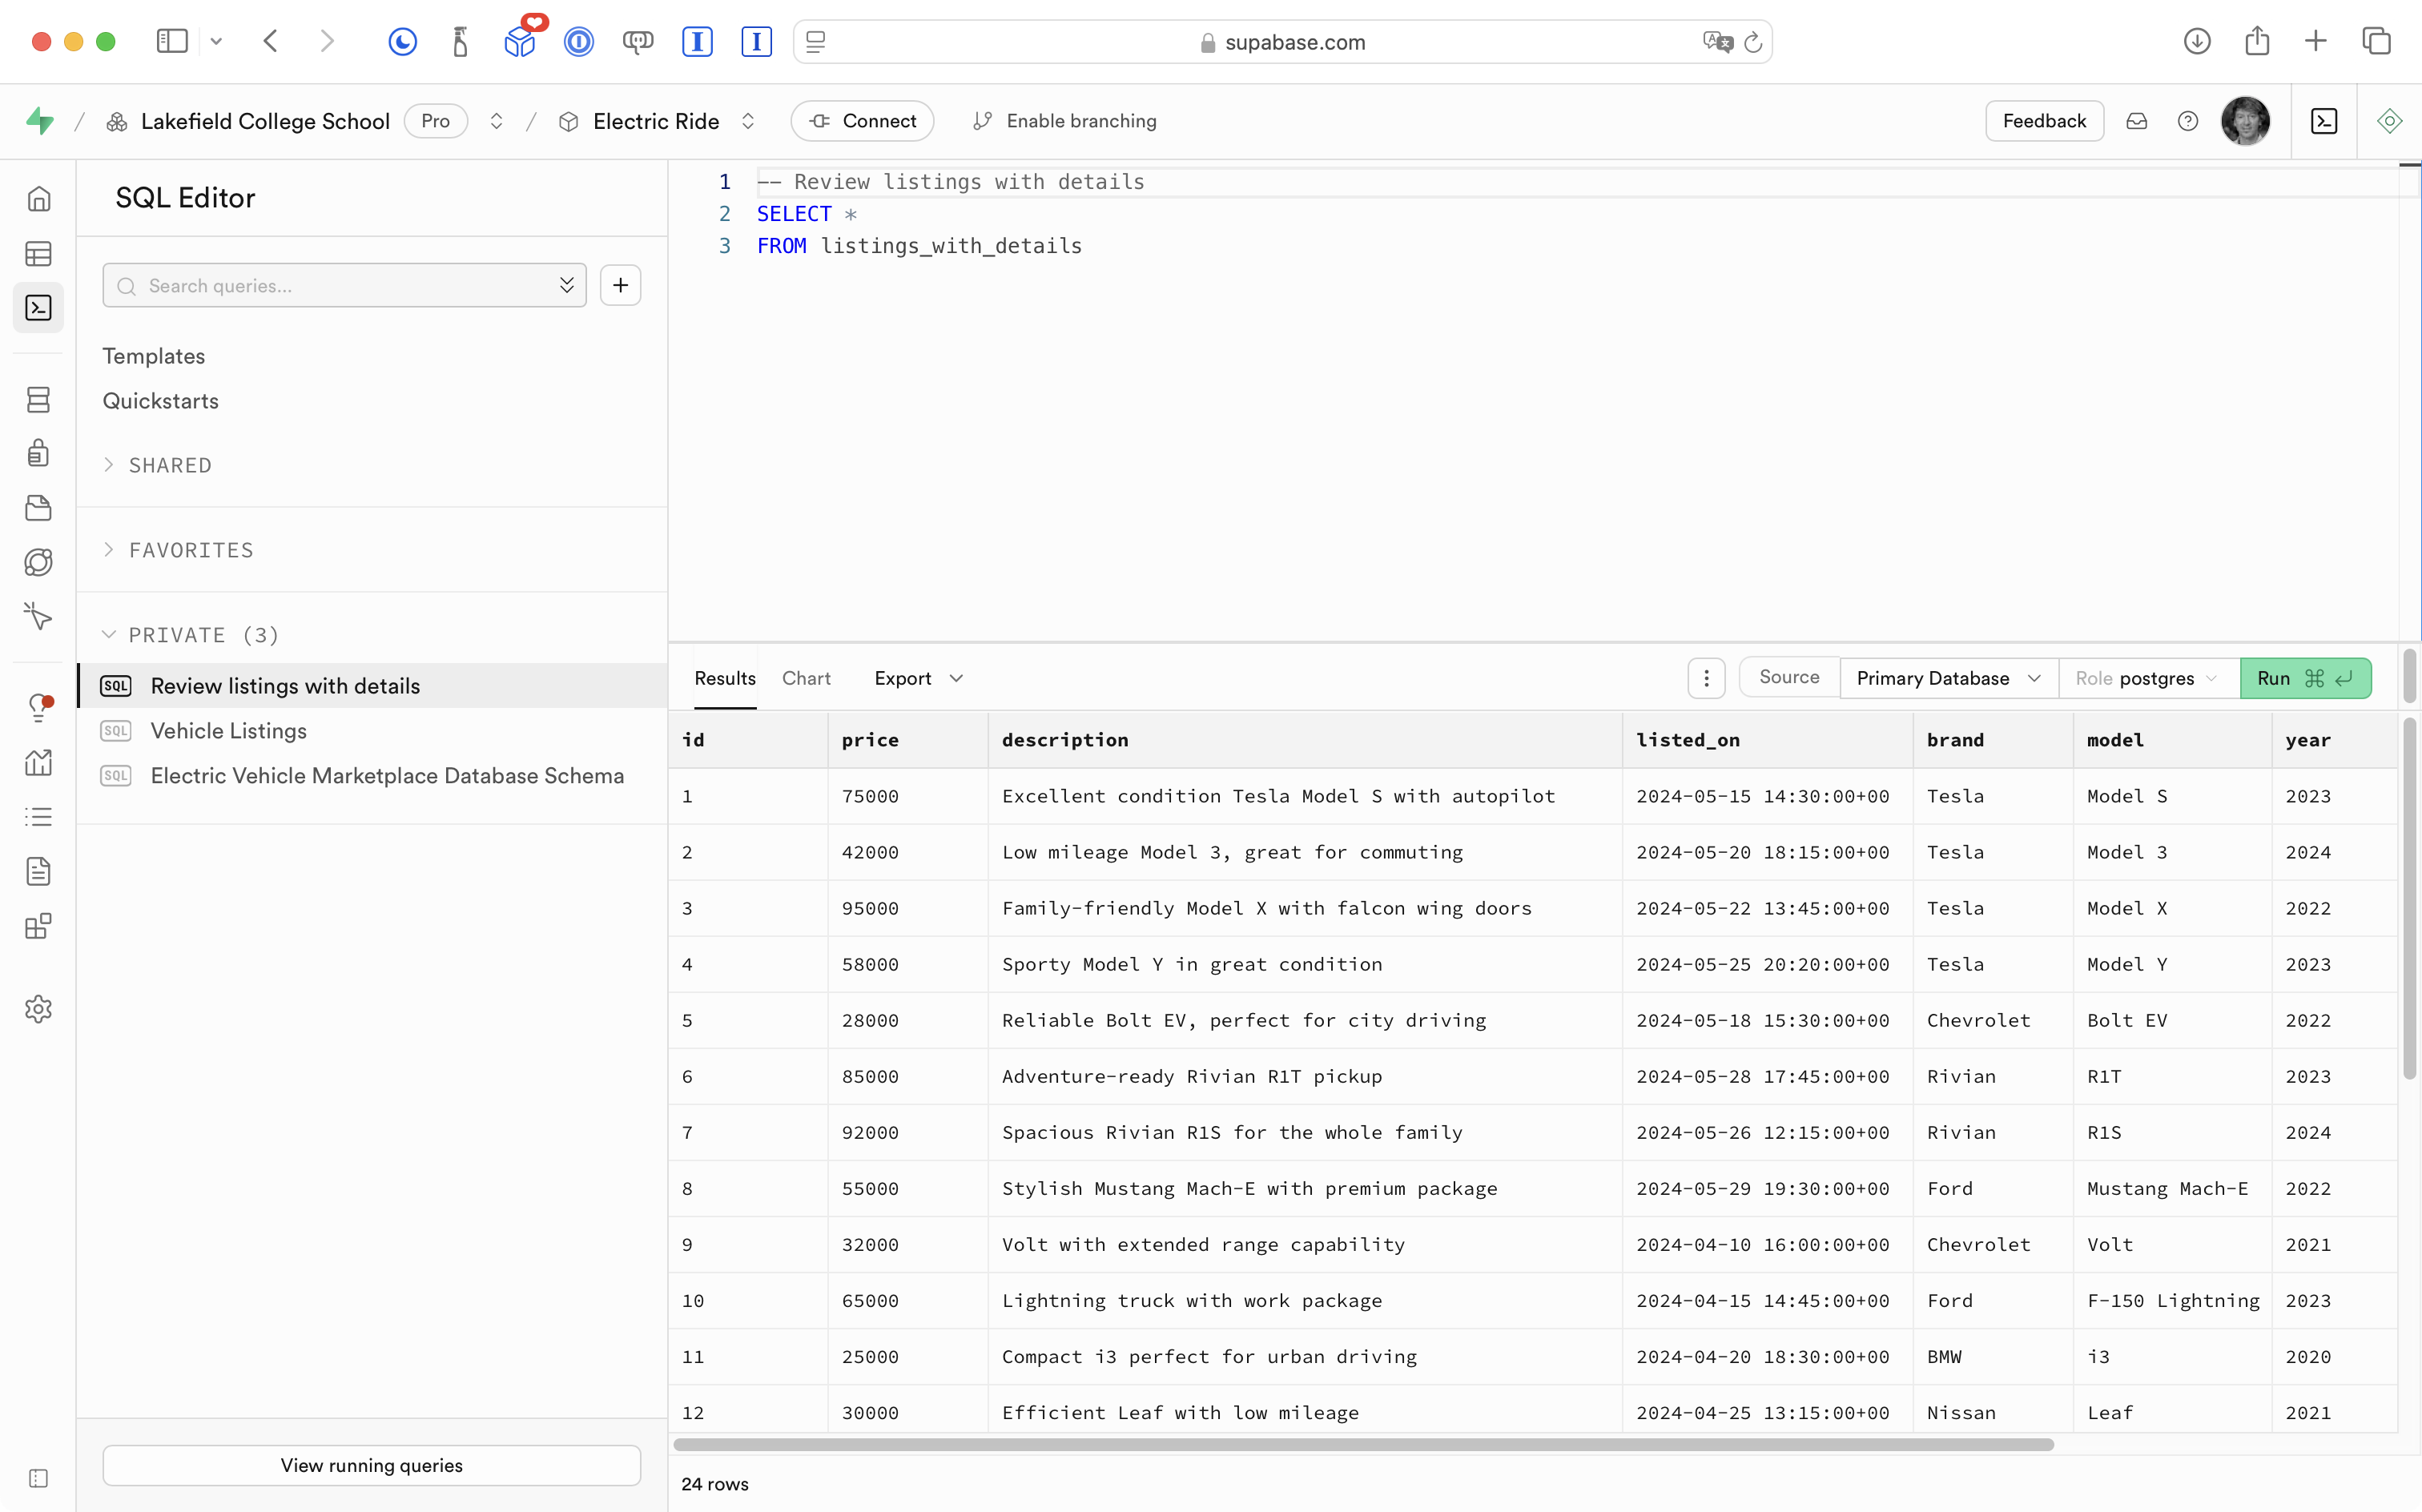
Or we can just browse the results of that database view, as if it were a table:

TIP
The word view means two different things, depending on the context.
In the context of a database, when we are talking about ways to see information, a view is as described above.
In the context of authoring code for an app, we describe a view as the part of an app’s source code that defines what the user will see and interact with.
It’s unfortunate that the same word means different things in different contexts, however, such are the vagaries of the English language…
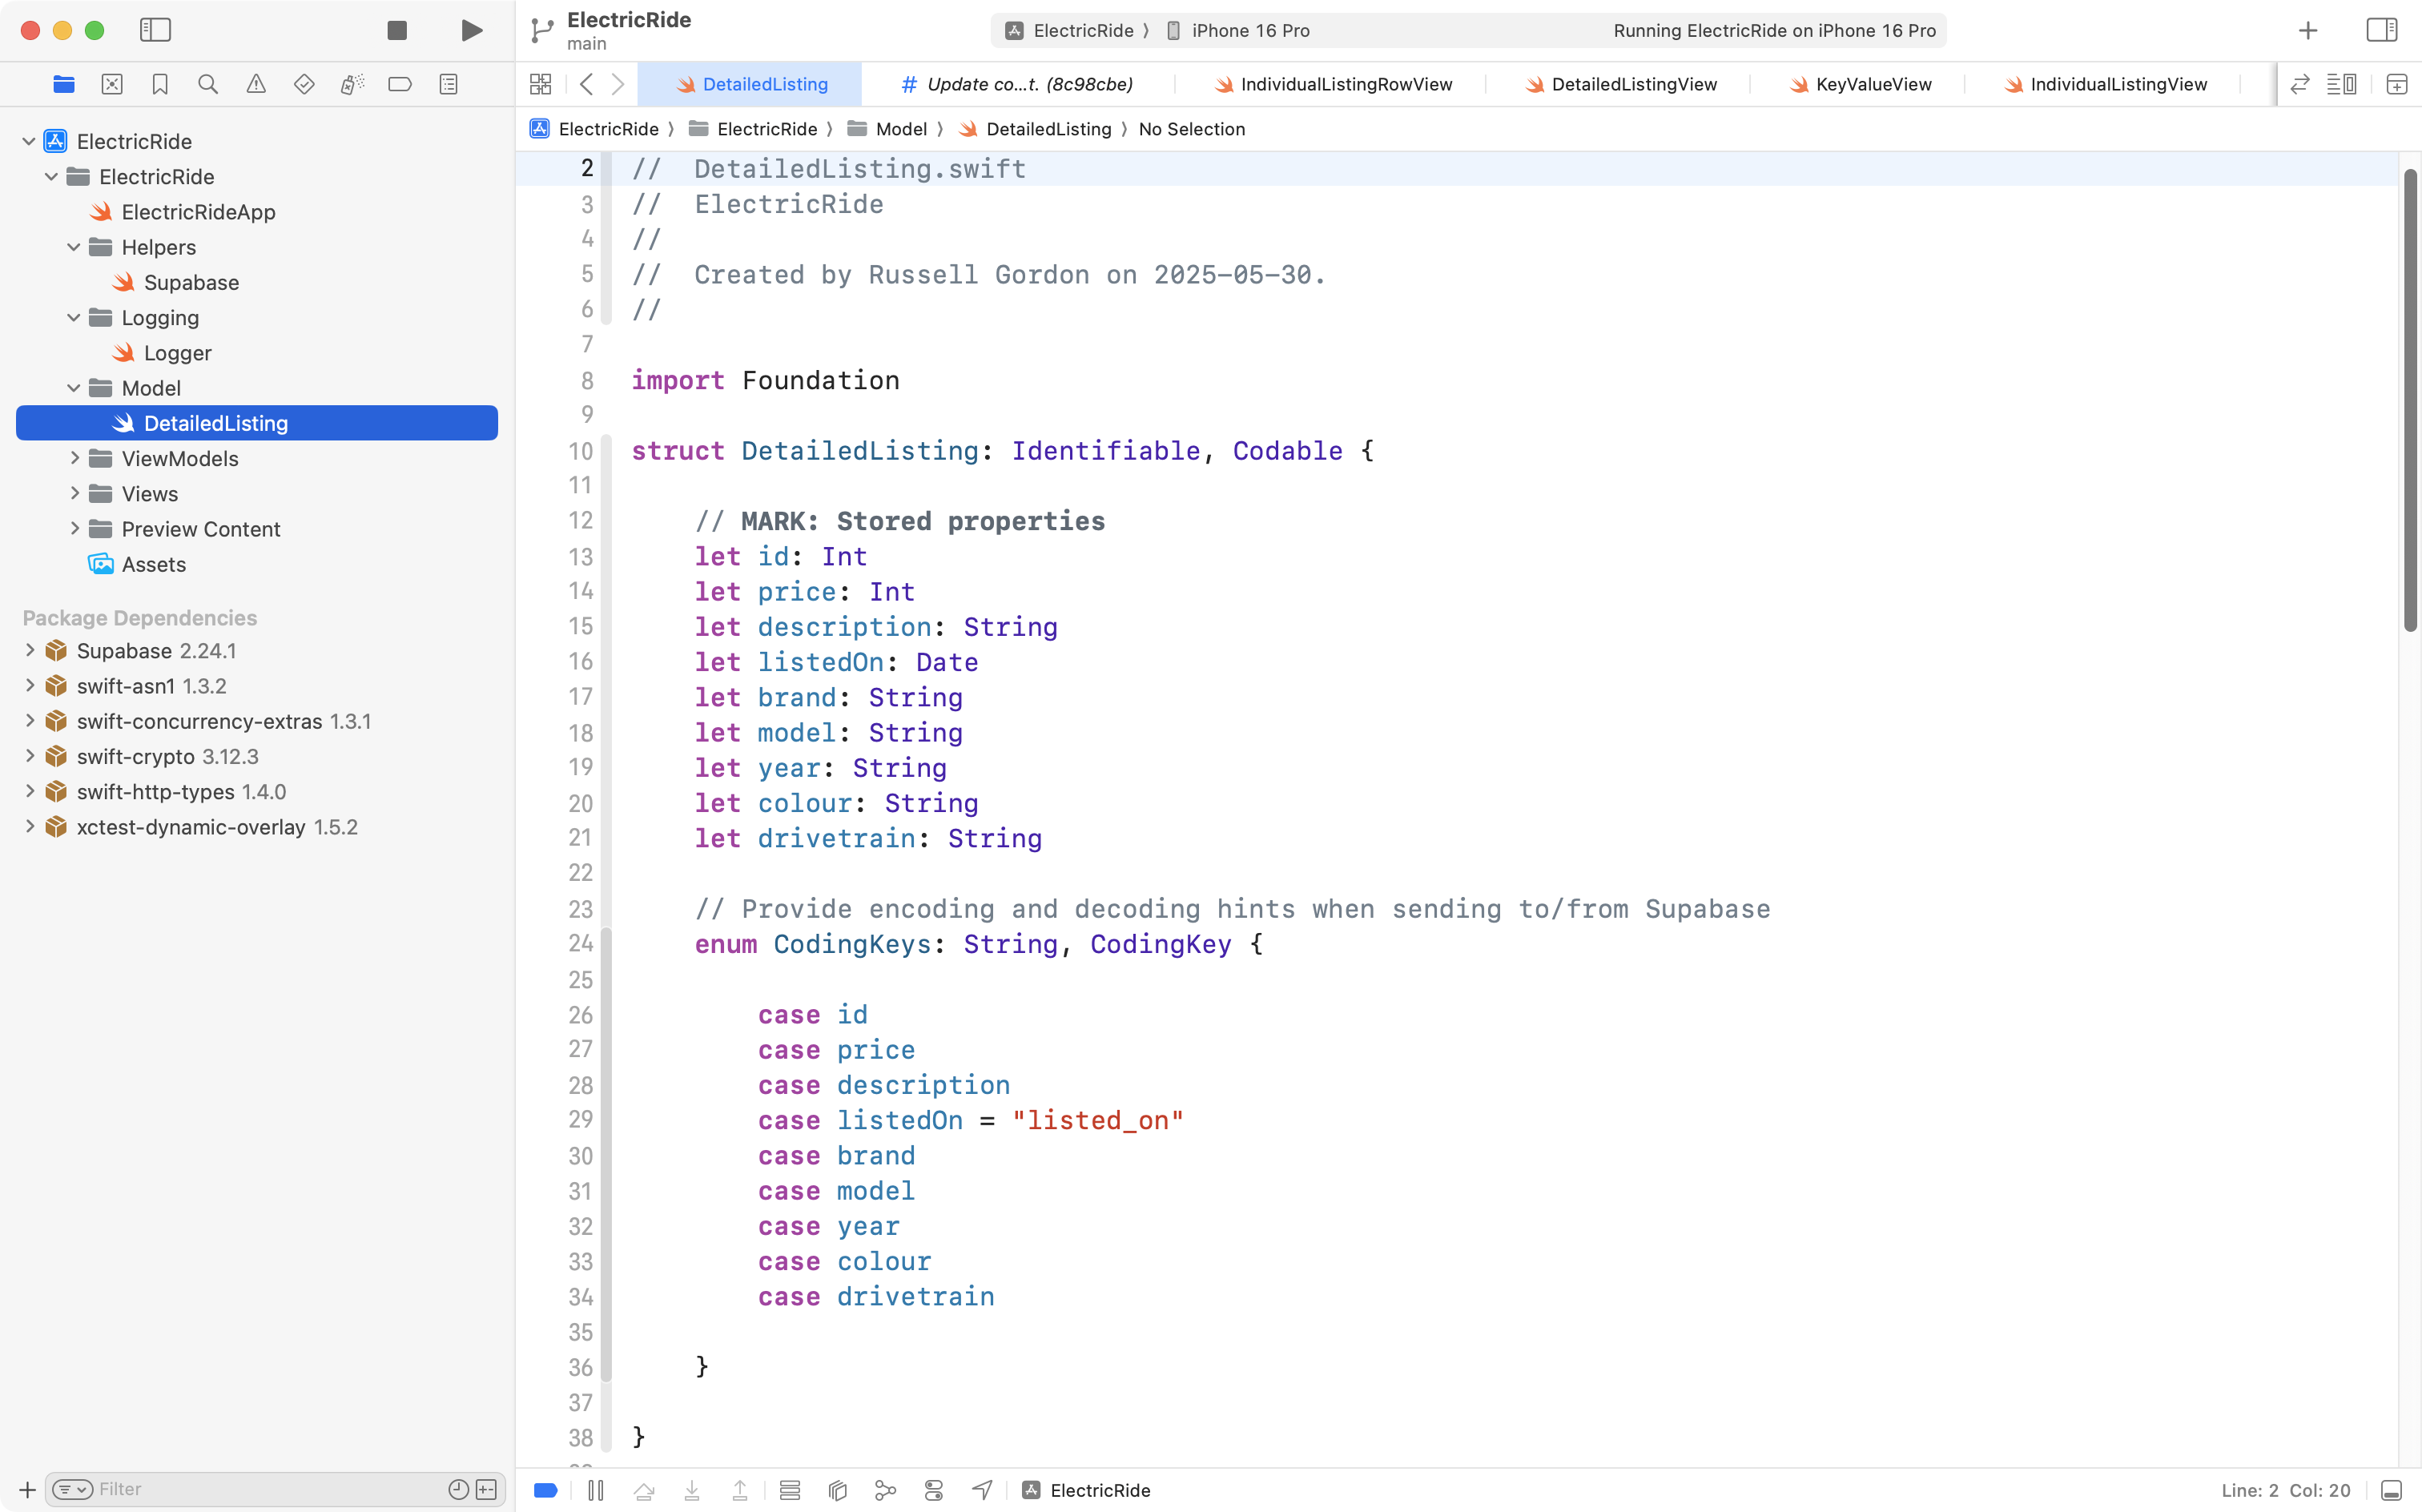
Crucially, we can use the view we’ve defined within the database, and then build a model to represent a single row:
Then we can author a view model to read all rows from the database view:
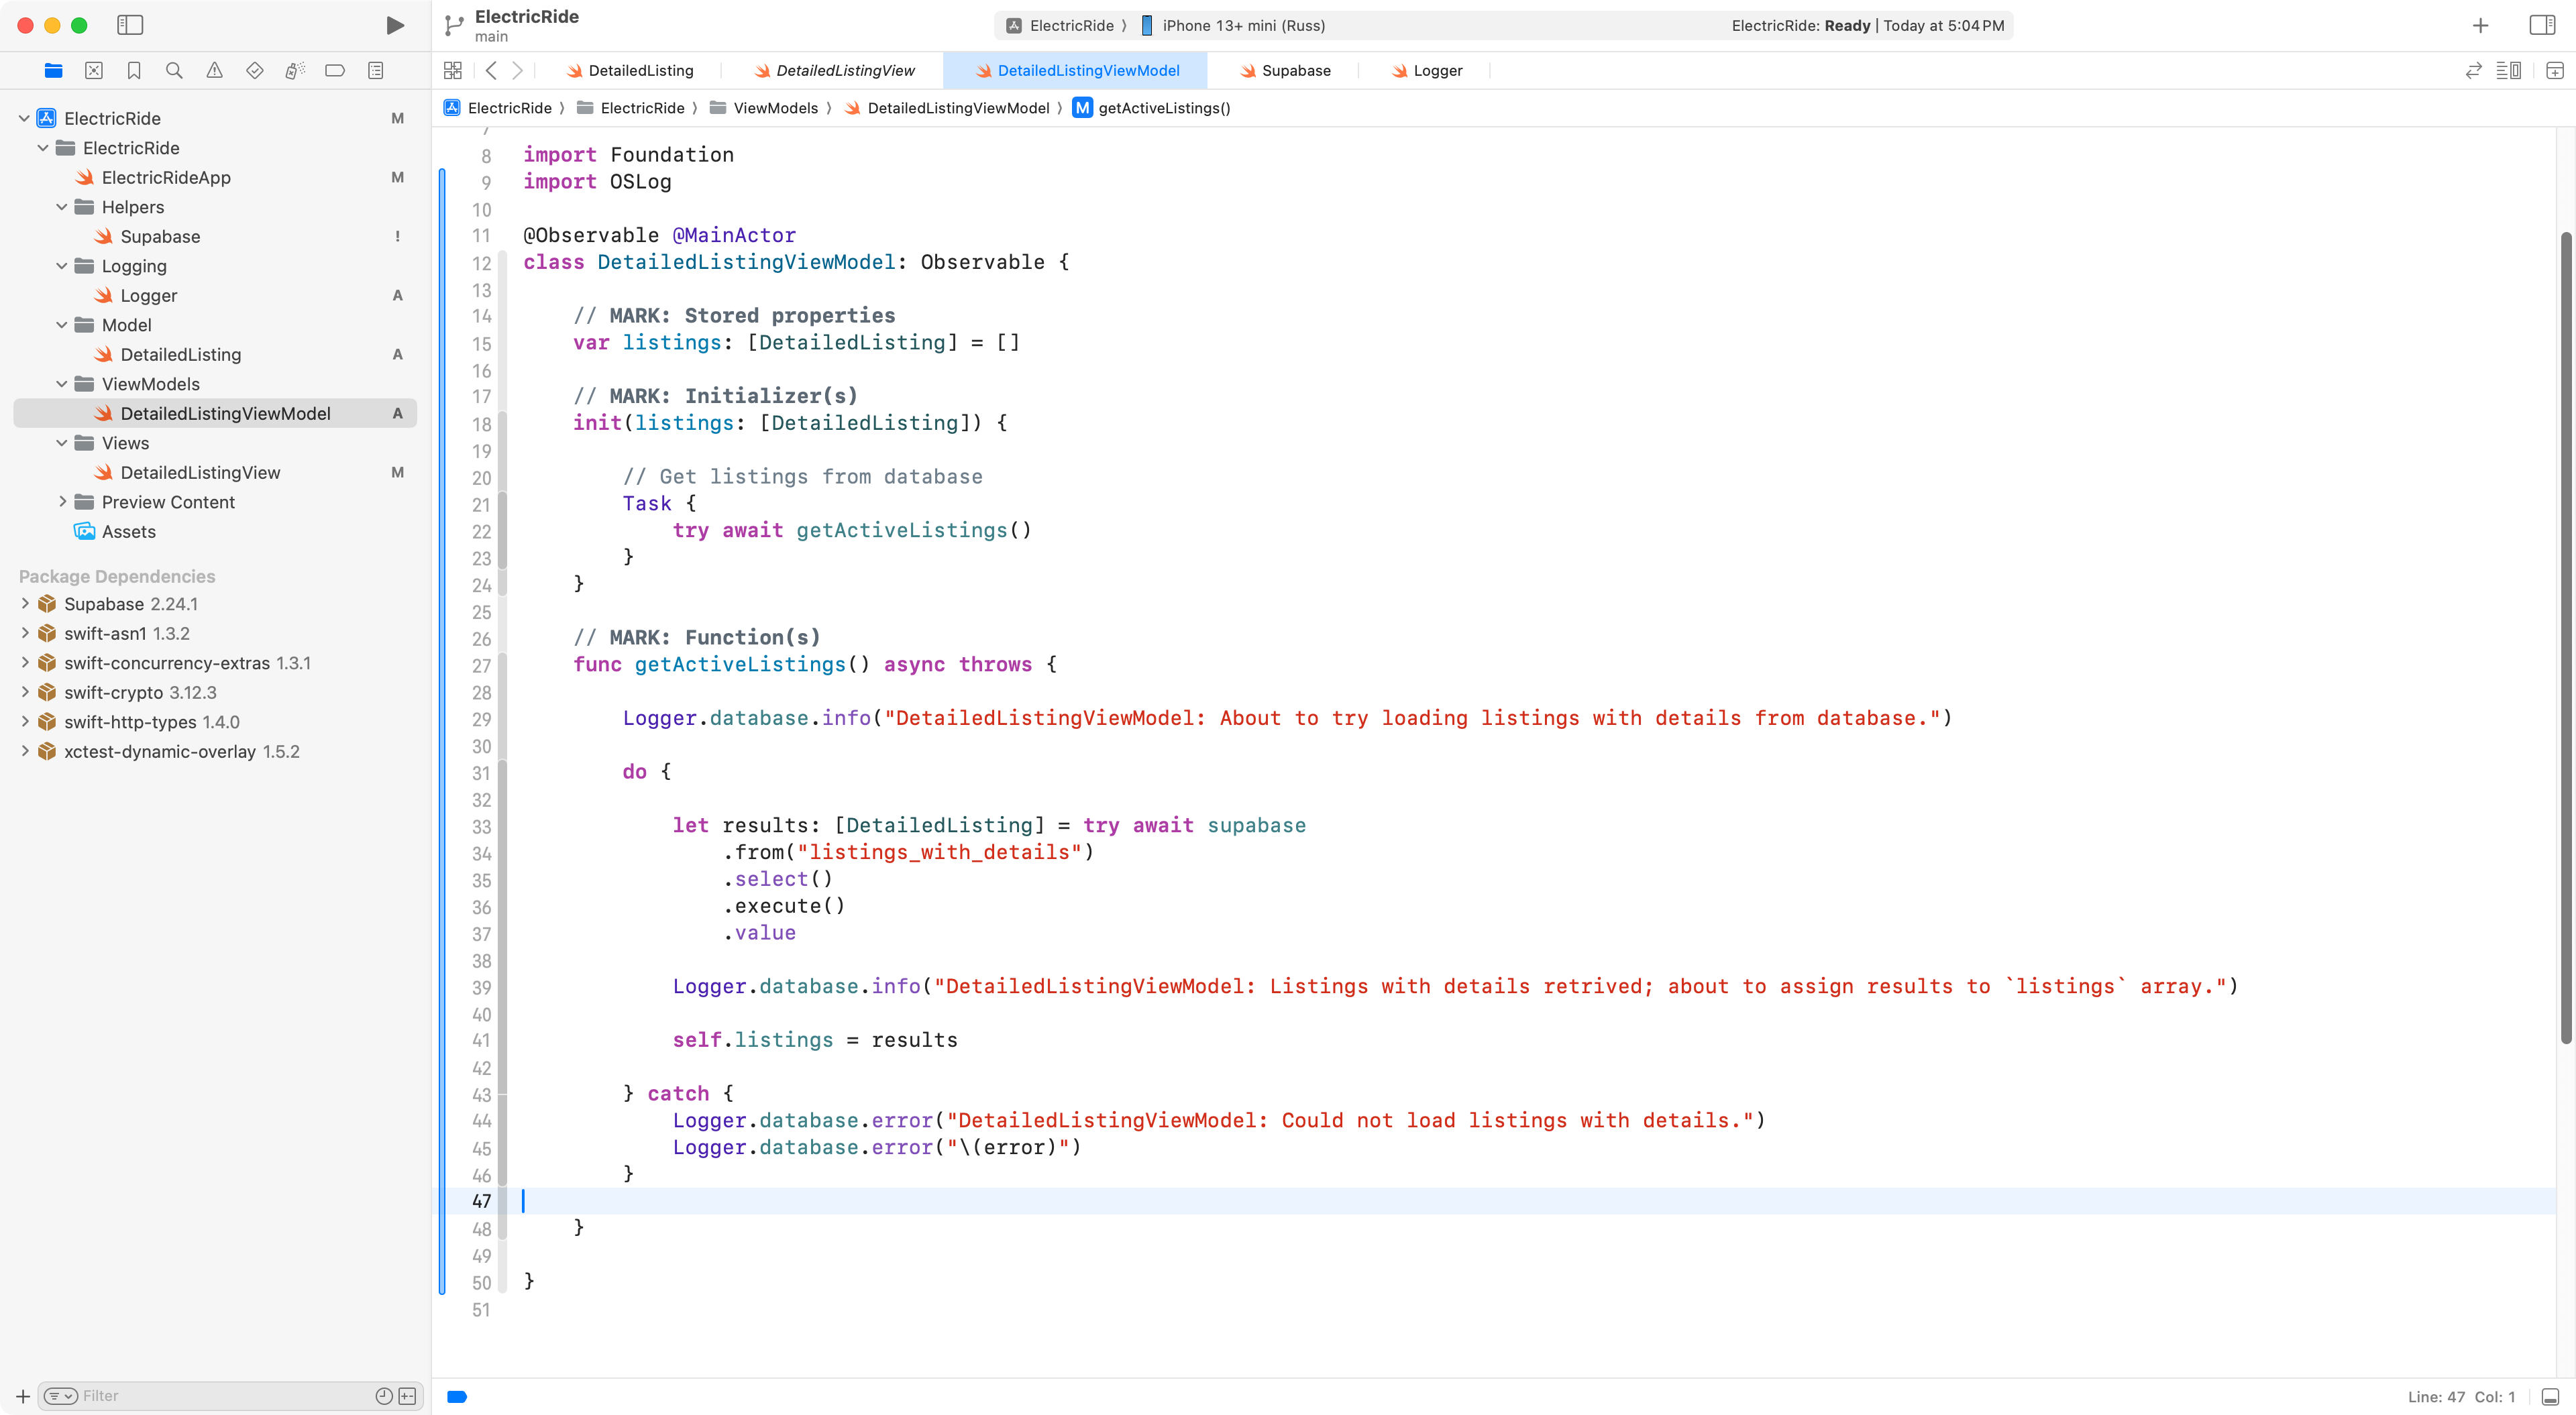
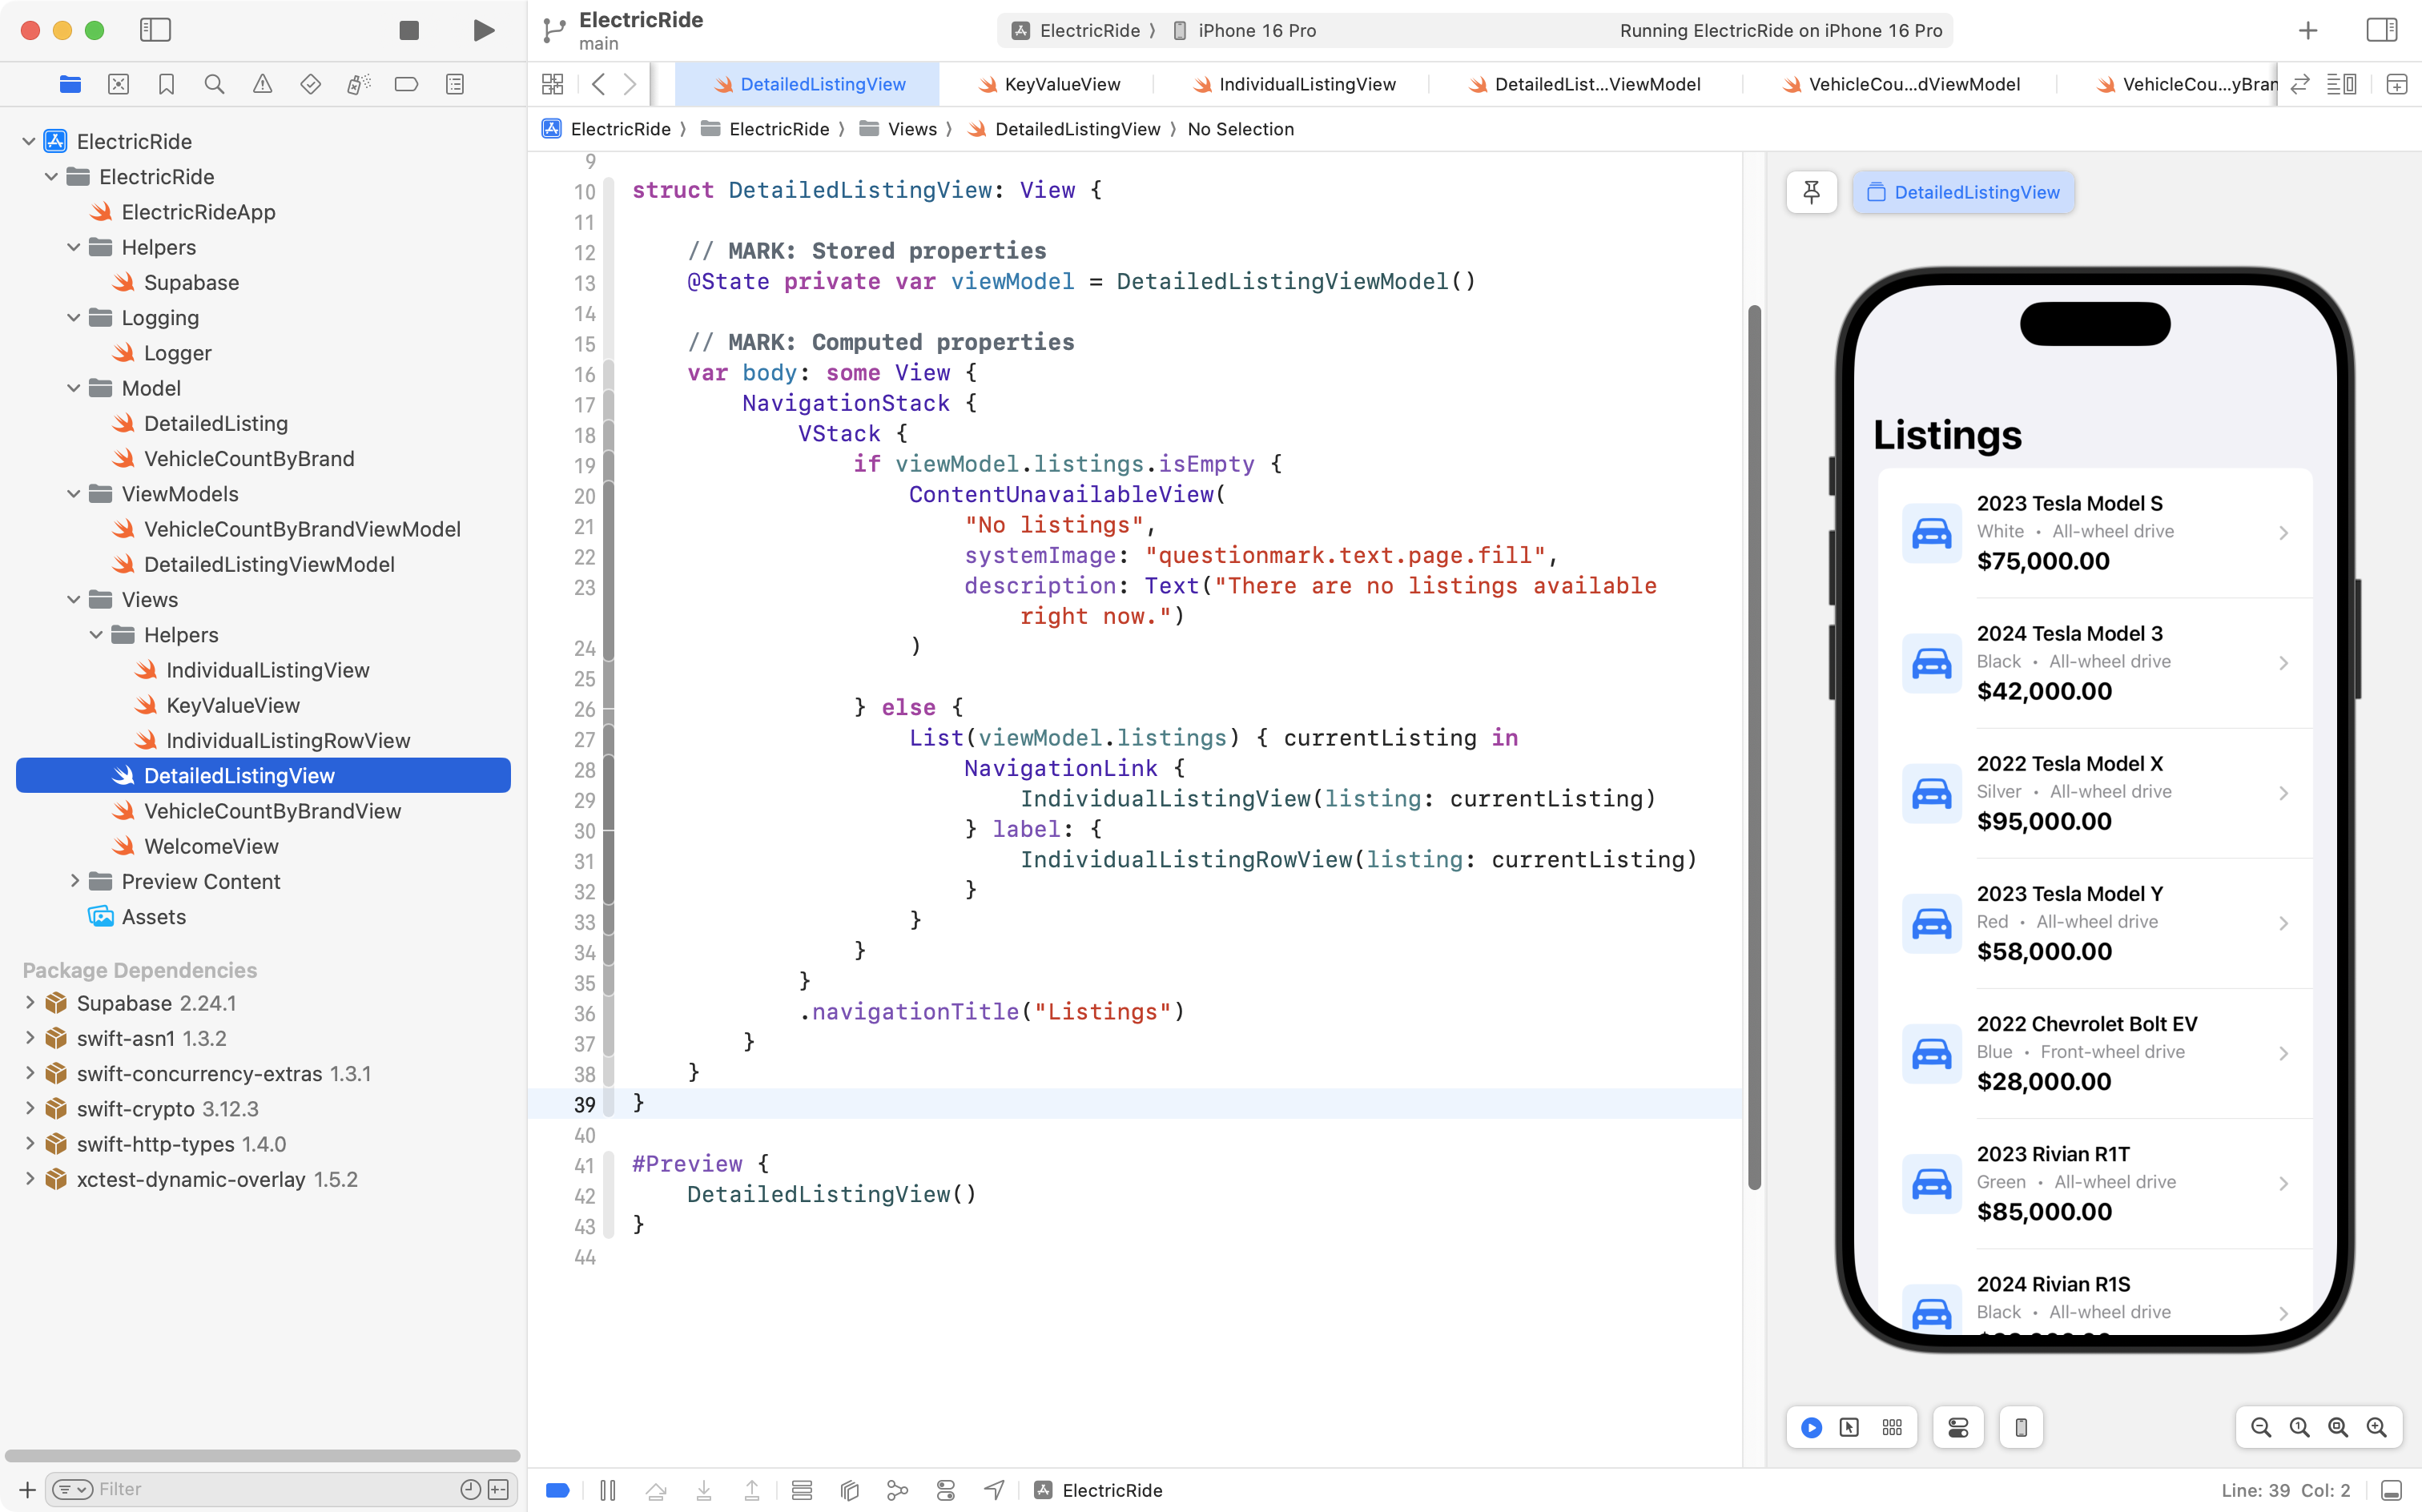
We can then make a view (in the context of an app) to read the view model’s listings array:
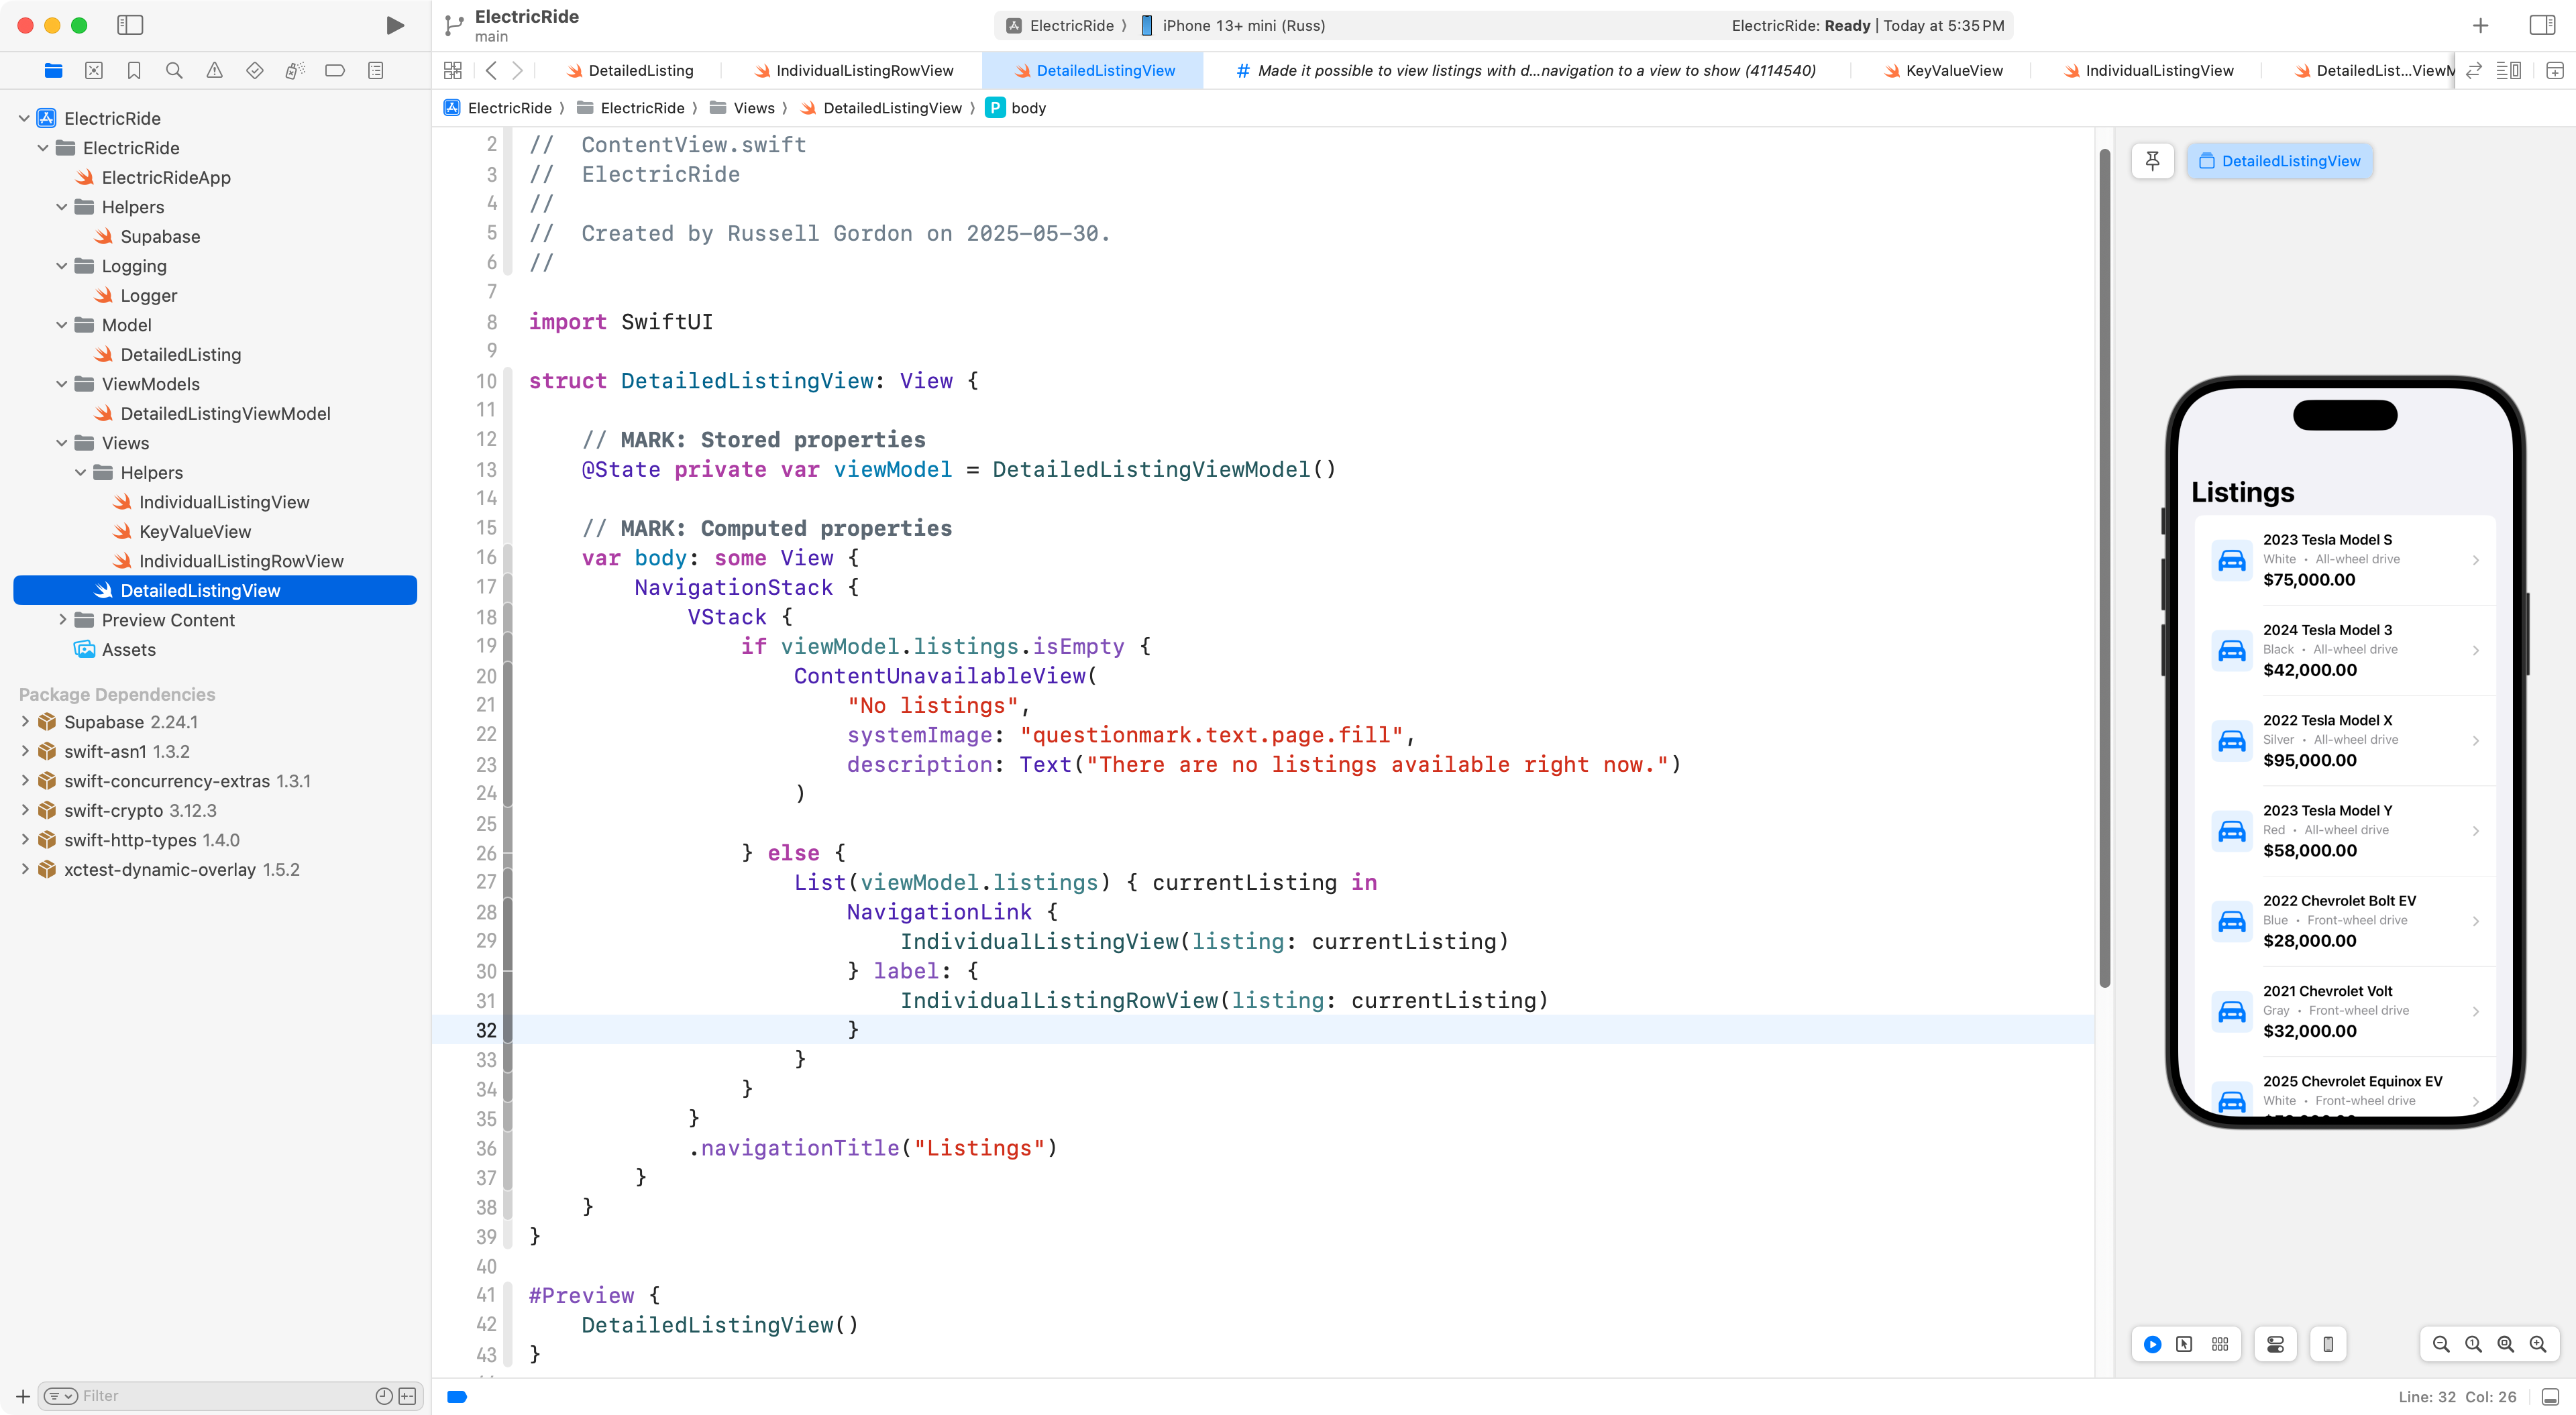
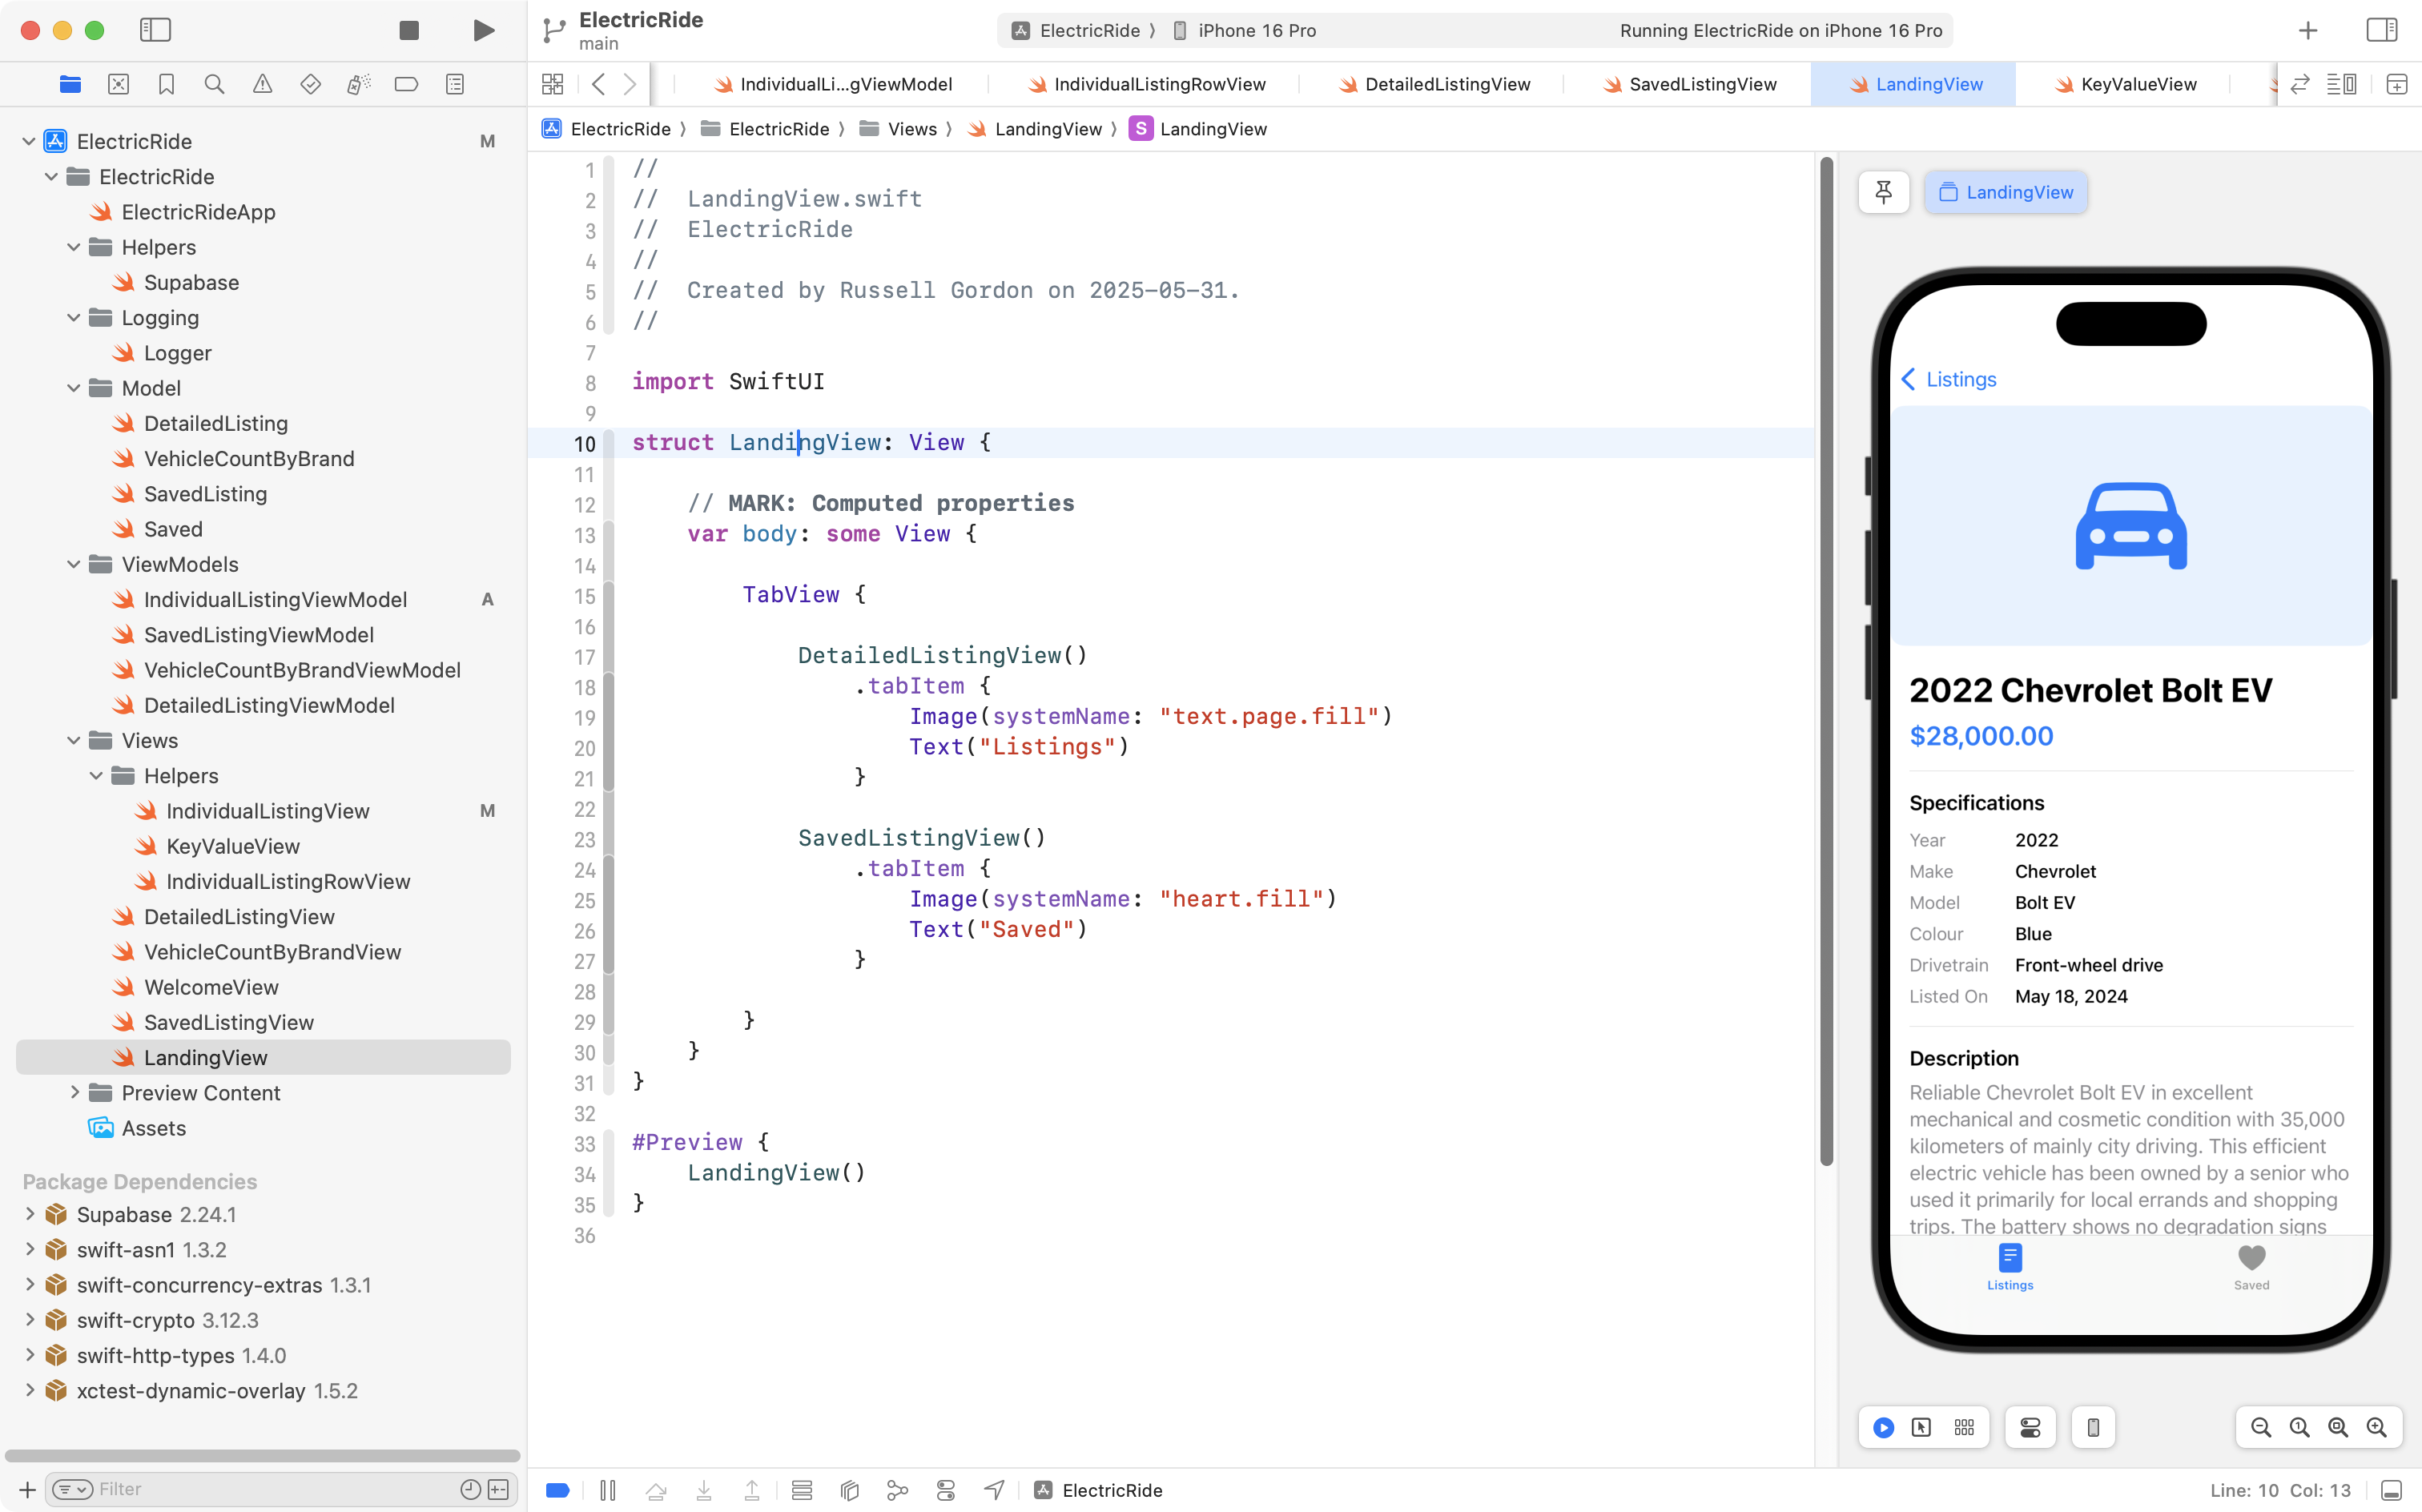
Now we can browse information about car listings from our app!
Showing active listings only
If you were paying close attention, you may have noticed that all listings were being retrieved by the view above:
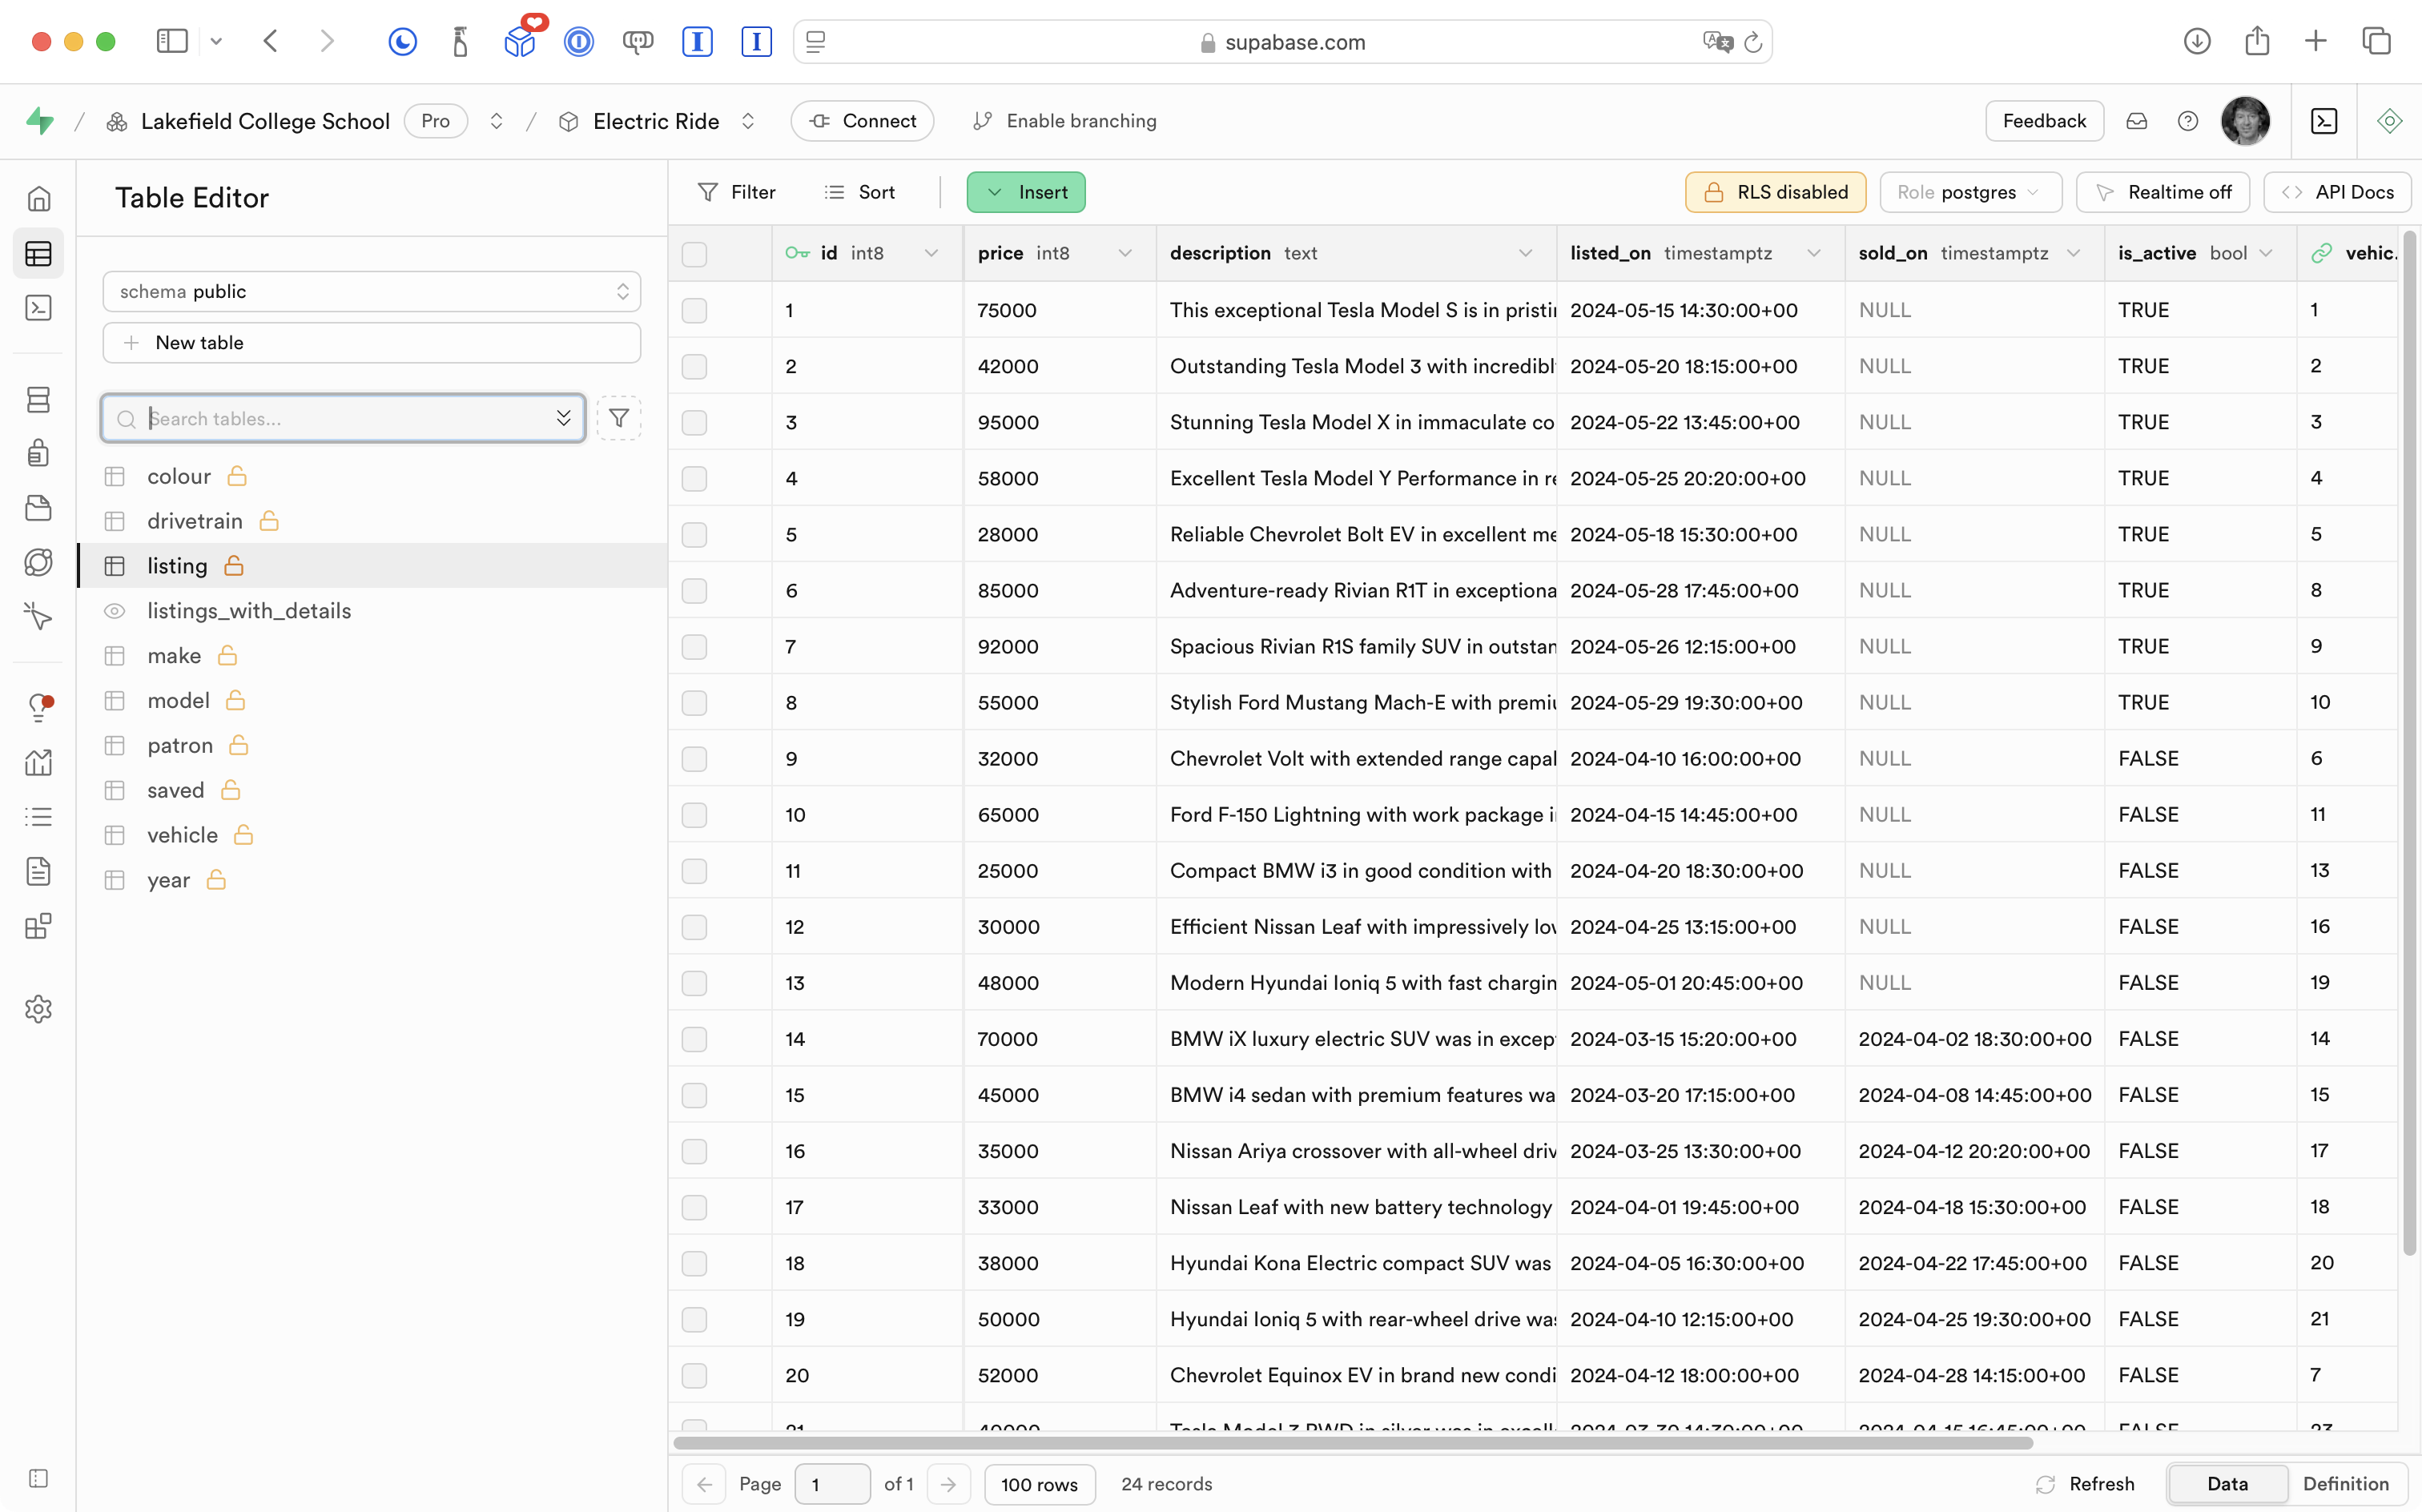
In the context of a used-car buy-and-sell app, it only makes sense to show listings that have not been sold and where the seller has chosen to keep the listing active:
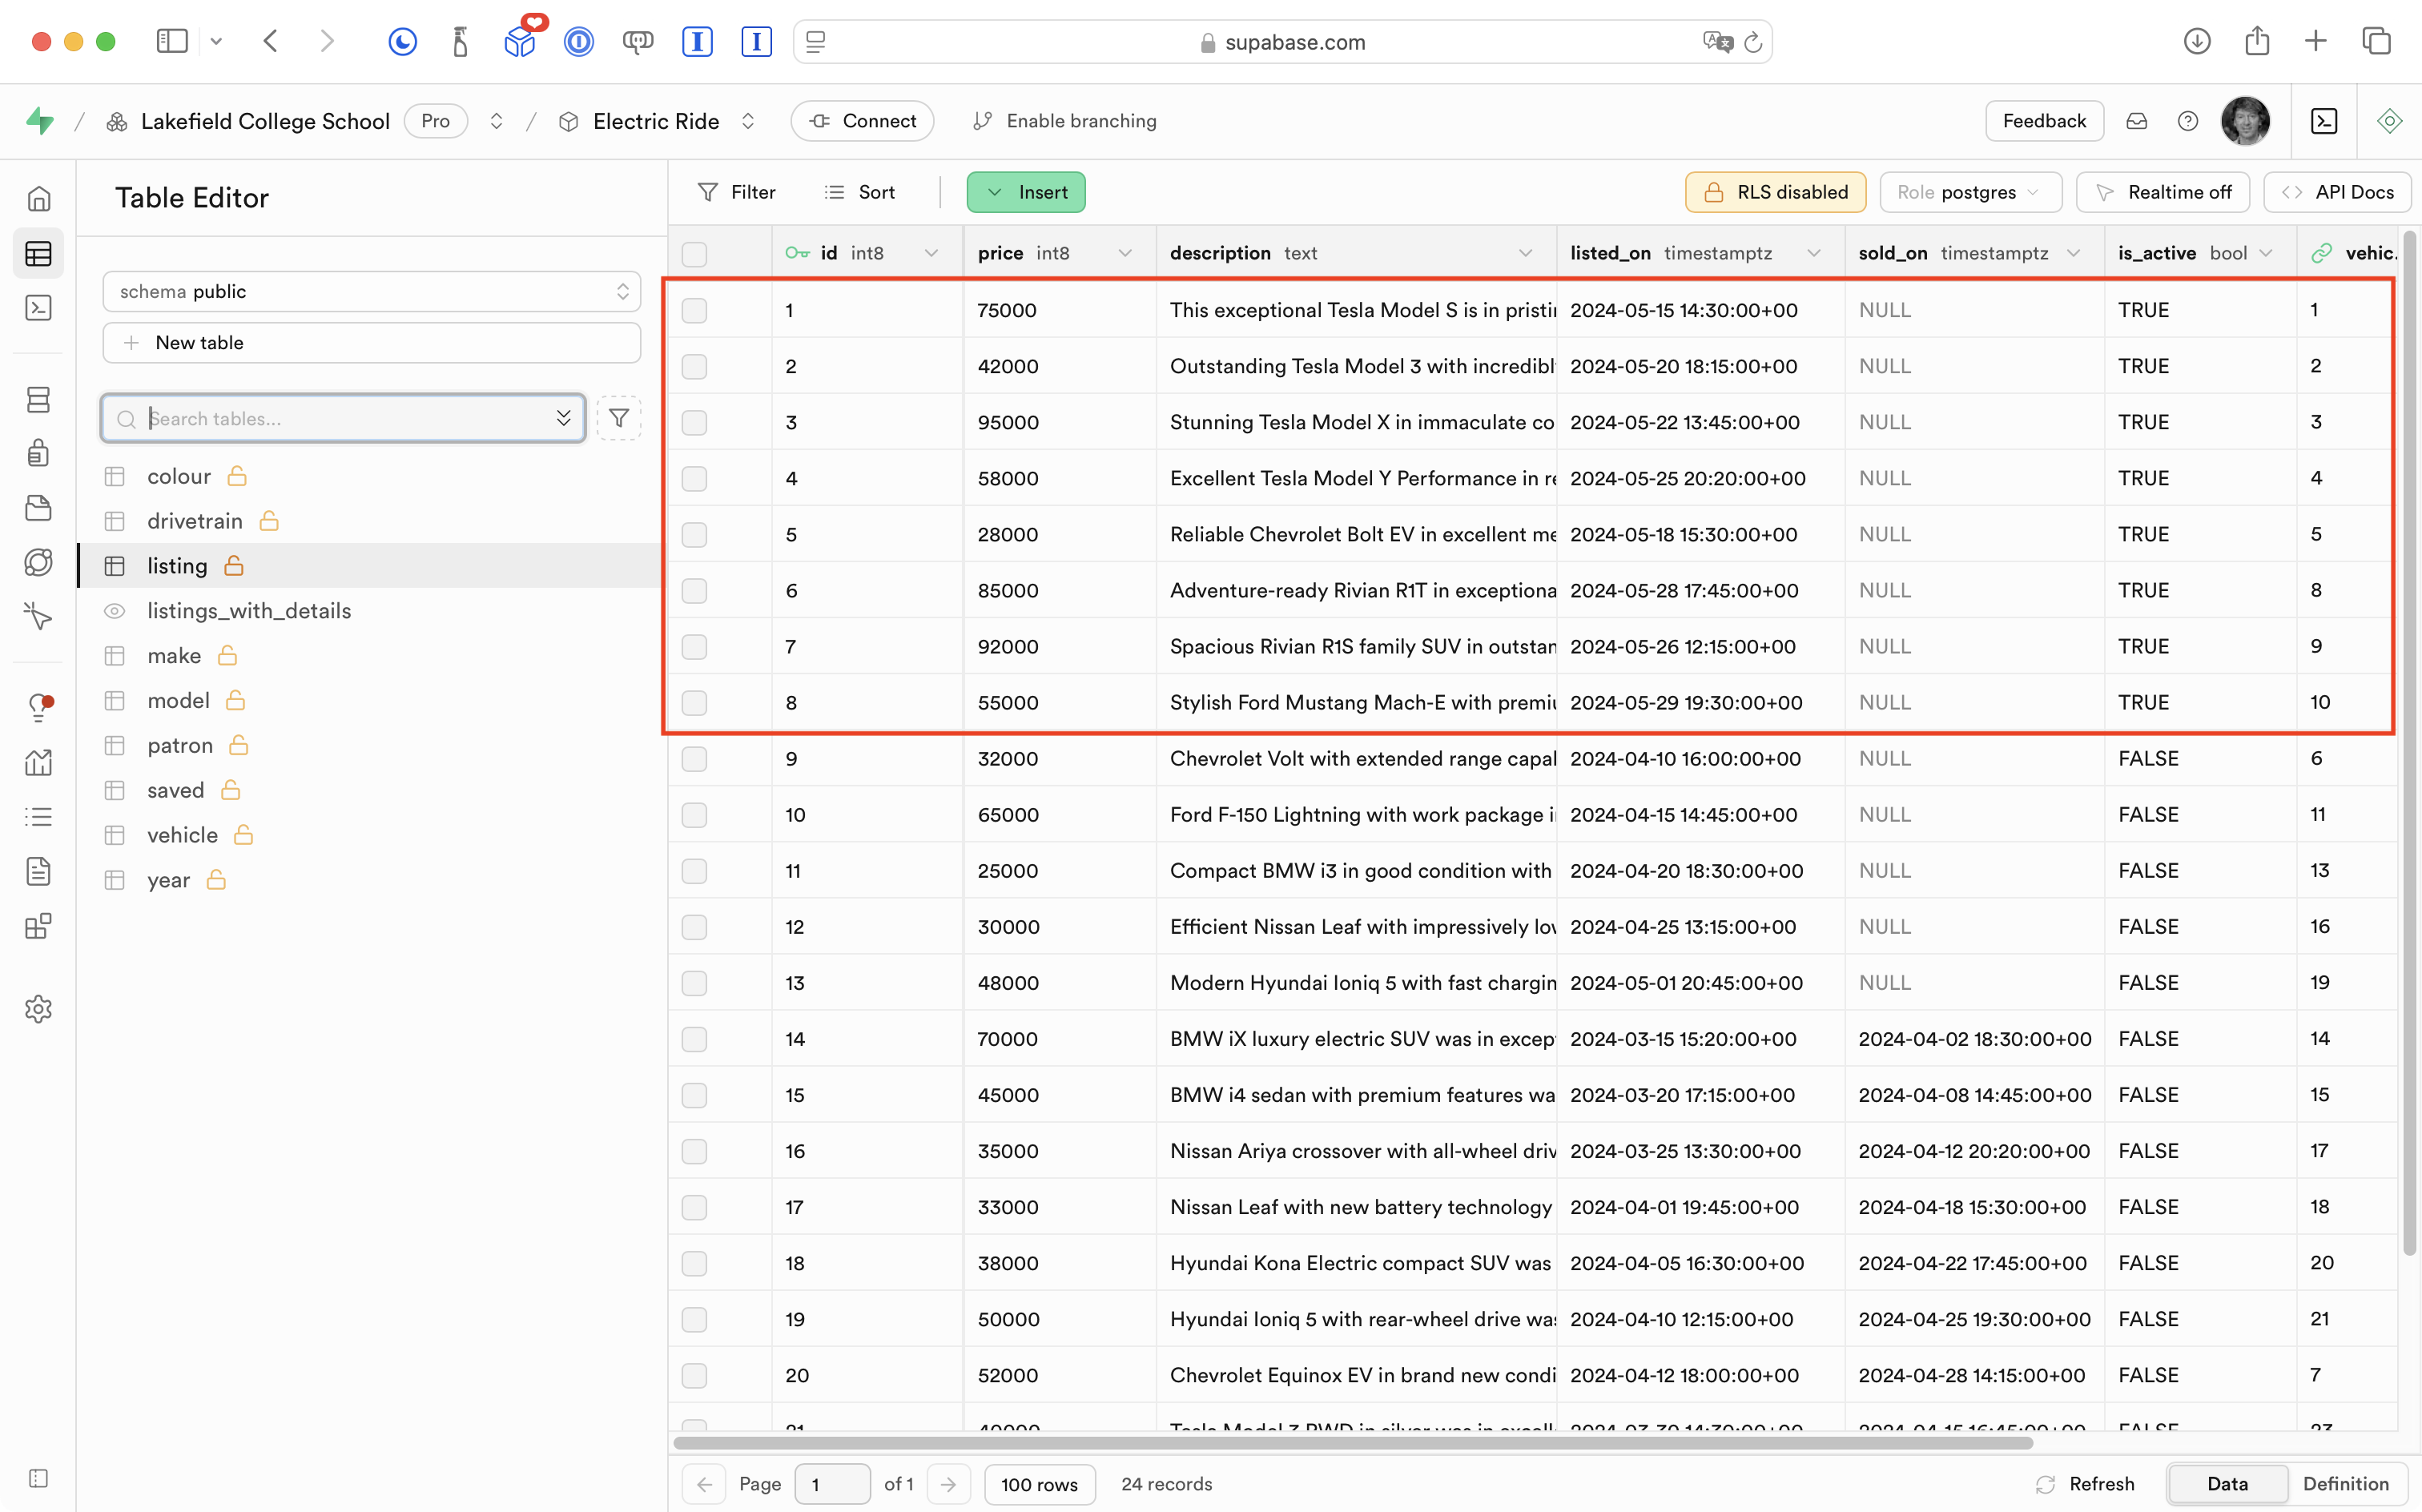
To fix this in the app, all that needs doing is adding a WHERE clause to the definition of the view:
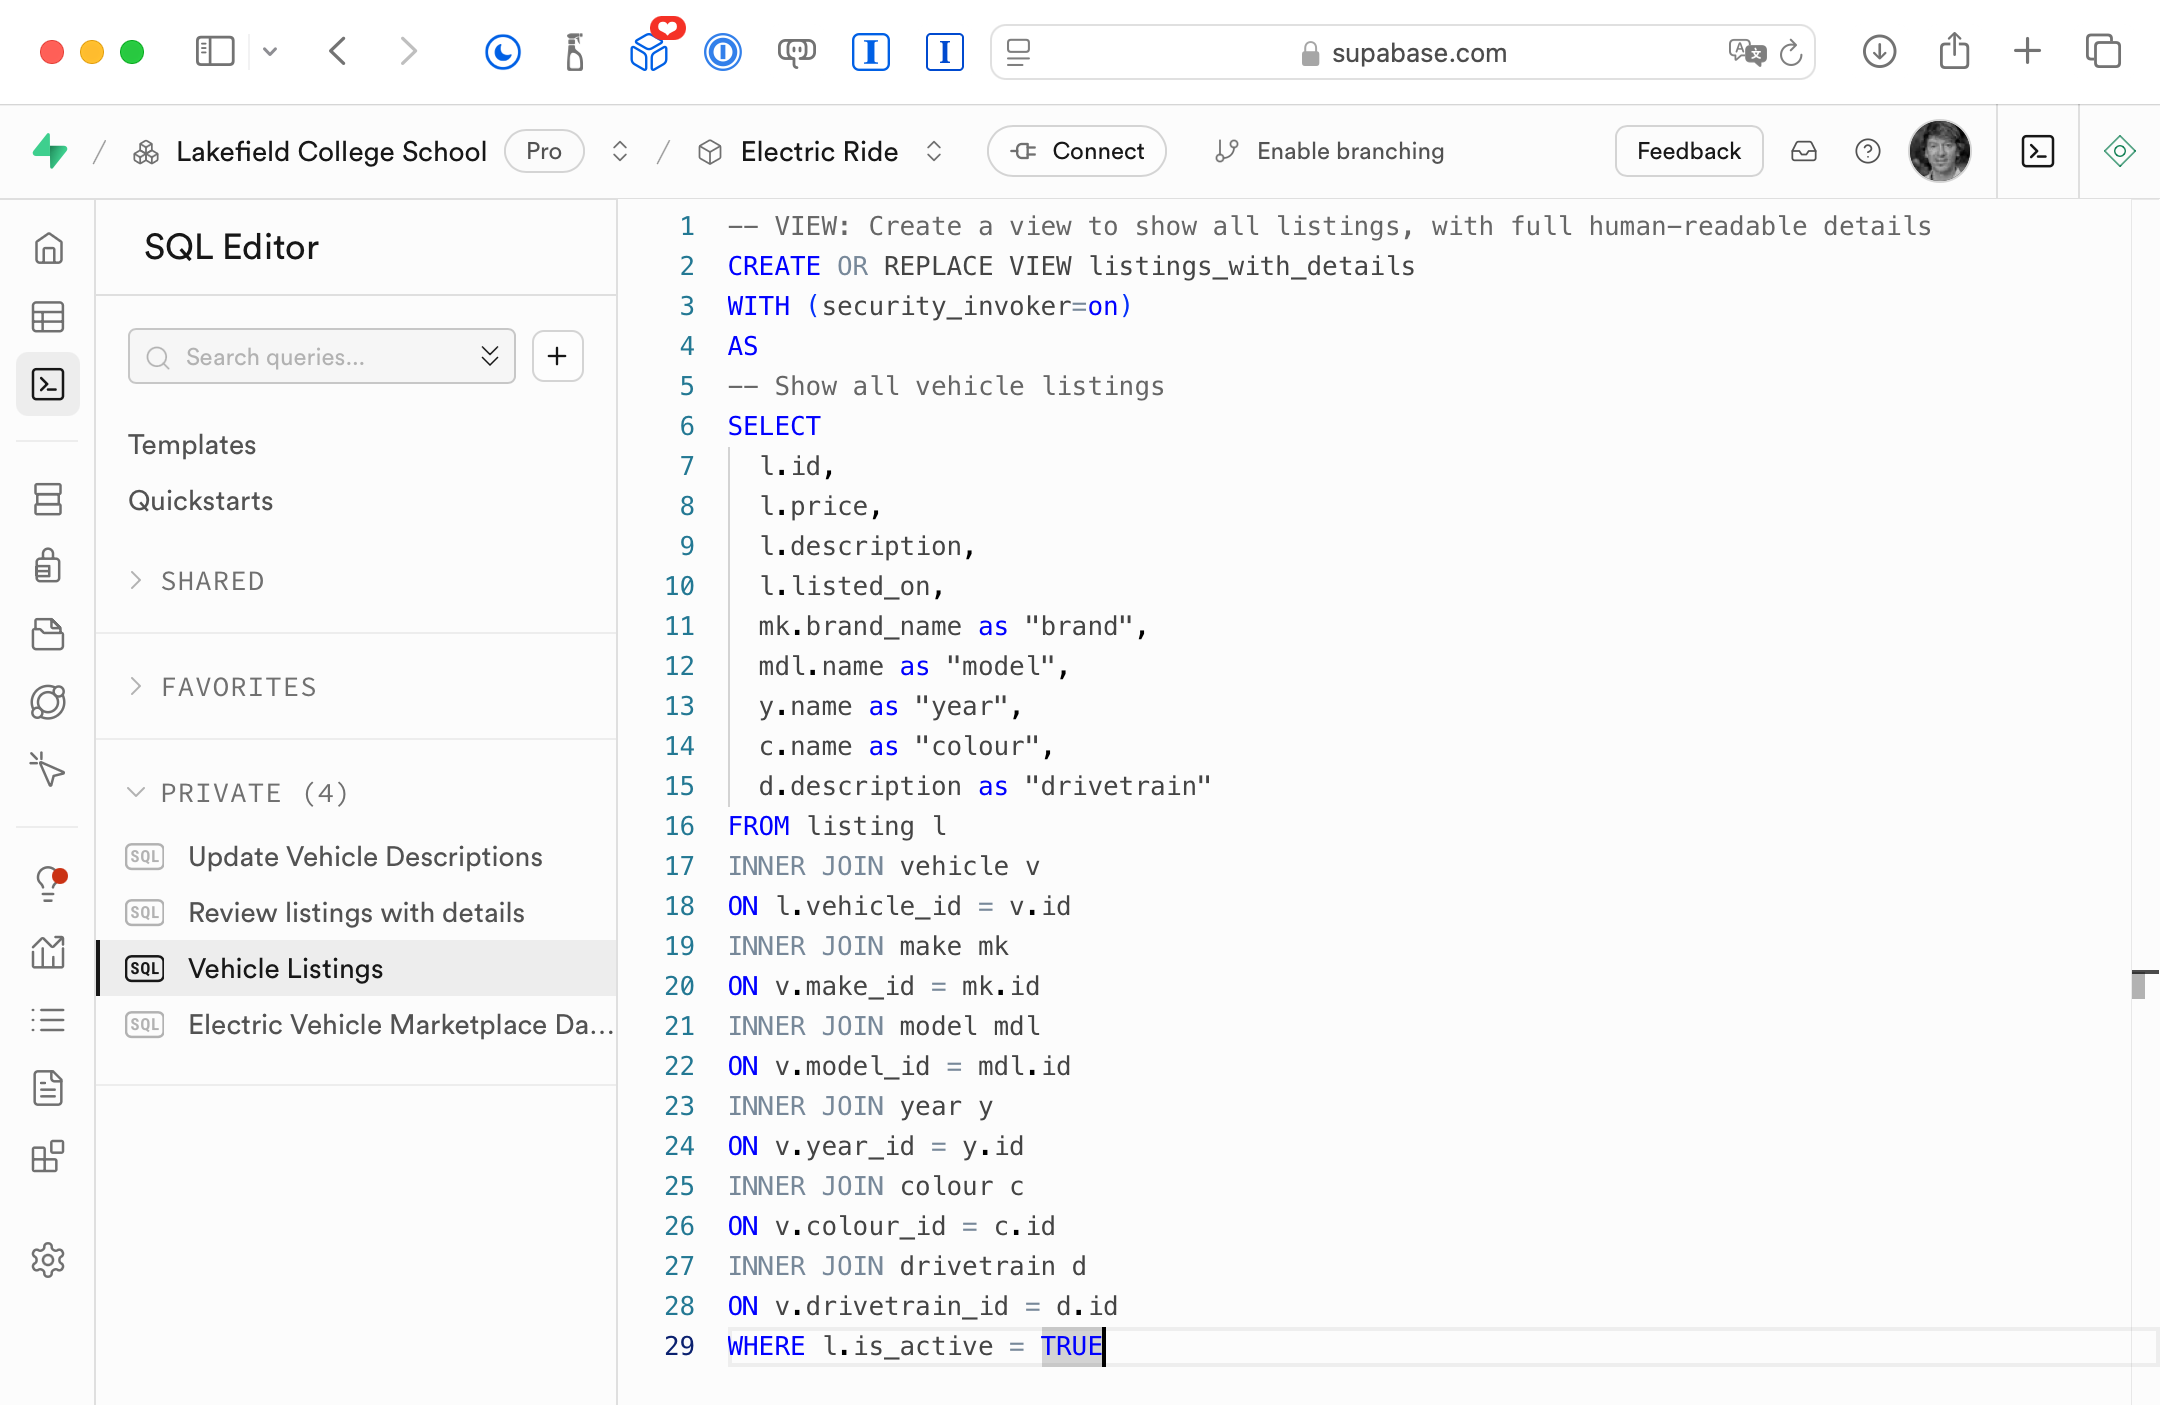
The view immediately updates:
The same data now shows up in the app, no code changes required:
Grouping and counting
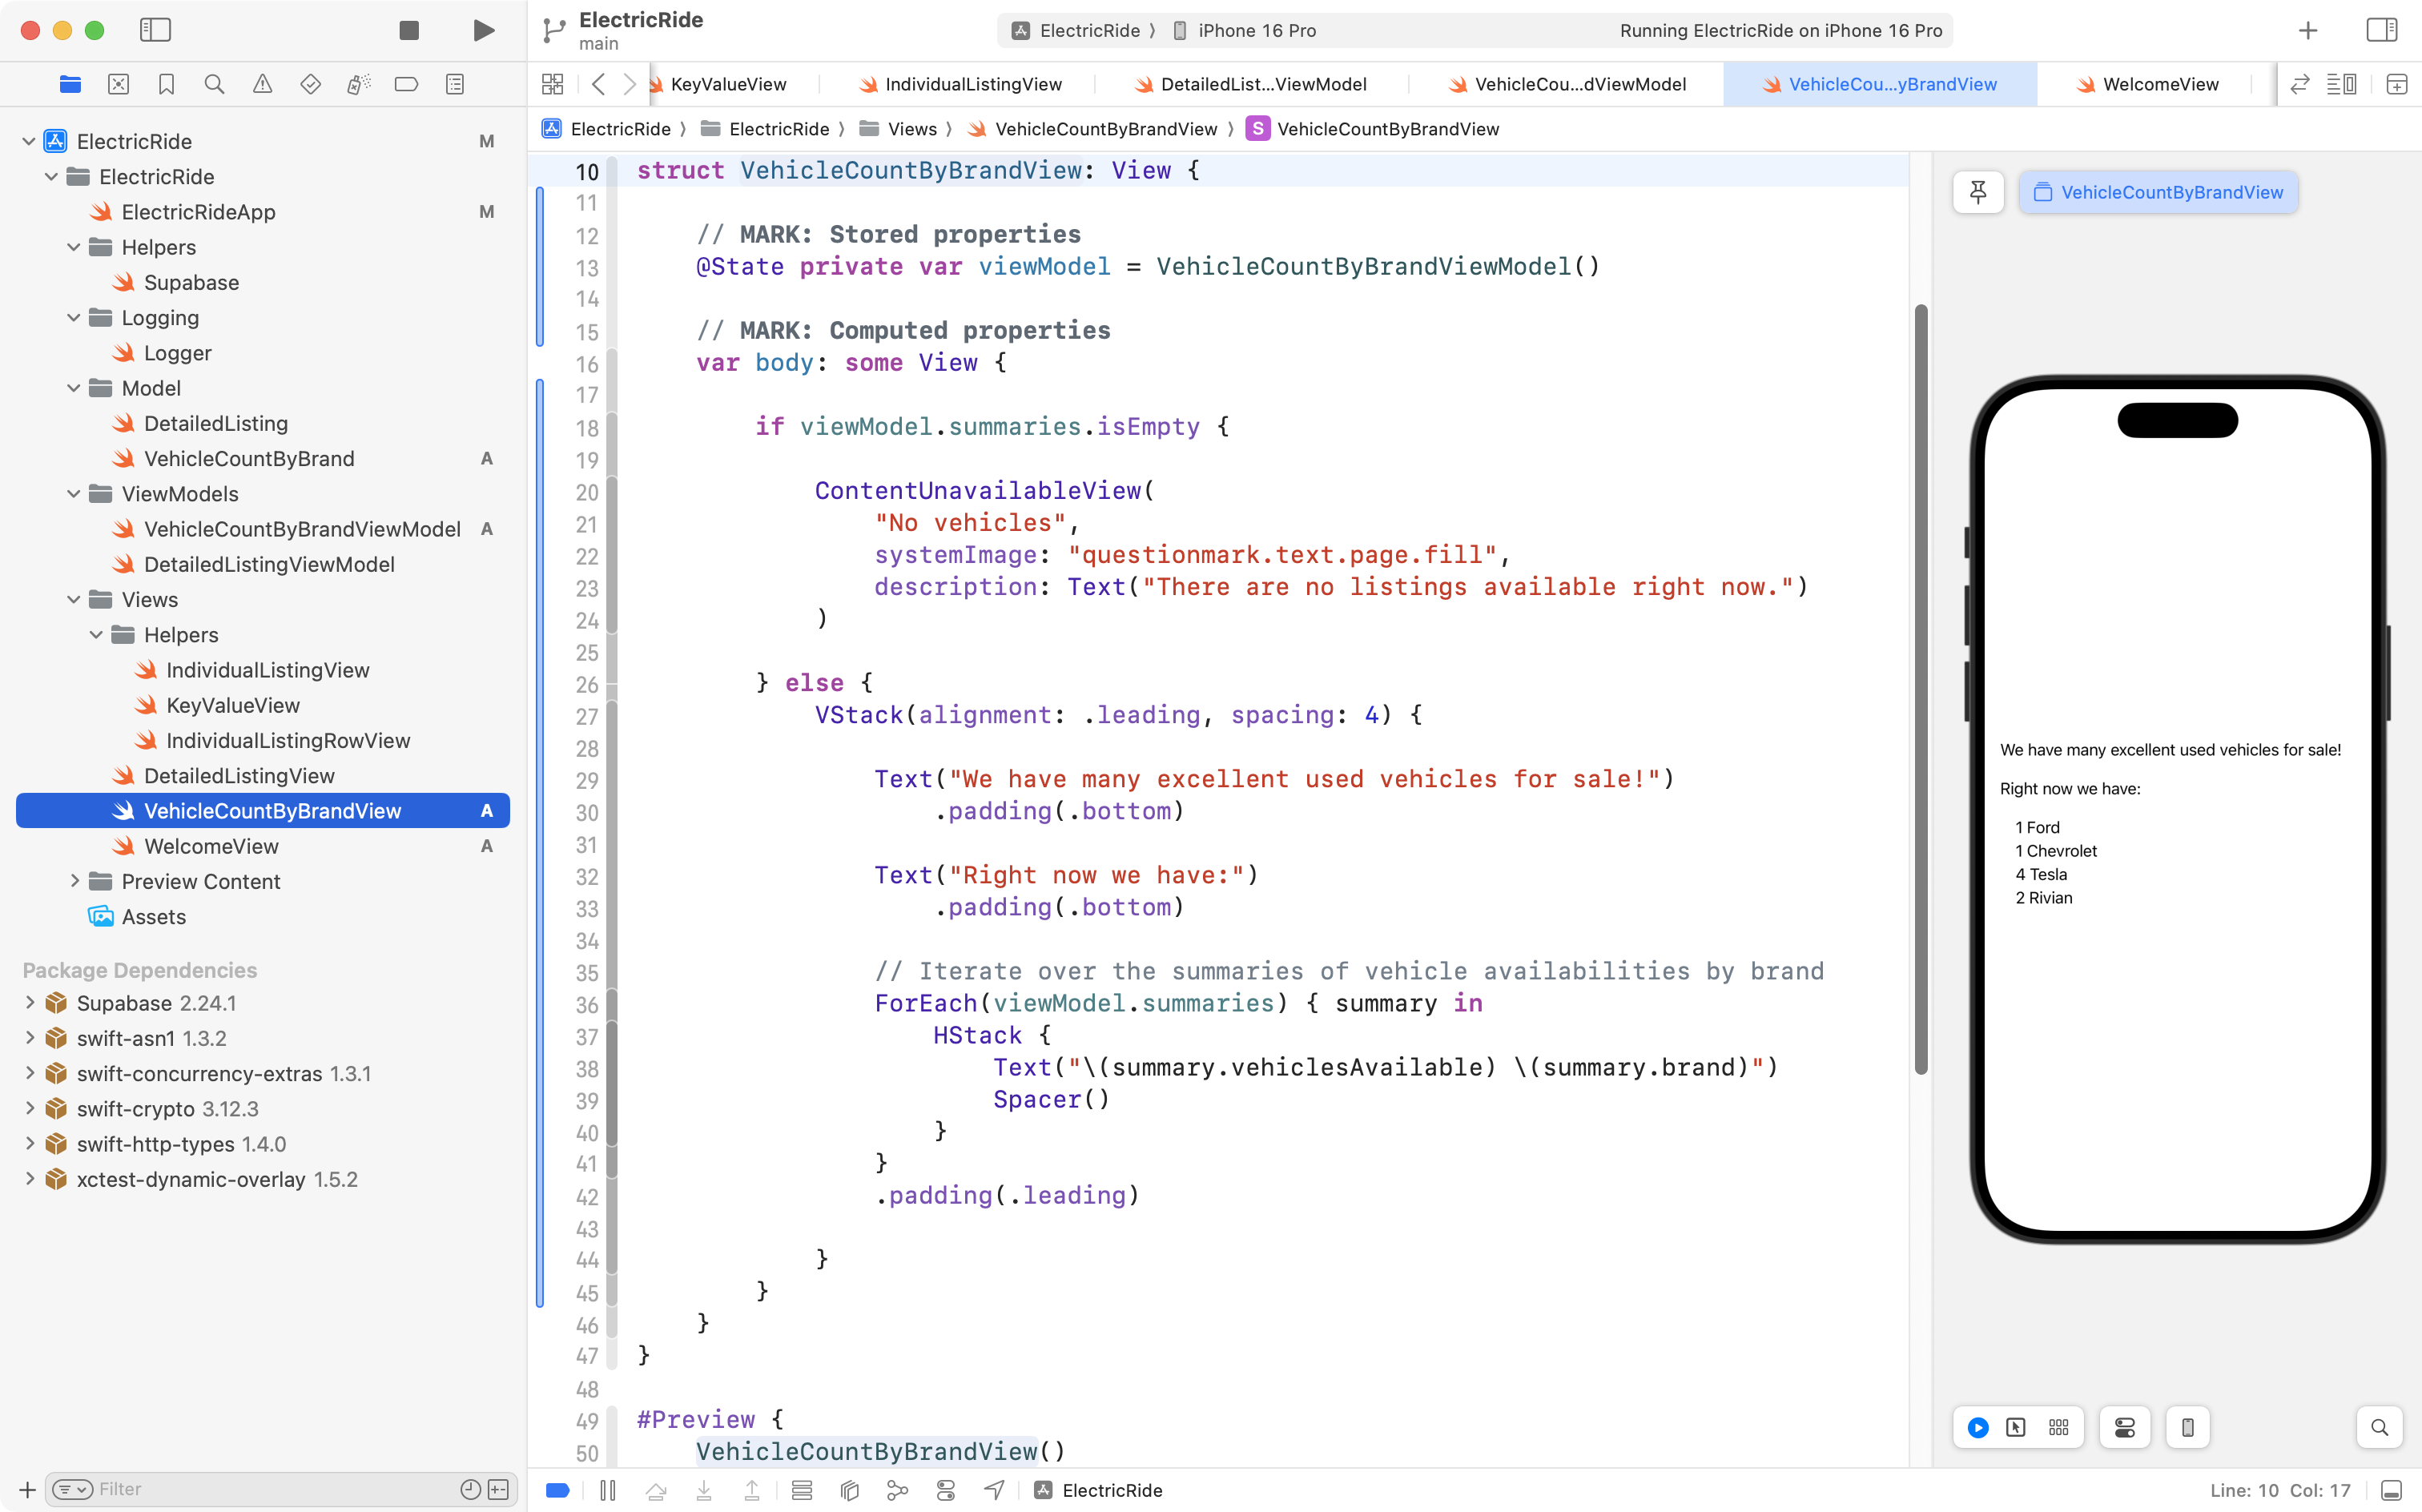
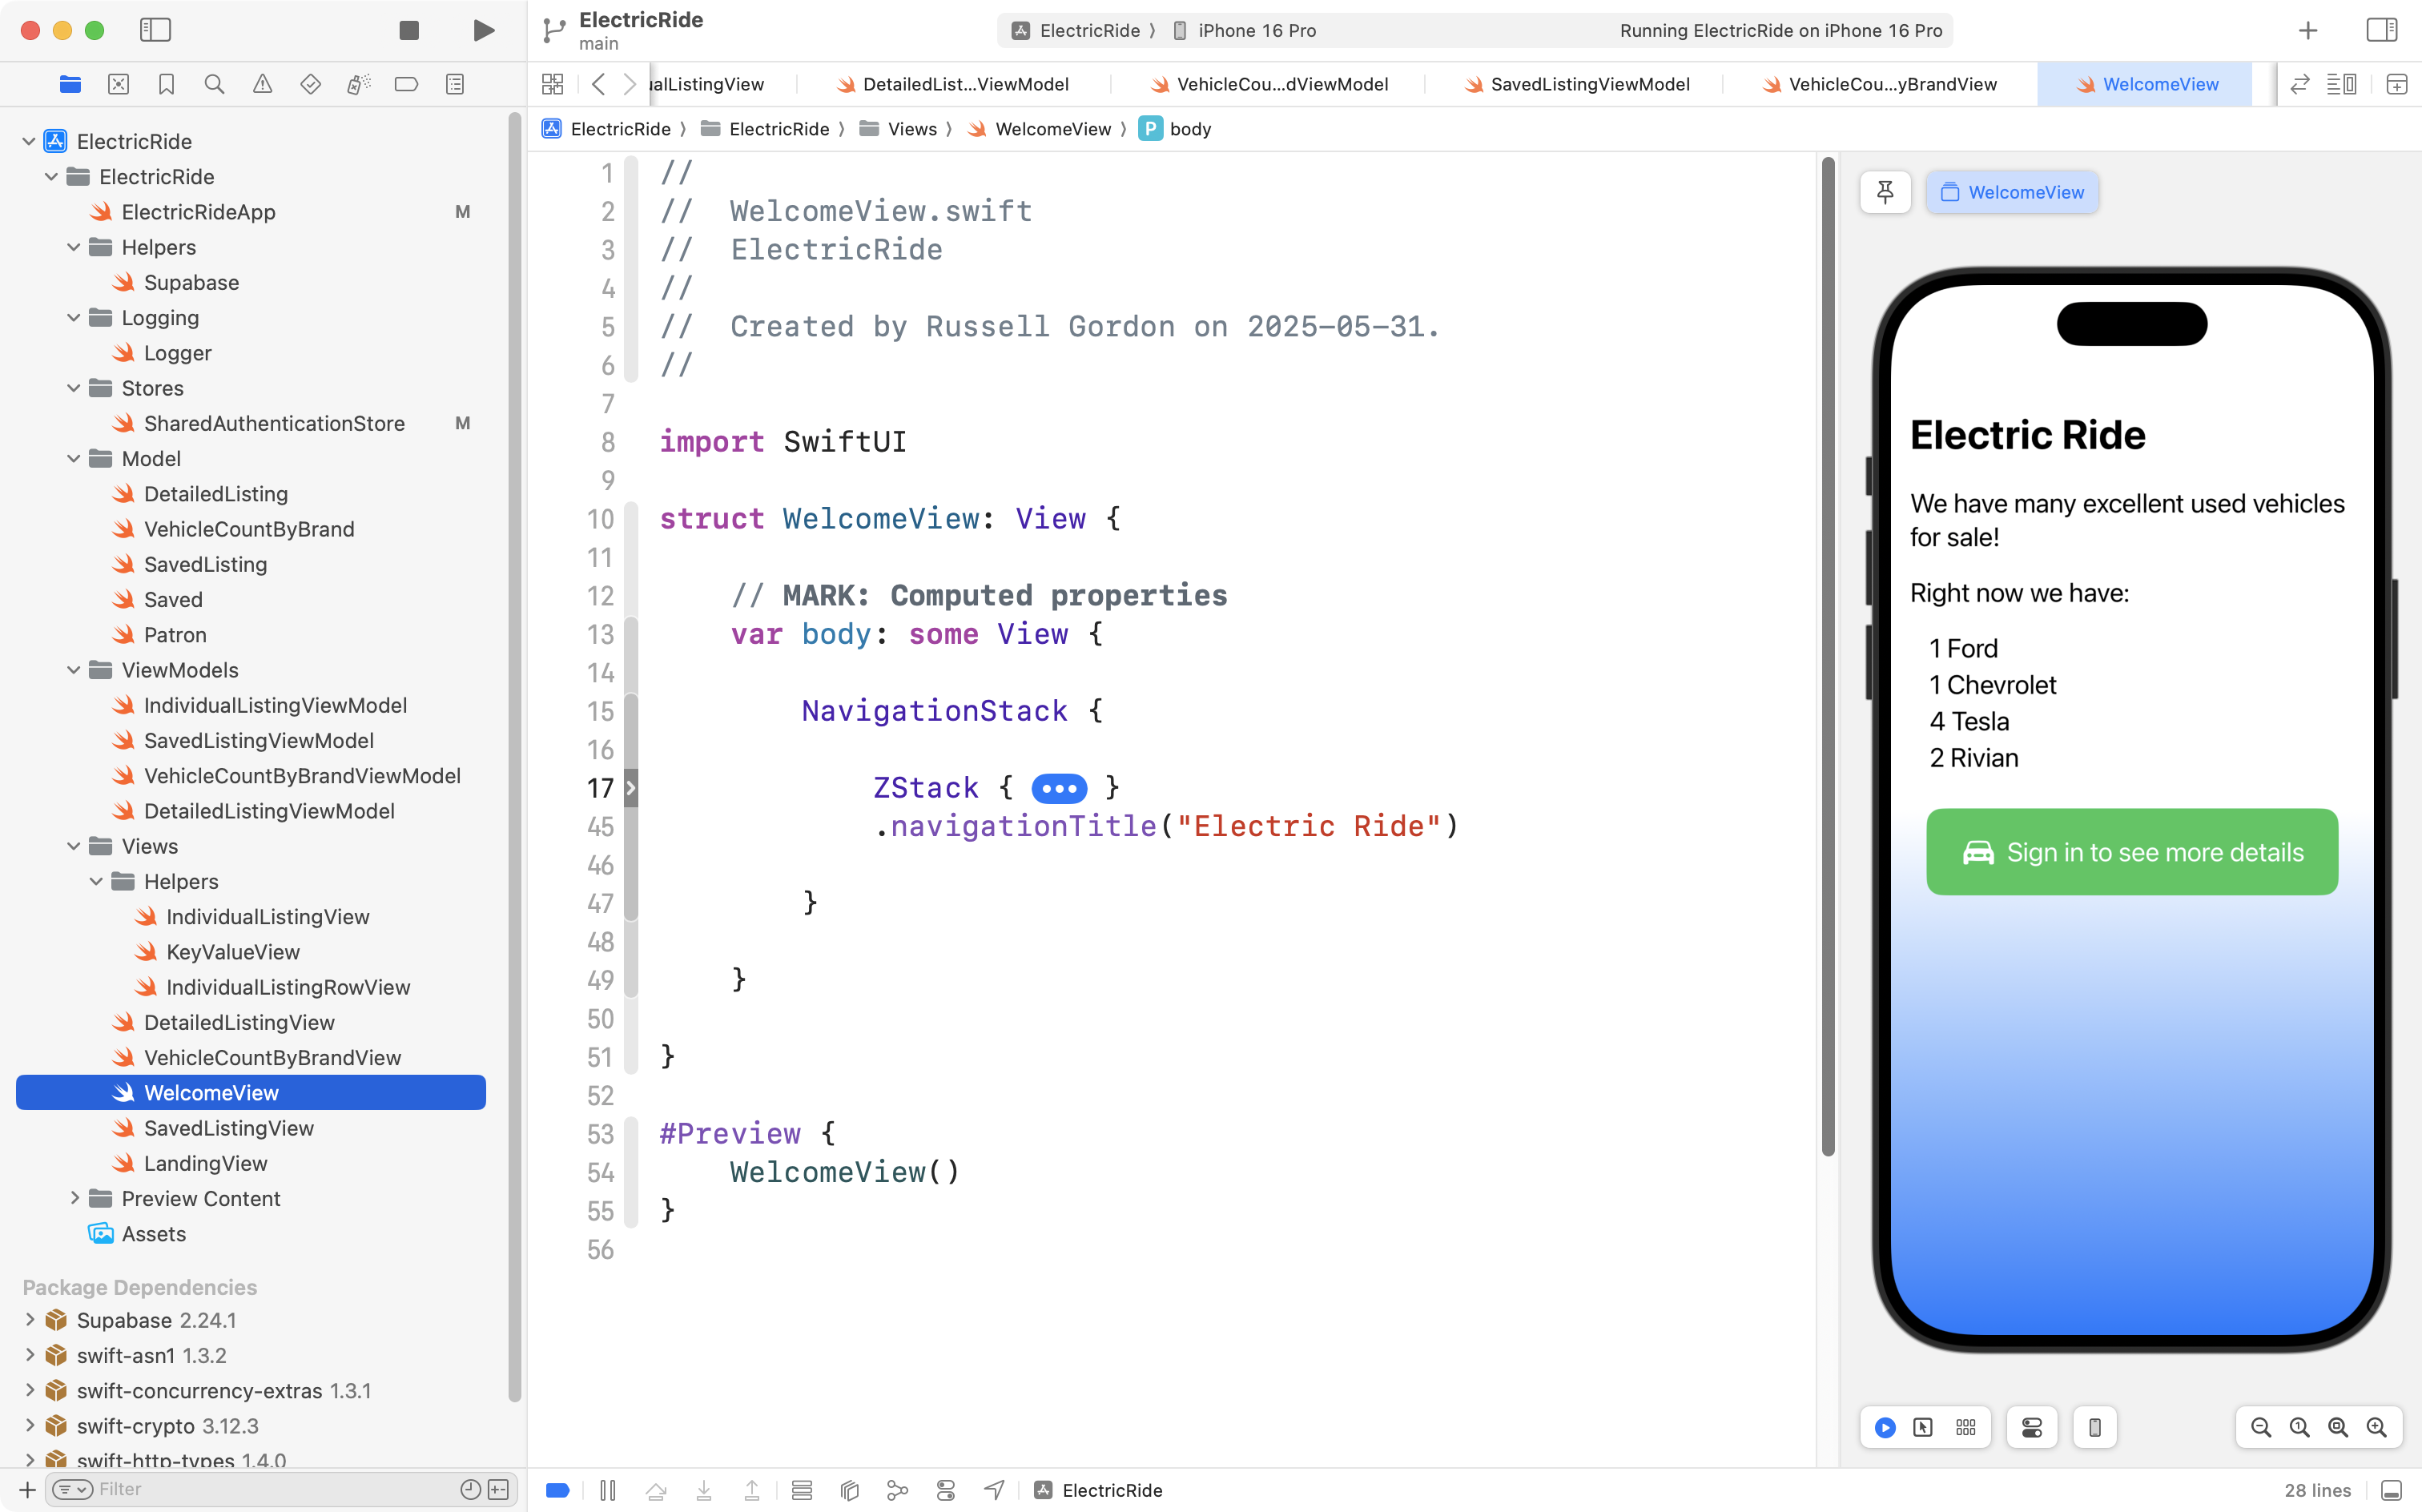
When a patron (user) of the app is not logged in they are going to be shown a summary screen that lists how many cars are available for sale, by brand.
For example, the screen might show something like this:
We have many excellent used vehicles for sale!

- 3 Chevrolet
- 2 Rivian
- 4 Tesla

Sign in now to see all the details.
Earlier we wrote a view to find all available listings:
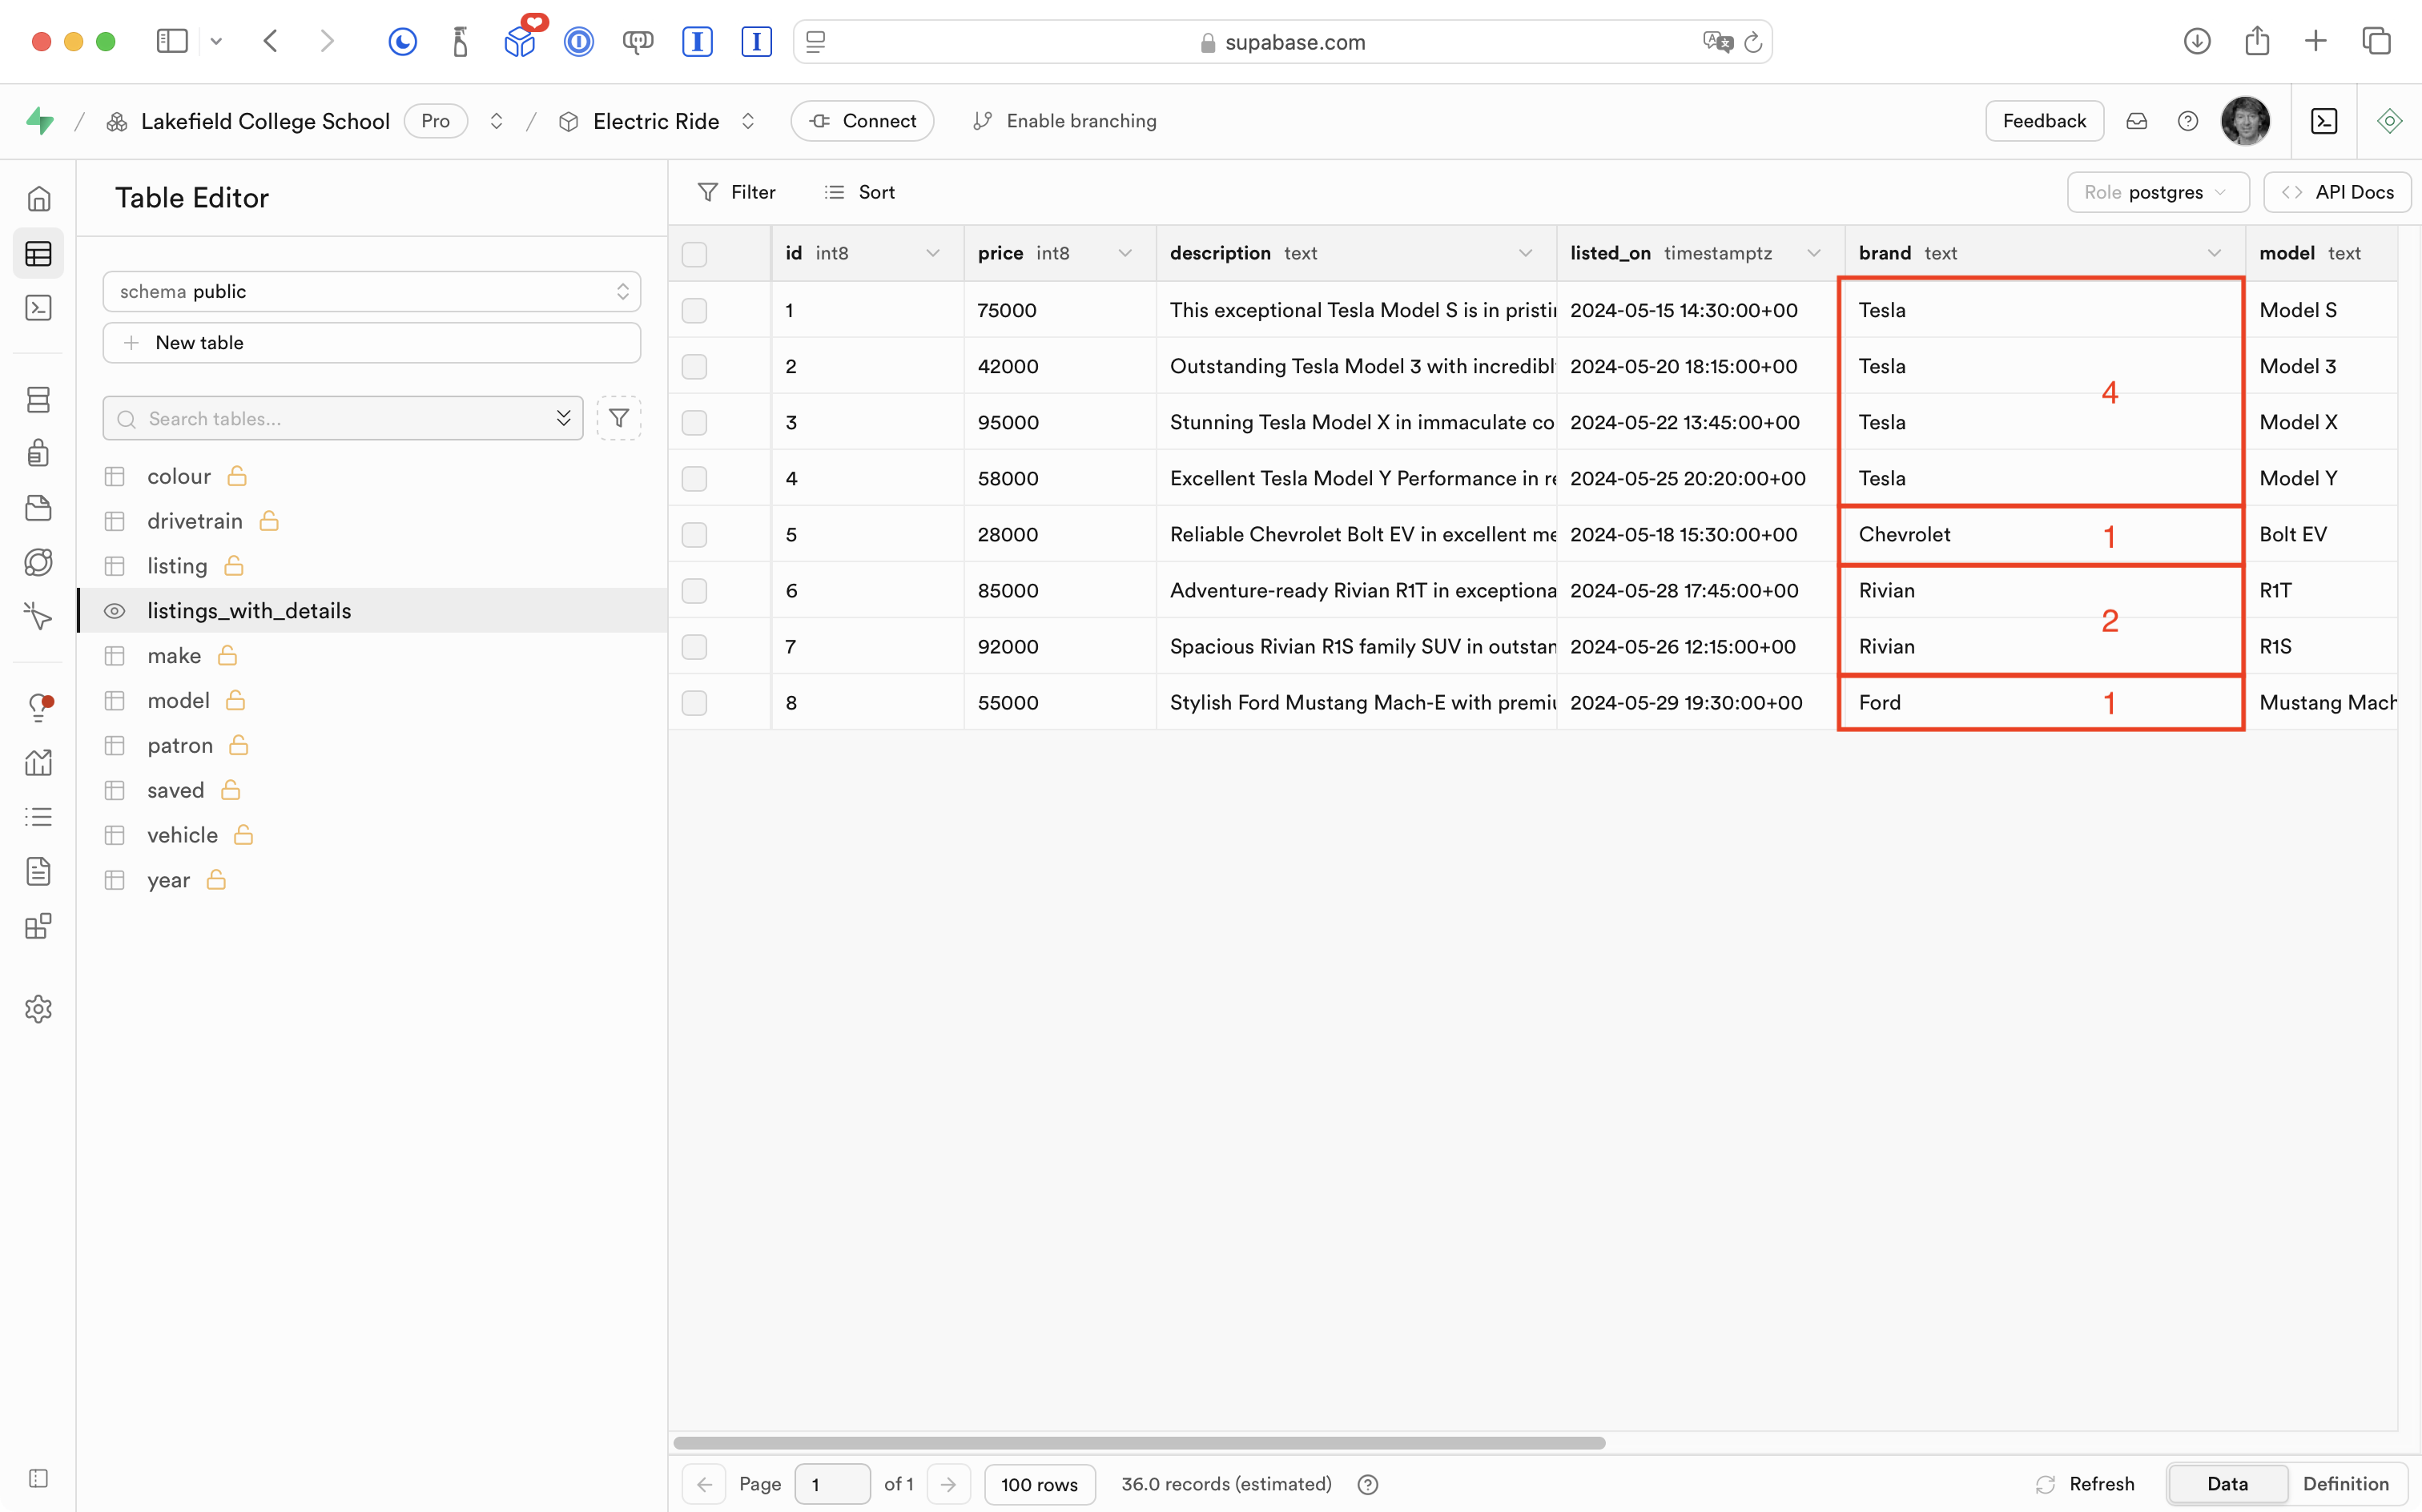
We want to group the results from that view by brand, then count how many cars are for sale within each brand, as shown above with the annotations in red.
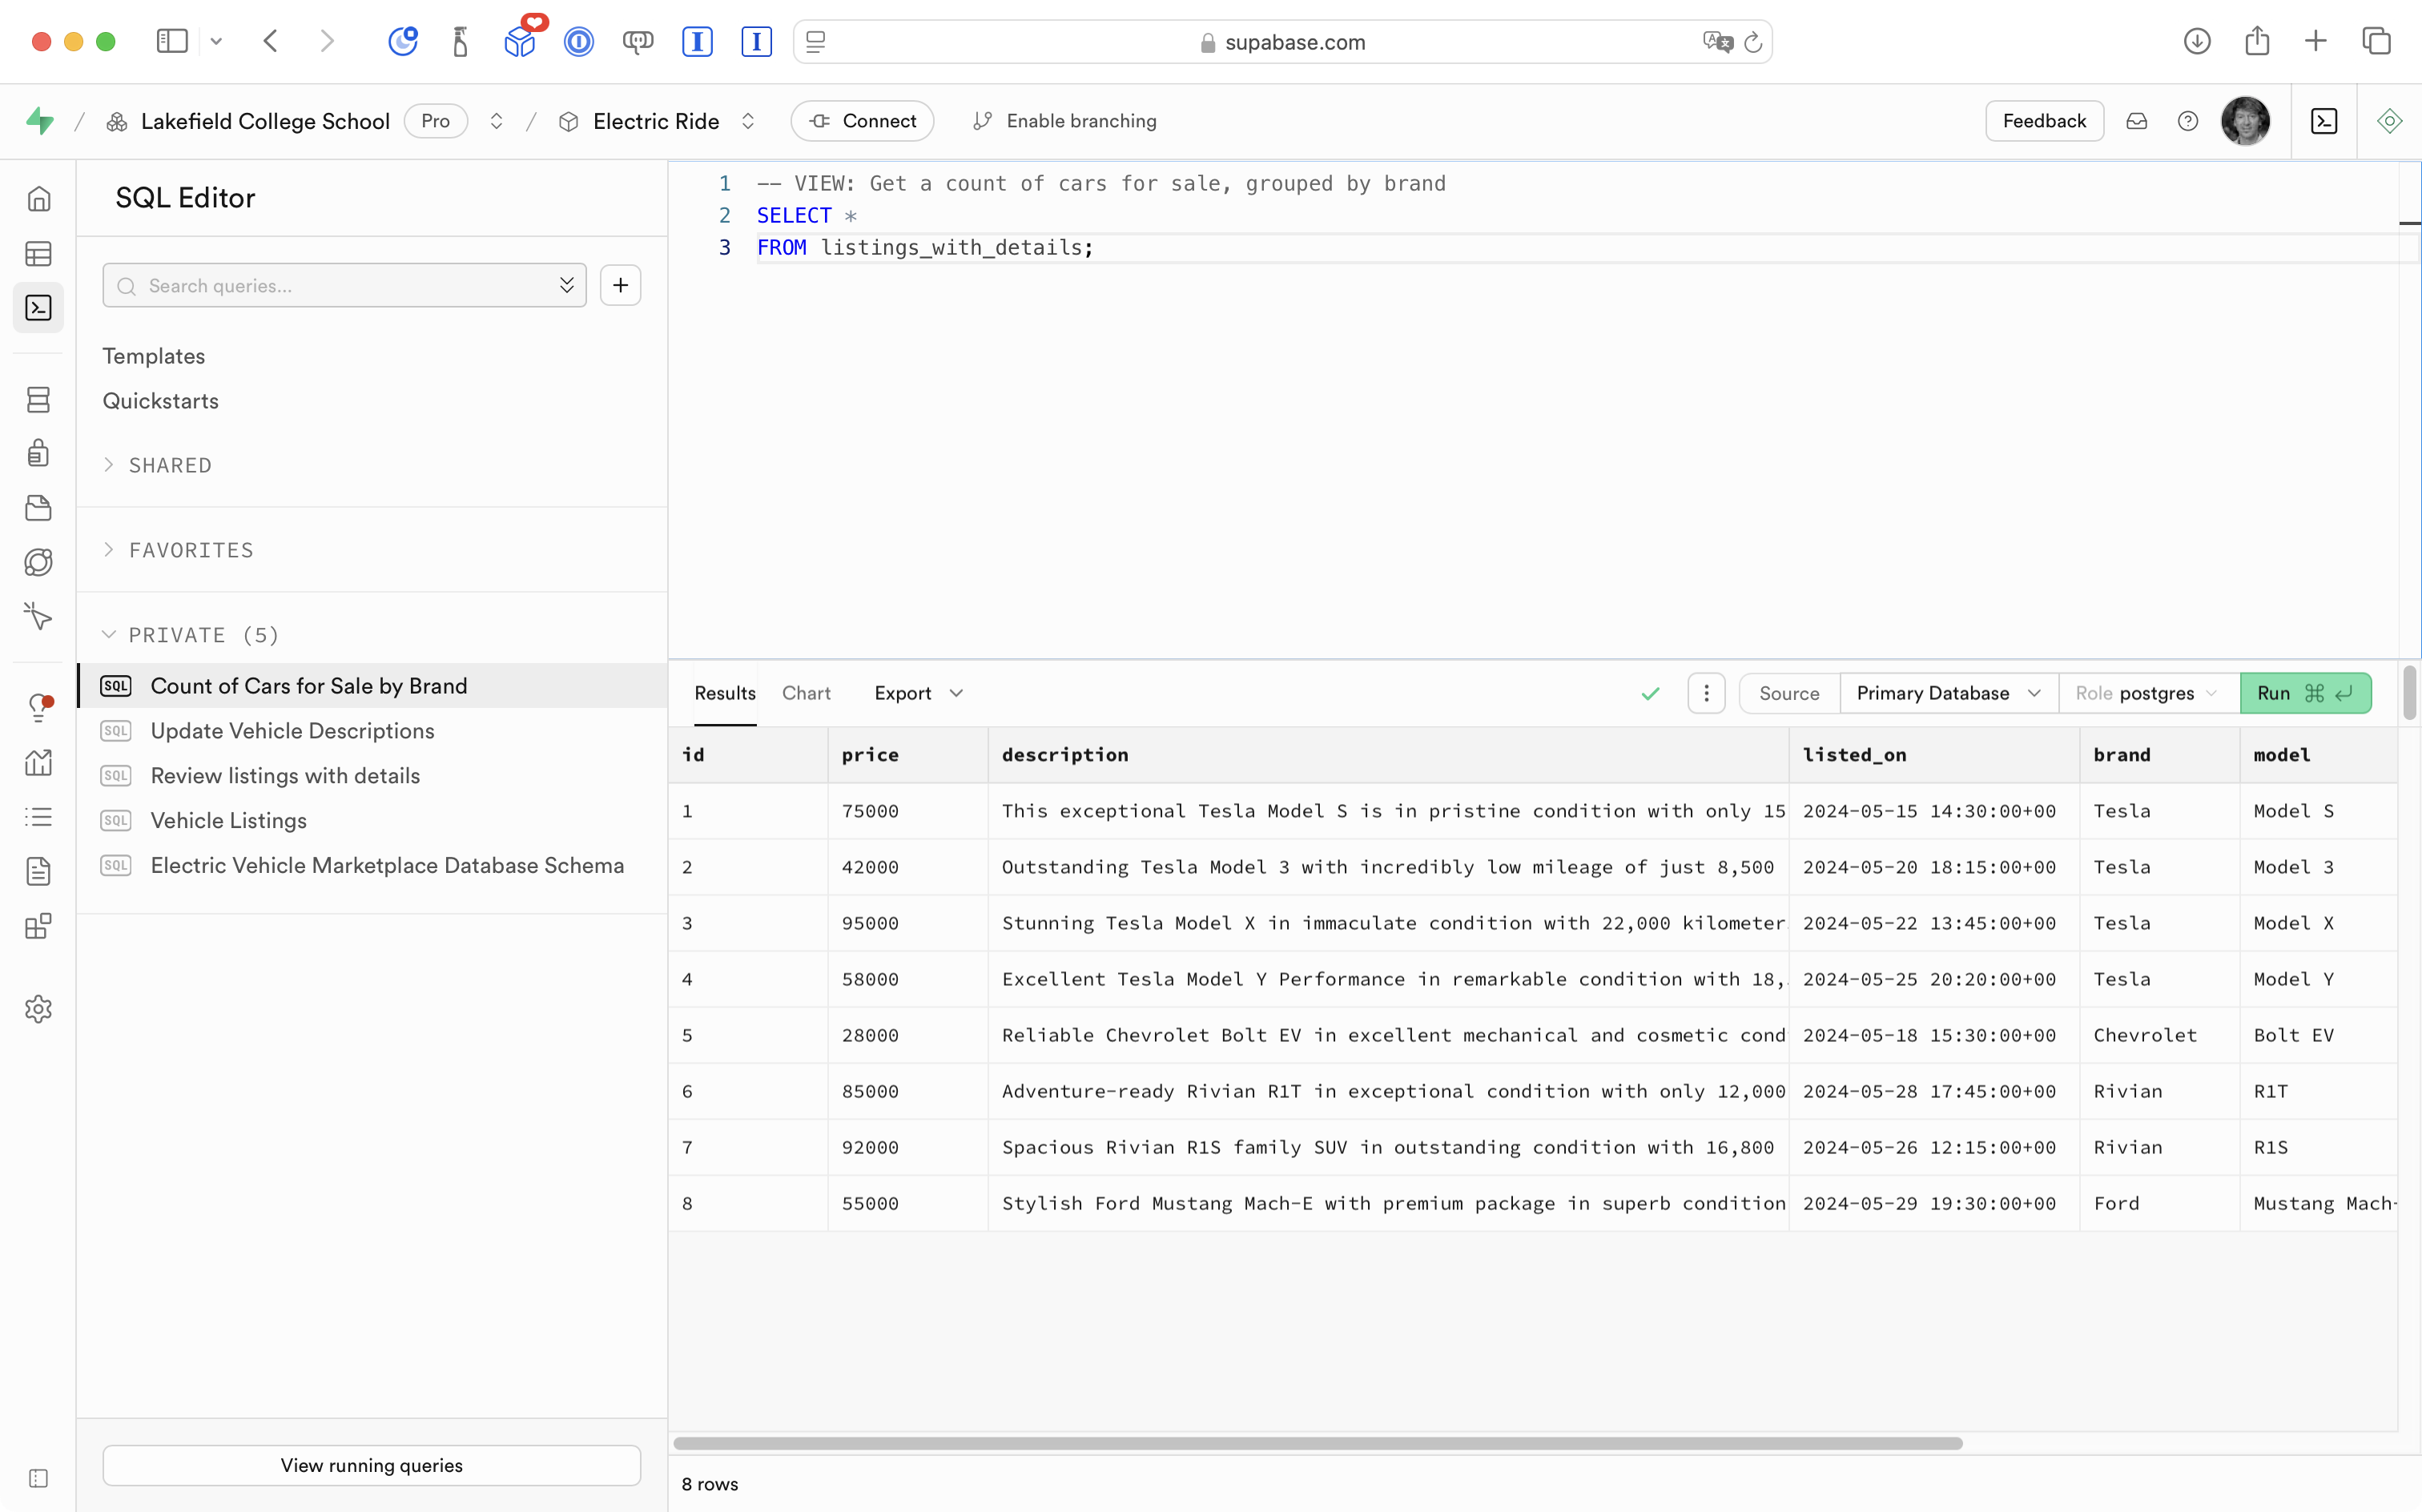
We can start by selecting everything from the view we wrote earlier to show vehicle listings:
If we just add the GROUP BY clause, we will get an error:
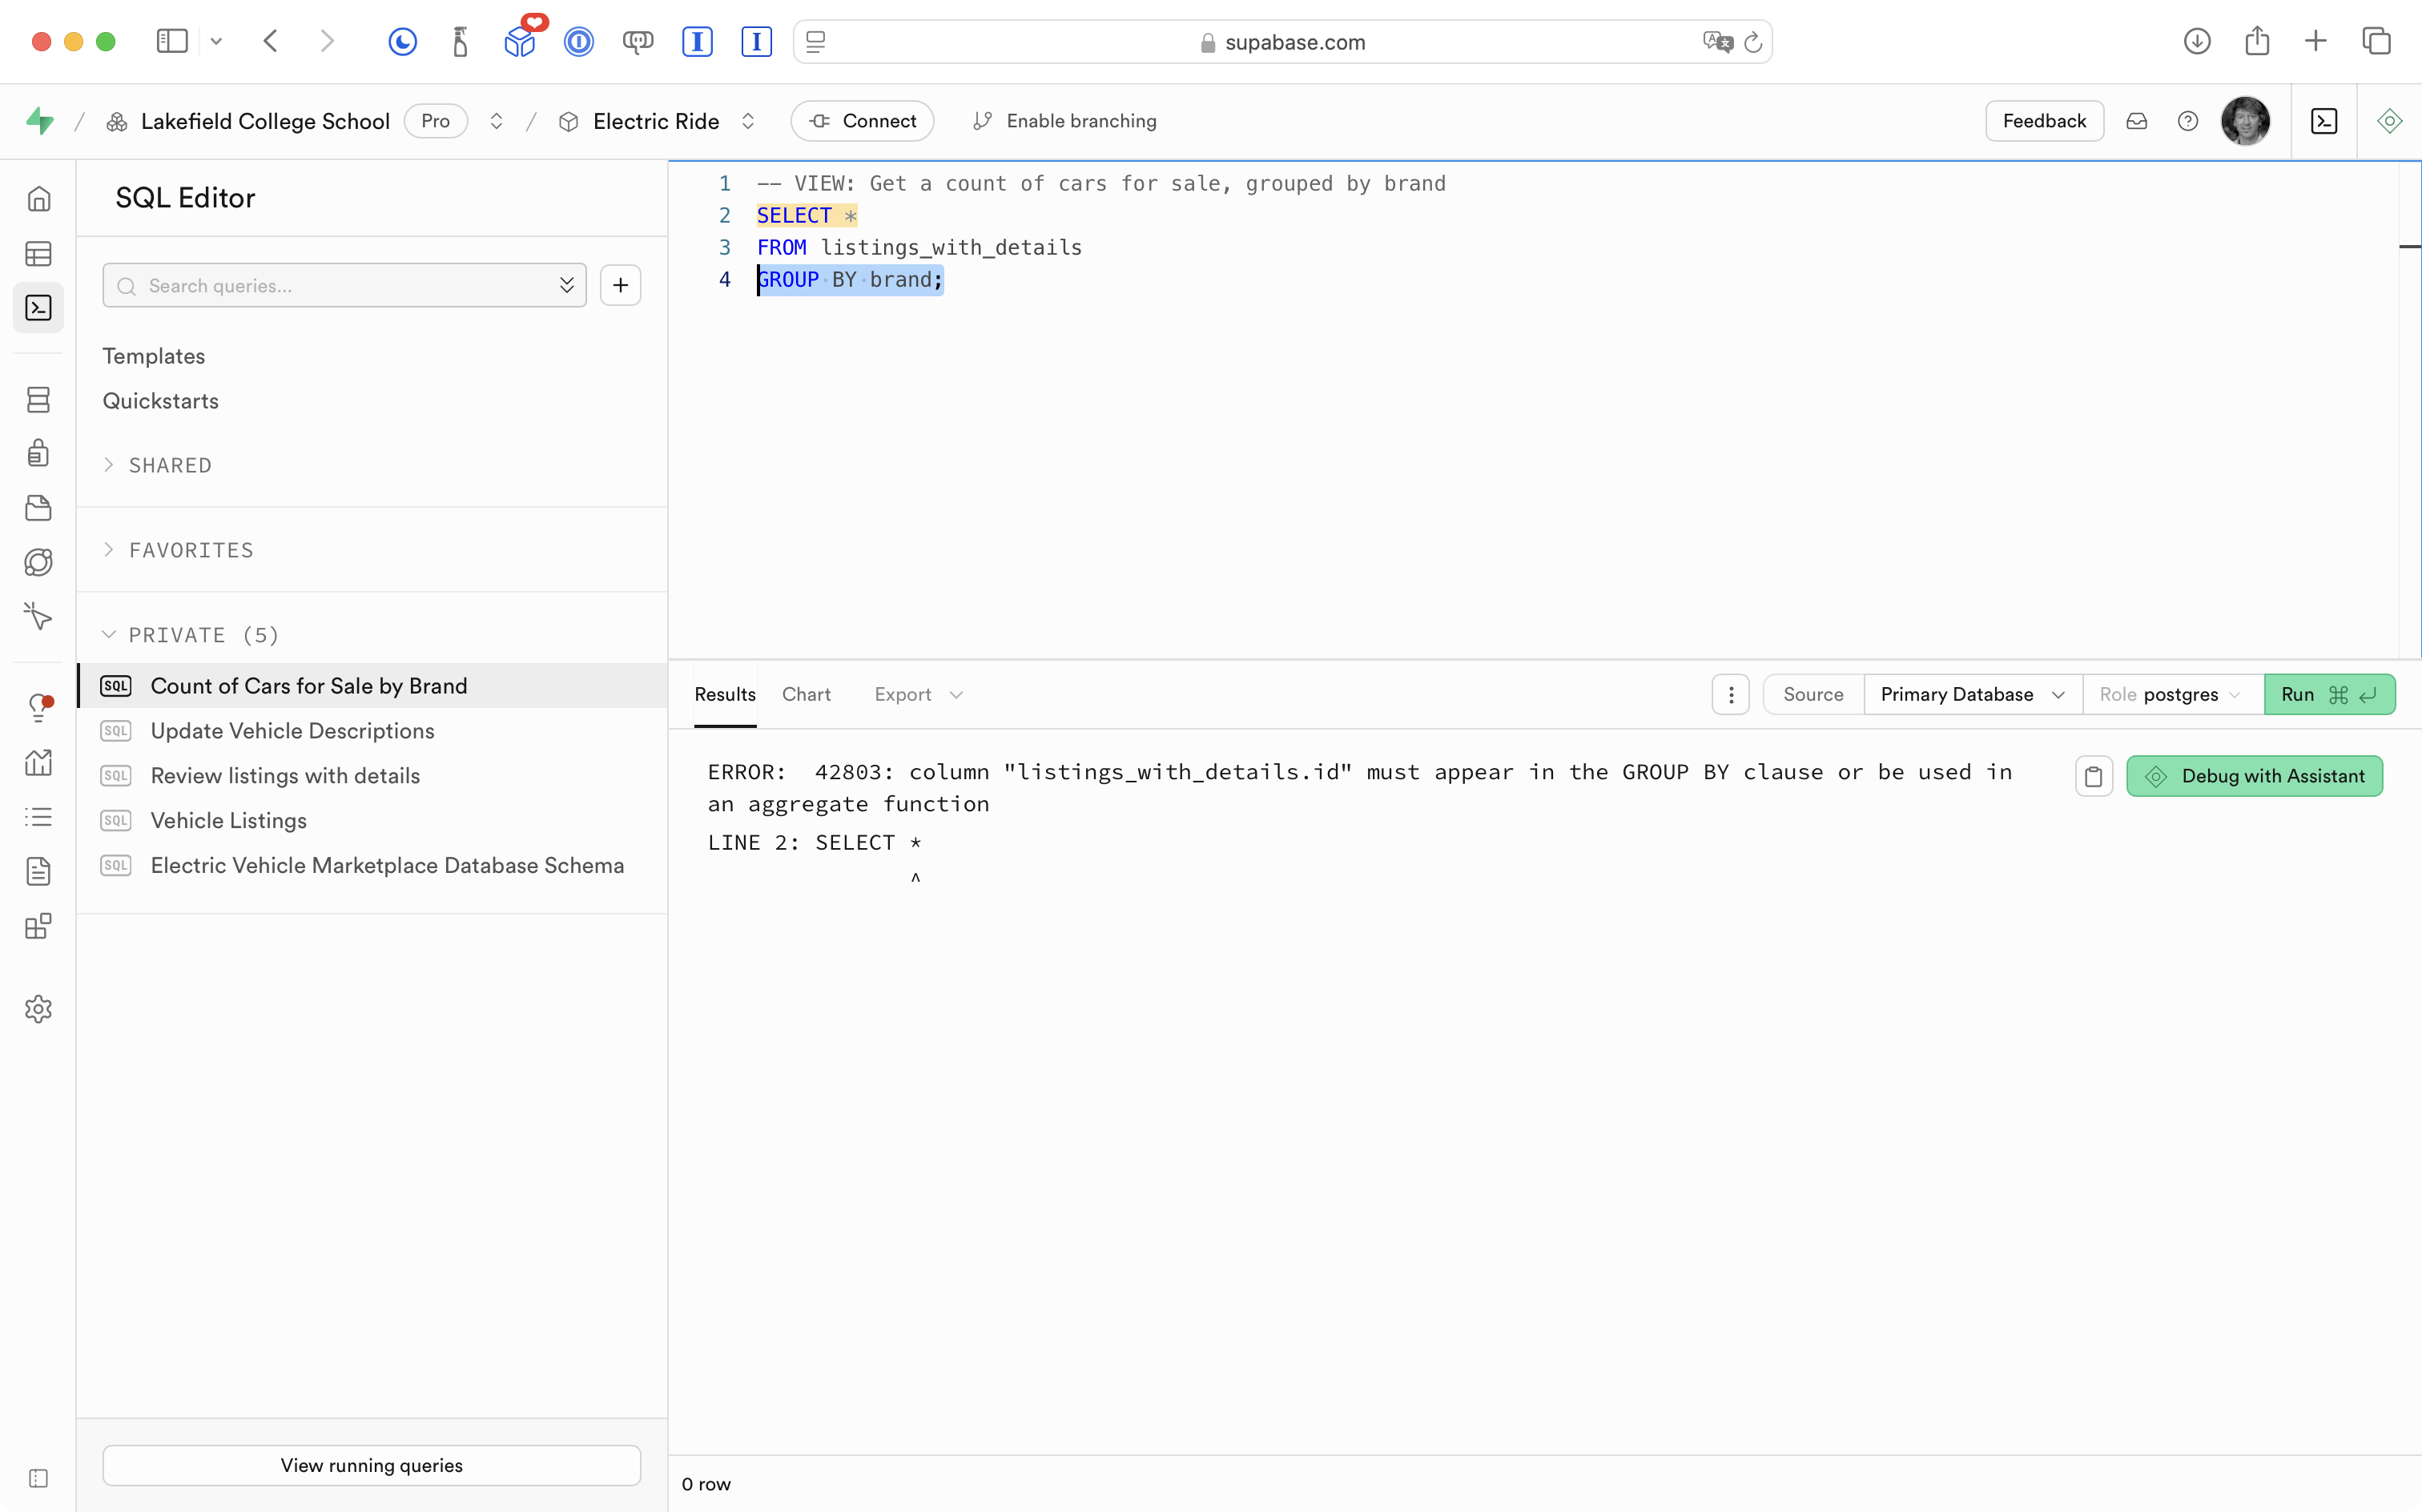
So what we need to do is select the column we are grouping on, and then use the COUNT aggregate function on another column:
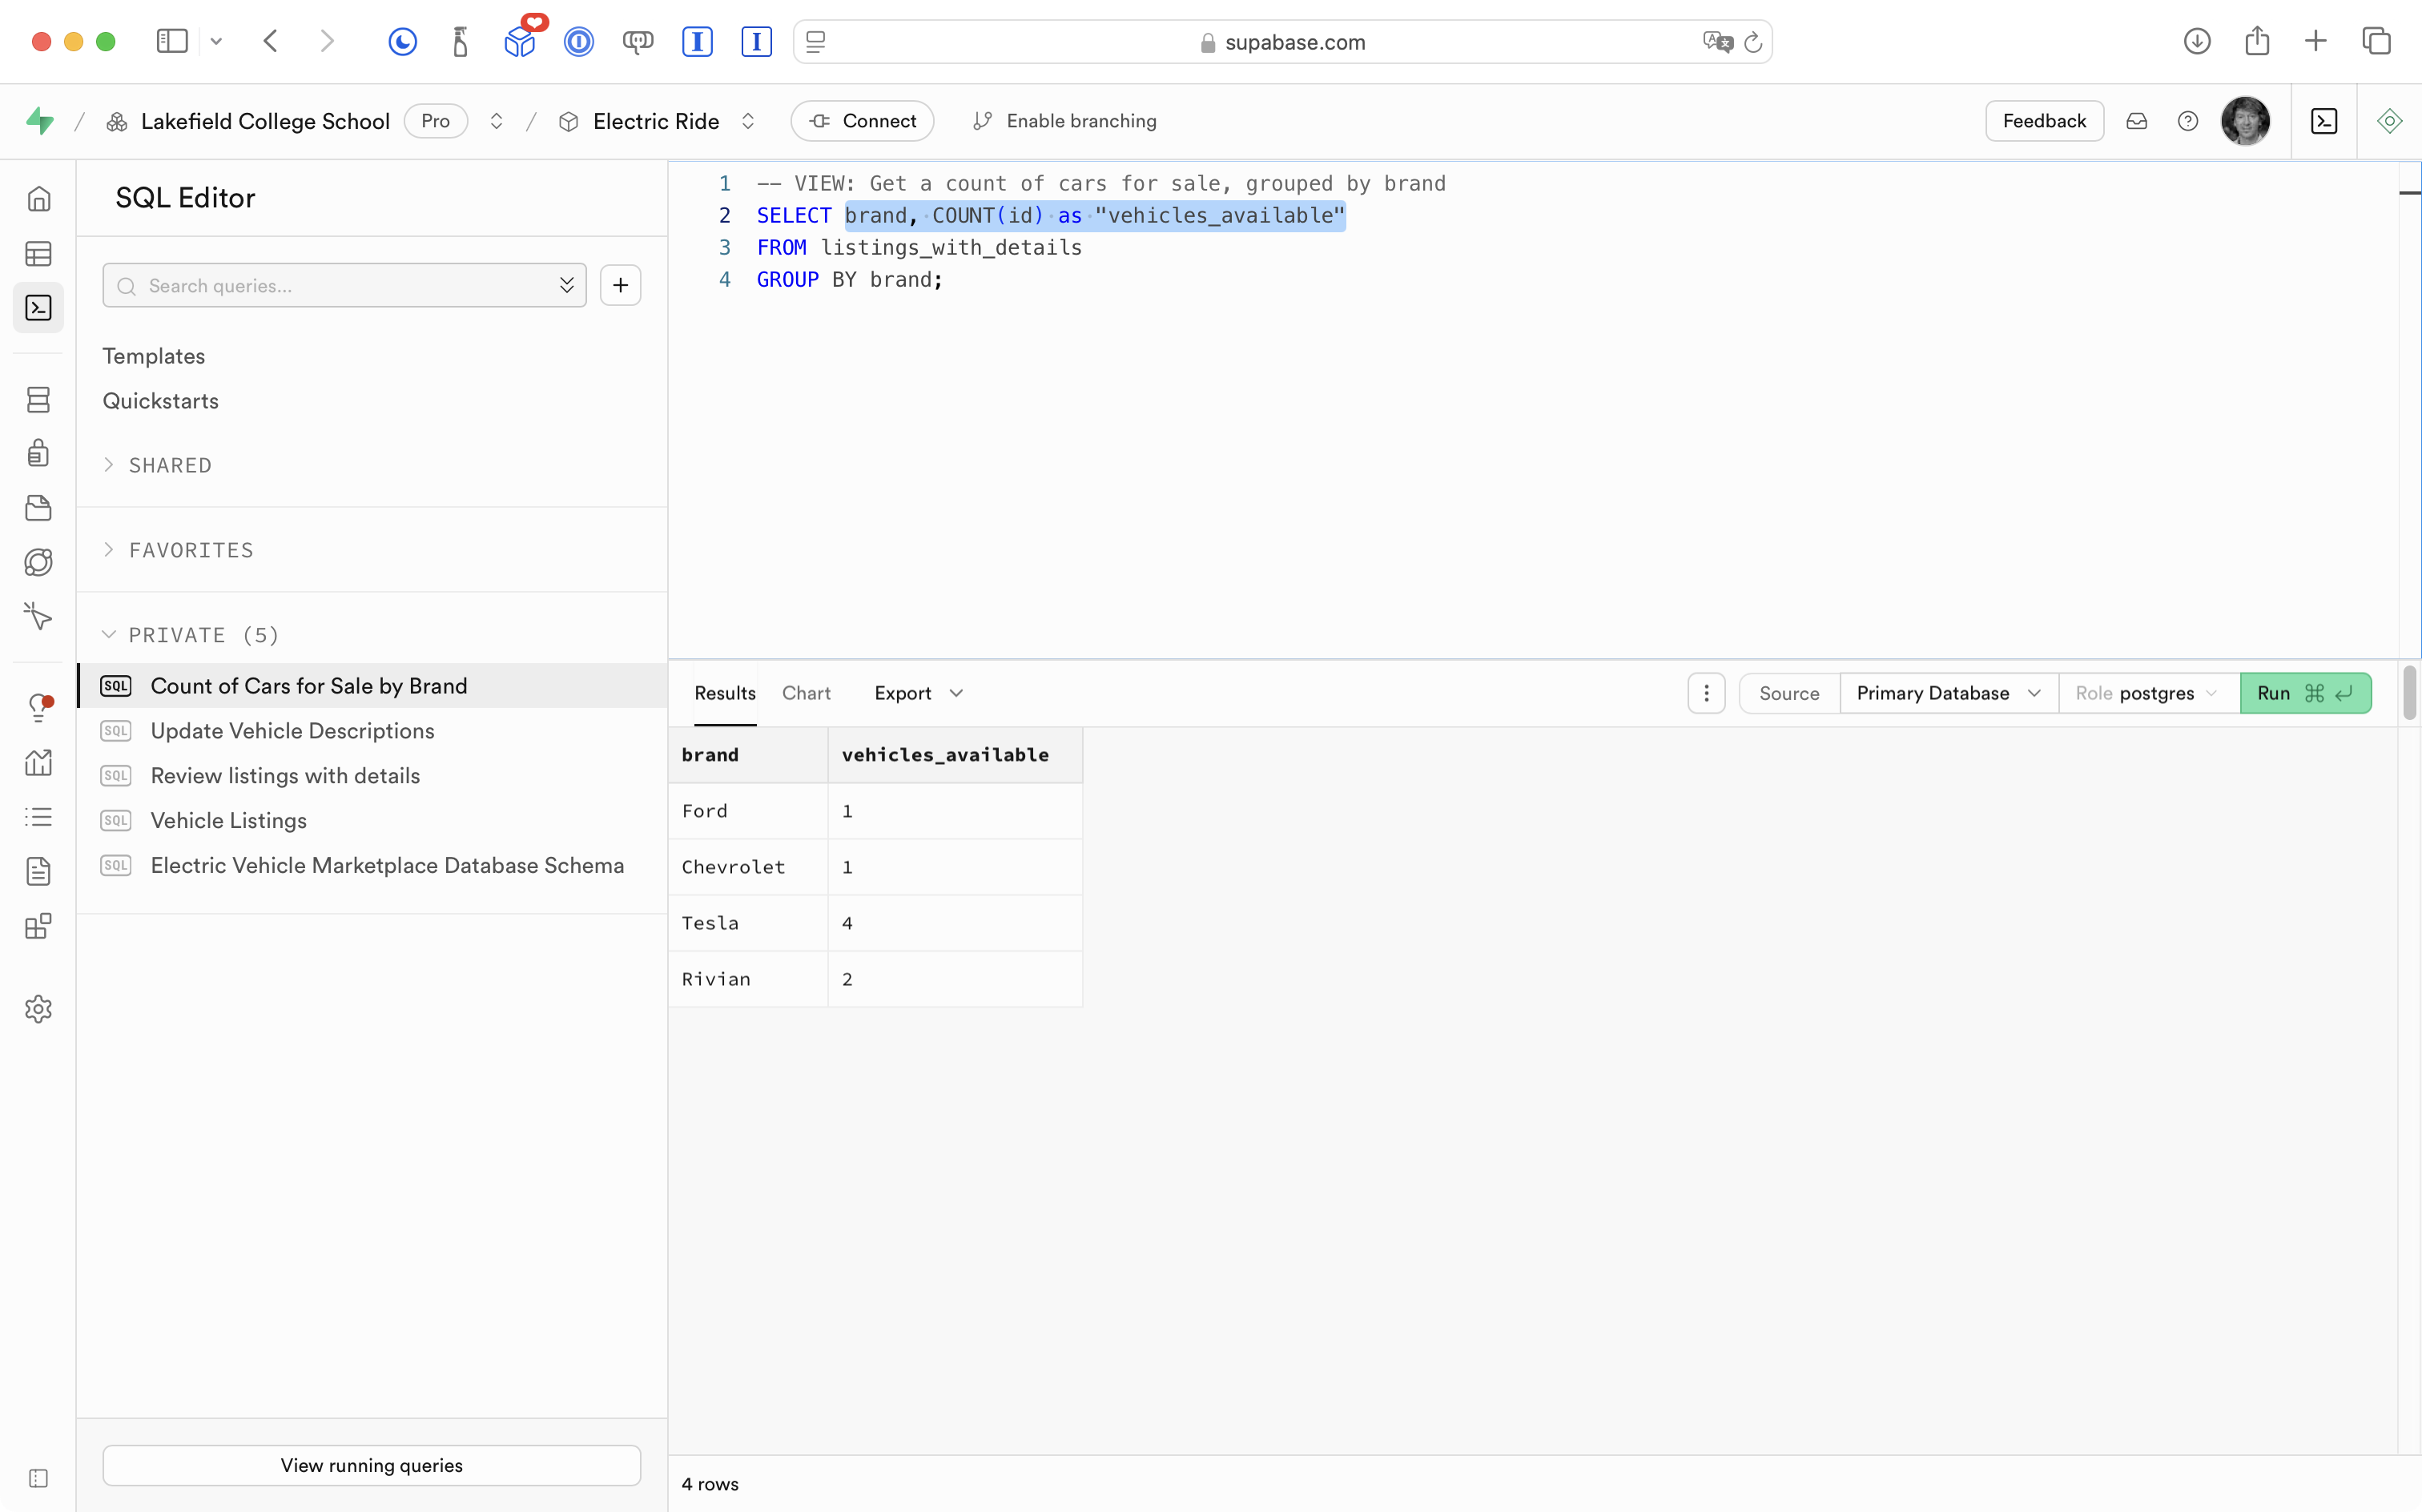
Now that we are happy with the results we are getting from the query in this snippet, we can add the lines shown here to define these results as a new database view:
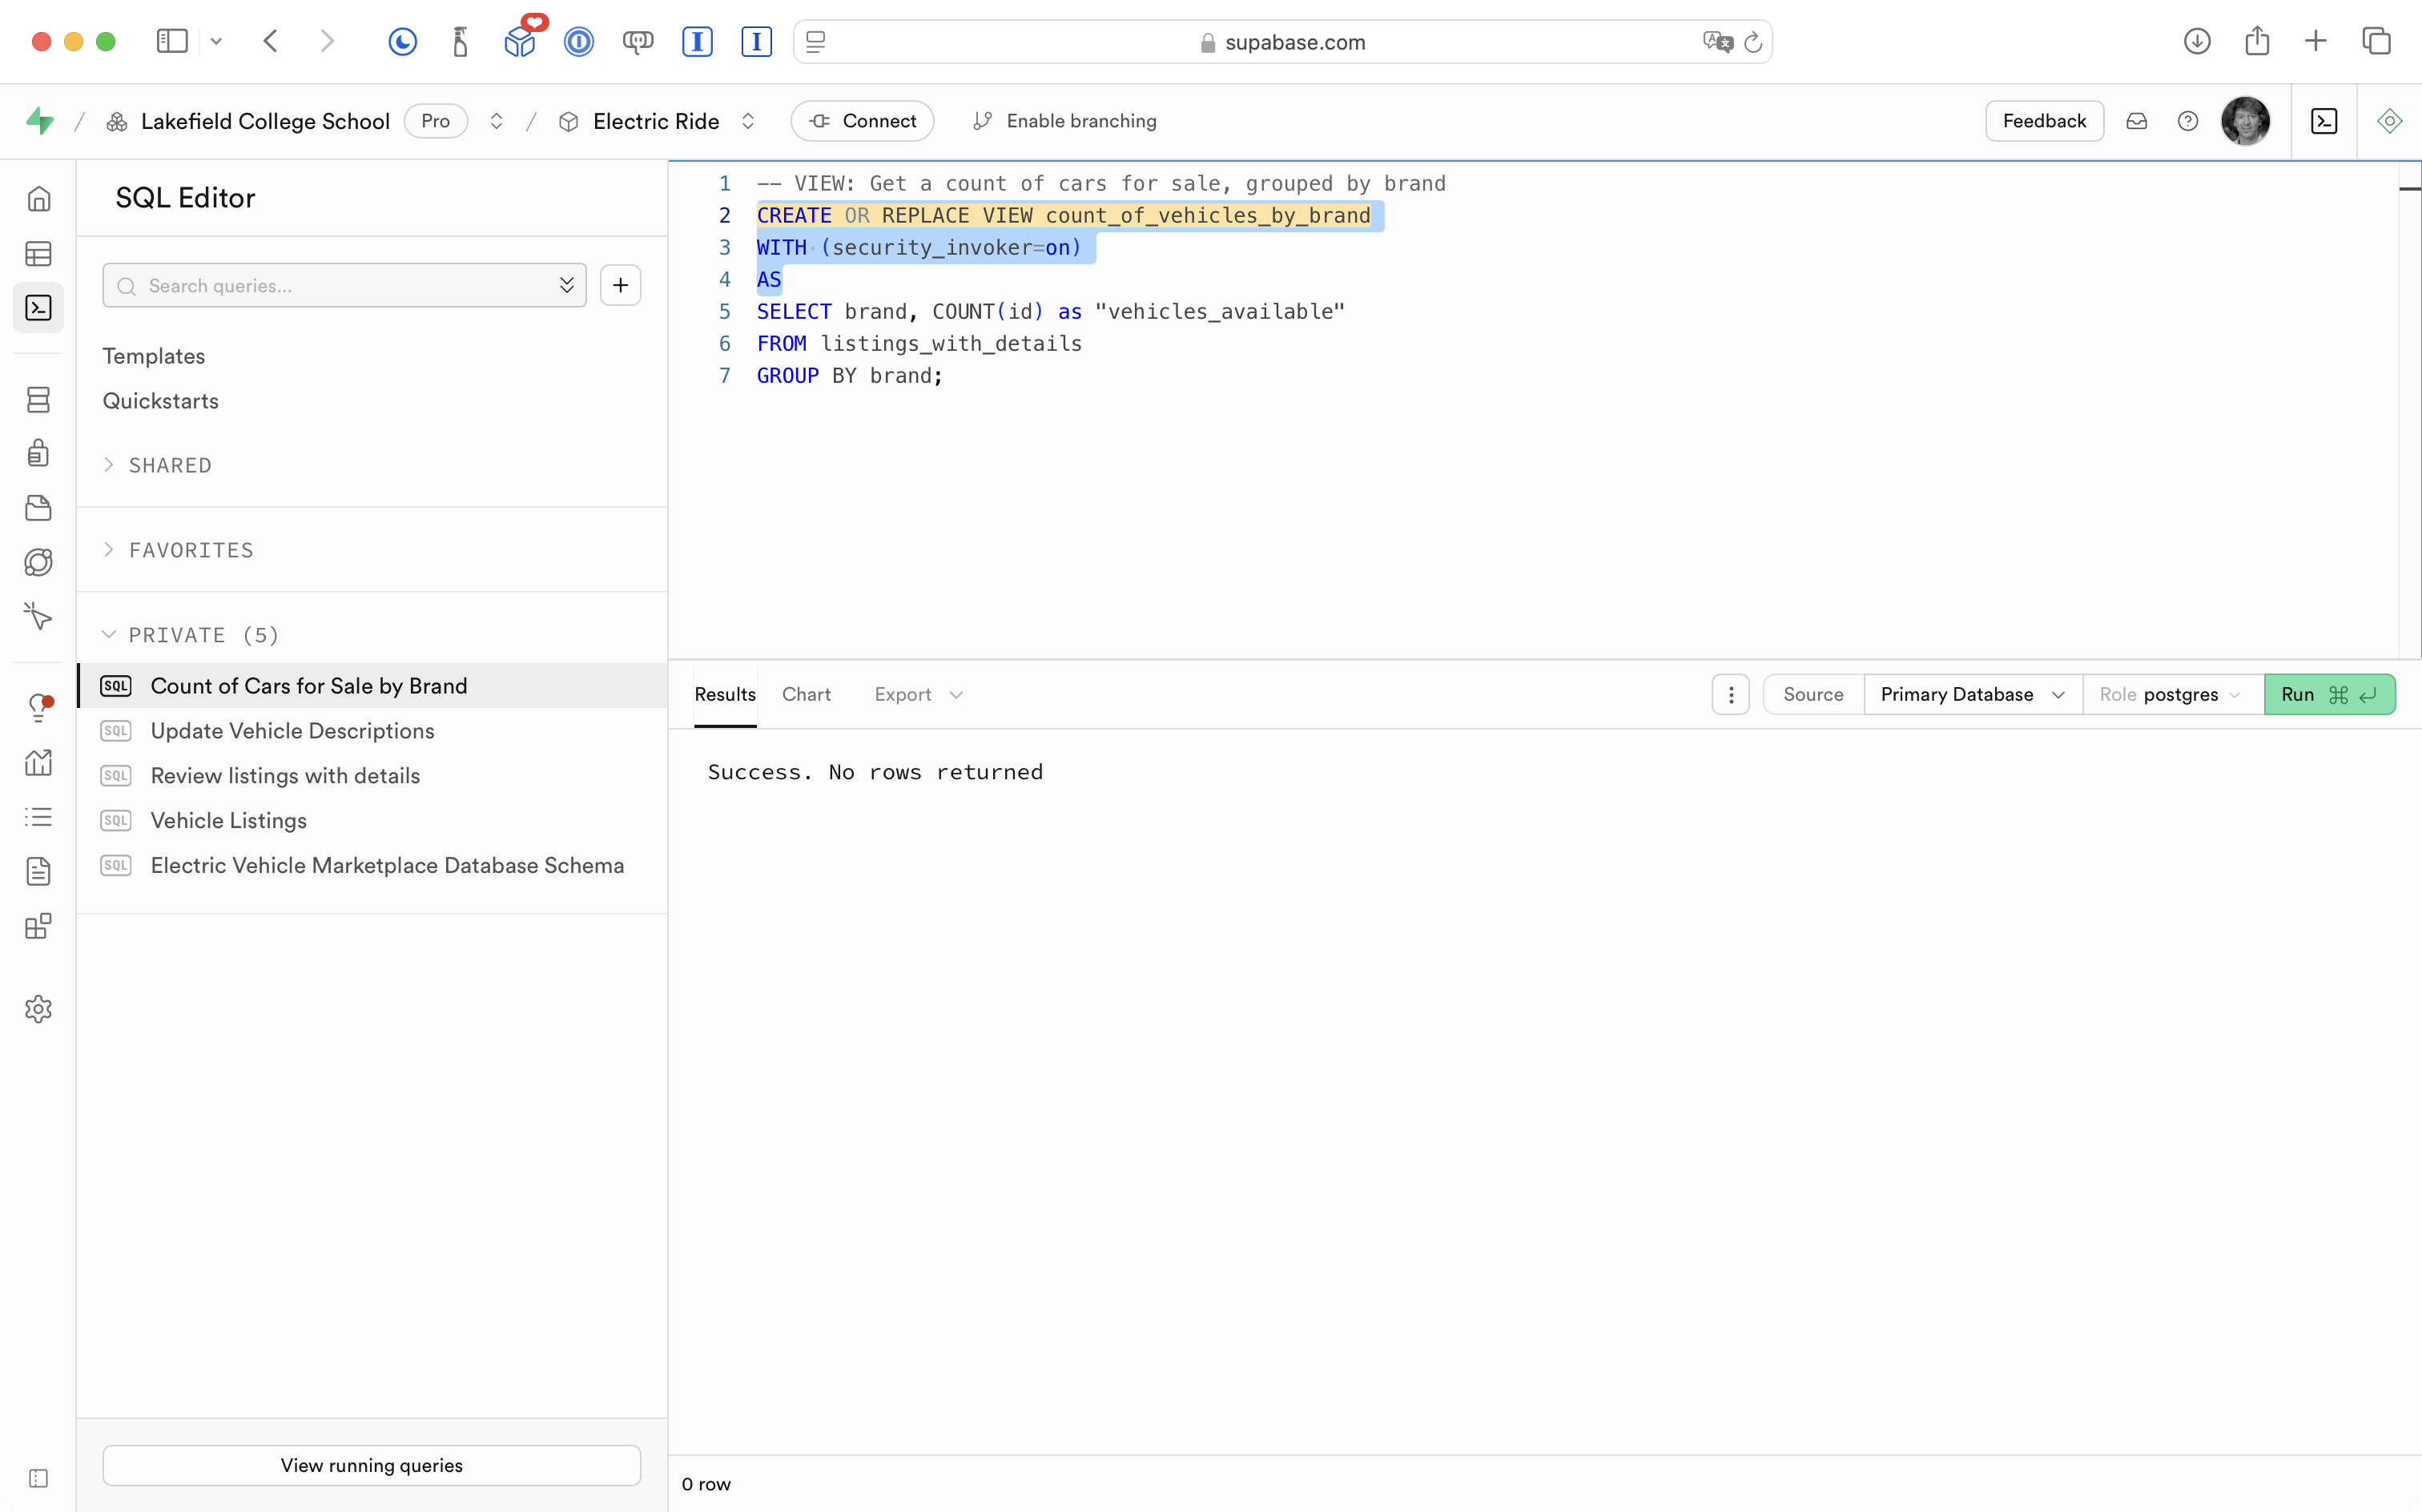
As a result of creating this new database view, we essentially have a new table that we can review at any time:
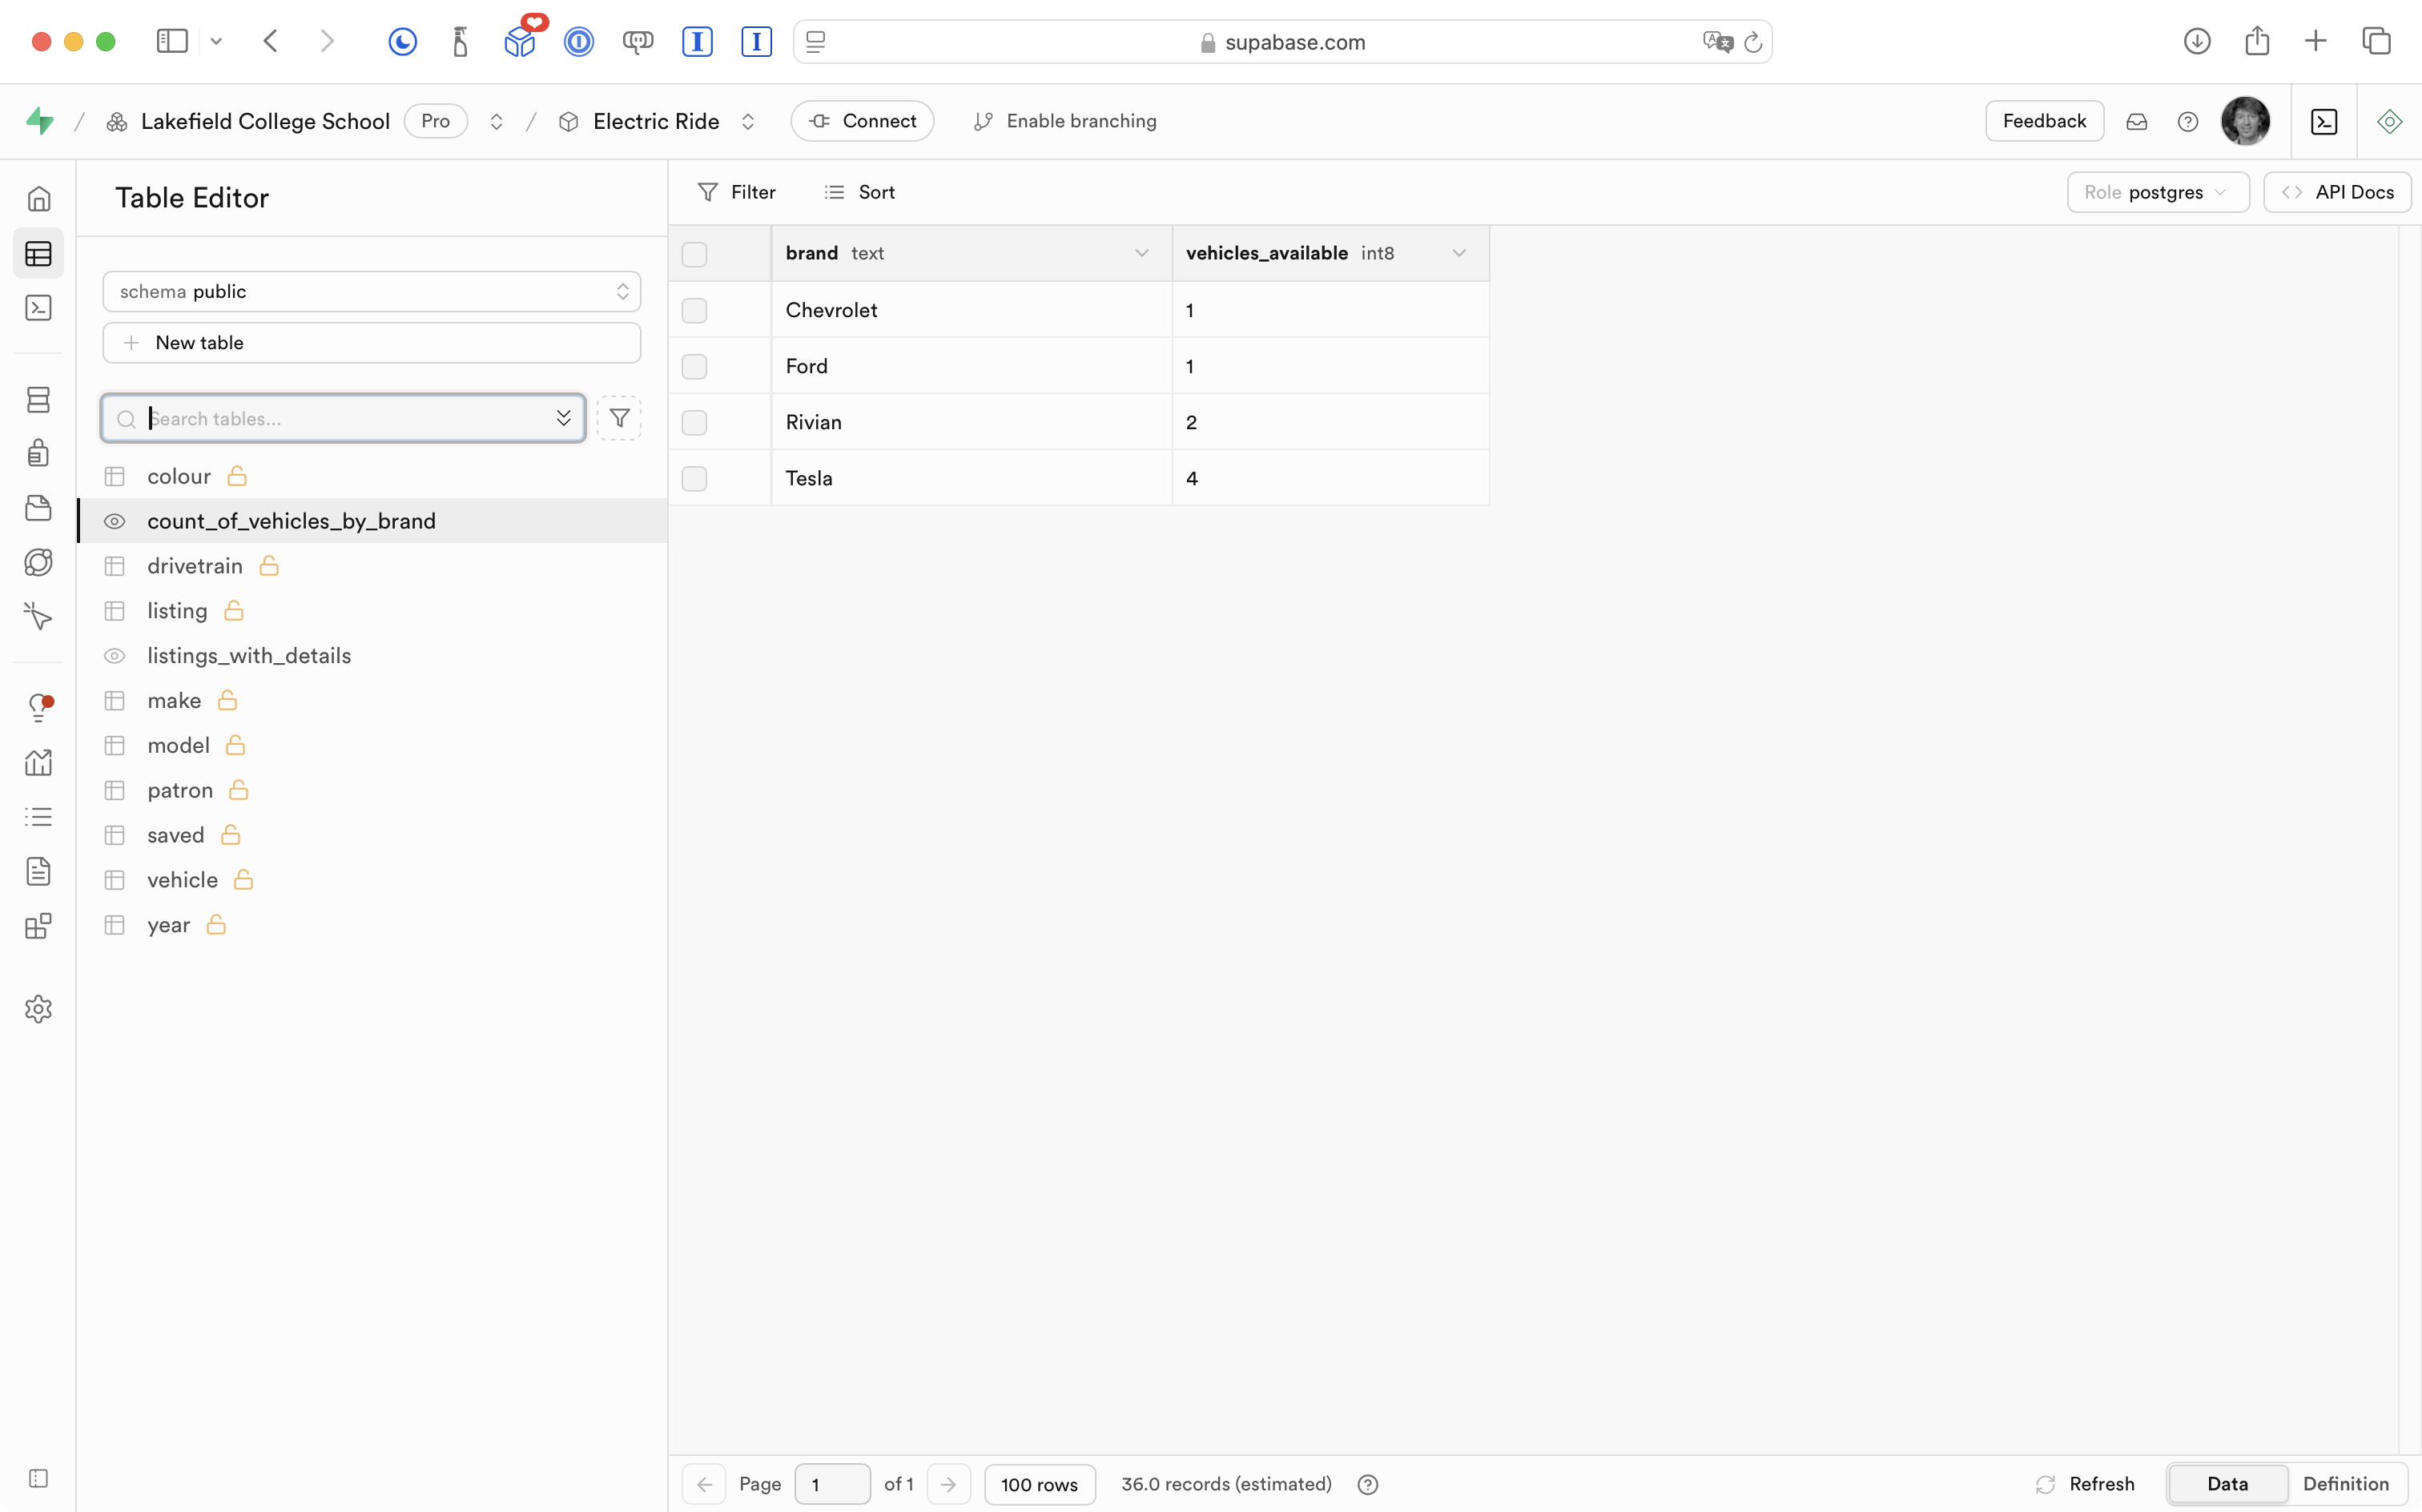
Note that this will update as data changes – for example, if a new Chevrolet vehicle is listed by a user, the count of Chevrolet vehicles for sale will automatically update to show as “2”.
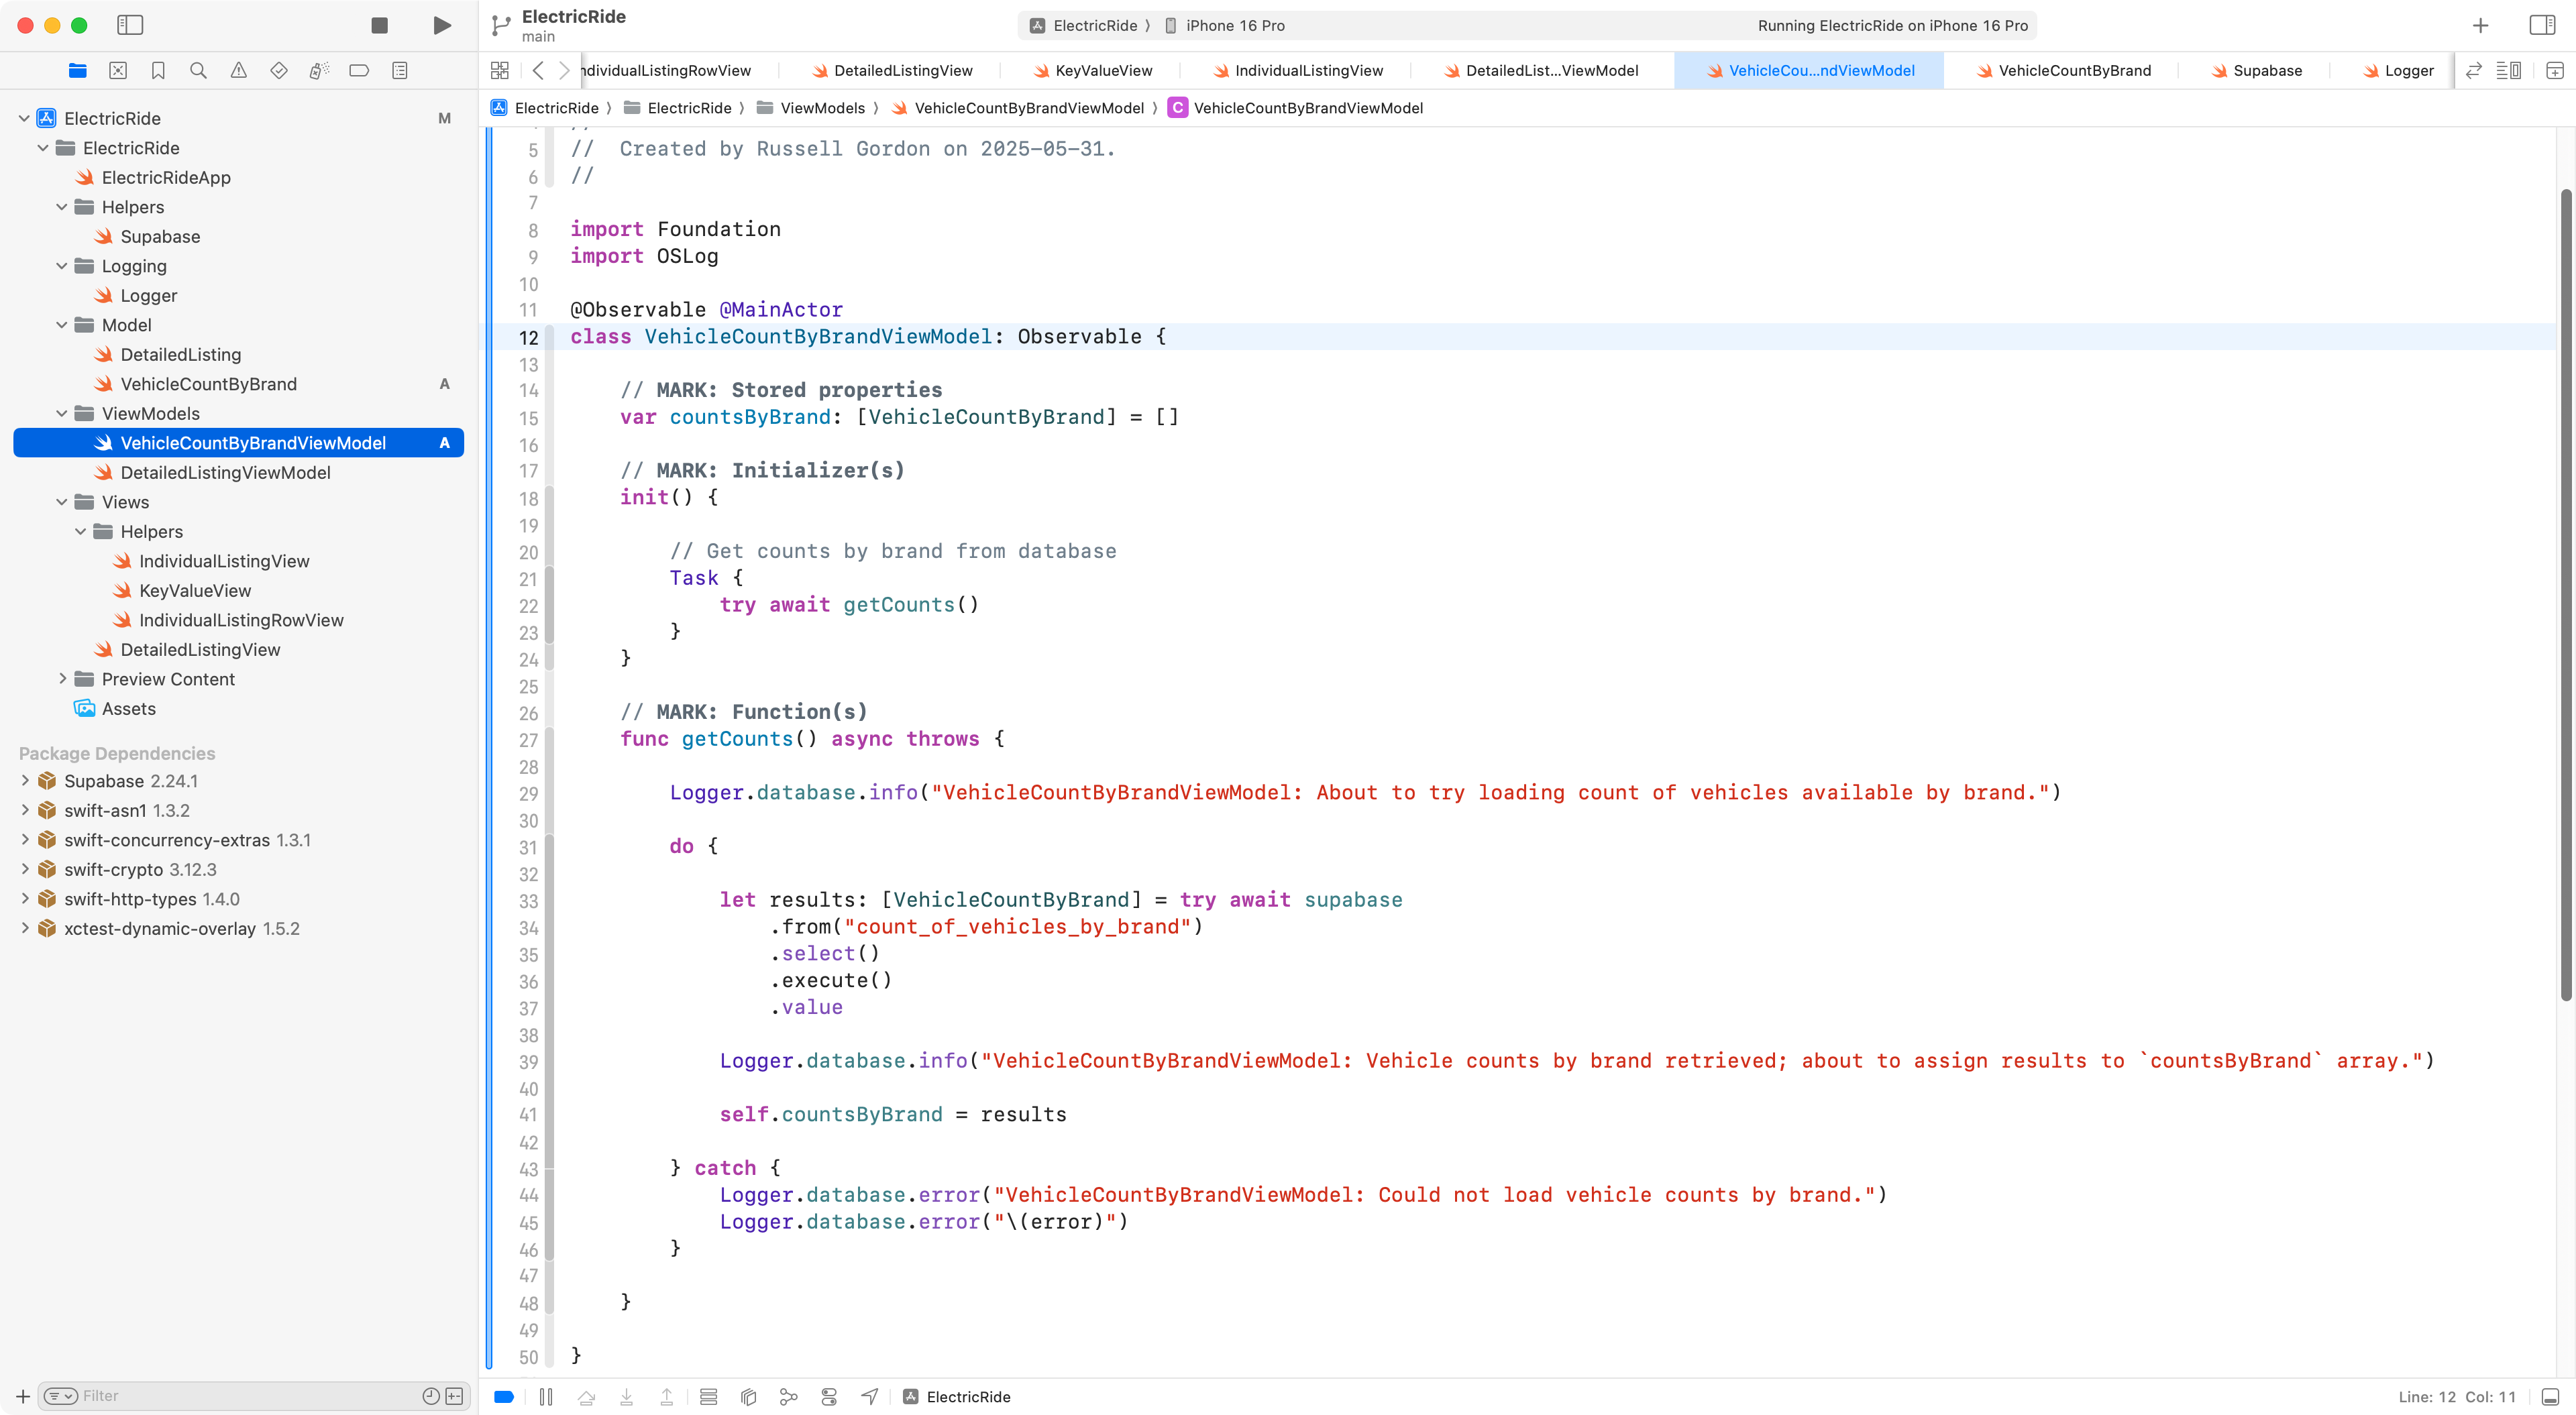
Now that this database view exists, we go through the same routine to use the information in our app:
- Write a model structure to match the column names and data types.
- Write a view model to query the database view.
- Write a view that uses the view model to show the information in the app.
Here is the addition to the data model that Mr. Gordon made in the app:
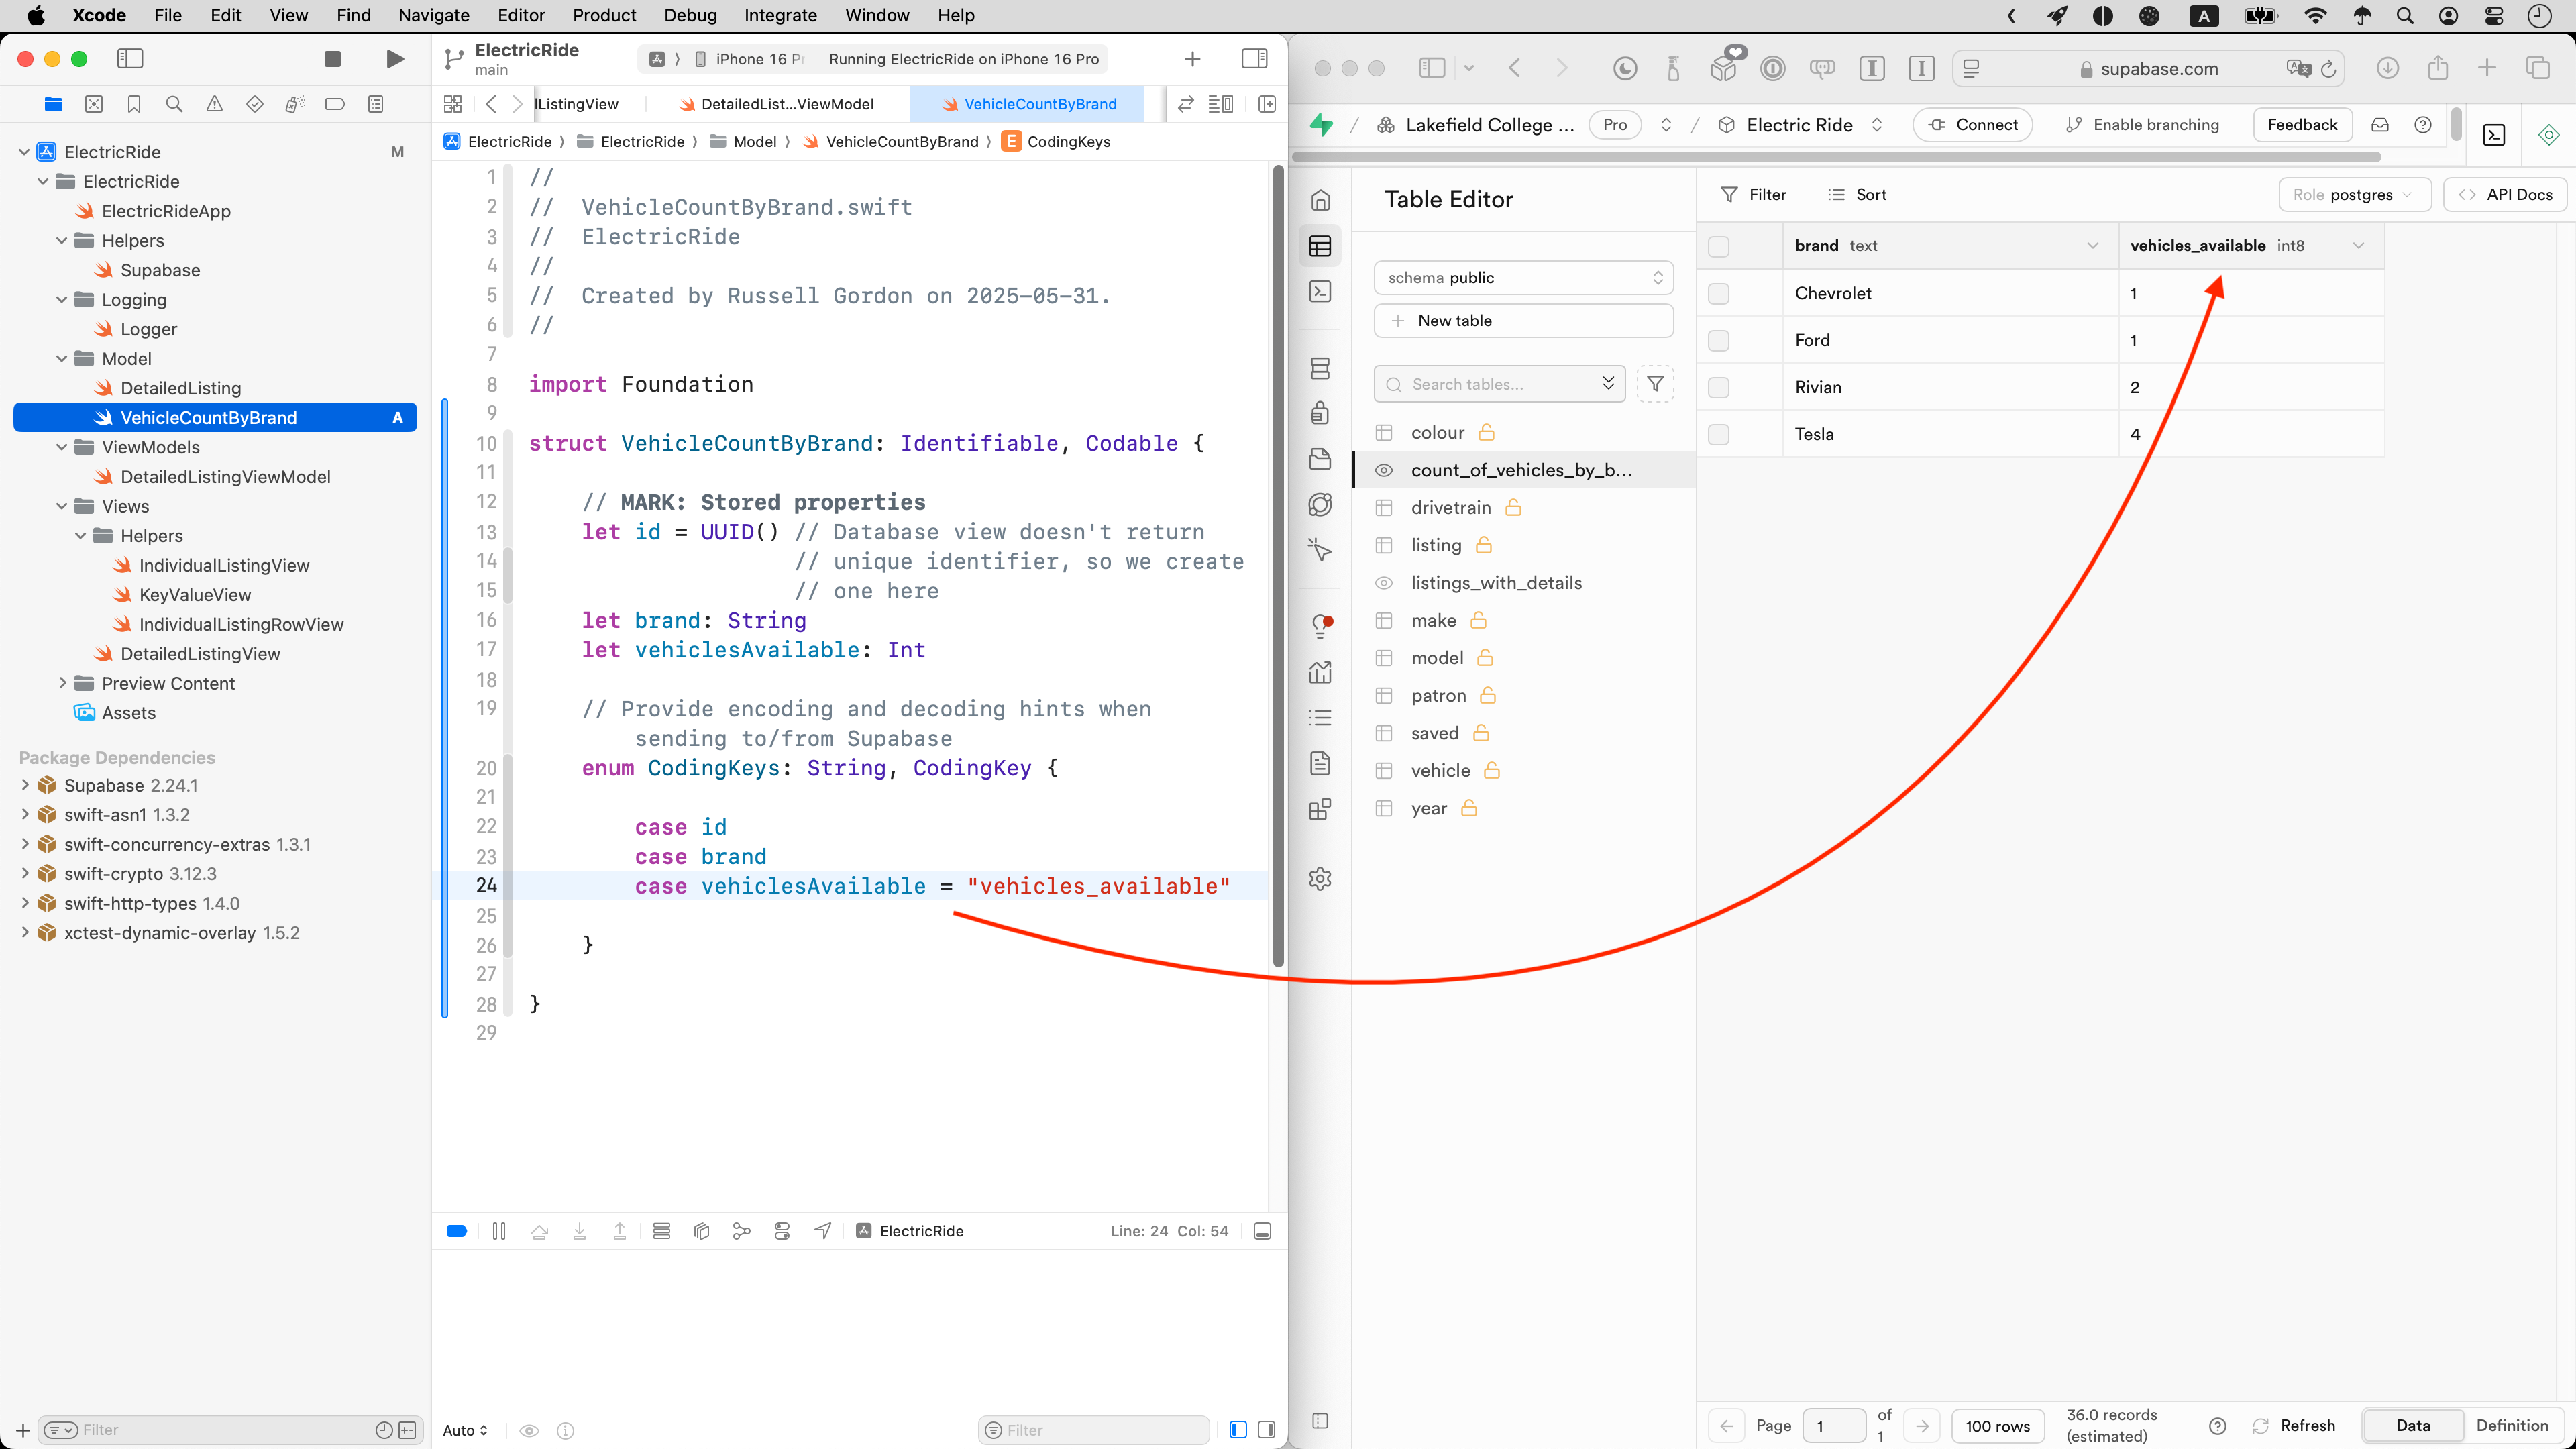
Notice how the column names of the database view dictate the property names we create in the data structure.
Here is the view model that Mr. Gordon authored:
Finally, here is the app view that makes use of the view model:
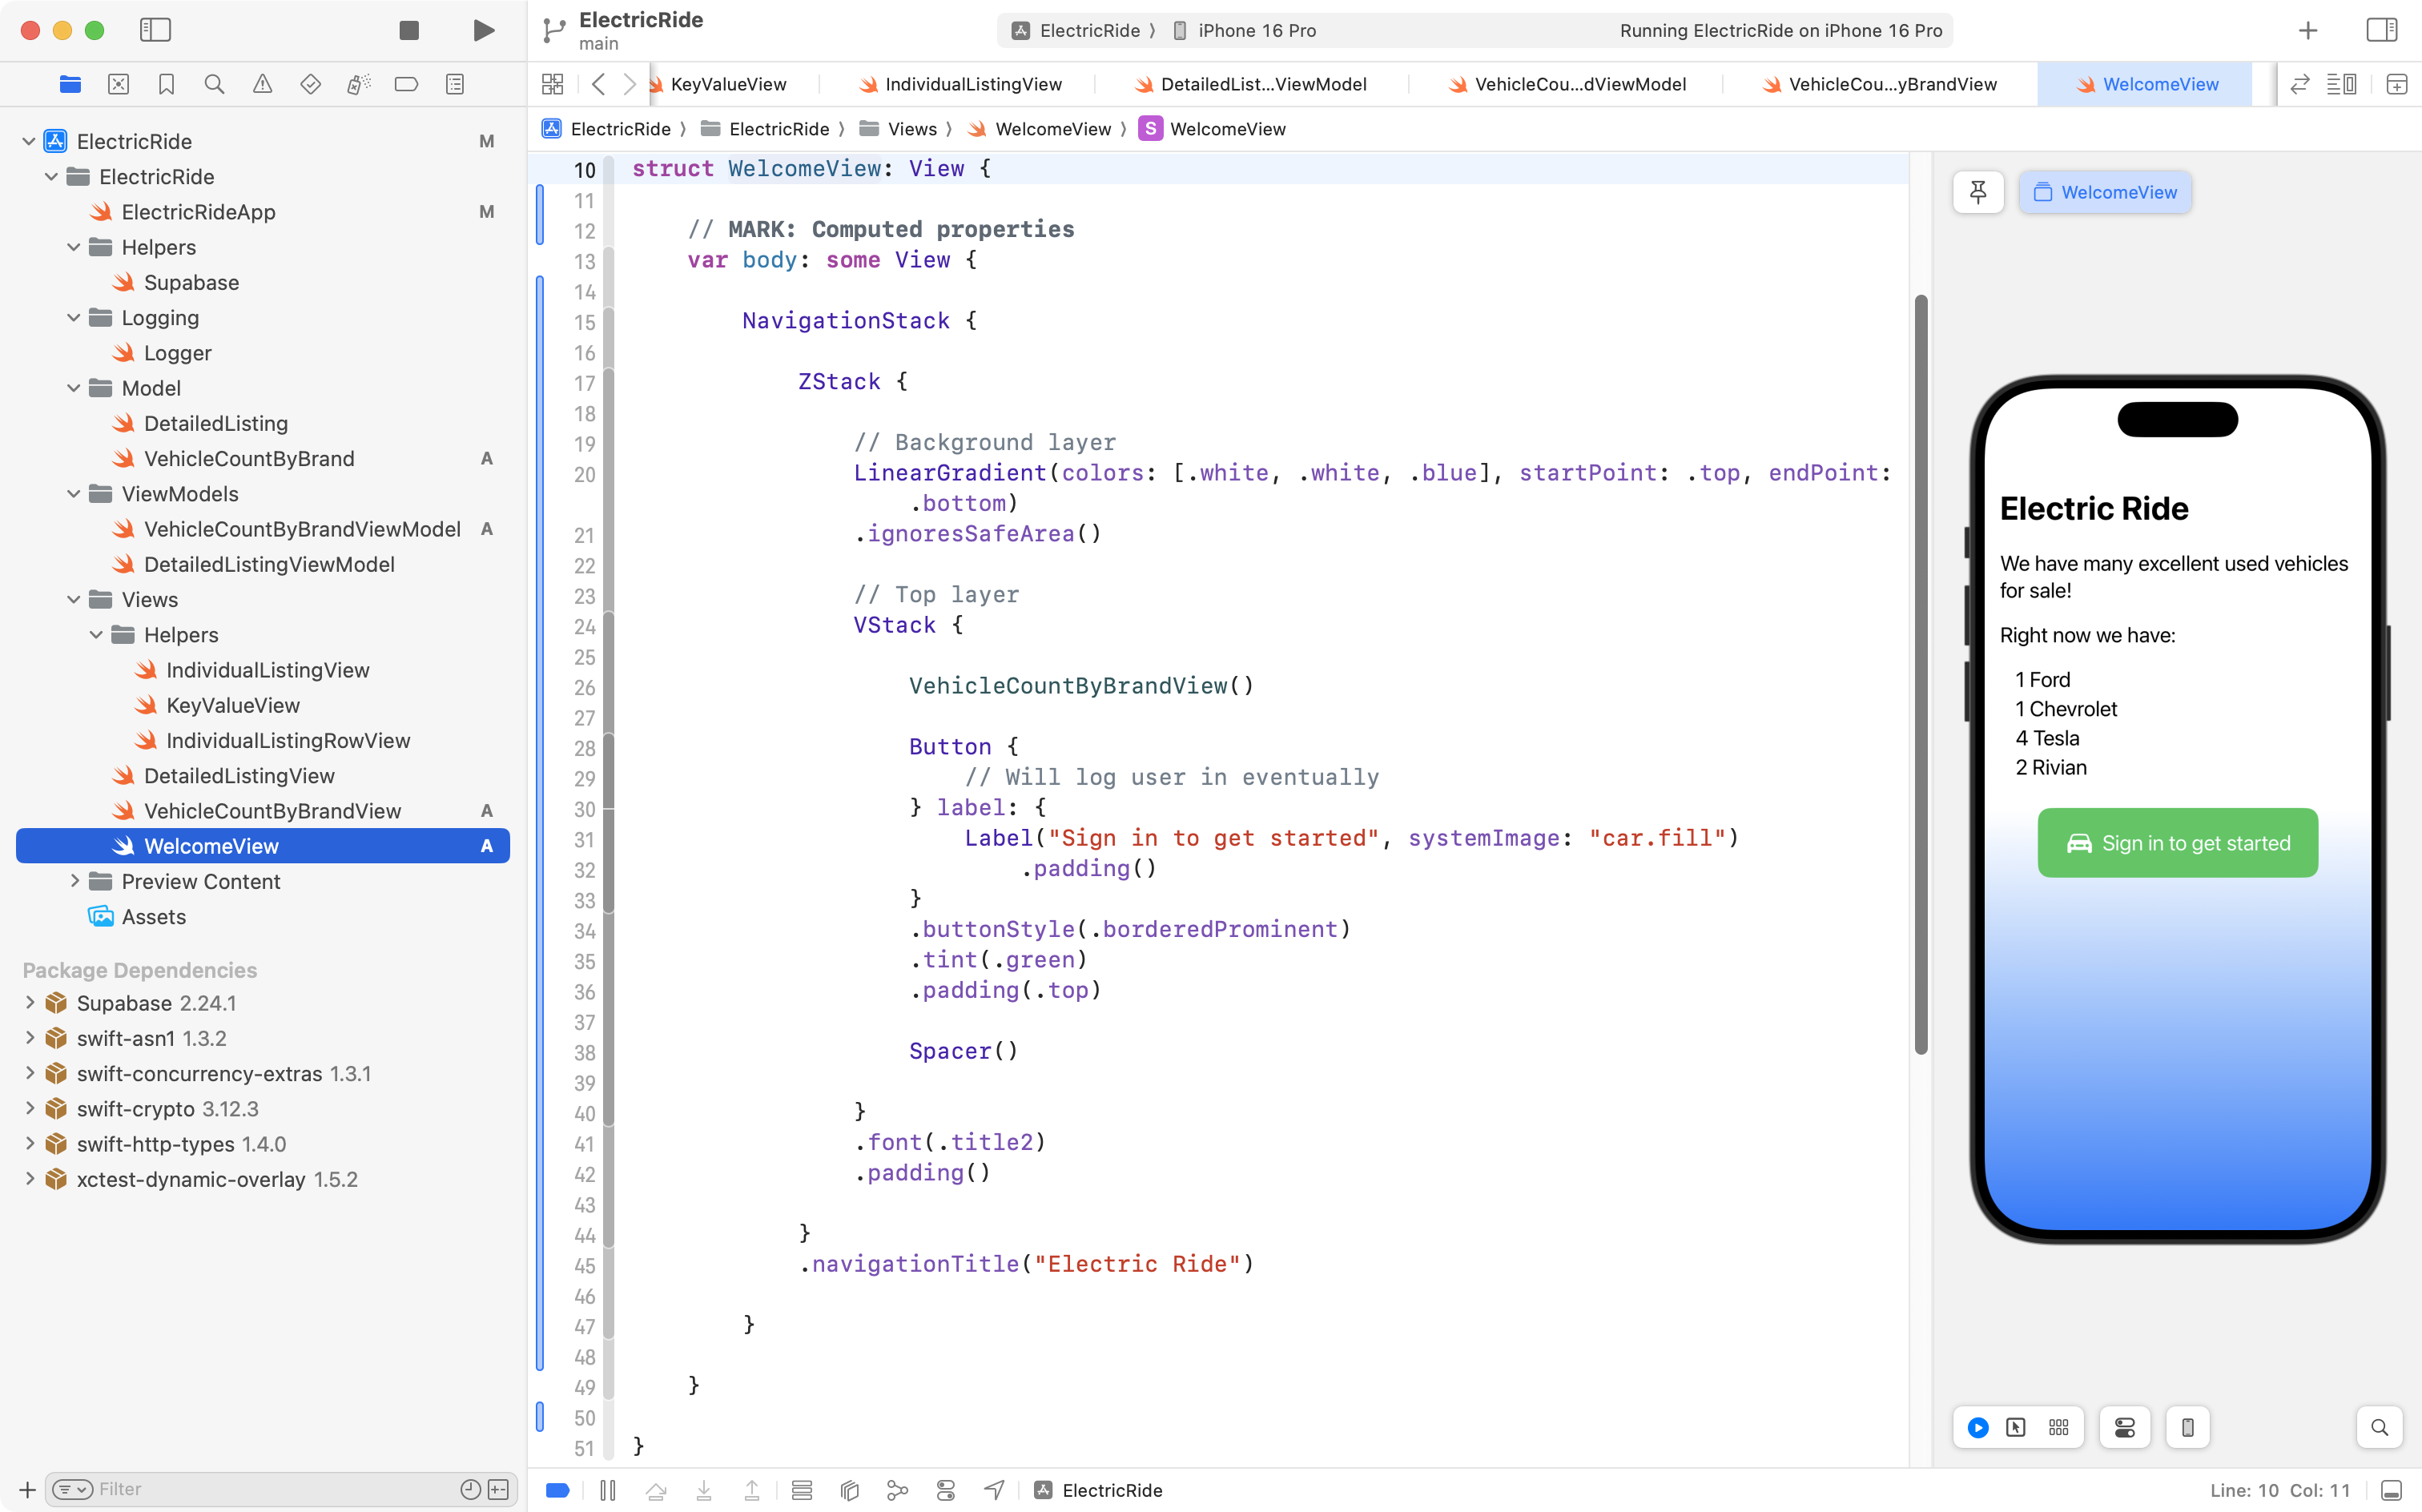
To reflect the fact that this new view will be shown to users who open the app but are not logged in, Mr. Gordon in turn authored WelcomeView which mostly just shows the information from VehicleCountByBrandView but also provides a button to get the login process started:
Simulating login
So far only two main views have been created.
One to show vehicle listings:
Another to welcome users who have not logged in:
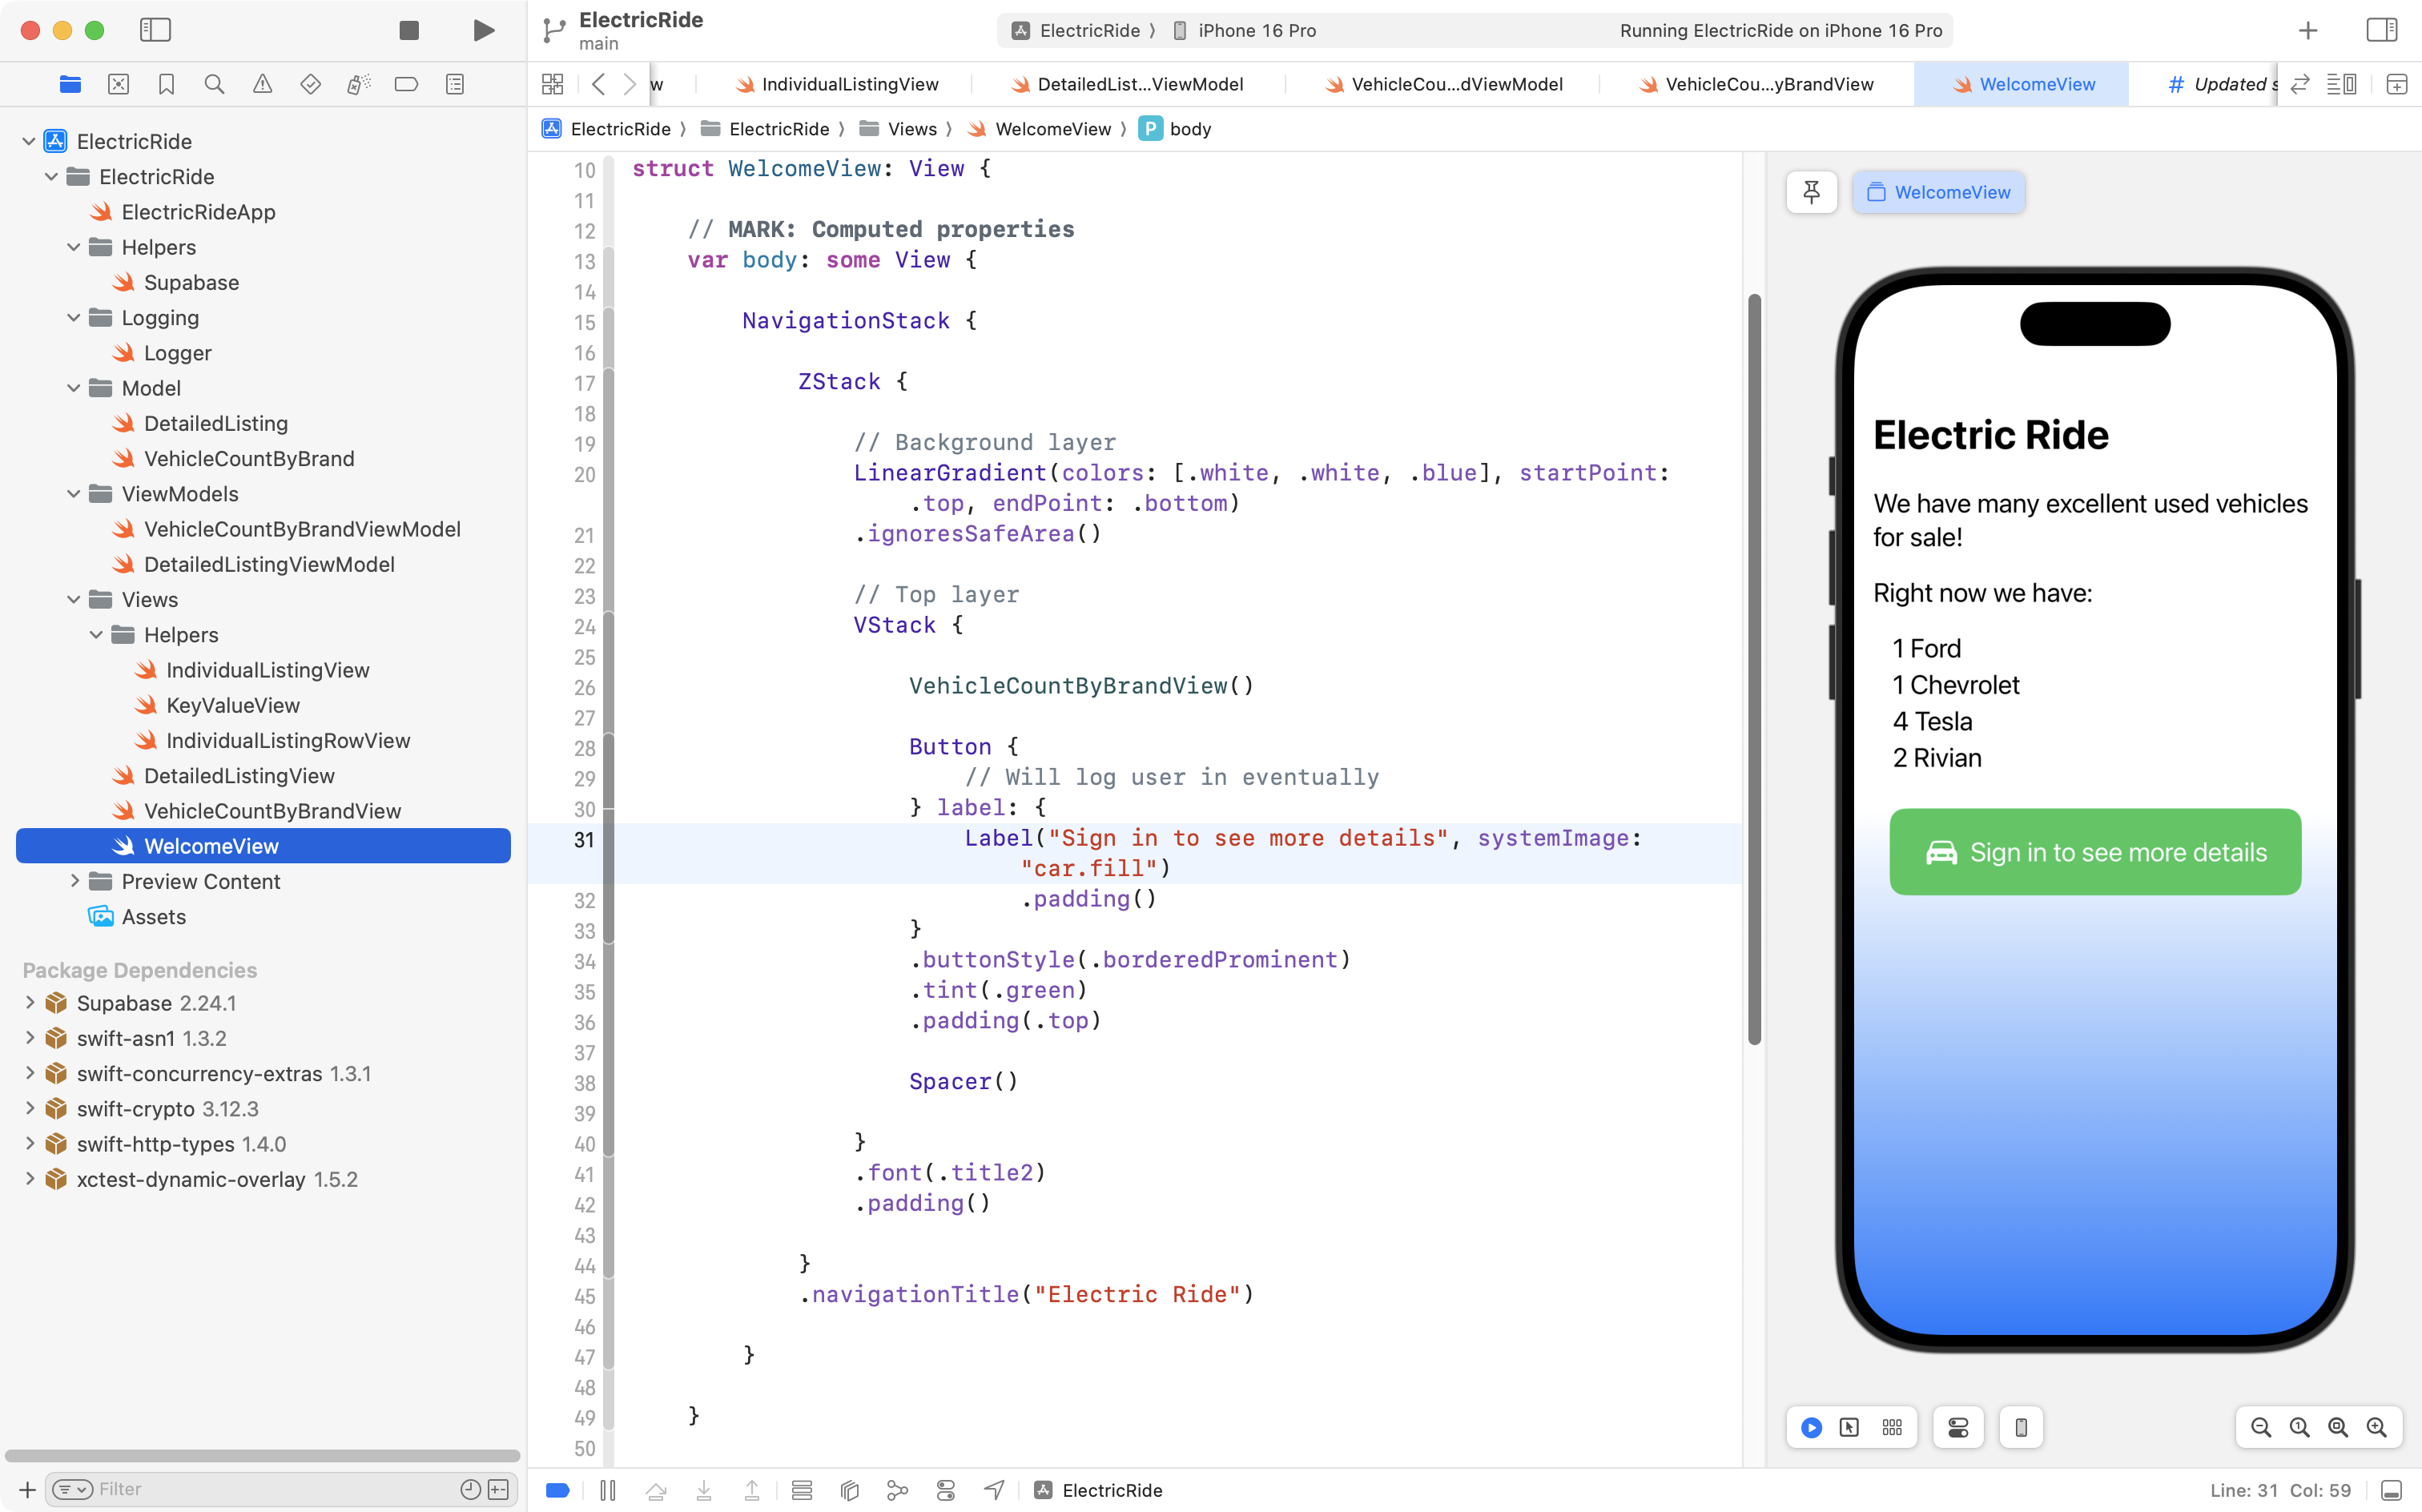
We are not quite ready to add the actual sign-in code using Sign in with Google or some other authentication service.
However, to implement the last part of this app – the ability to browse saved listings and for a user to save listings they are interested in:
… then based on our database schema:
… we need to know what user (or patron) is logged in.
To be clear, the saved table connects a user (patron) to a listing they saved for future reference. We cannot save a listing without knowing what user to save it for…
Faking a single user
So, the easiest way to start is to “hard code” or fake a single user as having been logged in.
Before we write code to present data in our app, generally the best approach is to ensure we can get the information we want using raw SQL queries.
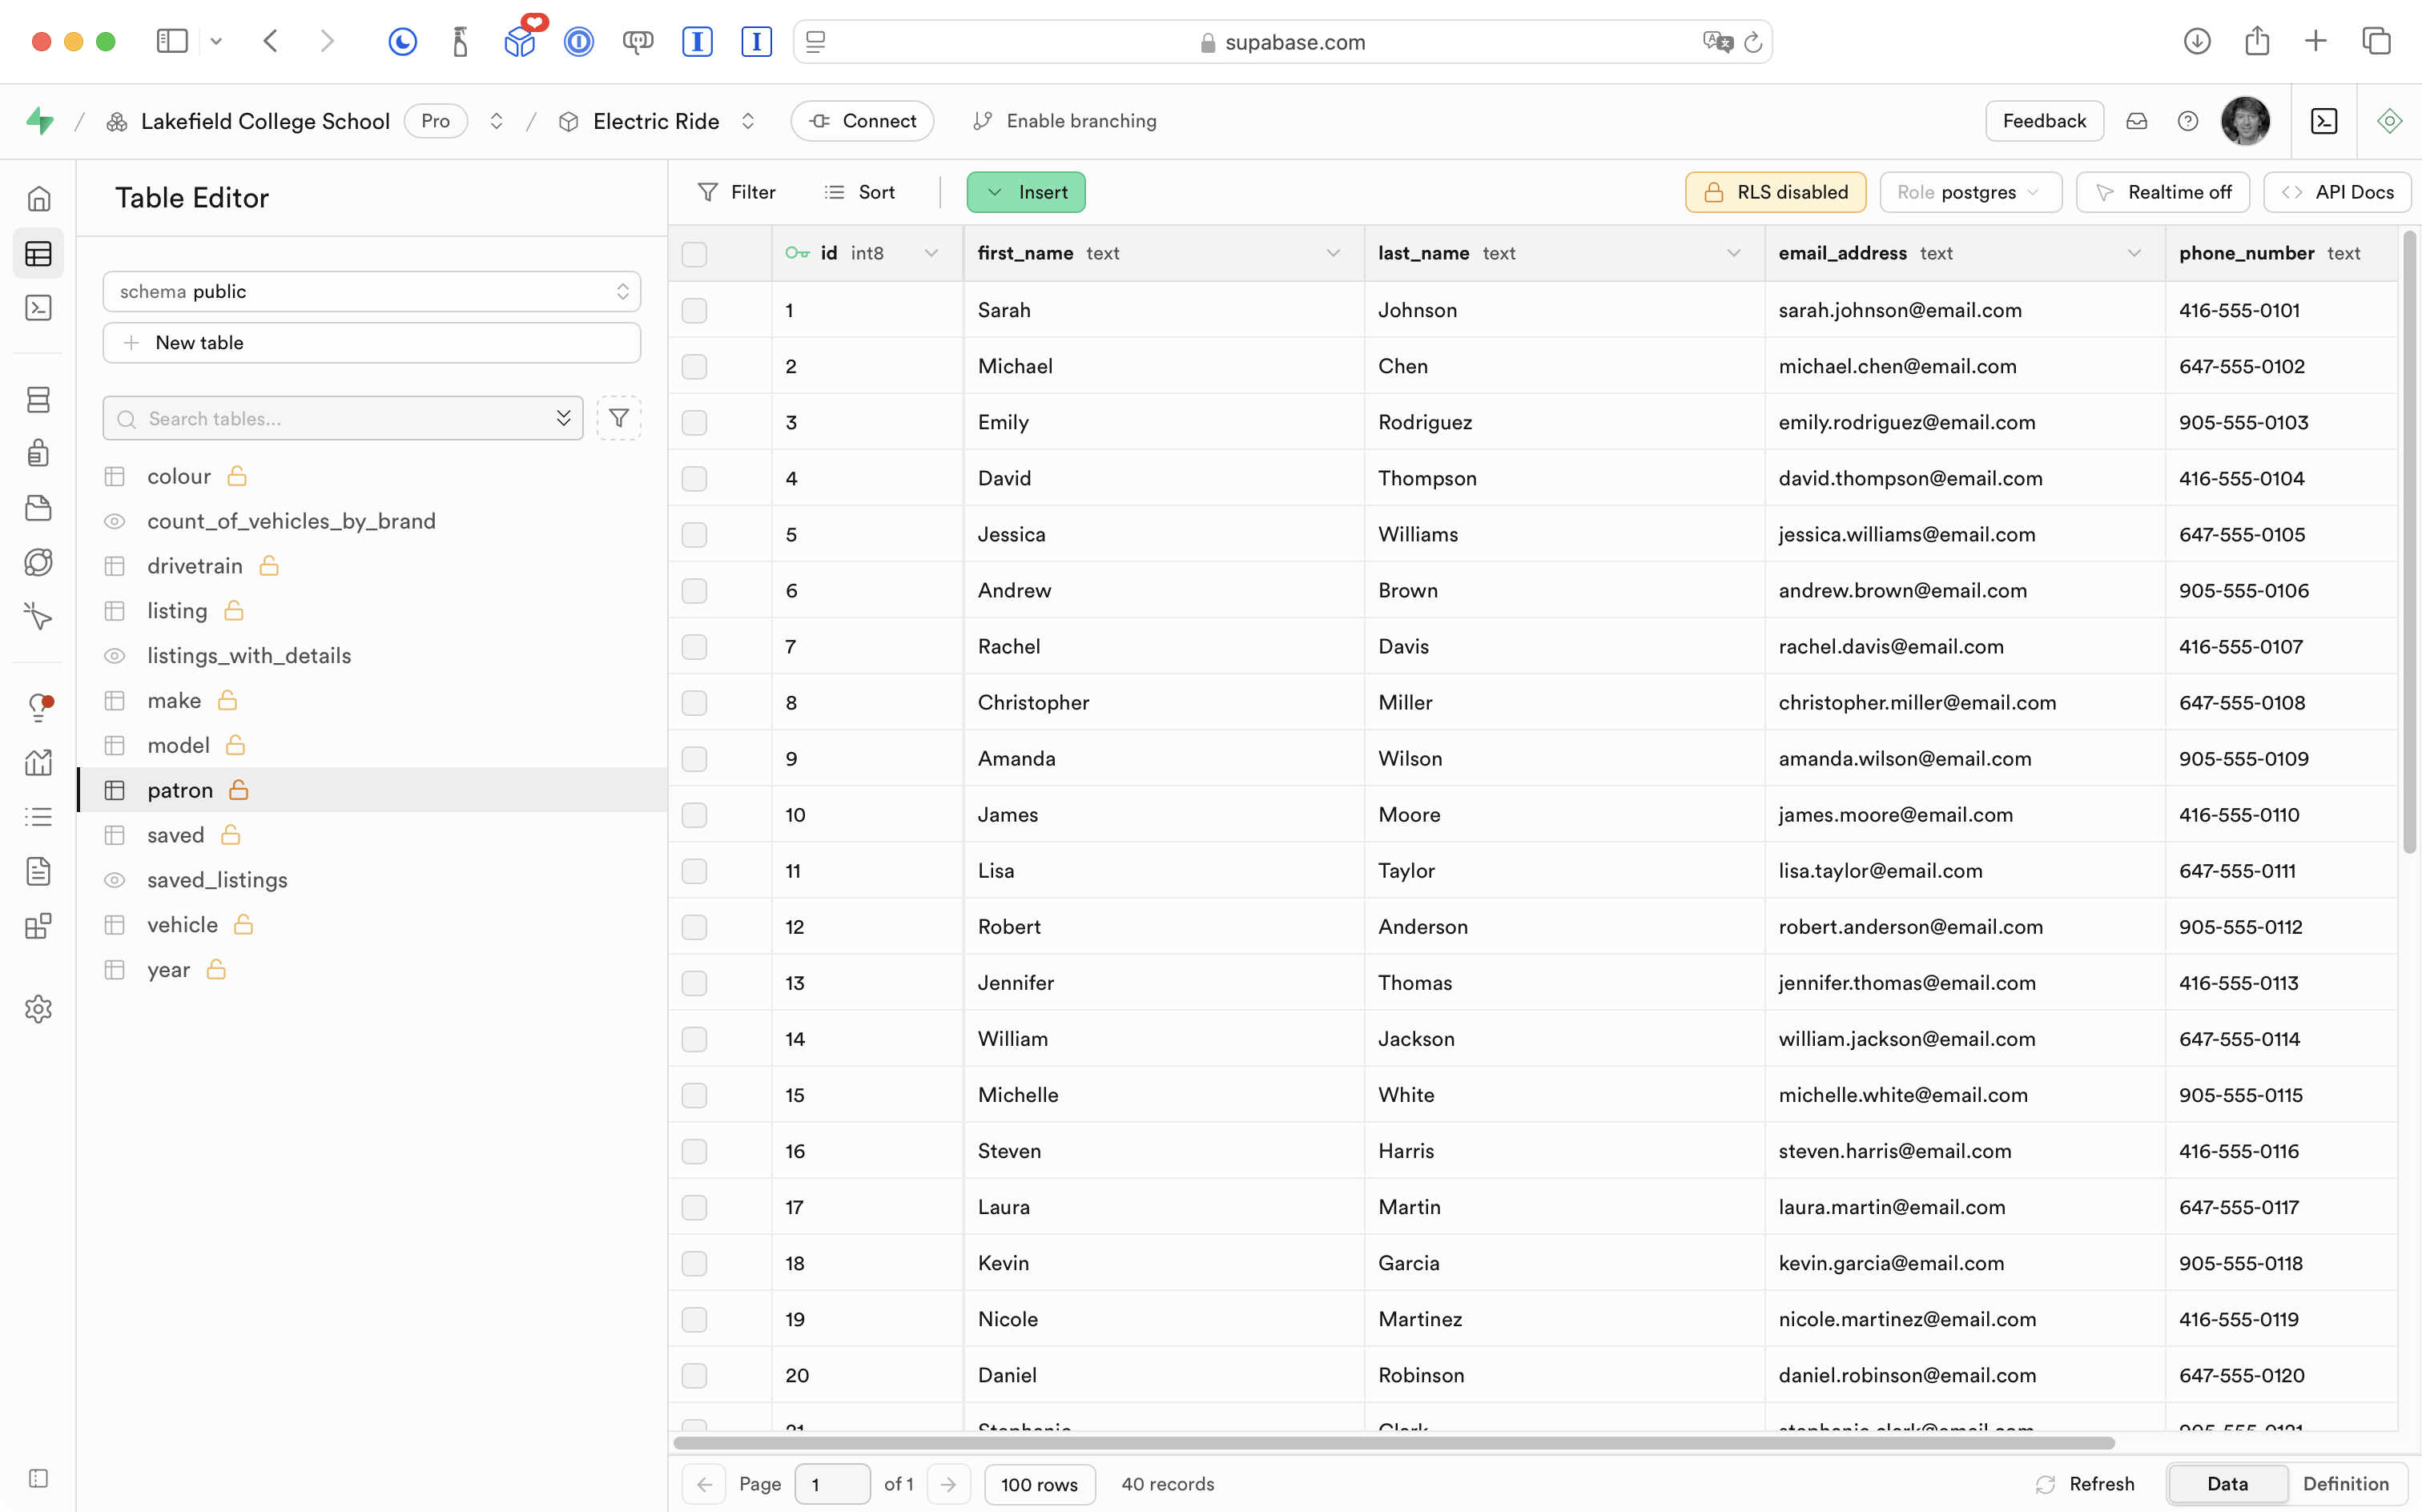
So, let’s say we want to fake this single user (patron) within our app – Michael Chen, who has a patron id of 2:
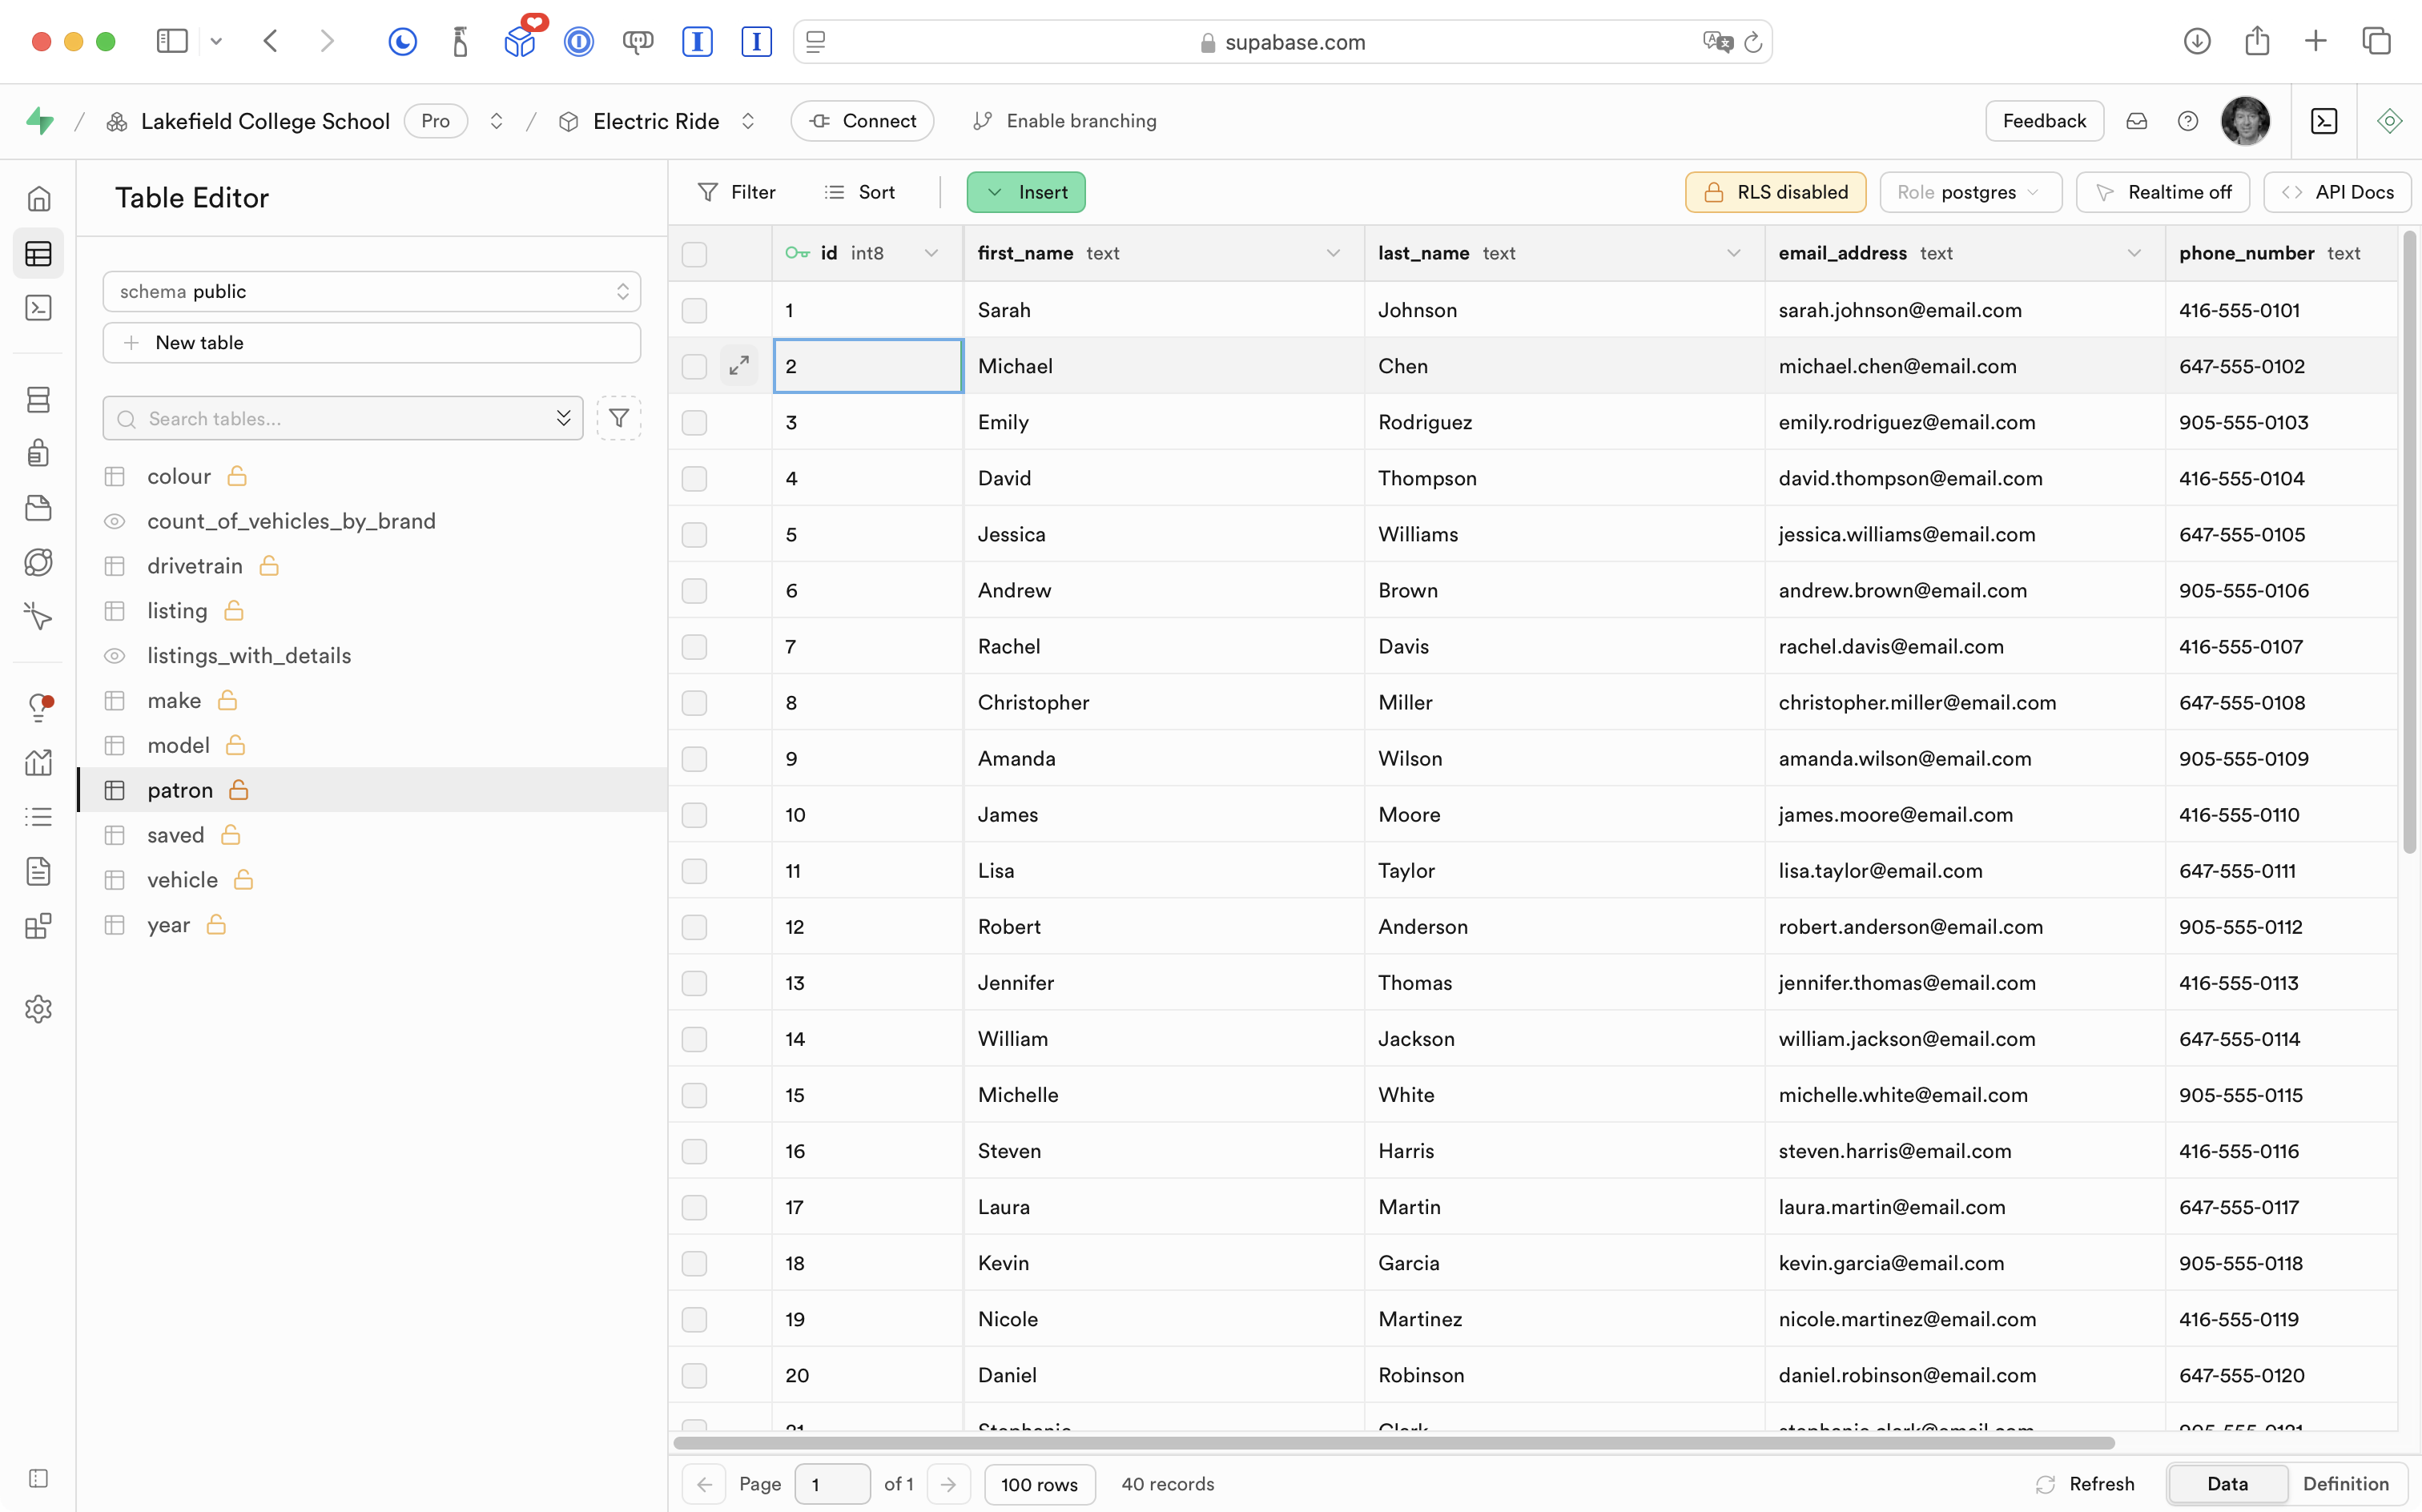
We have chosen this user because the example data generated earlier by the LLM has this user with multiple saved listings:
Get saved listings data
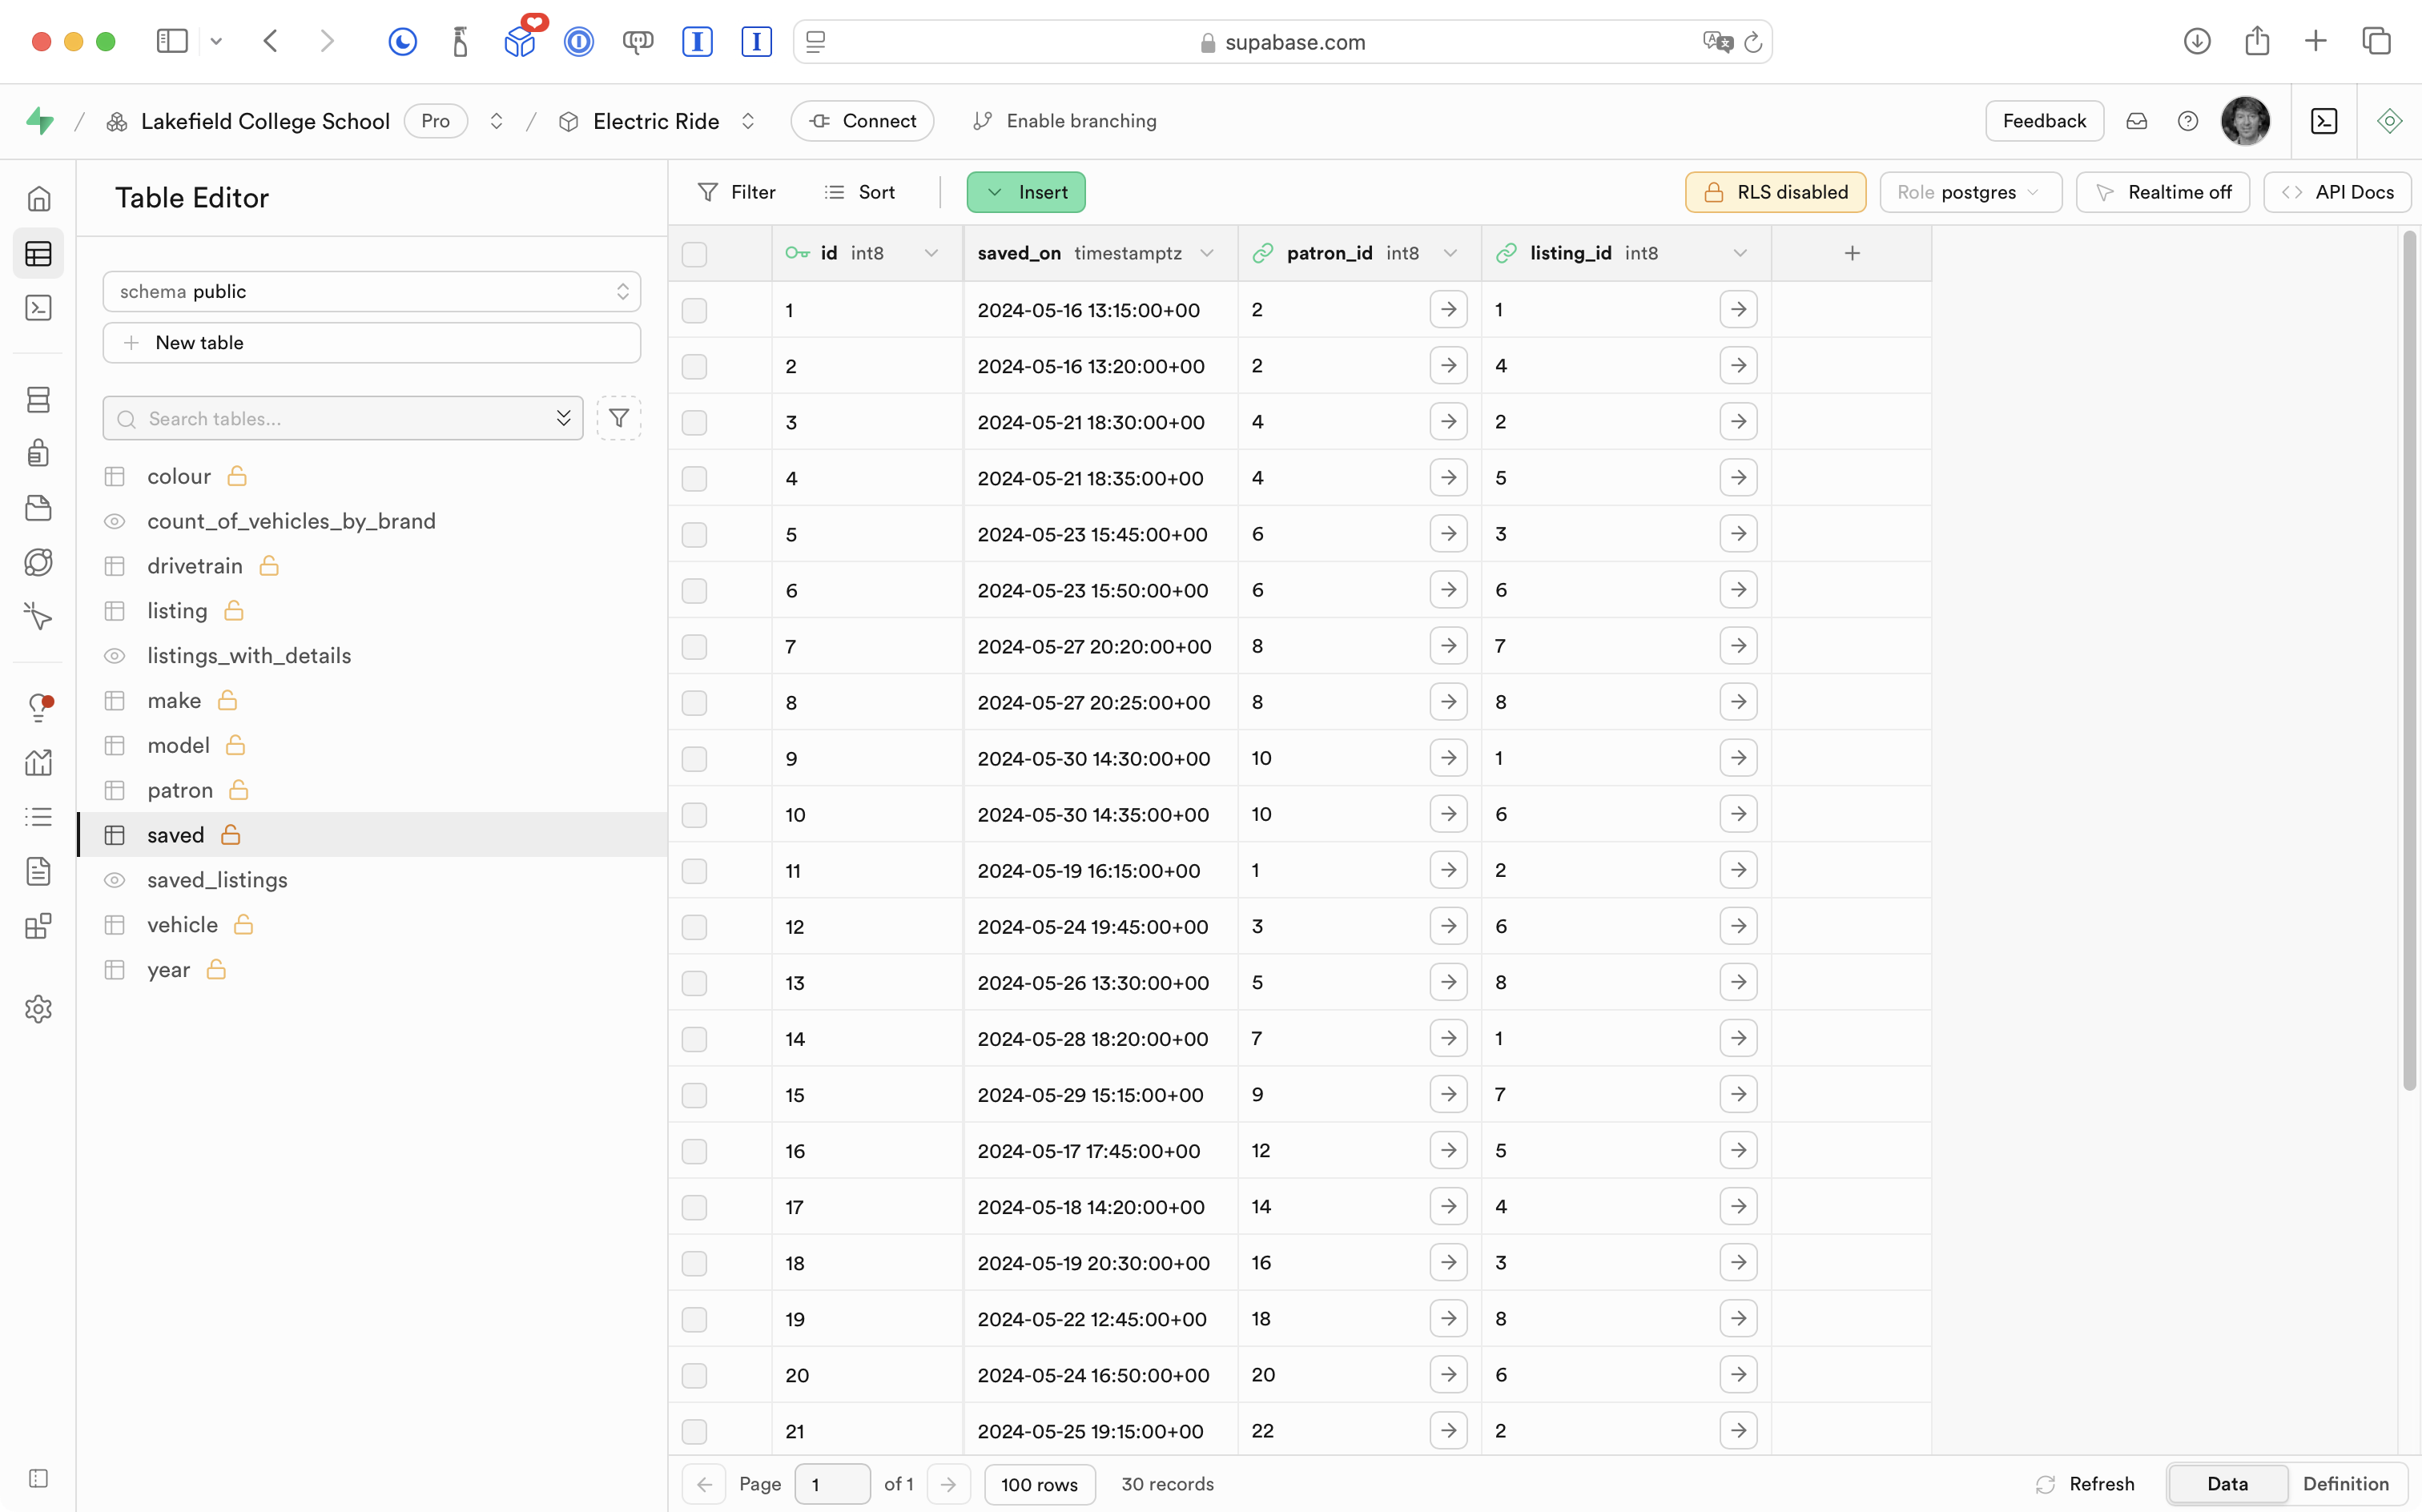
We can start by creating a new SQL snippet and simply selecting all rows from the saved table:
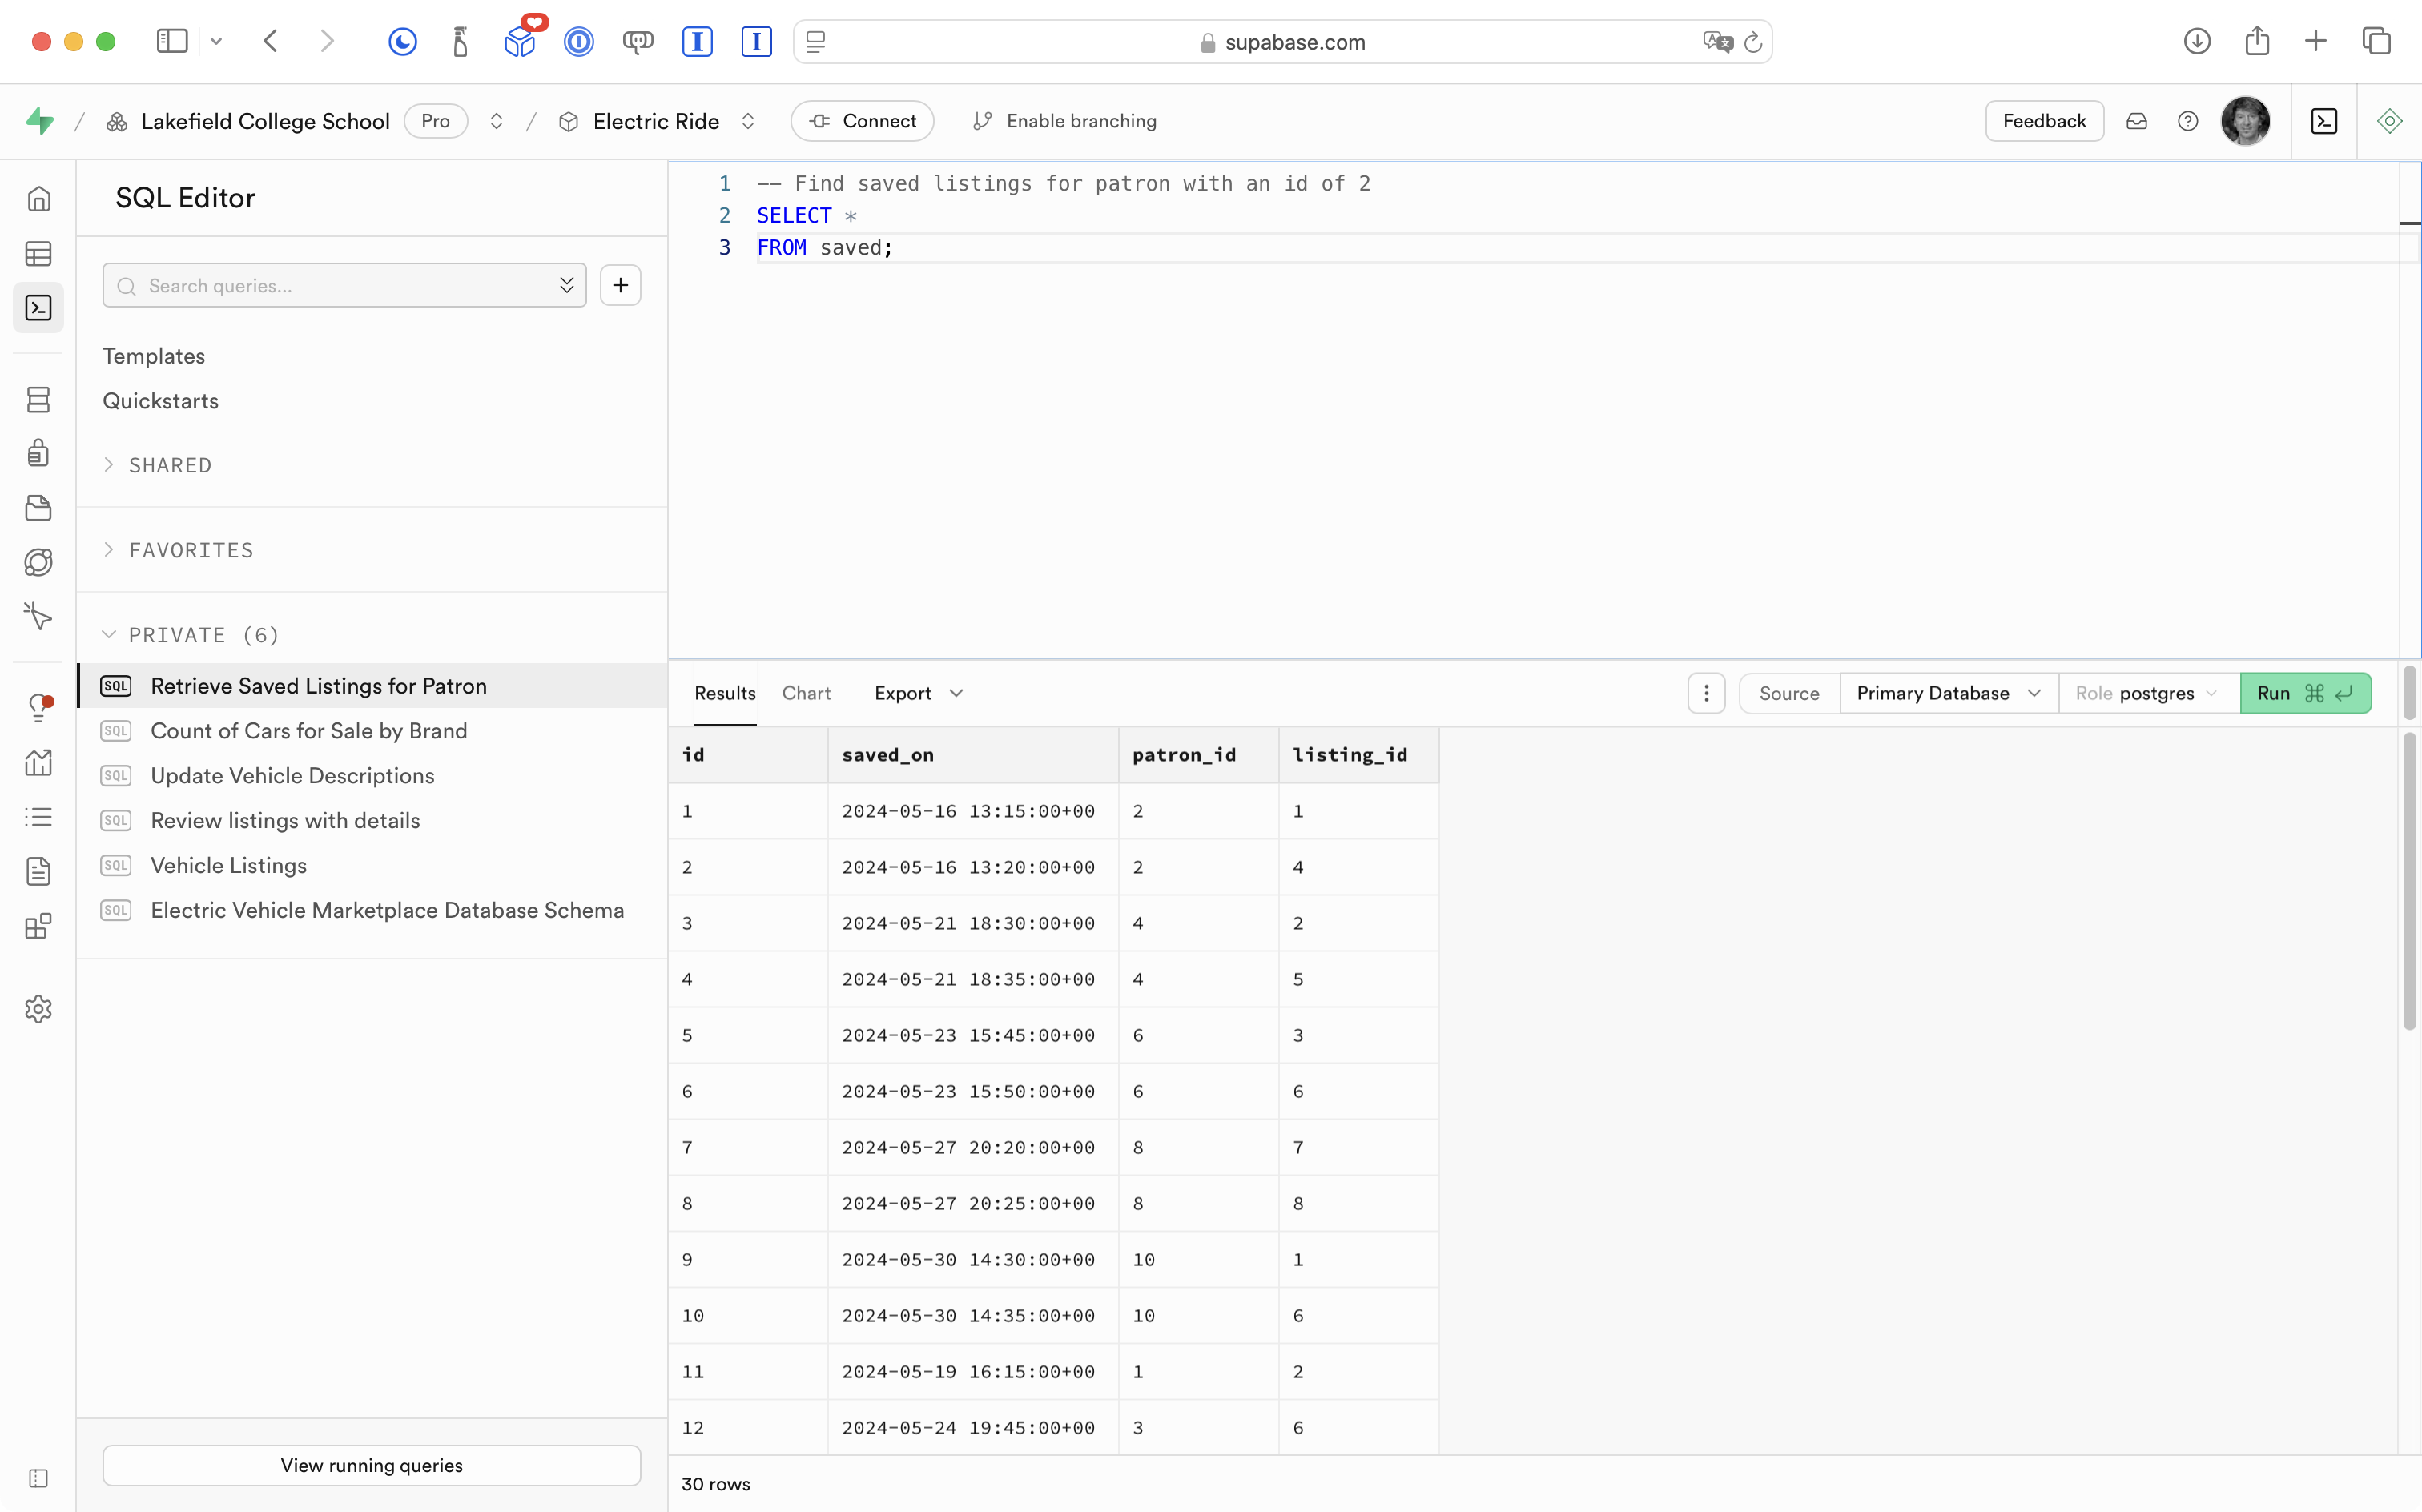
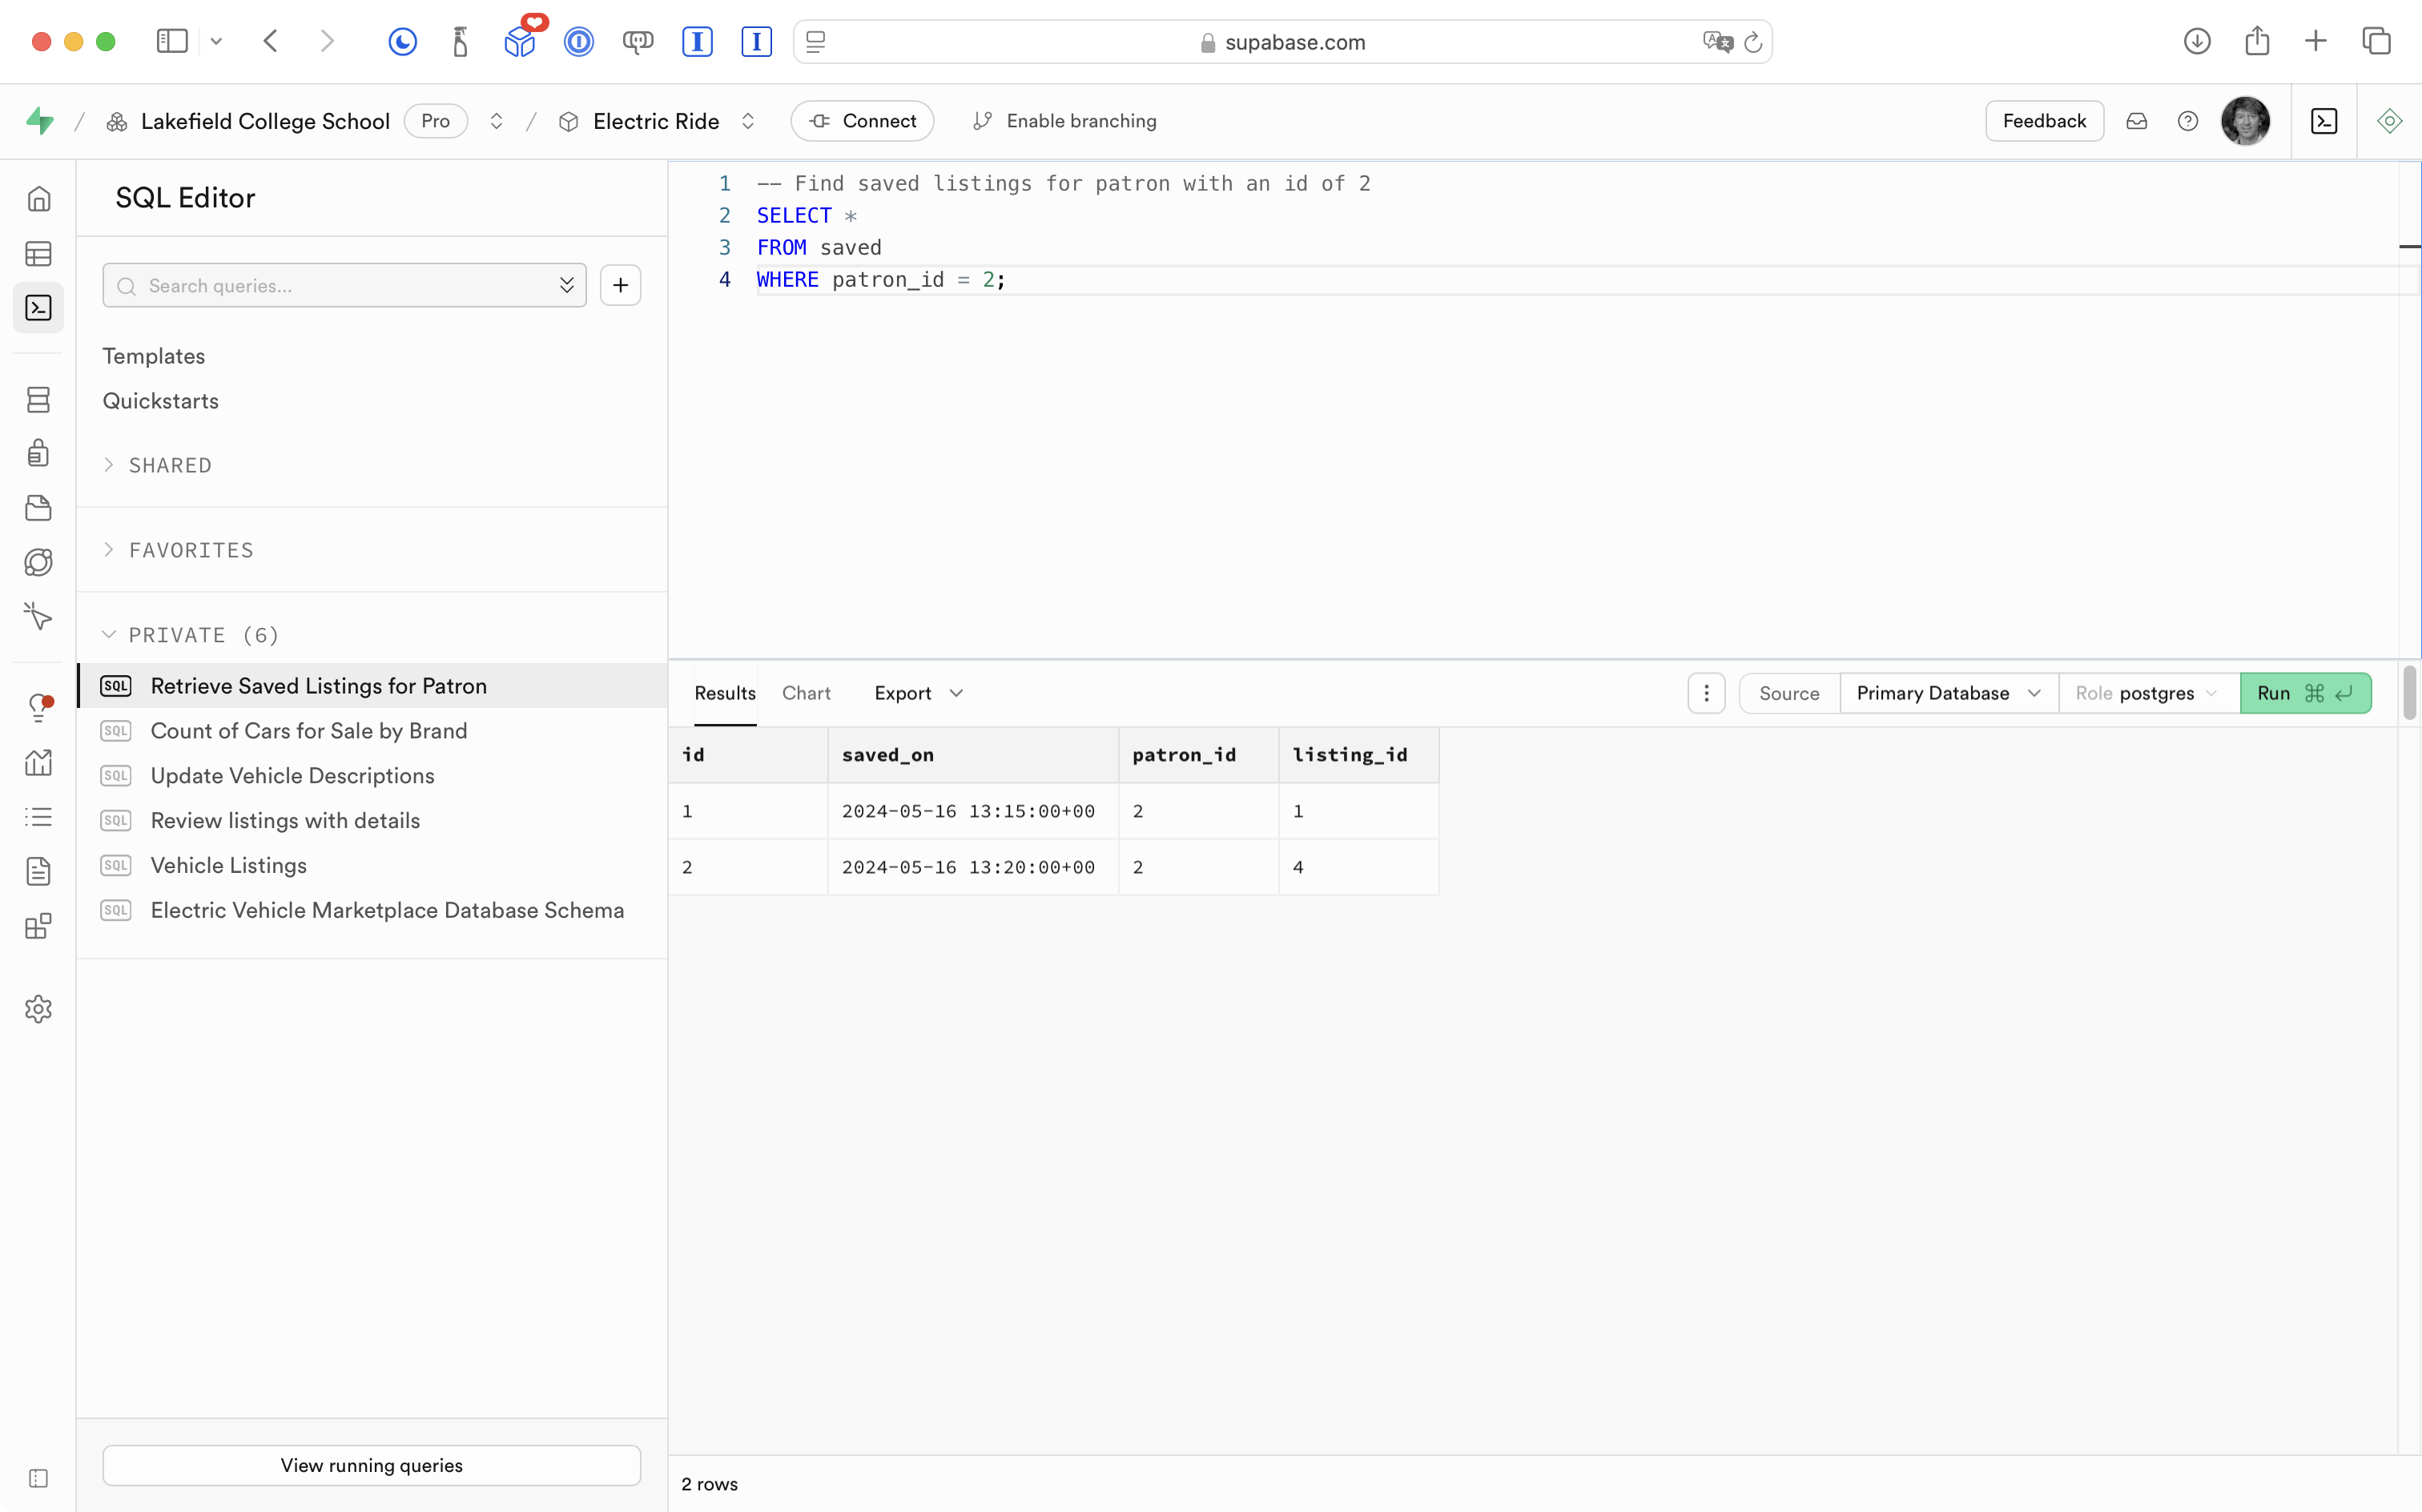
Then we can limit results to listings saved by this one user:
This information alone isn’t very useful – we need to join to the database view that we made earlier to get detailed information about each listing the patron saved:
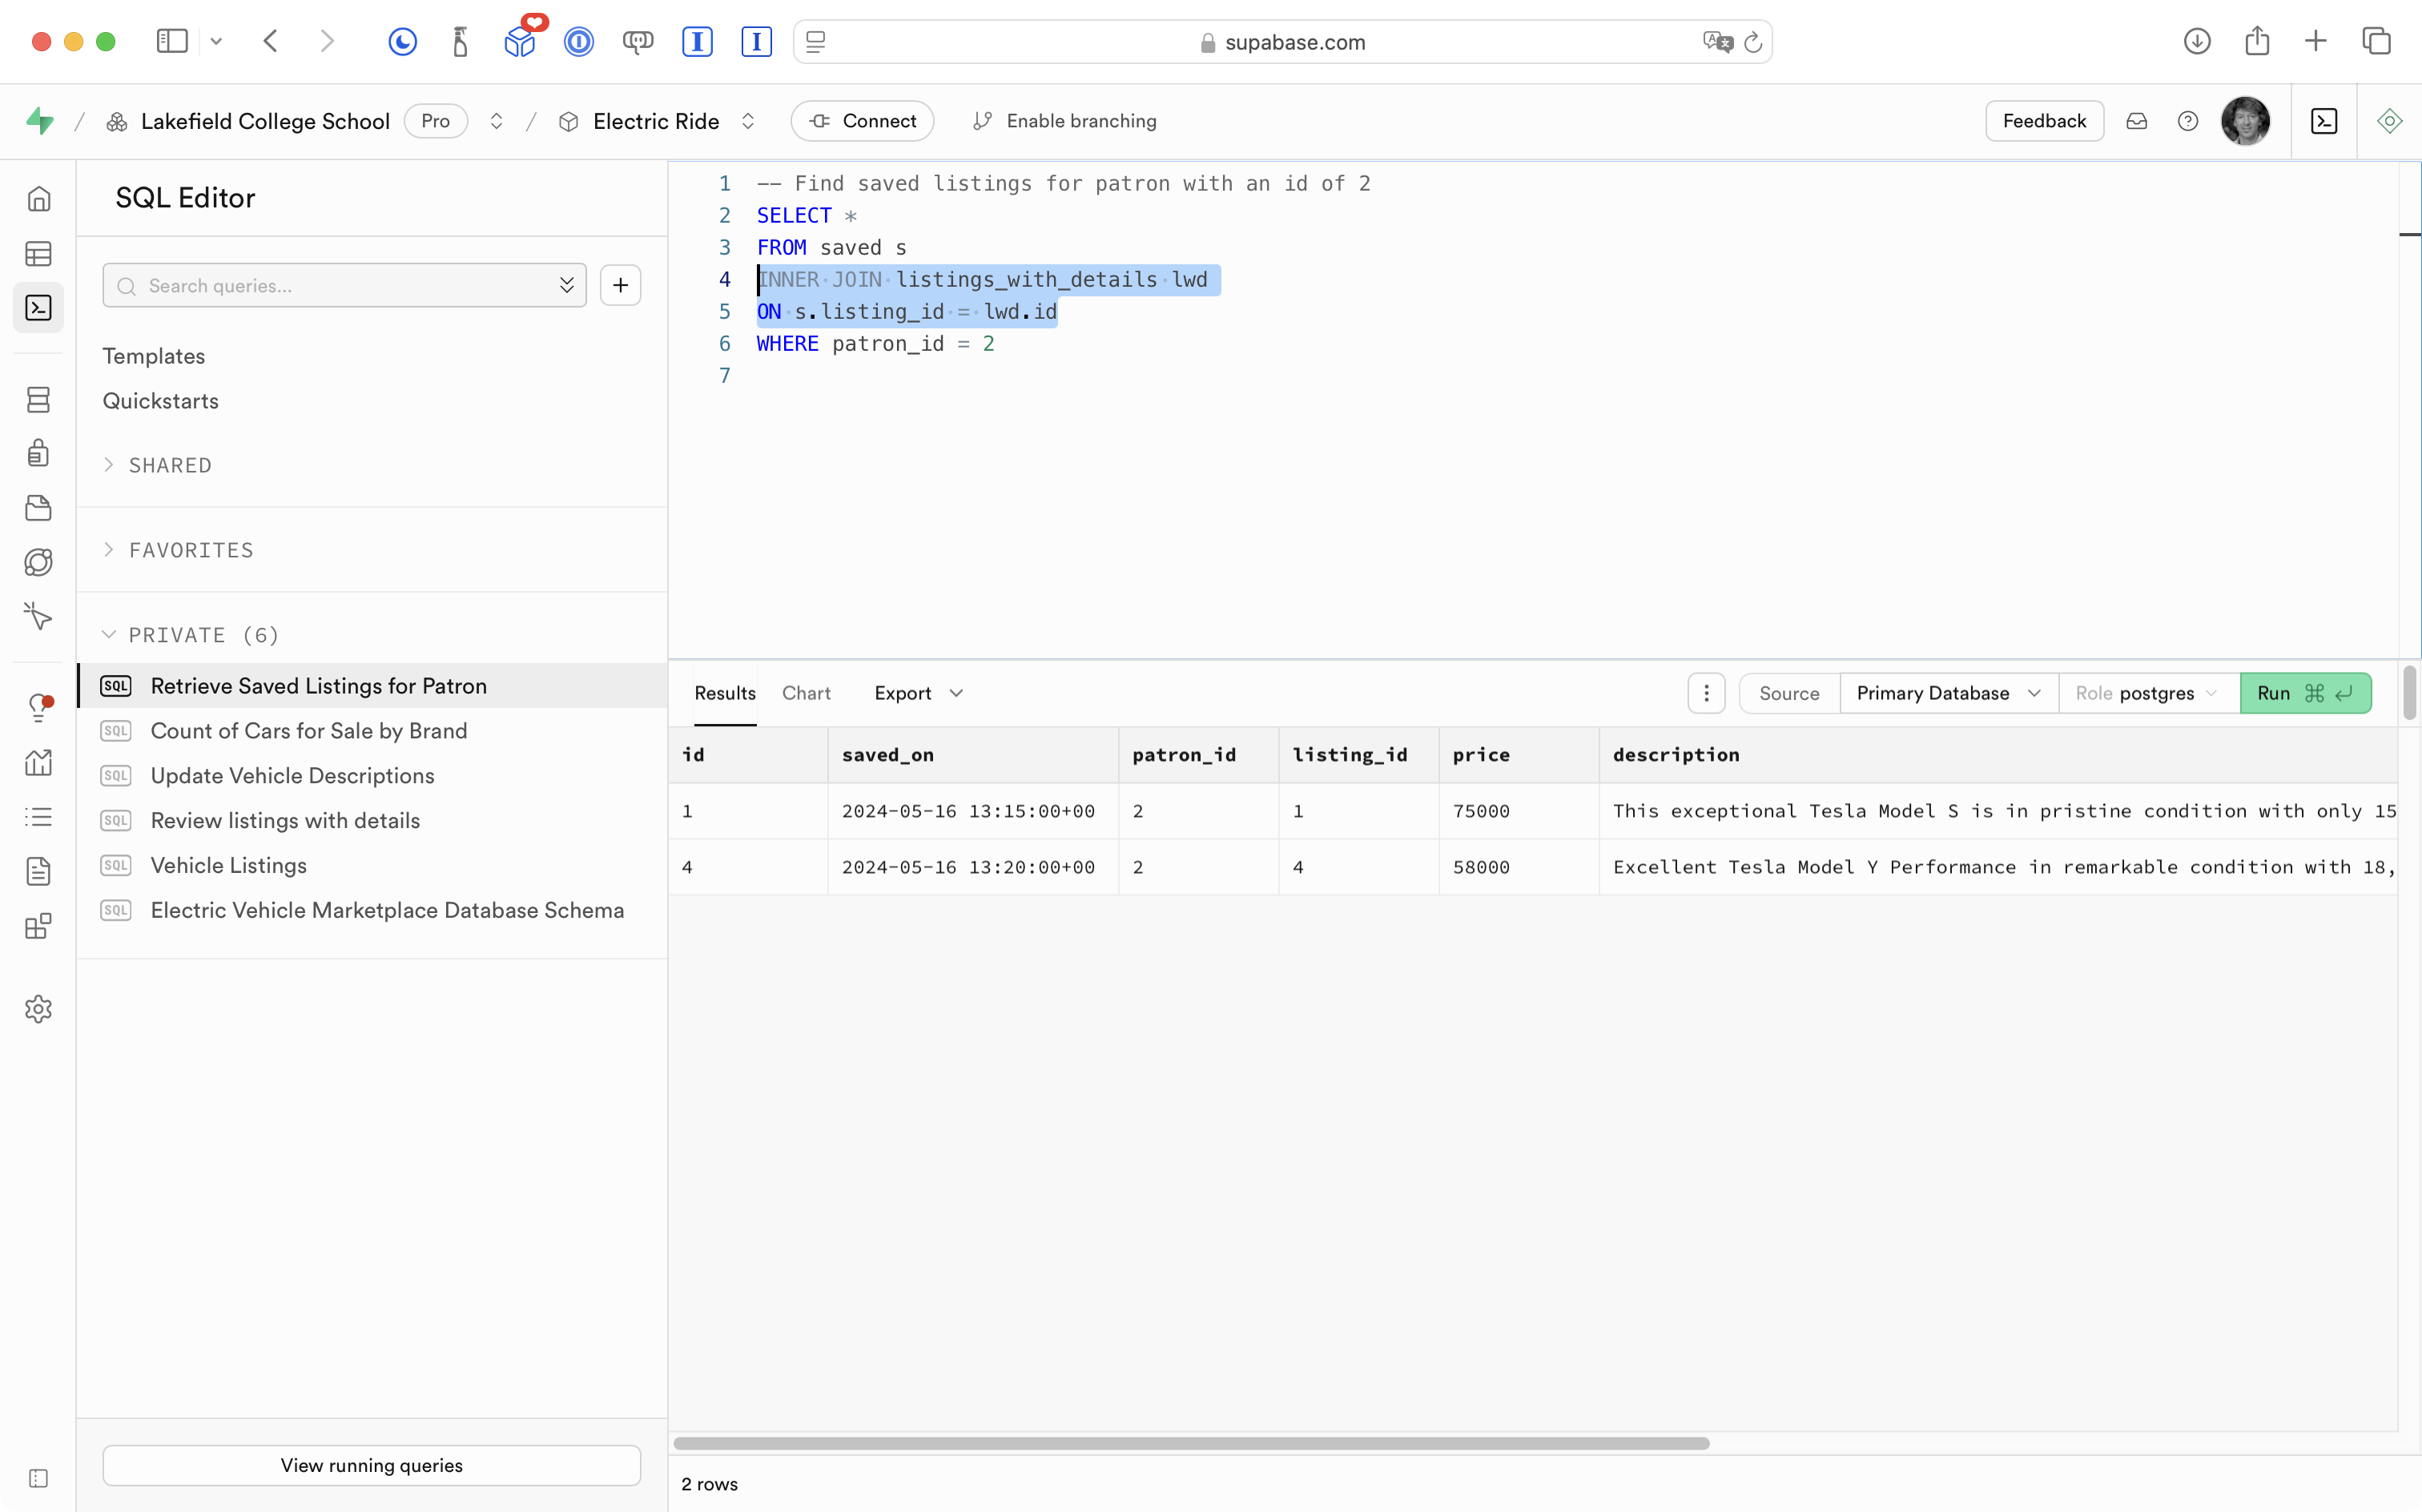
Now we get back all columns from both the saved table and the listings_with_details database view.
The saved table and the listings_with_details database view both have a column named id so it’s necessary to spell out exactly what columns we want to get information about – we only bother getting the listing id in this case:
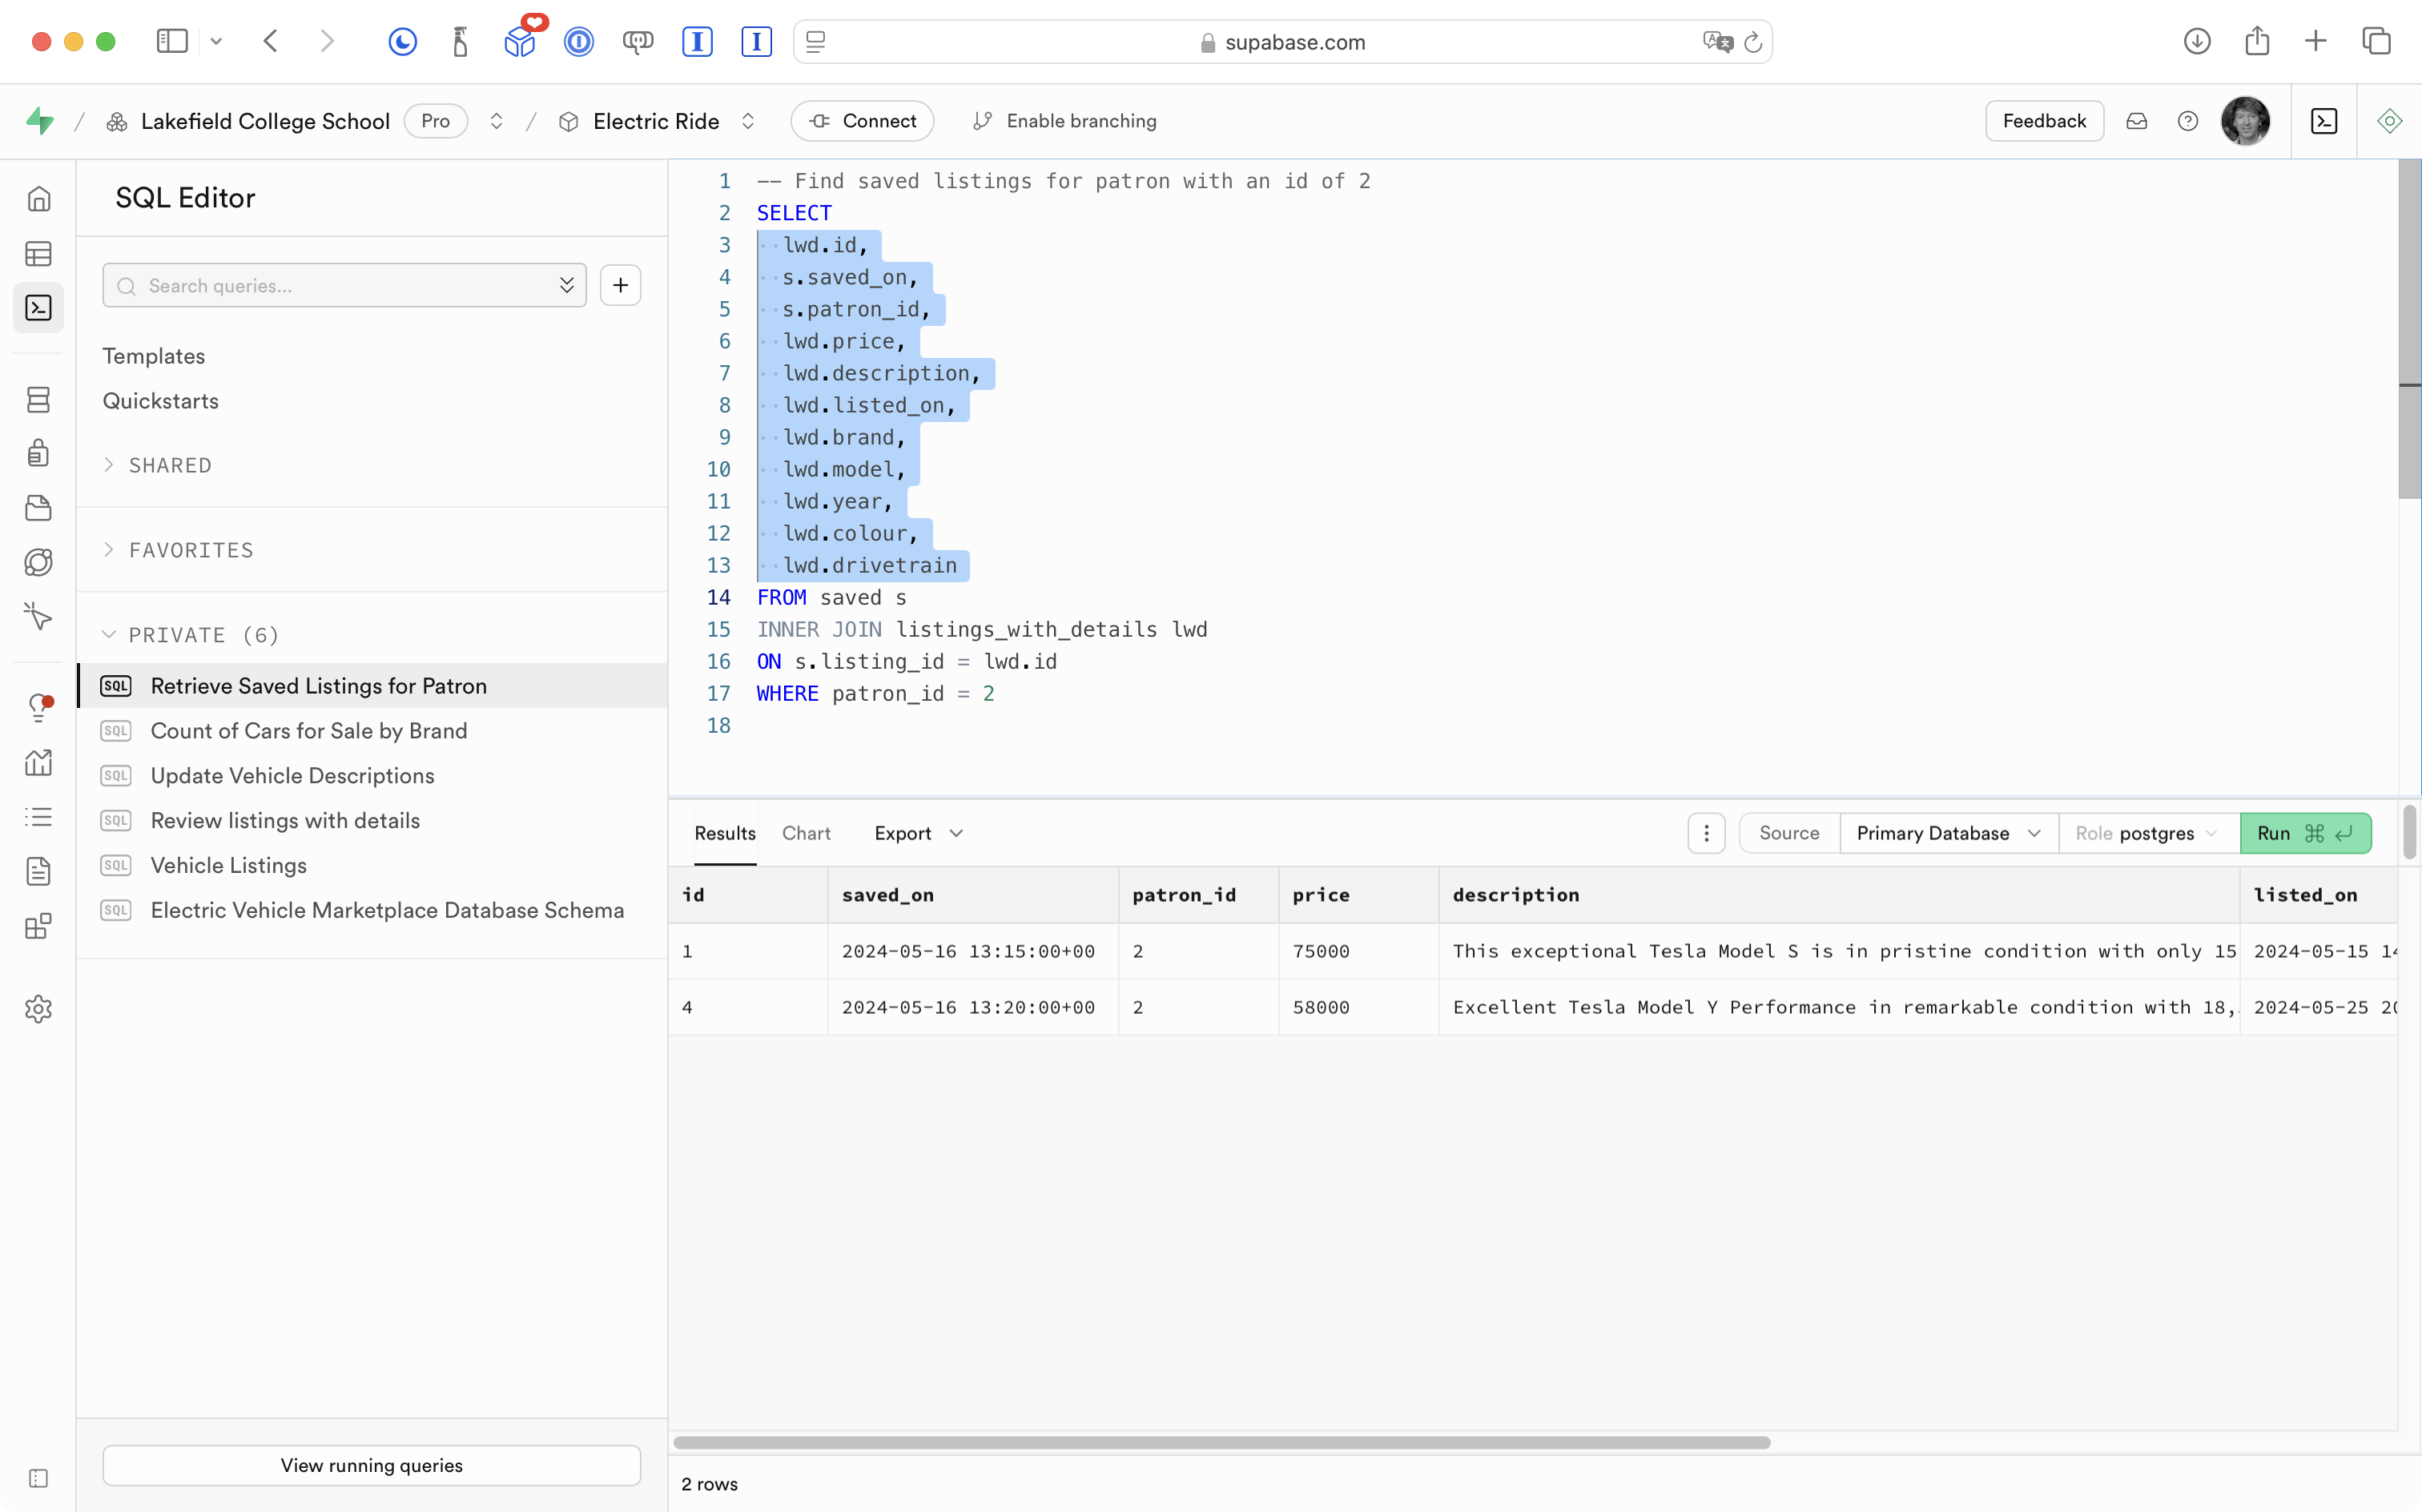
Finally, we will make this query into a database view:
Show saved listings
Now, as before, we must:
- Write a model structure to match the column names and data types of the database view.
- Write a view model to query the database view.
- Write a view that uses the view model to show the information in the app.
So, here is the model Mr. Gordon created:
.png)
Notice how the column names of the database view dictate the property names we create in the data structure.
Here is the view model Mr. Gordon created:
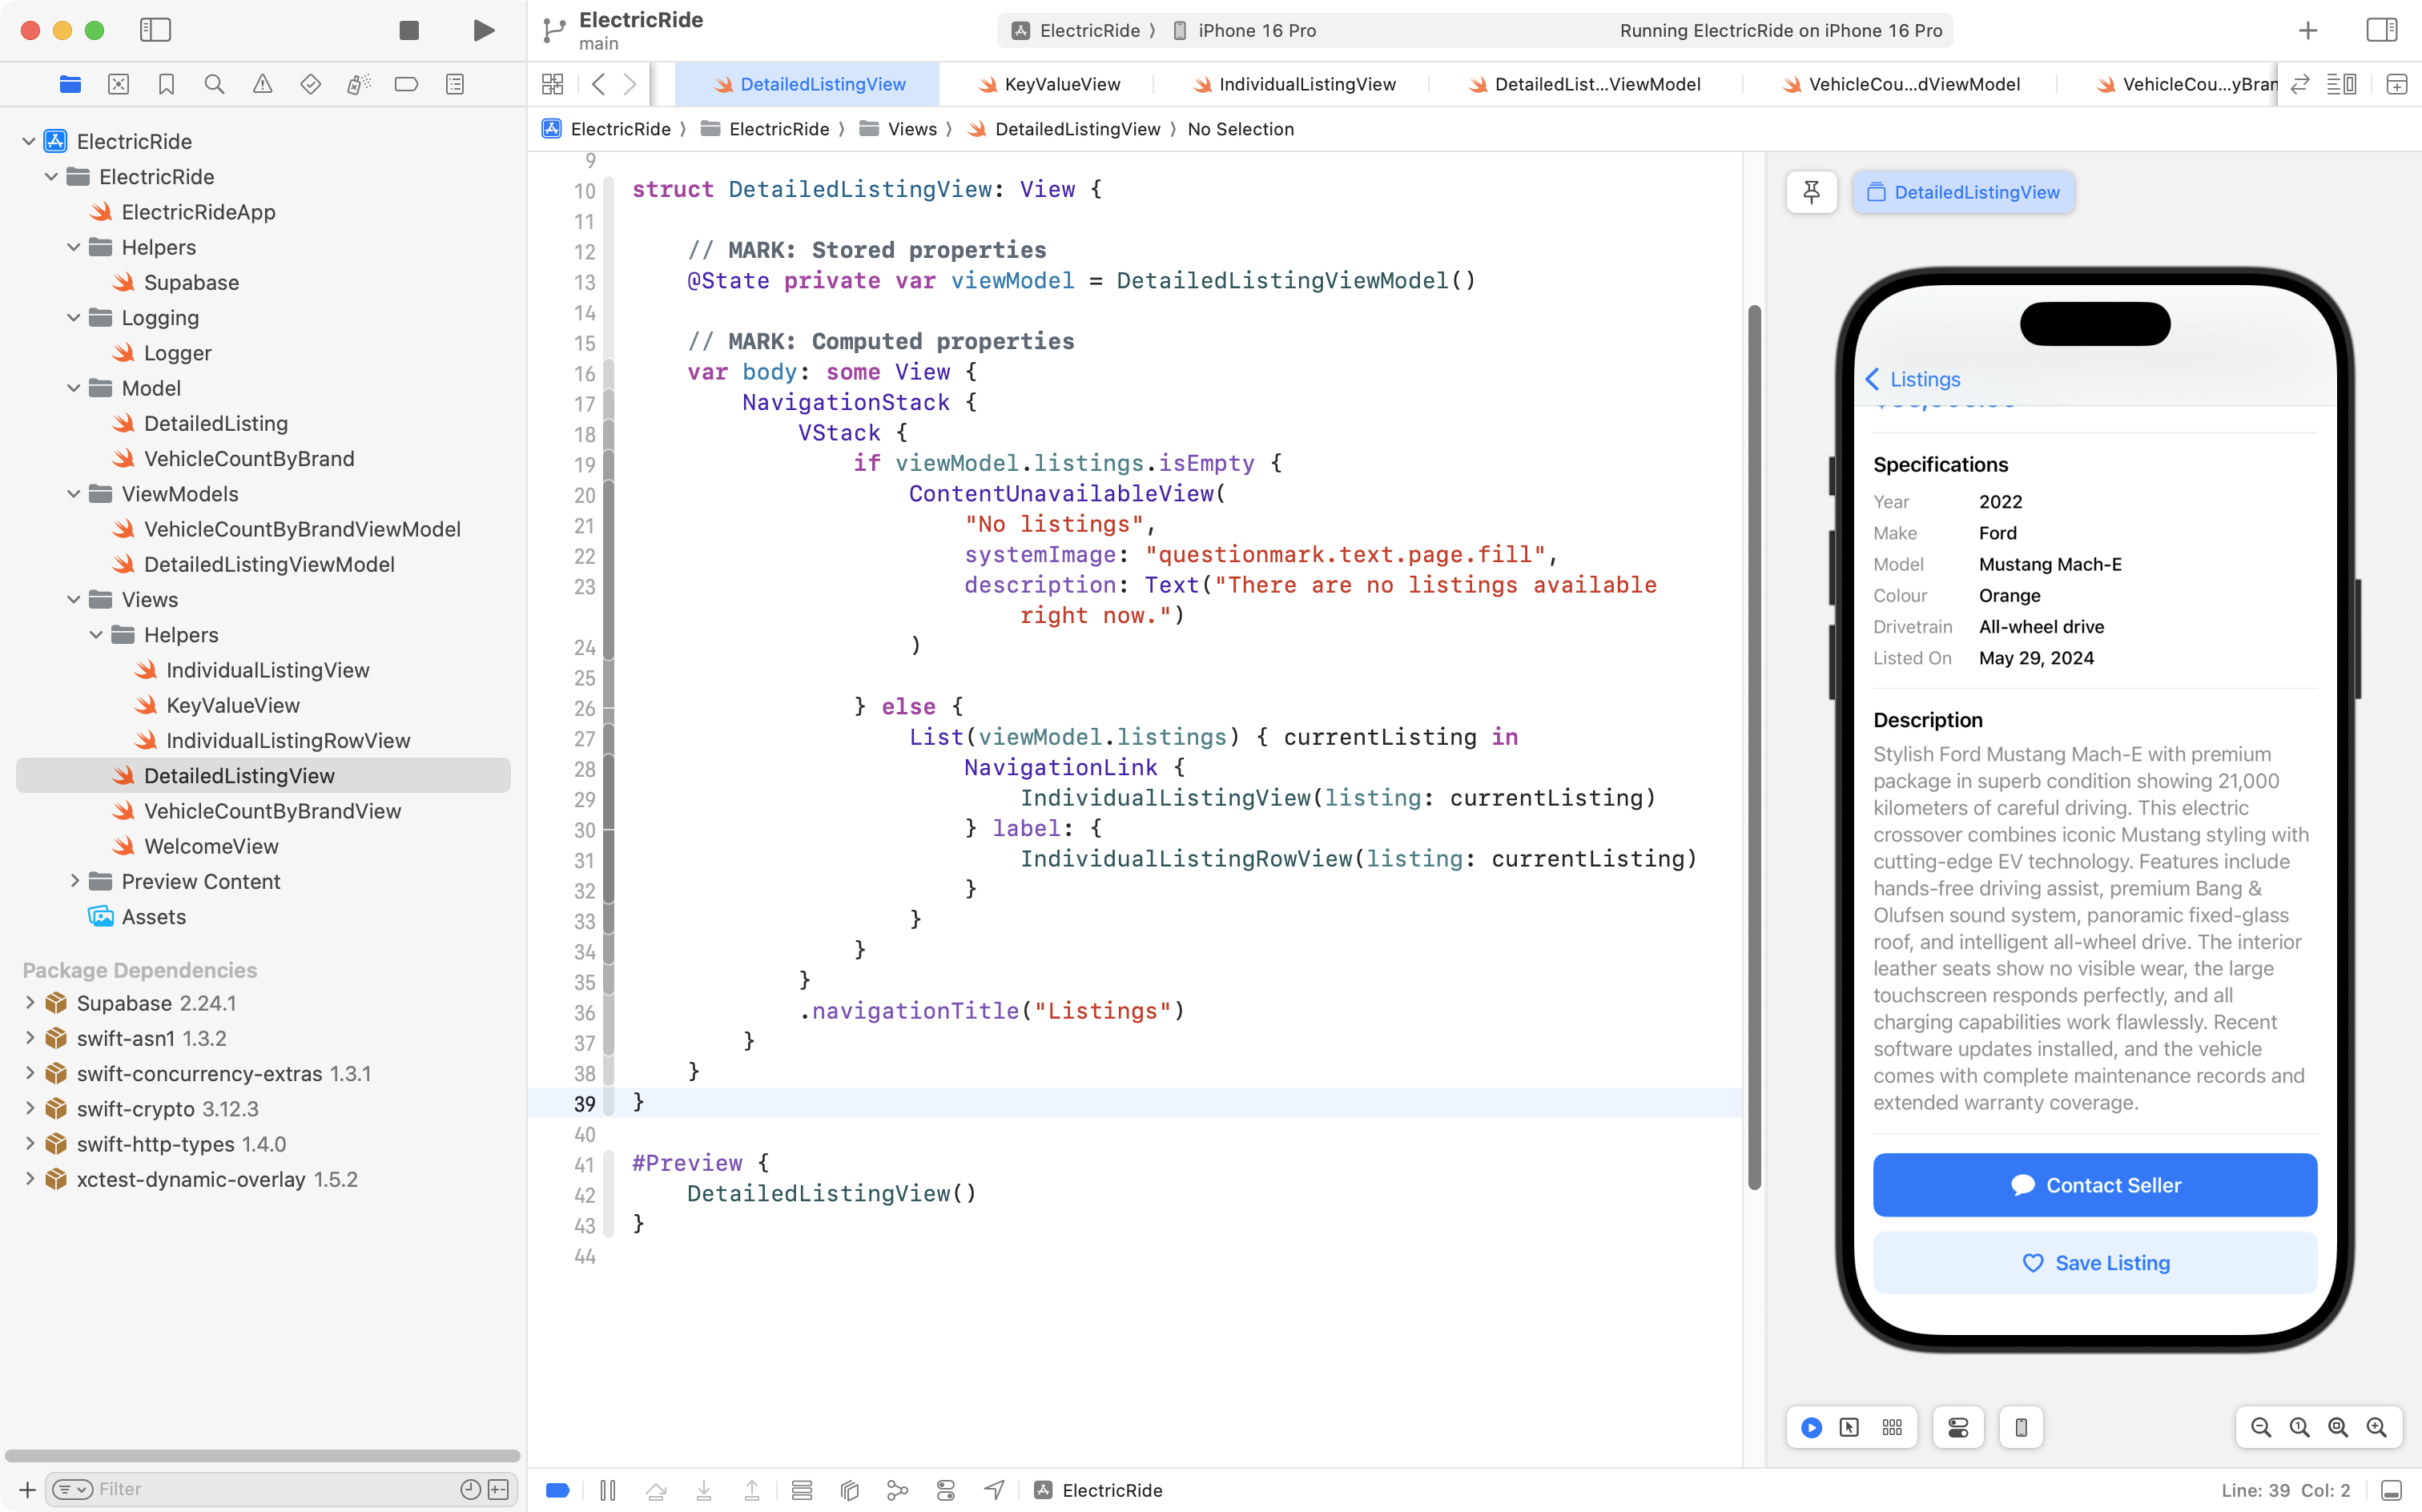
Here is the view Mr. Gordon created – it is very similar to DetailedListingView:
NOTE
The structures we have defined to hold listing information –
DetailedListingandSavedListing– contain many similar properties. This is true because the information being retrieved from the database ultimately comes from the same database view. In the app view above, we create a temporary instance ofDetailedListingusing the properties of each saved listing. We do this so that we can re-useIndividualListingViewandIndividualListingRowView.There is some re-factoring that could be done to make this more efficient, but that is a task for the future – we will stay focused on simulating how the app looks for a logged in user, right now.
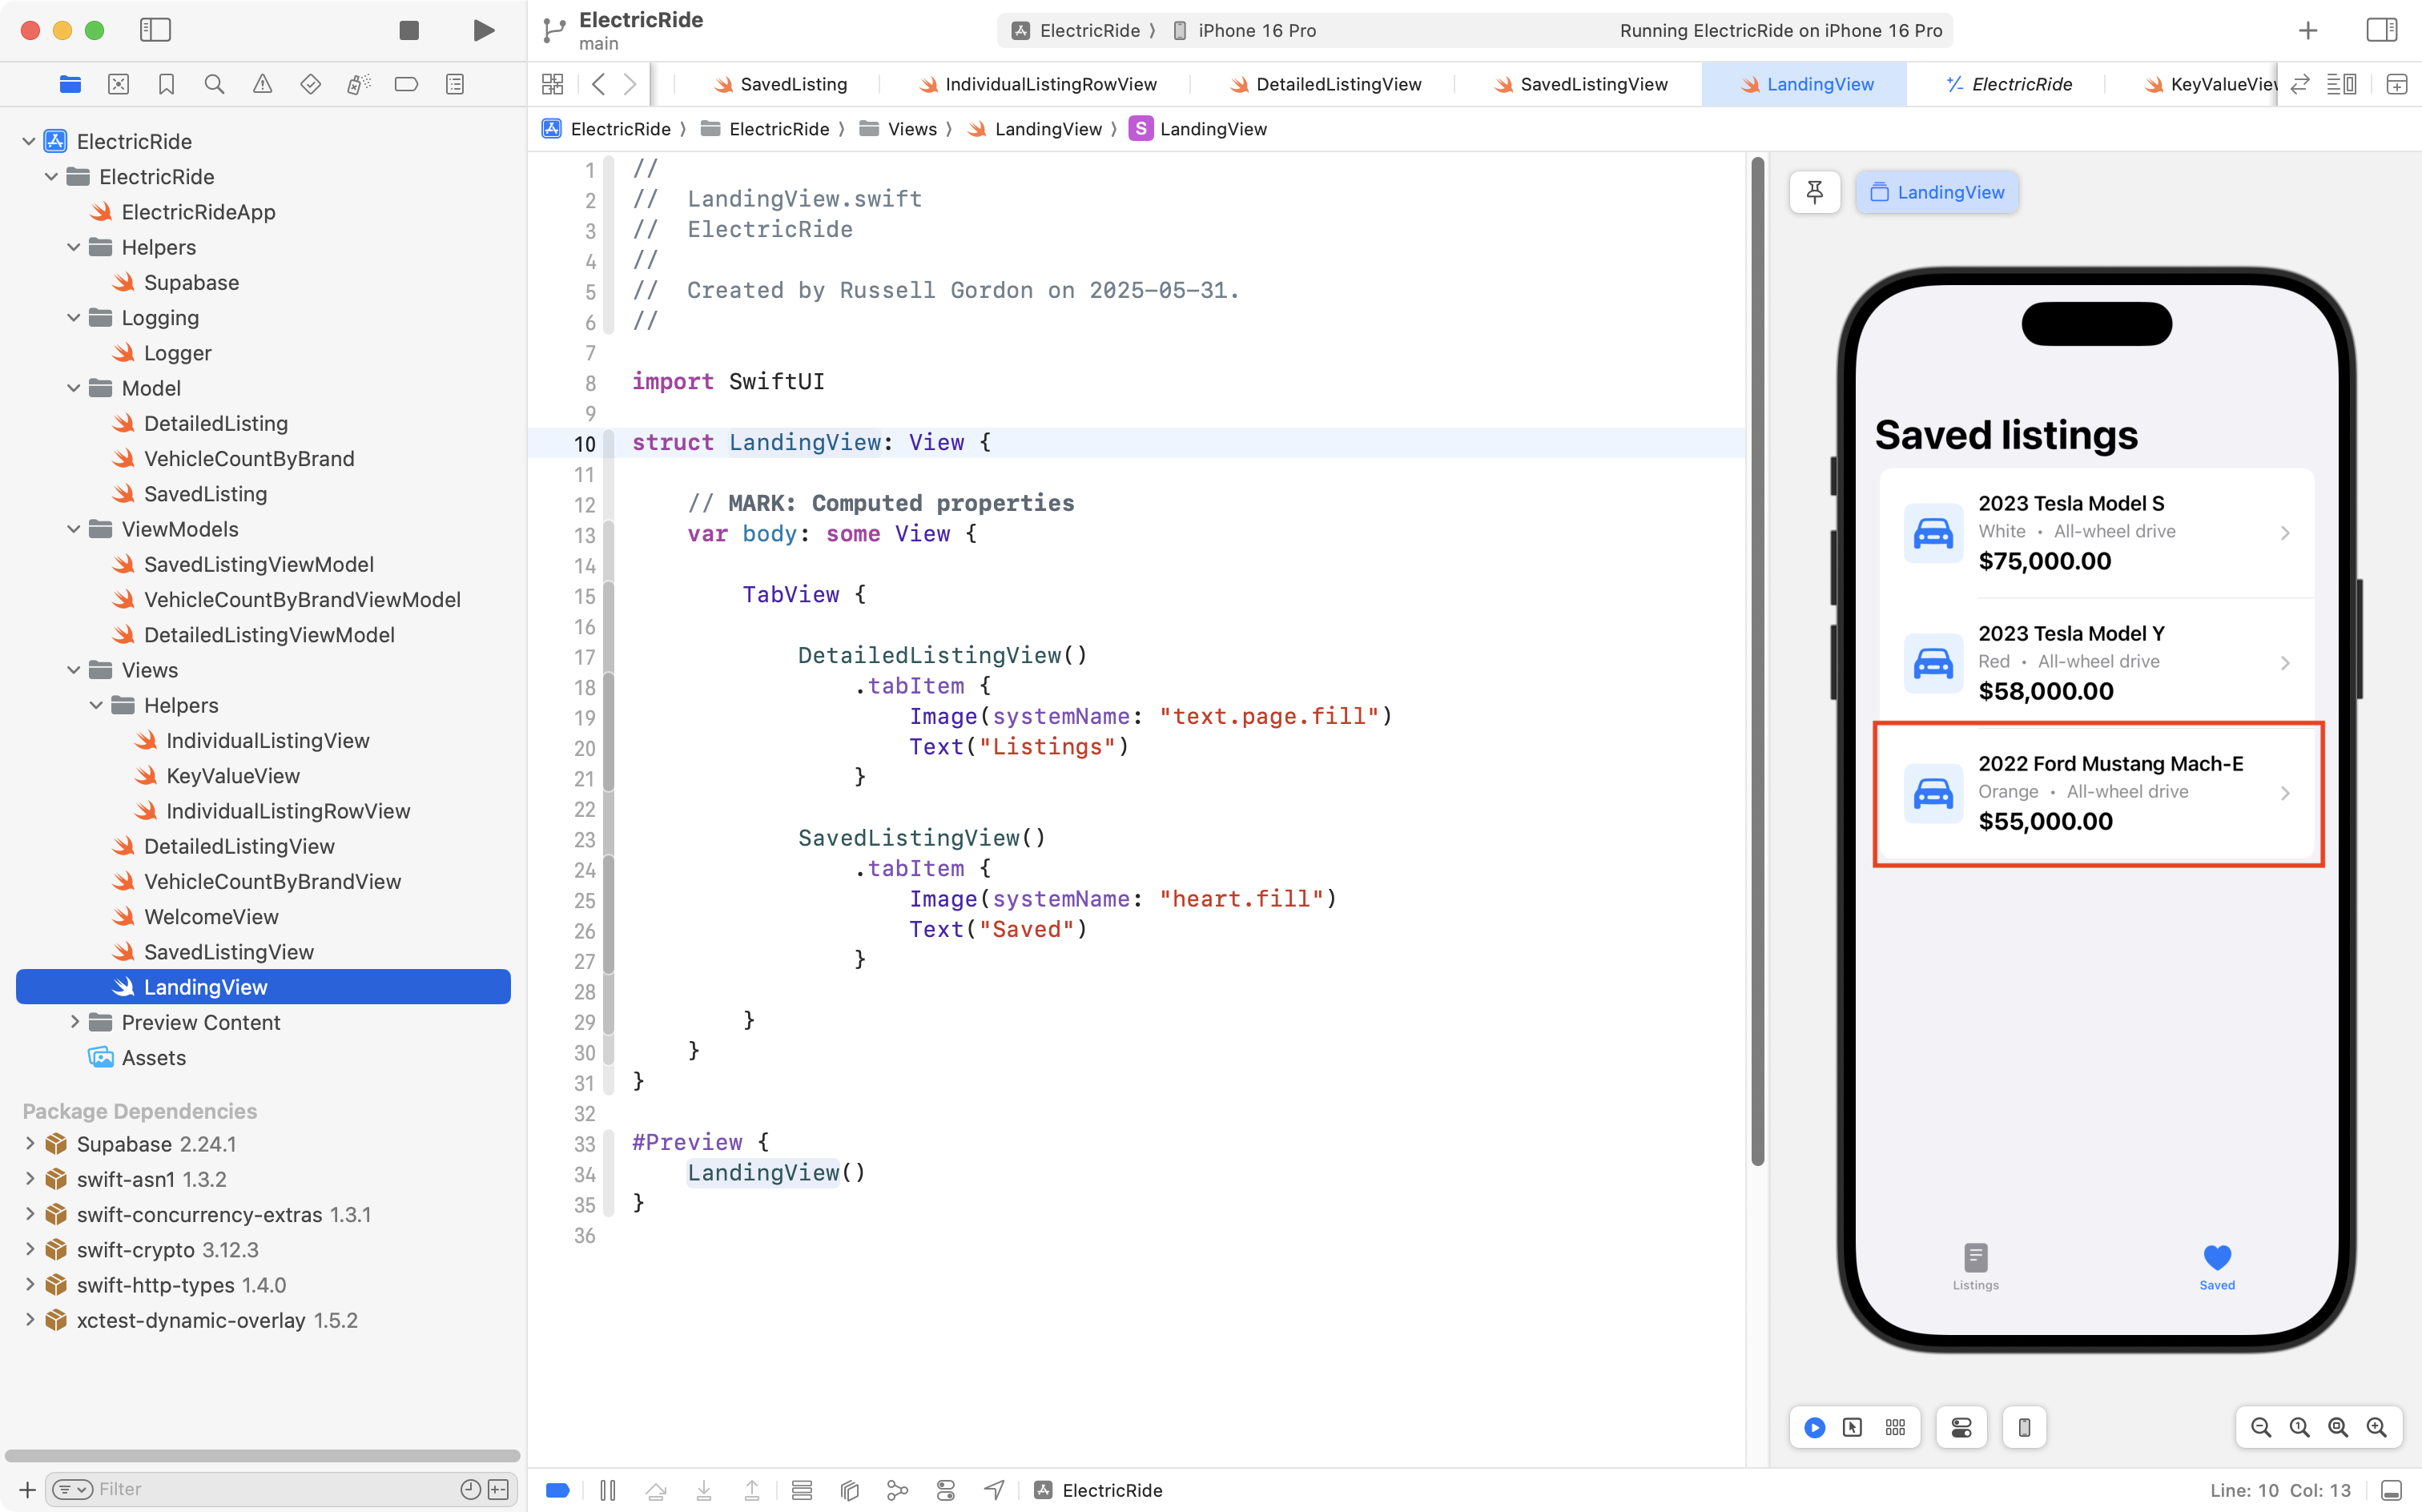
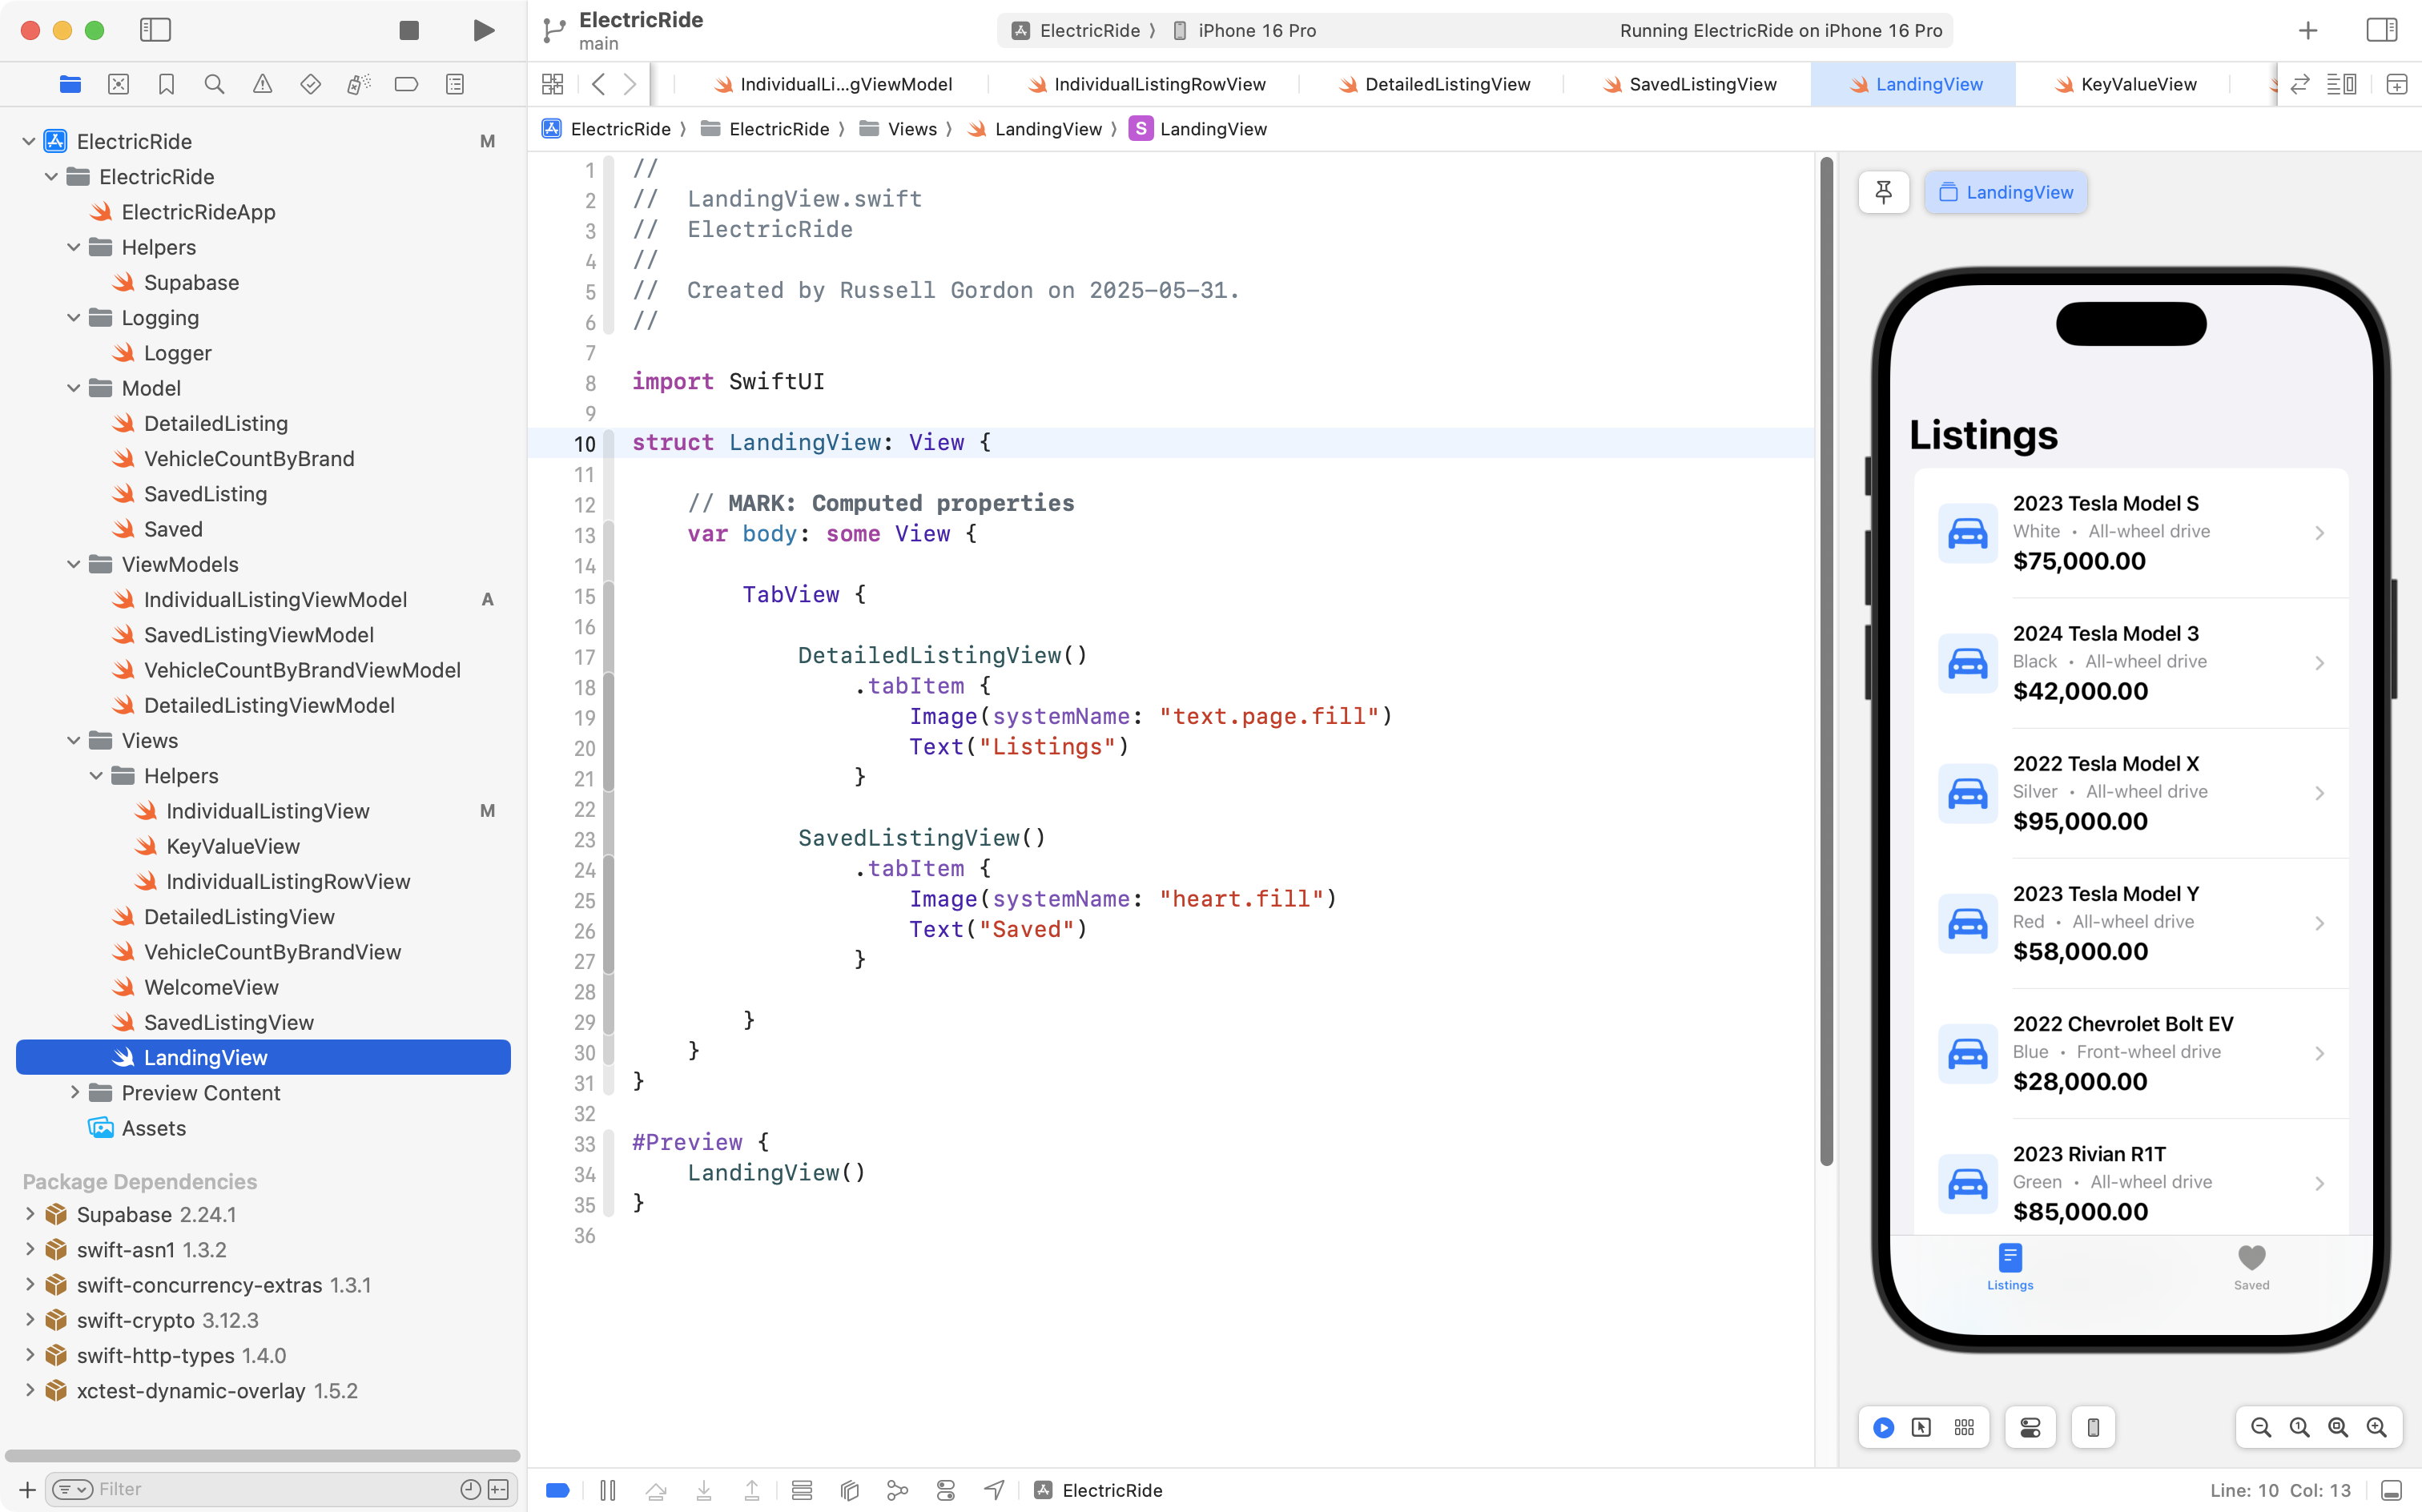
The app should have a tab view to let the user switch between seeing all listings, and just the listings they have saved.
So, Mr. Gordon authored this view which adds the tabs:
Save new listings
The app needs to let the user add new saved listings.
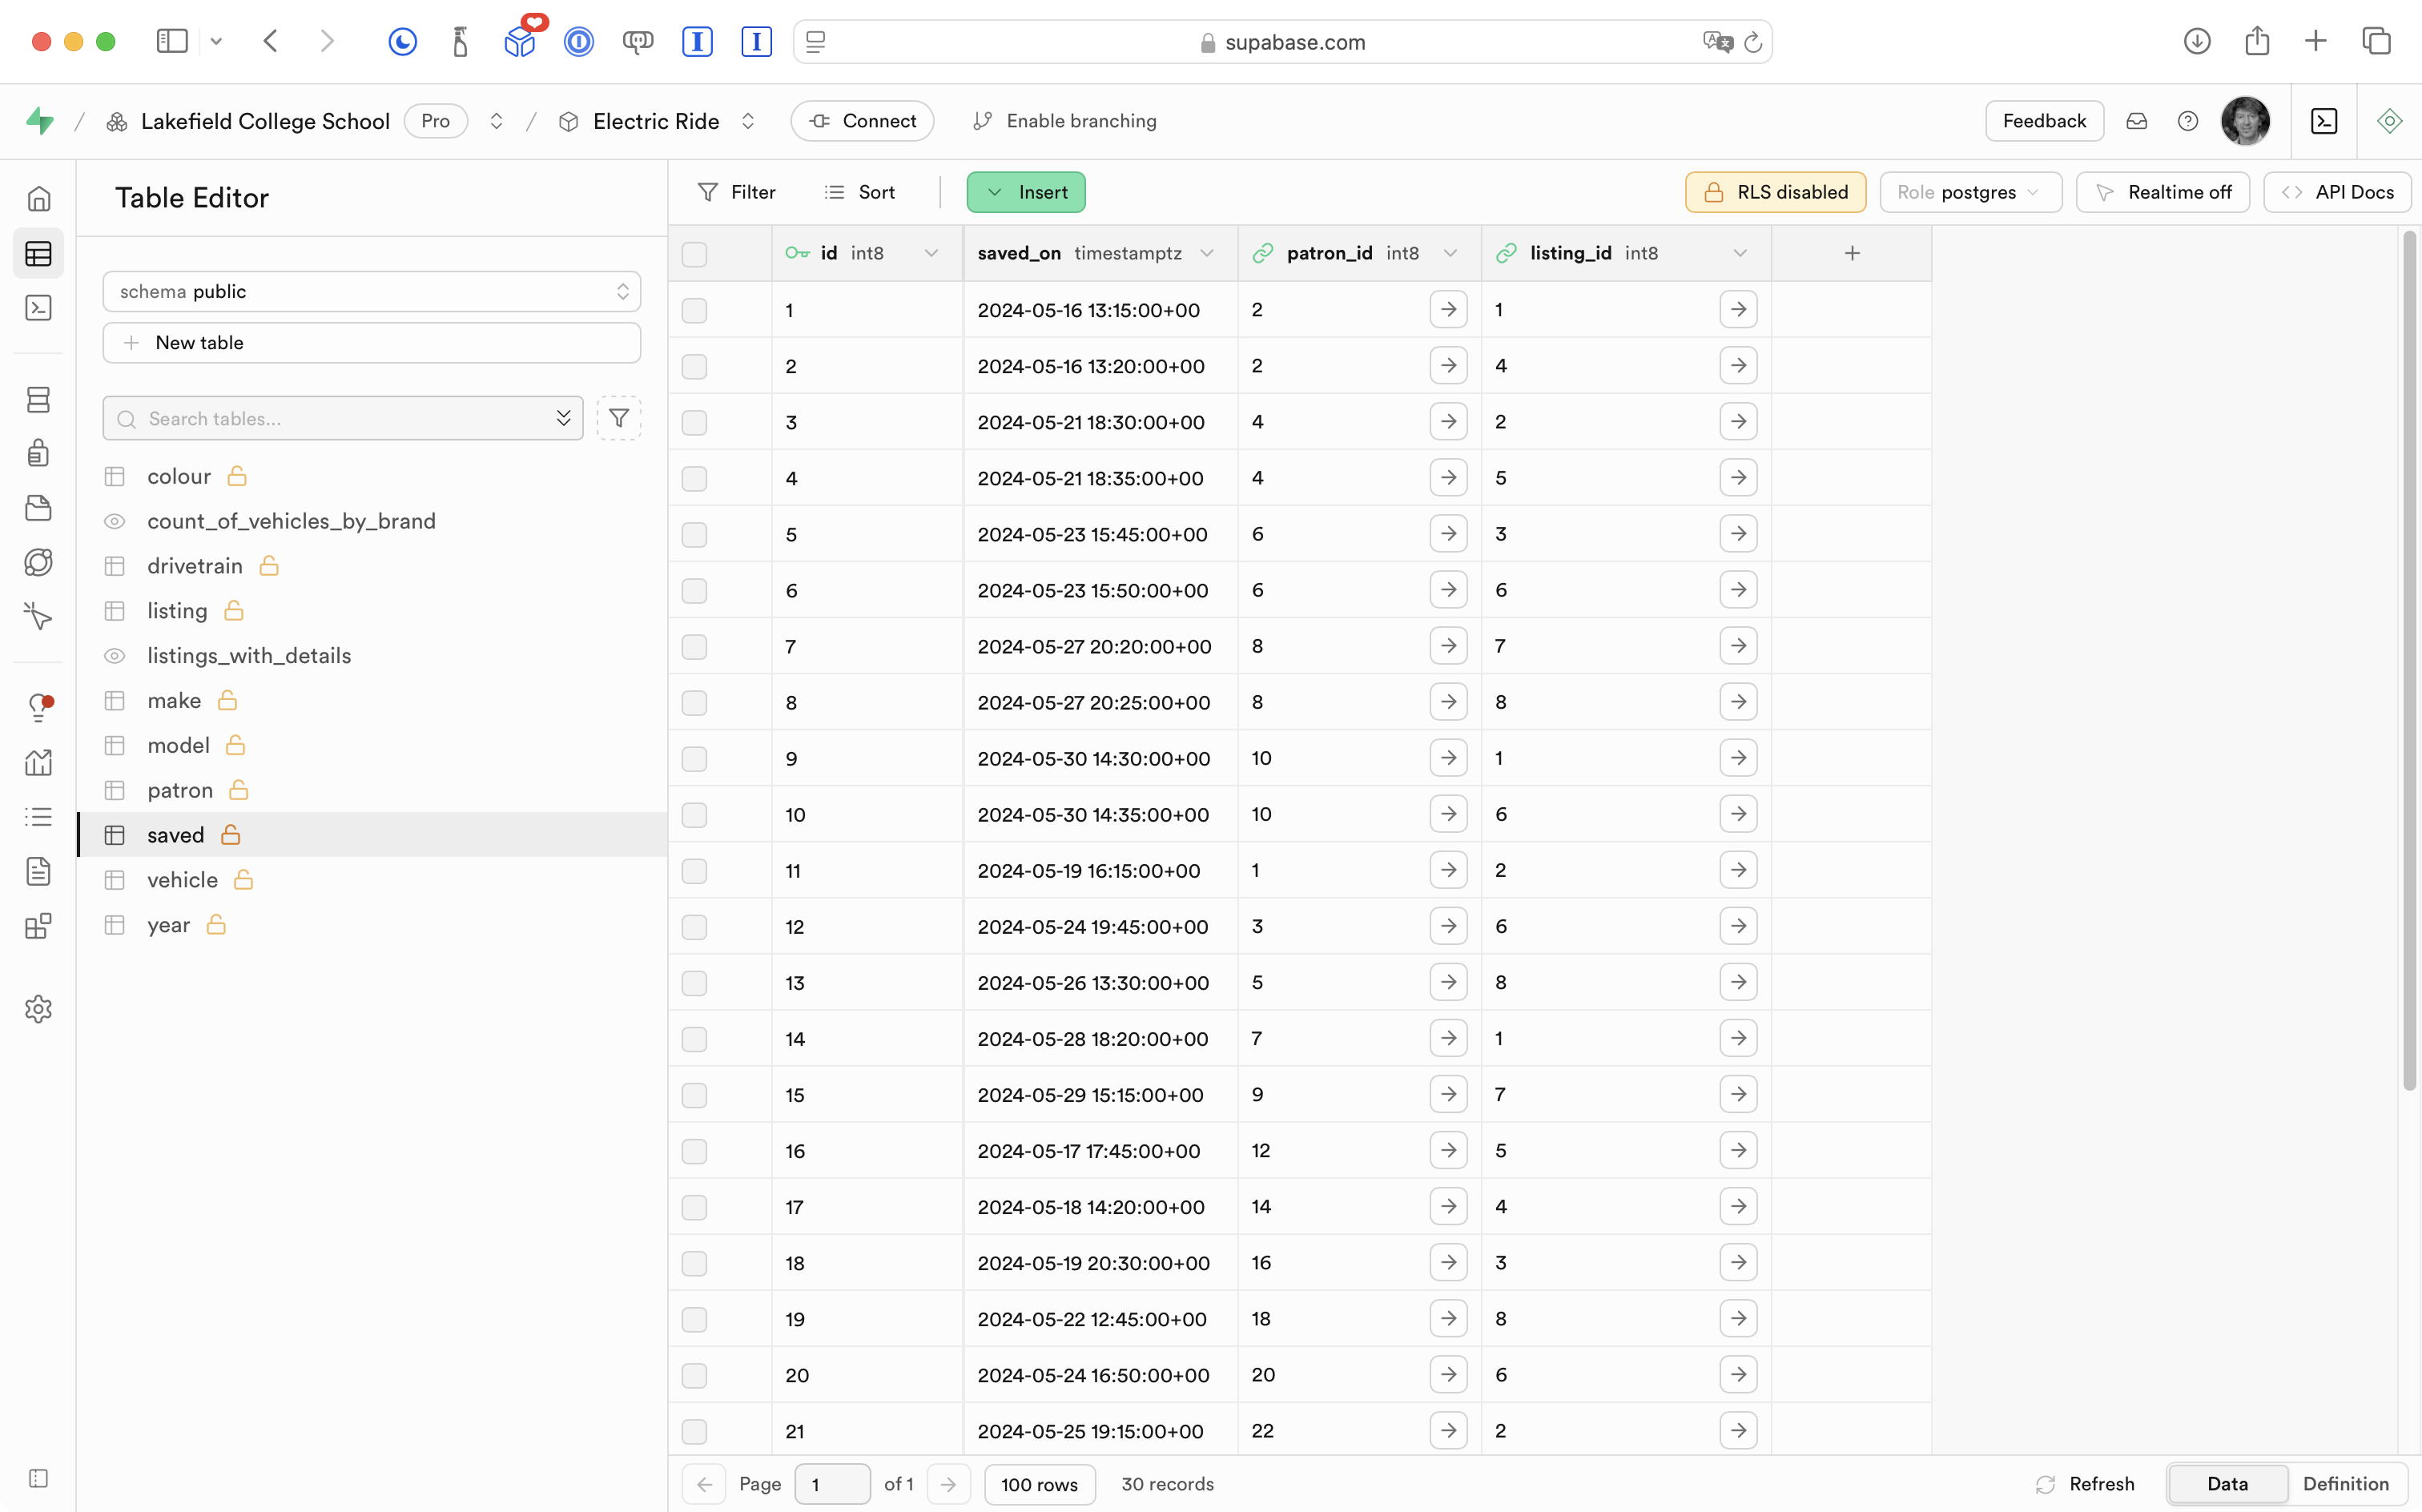
This will involve adding rows to this table in the database:
In pure SQL, all that involves is the following:

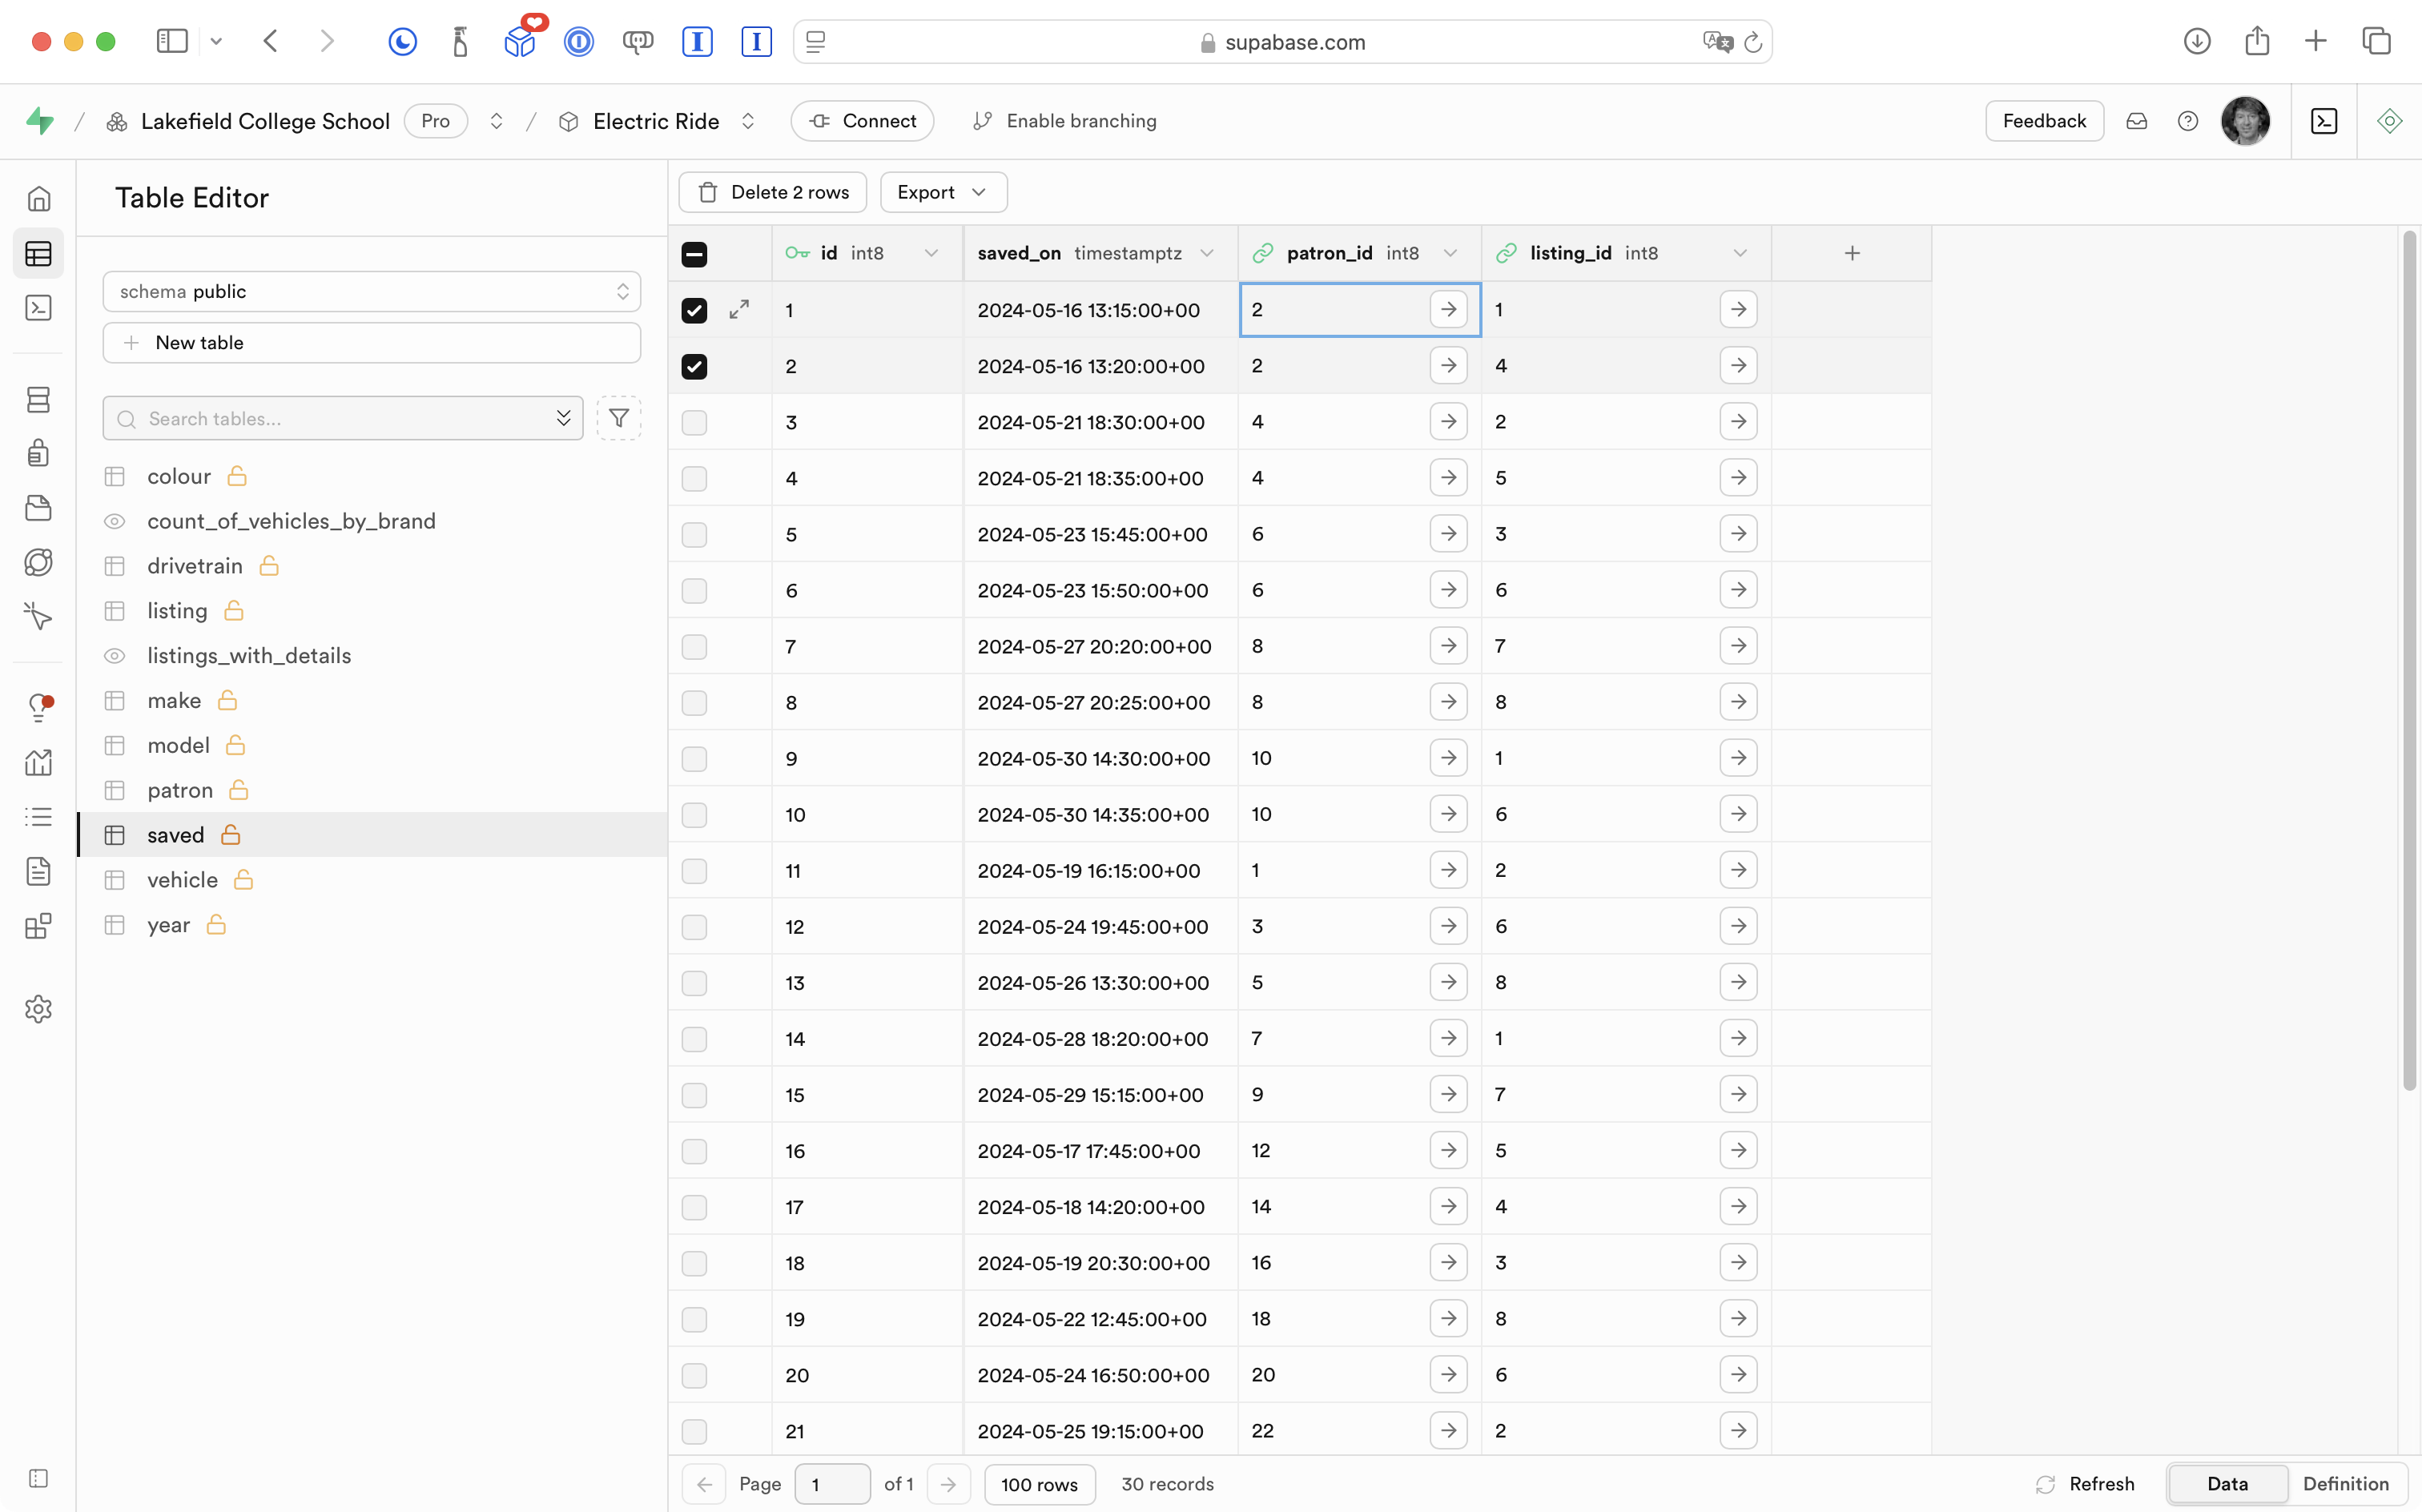
After running that SQL, there is a new saved listing for this patron:
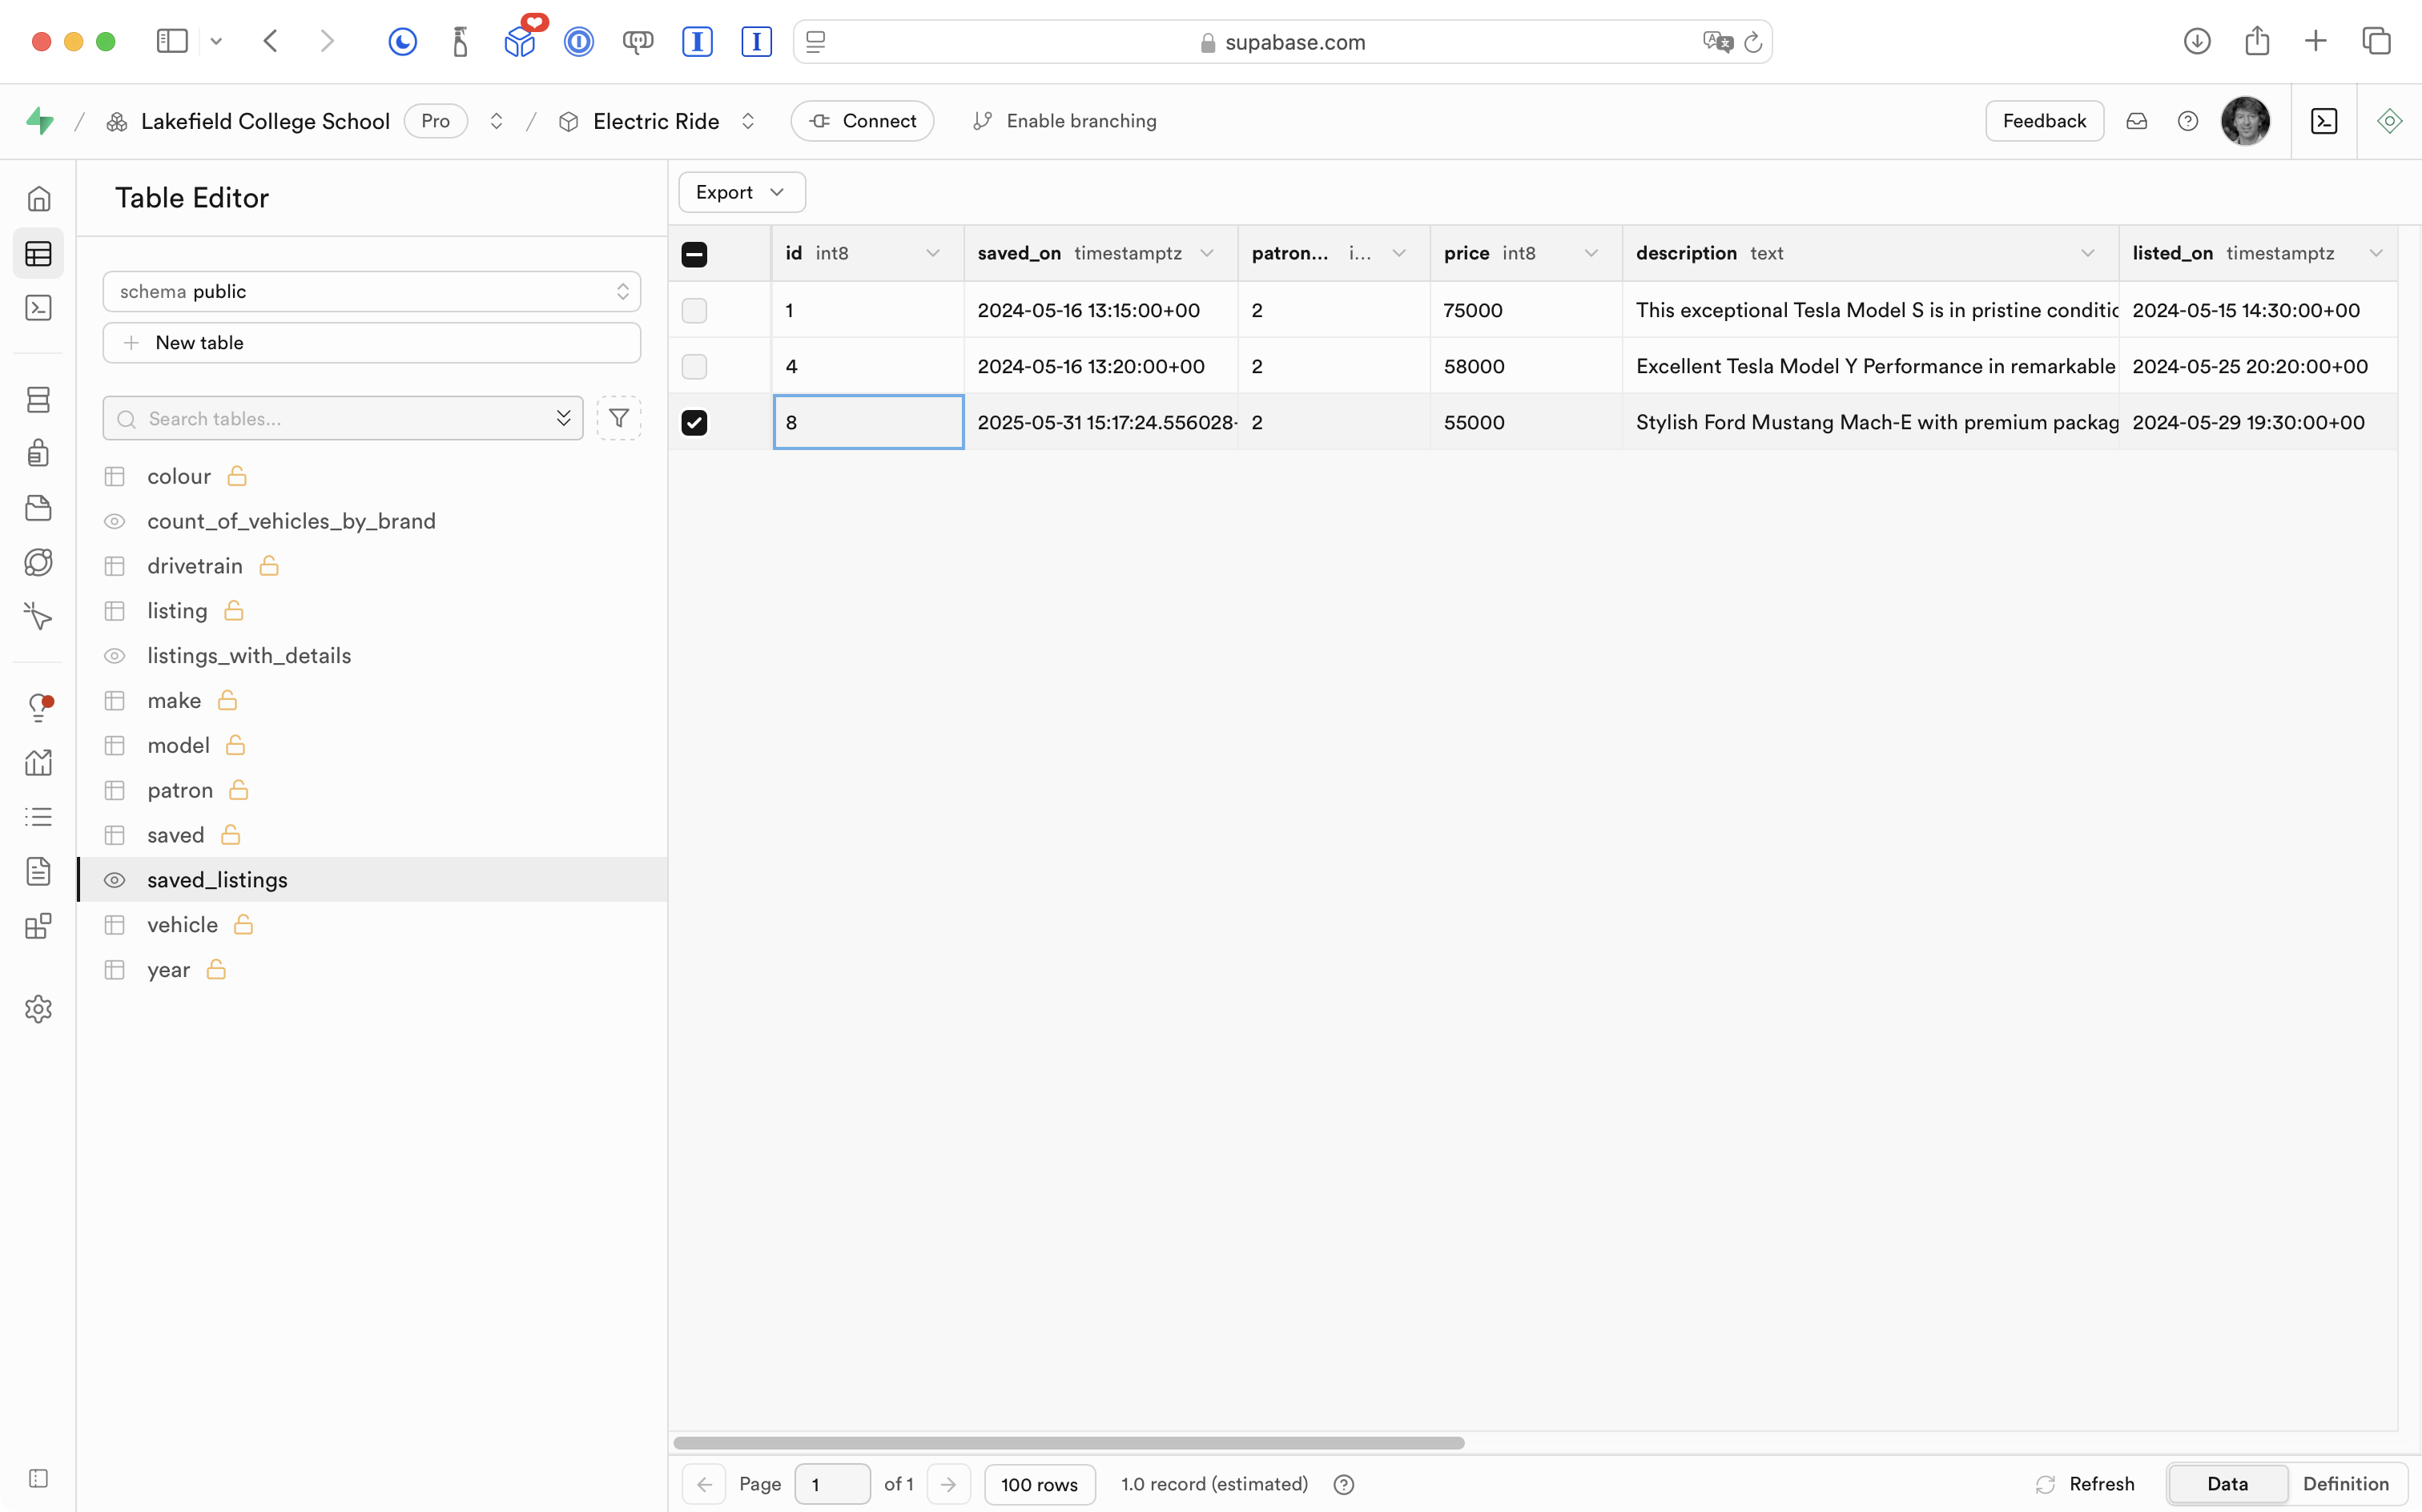
This is reflected in the app:
So what we need to do is run code in our app that is equivalent to running that INSERT INTO SQL statement.
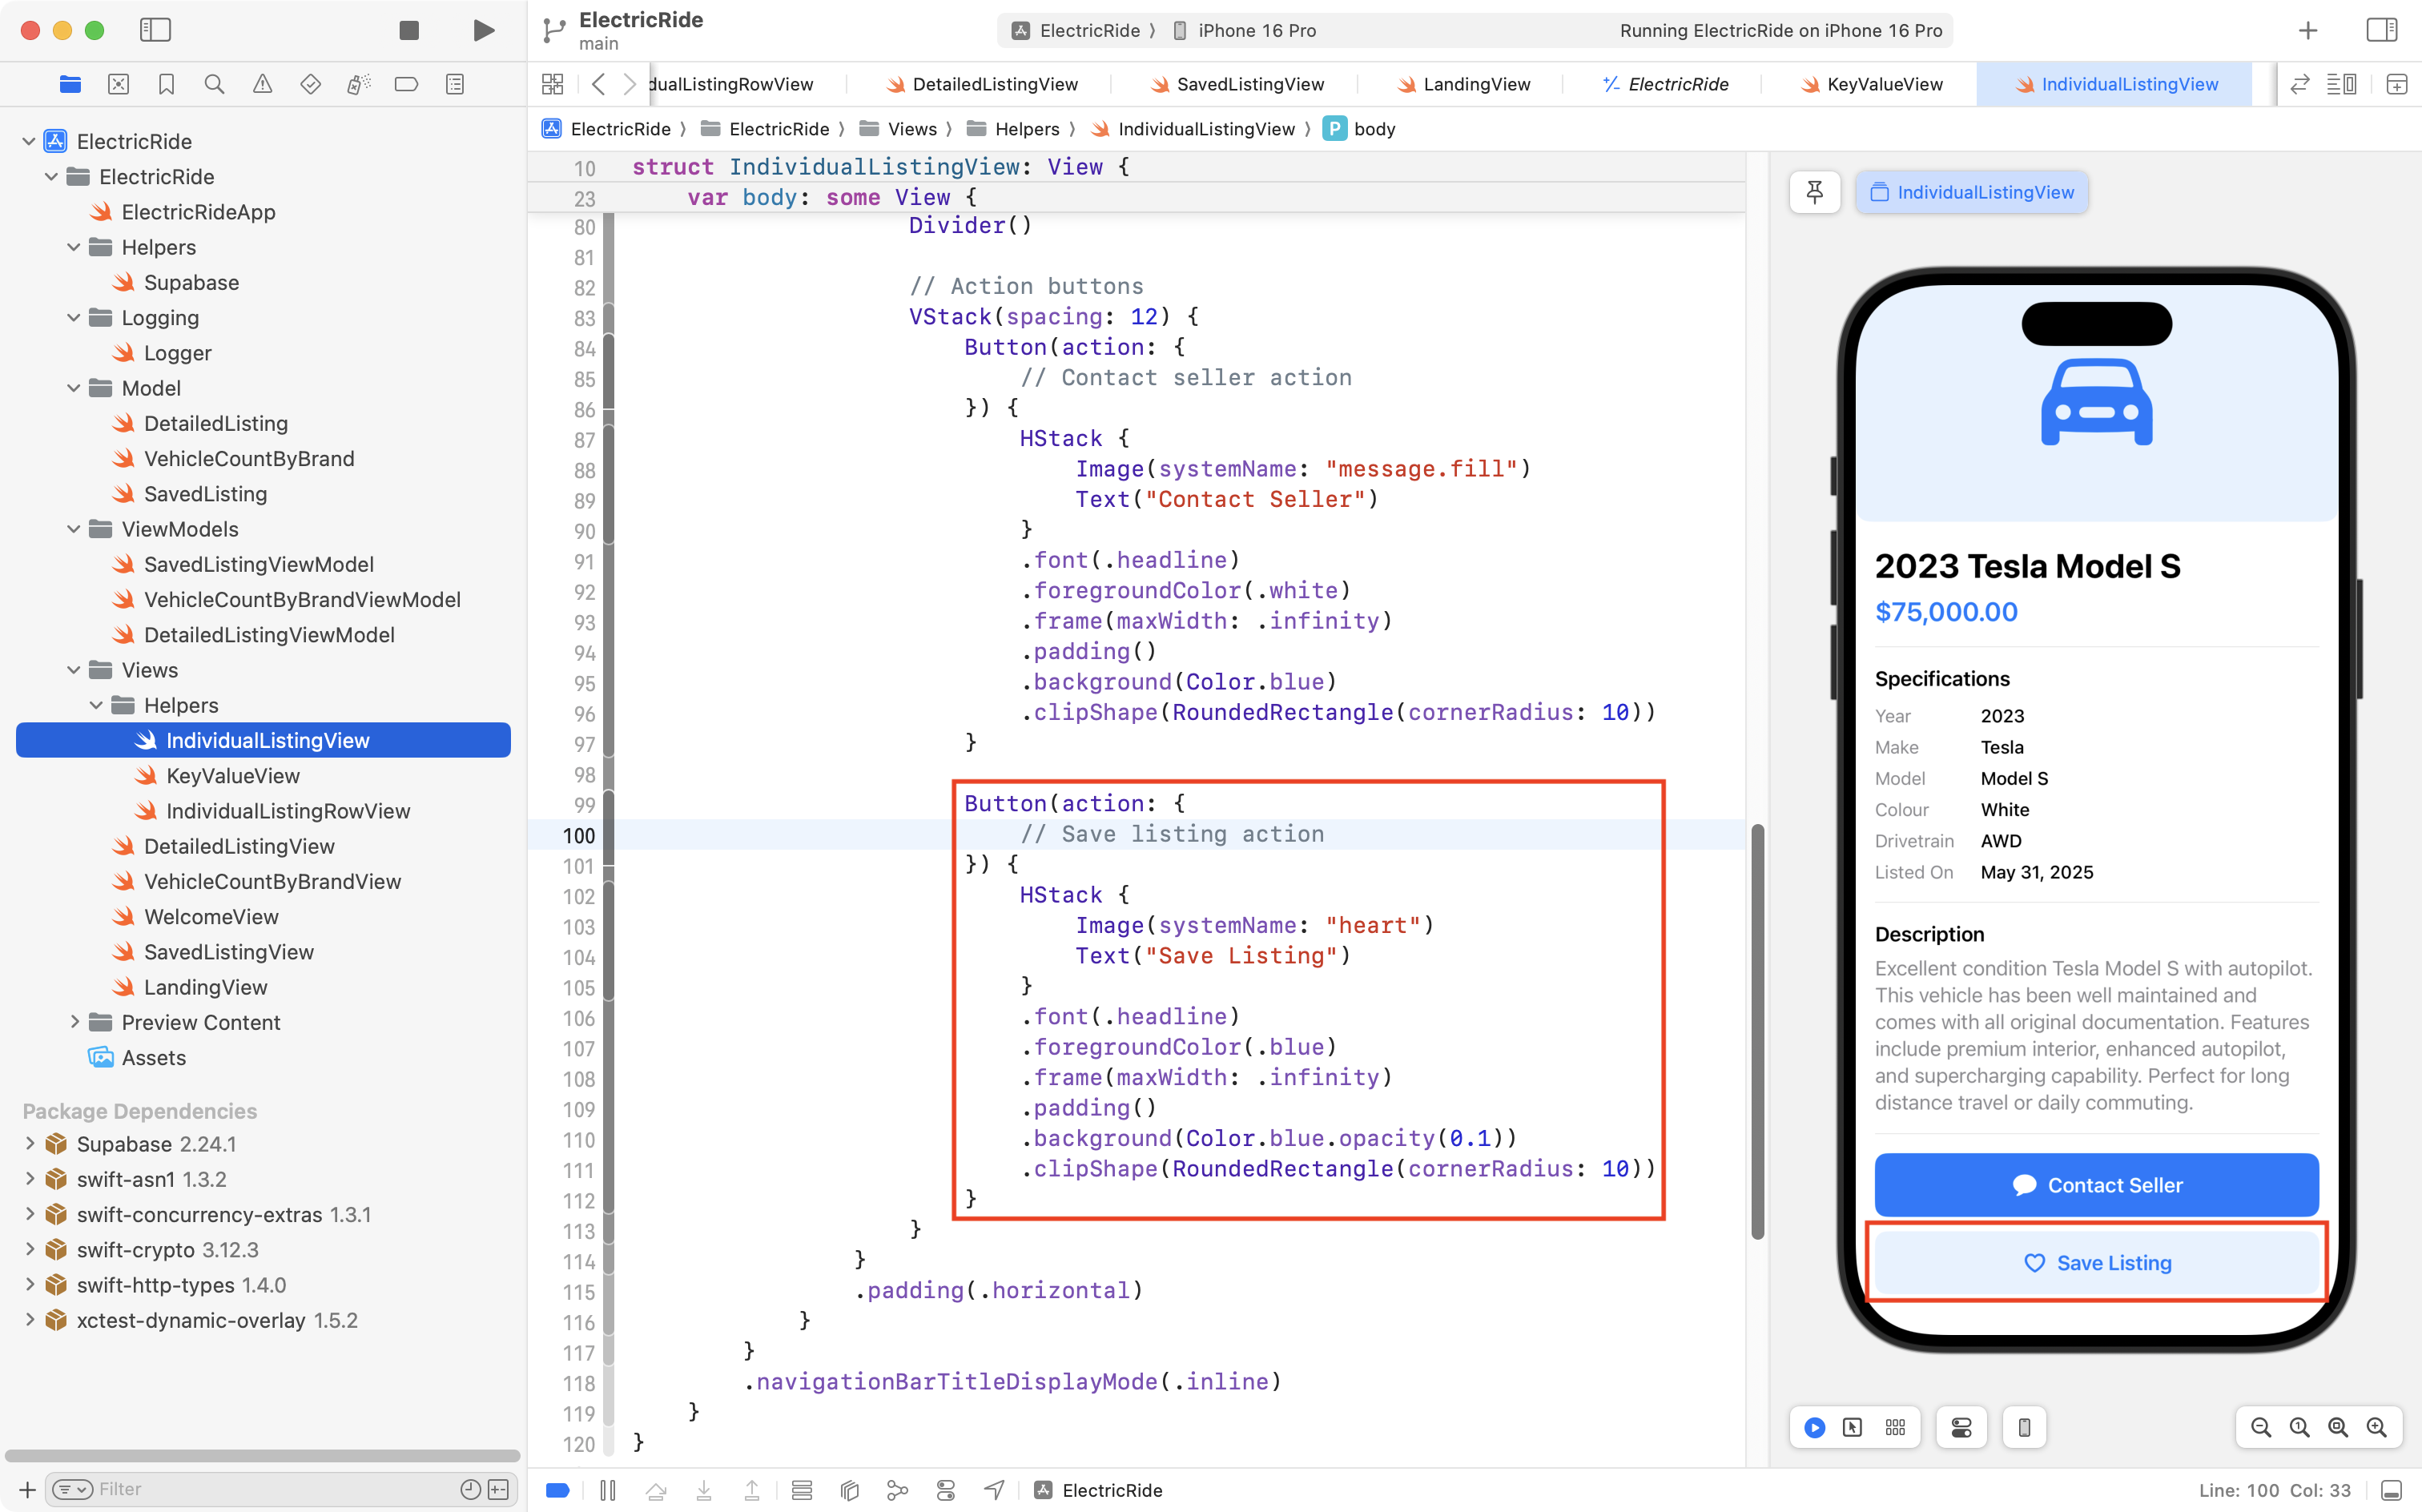
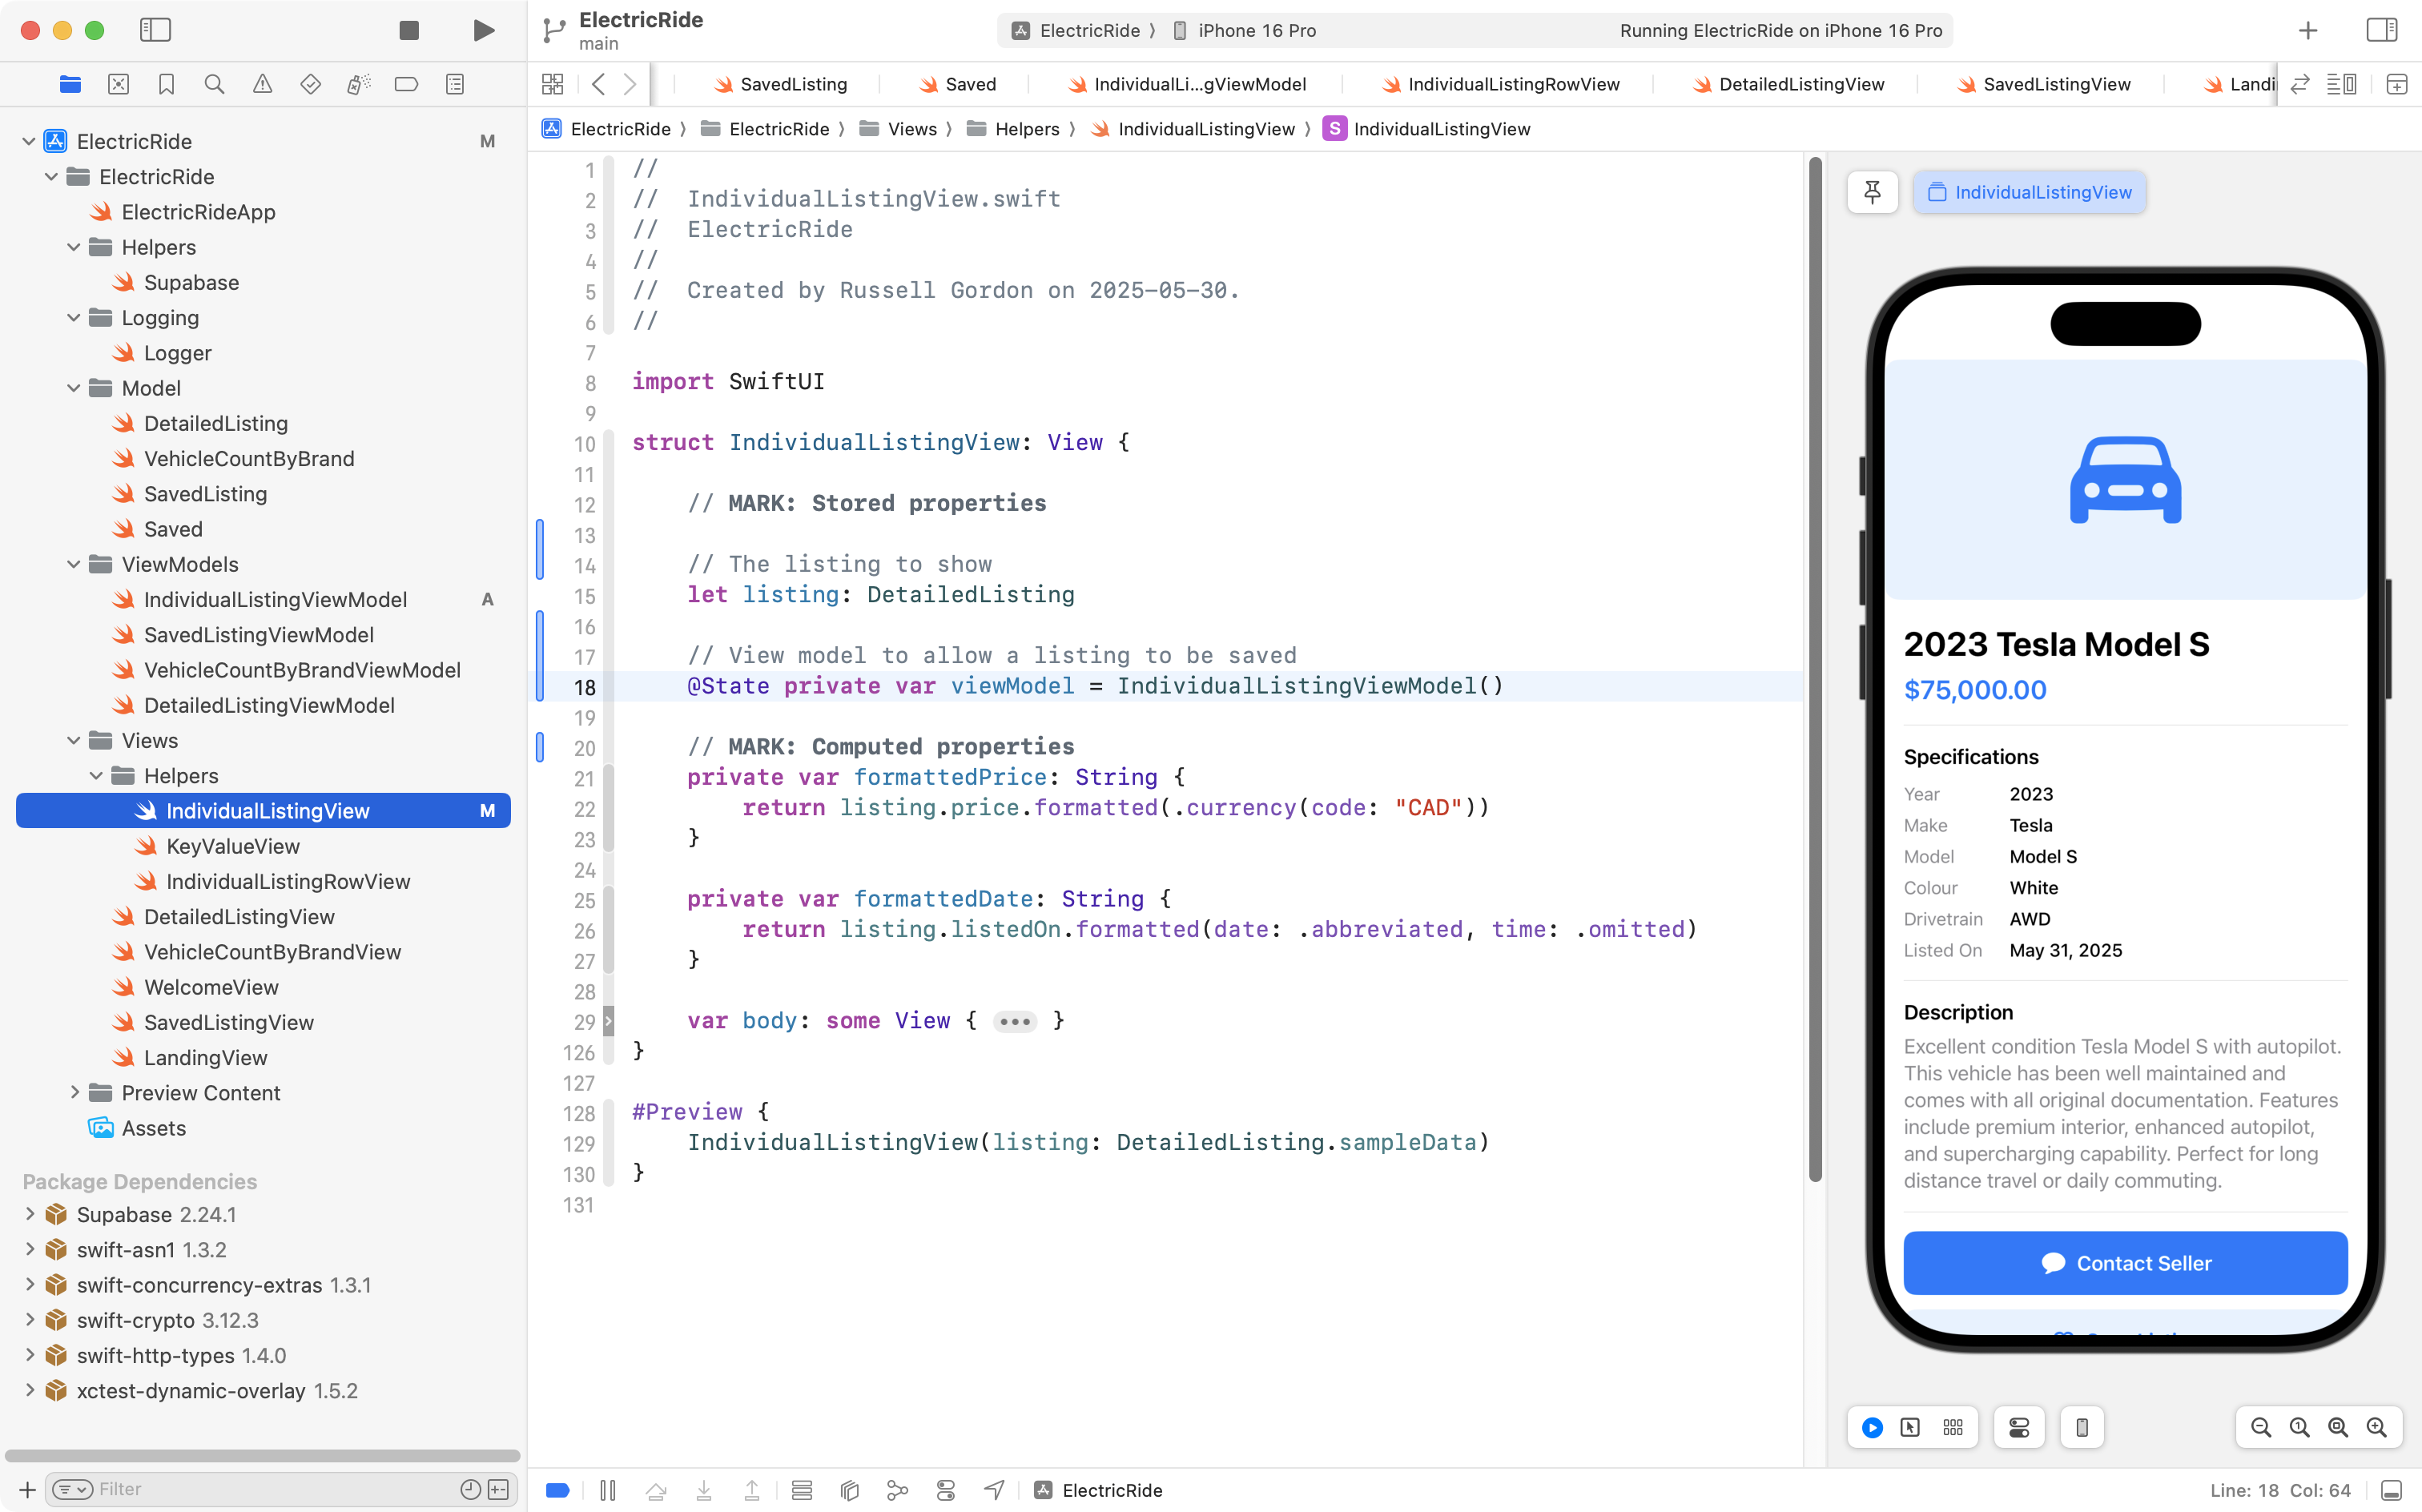
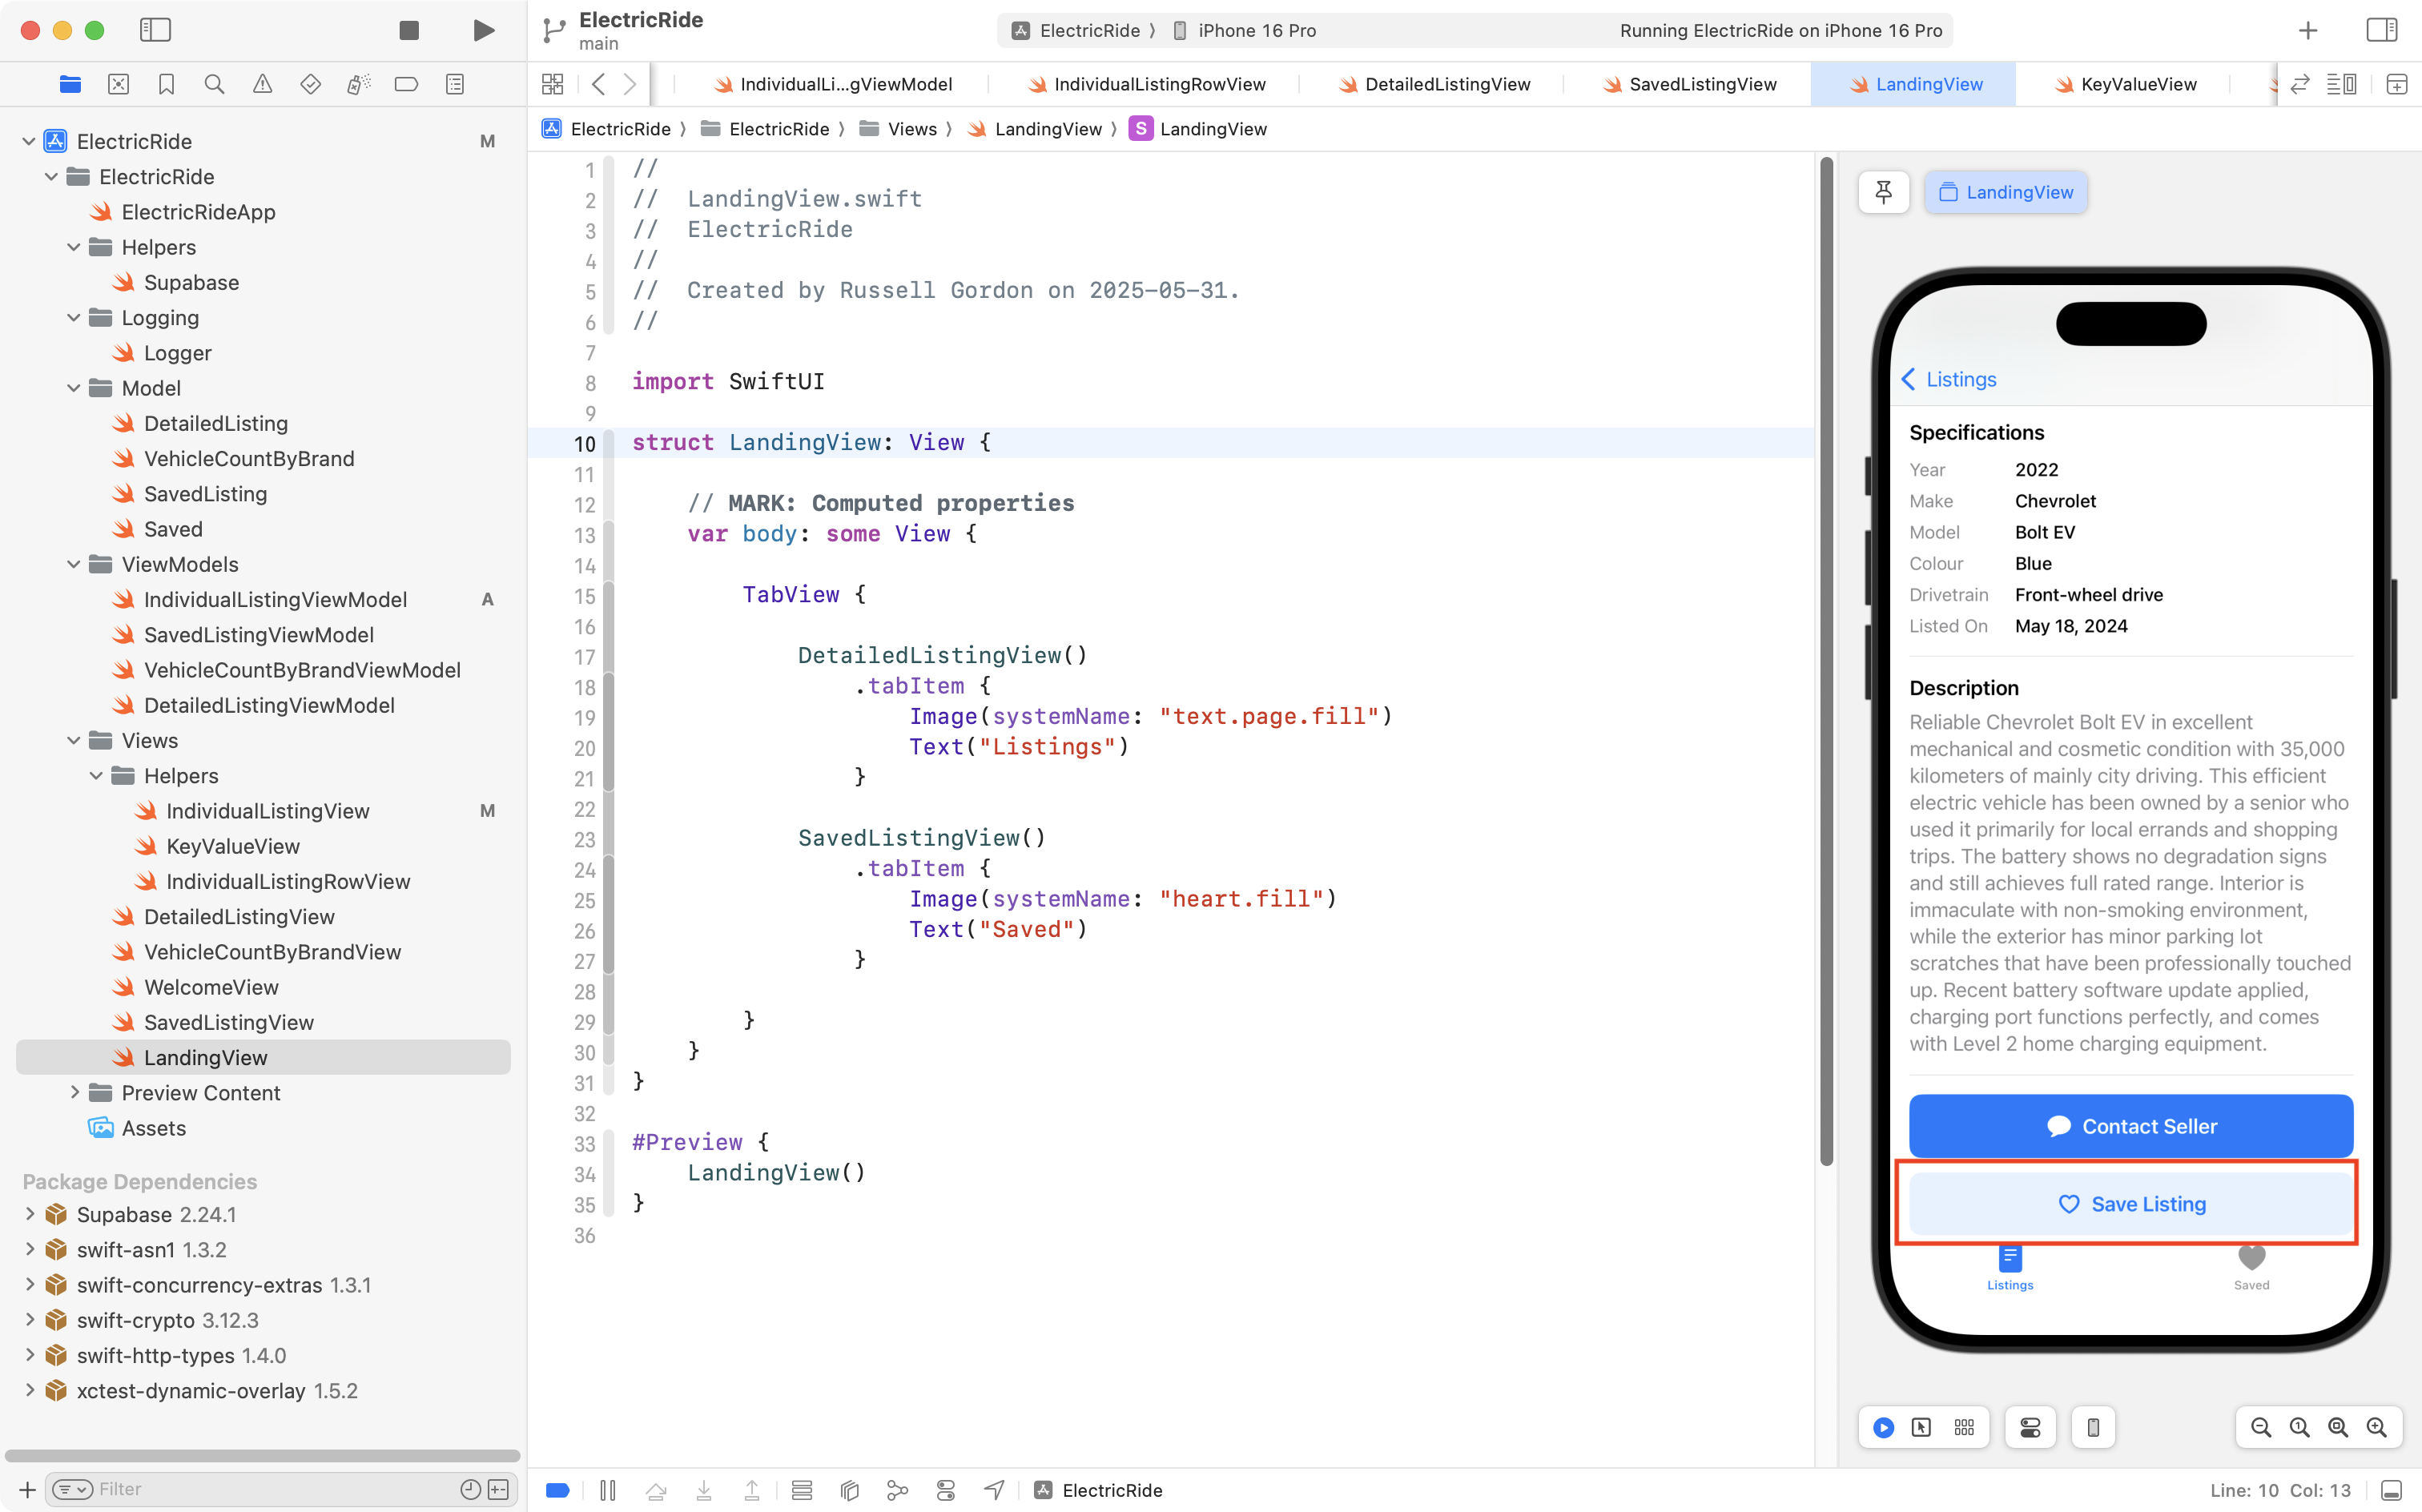
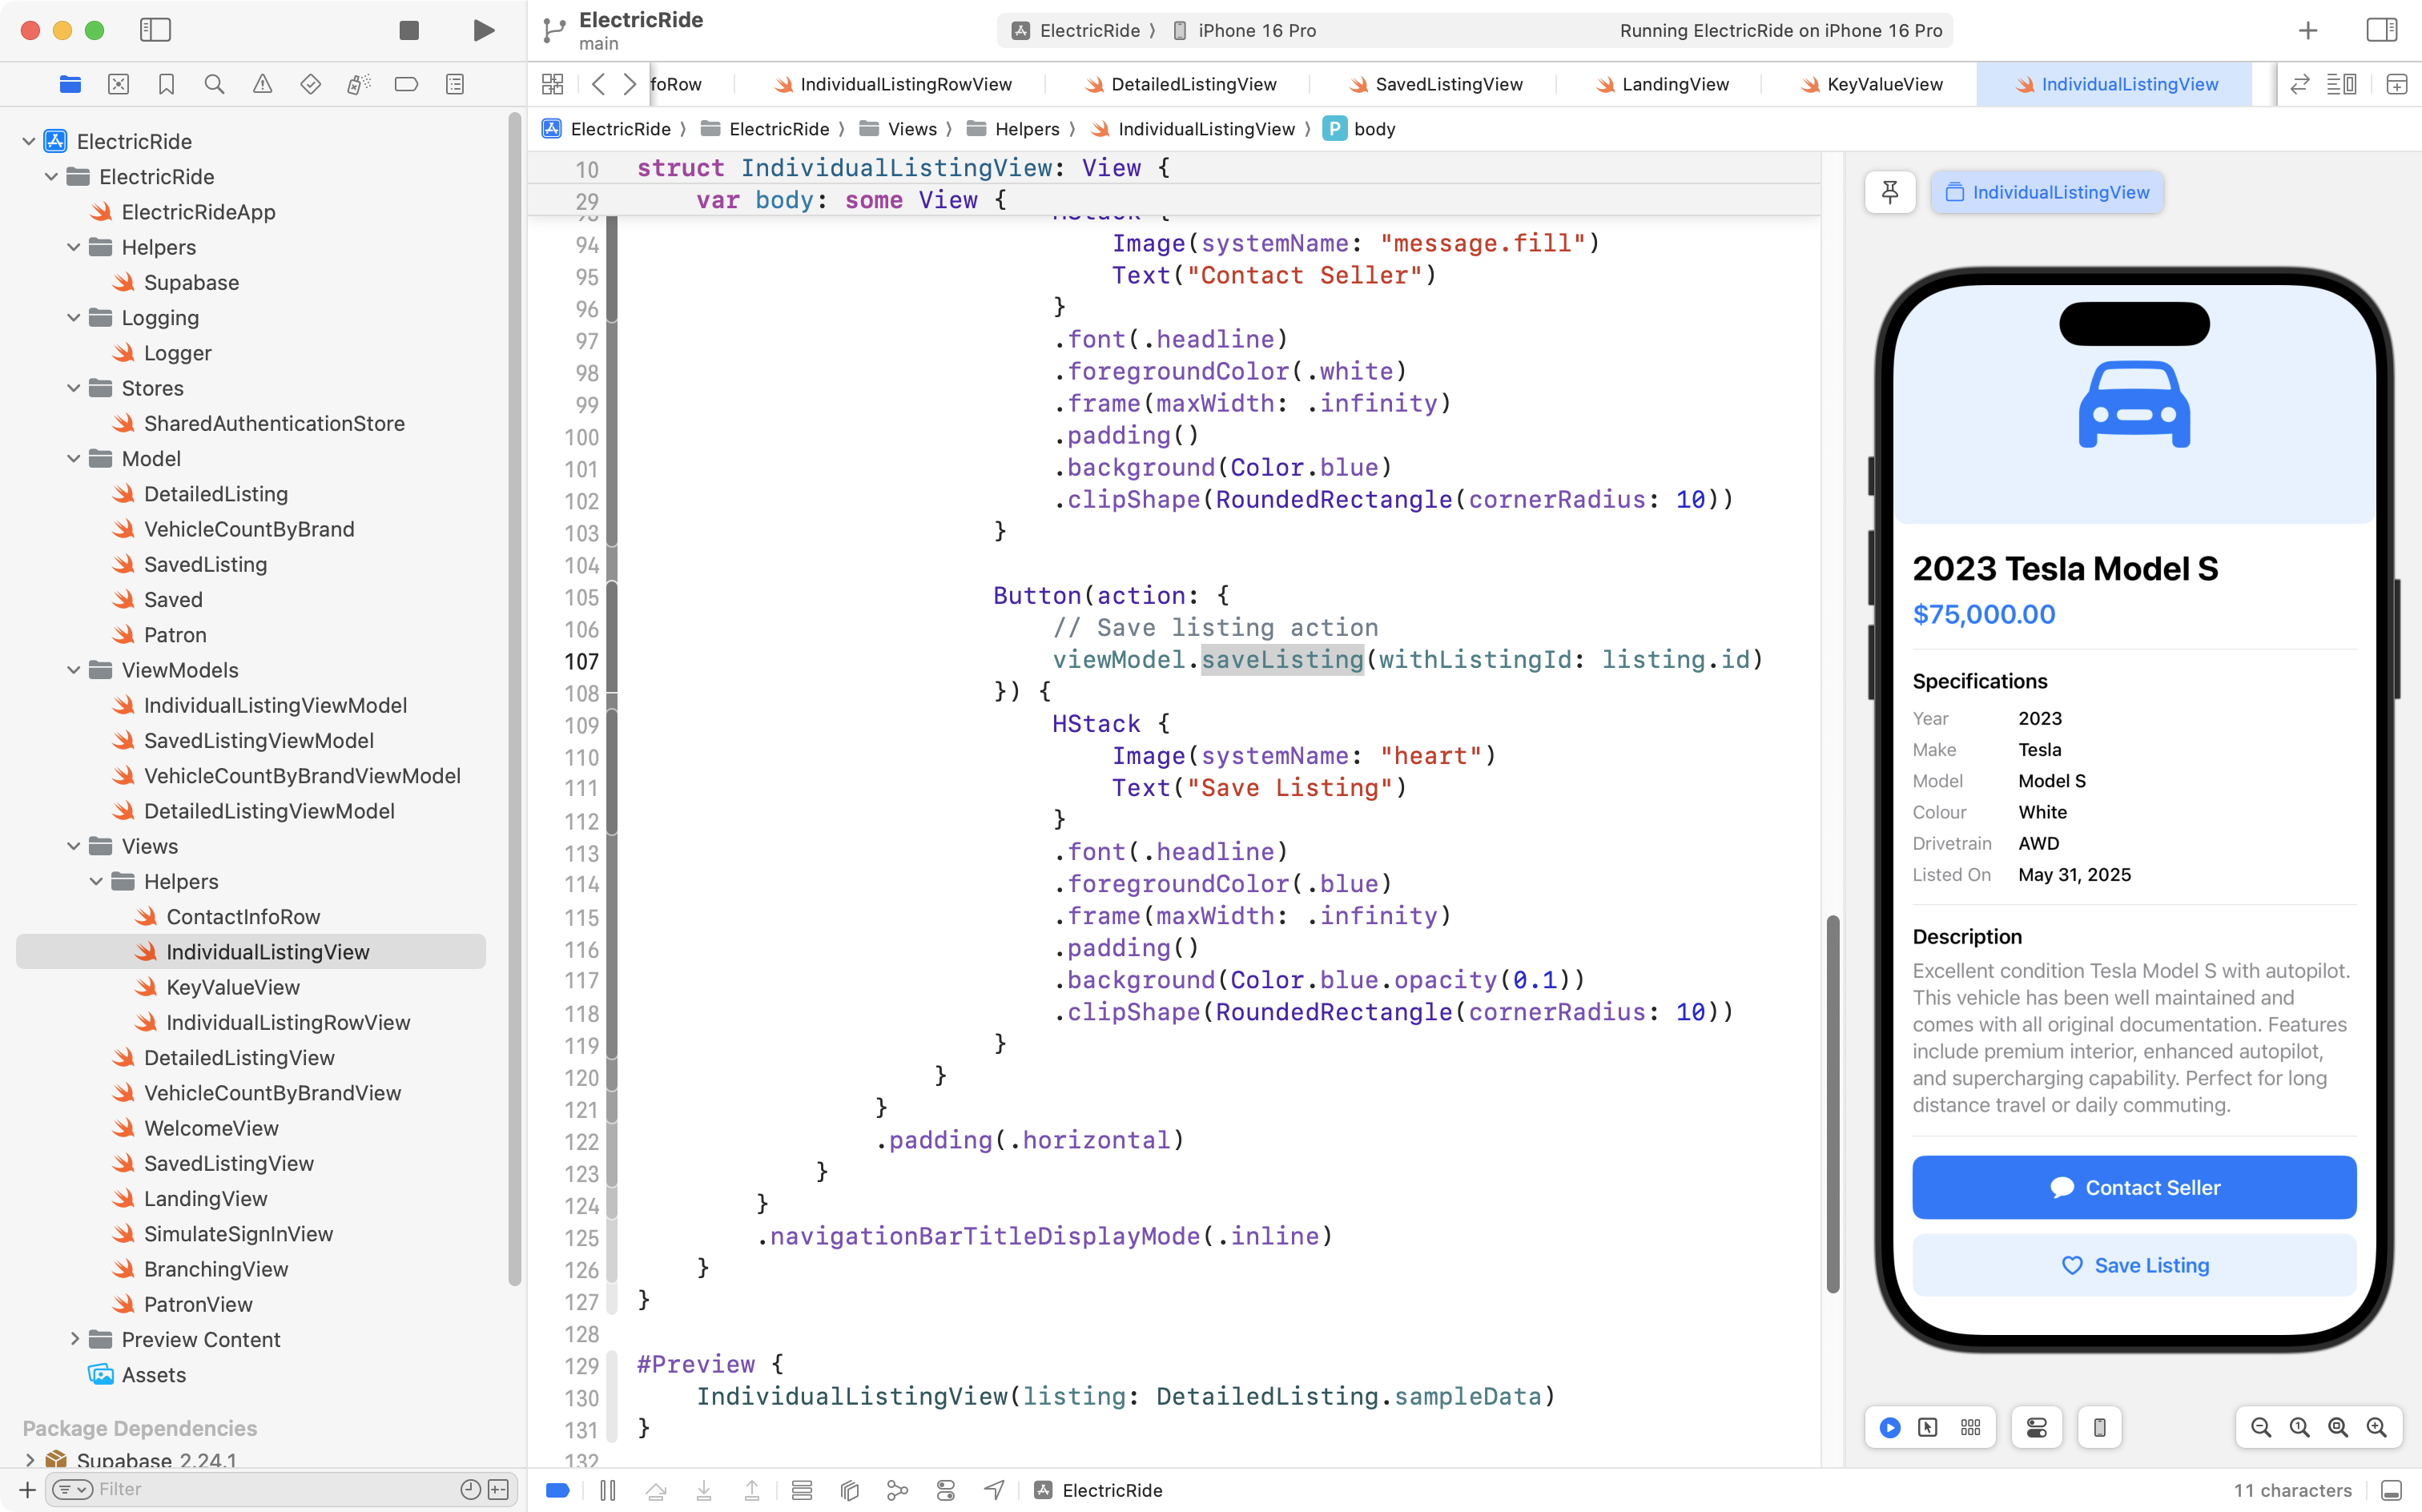
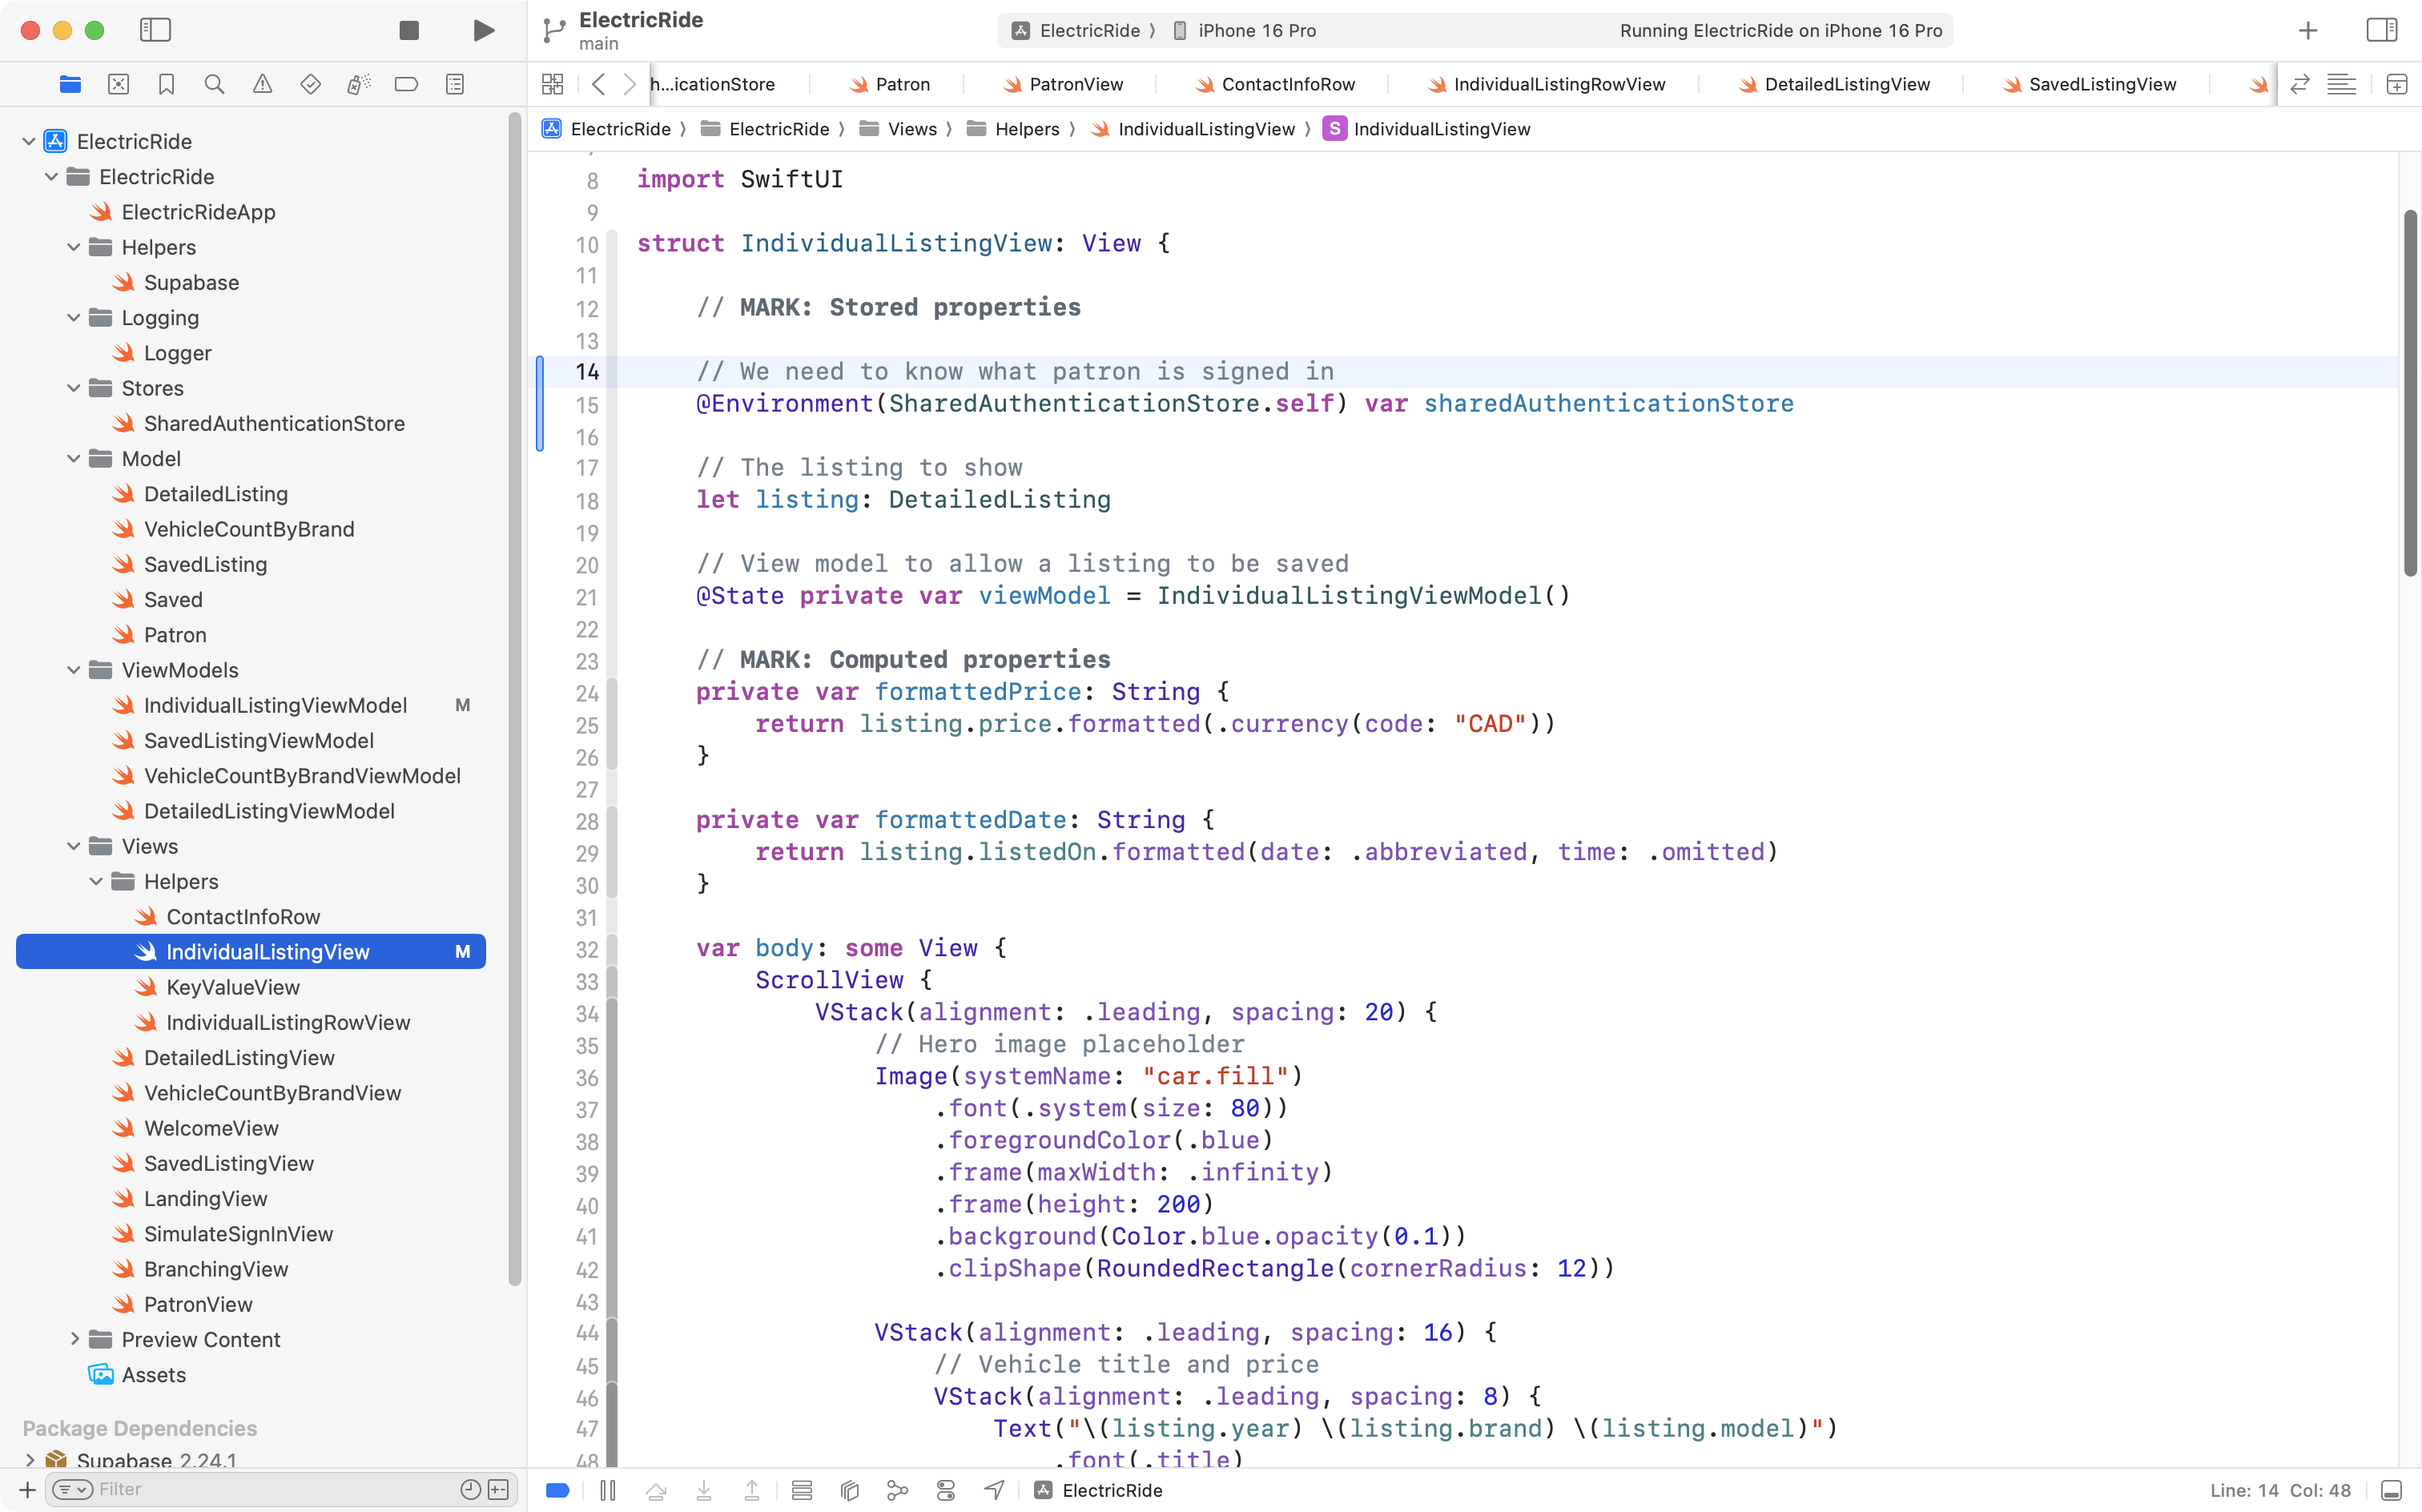
The button to save a listing exists on IndividualListingView:
To save a listing, we need to interact with the database.
First we need to add a data structure to our model with properties that match the columns in the saved table in the database:
.png)
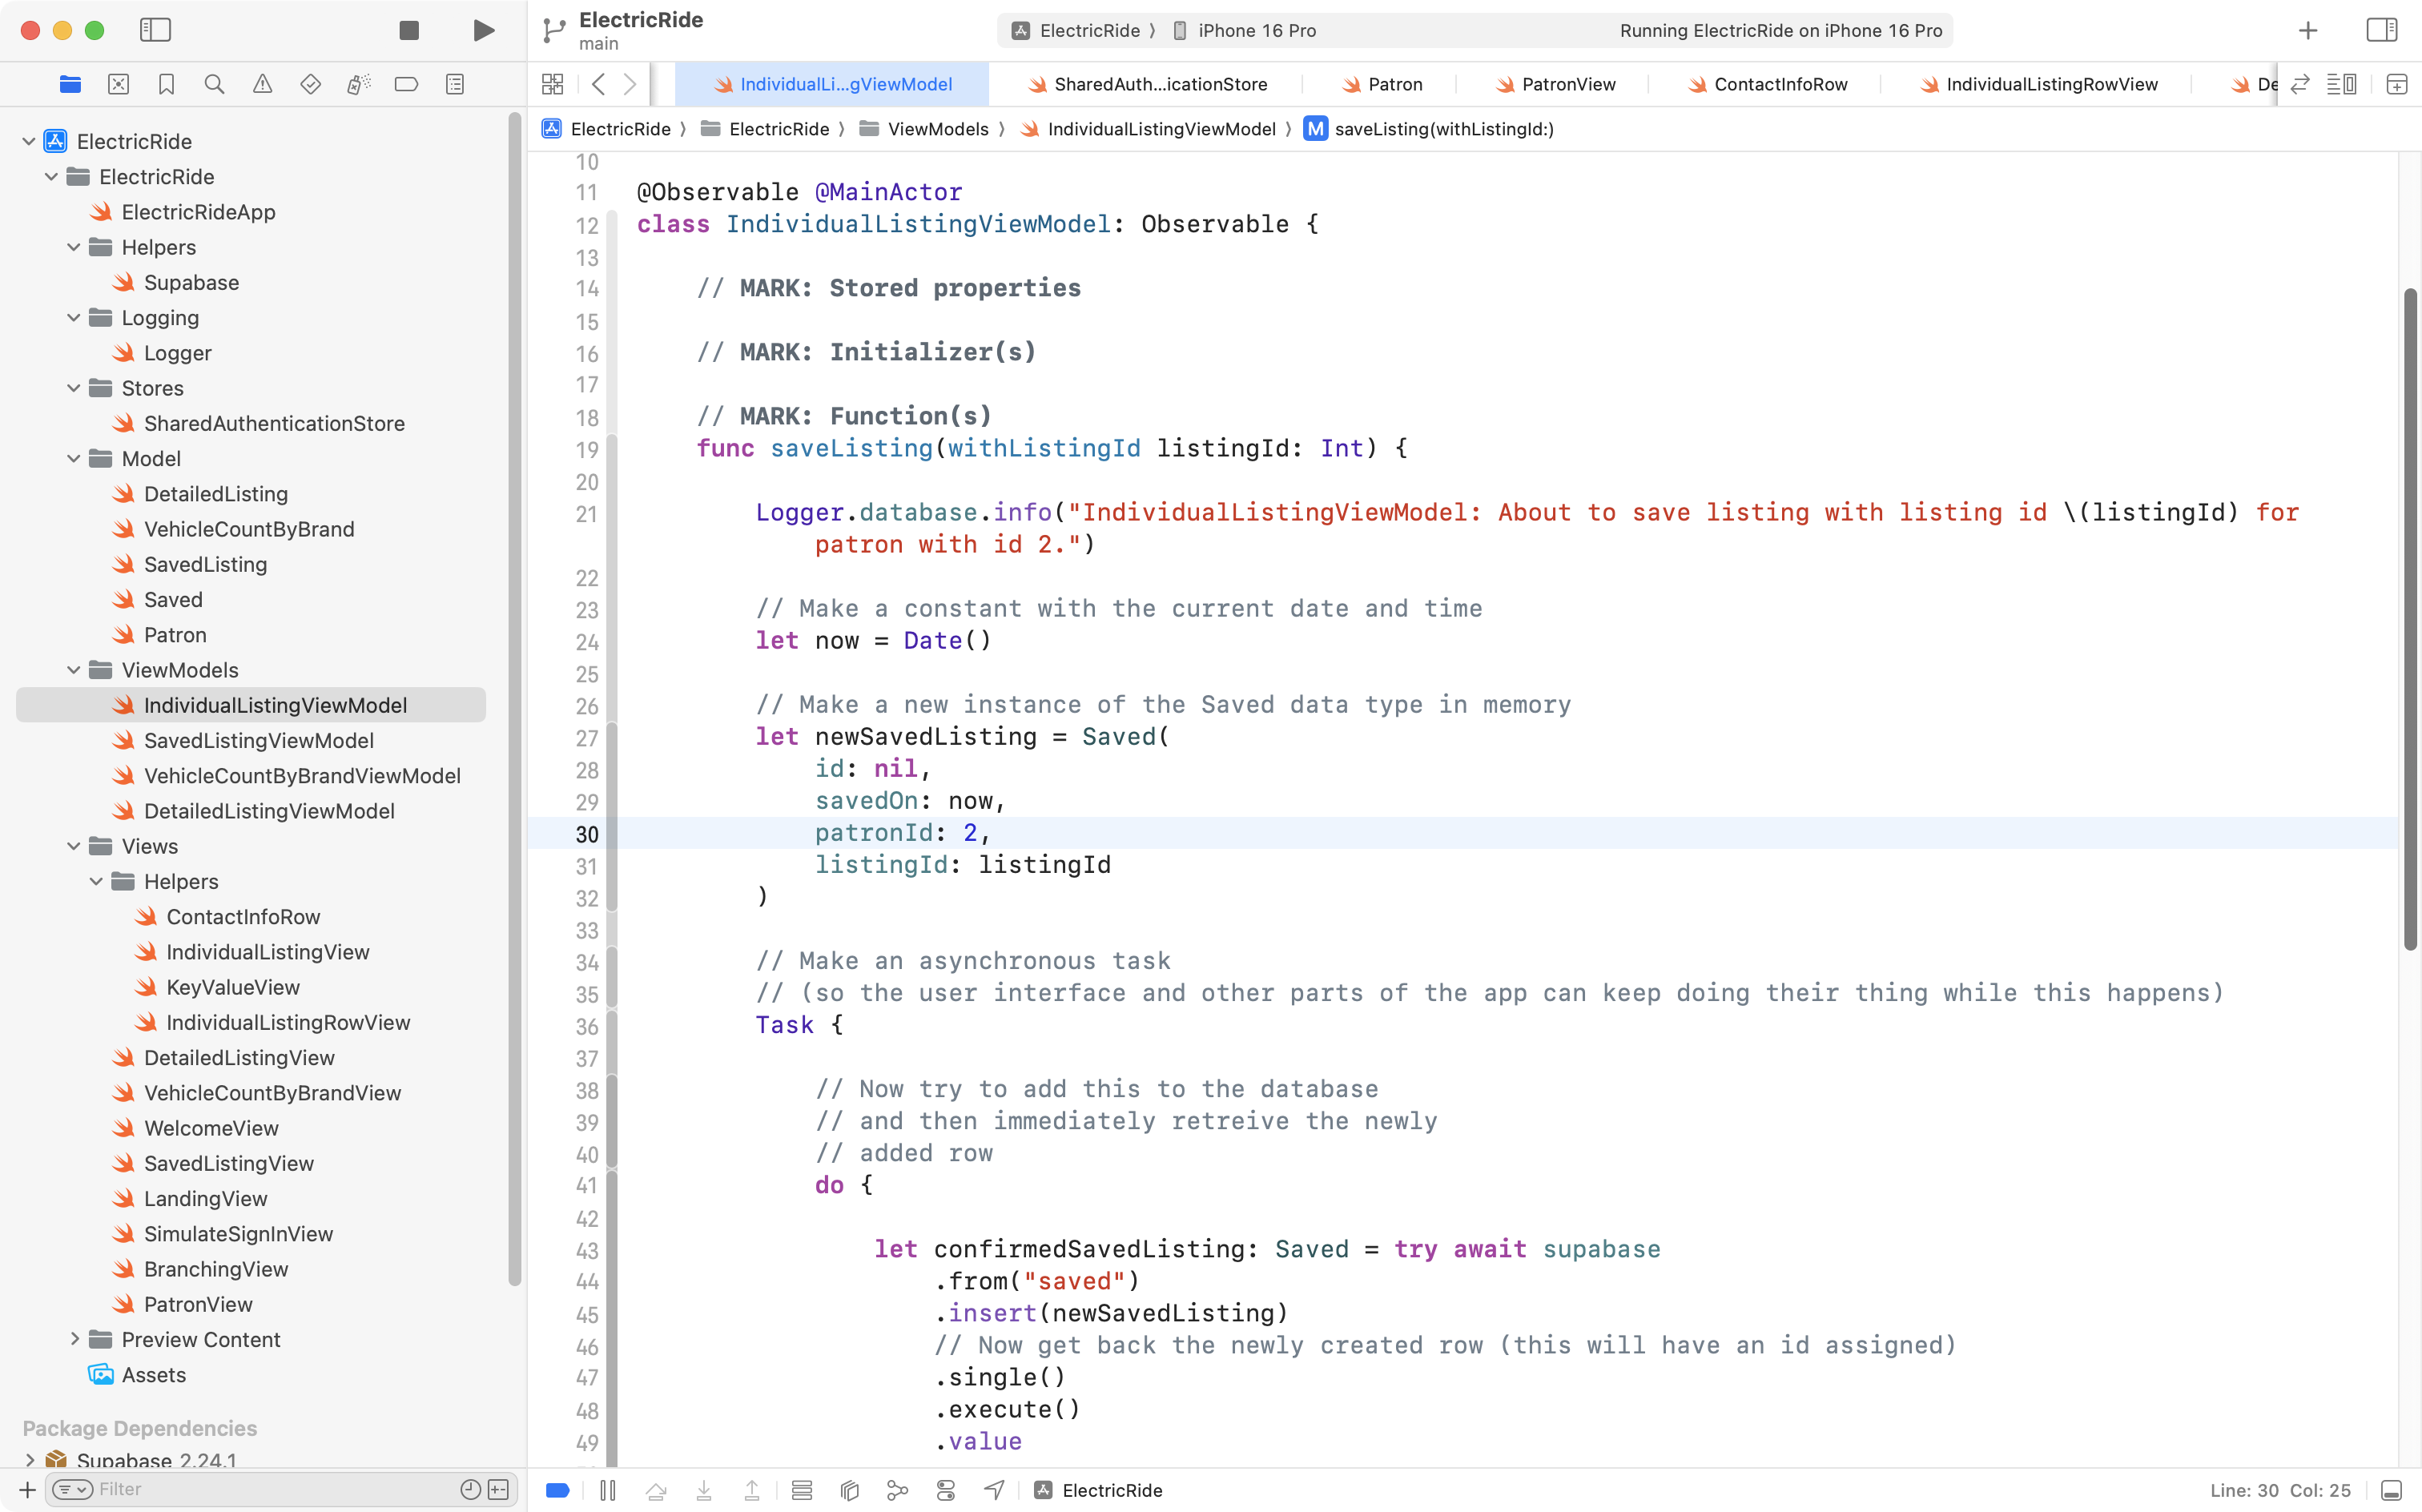
Then we need a view model that will insert an instance of the Saved structure into the saved table in the database:
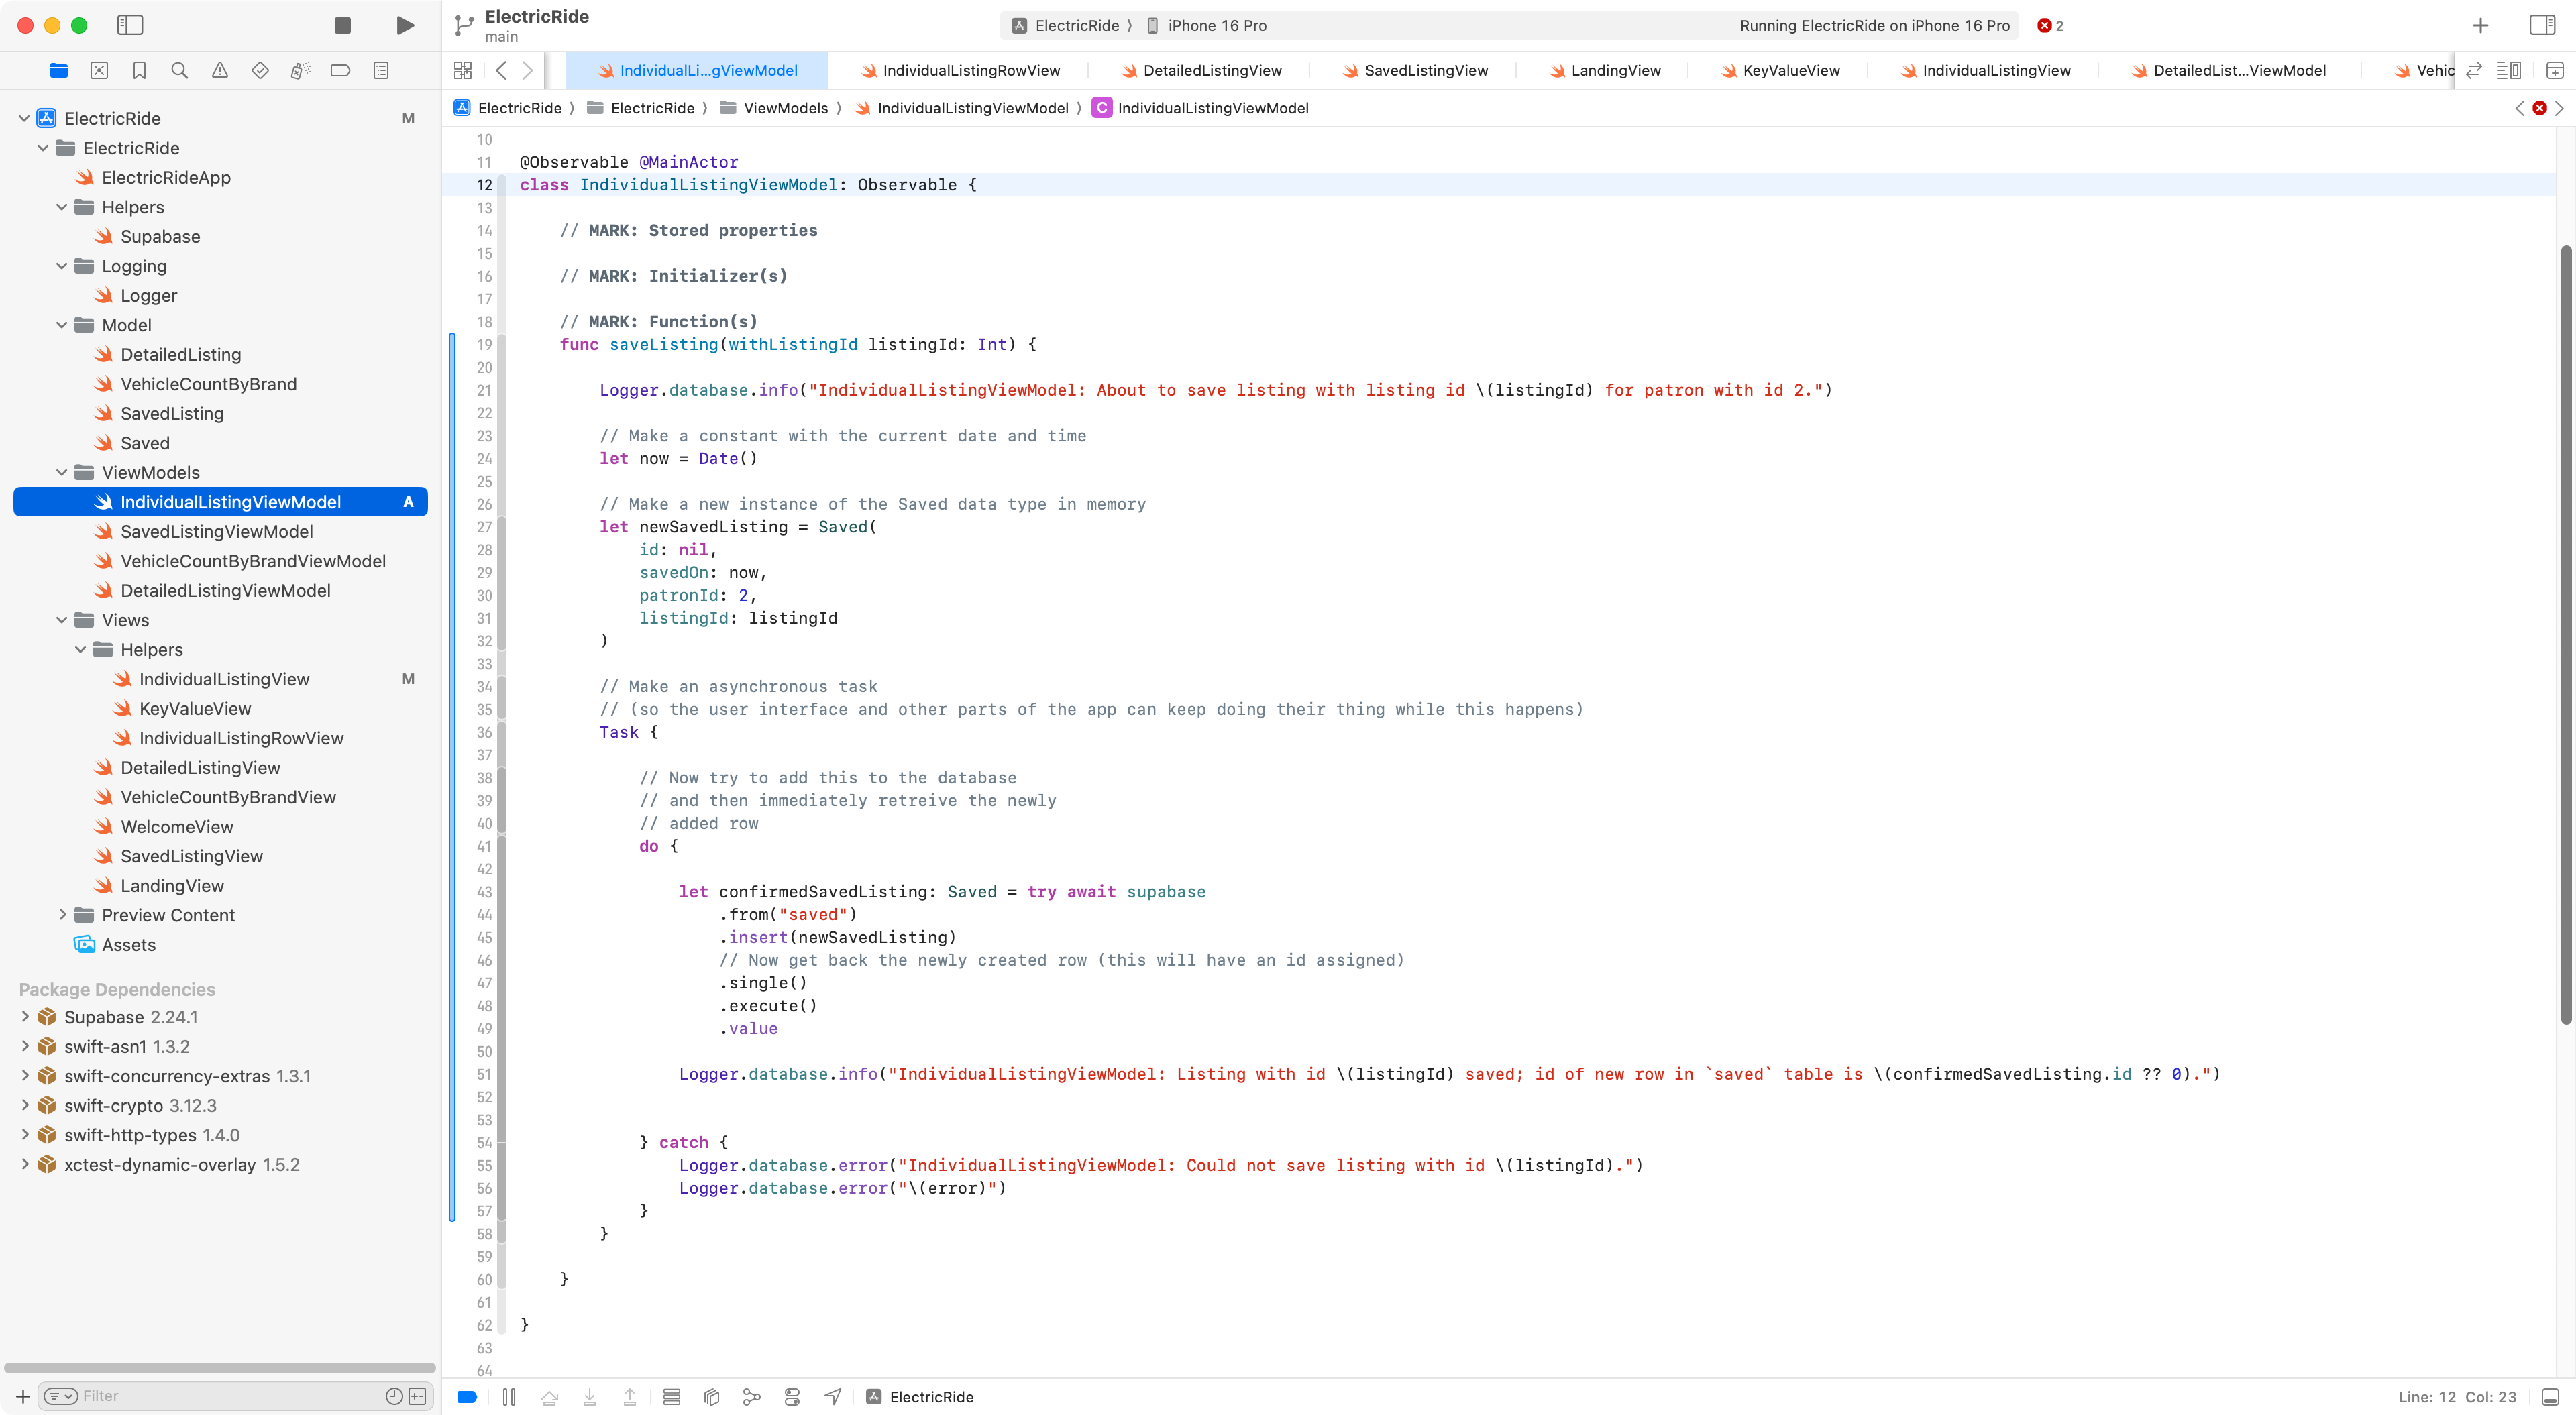
Finally, we need to make the button in IndividualListingView call this function on the new view model.
To do that, we first create an instance of the view model:
Then, we use the saveListing function on the view model to make the Save Listing button actually do something:

Let’s try all of this new app code out.
We currently have these saved listings:
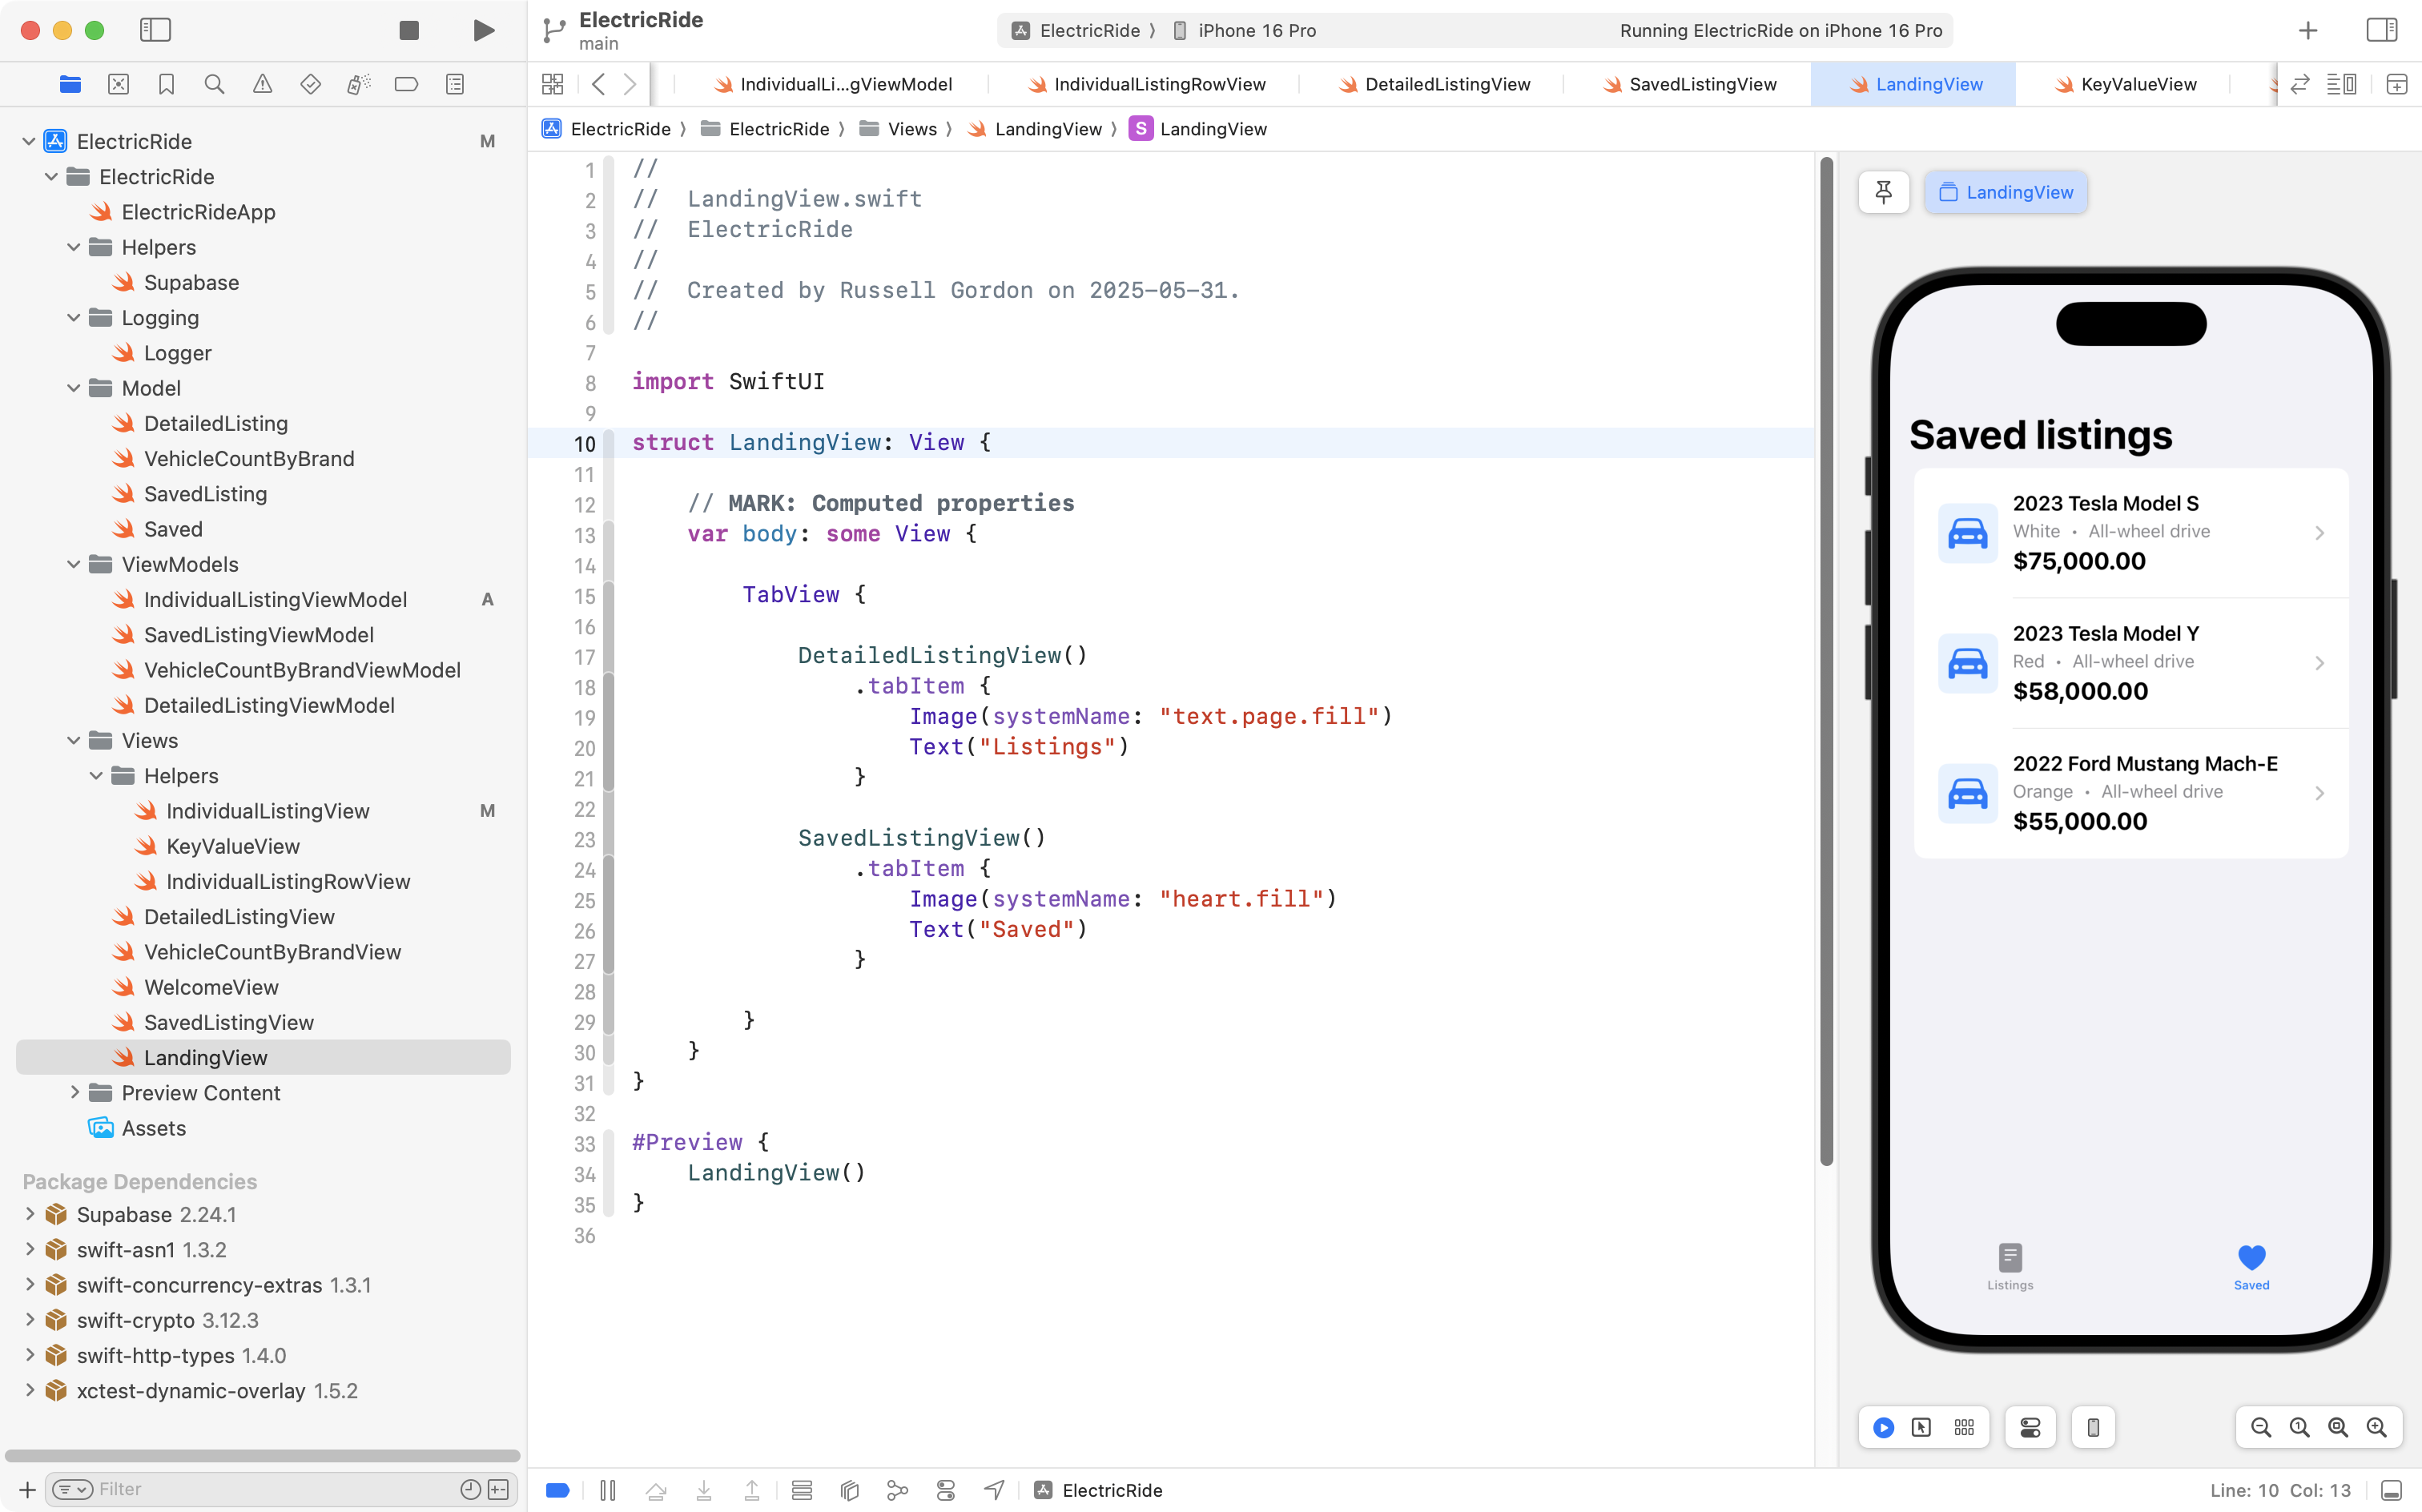
We can browse all listings:
We can navigate to a specific listing:
We can save that listing:
When we return to review saved listings, we see the new entry:
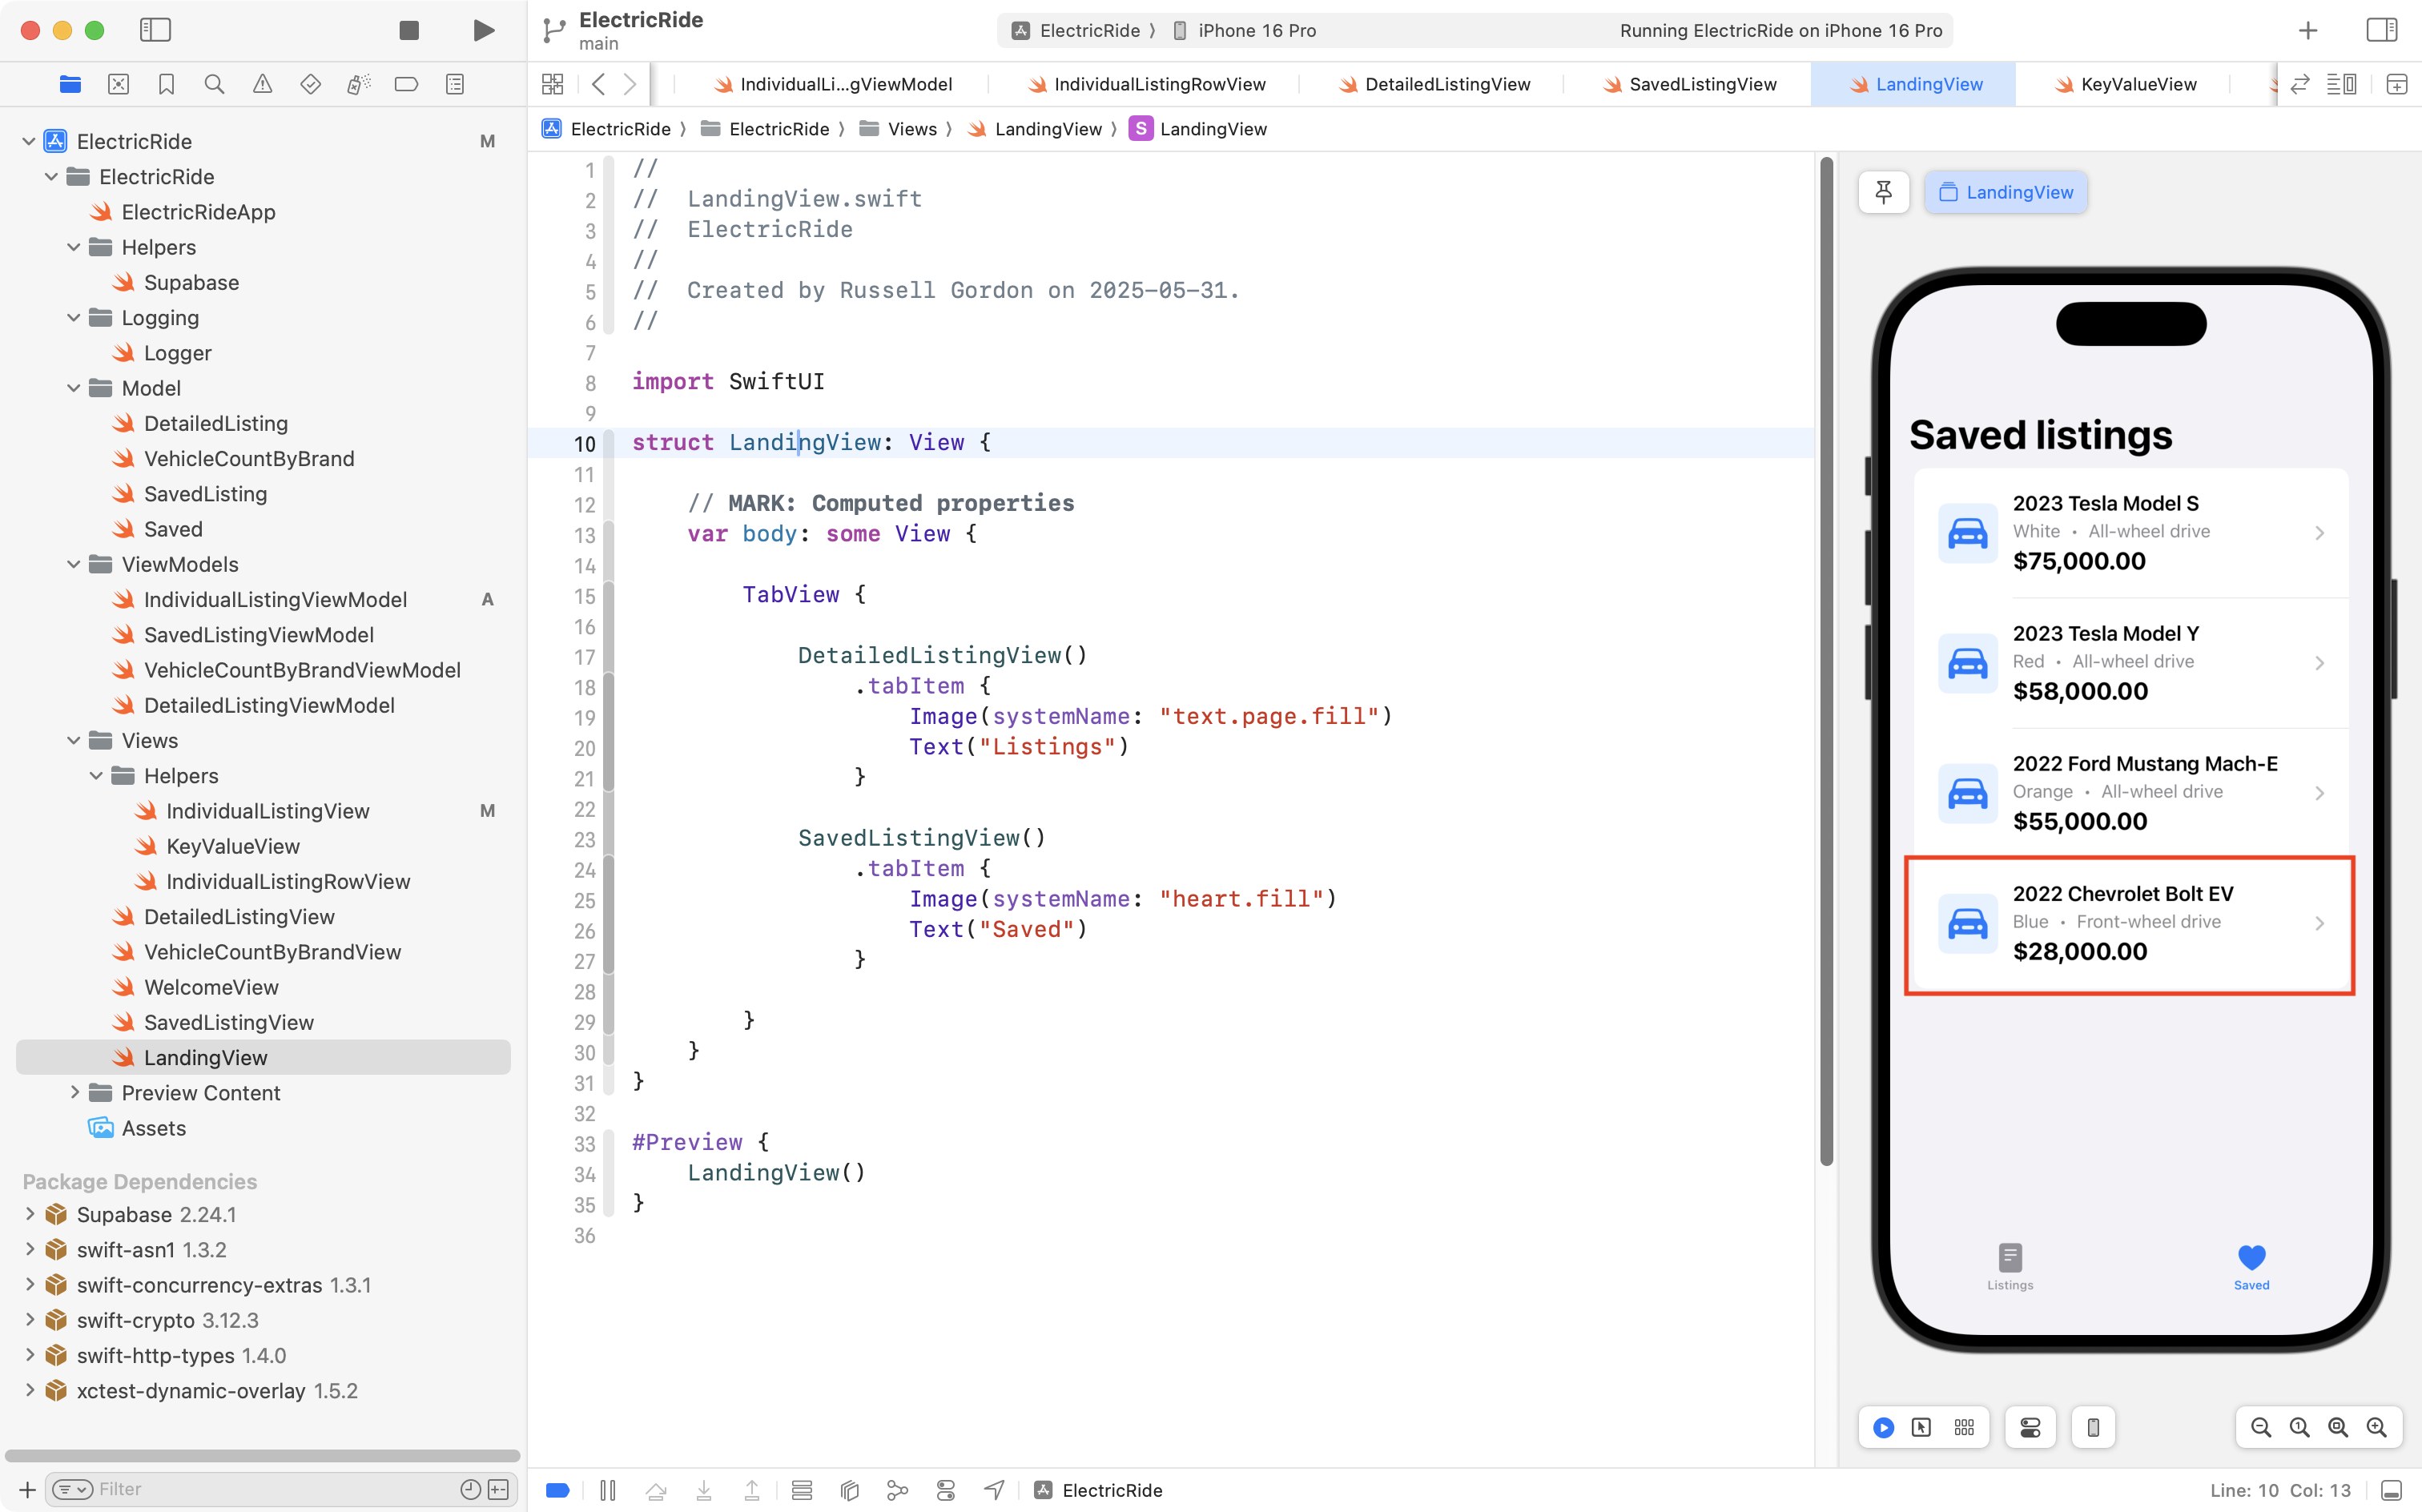
IMPORTANT
The newly saved listing won’t show up until the Preview window is refreshed by pressing Option-Command-P.
To have the saved listings automatically refresh, we’ll need to apply the Publisher-Subscriber Messaging Pattern.
We will do that later on, to stay focused on simulating logged in users.
Discussion
We have deliberately written recent code to work for a single user, because this is easier to think about at first.
Our next task is to generalize.
We need a way to fake a log in as any user.
Then we’ll need to make modest adjustments to the code we just wrote, so that it works for any user, not just the user with an id of 2.
Faking any given user
Create authentication store
Within an app we will need a shared observable class that will keep track of what user is logged in.
Naming conventions vary among developers, but this type of class is sometimes referred to as a shared data store, or just a store.
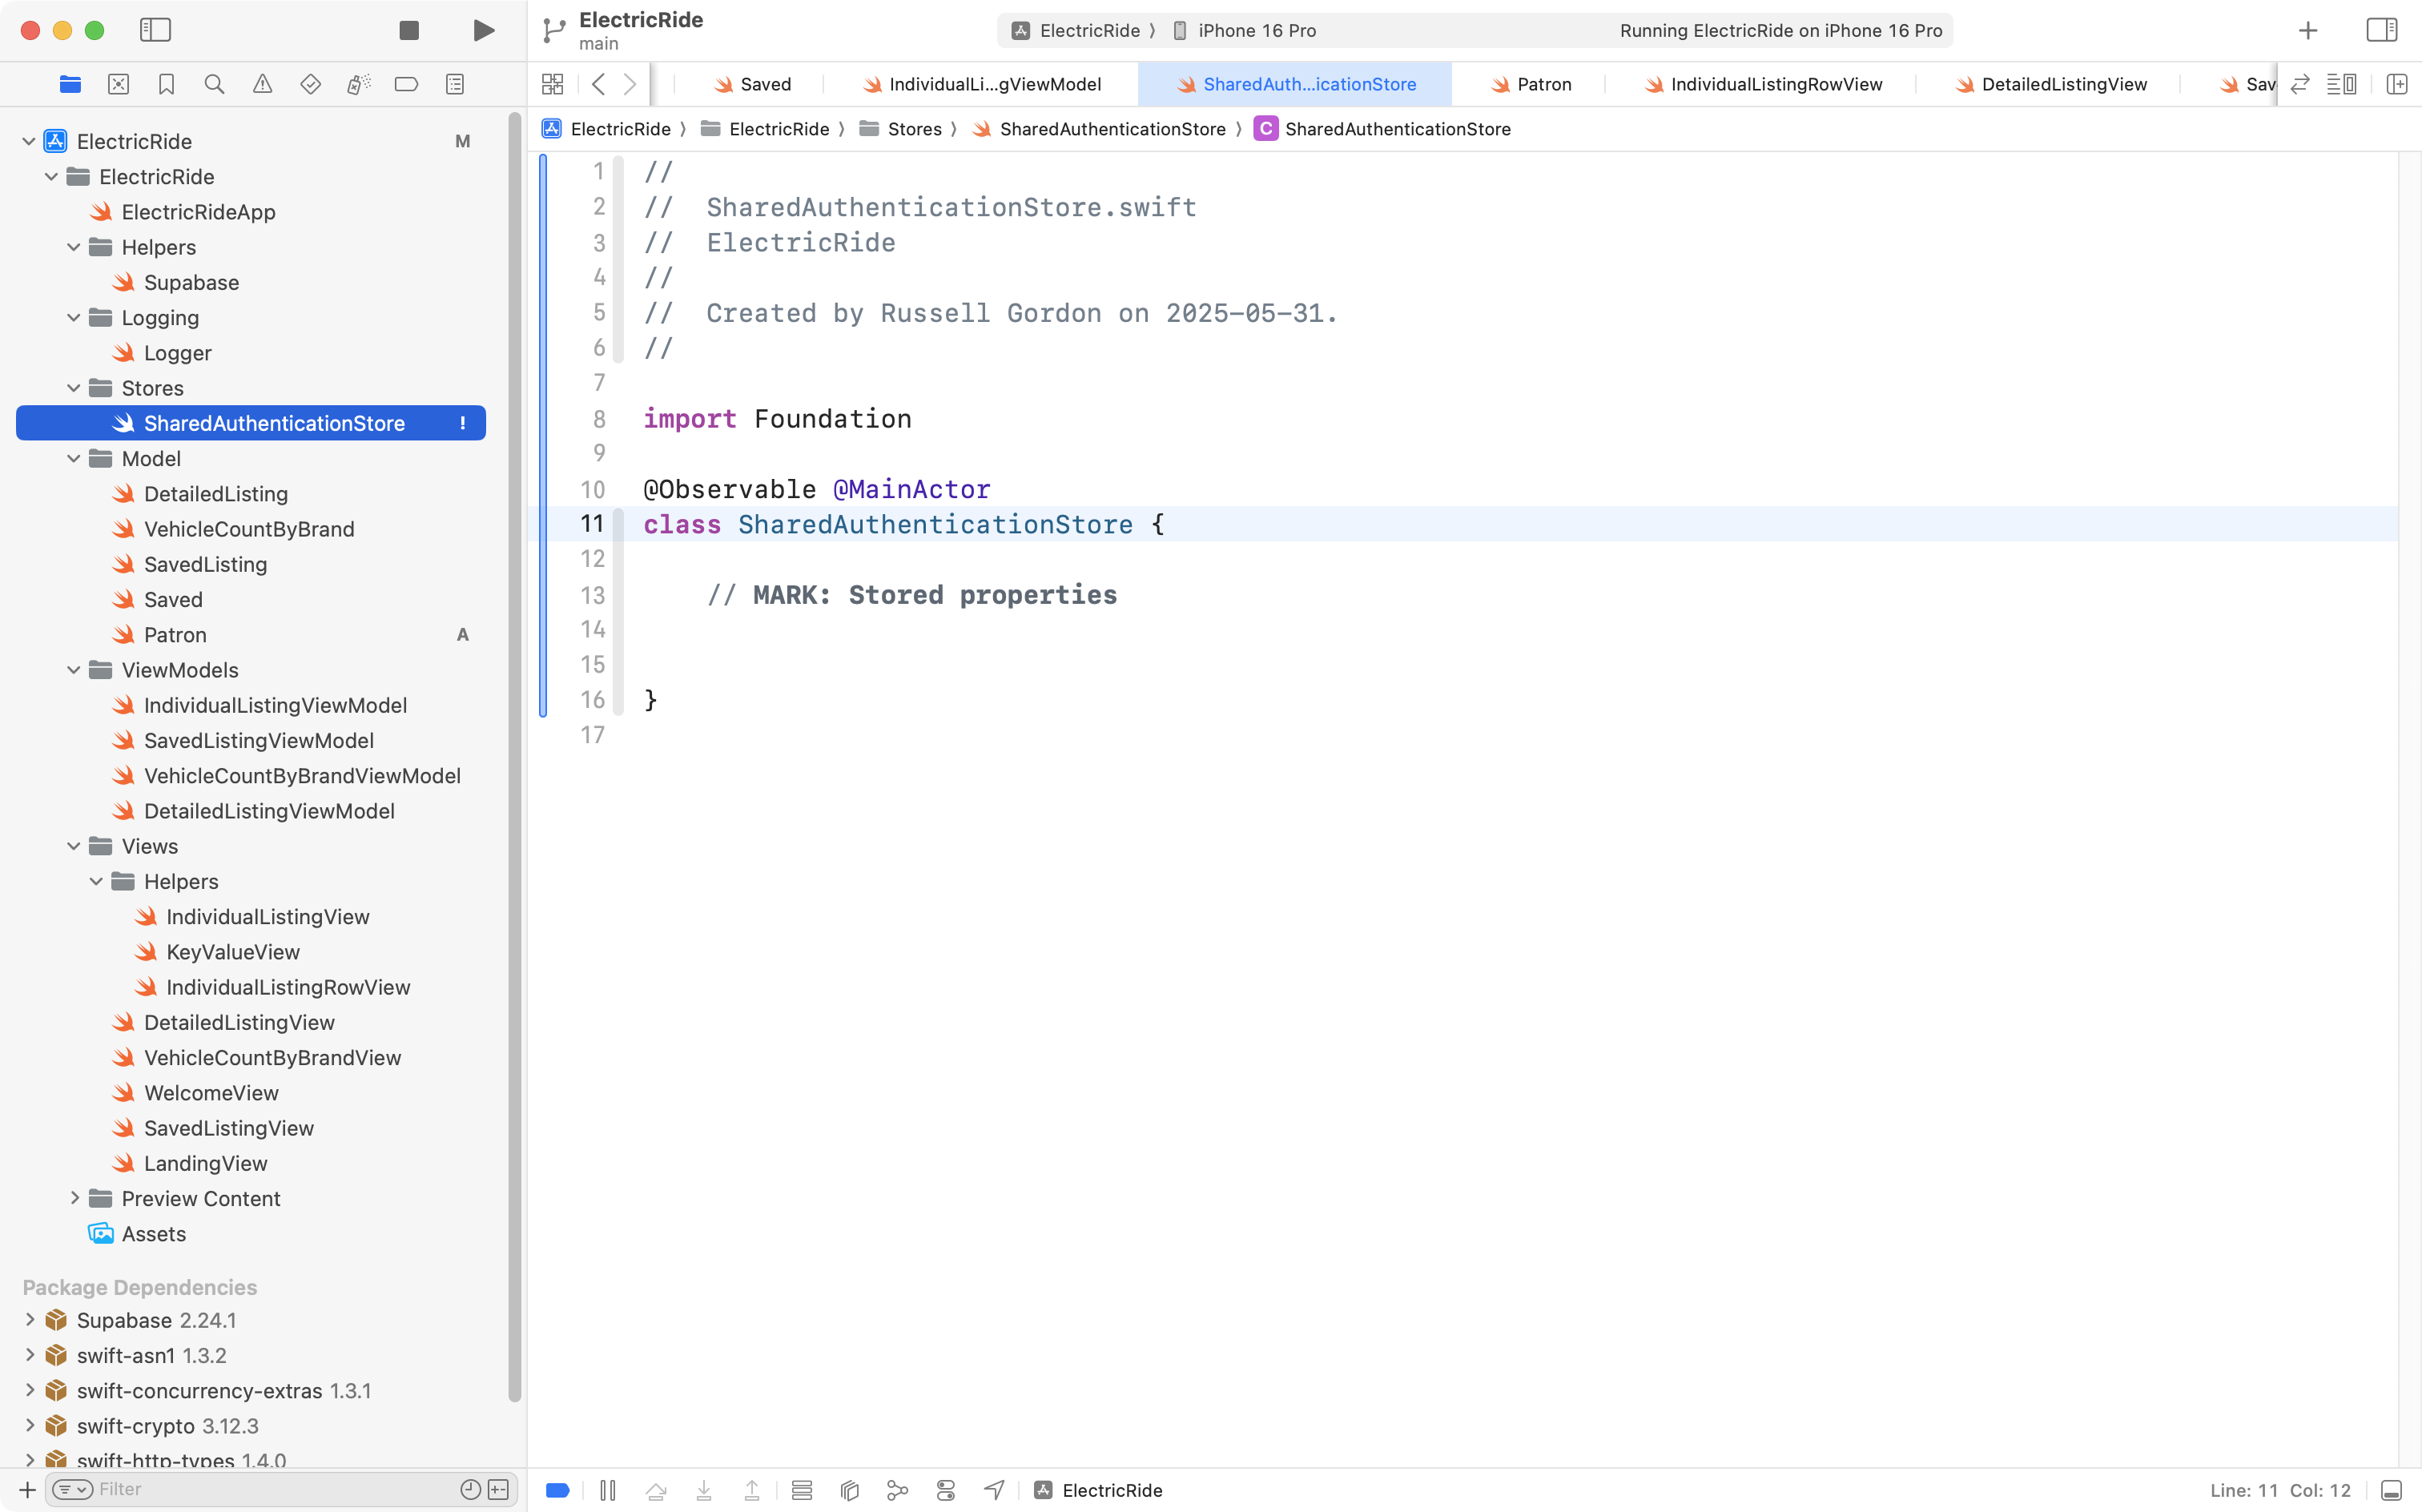
Mr. Gordon has added the Stores group and the SharedAuthenticationStore file to his project to get started on faking, or simulating, logins from any user:
There’s nothing there yet, but this will become an important part of our application soon.
We need to keep track of which patron is logged in.
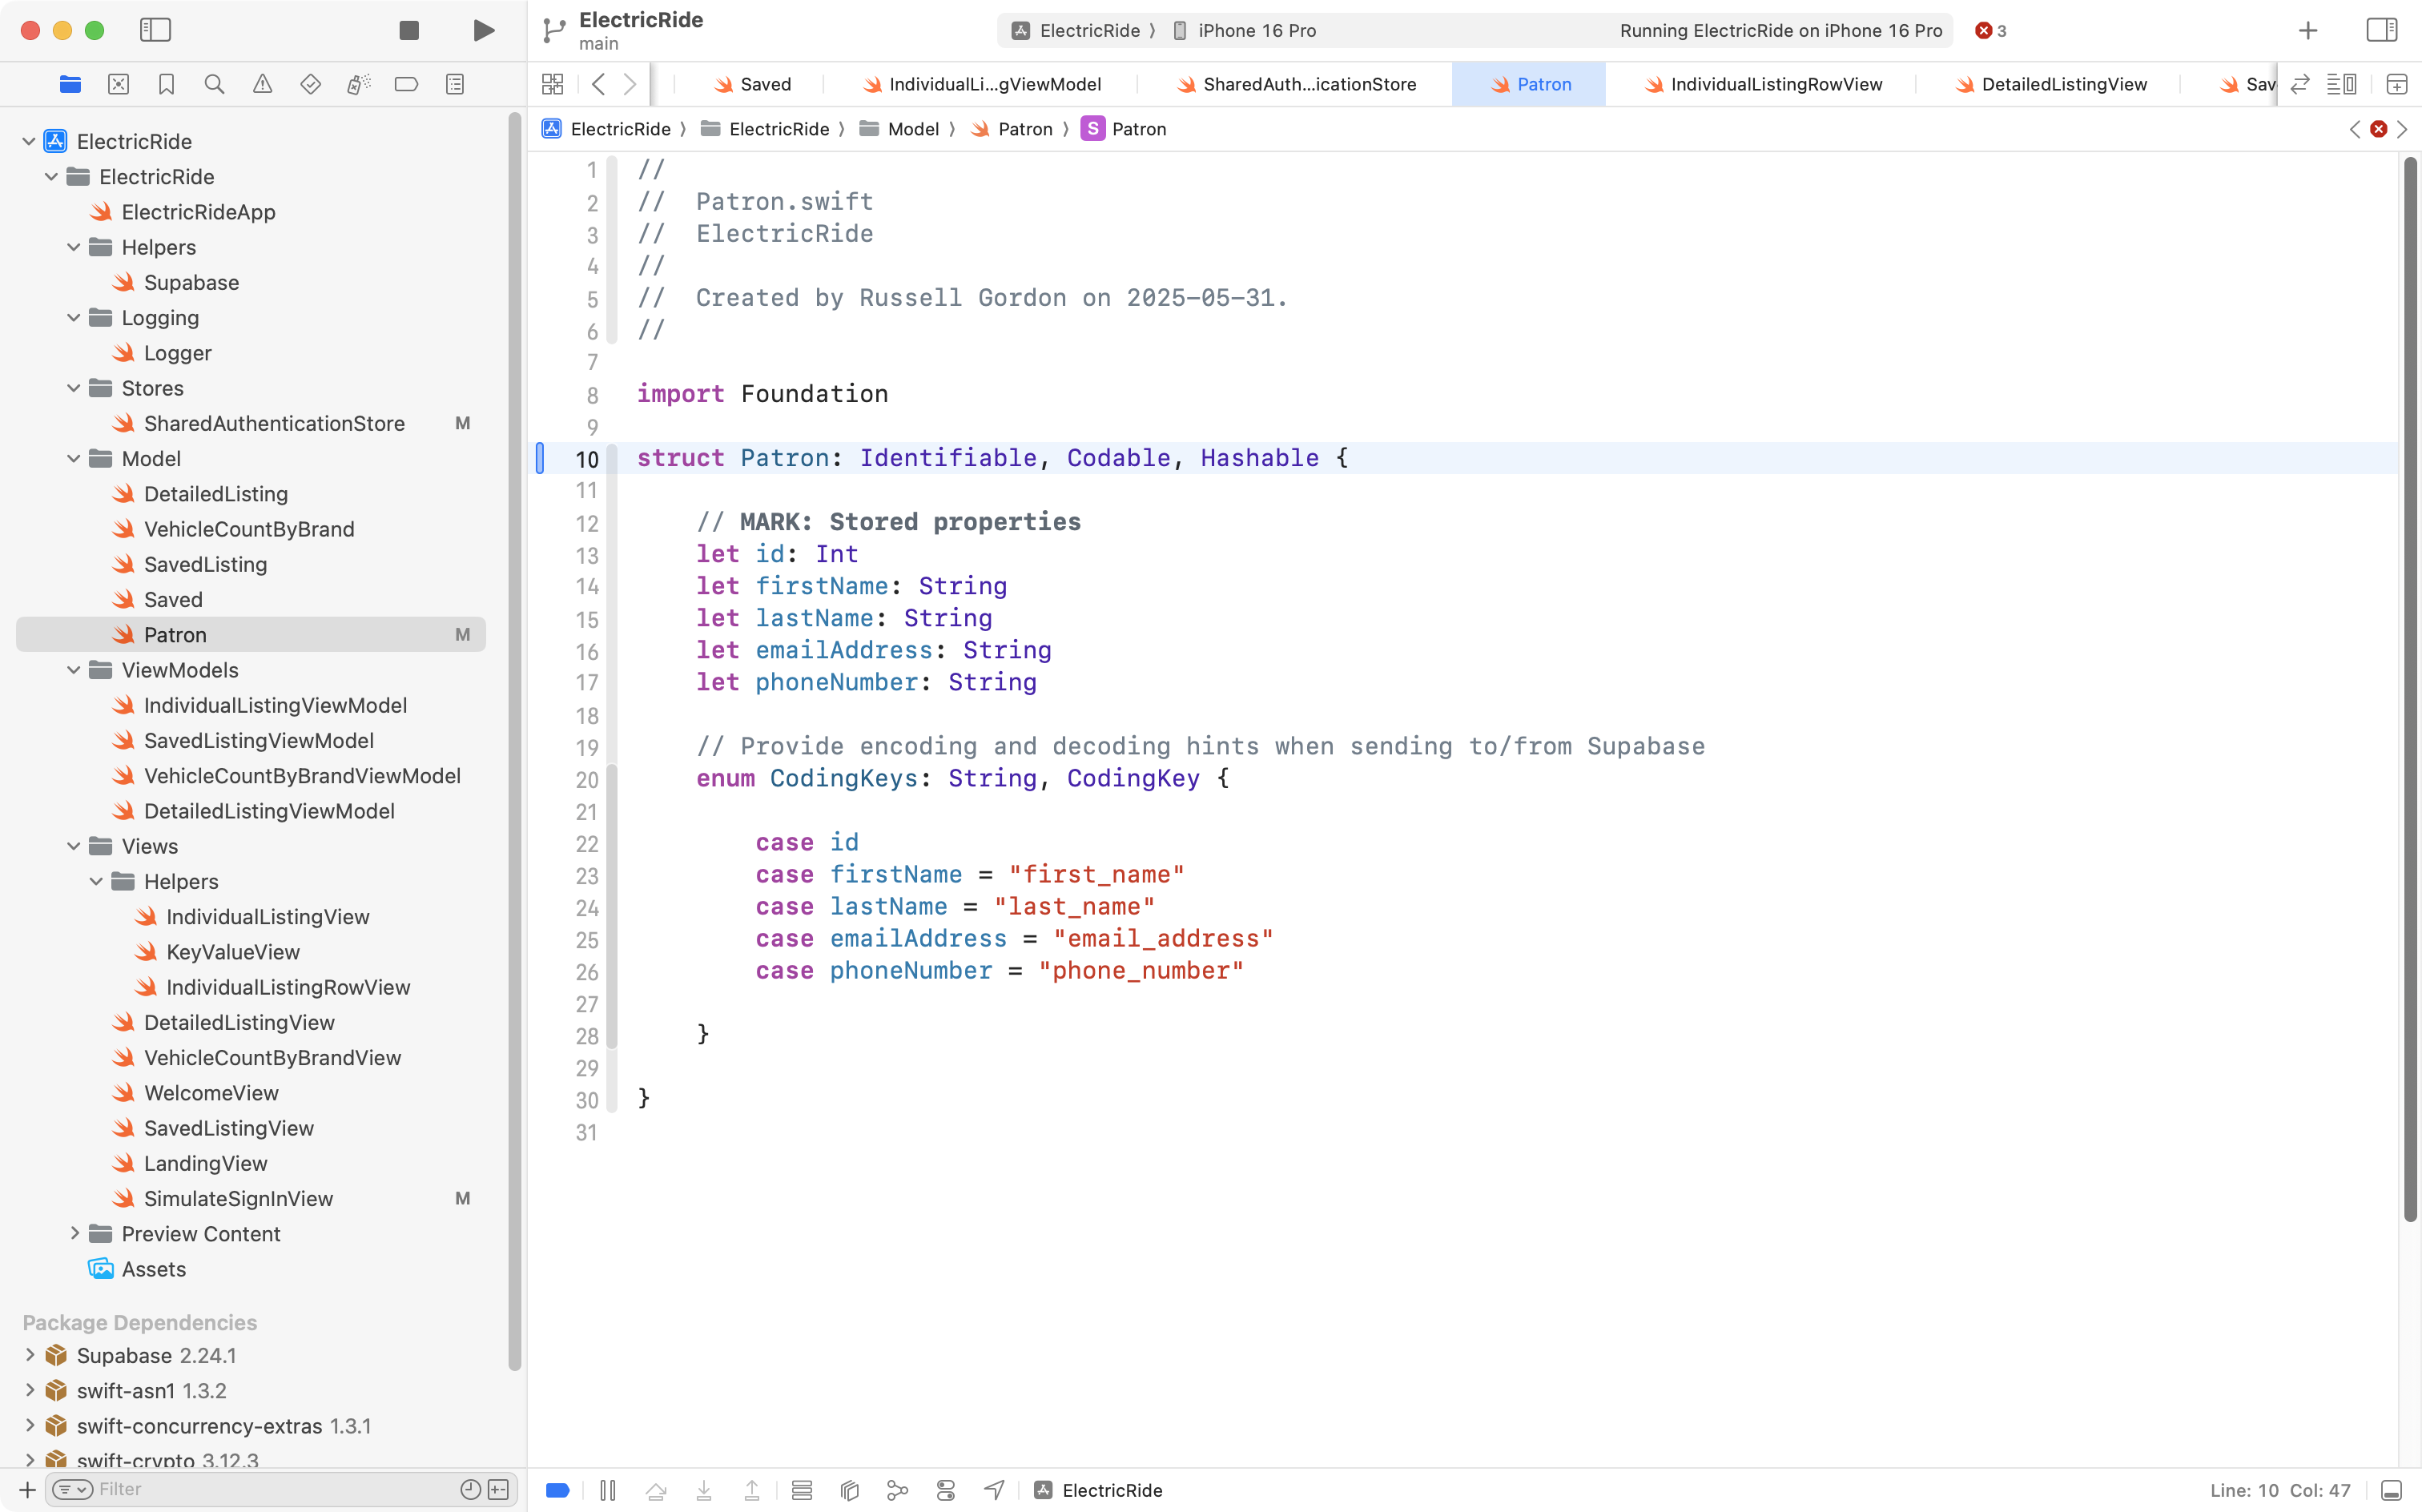
So, let’s create a data structure that matches the columns of the patron table:
… like this:
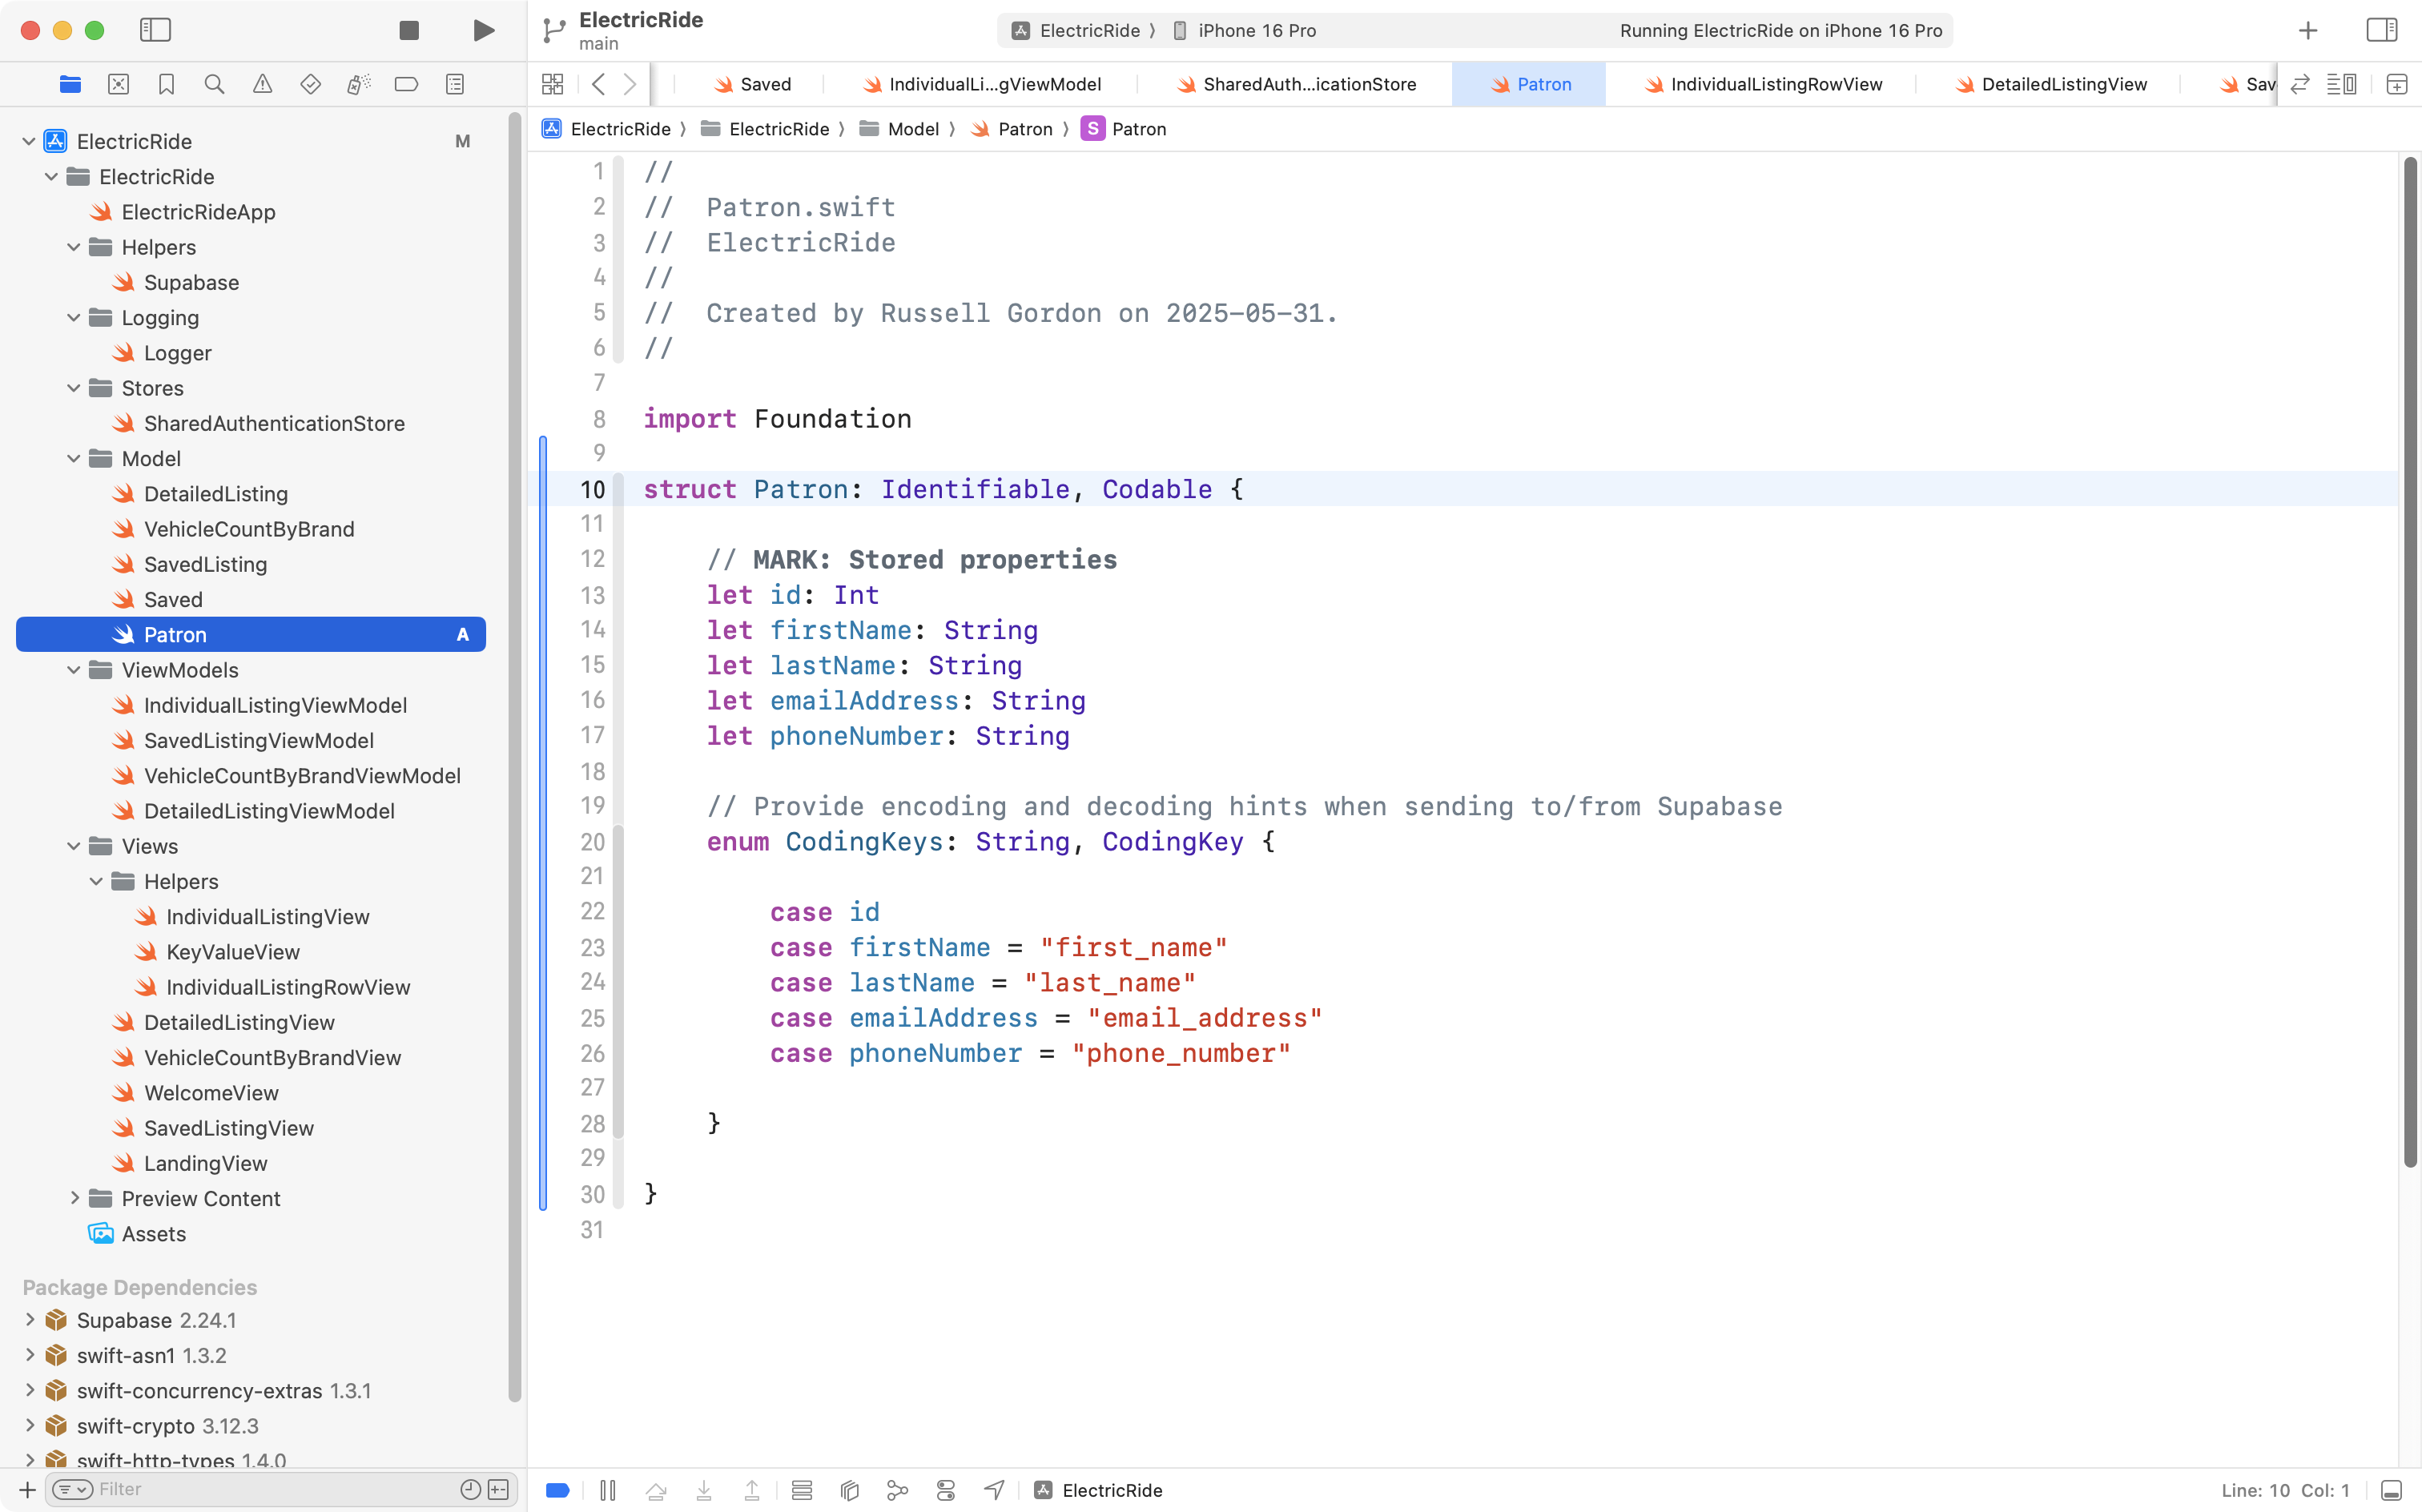
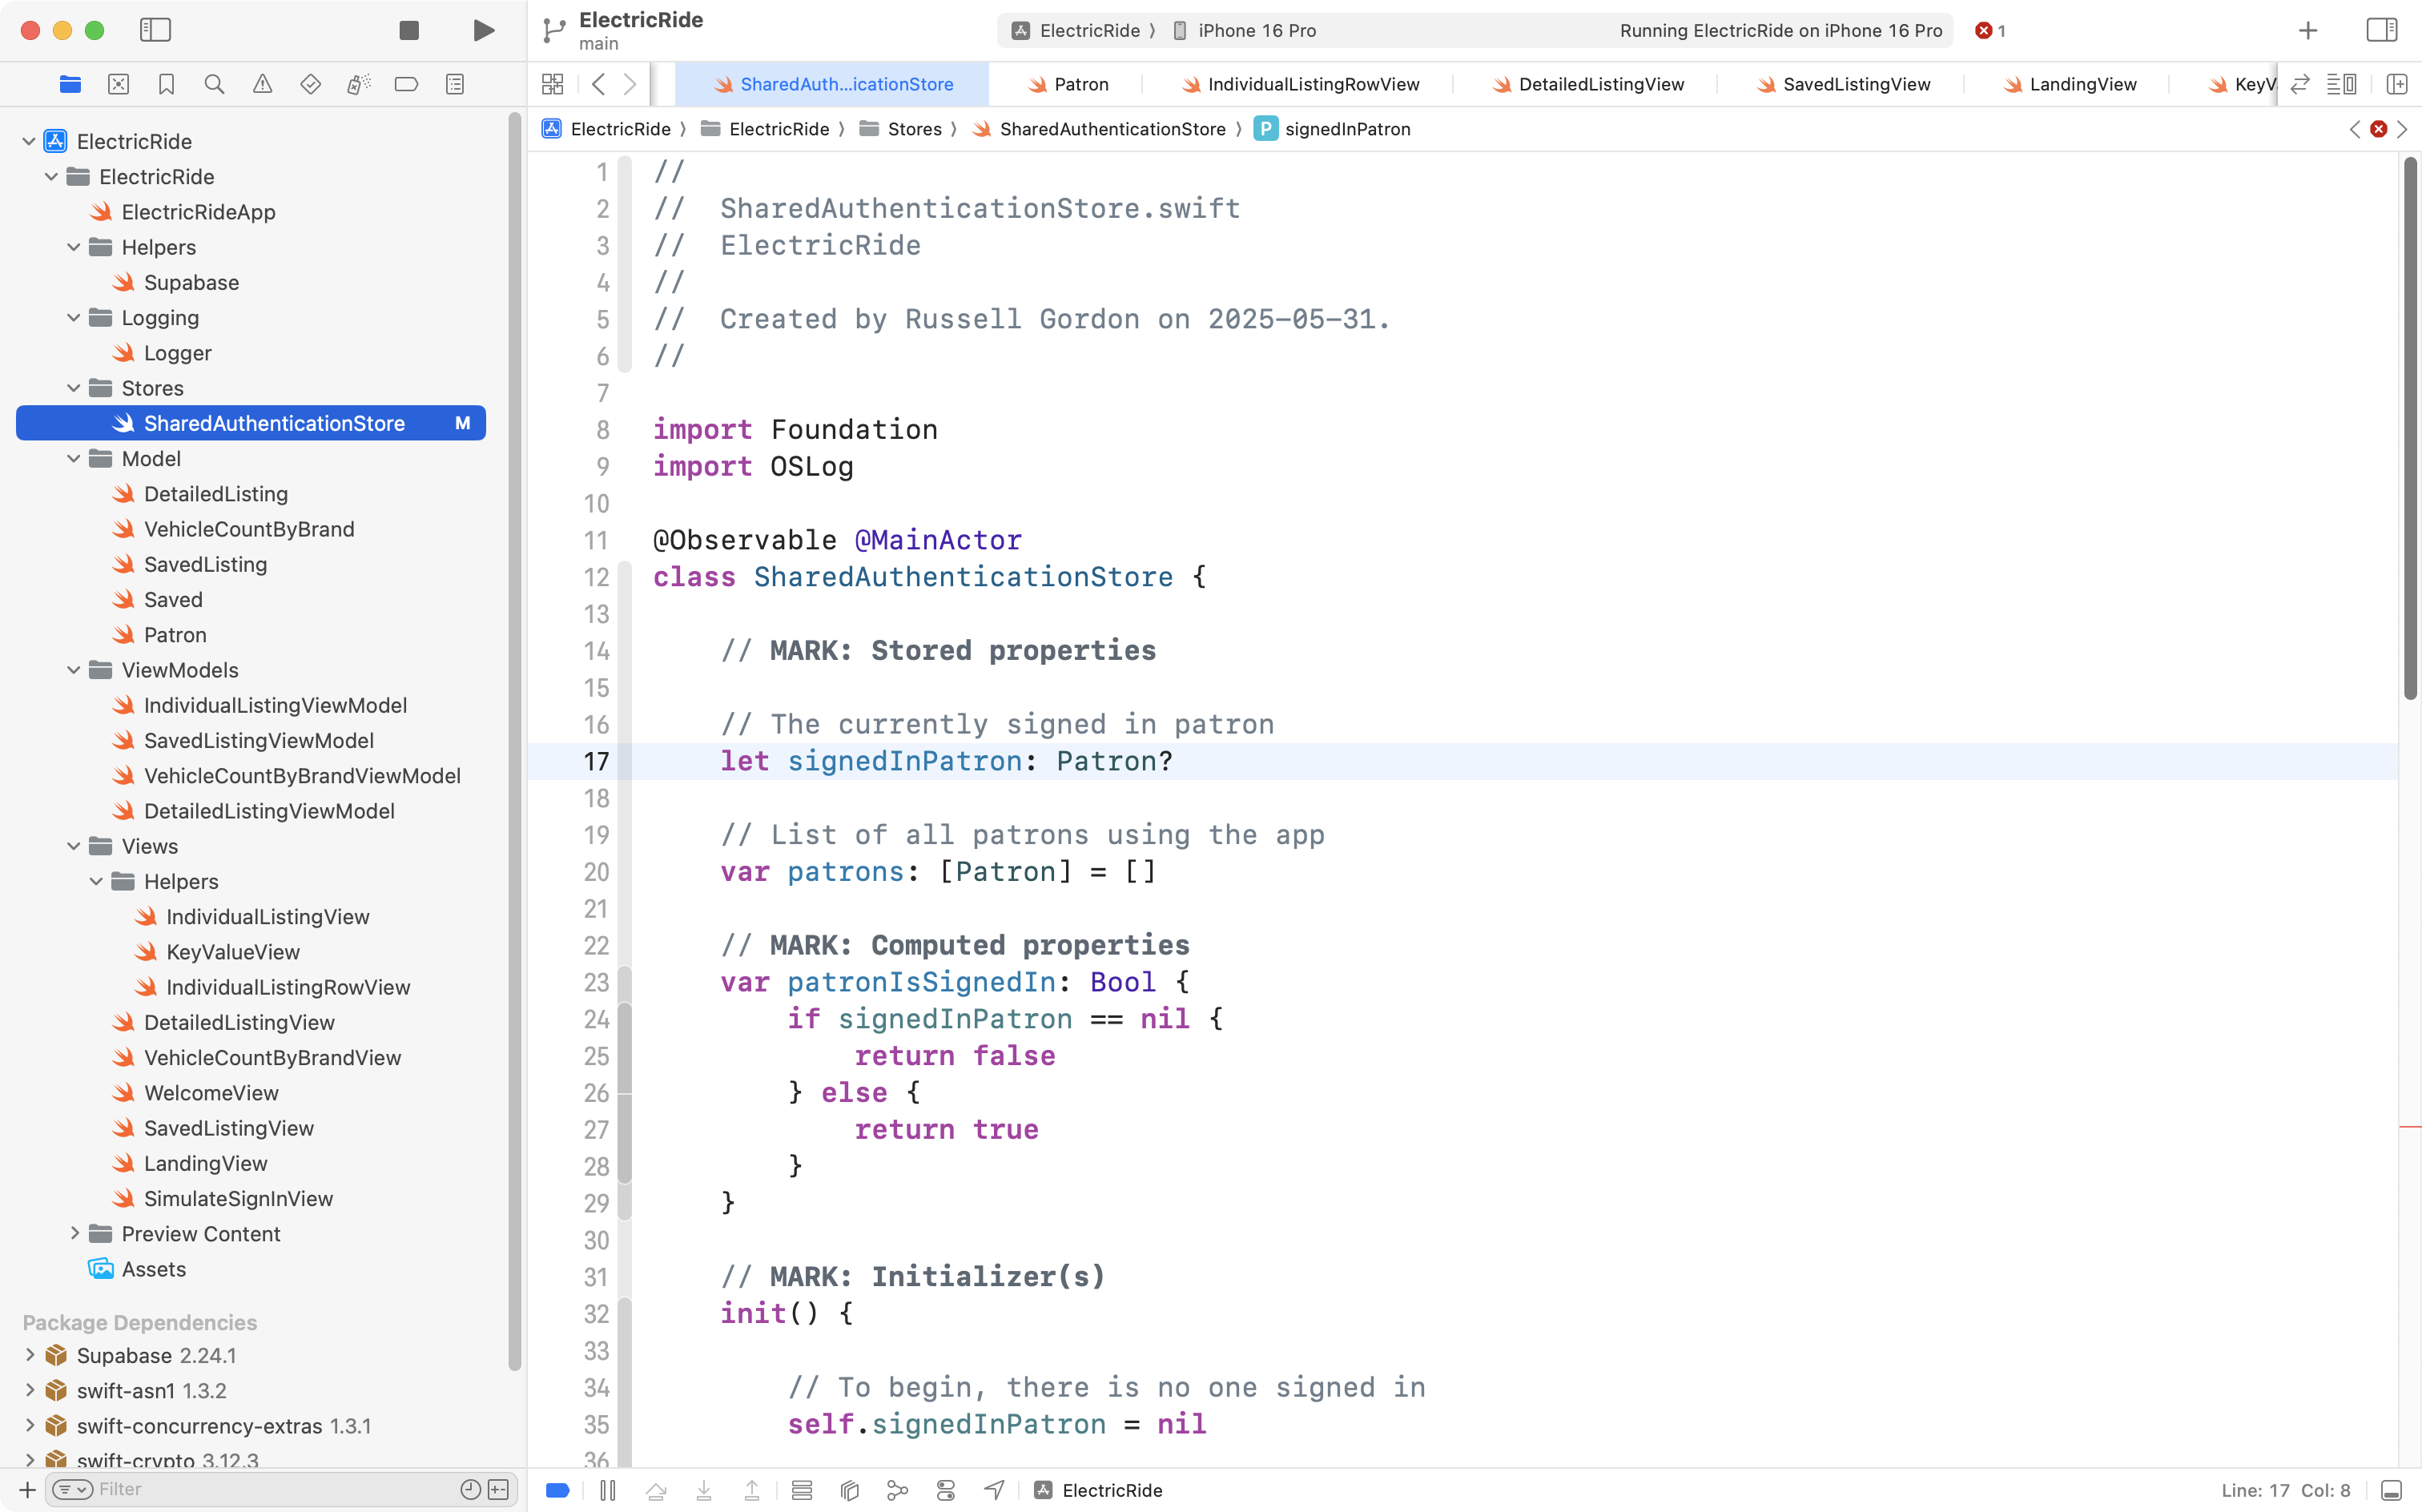
Now we can add a stored property – signedInPatron – to keep track of the specific user that has been signed in:
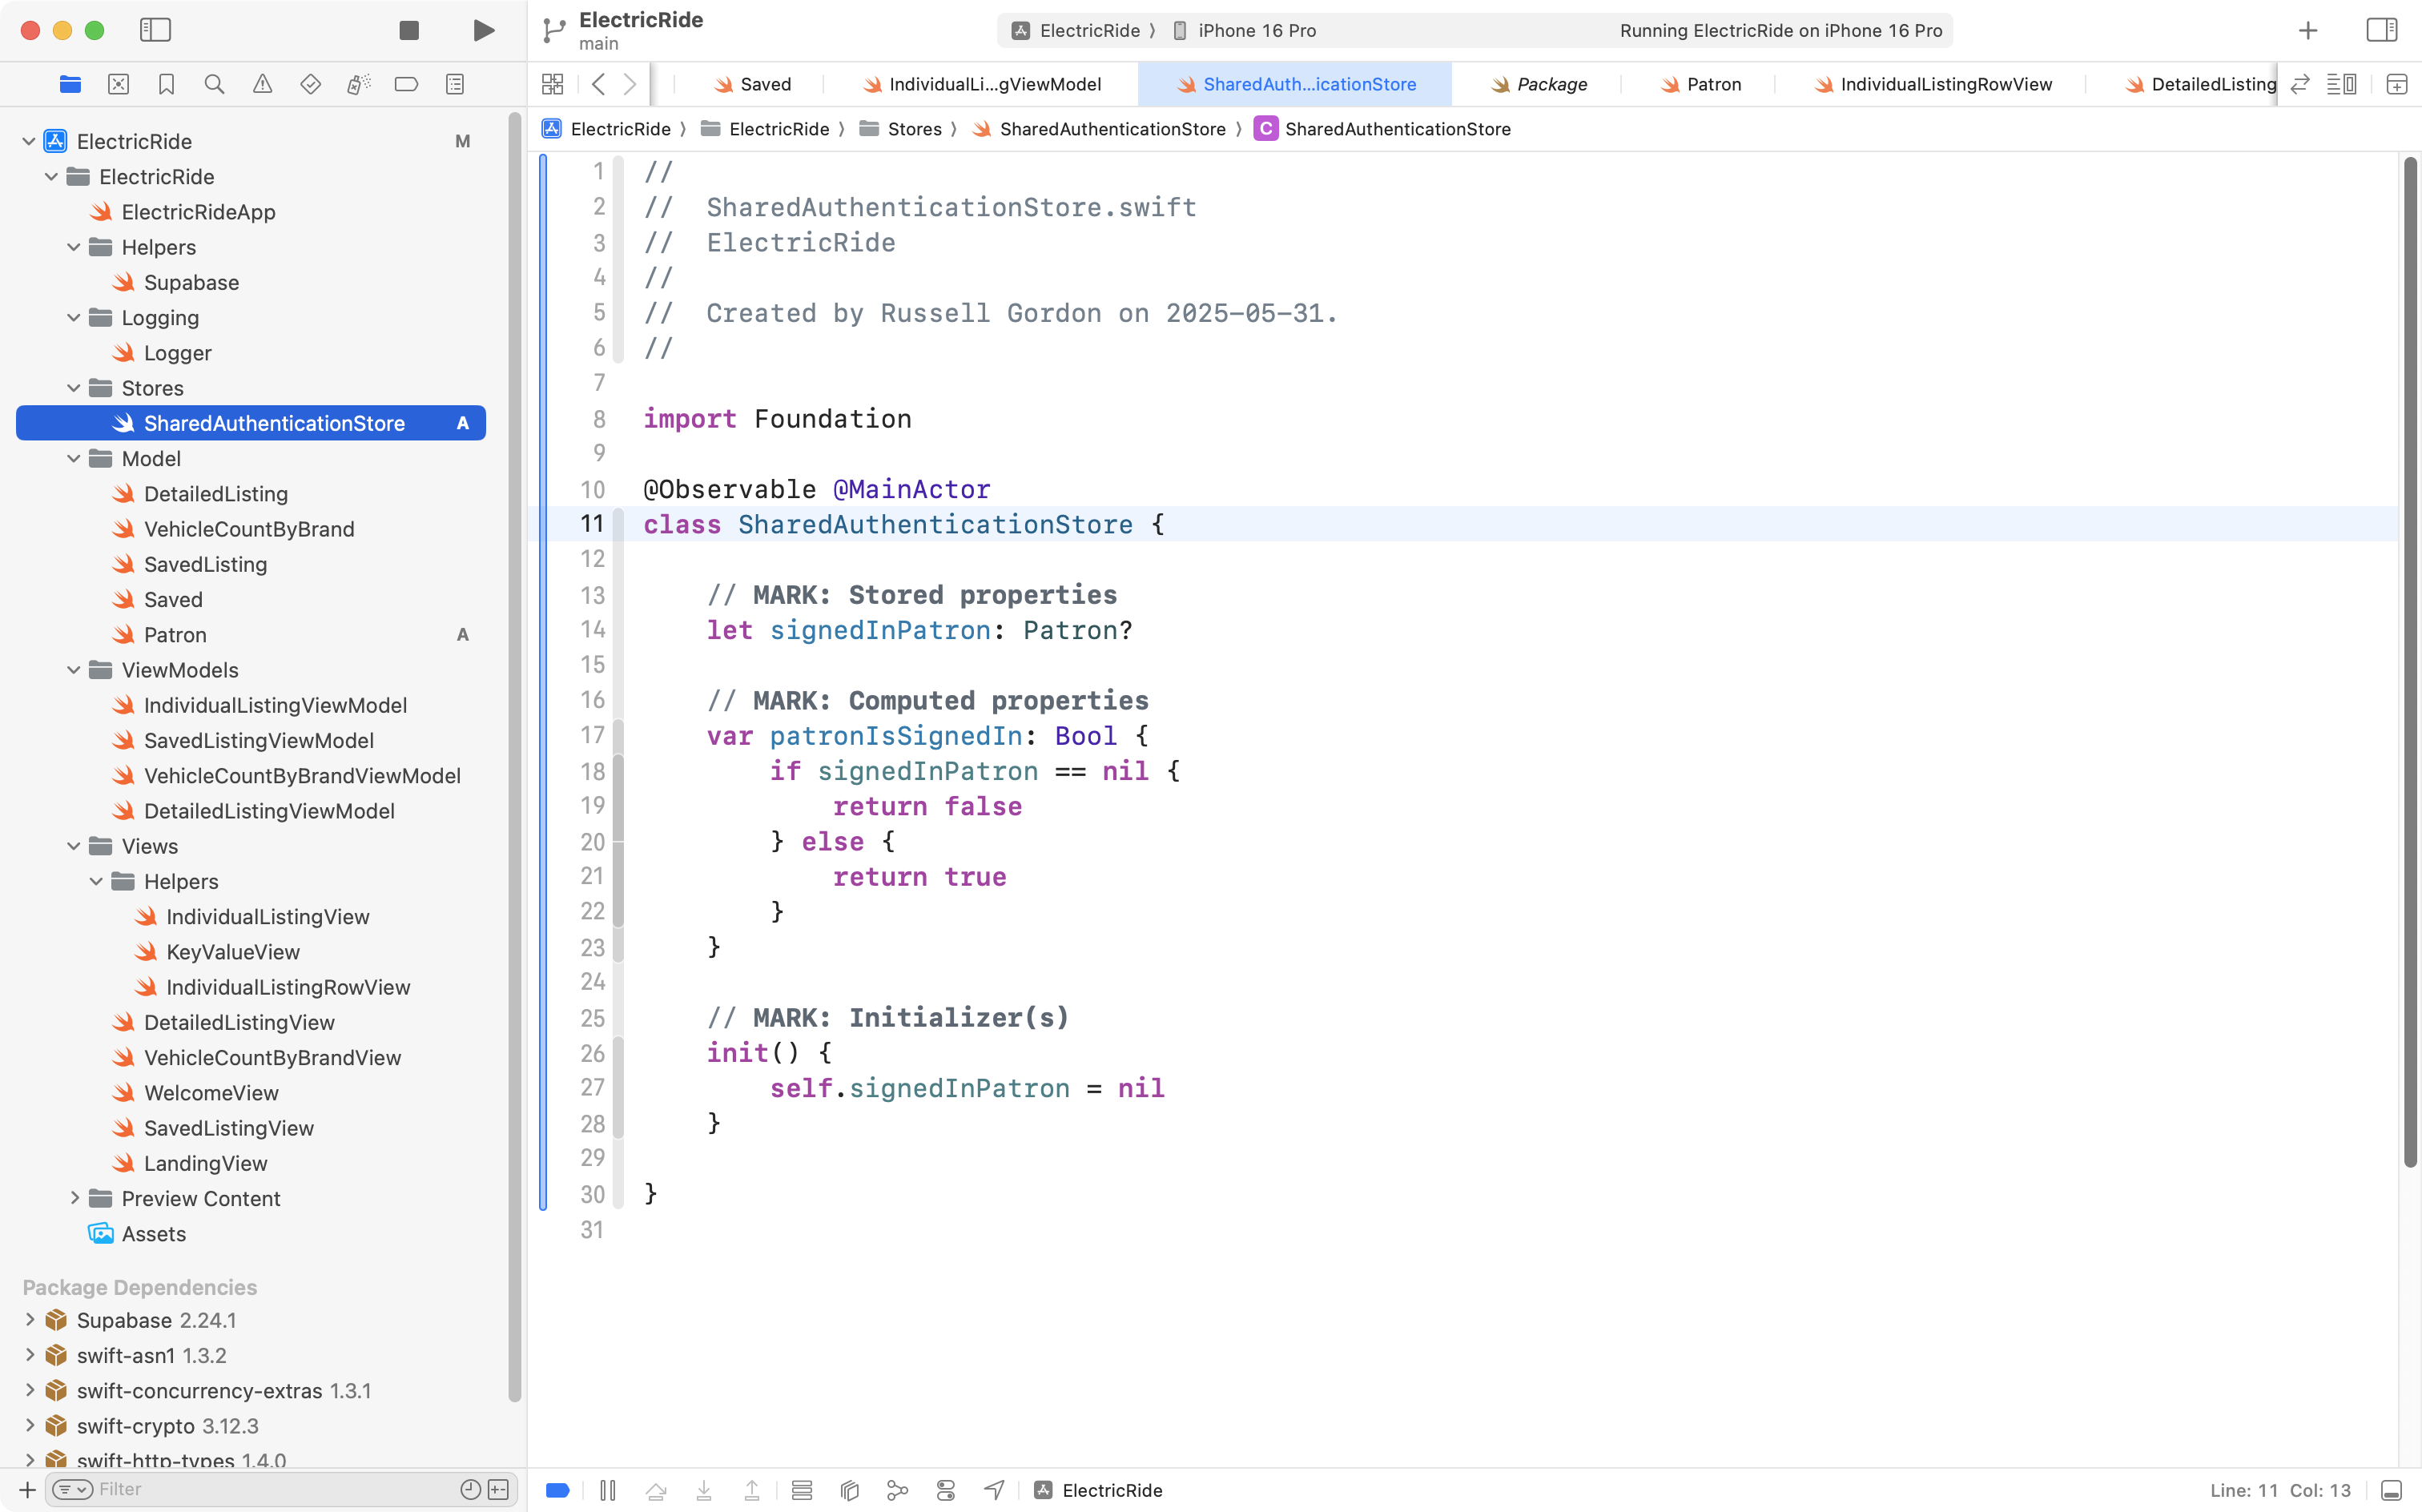
For convenience (this will be useful later on) we also added a computed property that returns a Bool that will be true when signedInPatron is not nil.
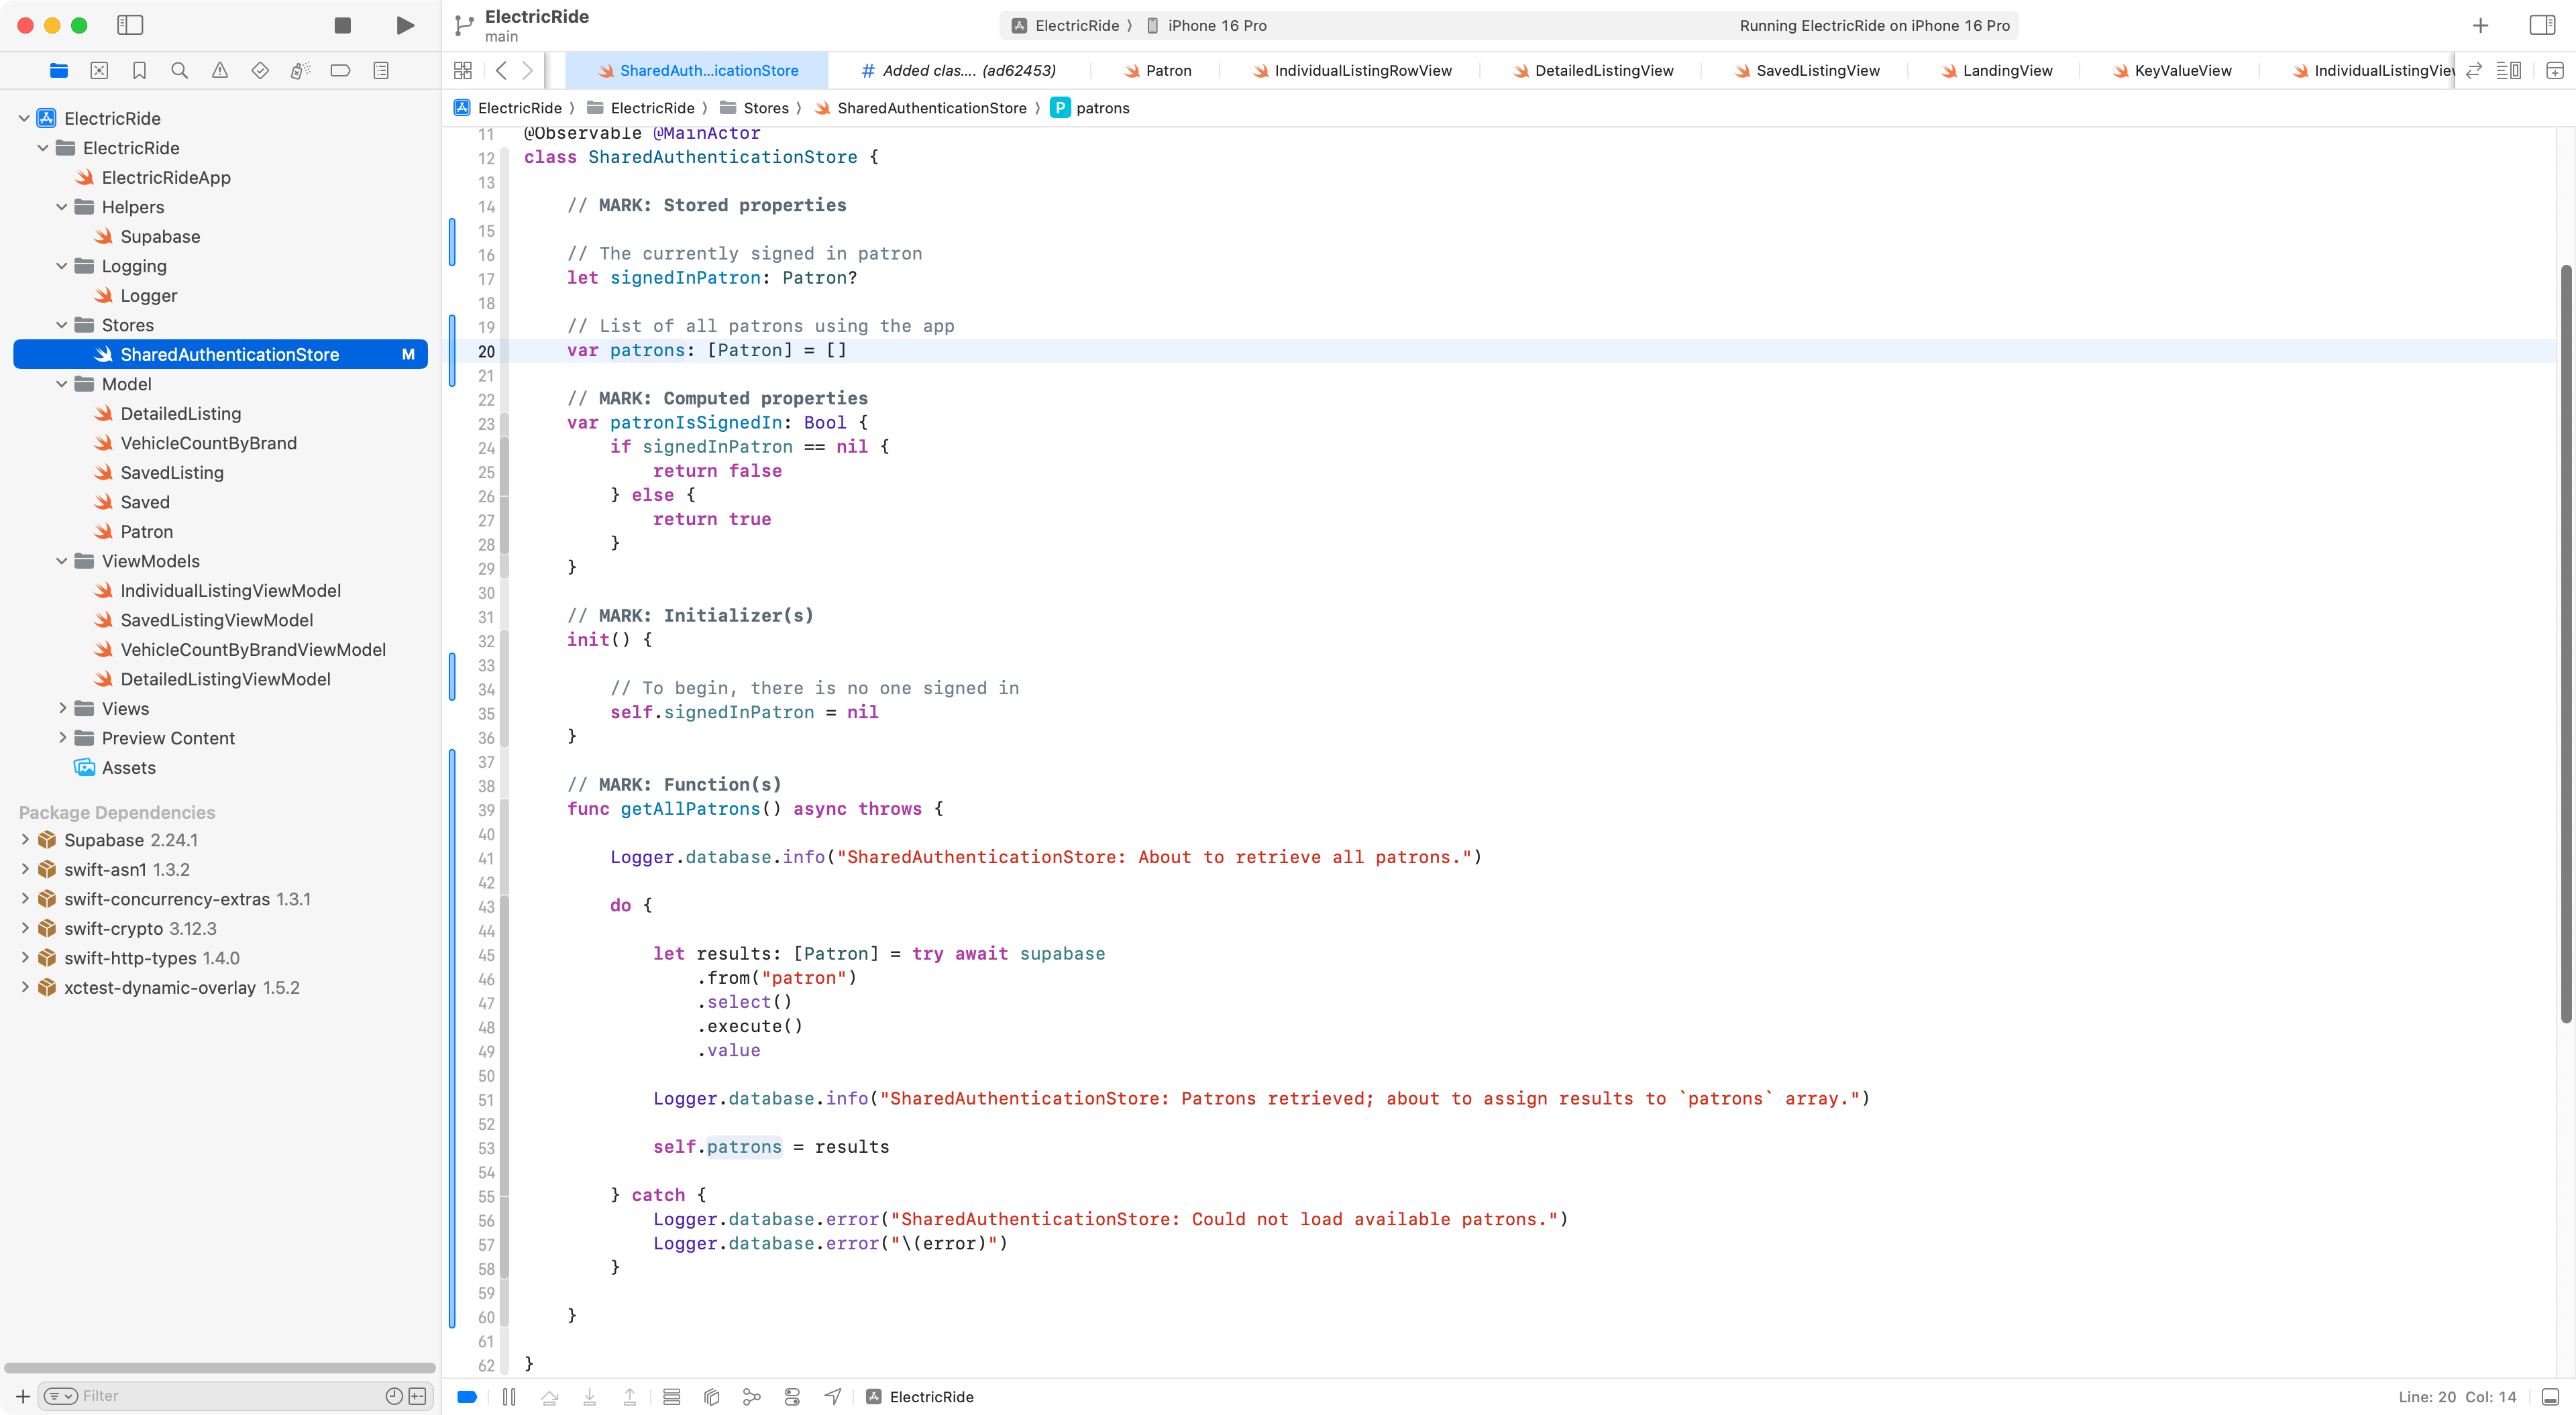
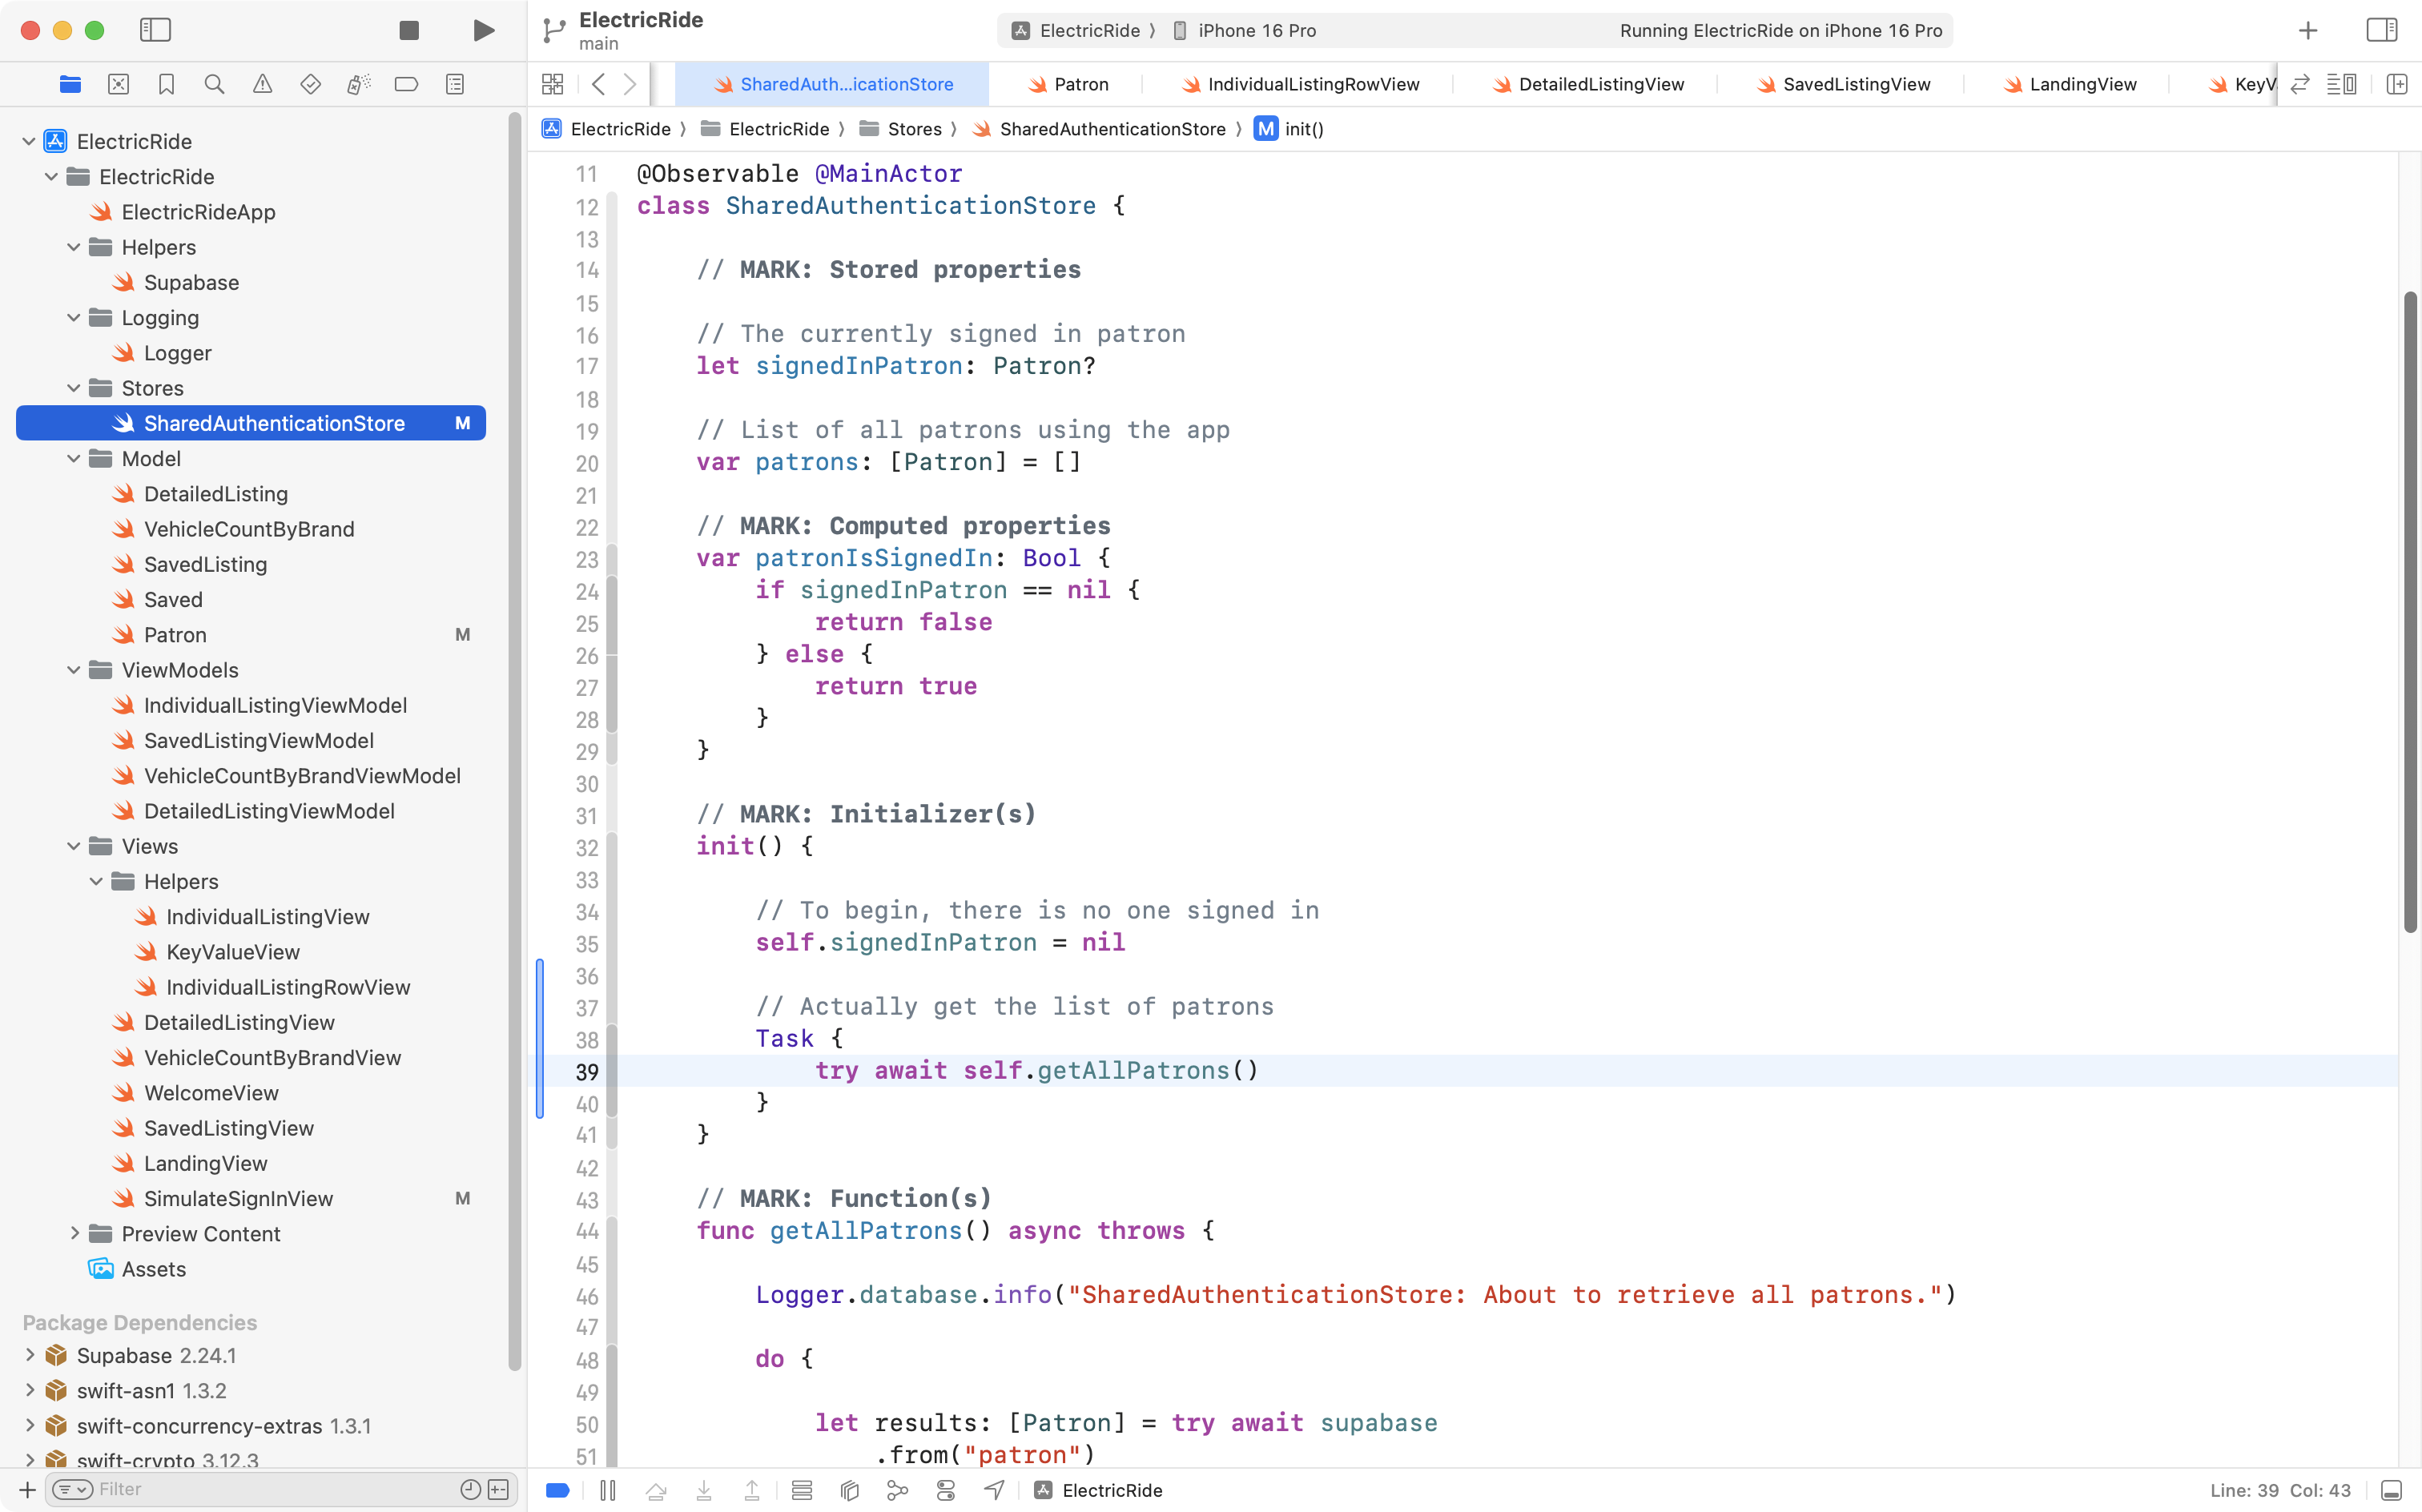
For the time being, this class will need to retrieve a list of all patrons in the database, so we can pick which one we want to fake a sign-in for.
Mr. Gordon made these changes to SharedAuthenticationStore to allow for this – this code is very similar to the other view models that fetch information from the database:
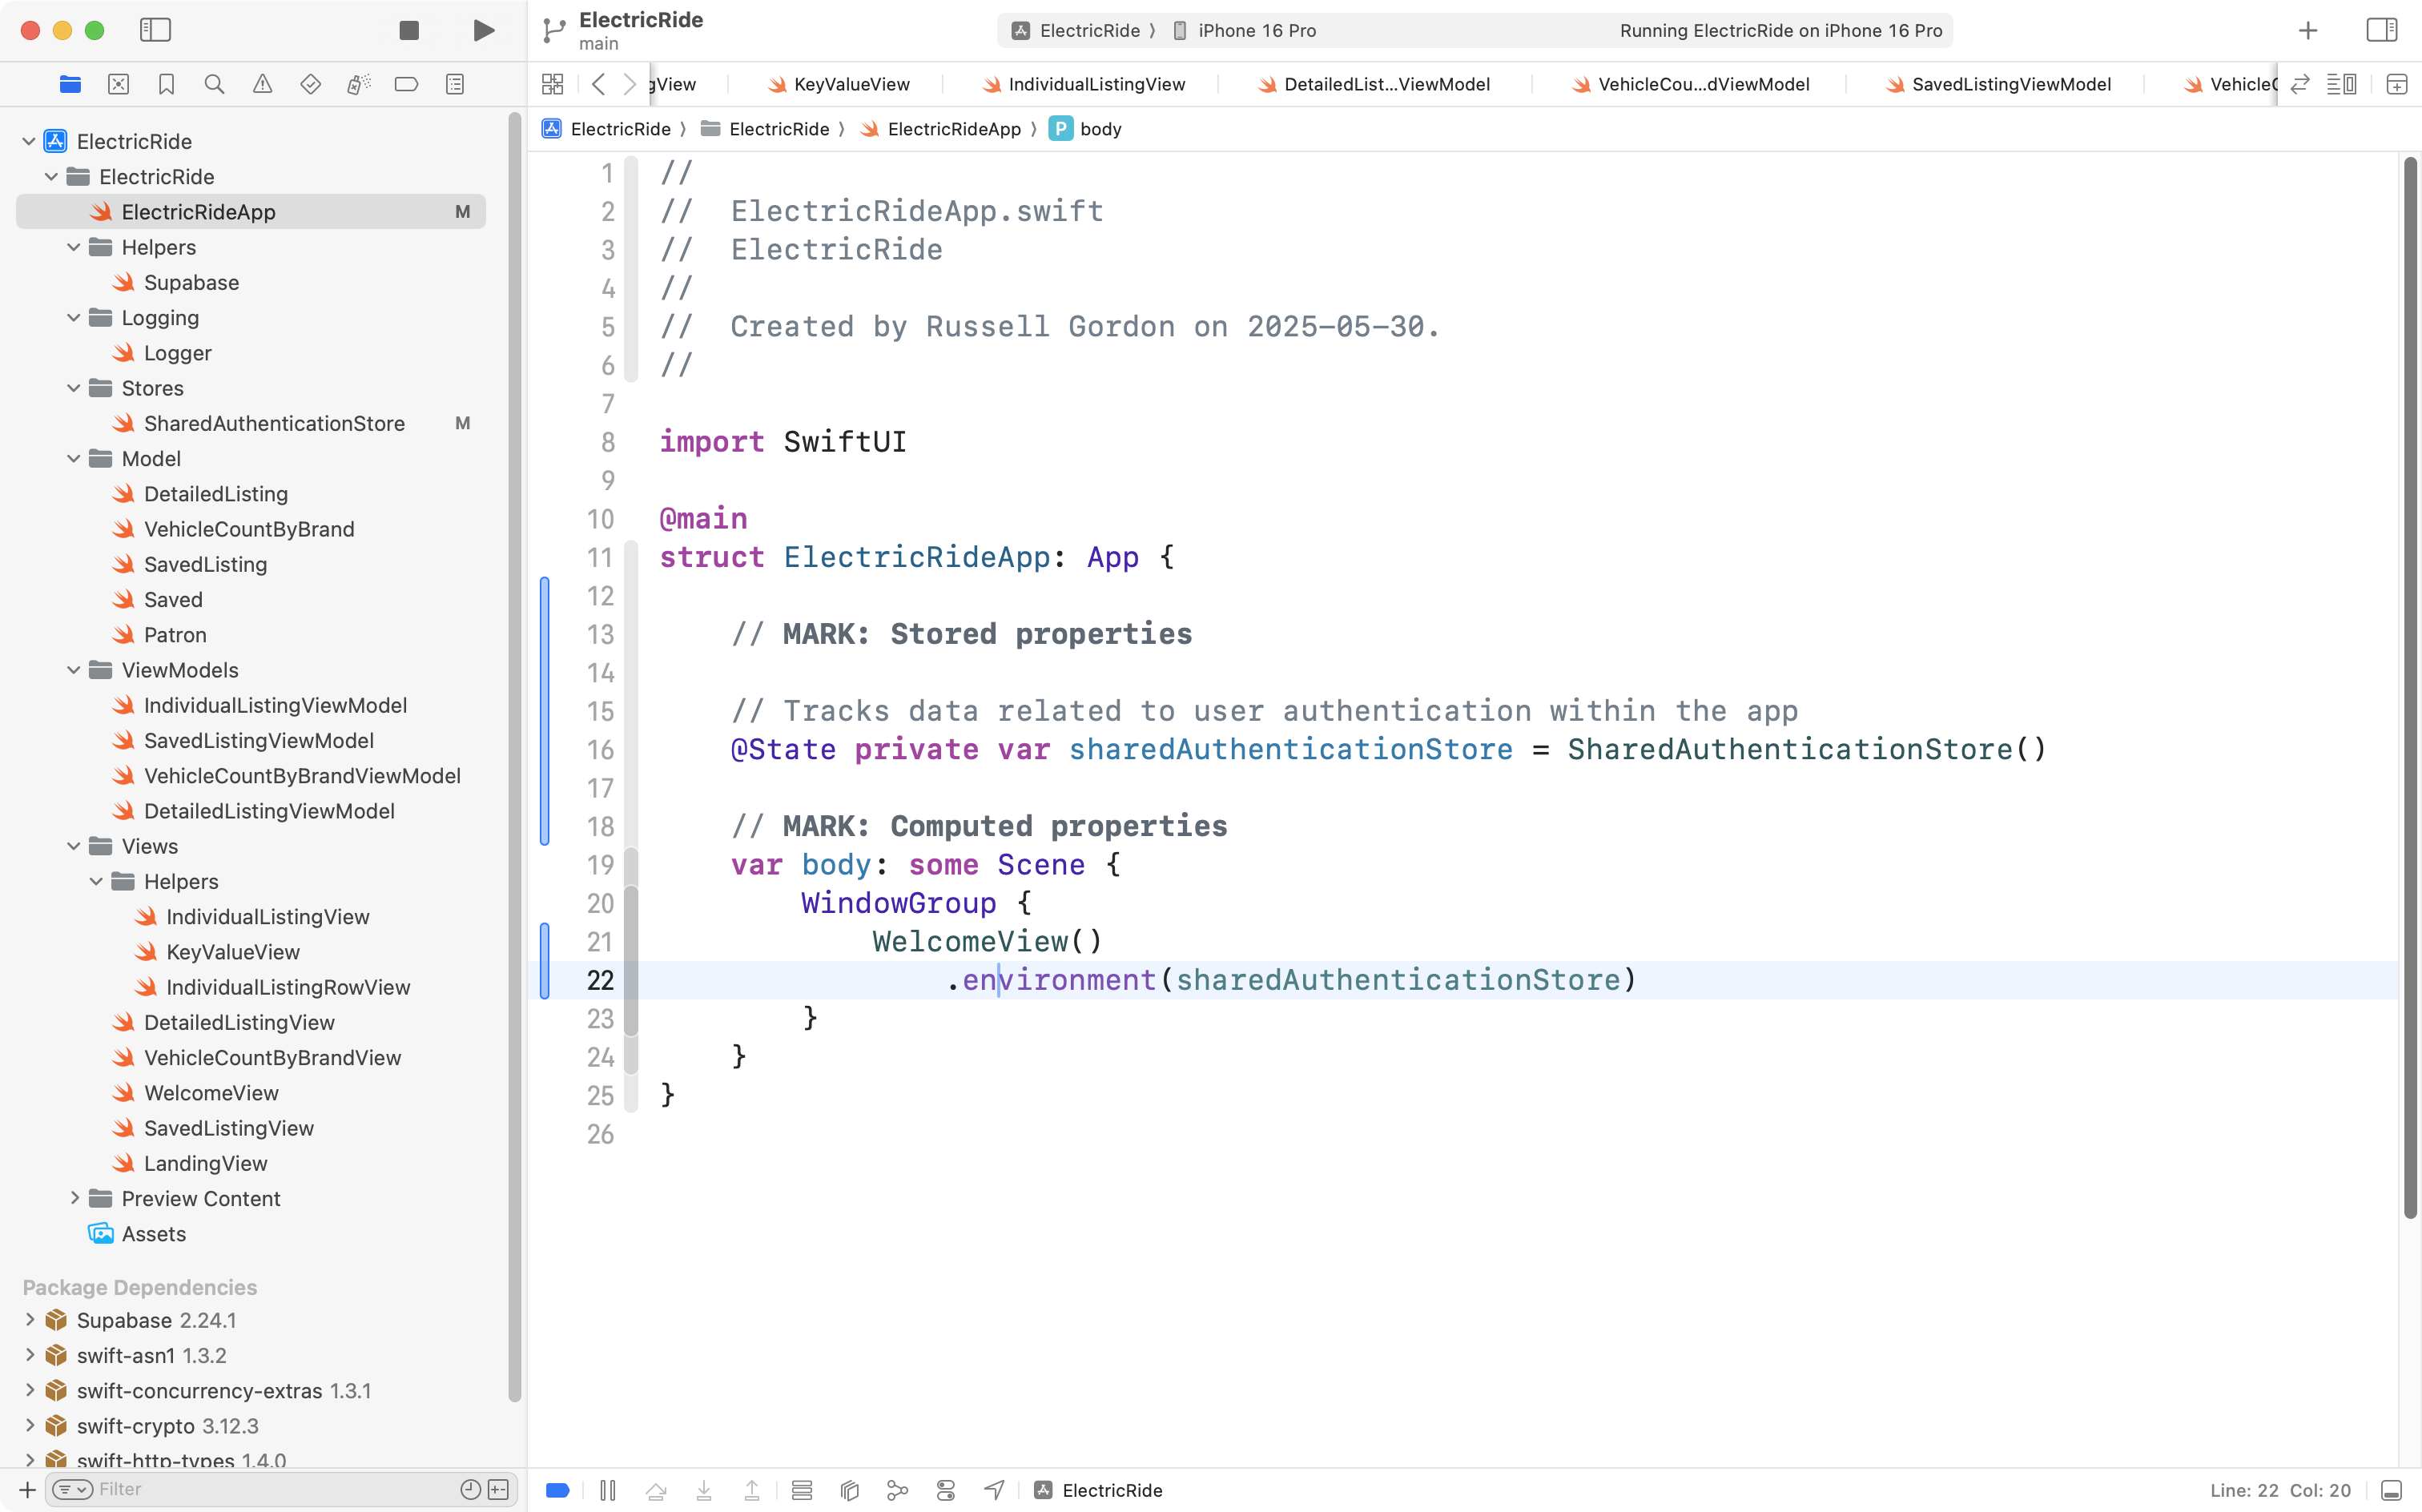
Now we need to create a single instance of SharedAuthenticationStore at the app entry point:
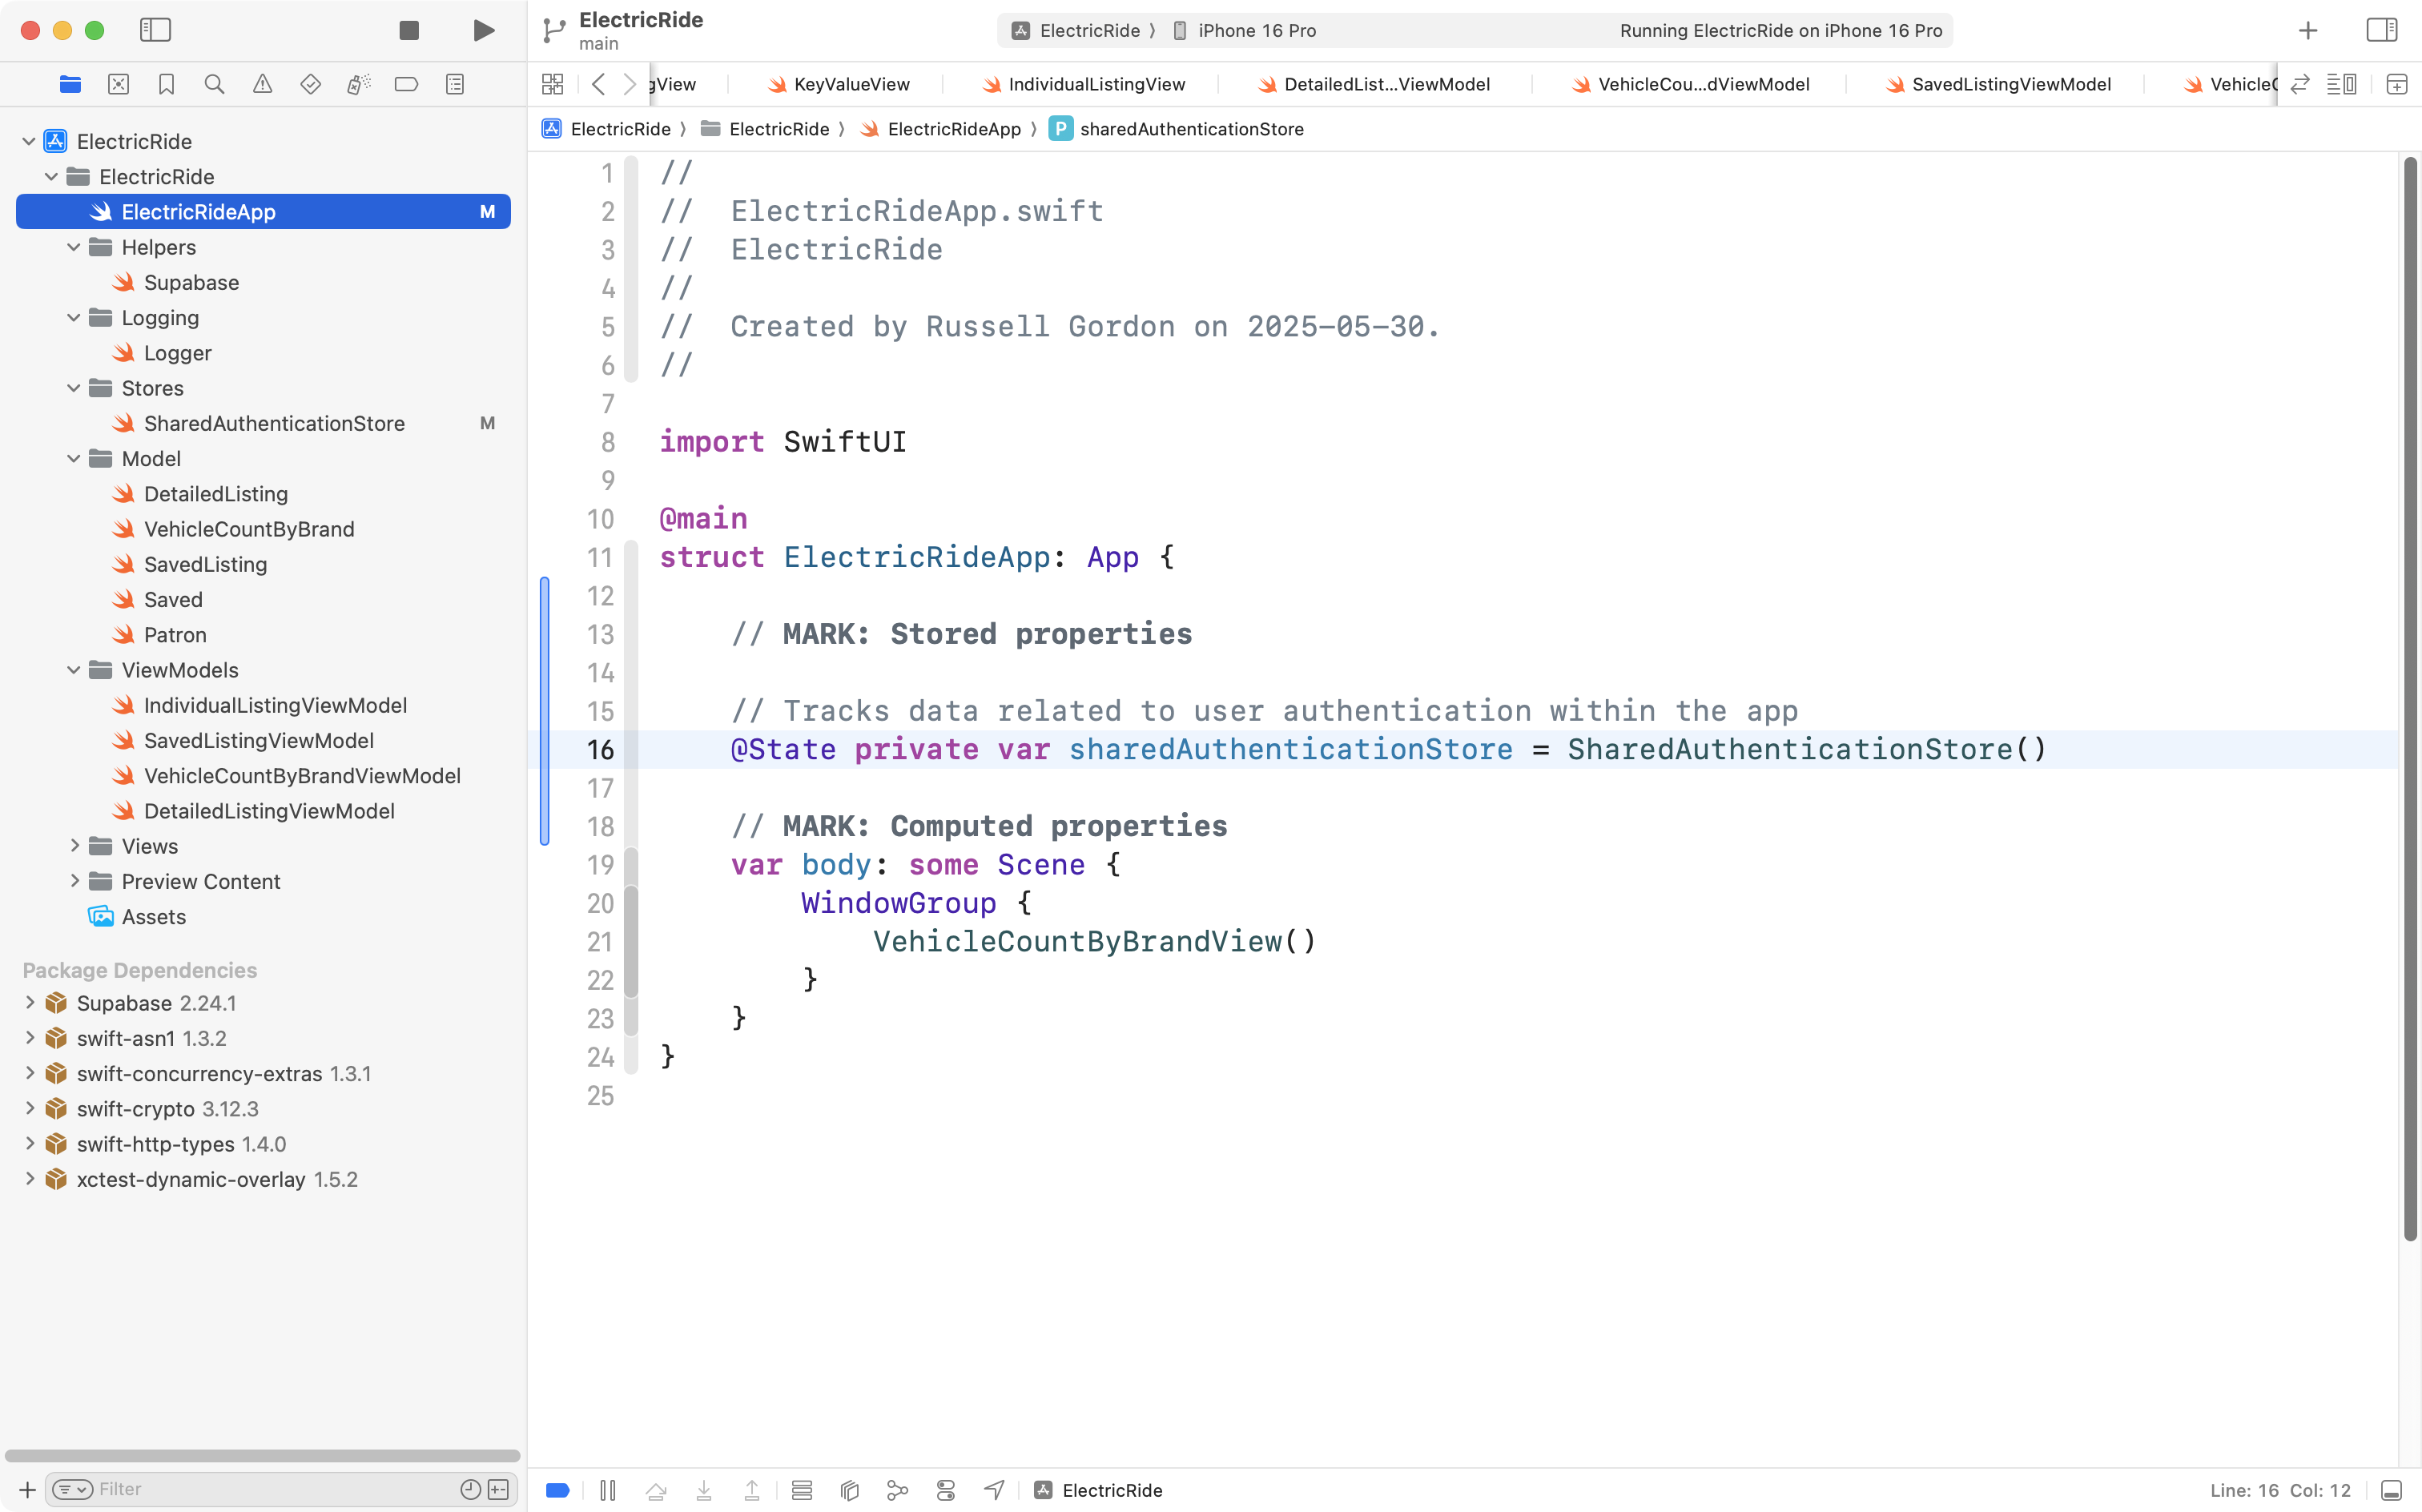
… and then share it, through the environment, so it can later be used by other views in the app:
Simulate a login
Next, we need a view that lets us simulate a sign-in.
We’ll eventually make this view show up in a sheet that slides up when the user taps the green sign in button on WelcomeView:
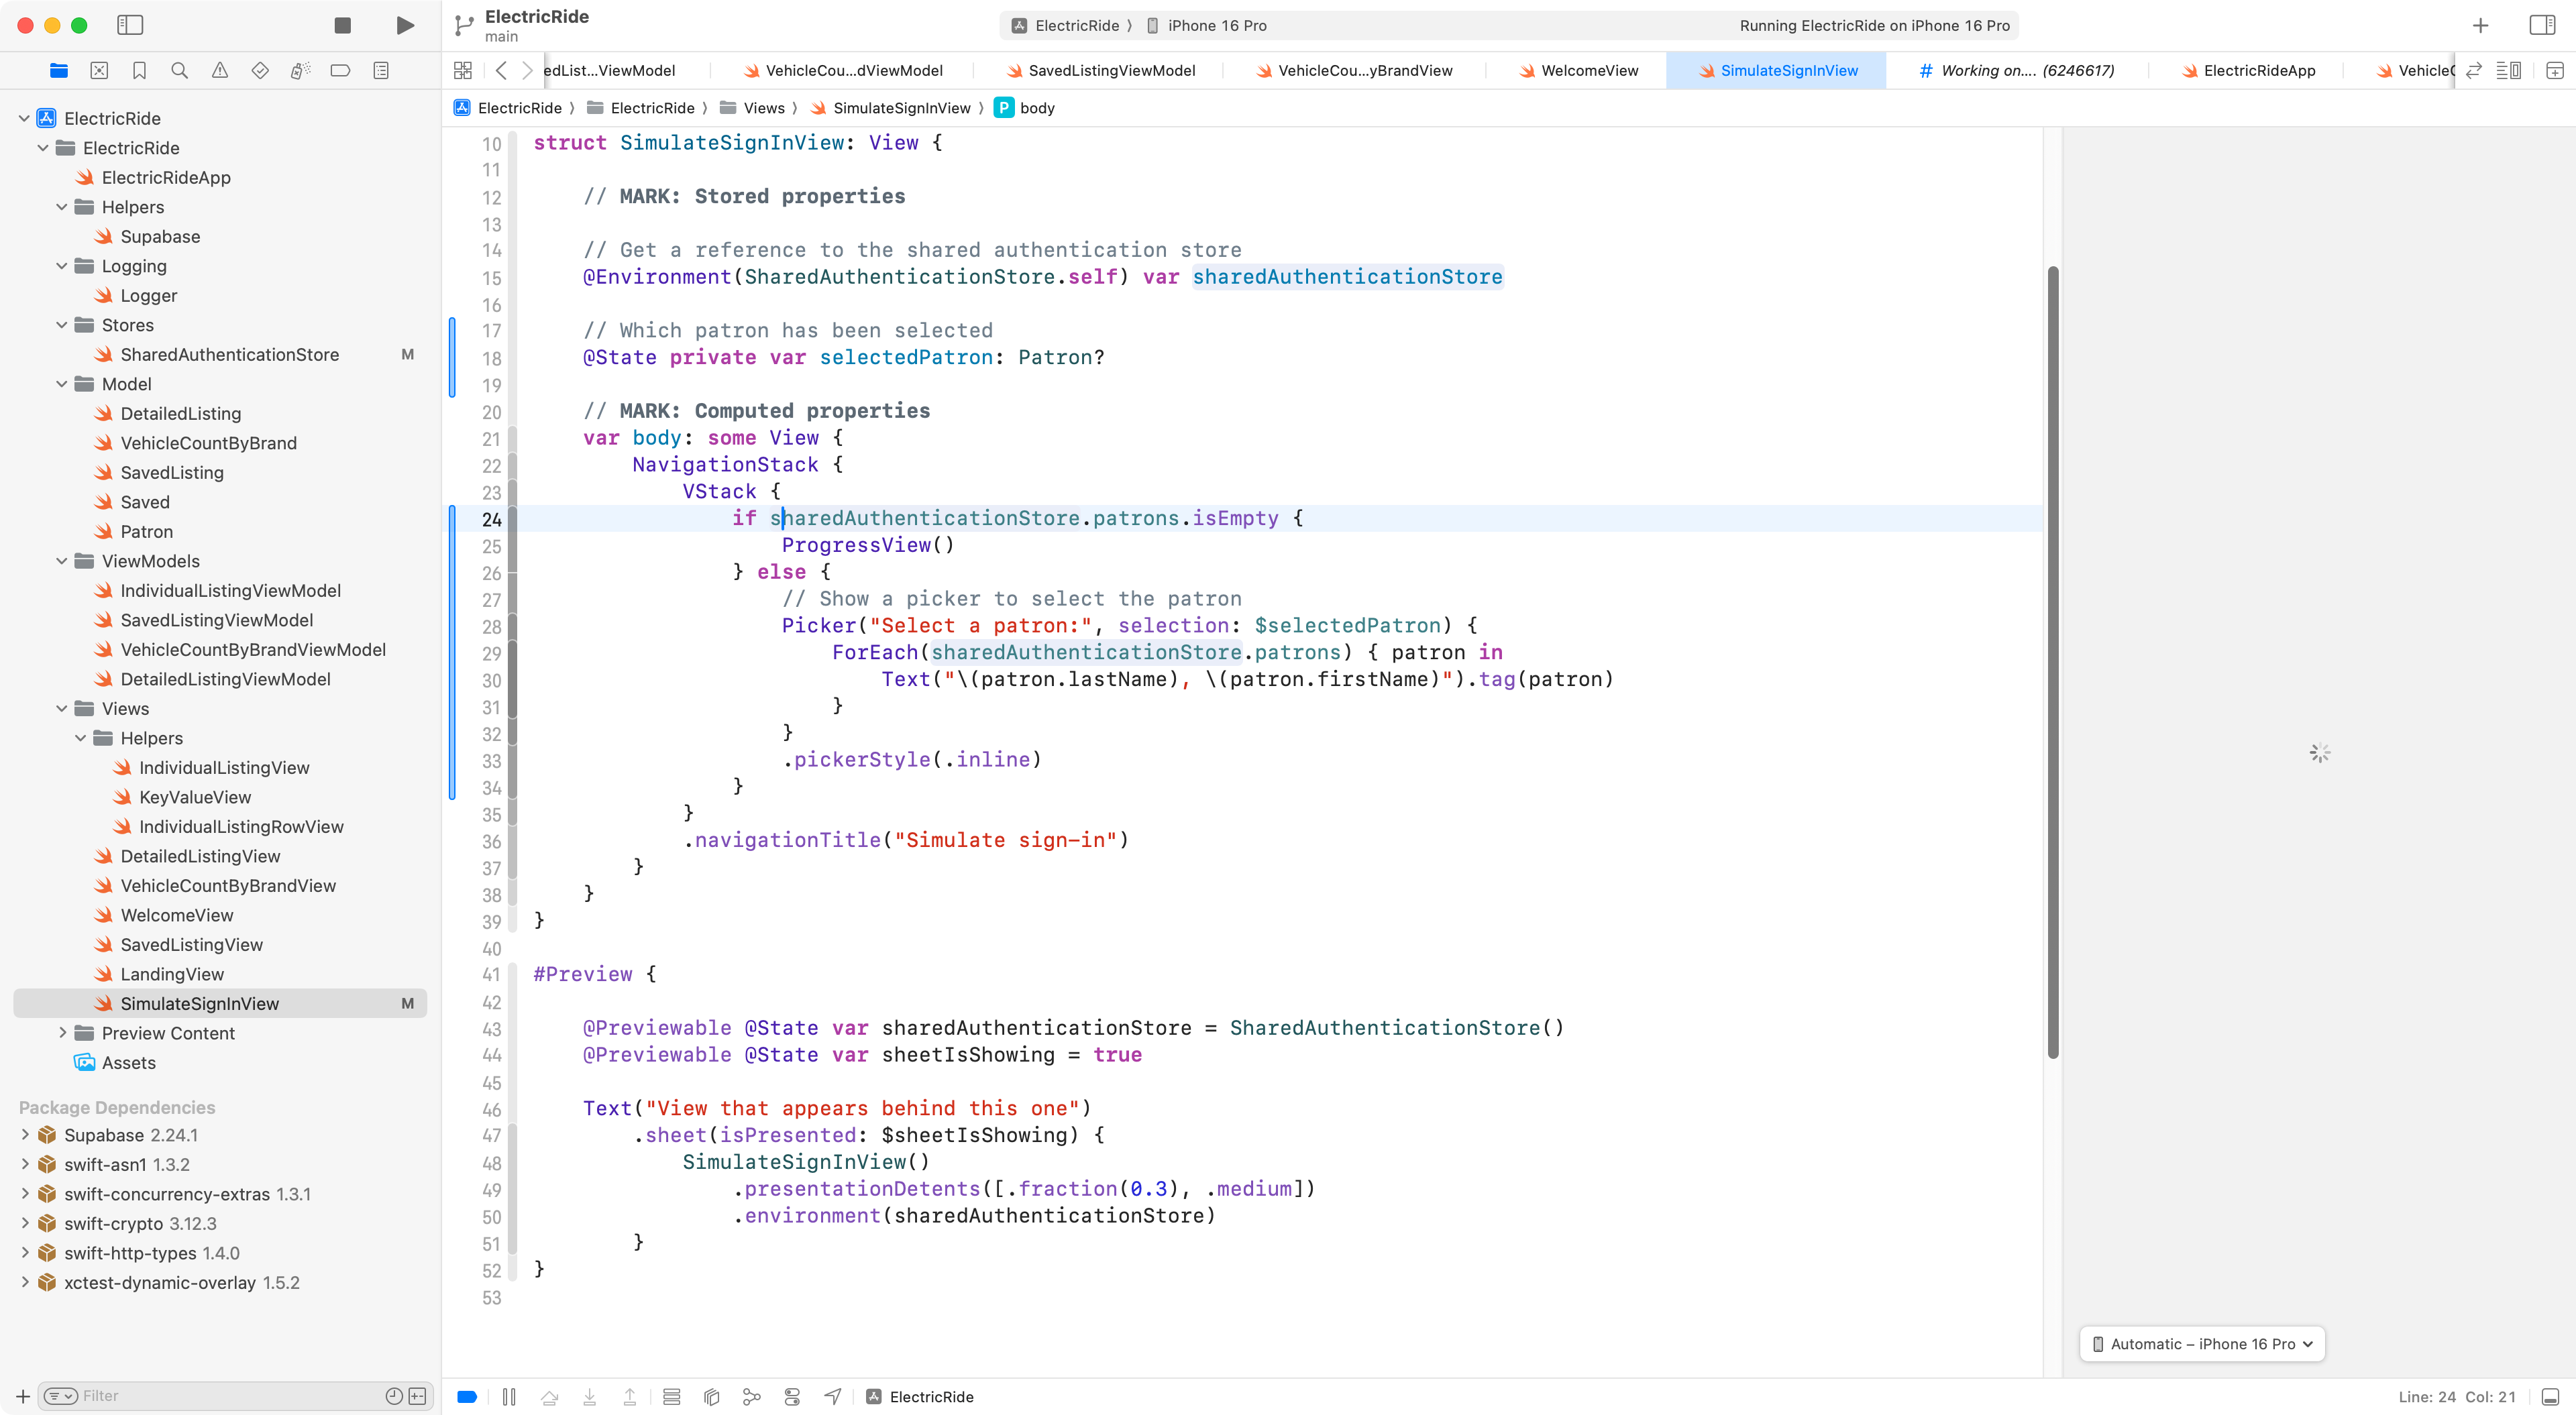
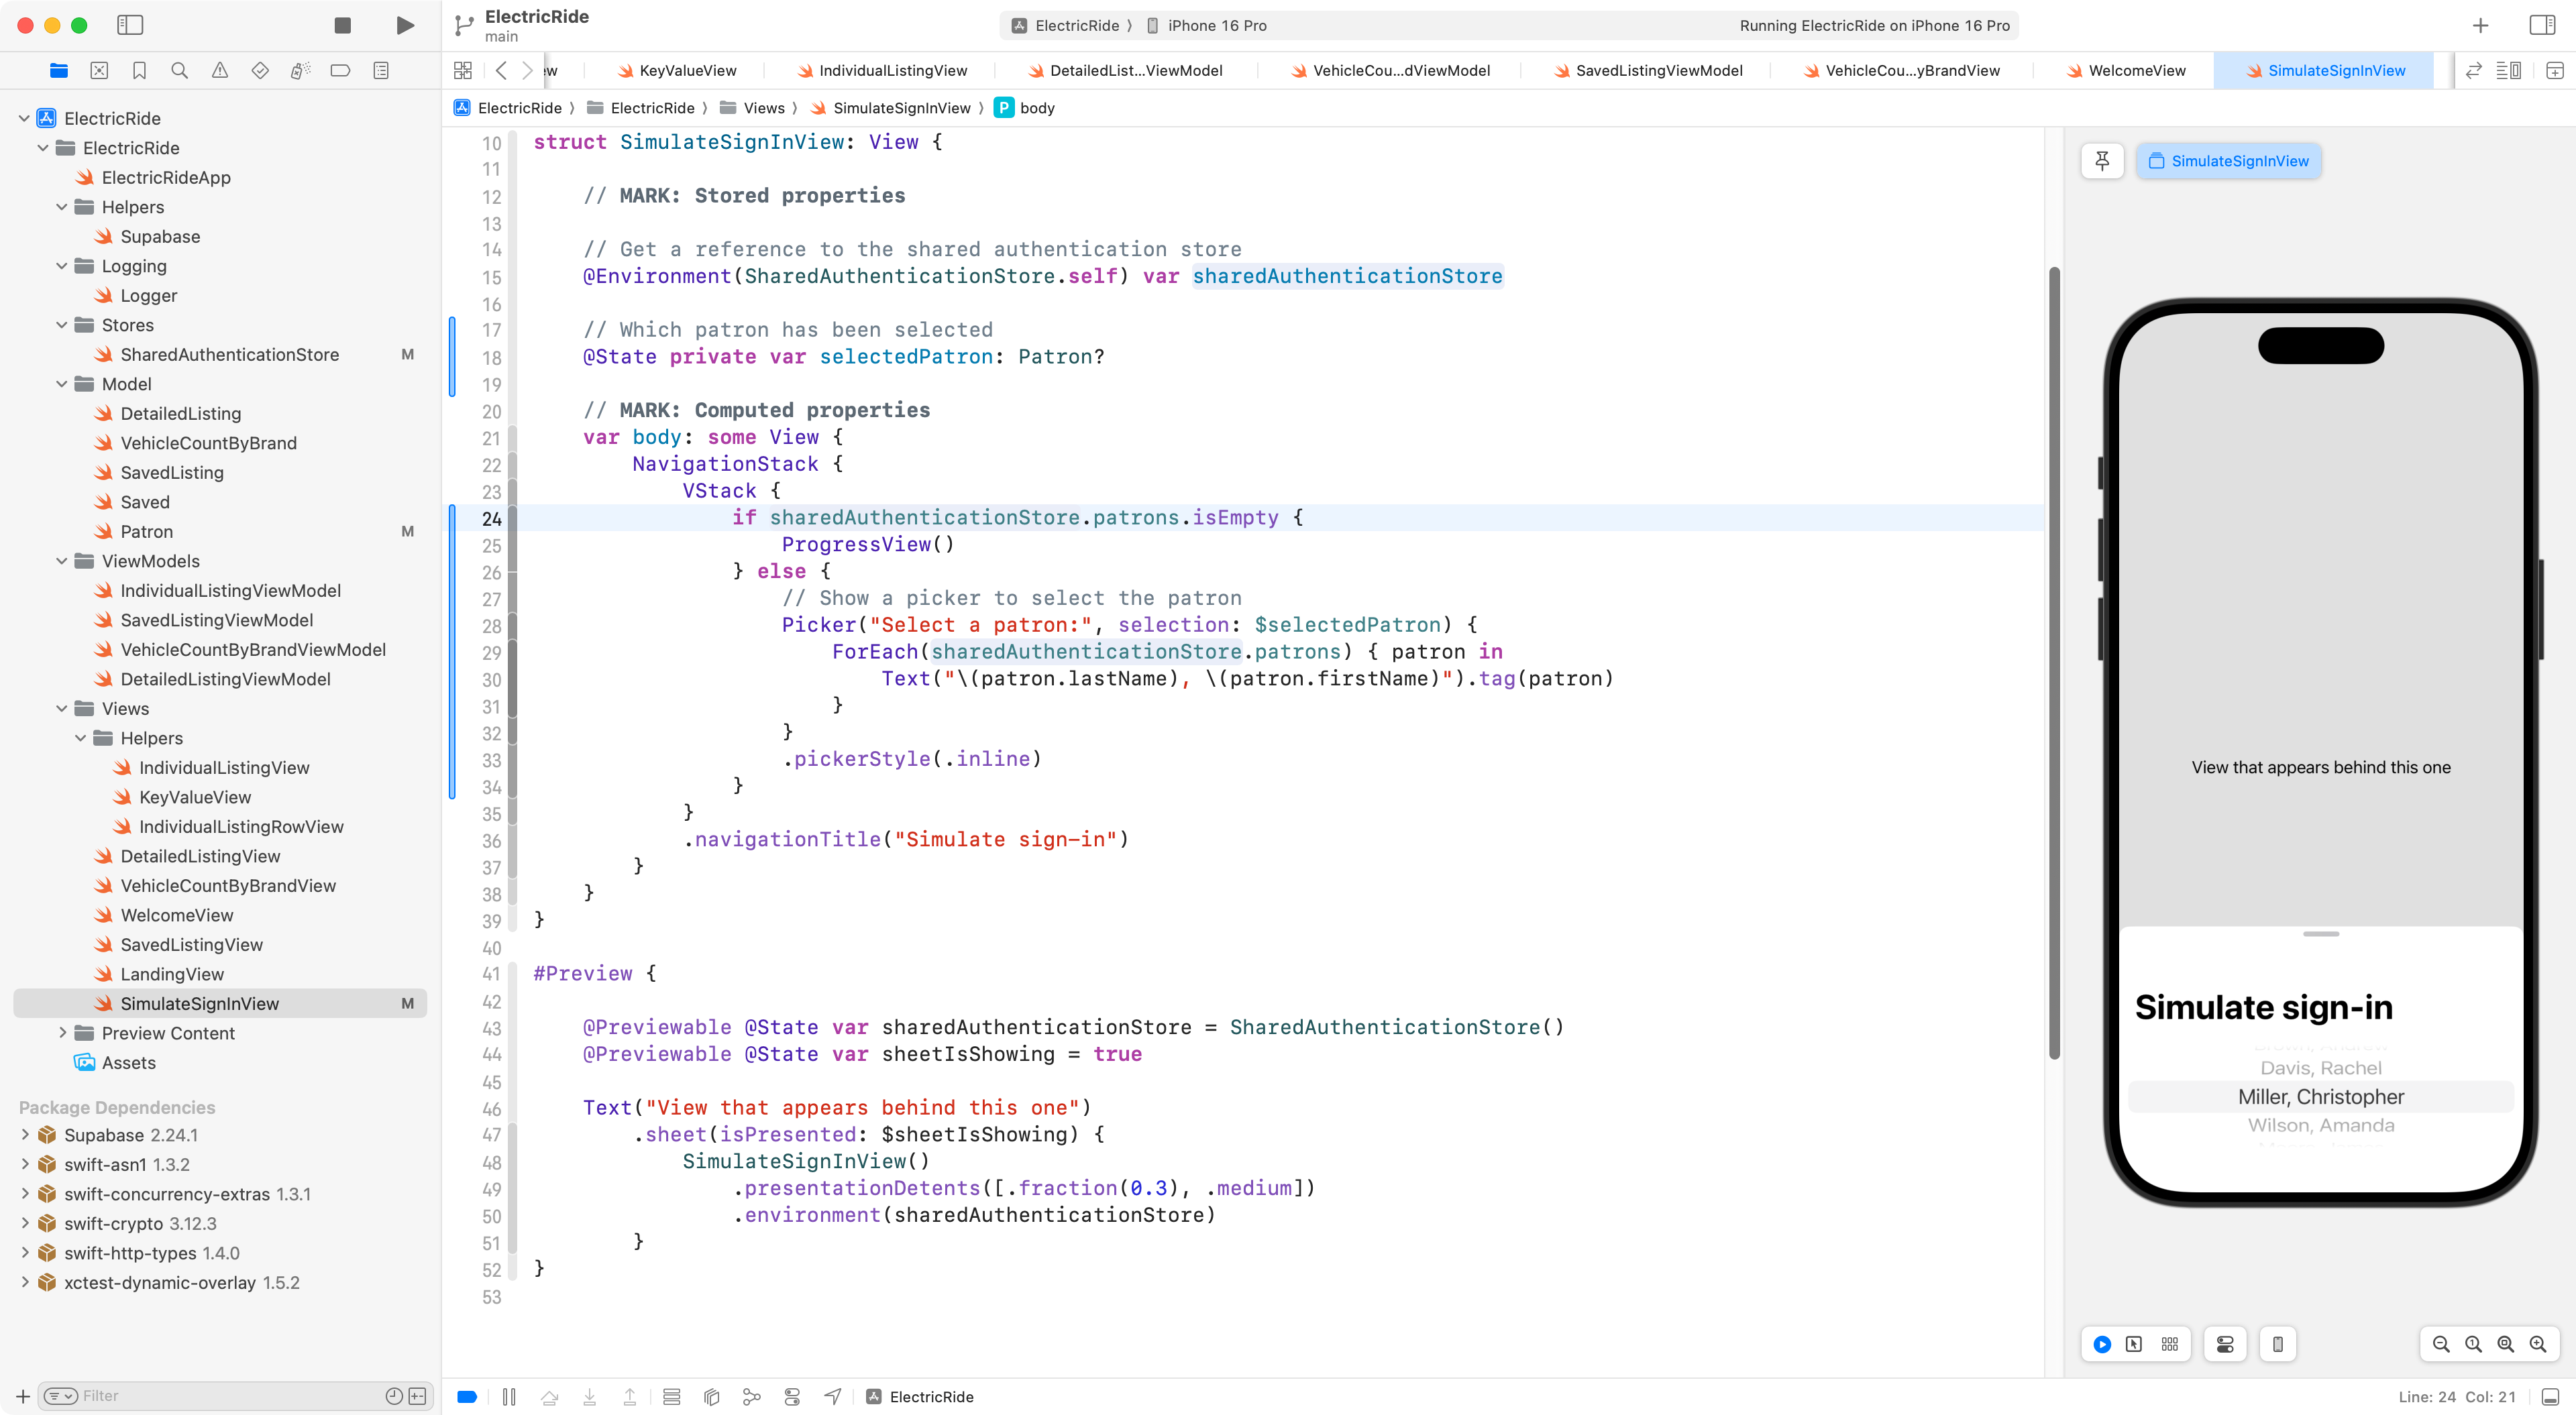
First, let’s start on the view that simulates a sign in:
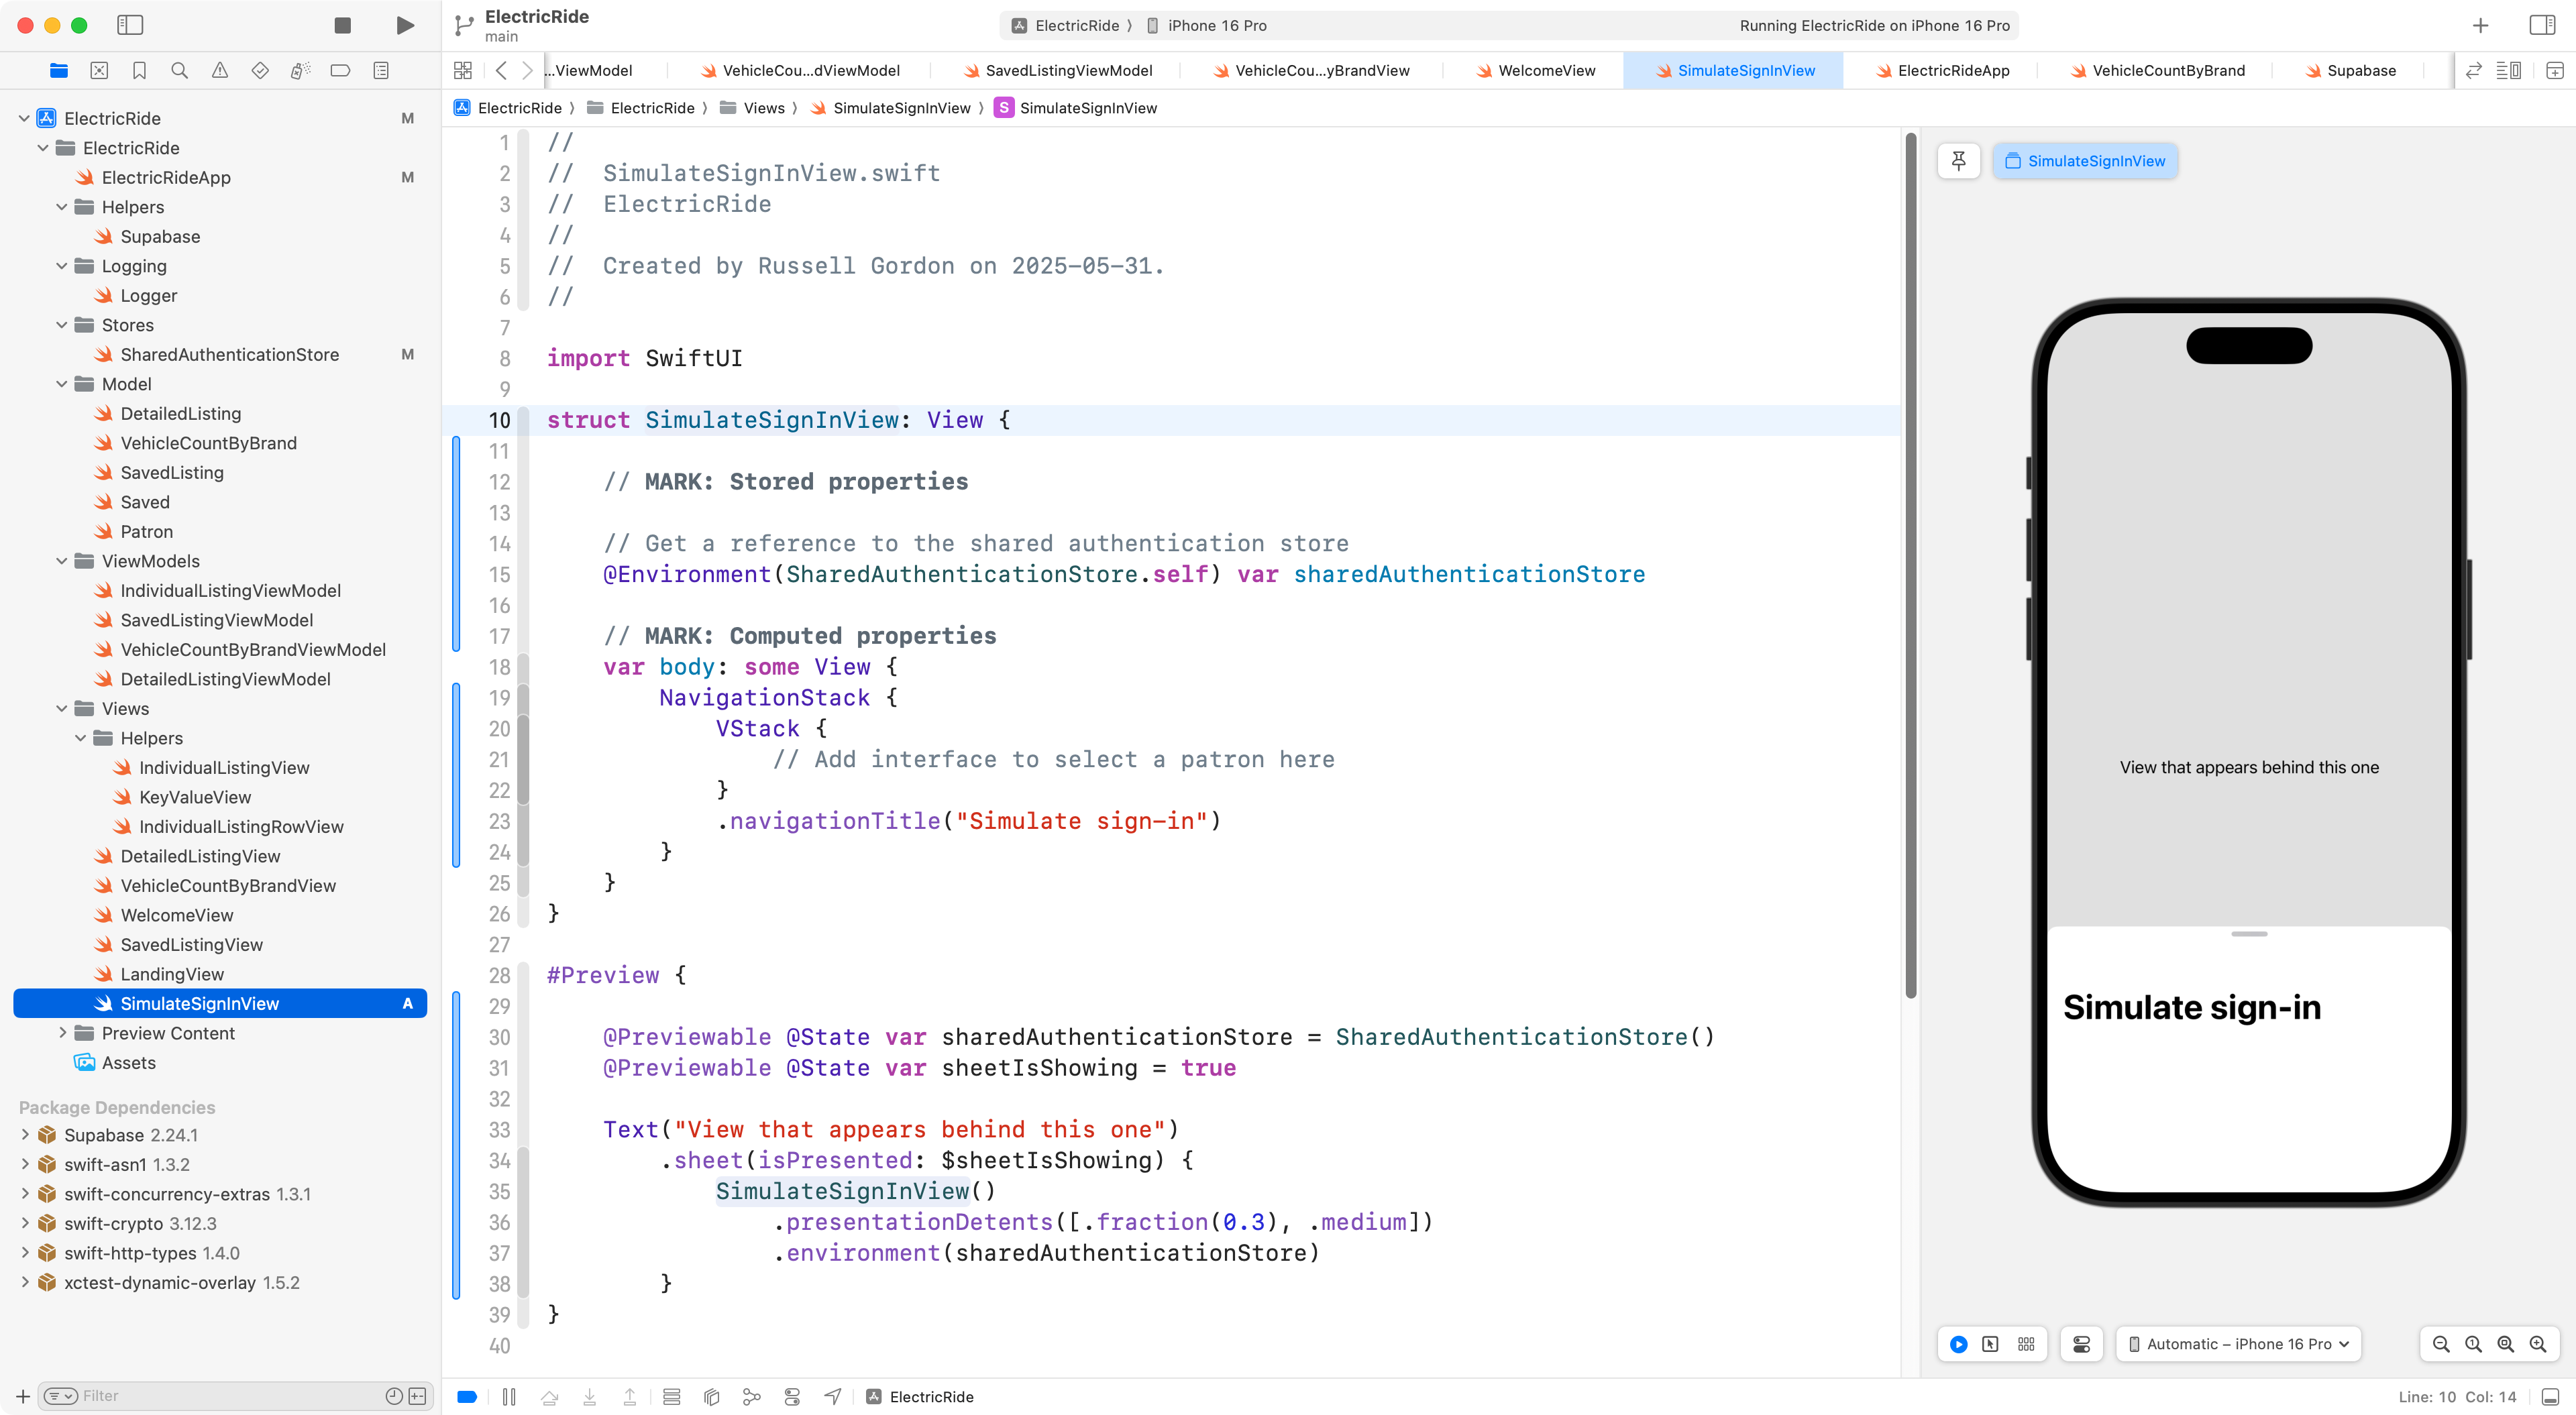
Note how the view pulls a reference to the instance of sharedAuthenticationStore from the environment.
Also, note how we need to take a few special steps to make the Previews window work.
TIP
For more details on how slide-up sheets work, consult this tutorial.
Now, first, we’ll adjust the SharedAuthenticationStore initializer so that when the instance of this class is created, the list of patrons is actually fetched:
Then, we’ll add a picker that uses the patrons array on the instance of sharedAuthenticationStore to show a list of all patrons:
In order for the picker to work:

… we must make the Patron type conform to the Hashable protocol:
TIP
Making a data type “hashable” just means that it will be easier for Swift to compare one instance of the data type with another. It is beyond the scope of this tutorial to explain further at this time.
Now we can see our list of patrons:
Finally, we just need a way to set the selected user as the user that we want to sign in with.
We will add a function to SharedAuthenticationStore to do this for us:
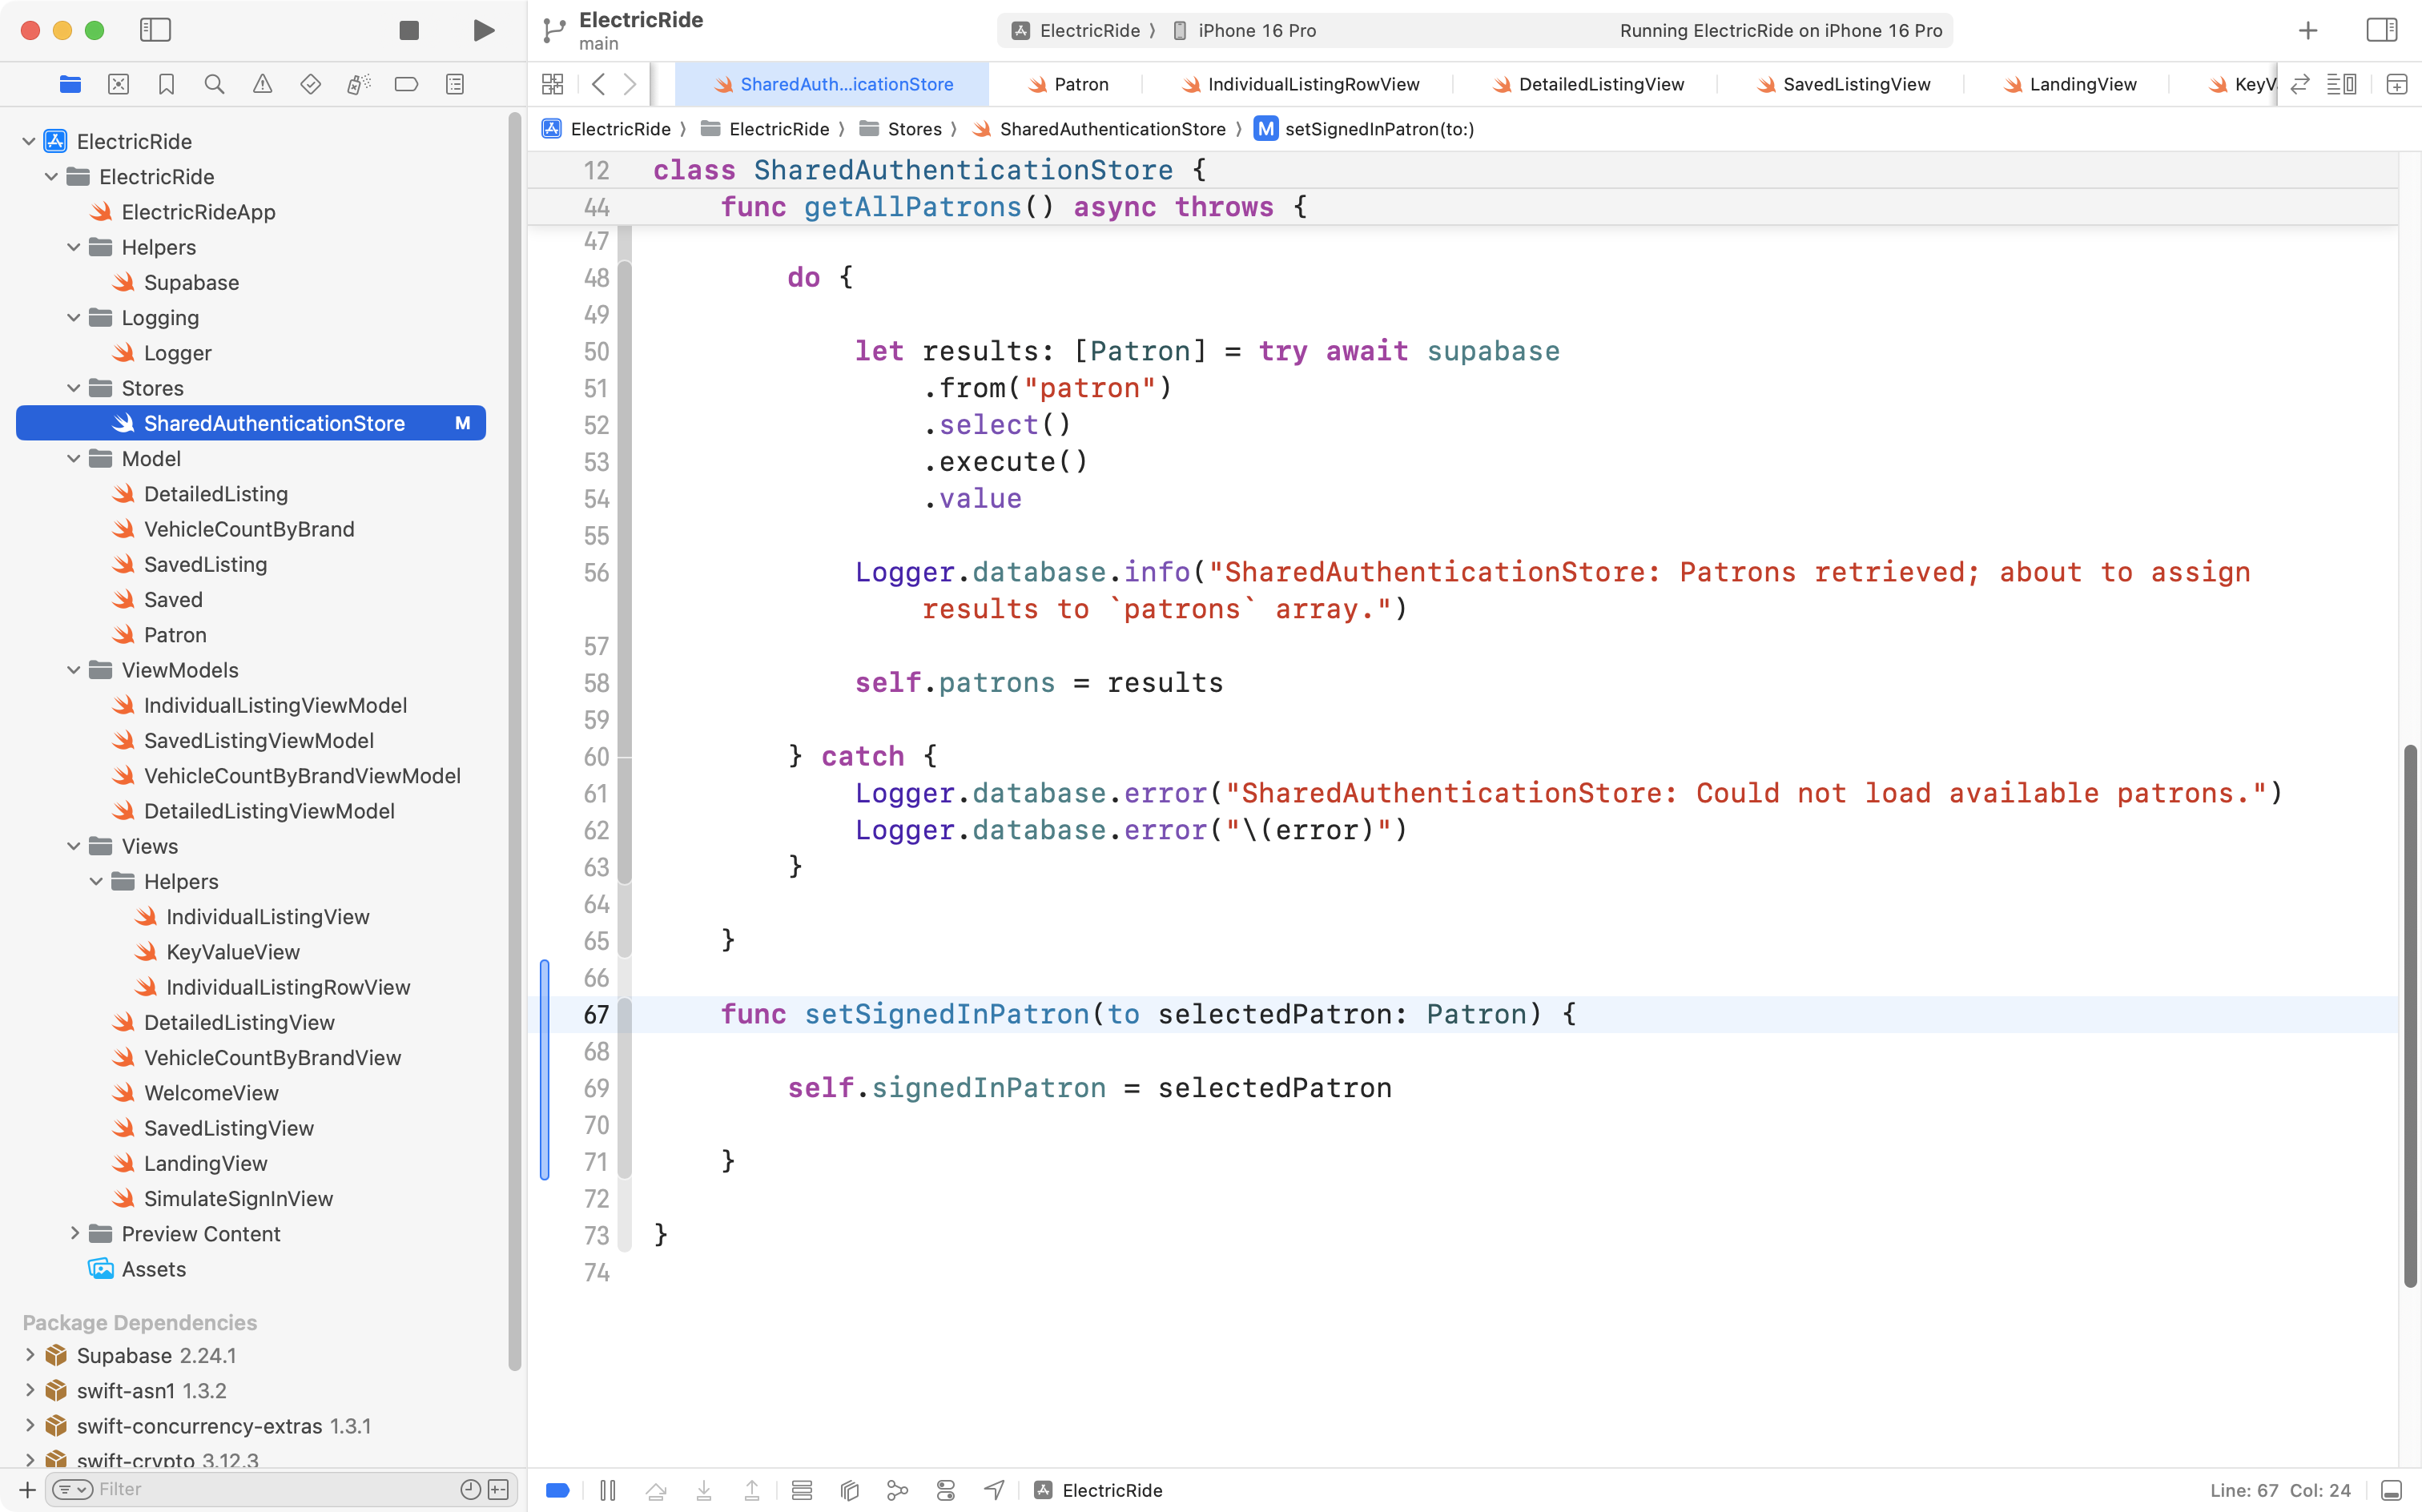
For that to work, signedInPatron needs to be changed from a constant:
… to a variable:

Now, we can invoke this new function from the view, via a Sign In button placed in the toolbar:
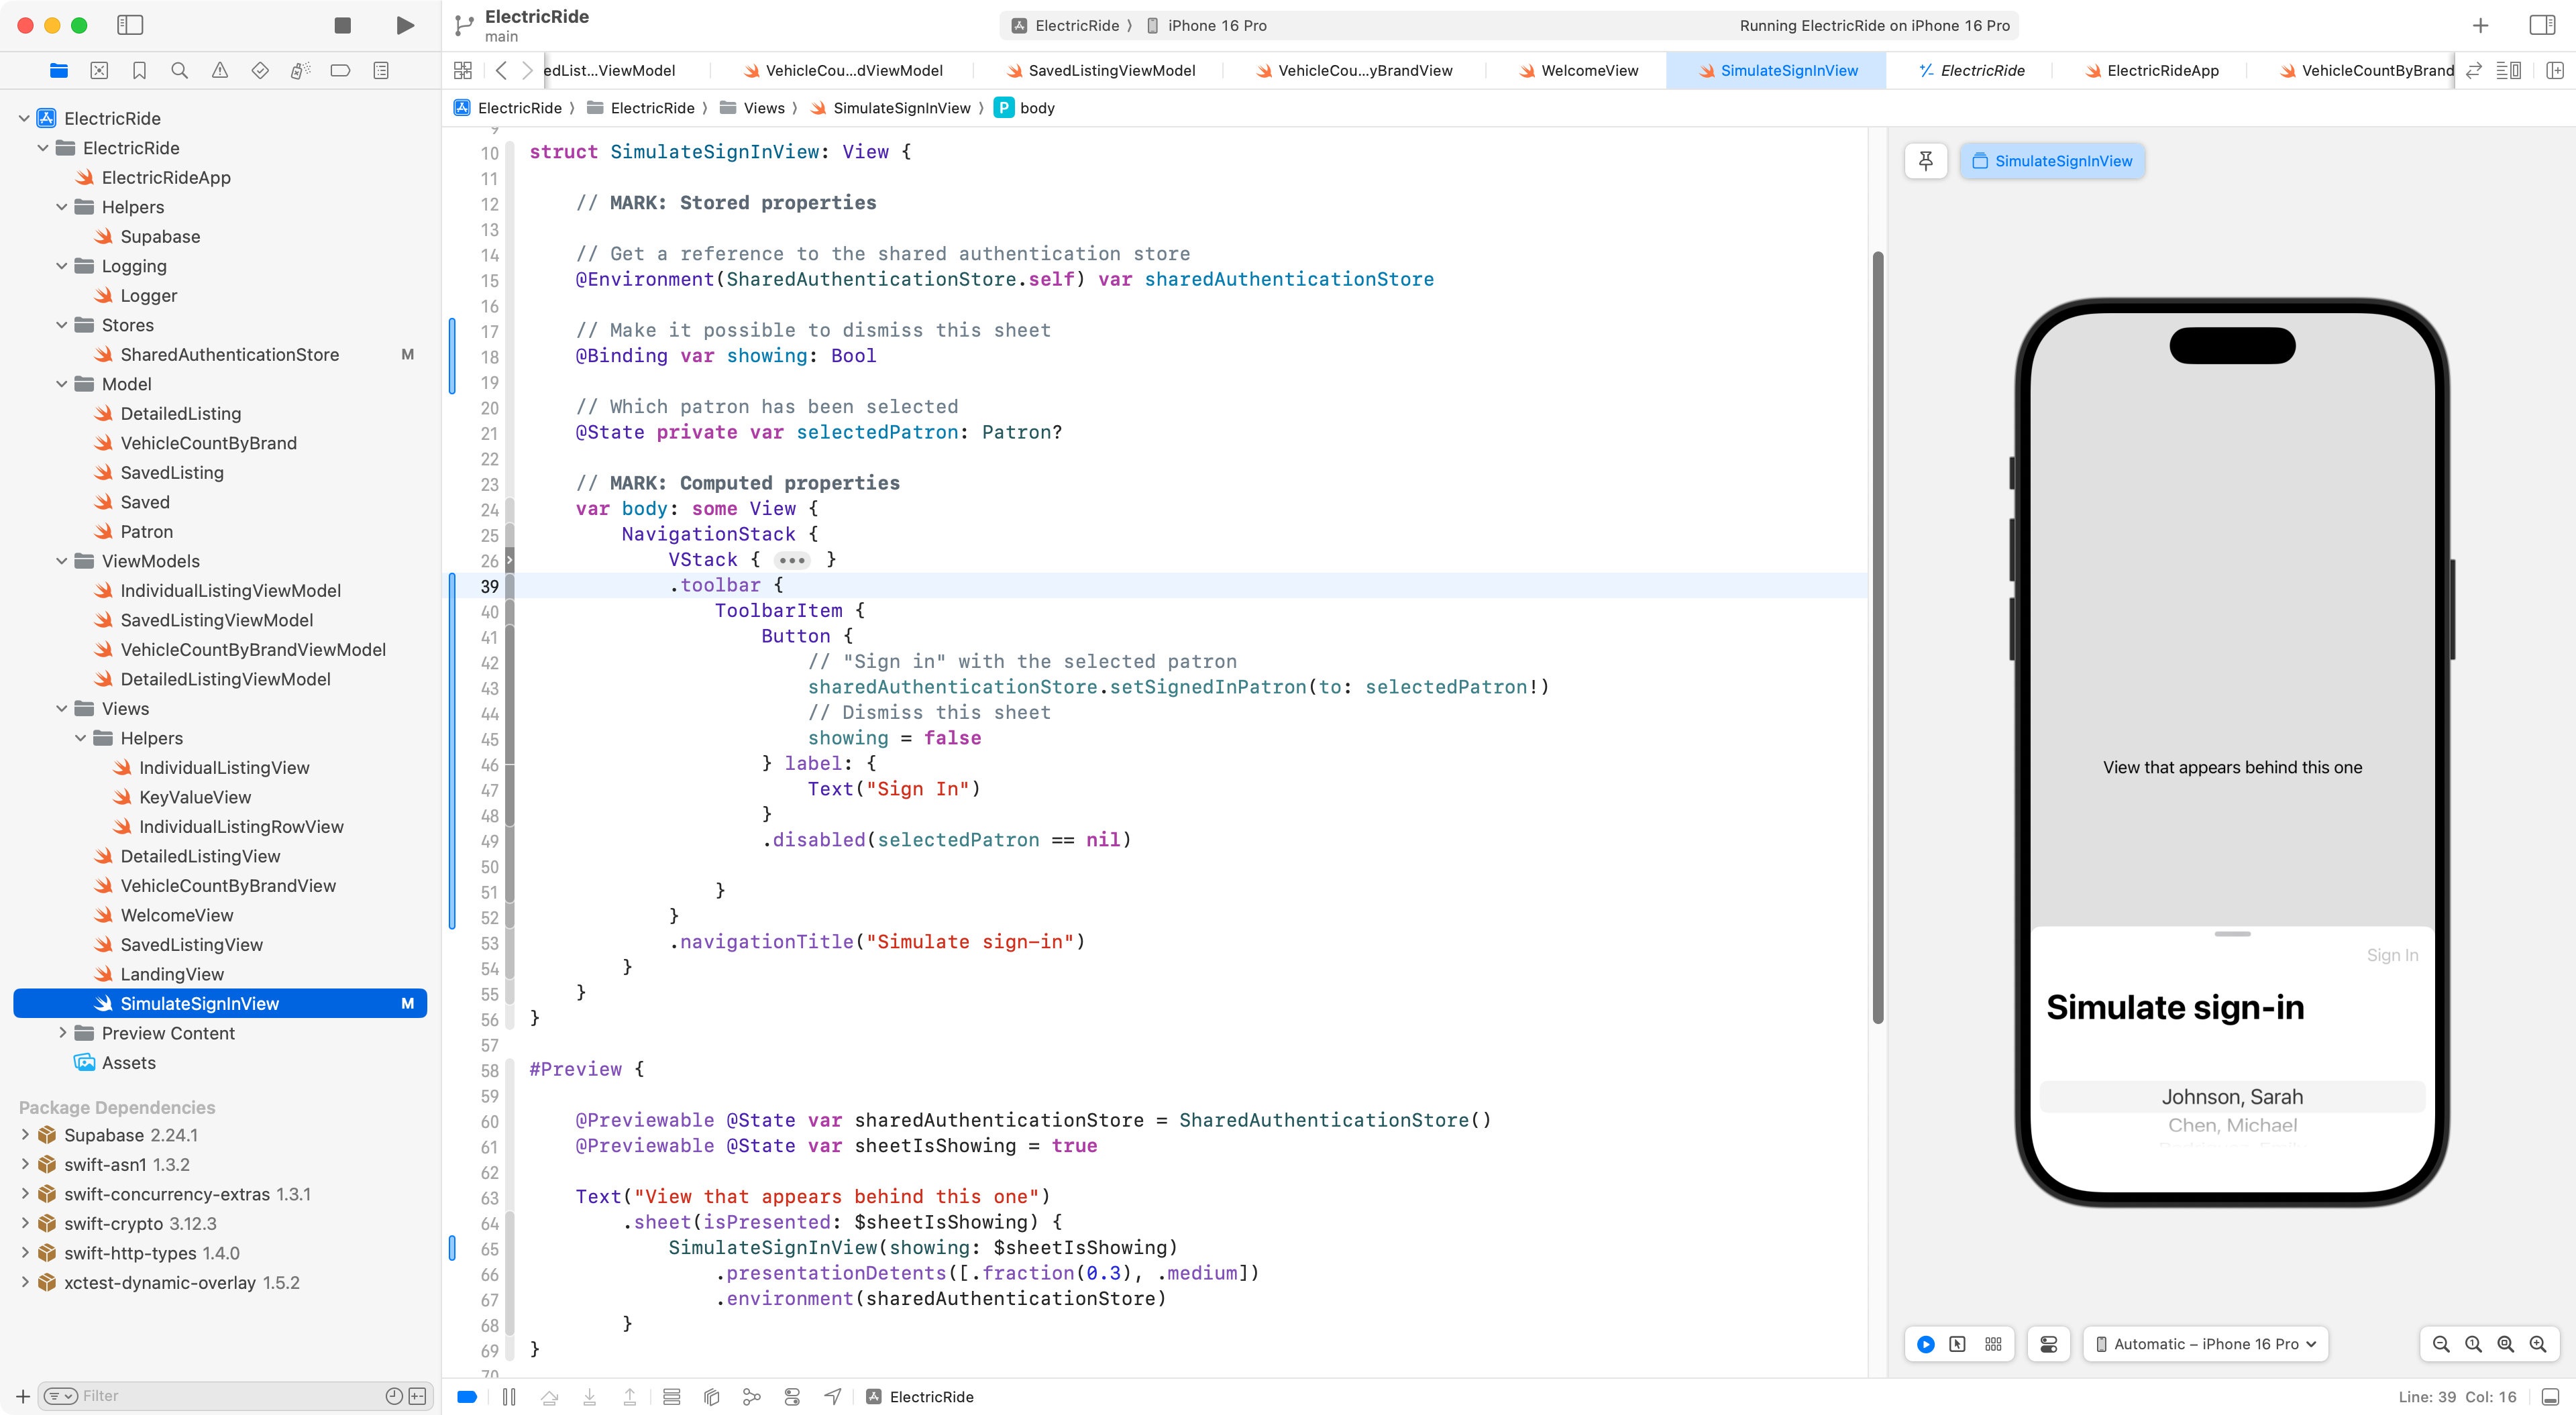
The Sign In button will not be enabled and available for use until we actually select a person from the picker.
NOTE
We also make it possible to dismiss the sheet by adding the code shown on lines 17-19, lines 44-45, and lines 65. For more explanation of how this works, please review this tutorial.
Finally, we need to make this sheet appear from WelcomeView. This is a modest series of changes:
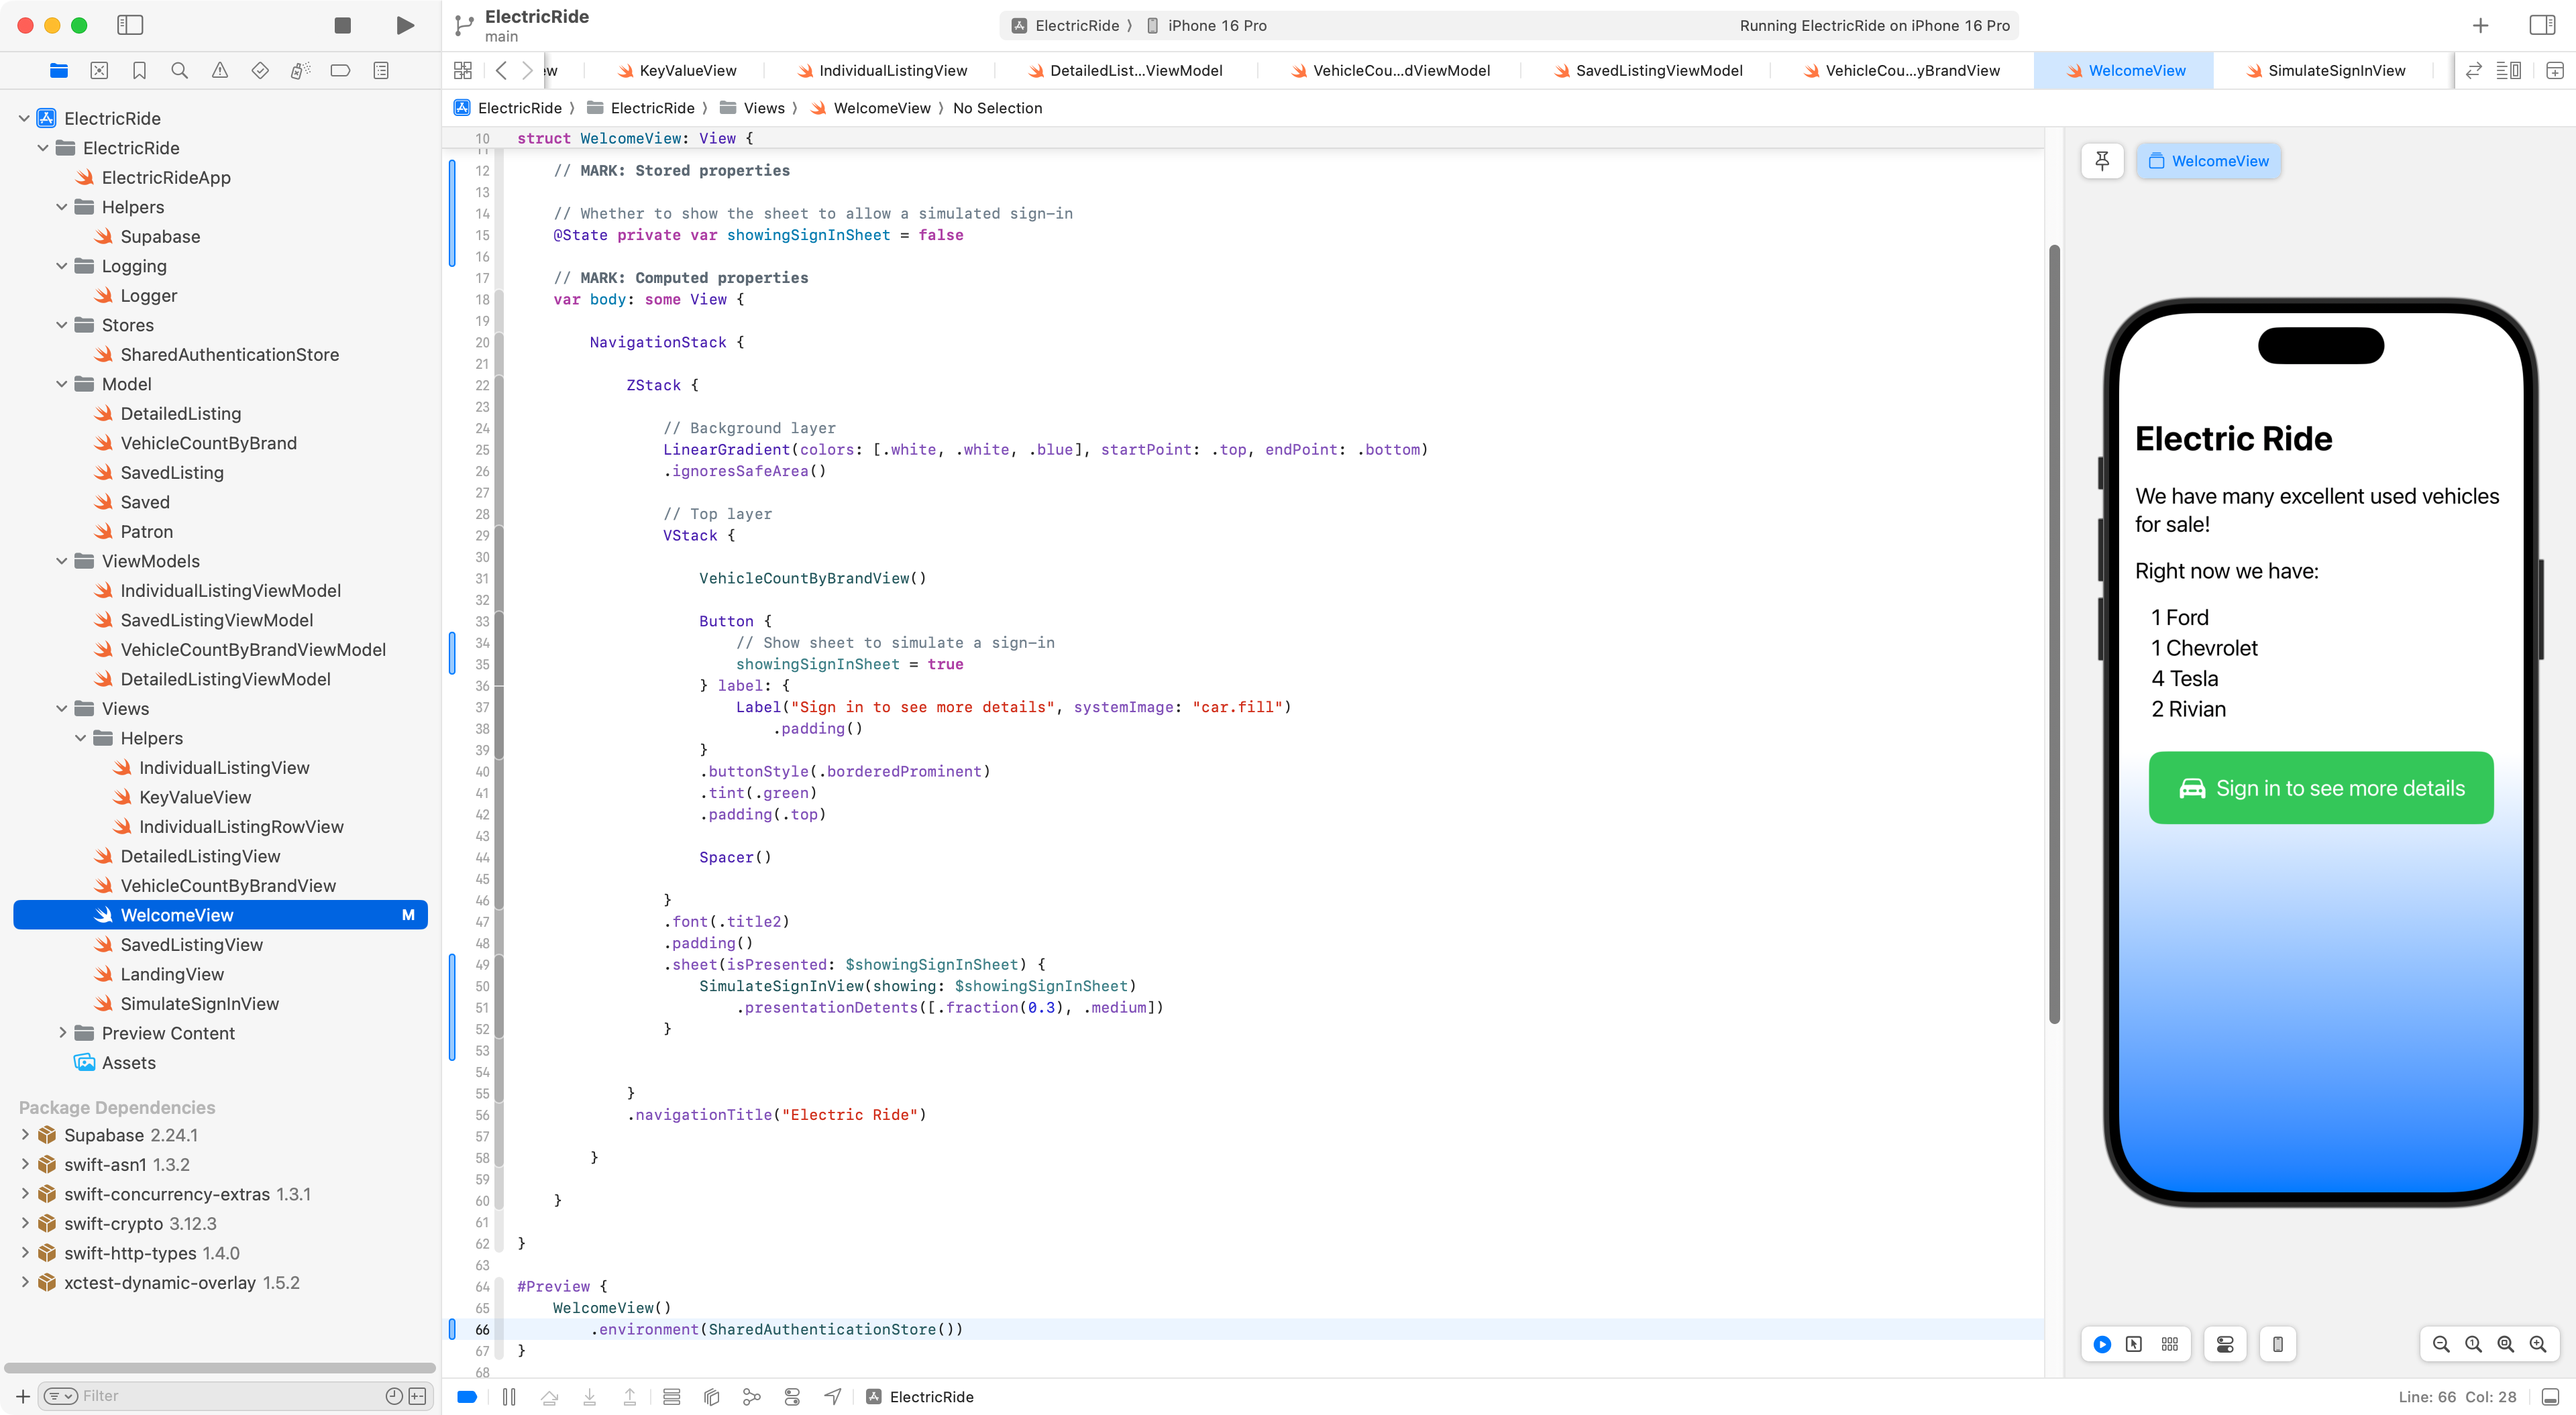
IMPORTANT
On line 66, an instance of
SharedAuthenticationStoreis added to the environment so thatSimulateSignInViewwill have something to pull out of the environment within the Previews window.
Respond to a sign-in
Once we have selected a user for sign-in, we must switch to the view that shows detailed listings.
We can do this by adding a new view named BranchingView that watches the patronIsSignedIn computed property, like this:
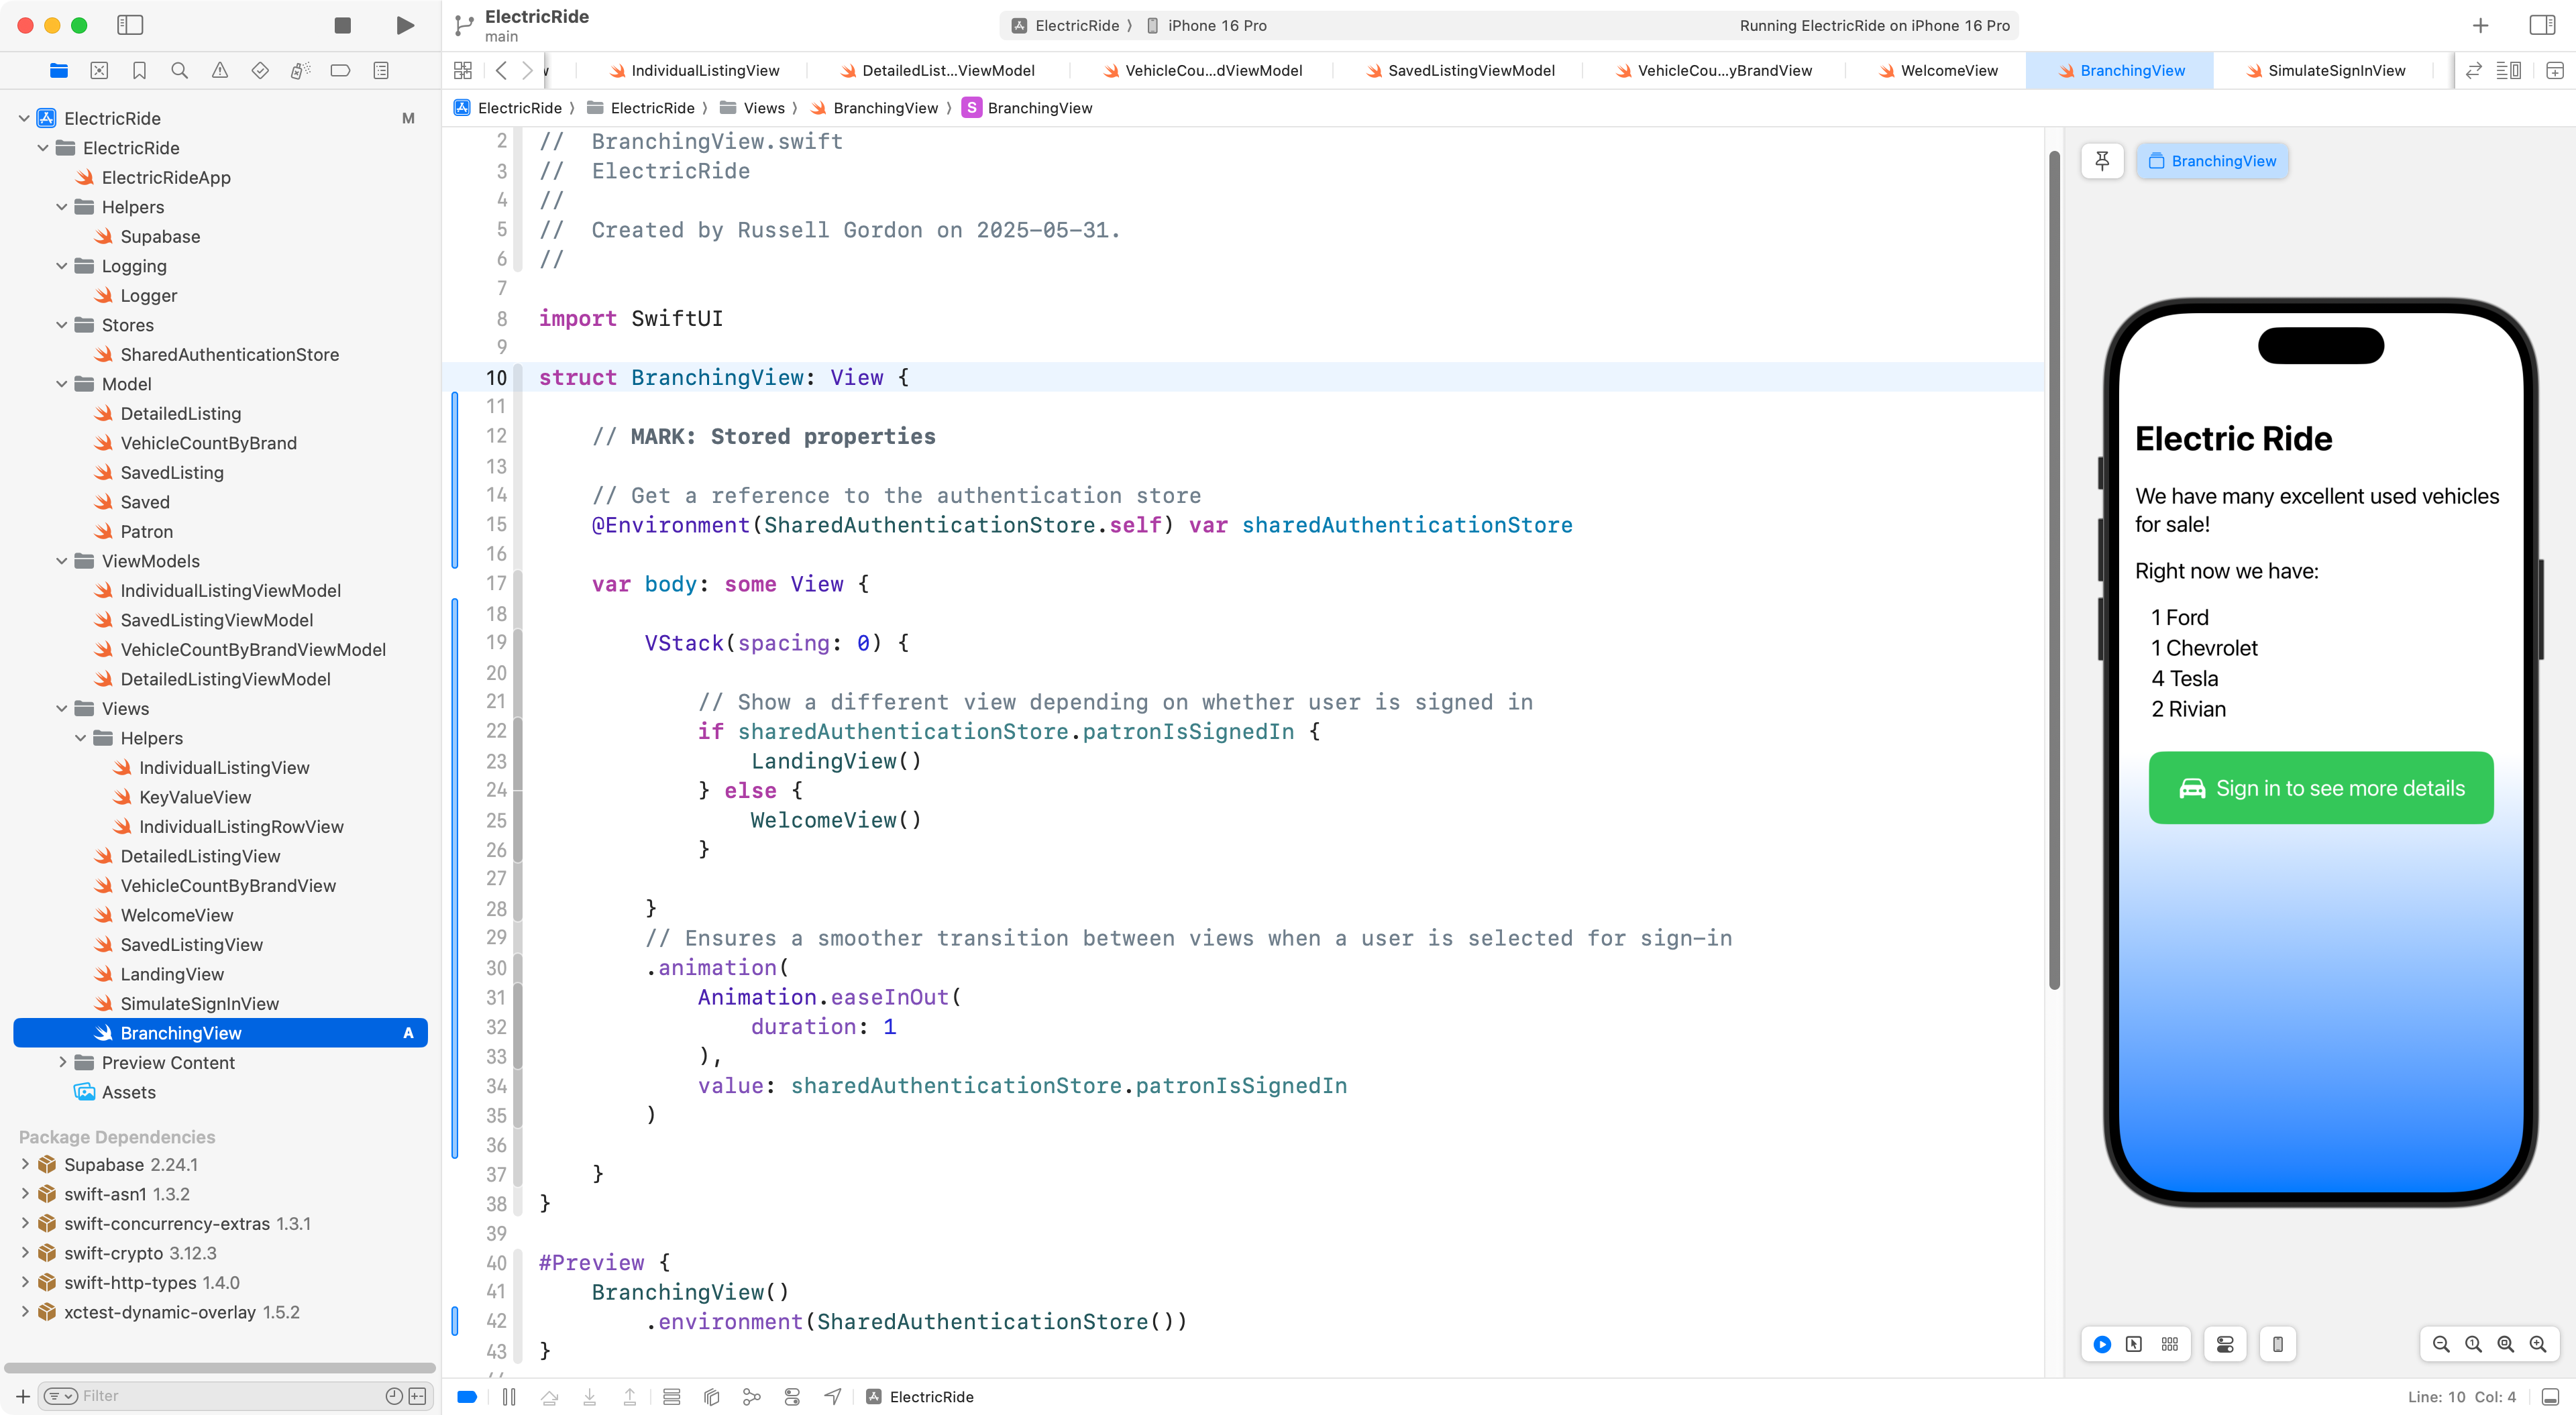
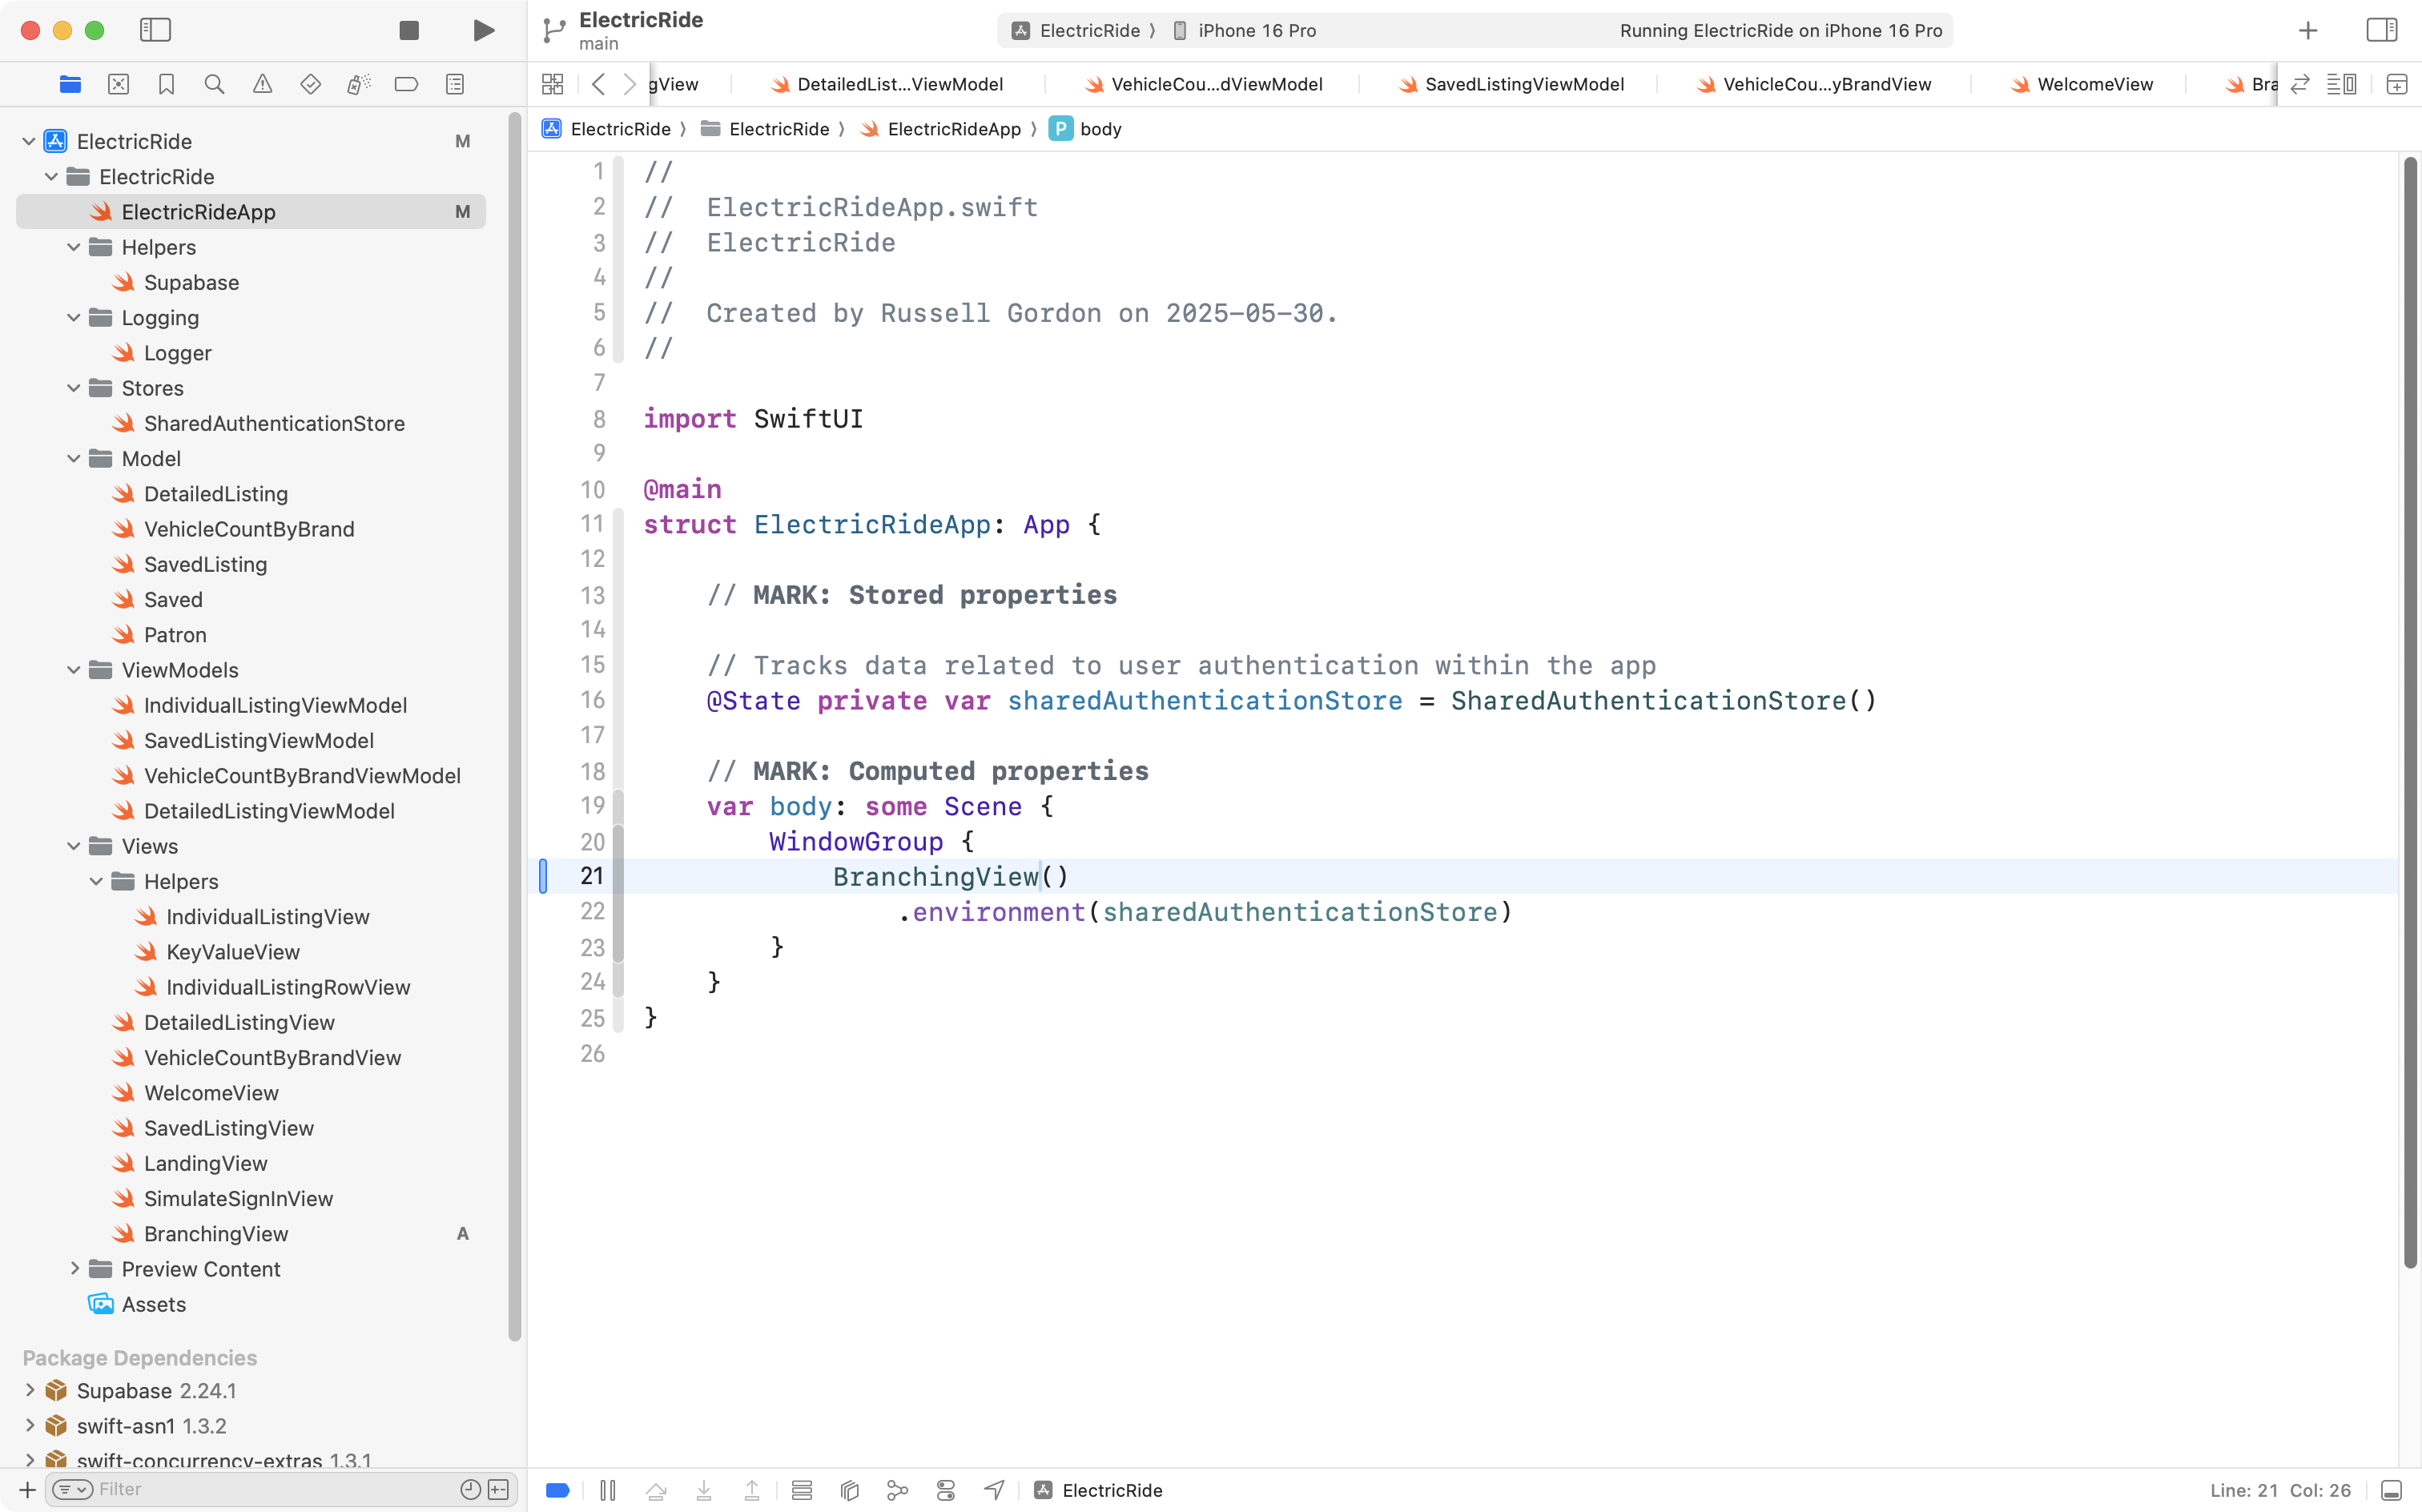
We have to remember to make this BranchingView be the view that is opened by the app entry point now:
Here’s what this looks like right now:
Allow for a sign out
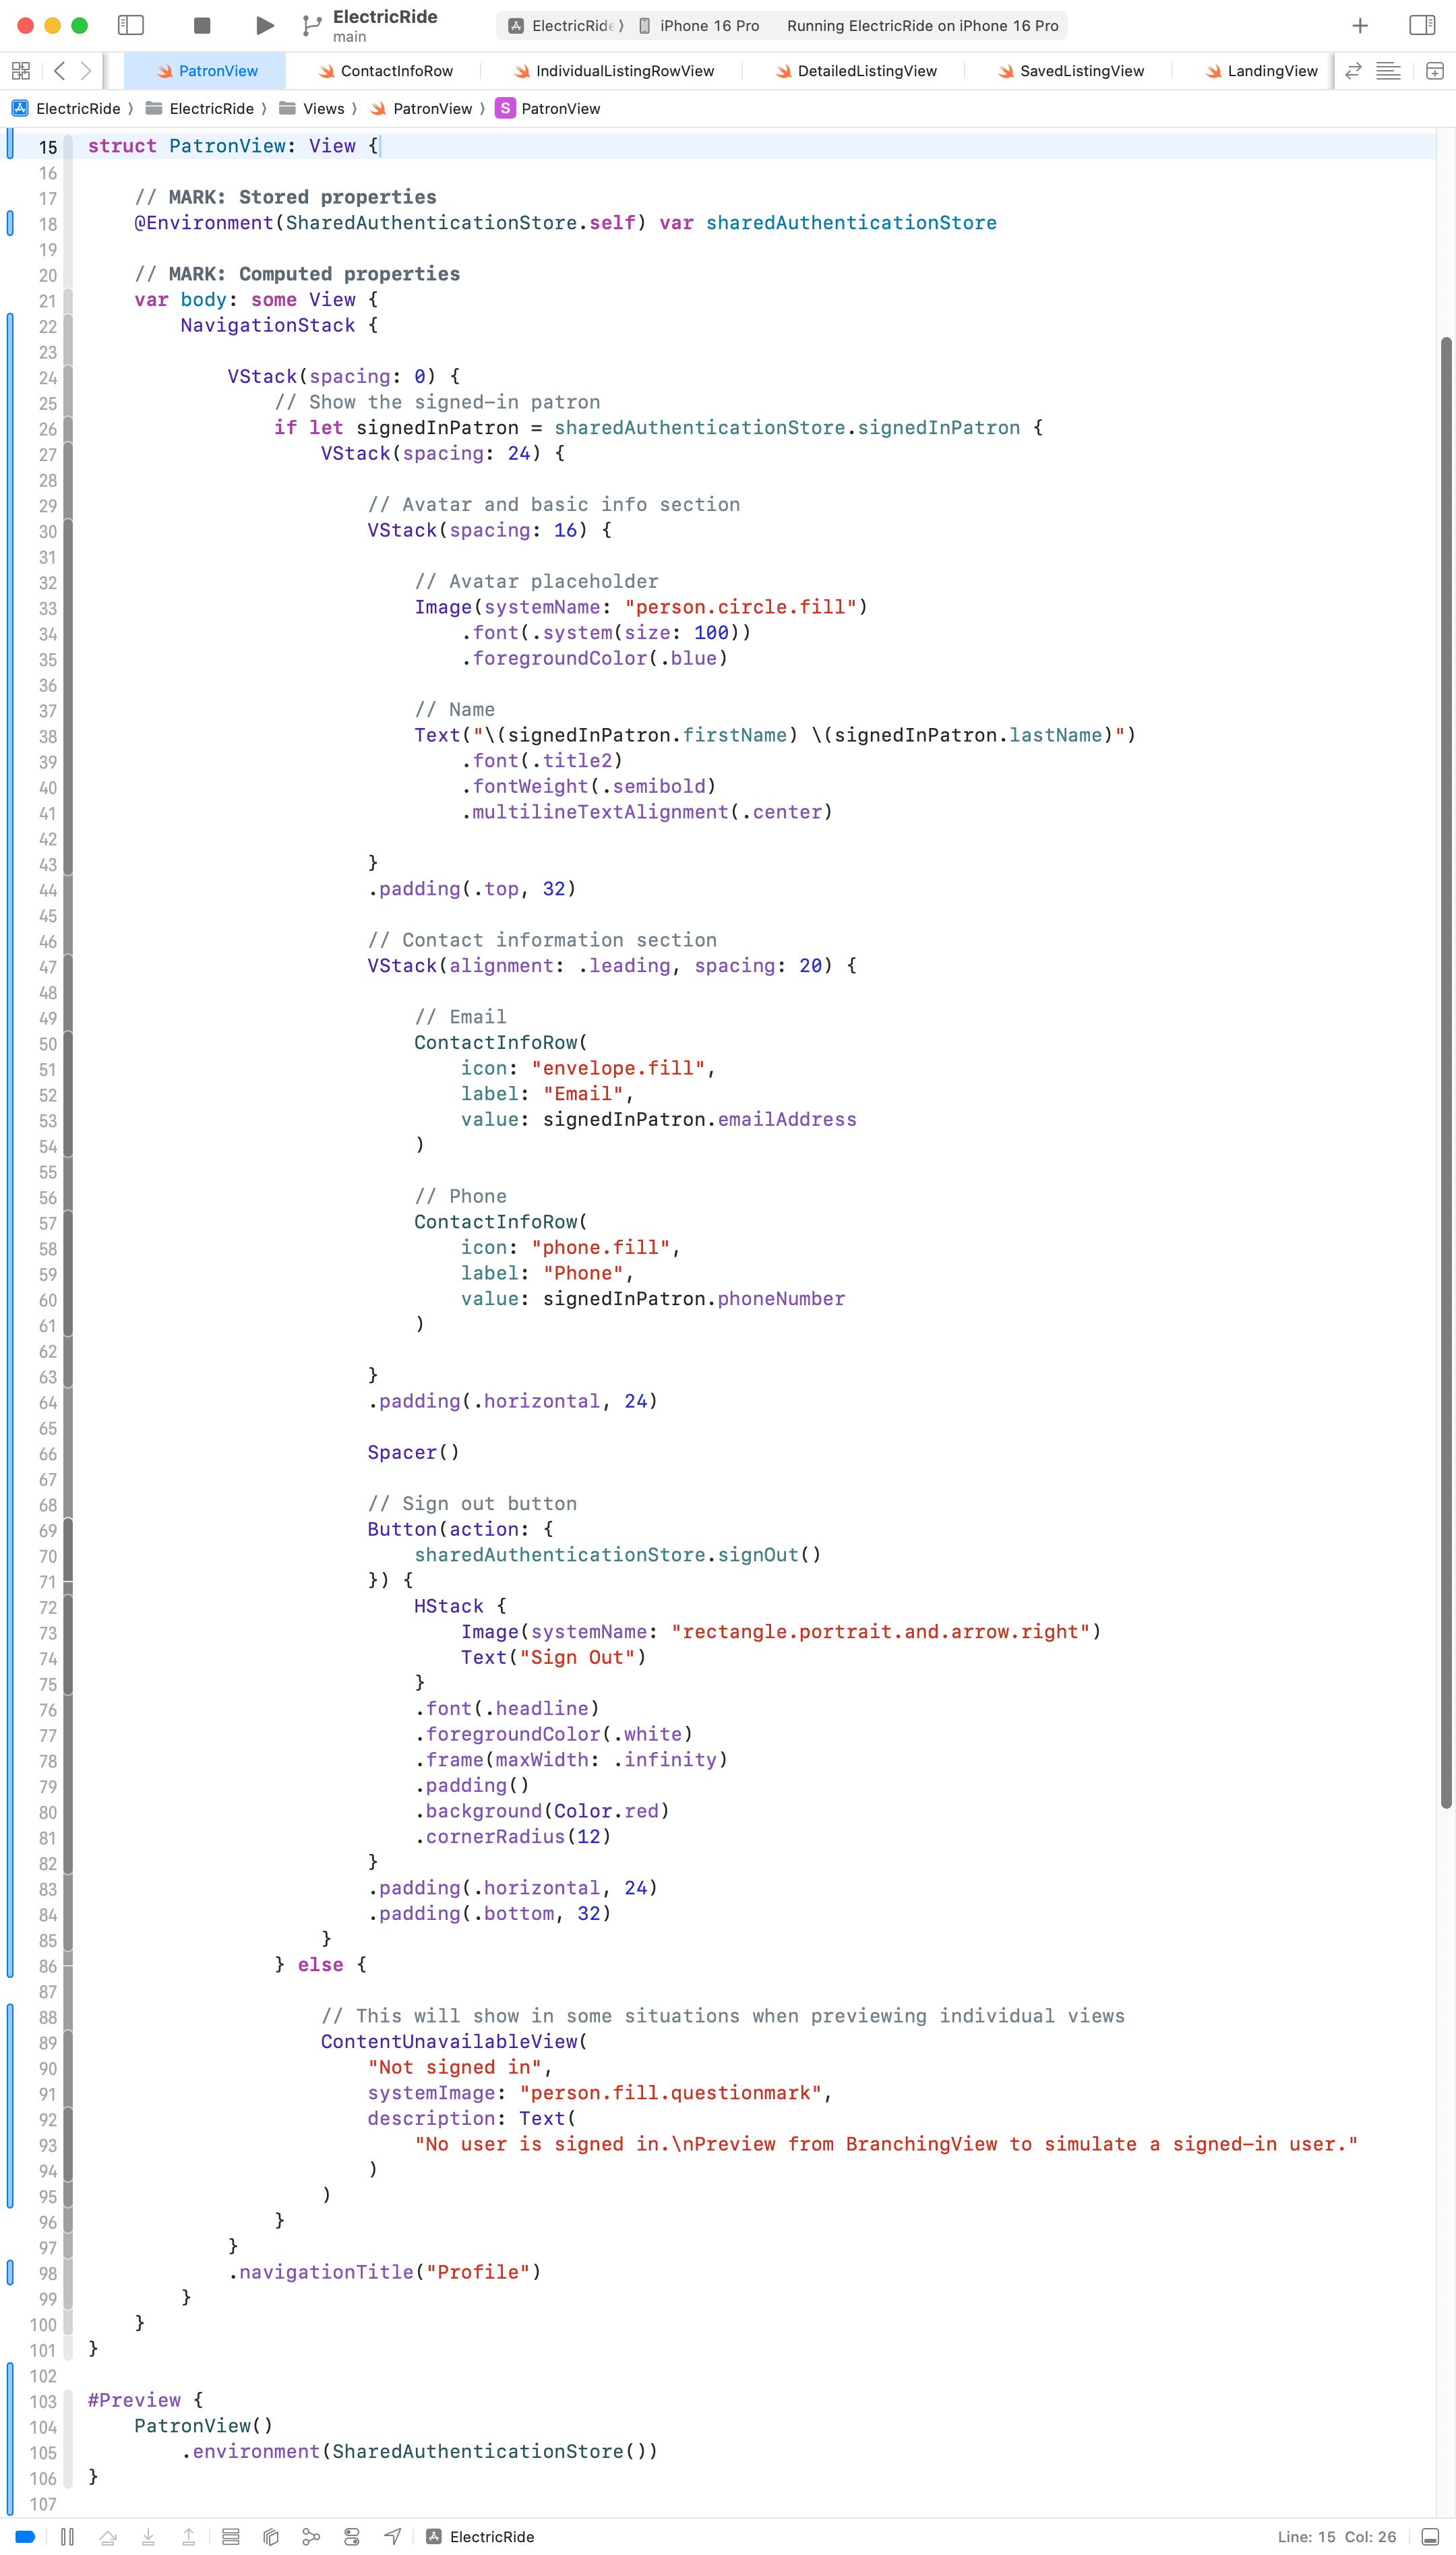
Now that we have a simulated user sign-in, we might like to have a view that shows the details of who is signed in, and, allows that user to be signed out.
Here is a view that does just that:
NOTE
To save a bit of time, Mr. Gordon generated portions of that view using the Anthropic AI service.
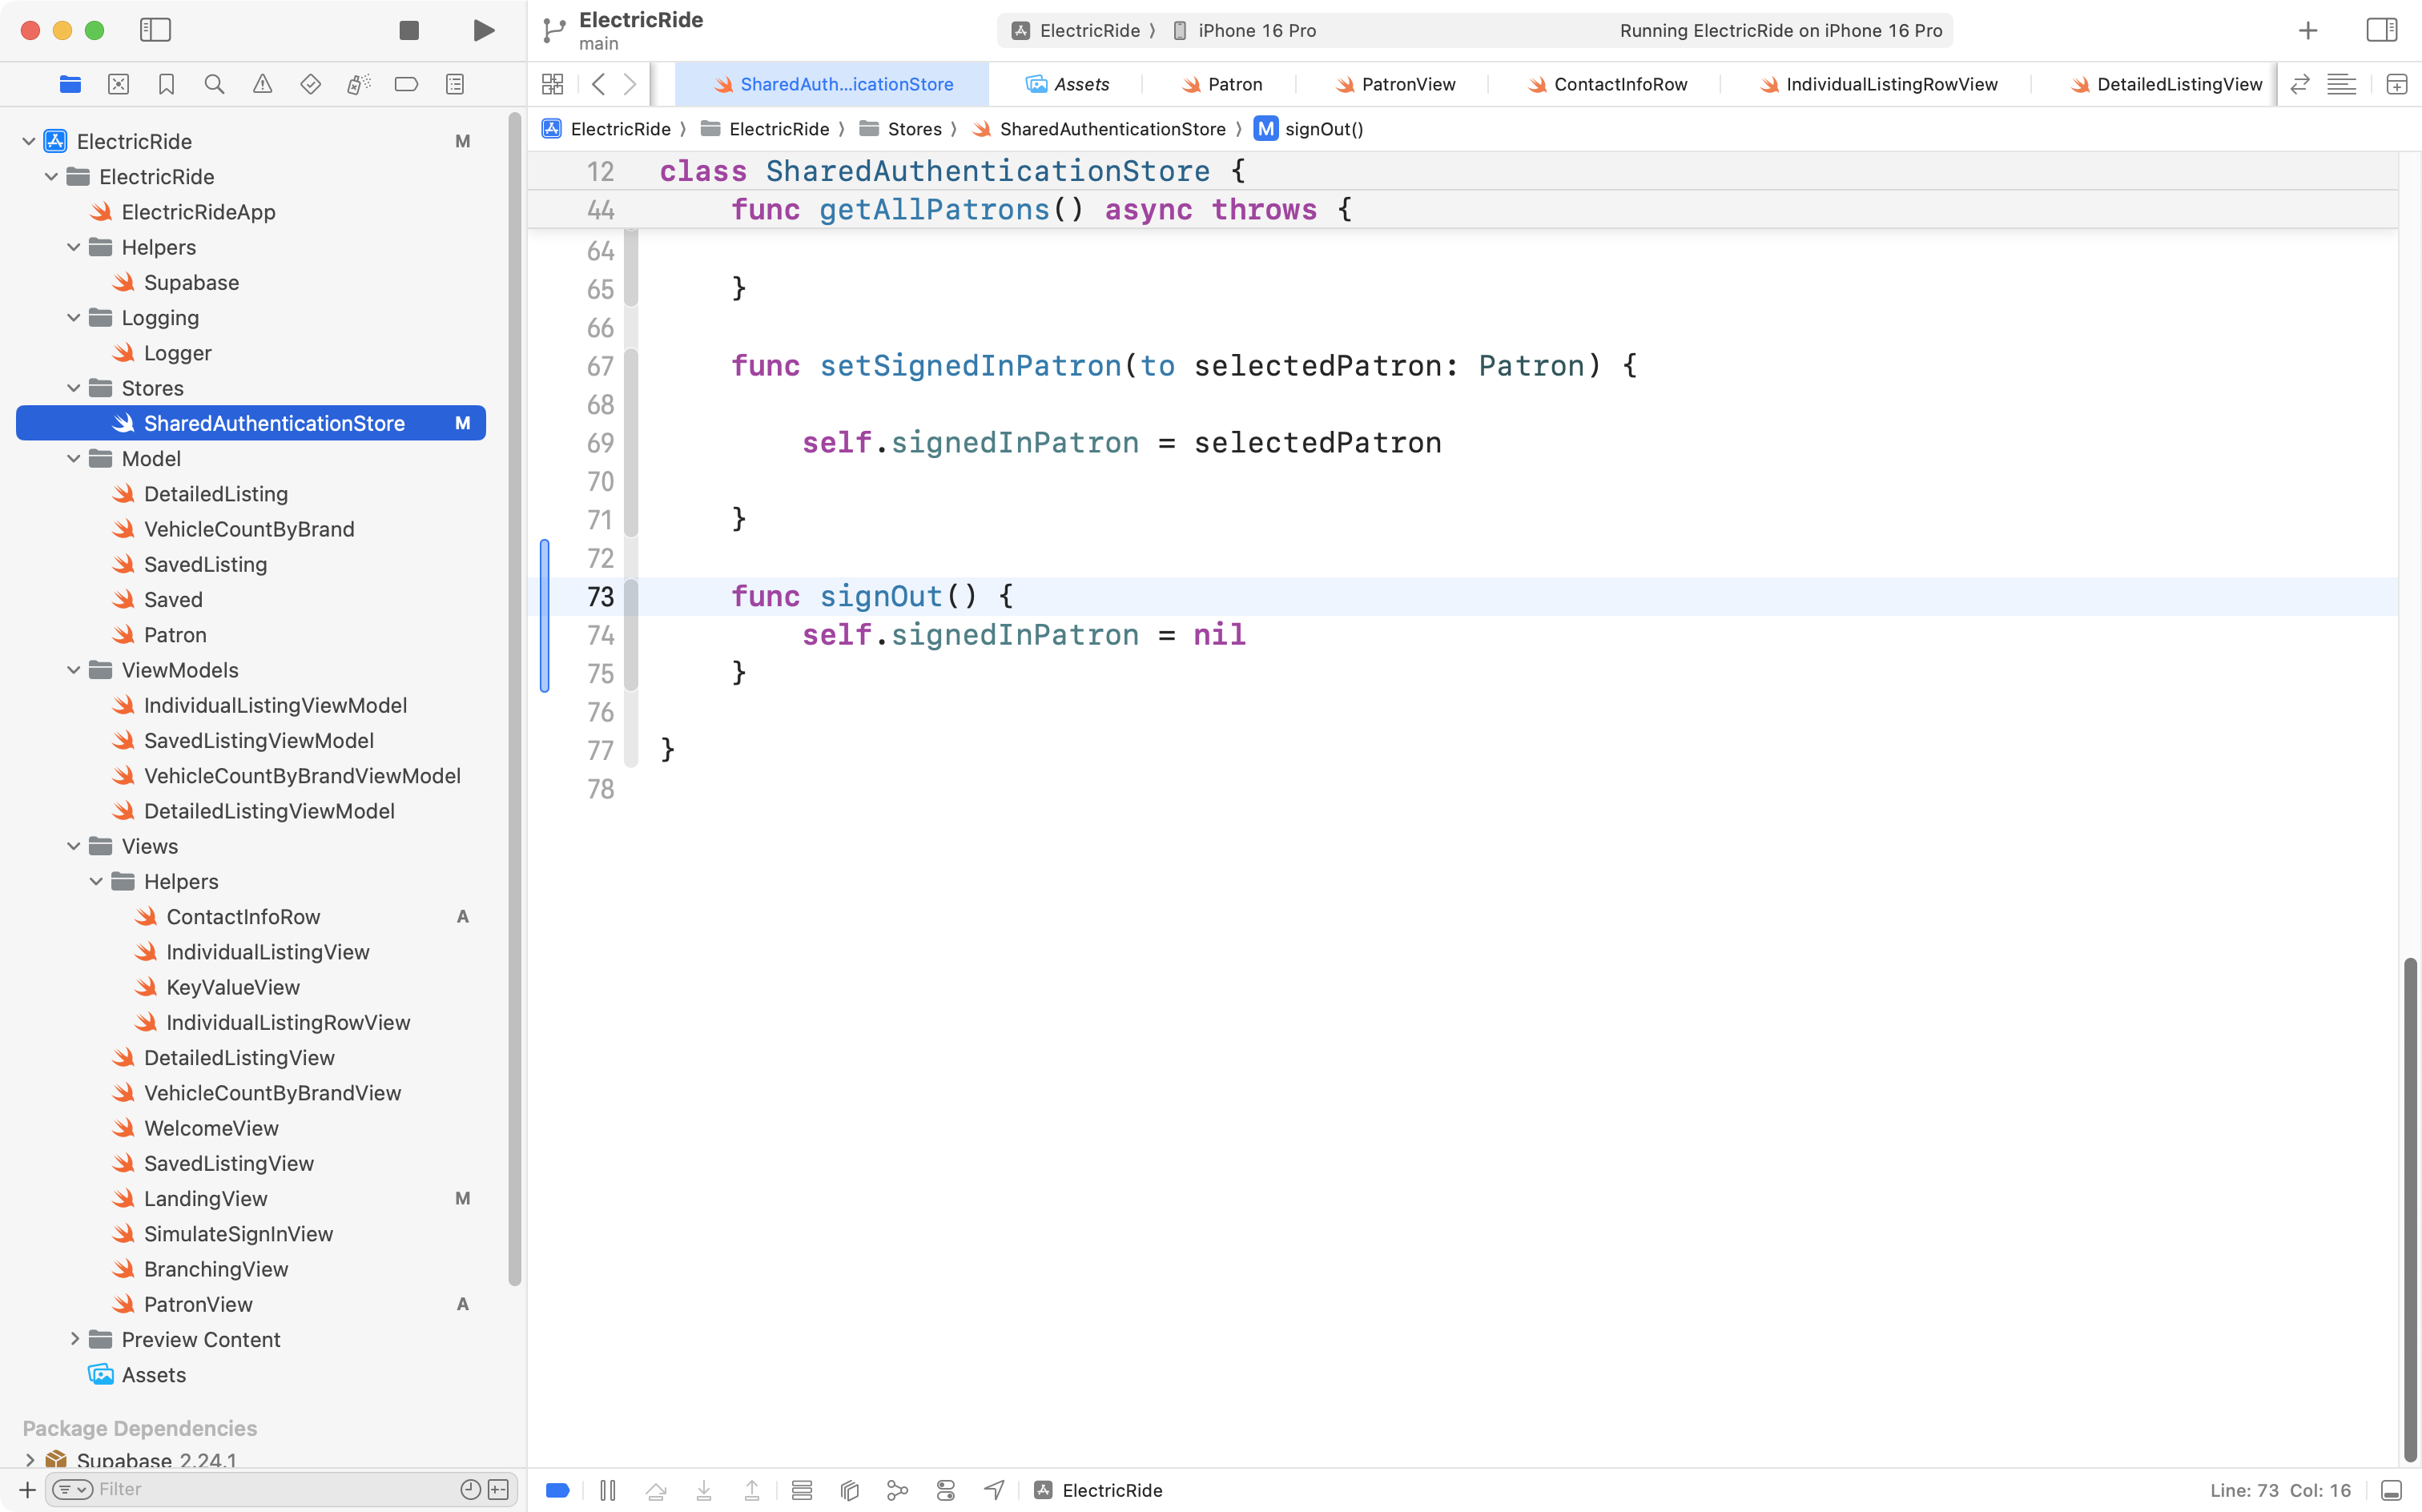
We add this function to SharedAuthenticationStore to make a sign-out possible:
The view to see information about a patron uses this helper view:
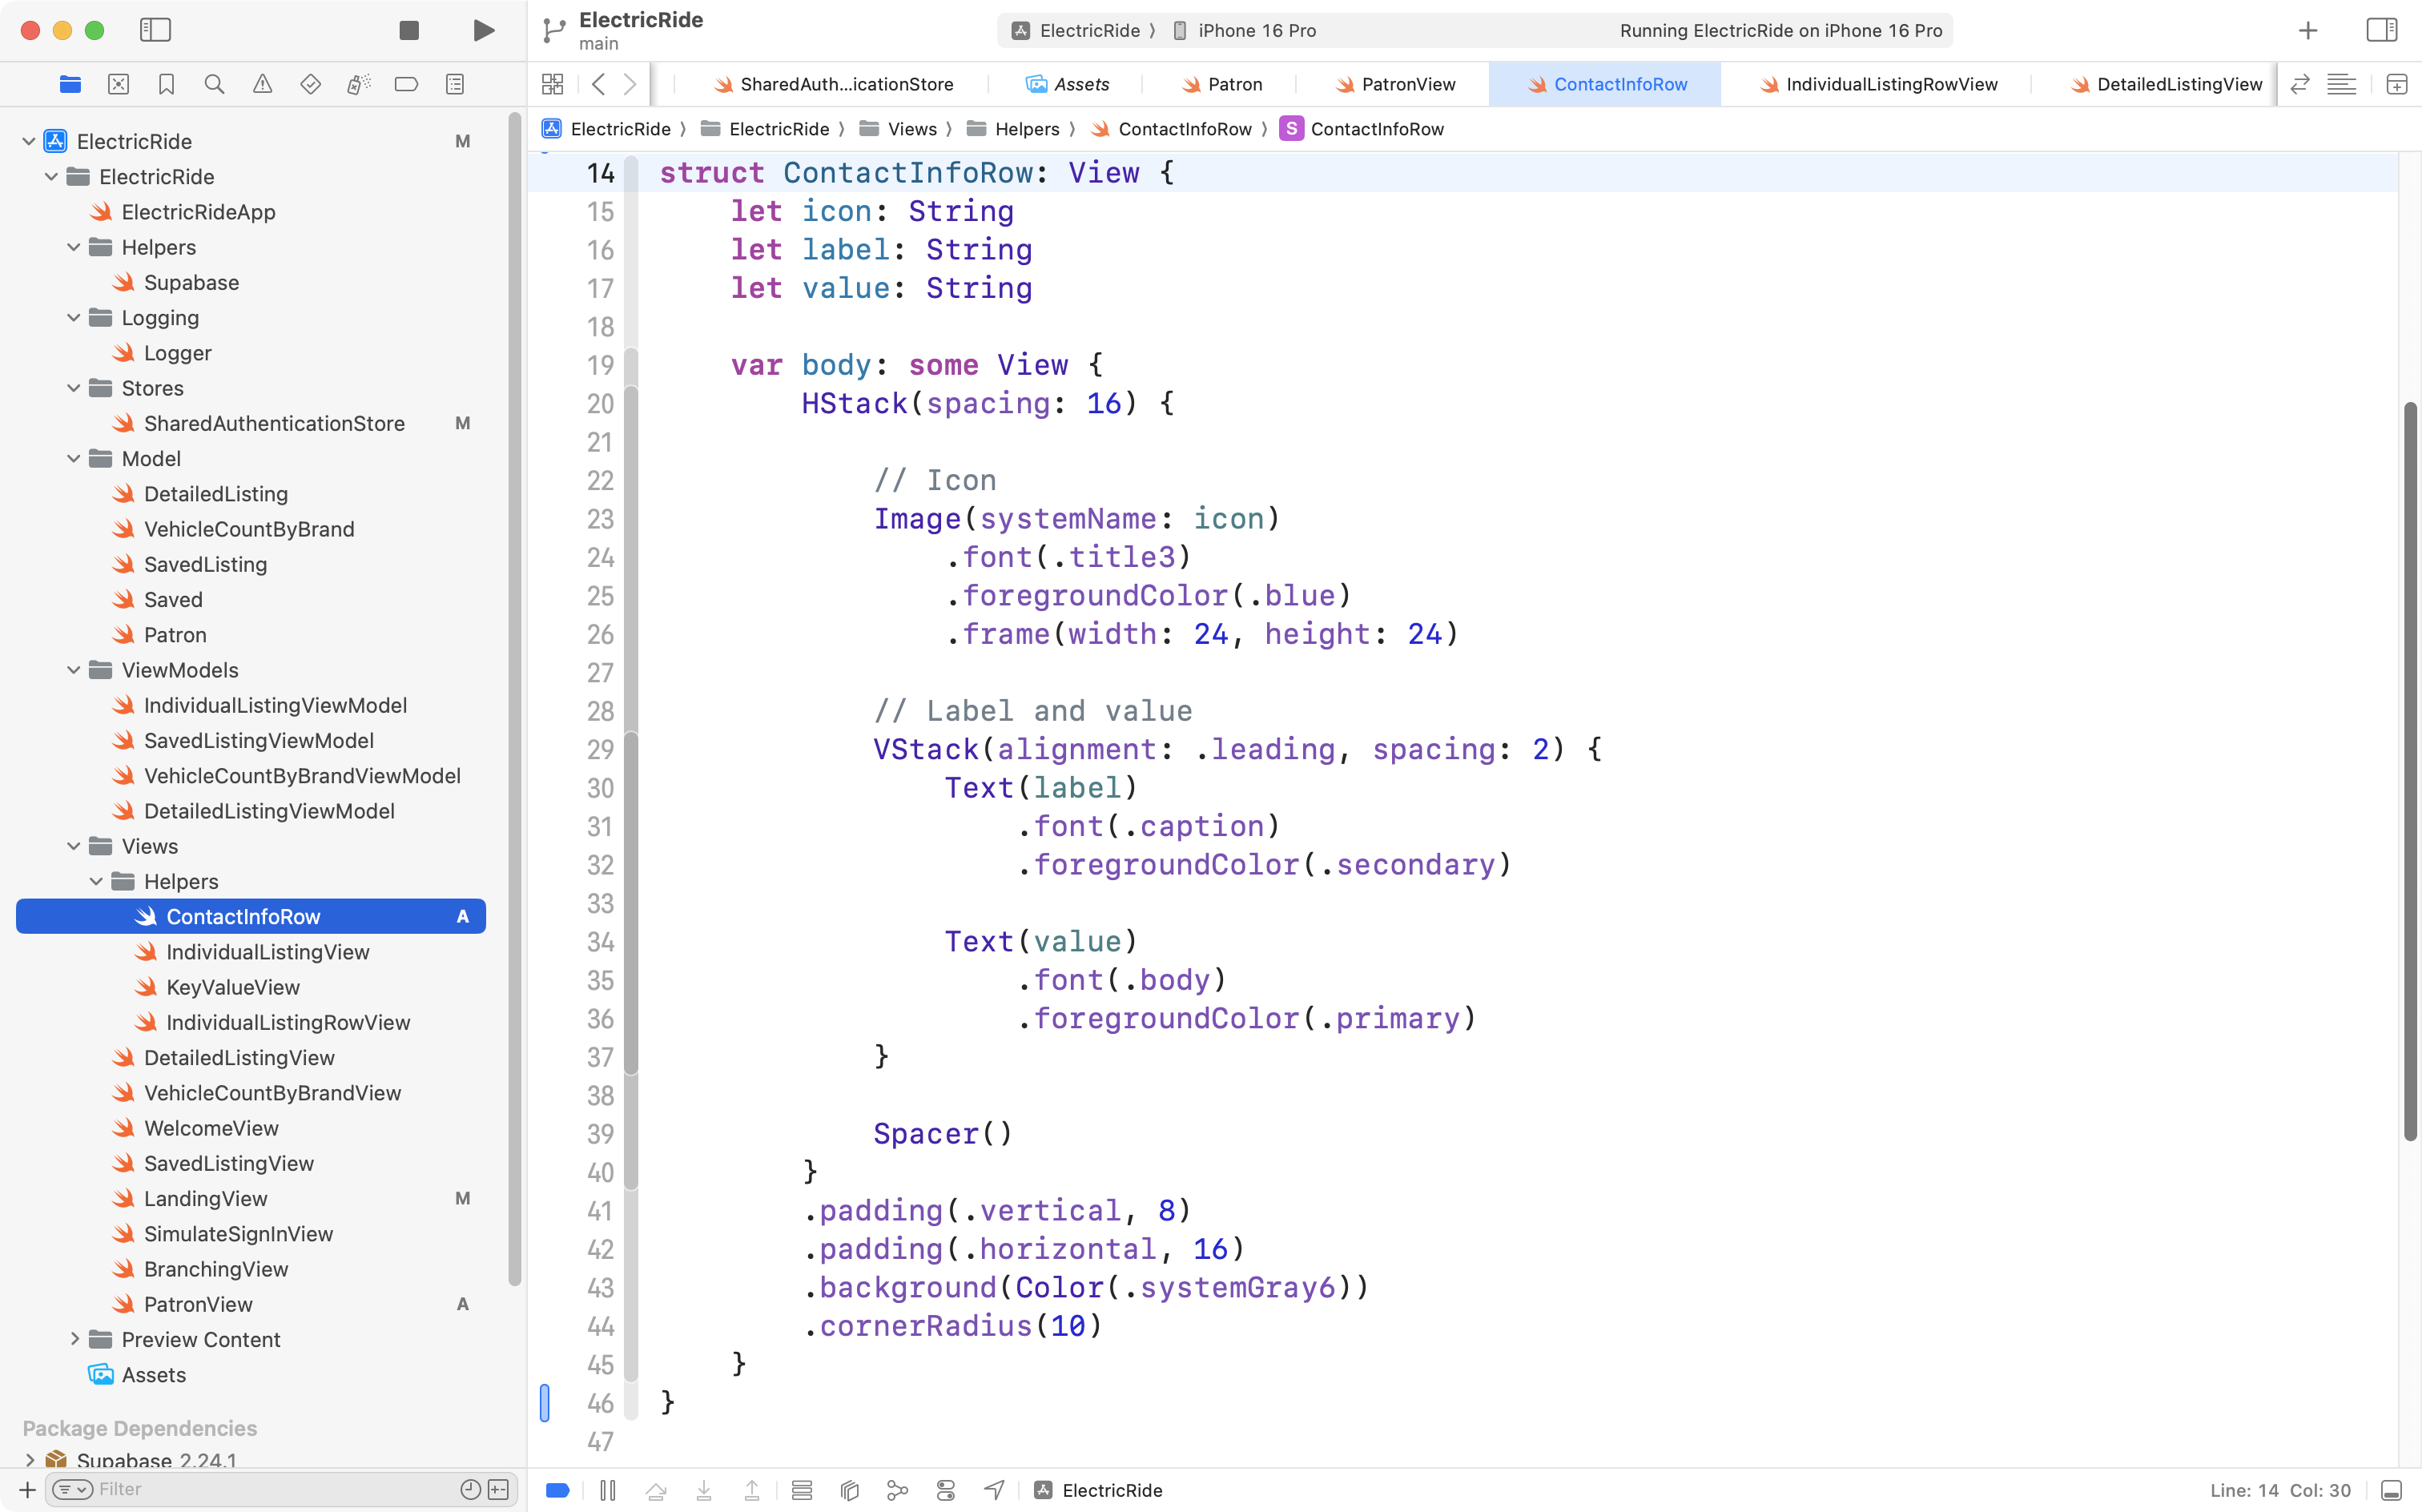
Finally, we adjust LandingView so that there is a tab to see this new view on:
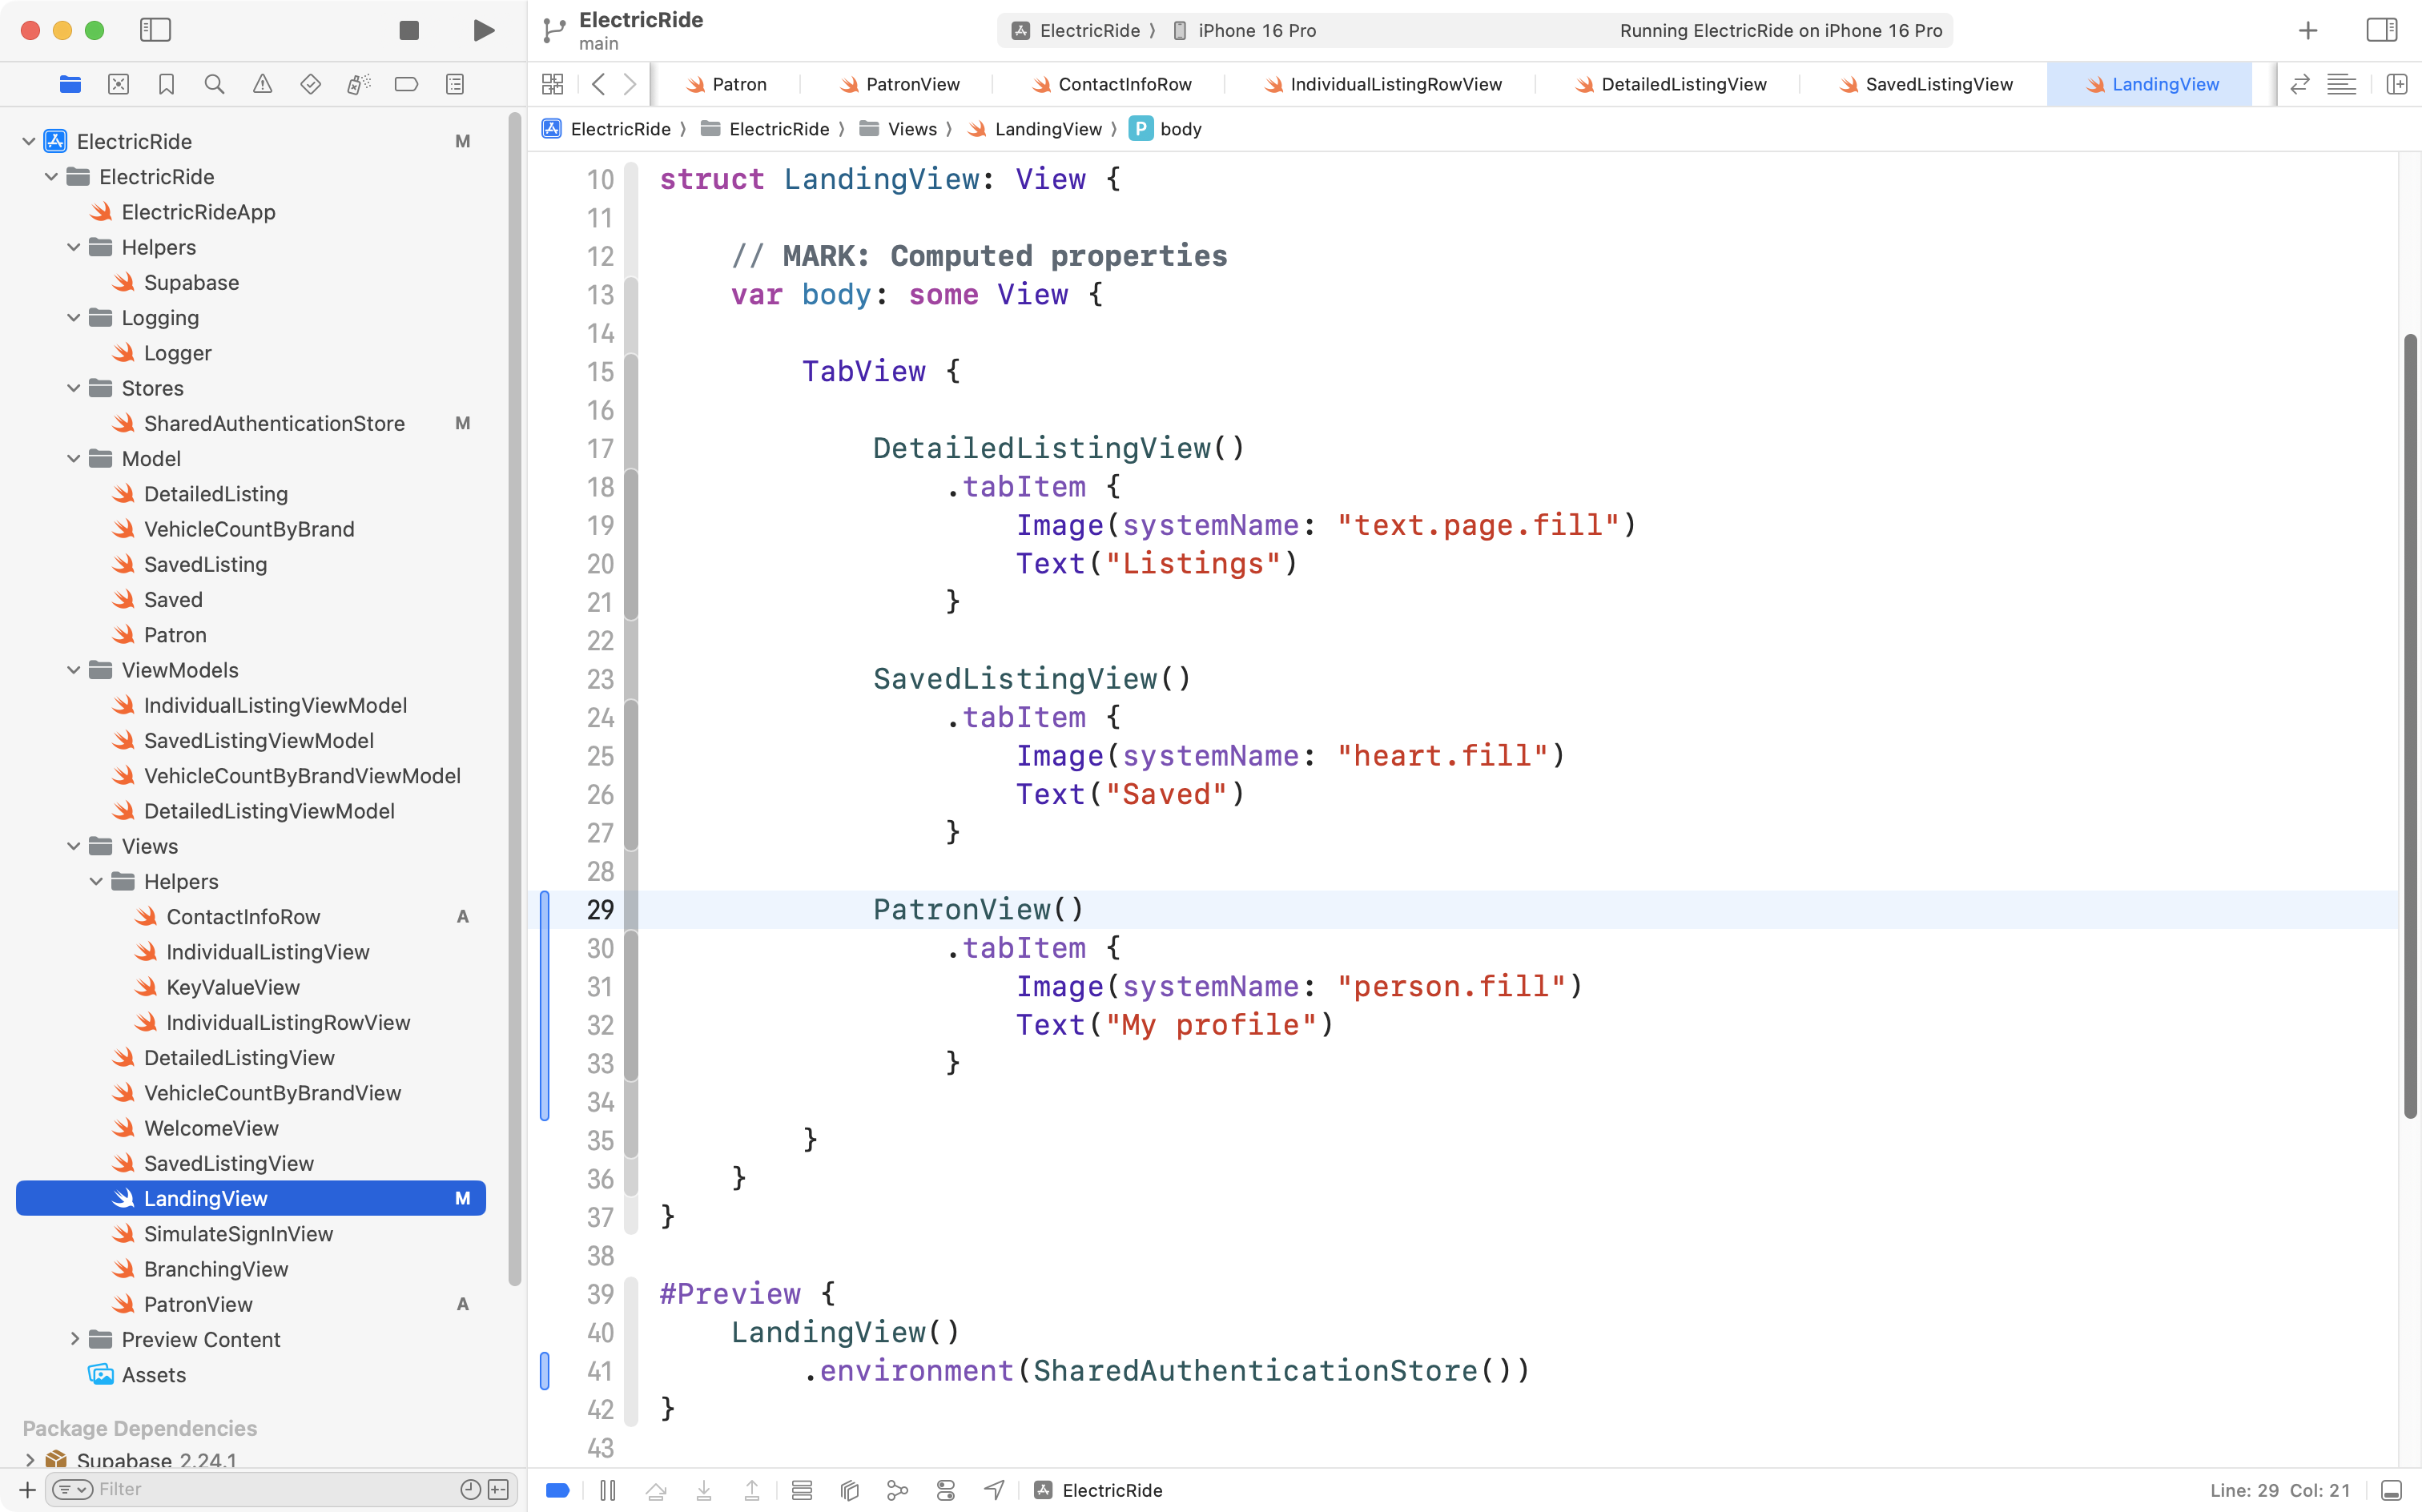
Here is what this all looks like right now:
Saved listings for any user
Earlier (before we had the ability to switch users in the app) we made the code to save a listing and to view saved listings specific to a user with an id of 2.
Now that we have a way to track which user is signed in, we can generalize the code written earlier.
This will not take too much effort.
As usual, we will begin in the database, then adjust the code in our app.
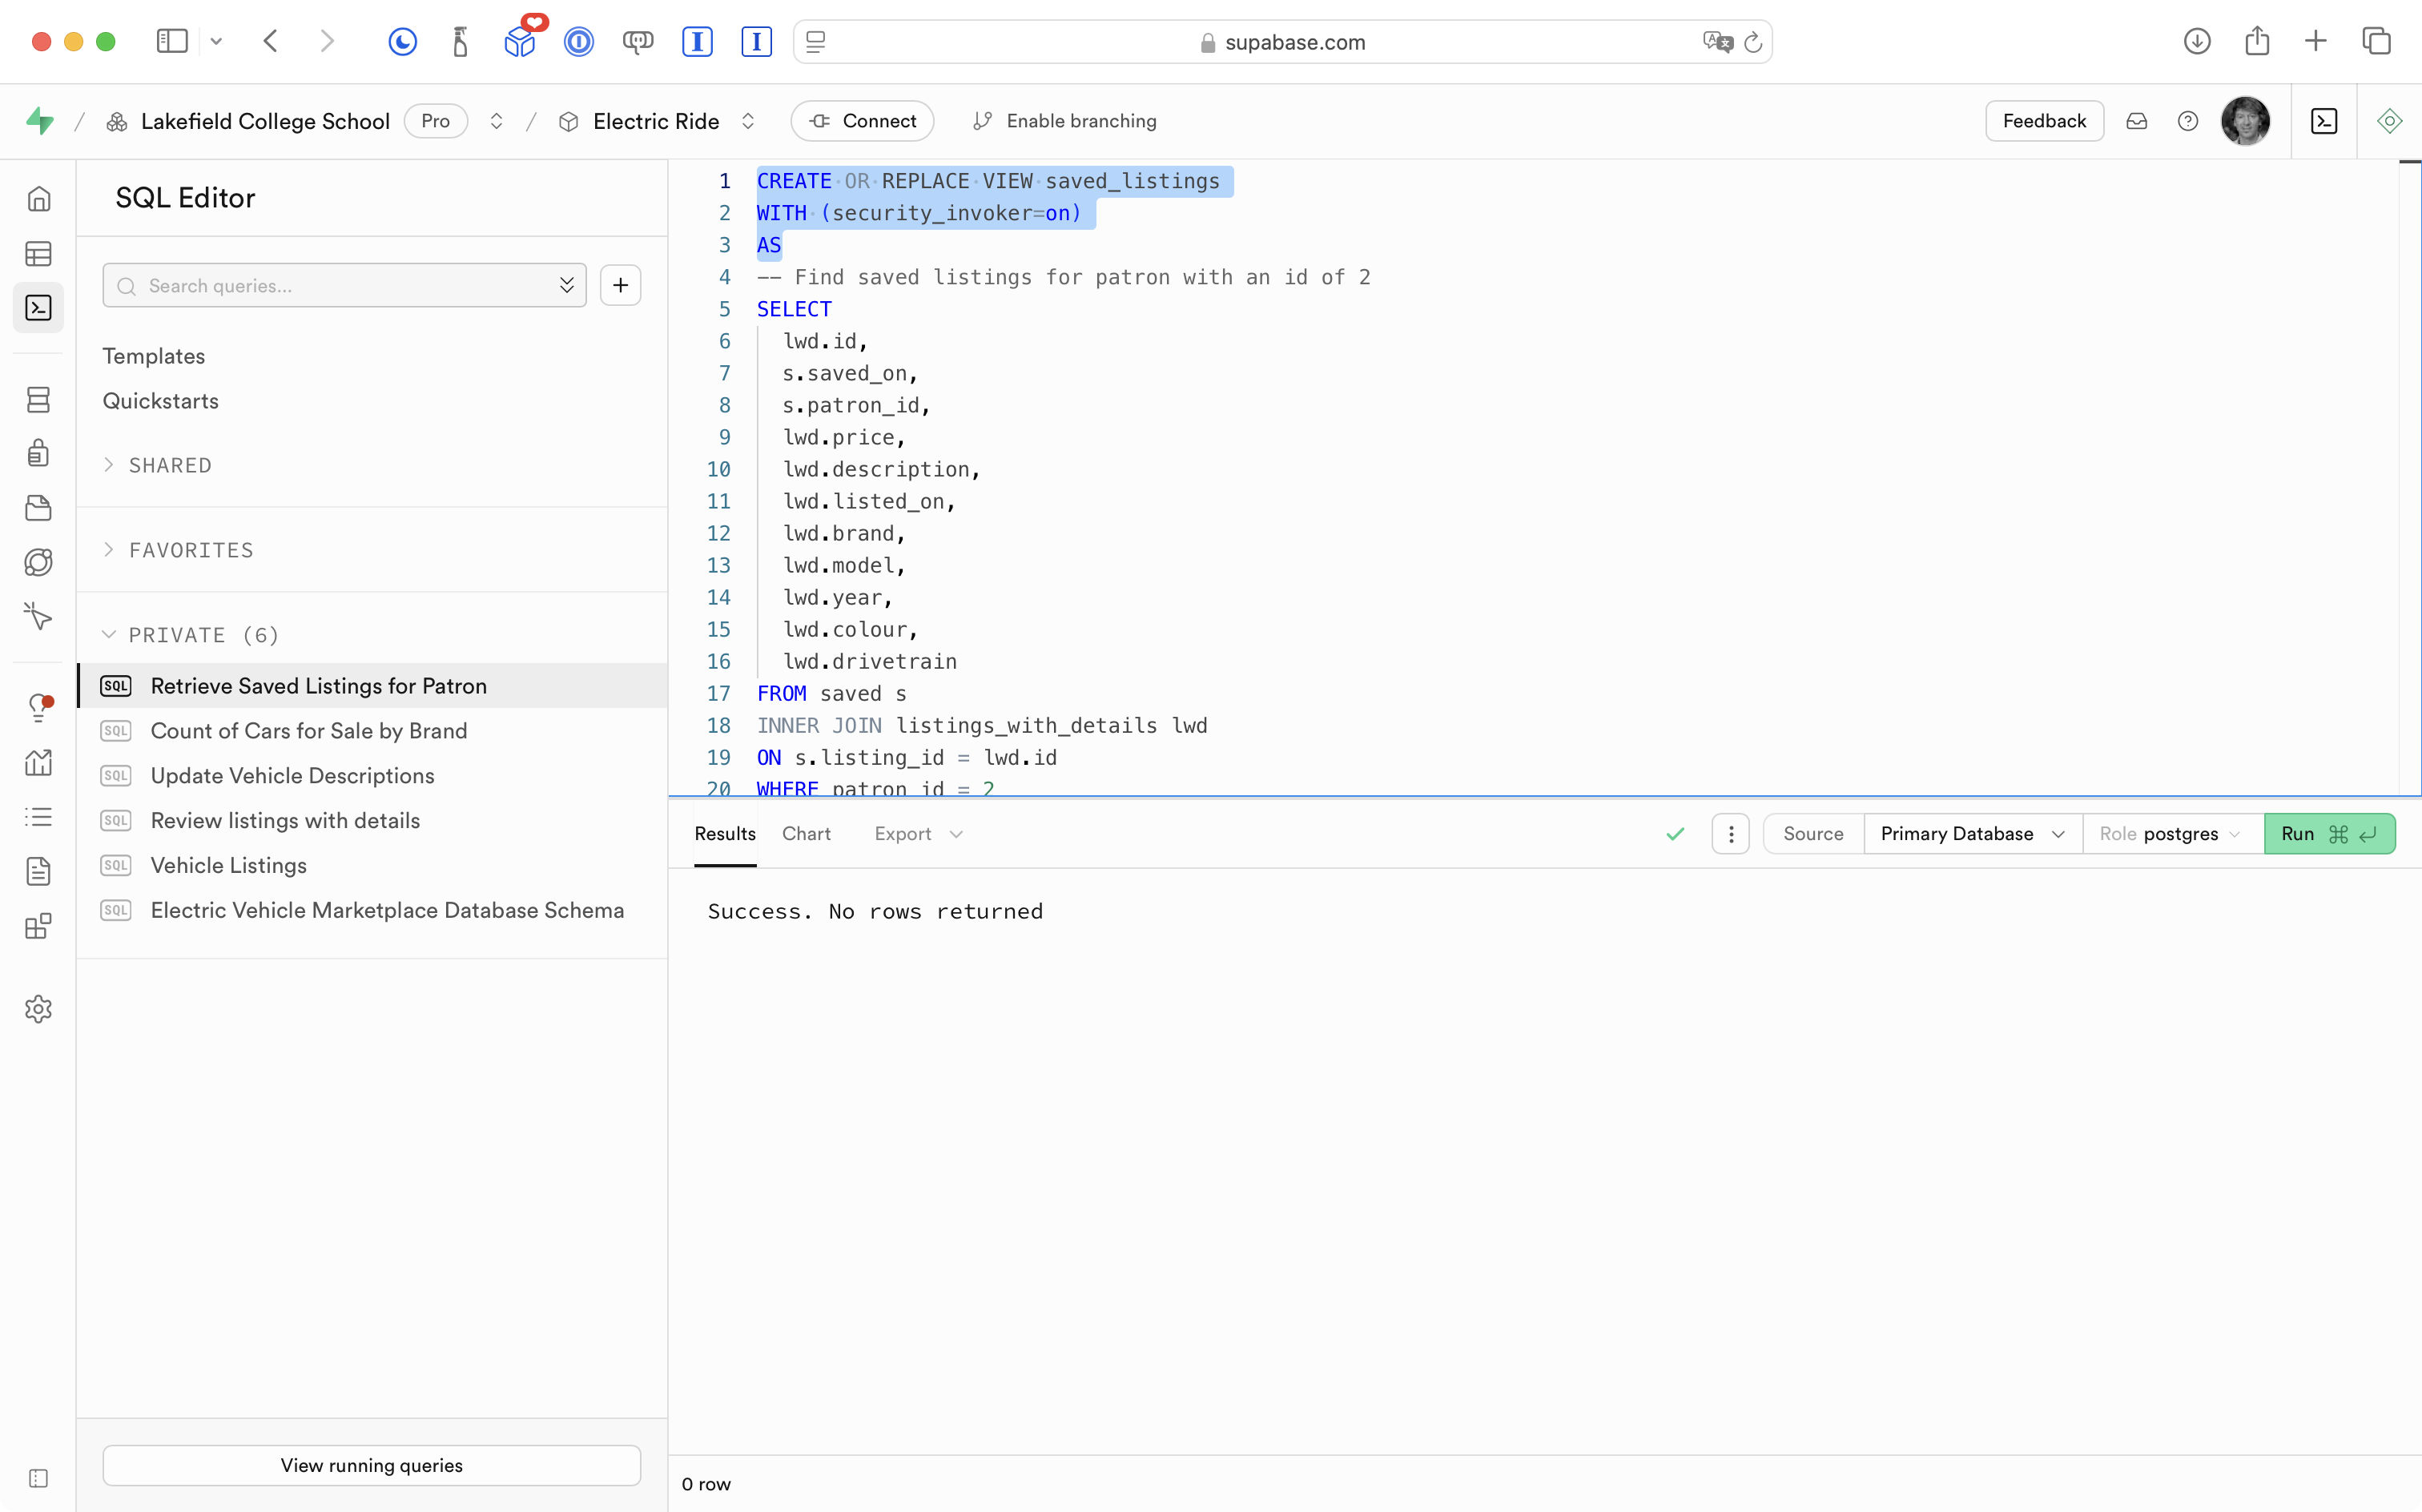
Fix the database view
The database view is currently hard-coded to find saved listings only for the user, or patron, with an id of 2:

We’ll simply remove the WHERE clause and re-run the SQL snippet to re-create the view:
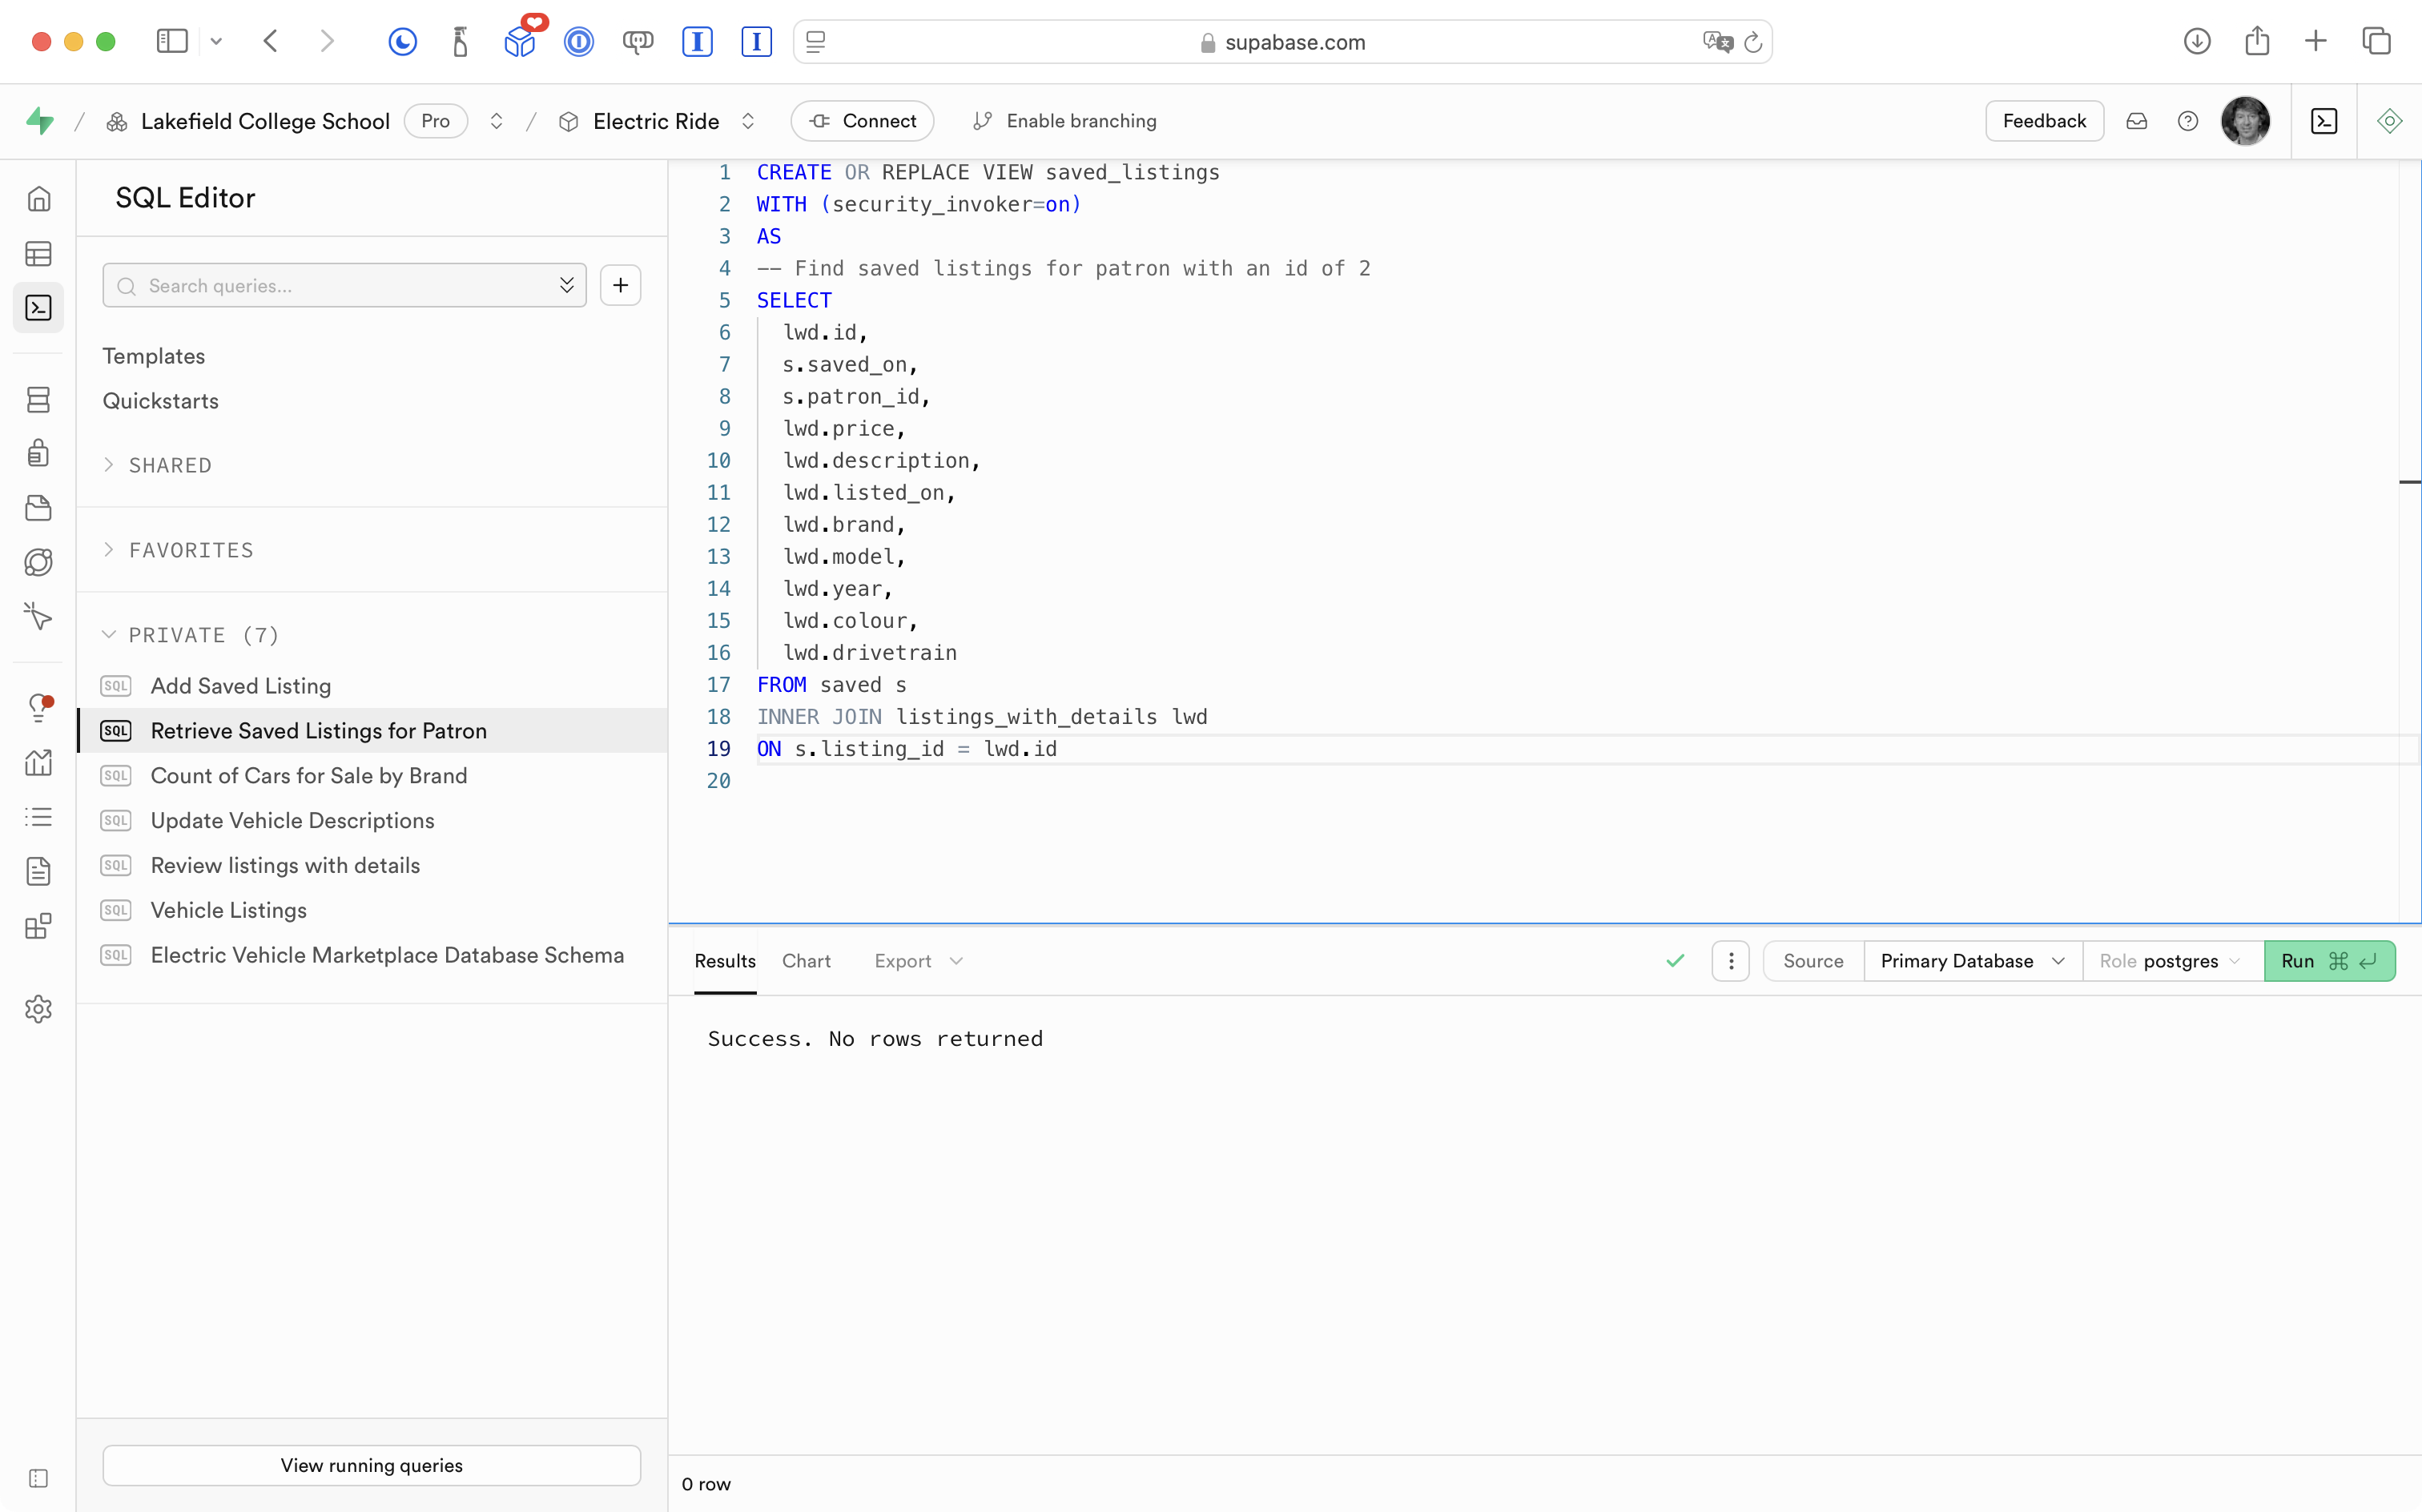
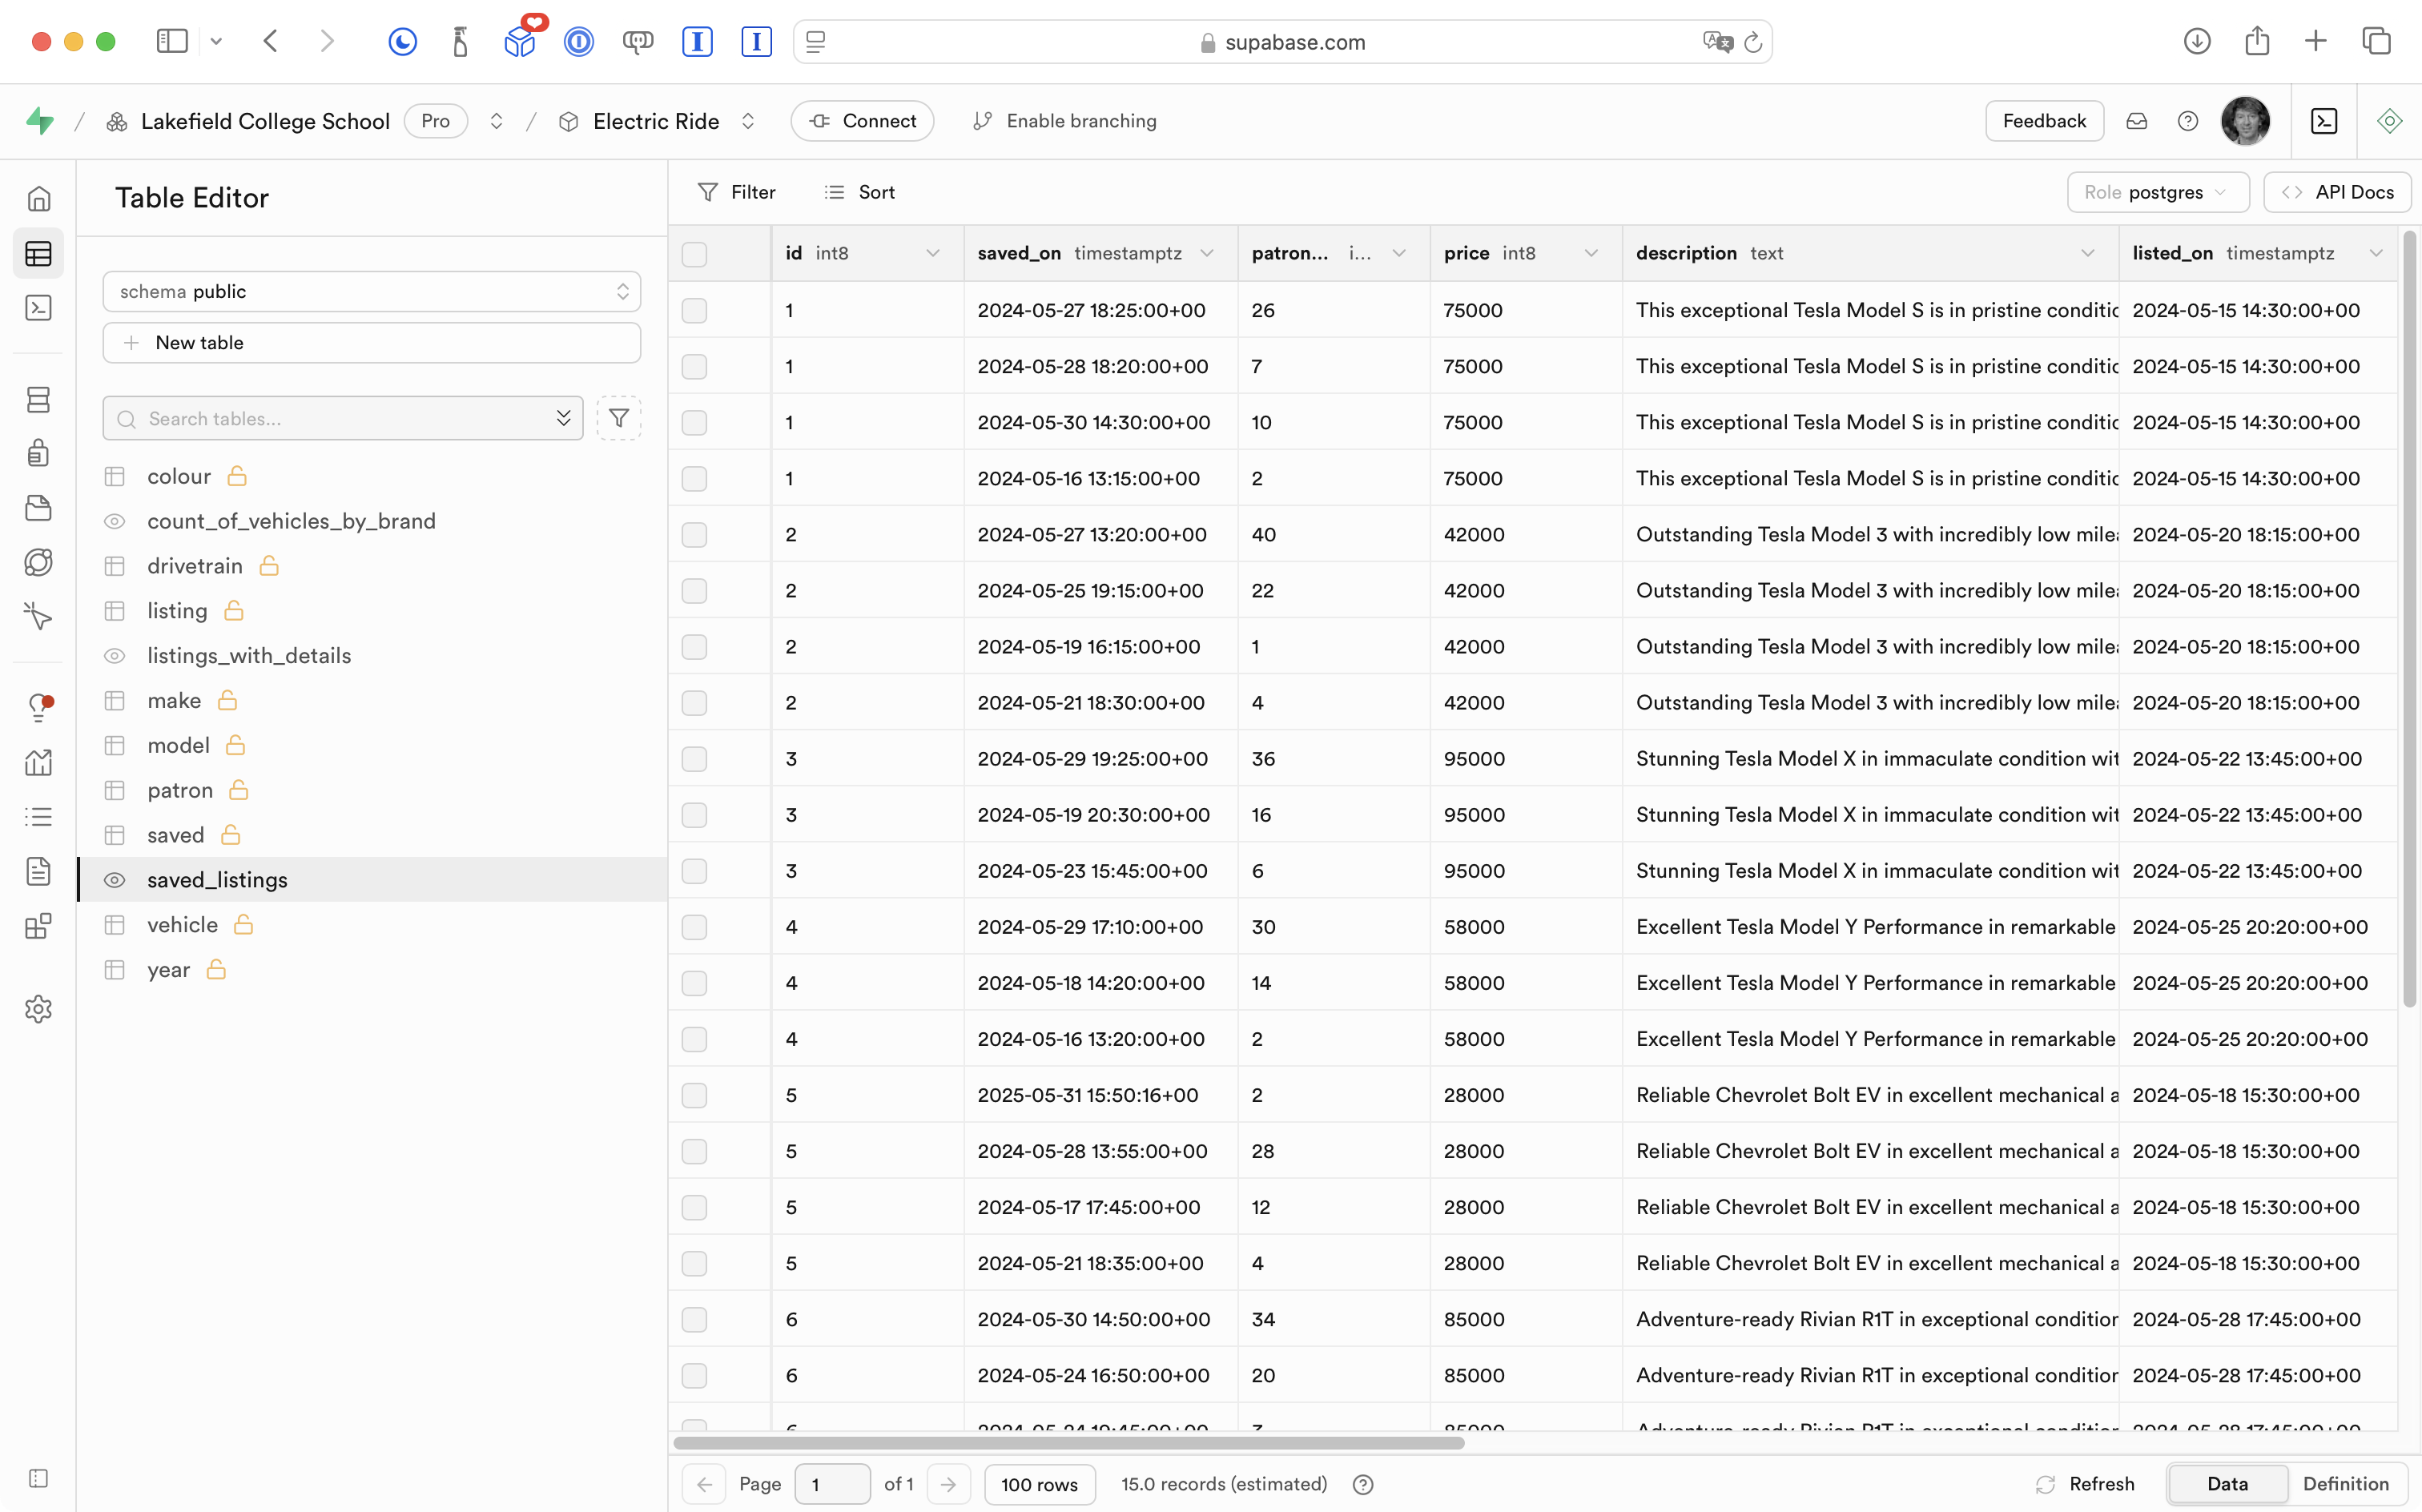
What this means is that the database view will now show all saved listings:
This might seem like a step backwards, but, we will next adjust the view model to compensate.
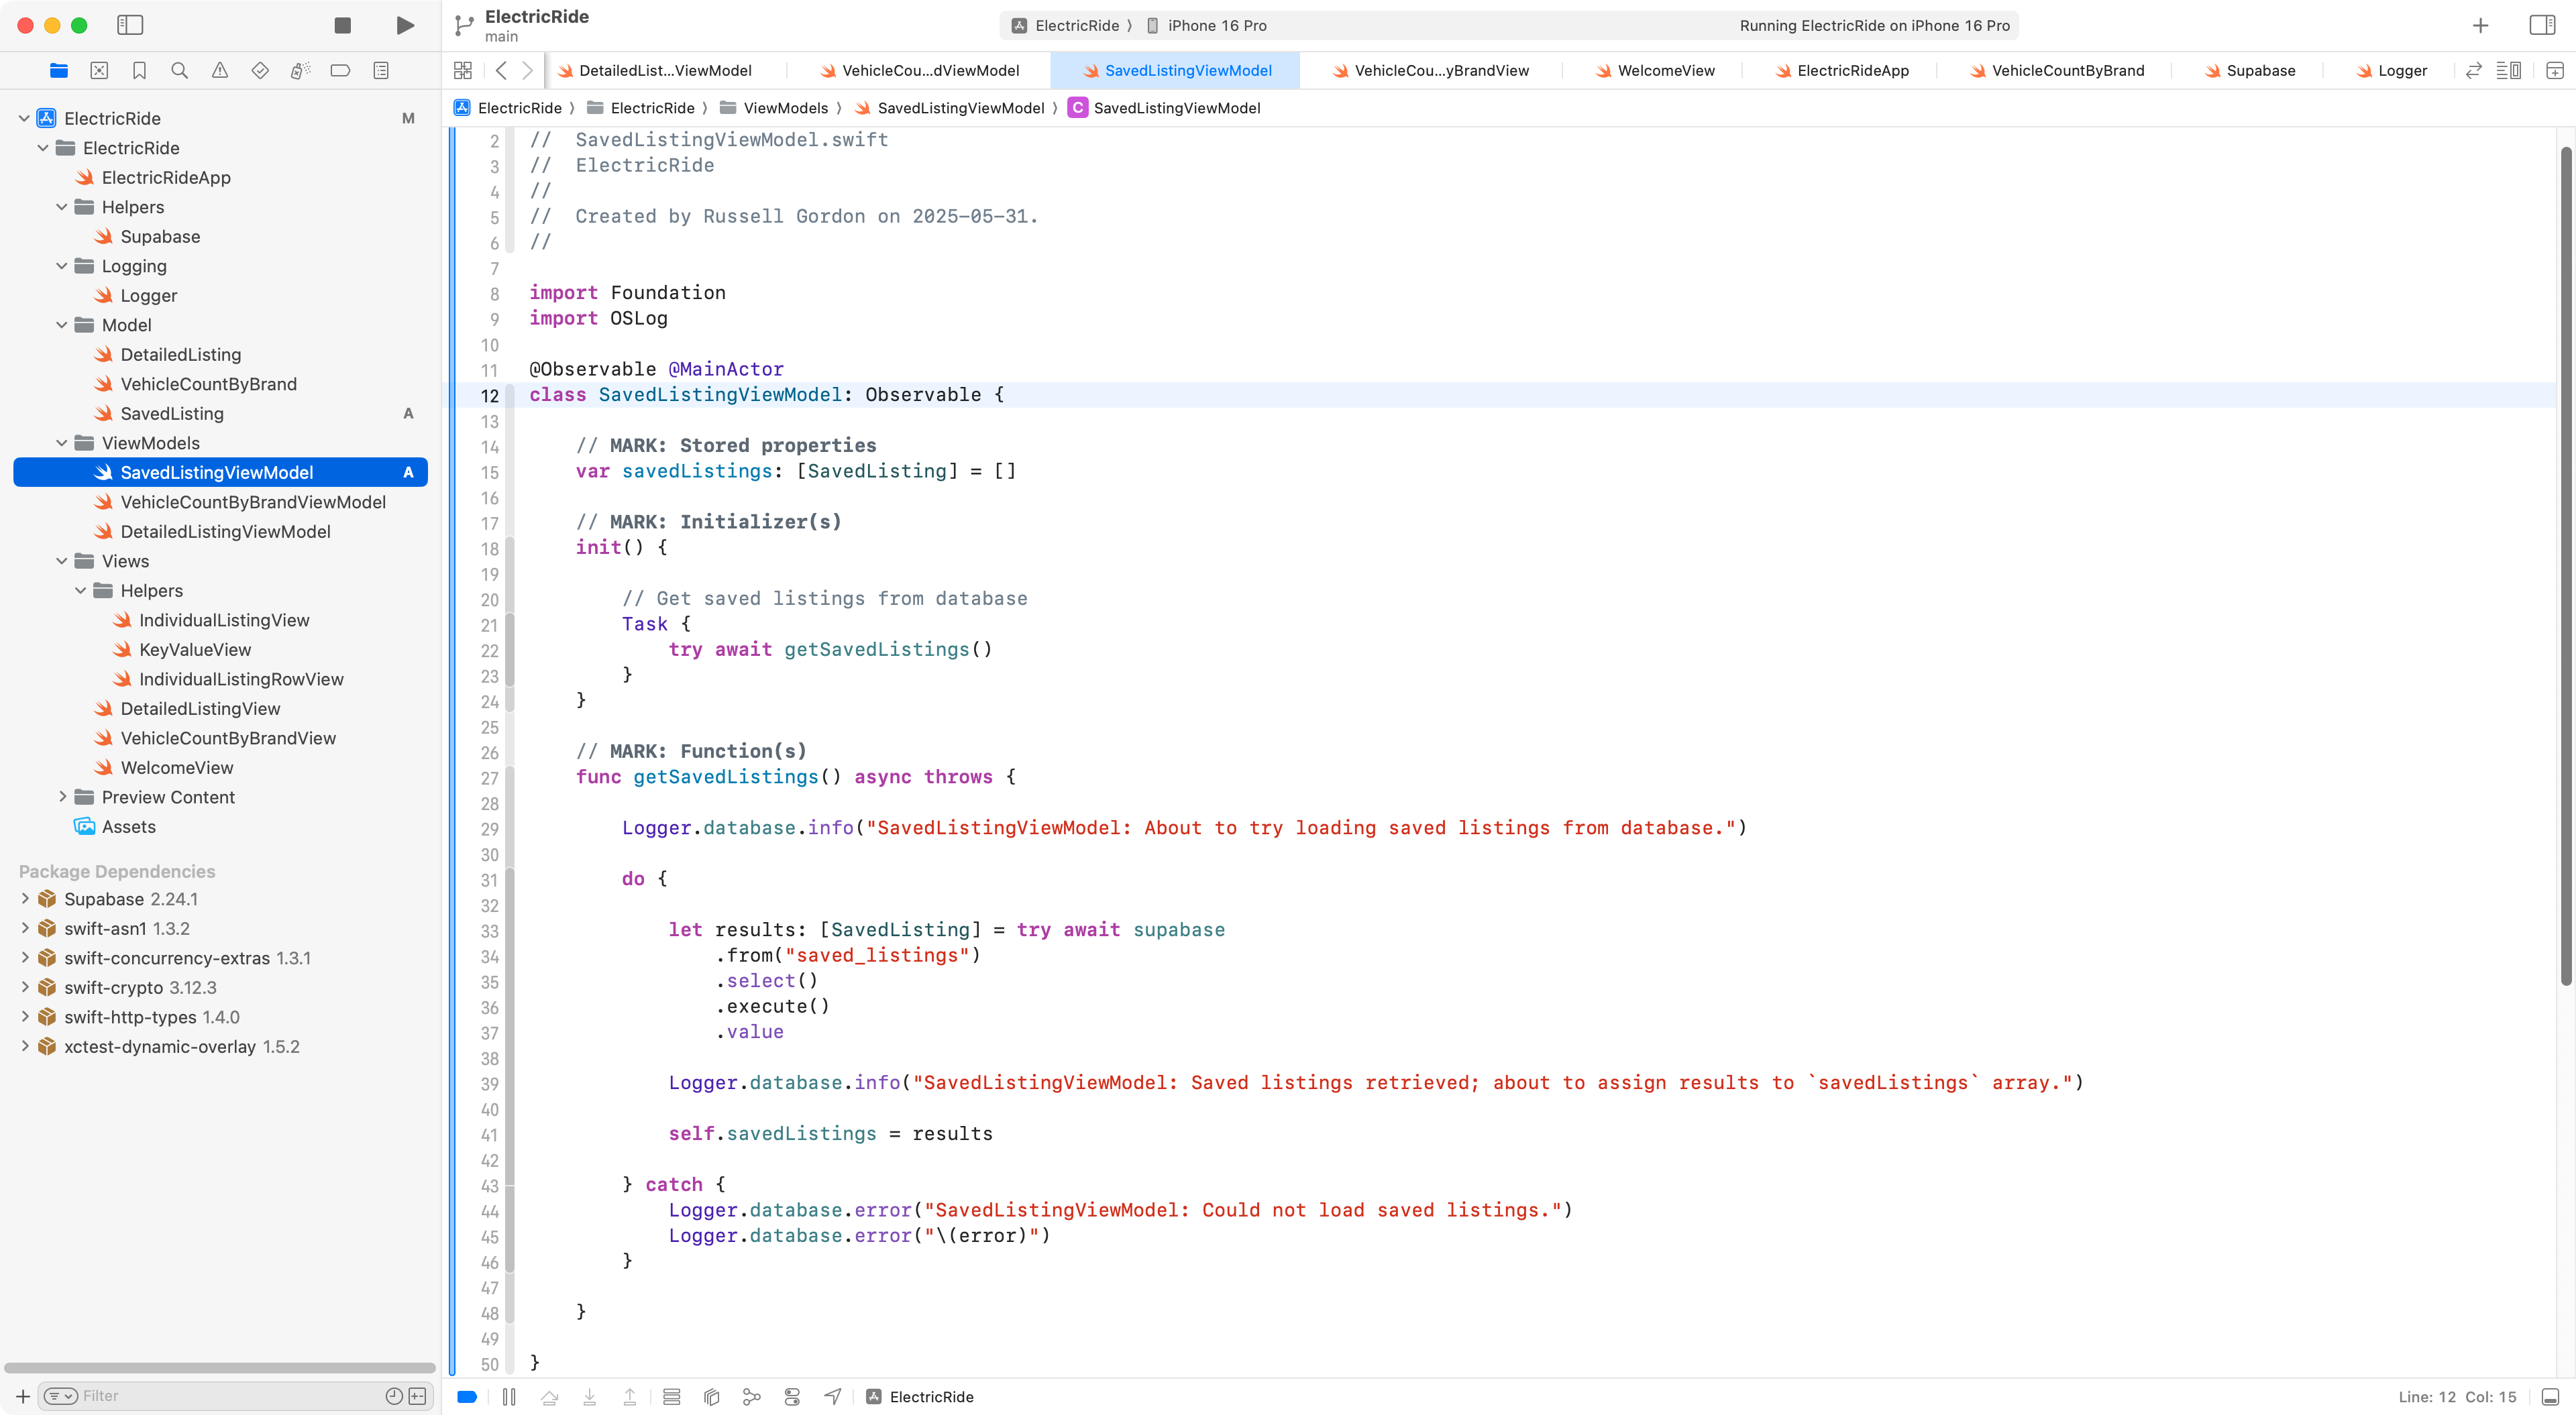
Fix the view model
We modify getSavedListings function in SavedListingViewModel so that it requires that a patron id be passed in:
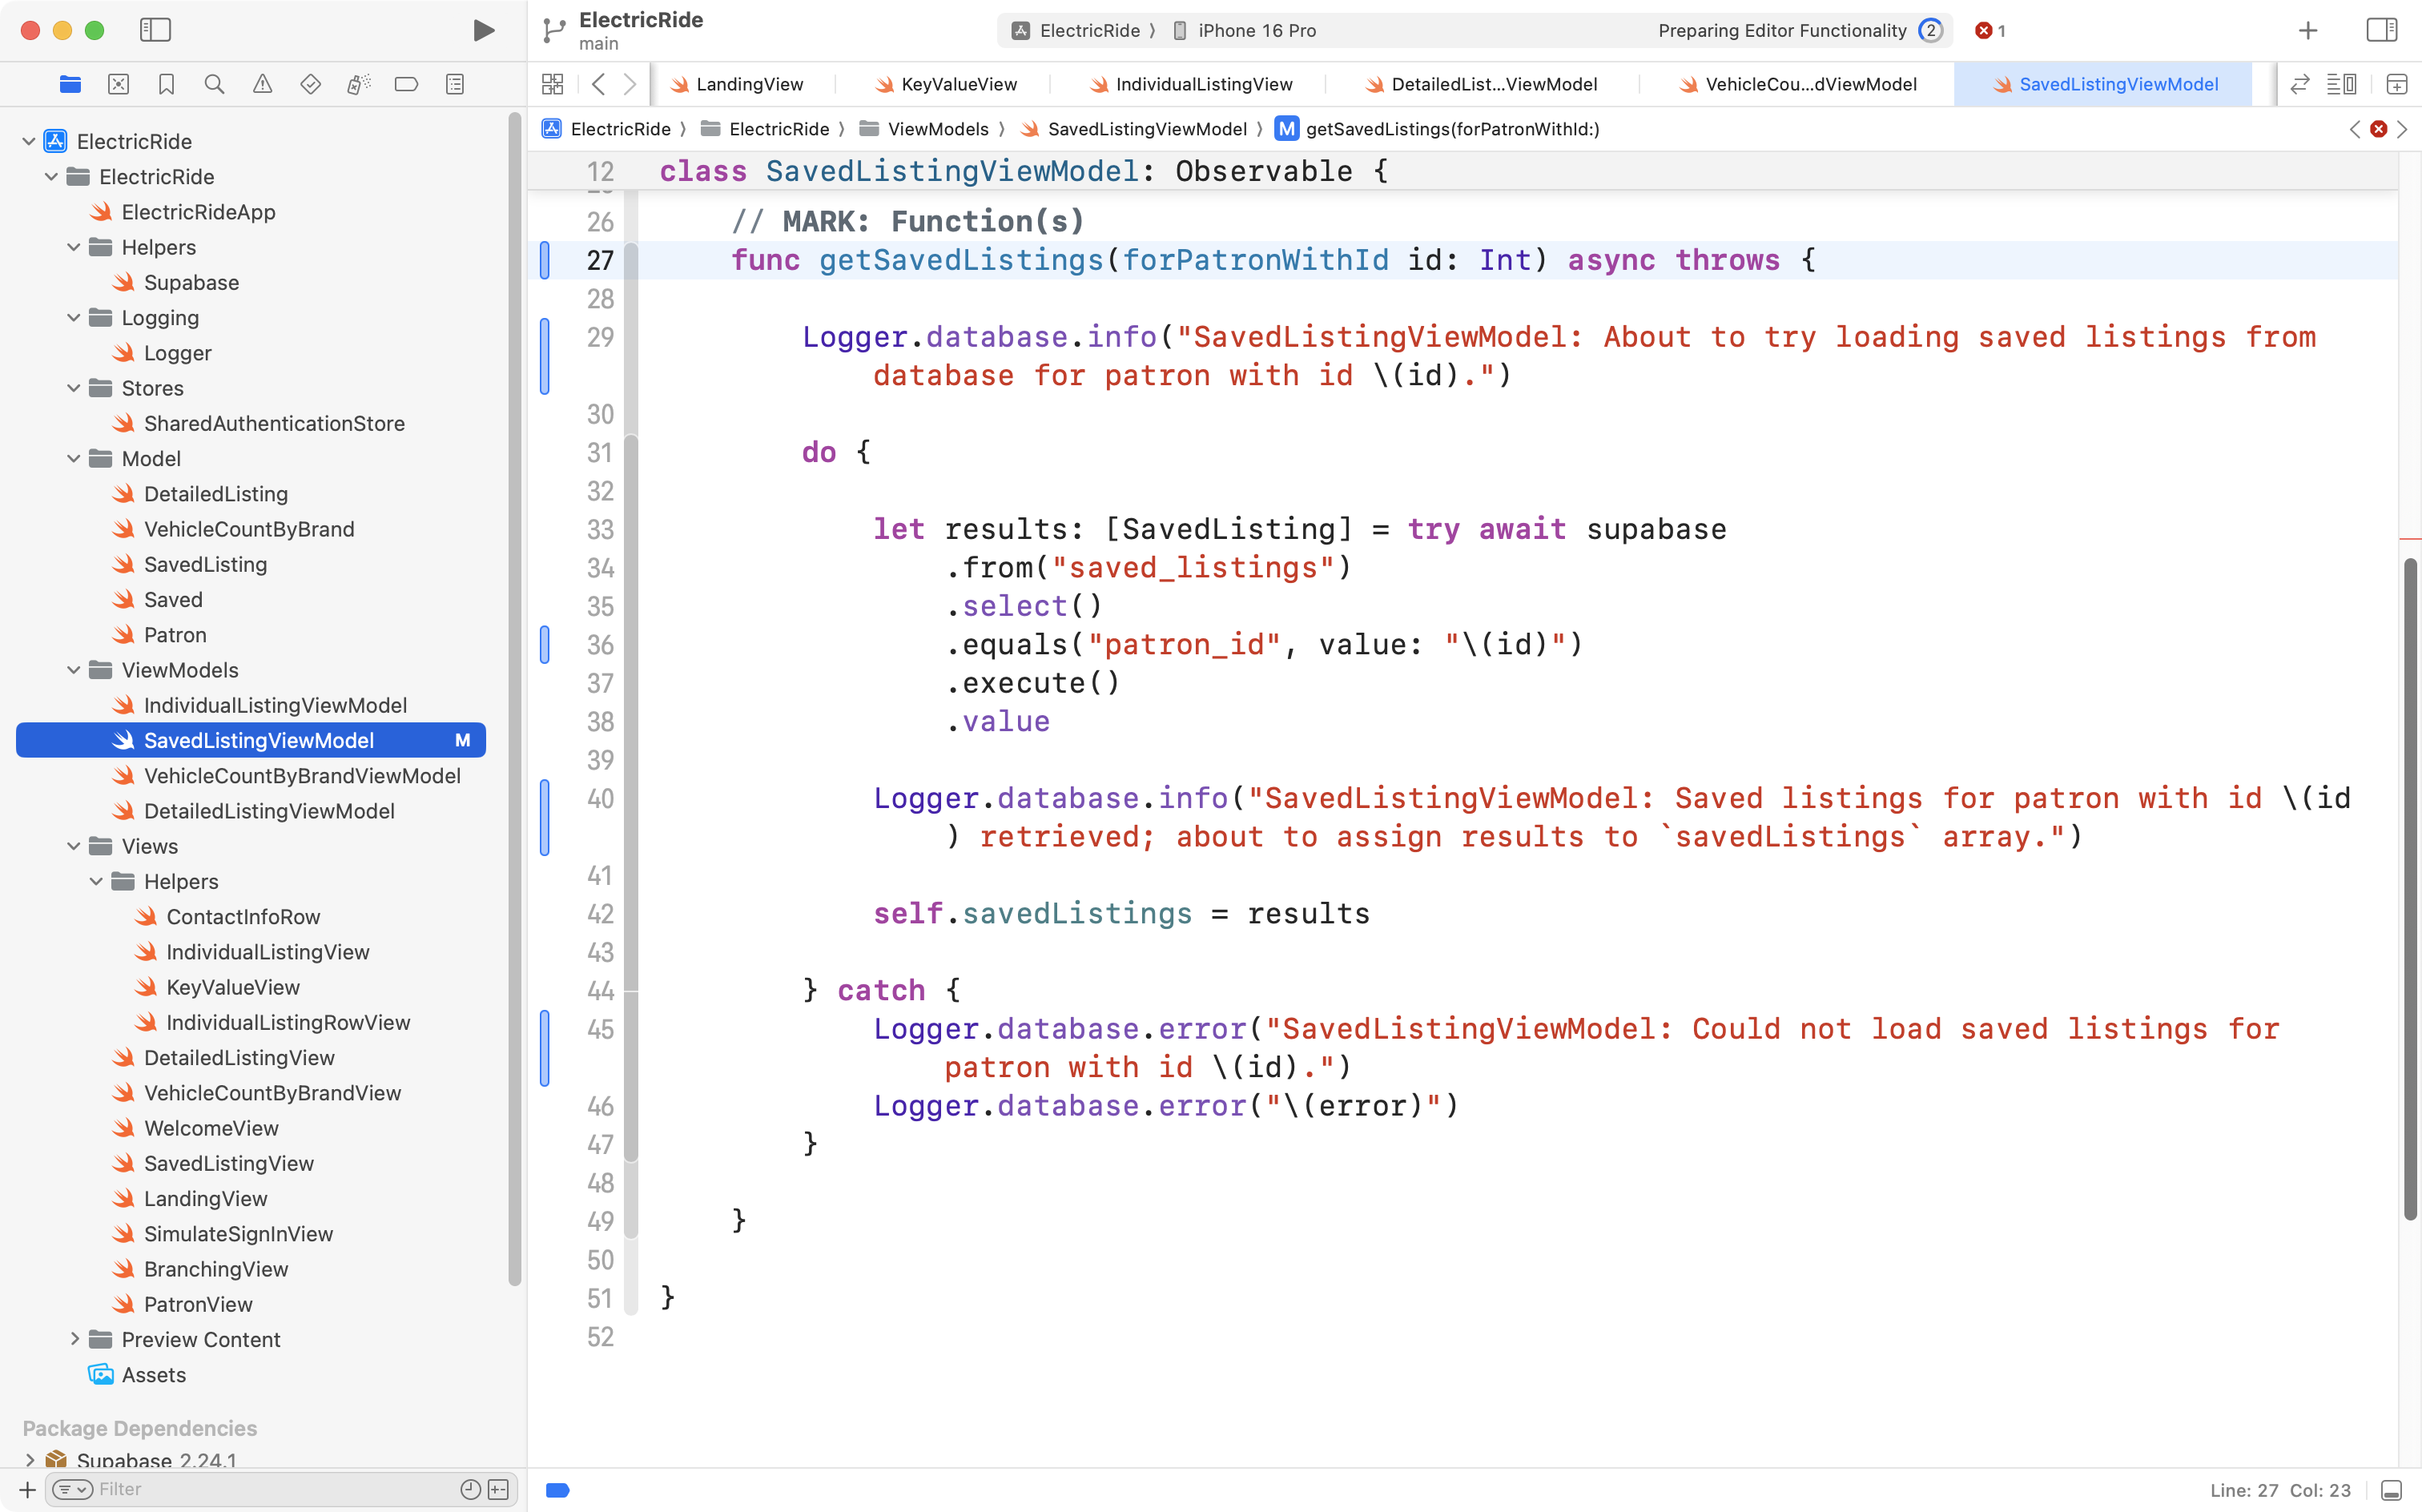
On line 36 in the screenshot above, we use that id to limit results to show only those listings that were saved by the specified patron. The code on line 36 has the same effect as the WHERE clause that we just removed – the view model will only retrieve listings tied to the patron indicated.
The caller (where getSavedListings is invoked) is actually in the initializer of the view model itself:
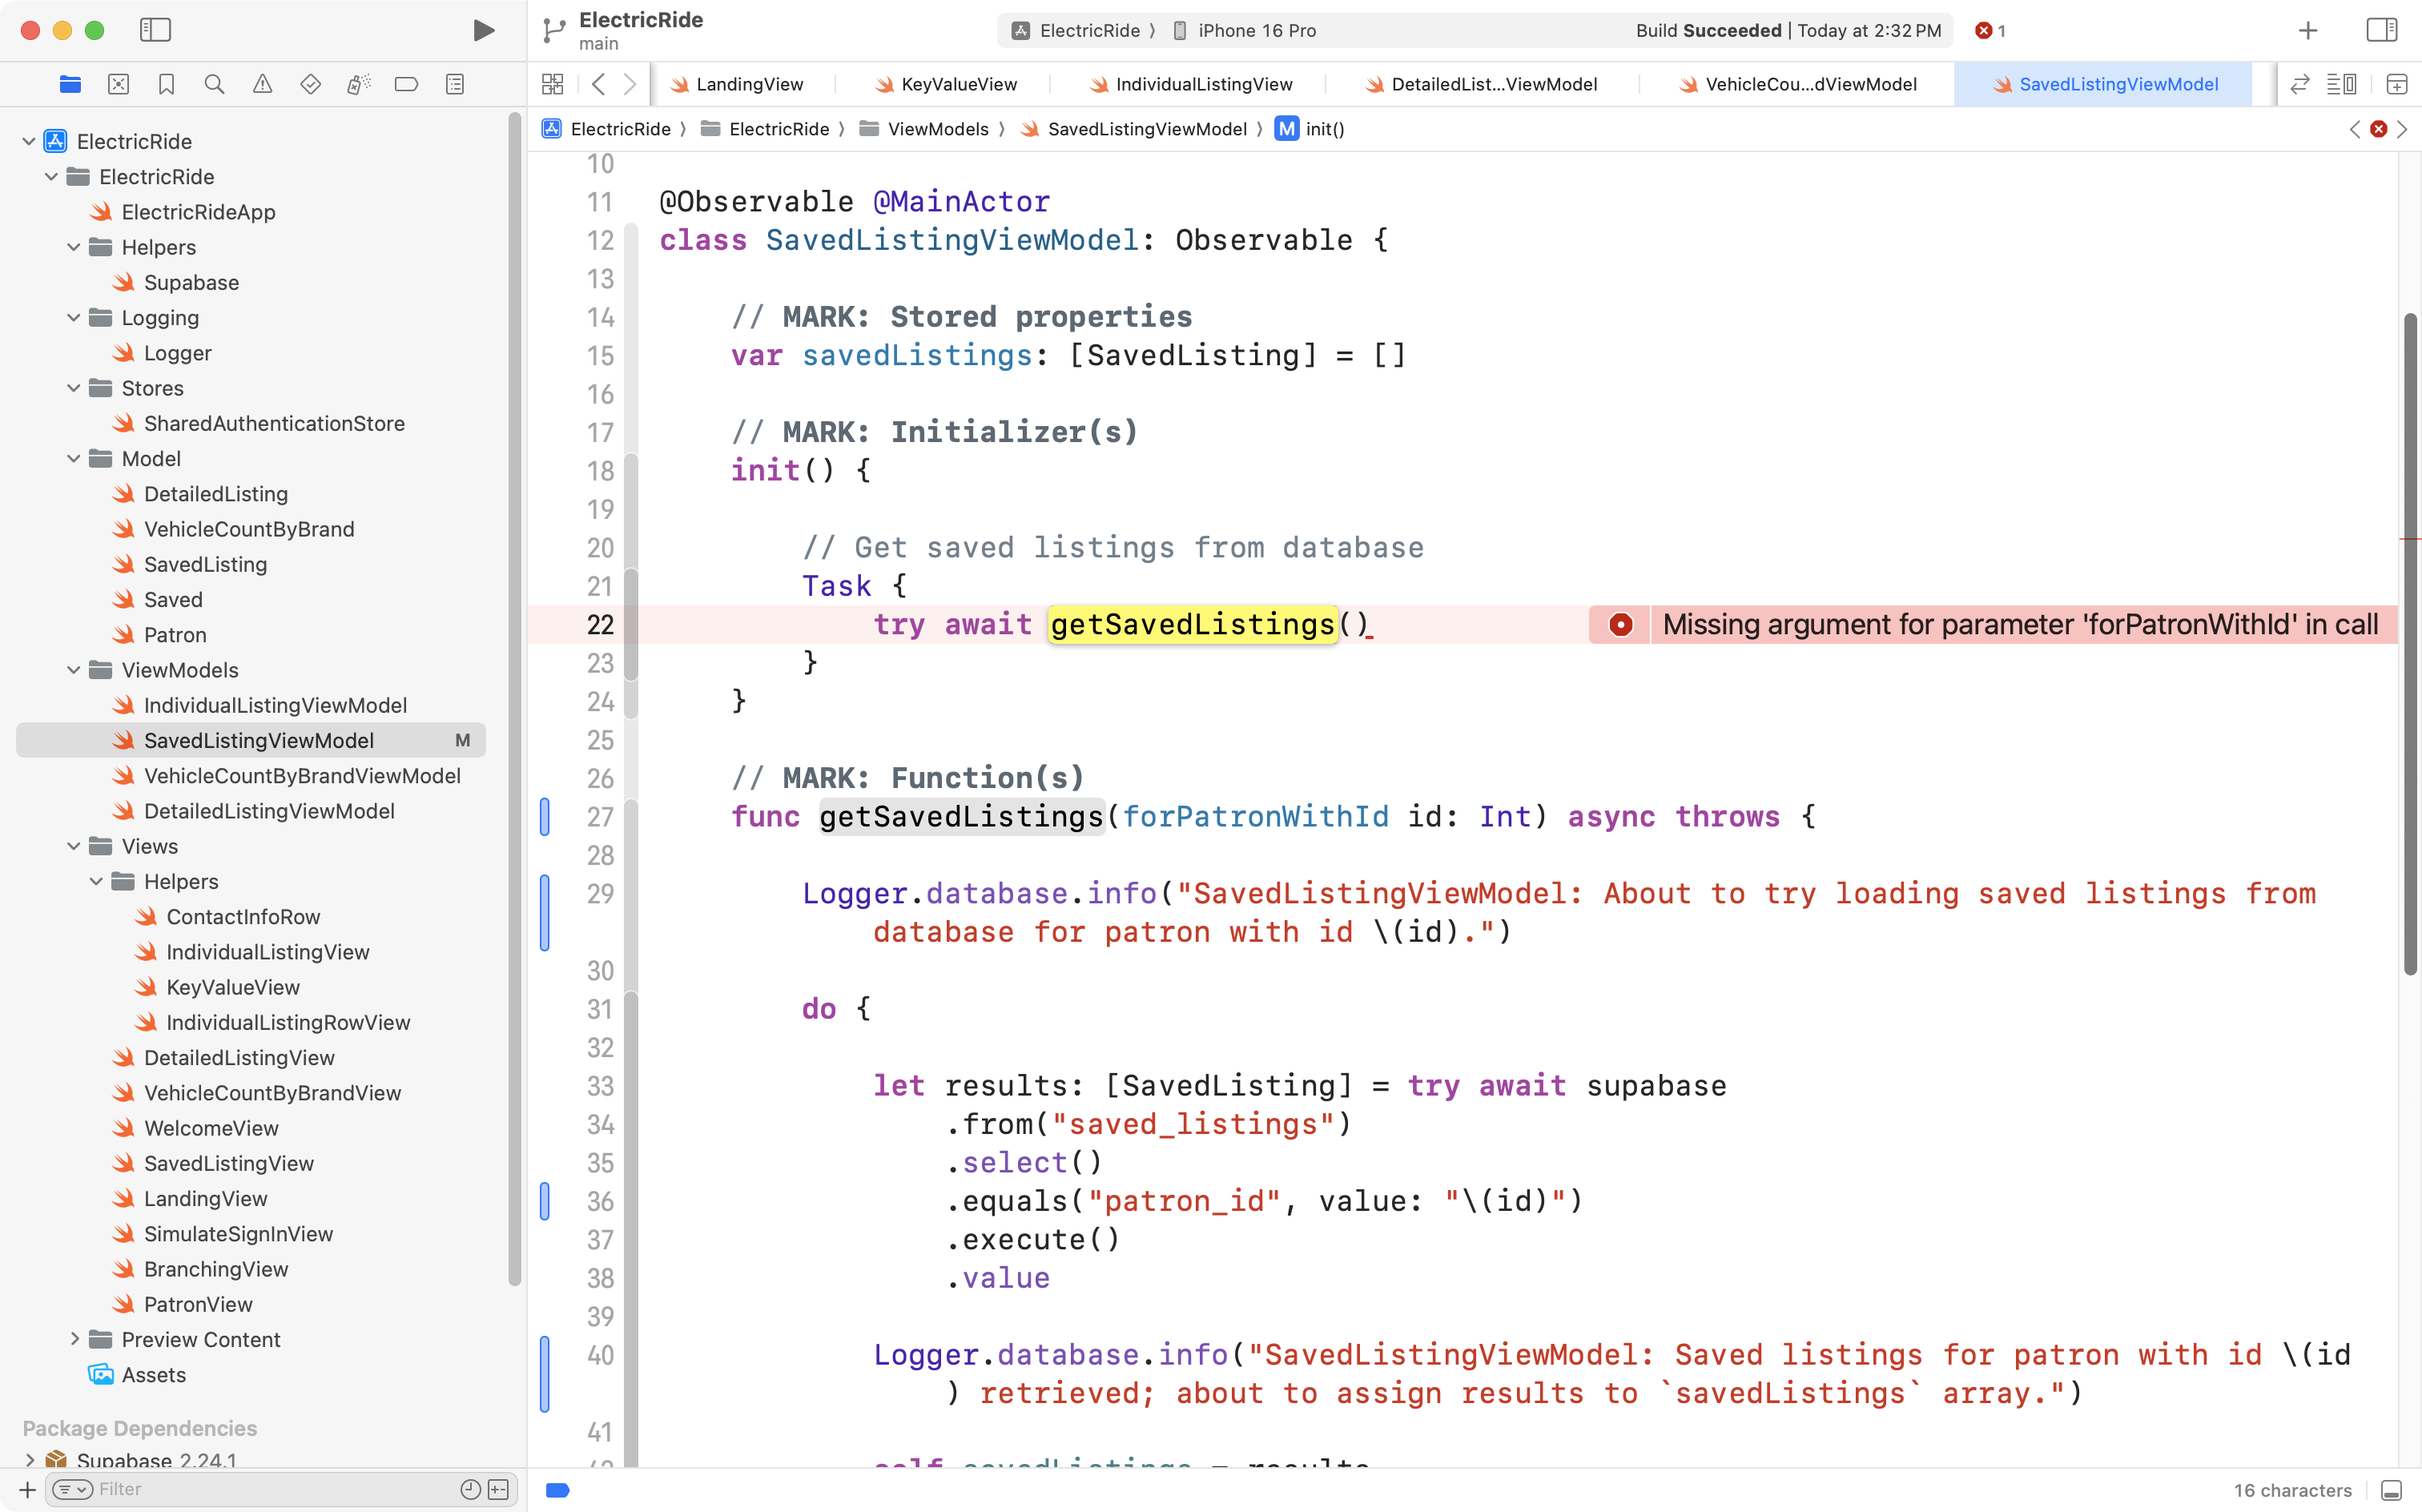
So, we need to adjust the initializer of the view model so that it accepts a patron id (line 18):
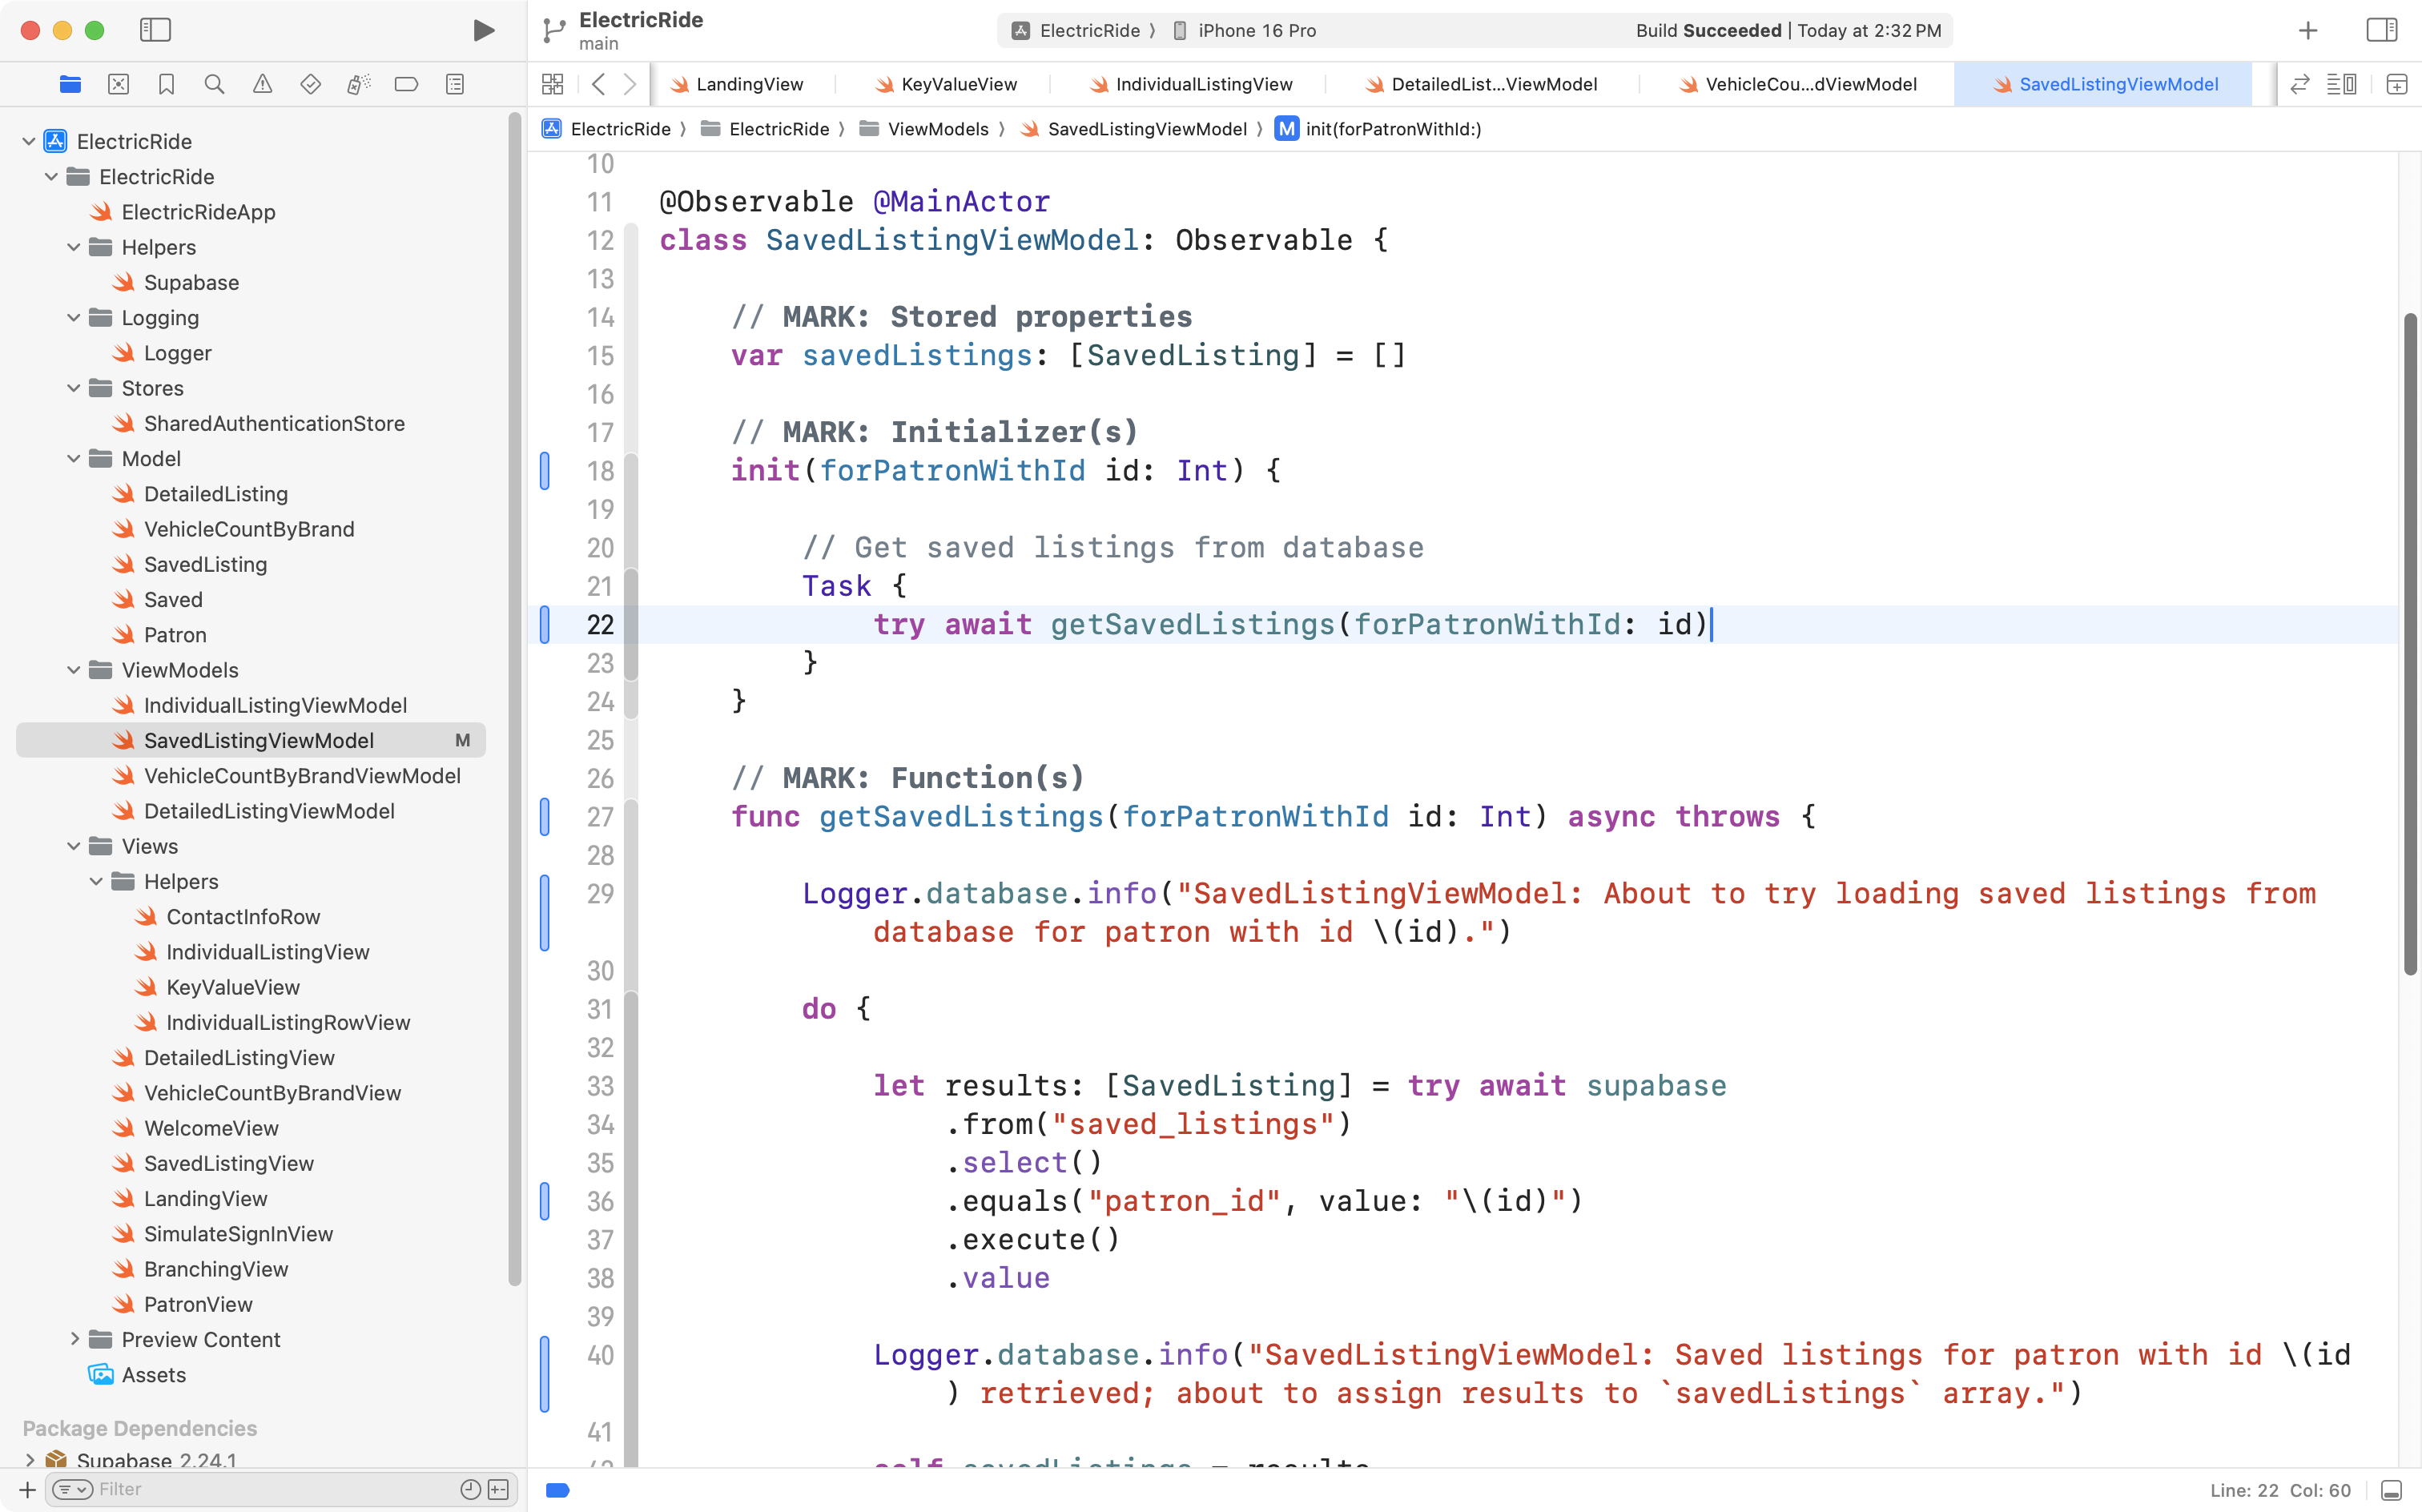
On line 22, we pass the id received in the initializer on to the getSavedListings function.
Fix the view
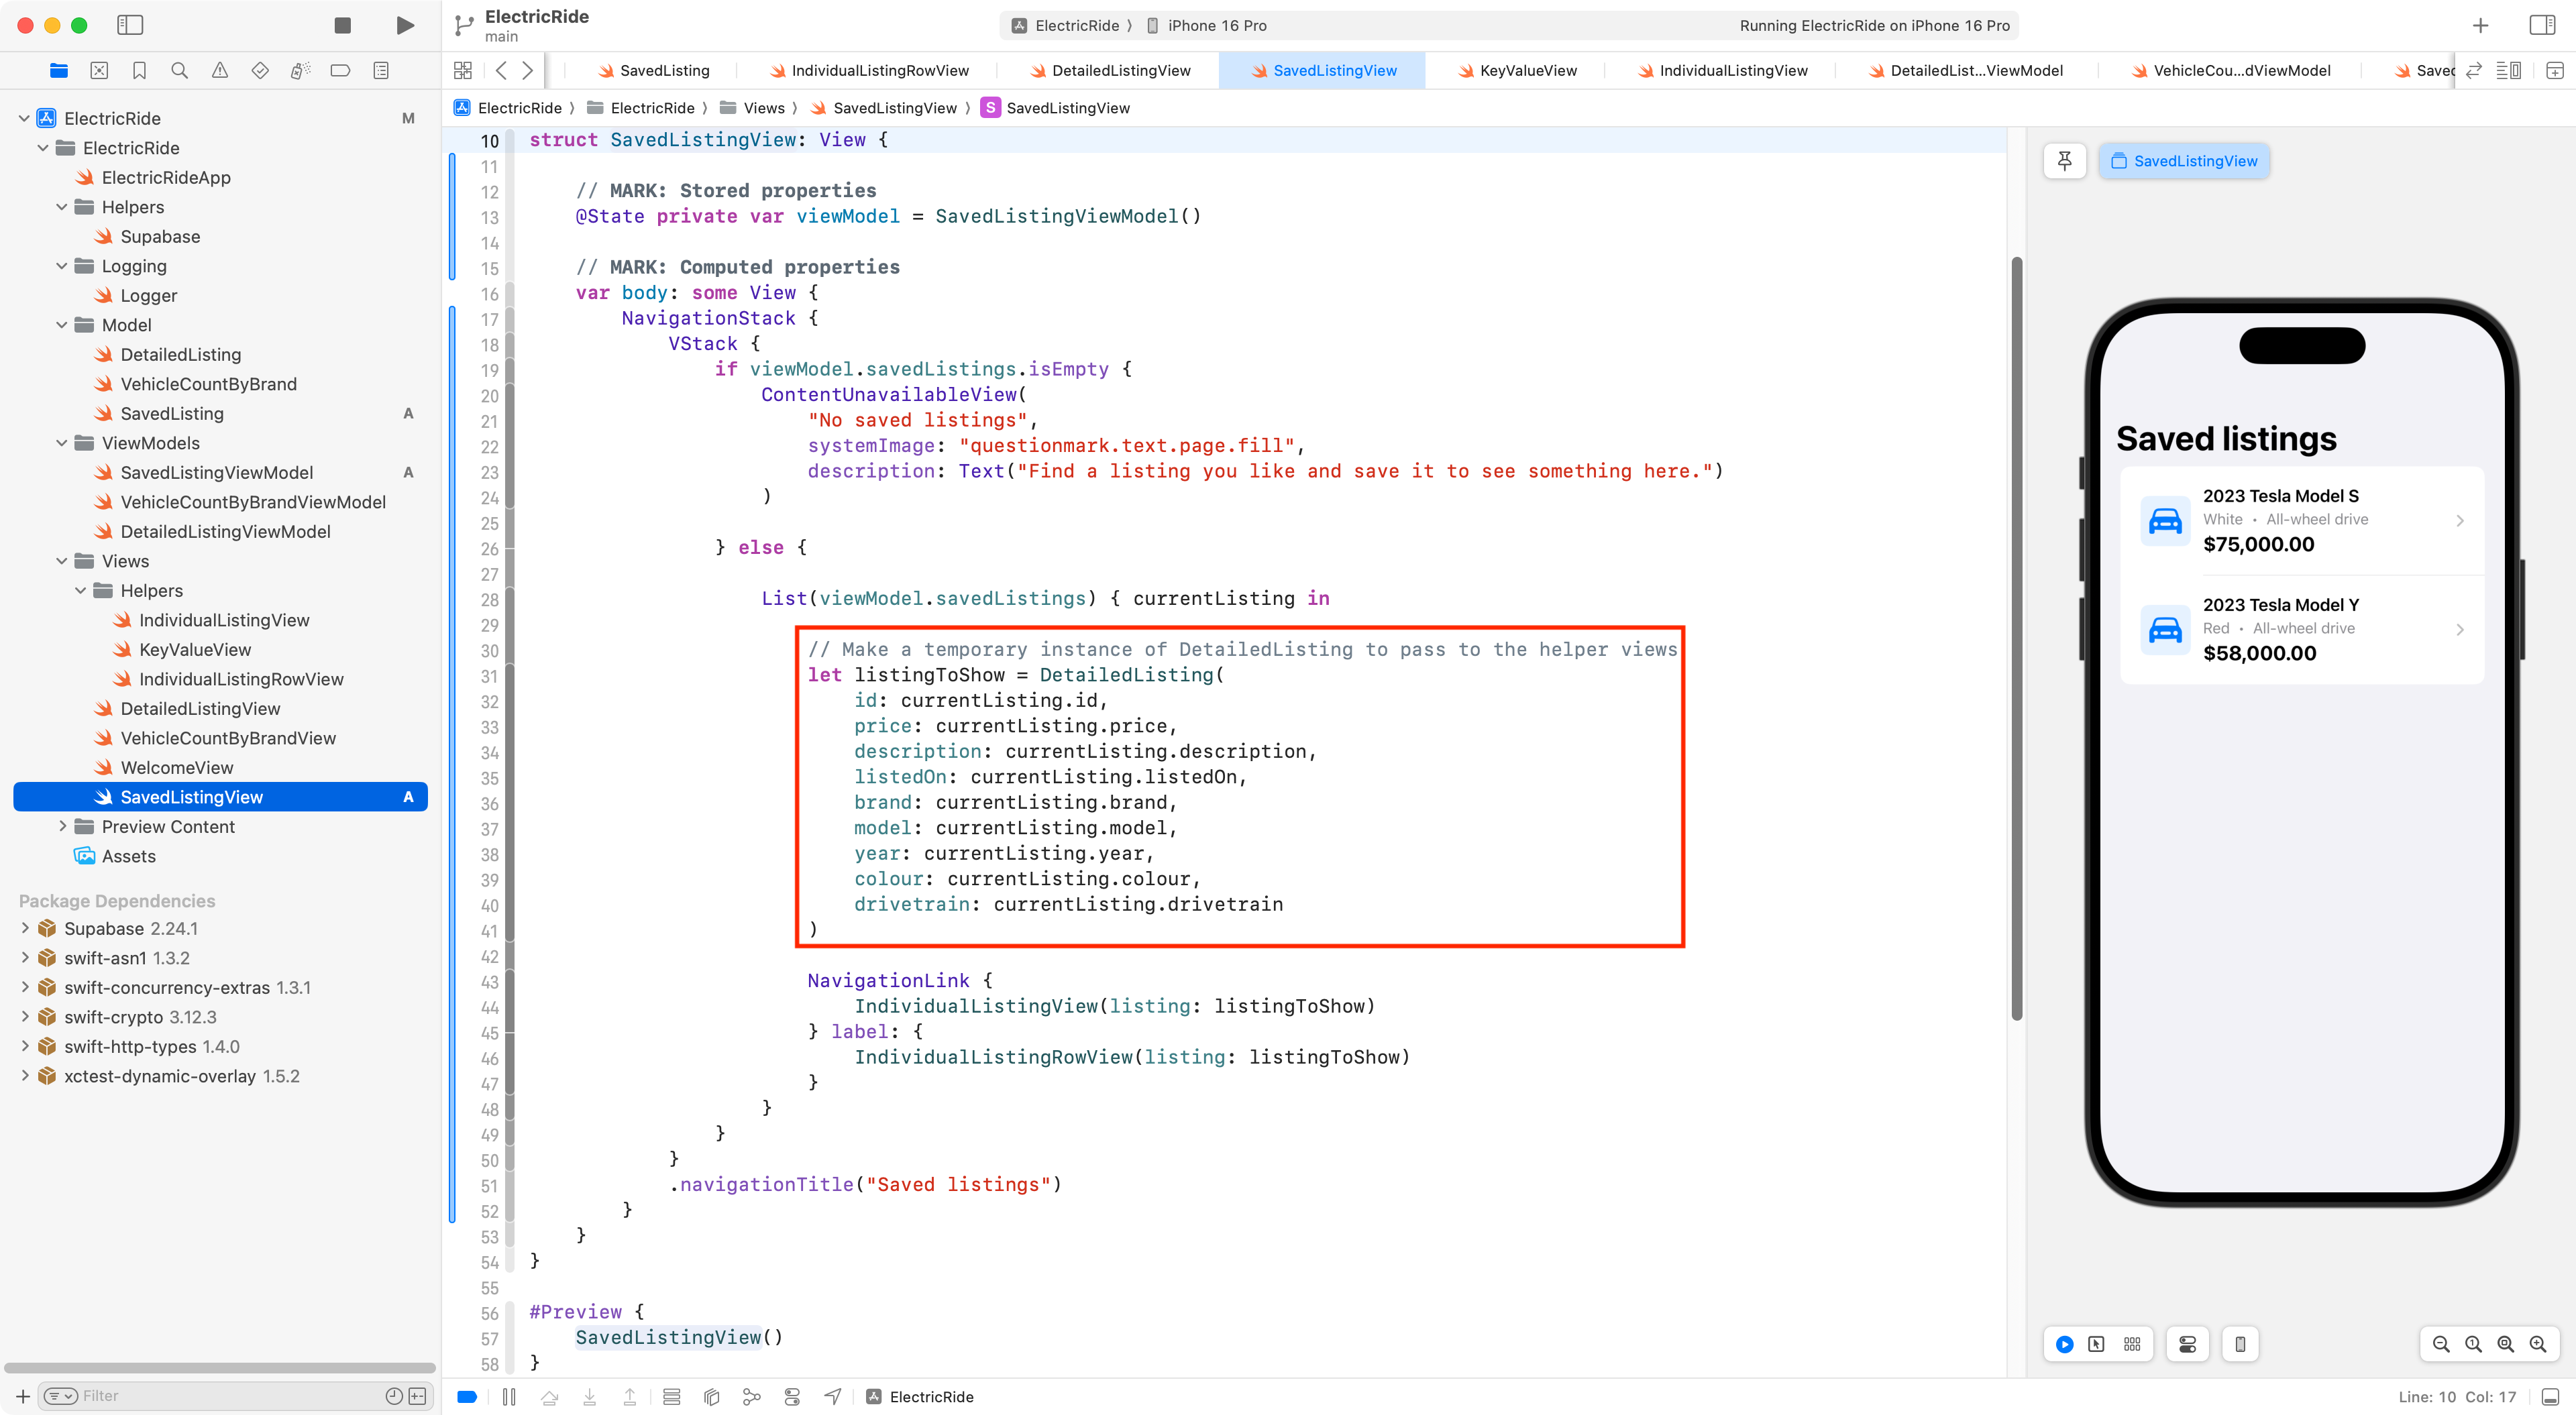
Now we need to adjust the view that uses the view model we just modified.
Currently SavedListingView creates its own view model:
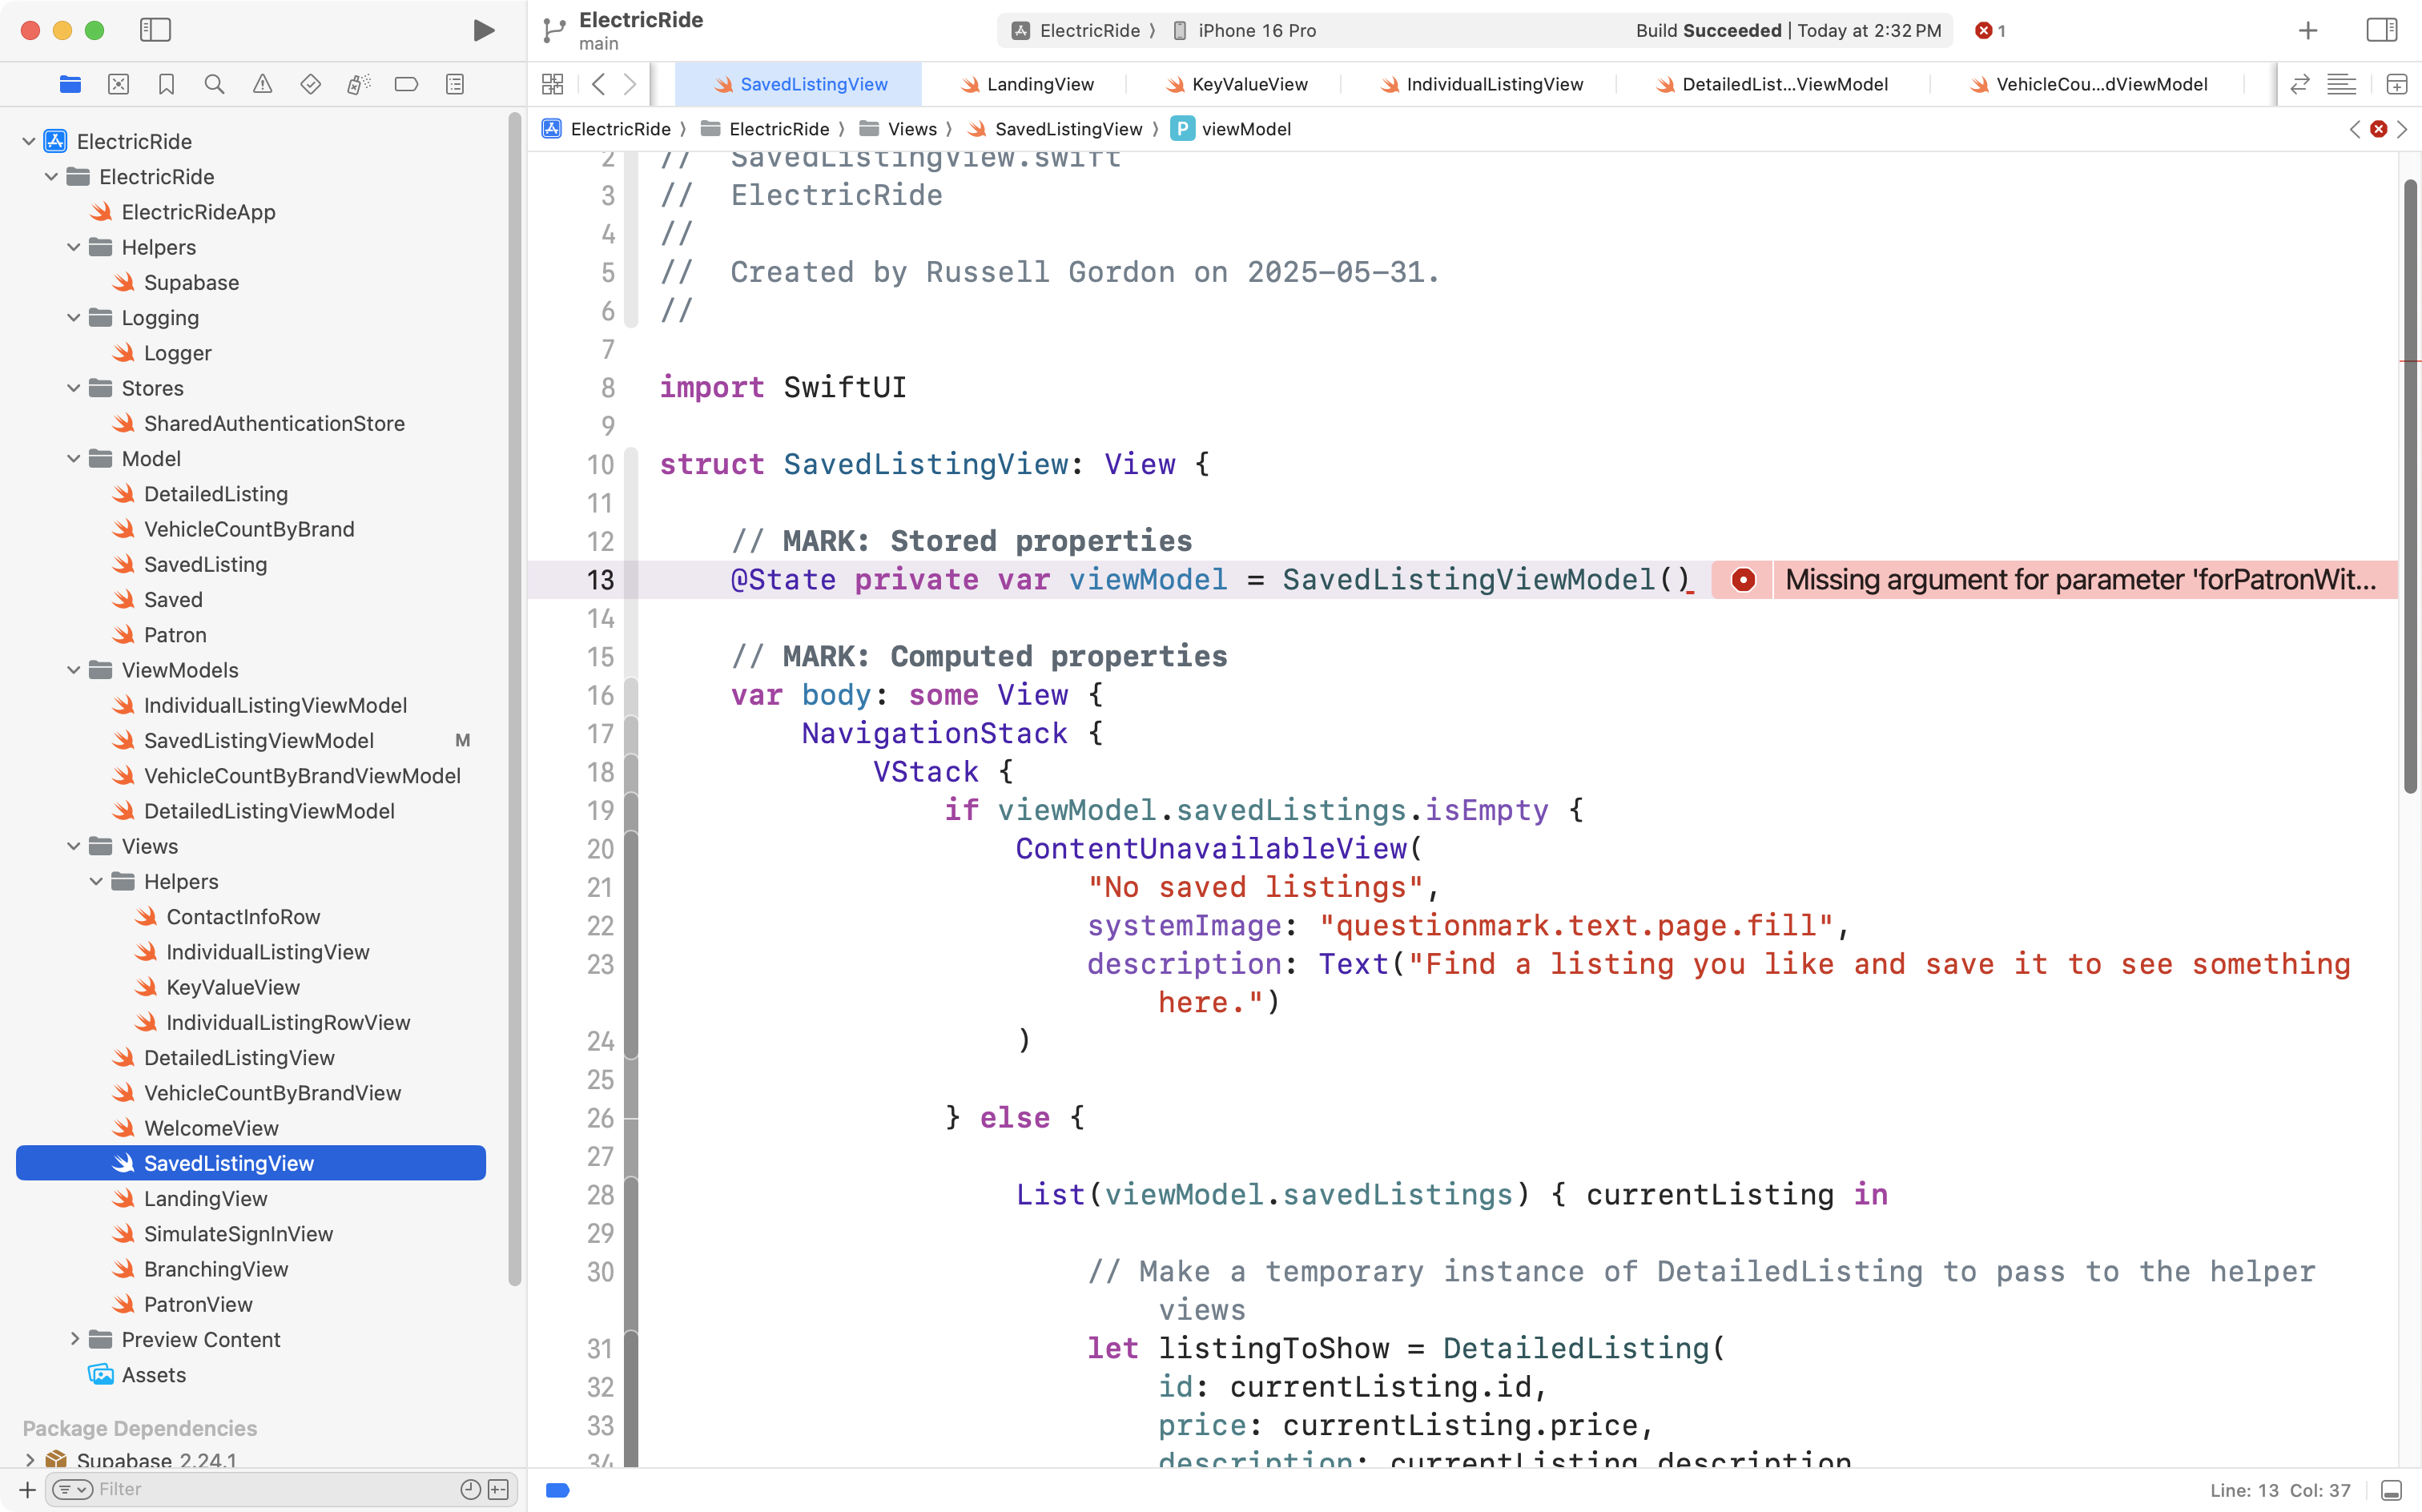
We’re going to change SavedListingView so that the view no longer creates its own view model, but instead accepts an instance of its view model – this instance will be provided by the view that creates SavedListingView:
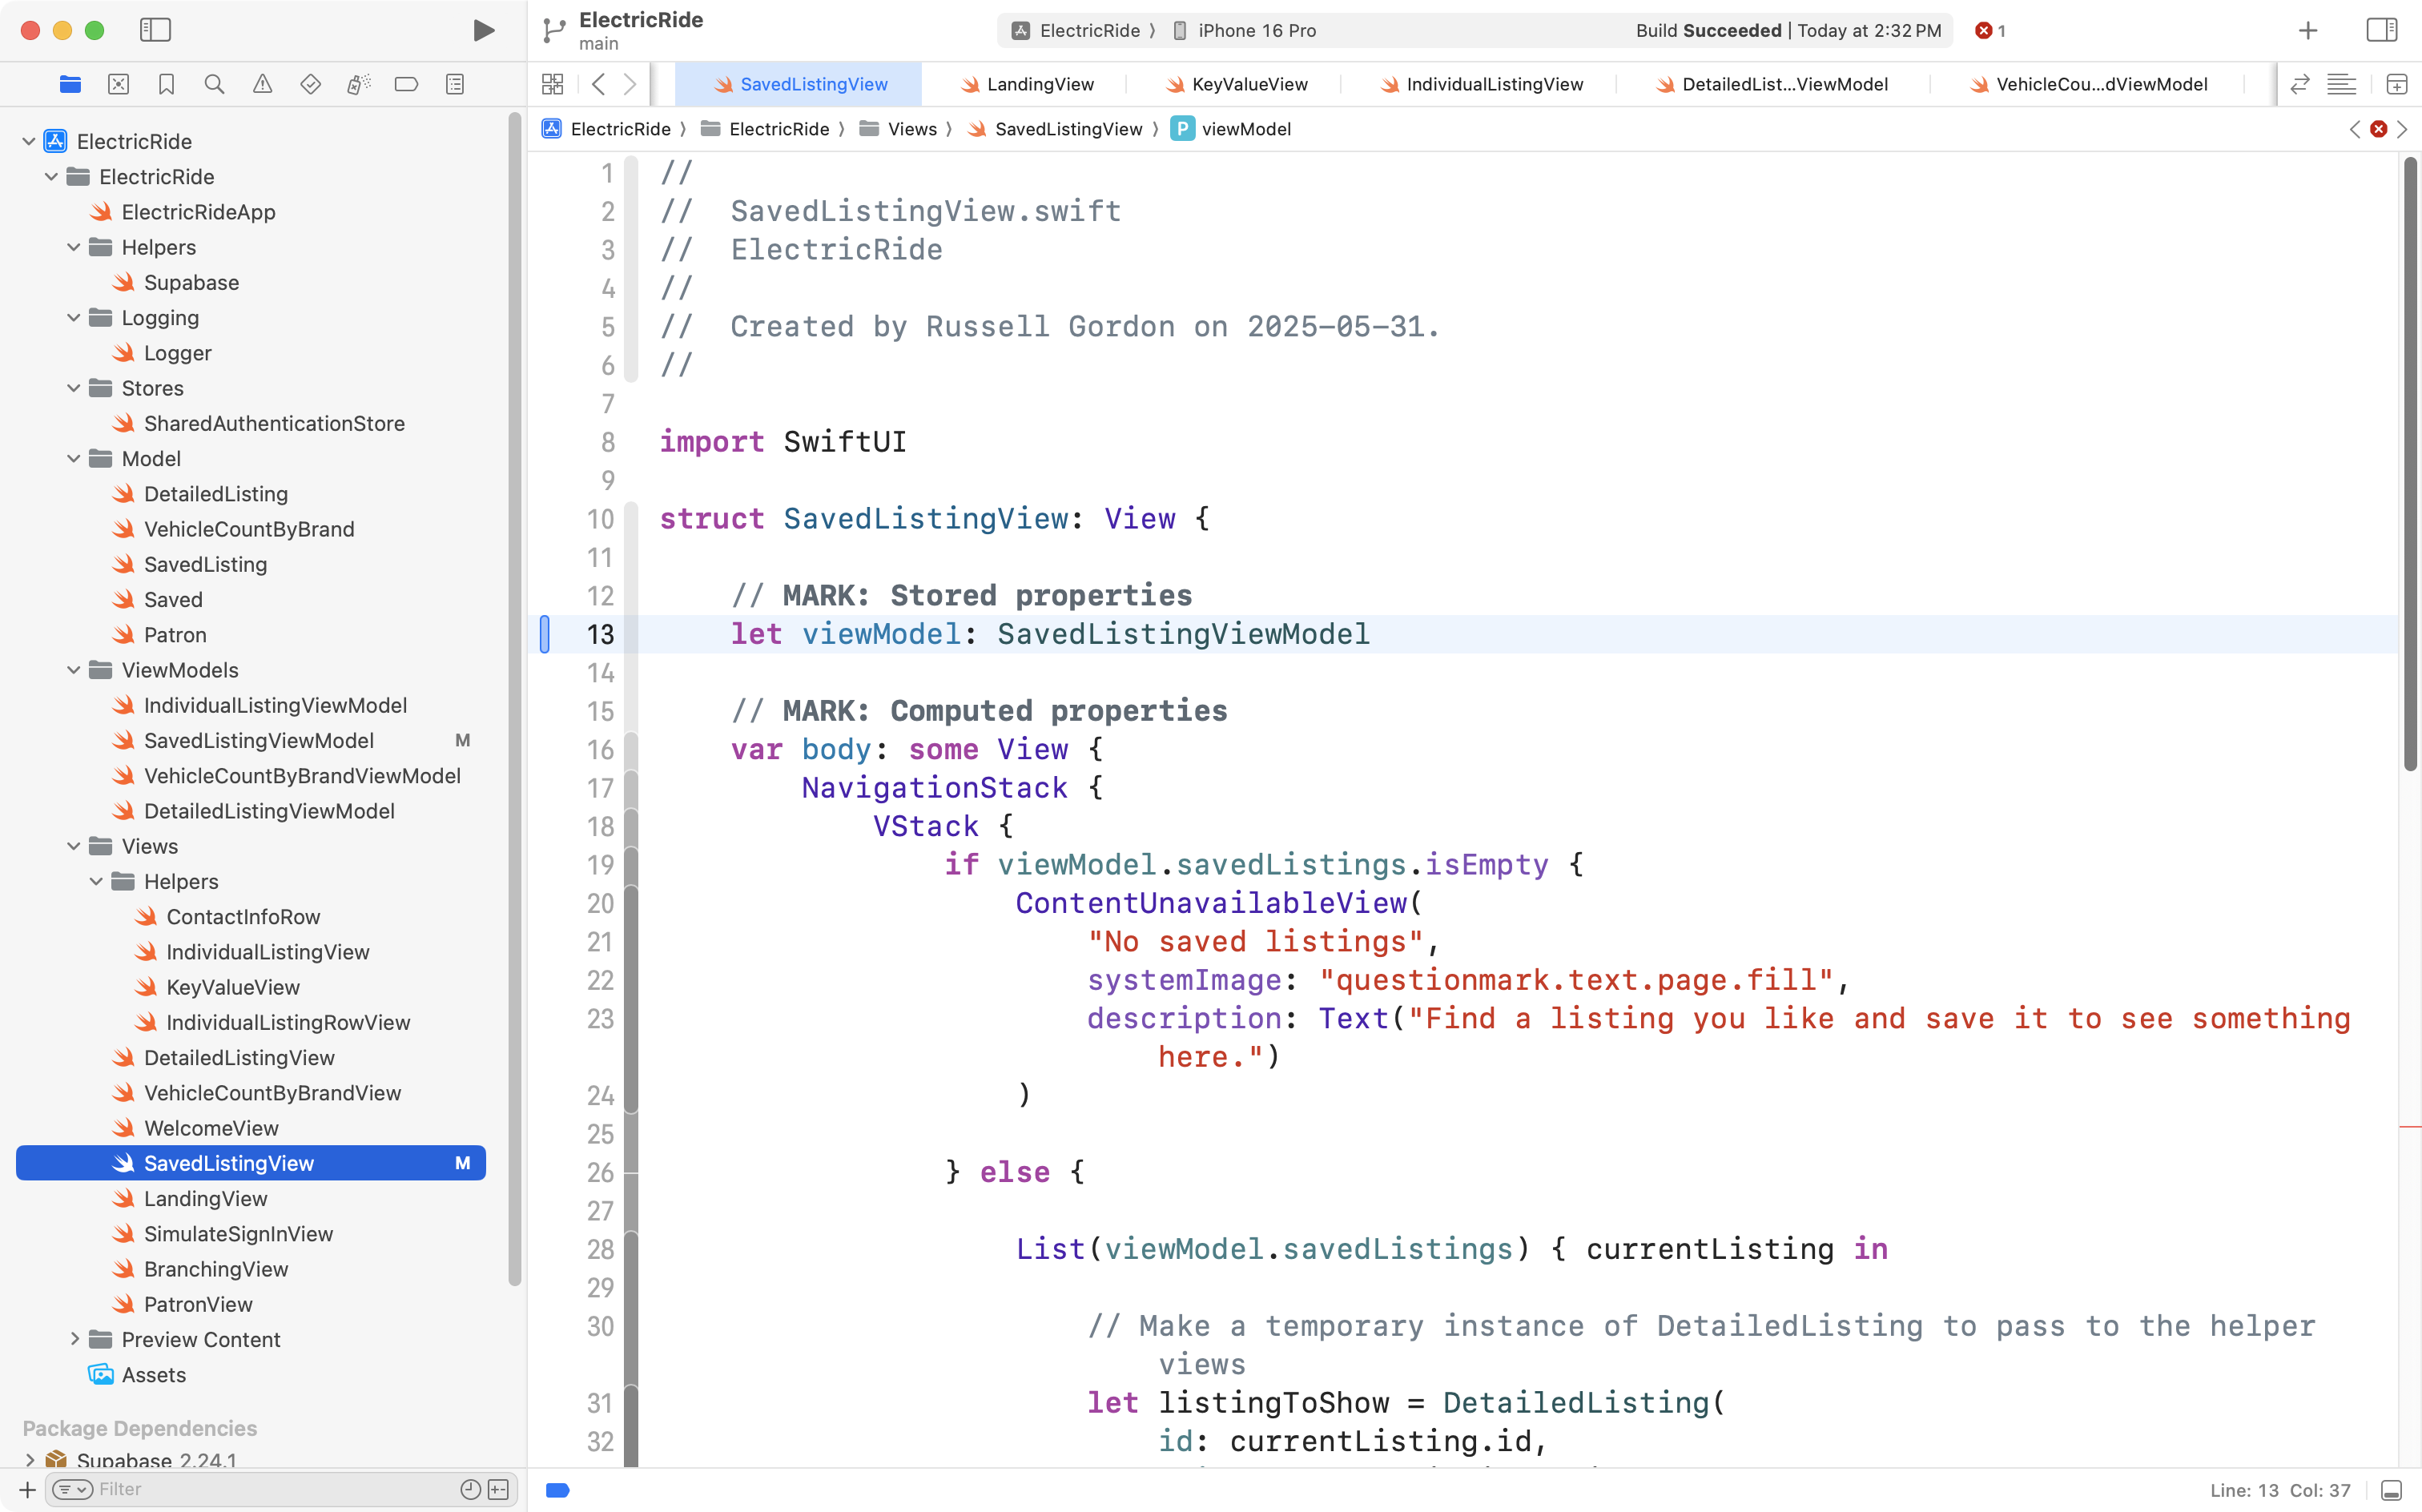
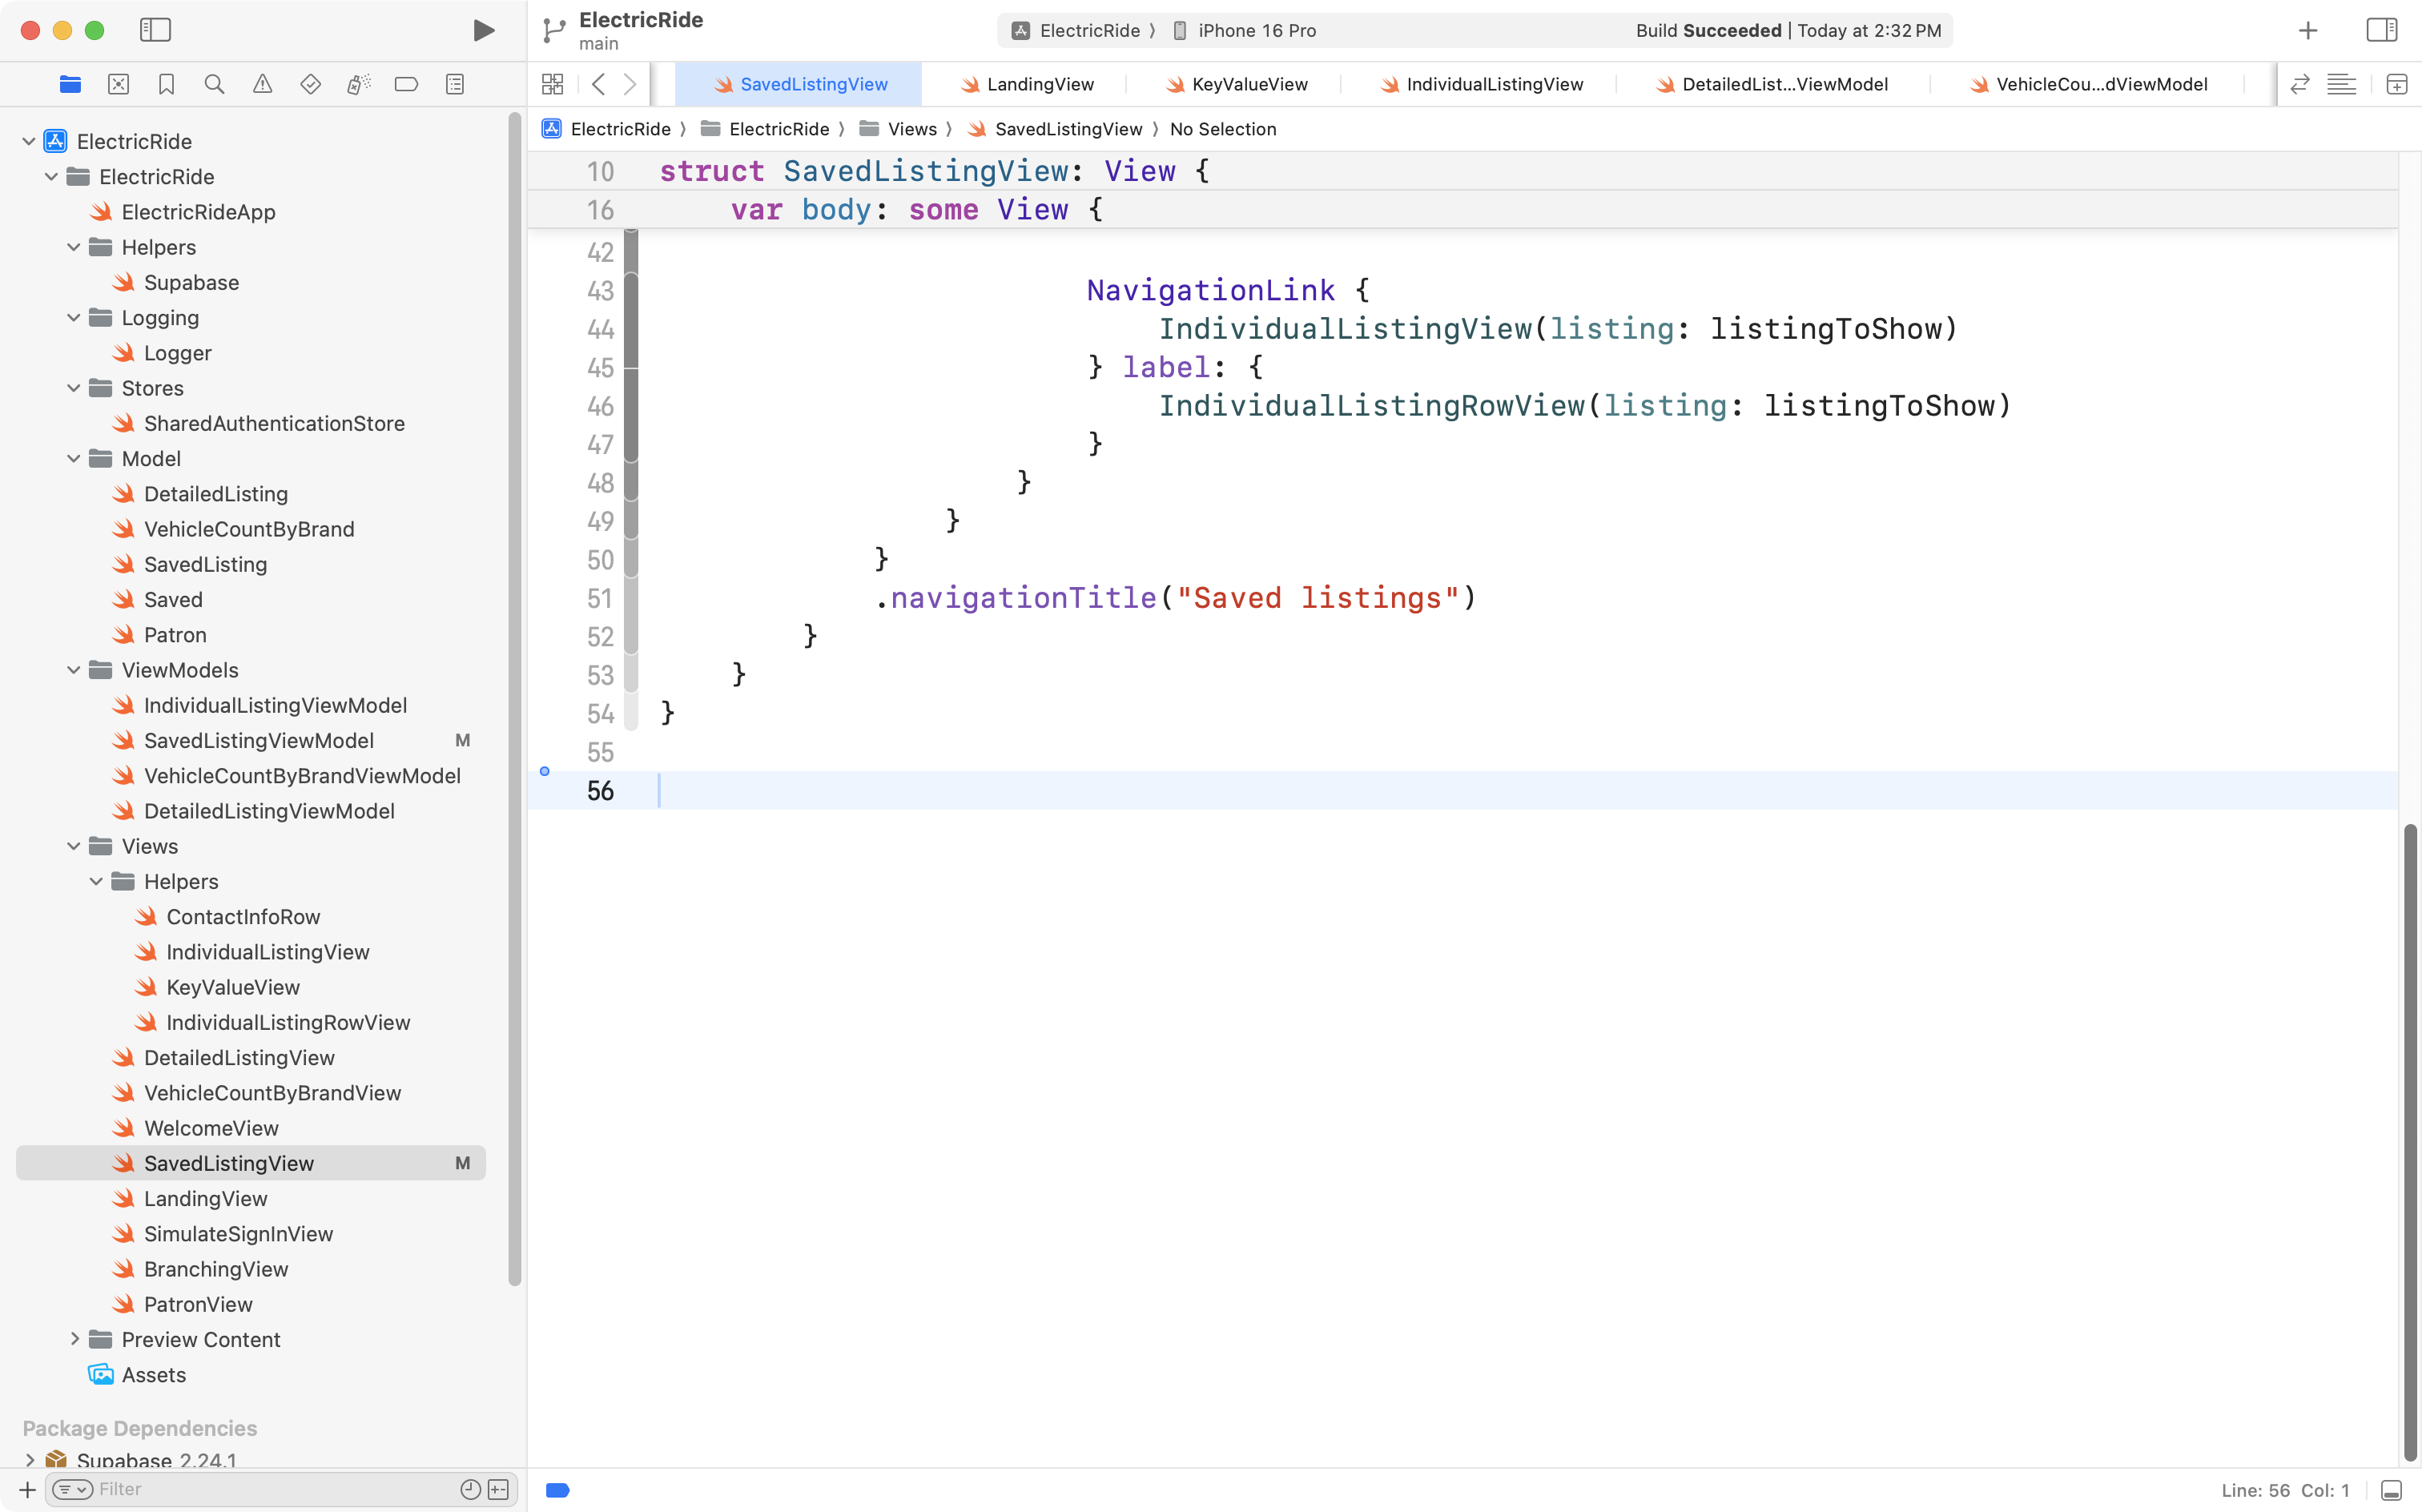
There’s no real need for a preview of SavedListingView right now, so we’ll remove that:
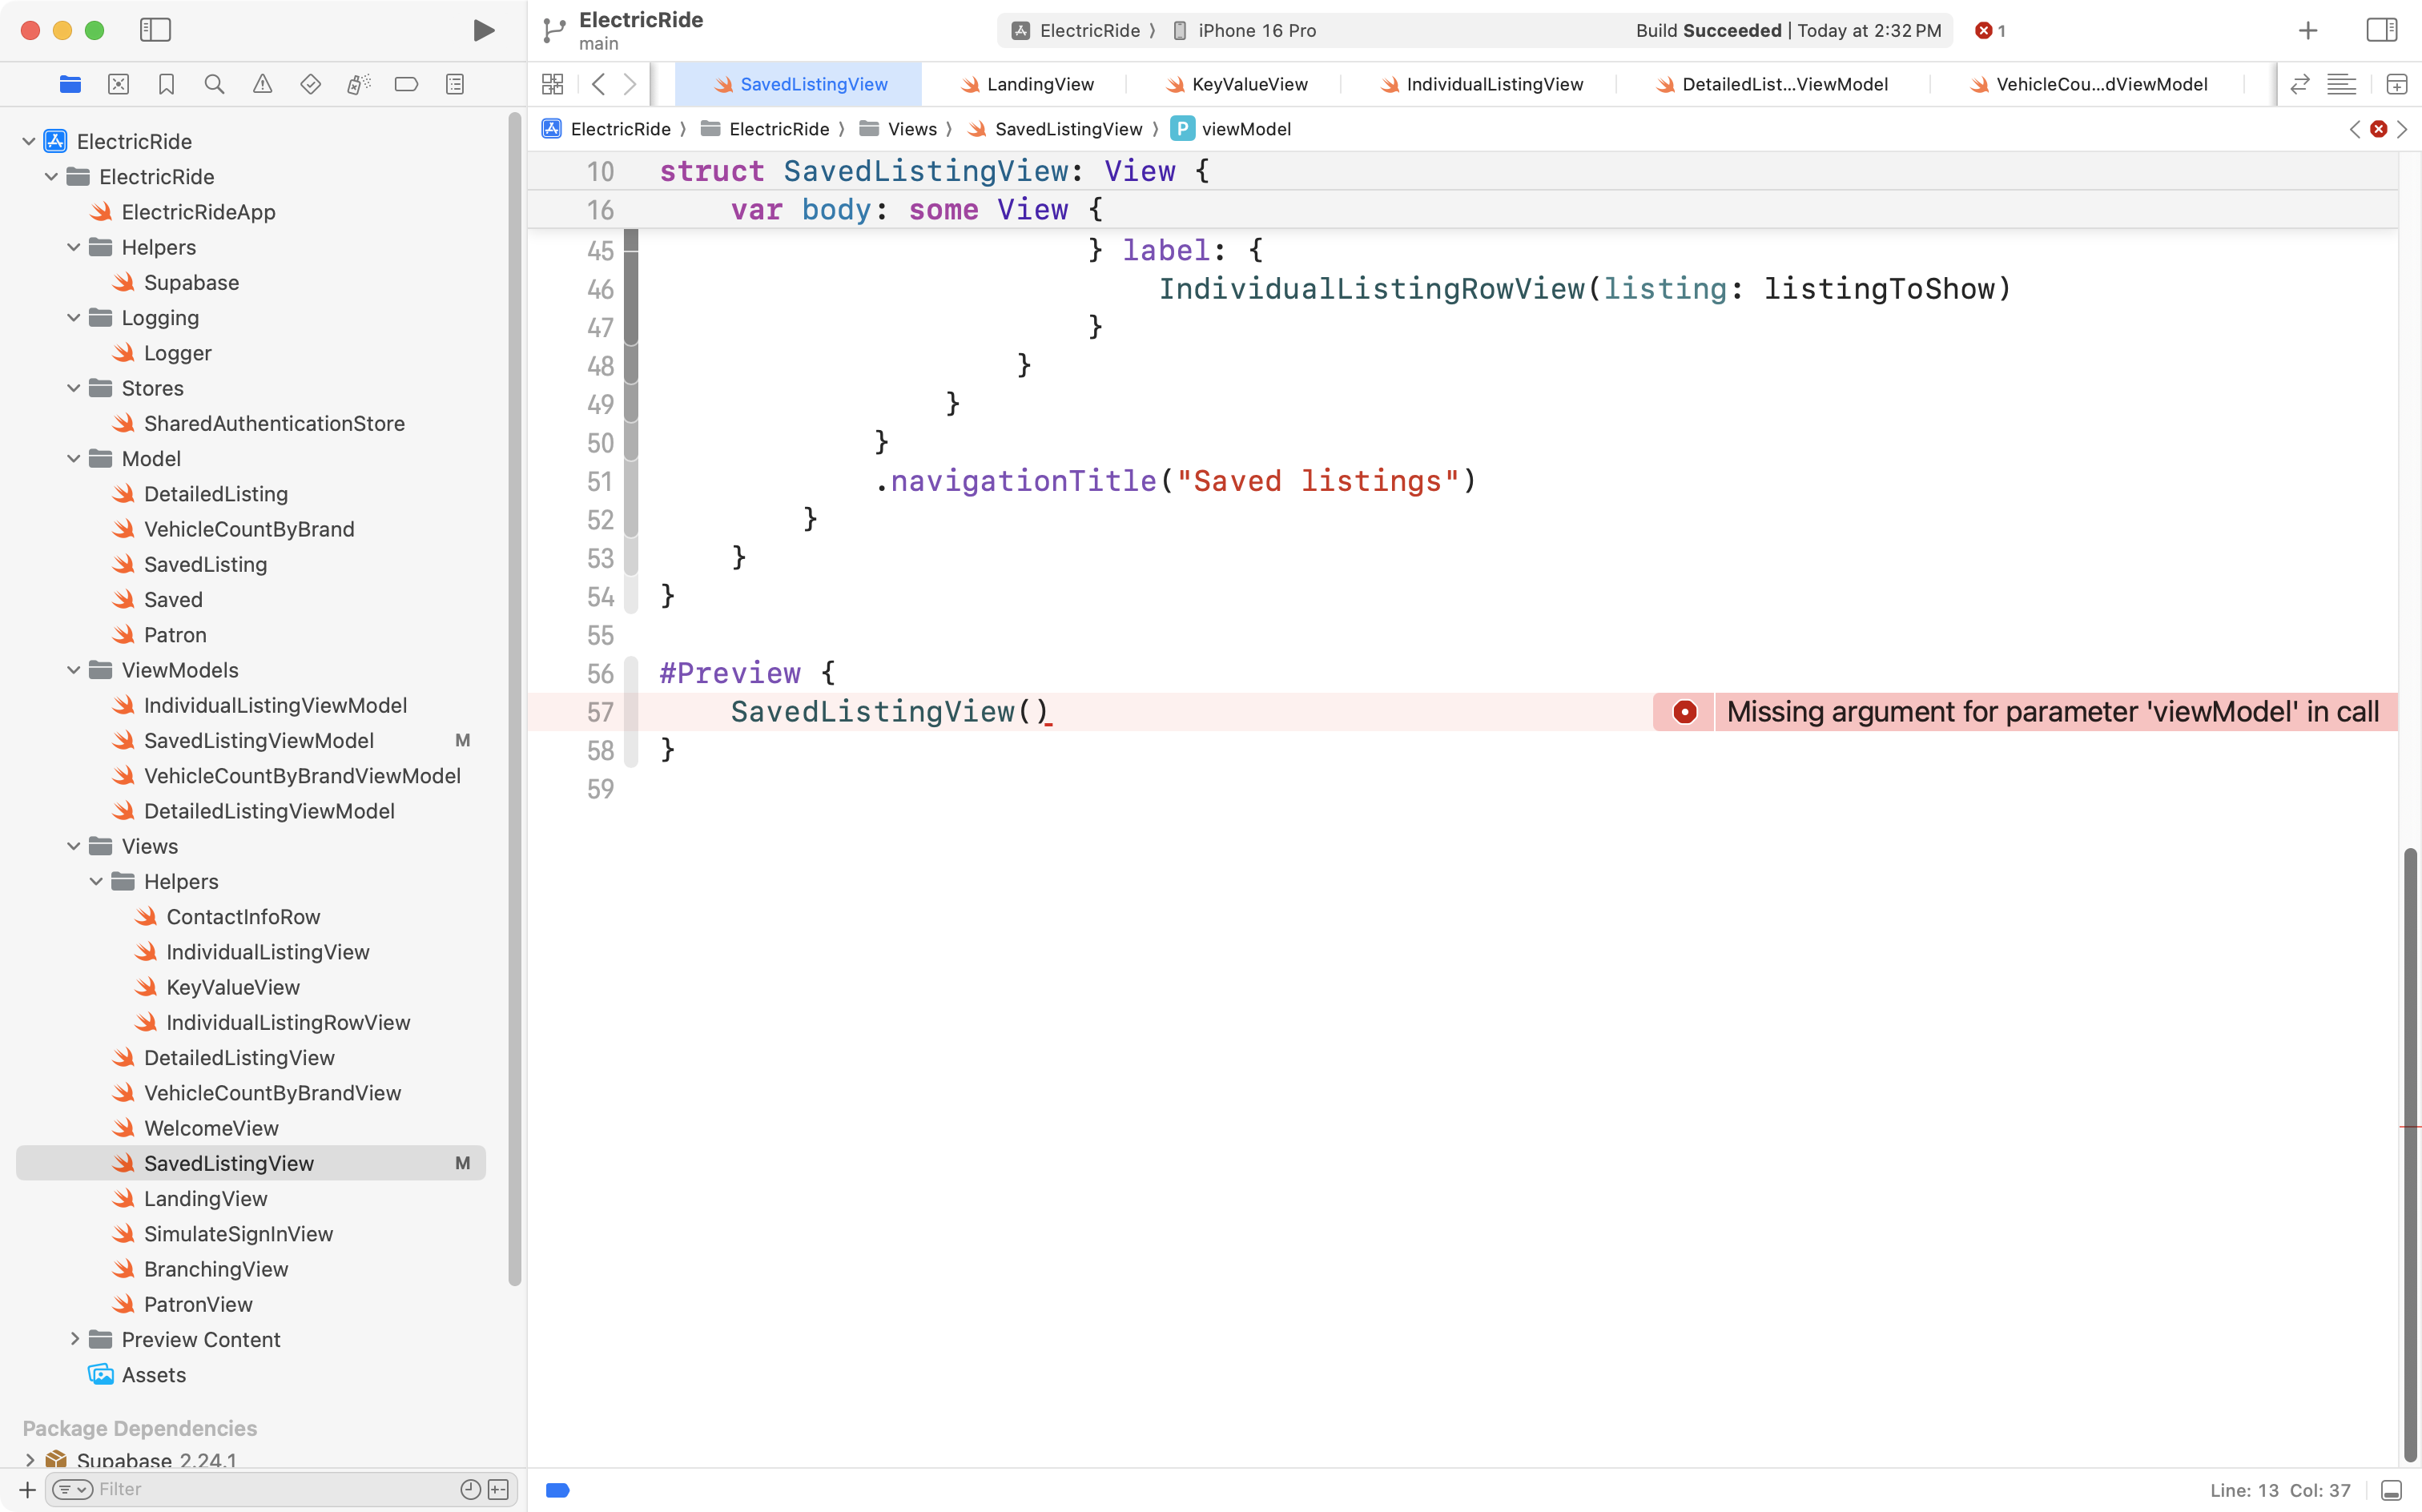
… like this:
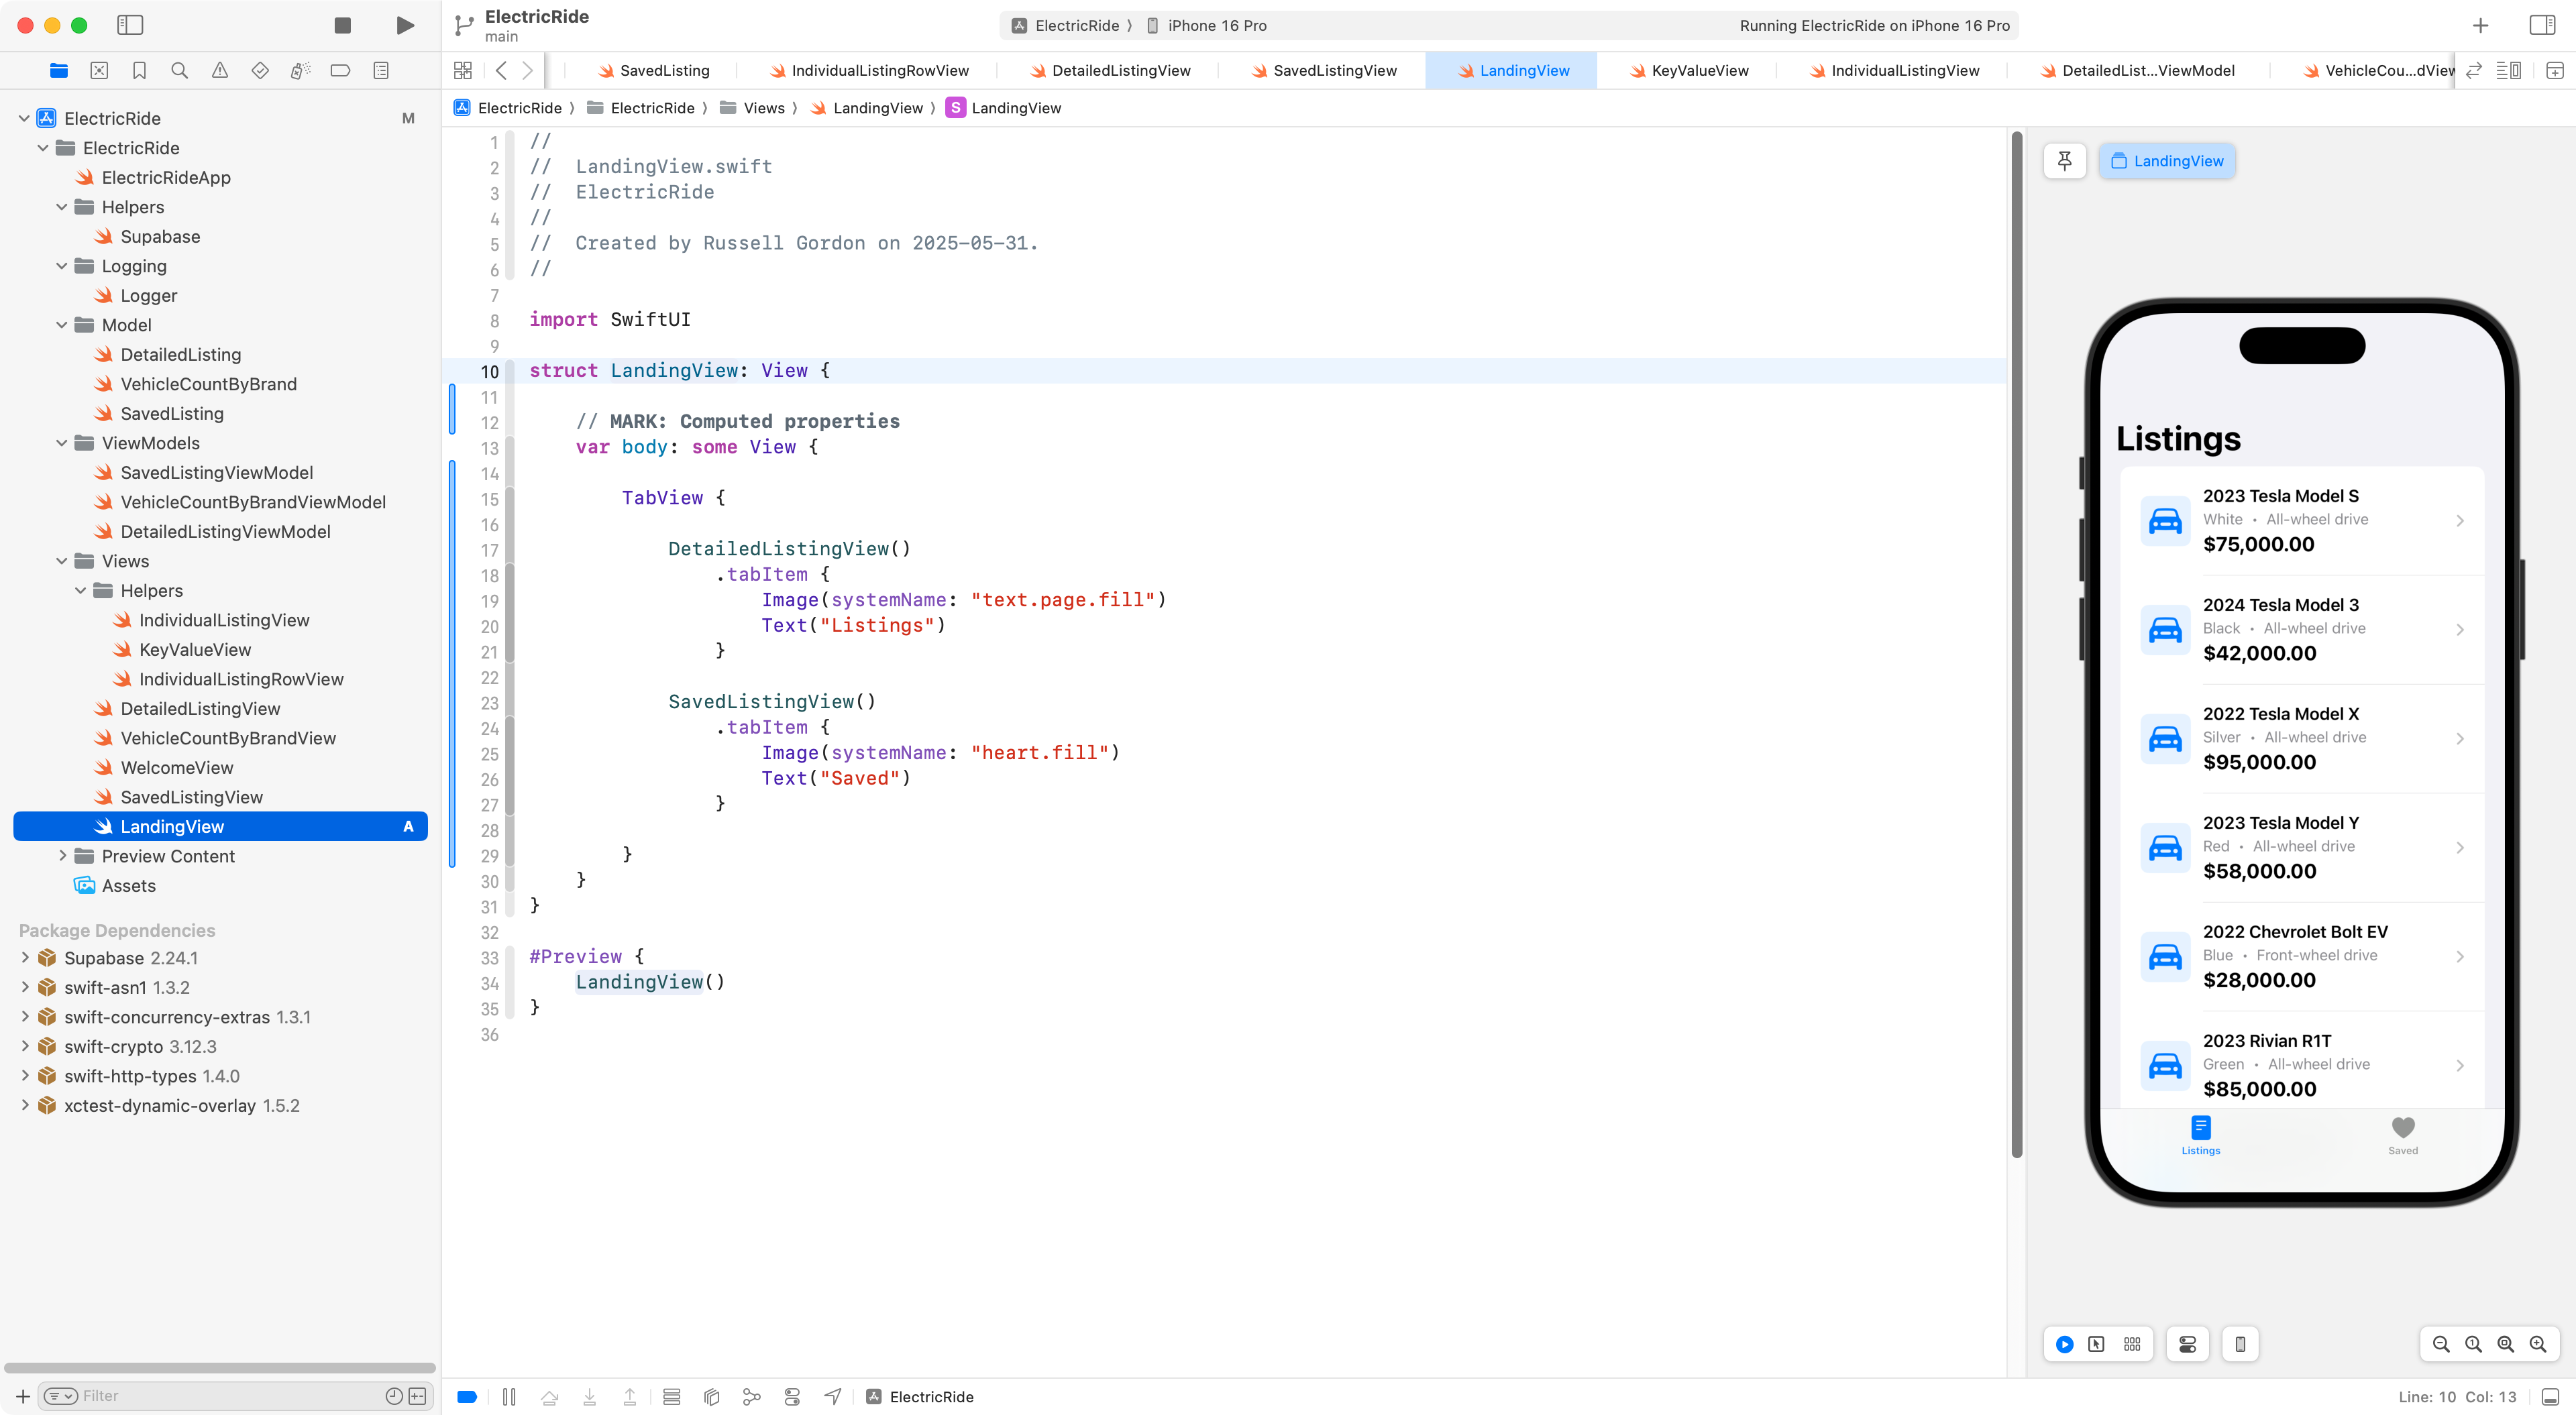
Now we need to adjust LandingView, since it creates SavedListingView, and have it provide the view model as an argument when SavedListingView is created:
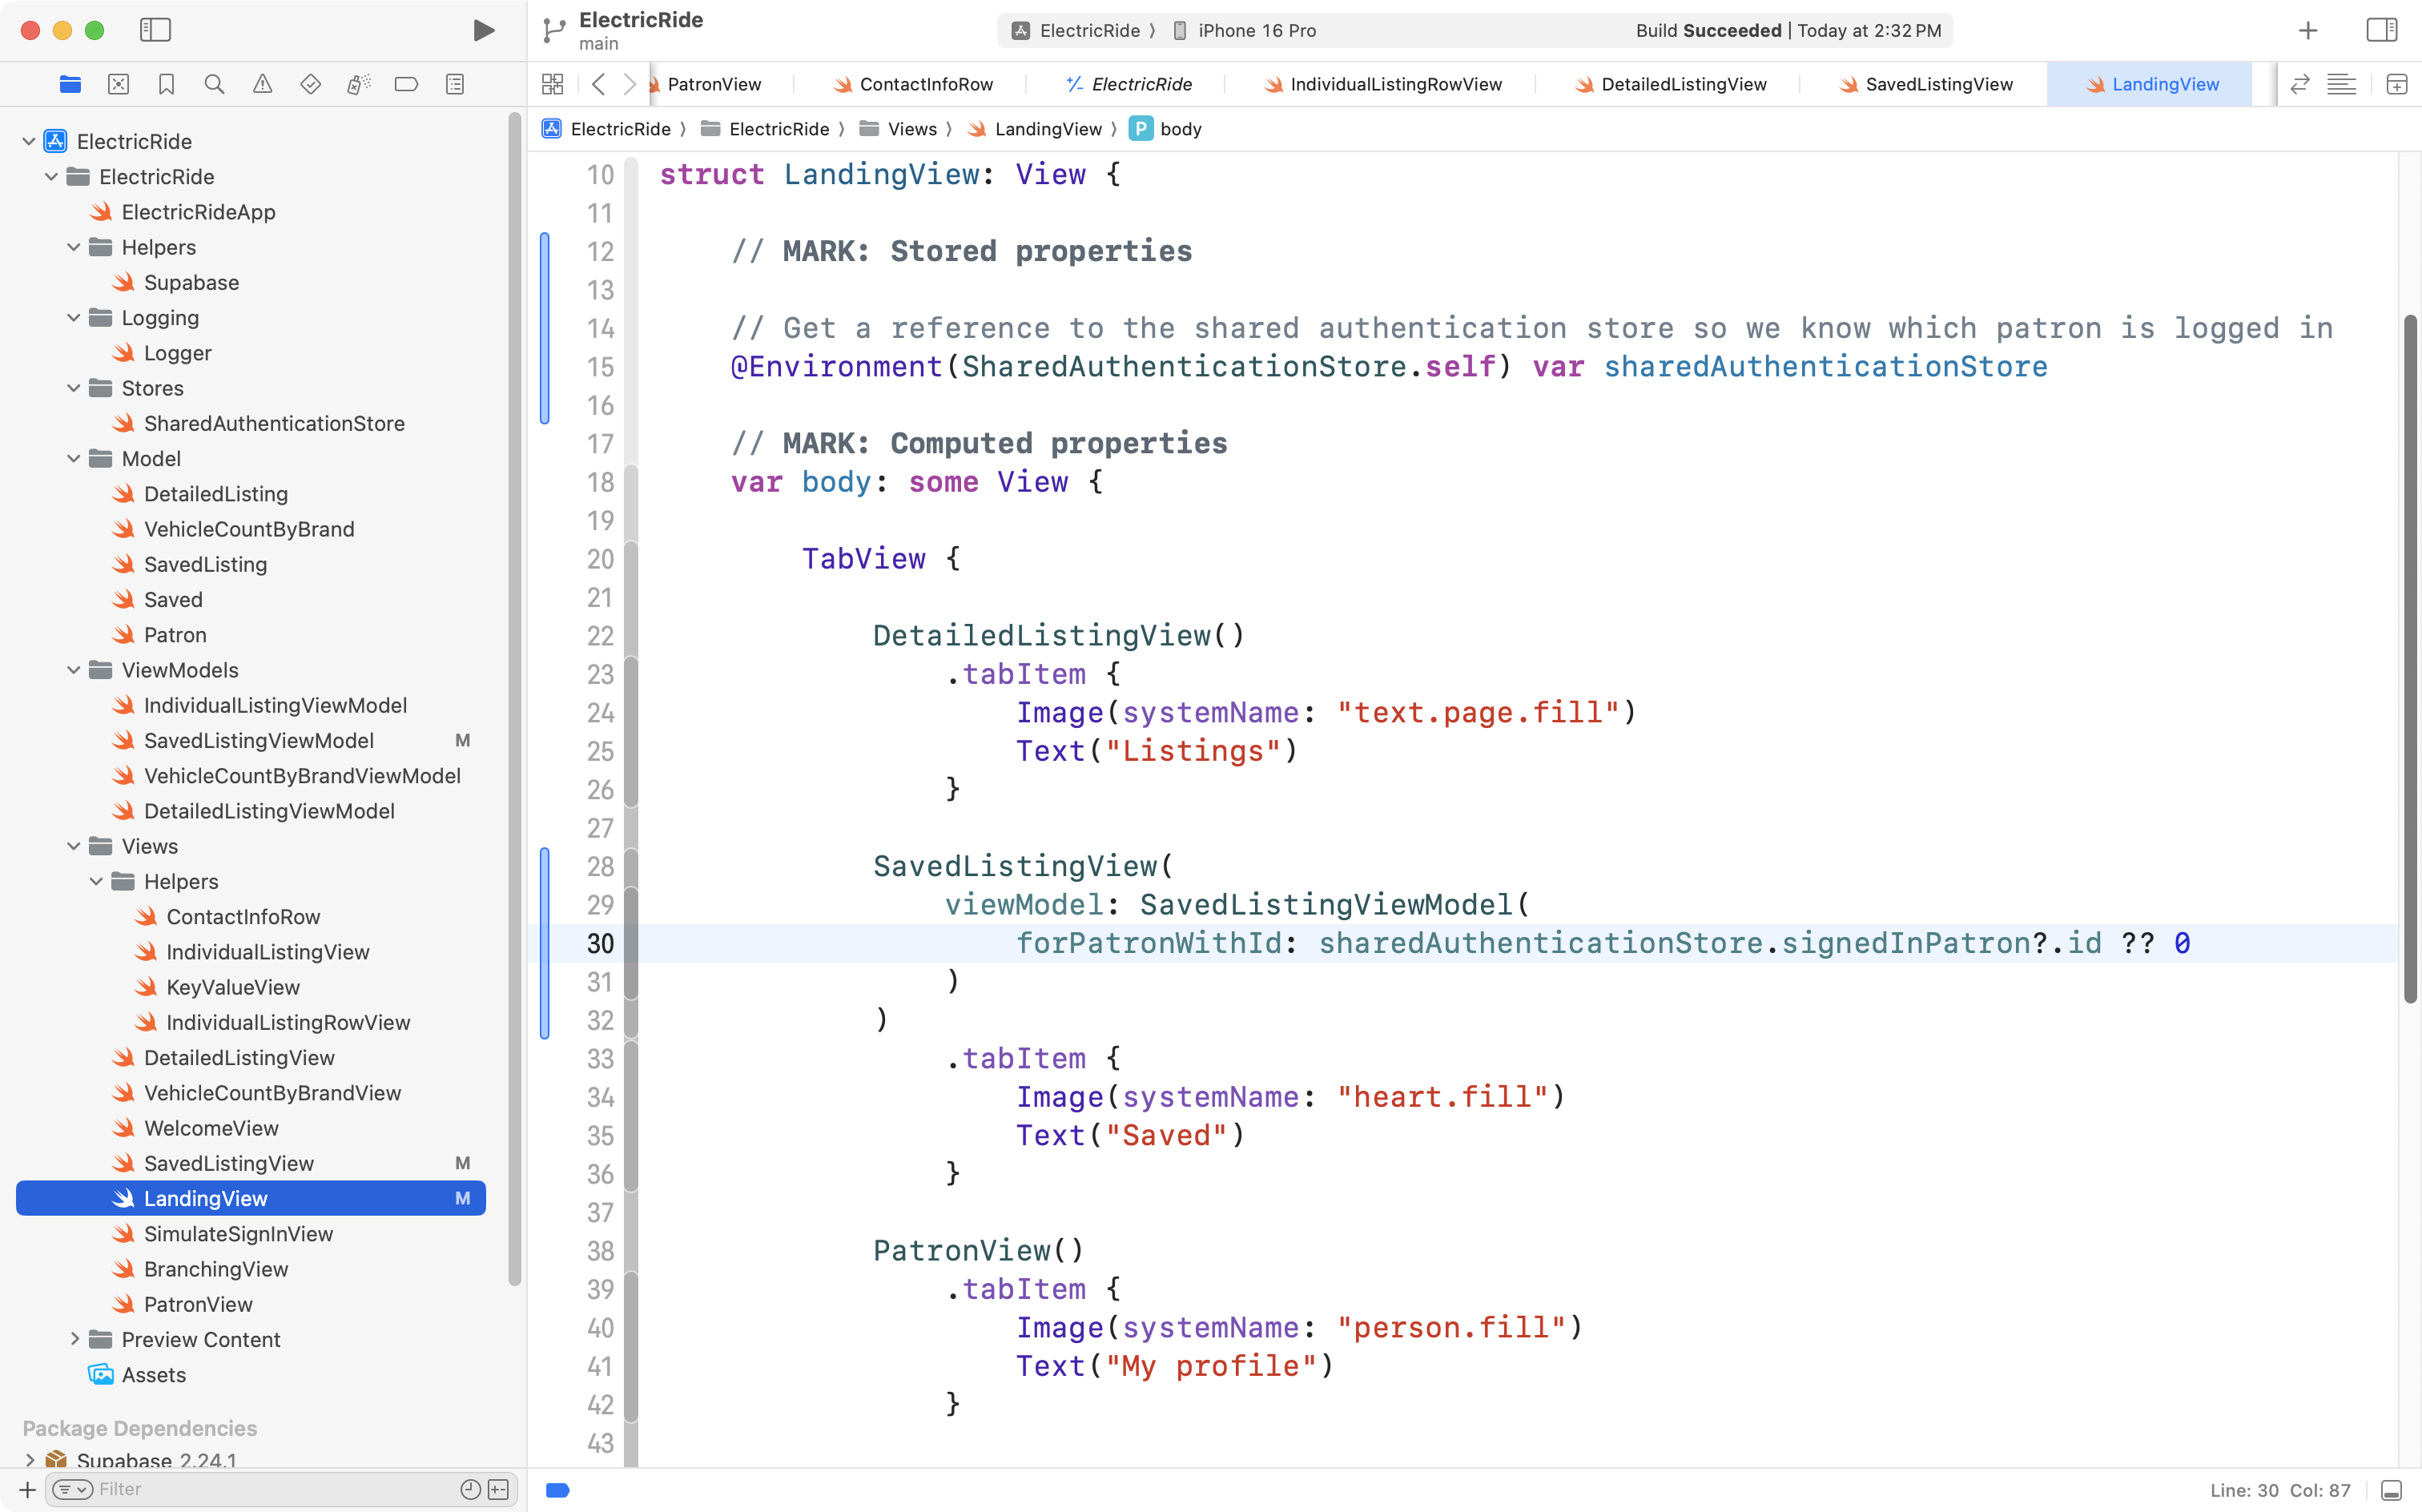
On line 15 above, we get a reference to sharedAuthenticationStore so we can figure out who is signed in.
On lines 28 to 32, we create SavedListingView and pass it an instance of its view model. Since the signedInPatron property of sharedAuthenticationStore is an optional we have to provide a default id that will be passed in when signedInPatron is nil. Of course, this should never happen when LandingView is being shown, because it’s only meant to be visible to someone who is signed in. Nonetheless, we must provide a default value for the optional property to satisfy the Swift compiler.
What this means is that we can now do a simulated sign in with different users, and see different saved listings:
Fix saving a new listing
Finally, the code in IndividualListingView uses InvidualListingViewModel which always saves the listing for the patron with an id of 2:
As shown here:
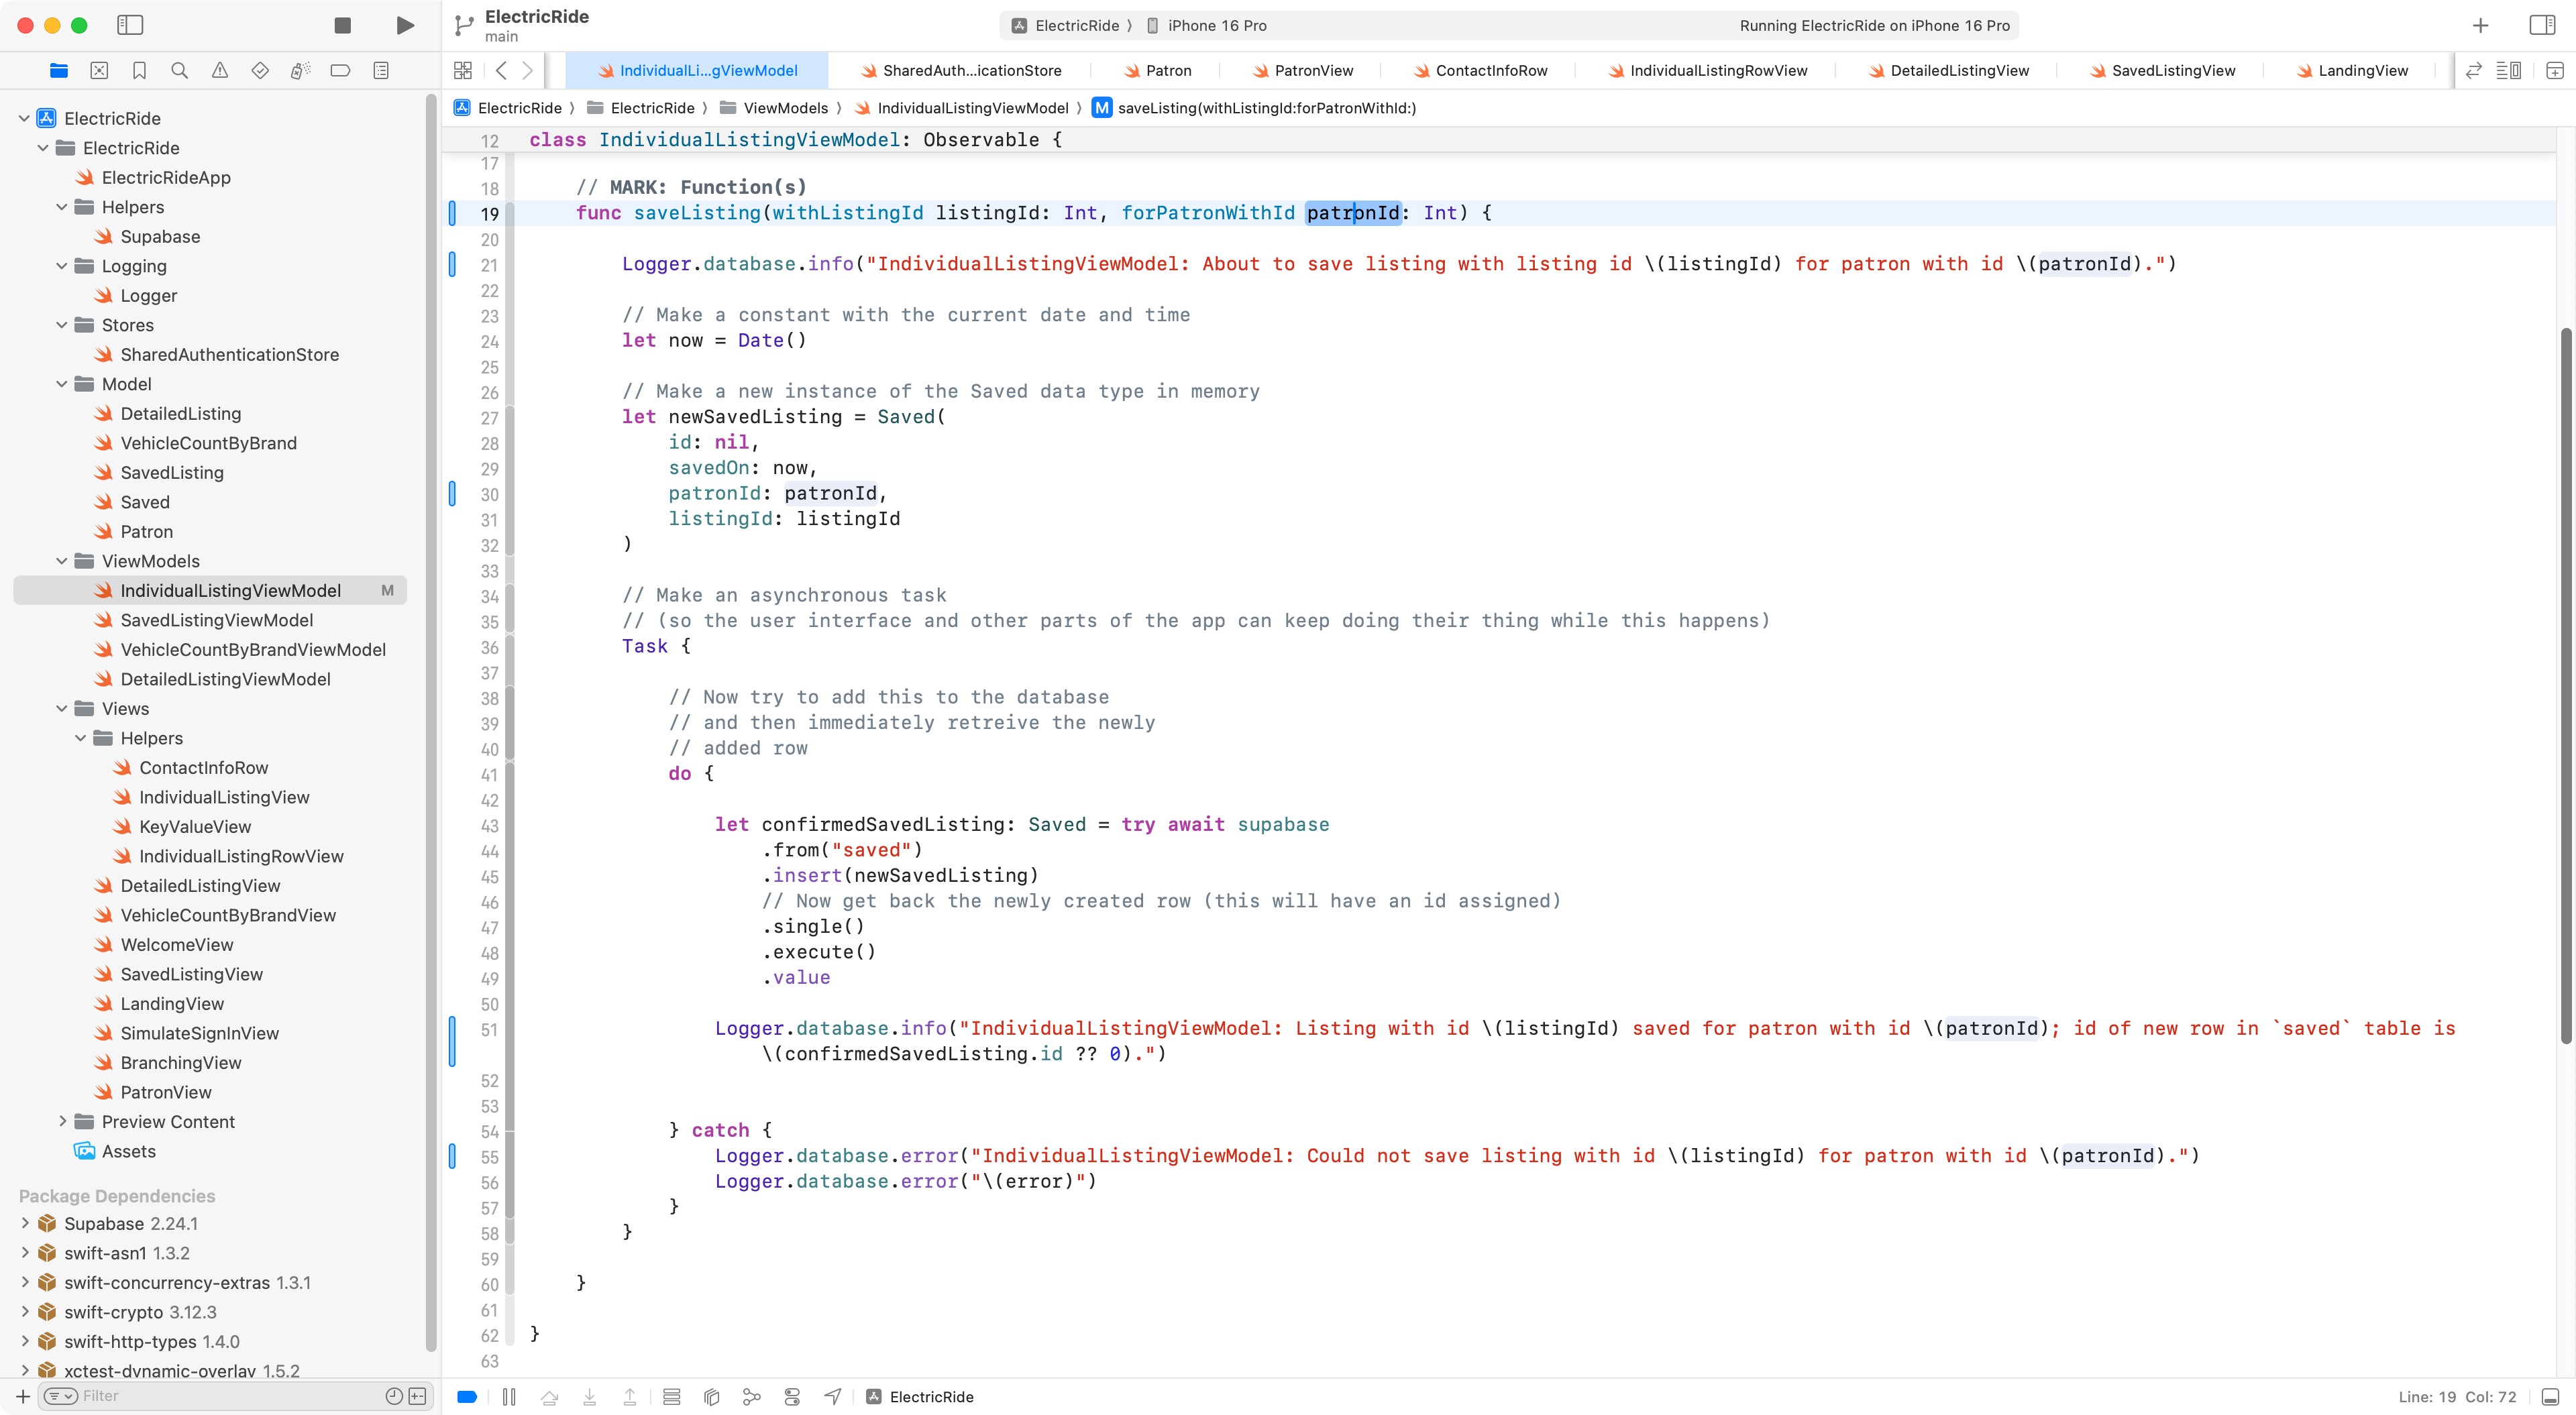
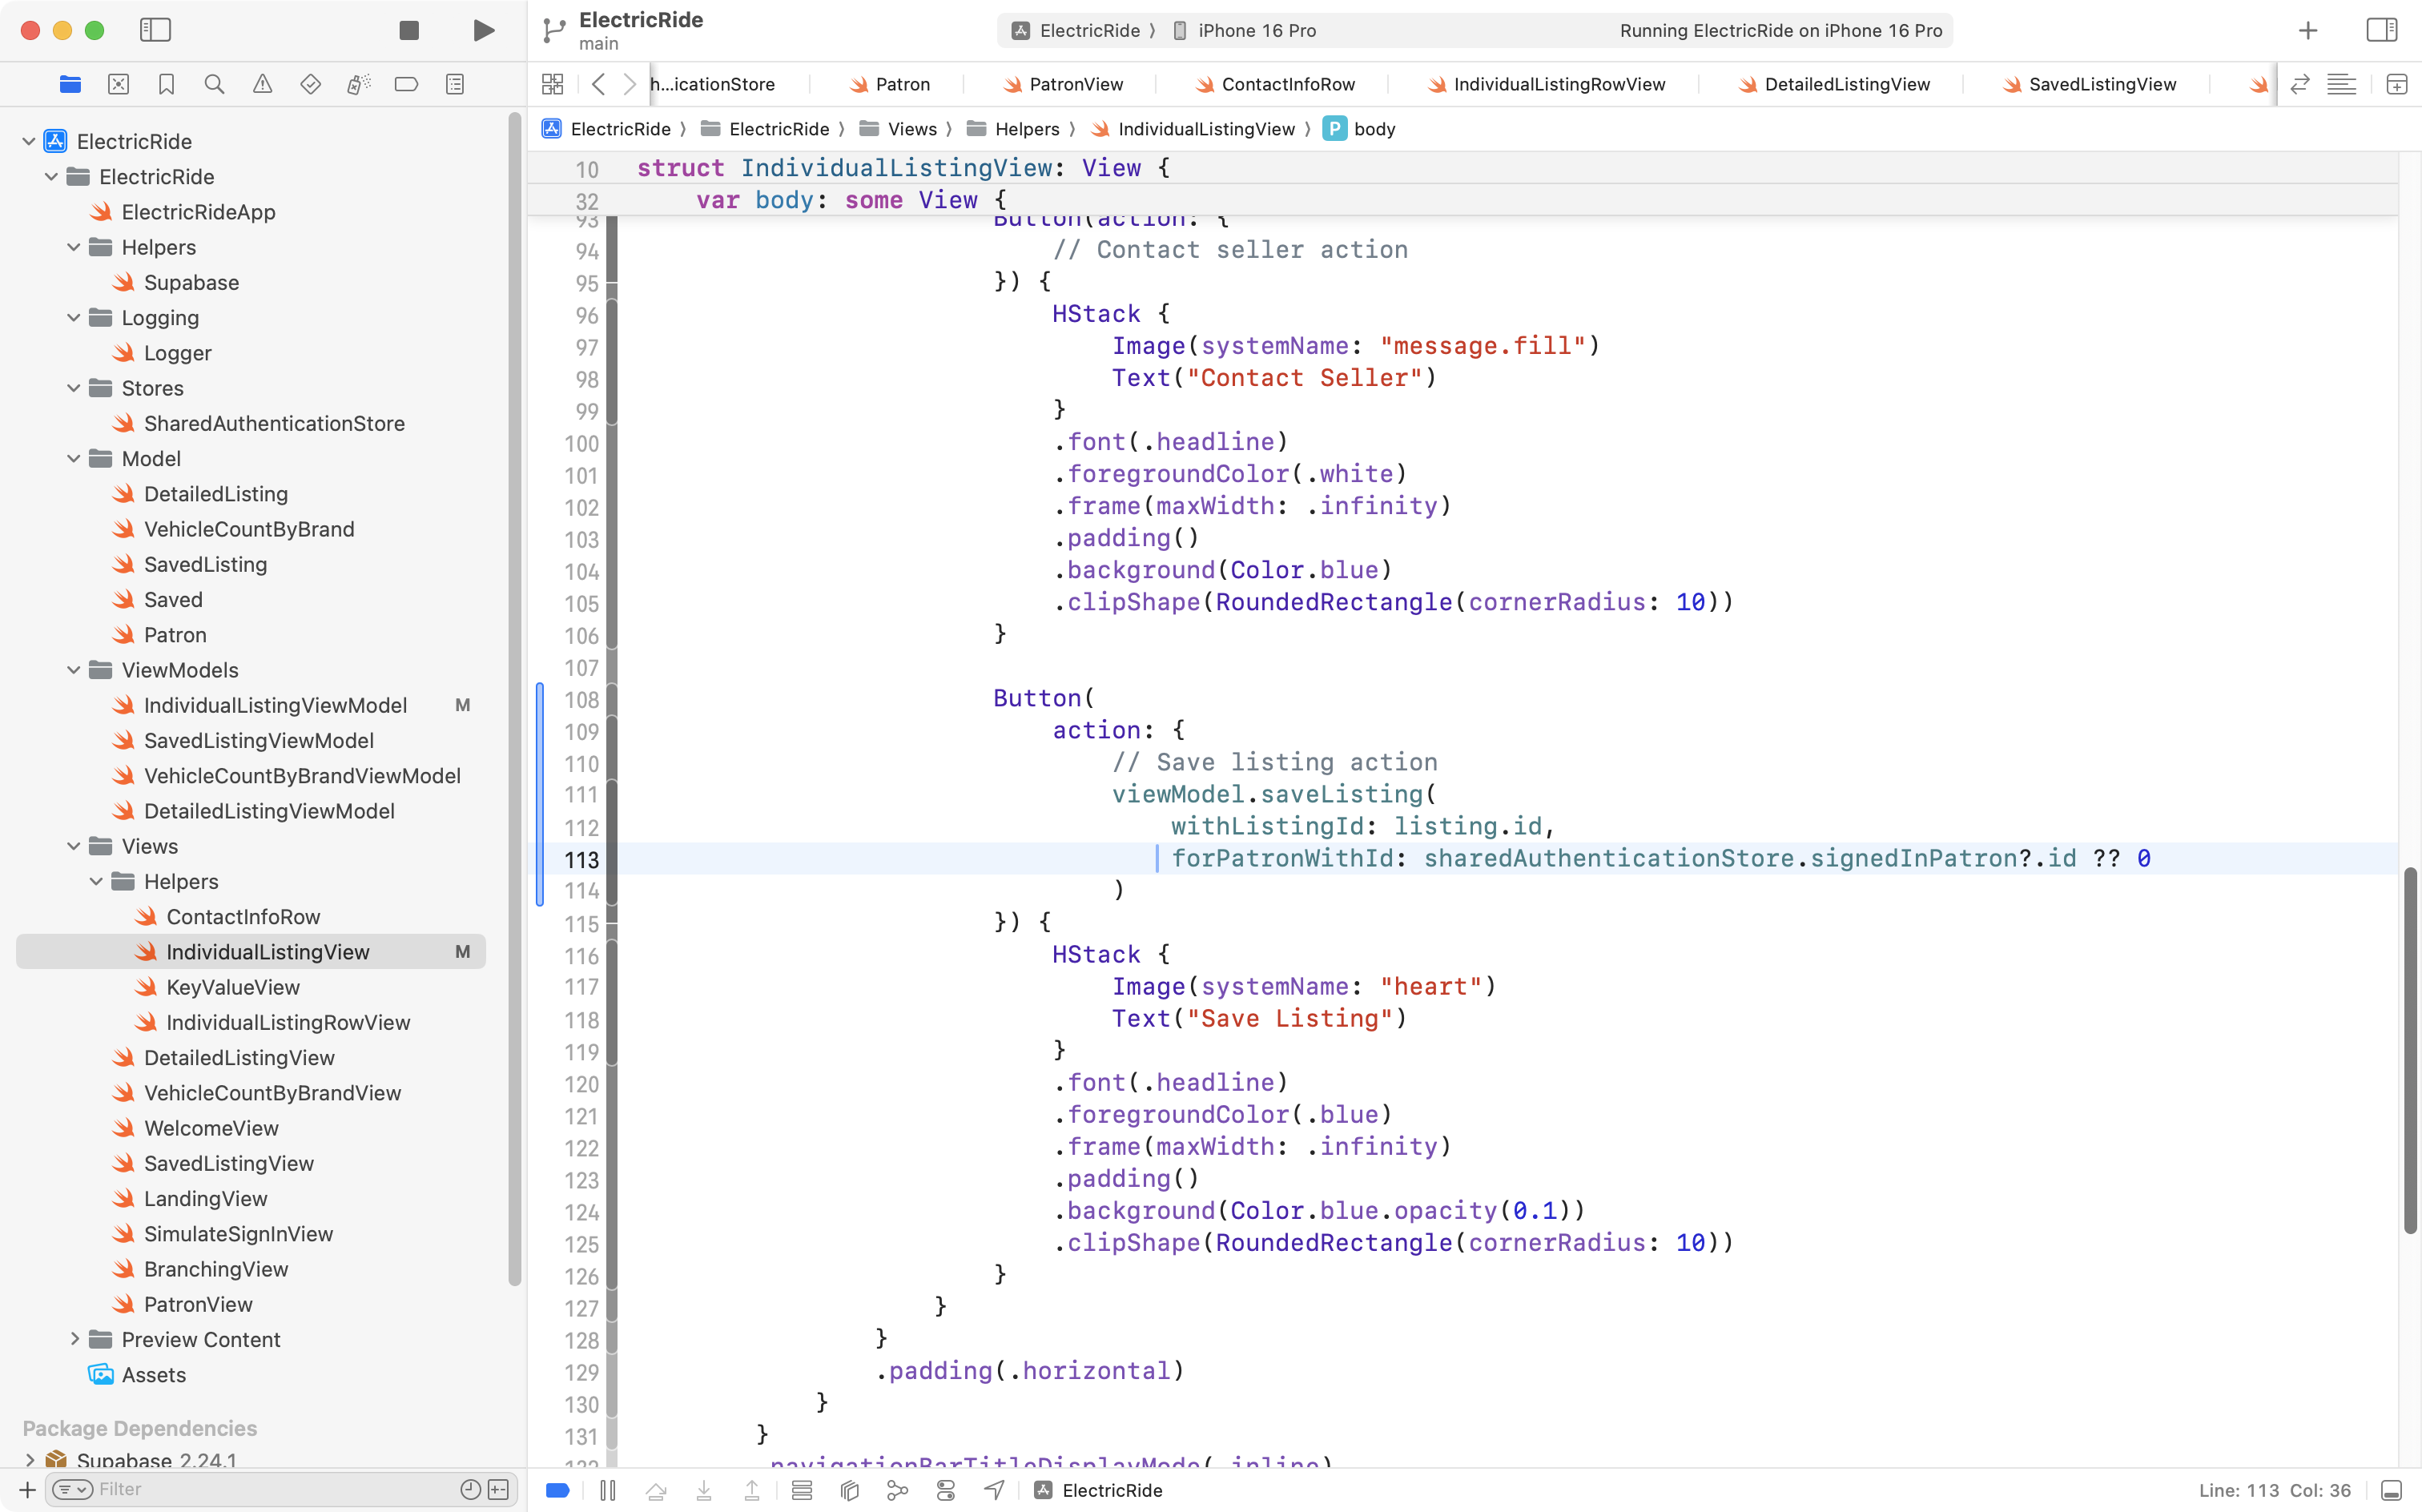
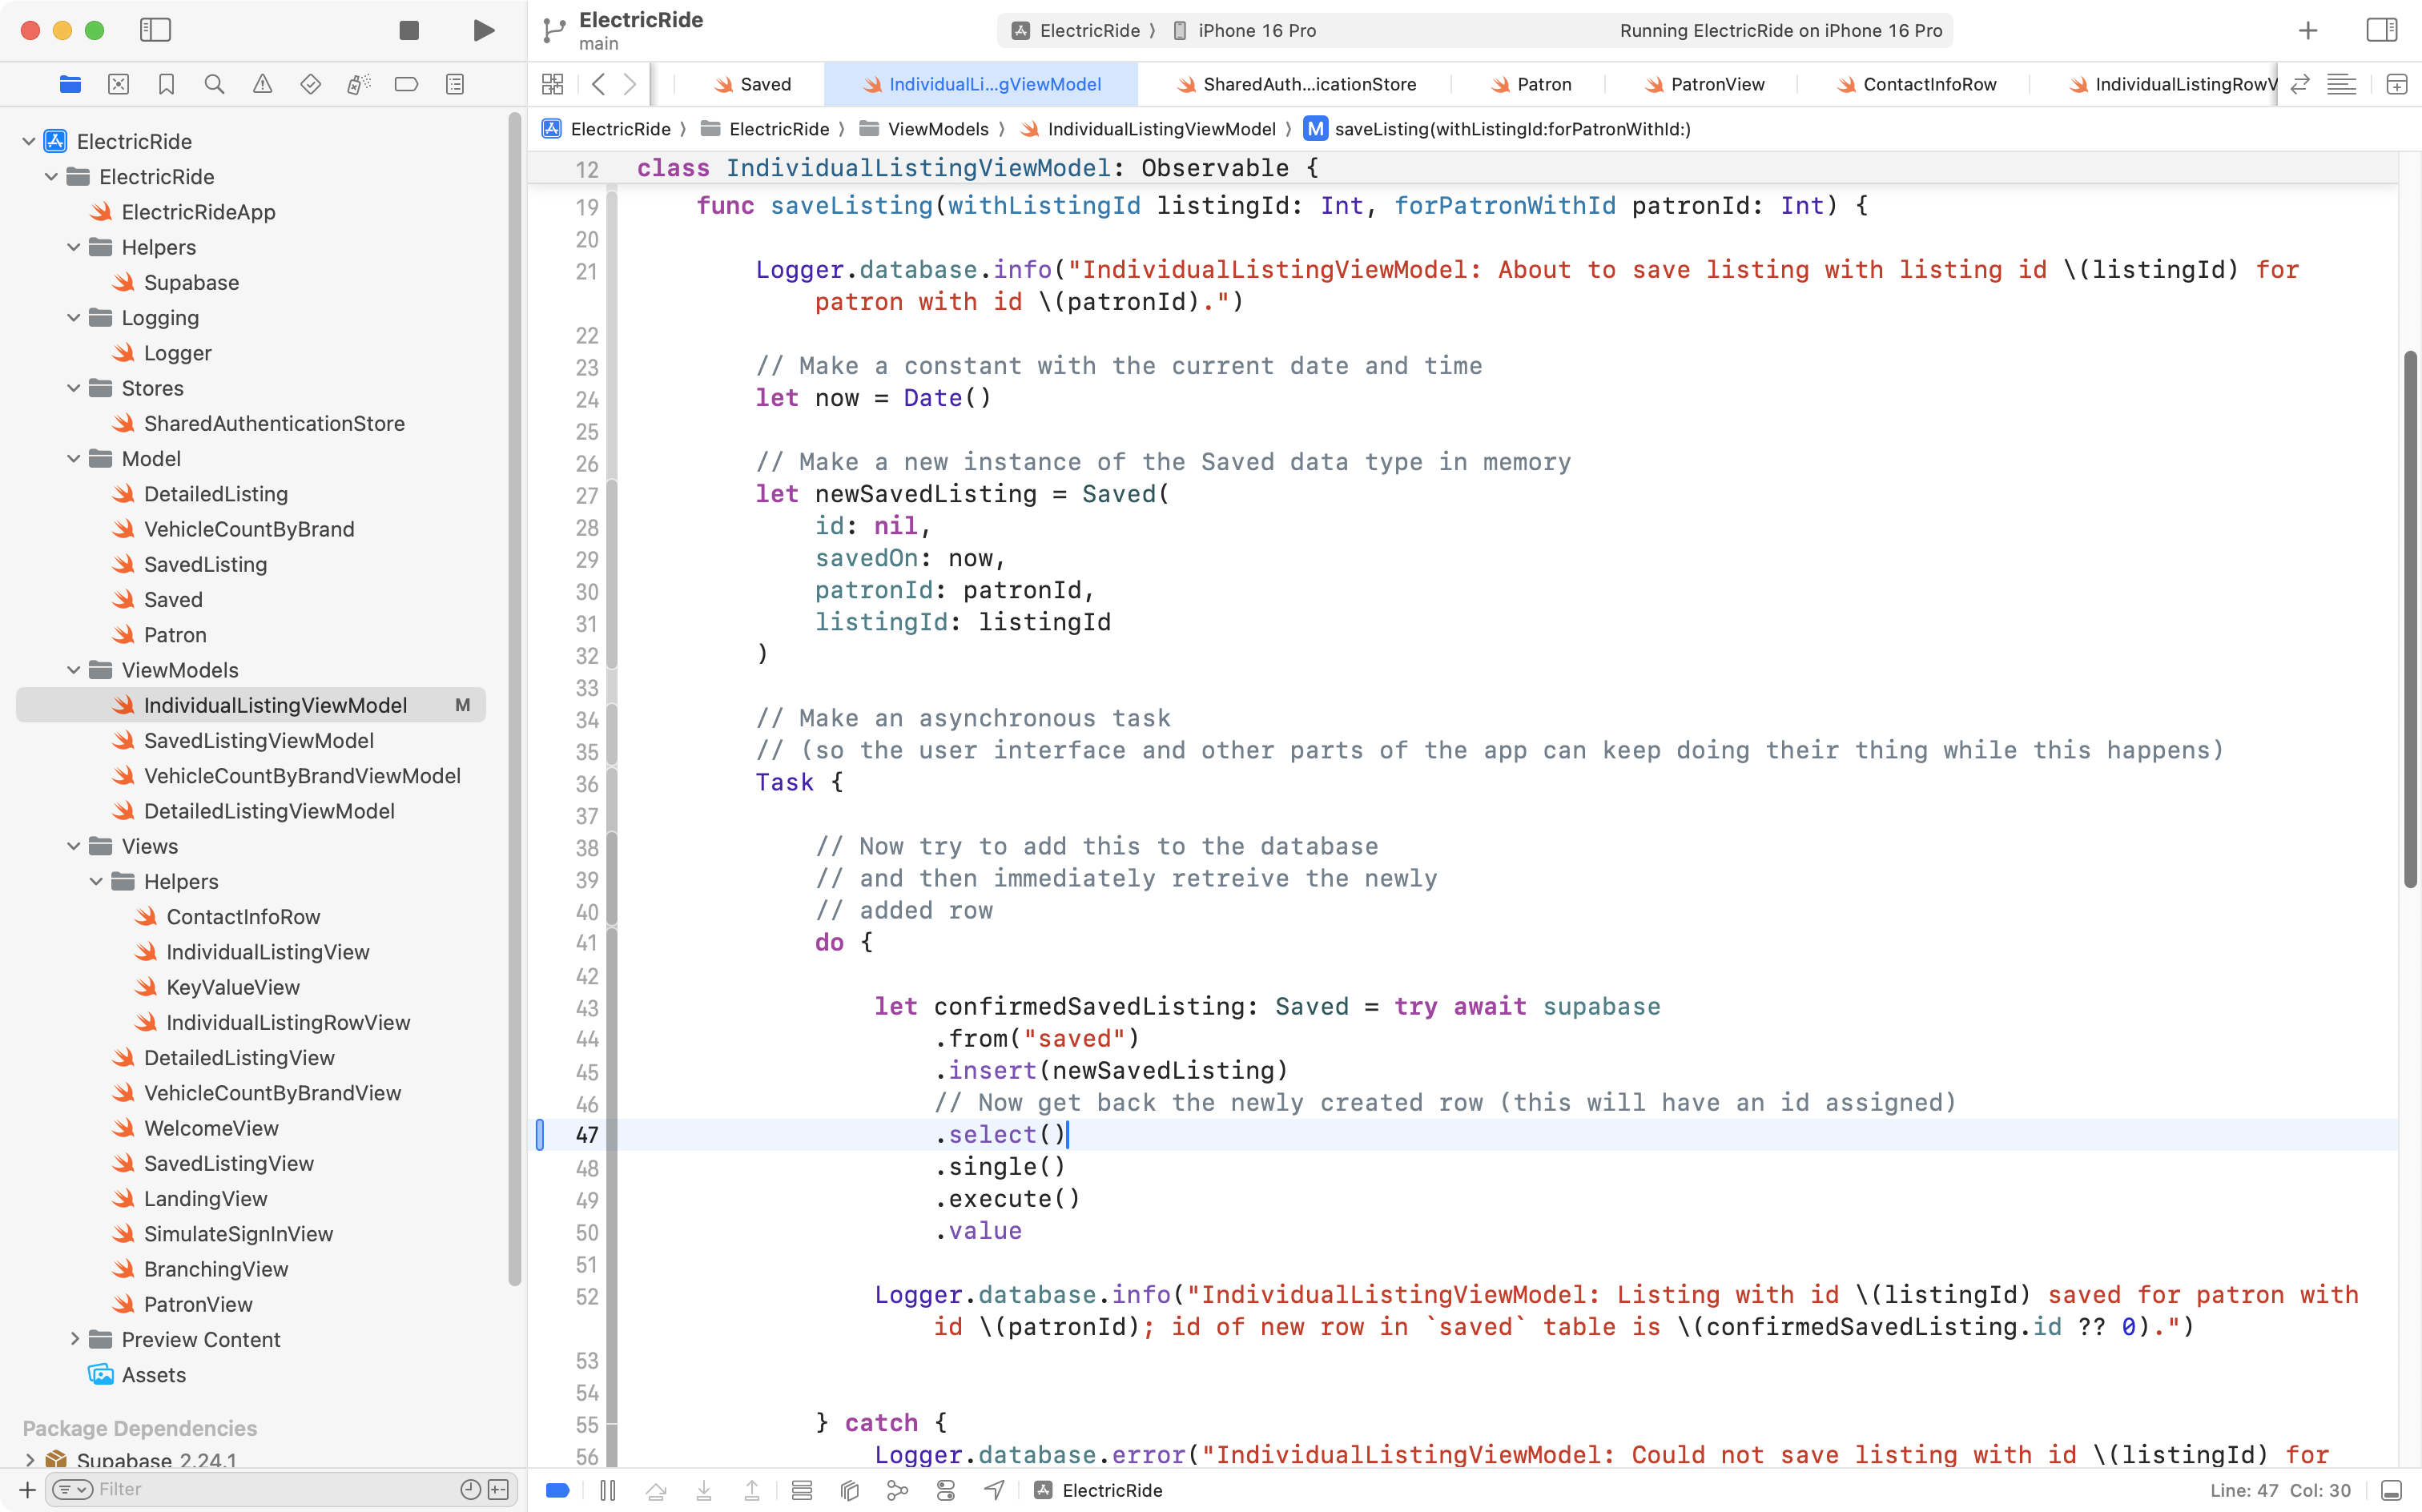
To fix this, we need to make the saveListing function on the view model accept a patron’s id and then use it when writing a new saved listing to the database, like so:
Then we need to adjust the view to use the revised function.
We start by accessing sharedAuthenticationStore from the environment:
We adjust the preview so it provides an instance of SharedAuthenticationStore so the Previews window does not crash for this view:
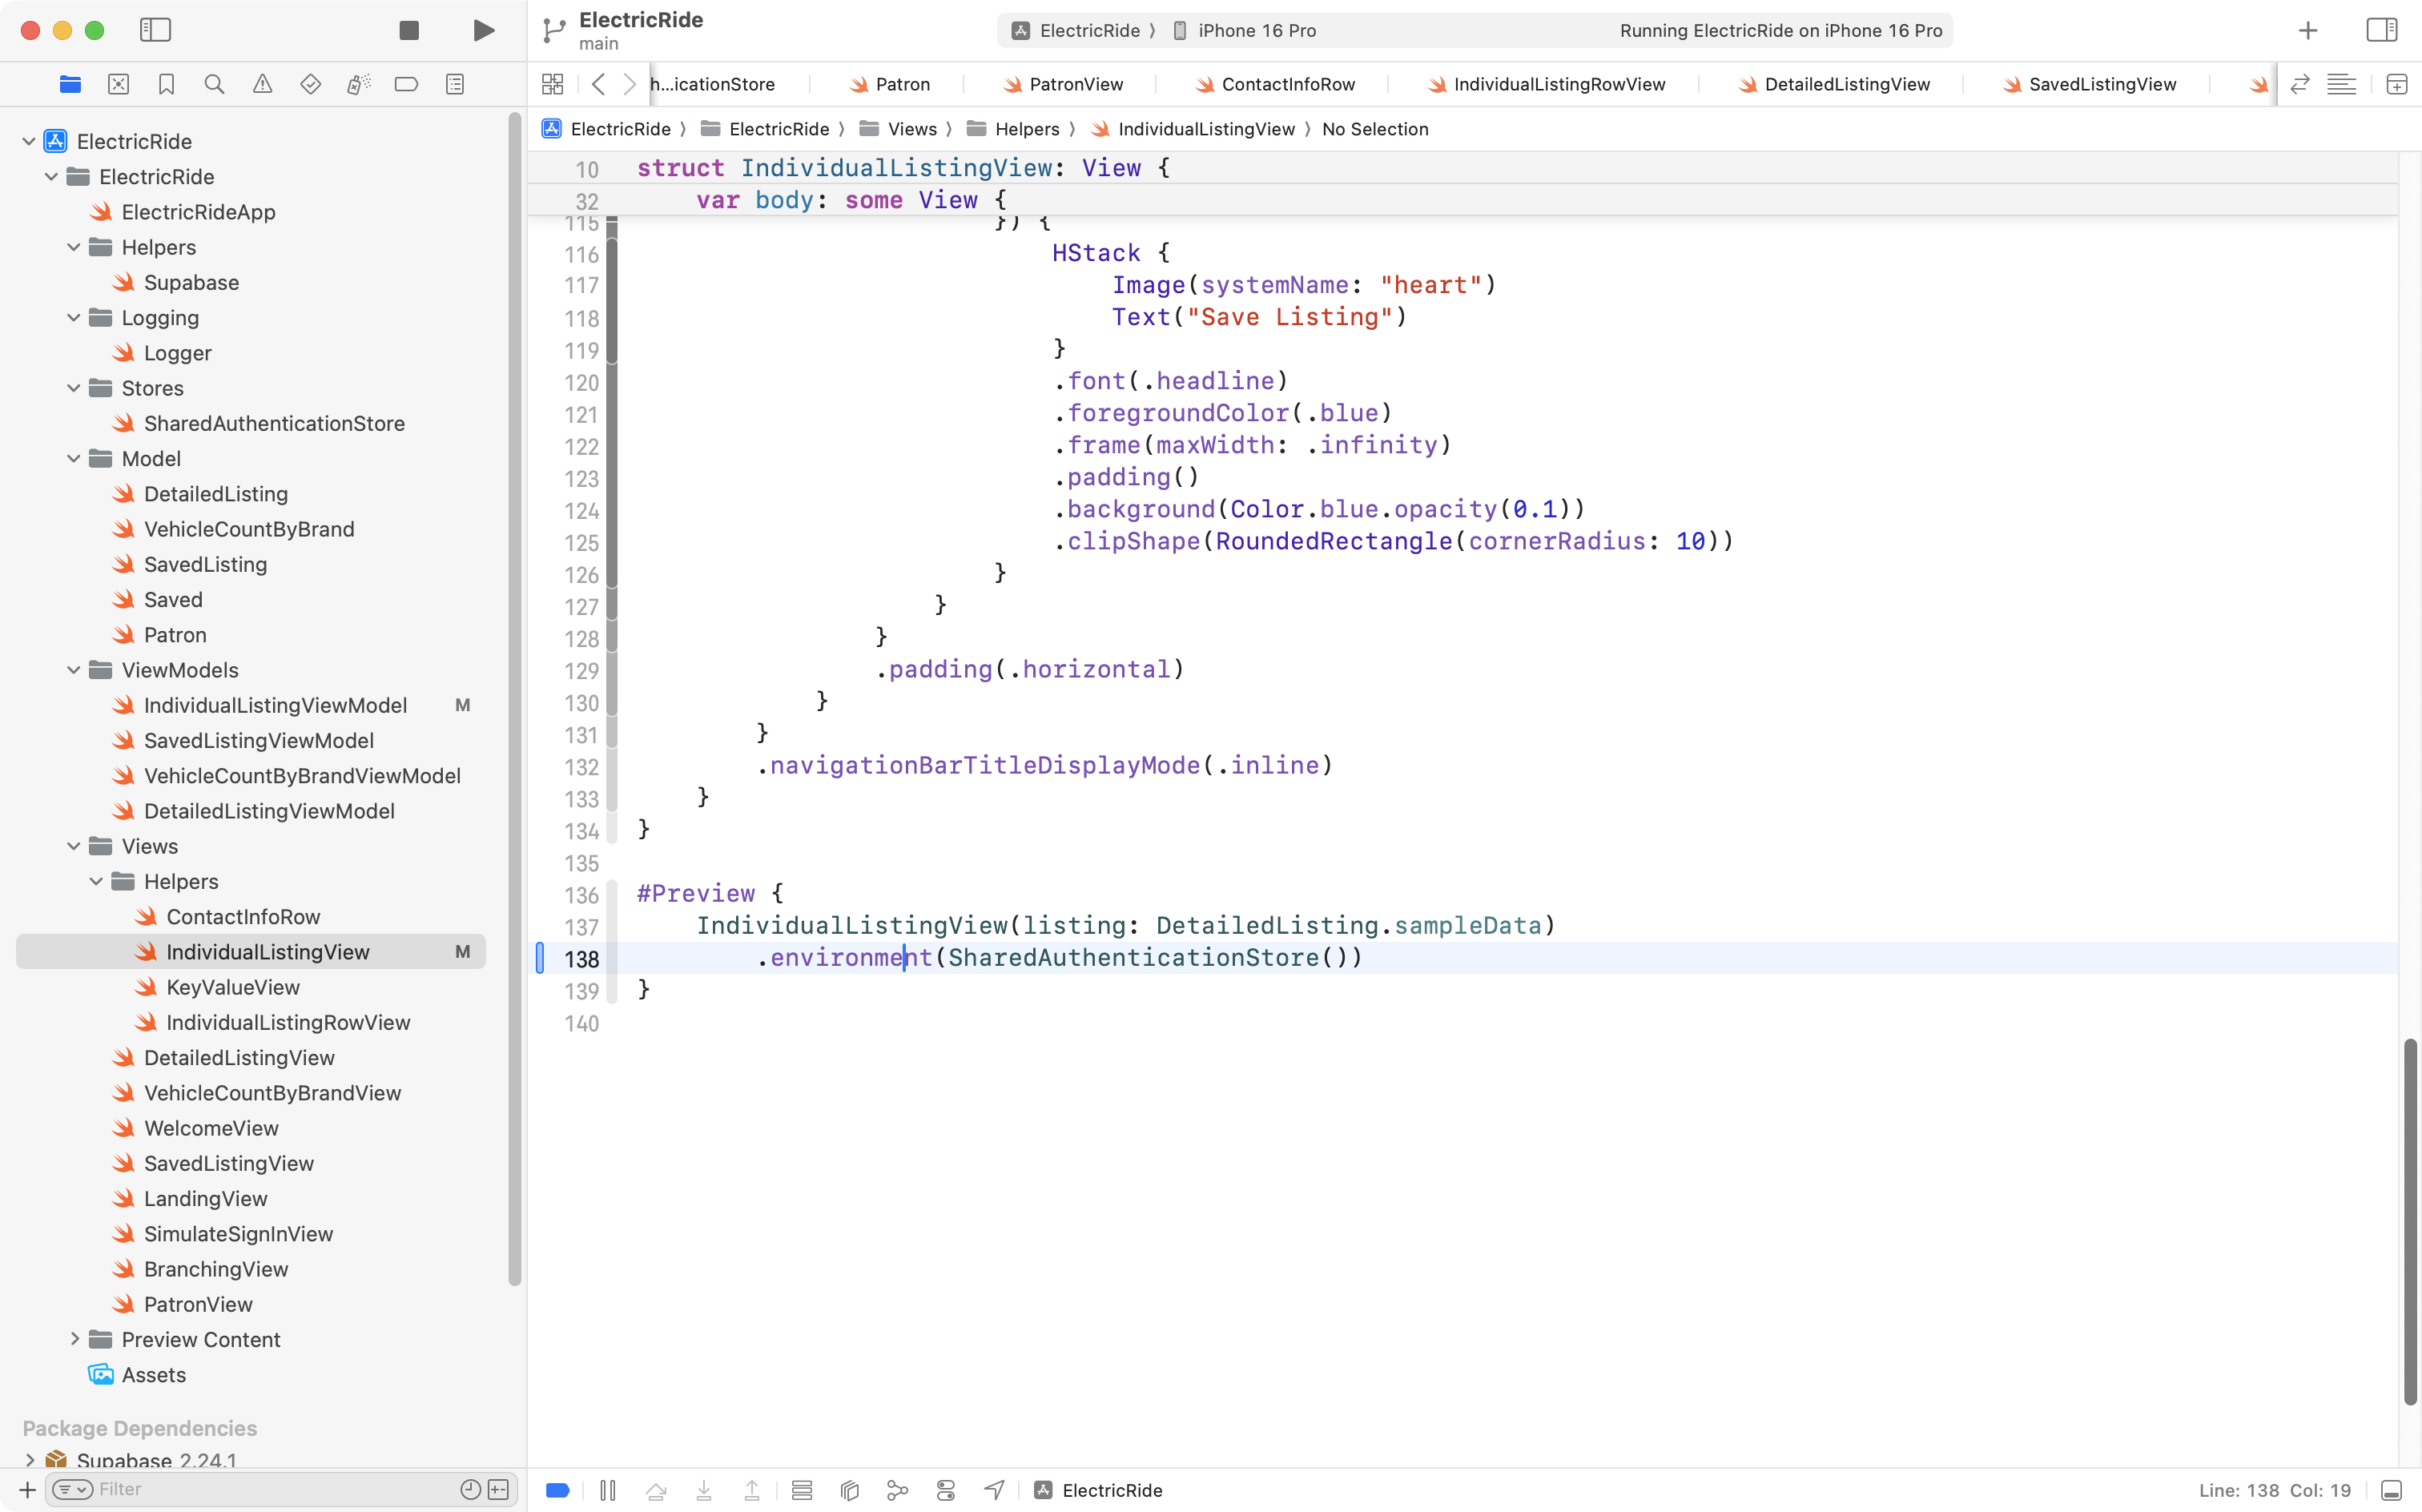
Finally we make the button that saves a listing pass along the patron id:
Updating views automatically
If we test the code to save listings for any user, we might think it is not working. For example:
As explained in the video, to fix the first problem, we must add this one line to the saveListing function in IndividualListingViewModel:
The larger problem – why the list of saved listings does not update – that is because we need to make this app use the Publisher-Subscriber Messaging Pattern, or “pub/sub”.
Since the need for the “pub/sub” messaging pattern is described in detail in that tutorial Mr. Gordon will omit further explanation in this tutorial.
However, you can review the code changes that Mr. Gordon made to the Electric Ride app so that it uses the “pub/sub” messaging pattern. Note that Mr. Gordon configured the following tables to broadcast when their data are changed:
listingsavedvehicle
Here’s a video showing how the app works now:
All that is left is to replace the simulated sign-ins with an actual sign-in.
This will be described in a (shorter) follow-up tutorial.