Introduction
All software applications, or “apps” for short:
- accept input
- process that input somehow according to a set of rules or “business logic”
- show output
As apps grow in size and complexity, software developers use design patterns to keep a project organized and easy to understand.
Employing a design pattern in this way is known as separating concerns. Simply put – we try to avoid placing “all our eggs in one basket” or writing all of our code for an app within one file.
The MVVM design pattern
MVVM is a software design pattern and the acronym stands for Model-View-ViewModel.
Here is a visual summary of this design pattern:
flowchart LR

id1["<b>Model</b><br/>Describes data"] --> id2["<b>View Model</b><br/>Manages the state of data<br/>Contains business logic"]
id2 --> id3["<b>View(s)</b><br/>Presents data"]
id3 --> id2
View
A view is anything the user sees within our apps or interacts with.
For example, consider this simple view – it is a structure designed to show a single item within a list – displaying a title and a subtitle:
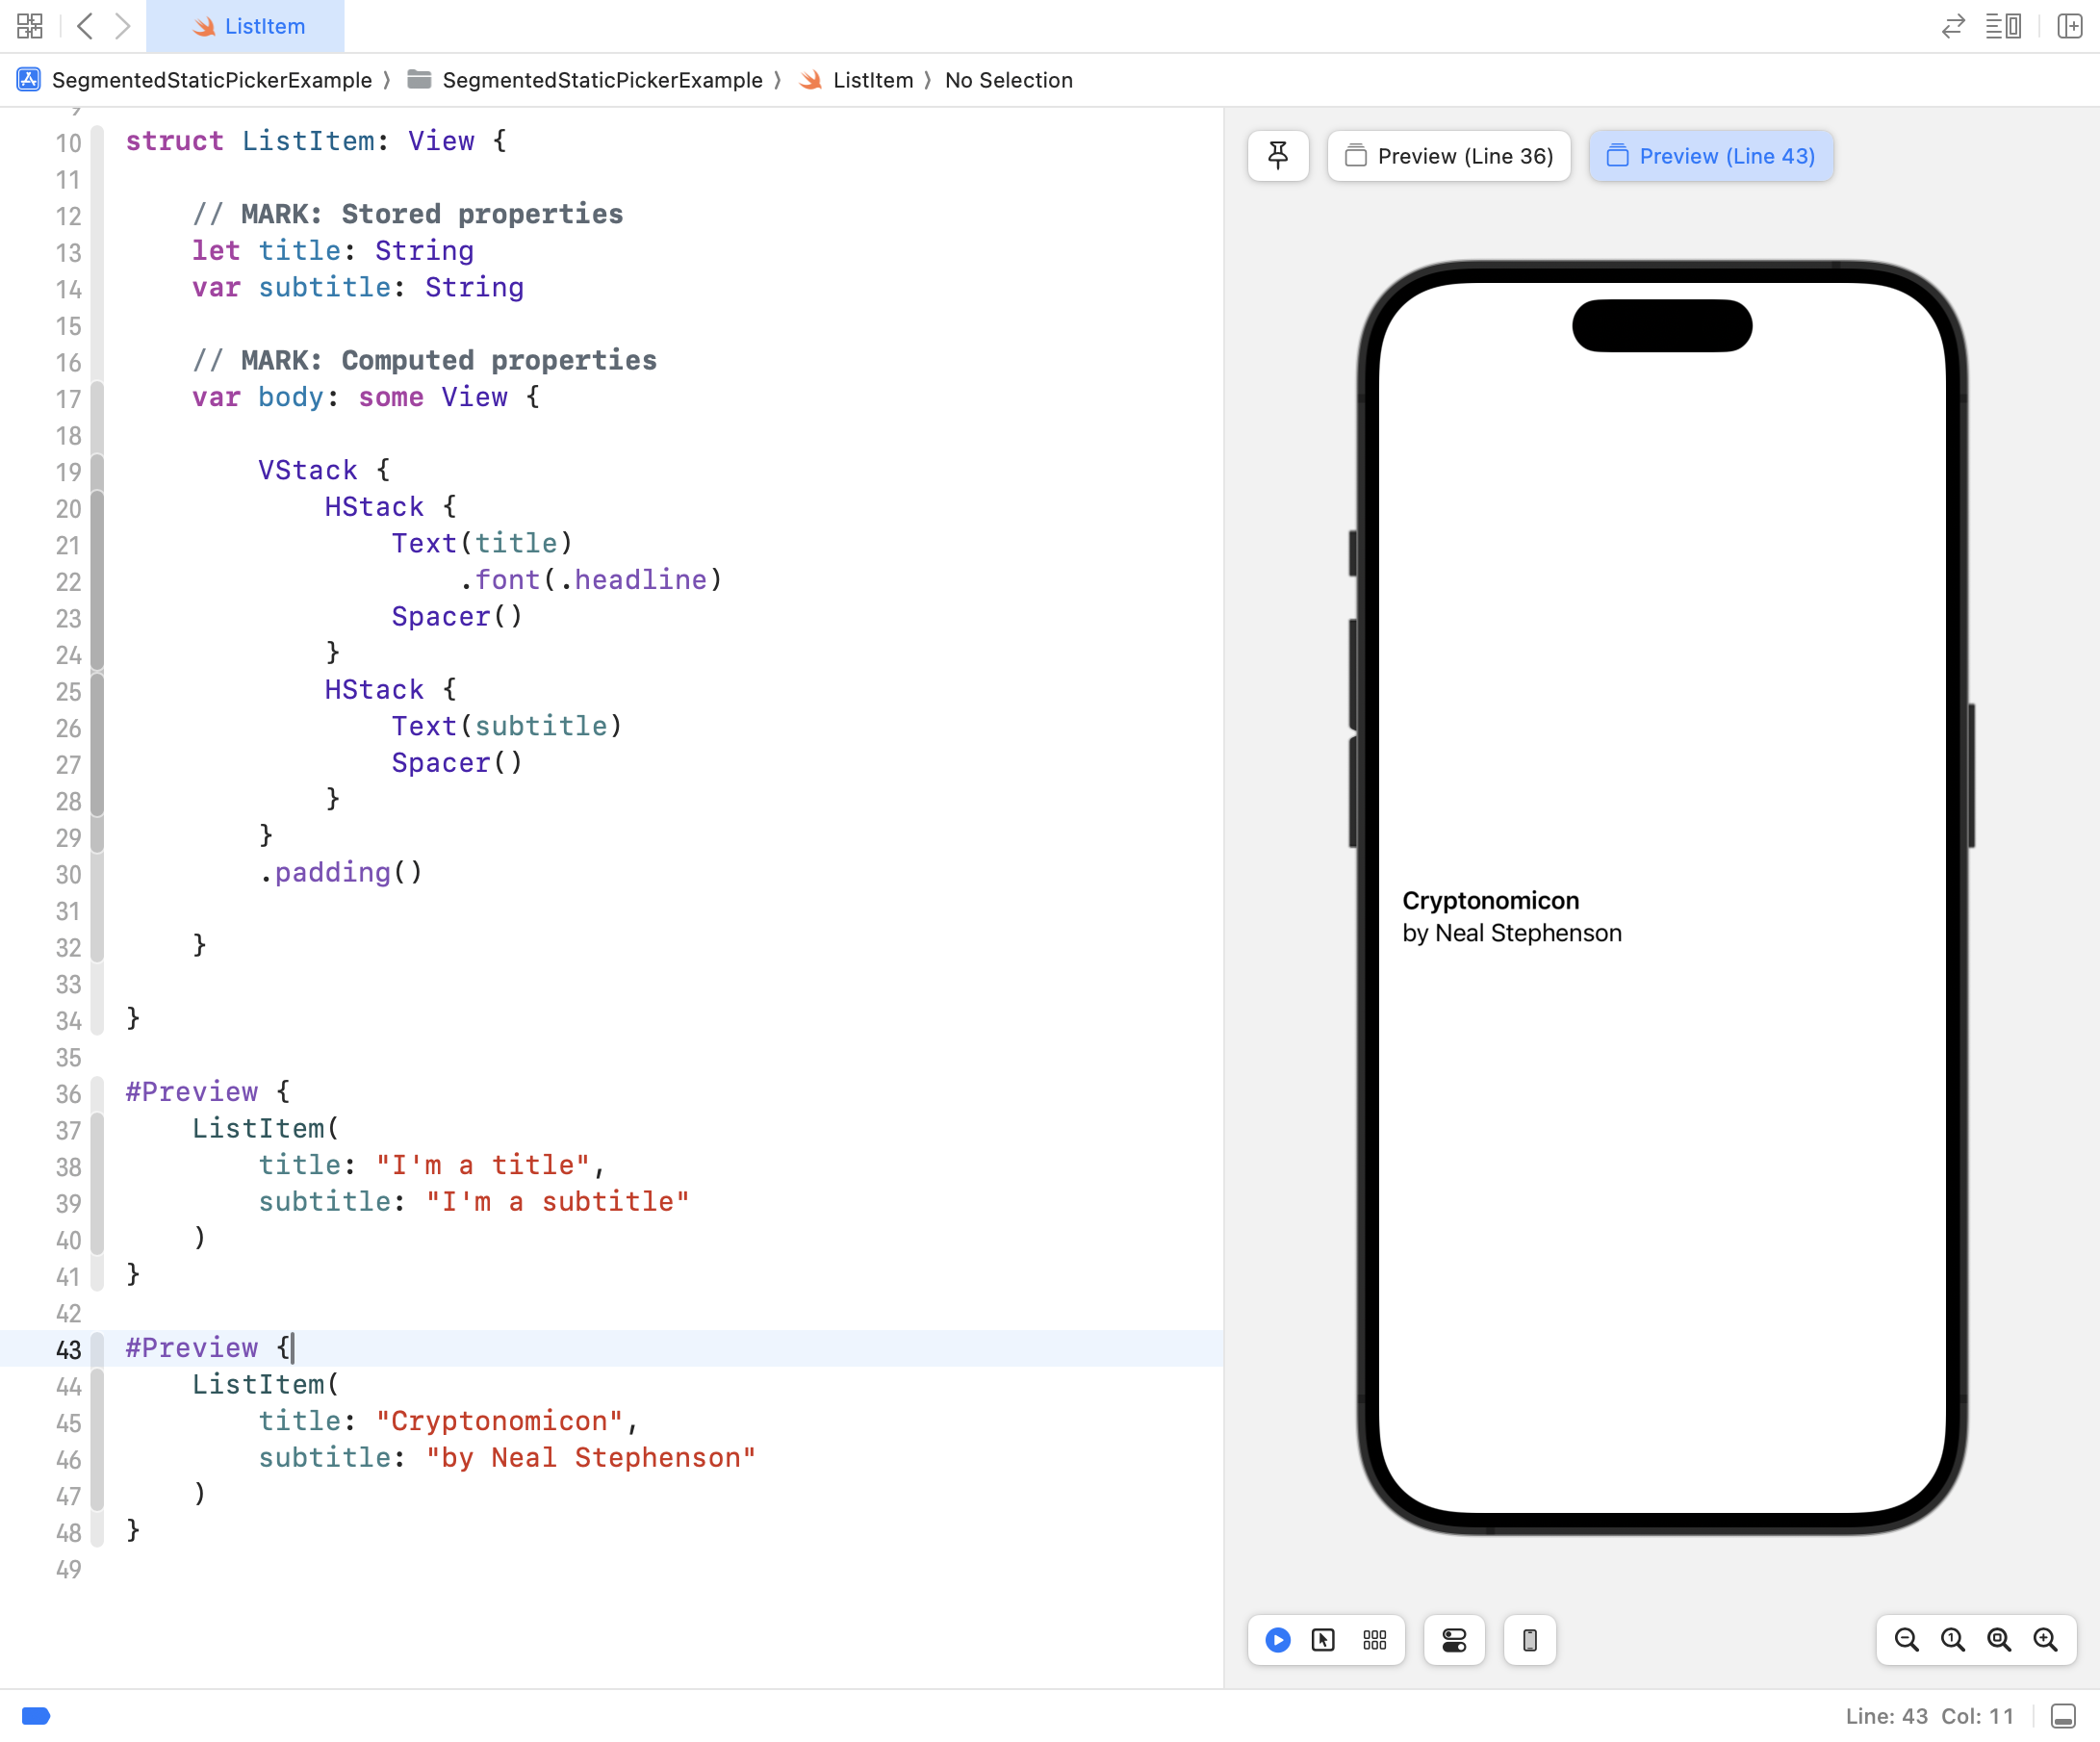
You have already written many views while learning about layout and designing interfaces with SwiftUI. 🤩
Model
The model within an app stores the data and logic that is directly related to that data.
What does that mean?
Let’s look at an example – here is a model for a circle:
struct Circle {

    // MARK: Stored properties
    var radius: Double

    // MARK: Computed properties
    var diameter: Double {
        return 2 * radius
    }

    var perimeter: Double {
        return 2 * Double.pi * radius
    }

    var area: Double {
        return Double.pi * radius * radius
    }
}
When we write a structure to serve as part of the model for our app, we consider:
- What data it needs to store – these become stored properties.
- What data it should offer – what useful information it could provide – these become computed properties .
You have already created many models when authoring Swift structures to describe shapes, hockey cards, book listings… 🚀
View Model
The view model is a concept that is new to you.
We will explore the role of a view model in this lesson.
The view model (as implied by its name) sits between the model code and the view code in an app.
A view model’s job is to store the current state of data within an app, and to encapsulate (contain) any business logic (processing rules) required to make the app perform its stated function. A common form of business logic in view models is code that validates user input (makes sure that the input is in the expected form).
Accept free-form input
Let’s now apply this concept and re-write an app that you made earlier in the Revisiting Interactive Apps exercise.
In that exercise, you wrote the following app:
However, the app’s interface leaves a little to be desired. If a user wanted to find the square of even a slightly larger number (say, 42) then they must repeatedly tap the stepper control.
This is very tedious.
As well, all of the logic for that app is kept within the view:
- Input is collected through the
Steppercontrol - Input is processed (via a stored property)
- The result is shown (via a
Textcontrol)
What if we could adjust the app so that it works as follows instead?
In this version of the app, the user can type whatever they want into the text fields.
An answer, or an appropriate error message, is shown to the user.
To write this app, we will separate concerns using the MVVM design pattern.
To summarize, here are the specific roles each layer will play in the re-designed app:
| Layer | Role |
|---|---|
| Model | Hold the base and exponent in numeric form; provide the result of evaluating the power. |
| View Model | Hold the text provided by the user for the base and exponent; provide an instance of the model – the power – where possible, otherwise, provide an appropriate error message. |
| View | Collect input from the user and display whatever output is provided by the view model. |
We will first work within a playground, so that we can focus on learning how the MVVM design pattern works at the model and view model layers.
Then, we will move our code into a full-fledged project, and add the view layer.
Create the playground
Please create a new macOS playground named PowersPlayground, like this:
Start with the data
Apps are simply an interface to data. App developers, like you and I, help end users by writing apps that make it easier to view or manipulate data that they care about. Writing apps to do this can be a lot of fun, and very lucrative.
NOTE
For a brief digression, have a look at the Future of Jobs Report 2025, issued by the World Economic Forum – here’s a key page:
Conservatively, six of the fifteen job categories listed are occupations for which a degree in computer science or software engineering would be essential. For some of the other job categories listed, understanding those subject areas would certainly be helpful.

Anyway, where were we? That’s right – data.
Begin by authoring the model.
Create the model
To create a model, once again, ask yourself two questions:
- What data do we need to store? These become stored properties.
- What data can the model provide? These become computed properties.
Stored properties
When evaluating a power, there are two separate pieces of information that must be provided by the user:
- the base value (what will be multiplied)
- the exponent (how many times the base will be multiplied by itself)
For example, if the base is and the exponent is then the power would be evaluated like this:
The base is not limited to being an integer. Say that the base of a power was and the exponent was . Then the power would be evaluated as:
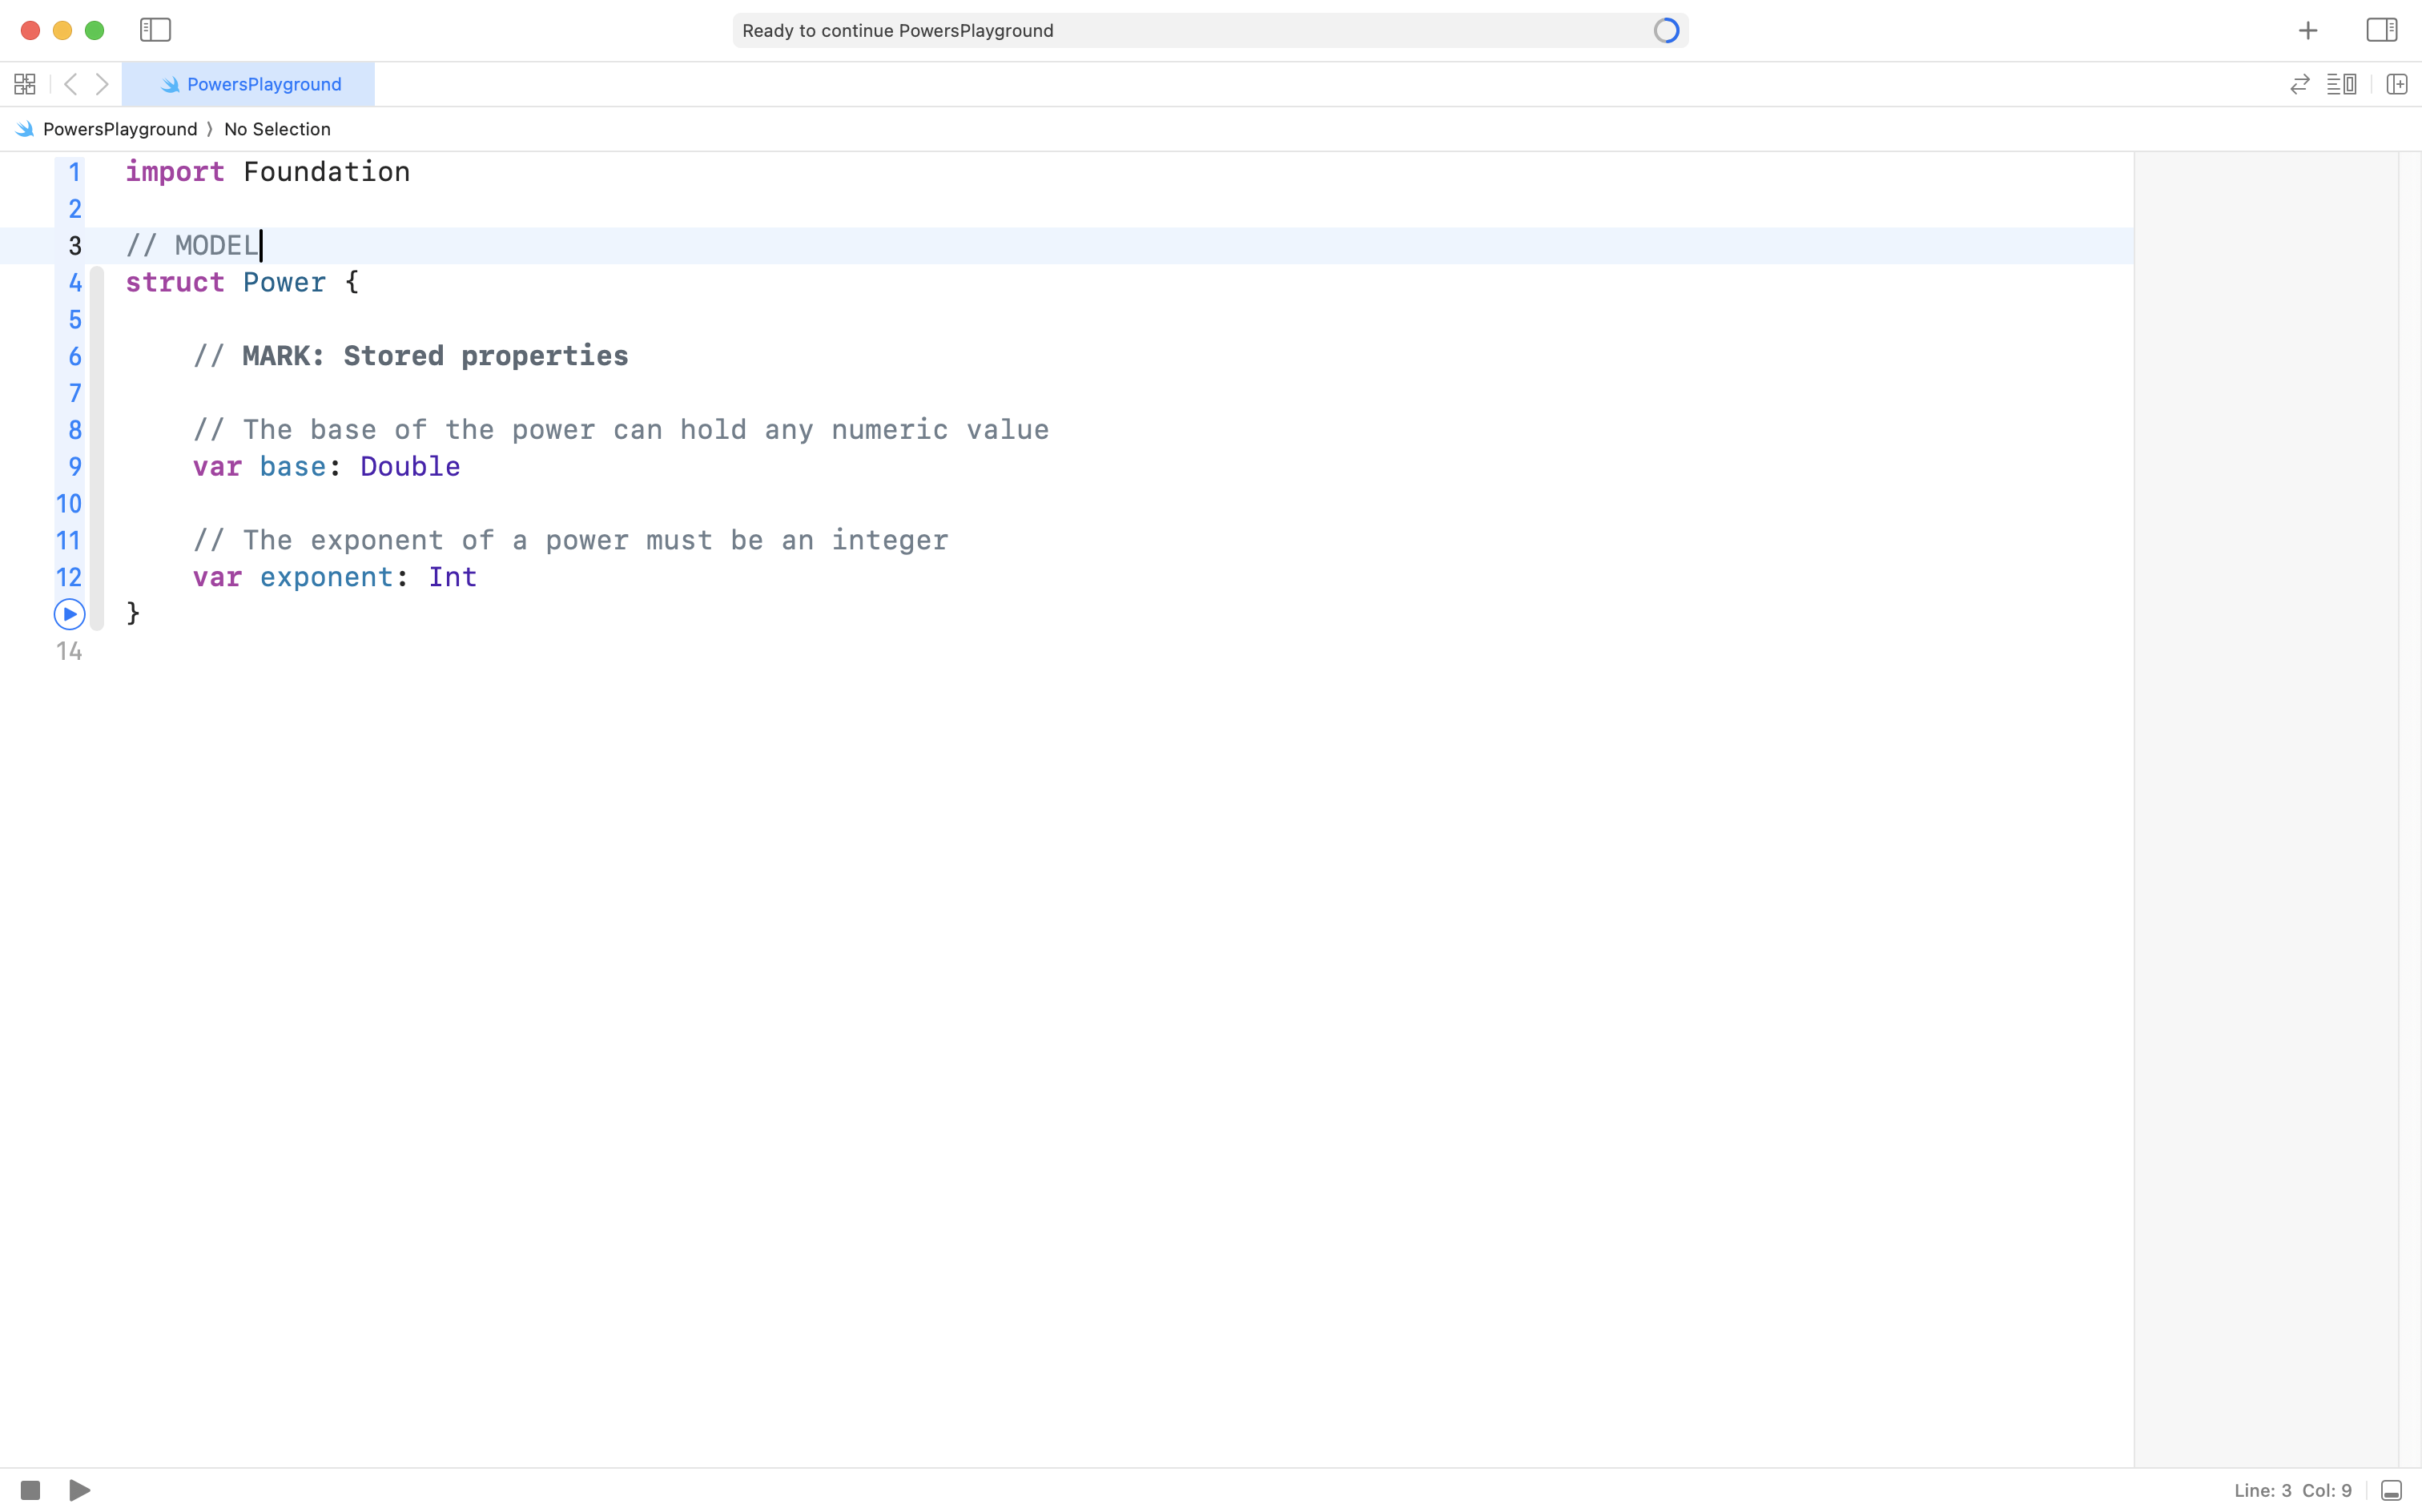
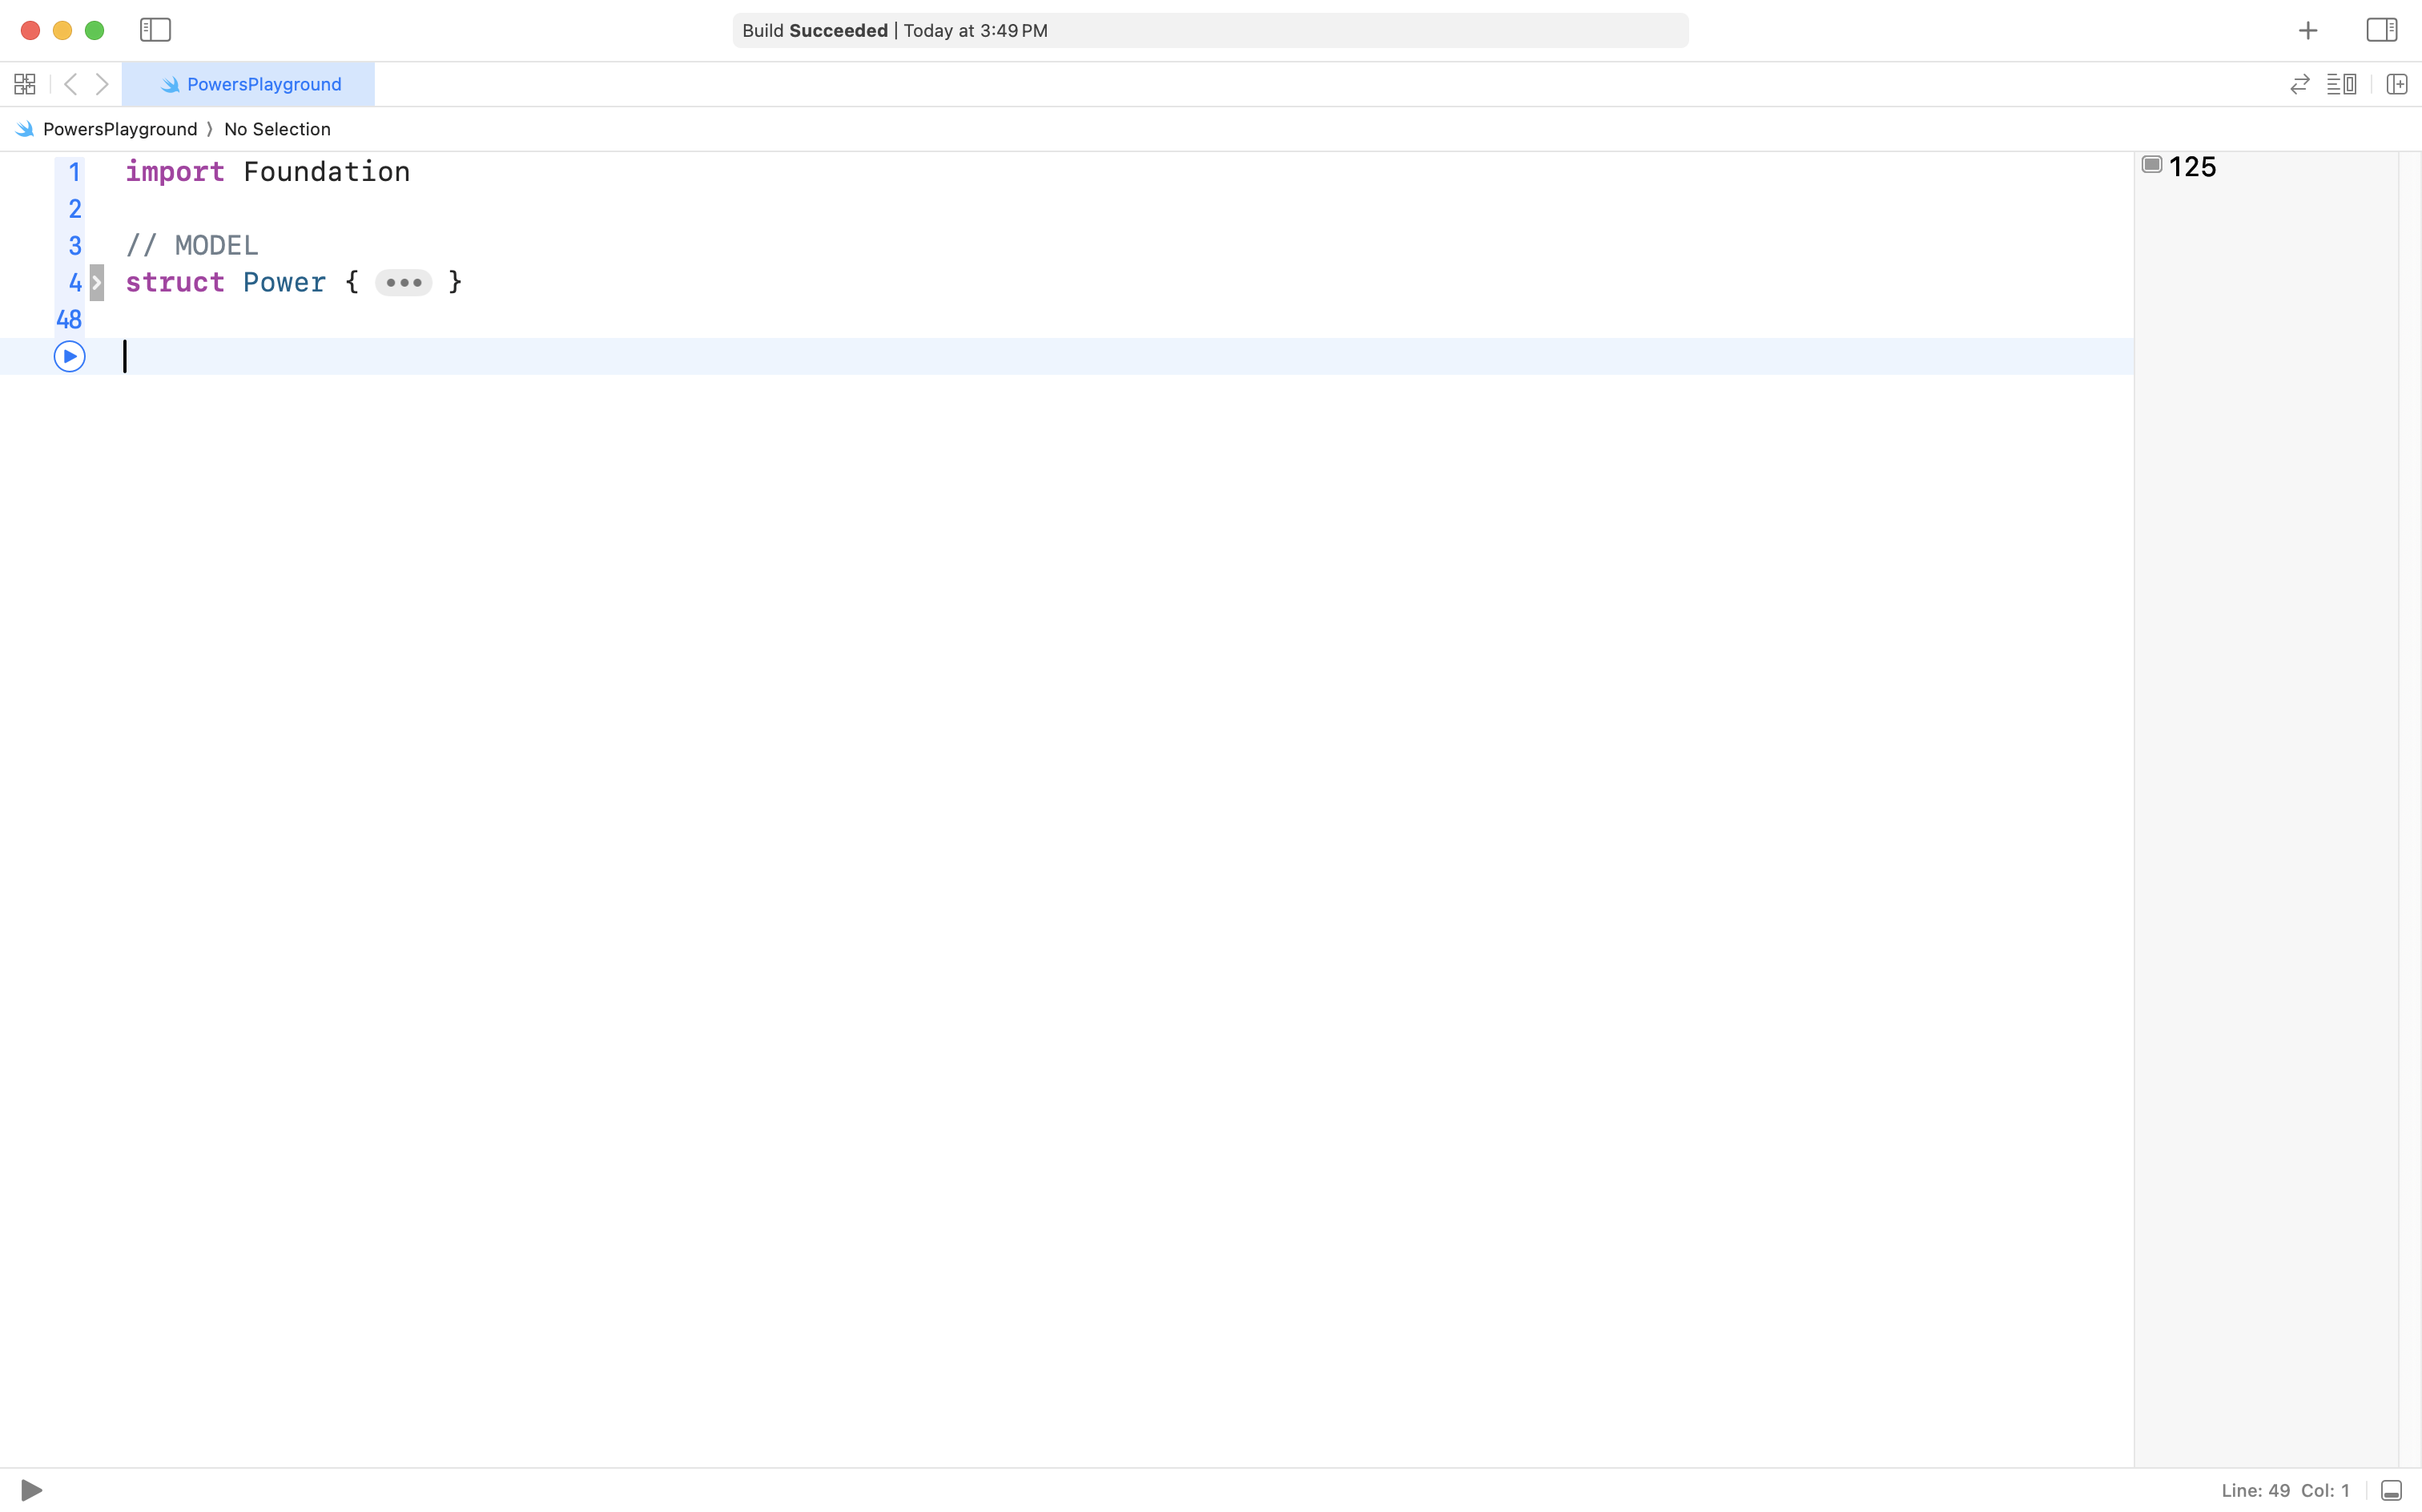
Considering all of this, we can begin authoring our app’s data model, within the playground, at first.
Copy the following code into your clipboard:
import Foundation

// MODEL
struct Power {

    // MARK: Stored properties

    // The base of the power can hold any numeric value
    var base: Double

    // The exponent of a power must be an integer
    var exponent: Int
}
… then paste it into the playground, like this:
Computed properties
We know that a power is nothing more than a convenient way, symbolically, to represent repeated multiplication.
Consider one more example of a power with a base of and an exponent of :
In our structure that models a power, then, the useful information our model can provide is the result of evaluating the power. That becomes our computed property.
NOTE
The
Foundationframework does provide us with a built-in way to evaluate powers, but we will learn more by implementing our own logic to do this.
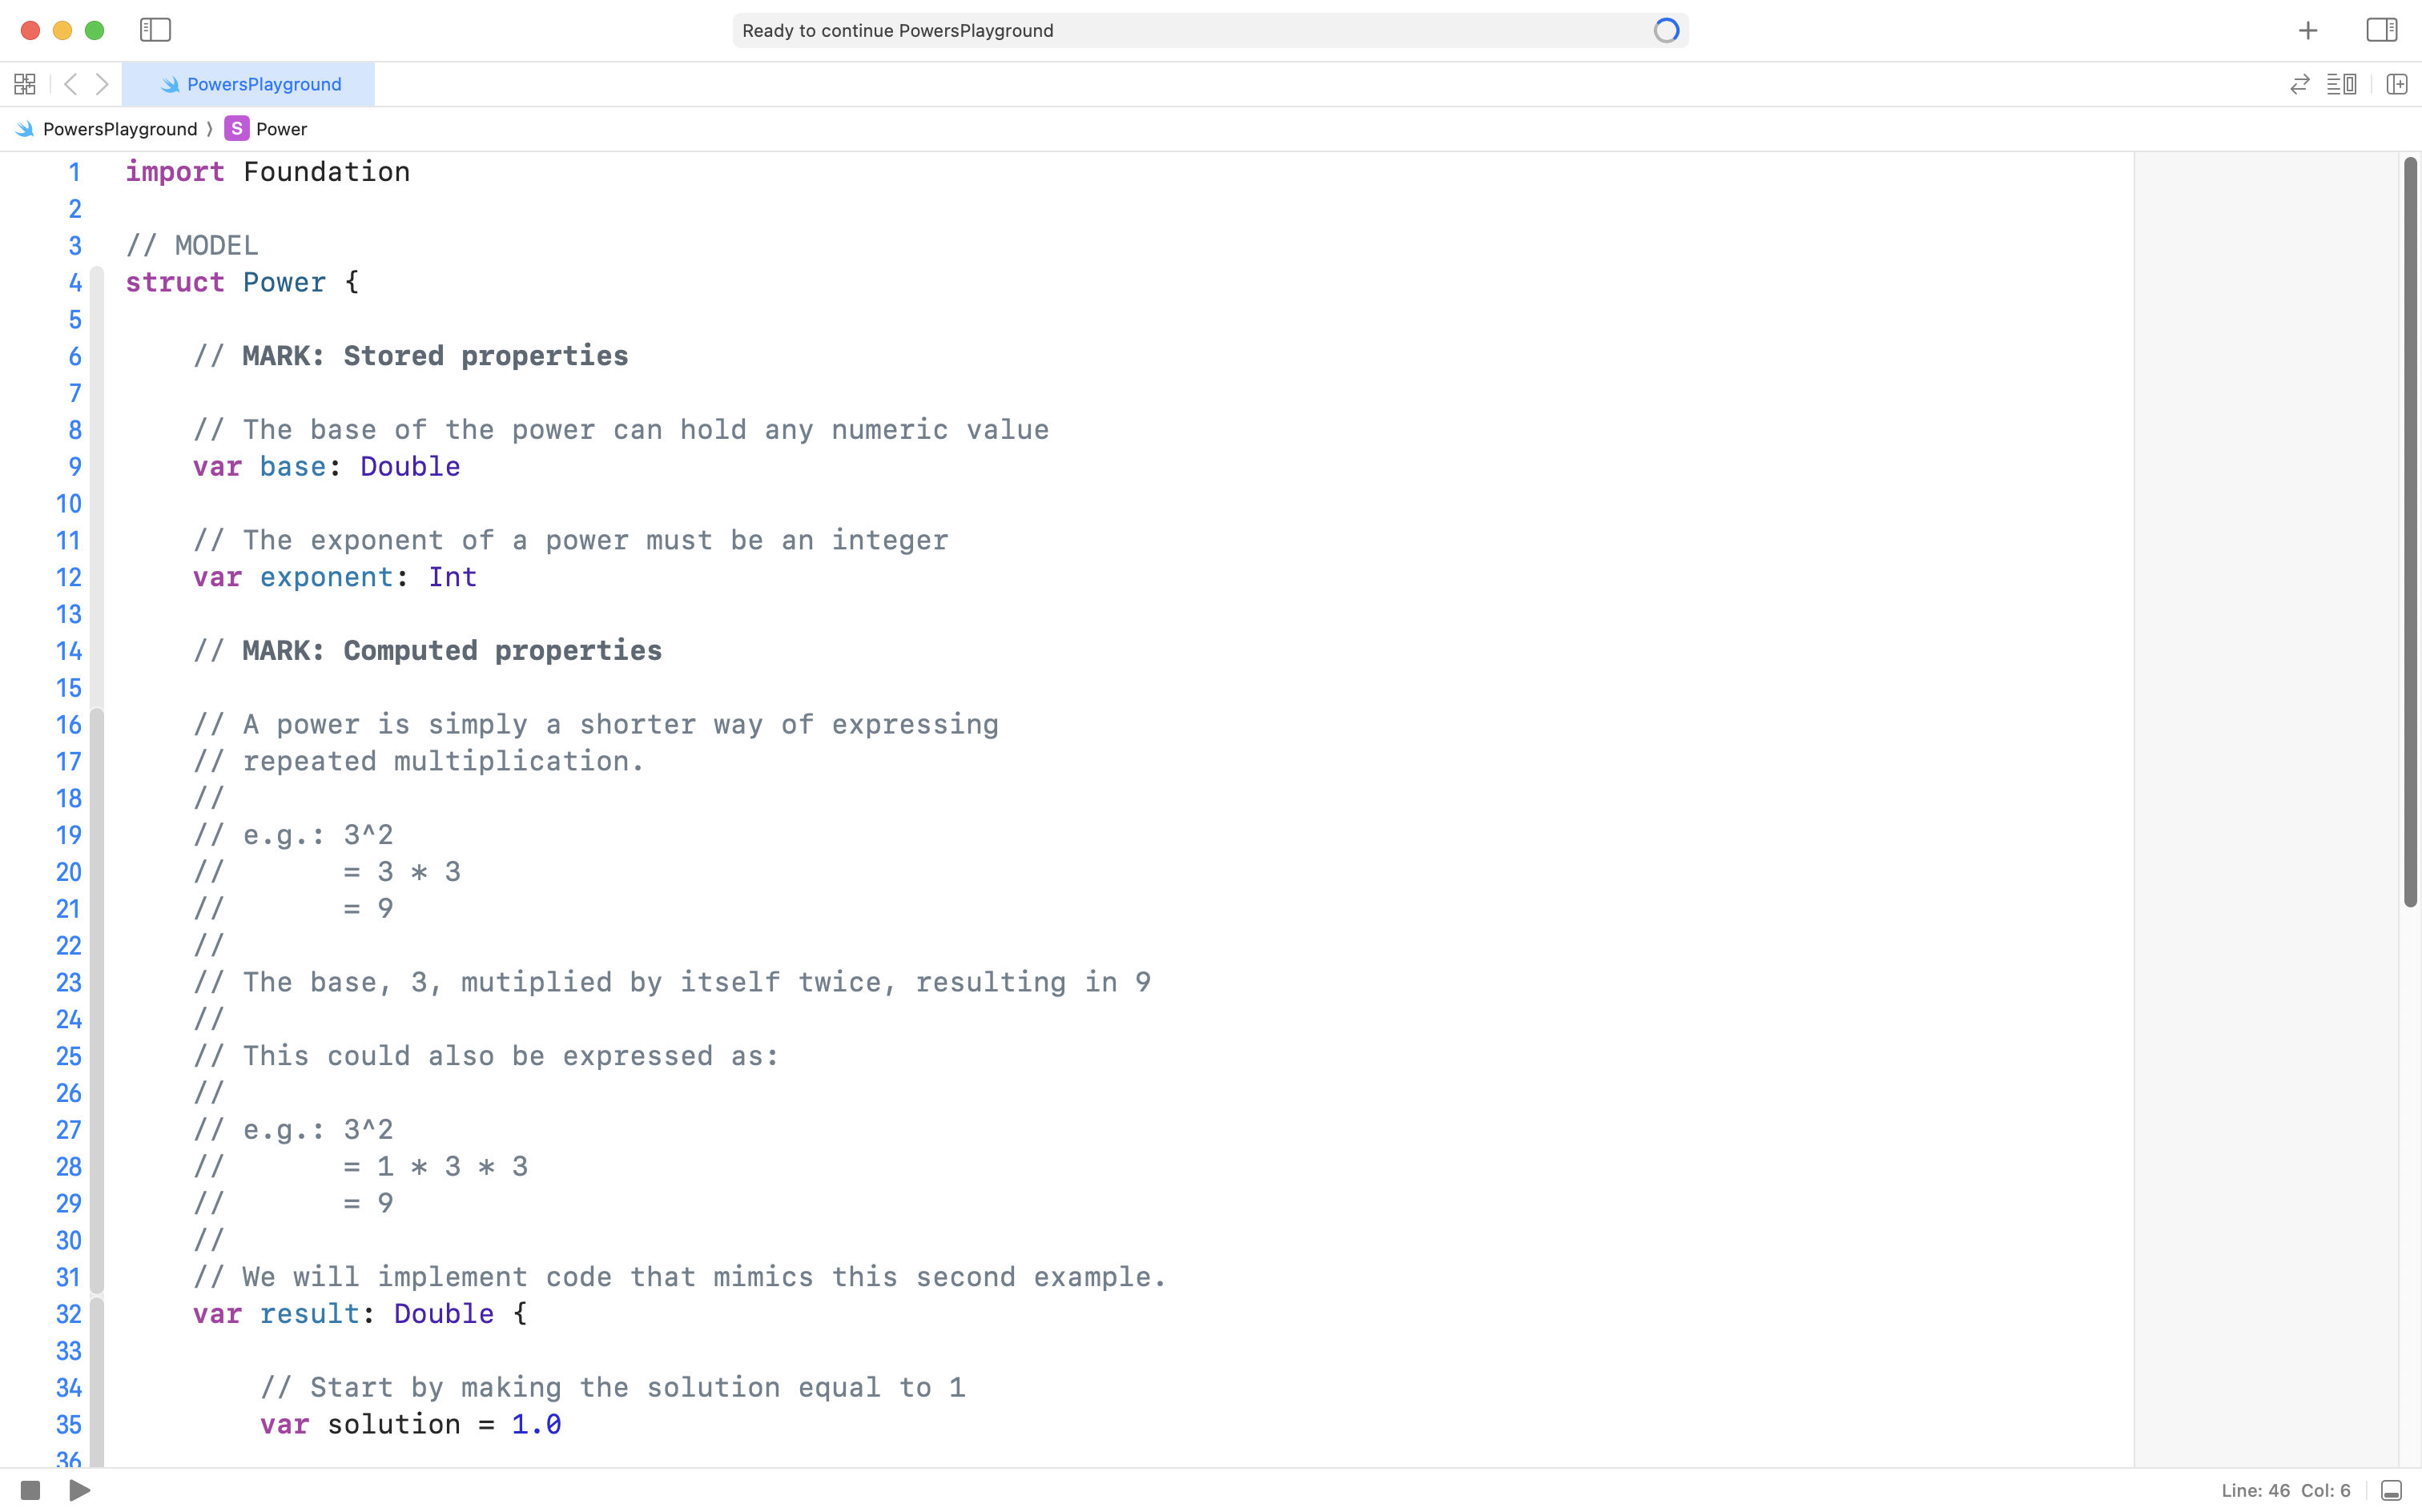
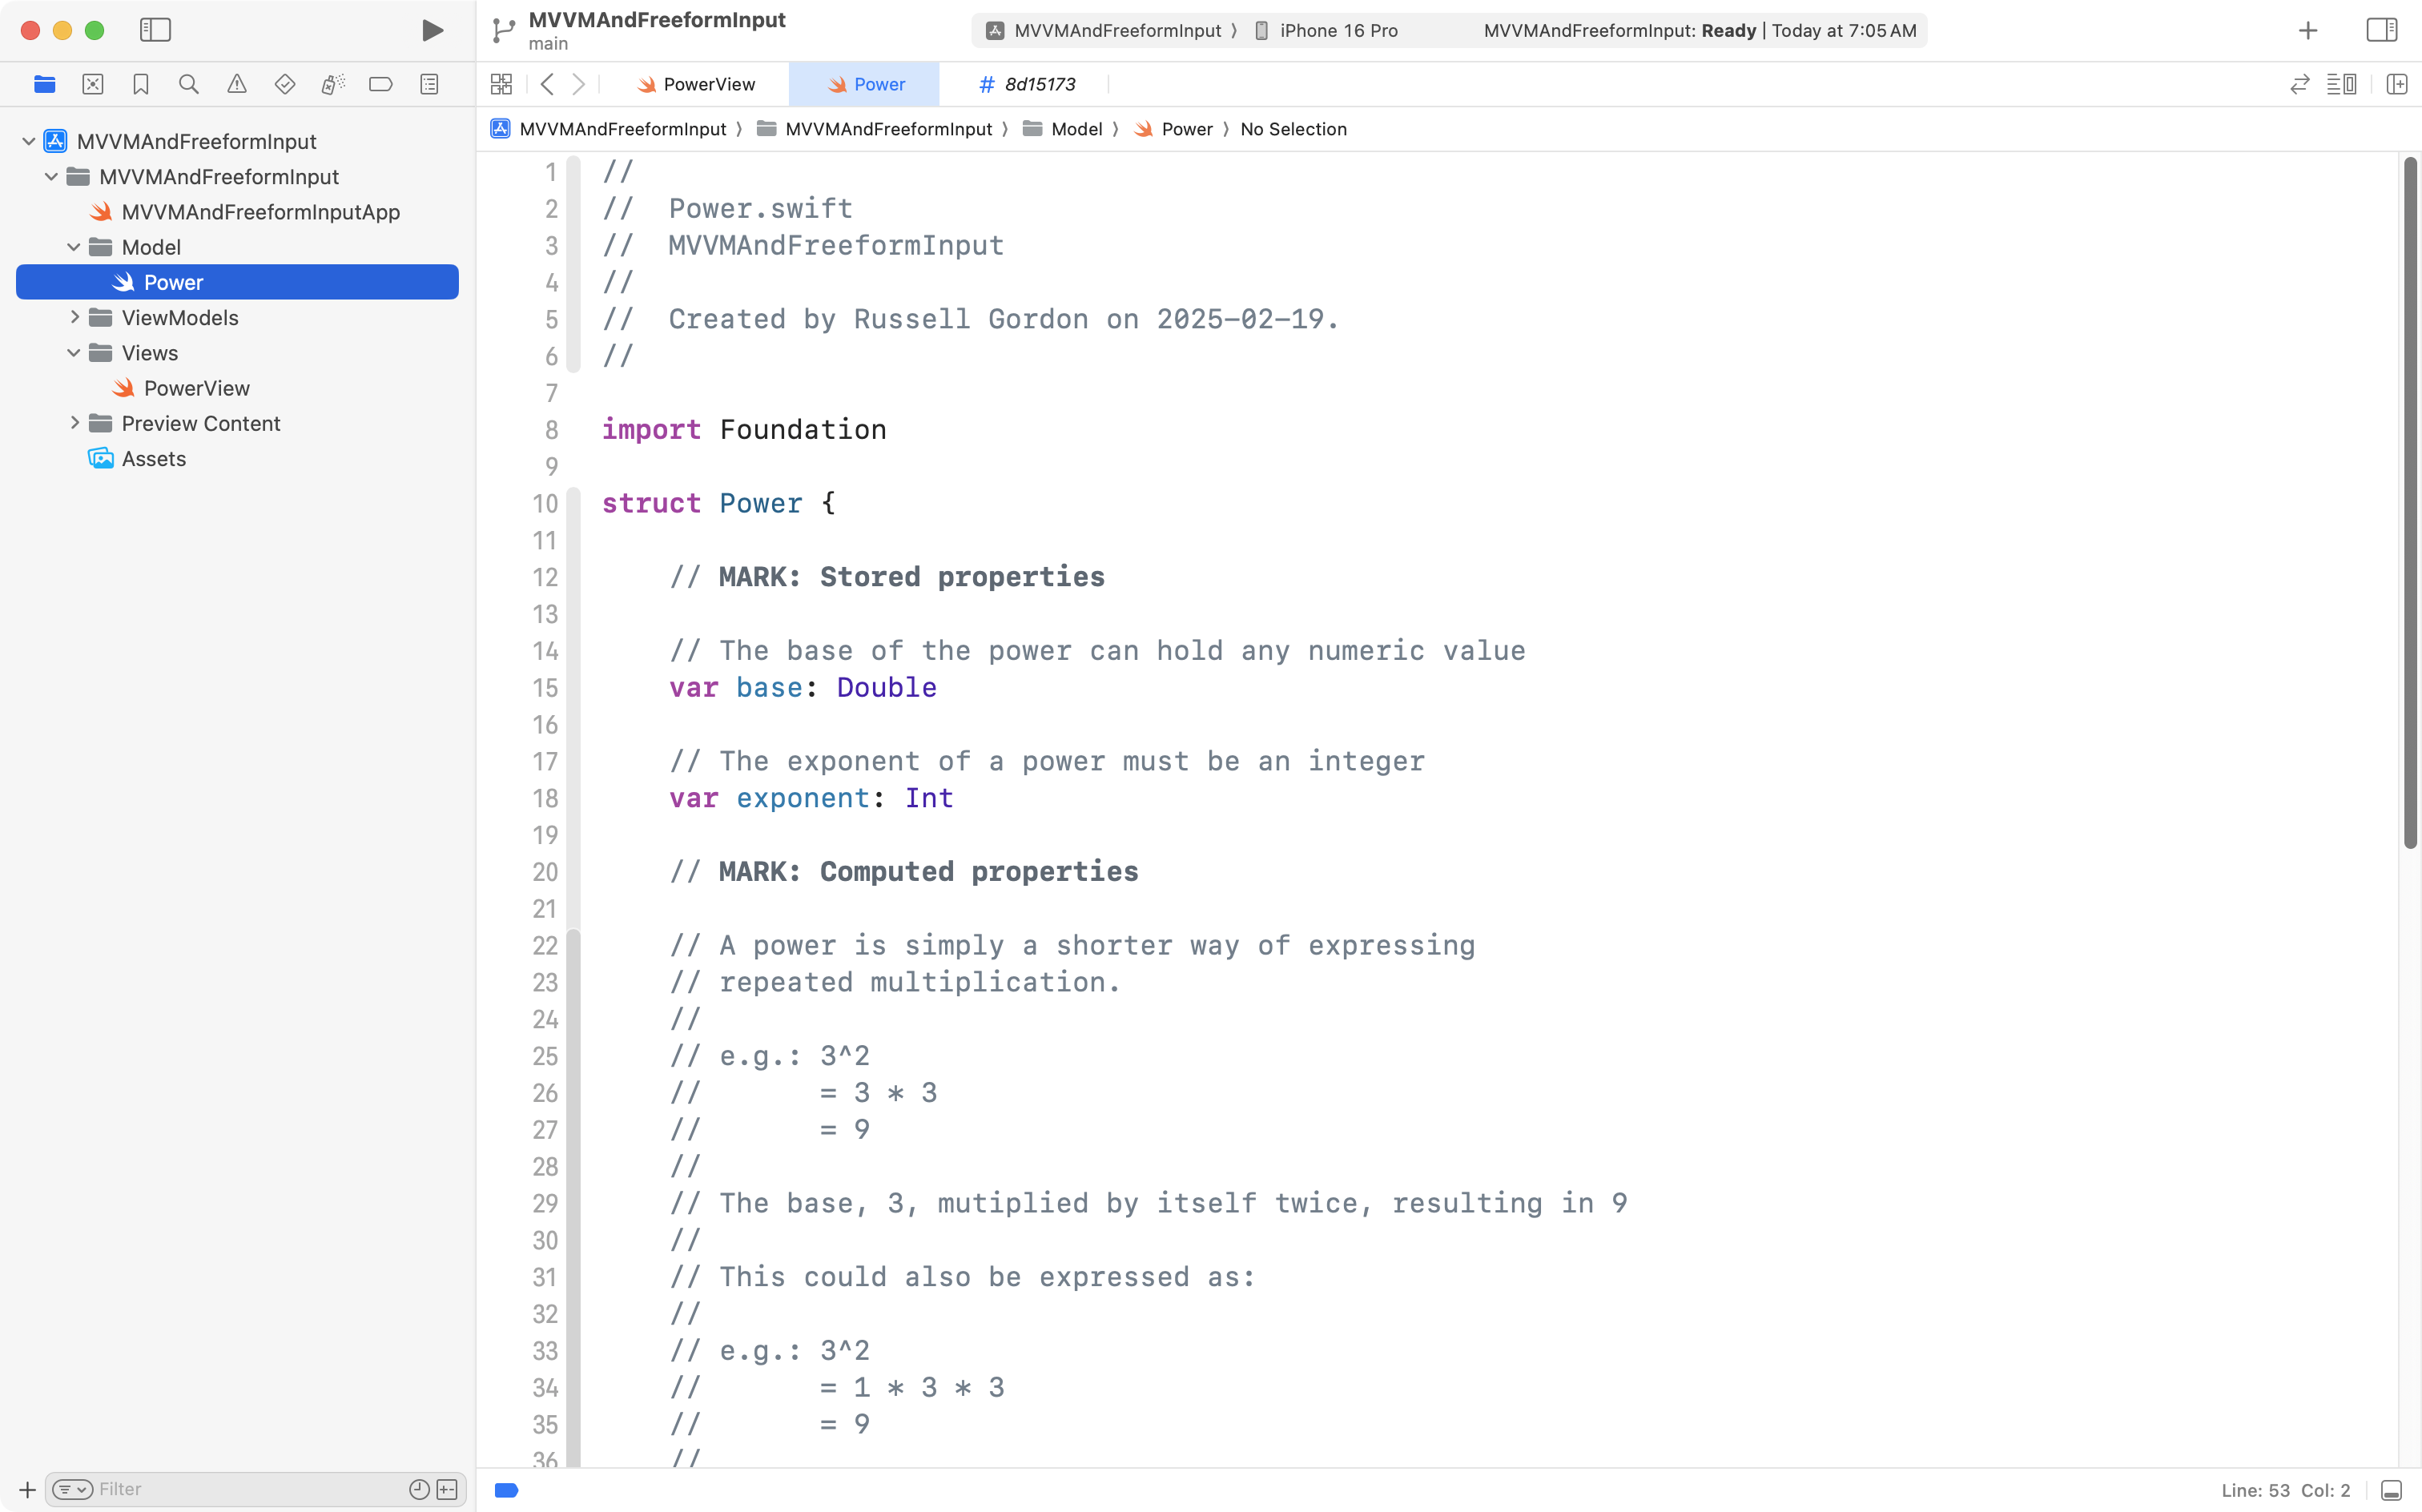
Add the following code to your Power structure, after the two stored properties, but before the closing curly bracket of the structure:
// MARK: Computed properties
// A power is simply a shorter way of expressing
// repeated multiplication.
//
// e.g.: 3^2
// = 3 * 3
// = 9
//
// The base, 3, mutiplied by itself twice, resulting in 9
//
// This could also be expressed as:
//
// e.g.: 3^2
// = 1 * 3 * 3
// = 9
//
// We will implement code that mimics this second example.
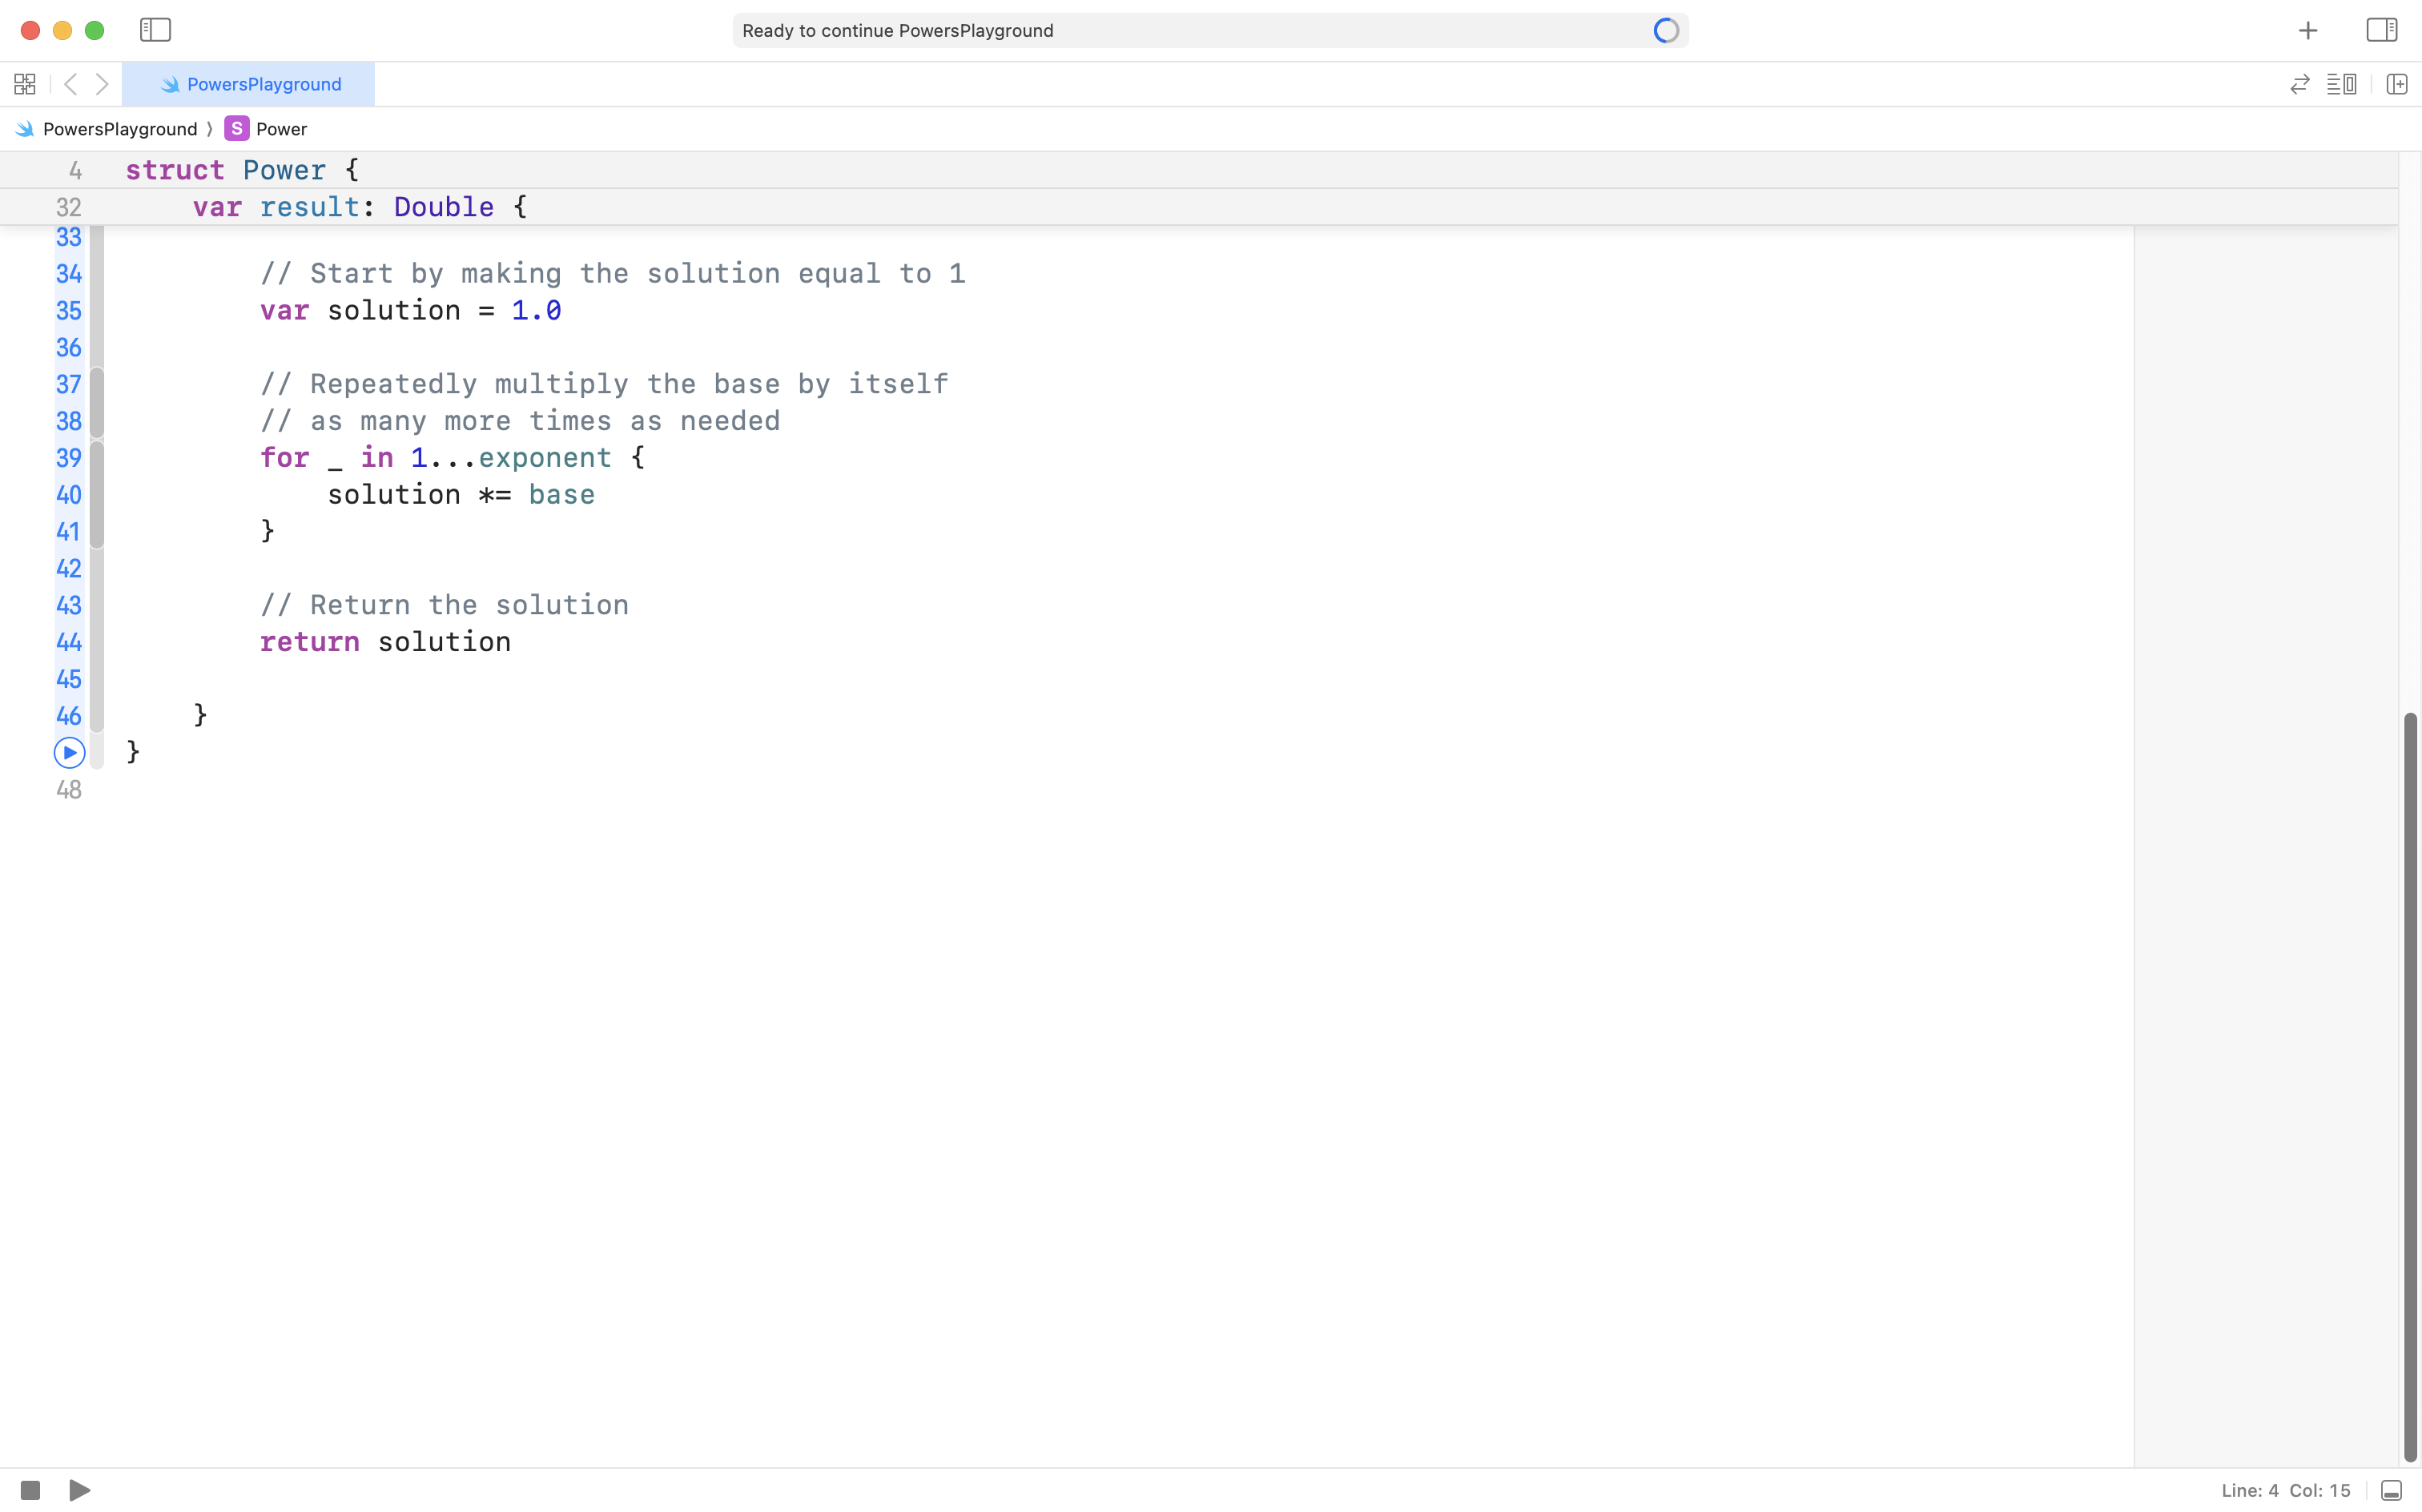
var result: Double {
// Start by making the solution equal to 1
var solution = 1.0
// Repeatedly multiply the base by itself
// as many more times as needed
for _ in 1...exponent {
solution *= base
}
// Return the solution
return solution
}When complete, your Power structure should look like this:
…and this, within your playground:
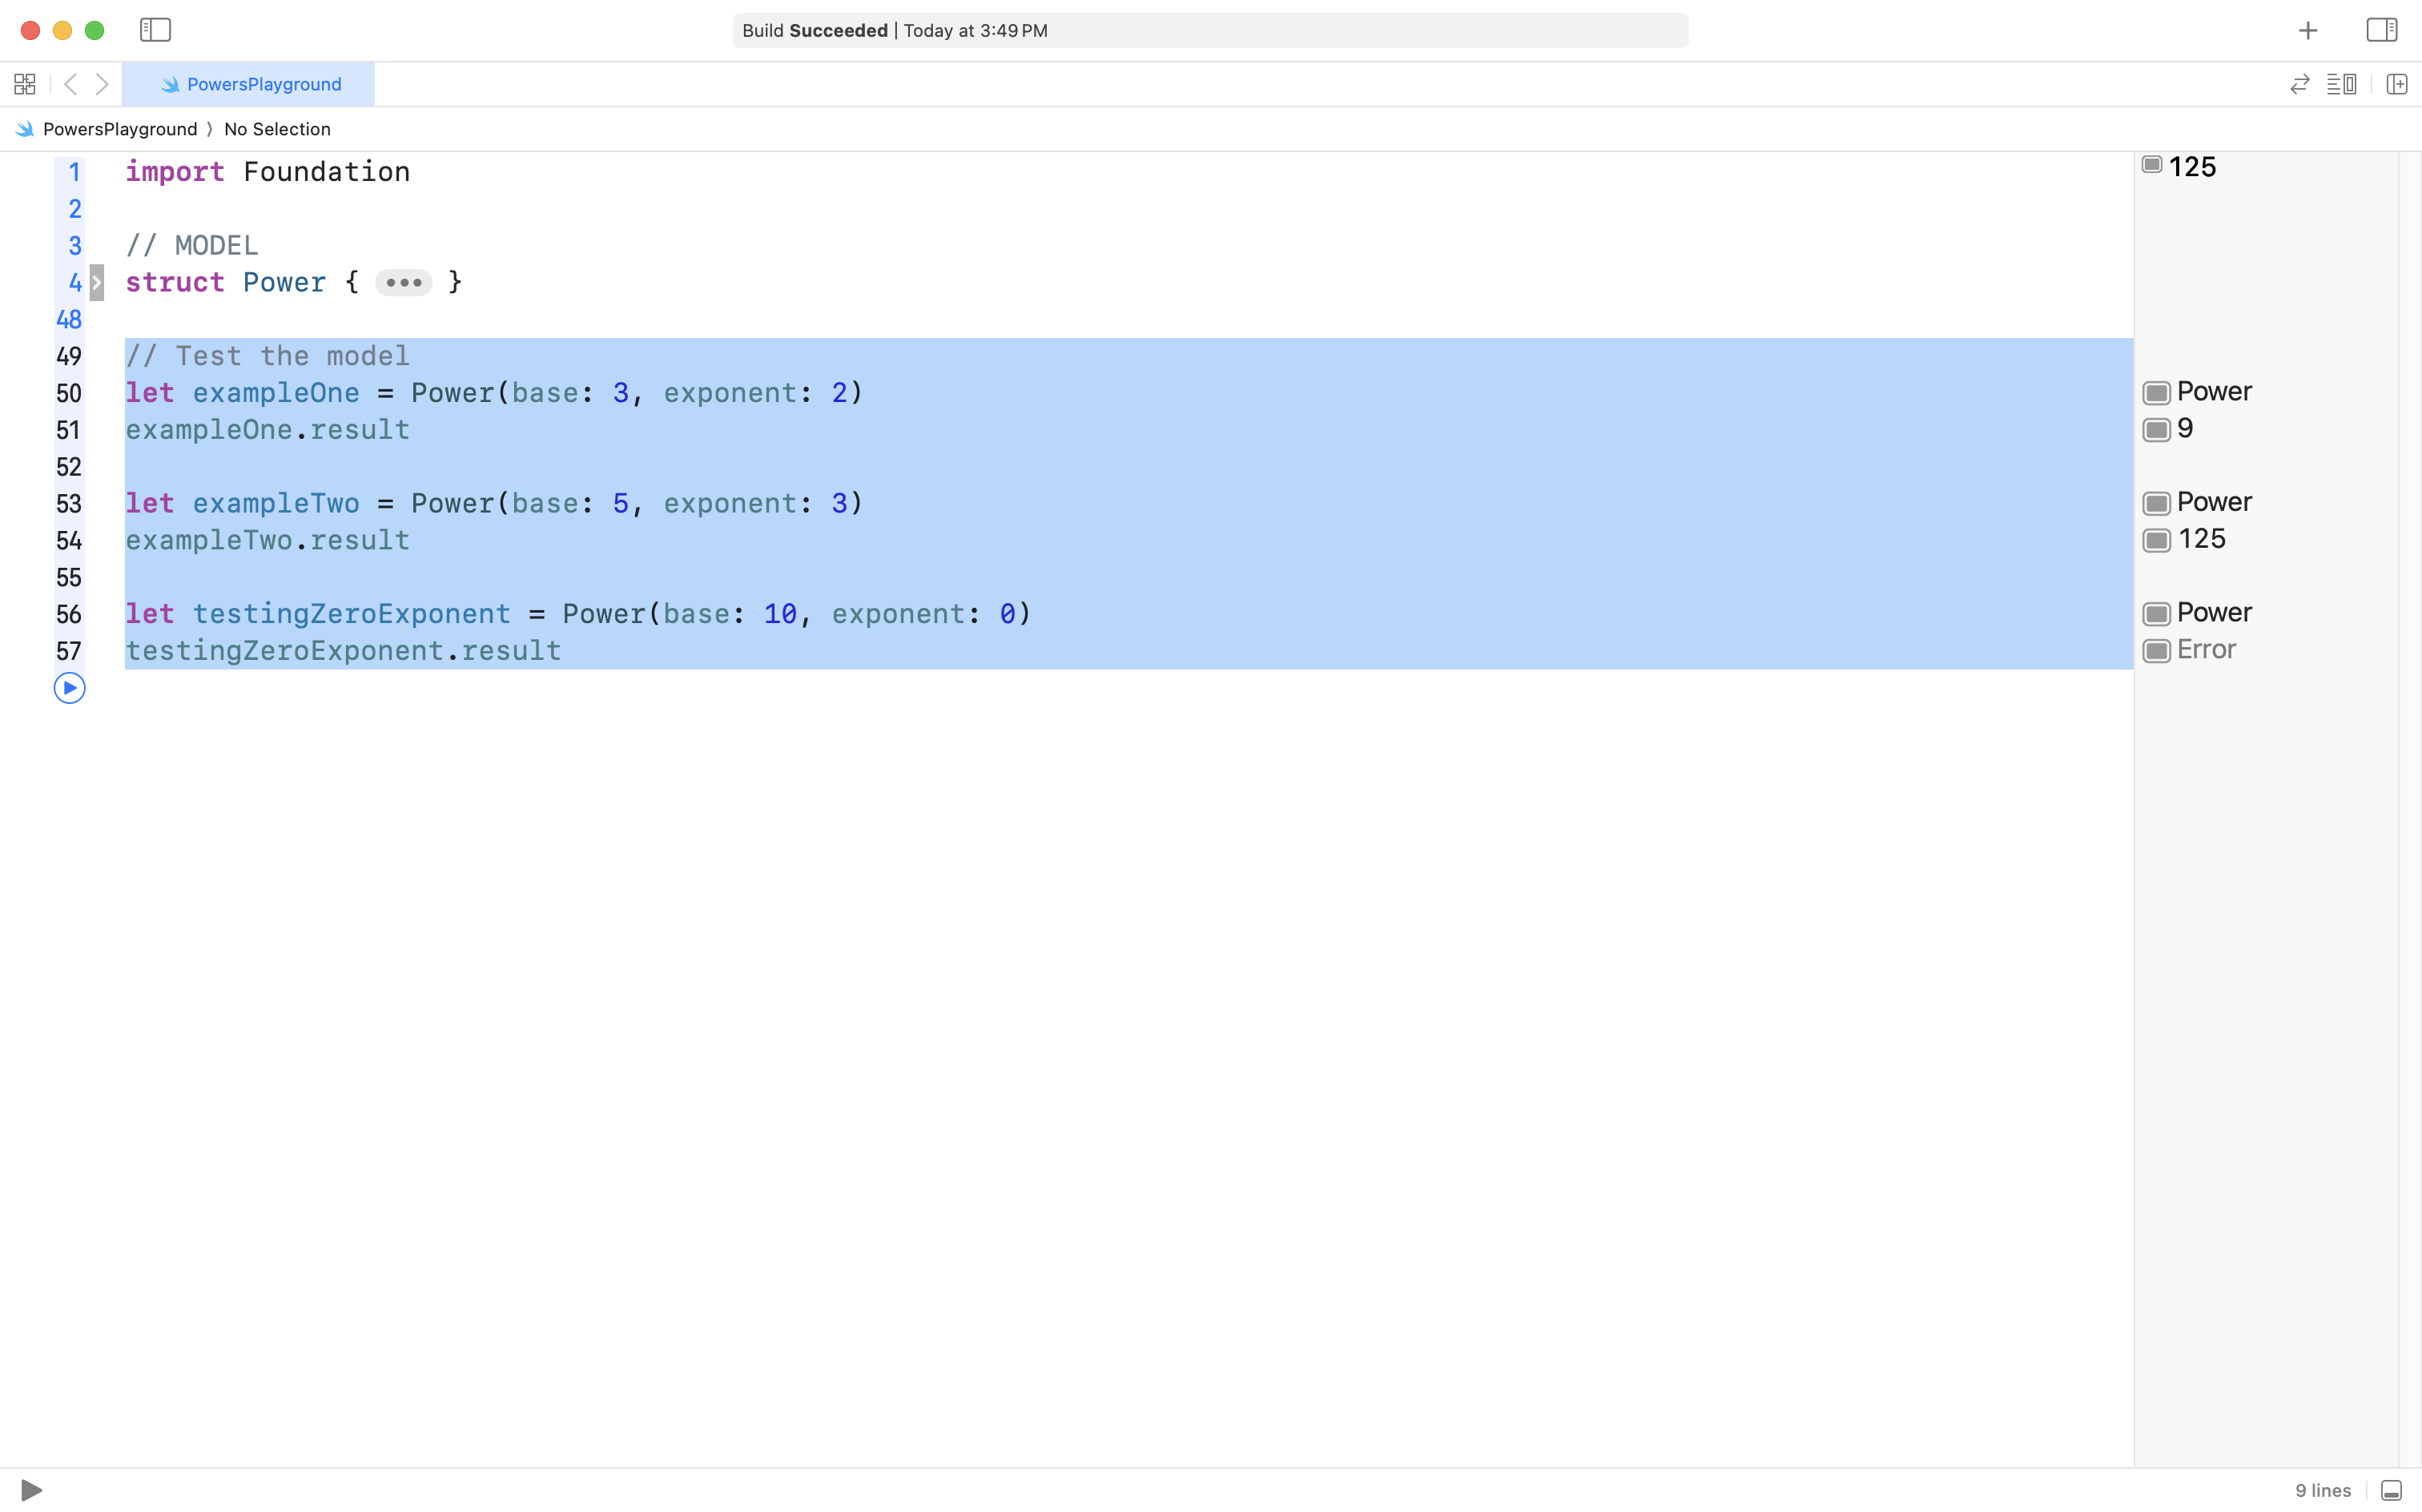
Test the model
We have authored a model layer by creating the Power structure.
We can test this code by creating a few instances of the Power structure and verifying that the results are what we expect to see:
To better understand how the computed property calculates the result of the power, you may wish to review this video where Mr. Gordon steps through the code using the debugging interface in Xcode (more on how to use this interface yourself in a future class):
Notice how the result is calculated by repeatedly multiplying by the base:
solution *= base… and that this is exactly what we do when calculating a power on paper:
Now, try using the Power model to calculate a power with an exponent of zero, or a negative exponent:
As you can see, there are some flaws in our Power model – but correcting these will be an exercise for you a bit later on.
Nonetheless, we have a model layer that works in some cases to calculate powers – so long as the exponent is positive.
Create the view model
Next, within our playground, we will create a structure to serve as the view model layer later on in our app.
Our view model needs to accept information from our view (information that will be provided by the user as they interact with the app).
TIP
For now, we will simulate user input within our playground.
Very soon, we will collect user input “for real” by adding the view layer within a real Xcode project.
The view model needs to validate the information it receives, returning an appropriate error message if the data is not in the expected format. Otherwise, the view model should use the model layer to calculate and return the result of the power, so this result can be displayed to the user through the view.
Let’s get started on writing the view model.
In your playground, highlight any code that you had written to test your model:
… and delete it:
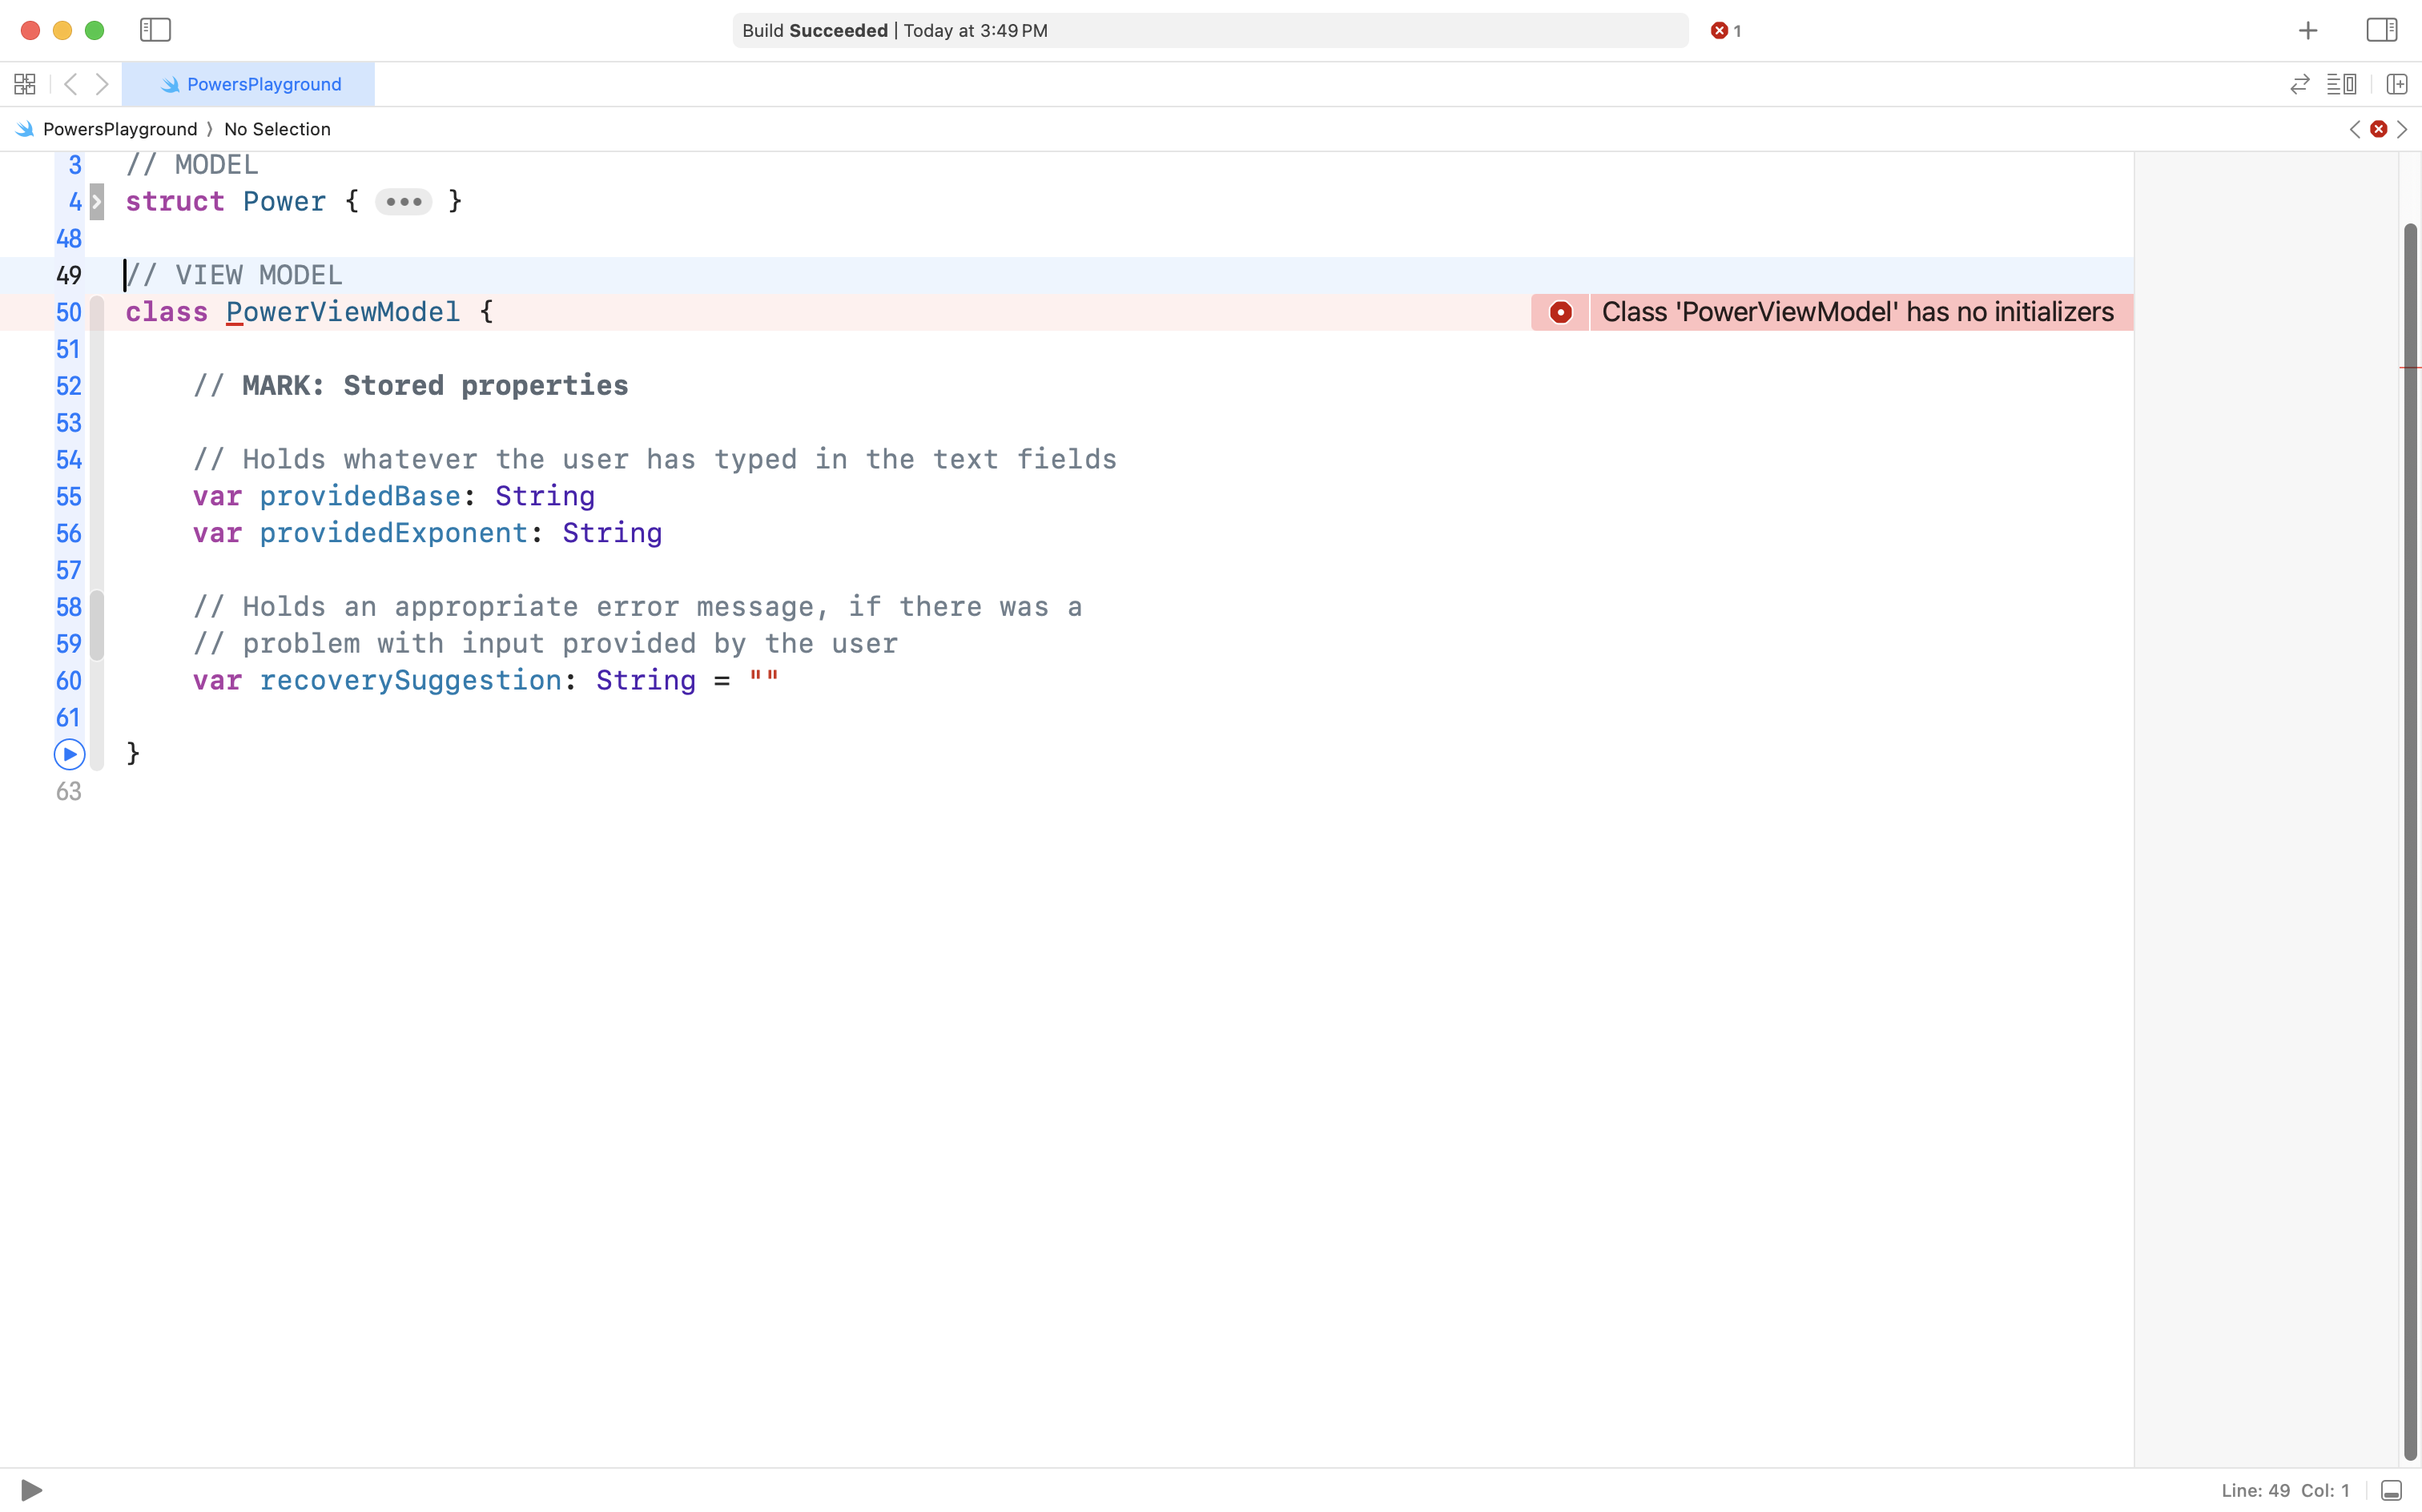
Then copy this code into your clipboard:
// VIEW MODEL
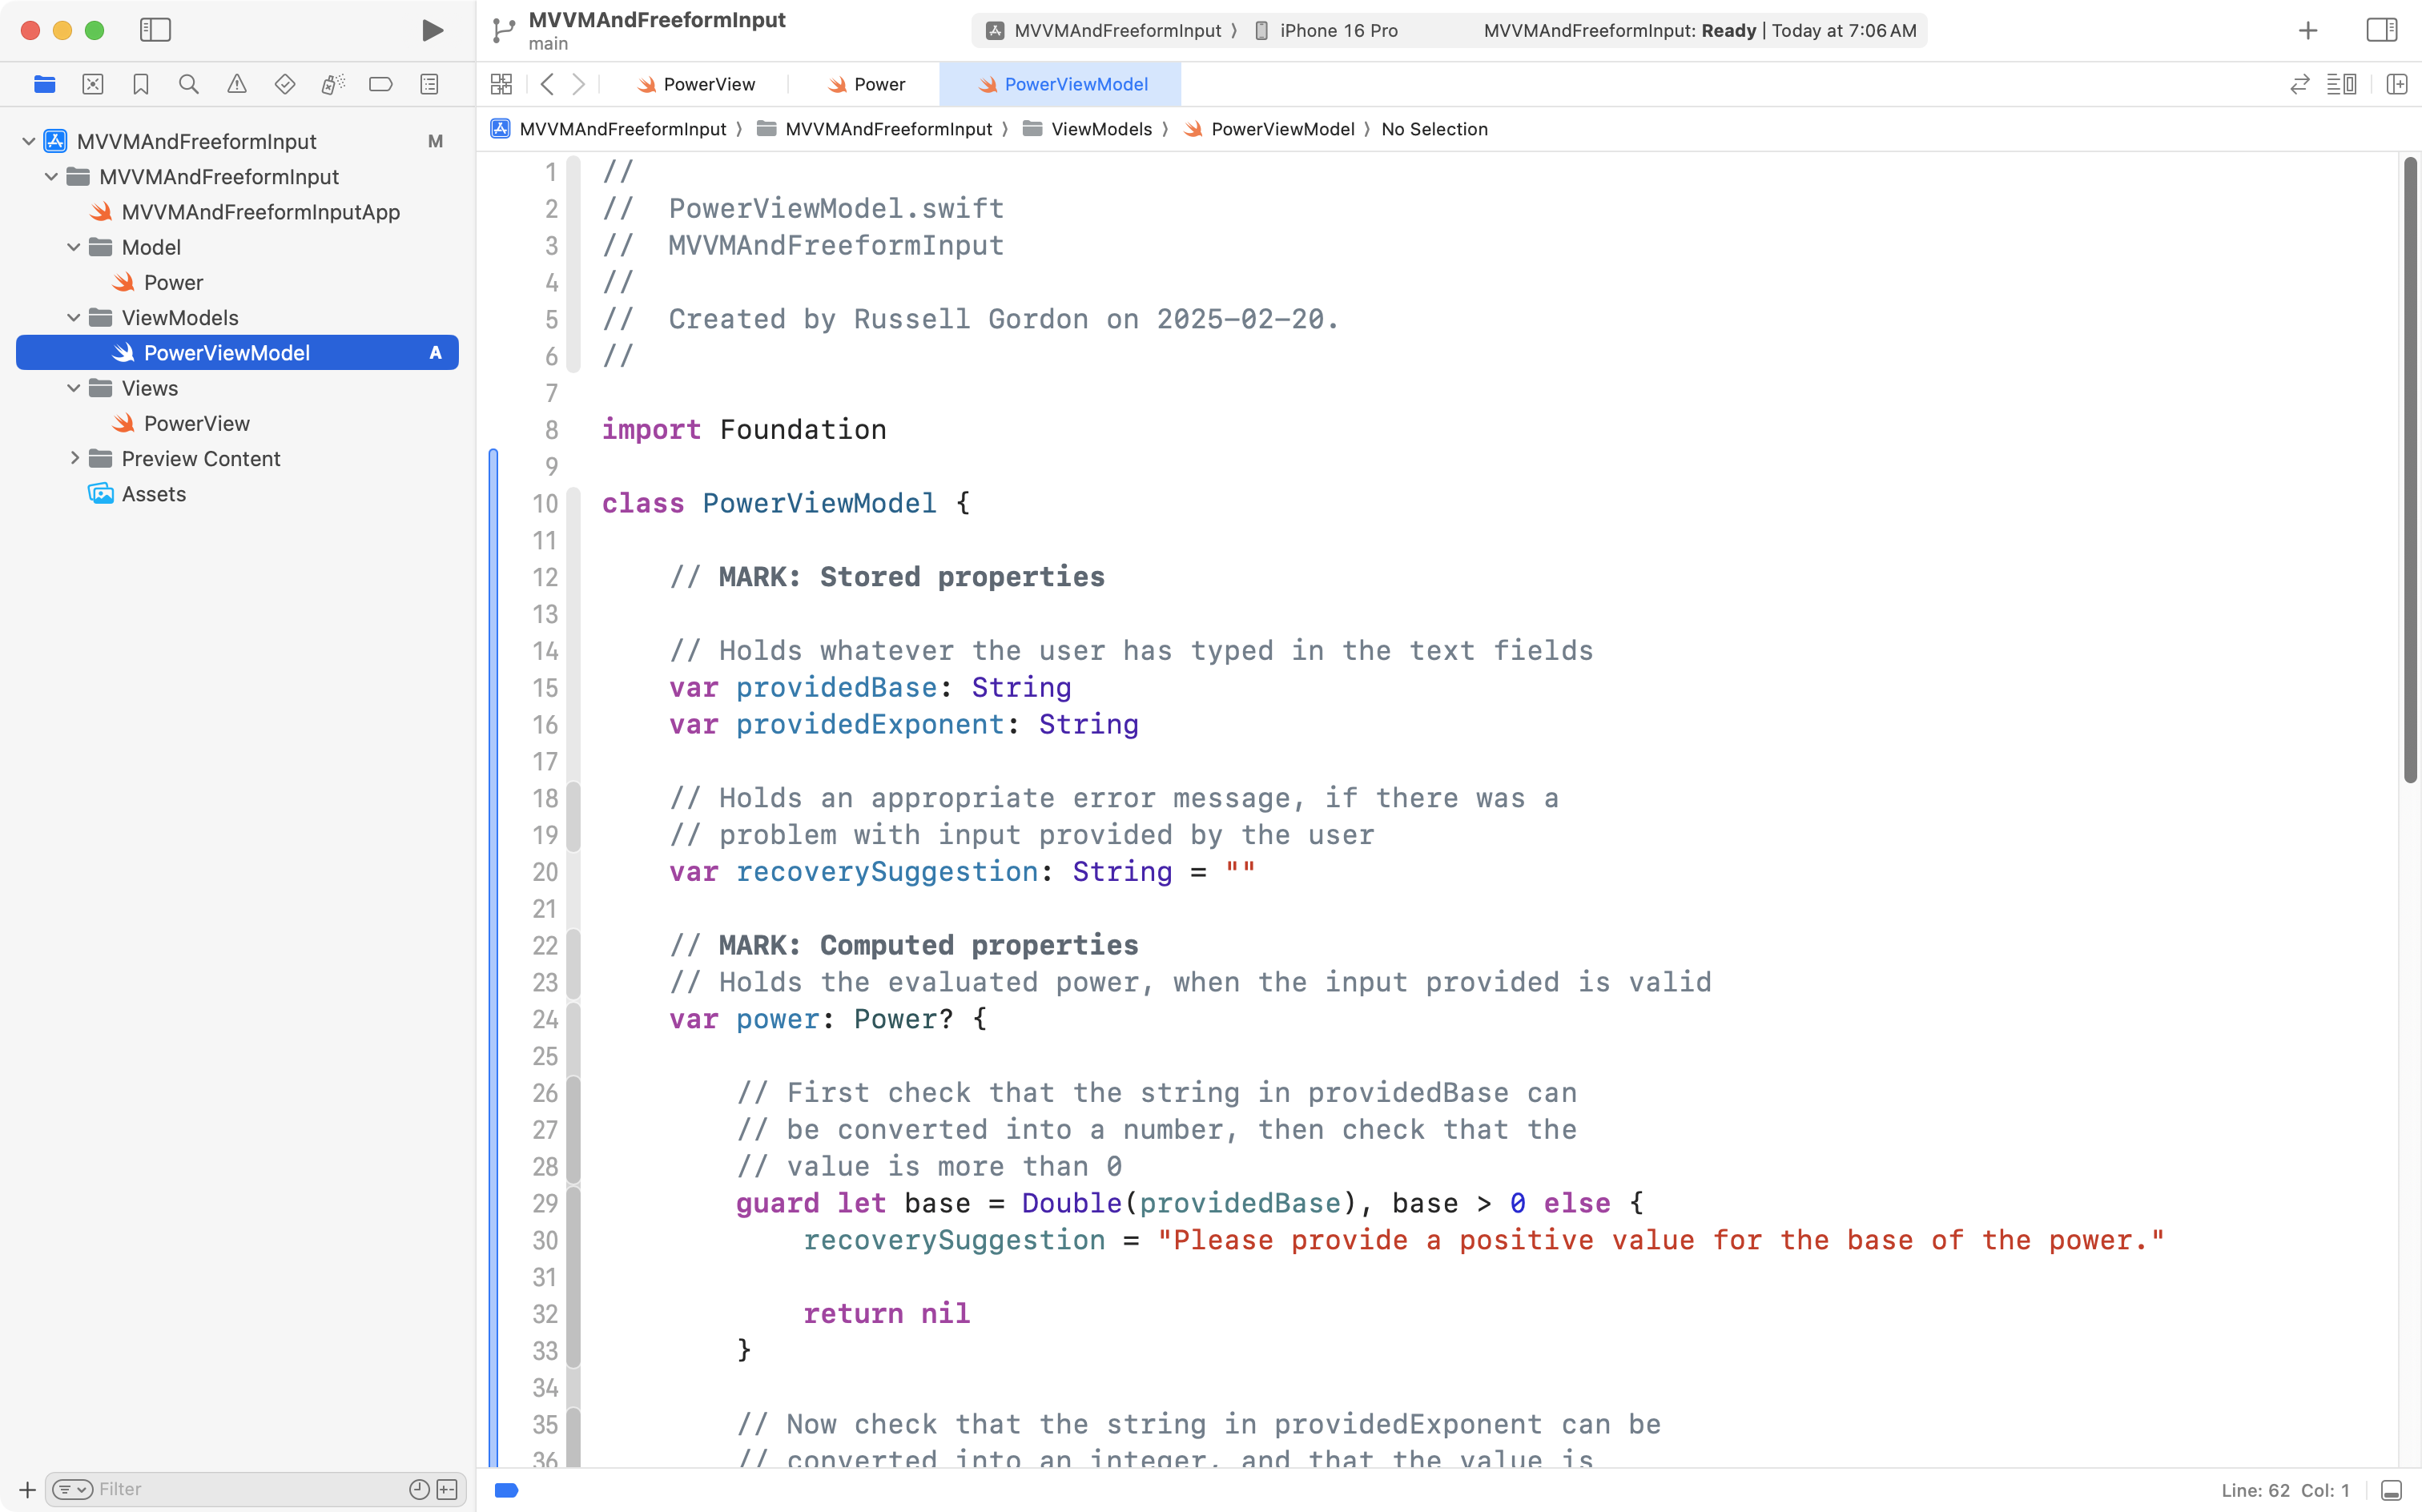
class PowerViewModel {
// MARK: Stored properties
// Holds whatever the user has typed in the text fields
var providedBase: String
var providedExponent: String
// Holds an appropriate error message, if there was a
// problem with input provided by the user
var recoverySuggestion: String = ""
}… then add it to your playground, like this:
NOTE
A view model will always be defined as a class, because the information it keeps may eventually be accessed from multiple views within our app. A view model is always implemented using a reference type. Recall the concepts we explored in the Structures vs. Classes exercise.
You will notice that the Swift compiler immediately complains, because a class requires an initializer, and we have not provided one yet.
Please watch this video – the easiest way to add an initializer to a class is to use the autocomplete feature:
Take note of how:
- starting to type
init, then pressing Return, is all we need to do to get a basic initializer - creating an instance of the
PowerViewModelclass with the default initializer code means we must supply arguments for each parameter (which in turn populate the stored properties) - when we instead provide default values of an empty string literal –
""– for each parameter to the initializer – we then have far more flexibility when creating an instance of thePowerViewModelclass- specifically, we can provide arguments for all parameters, just some, or none of the parameters
- for any parameters we do not manually provide a value for, an empty string will be assigned instead
Typically, all of the stored properties in a view model that are strings are at first initialized with an empty string literal – that is, two quotes, like this: "". This is equivalent to text fields in the user interface of an app being empty at first.
Right now, our view model has stored properties to hold whatever information the user types in to the view model, and one stored property to return an appropriate error message, when needed.
Now, we will add a computed property that will return the evaluated power – this computed property will use our model.
Copy this code into your clipboard:
// MARK: Computed properties
// Holds the evaluated power, when the input provided is valid
var power: Power? {

	// First check that the string in providedBase can
	// be converted into a number, then check that the
	// value is more than 0
	guard let base = Double(providedBase), base > 0 else {
		recoverySuggestion = "Please provide a positive value for the base of the power."

		return nil
	}

	// Now check that the string in providedExponent can be
	// converted into an integer, and that the value is
	// more than or equal to 1
	guard let exponent = Int(providedExponent), exponent >= 1 else {
		recoverySuggestion = "Please provide an integer value of 1 or greater for the exponent."

		return nil
	}

	// Now that we know the base and exponent have valid values, return the evaluated power
	recoverySuggestion = "" // No error message
	return Power(base: base, exponent: exponent)

}
… and paste it below the stored properties of the view model, but above the initializer:
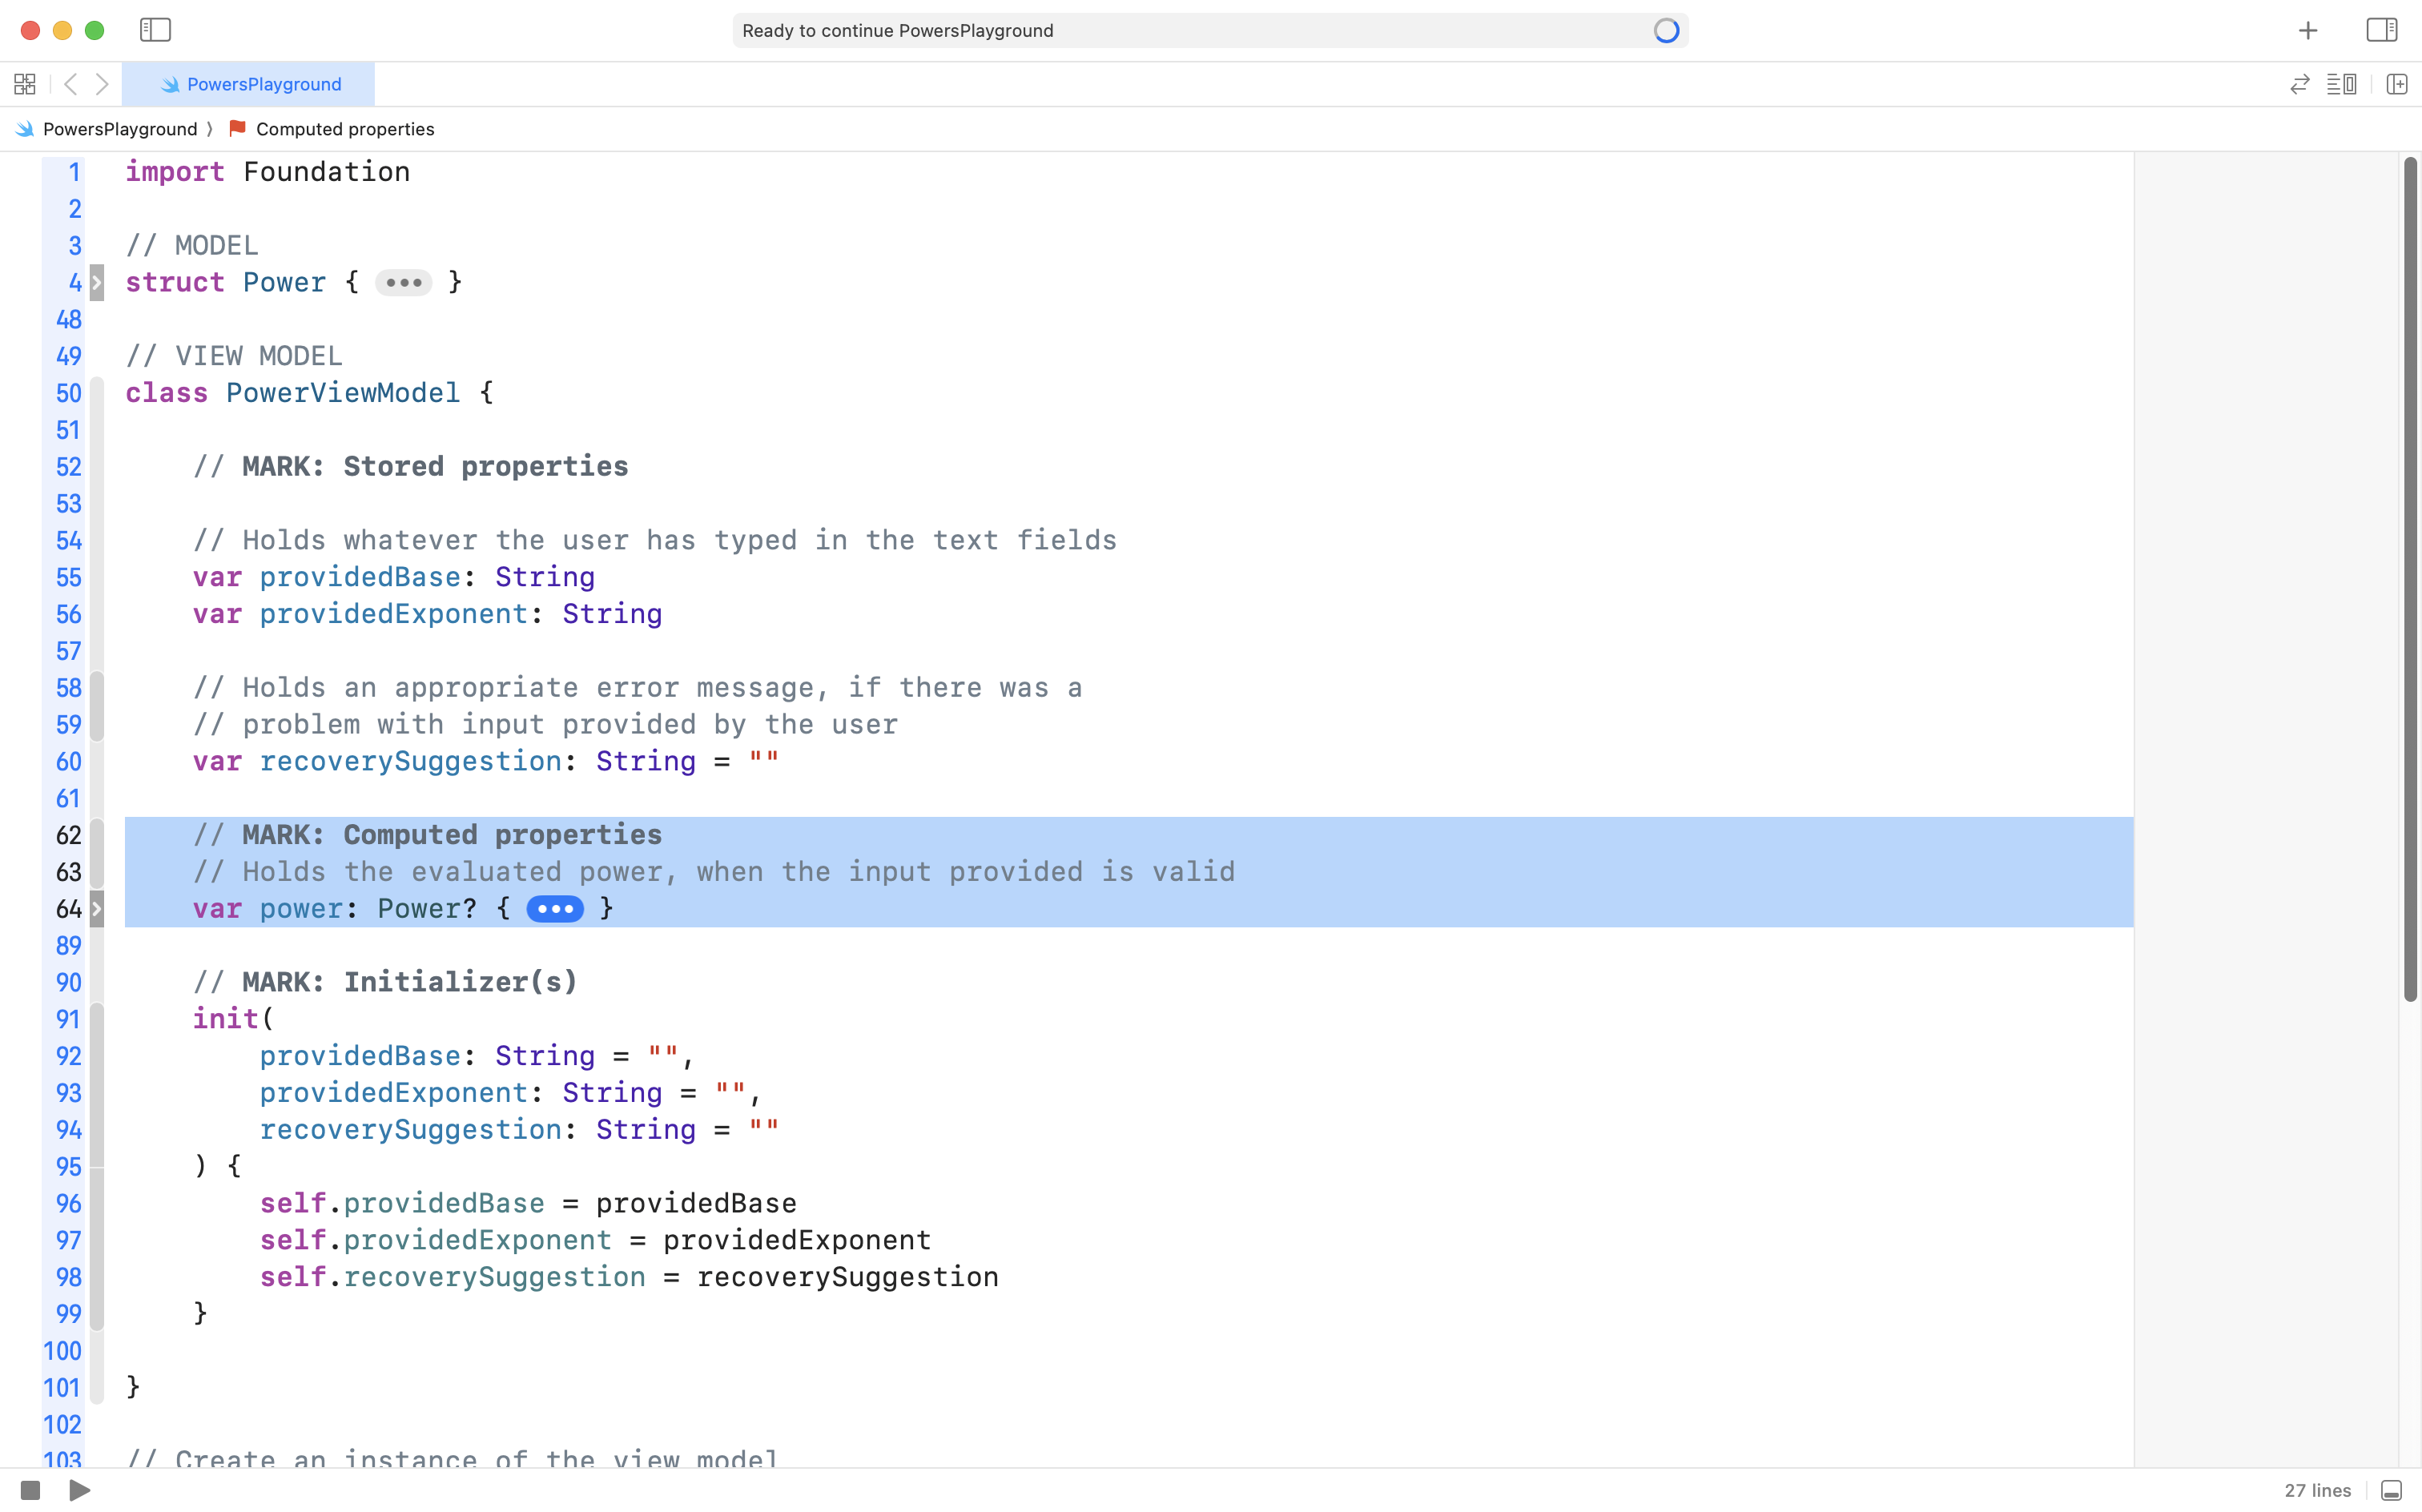
NOTE
Mr. Gordon folded up the new computed property so that he could show the stored properties above it, and the initializer below it.
Test the view model
To understand how this view model code works, let’s first experiment with simulating user input.
Please watch this video where Mr. Gordon tests the new view model, simulating valid user input to our app. Then, try doing something along these lines yourself, in your own playground:
Now watch as Mr. Gordon simulates invalid input – try this yourself, too, including trying other ways of providing invalid input:
Reflect on view model logic
At this point in time, after watching the video above and trying out the view model in your own playground, please pause and review the code in the view model – particularly the logic in the computed property named power:
class PowerViewModel {

    // MARK: Stored properties

    // Holds whatever the user has typed in the text fields
    var providedBase: String
    var providedExponent: String

    // Holds an appropriate error message, if there was a
    // problem with input provided by the user
    var recoverySuggestion: String = ""

    // MARK: Computed properties
    // Holds the evaluated power, when the input provided is valid
    var power: Power? {

        // First check that the string in providedBase can
        // be converted into a number, then check that the
        // value is more than 0
        guard let base = Double(providedBase), base > 0 else {
            recoverySuggestion = "Please provide a positive value for the base of the power."

            return nil
        }

        // Now check that the string in providedExponent can be
        // converted into an integer, and that the value is
        // more than or equal to 1
        guard let exponent = Int(providedExponent), exponent >= 1 else {
            recoverySuggestion = "Please provide an integer value of 1 or greater for the exponent."

            return nil
        }

        // Now that we know the base and exponent have valid values, return the evaluated power
        recoverySuggestion = "" // No error message
        return Power(base: base, exponent: exponent)

    }

    // MARK: Initializer(s)
    init(
        providedBase: String = "",
        providedExponent: String = "",
        recoverySuggestion: String = ""
    ) {
        self.providedBase = providedBase
        self.providedExponent = providedExponent
        self.recoverySuggestion = recoverySuggestion
    }

}
… then try answering these questions in a portfolio post on Notion:
- What is the purpose of the
recoverySuggestionproperty? - Why is the view model unable to calculate the result of the power when Mr. Gordon provided a base value of
five? - Why is the view model unable to calculate the result of the power when Mr. Gordon provided a negative base value, such as
-2? Do you think this restriction is necessary? - What happens if you provide an exponent of
2.5? Why does the view model behave the way that it does? - What do you think the purpose of a
guardstatement is? - Why does the view model return a
nilvalue when invalid input is provided by the user?
TIP
Write out your ideas about these responses by chatting with your partner, a peer nearby in class, or Mr. Gordon.
Then, proceed with the rest of the lesson.
Now that you have built an initial understanding of two of the three layers of the MVVM design pattern:
| Completed? | Layer | Role |
|---|---|---|
| ✅ | Model | Hold the base and exponent in numeric form; provide the result of evaluating the power. |
| ✅ | View Model | Hold the text provided by the user for the base and exponent; provide an instance of the model – the power – where possible, otherwise, provide an appropriate error message. |
| View | Collect input from the user and display whatever output is provided by the view model. |
… it’s time to add the view layer, within a real project.
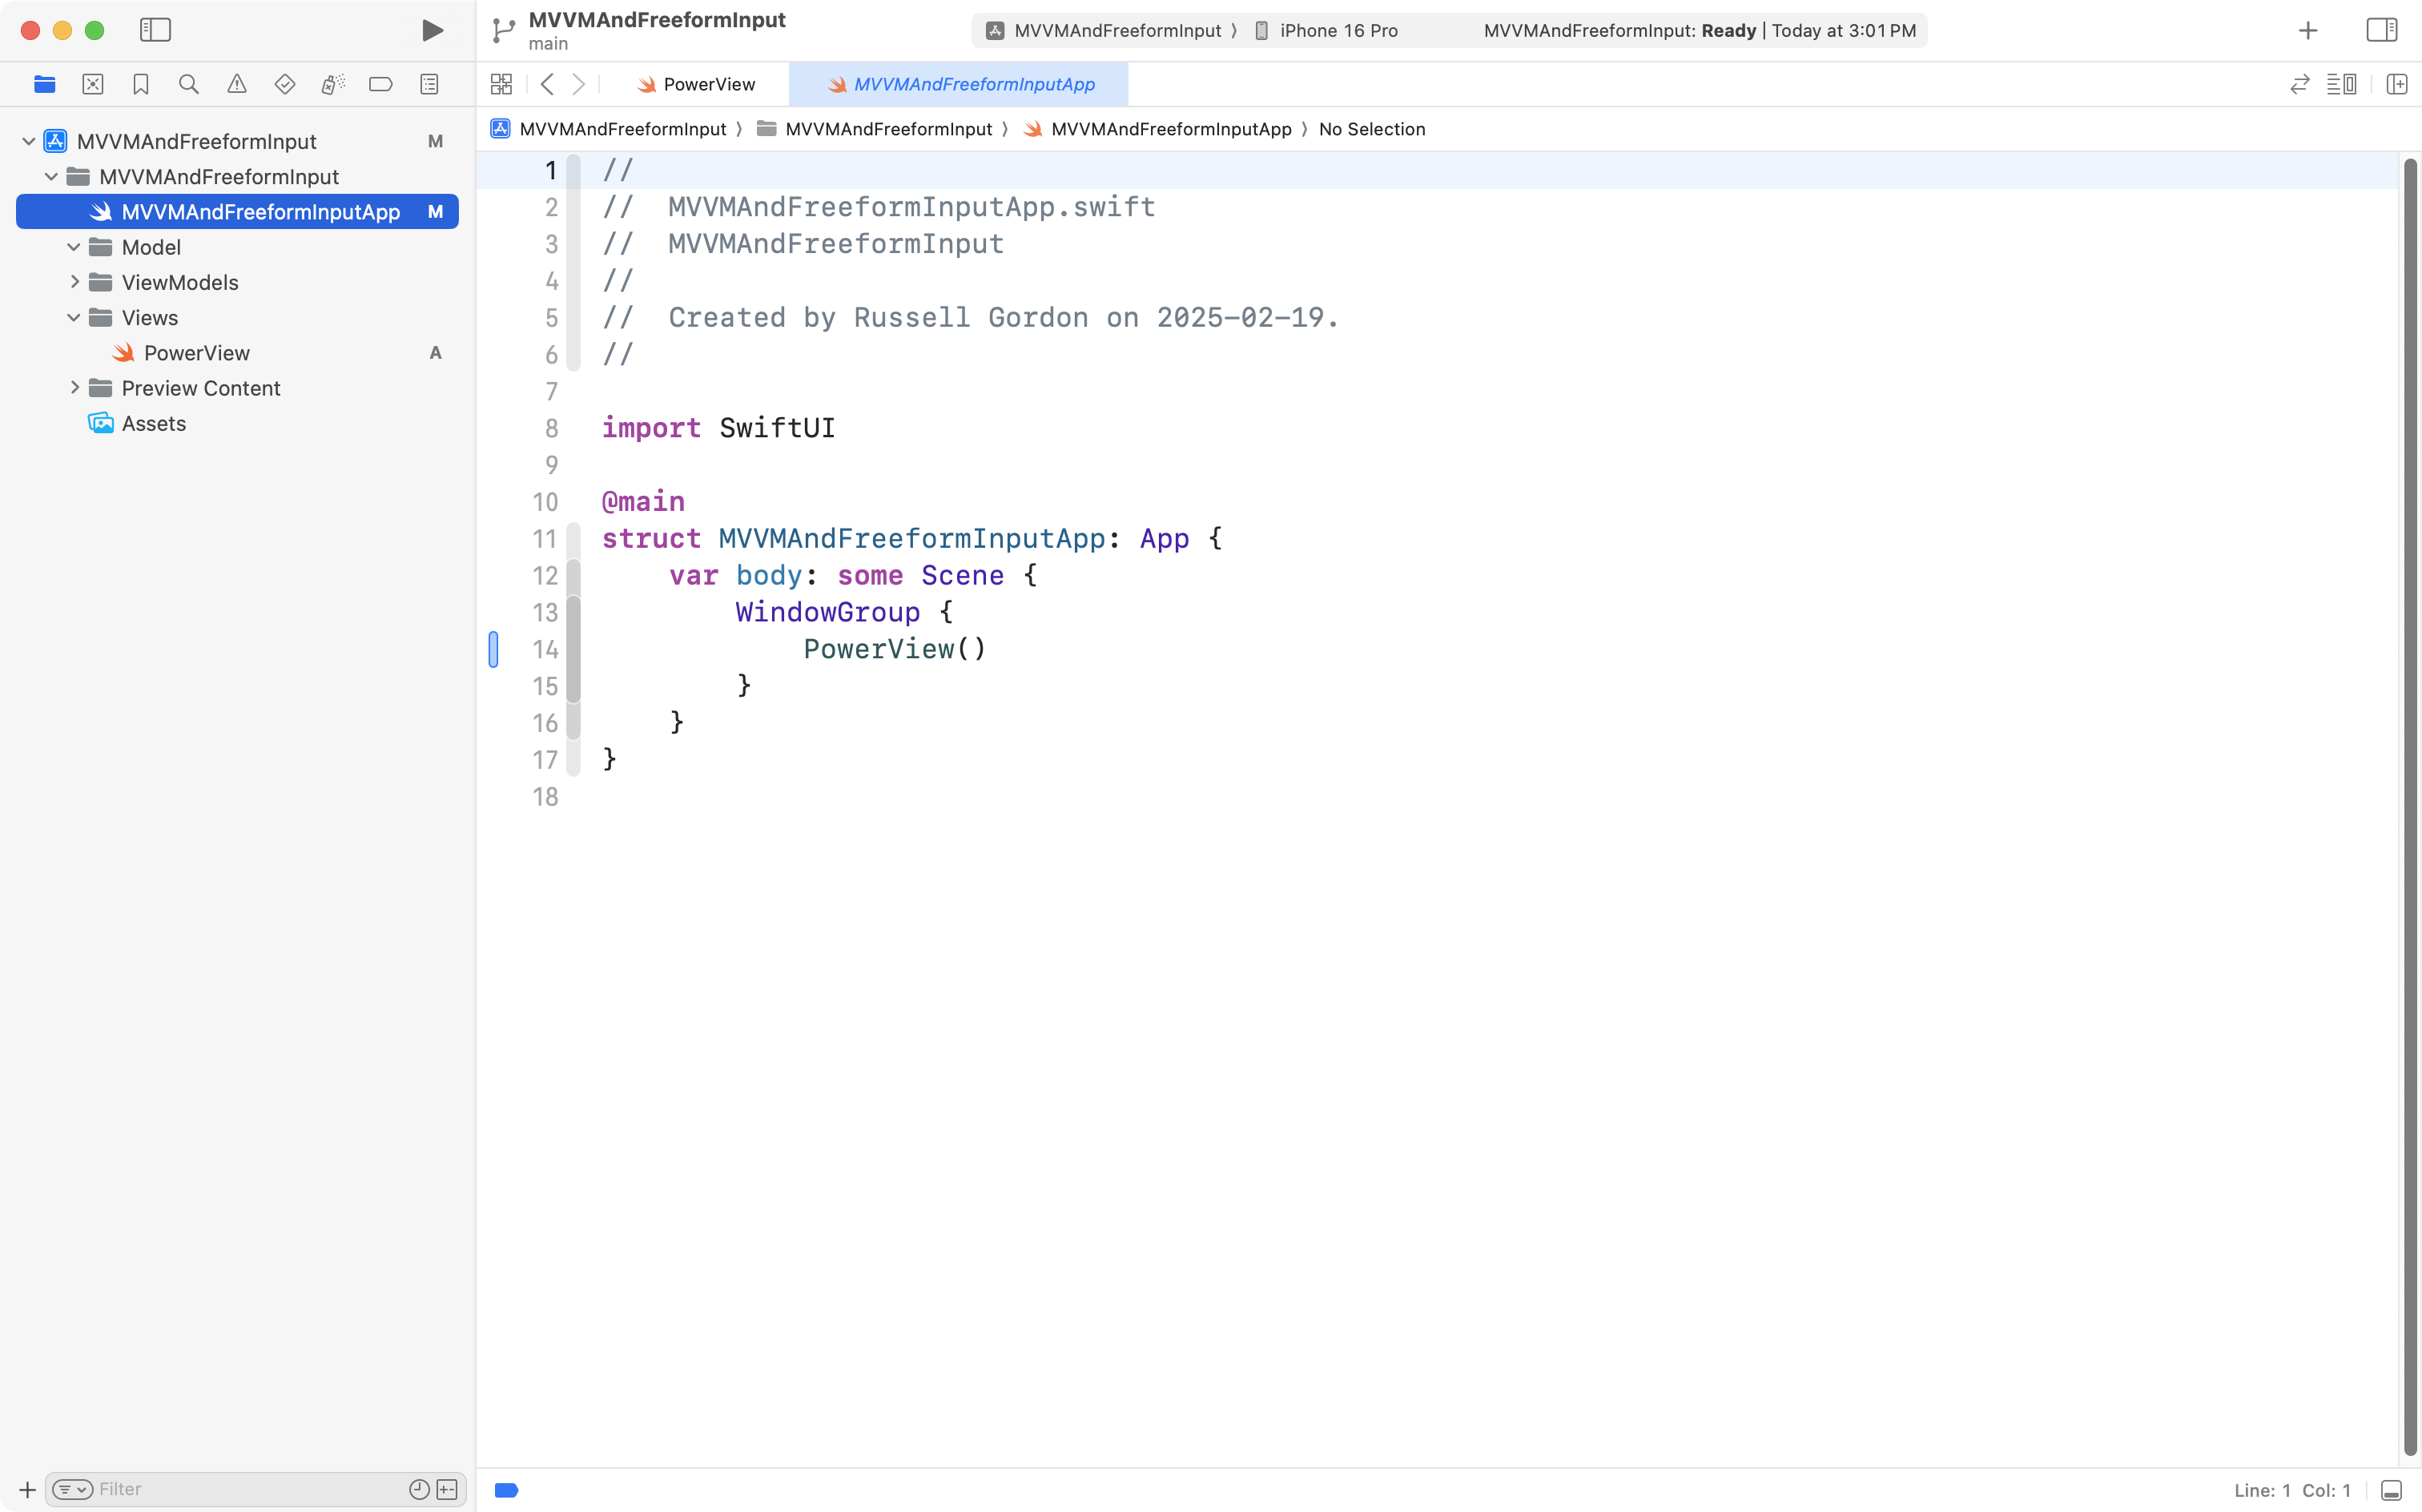
Create the project
Please now create a new iOS project named MVVMAndFreeformInput, remembering to also create a remote:
Organize the project
Then create folders like this:
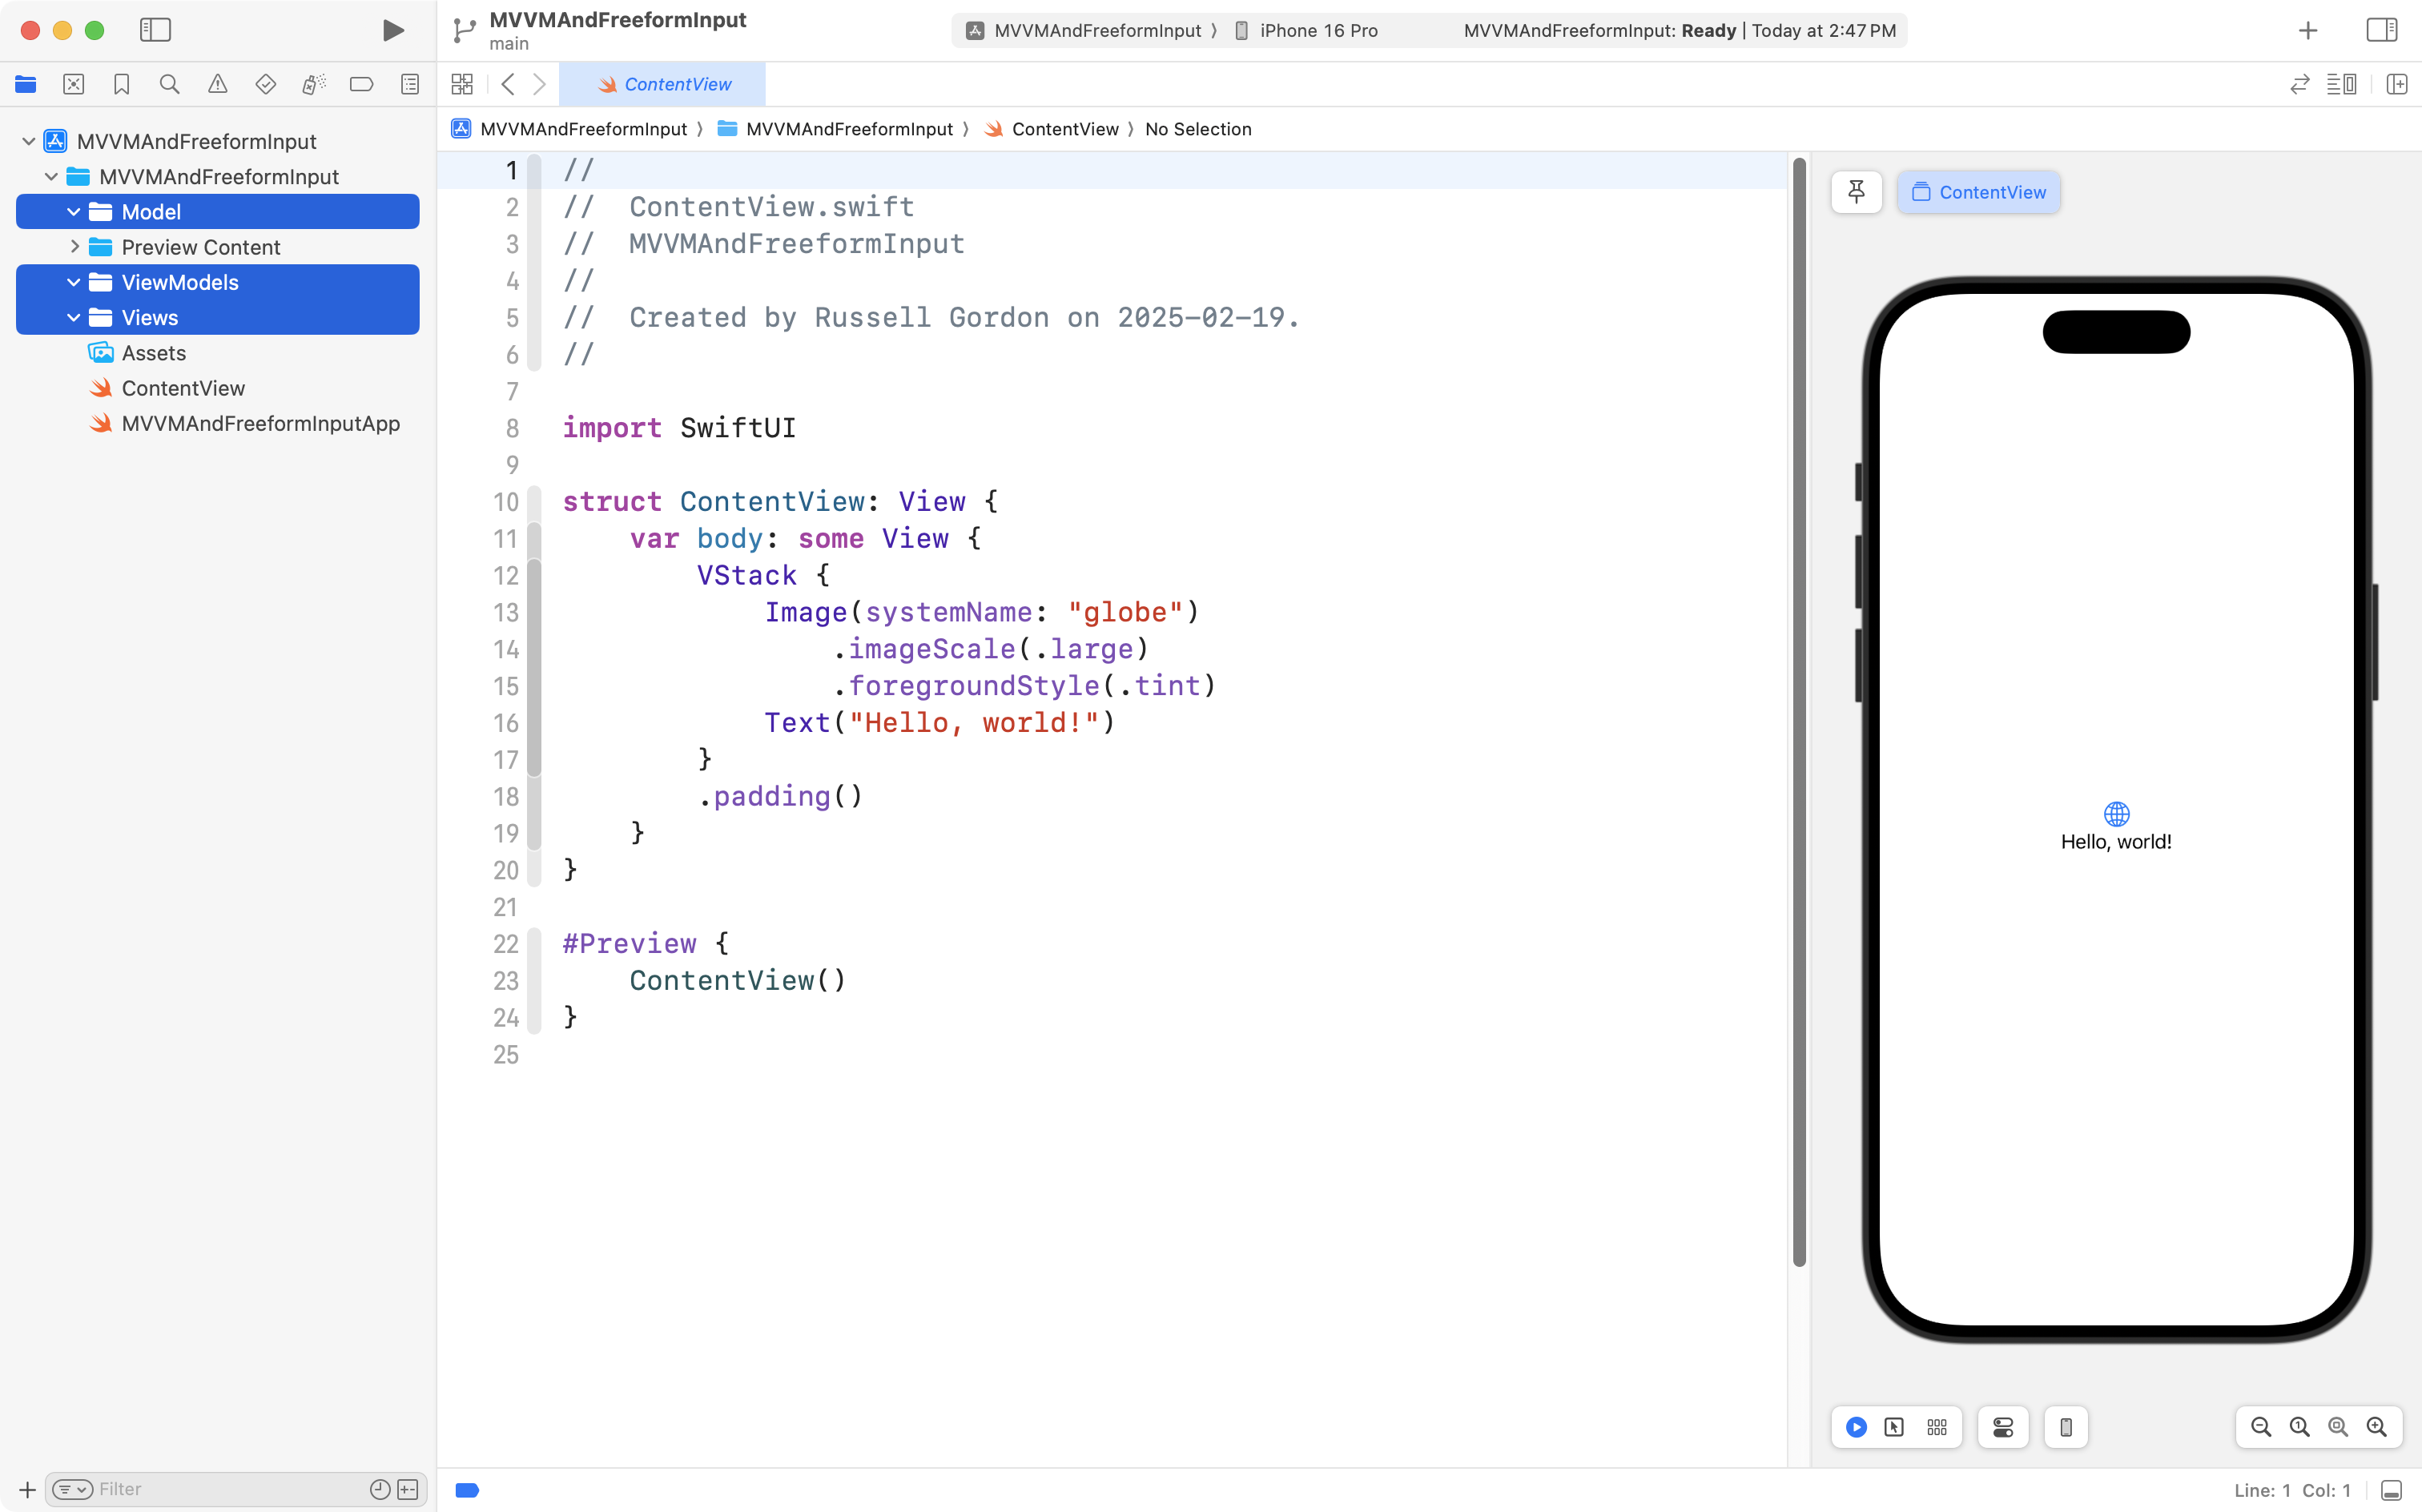
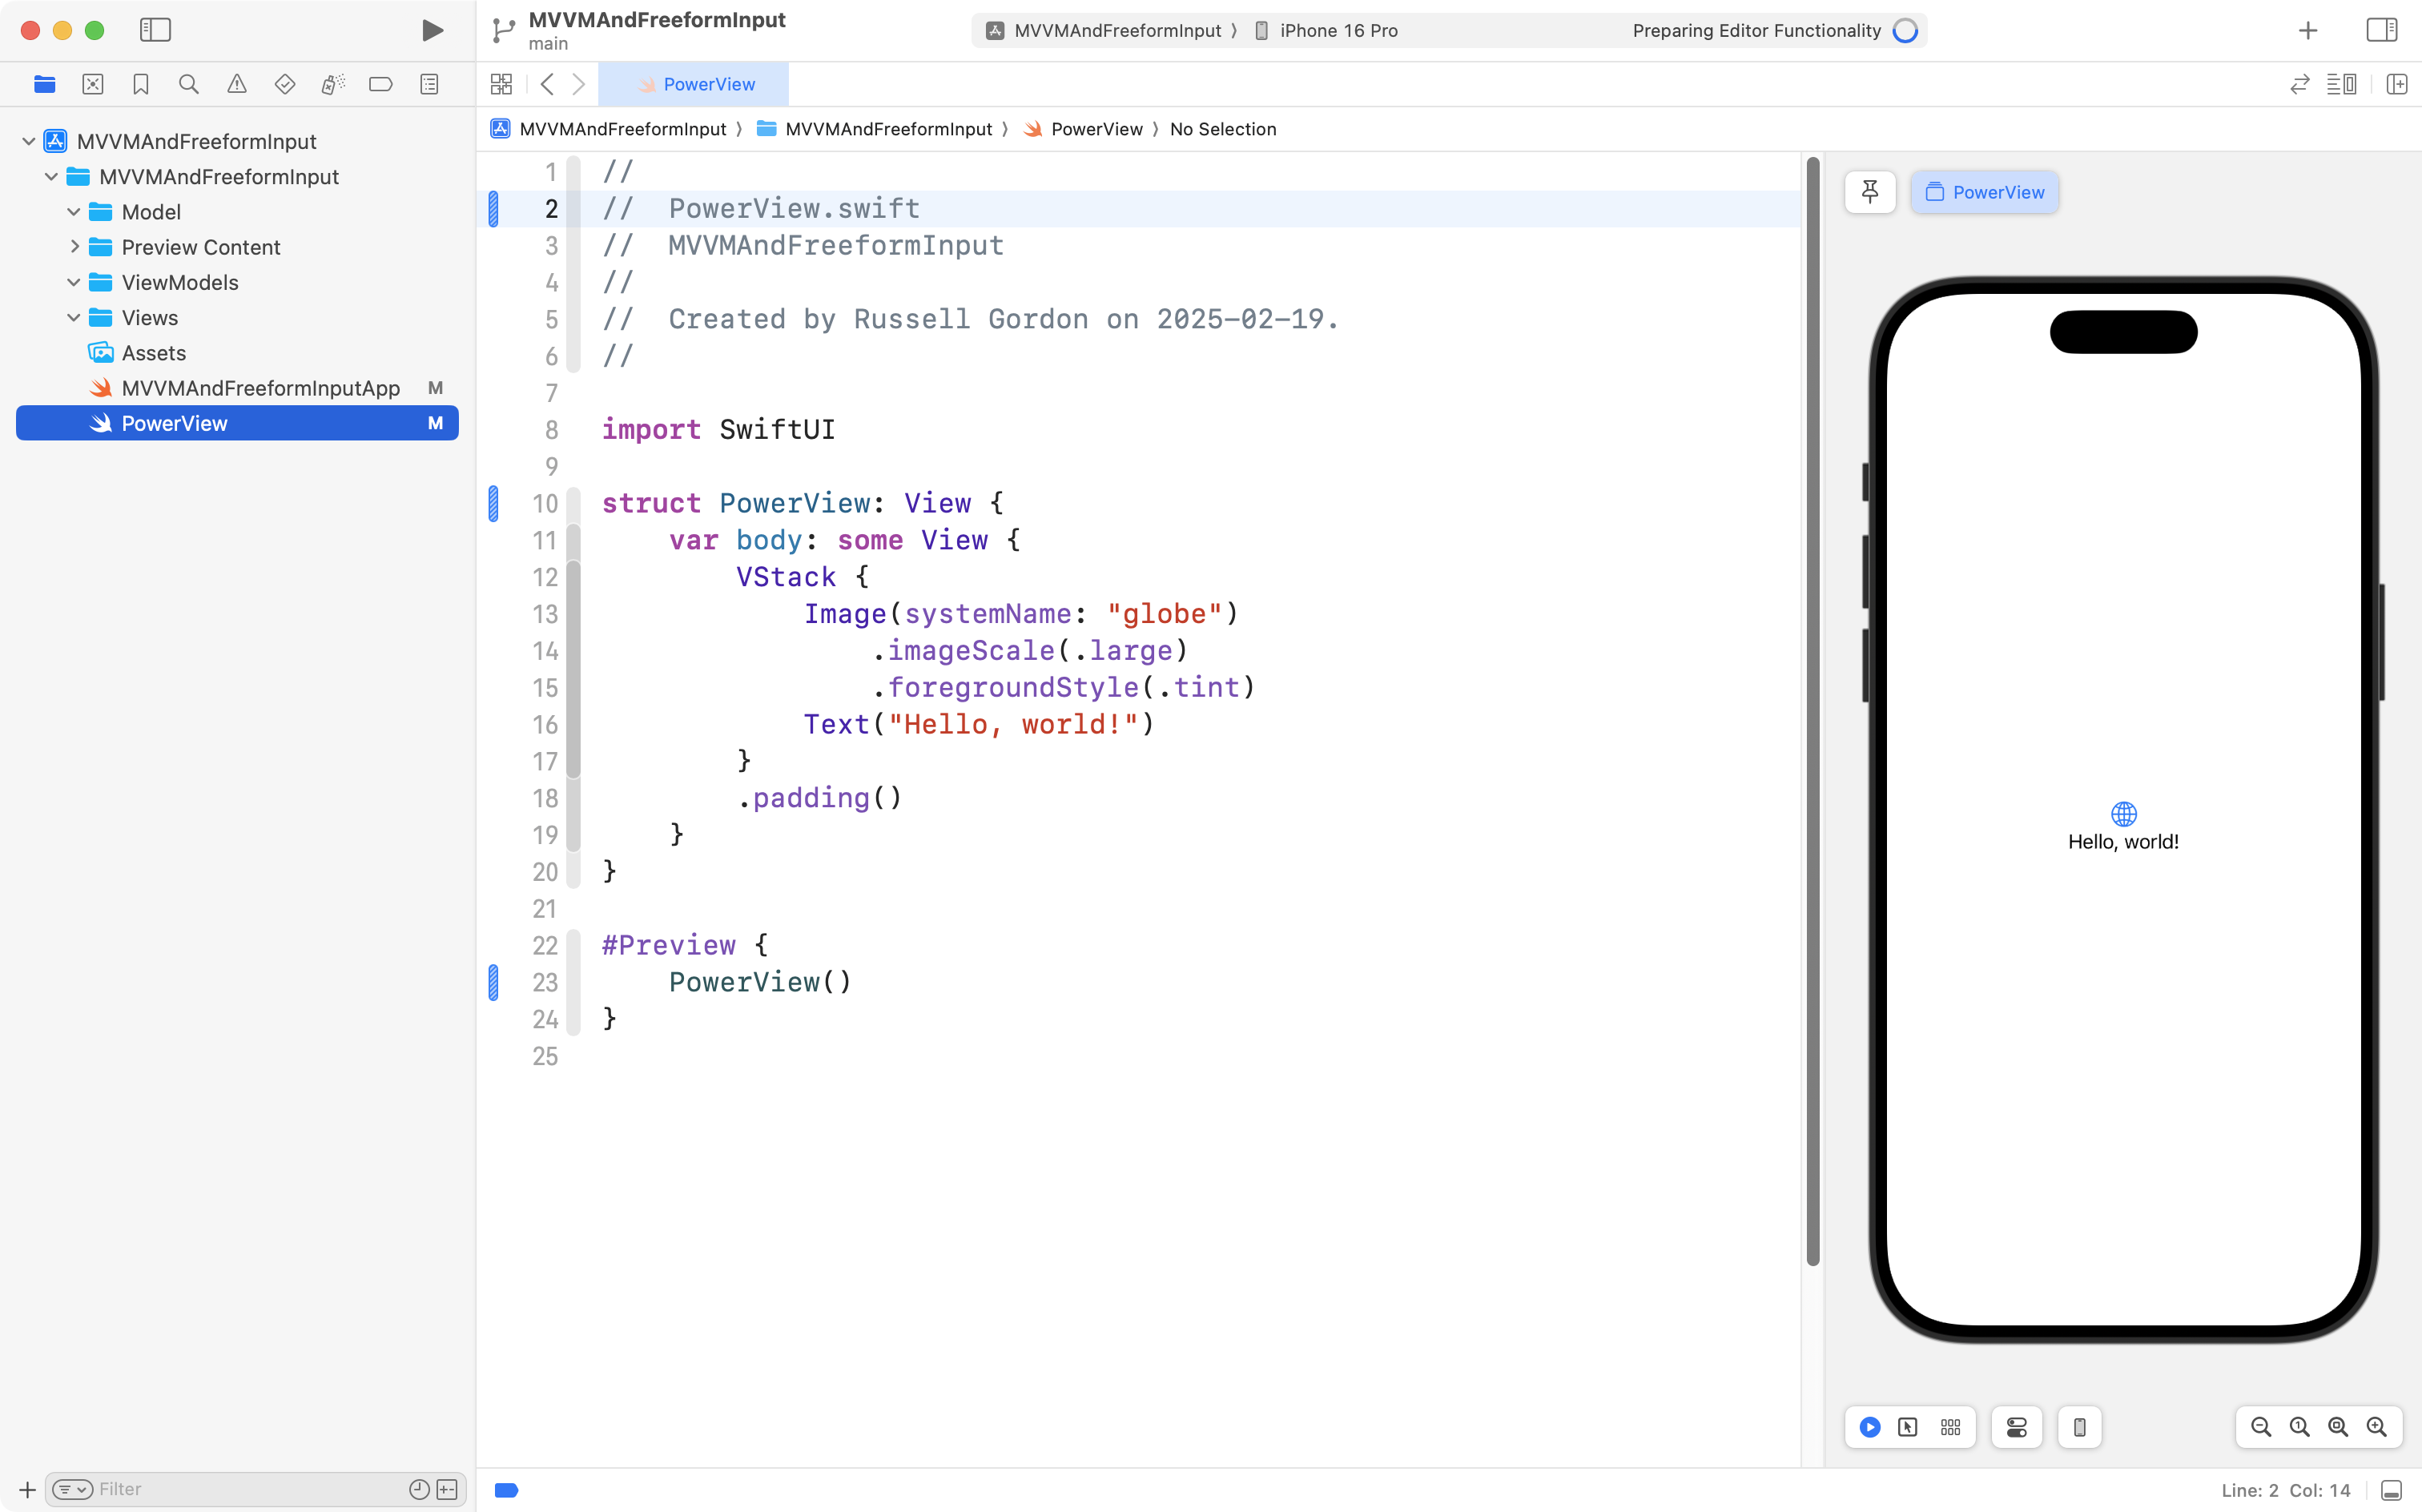
Next, refactor and rename ContentView so it is named PowerView instead:
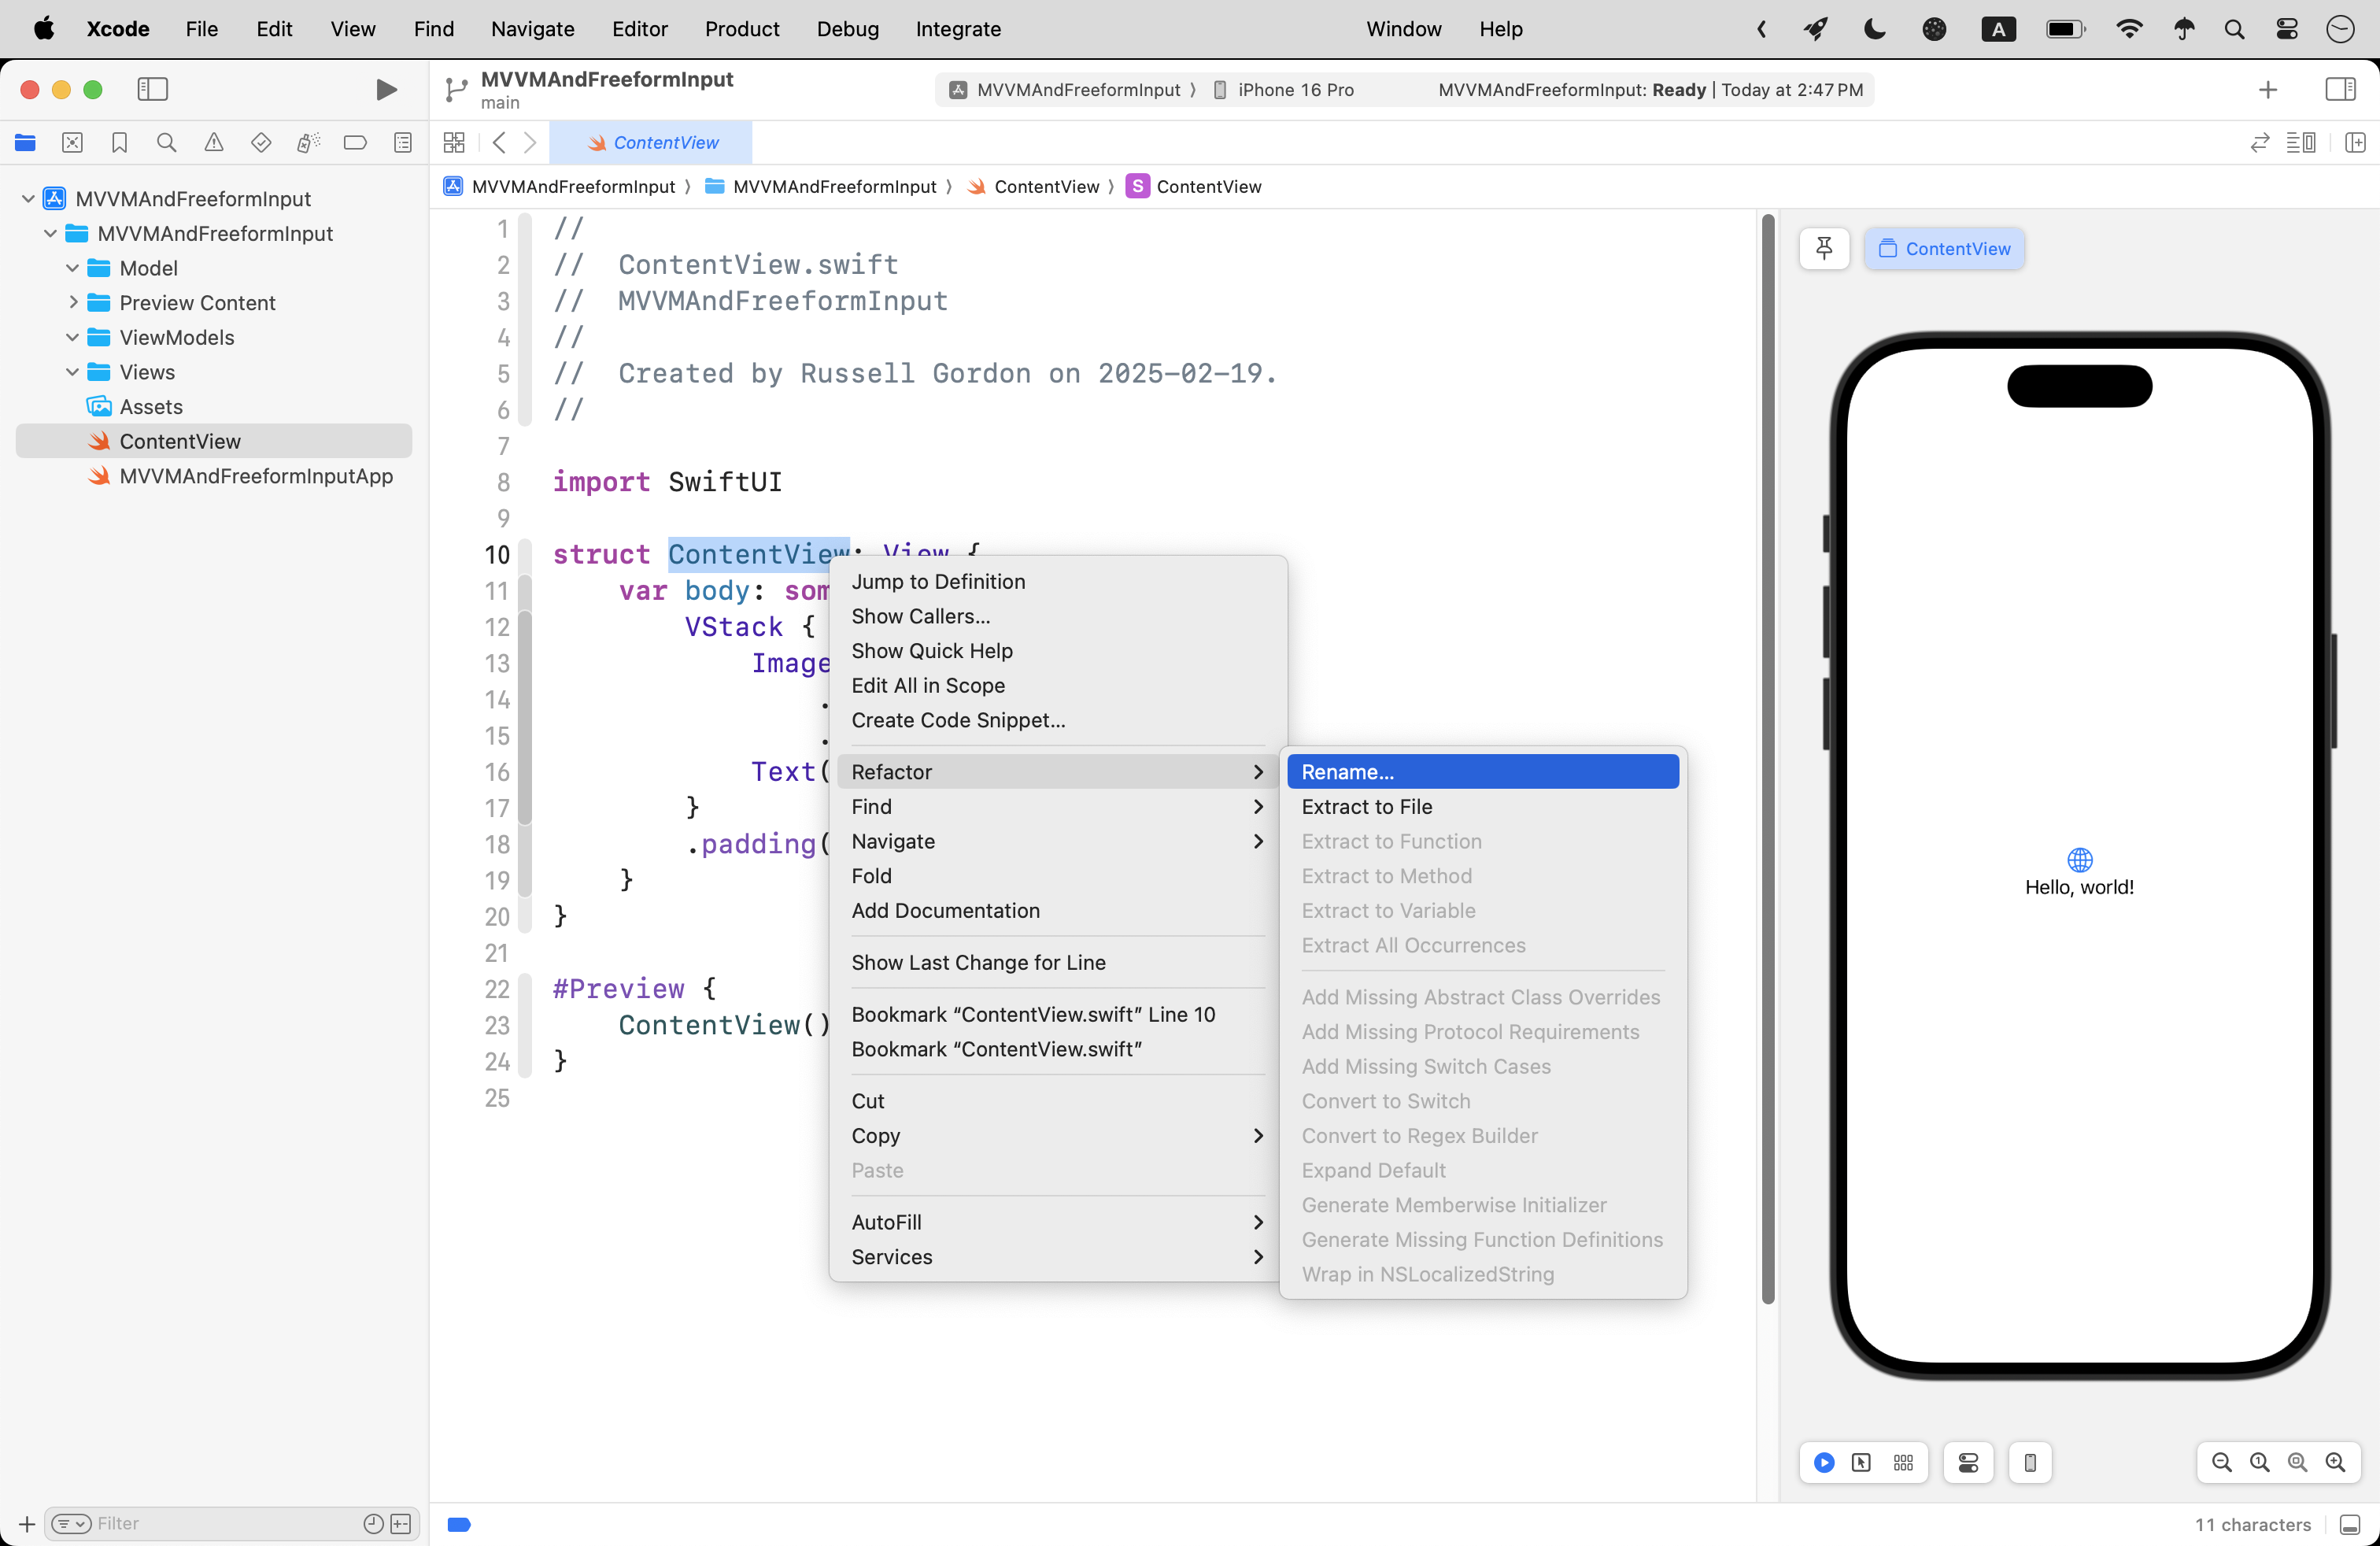
… like this:
Change the folders into groups:
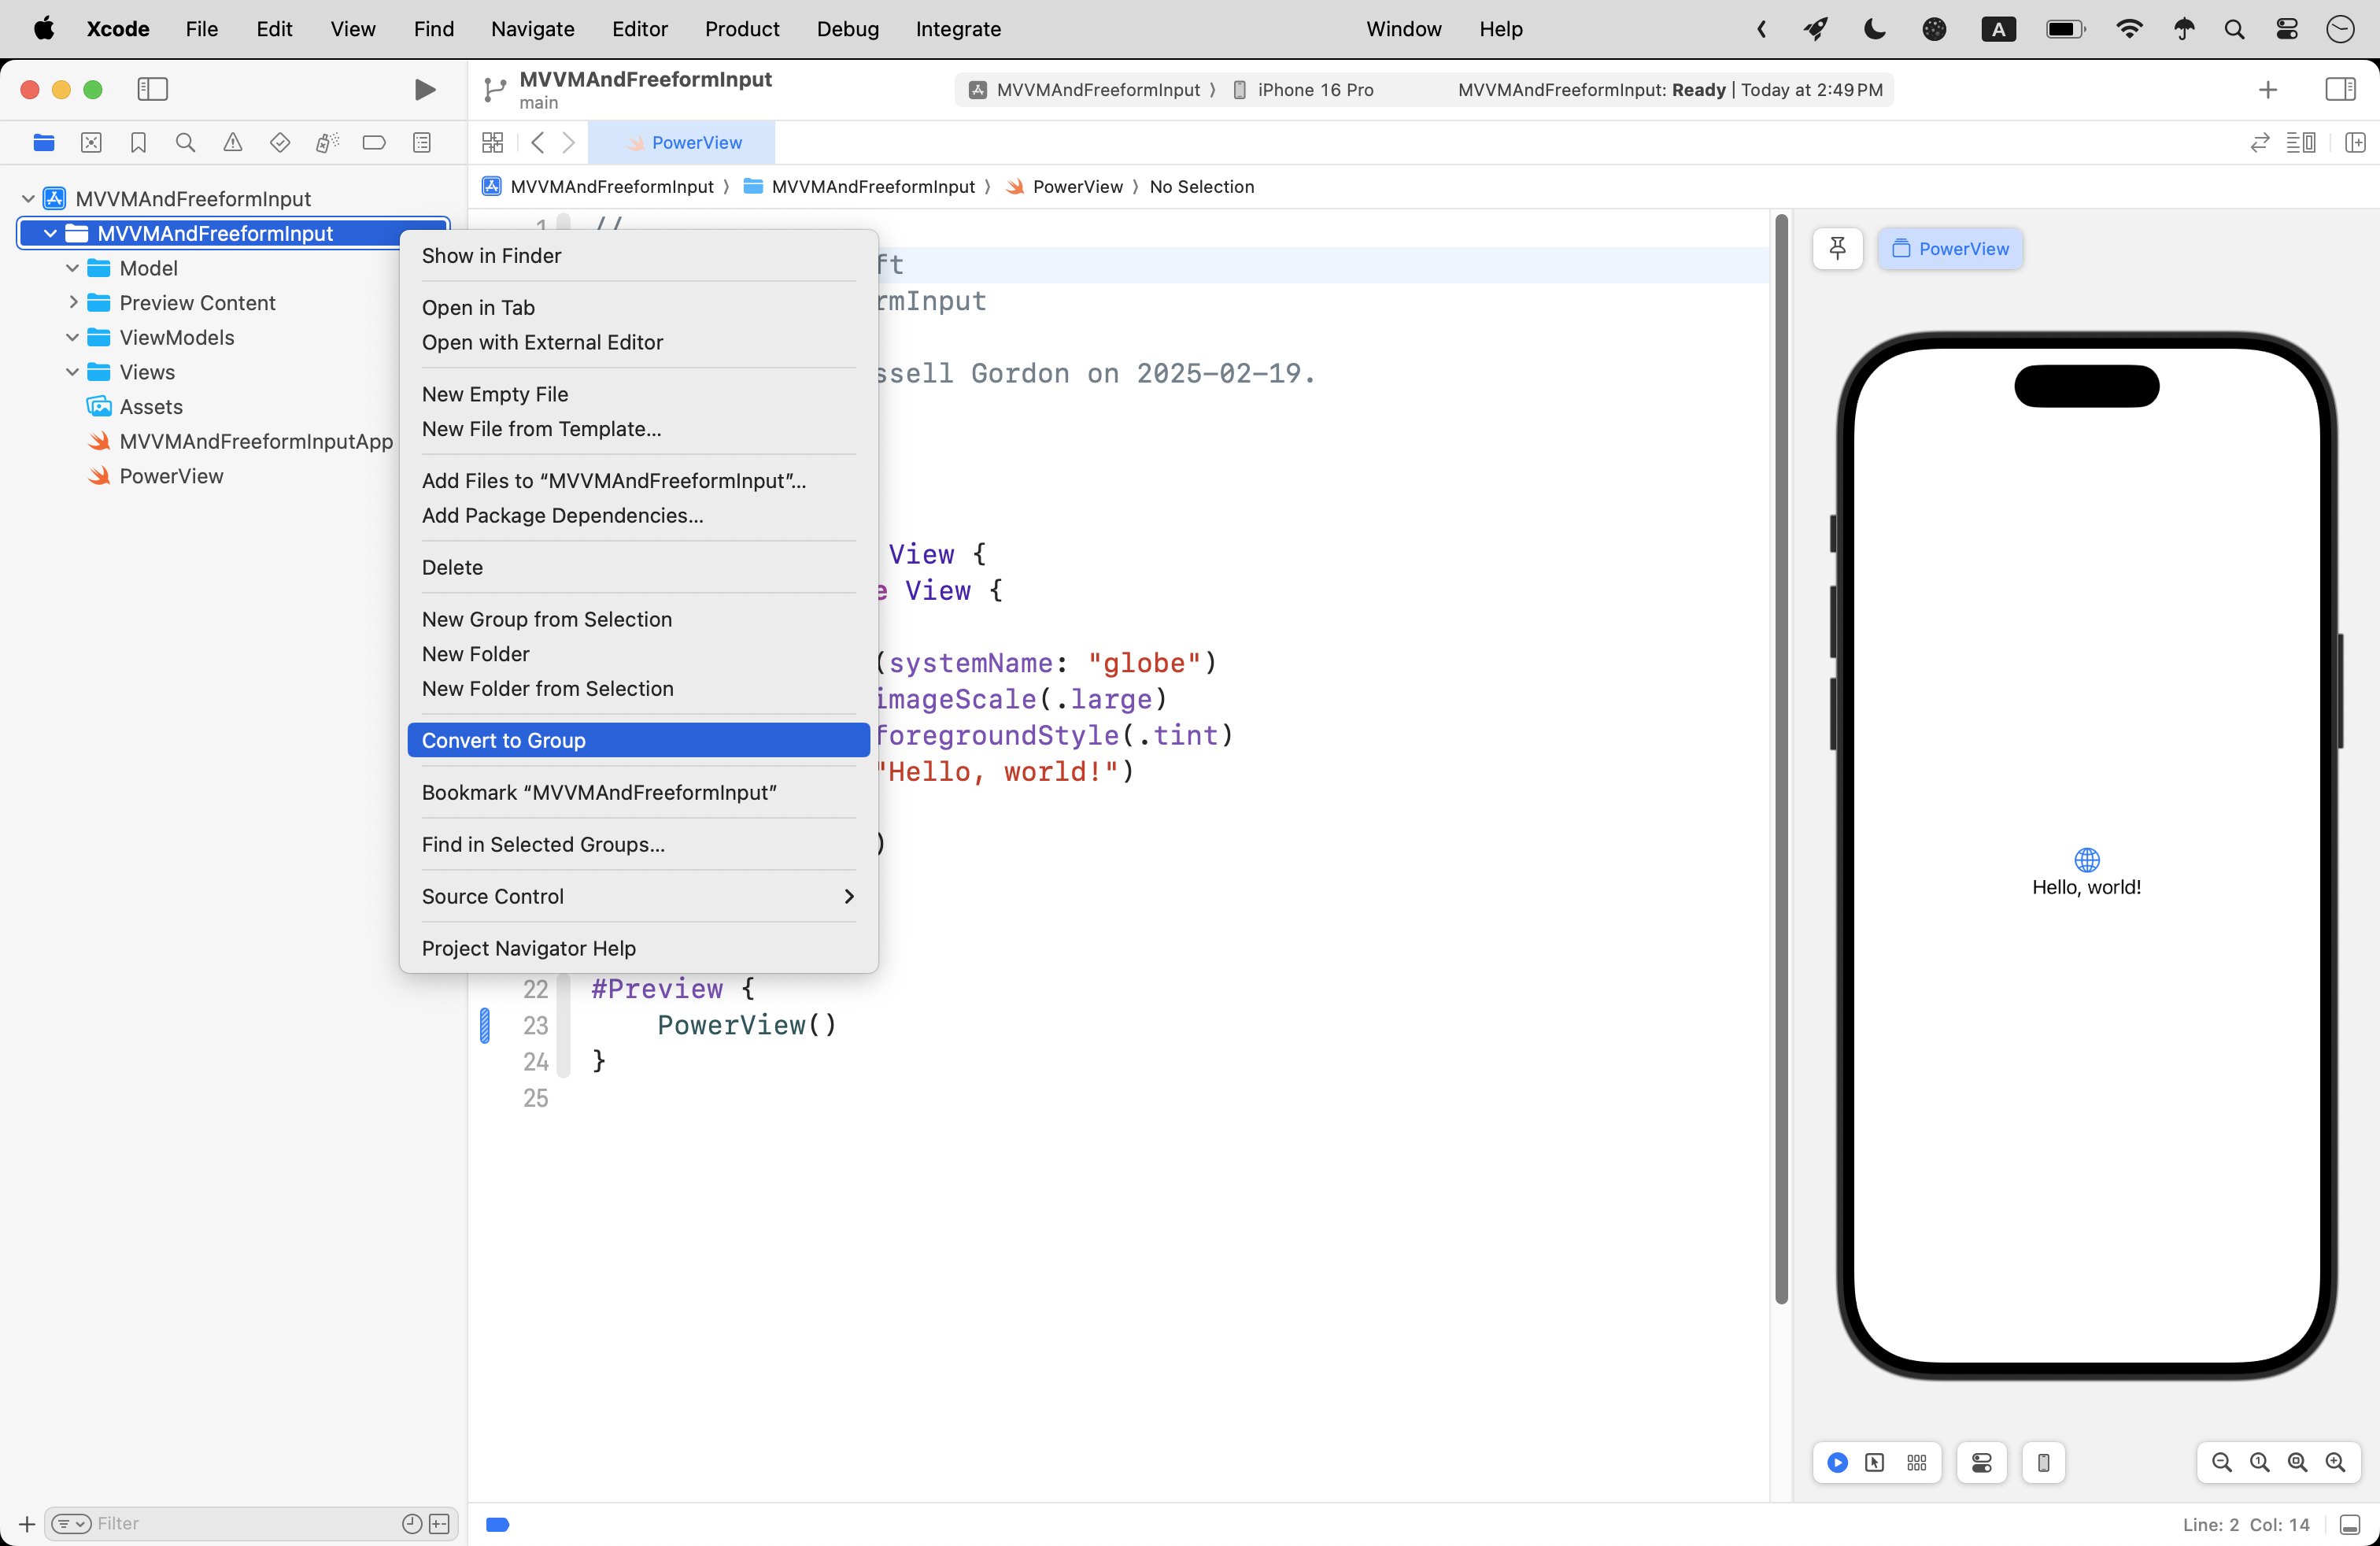
Finally, re-arrange the folders and files as shown, so that:
- the app entry point file is first
- the
PowerViewfile is inside the Views group - the Preview Content group and Assets folder are at the bottom
… like so:
Now is a good time to commit and push your work using this message:
Organized the project so that there are groups for views, the model, and view models.
Add the model
Create a new Swift file named Power and place it within the Model group in your project:
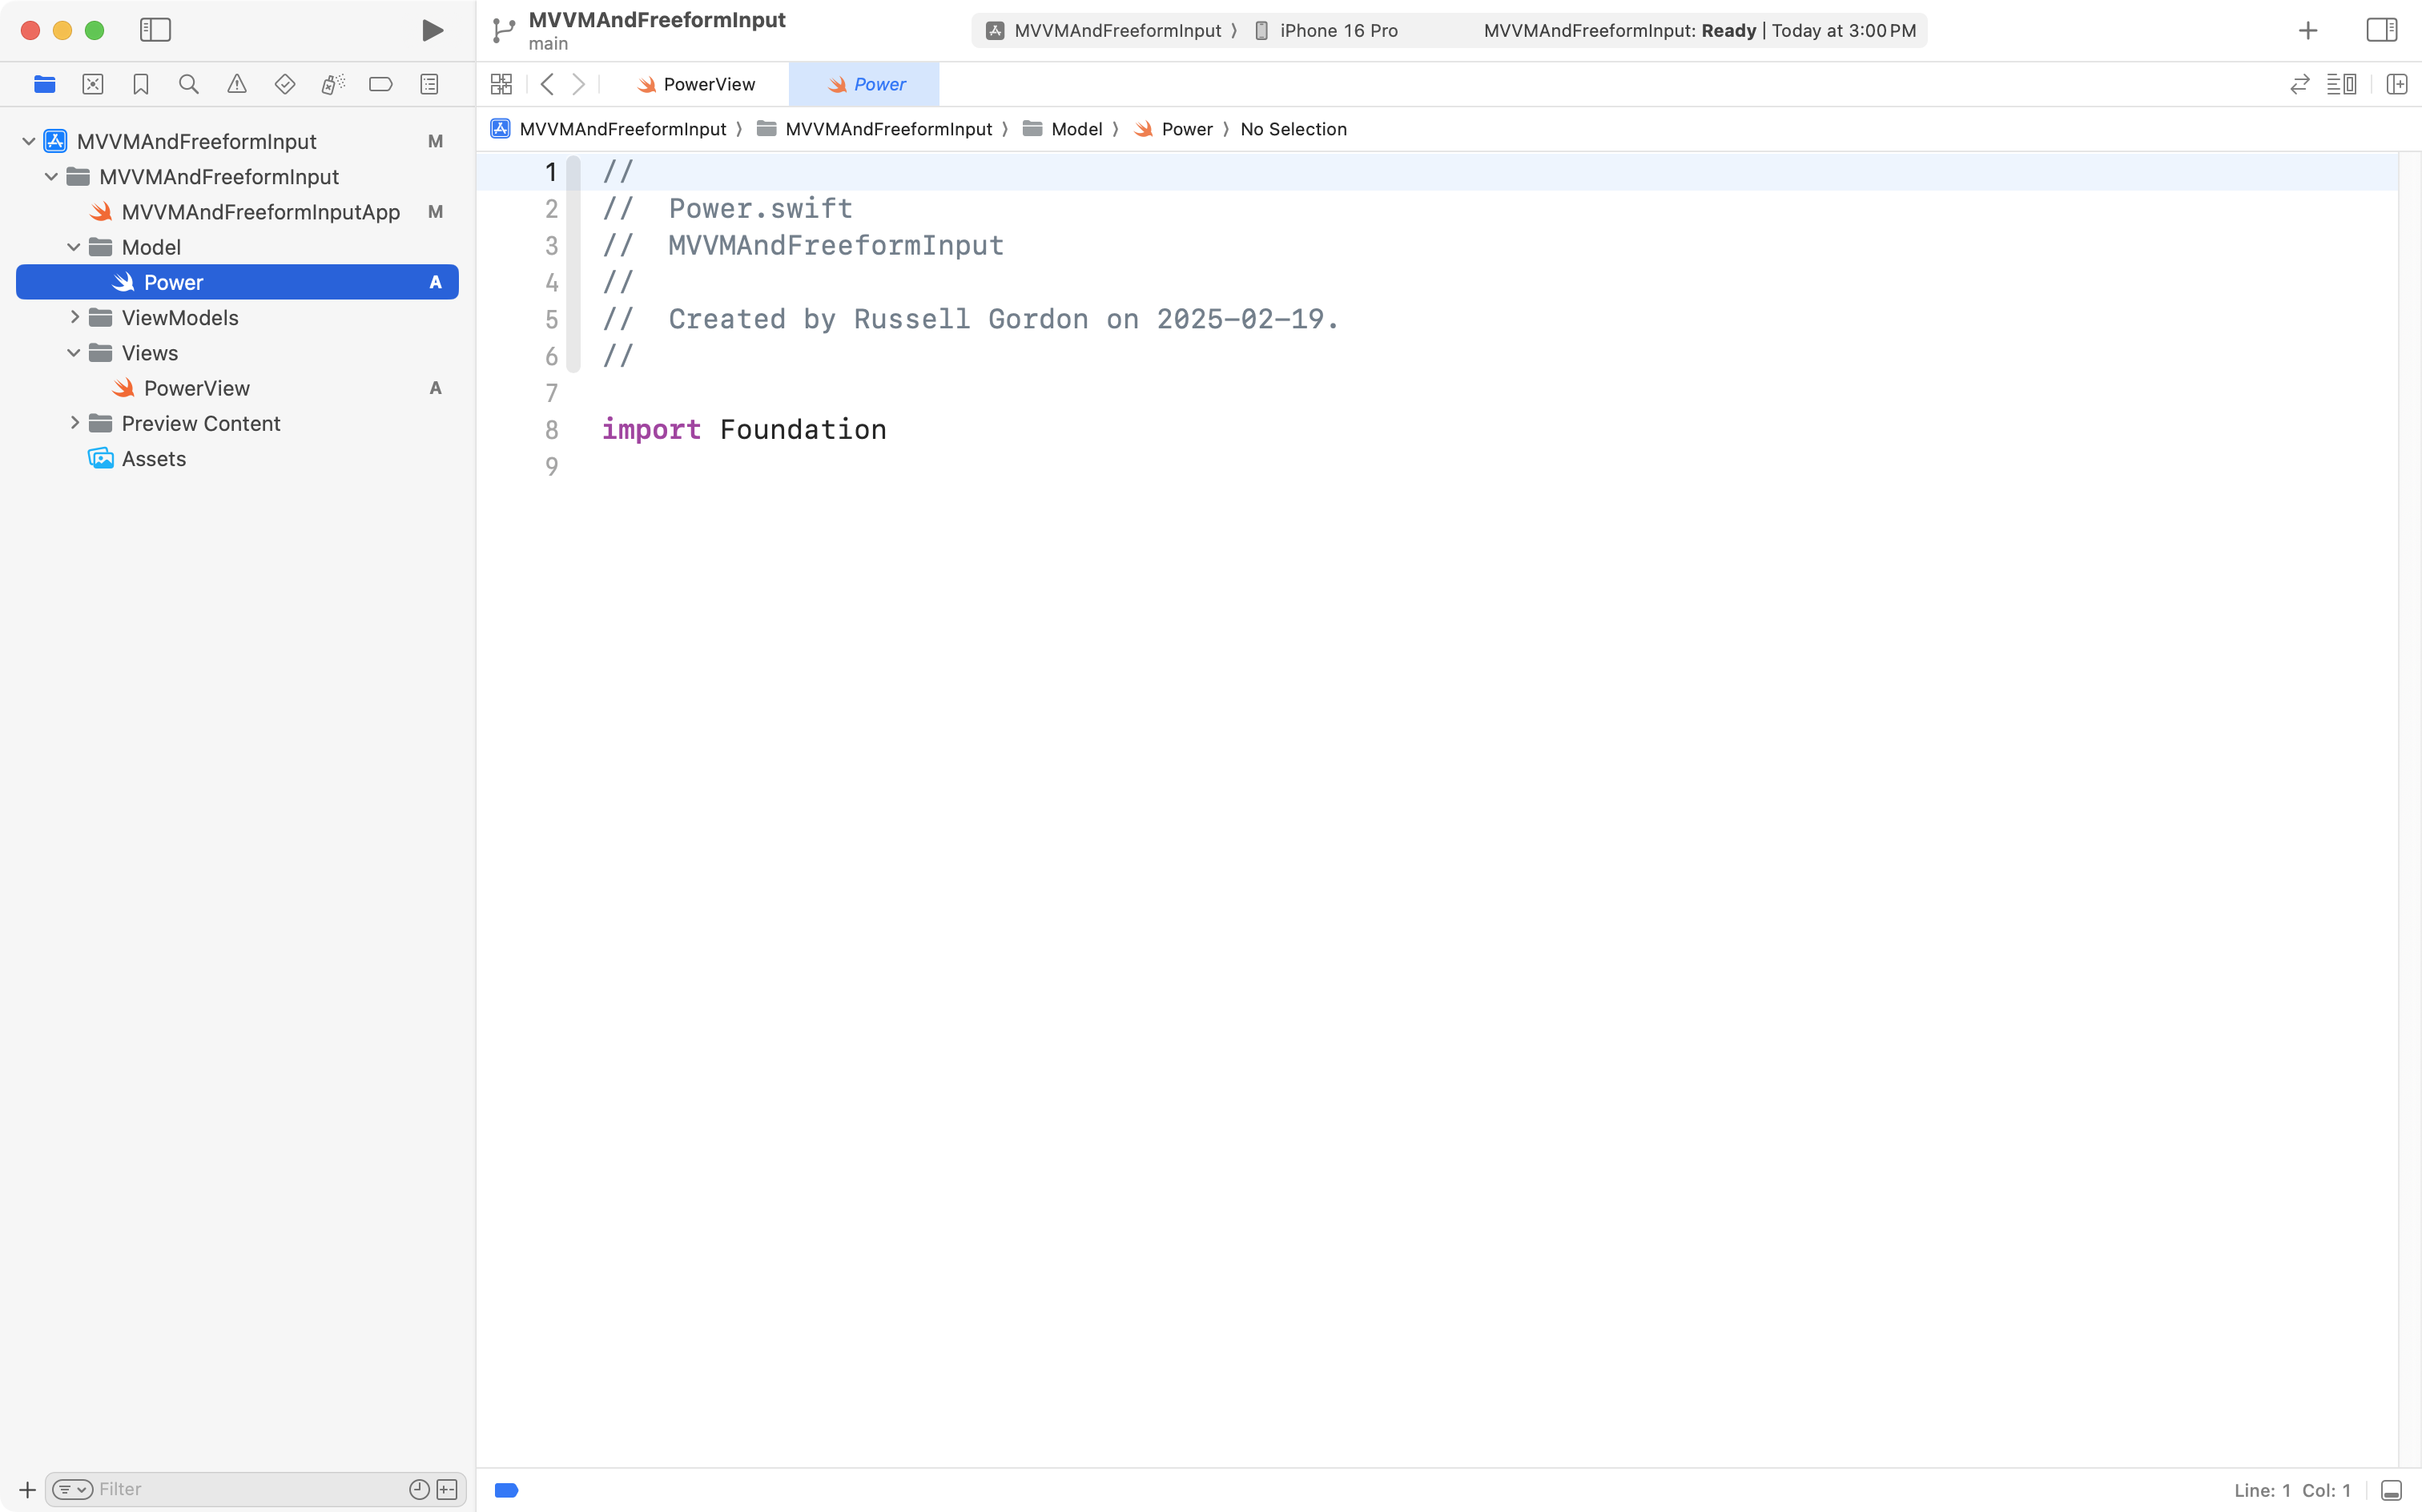
Then copy and paste the Power structure from your playground into the Power file in your new project:
Commit and push your changes with this message:
Added the model.
Add the view model
Create a new Swift file named PowerViewModel and place it within the ViewModels group in your project:
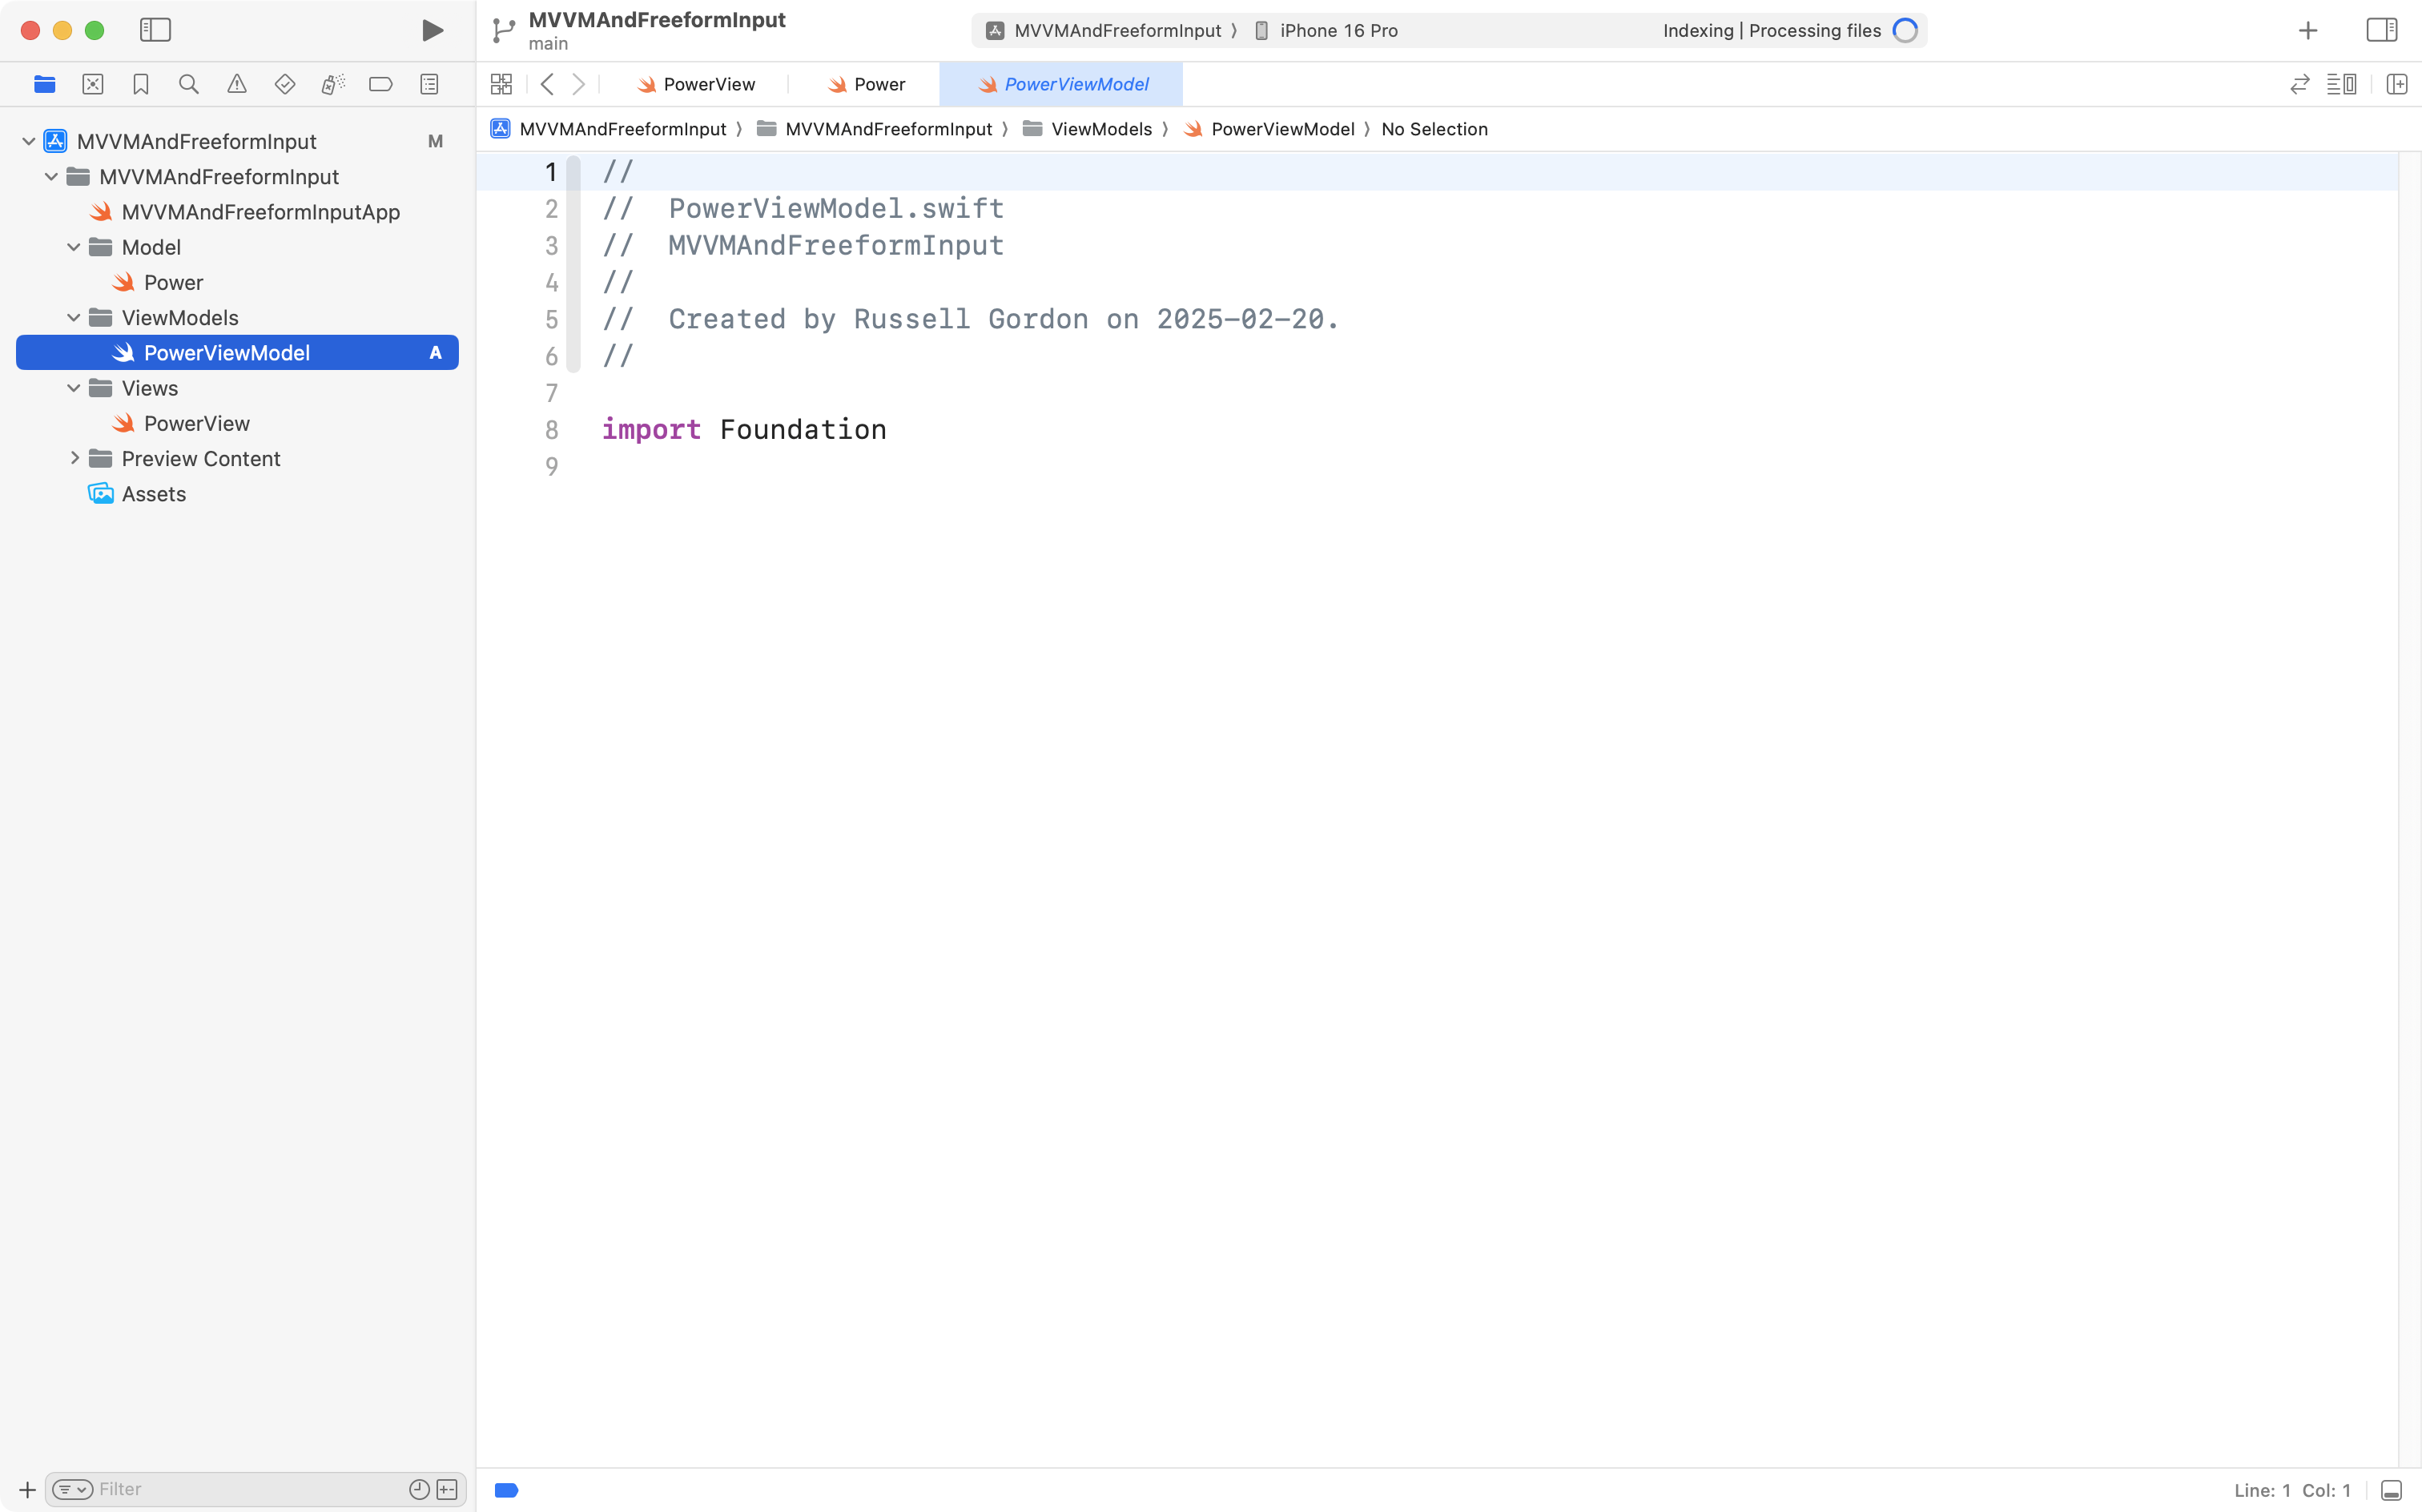
Then copy and paste the PowerViewModel class from your playground into the PowerViewModel file in your project:
Commit and push your changes with this message:
Added the view model.
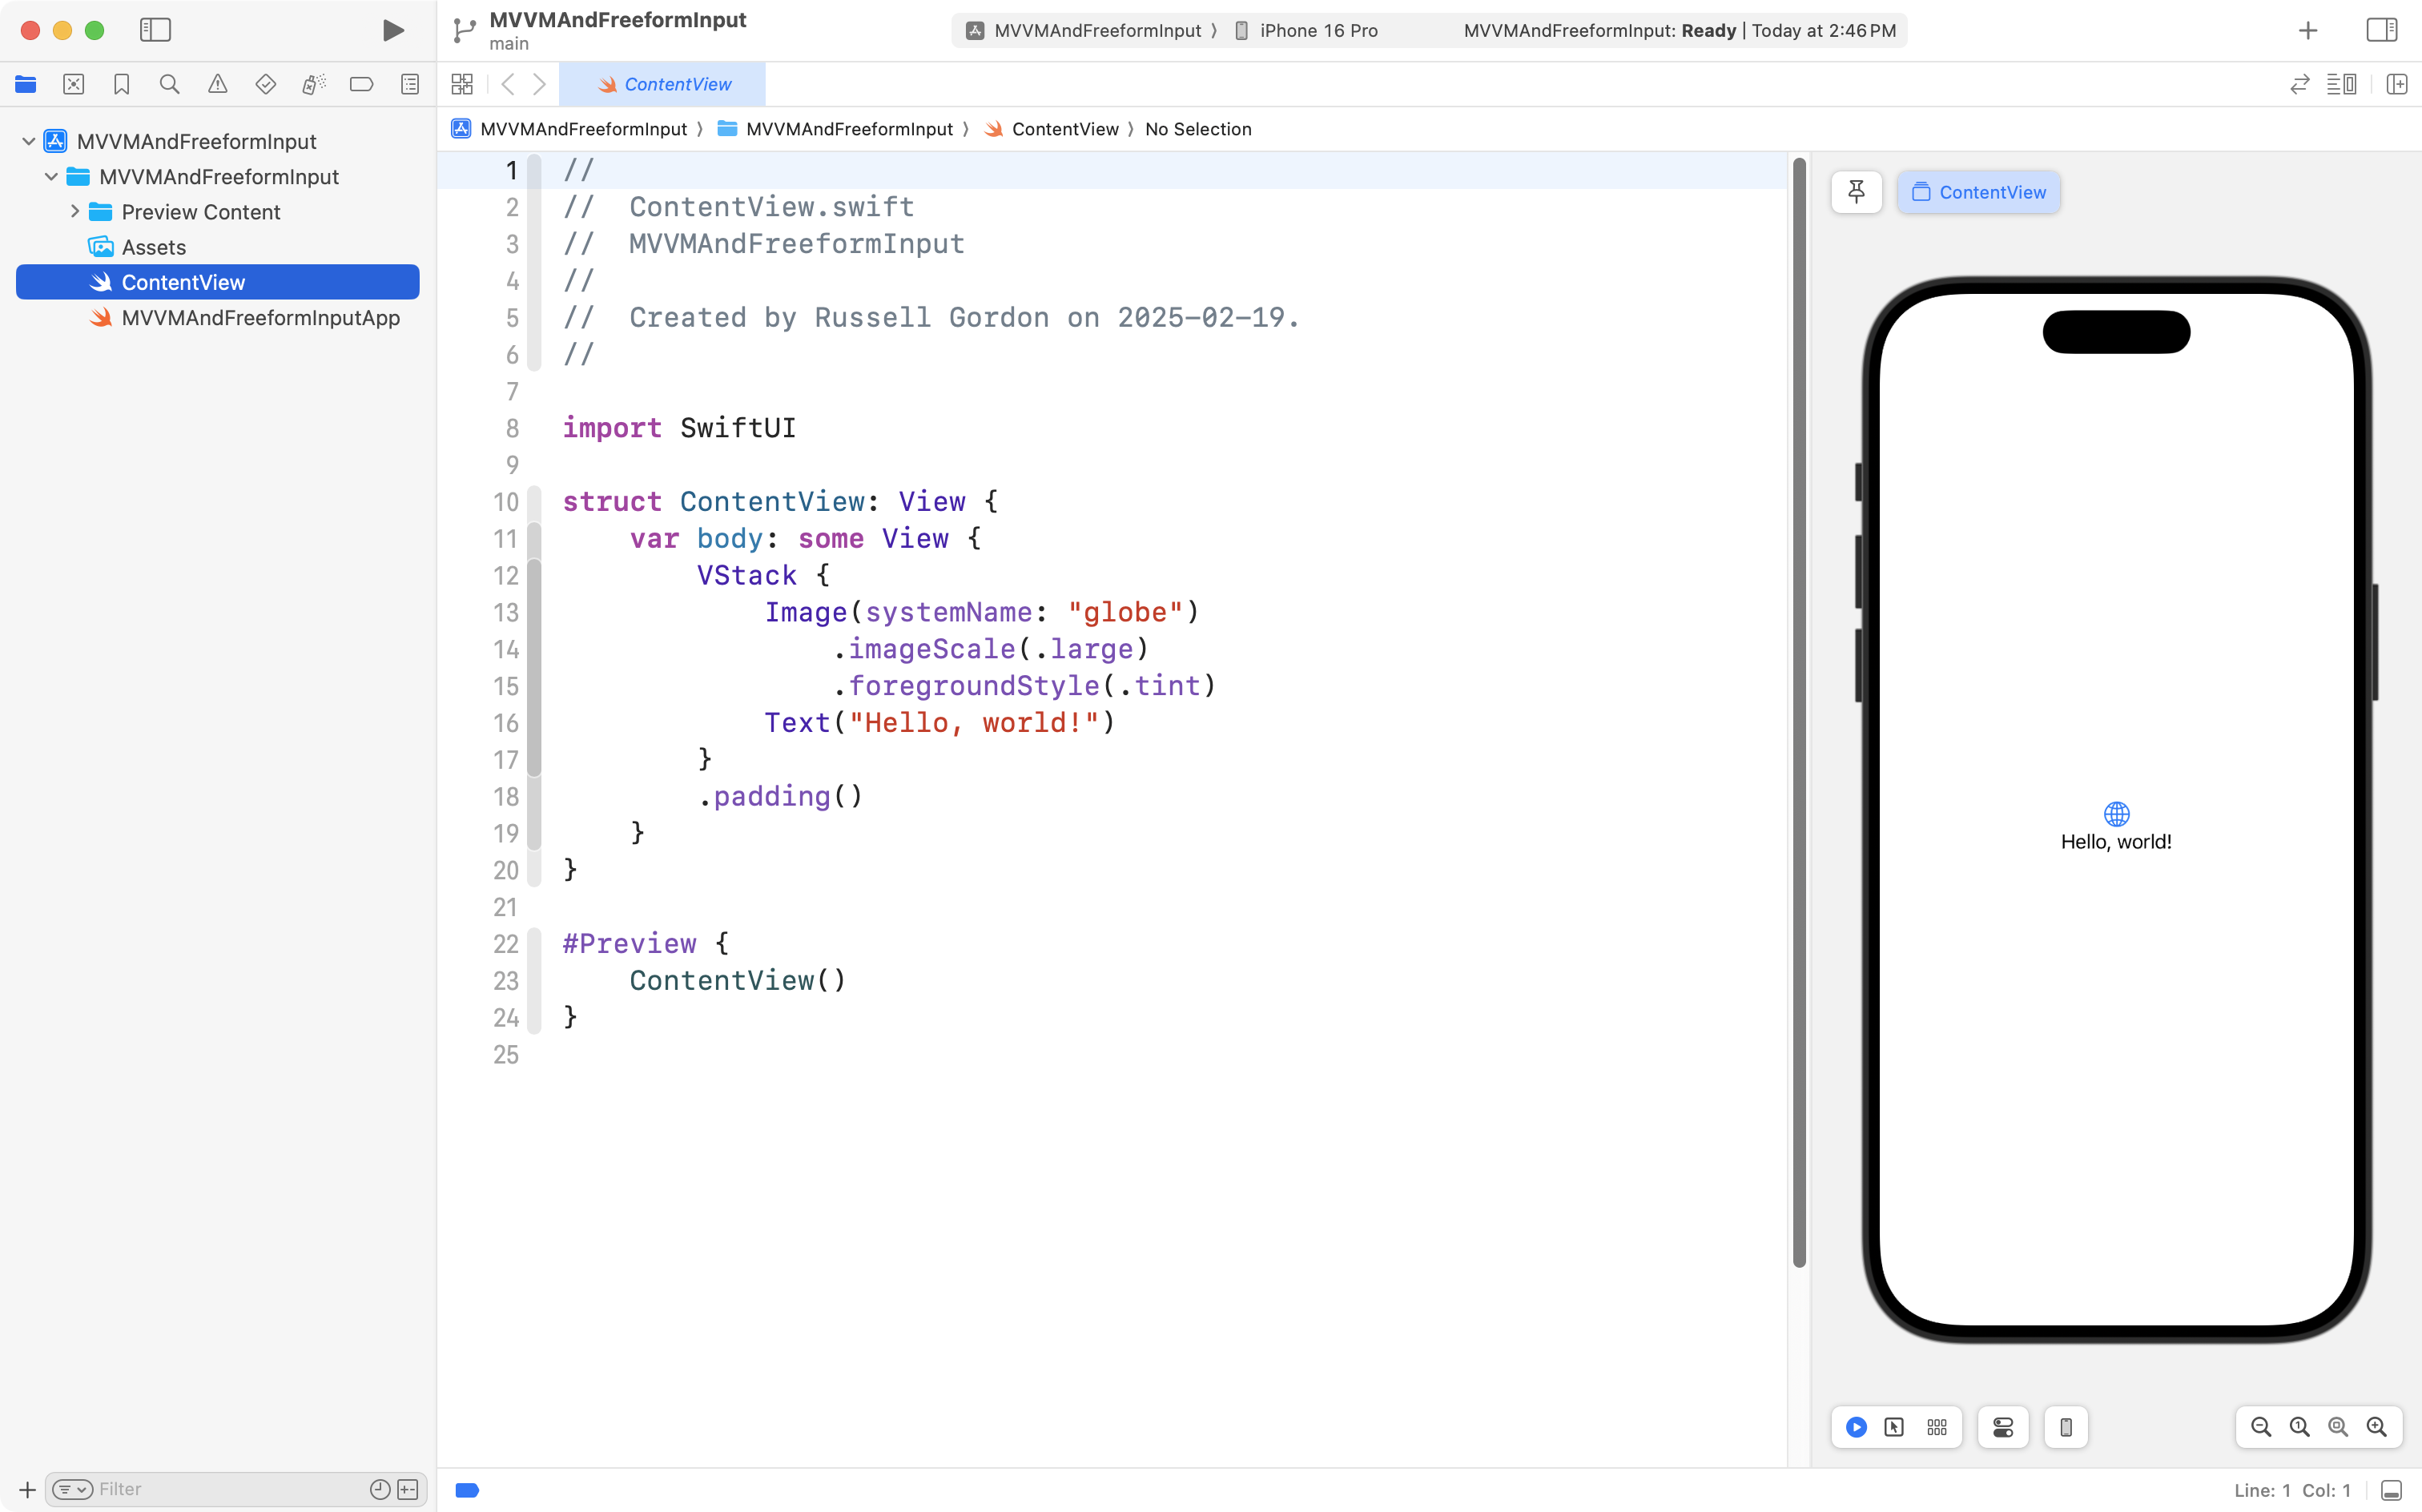
Make a basic view
Now we can replace the default code provided in PowerView with code that allows the user to provide input to our app and see appropriate output.
Begin by adding a stored property to hold an instance of our view model – copy and paste this code between the start of the PowerView structure and the start of its body property:
// MARK: Stored properties

// Holds the view model, to track current state of
// data within the app
@State var viewModel = PowerViewModel()

// MARK: Computed properties
… like this:
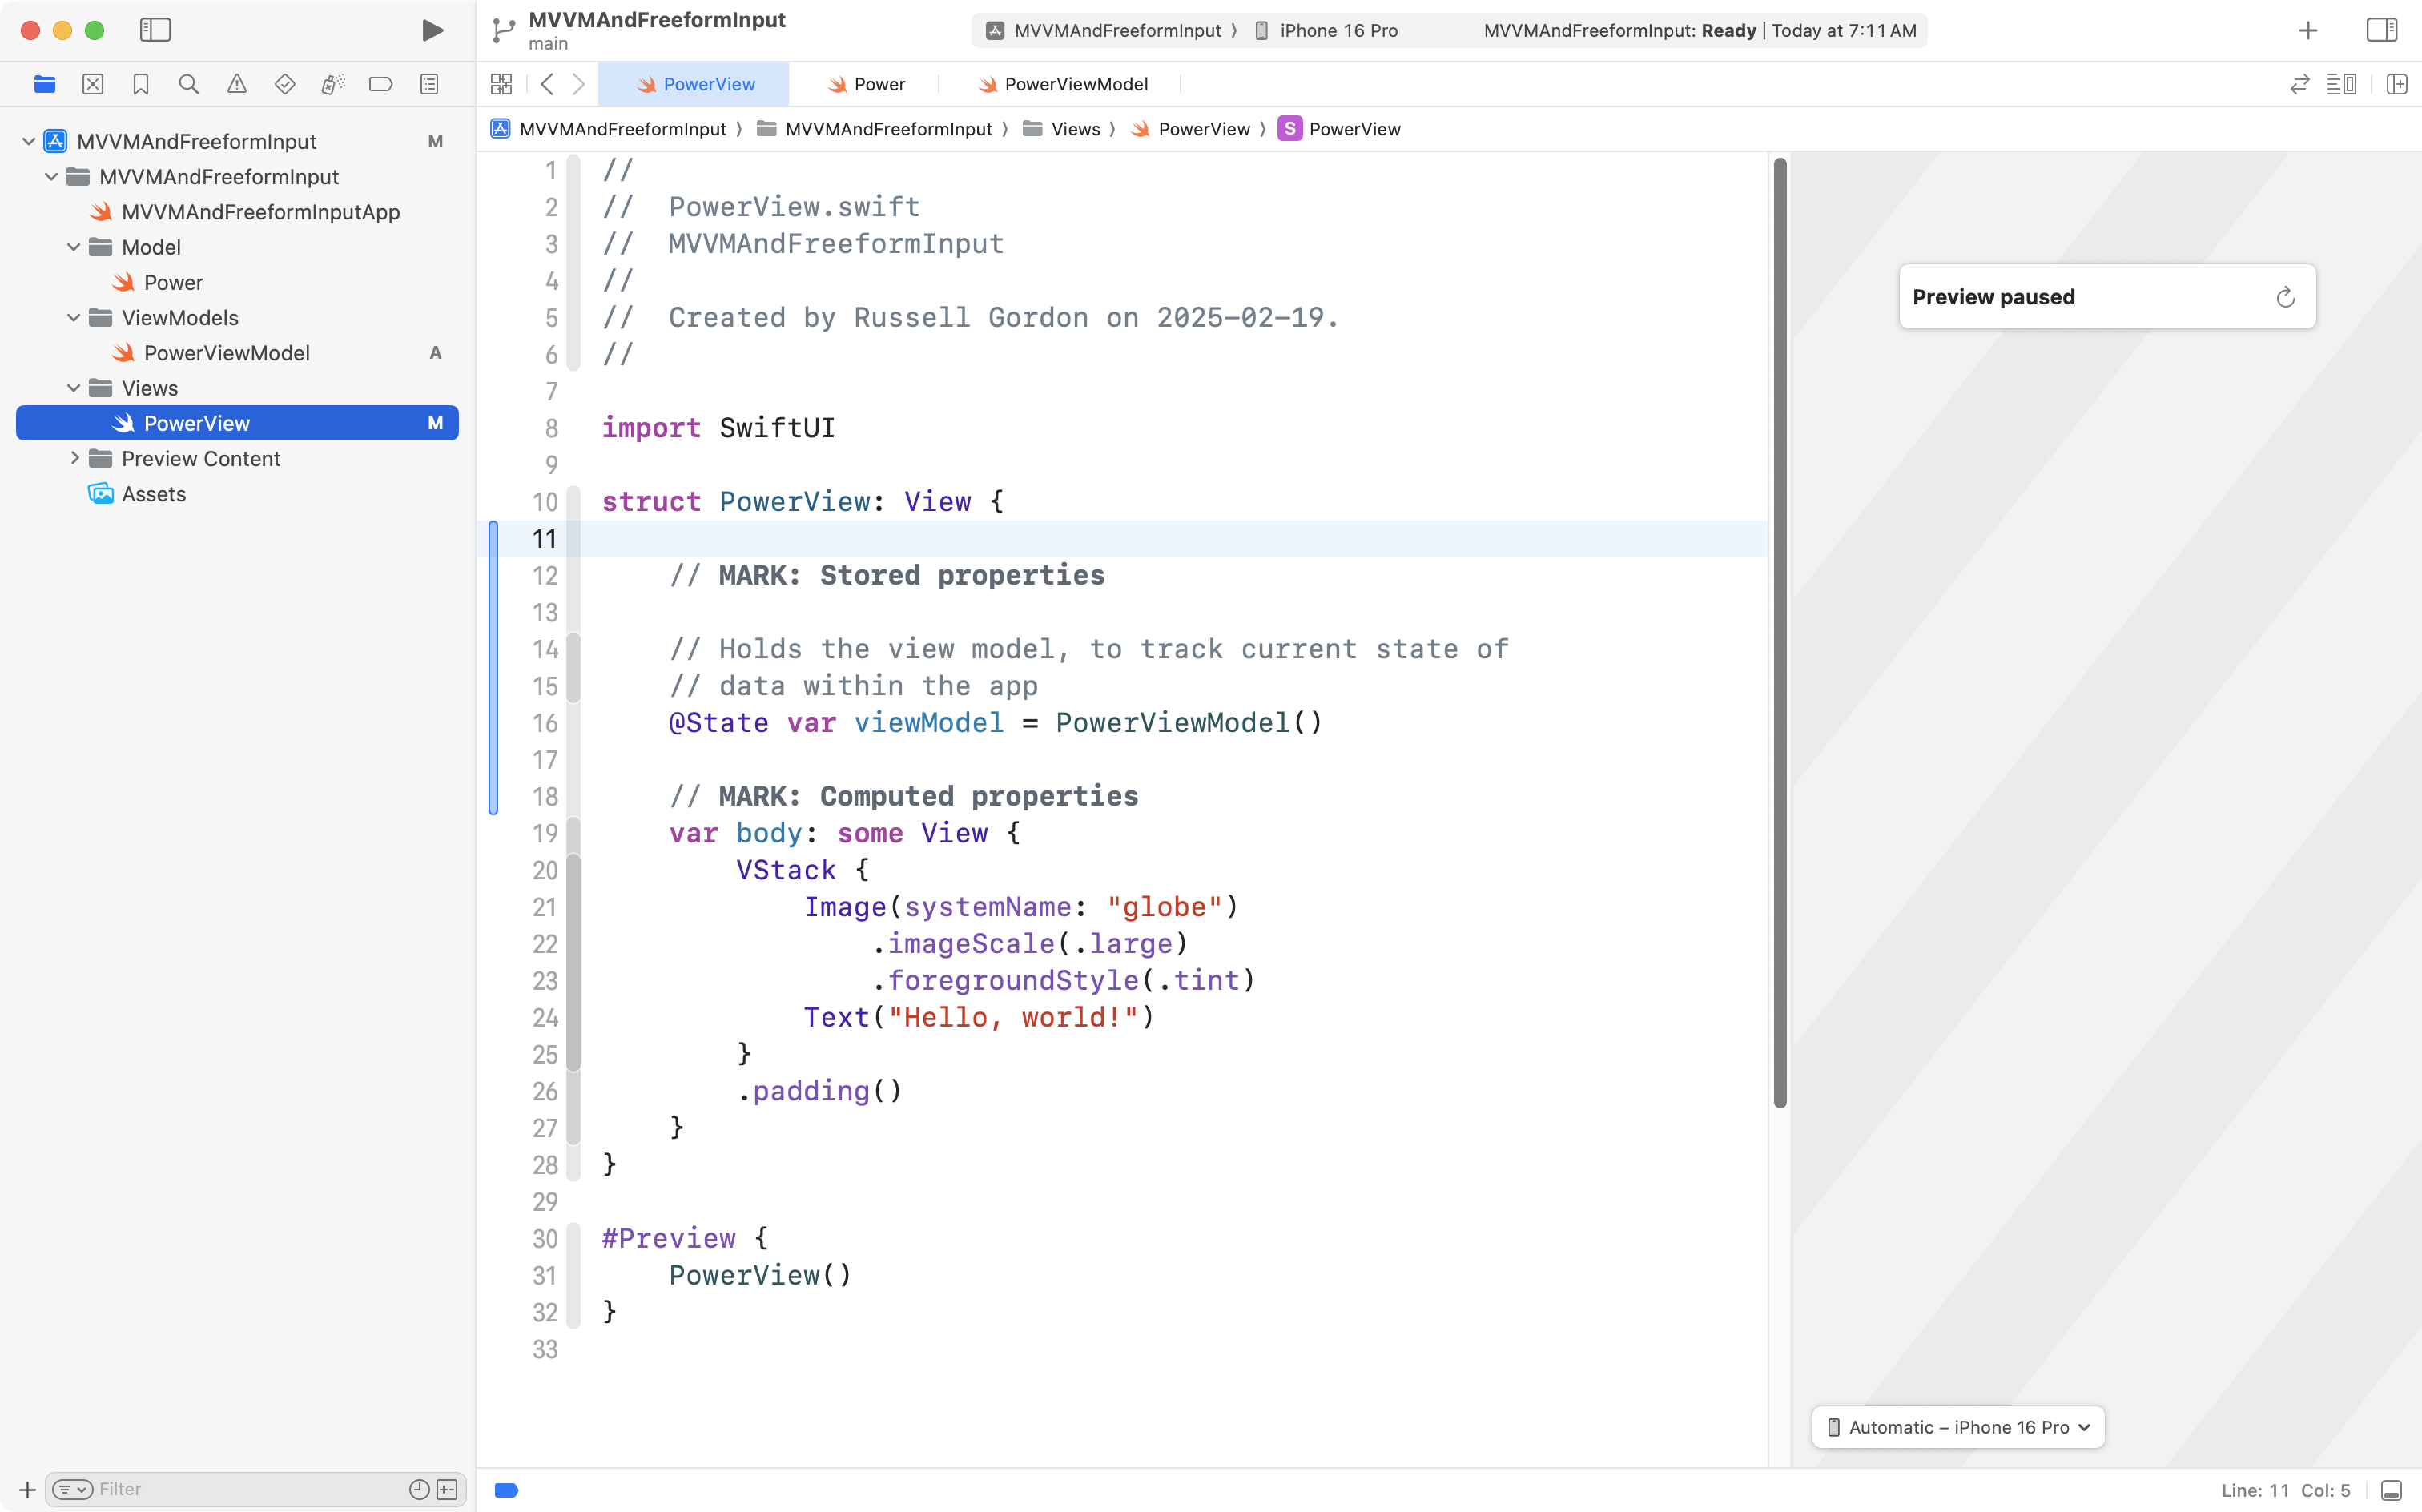
Next we can add a very basic user interface. Copy and paste this code, replacing the existing body property with the new body property below:
var body: some View {
	VStack {

		// INPUT
		TextField("Base", text: $viewModel.providedBase)
		TextField("Exponent", text: $viewModel.providedExponent)

		// OUTPUT
		if let power = viewModel.power {
			Text("Result is: \(power.result)")
		}
		Text(viewModel.recoverySuggestion)

	}
	.padding()
}
… like this:
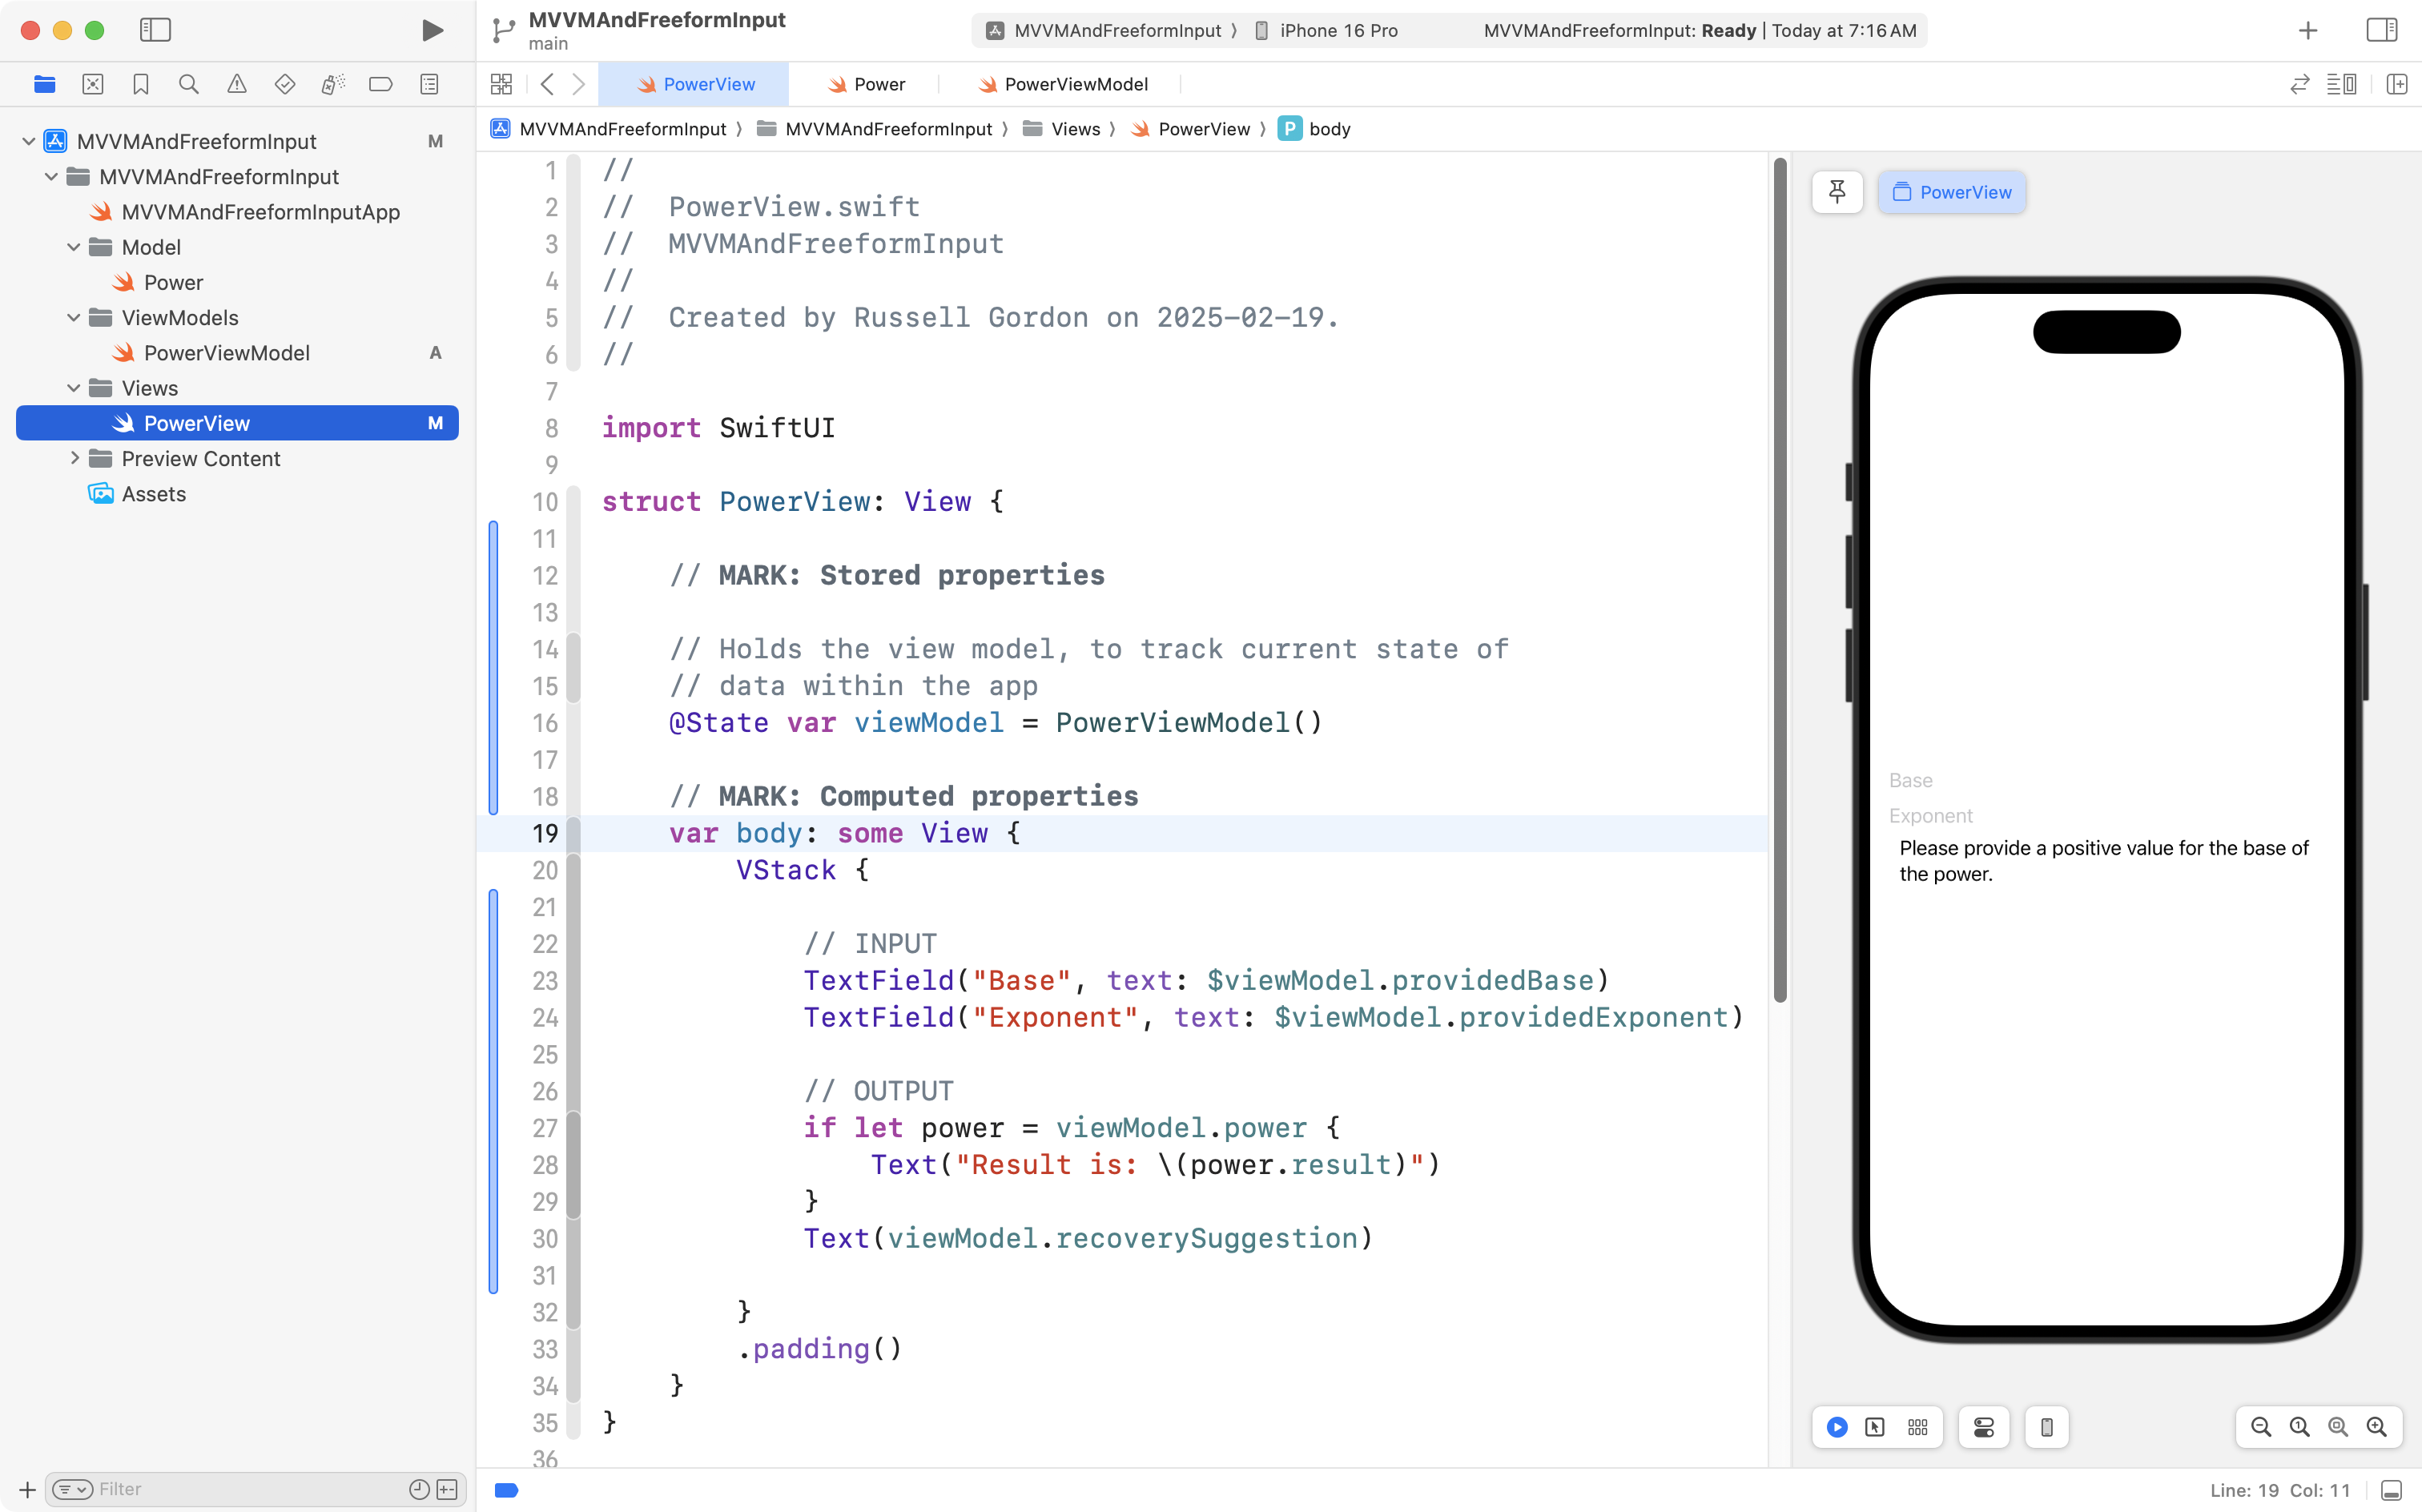
The user interface here is as simple as we can make it – it will allow us to use the view model and see some results, like we did in the playground earlier:
Let’s break down the code in the view to be sure you understand what’s happening:
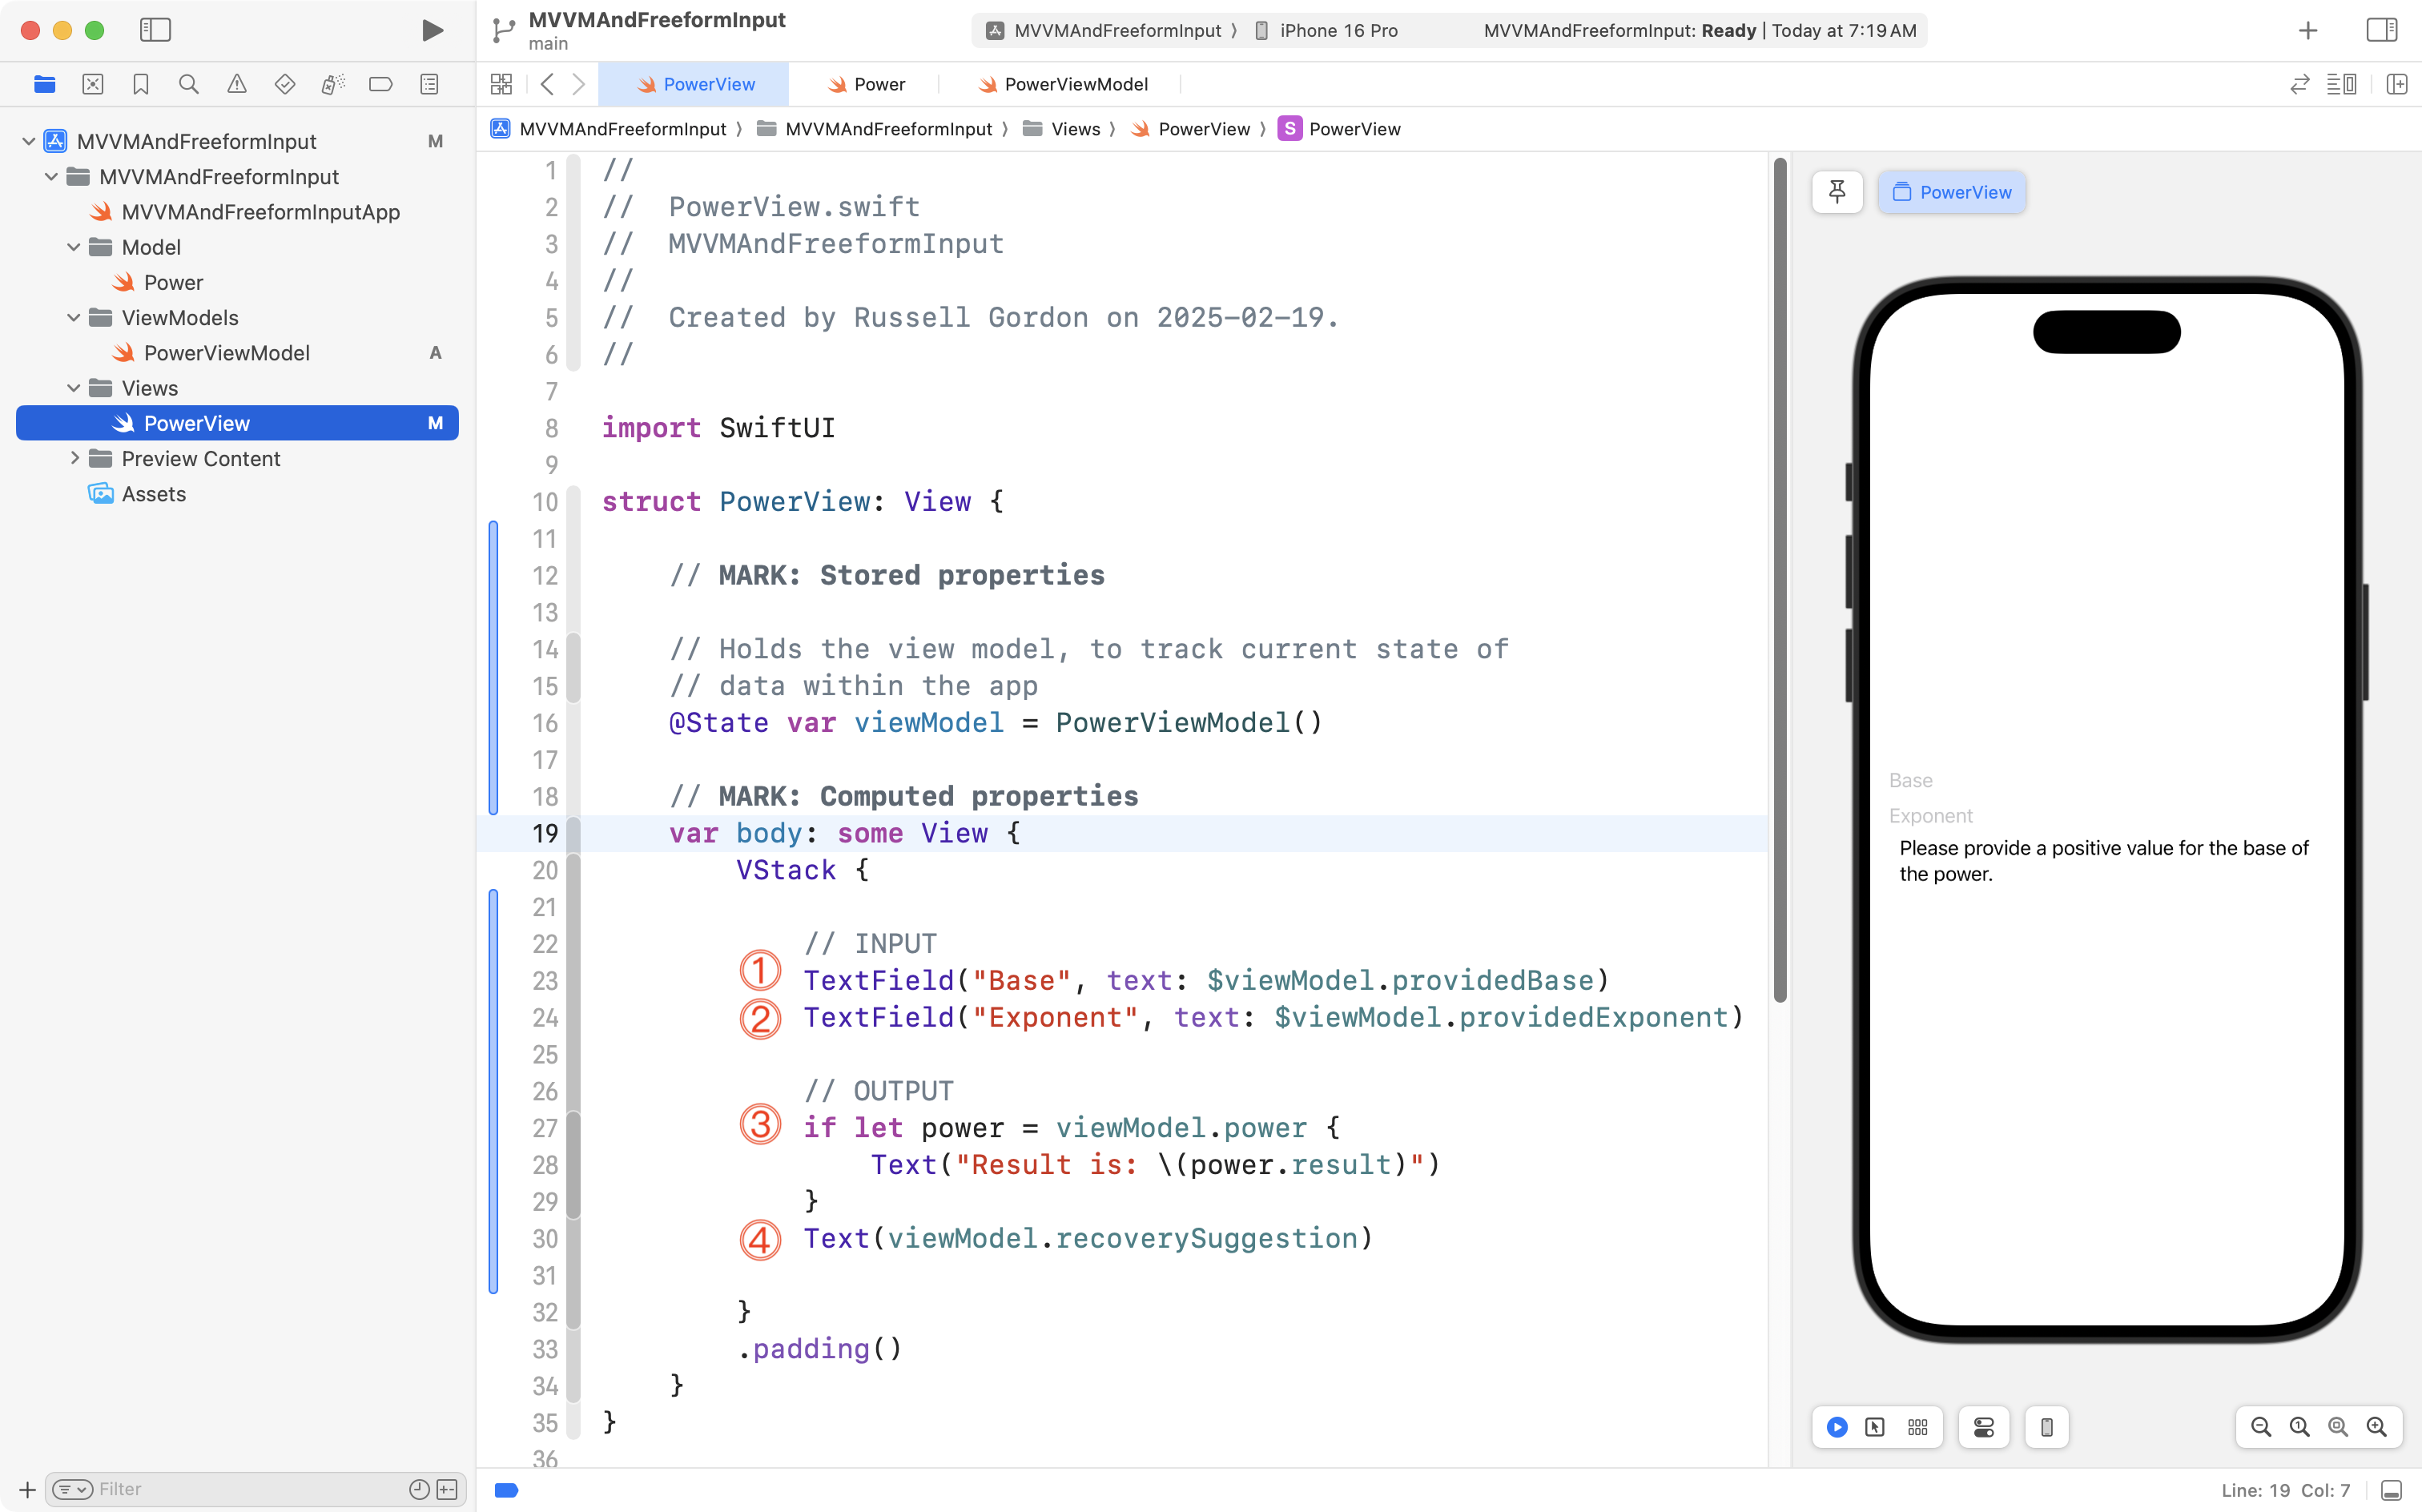
To summarize:
DISCUSSION
- A
TextFieldis defined and connected via a binding directly to theprovidedBasestored property in the view model.- A second
TextFieldis defined and connected via a binding directly to theprovidedExponentstored property in the view model.- When it is possible for the view model to evaluate the power, use a
Textview to show the result.- Show whatever recovery suggestion (error message) is appropriate, using a
Textview.
There is one small problem – if you try typing values into the text fields:
… you will notice that the user interface does not update. 😕
What gives? We have marked the view model with the @State property wrapper – so shouldn’t the user interface update when we change values inside the view model?
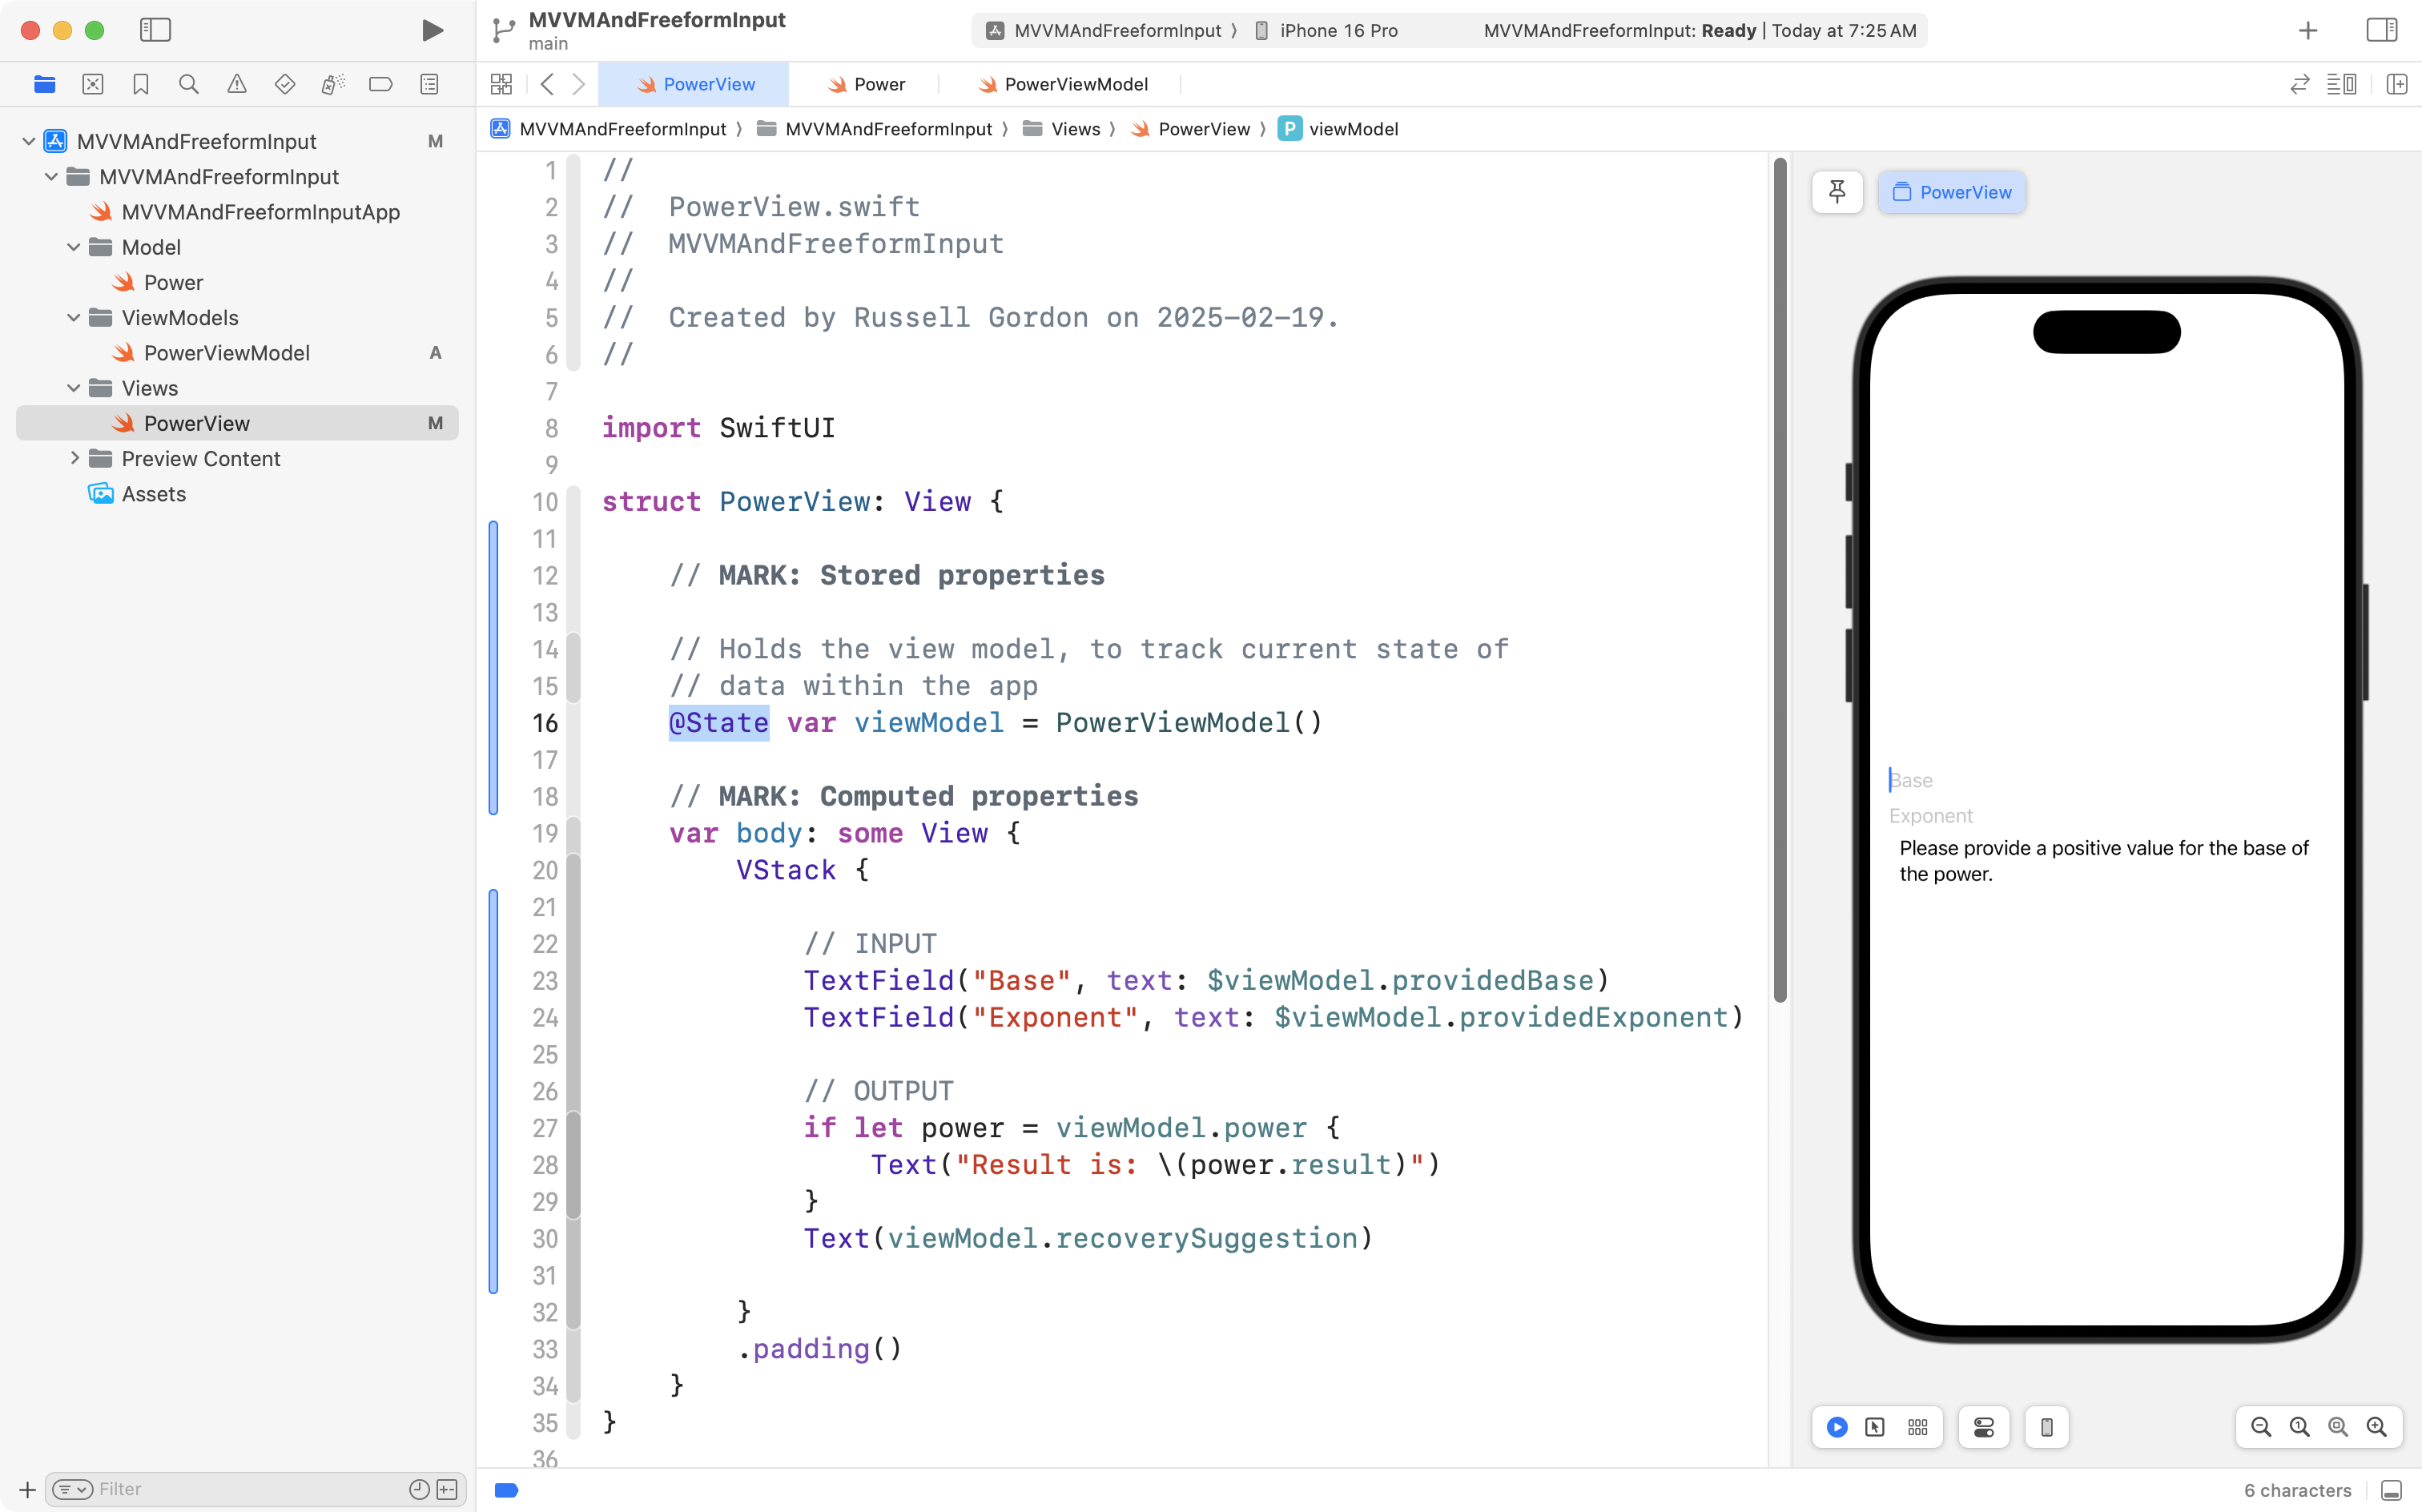
The answer is that when using a class with SwiftUI, we need to take one extra step to tell SwiftUI that it should watch the contents of that class for changes.
Add this line of code to the top of your PowerViewModel class:
@Observable… like this:
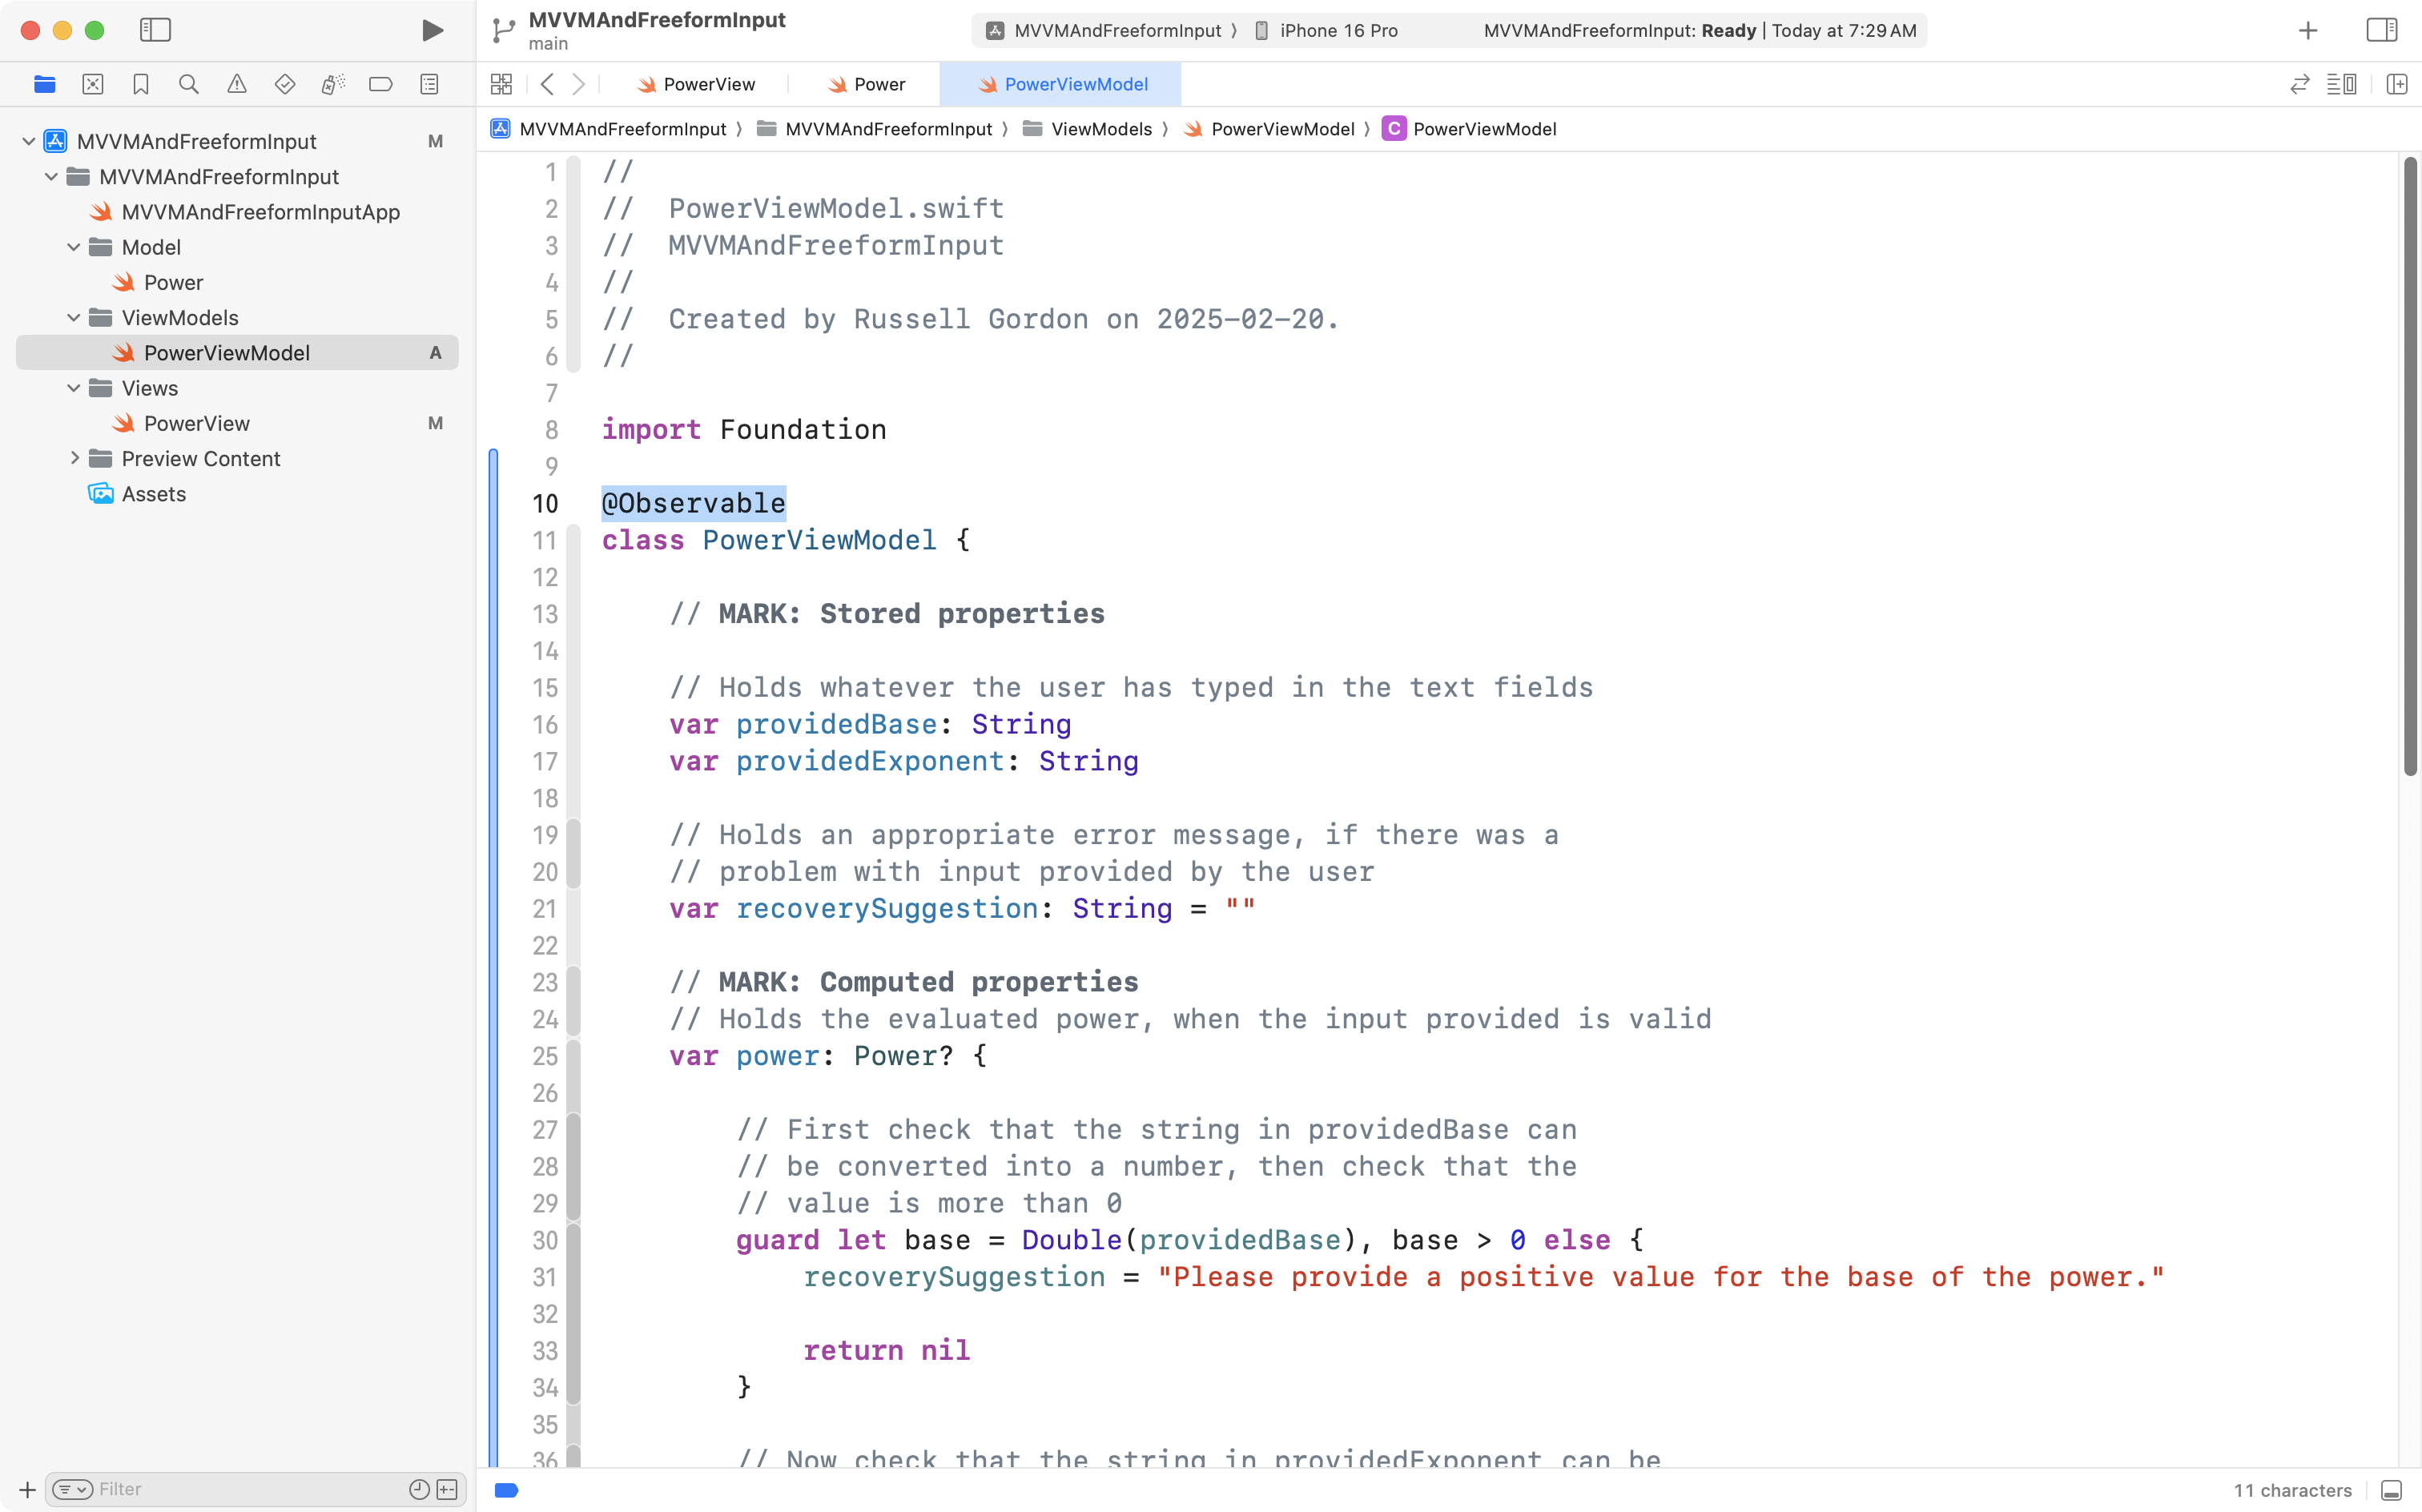
That’s all that we need to do! This makes use of the Observation framework, which does all of the heavy lifting to ensure the user interface updates when values inside the PowerViewModel class change.
Try this out now, in your view:
You should see that the user interface now updates when values are changed.
Although the view we have is not very visually appealing, it’s a start, so, let’s commit and push our work now with this message:
Added a view layer to allow for user input and to see output.
Improve the view
We can do better than the basic view that we have built so far, though.
Copy this code into your clipboard:
import SwiftUI
struct PowerView: View {
// MARK: Stored properties
// Holds the view model, to track current state of
// data within the app
@State var viewModel = PowerViewModel()
// MARK: Computed properties
var body: some View {
VStack {
// Extra space at top
Spacer()
// OUTPUT
// When the power can be unwrapped, show the result
if let power = viewModel.power {
// Show the provided base, exponent, and result
// in an arrangement that looks the same as how
// we write a power on paper in math class
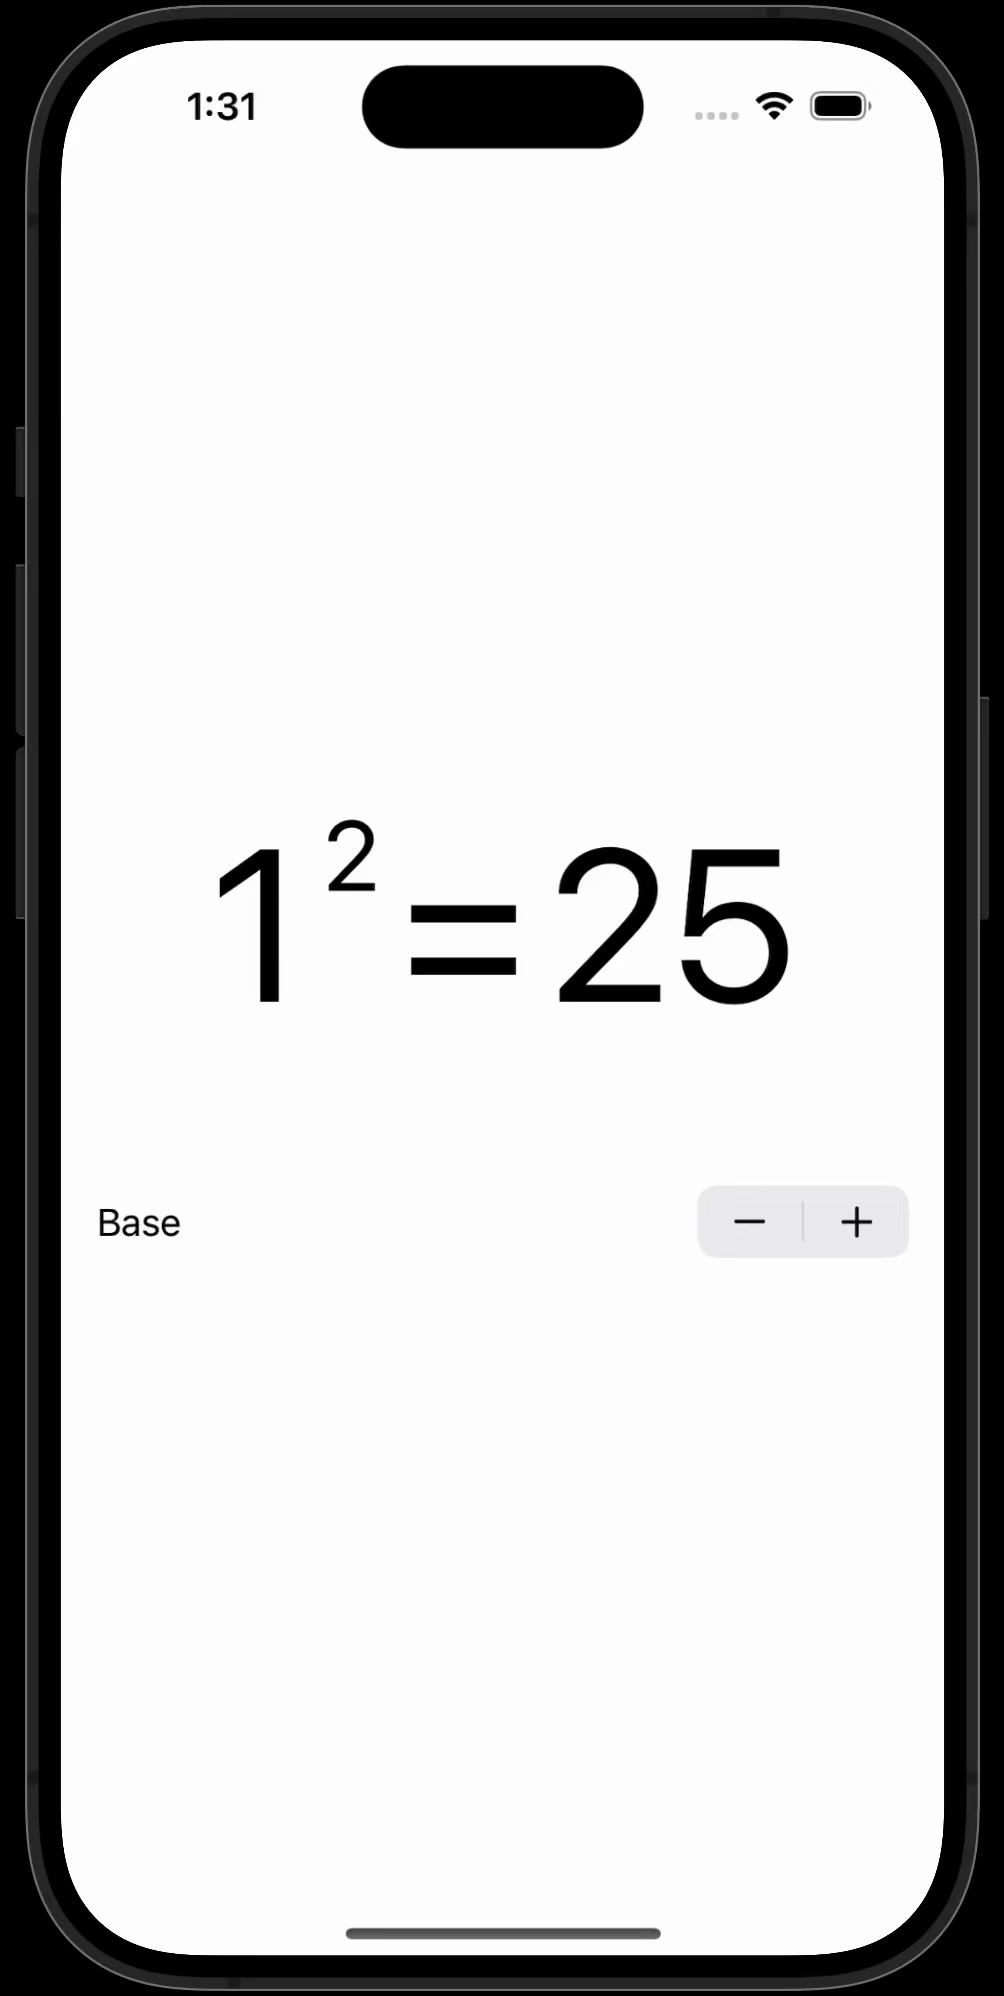
HStack(alignment: .center) {
HStack(alignment: .top) {
Text("\(power.base.formatted())")
.font(.system(size: 96))
Text("\(power.exponent)")
.font(.system(size: 44))
}
HStack {
Text("=")
.font(.system(size: 96))
Text("\(power.result.formatted())")
.font(.system(size: 96))
}
}
.lineLimit(1)
.minimumScaleFactor(0.5)
.frame(height: 300)
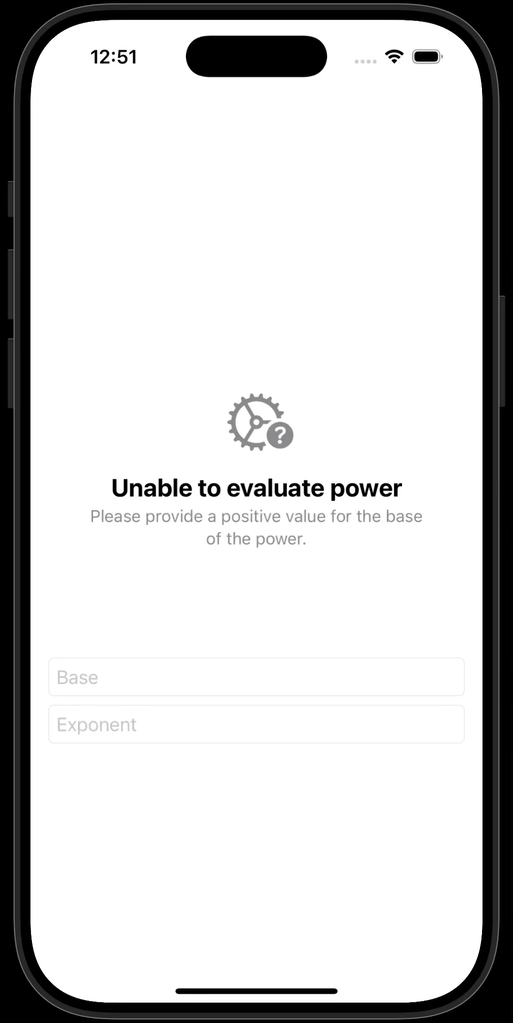
} else {
// Show a message indicating that we are
// awaiting reasonable input
ContentUnavailableView(
"Unable to evaluate power",
systemImage: "gear.badge.questionmark",
description: Text(viewModel.recoverySuggestion)
)
.frame(height: 300)
}
// INPUT
TextField("Base", text: $viewModel.providedBase)
.textFieldStyle(.roundedBorder)
TextField("Exponent", text: $viewModel.providedExponent)
.textFieldStyle(.roundedBorder)
// Extra space at bottom
Spacer()
}
.padding()
}
}
#Preview {
PowerView()
}… and then replace the code in your view within the project, like this:
Review the comments in that code to understand how it works.
The only thing that is new is the use of a structure named ContentUnavailableView.
This is a structure provided by the SwiftUI framework. Apple recommends the use of this view as a standard user interface component that should be displayed in our apps when valid output cannot be shown.
As you can see, there are three arguments (answers) that must be provided for parameters (questions) to use this structure:
- What is the primary text, or error message, that should be shown? In this case, we provide the argument:
"Unable to evaluate power". - What is the SF Symbol that should be shown? In this case, we provide the argument:
"gear.badge.questionmark". - What hint should be shown to the user to correct the situation? In this case, we pass in the recovery suggestion given by the view model.
Please now commit and push your work with this message:
Refined the view so it presents the power in a way that better matches symbolic mathematics standards; showing a nicer user interface overall.
Exercises
Try extending the app in the following ways.
TIP
Before trying the exercises, you may find it helpful to review this addendum regarding how to selectively run different blocks of code.
Handle zero exponents
When a zero exponent is provided, the app currently returns an error message.
Make changes first to the model, then to the view model, to support the evaluation of powers with an exponent of 0.
HINT
From math class, recall that any power with an exponent of 0 has a result of 1.
TIP
Try modifying the model, and then the view model, first within the playground you set up earlier. Once you have the code there working correctly, move it into your project.
NOTE
The point is always to learn. If you are super-stuck on this exercise, please watch this video to understand how to modify the model and view model to allow for zero exponents:
Handle a negative base
When a negative base is provided, the app currently returns an error message.
Make changes first to the view model, then to the view, to support the evaluation of powers with a negative base.
Ensure that the view properly represents the base when it is negative.
For example, it is correct to show this:
It is not correct to show this:
… since the base in the power is and not .
NOTE
The point is always to learn. If you are super-stuck on this exercise, please watch this video to understand how to modify view model and view to allow for evaluation of powers with a negative base:
Handle negative exponents
When a negative exponent is provided, the app currently returns an error message.
Make changes first to the model, then to the view model, and finally to the view, to support the evaluation of powers with negative exponents.
TIP
When the user provides a negative exponent, express the result as a fraction.
For example,
NOTE
The point is always to learn. If you are super-stuck on this exercise, please watch this video to understand how to modify the model, view model, and view to allow for zero exponents:
The point is always to learn. If you are super-stuck on this exercise, please watch this video to understand how to modify view model and view to allow for evaluation of powers with a negative base:
Addendum
Selection statements
To complete the exercises, you will need to make some use of selection statemetns.
That means comparing values to one another, and selectively – based on certain conditions – choosing to run a given block of code.
There are multiple types of programming language structures that allow for selection to occur.
In this discussion, we will look at if statements.
The general syntax is:
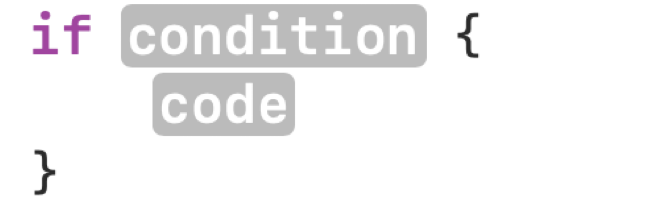
In that example, only when the condition evaluates to true does the block of code inside the { } brackets get selected to be run. Otherwise, the block of code is skipped.
Here is another example:
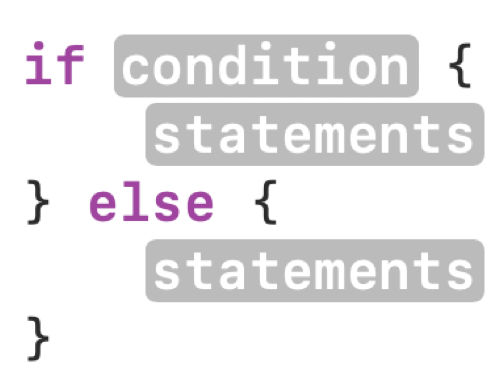
In that example, when the condition is true the first block of code runs. Otherwise, else, the second block of code runs.
And finally, here is a third example – note that as necessary, you can add additional else if branches:
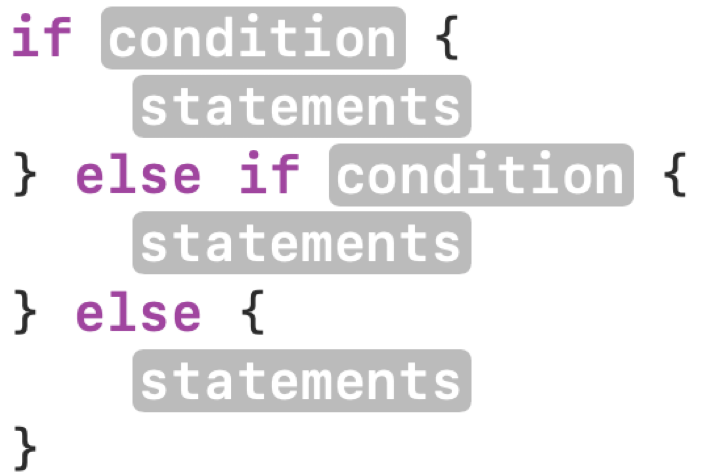
In this example, there would be different conditions in the first and second branches.
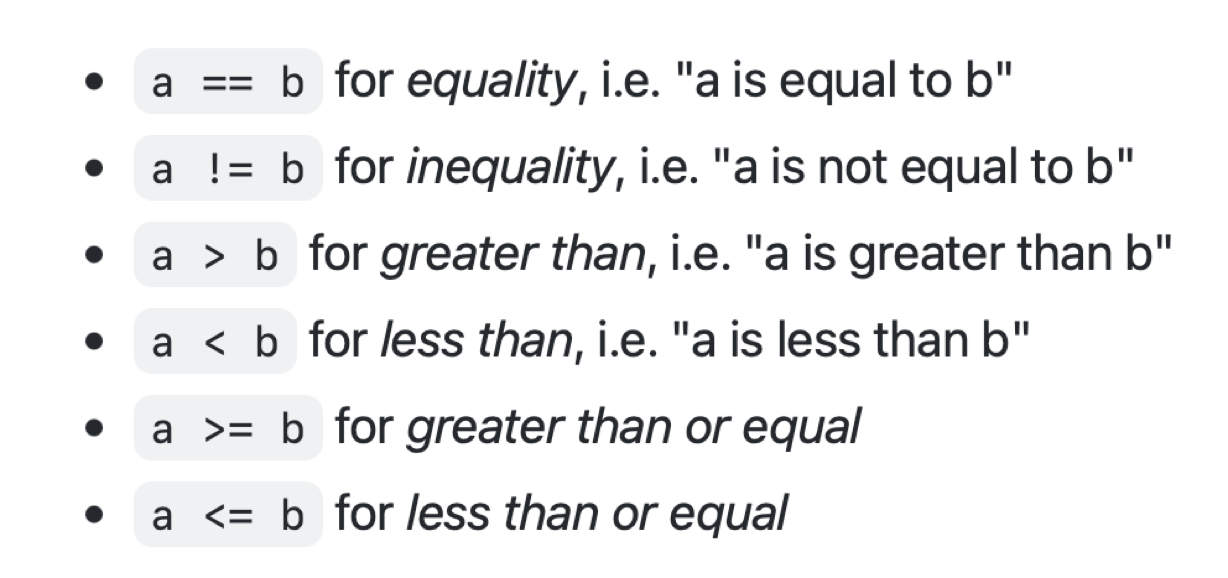
So… what is a condition?
A condition is often a comparison of two values. Here are all the ways two numeric values can be compared:
For example, the following code has a condition, a > b:
let a = 20
let b = 10
if a > b {
	print("a is greater")
} else {
	print("b is greater")
}
Since a has a value of 20 in that example, the first branch of the if statement is run, and second branch is ignored. a is greater will be printed on the screen.