Introduction
The purpose of this lesson is to demonstrate how to retrieve information from a website over the Internet to use within an iOS app whose source code is organized using the MVVM design pattern.
Retrieving data from the Internet is a very common task for app developers.
It is a part of built-in apps like Weather and Stocks. It is a part of third-party apps like Please Don’t Rain as well.
It would, in fact, be hard to name apps that do not use data retrieved over the Internet in some way.
When you are finished this lesson, you will have an app that works like this, to show jokes that have a setup and a punchline:
JavaScript Object Notation
To retrieve information from another computer over the Internet, or, to send information to another computer, there must be an agreed upon format for the information shared.
That is where JavaScript Object Notation, or JSON, is often used.
JSON files are just plain text files, but they provide information in name-value pairs, like this:
"color":"green"In this case, the field or property name is color.
The associated value is green.
Several name-value pairs can be grouped together into an object:
{
	"name":"triangle",
	"color":"green",
	"sides": 3
}
Curly braces – the { and } characters – mark the start and end of a JSON object.
Name-value pairs within an object are separated by commas.
JSON objects can be directly mapped to a Swift native data types.
The JSON object described above can be modelled using this structure:
struct Shape {
	let name: String
	let color: String
	let sides: Int
}
If you look at the JSON object side-by-side with the Swift data structure, can you see how they are alike?

JSON values can be one of the following data types:
- string
- number
- object
- array
- boolean
- null
In time you will learn how to handle each of these JSON data types within an app.
Endpoints
Generous third-party individuals or organizations build websites that may offer several endpoints.
The term endpoint refers to a single address that is part of a larger website from which we can obtain useful information, often encoded in the JSON format.
A given website will offer information to app developers according to a predictable set of rules known as an application programming interface or API.
It is common to hear app developers ask questions like:
- What is the overall API provided by this website?
- What endpoints are offered?
- What is the format of the data we will receive from a given endpoint?
Translated to less technical terms, that all means: “How do I ask for information from this website and in what format can I expect to receive that information?”
Sometimes an endpoint requires authentication before we can receive information from it.
TIP
Mr. Gordon maintains a list of websites with useful public APIs that offer information in JSON format that he has tested personally.
There are many more public APIs out there and any of these could theoretically be used to build an app upon.
Create the project
Please now create a new iOS project named JokeFinder.
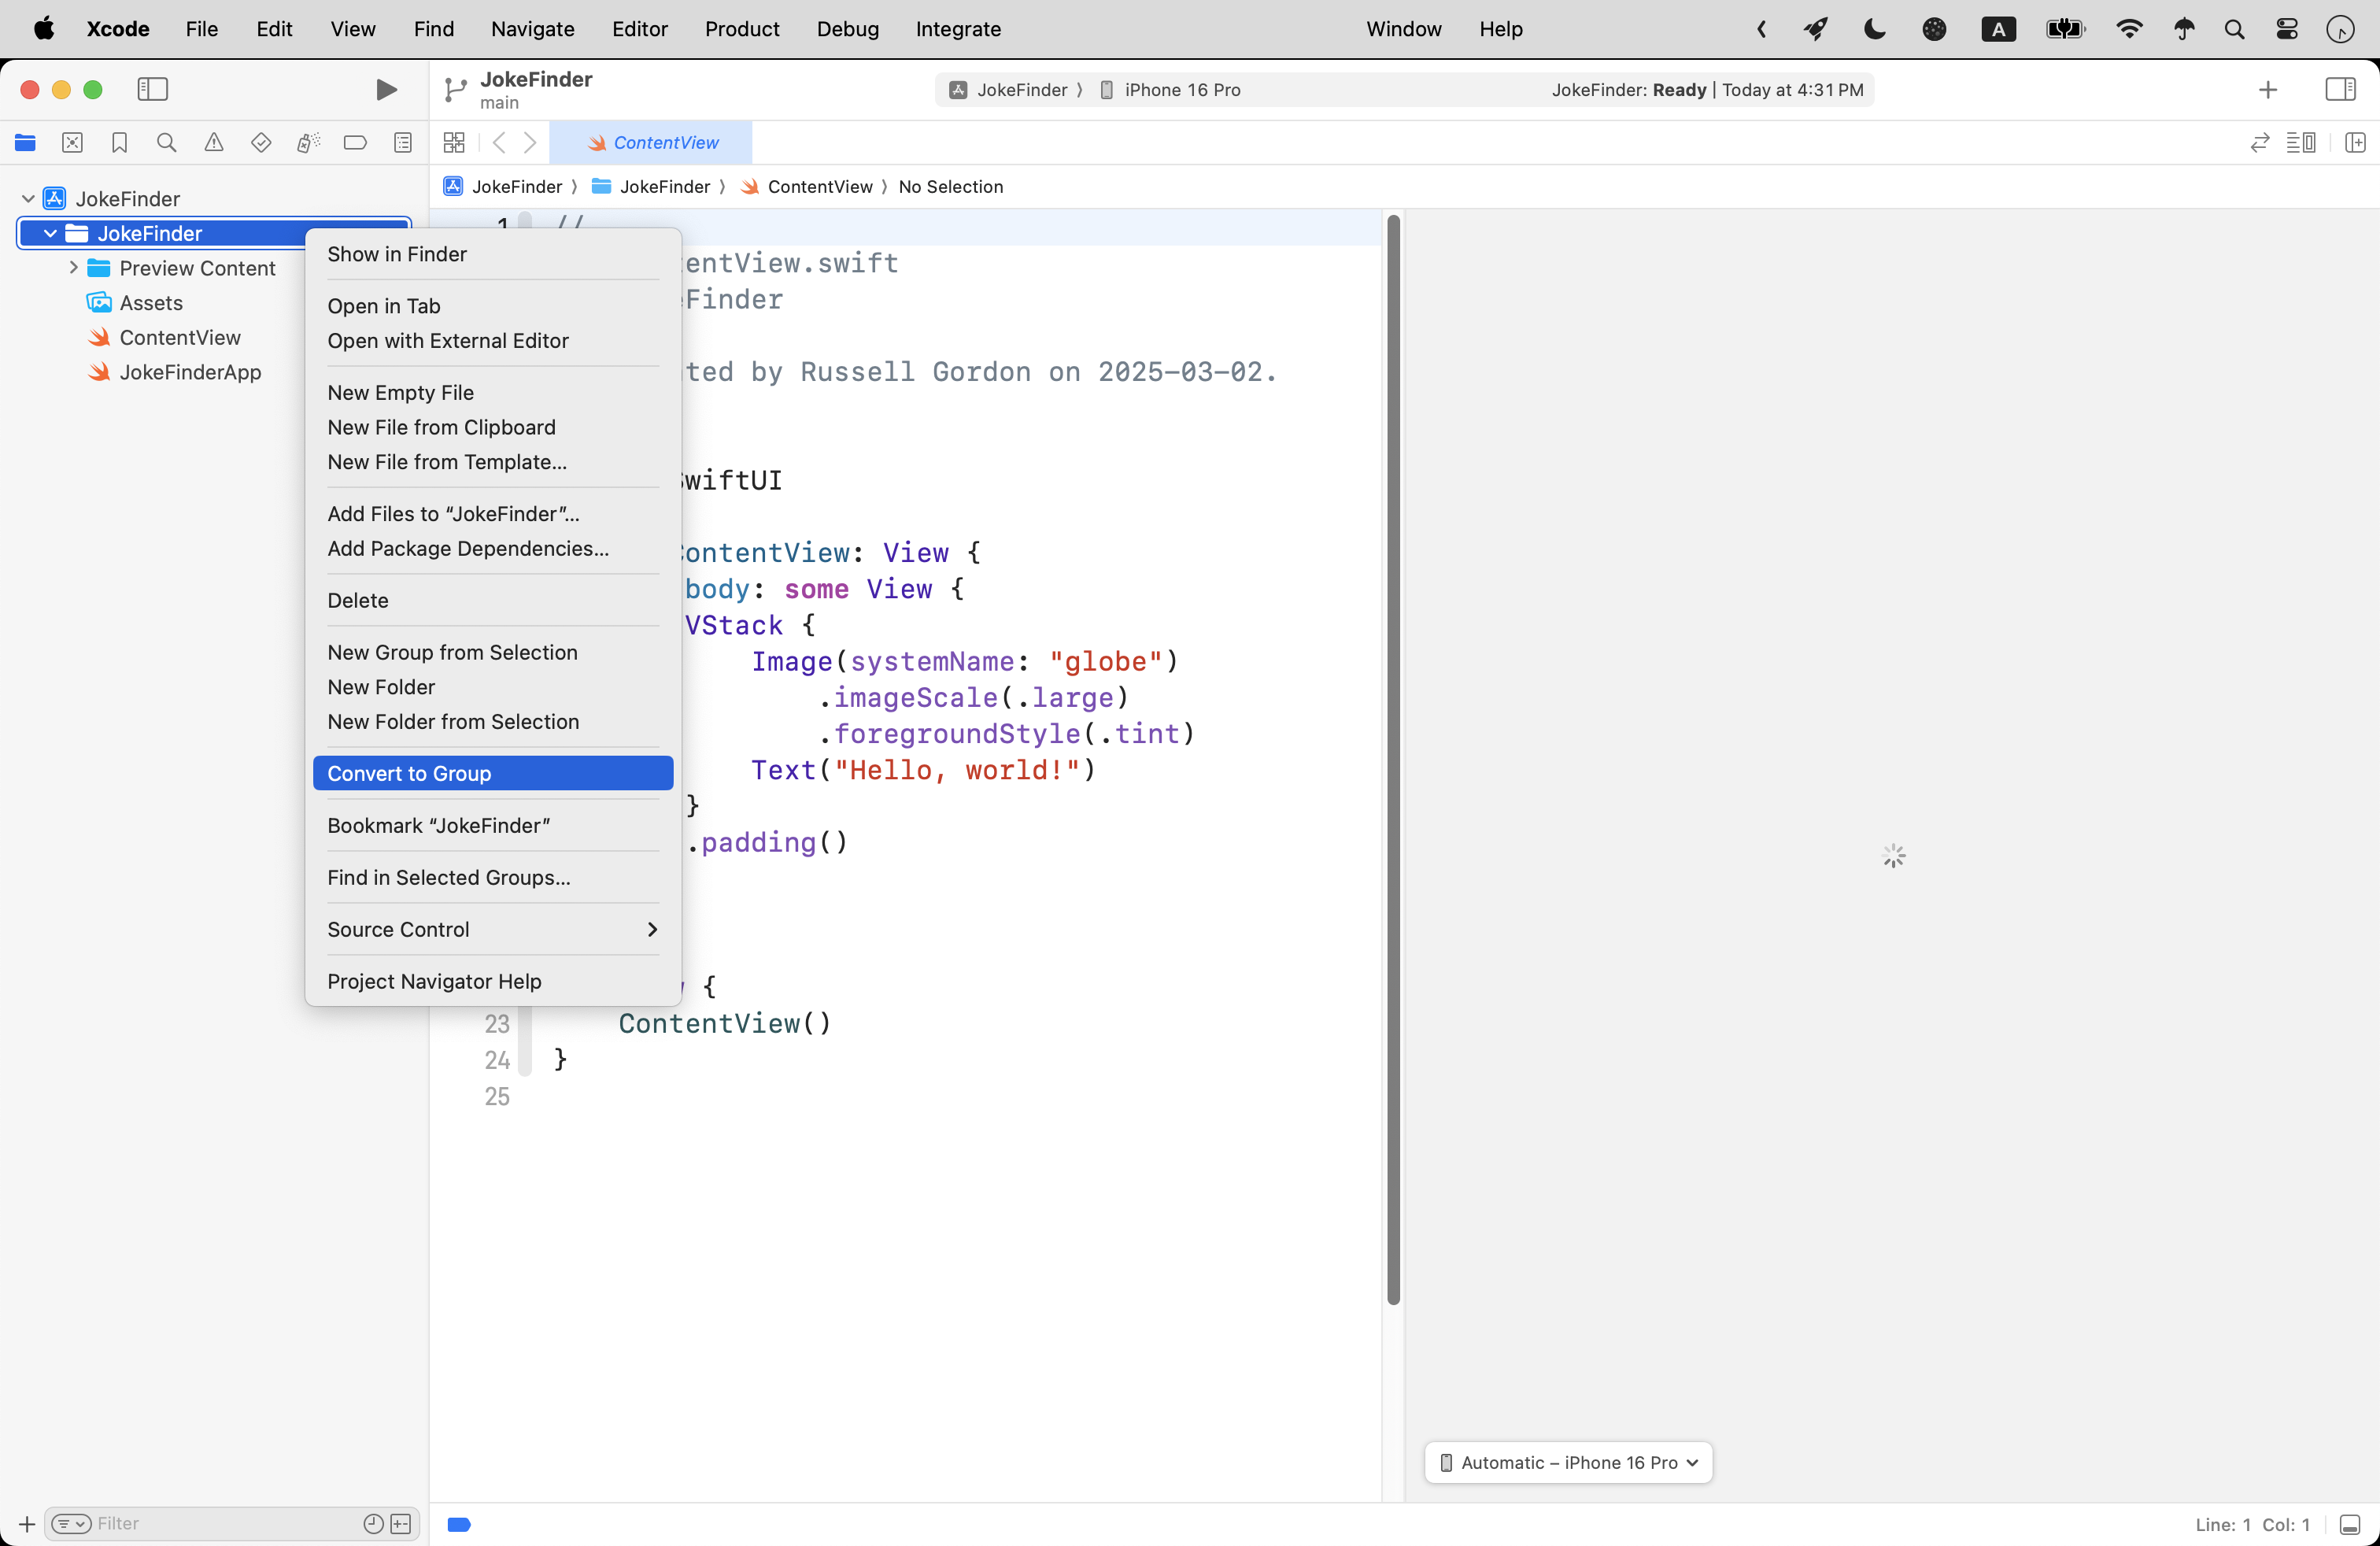
Then, adjust the folders so that they are groups instead:
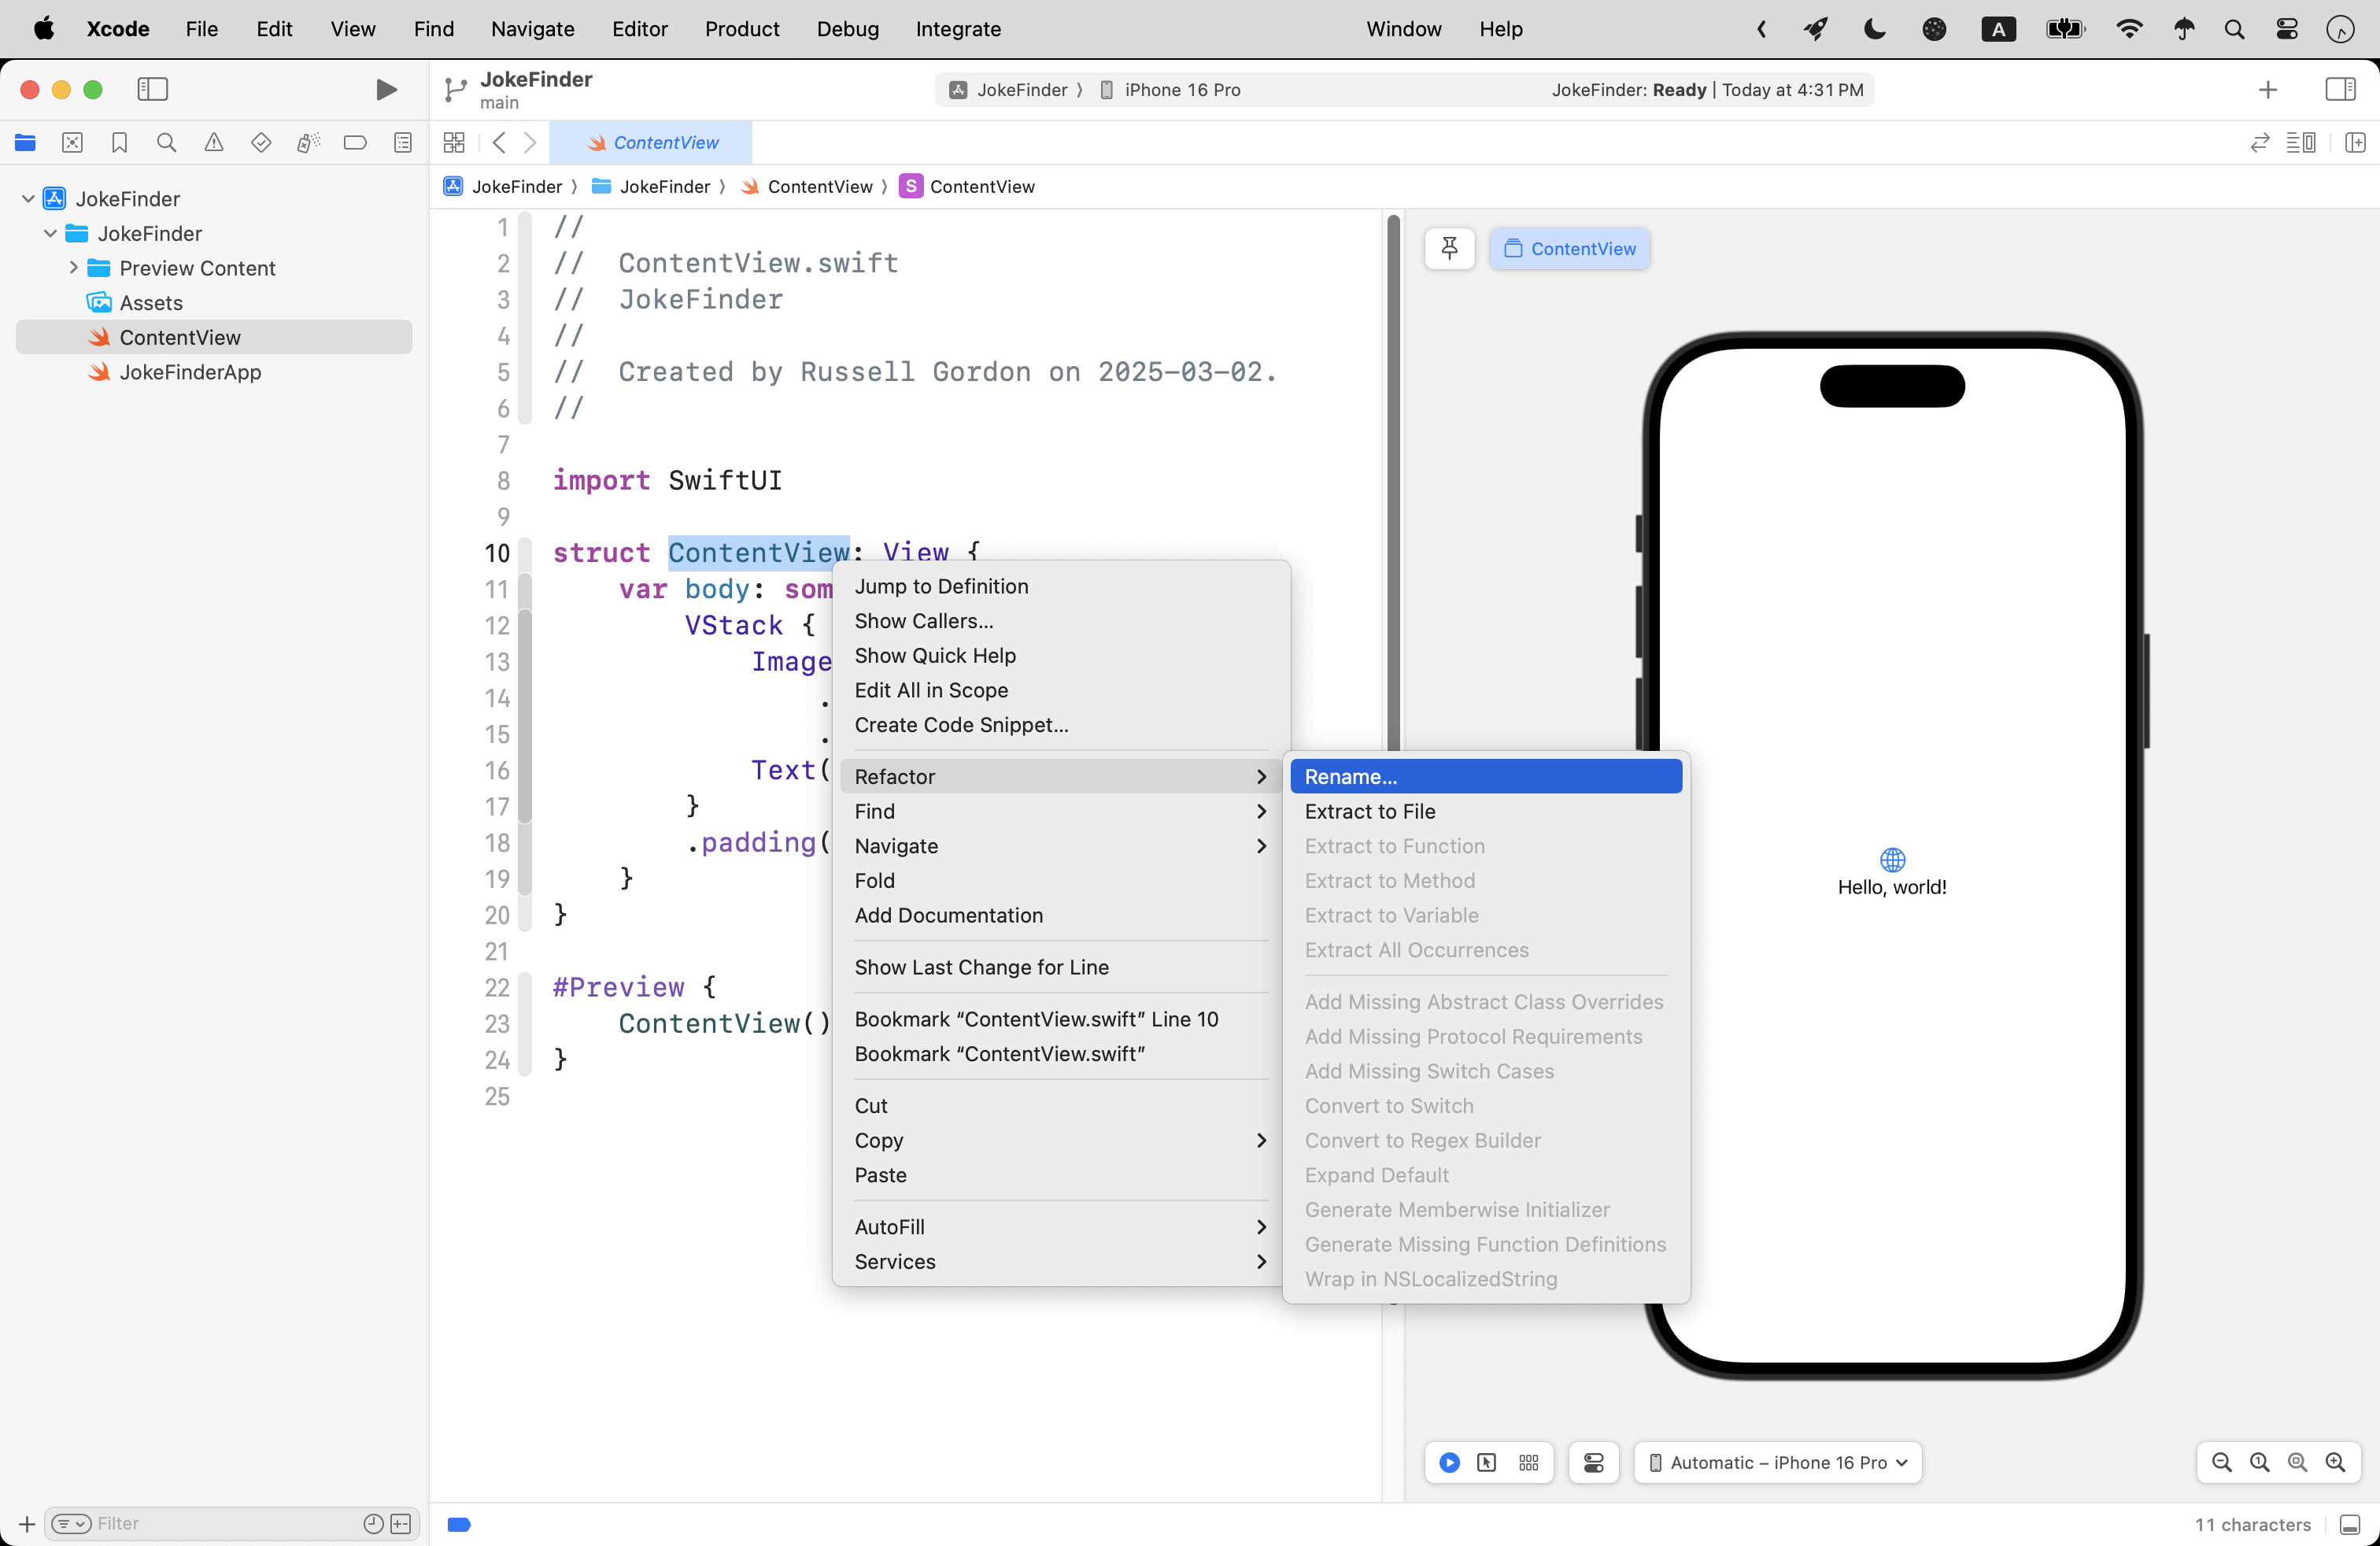
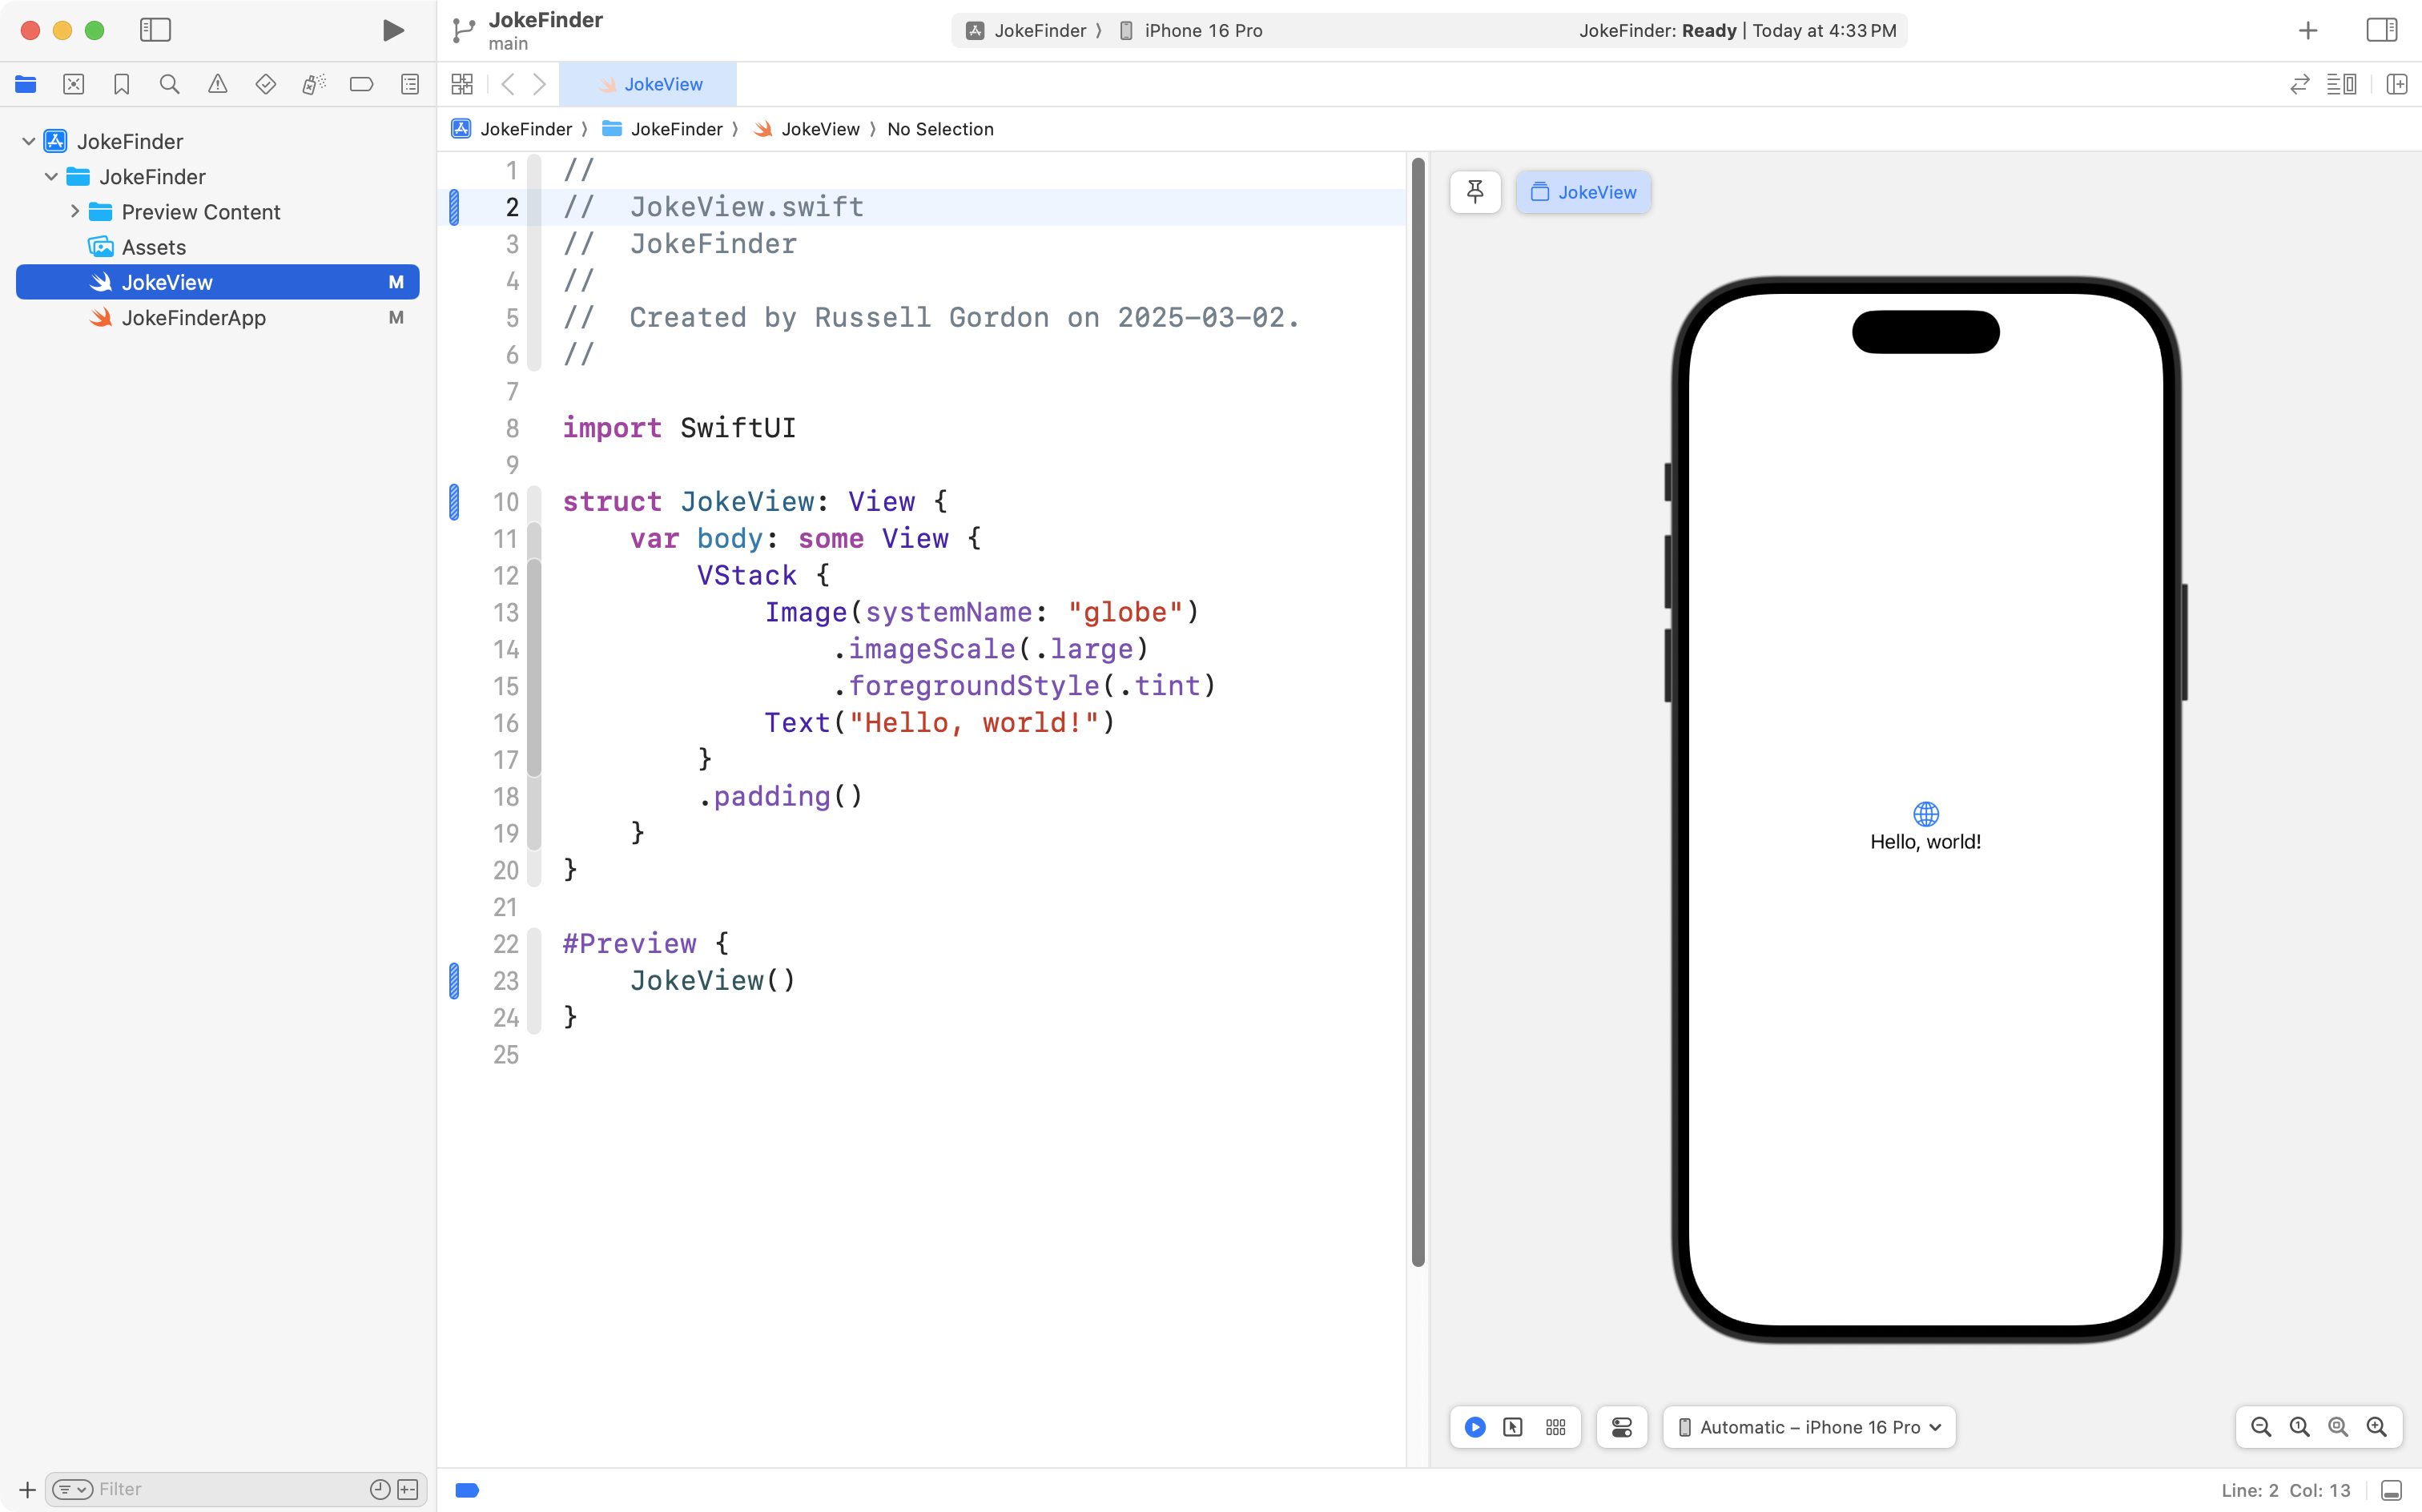
Refactor ContentView so that it is named JokeView instead:
… like this:
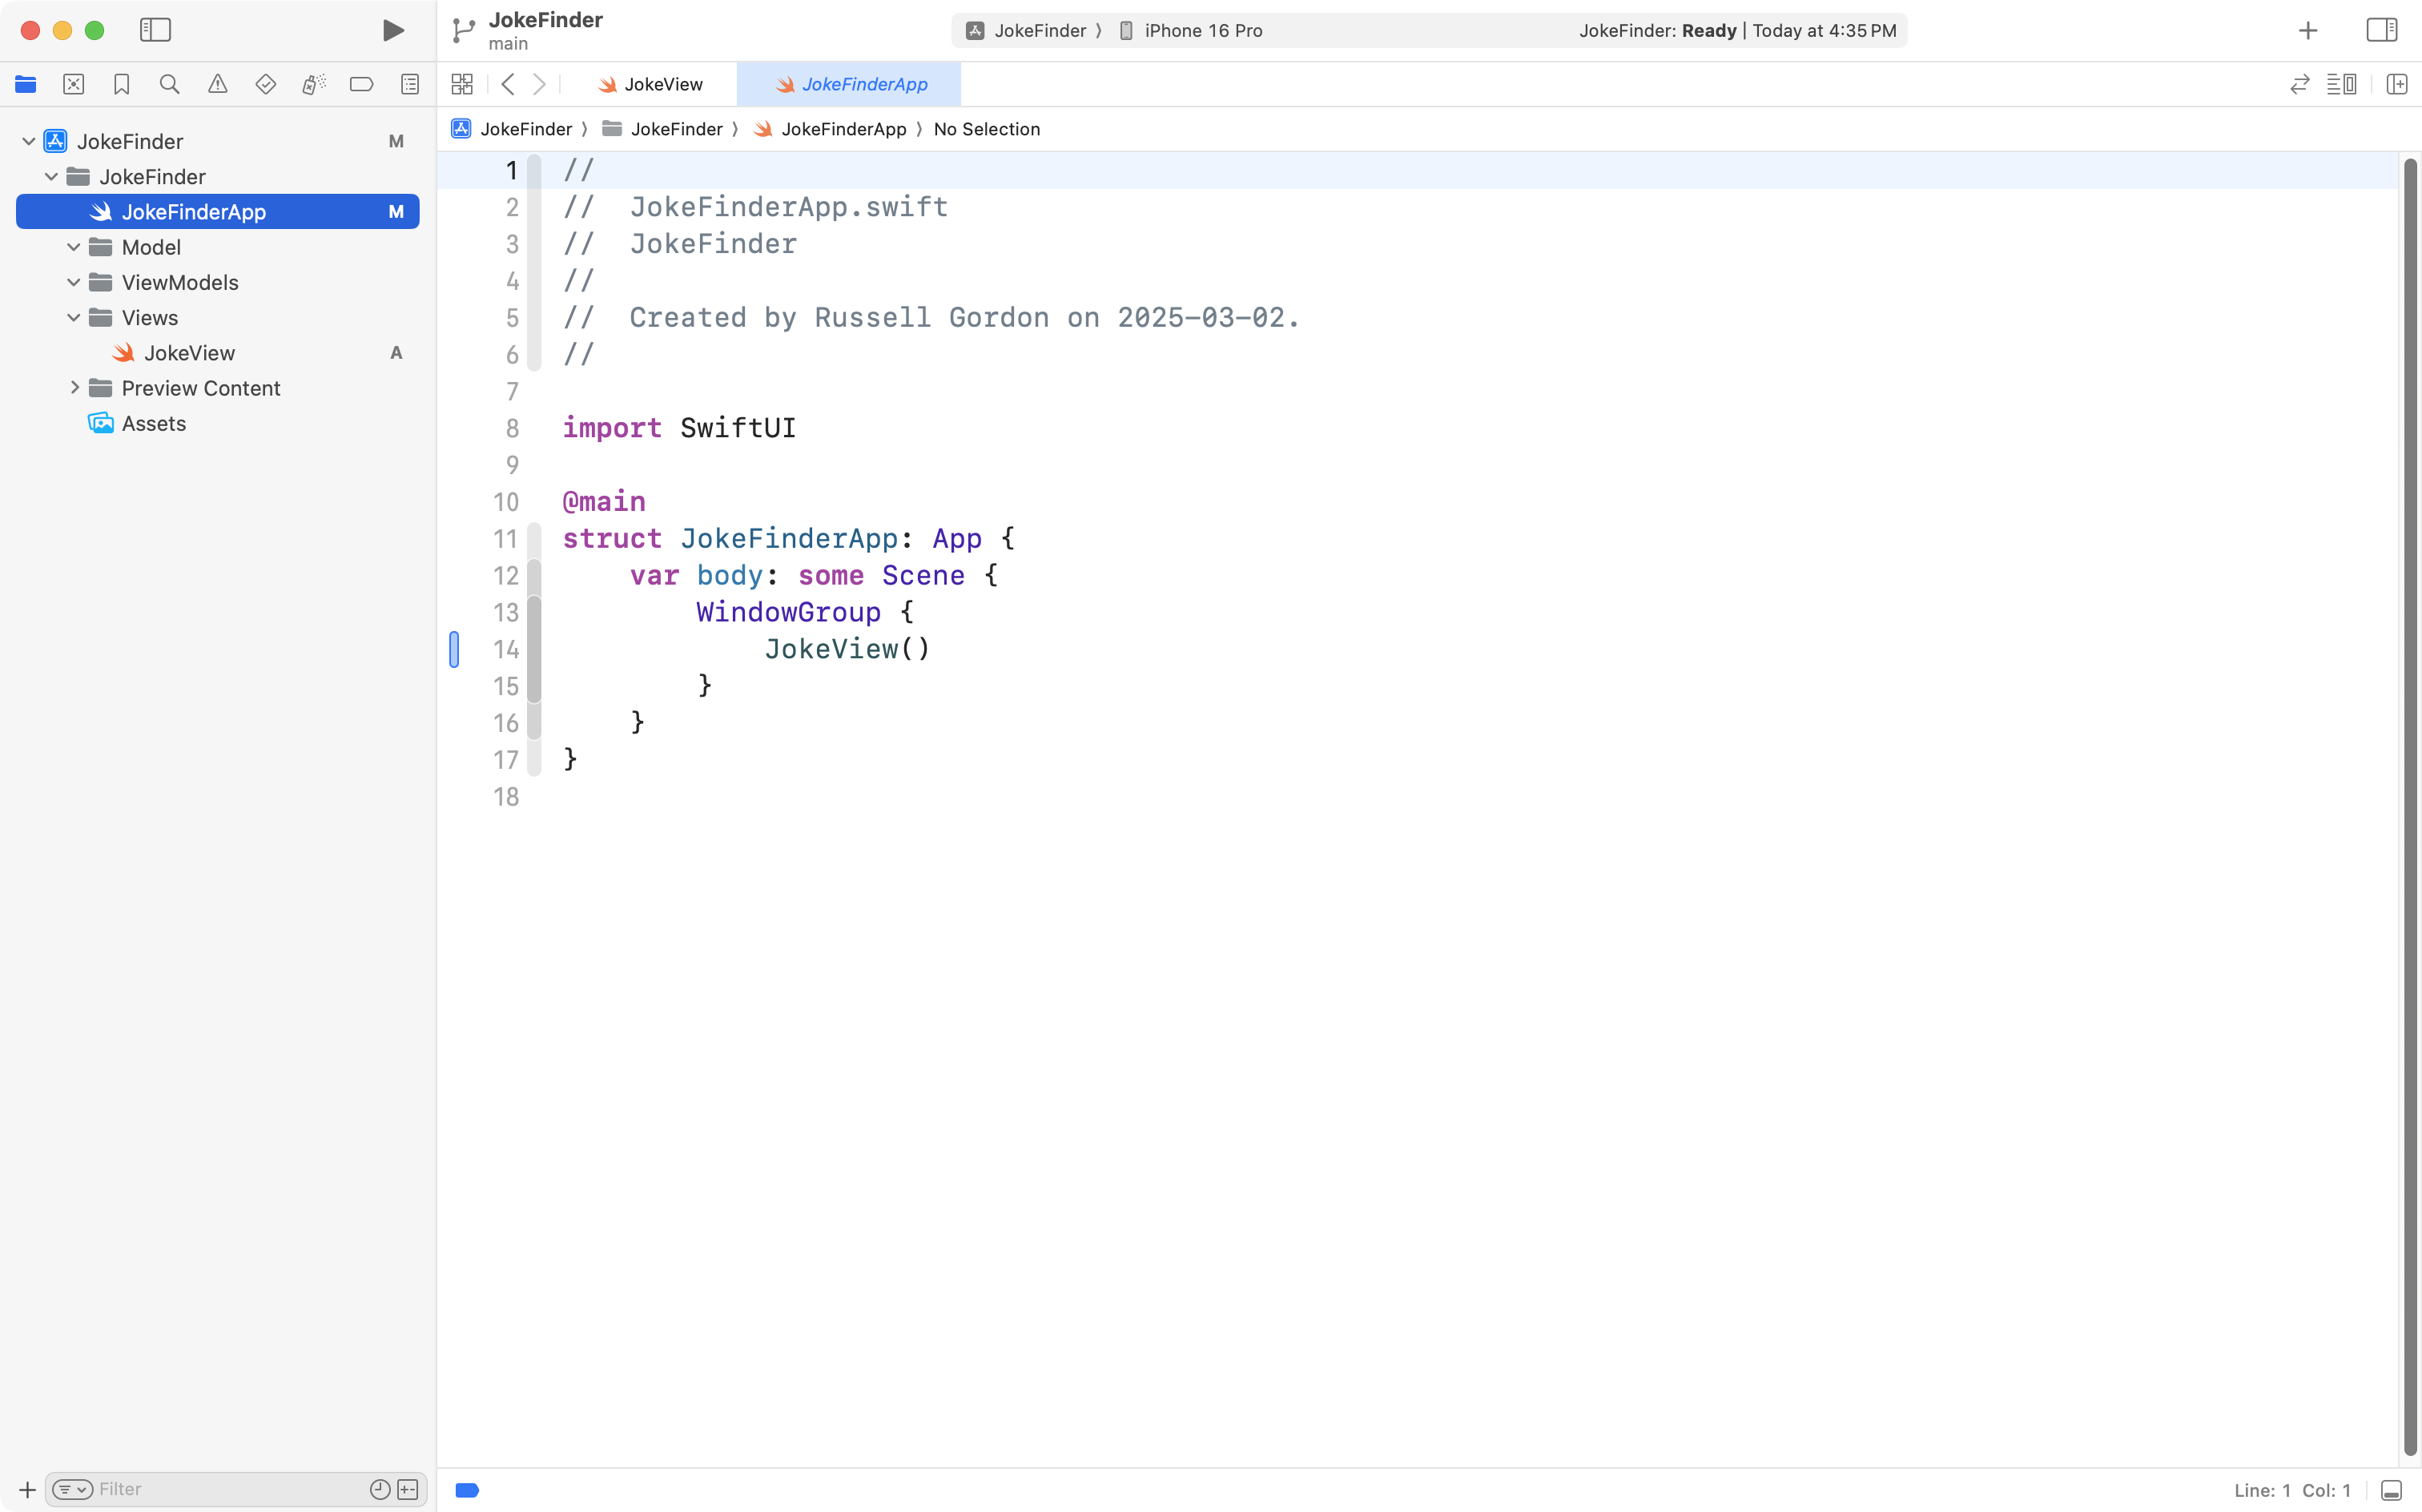
Finally, create groups named Model, ViewModels, and Views and then re-arrange the files so they are organized as shown at left in this image:
Now is a good time to commit and push your work with this message:
Initial project organization; added groups for MVVM design pattern.
Create the model
At a very literal level, app design is all about identifying a way to uniquely present data to users – and allowing them to interact with that data easily.
If the convenience and utility of using your app to interact with data outweighs the price you attach when you choose to sell software – well, that is how you make money as an app developer. 💵
All of this is to say – we will begin by considering the data – writing the model for this app.
Inspect the response format
When building an app that will use JSON-encoded data we must first take a look at the format of the response we will receive.
We will retrieve random jokes from this website. If you follow that link, you will see some documentation for this API – there are several endpoints that can be used. No authentication is required to use these endpionts.
We will use an endpoint that provides a single joke each time we make a request for data.
If you follow the link to the single joke endpoint, you will see a response that looks something like this, just with different information:
{"type":"general","setup":"Why did the coffee file a police report?","punchline":"It got mugged.","id":325}While that is a valid JSON object, since the text has no whitespace, it is hard for humans to read.
Tidy up the JSON
So, we can make use of an online JSON formatting service to tidy up the response:
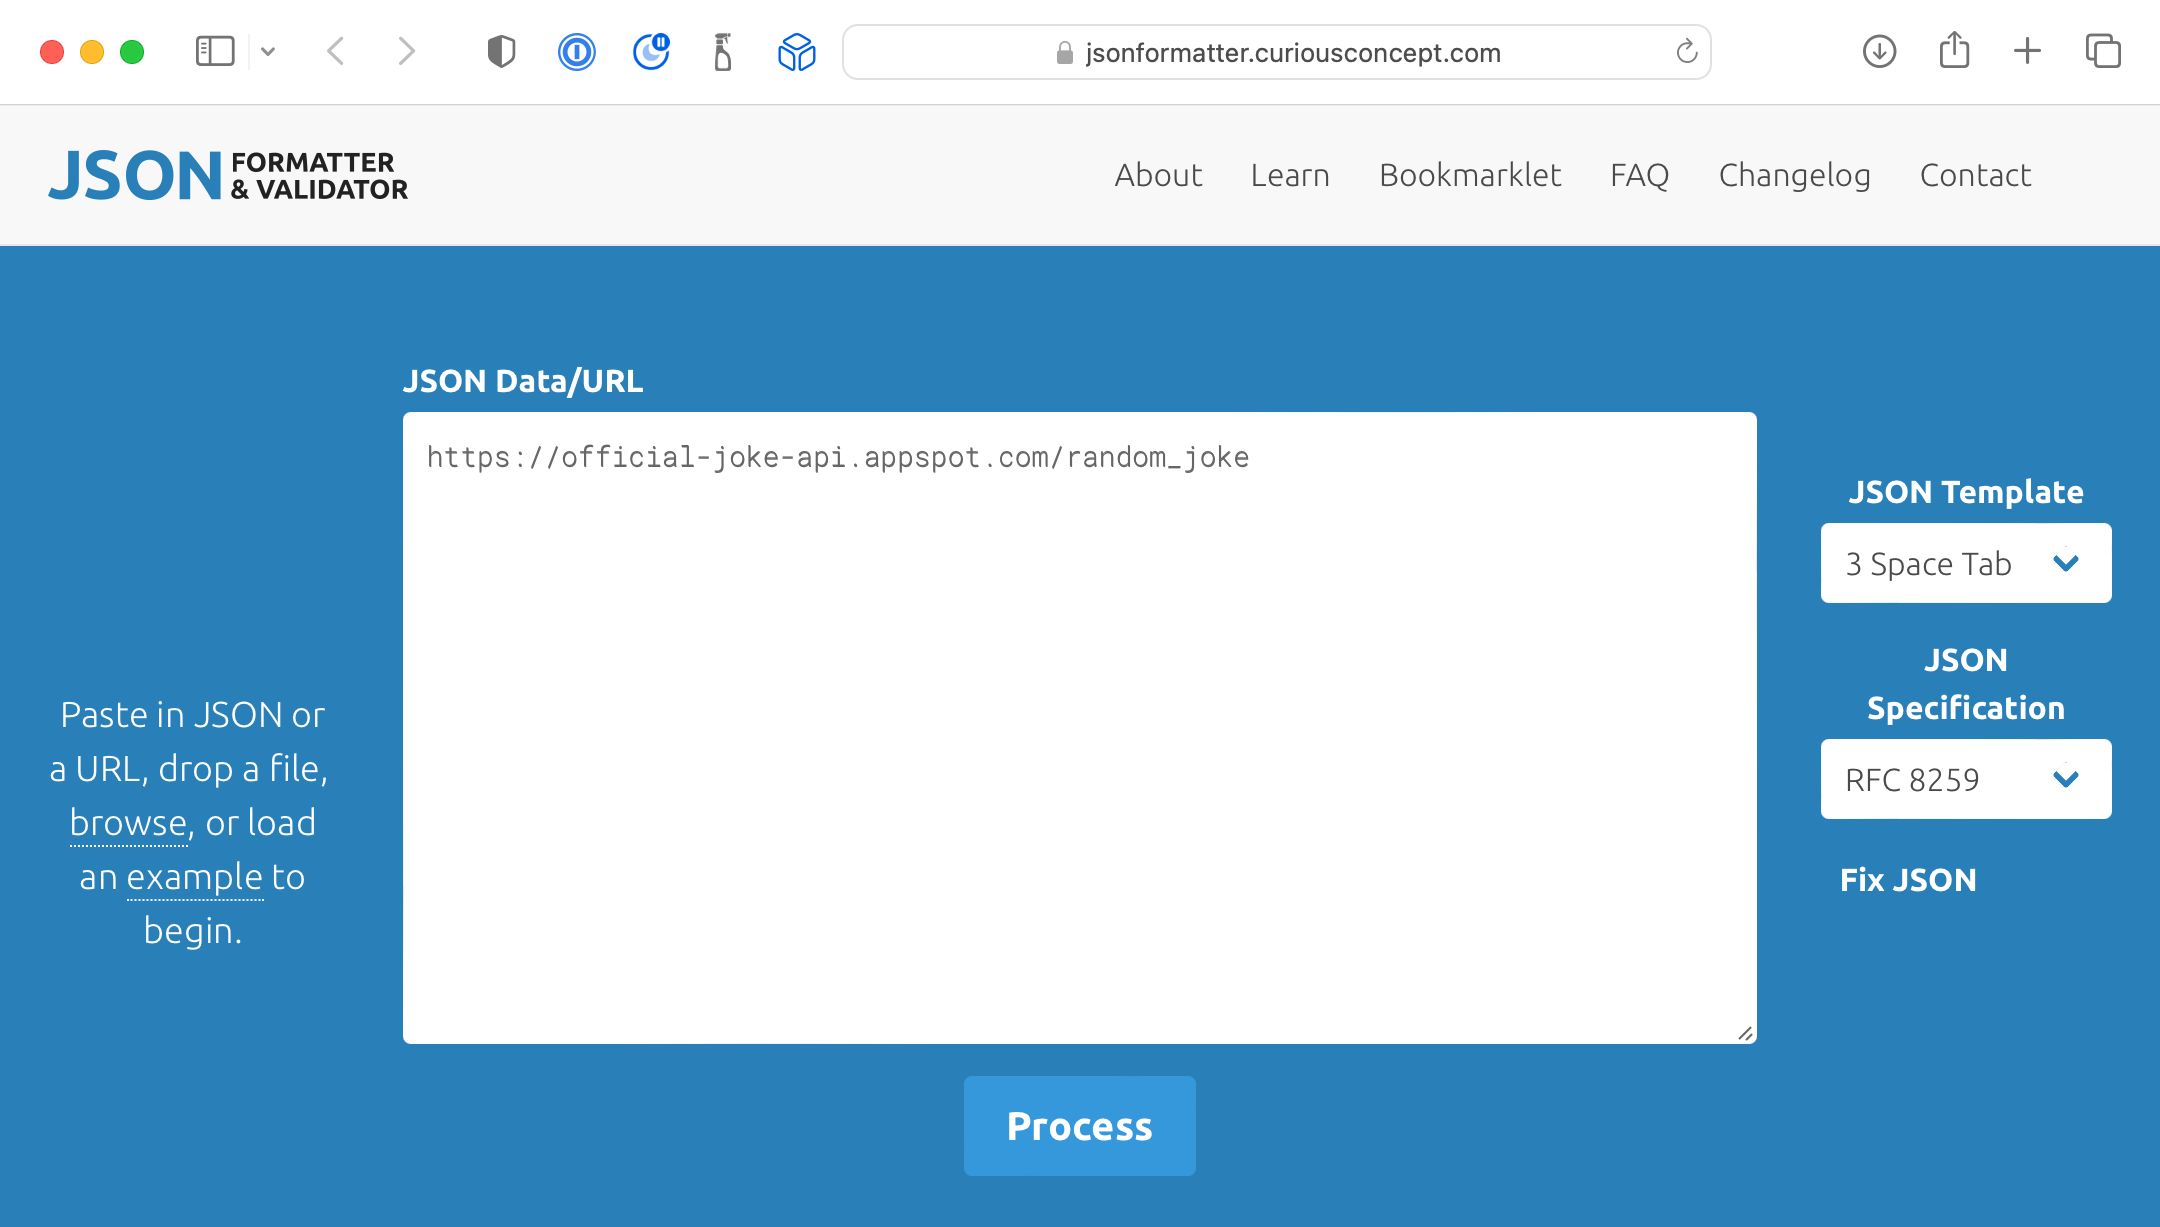
To use the formatter, paste the address of the endpoint you want to see formatted data from. In this example, that is:
https://official-joke-api.appspot.com/random_joke
Then after clicking the Process button you should see a result similar to this one:
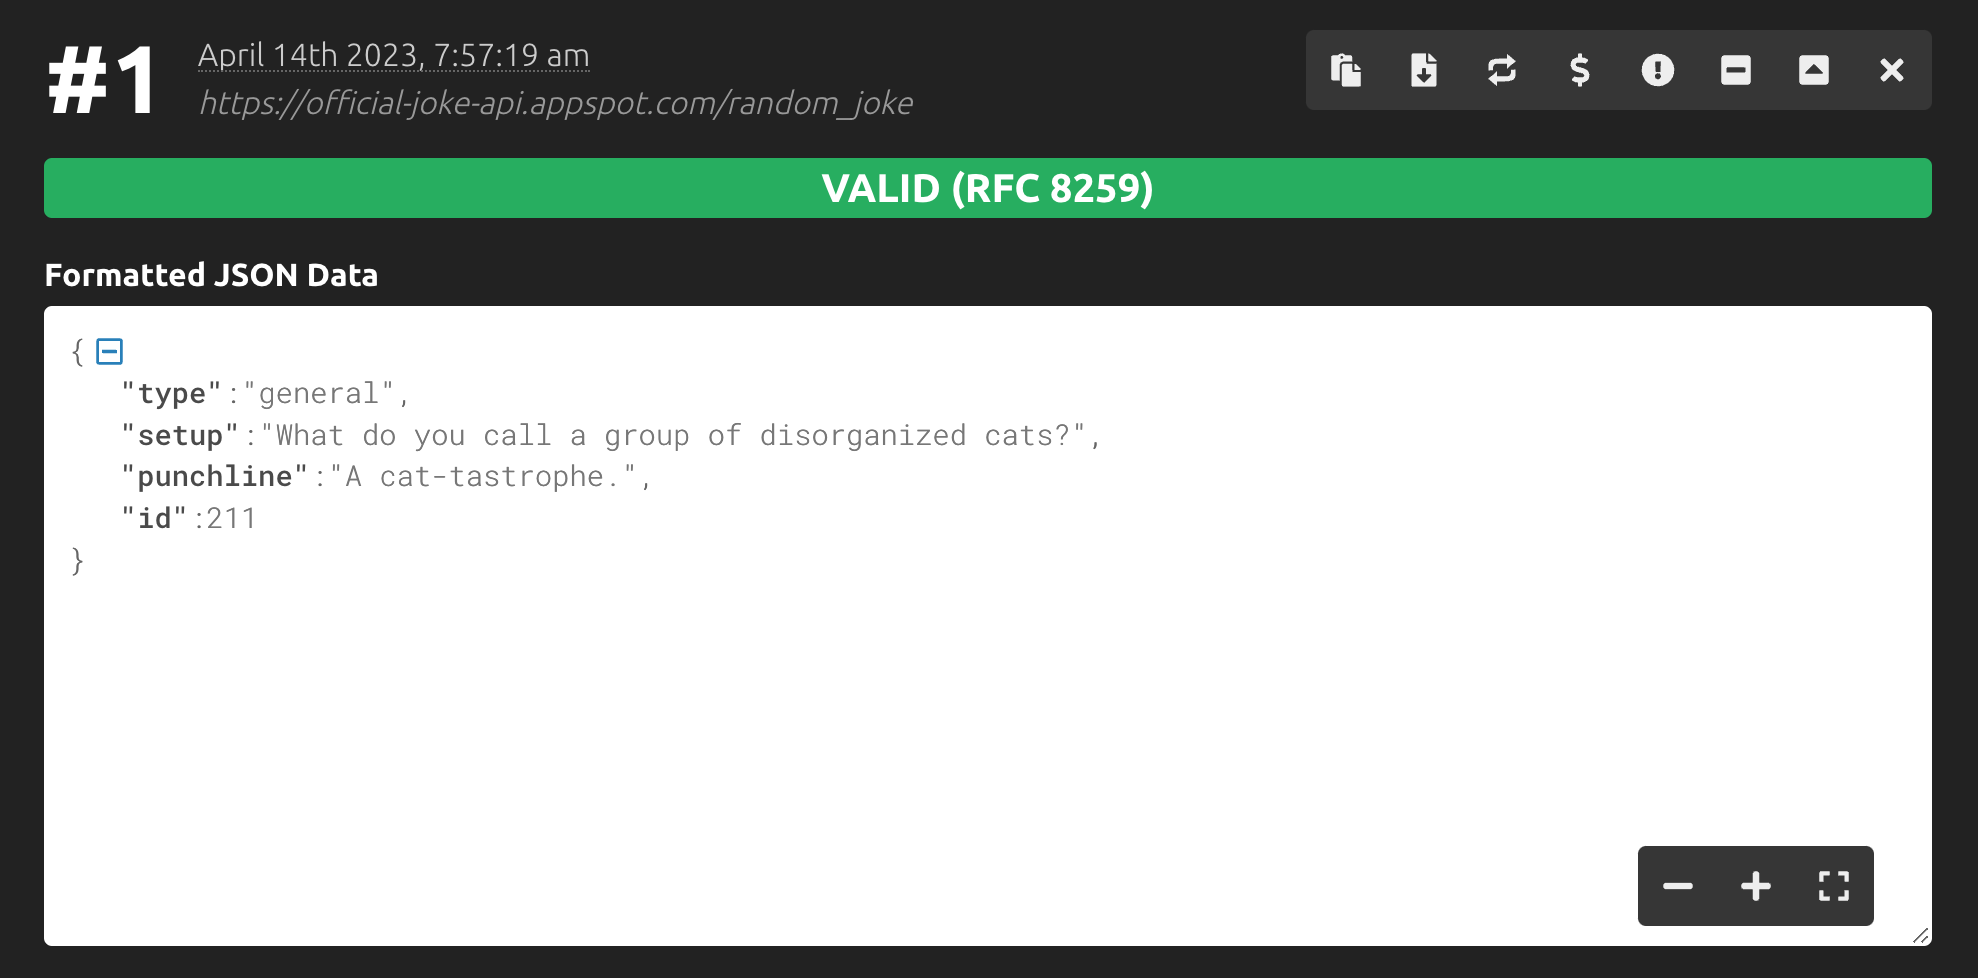
This makes it much easier to read the response from the endpoint.
Recall that we must author a Swift native data structure that matches the format of the JSON we expect to receive:
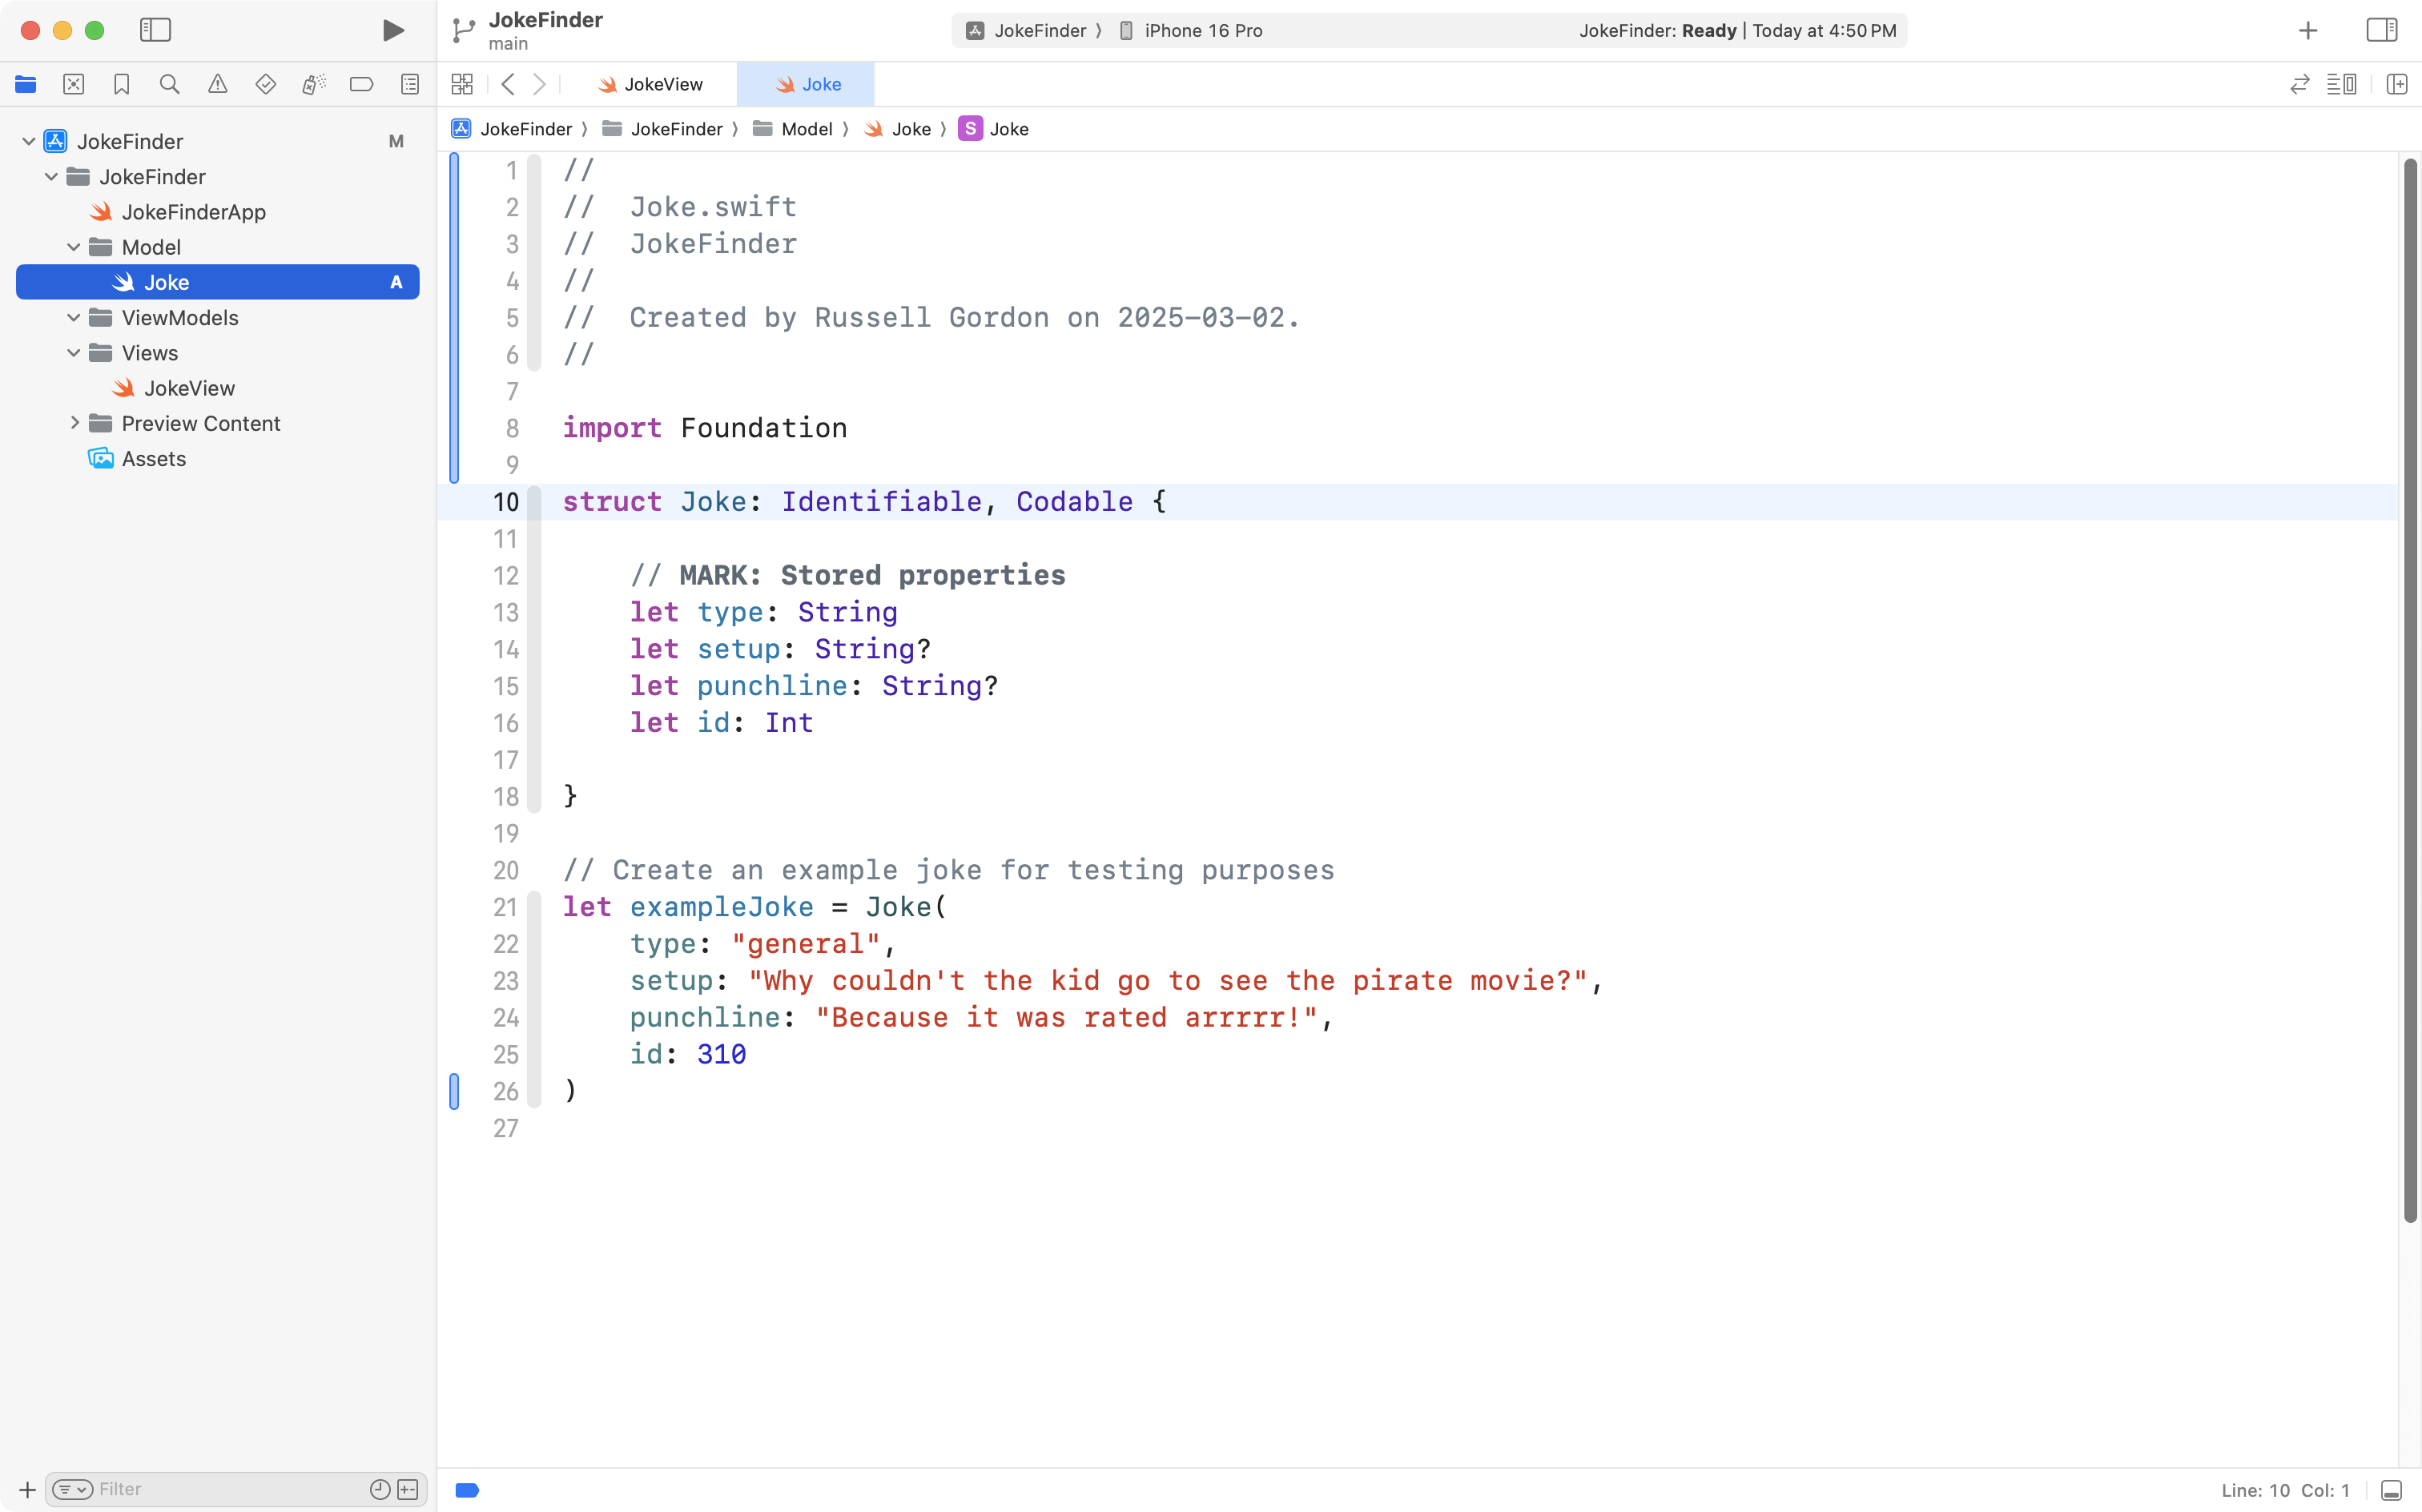
So, in the Model group of your project, add this code to a file named Joke.swift:
struct Joke: Identifiable, Codable {

    // MARK: Stored properties
    let type: String
    let setup: String?
    let punchline: String?
    let id: Int

}

// Create an example joke for testing purposes
let exampleJoke = Joke(
    type: "general",
    setup: "Why couldn't the kid go to see the pirate movie?",
    punchline: "Because it was rated arrrrr!",
    id: 310
)
… like this:
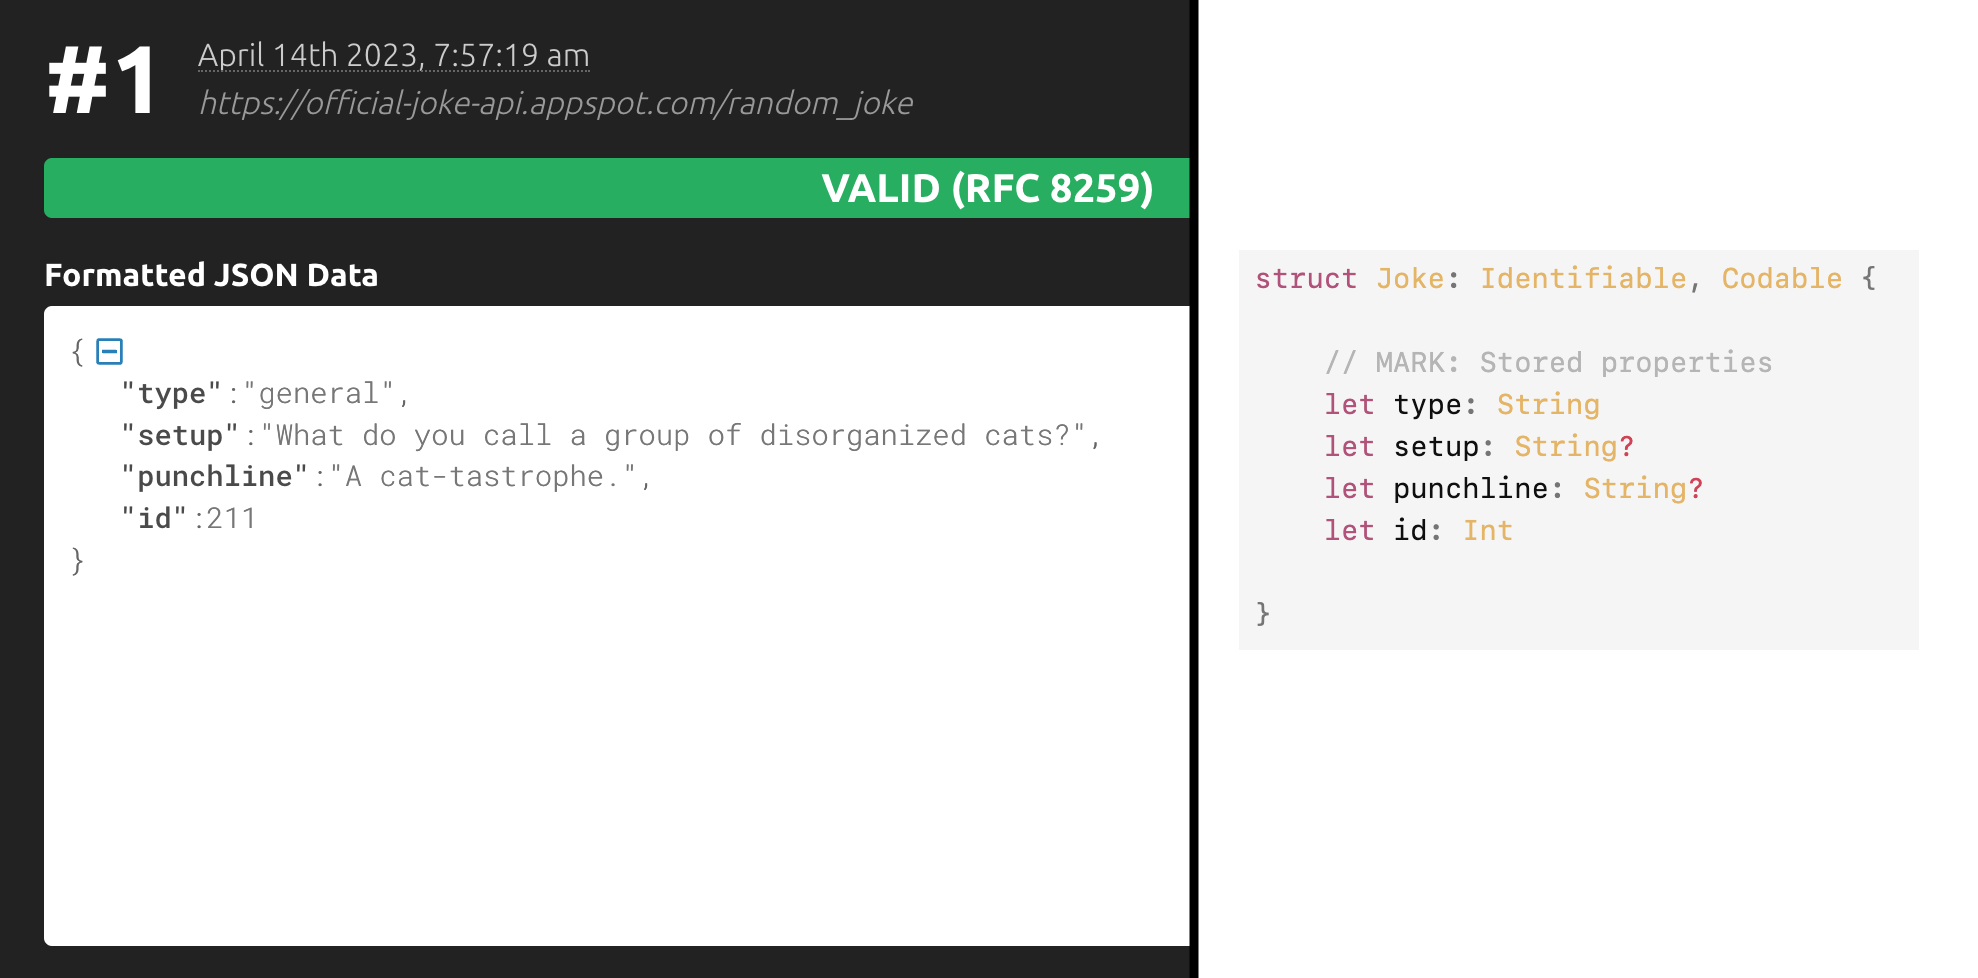
Notice how the properties included in the Joke structure correspond to the fields of the JSON object:
TIP
It is possible to write our code so that we do not need to exactly match the naming of fields provided by the endpoint, or, to even use all of the name-value pairs that a JSON endpoint provides.
However, today, to keep this tutorial simple, we will exactly match the structure offered by the endpoint.
Please now commit and push your work now with this message:
Added a model to match the structure of the JSON object received from our endpoint.
Create the view model
Next, we will author a simple view model that can hold a joke to be displayed by the view.
Copy this code into your computer’s clipboard:
import Foundation

@Observable
class JokeViewModel {

    // MARK: Stored properties

    // Whatever joke has most recently been downloaded
    // from the endpoint
    var currentJoke: Joke?

    // MARK: Initializer(s)
    init(currentJoke: Joke? = nil) {

        // Take whatever joke was provided when an instance of
        // this view model is created, and make it the current joke.
        //
        // Otherwise, the default value for the current joke
        // will be a nil.
        self.currentJoke = currentJoke
    }

}
… and add it to a file named JokeViewModel.swift in the ViewModels group, like this:
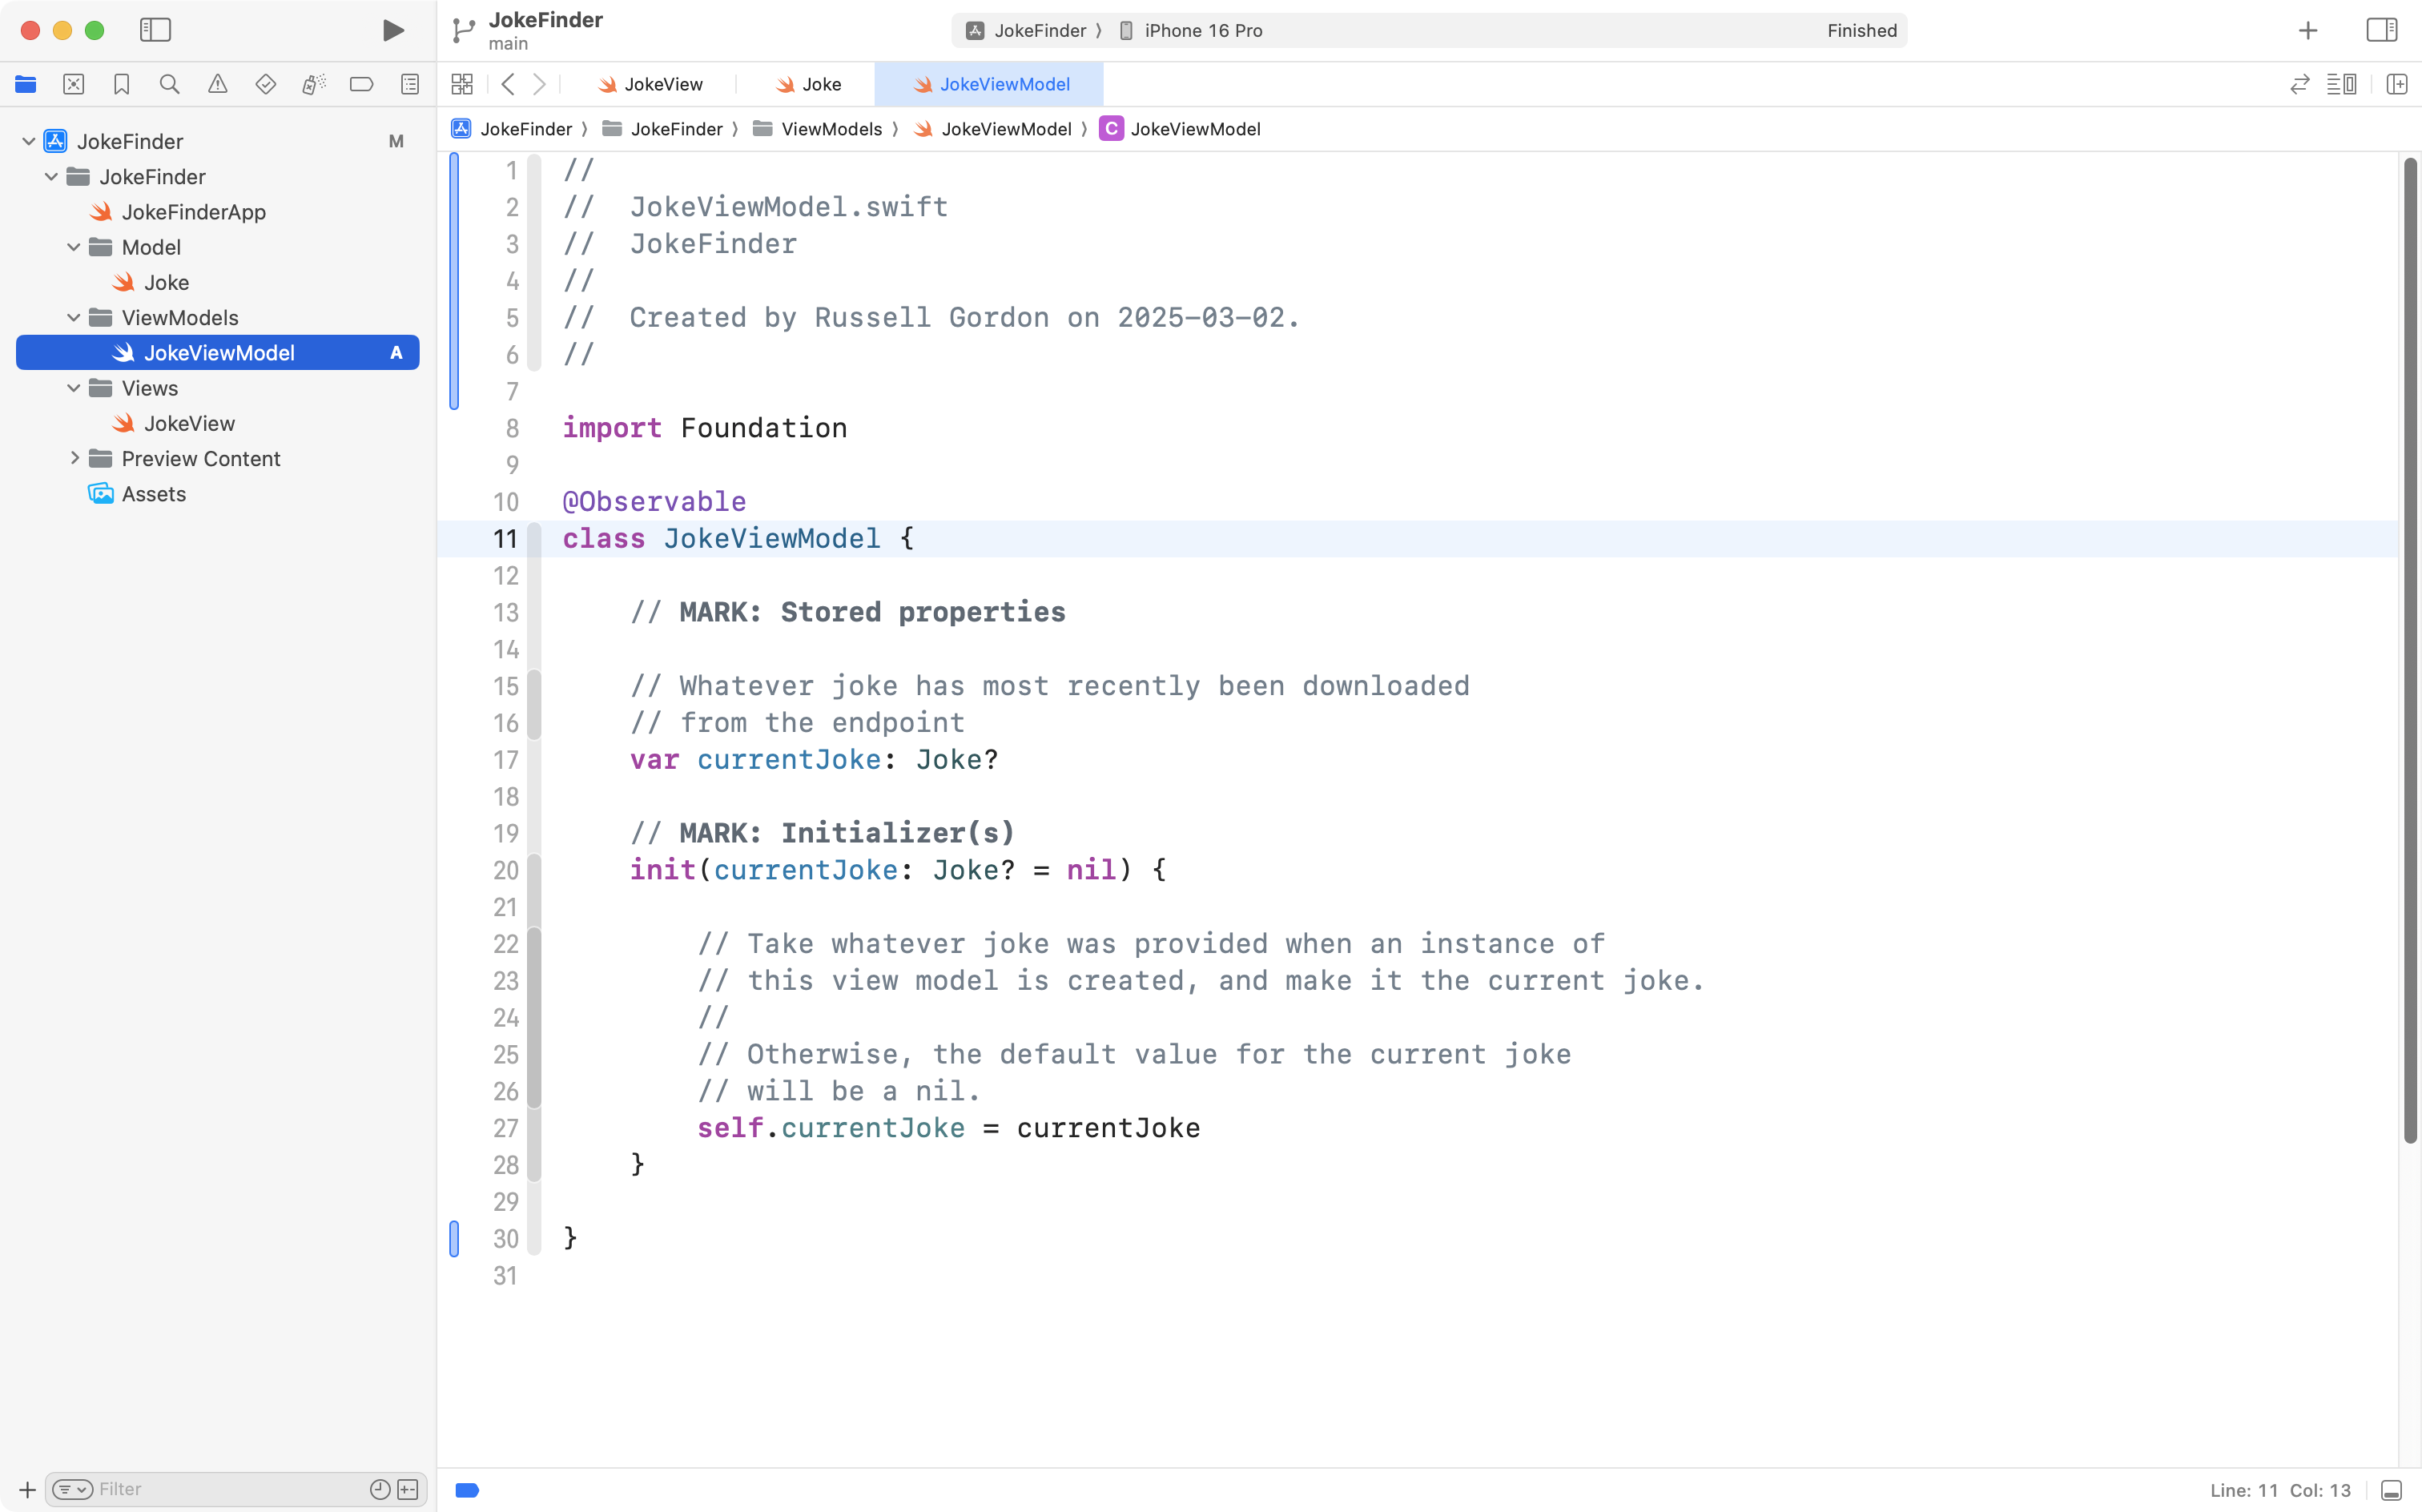
Be sure to read the comments in the code provided to understand what the code is doing.
Right now, this view model is very basic – we will add more functionality soon.
Commit and push your work now with this message:
Added a basic view model to hold the current joke that will be shown by the view.
Create the view
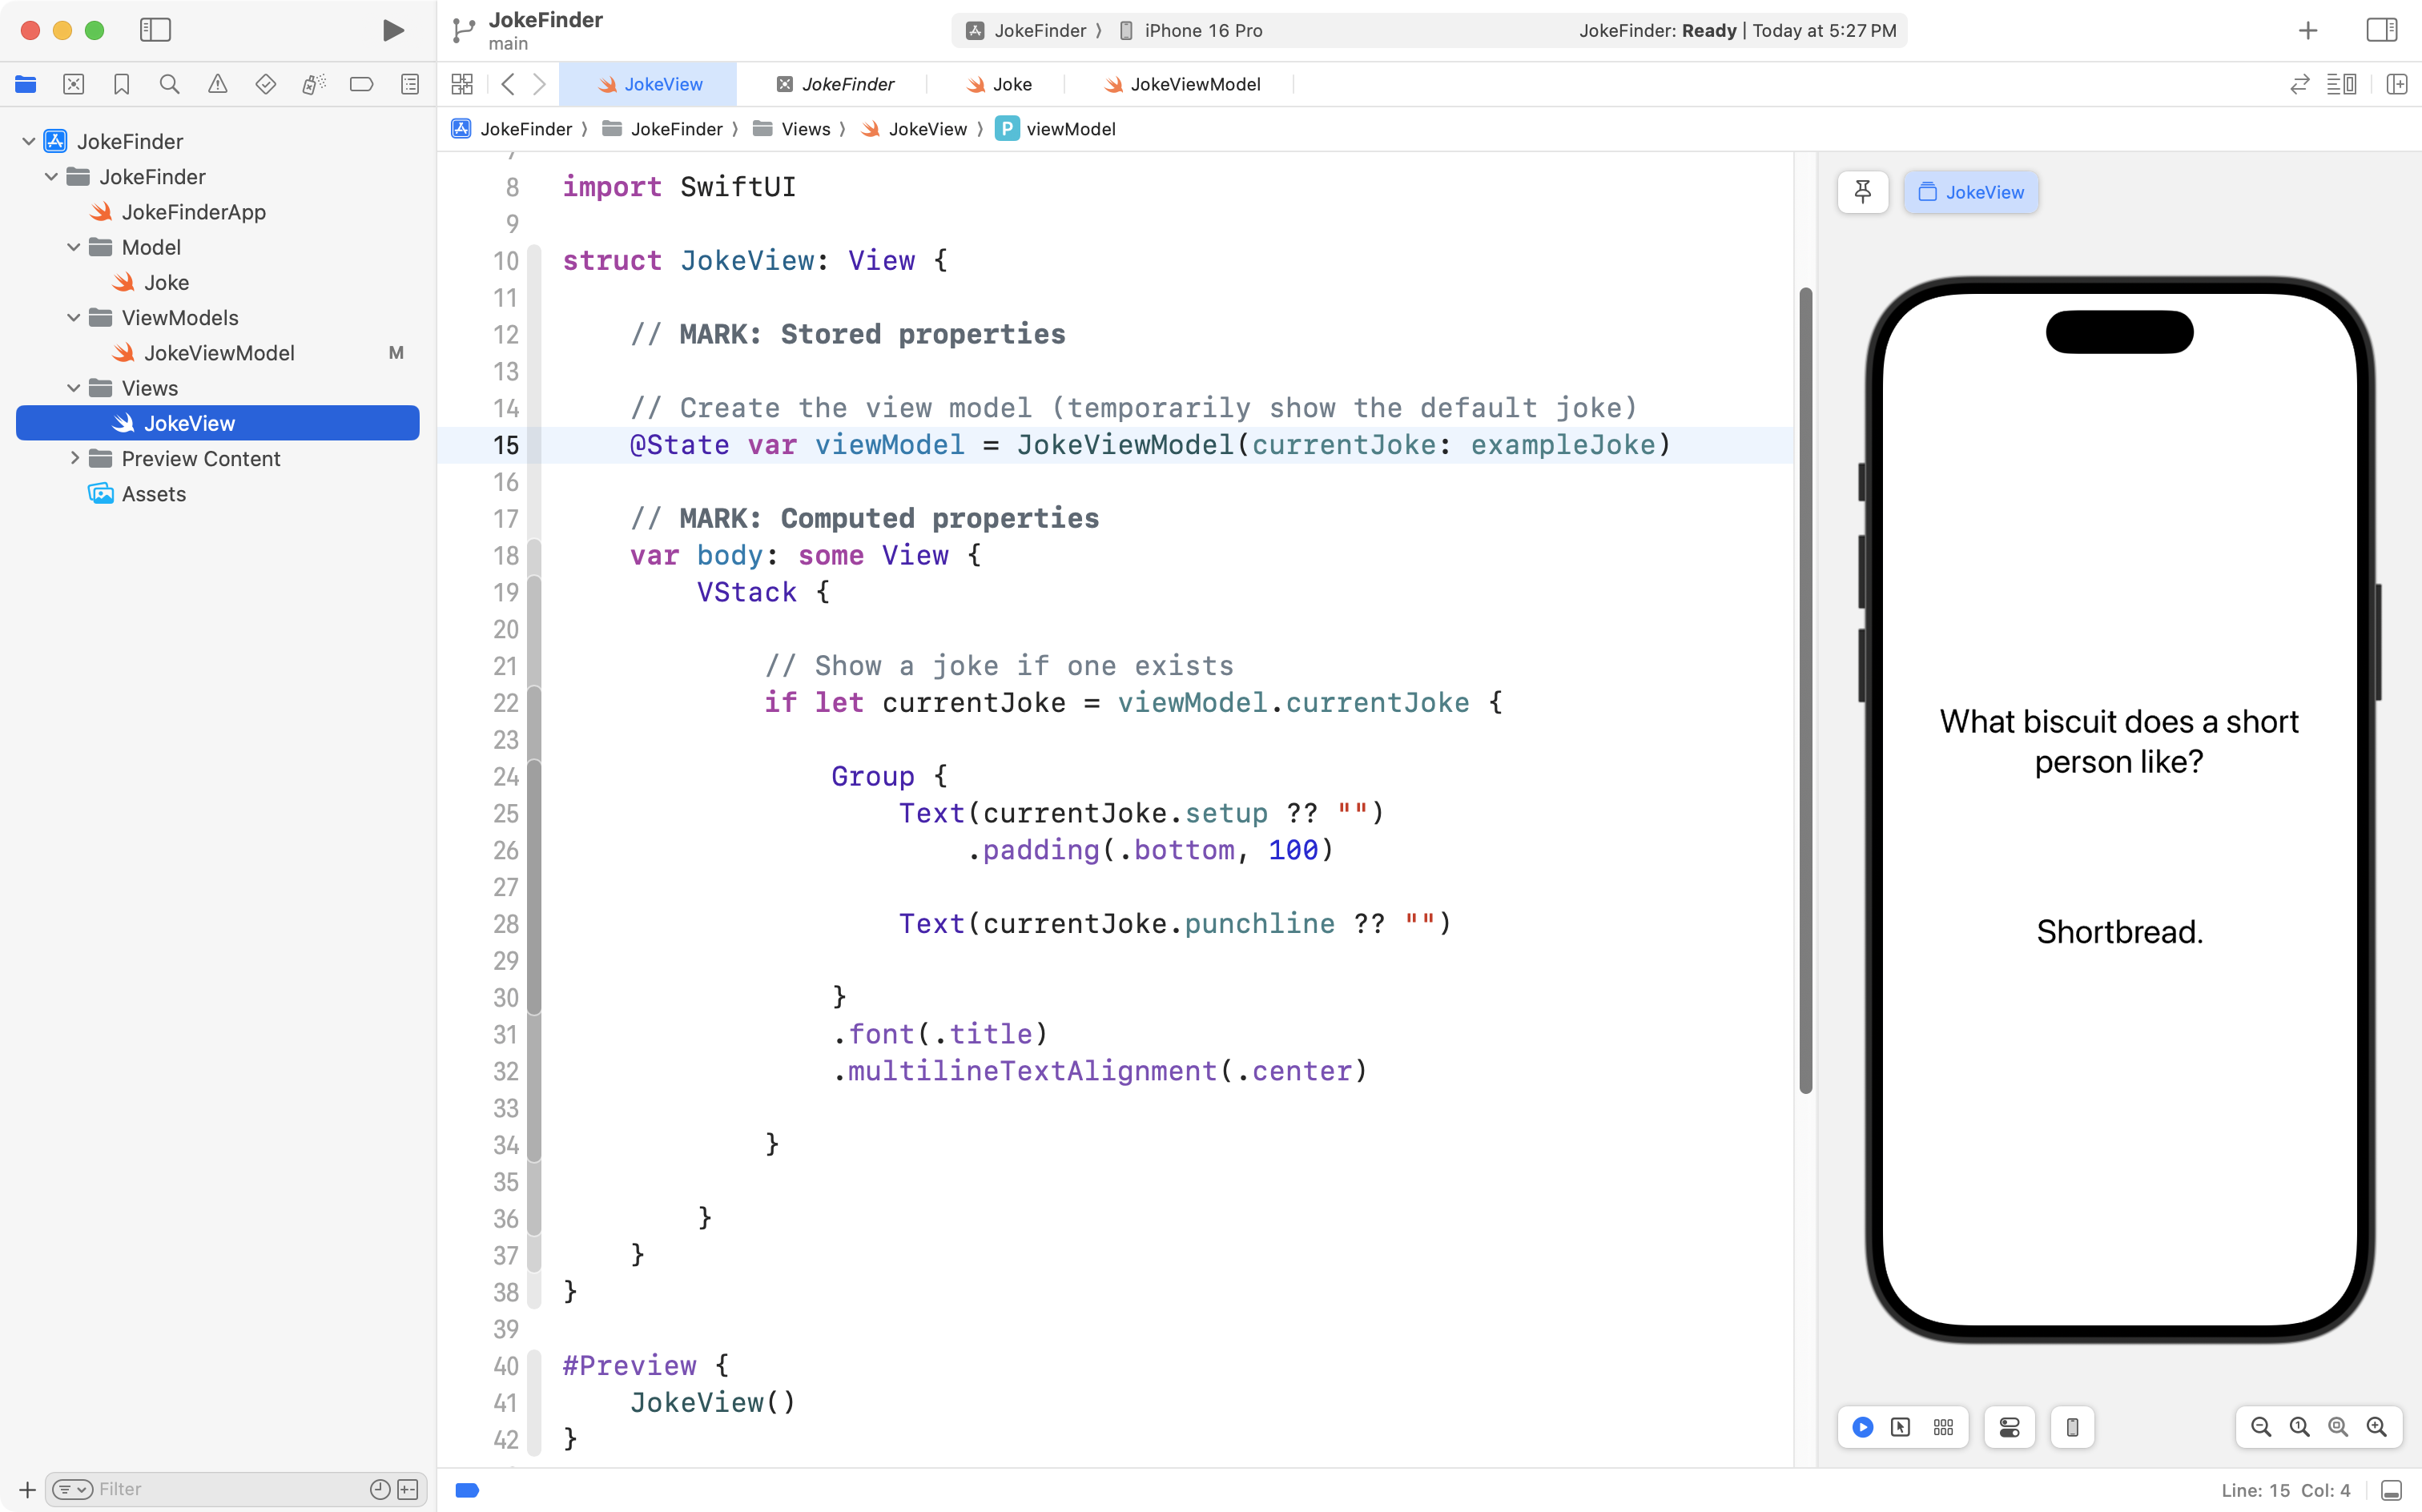
Now we will create a very simple view that shows the example joke from our model.
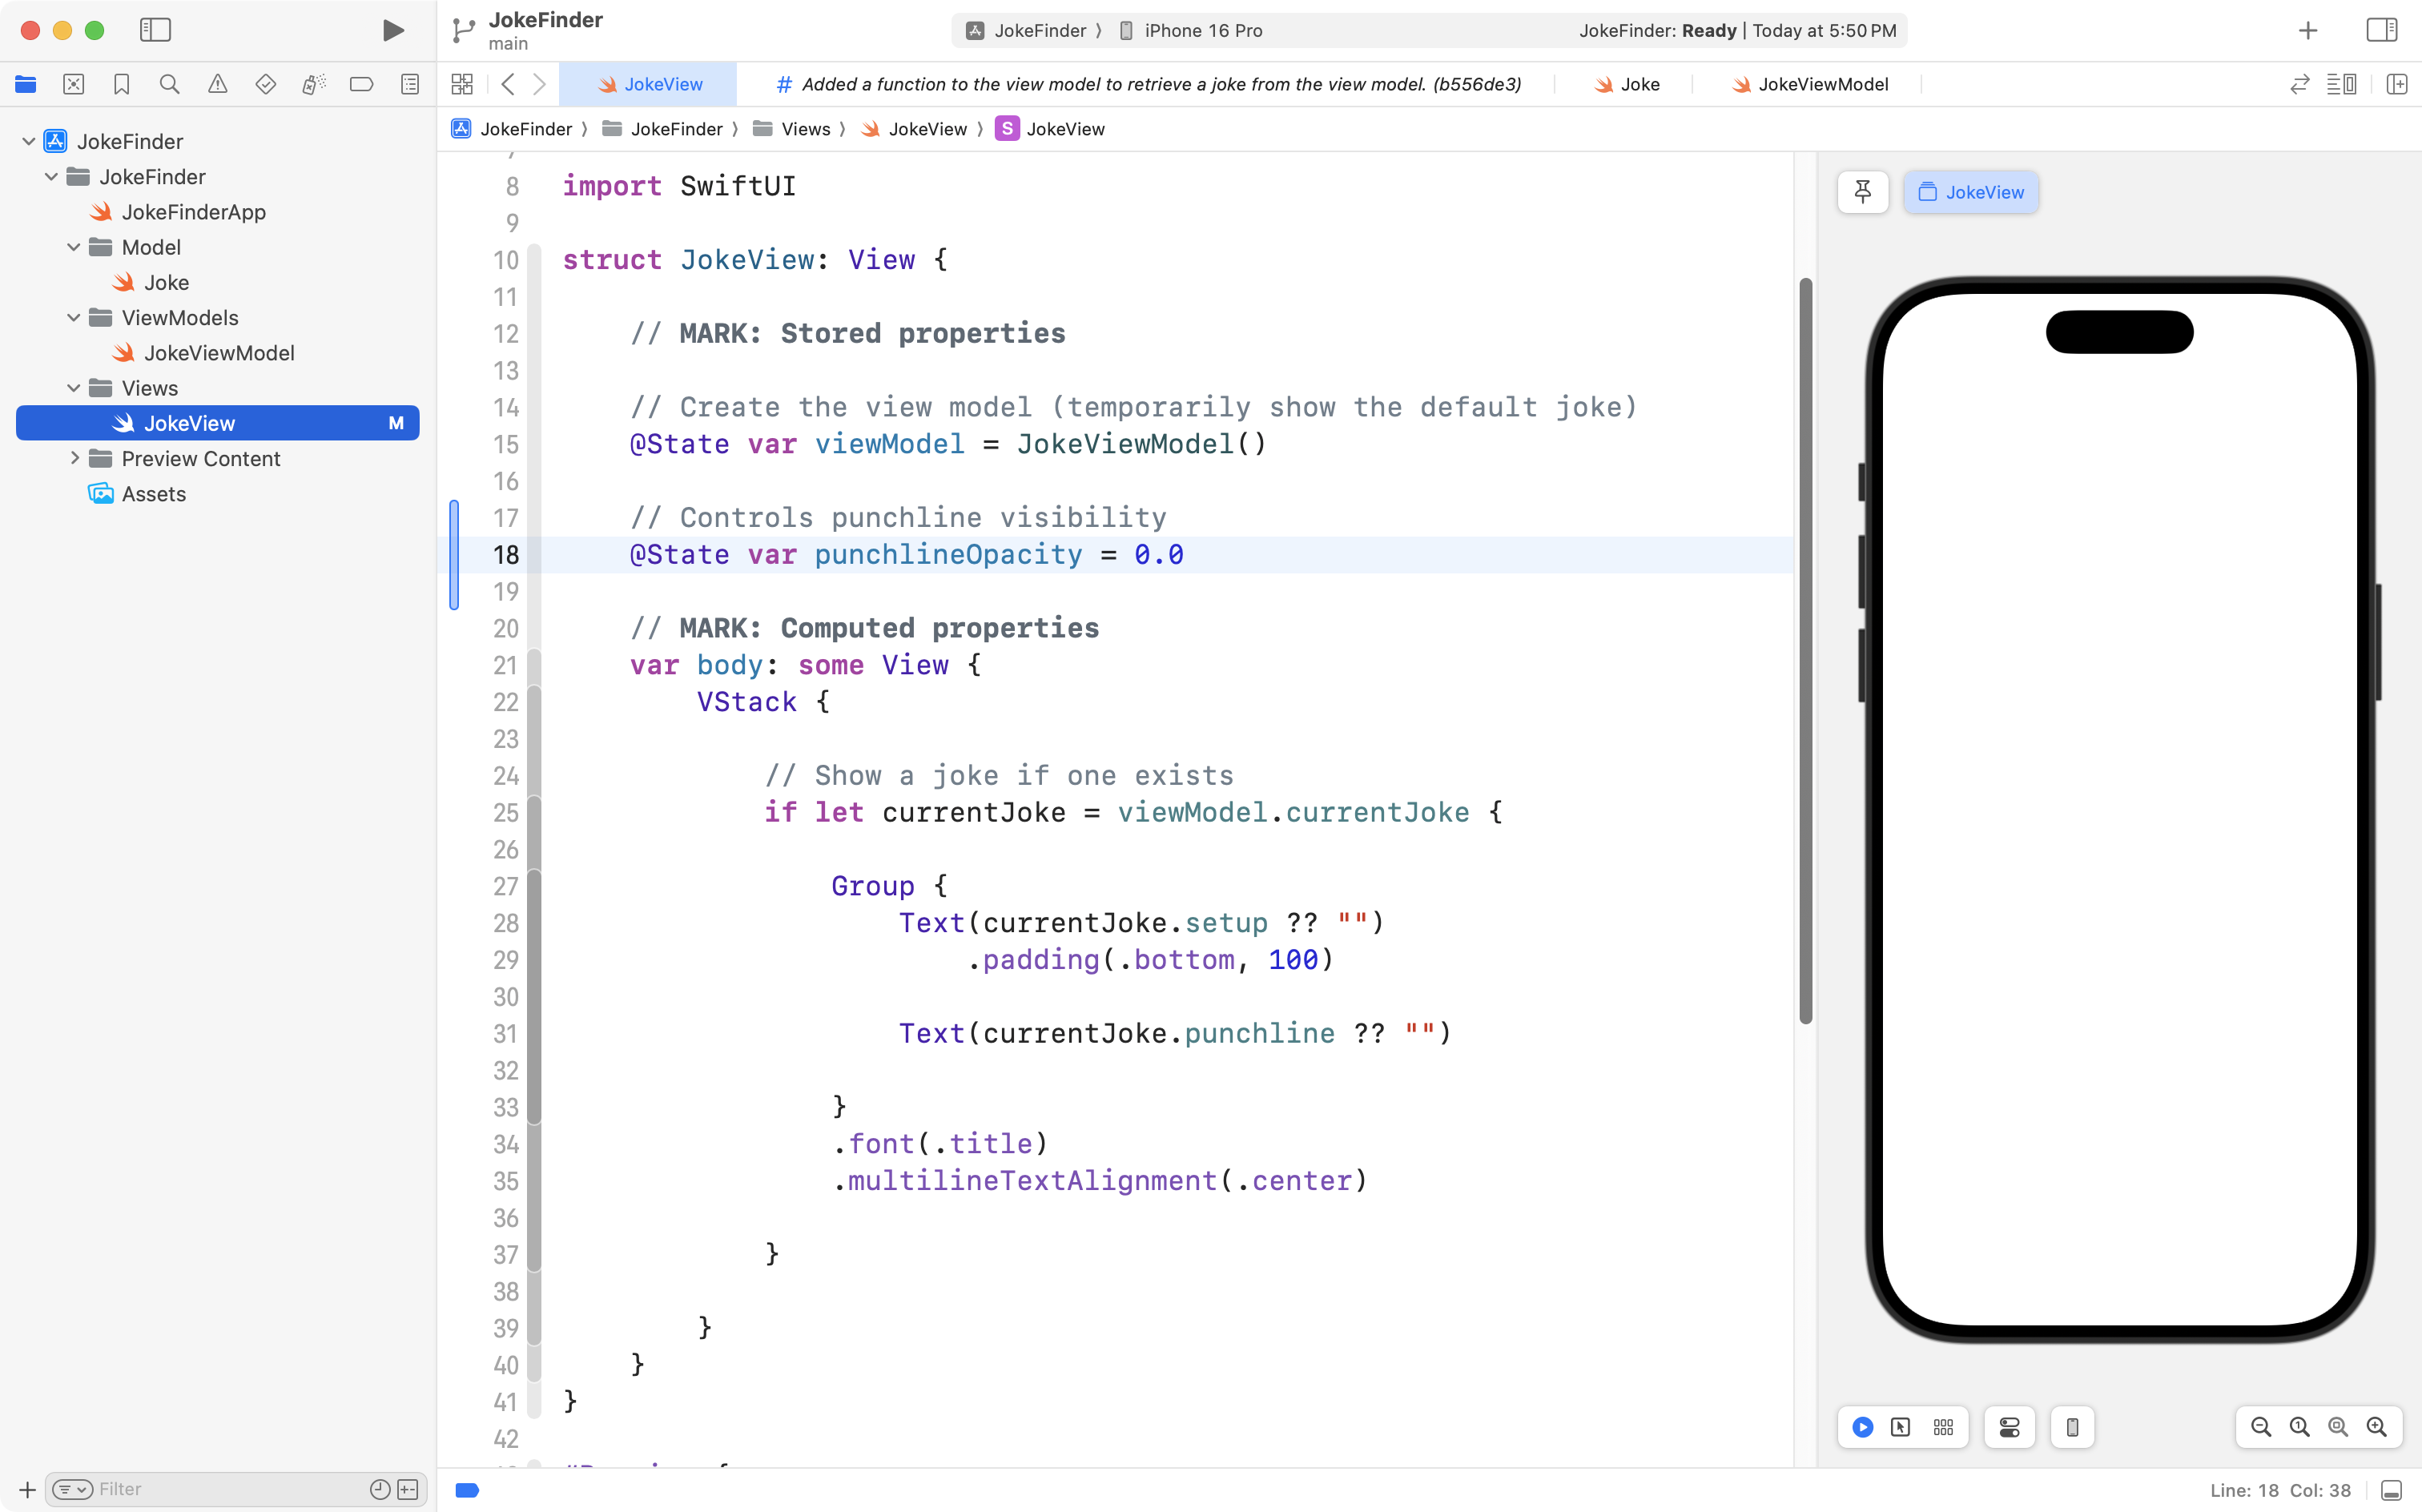
Copy this code to your clipboard:
struct JokeView: View {

    // MARK: Stored properties

    // Create the view model (temporarily show the default joke)
    @State var viewModel = JokeViewModel(currentJoke: exampleJoke)

    // MARK: Computed properties
    var body: some View {
        VStack {

            // Show a joke if one exists
            if let currentJoke = viewModel.currentJoke {

                Group {
                    Text(currentJoke.setup ?? "")
                        .padding(.bottom, 100)

                    Text(currentJoke.punchline ?? "")

                }
                .font(.title)
                .multilineTextAlignment(.center)

            }

        }
    }
}

#Preview {
    JokeView()
}
… replacing the code currently in JokeView so that your project looks like this:
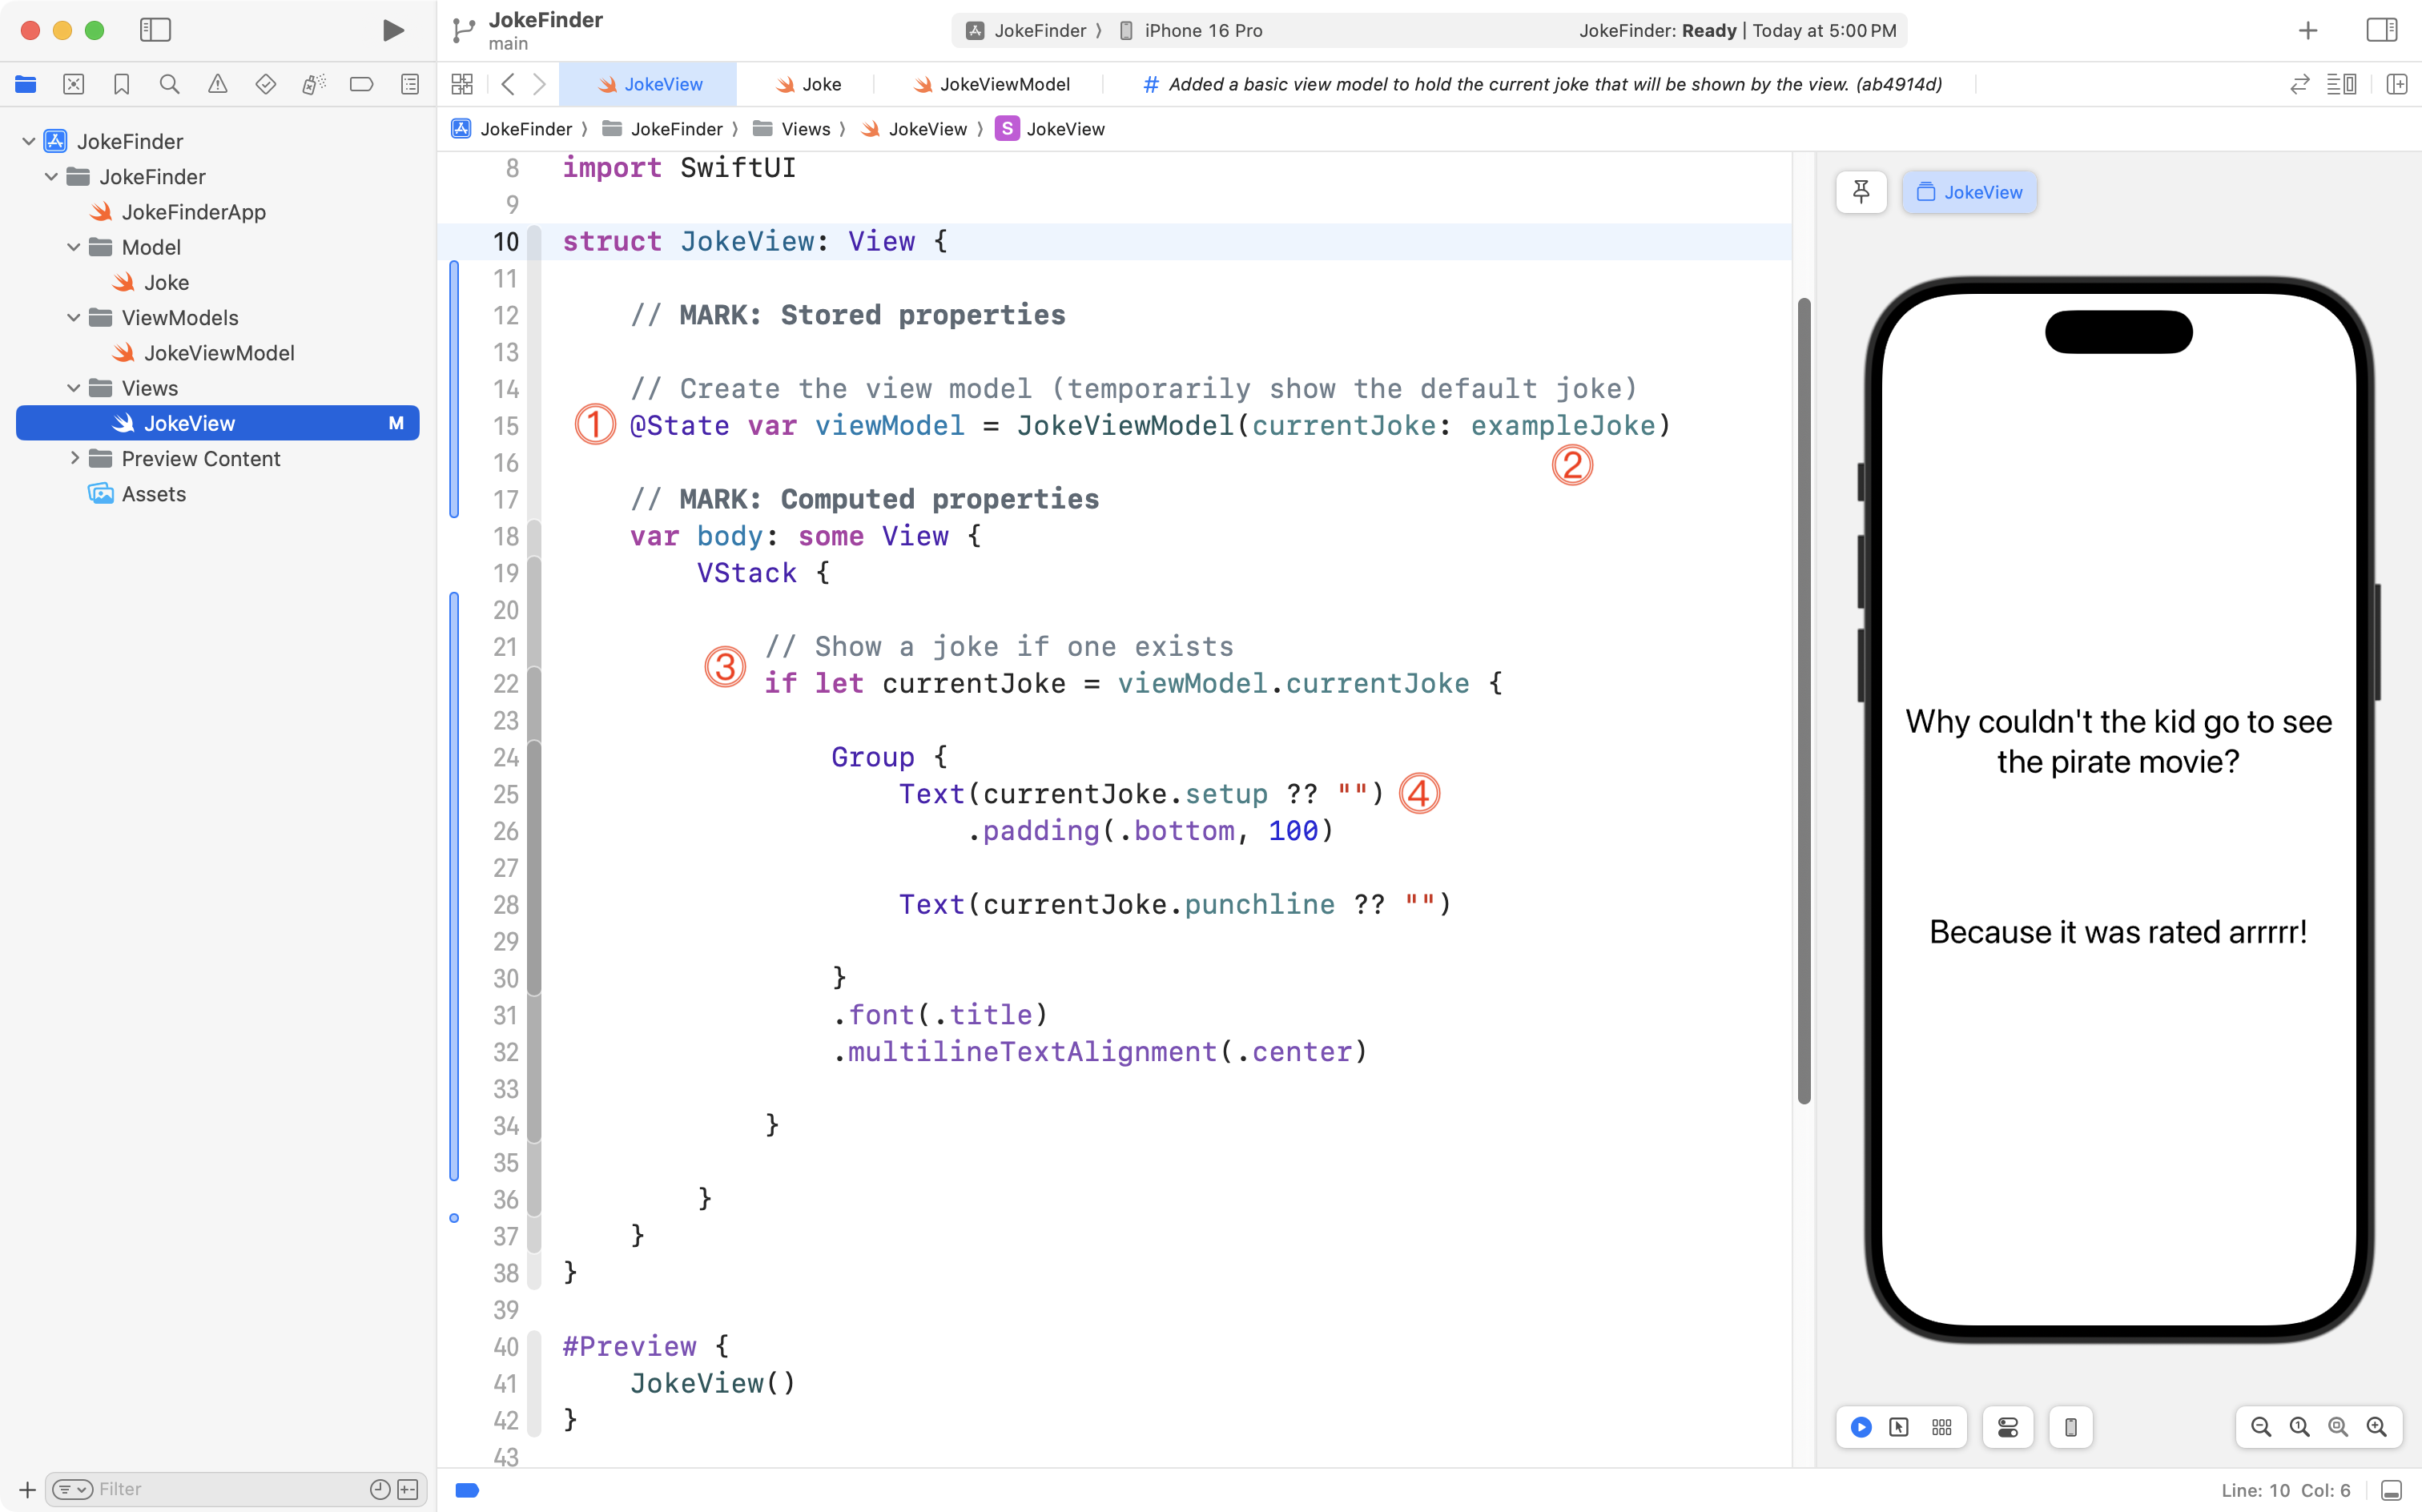
Let’s break down what is happening there:
DISCUSSION
- We create a stored property that holds an instance of our view model.
- When an instance of the view model is created, the initializer is asking us what the current joke should be – we set it to the example joke that was defined in the model.
- In the view model, the
currentJokestored property is an optional, because when we are (eventually) waiting to download a joke from the remote endpoint, there will be a point in time when there is nocurrentJoketo show.
So in our view, we safely unwrap thecurrentJokeproperty of our view model, to create a non-optional, local instance ofcurrentJoke.- The
setupproperty of theJokedata type is also an optional – here we use syntax that is new to us – the??is called the nil coalescing operator. It allows us to provide a default value to show – in this case an empty string – if thesetupproperty of the current joke happens to be nil. We do the same thing with thepunchlineproperty.
Now, please commit and push your work with this message:
Added a very basic view to show the current joke.
Retrieve a joke from the endpoint
Next we will modify the view model so that it actually goes out and gets a joke from the endpoint.
Highlight the closing curly bracket of the view model’s initializer:
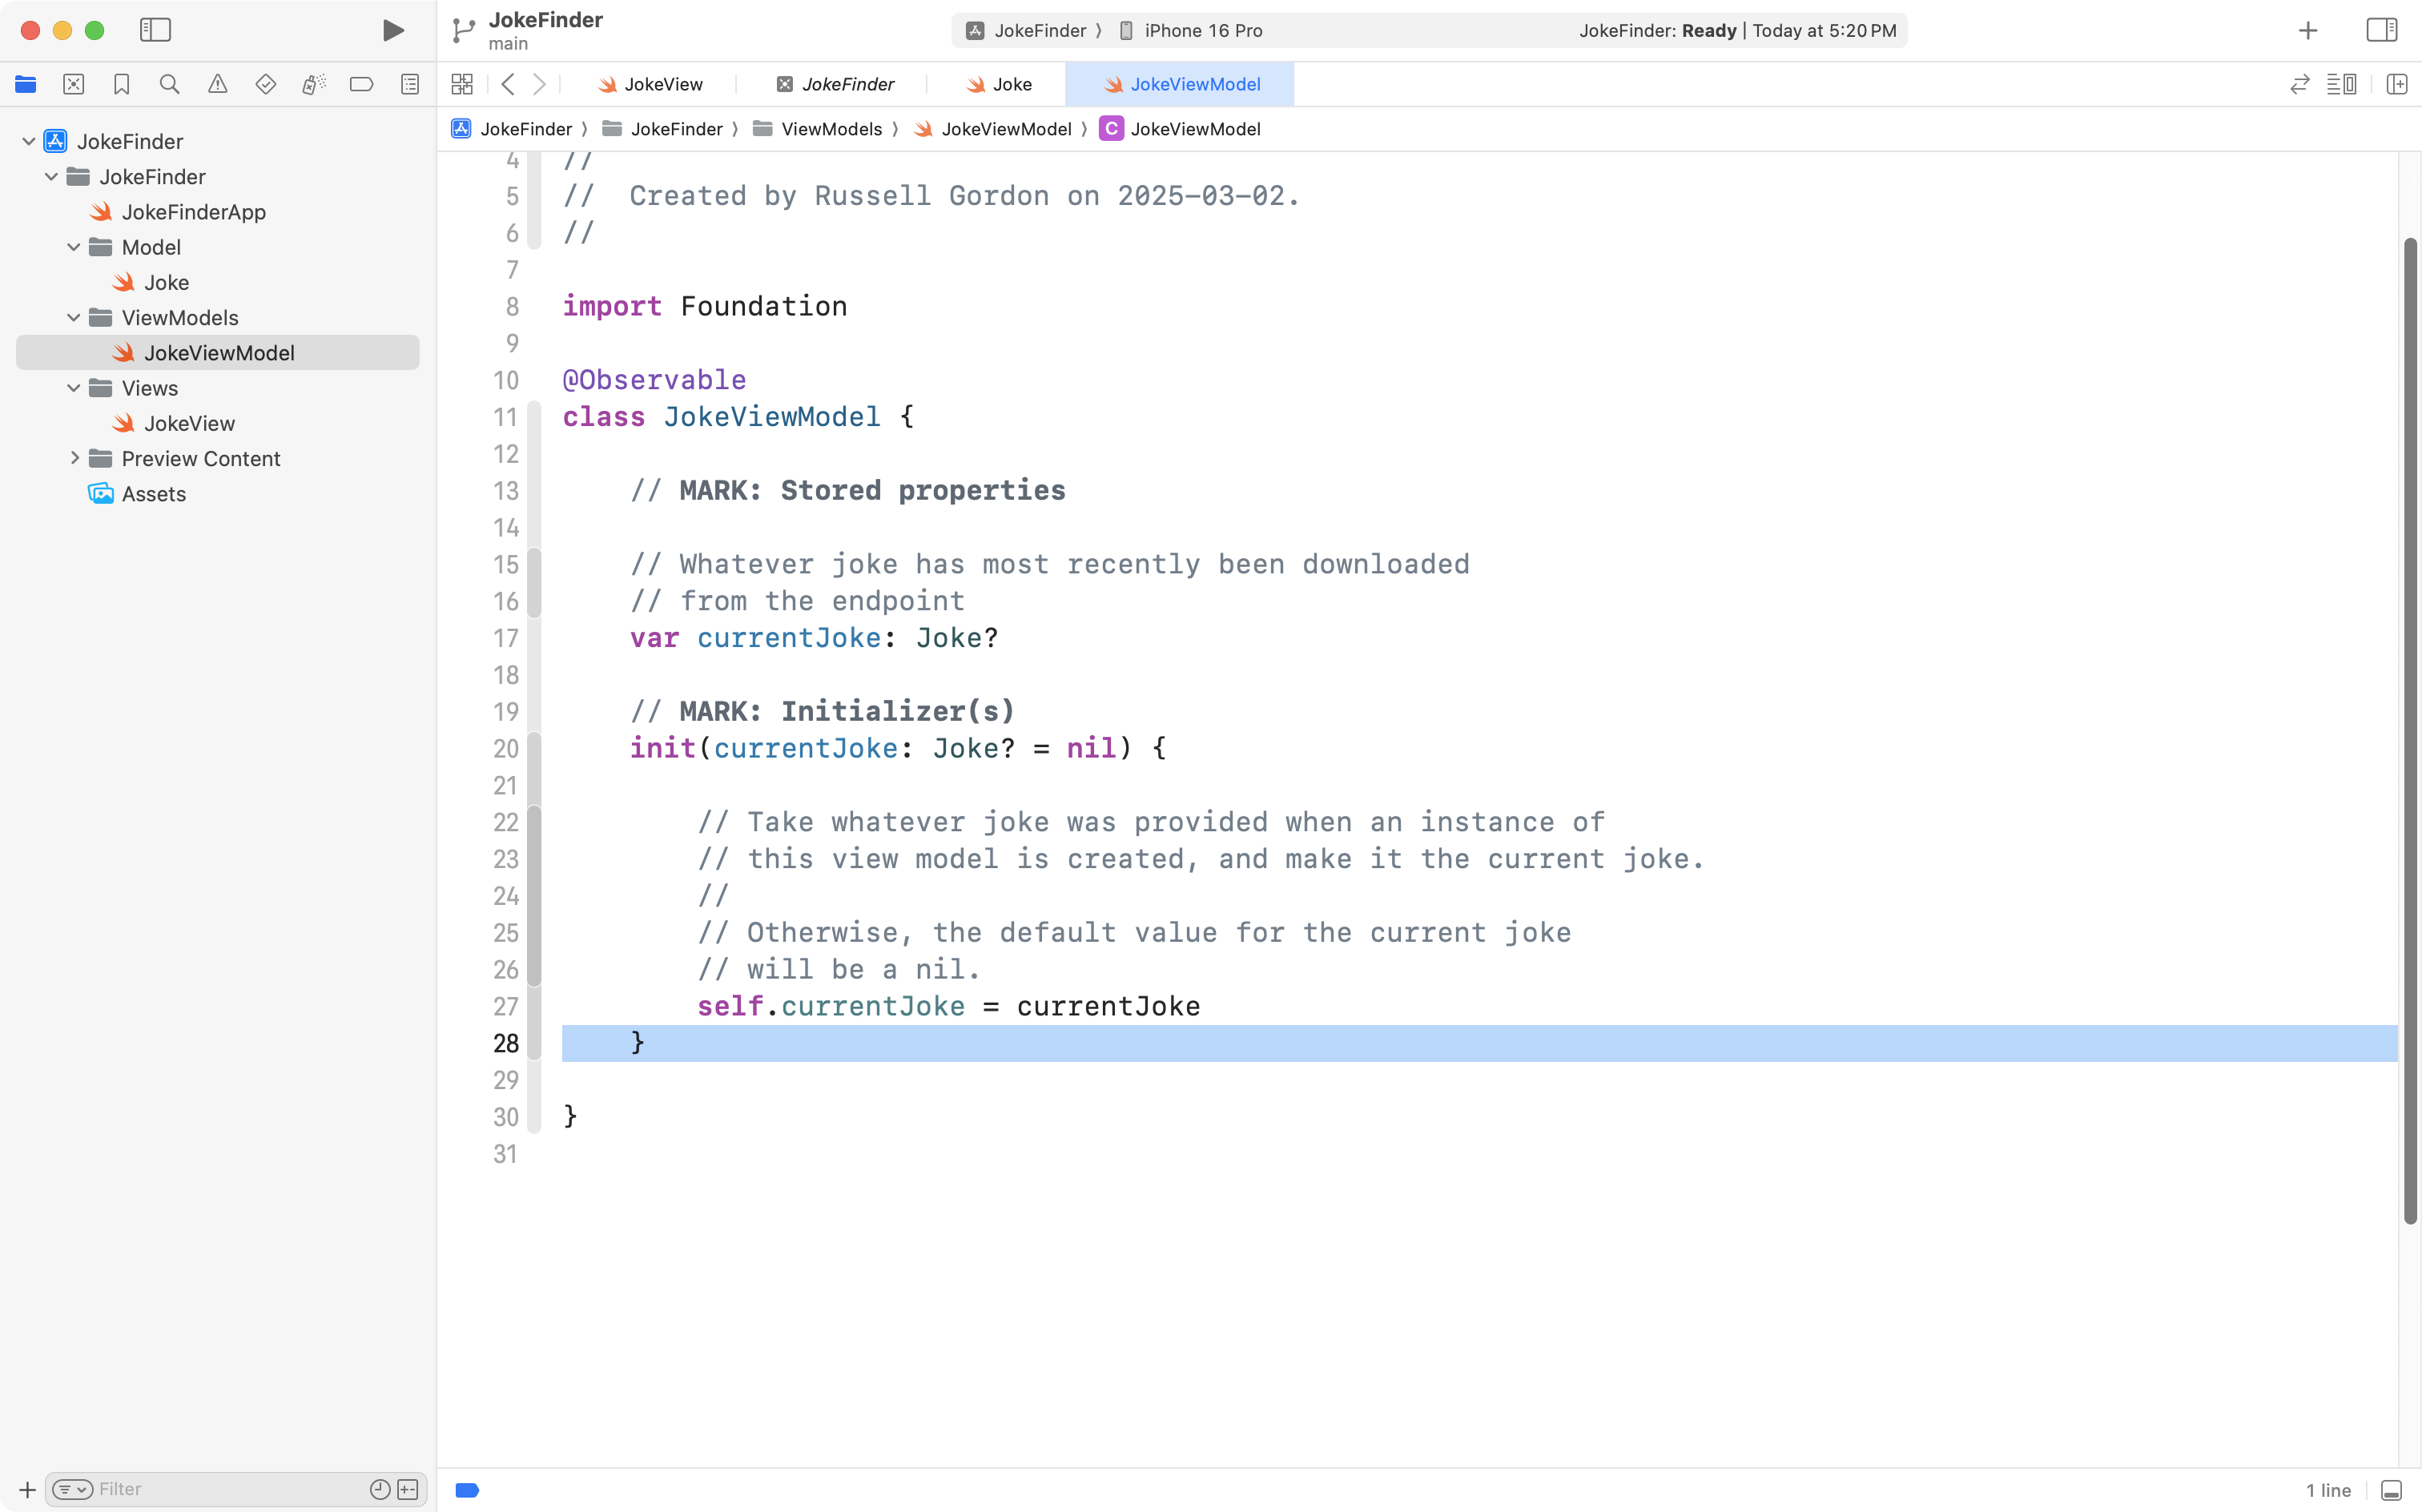
Then copy this code into your computer’s clipboard:
		// Load a joke from the endpoint
        Task {
            await self.fetchJoke()
        }
    }

    // MARK: Function(s)

    // This loads a new joke from the endpoint
    //
    // "async" means it is an asynchronous function.
    //
    // That means it can be run alongside other functionality
    // in our app. Since this function might take a while to complete
    // this ensures that other parts of our app, such as the user
    // interface, won't "freeze up" while this function does it's job.
    func fetchJoke() async {

        // 1. Attempt to create a URL from the address provided
        let endpoint = "https://official-joke-api.appspot.com/random_joke"
        guard let url = URL(string: endpoint) else {
            print("Invalid address for JSON endpoint.")
            return
        }

        // 2. Fetch the raw data from the URL
        //
        // Network requests can potentially fail (throw errors) so
        // we complete them within a do-catch block to report errors
        // if they occur.
        //
        do {

            // Fetch the data
            let (data, _) = try await URLSession.shared.data(from: url)

            // Print the received data in the debug console
            print("Got data from endpoint, contents of response are:")
            print(String(data: data, encoding: .utf8)!)

            // 3. Decode the data into a Swift data type

            // Create a decoder object to do most of the work for us
            let decoder = JSONDecoder()

            // Use the decoder object to convert the raw data
            // into an instance of our Swift data type
            let decodedData = try decoder.decode(Joke.self, from: data)

            // If we got here, decoding succeeded,
            // return the instance of our data type
            self.currentJoke = decodedData

        } catch {

            // Show an error that we wrote and understand
            print("Count not retrieve data from endpoint, or could not decode into an instance of a Swift data type.")
            print("----")

            // Show the detailed error to help with debugging
            print(error)

        }
    }
… and paste it into your view model, like this:
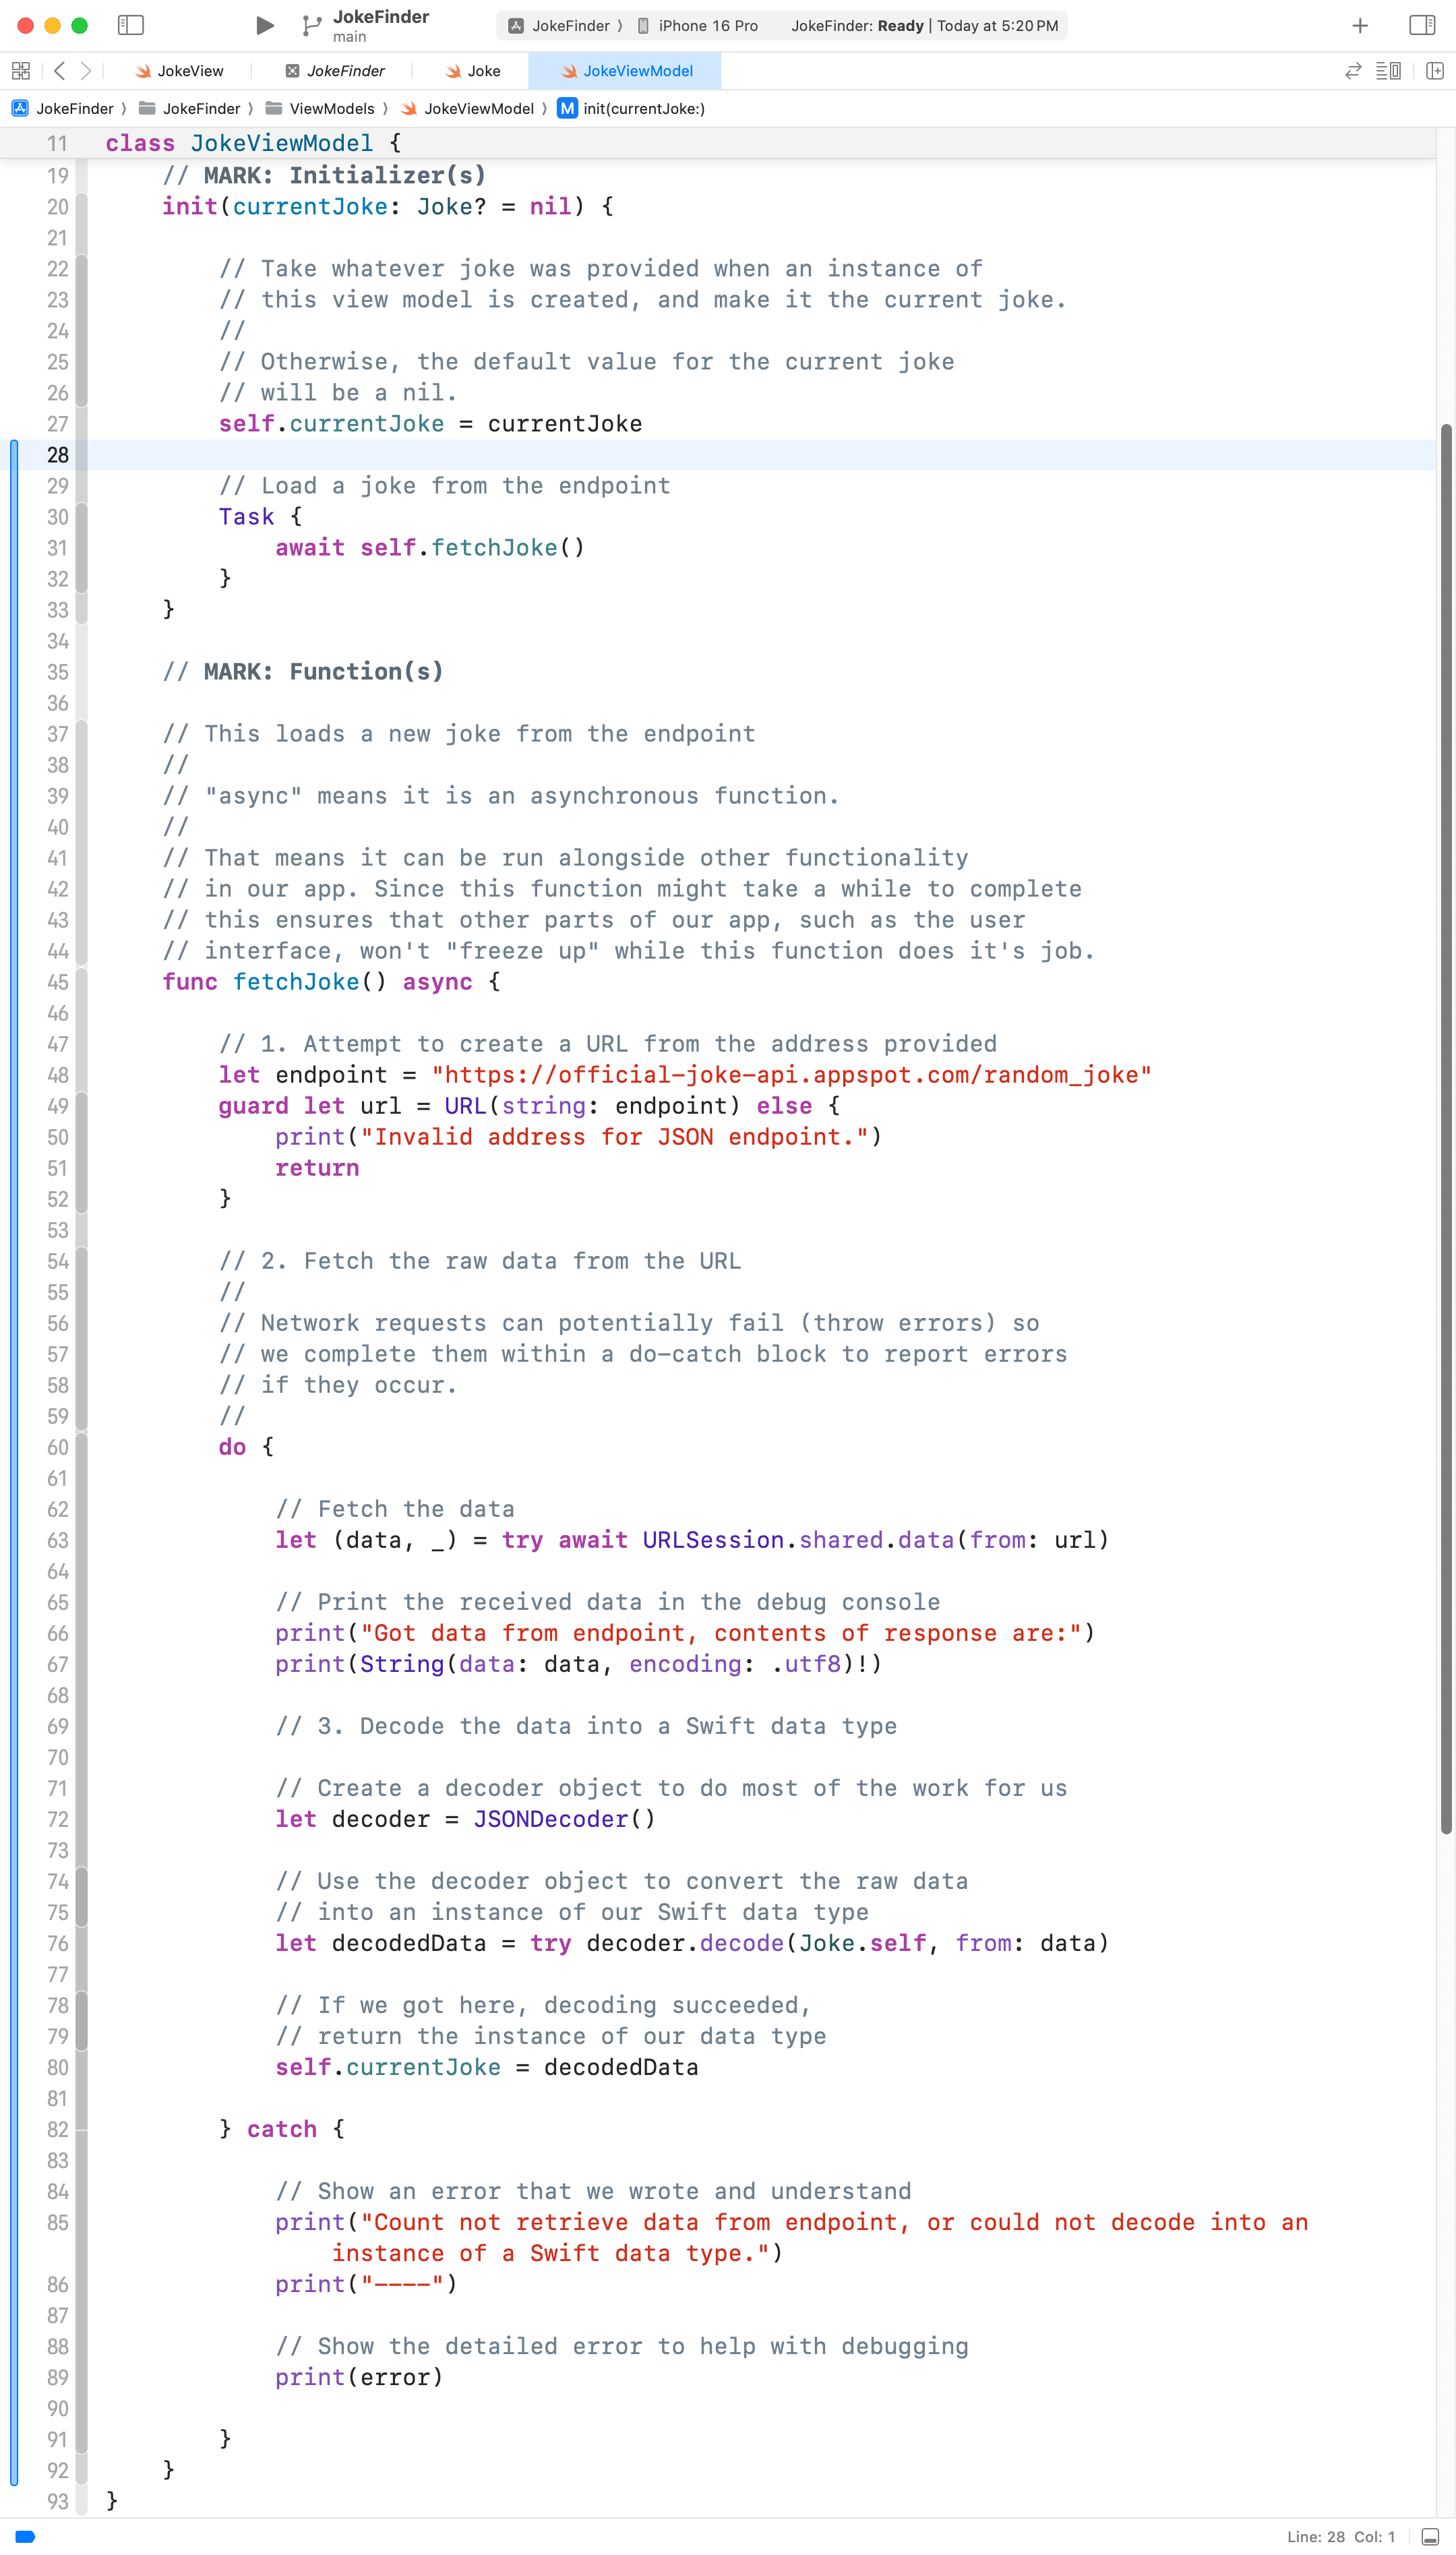
IMPORTANT
Take a moment to read through the new code, line by line, and the comments provided.
Essentially, we have added a function that fetches a joke from the remote endpoint.
We invoke this function from the initializer of the view model.
In this way, when the view model is created, a joke is immediately loaded from the remote endpoint.
Before continuing, it is worth taking a moment to further explore what the terms asynchronous and synchronous mean (see the async keyword on line 45) of the screenshot above.
At this point, I will quote Paul Hudson, who writes amazing tutorials for Swift and SwiftUI on his website Hacking with Swift:
You see, any iPhone capable of running SwiftUI can perform billions of operations every second – it’s so fast that it completes most work before we even realized it started it. On the flip side, networking – downloading data from the internet – might take several hundreds milliseconds or more to come, which is extremely slow for a computer that’s used to doing literally a billion other things in that time.
Rather than forcing our entire progress to stop while the networking happens, Swift gives us the ability to say “this work will take some time, so please wait for it to complete while the rest of the app carries on running as usual.”
This functionality – this ability to leave some code running while our main app code carries on working – is called an asynchronous function. A synchronous function is one that runs fully before returning a value as needed, but an asynchronous function is one that is able to go to sleep for a while, so that it can wait for some other work to complete before continuing. In our case, that means going to sleep while our networking code happens, so that the rest of our app doesn’t freeze up for several seconds.
OK, back to our app.
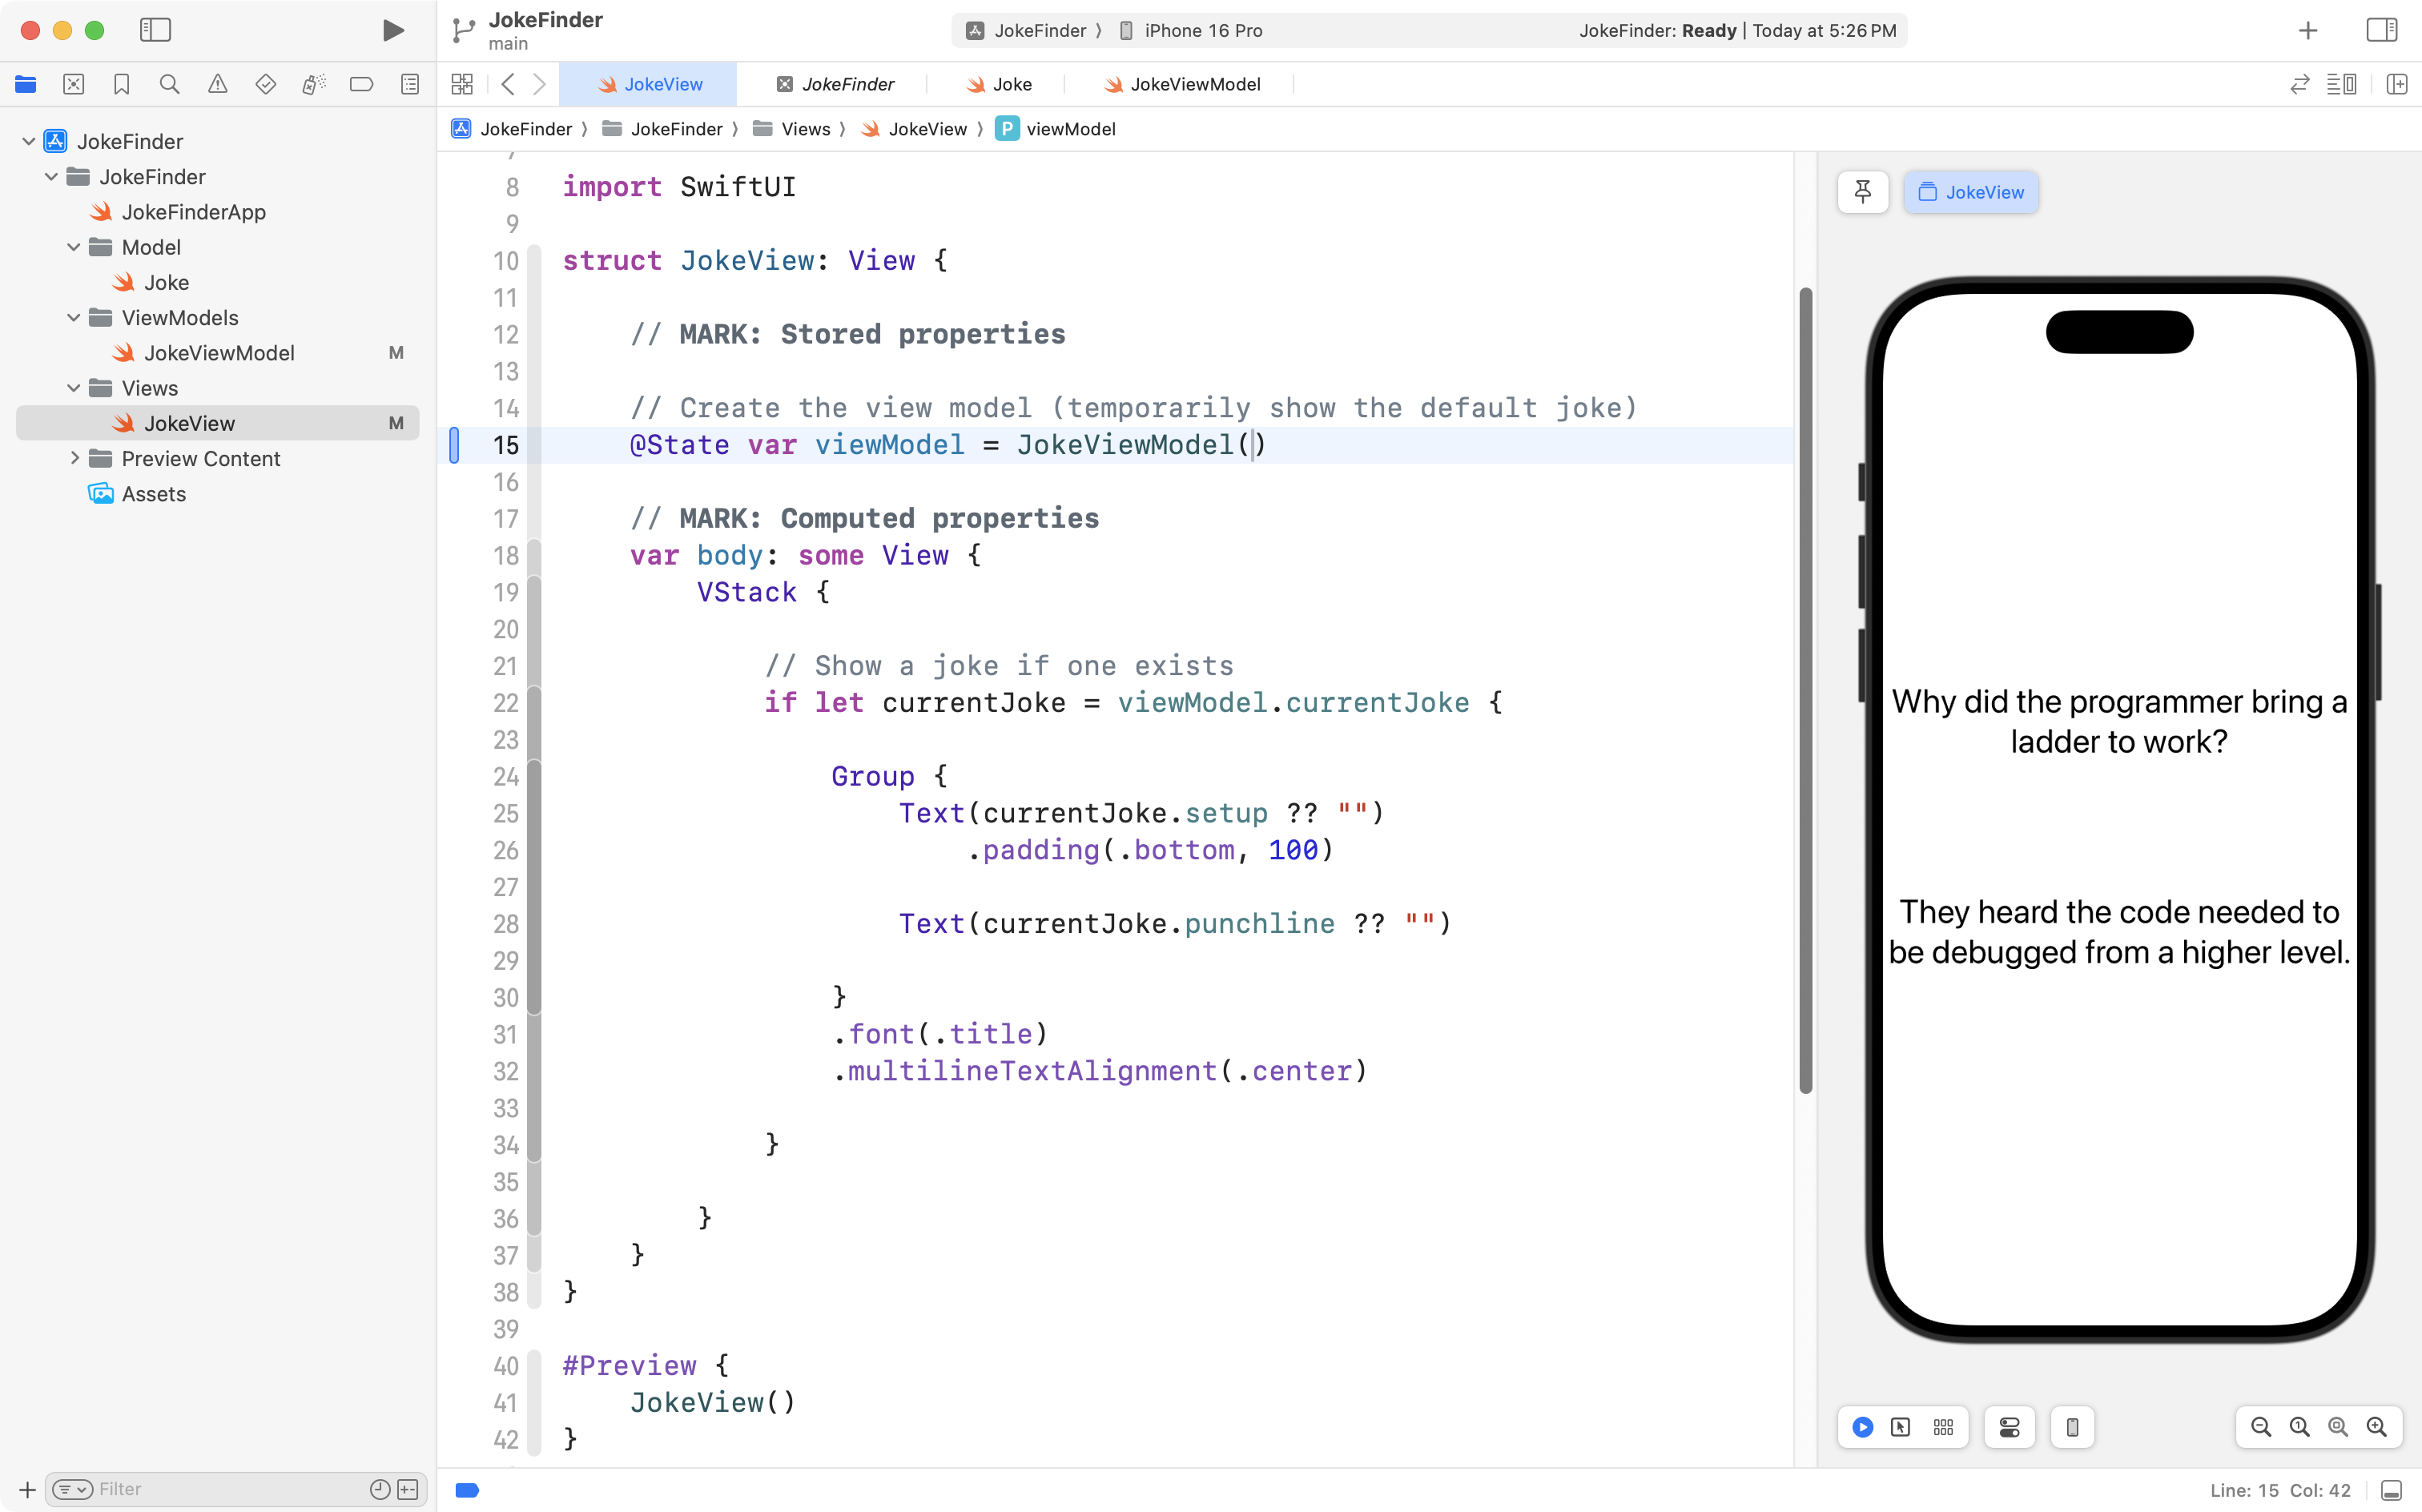
Please return to the view, and locate the line of code where the view model is created:
Adjust that line of code so that the example joke is no longer provided when the view model is created:
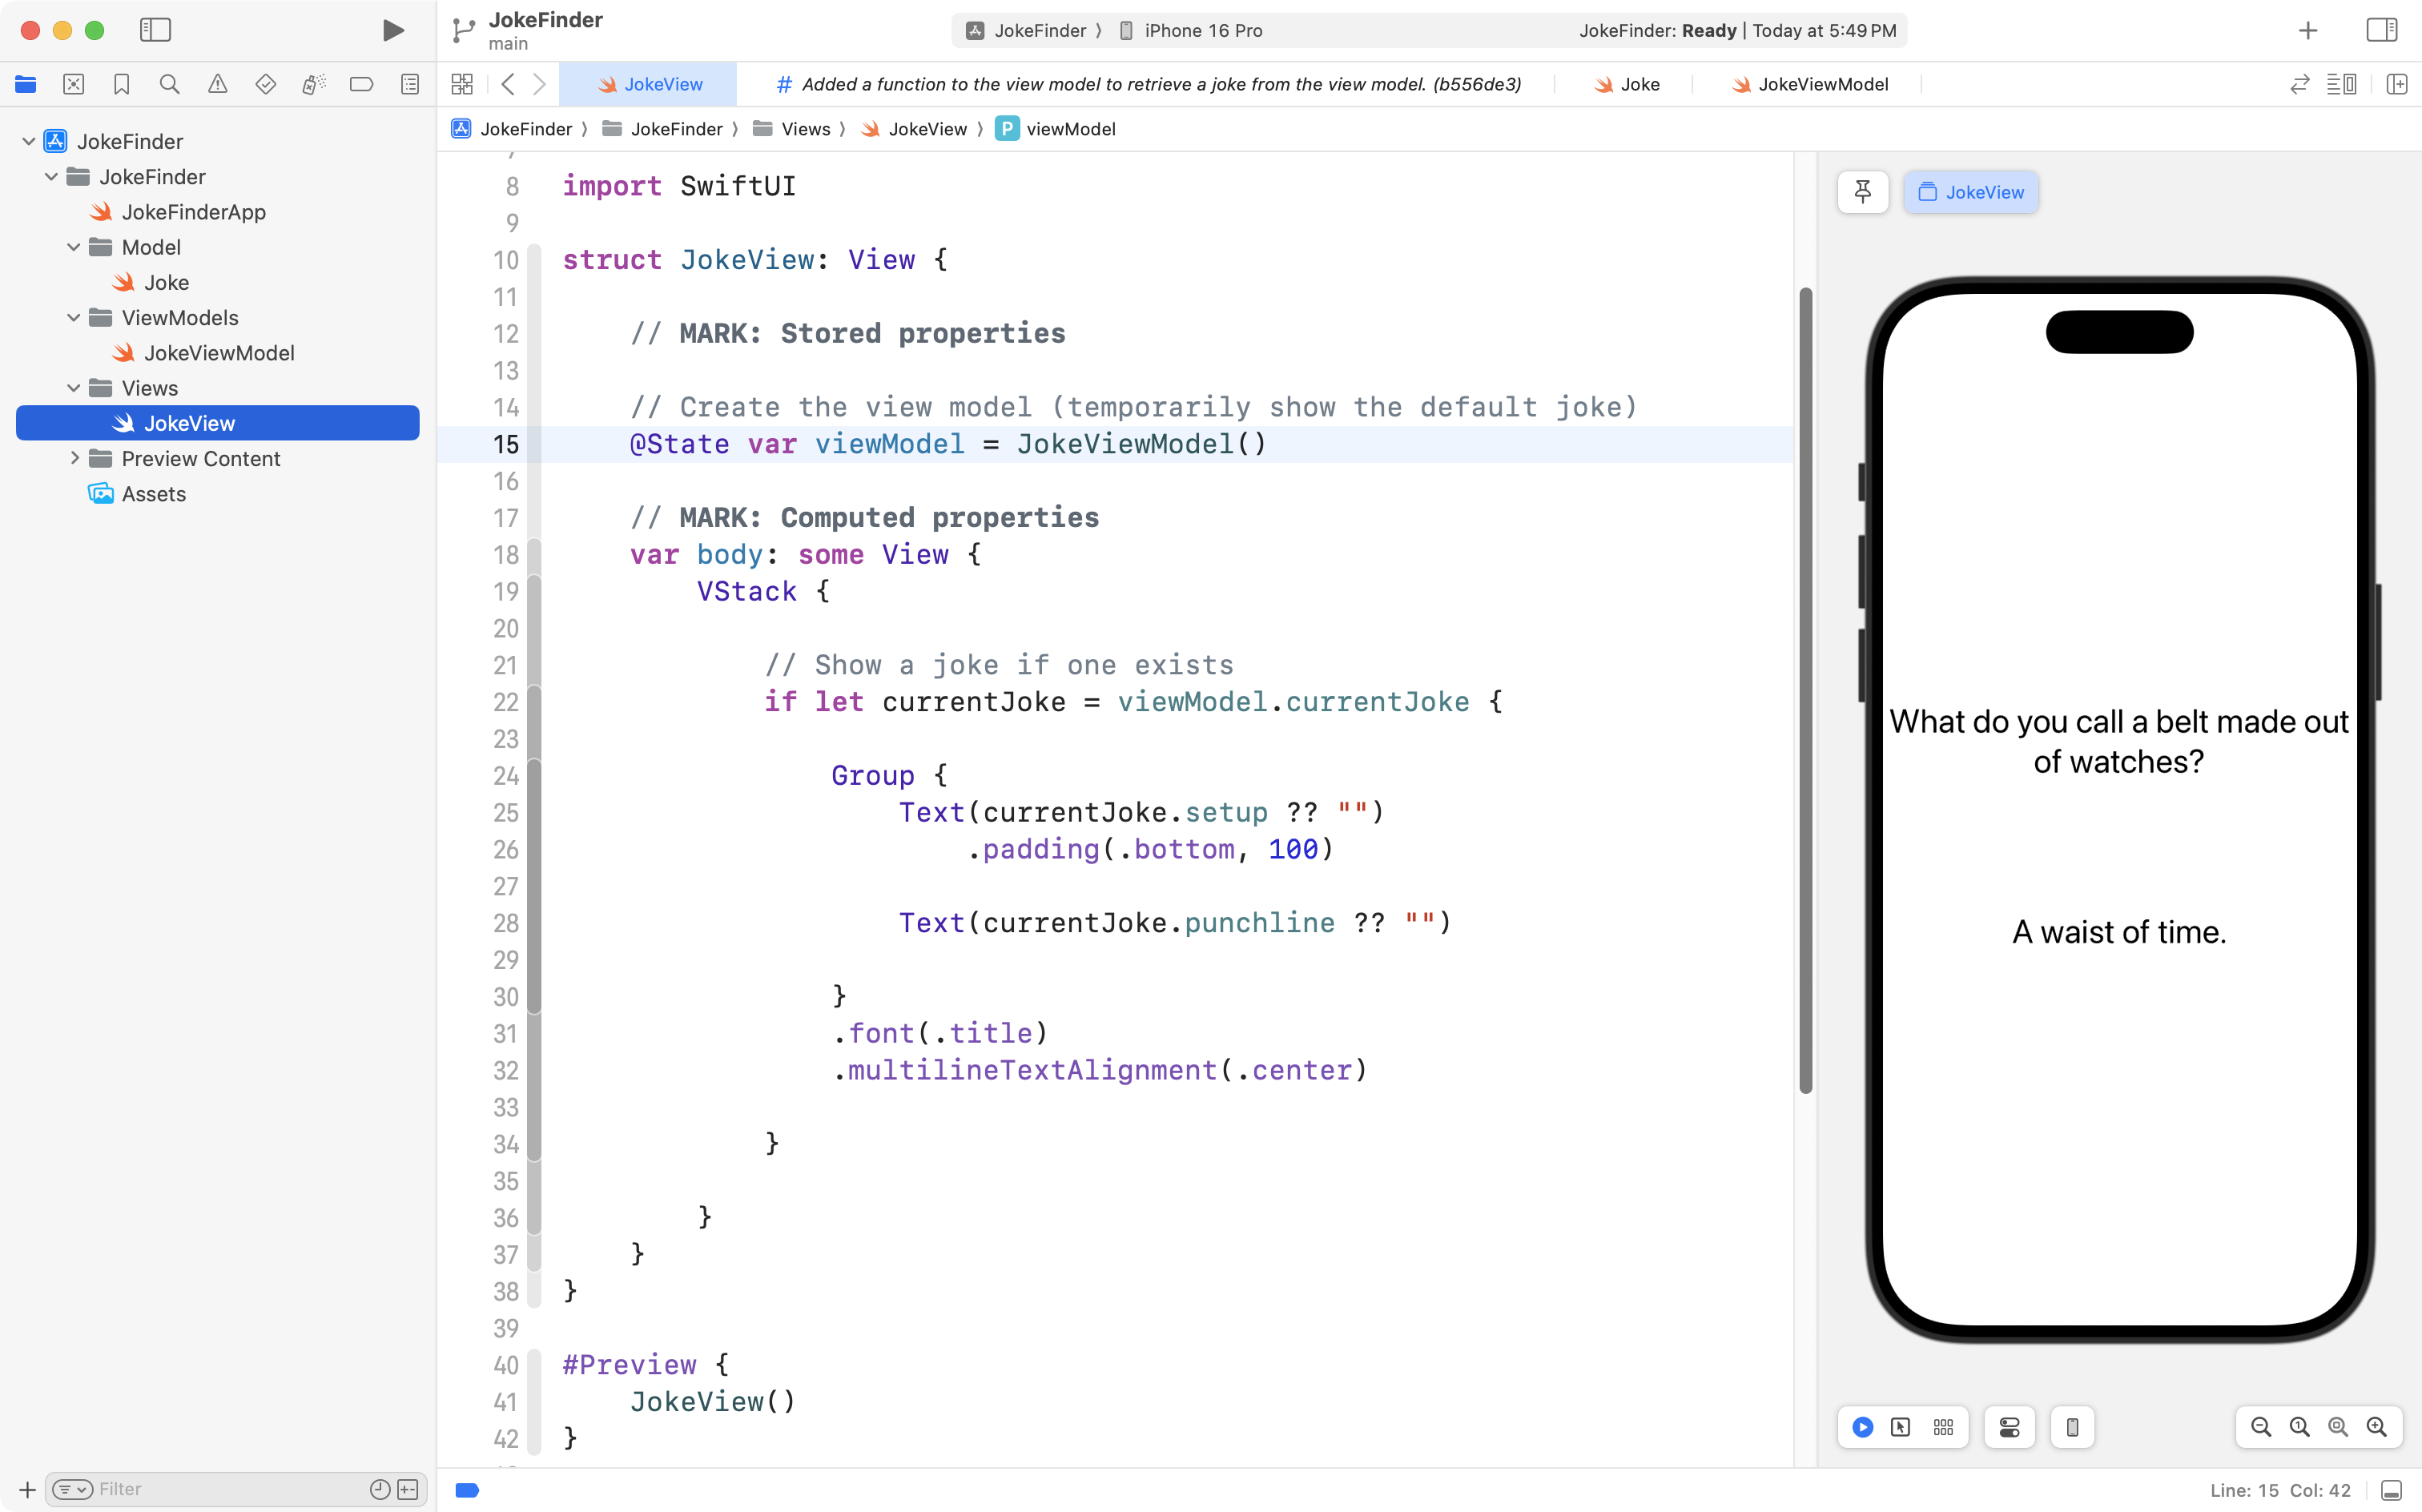
If all has gone well, you should see that a different joke is being displayed each time the view is loaded.
Commit and push your work with this message:
Added a function to the view model to retrieve a joke from the view model.
IMPORTANT
We are using a web service that provides a response each time we load the endpoint.
Most web servers are configured to limit the number of responses they will provide to a given computer on the Internet, so that they are less likely to be overwhelmed by a DDOS attack.
Generally – each computer on the Internet is identified by a unique identifier, known as its IP address or Internet Protocol address.
When you are completing this lesson with your classmates while in the academic block at LCS, we are all “showing up” on the Internet as though we are “calling from” the same IP address.
As a result, when you are completing this lesson, you may find that a joke will not always load from the endpoint.
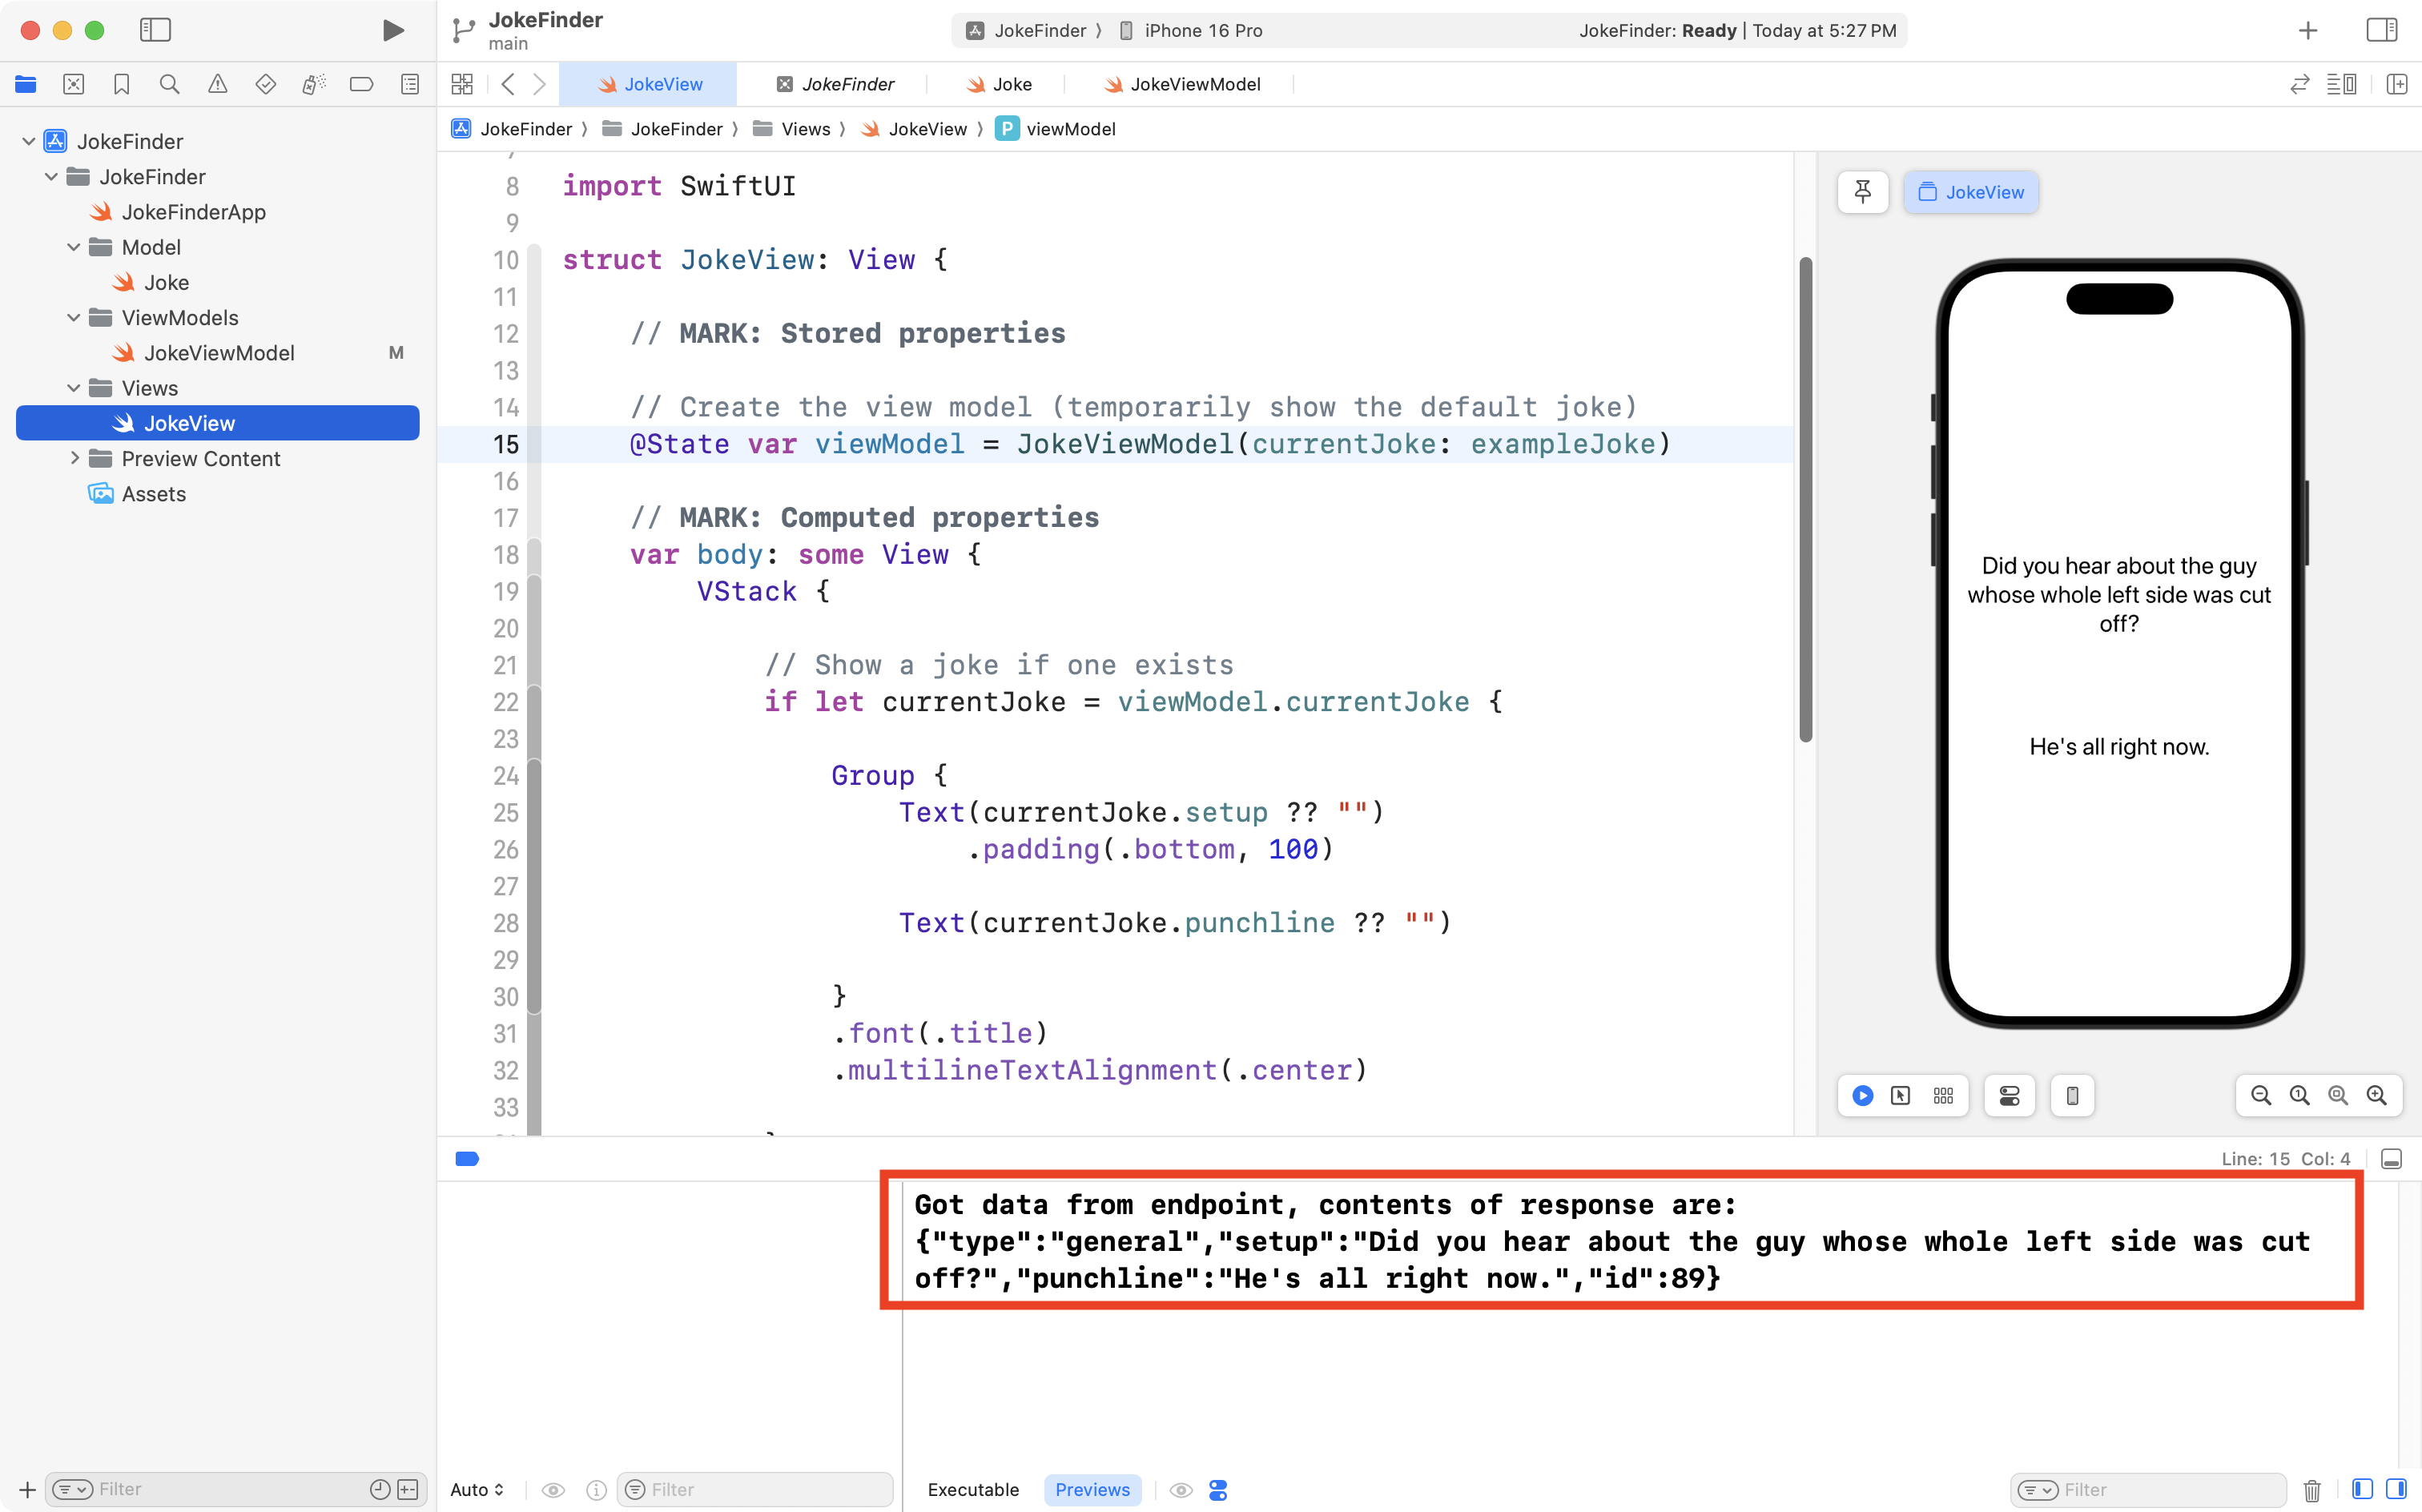
If you think that is happening, open the Debug area of the Xcode interface by pressing Command-Shift-Y. When a joke is loading normally, you should see a message like this one:
If a joke is not loading, you will see a message indicating we have made too many requests, and need to wait a while (15 minutes) before making more requests from the endpoint.
If this happens to you, you can work around the problem by using the Internet connection from your phone while finishing this lesson – this is why Mr. Gordon suggested that you bring your phone with you to class today.
Improve the view
As you may know, timing is critical when attempting to be funny.
Usually, when you are telling a joke, you will want to wait a moment to deliver the punchline.
The problem with our app right now is that it shows both the setup and the punchline at the same time:
We can adjust our view so that it waits a bit, then shows the punchline to us.
First, add this code:
// Controls punchline visibility
@State var punchlineOpacity = 0.0
… to the list of stored properties in the view, like this:
Now add this code:
.opacity(punchlineOpacity)… as a view modifier on the second text view, like this:
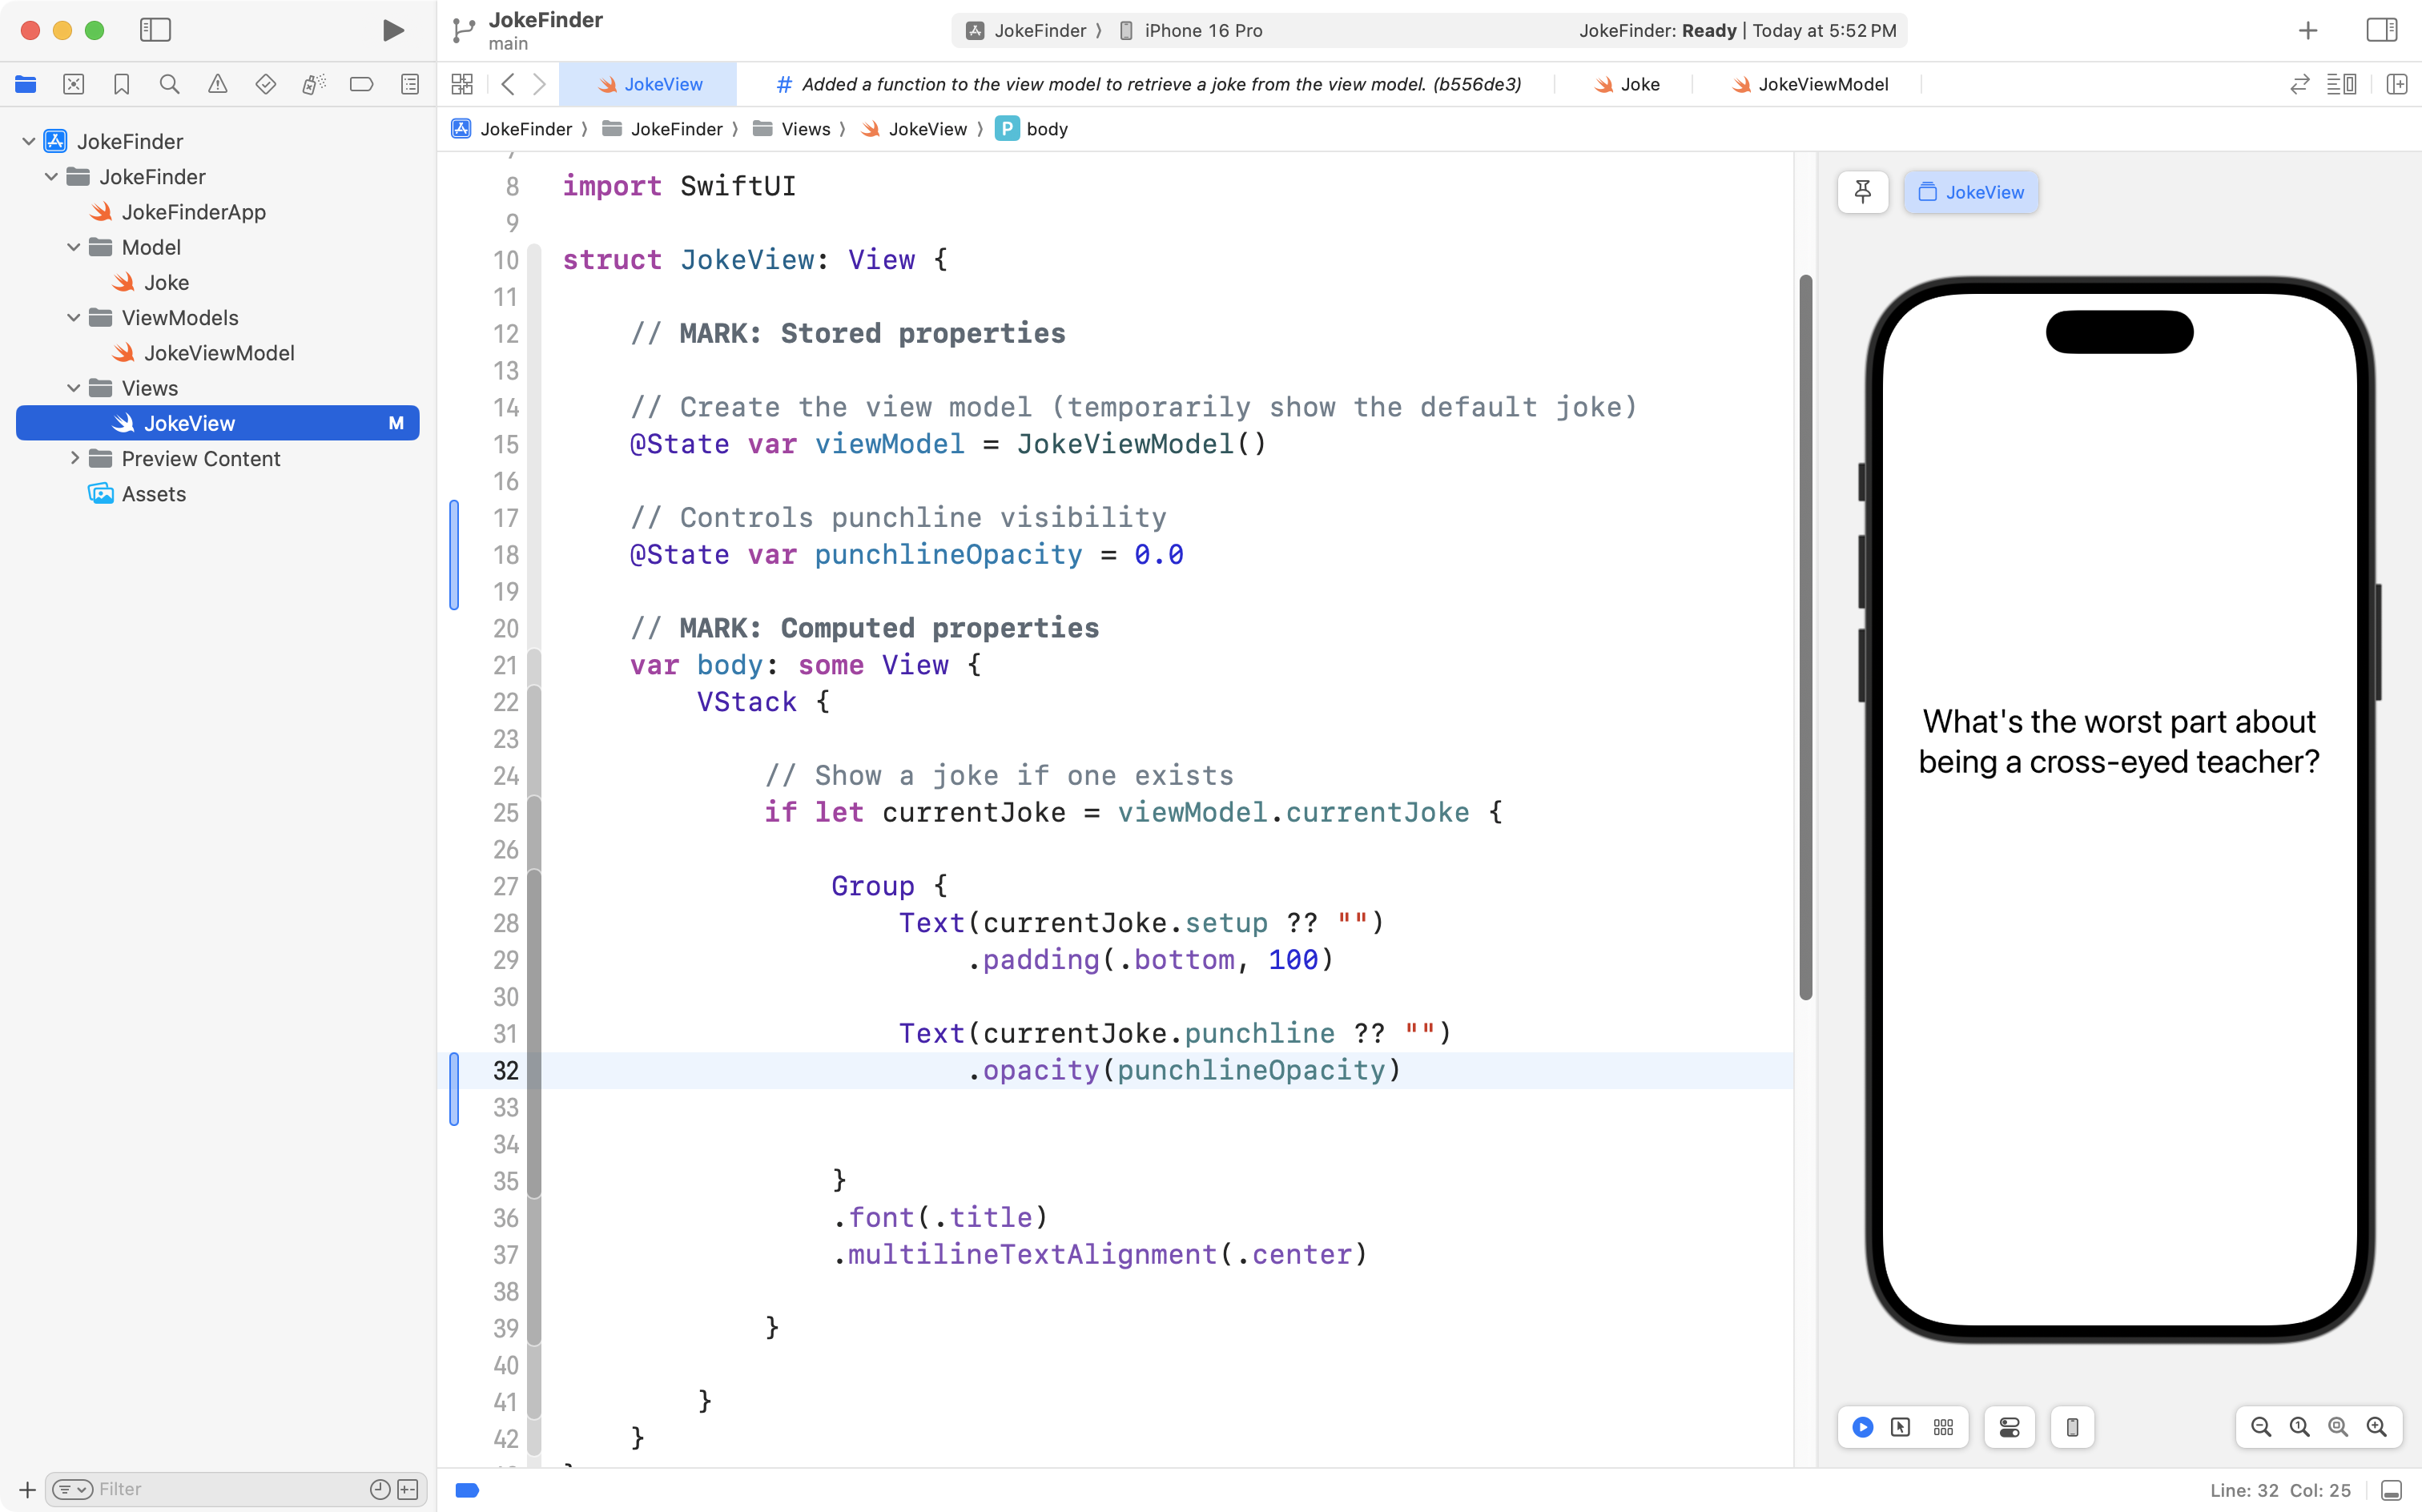
What this does is make the second text view invisible (opacity of zero) when the view loads.
What we need to do now is make the second text view visible (opacity of one) after a few seconds.
To do this, add this code:
// Starts a timer to wait on revealing punchline
@State var punchlineTimer = Timer.publish(every: 3, on: .main, in: .common).autoconnect()
… to the list of stored properties, like this:
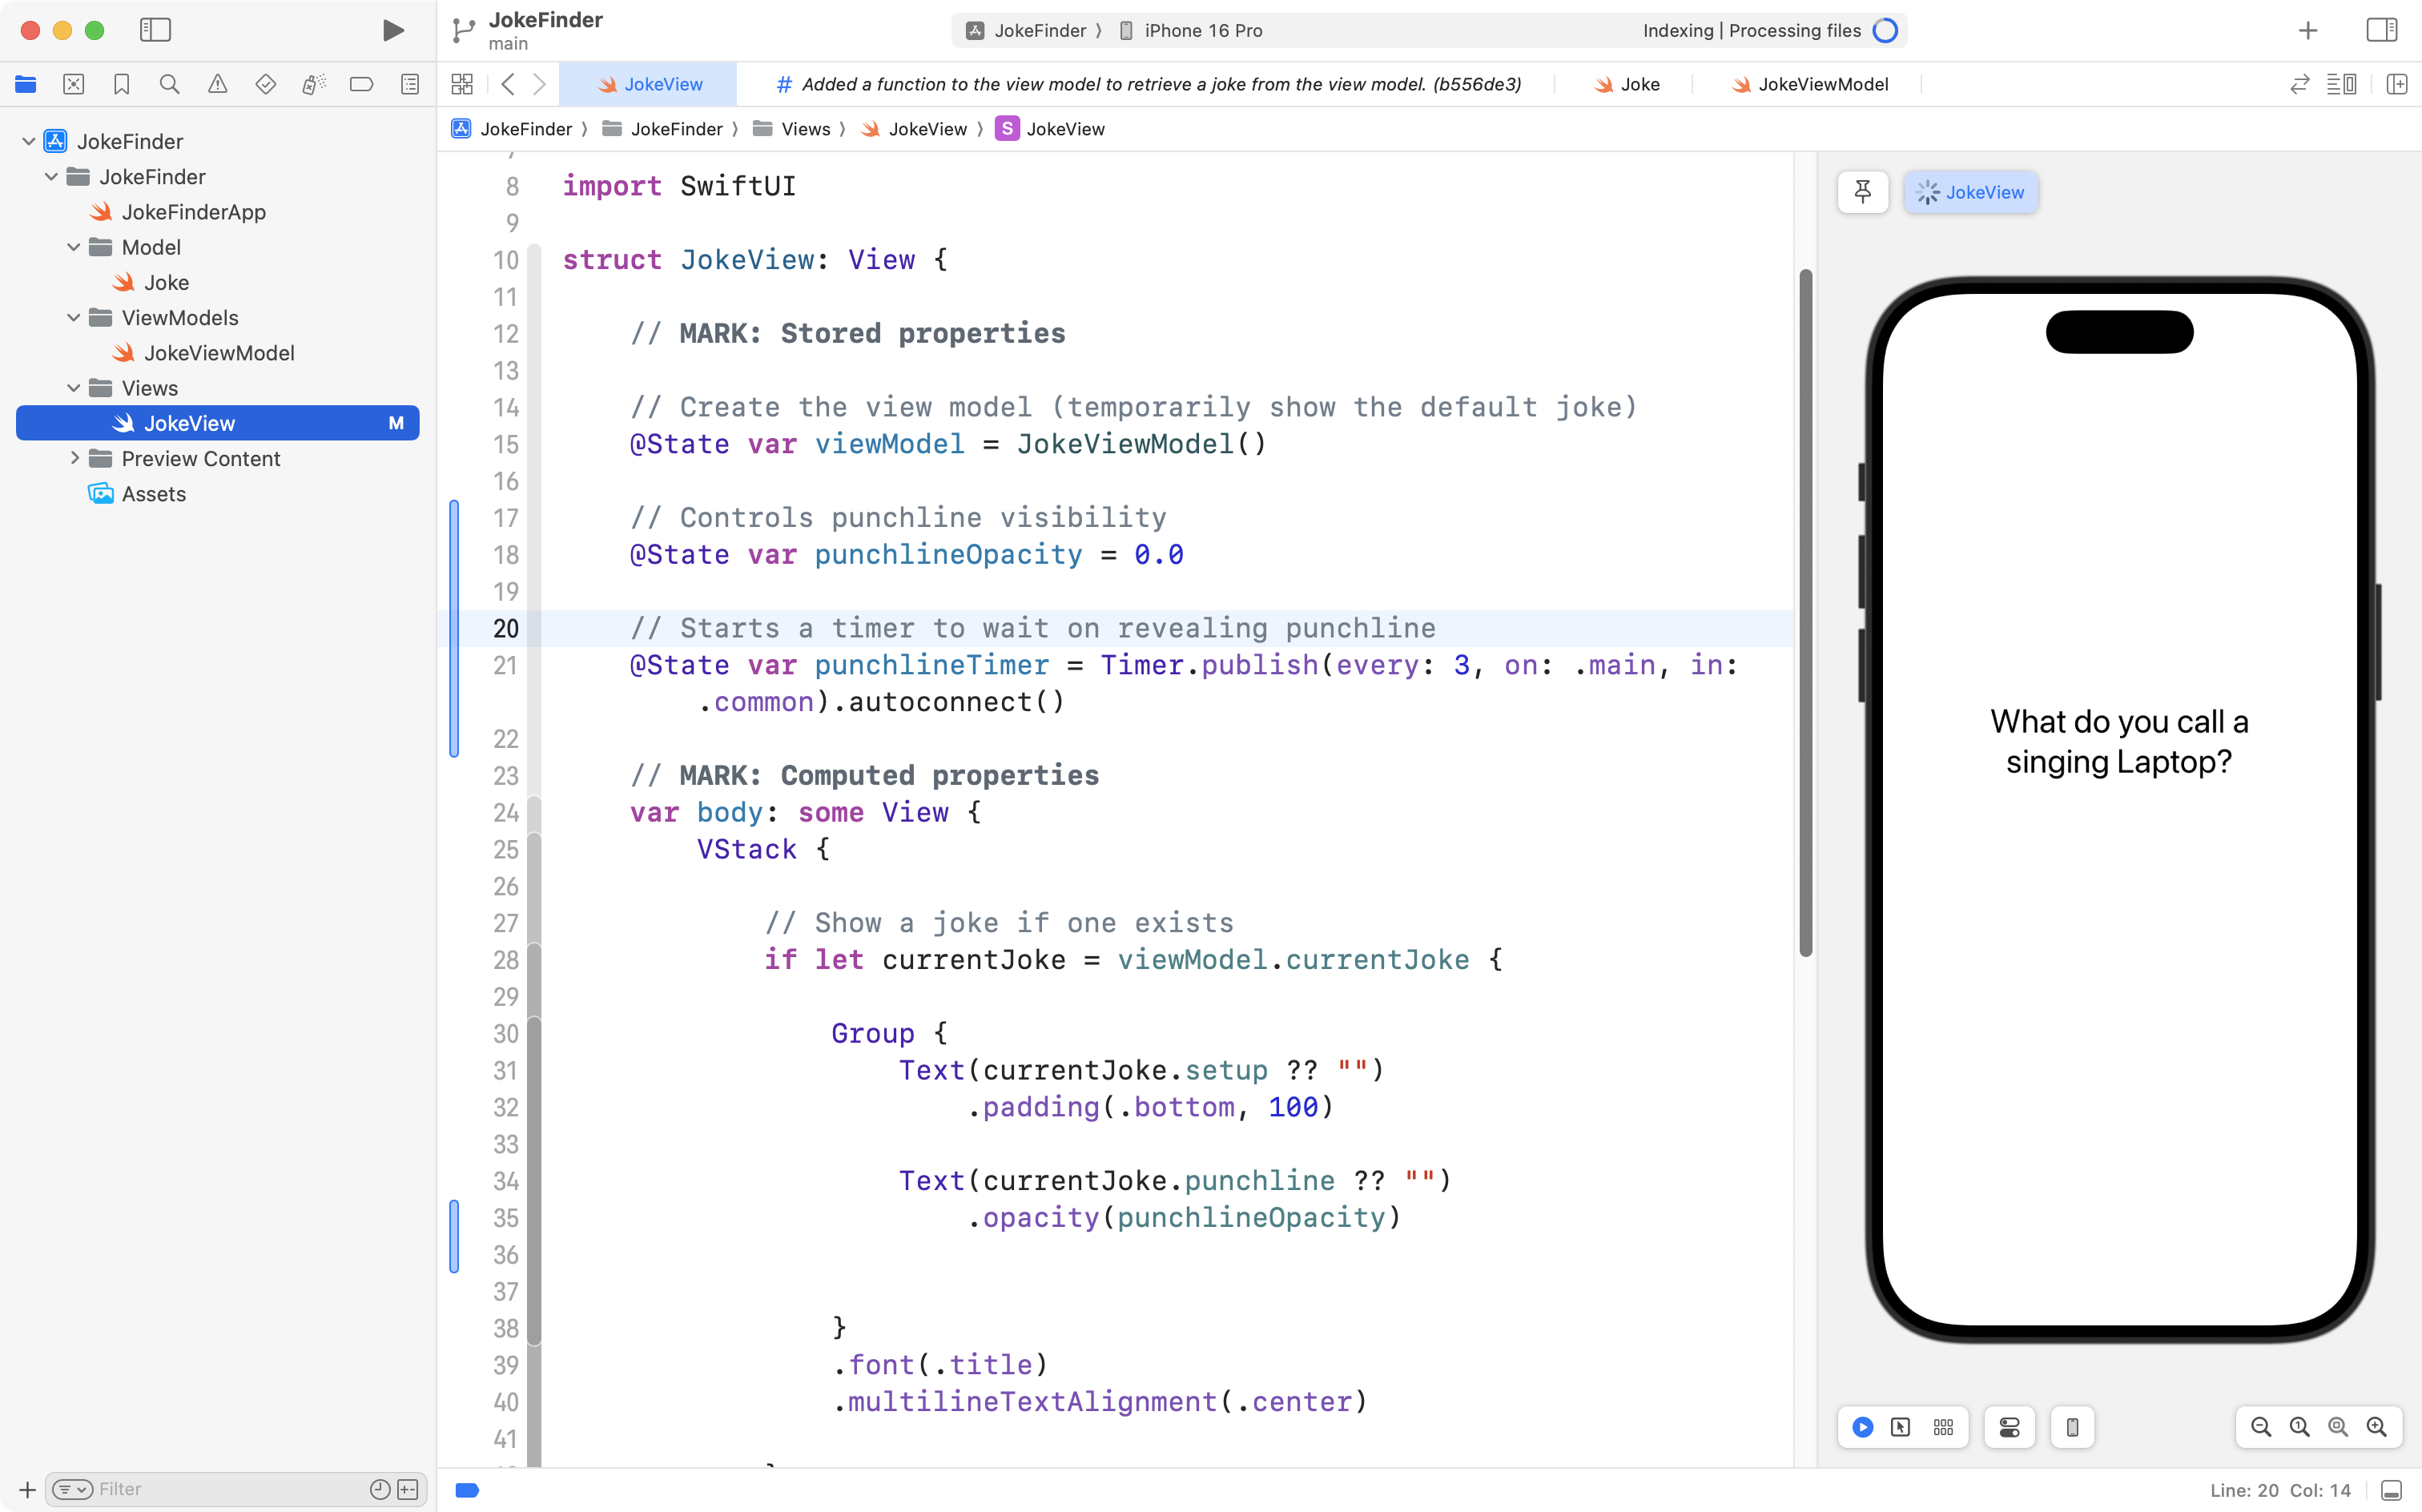
That code creates a timer that will “fire” about three seconds after the view is loaded.
Next, we need a way for our view to respond when the timer fires.
Copy this code into your clipboard:
.onReceive(punchlineTimer) { _ in

	withAnimation {
		punchlineOpacity = 1.0
	}

	// Stop the timer
	punchlineTimer.upstream.connect().cancel()
}
… and attach it as a view modifier to the second text view – the one that shows the punchline:
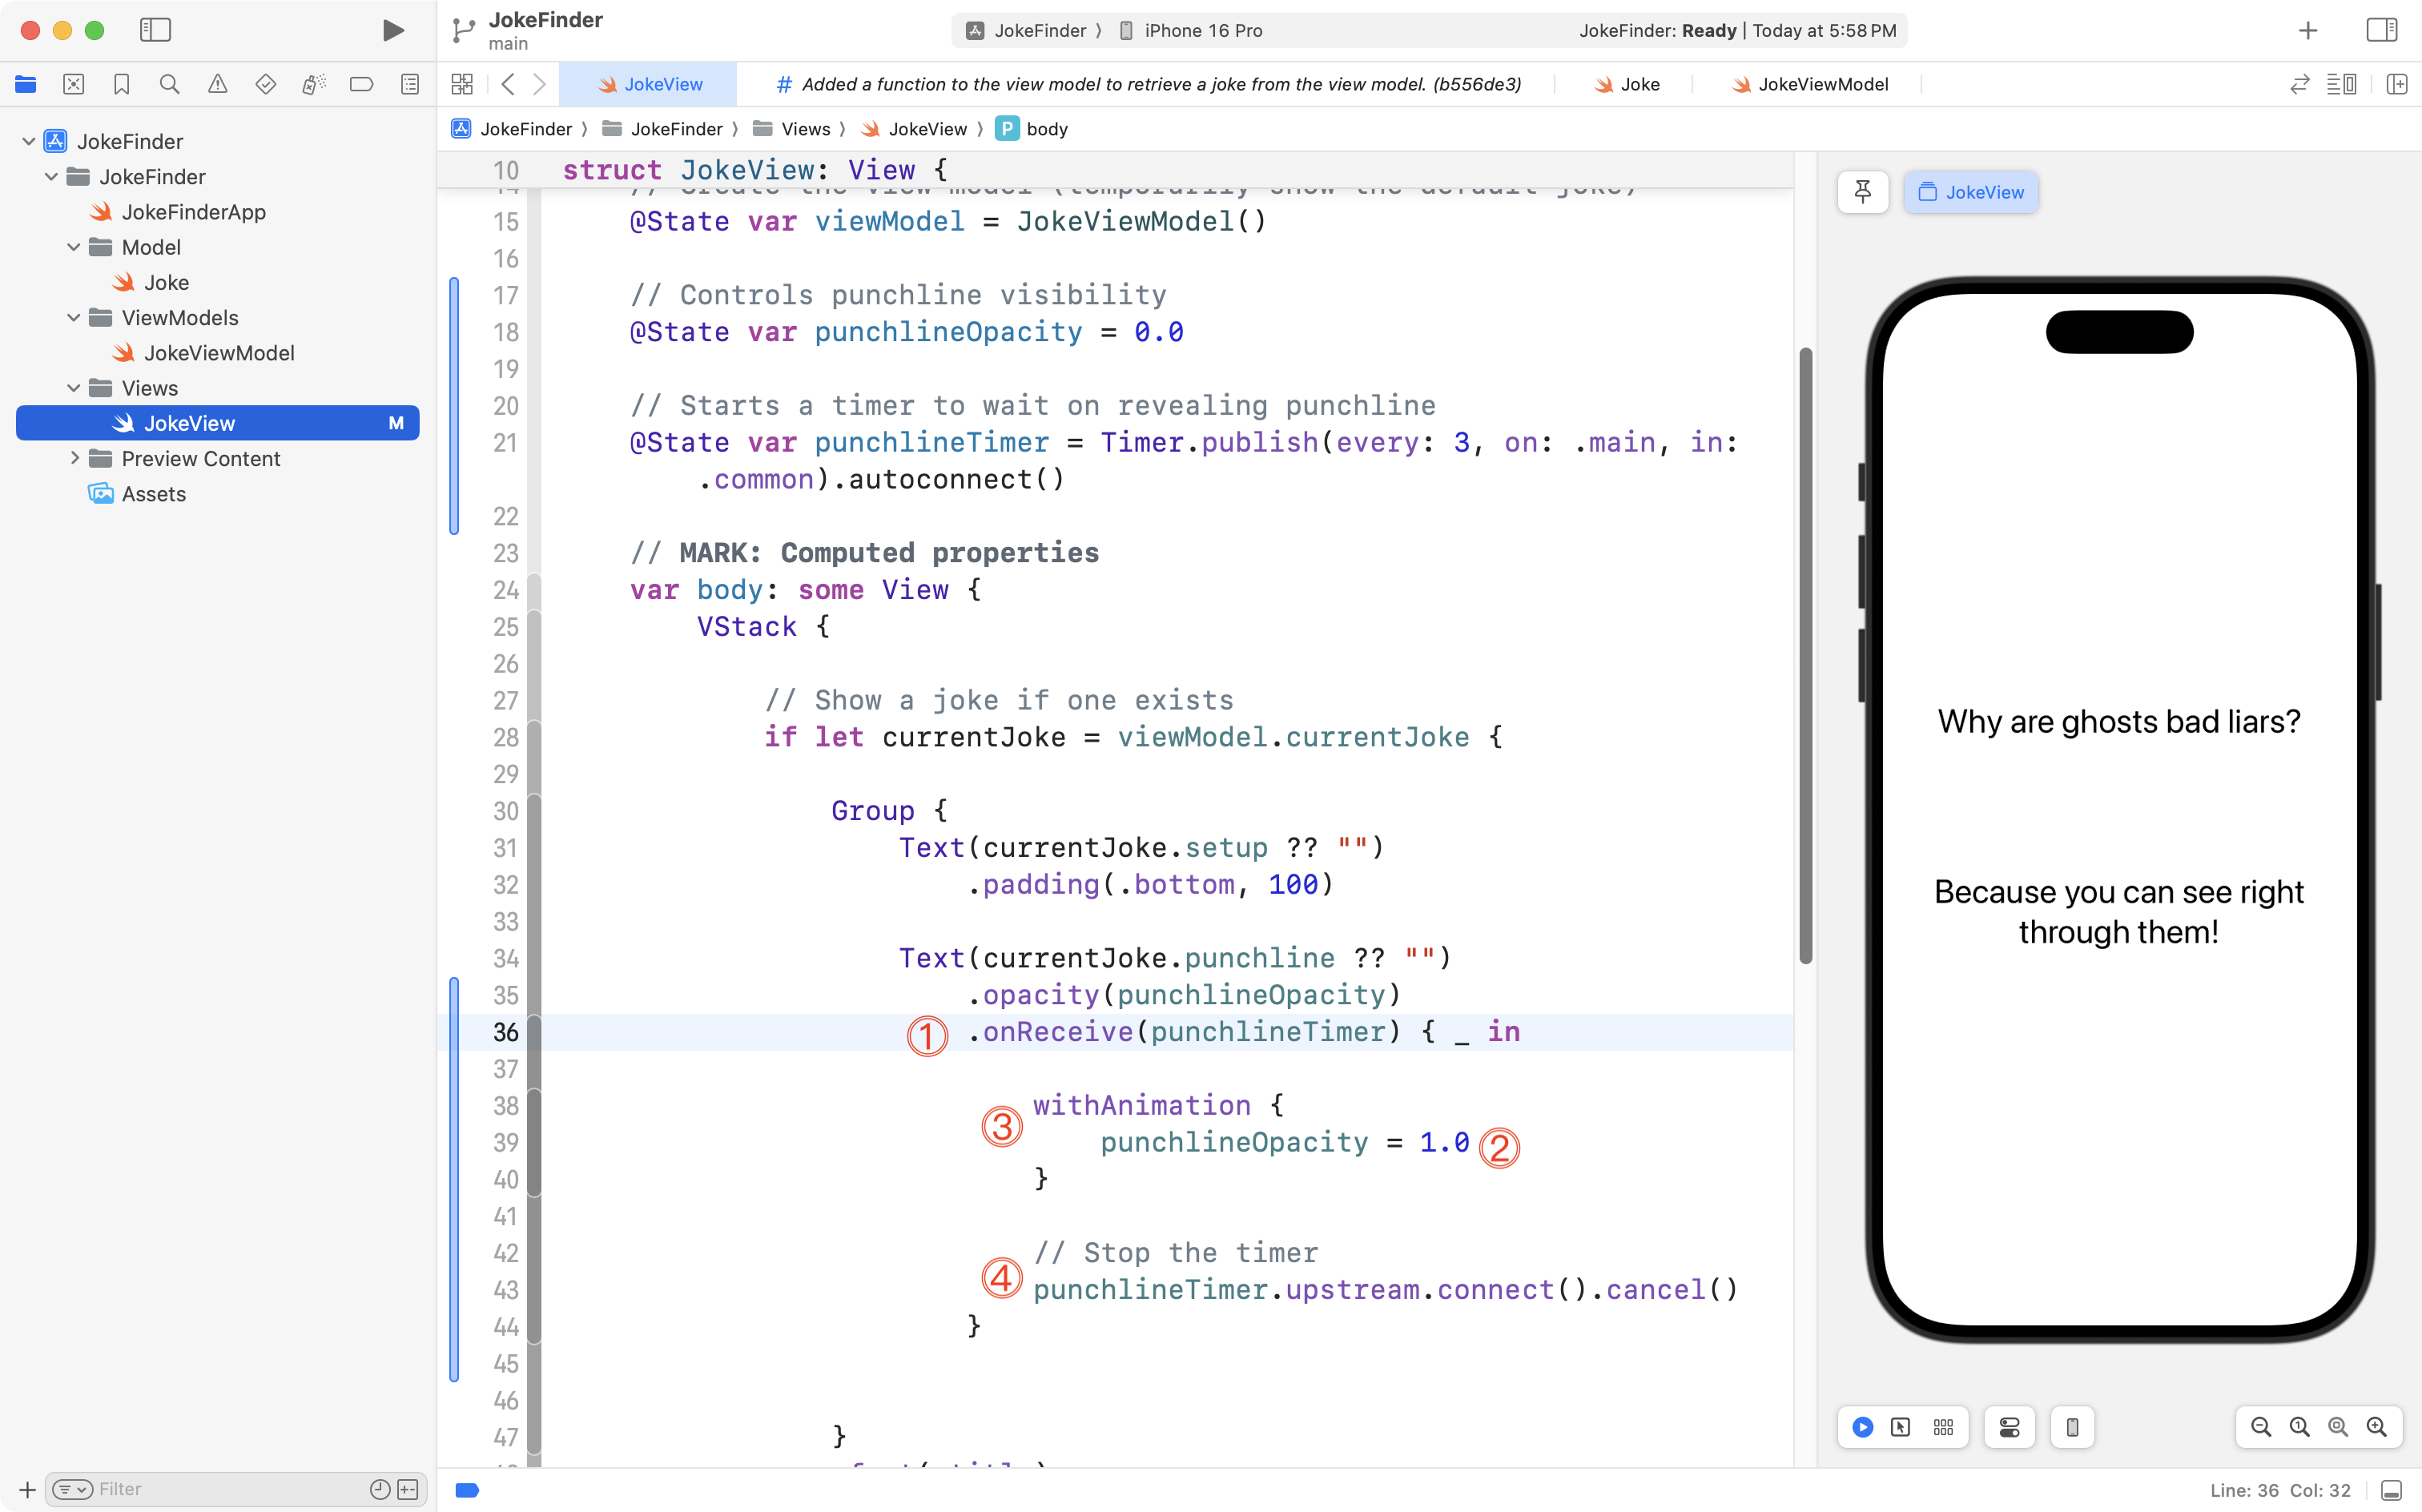
Let’s break that new code down a bit.
DISCUSSION
- Run the block of code provided when
punchlineTimerfires (when a “fire” event is received).- Set
punchlineOpacityto one, so that the second text view becomes visible.- Animate the transition from an opacity of zero to an opacity of one, so that the punchline fades in.
- Stop the timer from continuing to fire, to save CPU cycles.
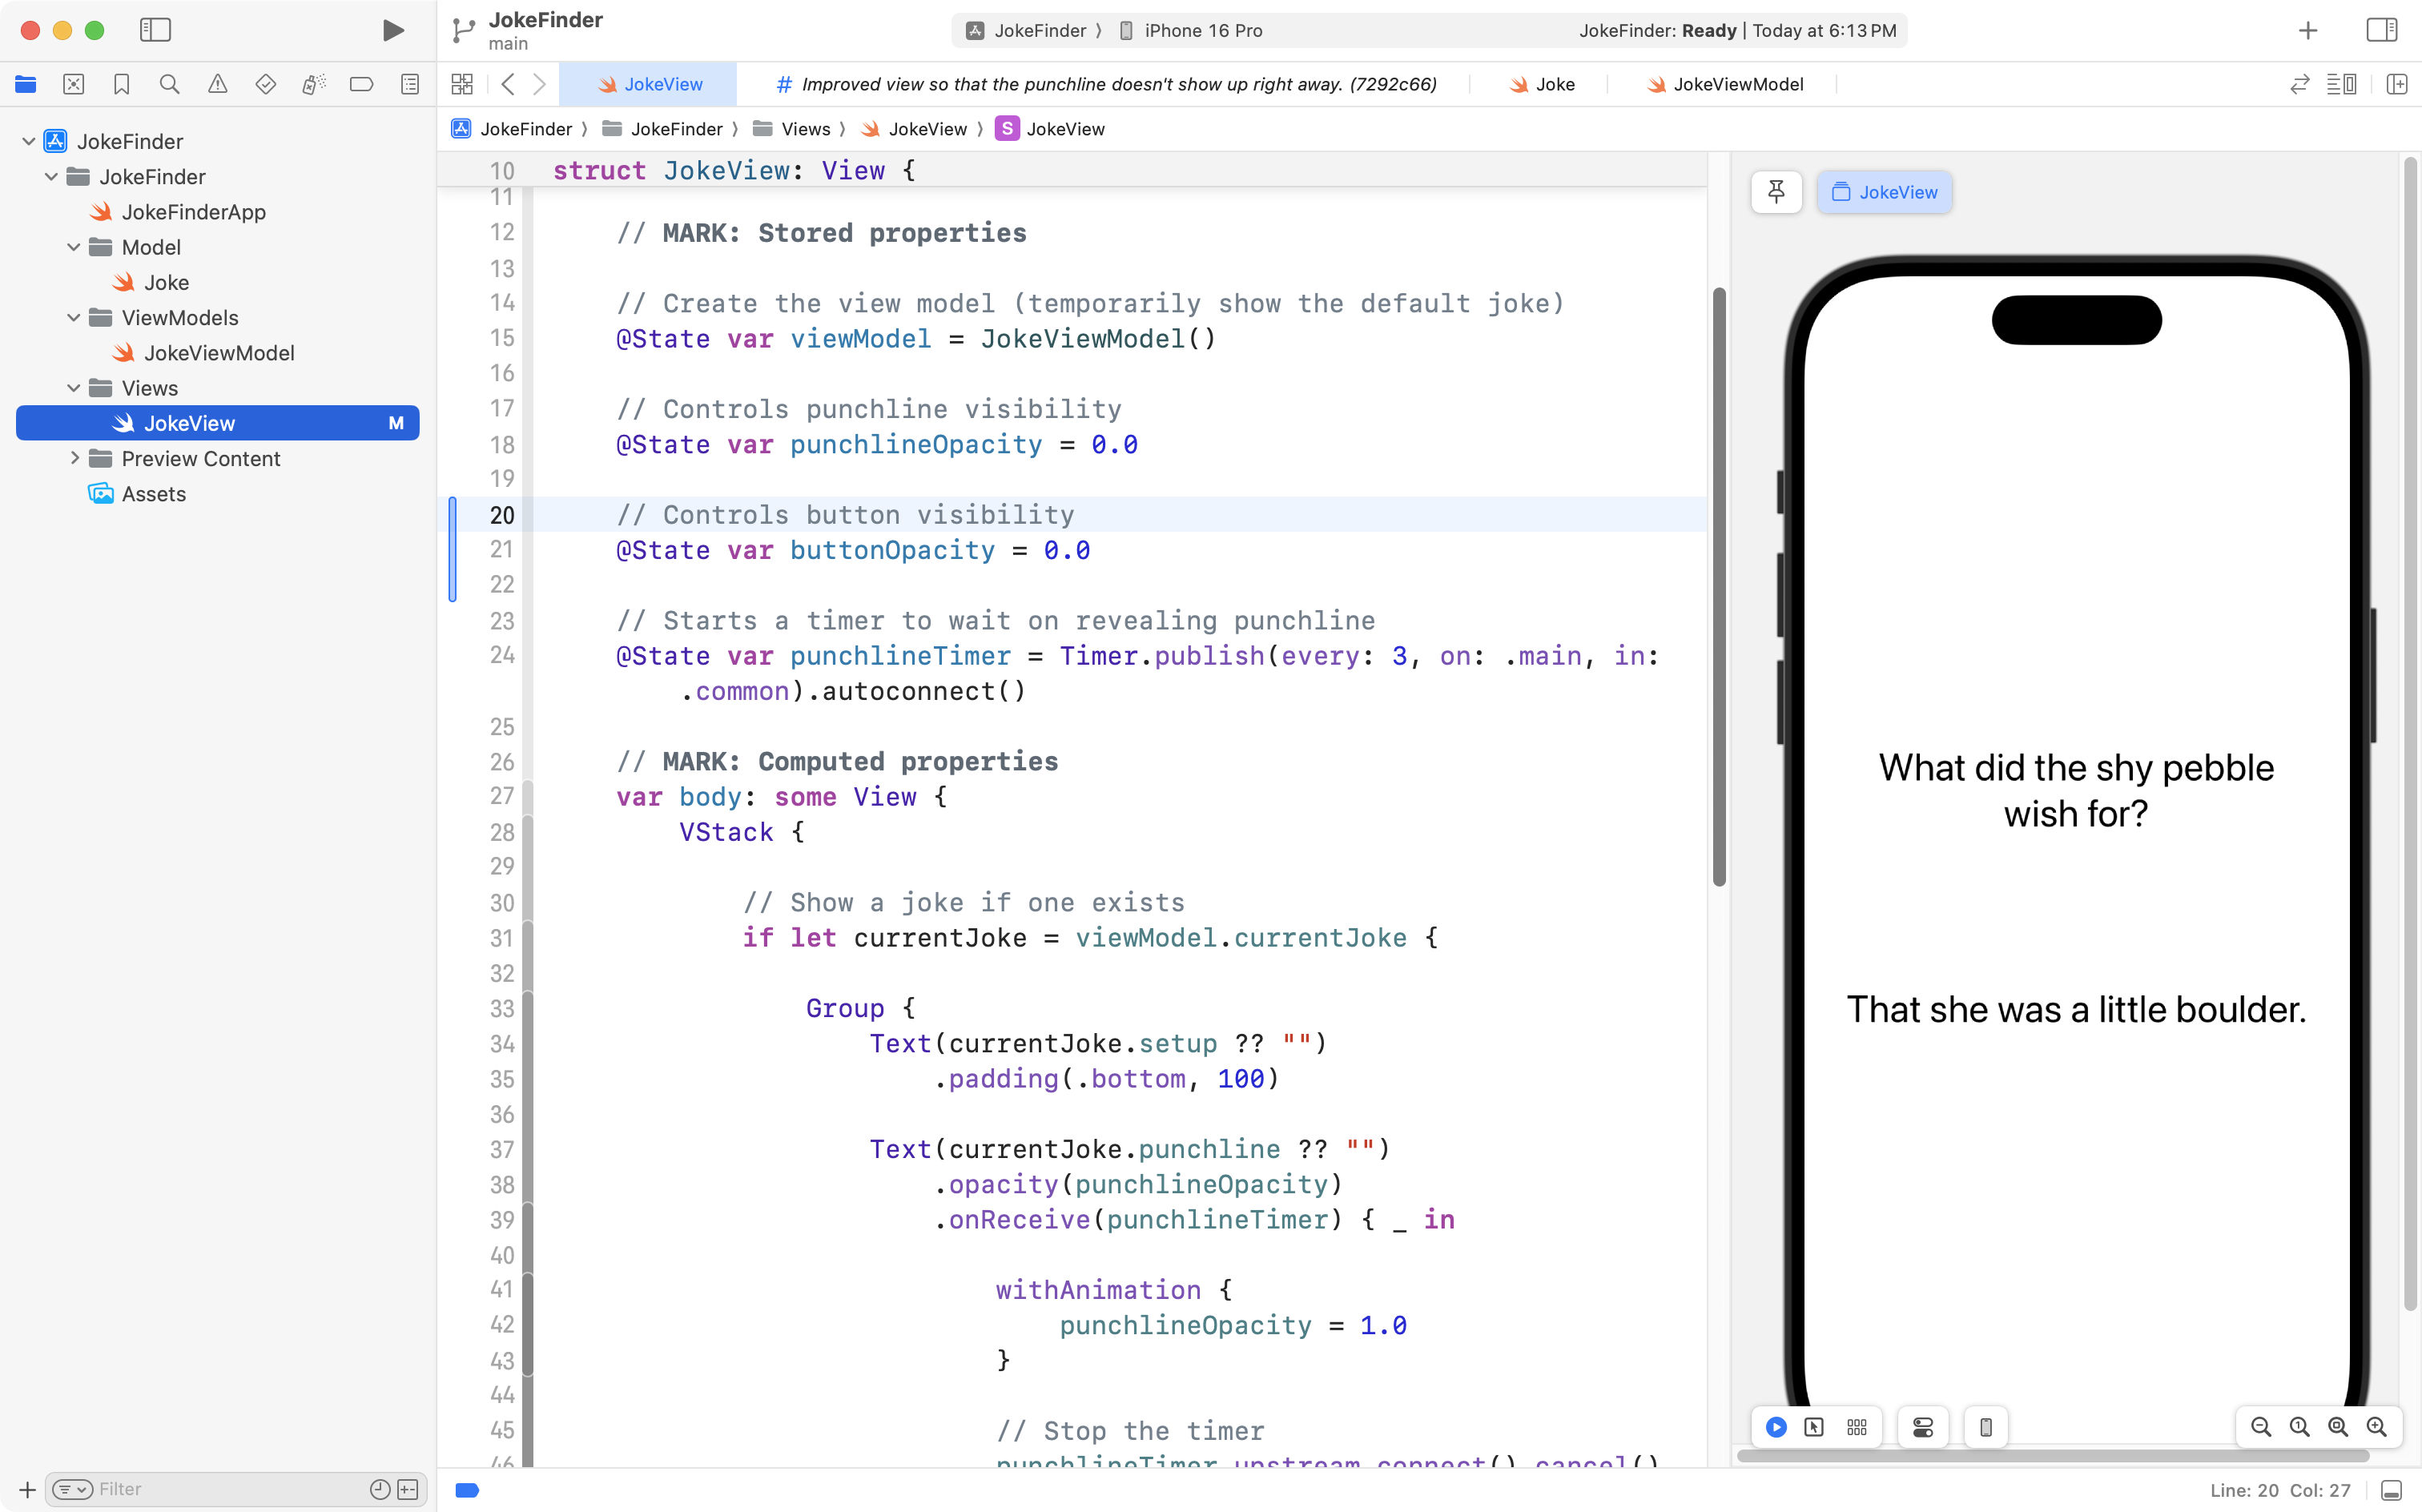
You should now see that the view works like this when it is loaded:
Notice how the punchline doesn’t show up immediately, but instead, fades in after about three seconds. Note that this looks better in real life when testing on your own computer (in a screen recording, the “fade in” effect isn’t captured very well).
Please commit and push your work with this message:
Improved view so that the punchline doesn't show up right away.
Load a new joke
Finally, the app is not super useful unless the user can load a new joke after reading the current one.
We will add a button to allow a new joke to be loaded.
We will configure the button so that its visibility is also controlled by a timer, similar to the way we make the punchline show up after a certain amount of time.
First, add this code:
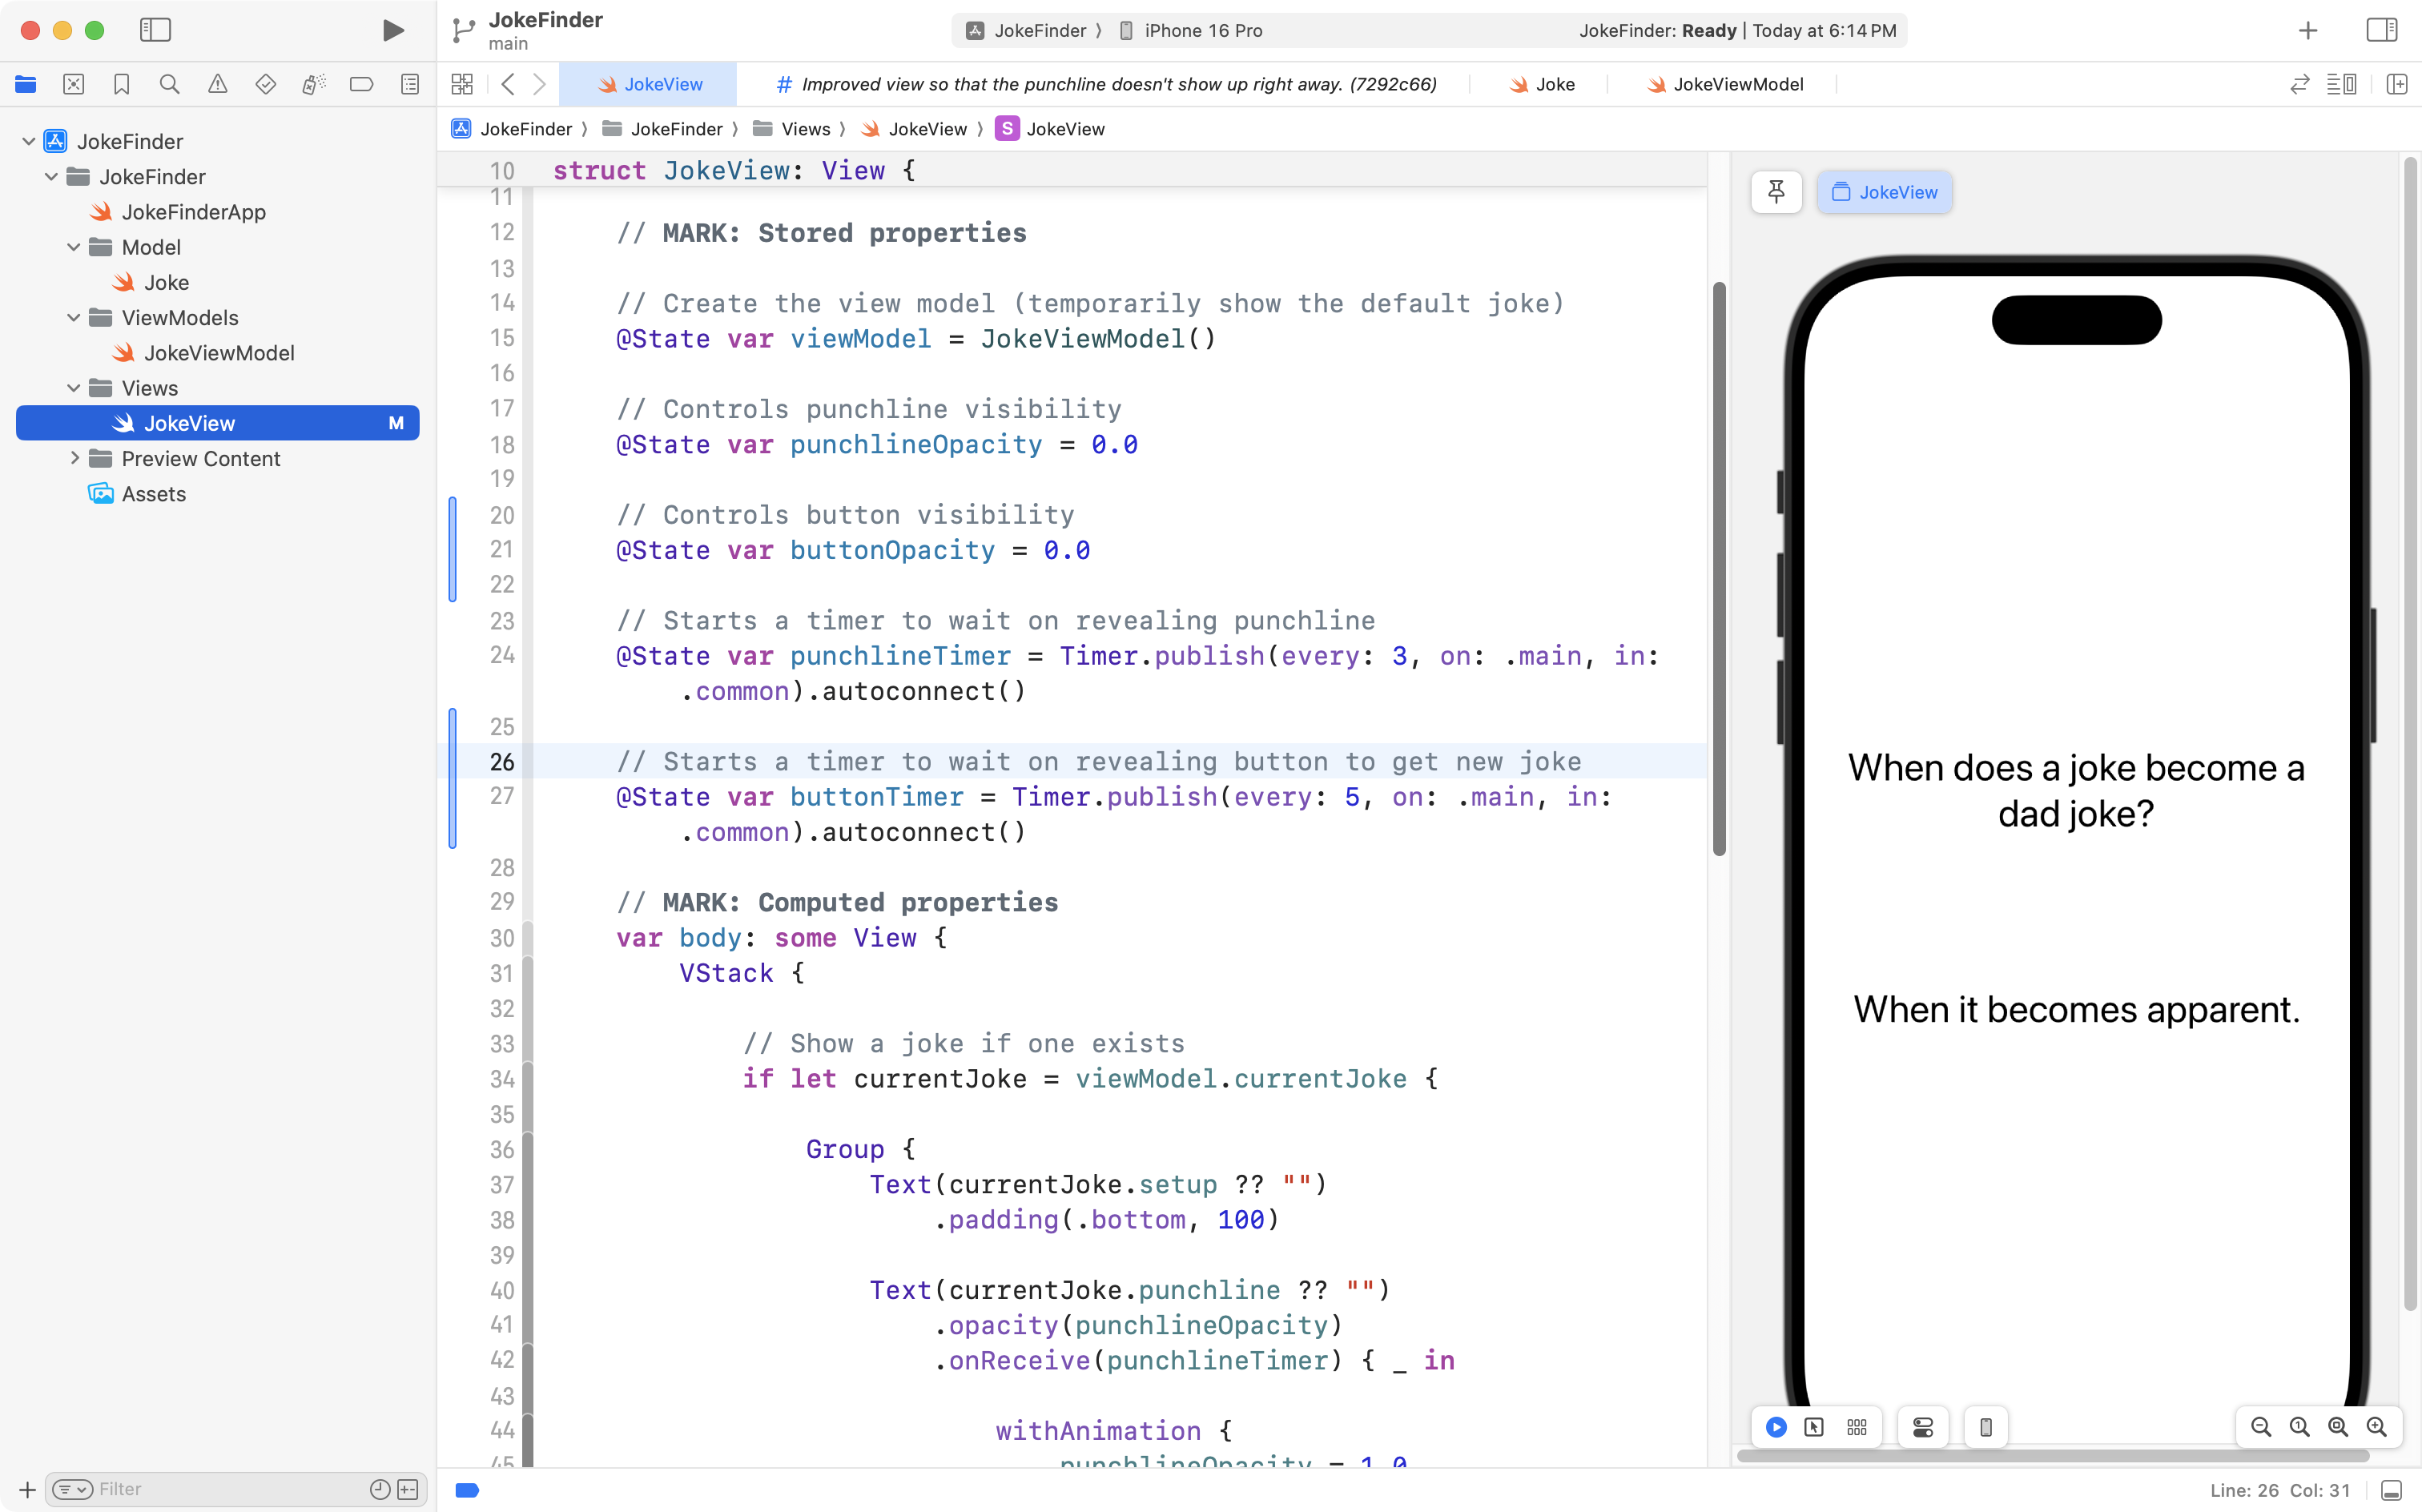
// Controls button visibility
@State var buttonOpacity = 0.0
… to the list of stored properties, like this:
Then, create a second timer that fires after five seconds – copy it to your clipboard:
// Starts a timer to wait on revealing button to get new joke
@State var buttonTimer = Timer.publish(every: 5, on: .main, in: .common).autoconnect()
… and add it to the list of stored properties, like this:
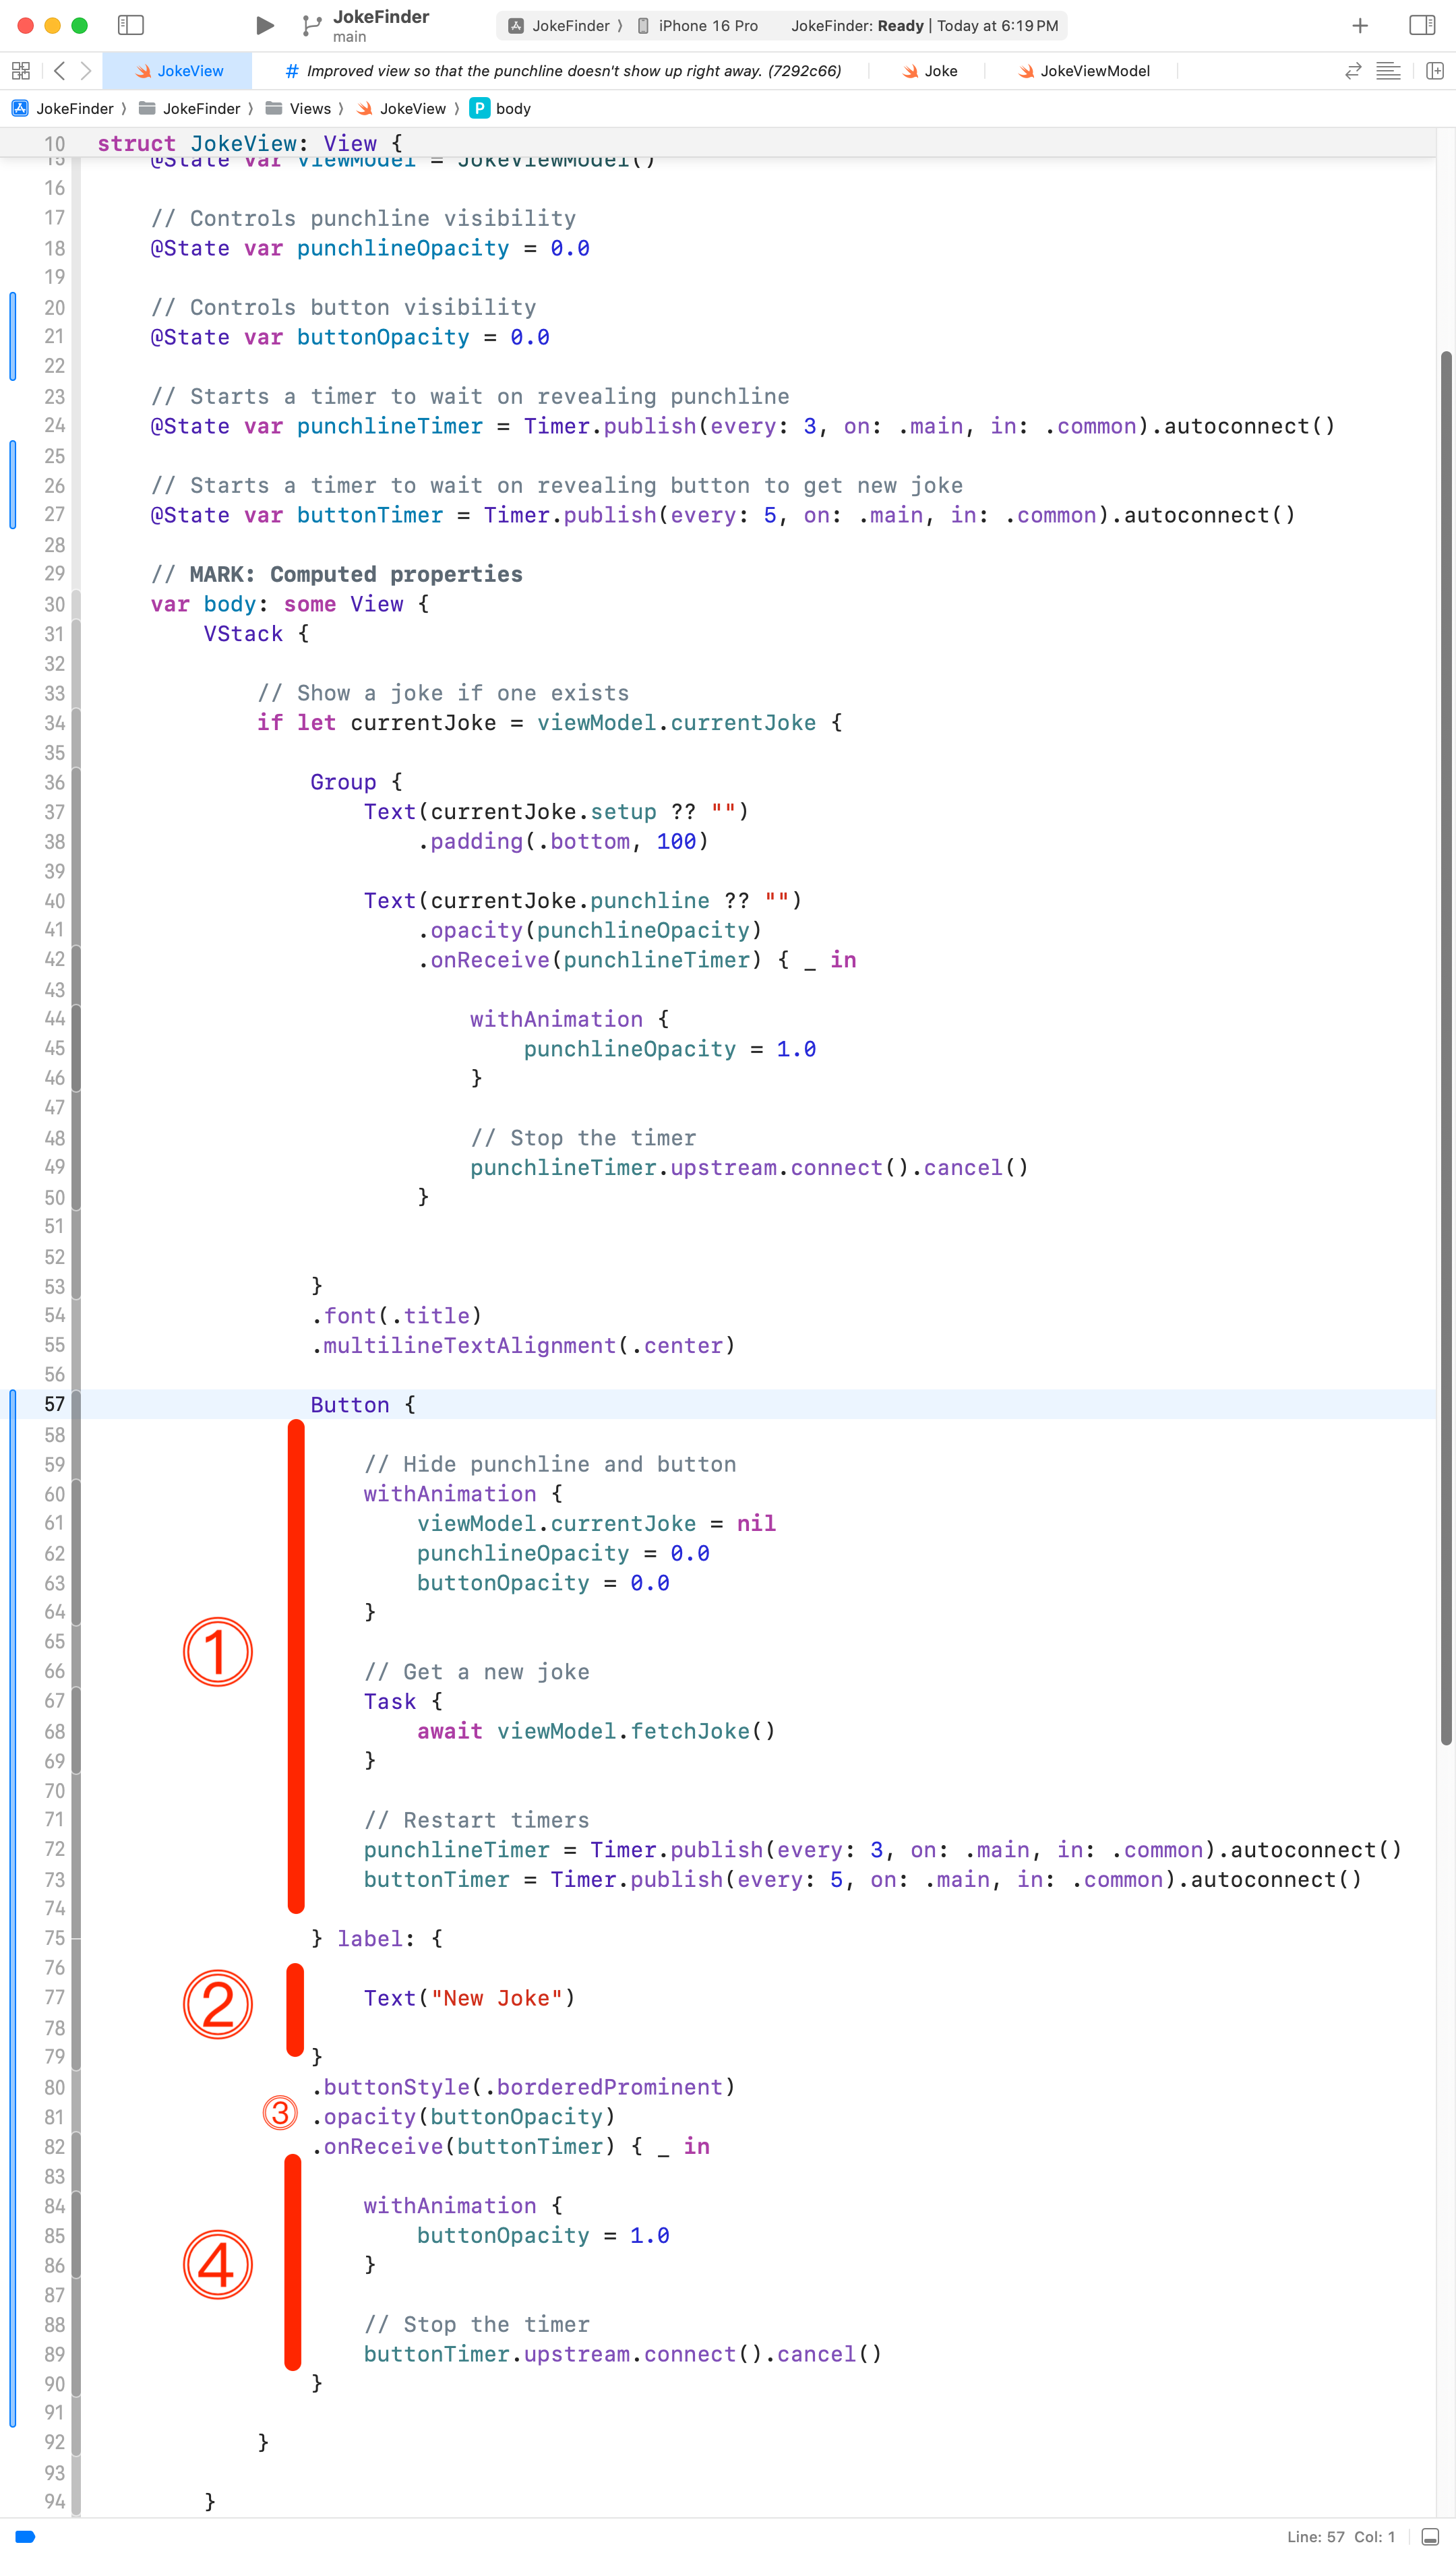
Now, here is the code for the button – don’t worry – we’ll break down how this works in a moment – for now, please copy it to your computer’s clipboard:
Button {

    // Hide punchline and button
    withAnimation {
        viewModel.currentJoke = nil
        punchlineOpacity = 0.0
        buttonOpacity = 0.0
    }

    // Get a new joke
    Task {
        await viewModel.fetchJoke()
    }

    // Restart timers
    punchlineTimer = Timer.publish(every: 3, on: .main, in: .common).autoconnect()
    buttonTimer = Timer.publish(every: 5, on: .main, in: .common).autoconnect()

} label: {

    Text("New Joke")

}
.buttonStyle(.borderedProminent)
.opacity(buttonOpacity)
.onReceive(buttonTimer) { _ in

    withAnimation {
        buttonOpacity = 1.0
    }

    // Stop the timer
    buttonTimer.upstream.connect().cancel()
}
Place the button below the two text views, like this:
Now, let’s examine this code together.
DISCUSSION
- All the code that runs when the button is pressed. In order, we clear the current joke and hide the punchline and the button. Then we get a new joke using the view model. Finally, we restart the timers so the new joke’s punchline will fade in after three seconds, followed by the button.
- This is the text that shows up on the button.
- The button’s visibility is controlled by the stored property we added named
buttonOpacity.- When
buttonTimerfires, this block of code runs to make the button visible by setting its opacity to one. We then stop the timer to preserve CPU cycles.
When all is said and done, you should have an app that works like the example given at the outset of this lesson:
Finally, it’s a good idea to commit these changes with the following message right now:
Added a button so that we can load a new joke if desired.
Exercise
Examine the structure of the JSON object returned by this endpoint:
https://api.forismatic.com/api/1.0/?method=getQuote&key=457653&format=json&lang=en
Write an app that shows a quote in an appropriate user interface, with code organized using the MVVM design pattern.
Design an attractive user interface for the quotes that are shown.
Make it possible for the user to retrieve more quotes, if they wish.
You may refer to the Jokes app you just built, or any part of this lesson.
TIP
Get started by designing a structure that models the format of the JSON received from the endpoint.
NOTE
If you’d like to learn how to create a more advanced user interface for this app and learn how to persist (save) jokes for future reference – as shown in the video below – then have a look at this follow-up lesson.