Most often this year, we have used arrays that hold a set number of elements, like in the Hobby Cards app:
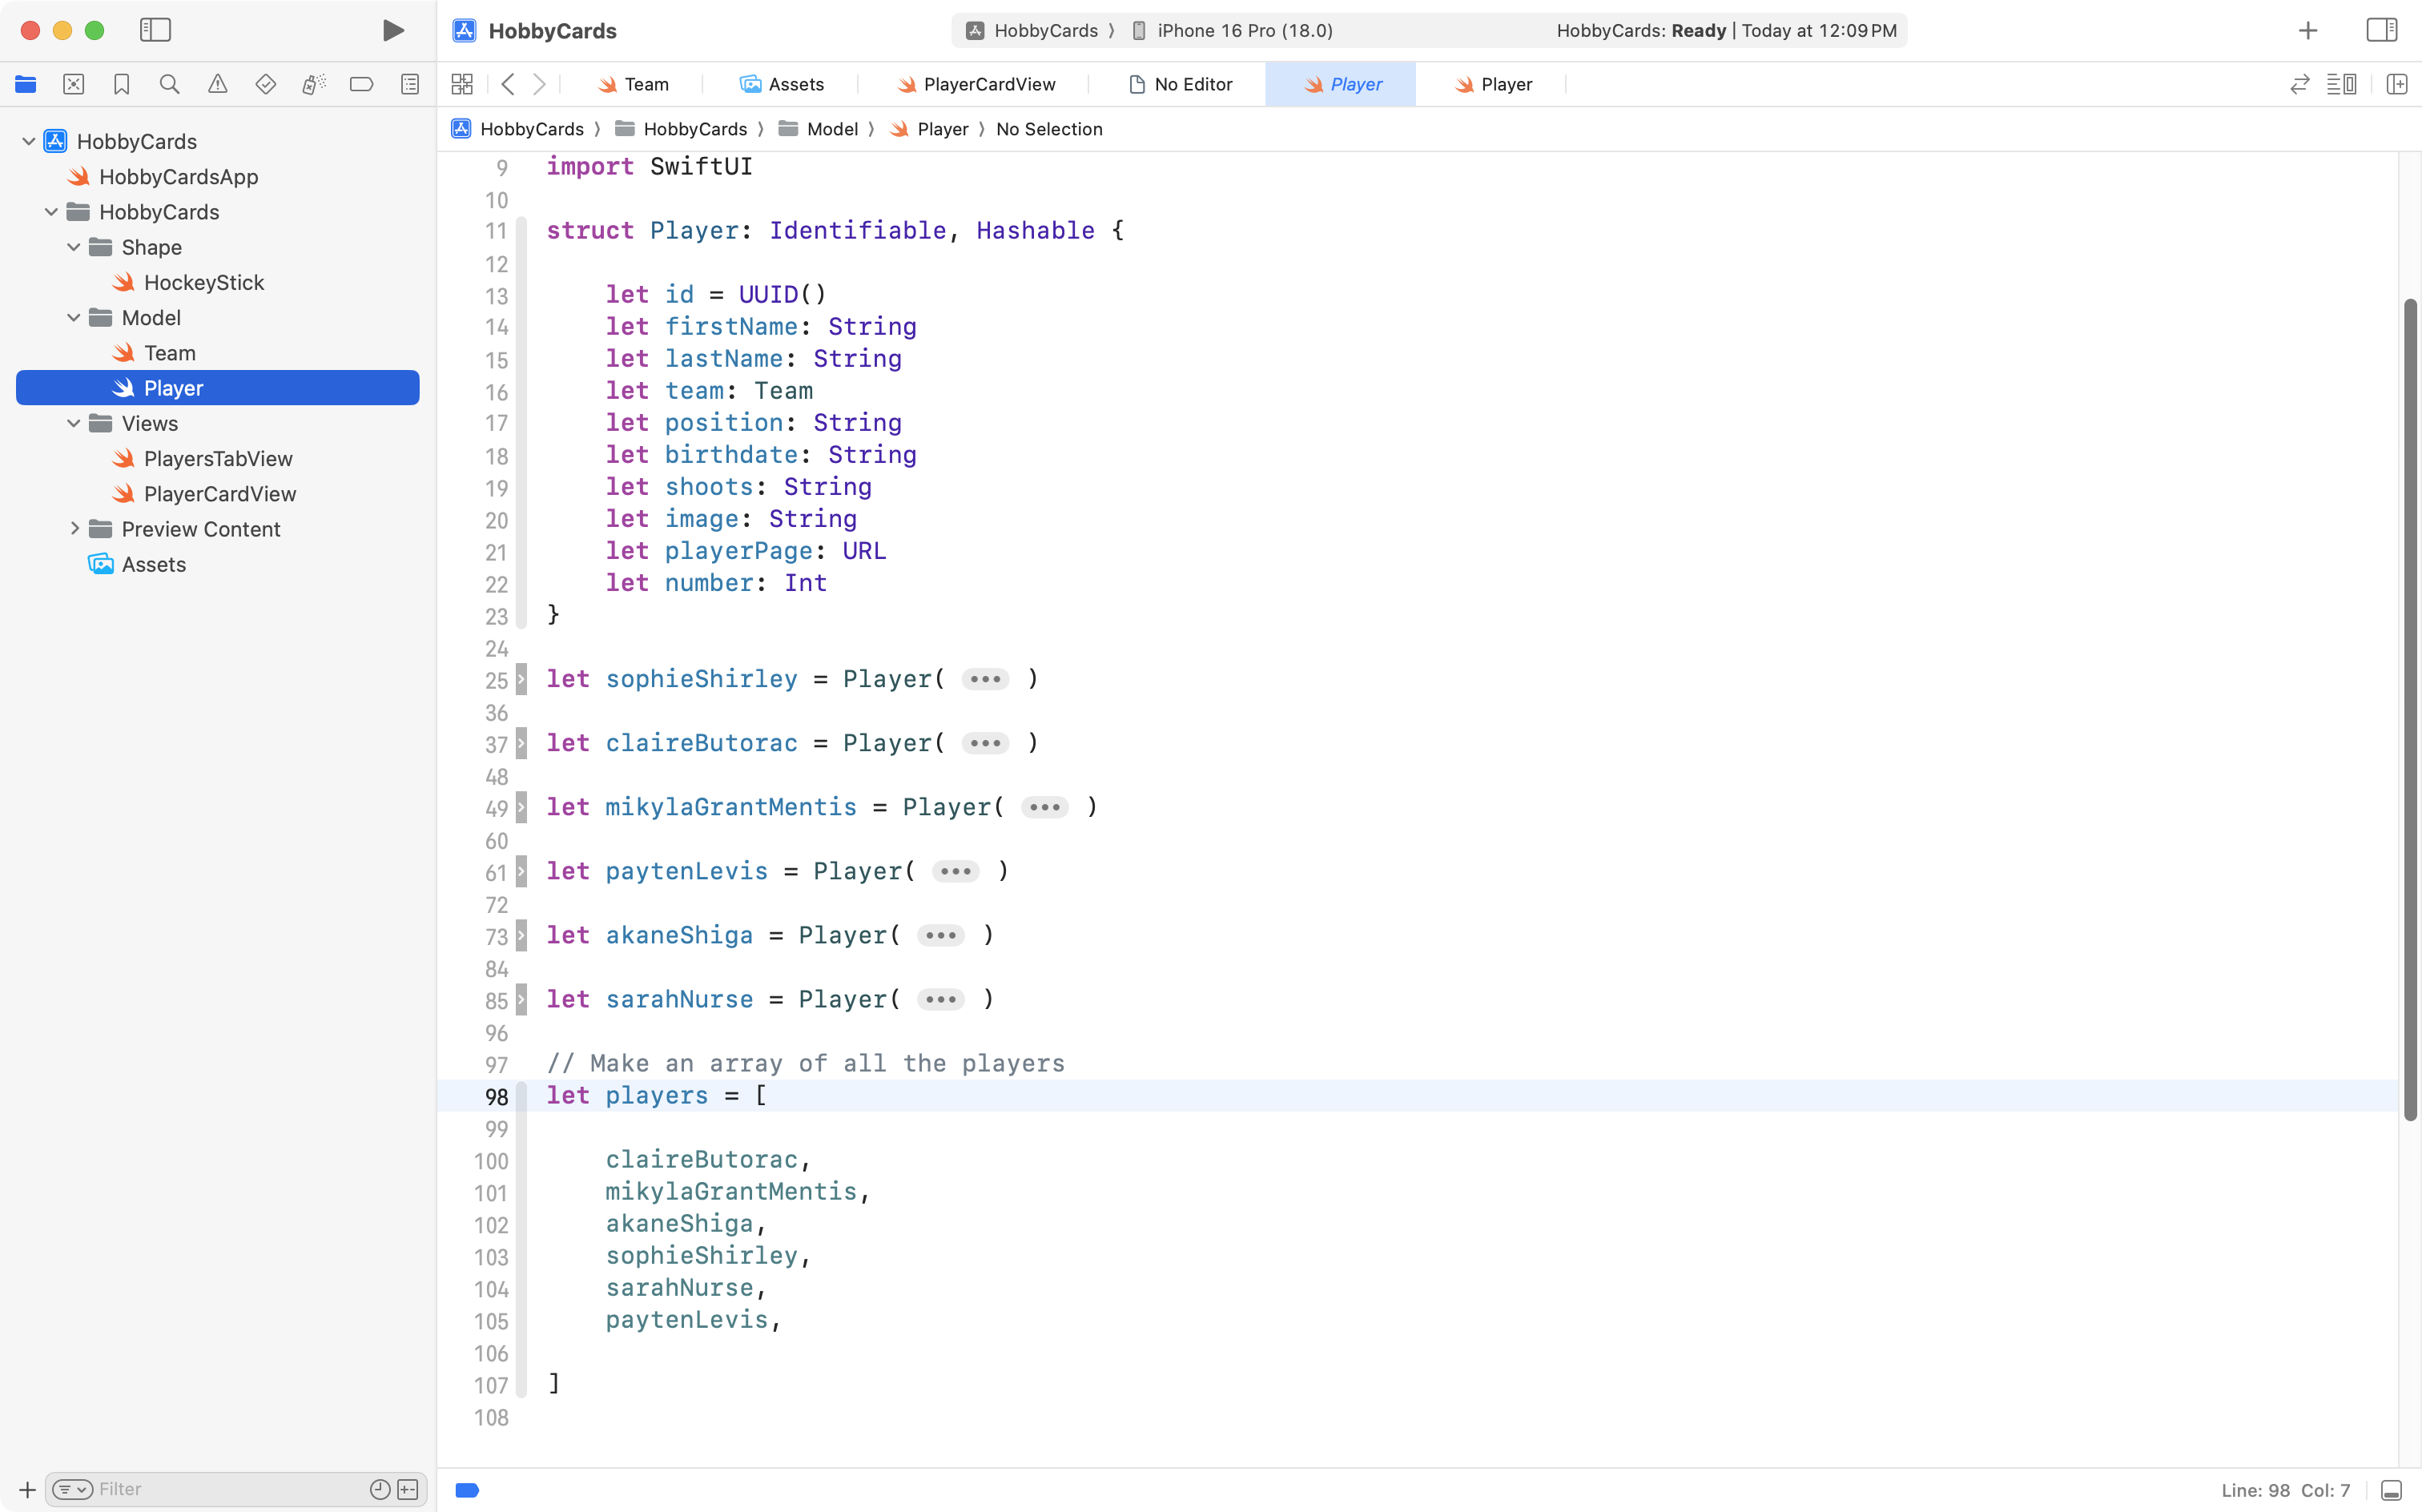
For example, in the screenshot above, on lines 98 to 107, an array (also called a list) named players was created and holds six elements, with indices from 0 to 5:
| Index | Element |
|---|---|
| 0 | claireButorac |
| 1 | mikylaGrantMentis |
| 2 | akaneShiga |
| 3 | sophieShirley |
| 4 | sarahNurse |
| 5 | paytenLevis |
The use of an array allowed Mr. Gordon to apply abstraction and create his exemplar for the Hobby Cards task, where users can swipe through a list of players in the PWHL:
This was a fun app to make, however, a great deal of the utility of using an array comes from its flexibility: the number of elements can be increased (or decreased) while our program runs.
For example, consider the following improvement to our app that allows for powers to be evaluated – it might be nice for users to see a list of previous calculations:
A similar app that performs more complex calculations and provides a way to save prior results might be even more useful.
For example, say that you are working through a problem set in Physics that requires kinematics equations – it might be useful to see previous equations you have solved using an app, similar to the way you can call back prior calculations made on a handheld calculator.
Understanding the data structure
Before you learn how to build out an app that can save a history of results, let’s take just a bit of time to explore the structure of an array (also known as a list) again.
Initializing an array
Create a new command-line macOS app named DynamicListExamples, and then copy this code into the main file:
// Create an array of integers that
// holds three random numbers to start
var numbers: [Int] = [

    Int.random(in: 1...100),
    Int.random(in: 1...100),
    Int.random(in: 1...100),

]

// Print the values in the array
for number in numbers {
    print(number)
}
… like this:
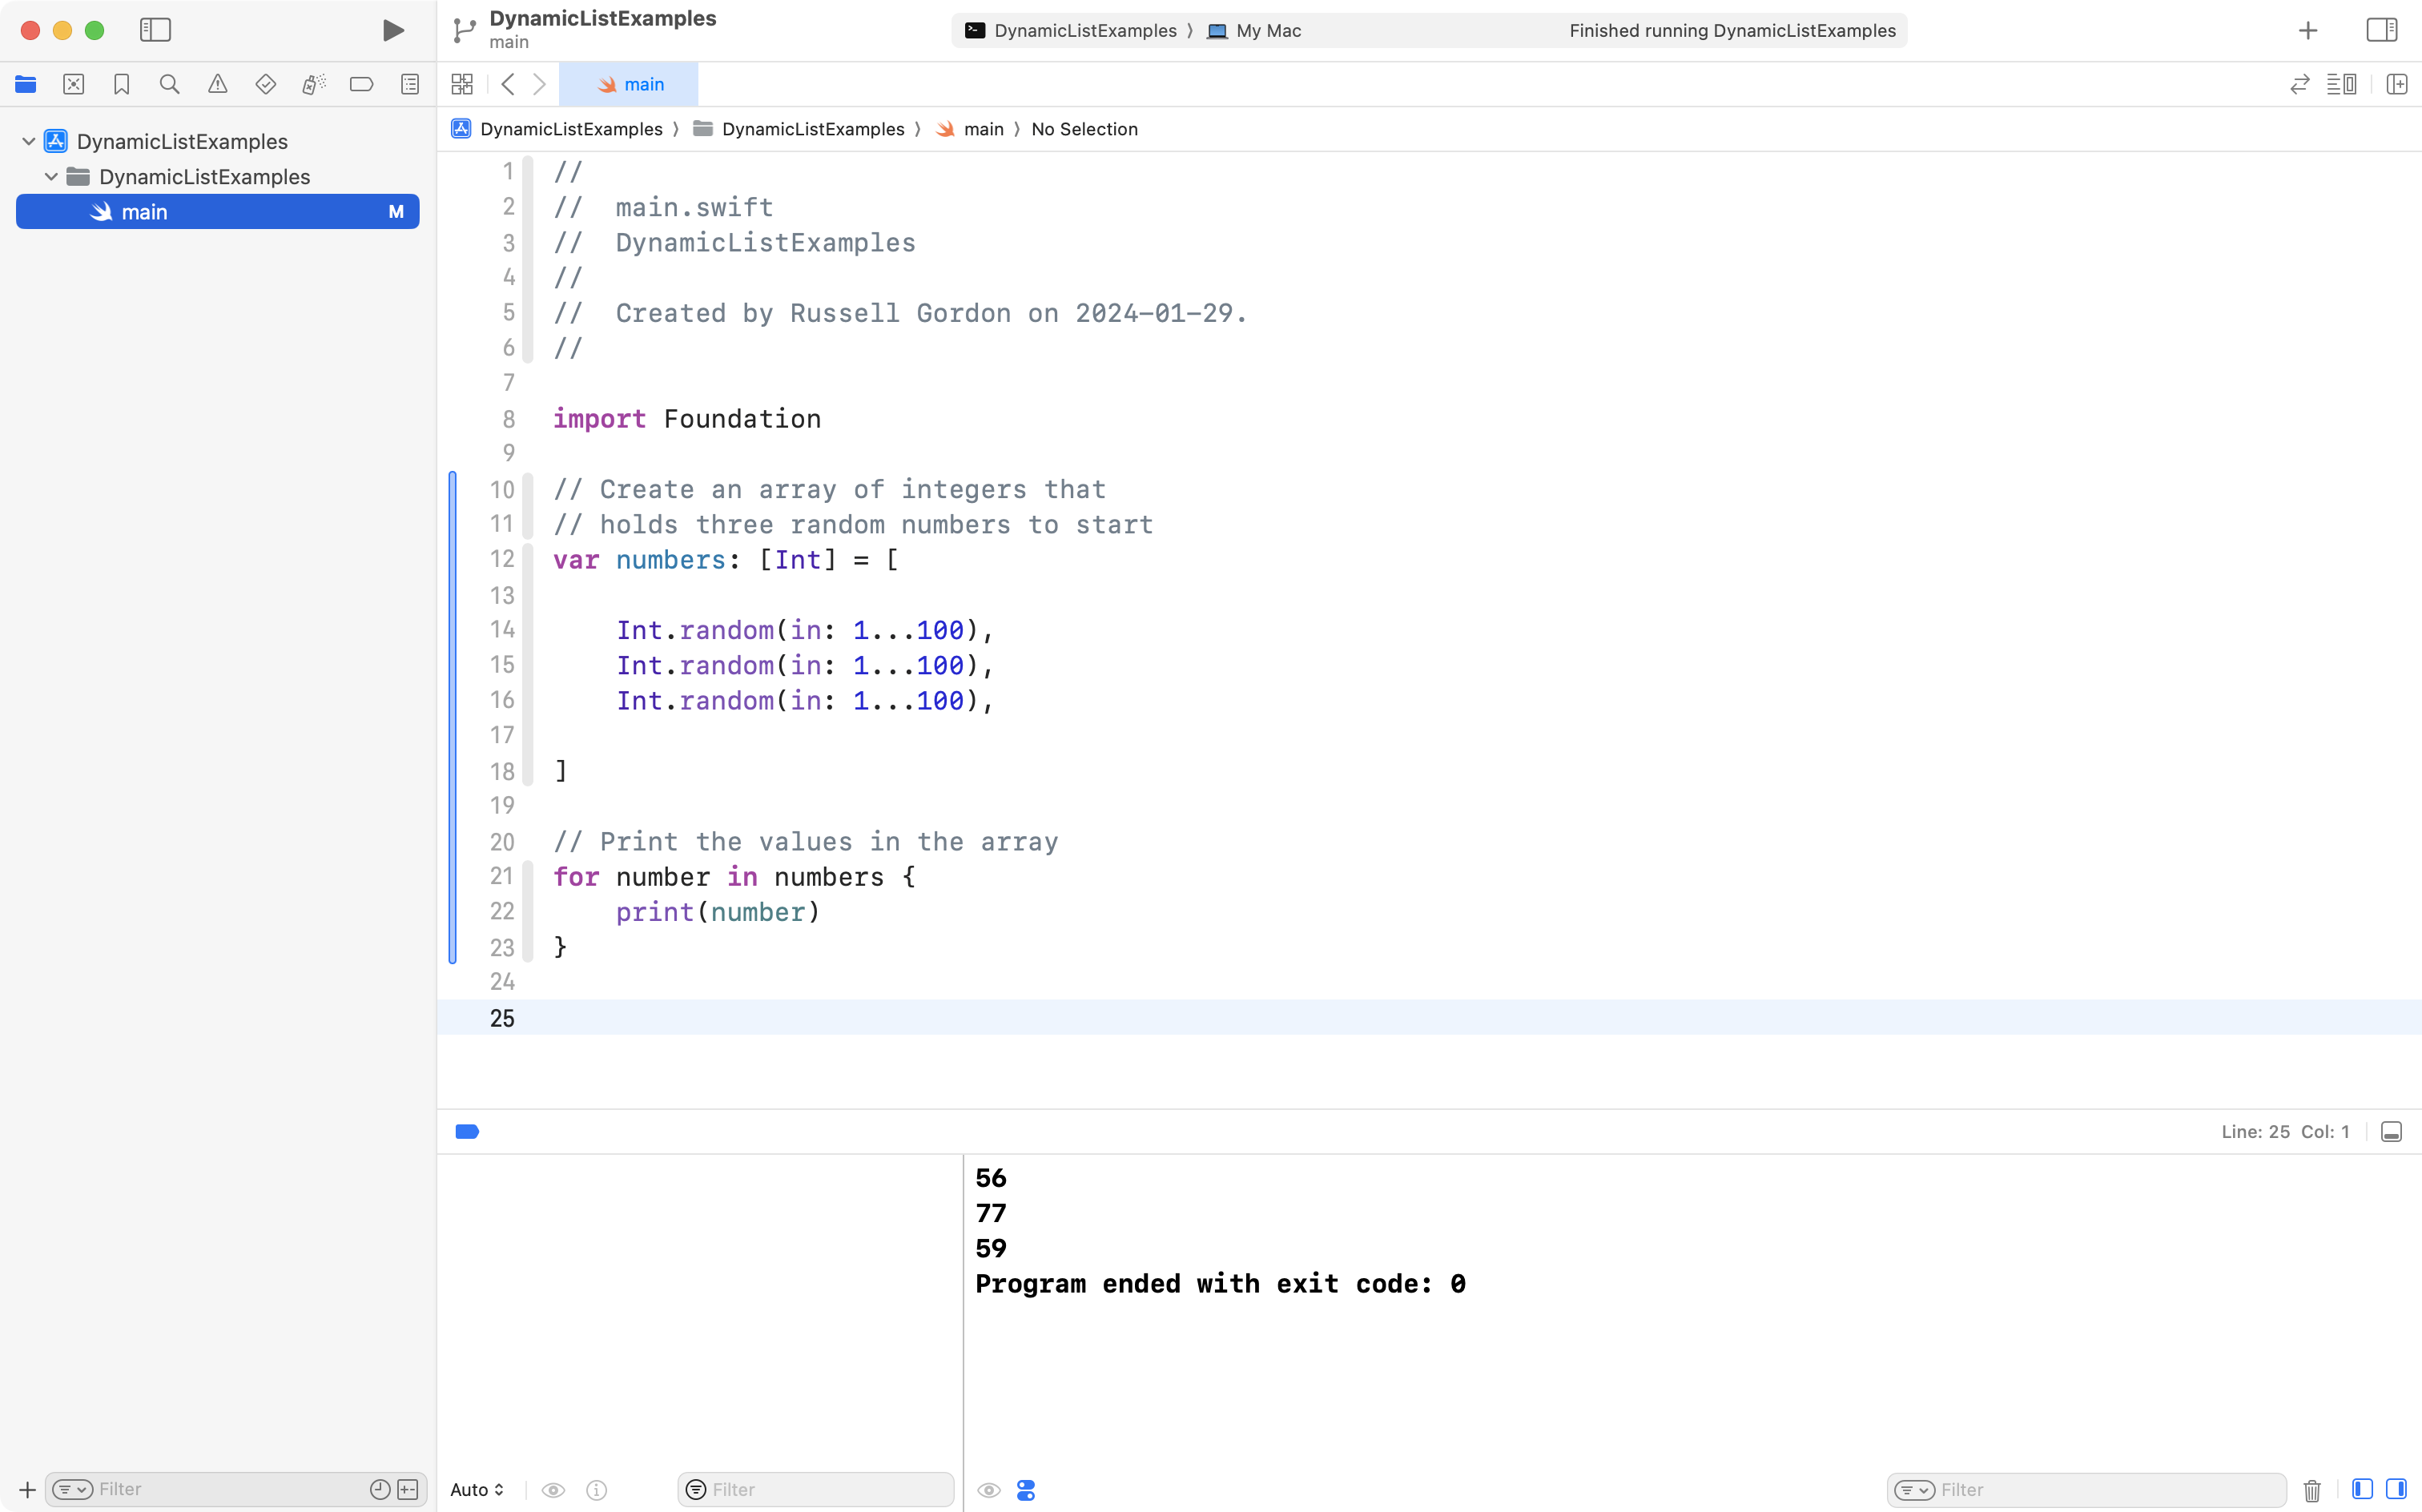
Run the app a few times by using the Command-R keyboard shortcut.
Notice how the numbers in the array change each time. That is because they are randomly generated.
However, there are always three elements in the array.
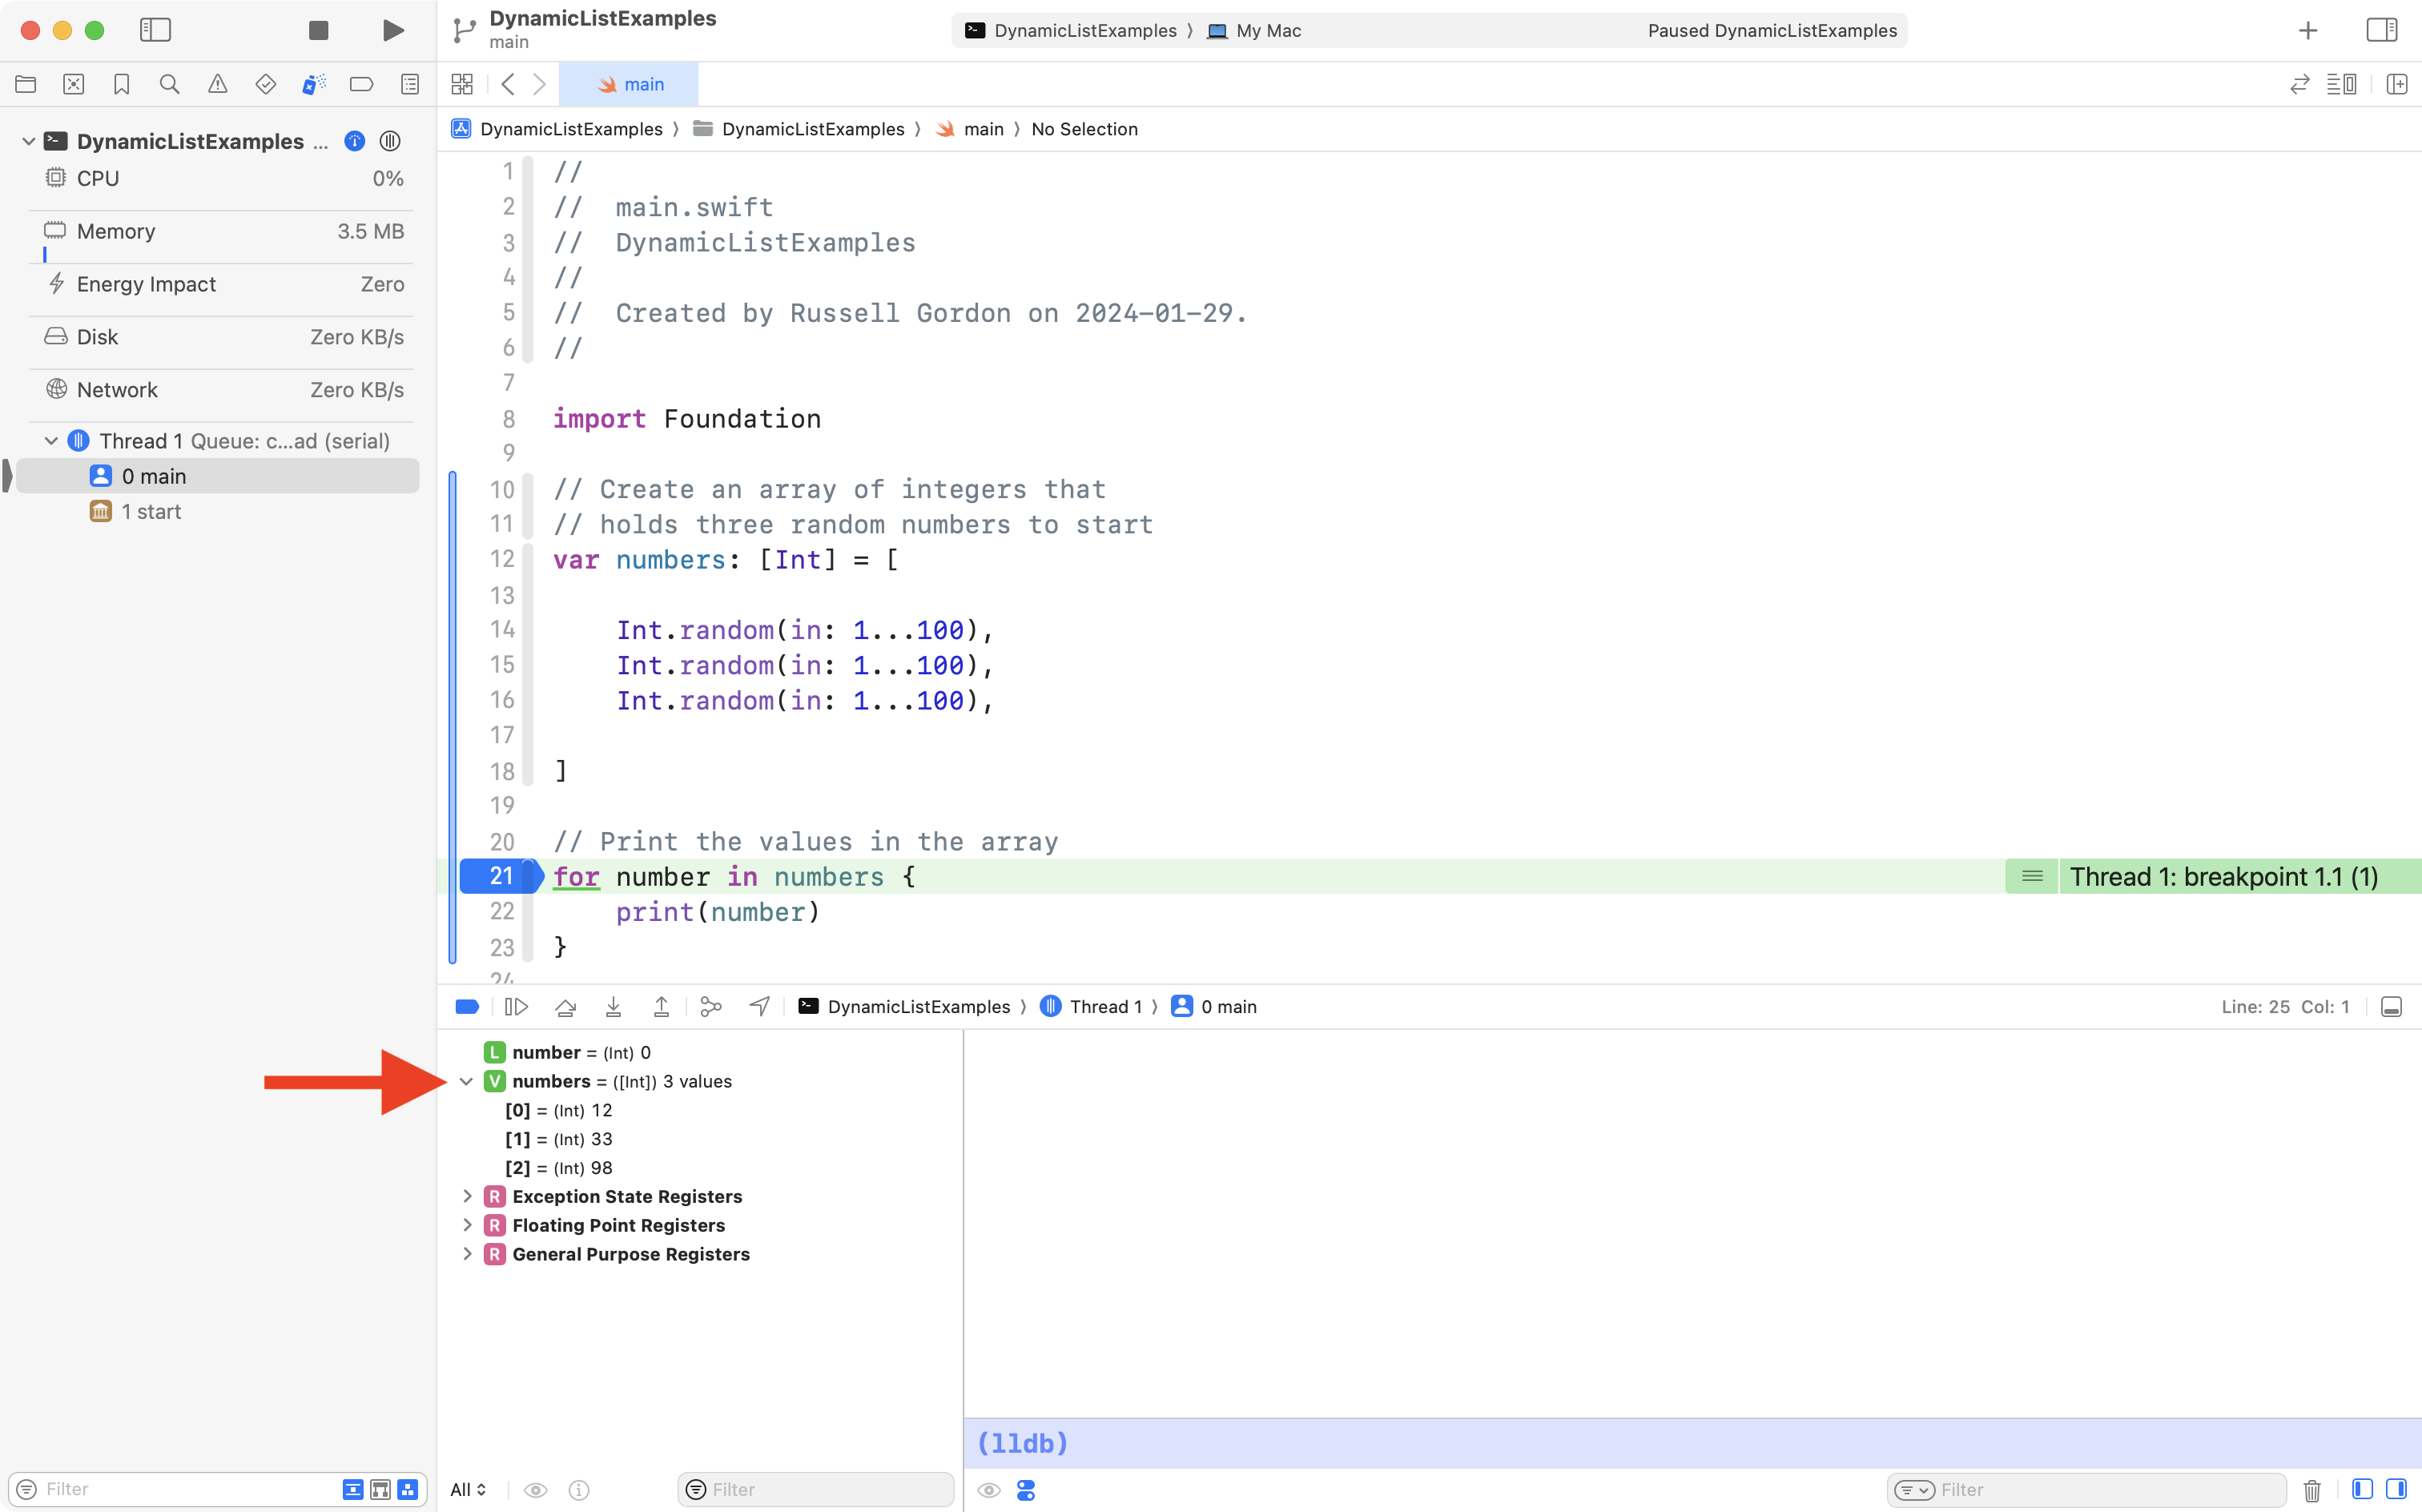
Three elements will exist at indices 0 through 2, inclusive, like this (using values from the screenshot above):
| Index | Element |
|---|---|
| 0 | 56 |
| 1 | 77 |
| 2 | 59 |
You can check for yourself that this is in fact how the array is organized.
Click the left margin of the Xcode interface, where it says line 21, then run your app:
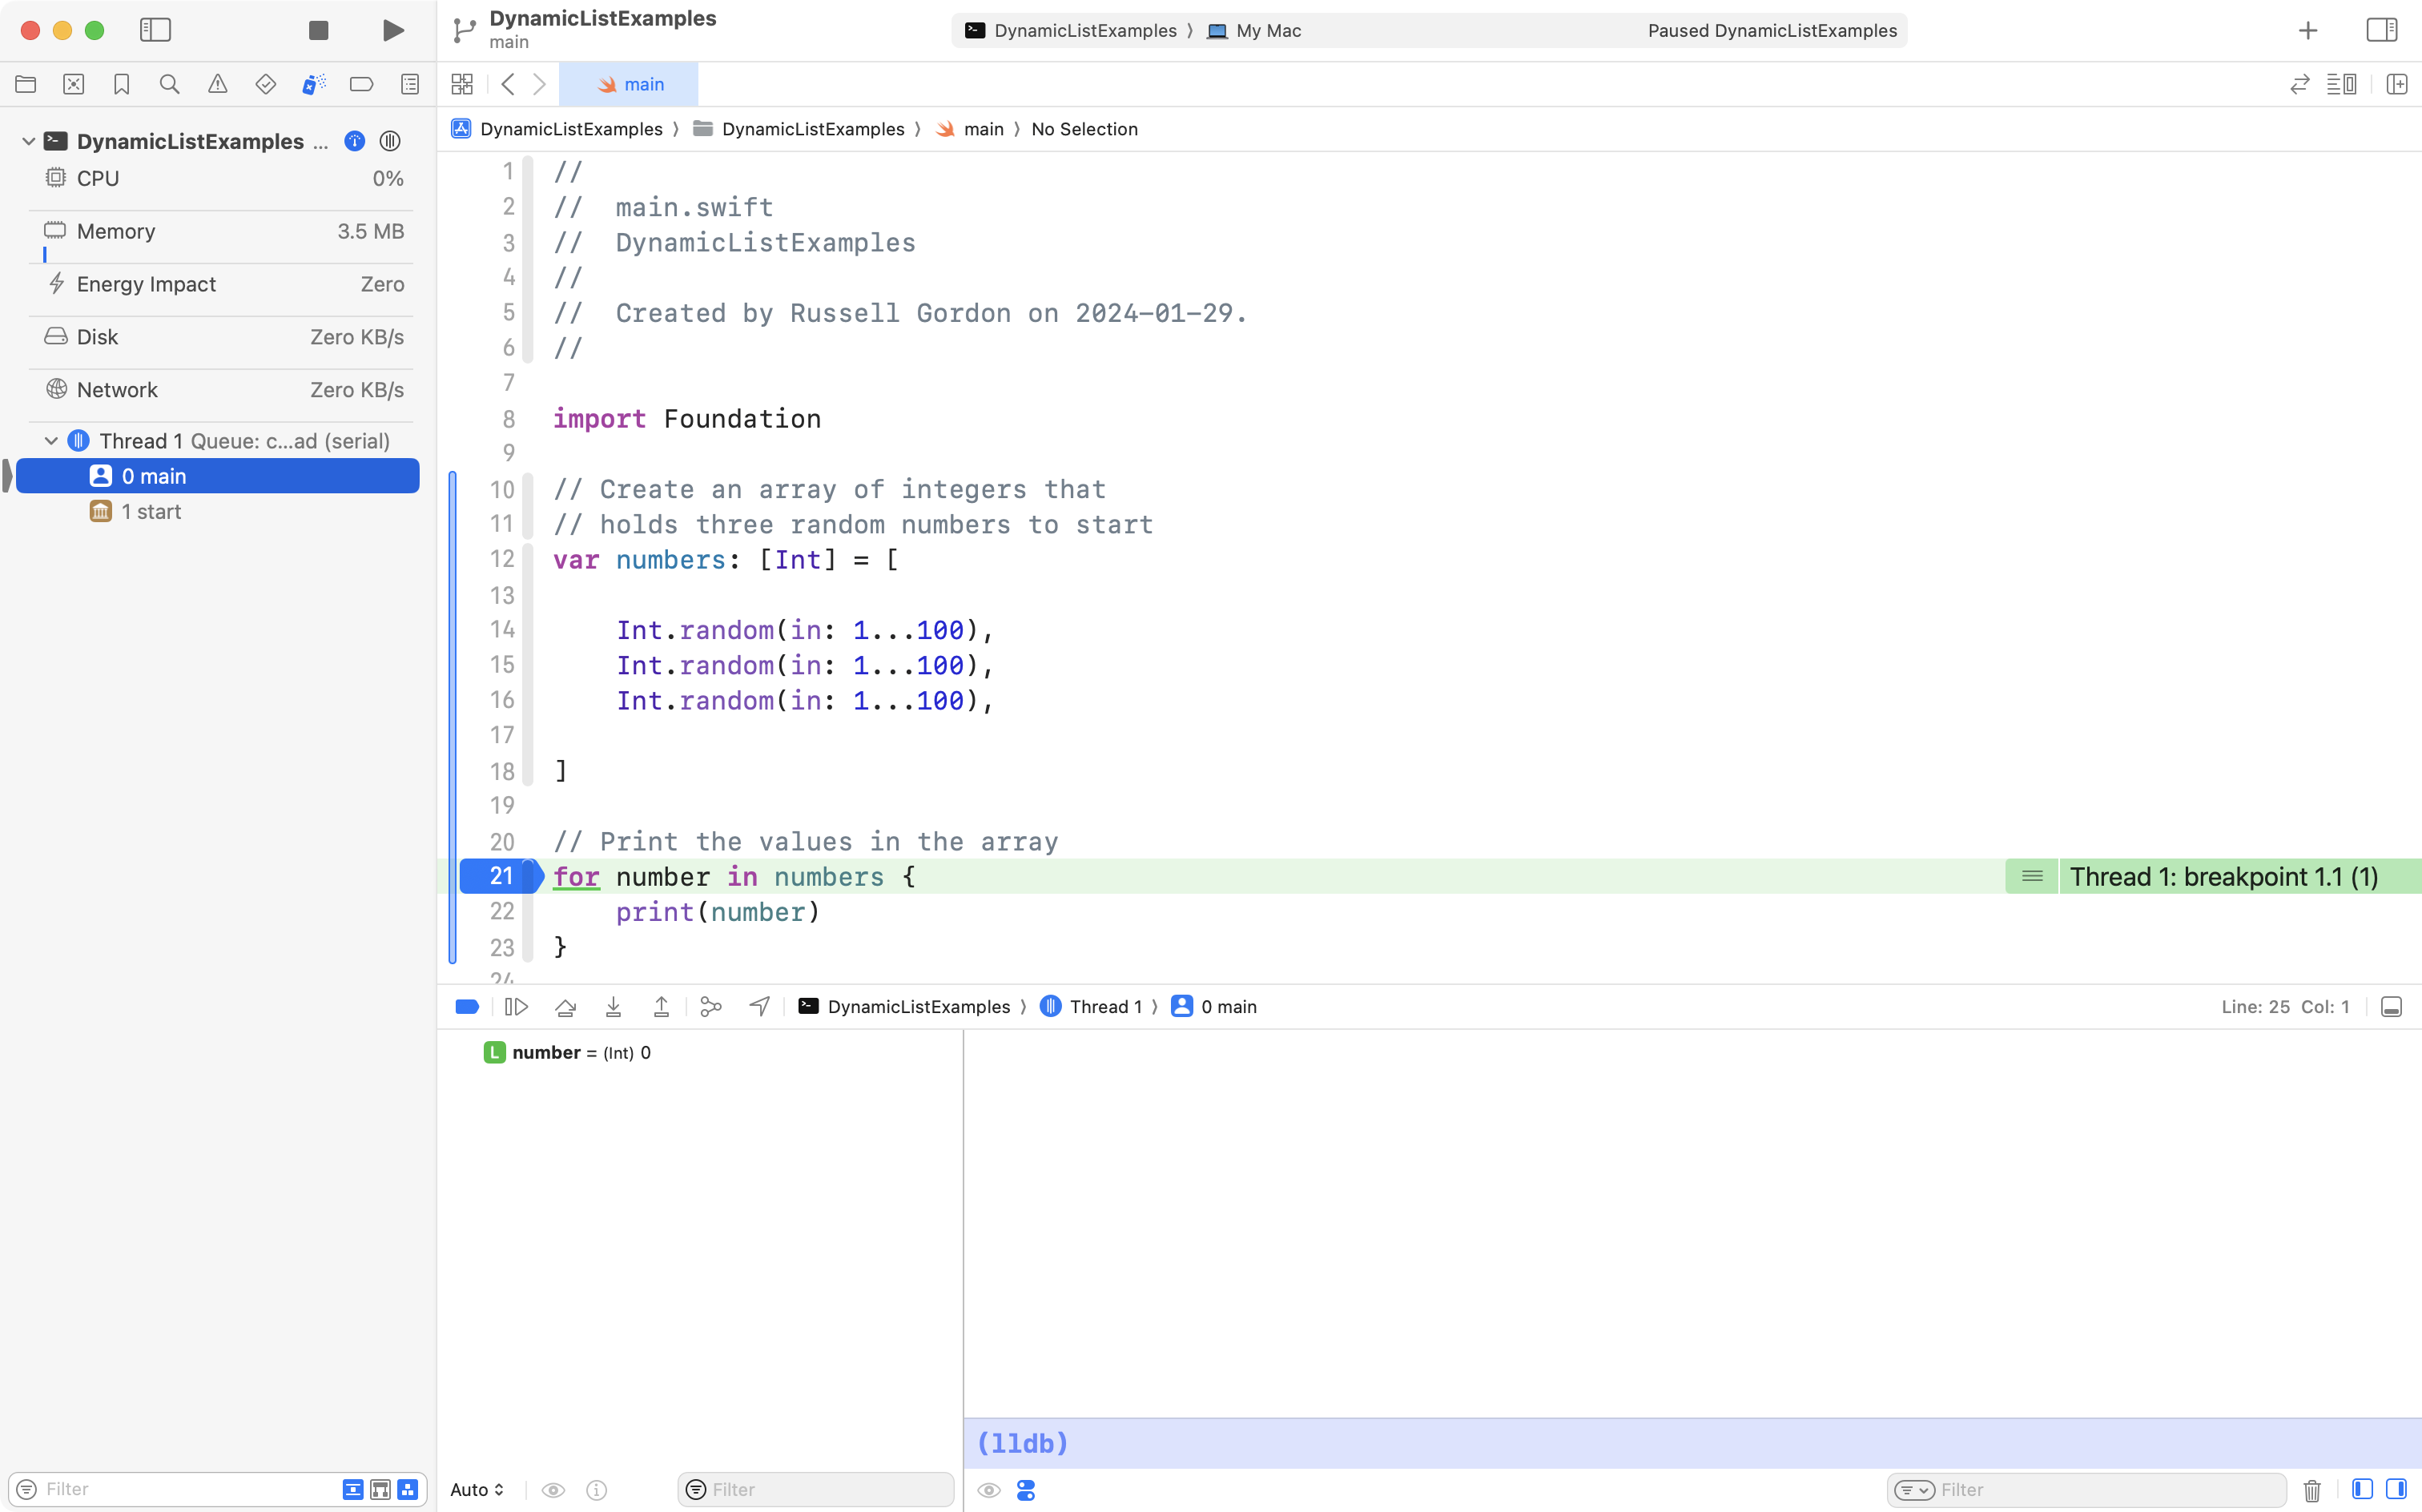
The blue mark in the margin is a breakpoint, and you are now debugging your app in real-time.
The green line indicates the line of code that is about to be run. We will use this in a moment.
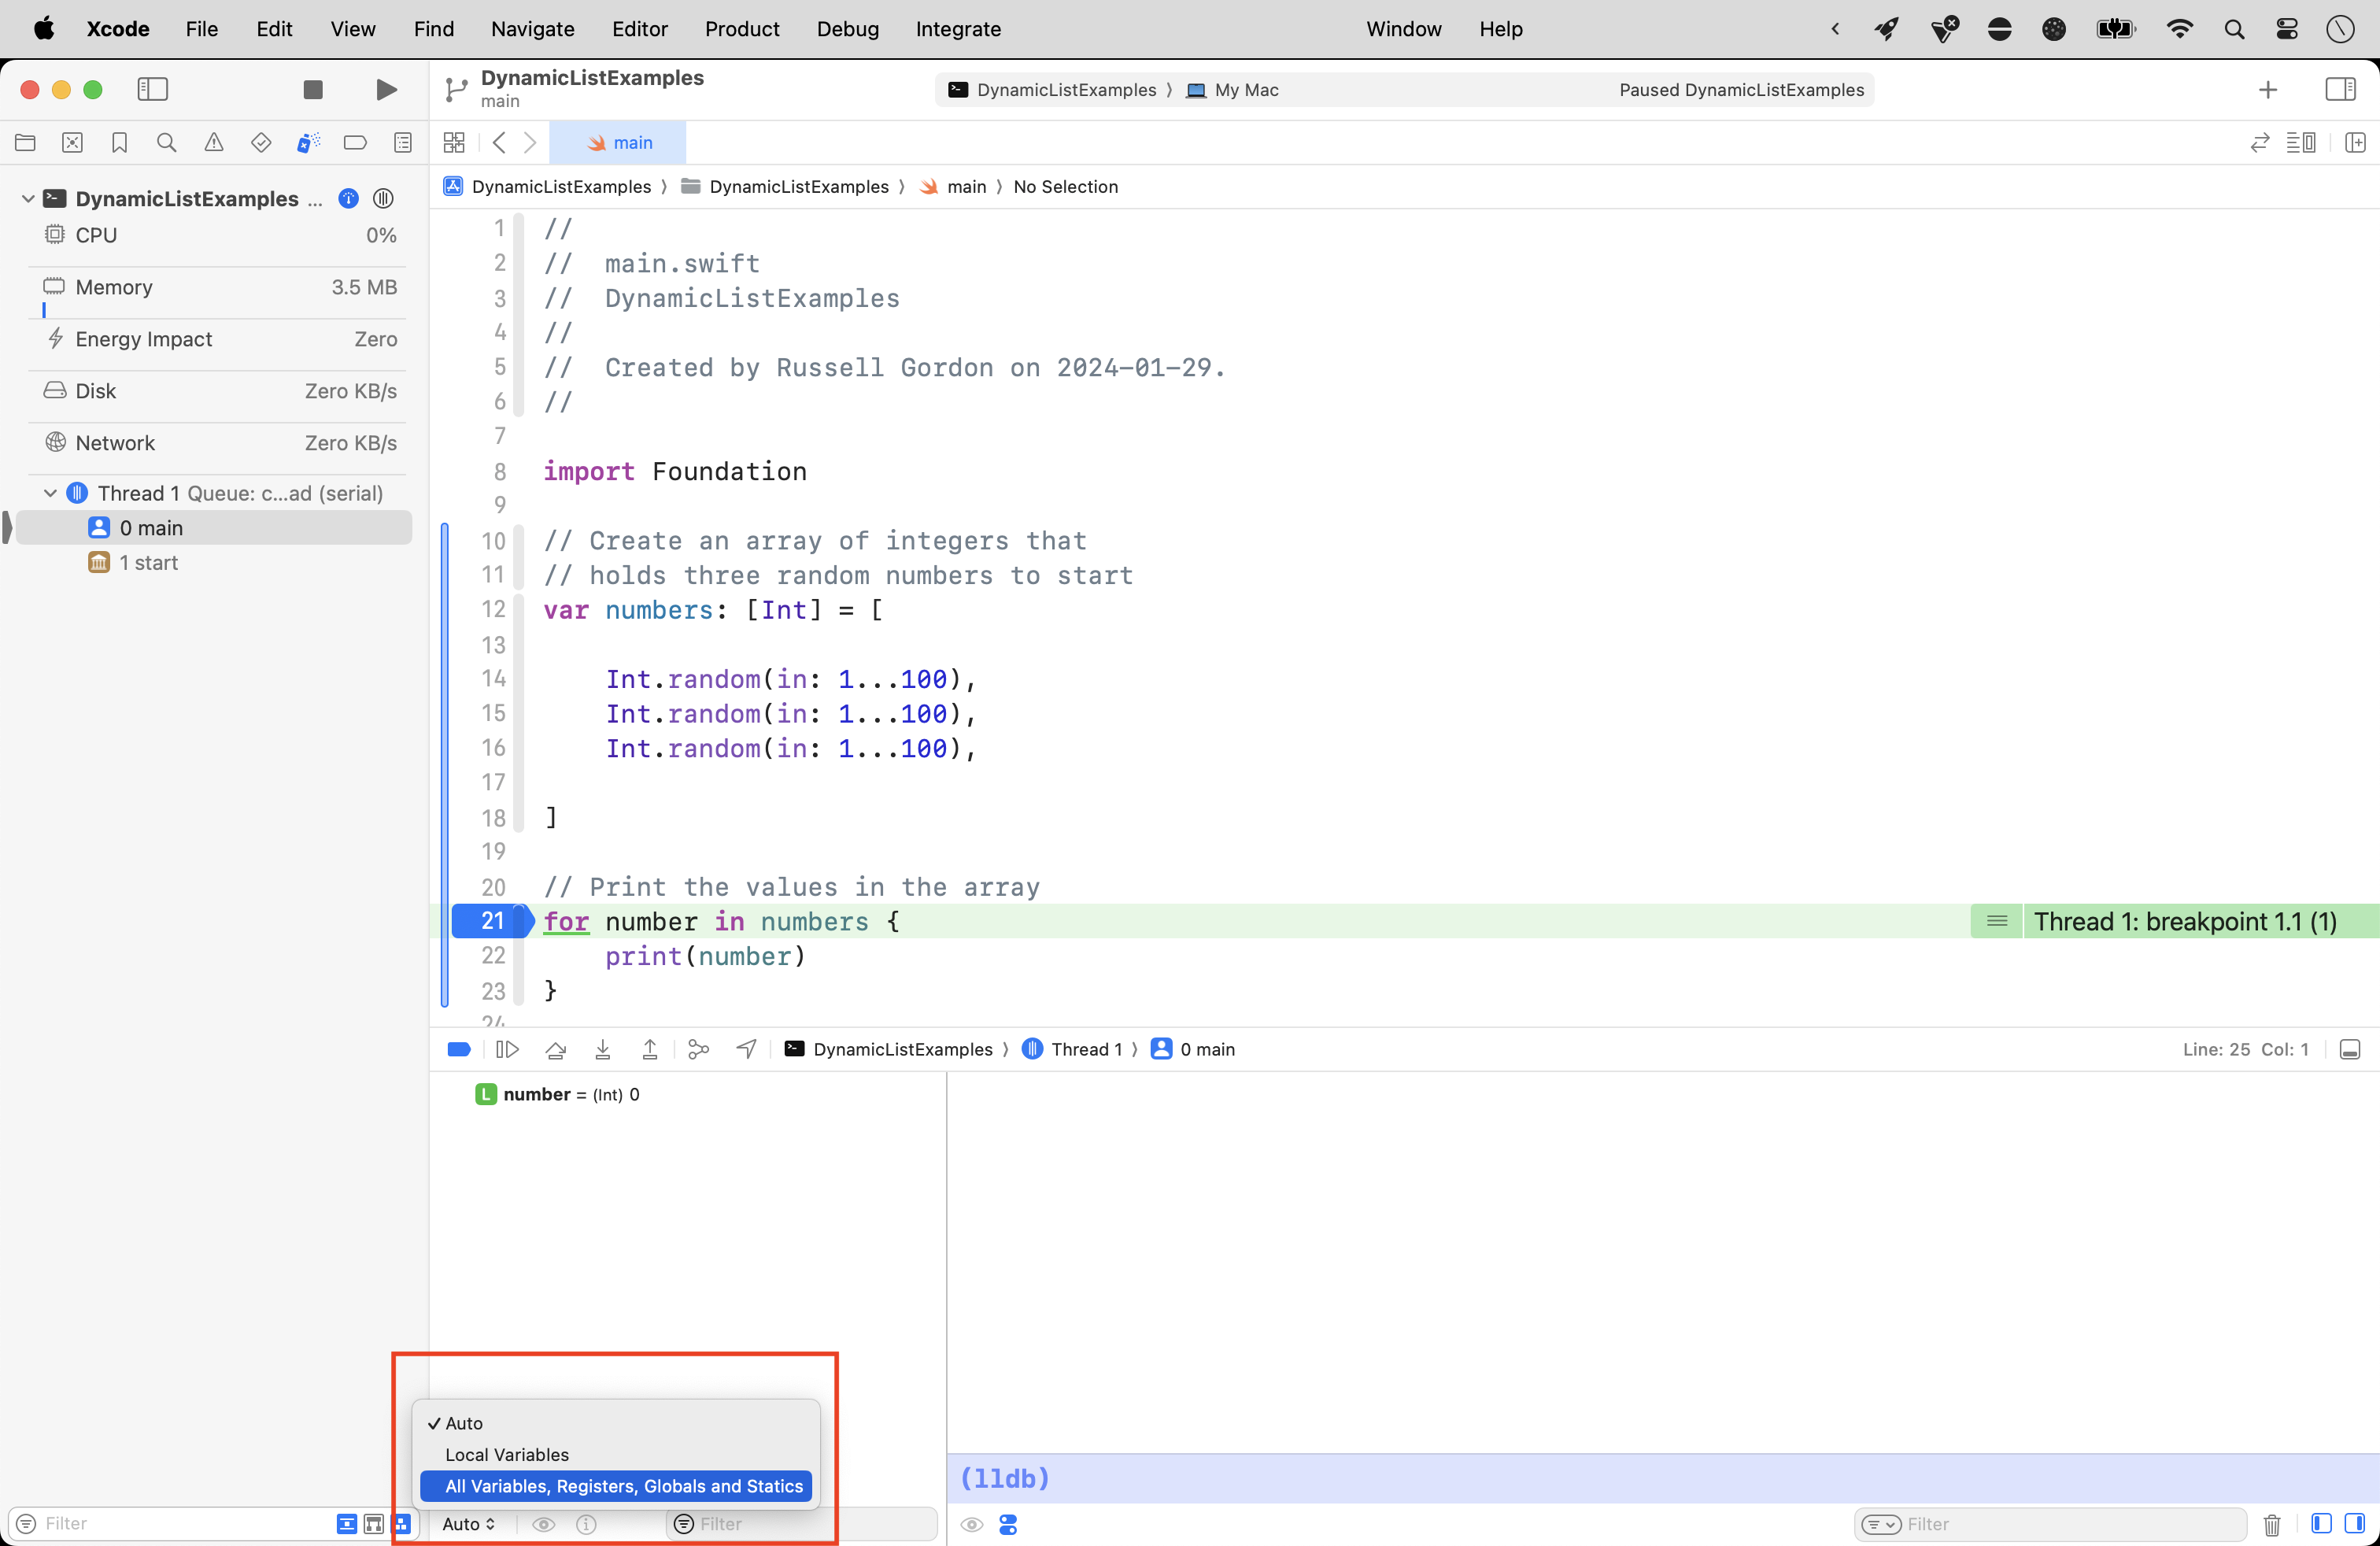
For now, click near the bottom of the Xcode interface, where it says Auto↕, and then select All Variables, Registers, Globals and Statics, like this:
You should then see the following:
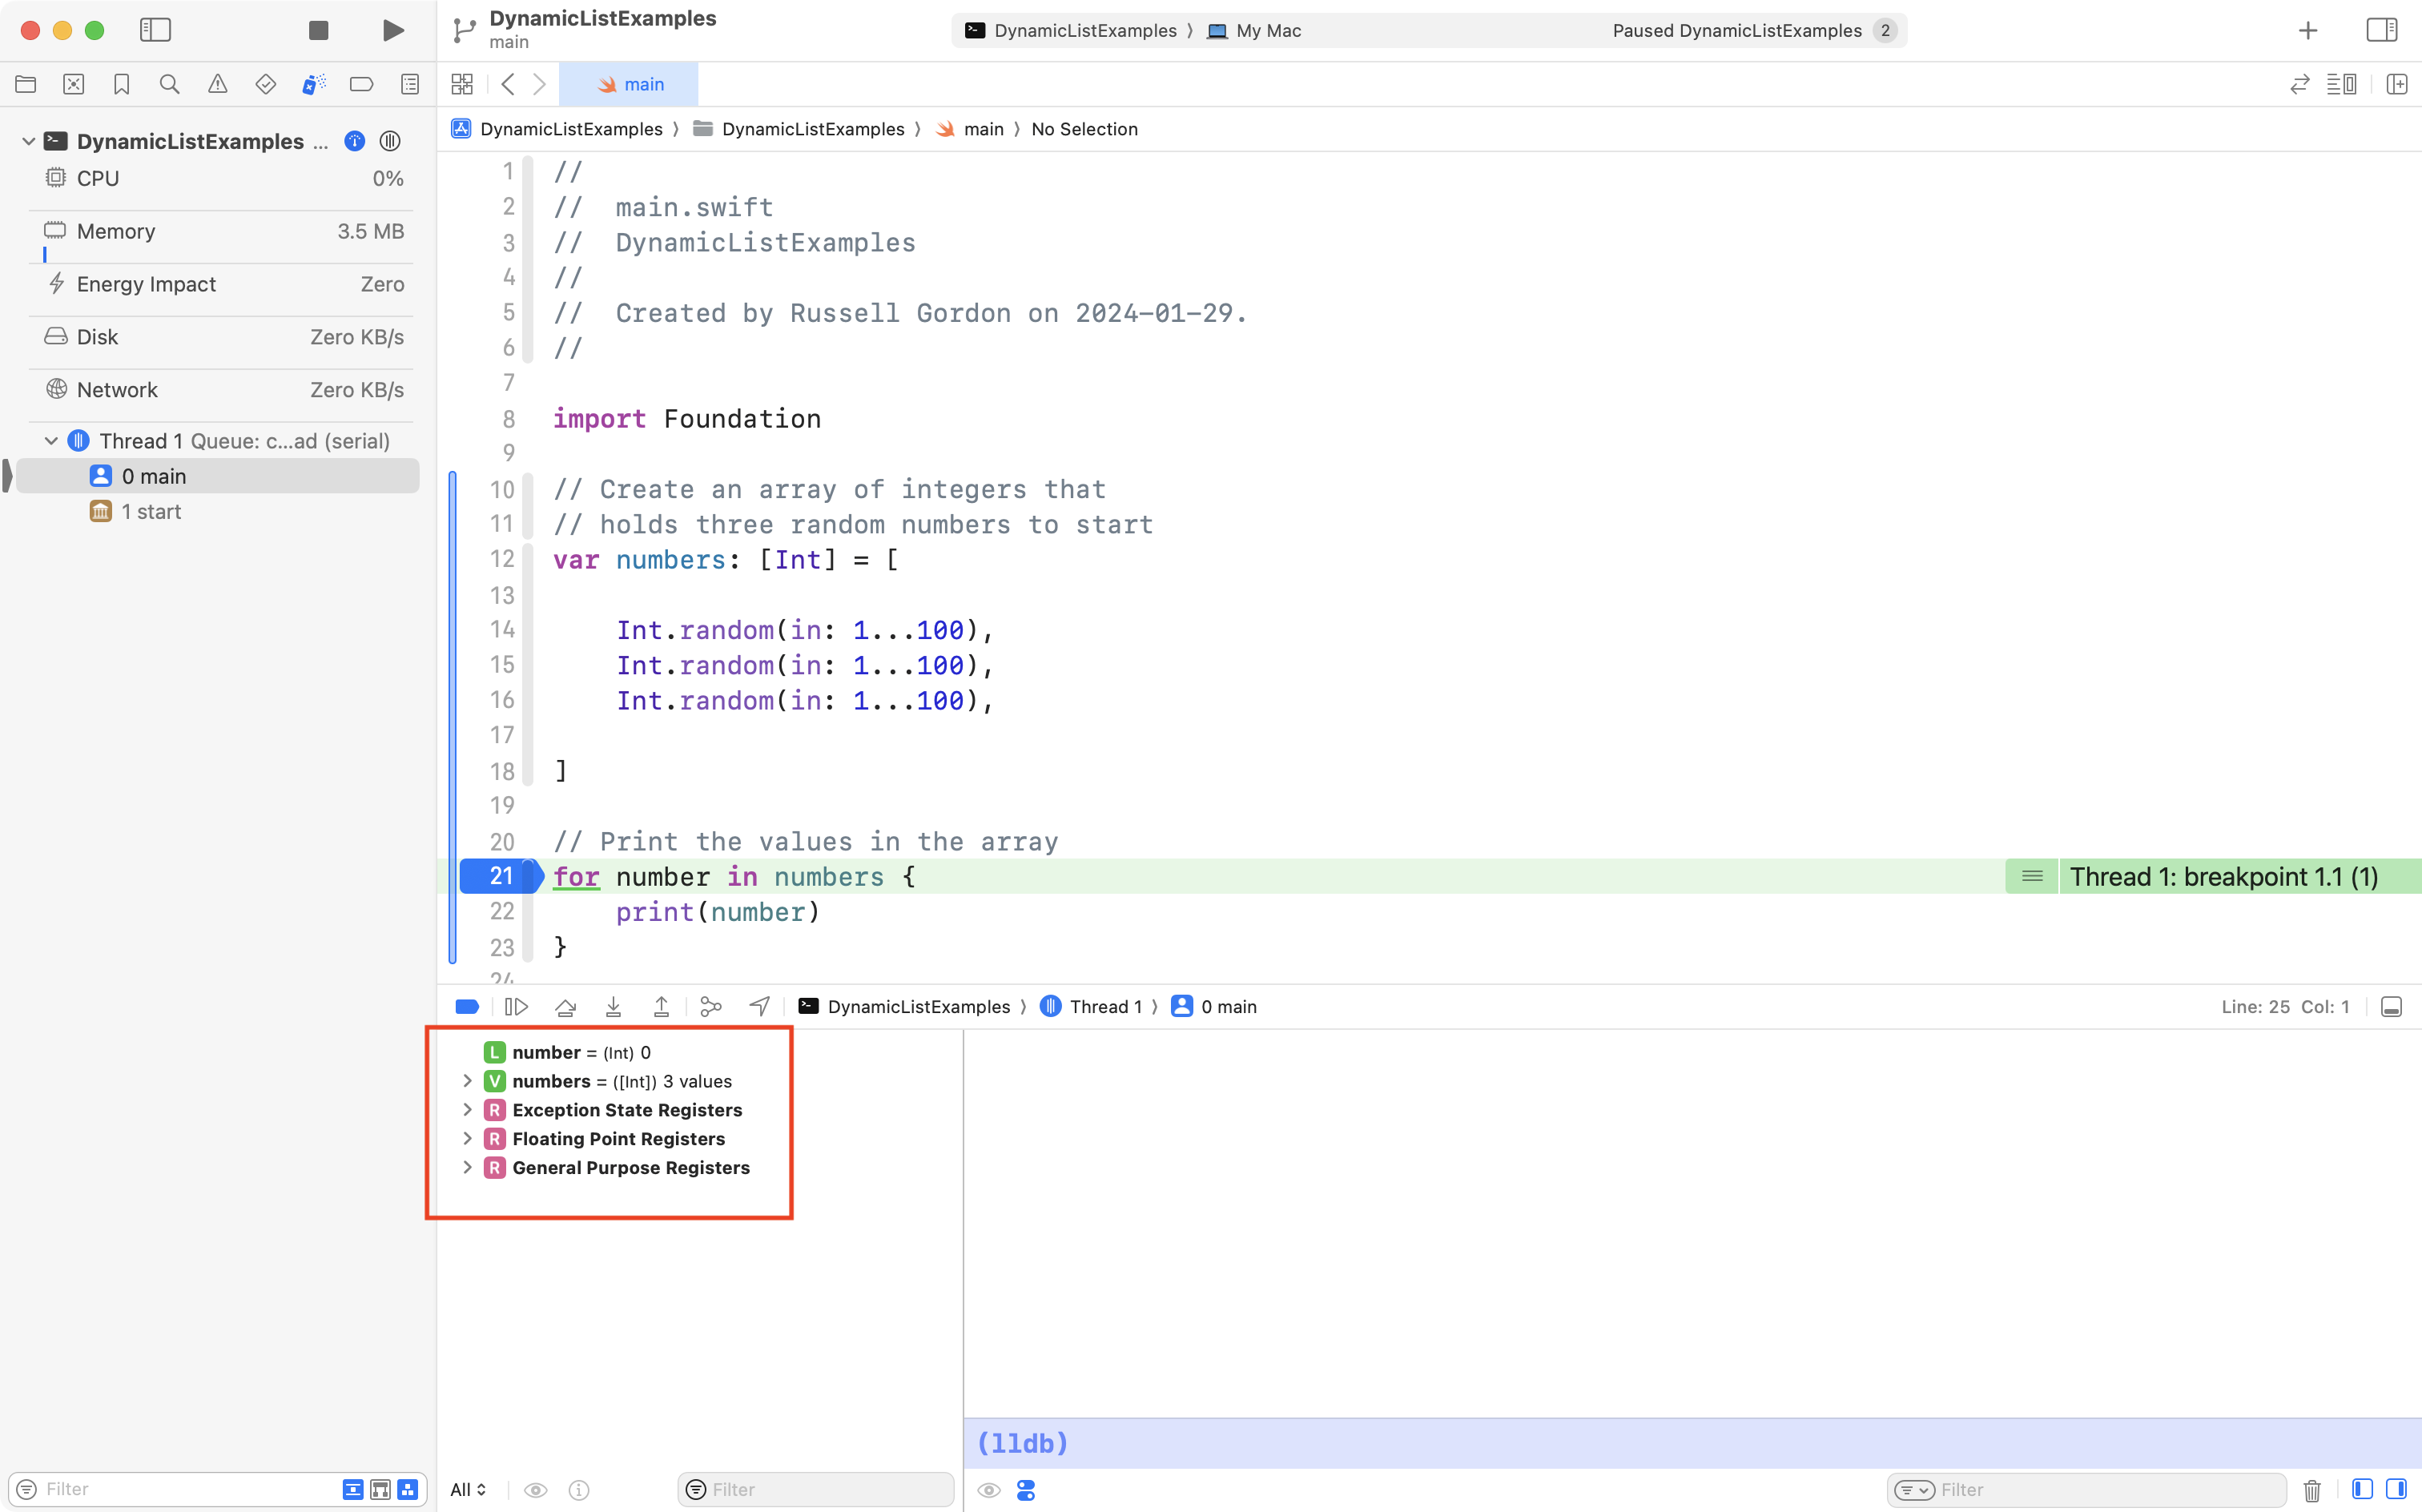
Finally, click the disclosure triangle beside numbers and you will see the three existing values in the array, and index positions 0, 1, and 2:
If you wish, you can step through the code. Press the Step Over button a few times, and you will see the loop print the numbers in the array to the console:
Mutating the array
However, what if we want to add more values to the array?
When a data structure is changed, we say it is mutated.
We could do this by adding more lines of code after the existing code:
// Add two more random numbers to the array
numbers.append(Int.random(in: 1...100))
numbers.append(Int.random(in: 1...100))

// Print a divider
print("----------")

// Print the values in the array again
for number in numbers {
    print(number)
}
… like this – all the code on lines 25 and below is new:
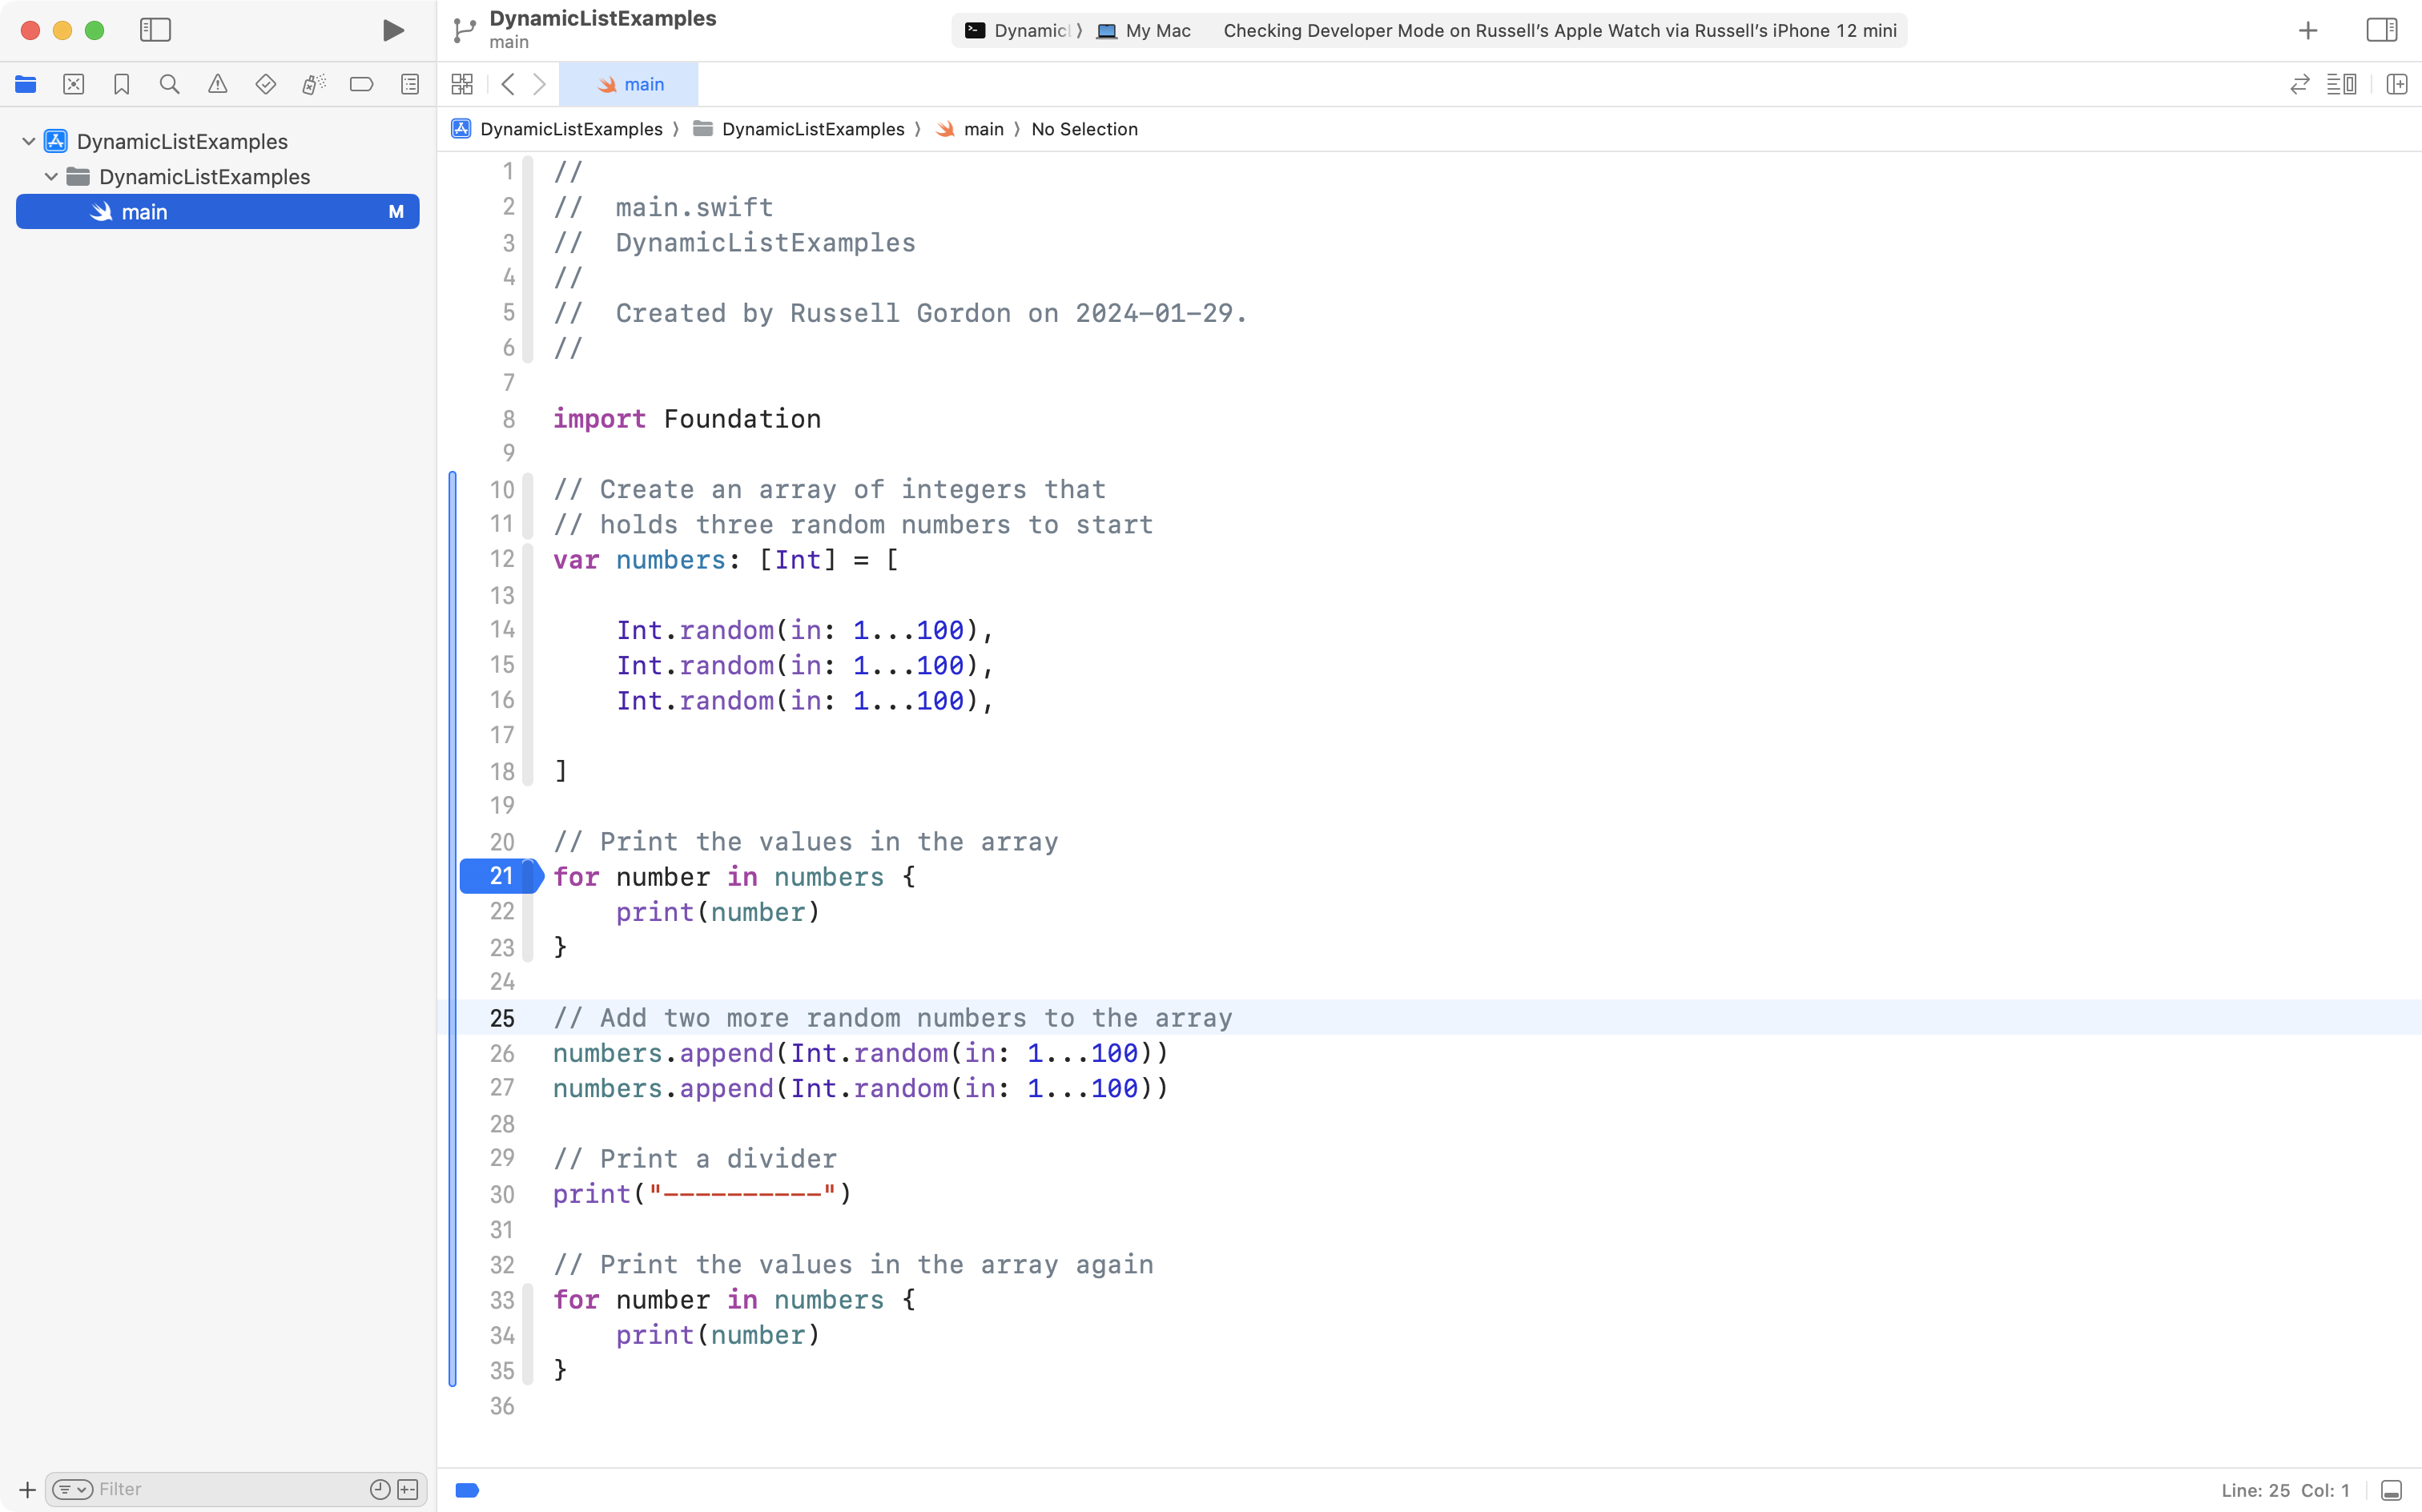
With the new code, from the screenshot above, at first the array contains just three values:
| Index | Element |
|---|---|
| 0 | 21 |
| 1 | 35 |
| 2 | 55 |
However, after the additional elements are appended (added to the end) of the array, it contains:
| Index | Element |
|---|---|
| 0 | 21 |
| 1 | 35 |
| 2 | 55 |
| 3 | 82 |
| 4 | 51 |
This demonstrates that you can mutate, or change, the number of elements in an array after the array is first initialized.
Try this out by running the code and stepping through it – notice how the size of the array changes as the additional lines of code are run:
However, we, as the programmer, are still deciding to add two more elements, and we are writing the code to make that happen.
What if we want to change the elements in the array at run time?
That is… while the program is running?
By letting the user decide?
We can do that.
Mutating at run time
First, let’s clear the breakpoint on line 21, like this:
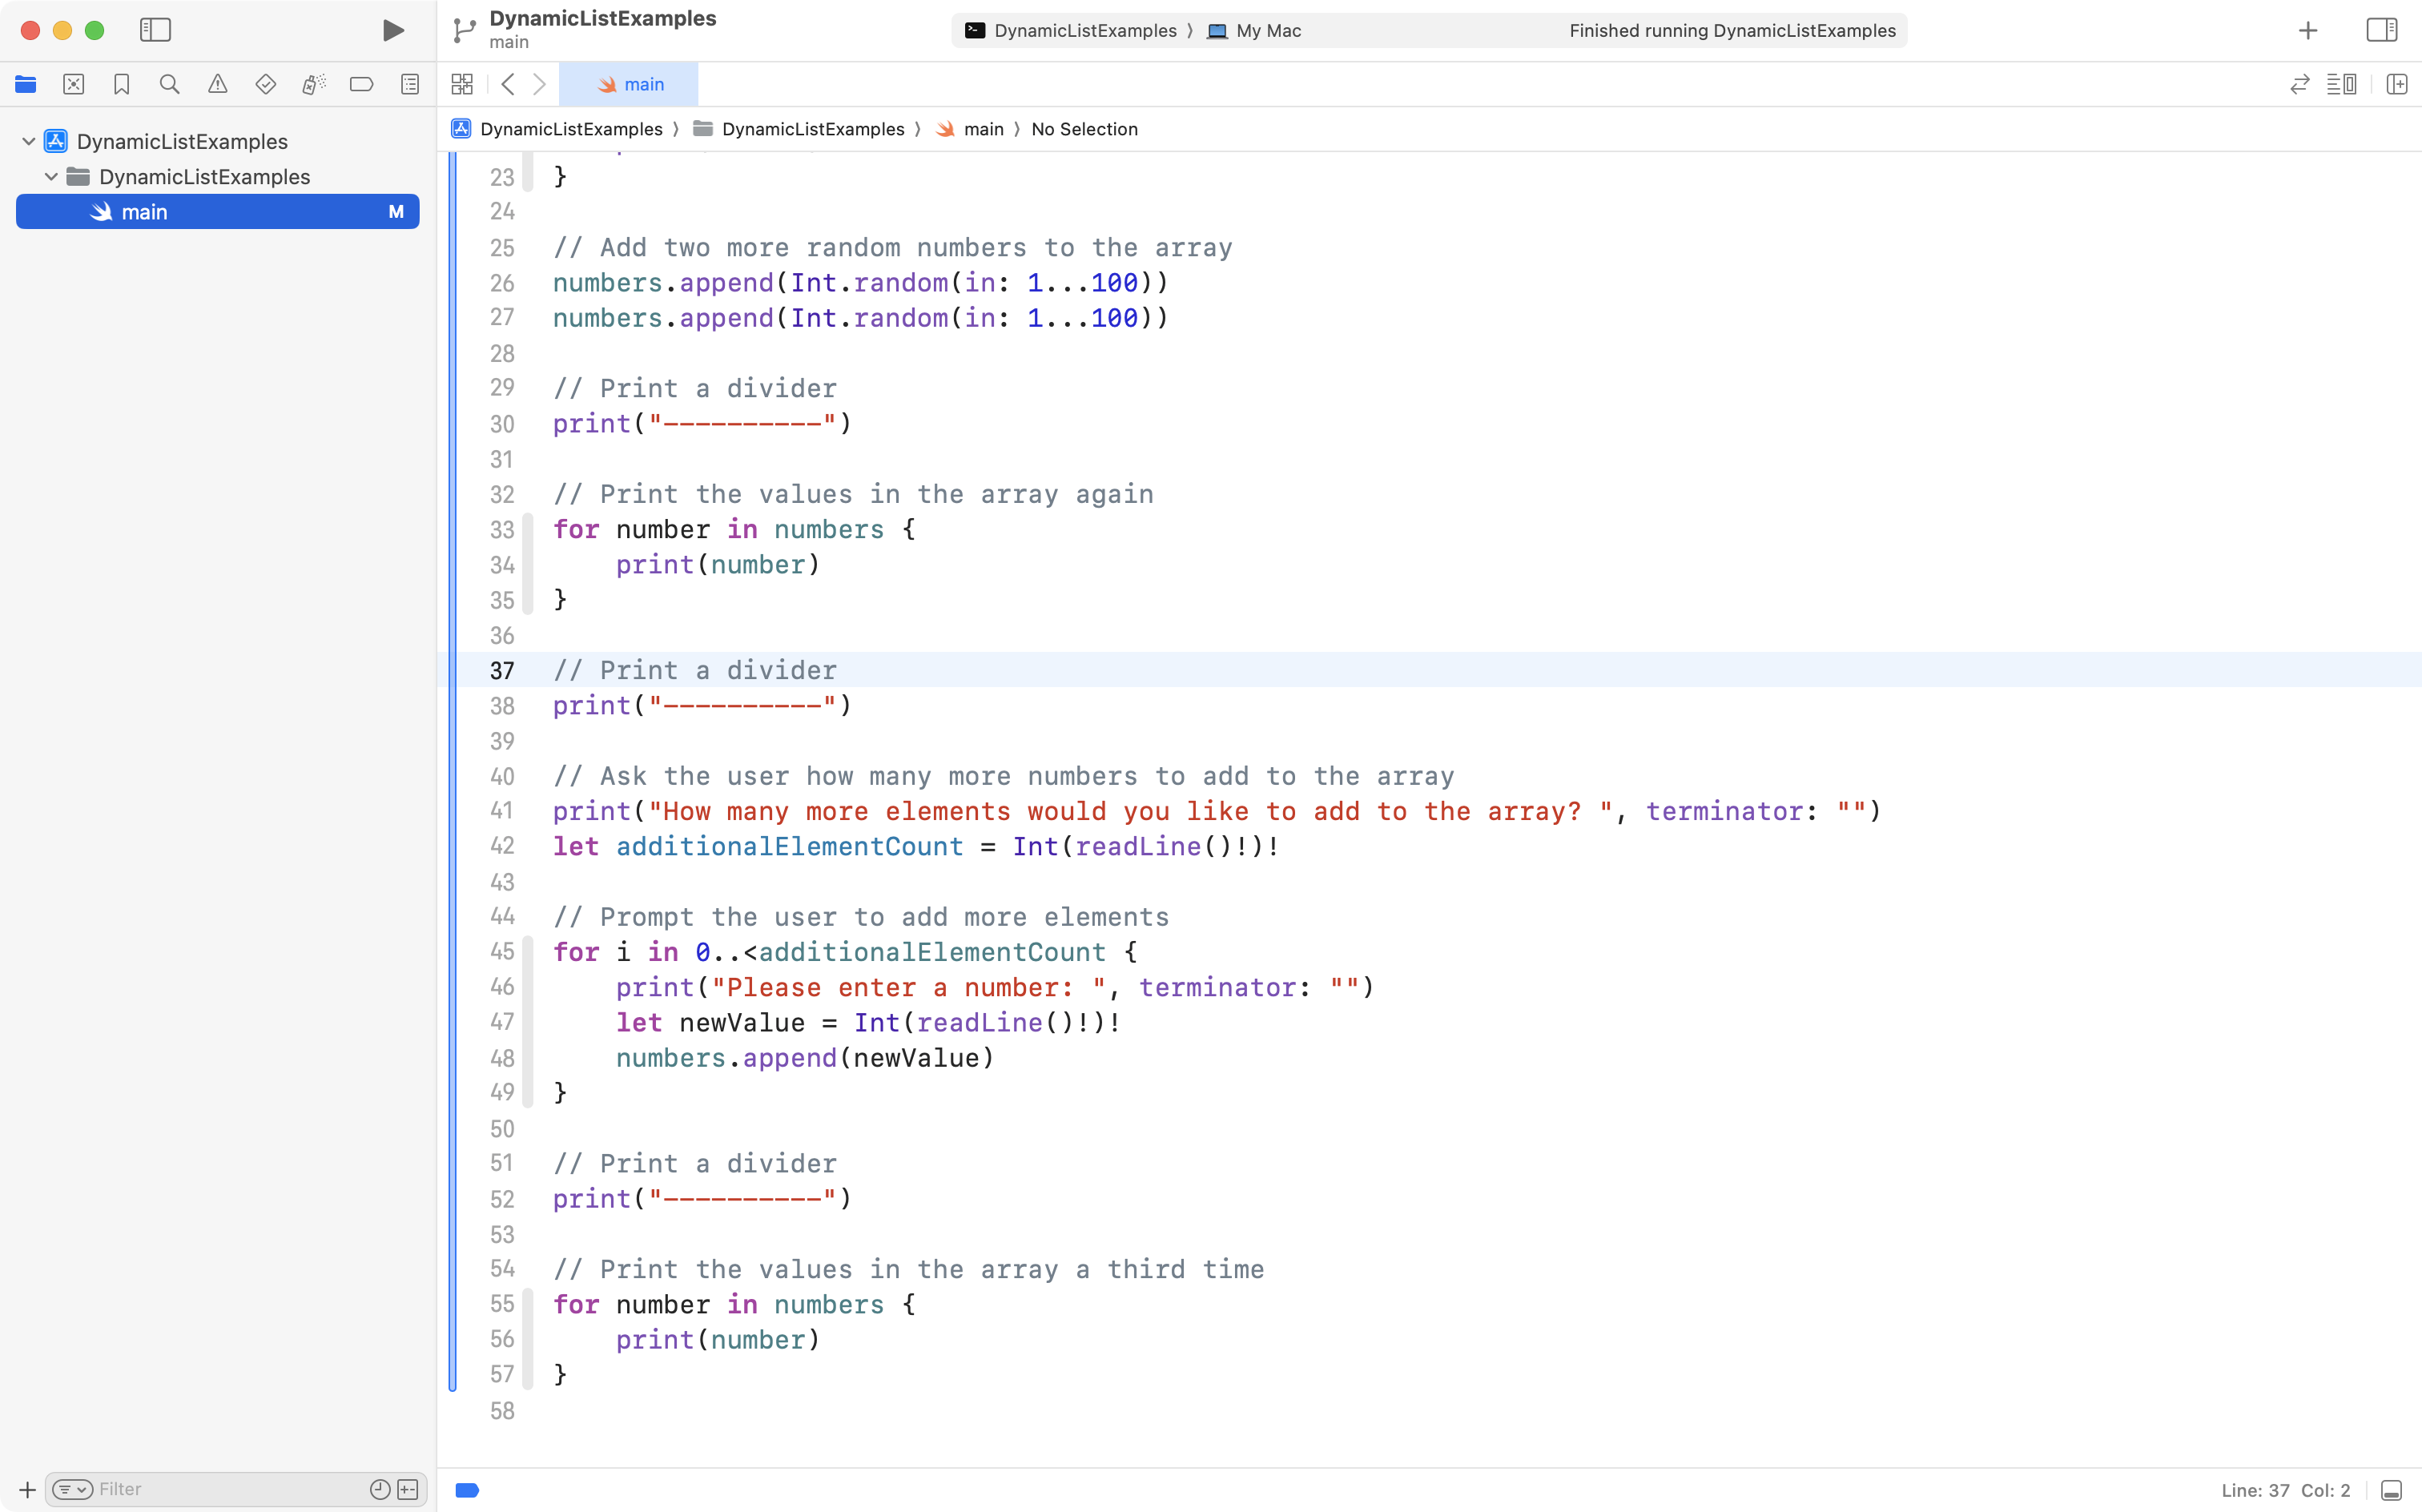
Then add the code below to the bottom of the existing code in your app:
// Print a divider
print("----------")

// Ask the user how many more numbers to add to the array
print("How many more elements would you like to add to the array? ", terminator: "")
let additionalElementCount = Int(readLine()!)!

// Prompt the user to add more elements
for _ in 0..<additionalElementCount {
    print("Please enter a number: ", terminator: "")
    let newValue = Int(readLine()!)!
    numbers.append(newValue)
}

// Print a divider
print("----------")

// Print the values in the array a third time
for number in numbers {
    print(number)
}
… like this – everything on line 37 and after is new:
Now set a breakpoint on line 38, and another breakpoint on line 52, like this:
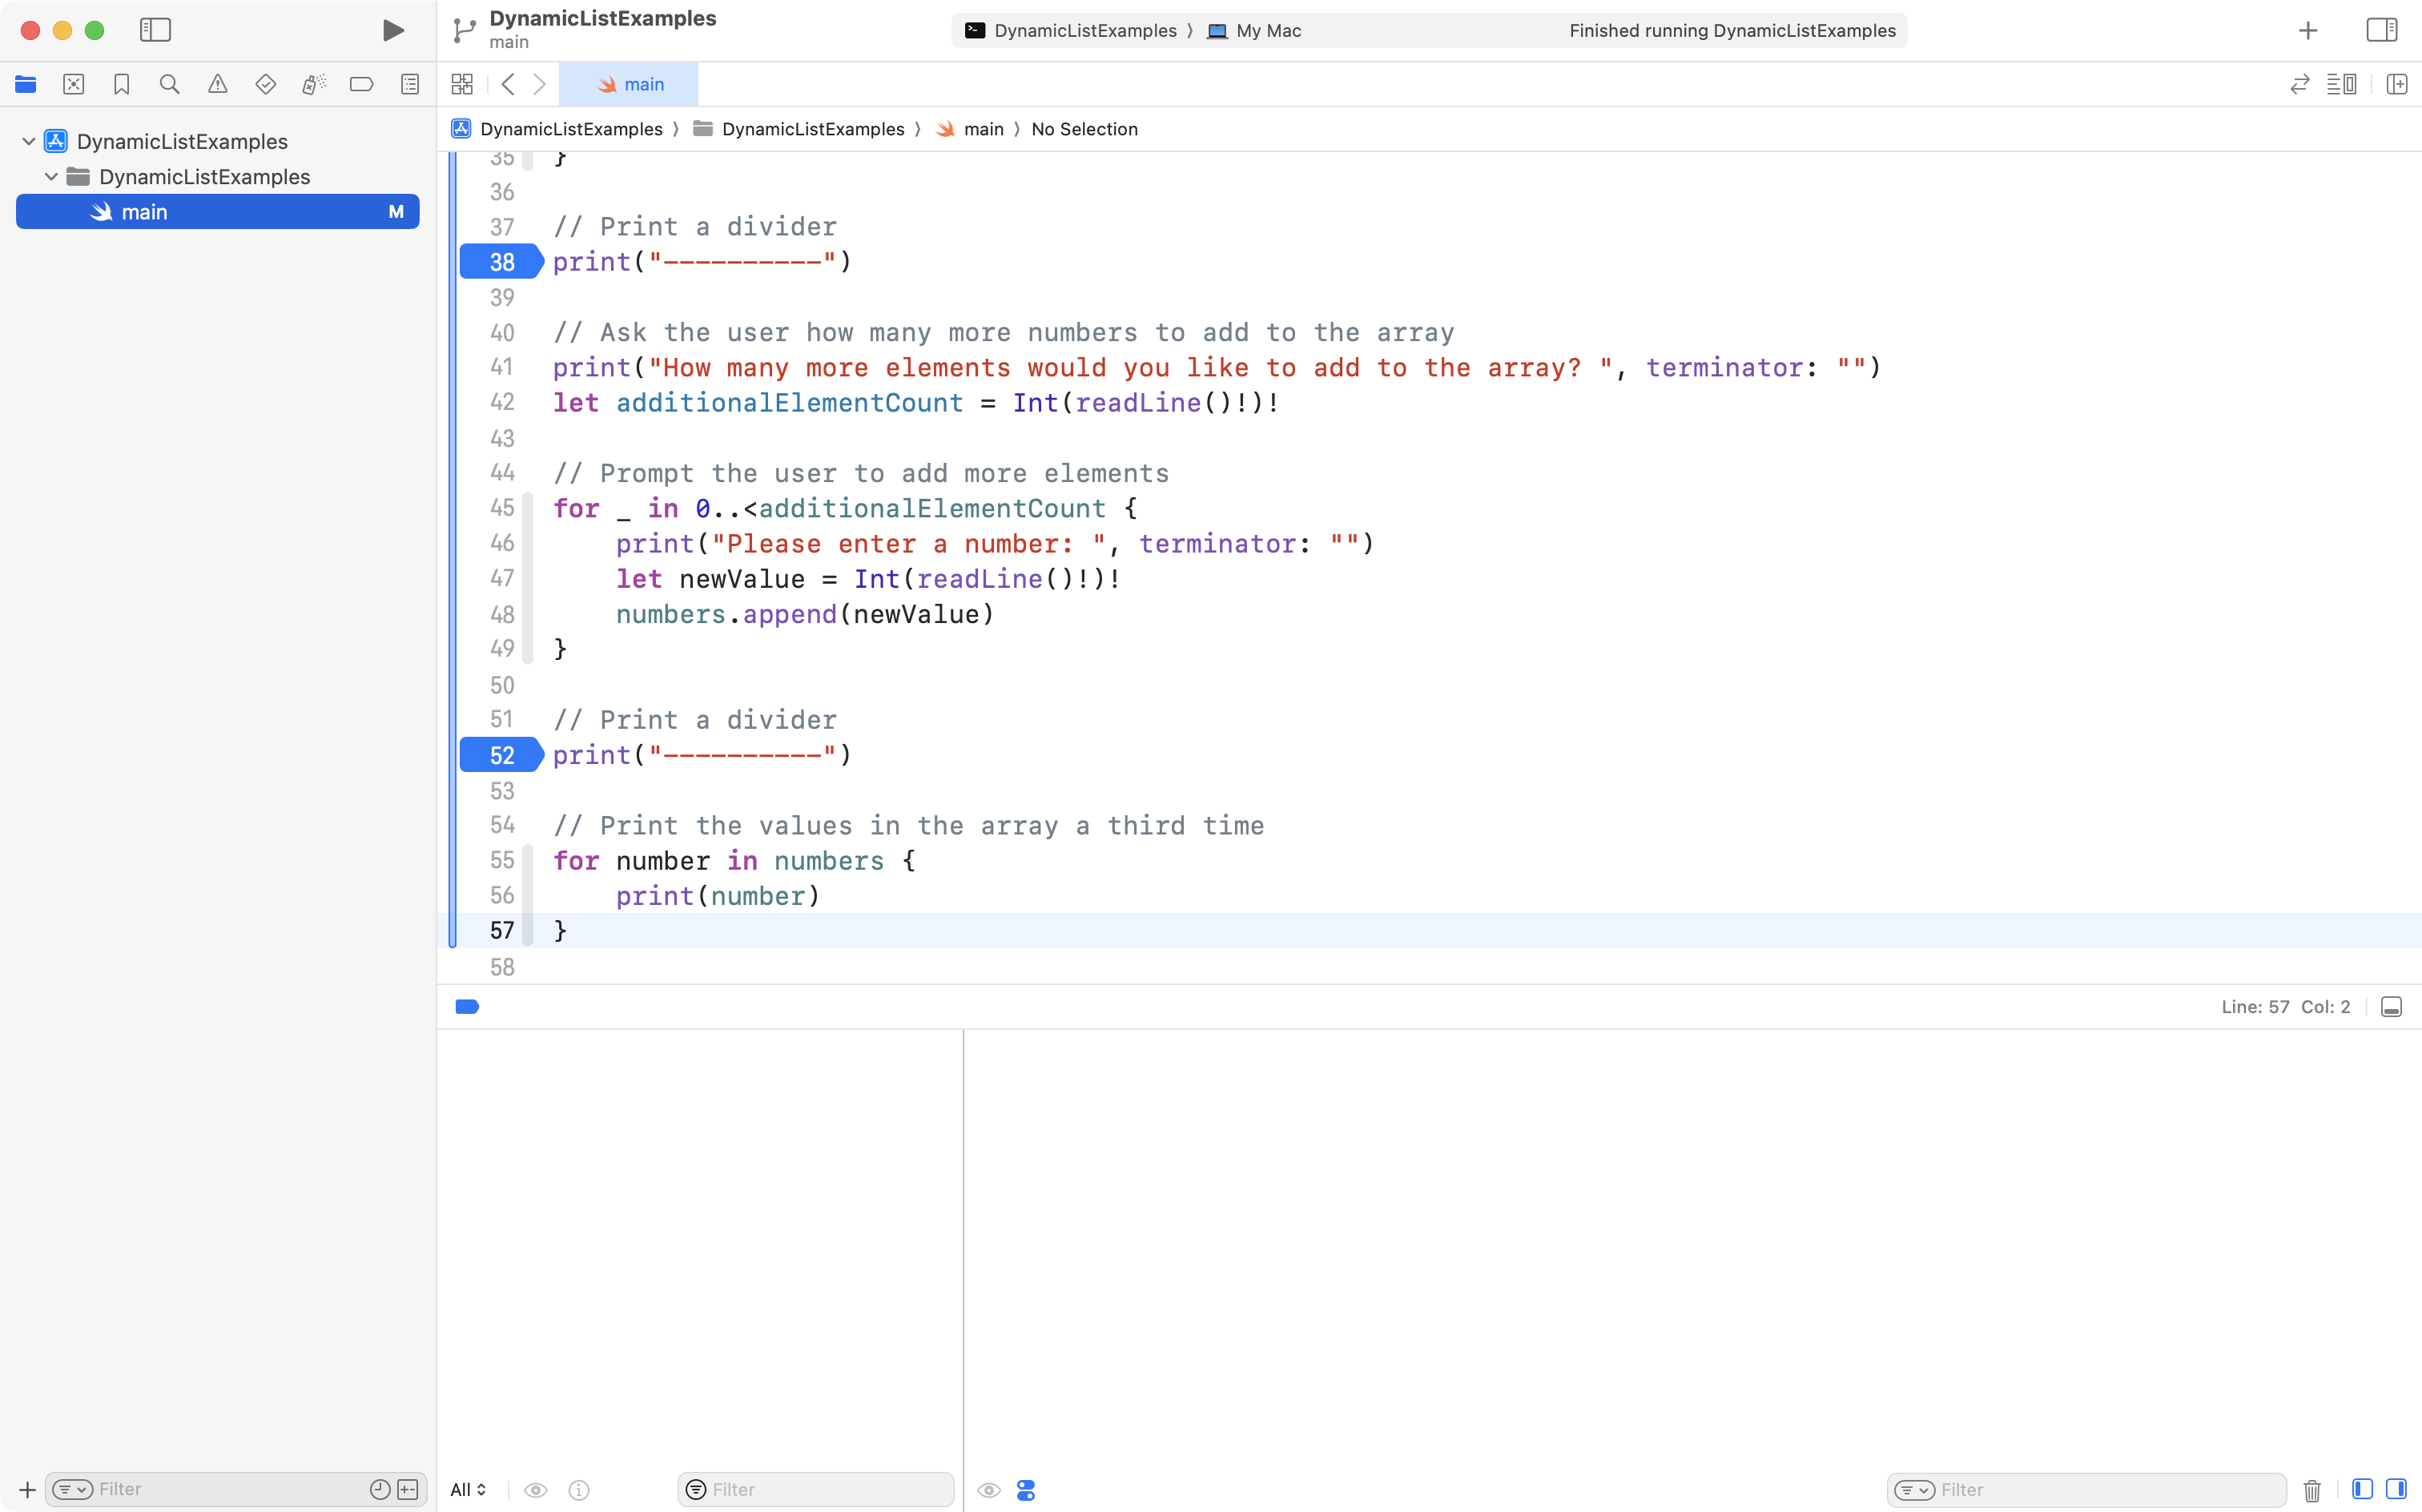
Try running the program.
It will stop just before the user – you – will be prompted to add more elements to the array.
Notice how there are currently five elements in the array:
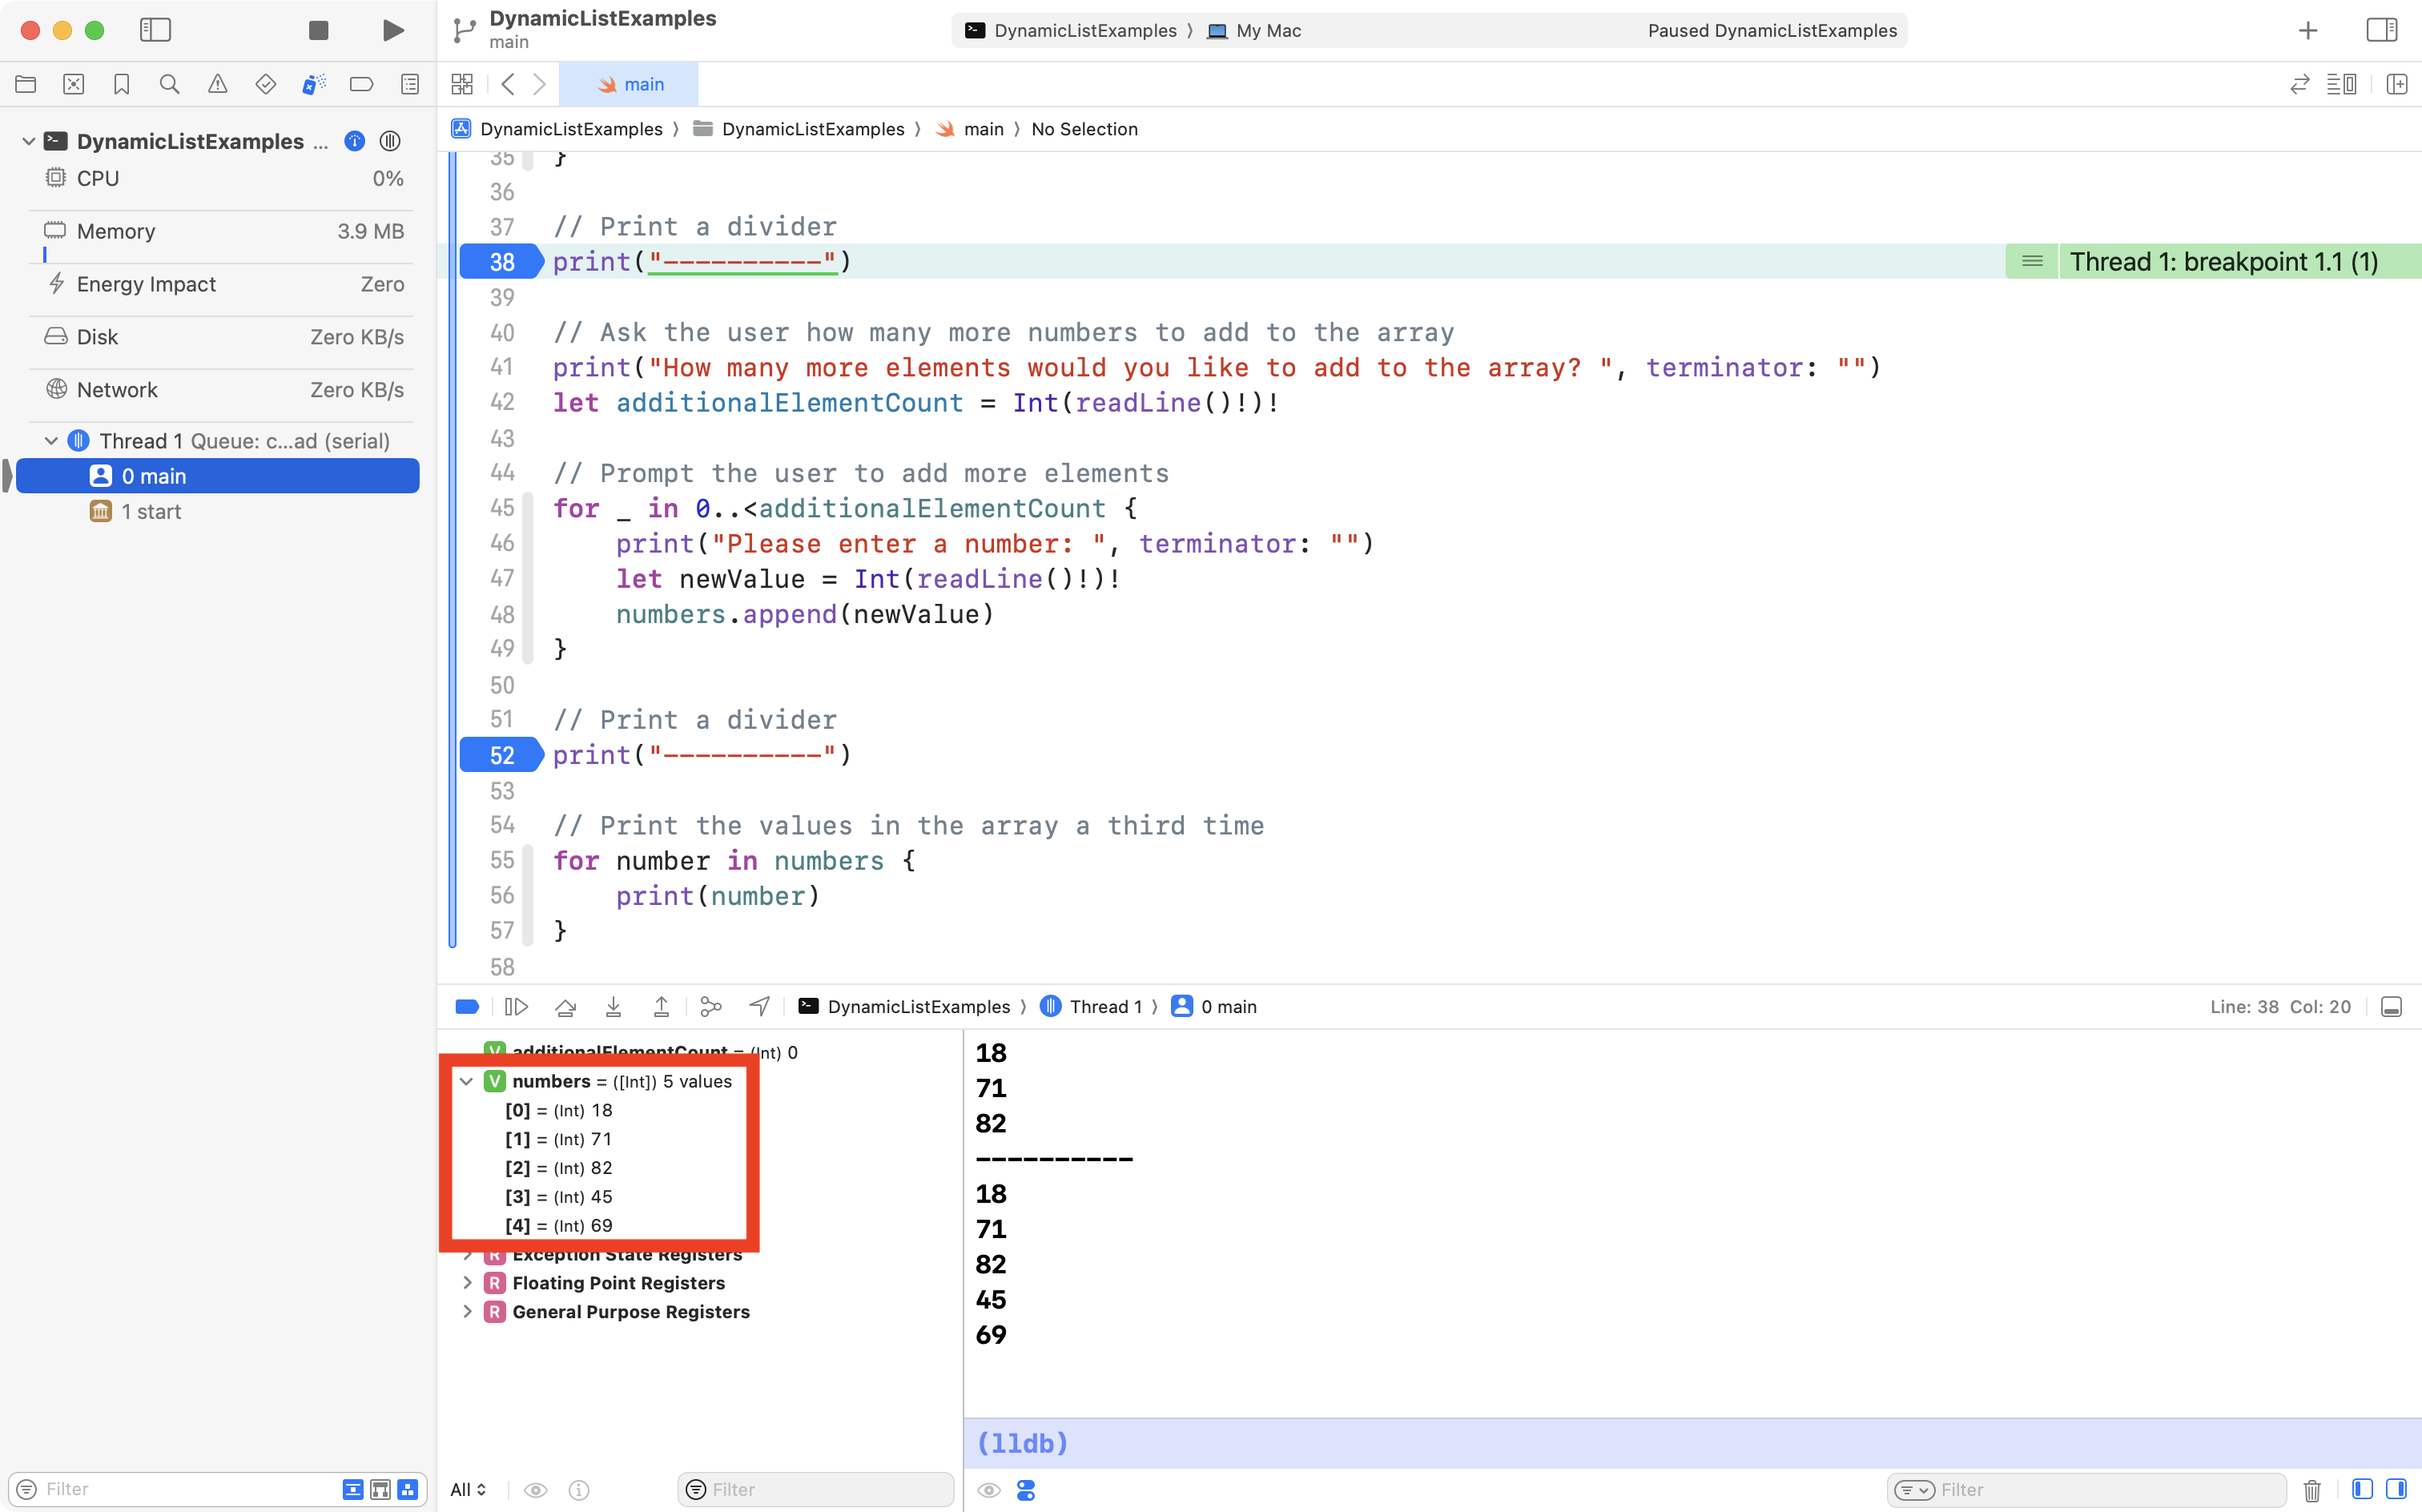
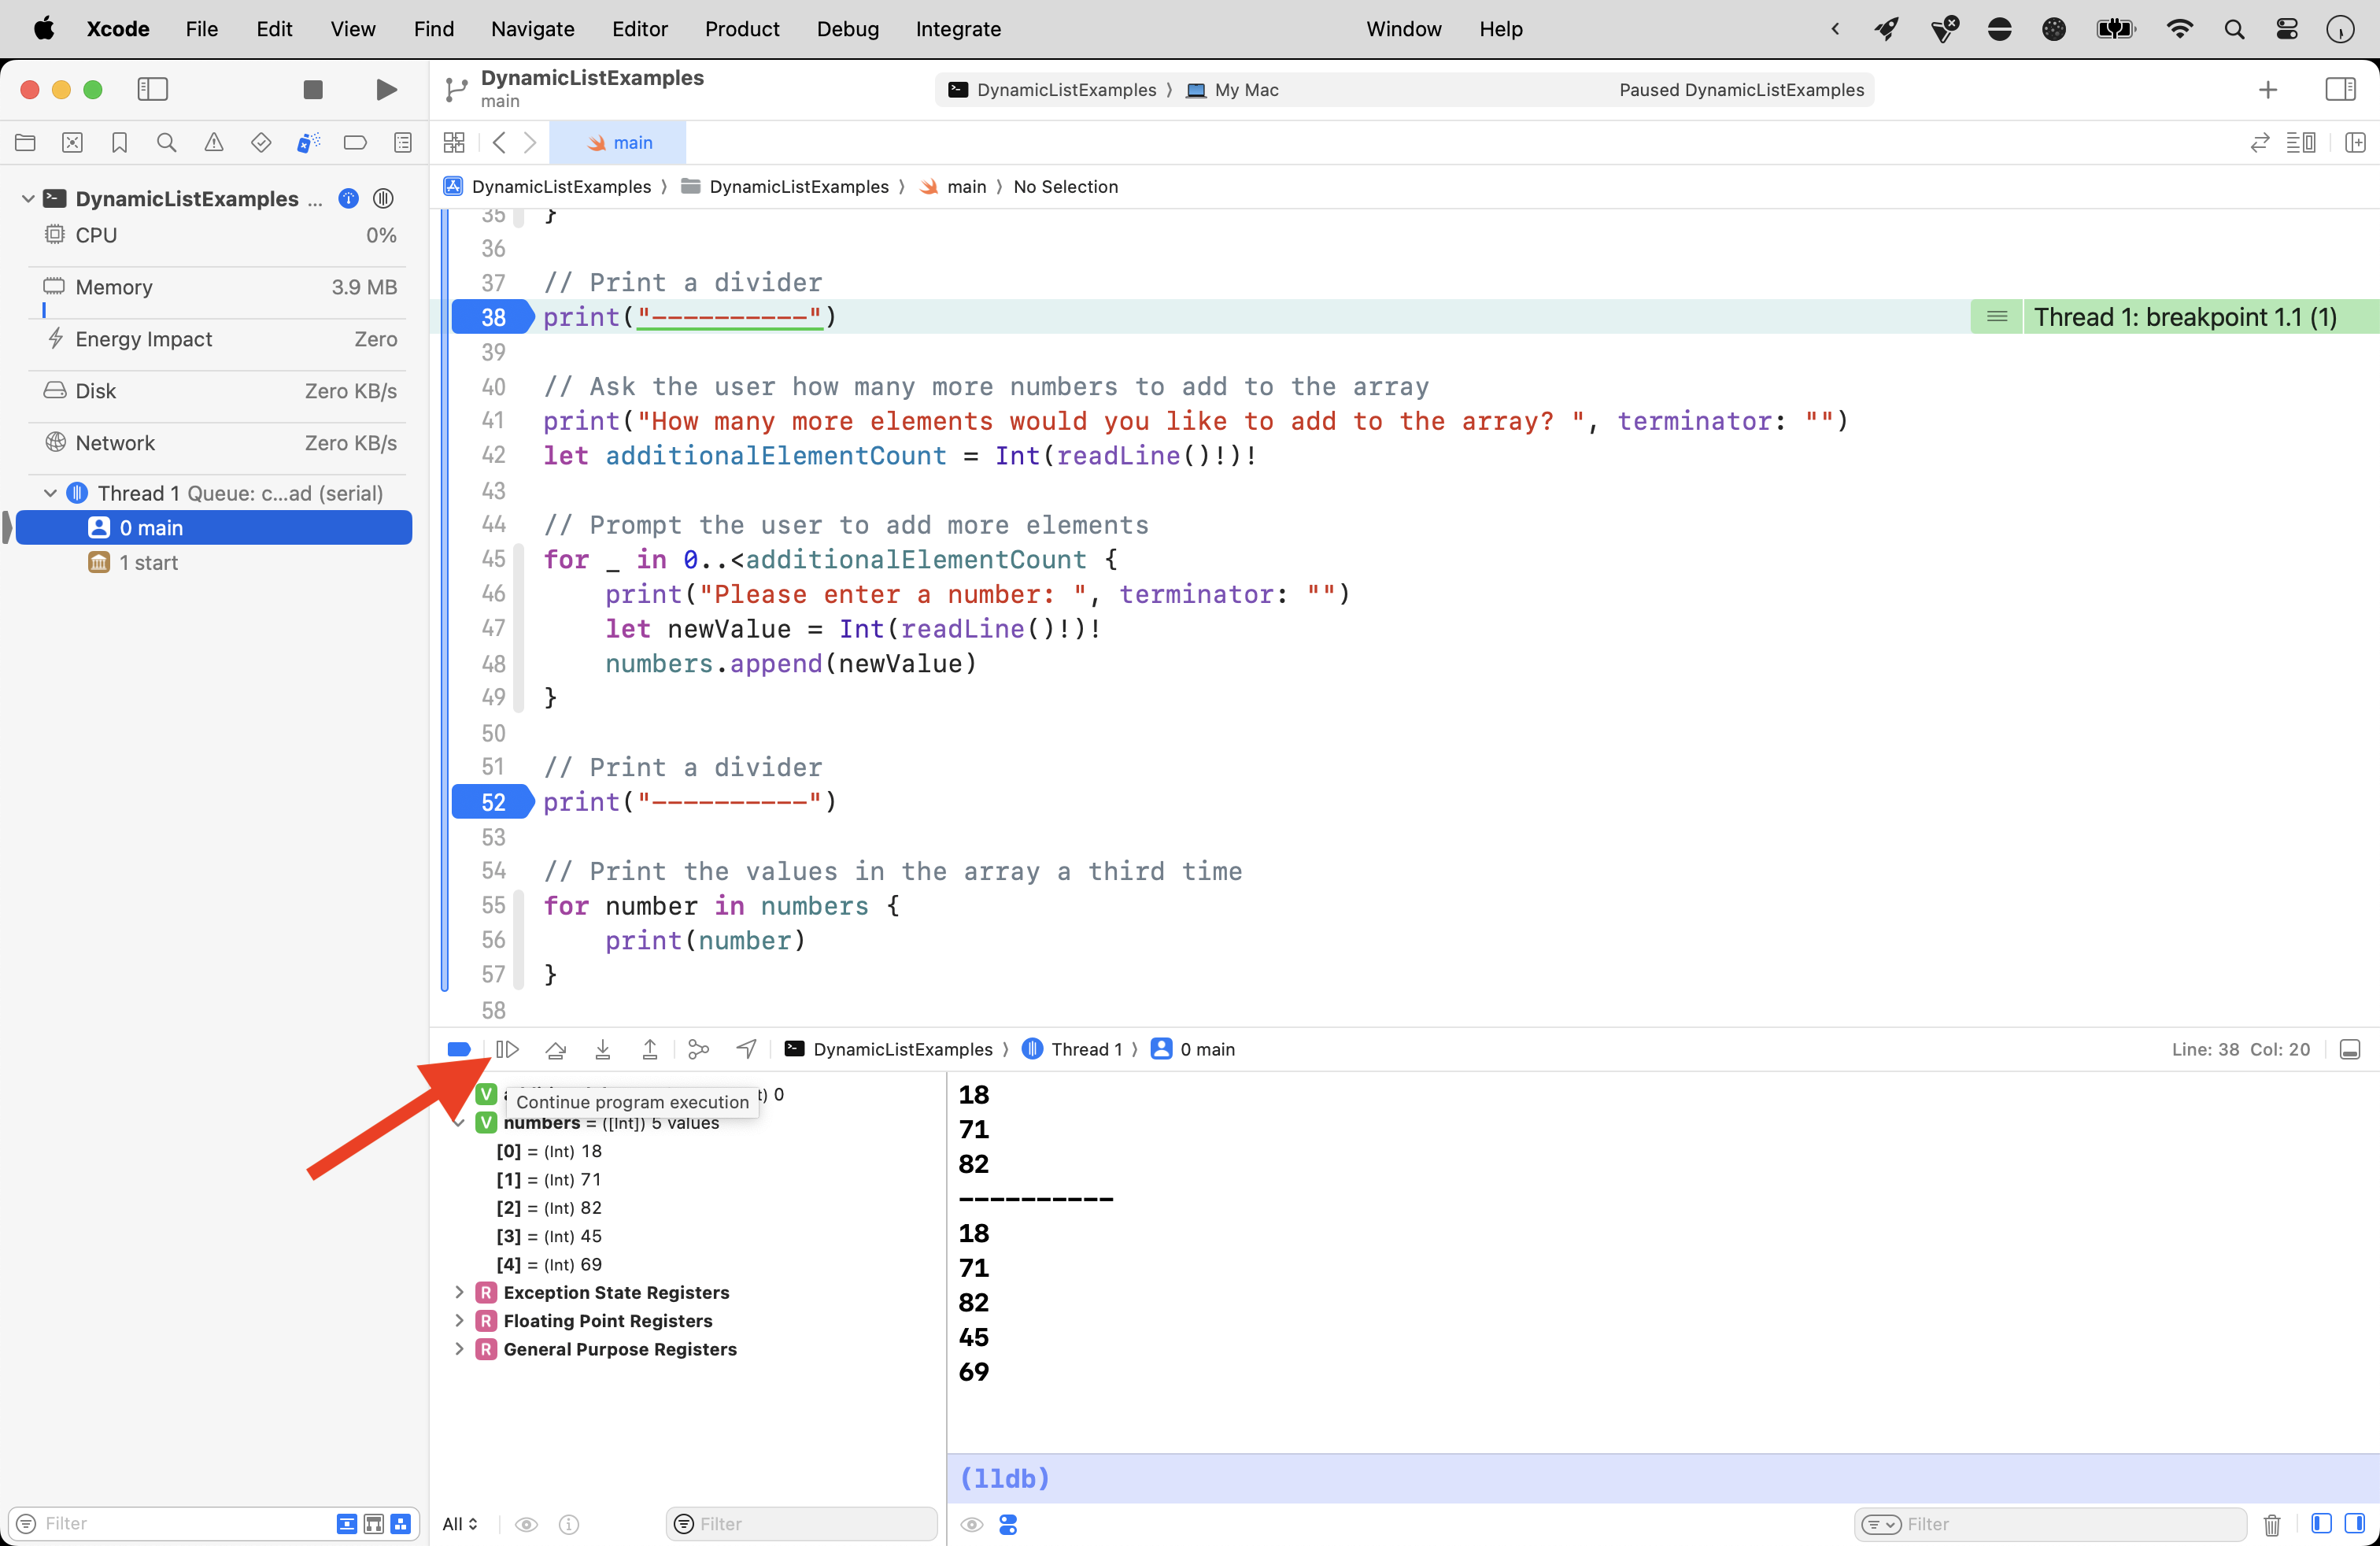
If you press the Continue program execution button:
… you will be prompted to add as many new elements to the array as you want.
Choosing a value less than 10 is recommended unless you really enjoy typing numbers into a computer!
Notice that when the program stops at the second breakpoint, the size of the array has grown by however many elements you chose to add:
So, that is a recap of how arrays are structured.
We have shown that we can place elements in an array:
- when it is first initialized
- this is what we did in Hobby Cards, Landmarks, and similar apps
- after it is initialized
- we can change an array’s contents after it is first created
- at run time
- the user can control how many new elements are added to an array
TIP
Run the command line program we just wrote again.
Try typing something other than a number in when prompted.
For example, type
fiverather than5.What happens? Why do you think that happened? Write your response in your Notion post for today before continuing.
More on how to handle this later…
Use a dynamic array
From our look at Separation of Concerns you know the high-level purpose of each layer in MVVM design pattern:
flowchart LR

id1["<b>Model</b><br/>Describes data"] --> id2["<b>View Model</b><br/>Manages the state of data<br/>Contains business logic"]
id2 --> id3["<b>View(s)</b><br/>Presents data"]
id3 --> id2
As we did when originally authoring the app to calculate powers, we will start with the data, by adjusting the view model to hold our array containing previous calculations.
Adjust the view model
Add the array
We need a place to store state – that is – the history of previously calculated powers that we want to keep around to review in our app.
Take this code:
// Holds the list of previously computed and evaluated powers
var resultHistory: [Power] = []
… and add it to your the view model, like this:
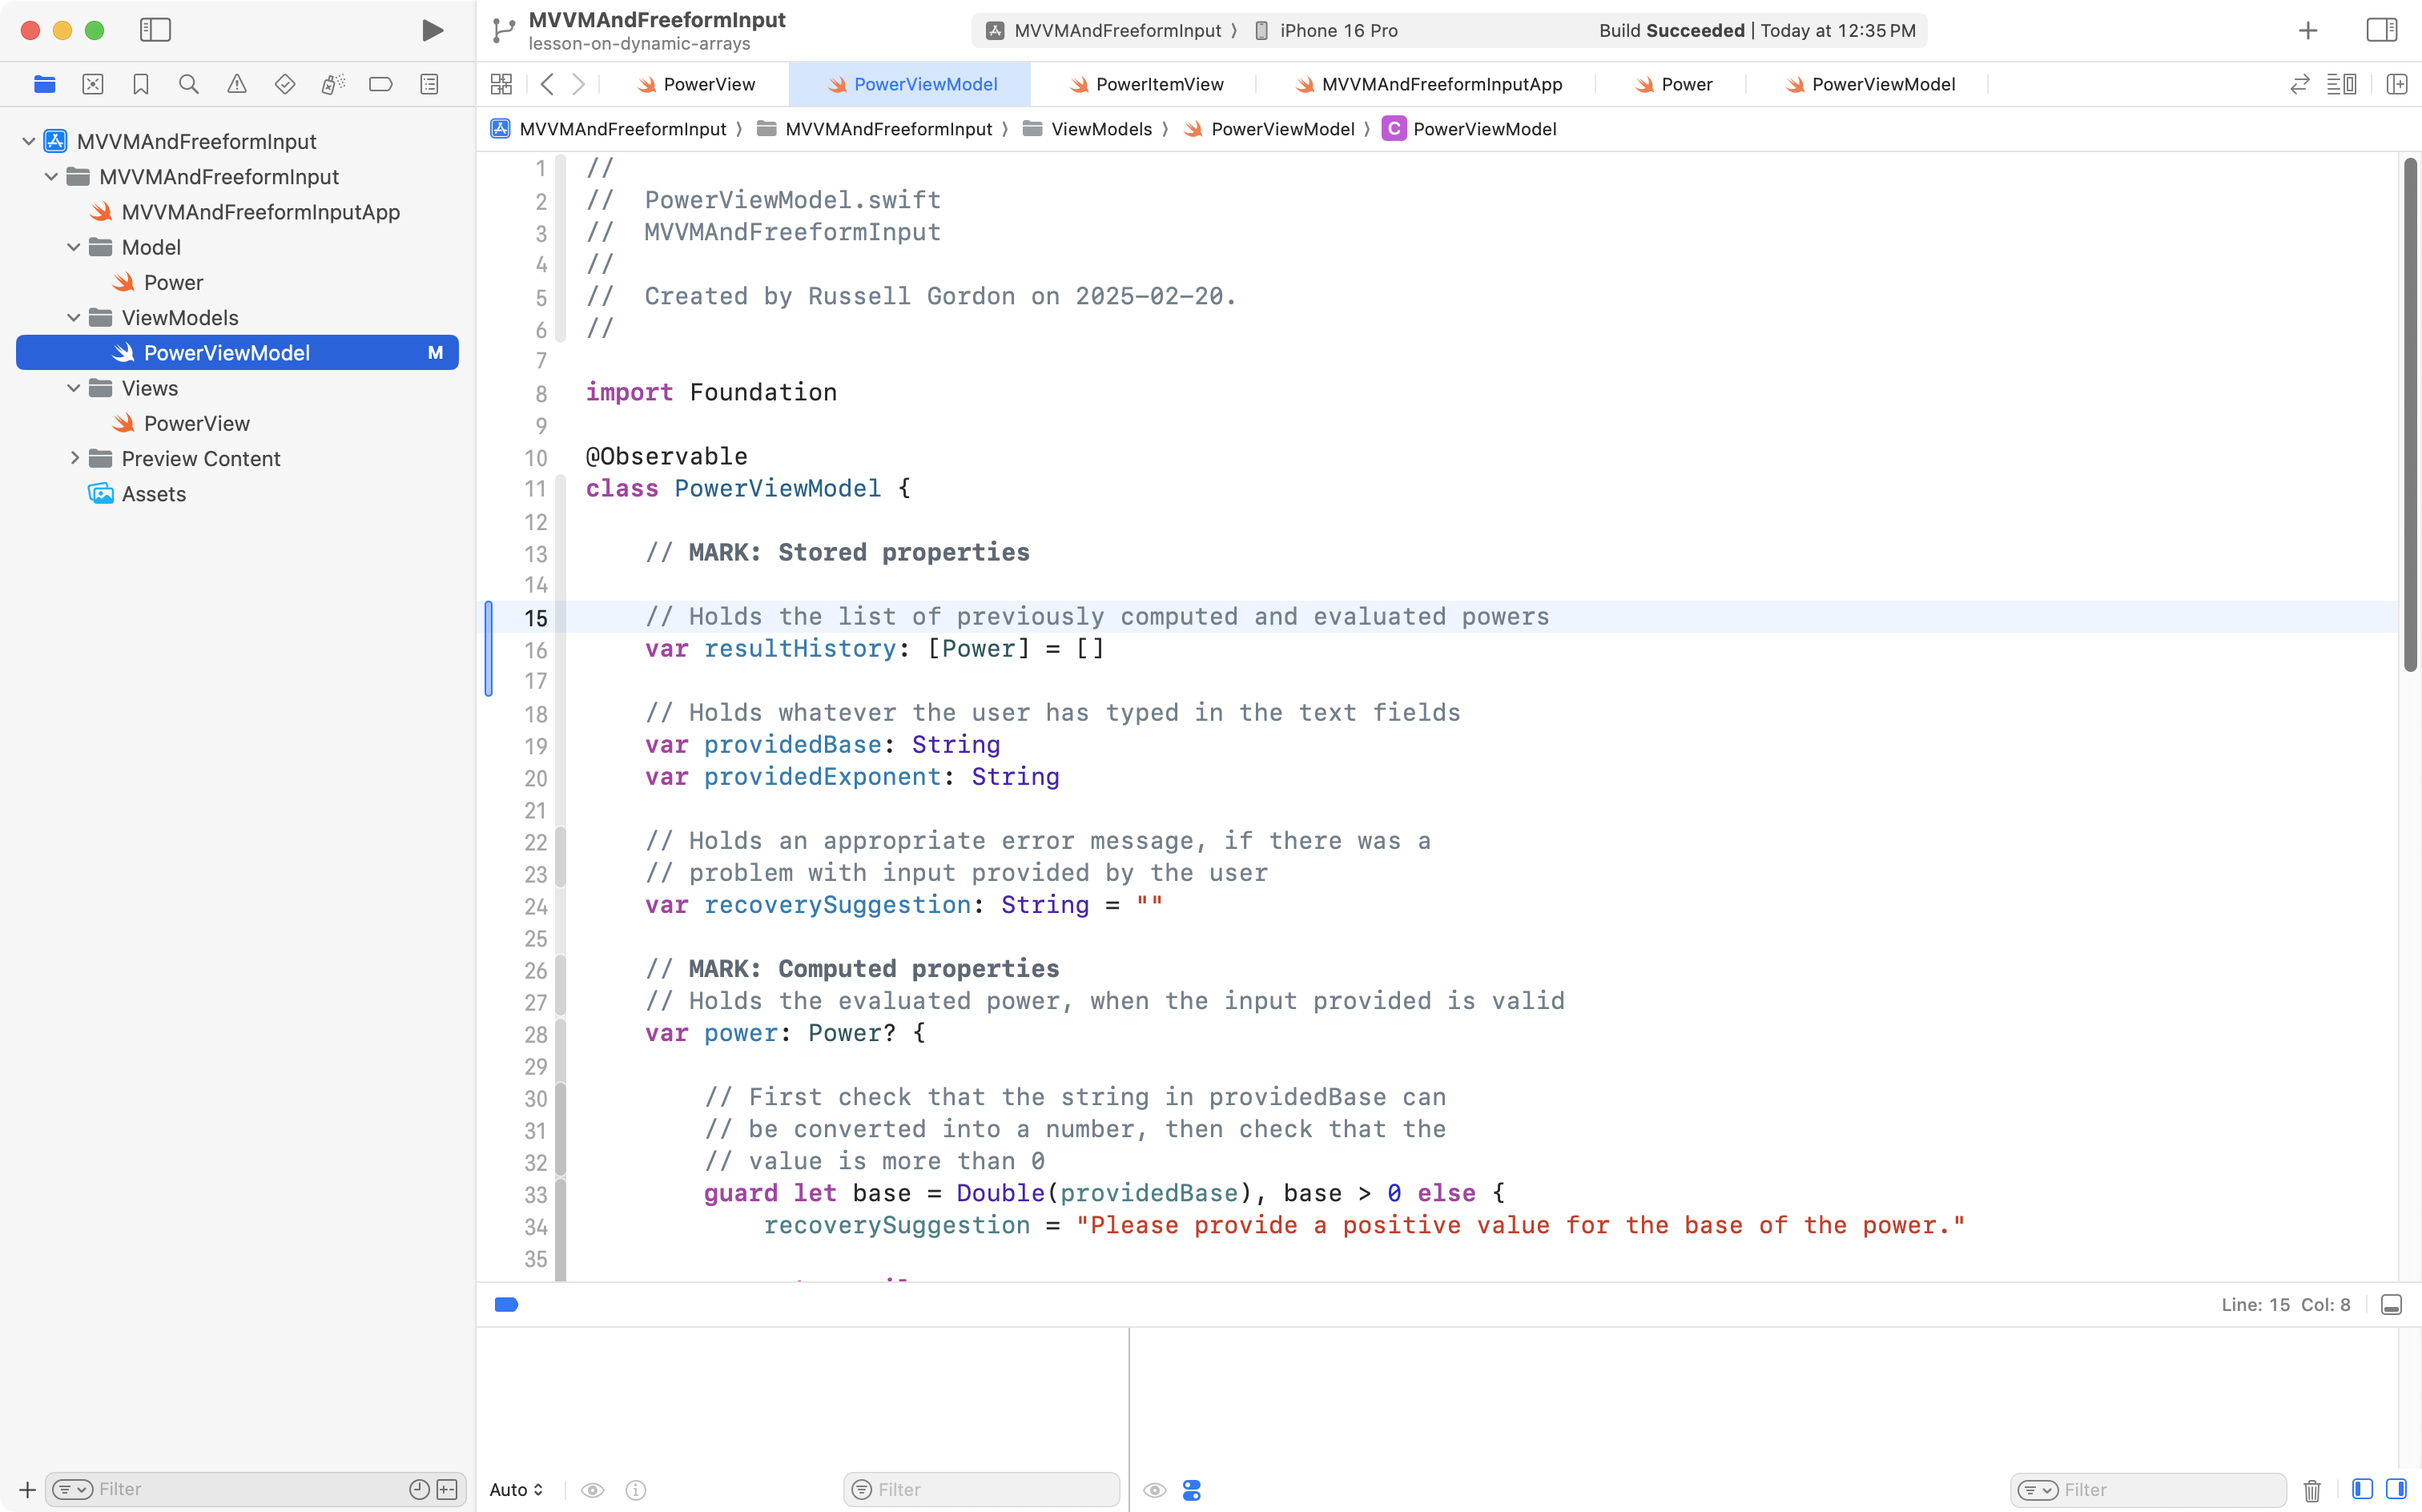
This creates a new stored property named resultHistory.
The type annotation of [Power] indicates that the stored property will hold an array of instances of the Power data type – recall that square brackets – [ and ] denote the start and end of an array in Swift.
Finally, the stored property is assigned an empty array by default – that is what the syntax = [] means.
NOTE
Since we are assigning an empty array by default to the
resultHistorystored property, no changes to the initializer ofPowerViewModelare required.When an instance of
PowerViewModelis created,resultHistorywill be automatically initialized with an empty array.
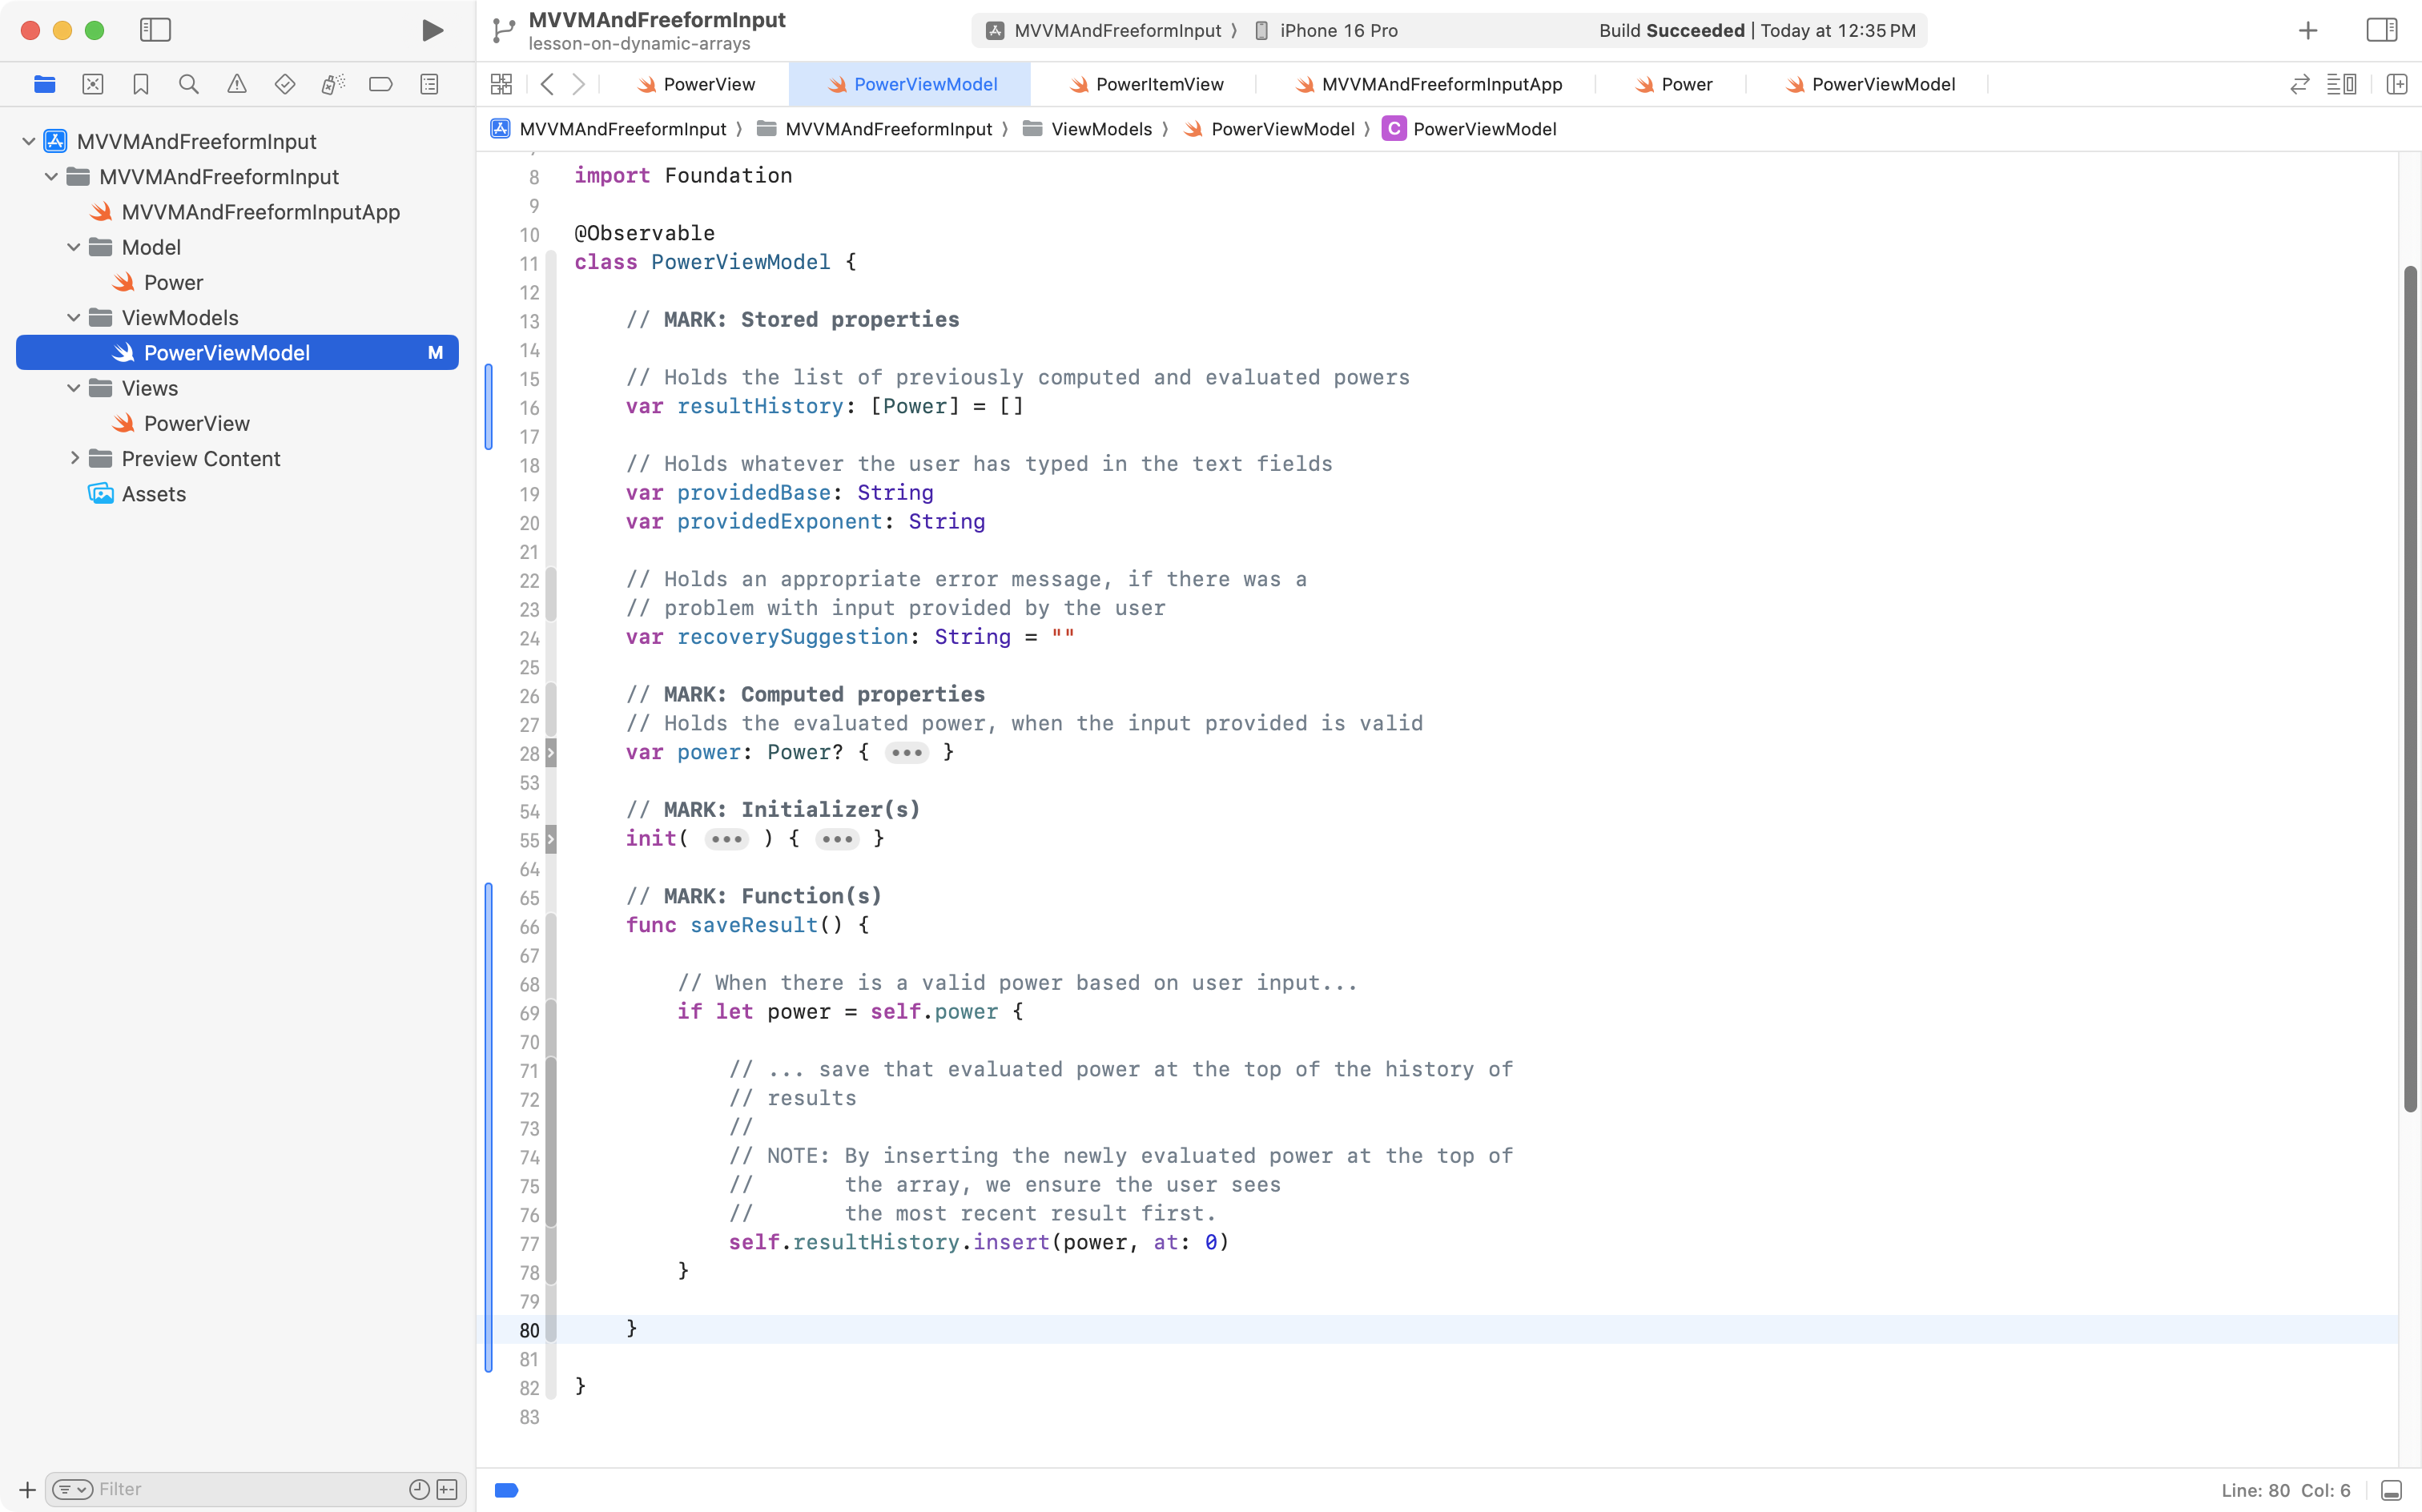
Add a function
Our view model needs a way for the view to say:
“Hey, take this power the user has calculated, and add it to your array that keeps track of their previous calculations.”
So, we can use this code – copy it into your computer’s clipboard:
// MARK: Function(s)
func saveResult() {

	// When there is a valid power based on user input...
	if let power = self.power {

		// ... save that evaluated power at the top of the history of
		// results
		//
		// NOTE: By inserting the newly evaluated power at the top of
		//       the array, we ensure the user sees
		//       the most recent result first.
		self.resultHistory.insert(power, at: 0)
	}

}
… and paste it below the initializer in the view model, but before the end of the class:
NOTE
A function is just a way to encapsulate (contain) some logic that we want to happen at a certain point in time within our app.
Although we are not yet done implementing the new feature to save prior calculations, this is a good time to commit and push our work with the message:
Made view model changes to support saving a history of previous calculations.
Adjust the view
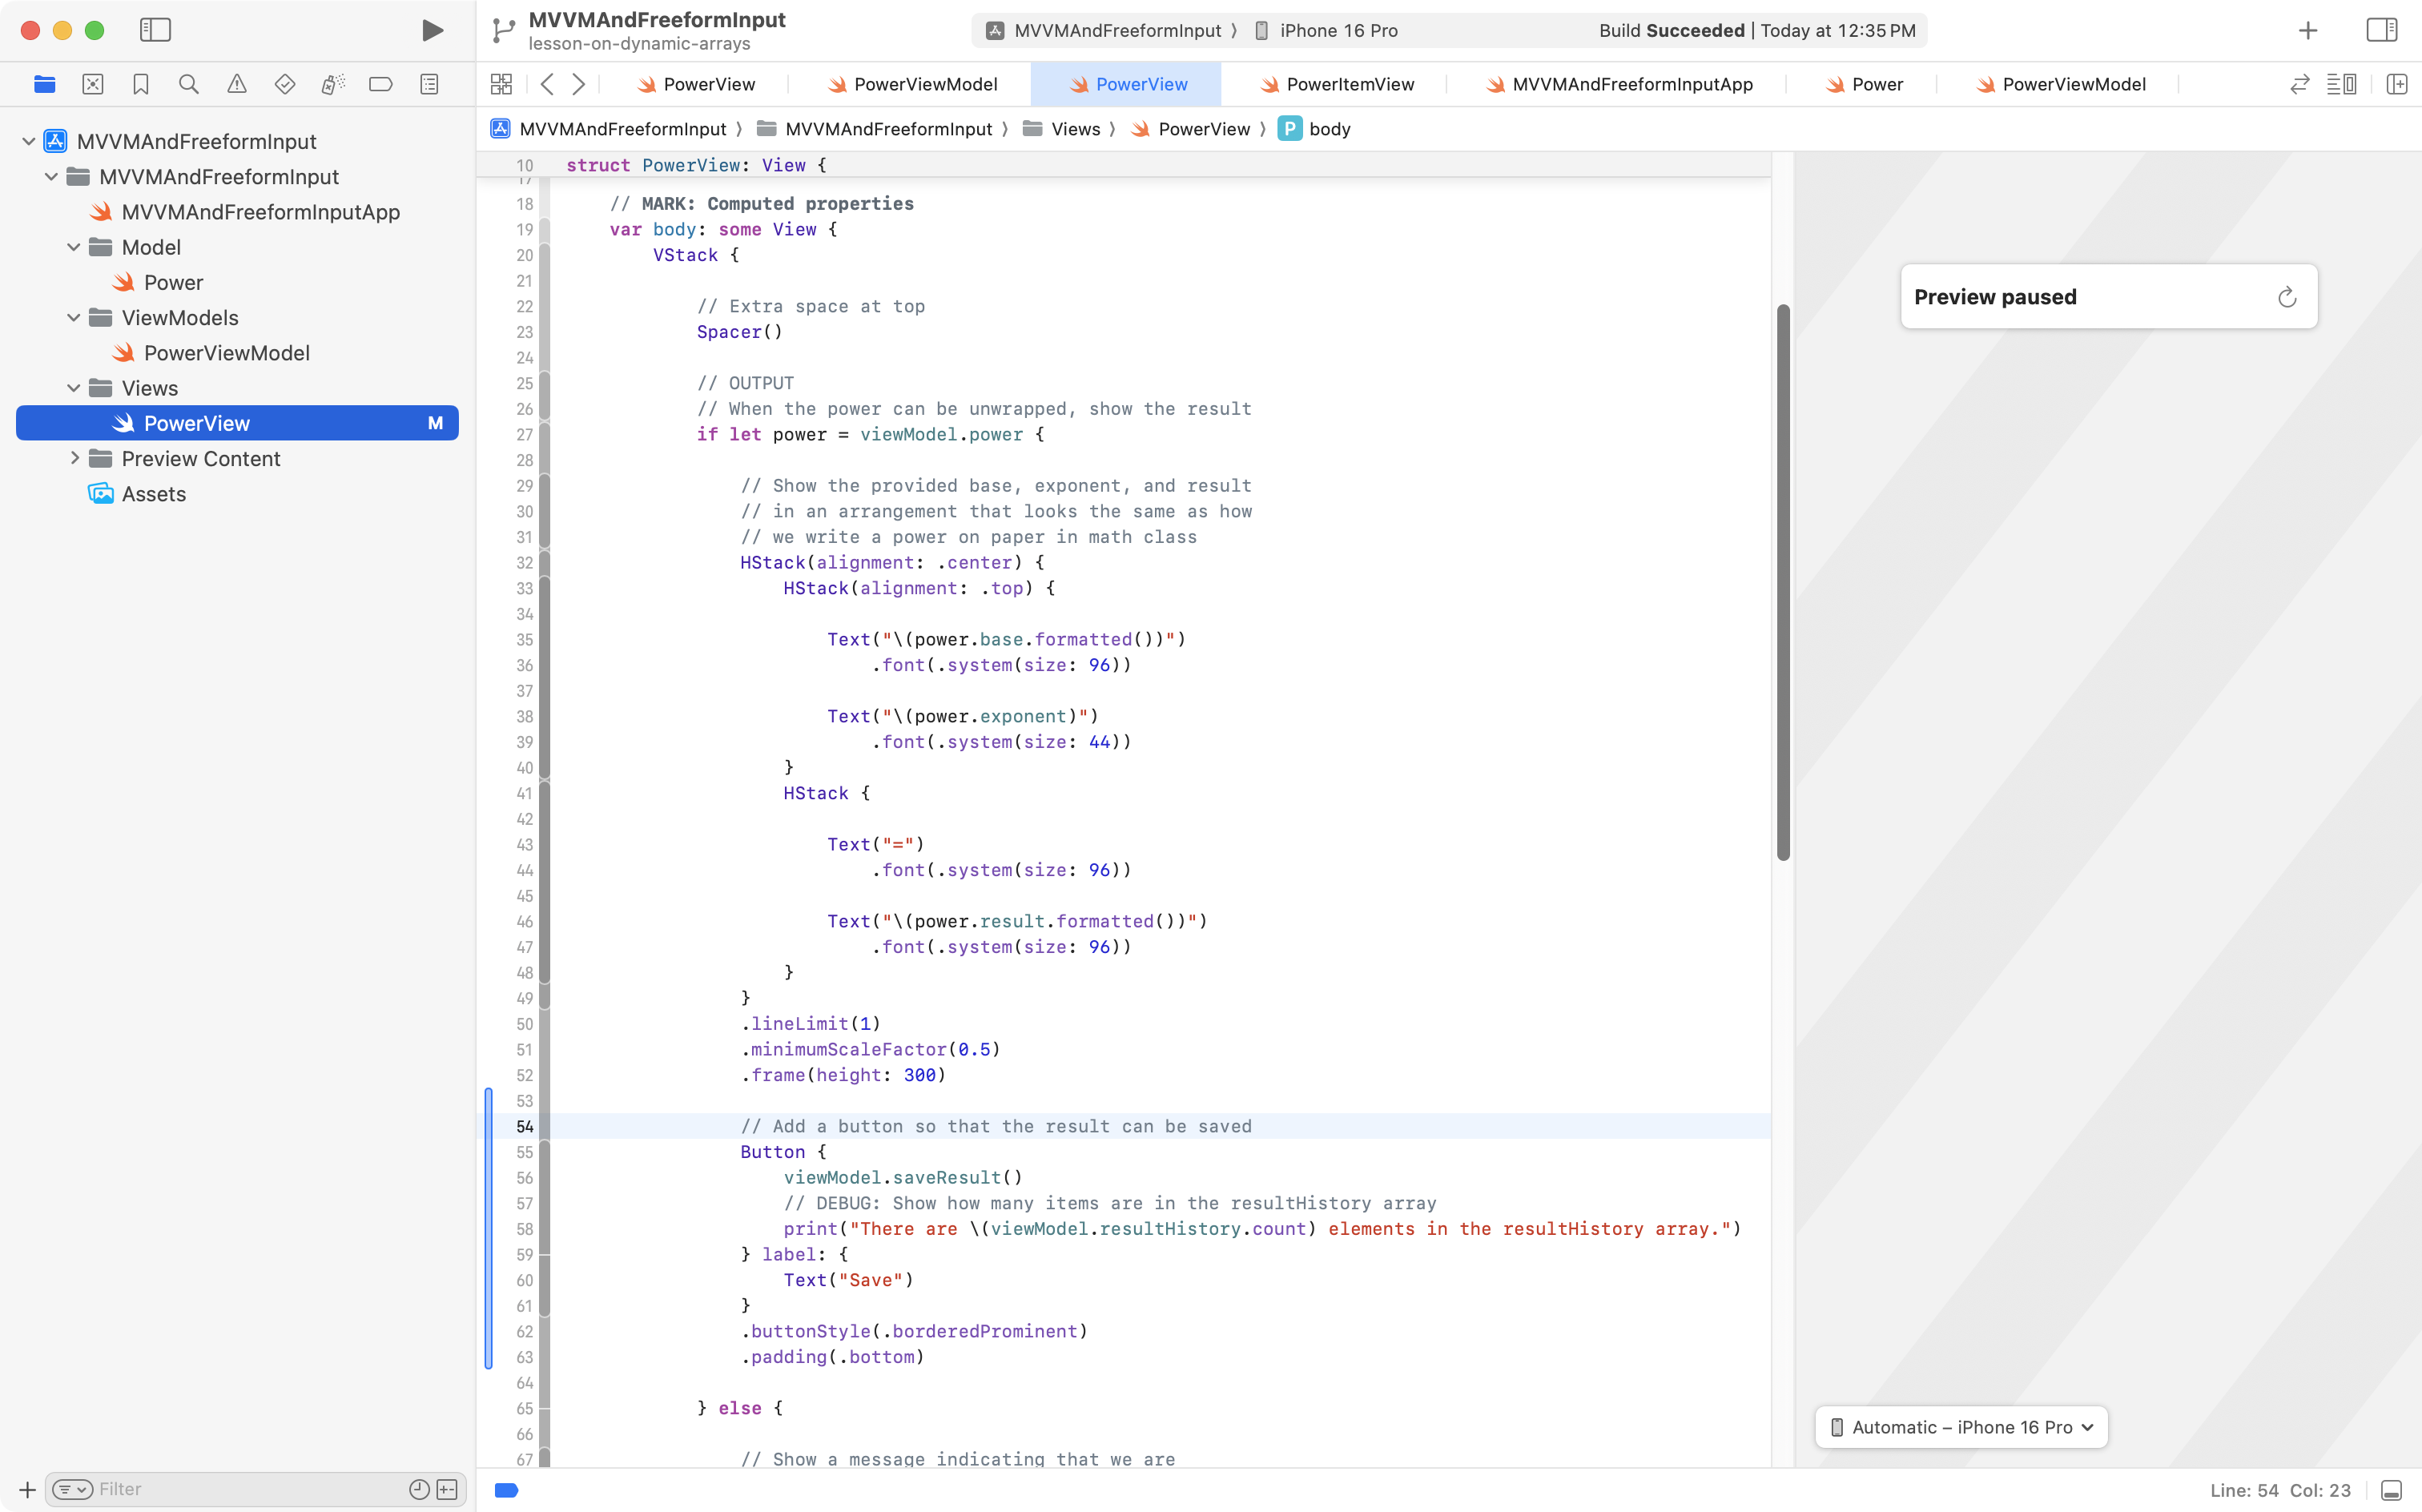
Add a button
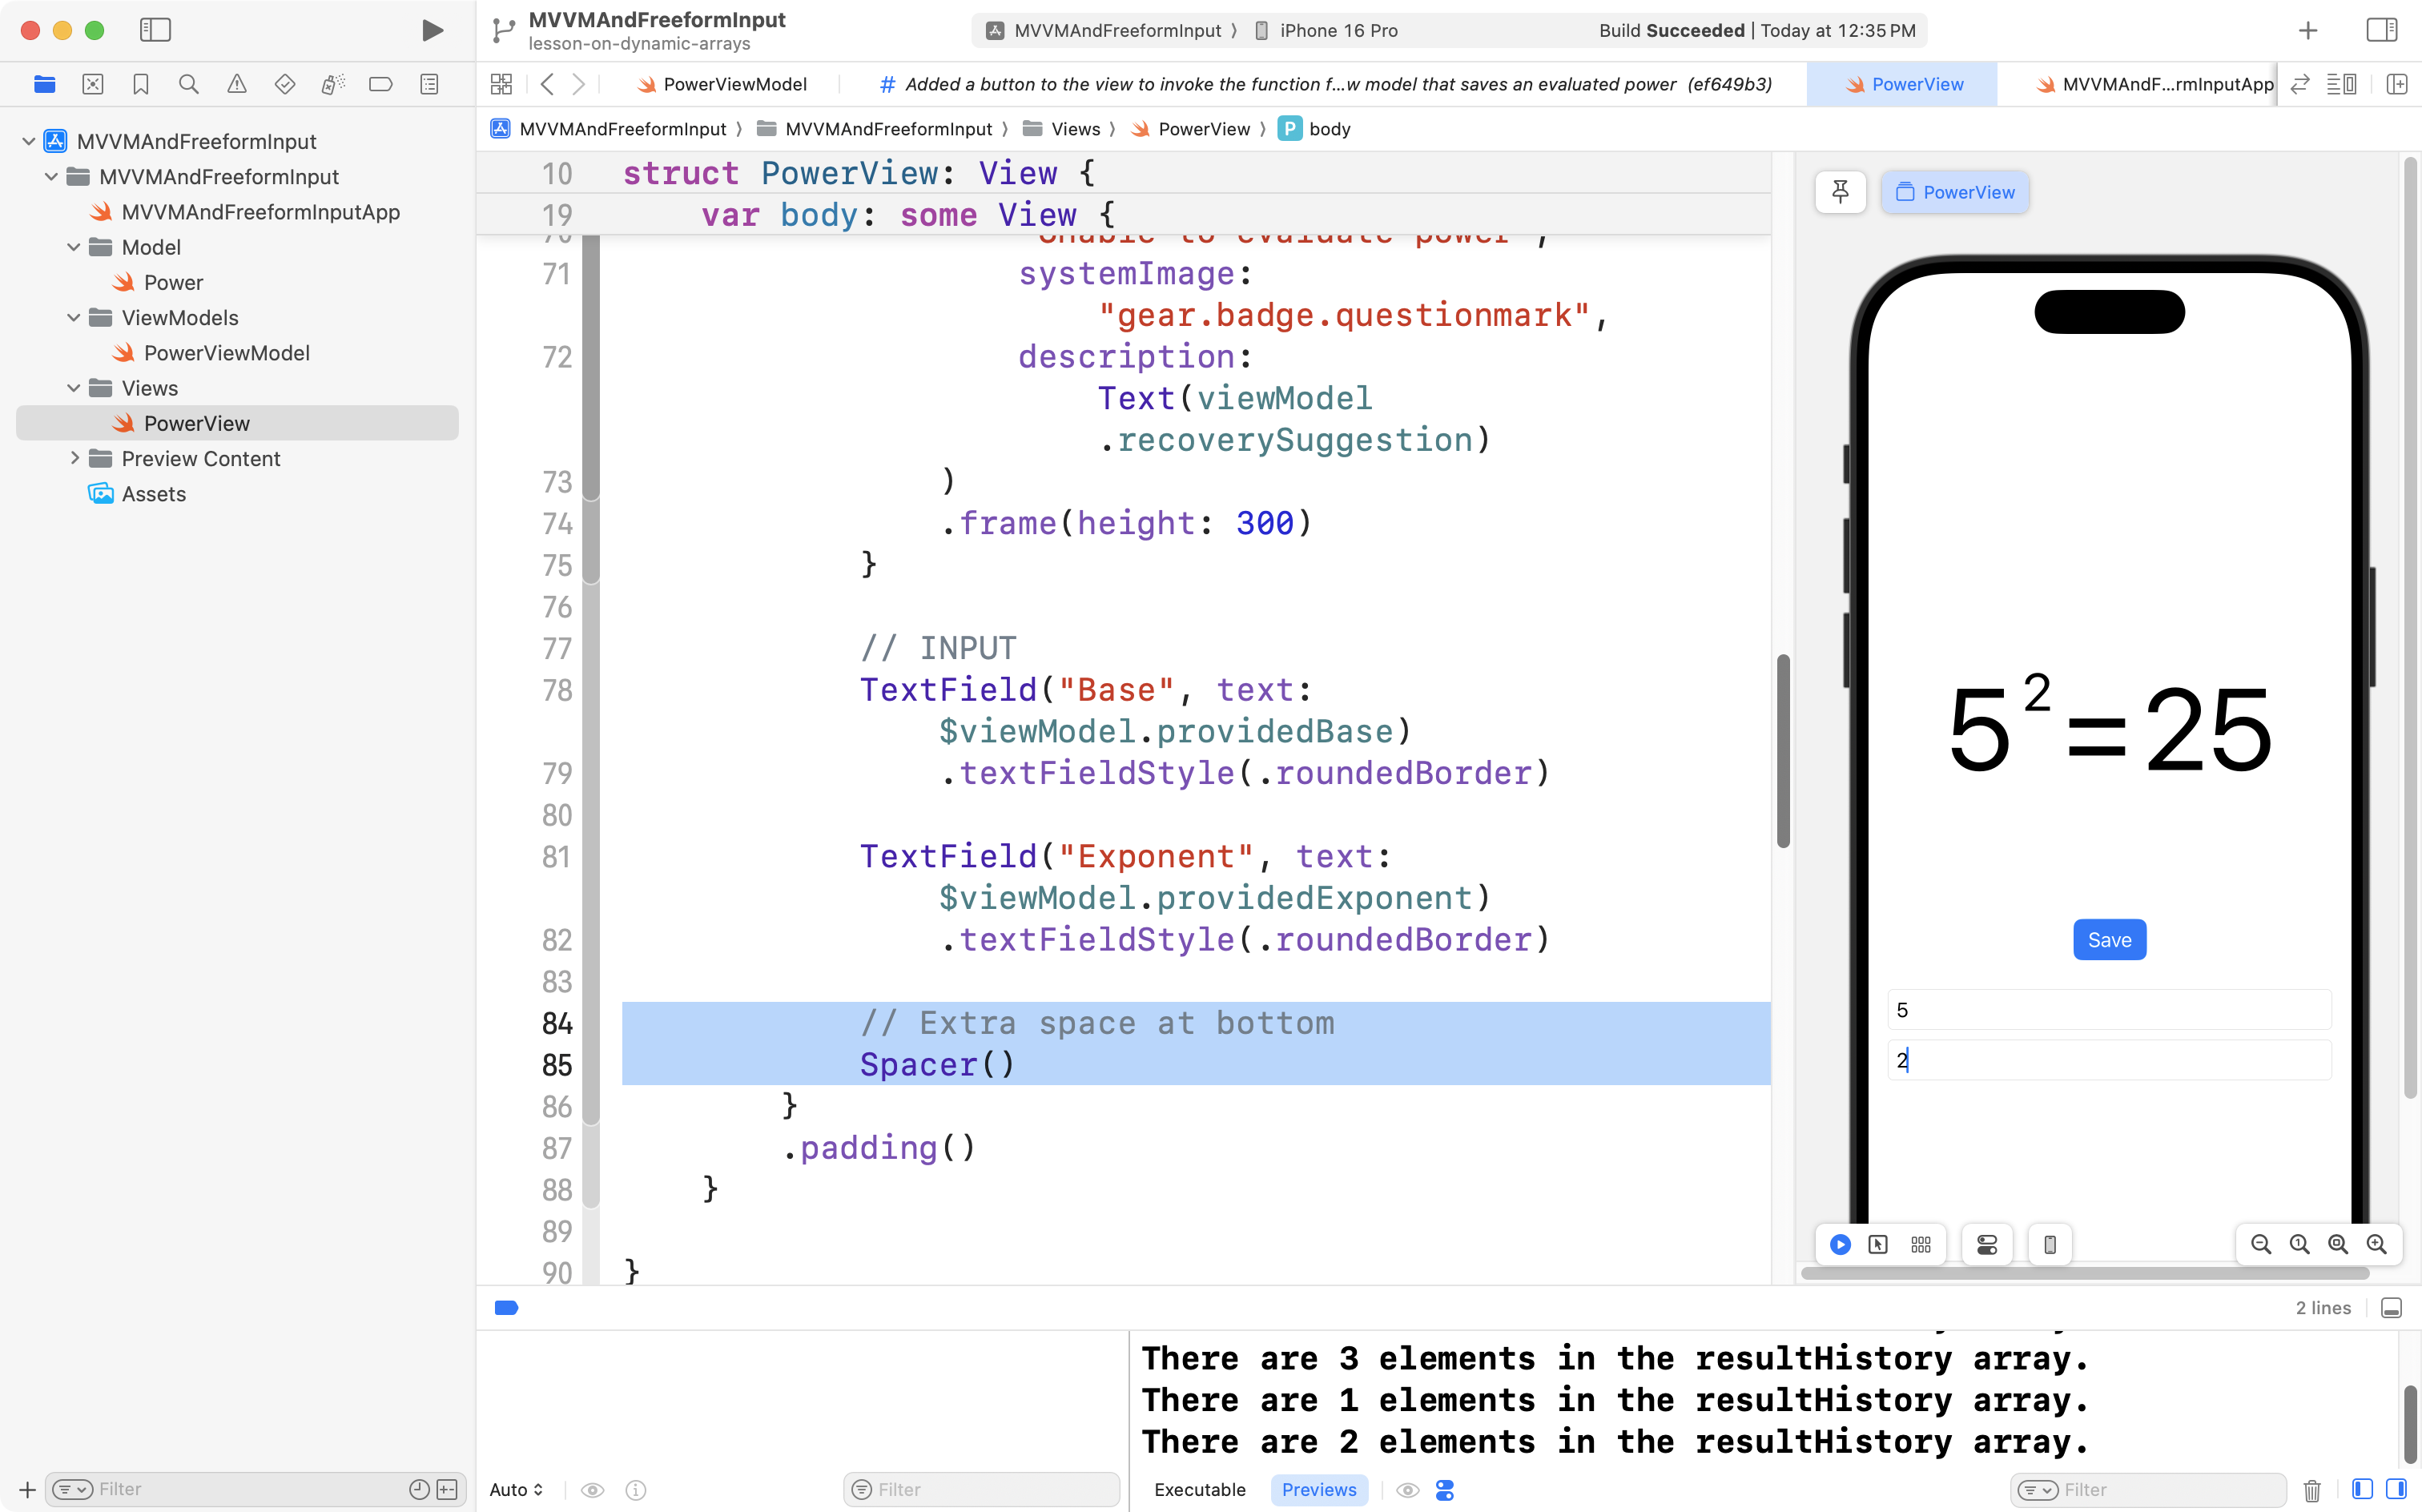
When our view shows a power that has been evaluated, we should also show a button that allows the user to save that result.
Copy this code into your computer’s clipboard:
// Add a button so that the result can be saved
Button {
	viewModel.saveResult()
	// DEBUG: Show how many items are in the resultHistory array
	print("There are \(viewModel.resultHistory.count) elements in the resultHistory array.")
} label: {
	Text("Save")
}
.buttonStyle(.borderedProminent)
.padding(.bottom)
… then locate the end of the HStack that shows the evaluated result:
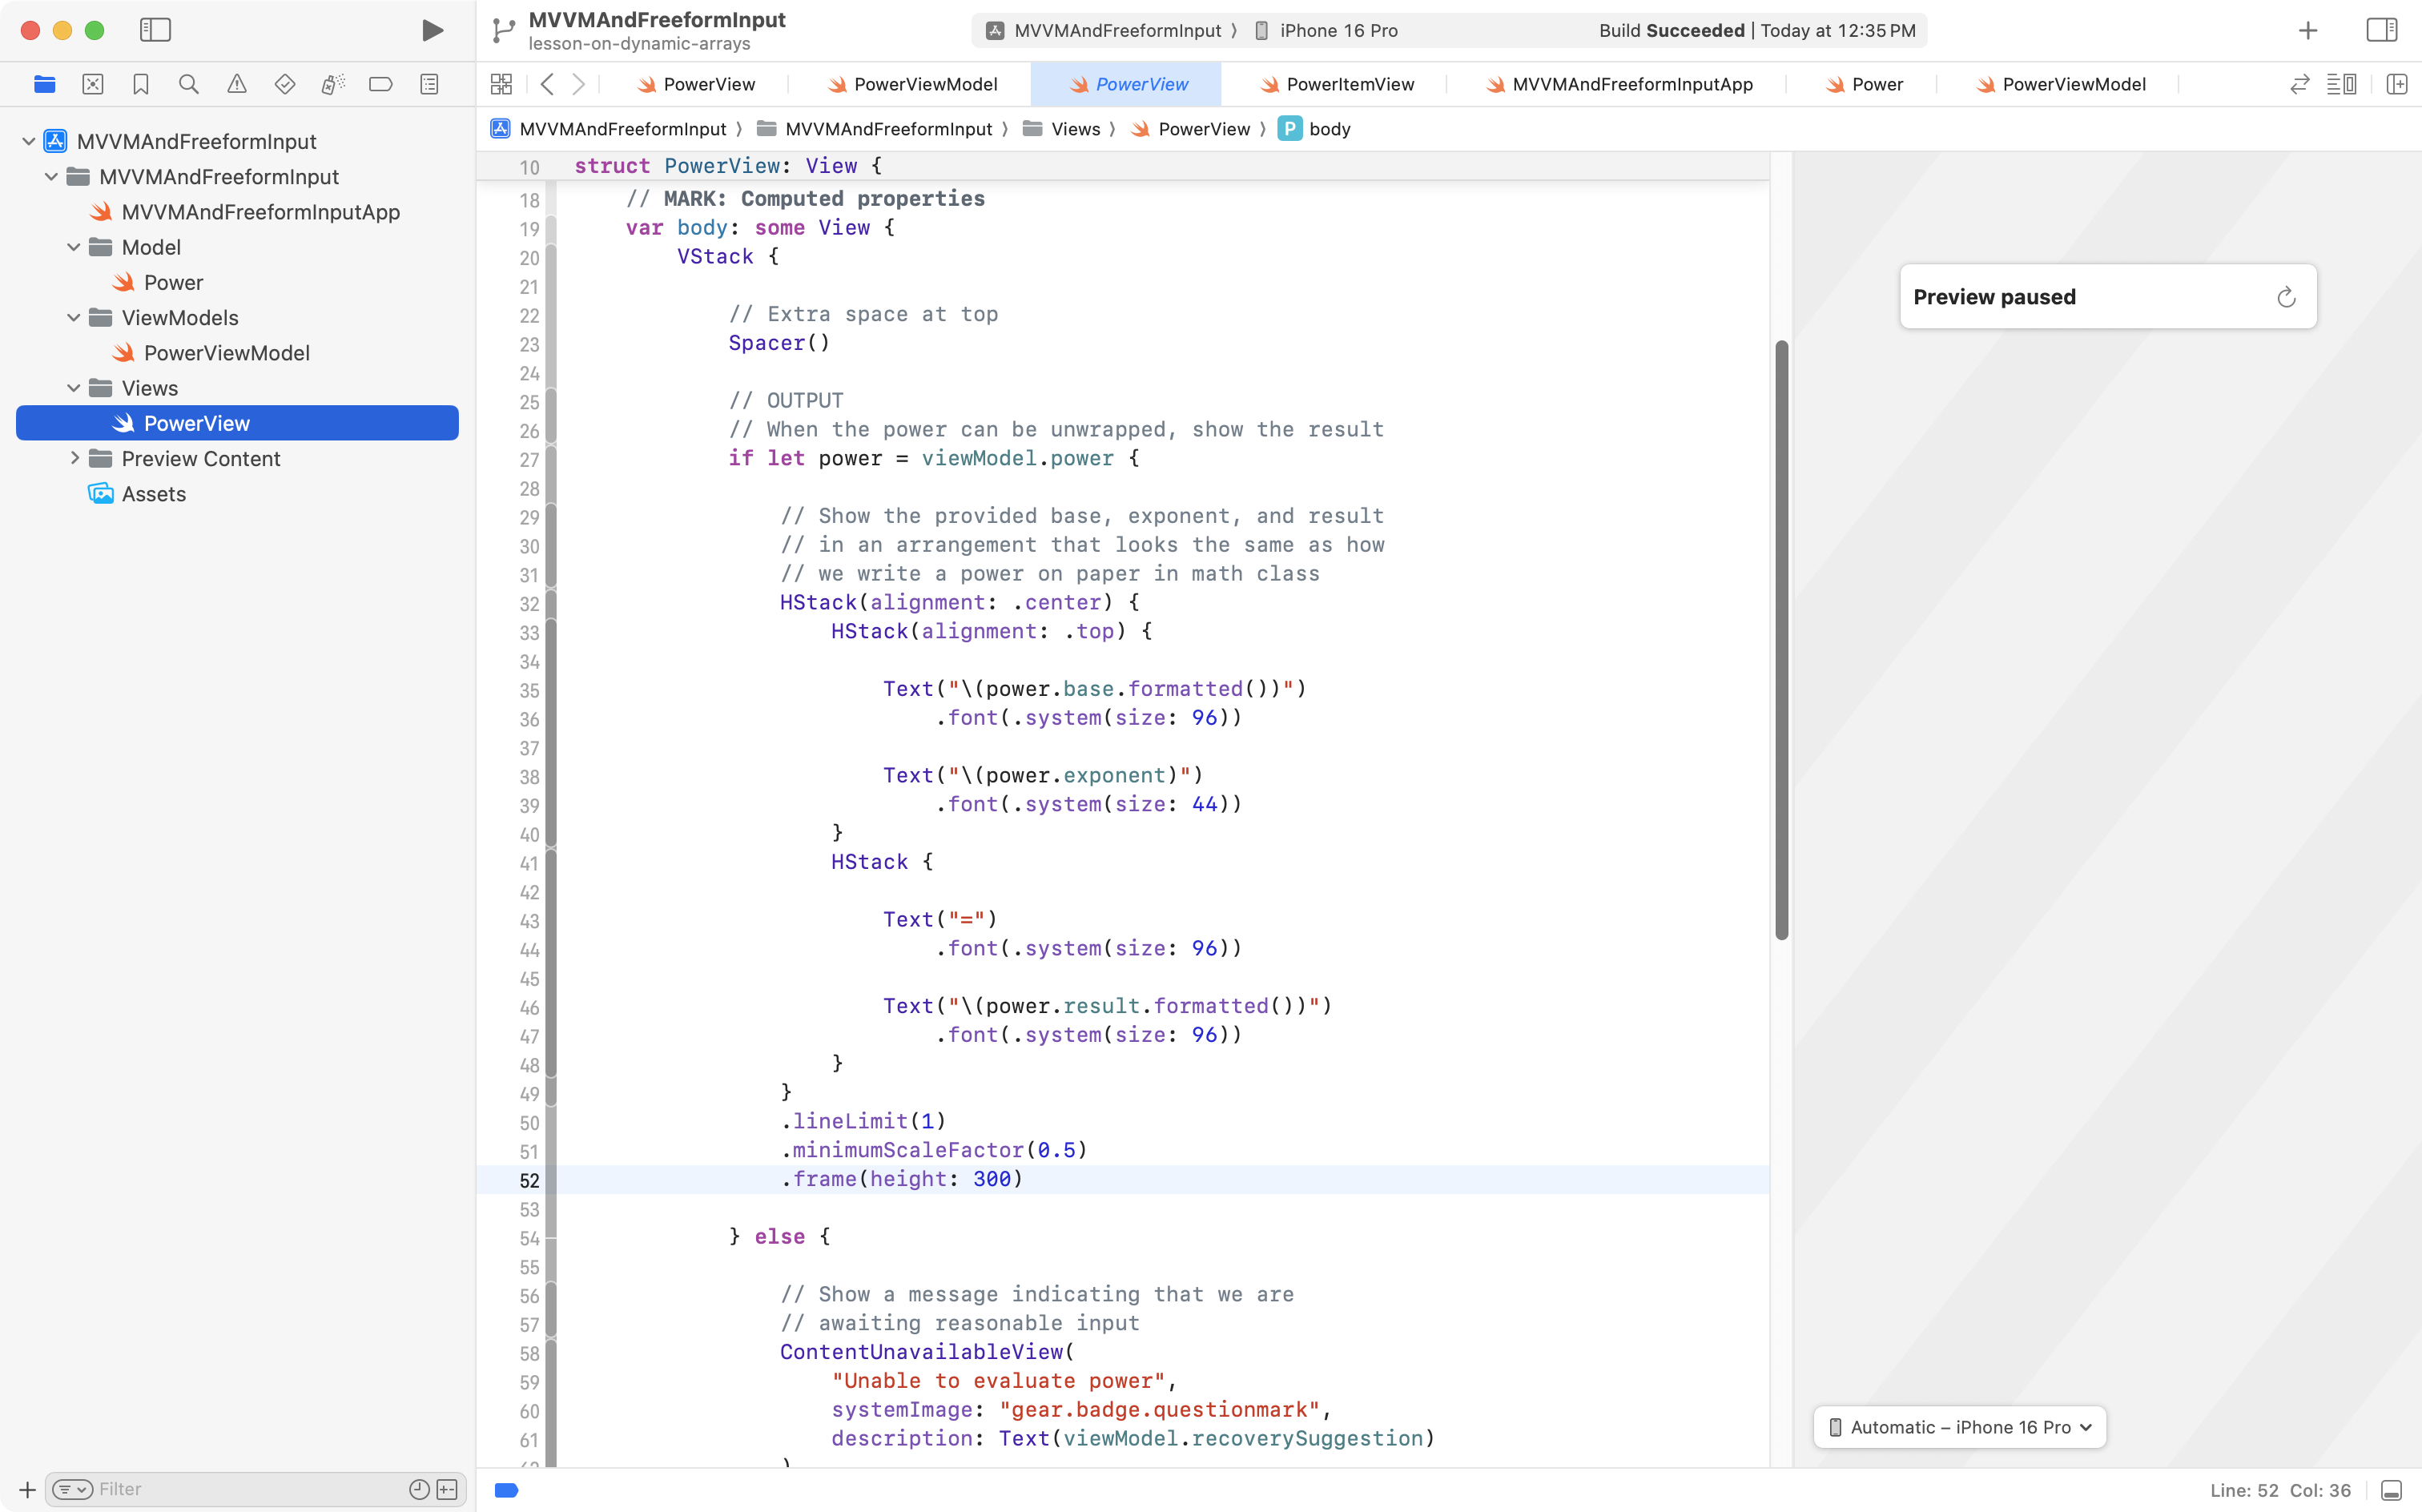
.. and paste new code after that HStack but before the else branch:
Now let’s try out the code we’ve added to the view model and the view.
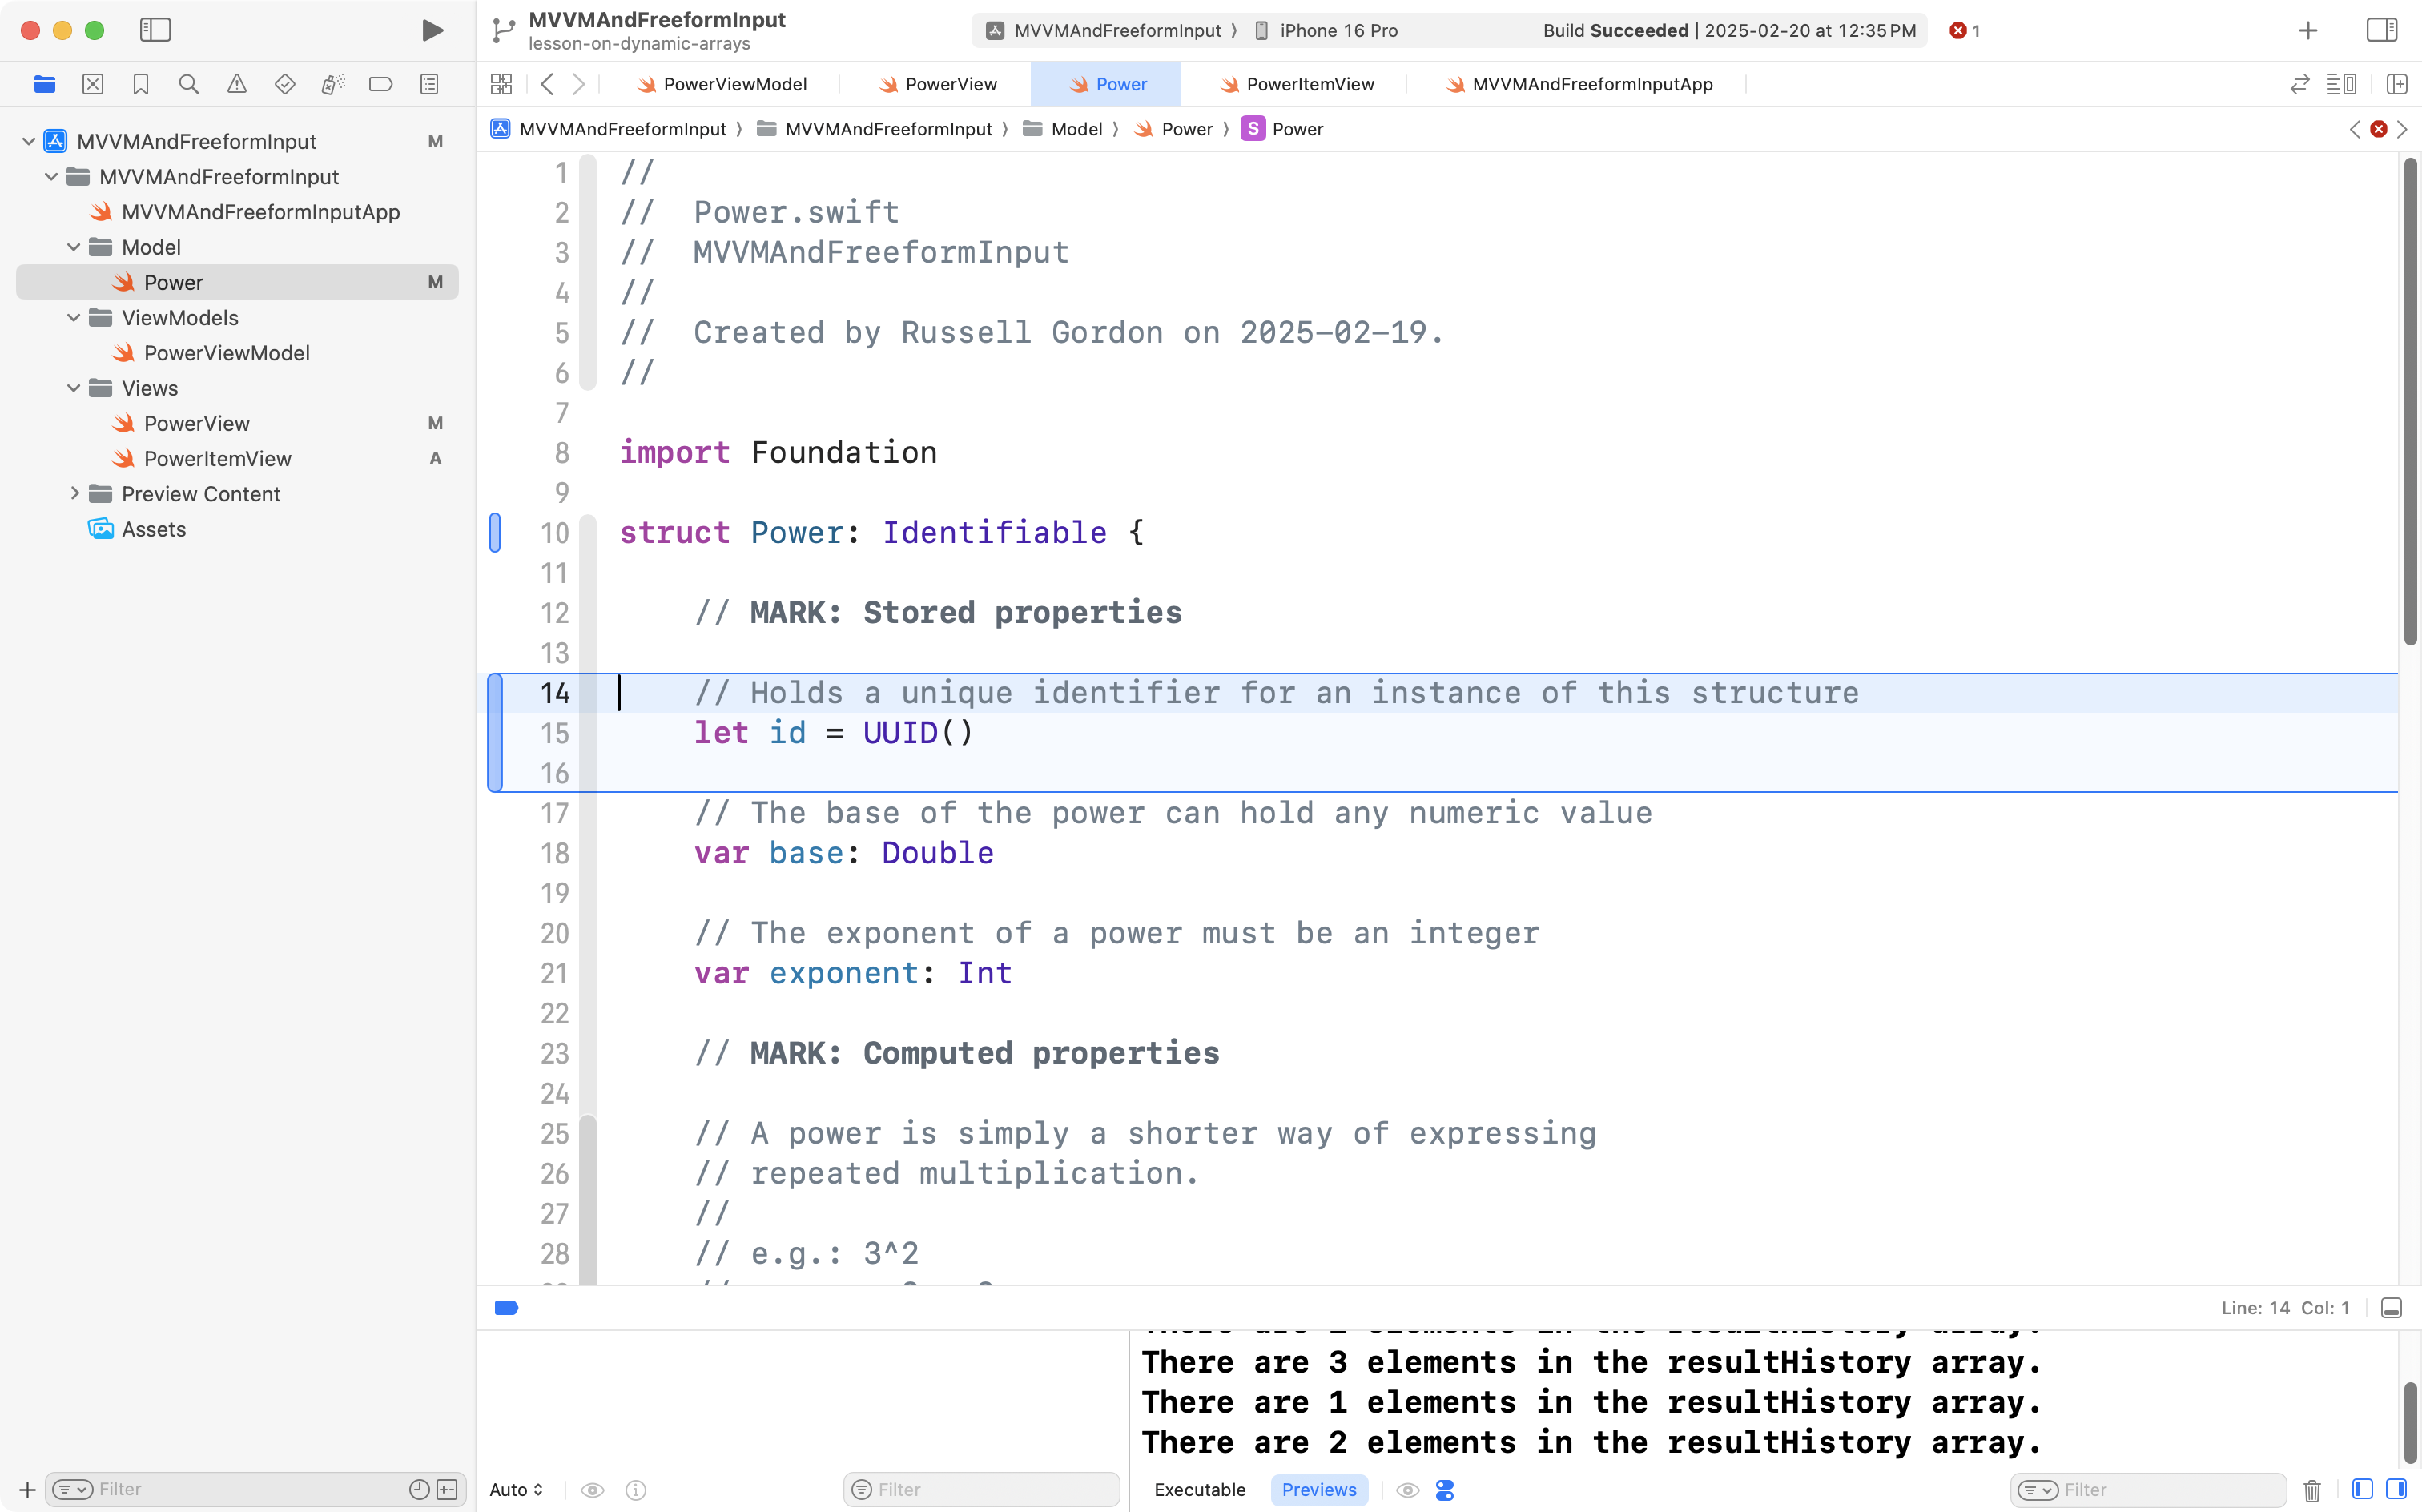
Start the Xcode Previews window, if necessary, by pressing Option-Command-P. Then click this icon in the lower left corner of the Xcode window, or, press the Shift-Command-Y keyboard shortcut to show the Debug Area:
Now try typing in a power, and then saving the evaluated result. You should see the count of elements in the view model’s resultHistory array increasing each time you press the button:
So – now you can see that the resultHistory array is being mutated each time we press the Save button in the user interface – a new element is being added to the array.
This is a good time to commit and push your work with the following message:
Added a button to the view to invoke the function from the view model that saves an evaluated power to our history of previously evaluated powers.
Show the history
Our view model contains the array that the history of previously calculated results is saved in.
The button we added invokes the function on the view model that adds a result to the array.
Now that we are successfully mutating the array at run time, of course, the next step is to let the user see that history of previously calculated results.
To do this, we can add the following code to our view, to create a scrollable list showing the history. Copy this code to your clipboard:
// Show a title for the history
HStack {
Text("History")
.bold()
Spacer()
}
.padding(.vertical)
// Iterate over the history of results
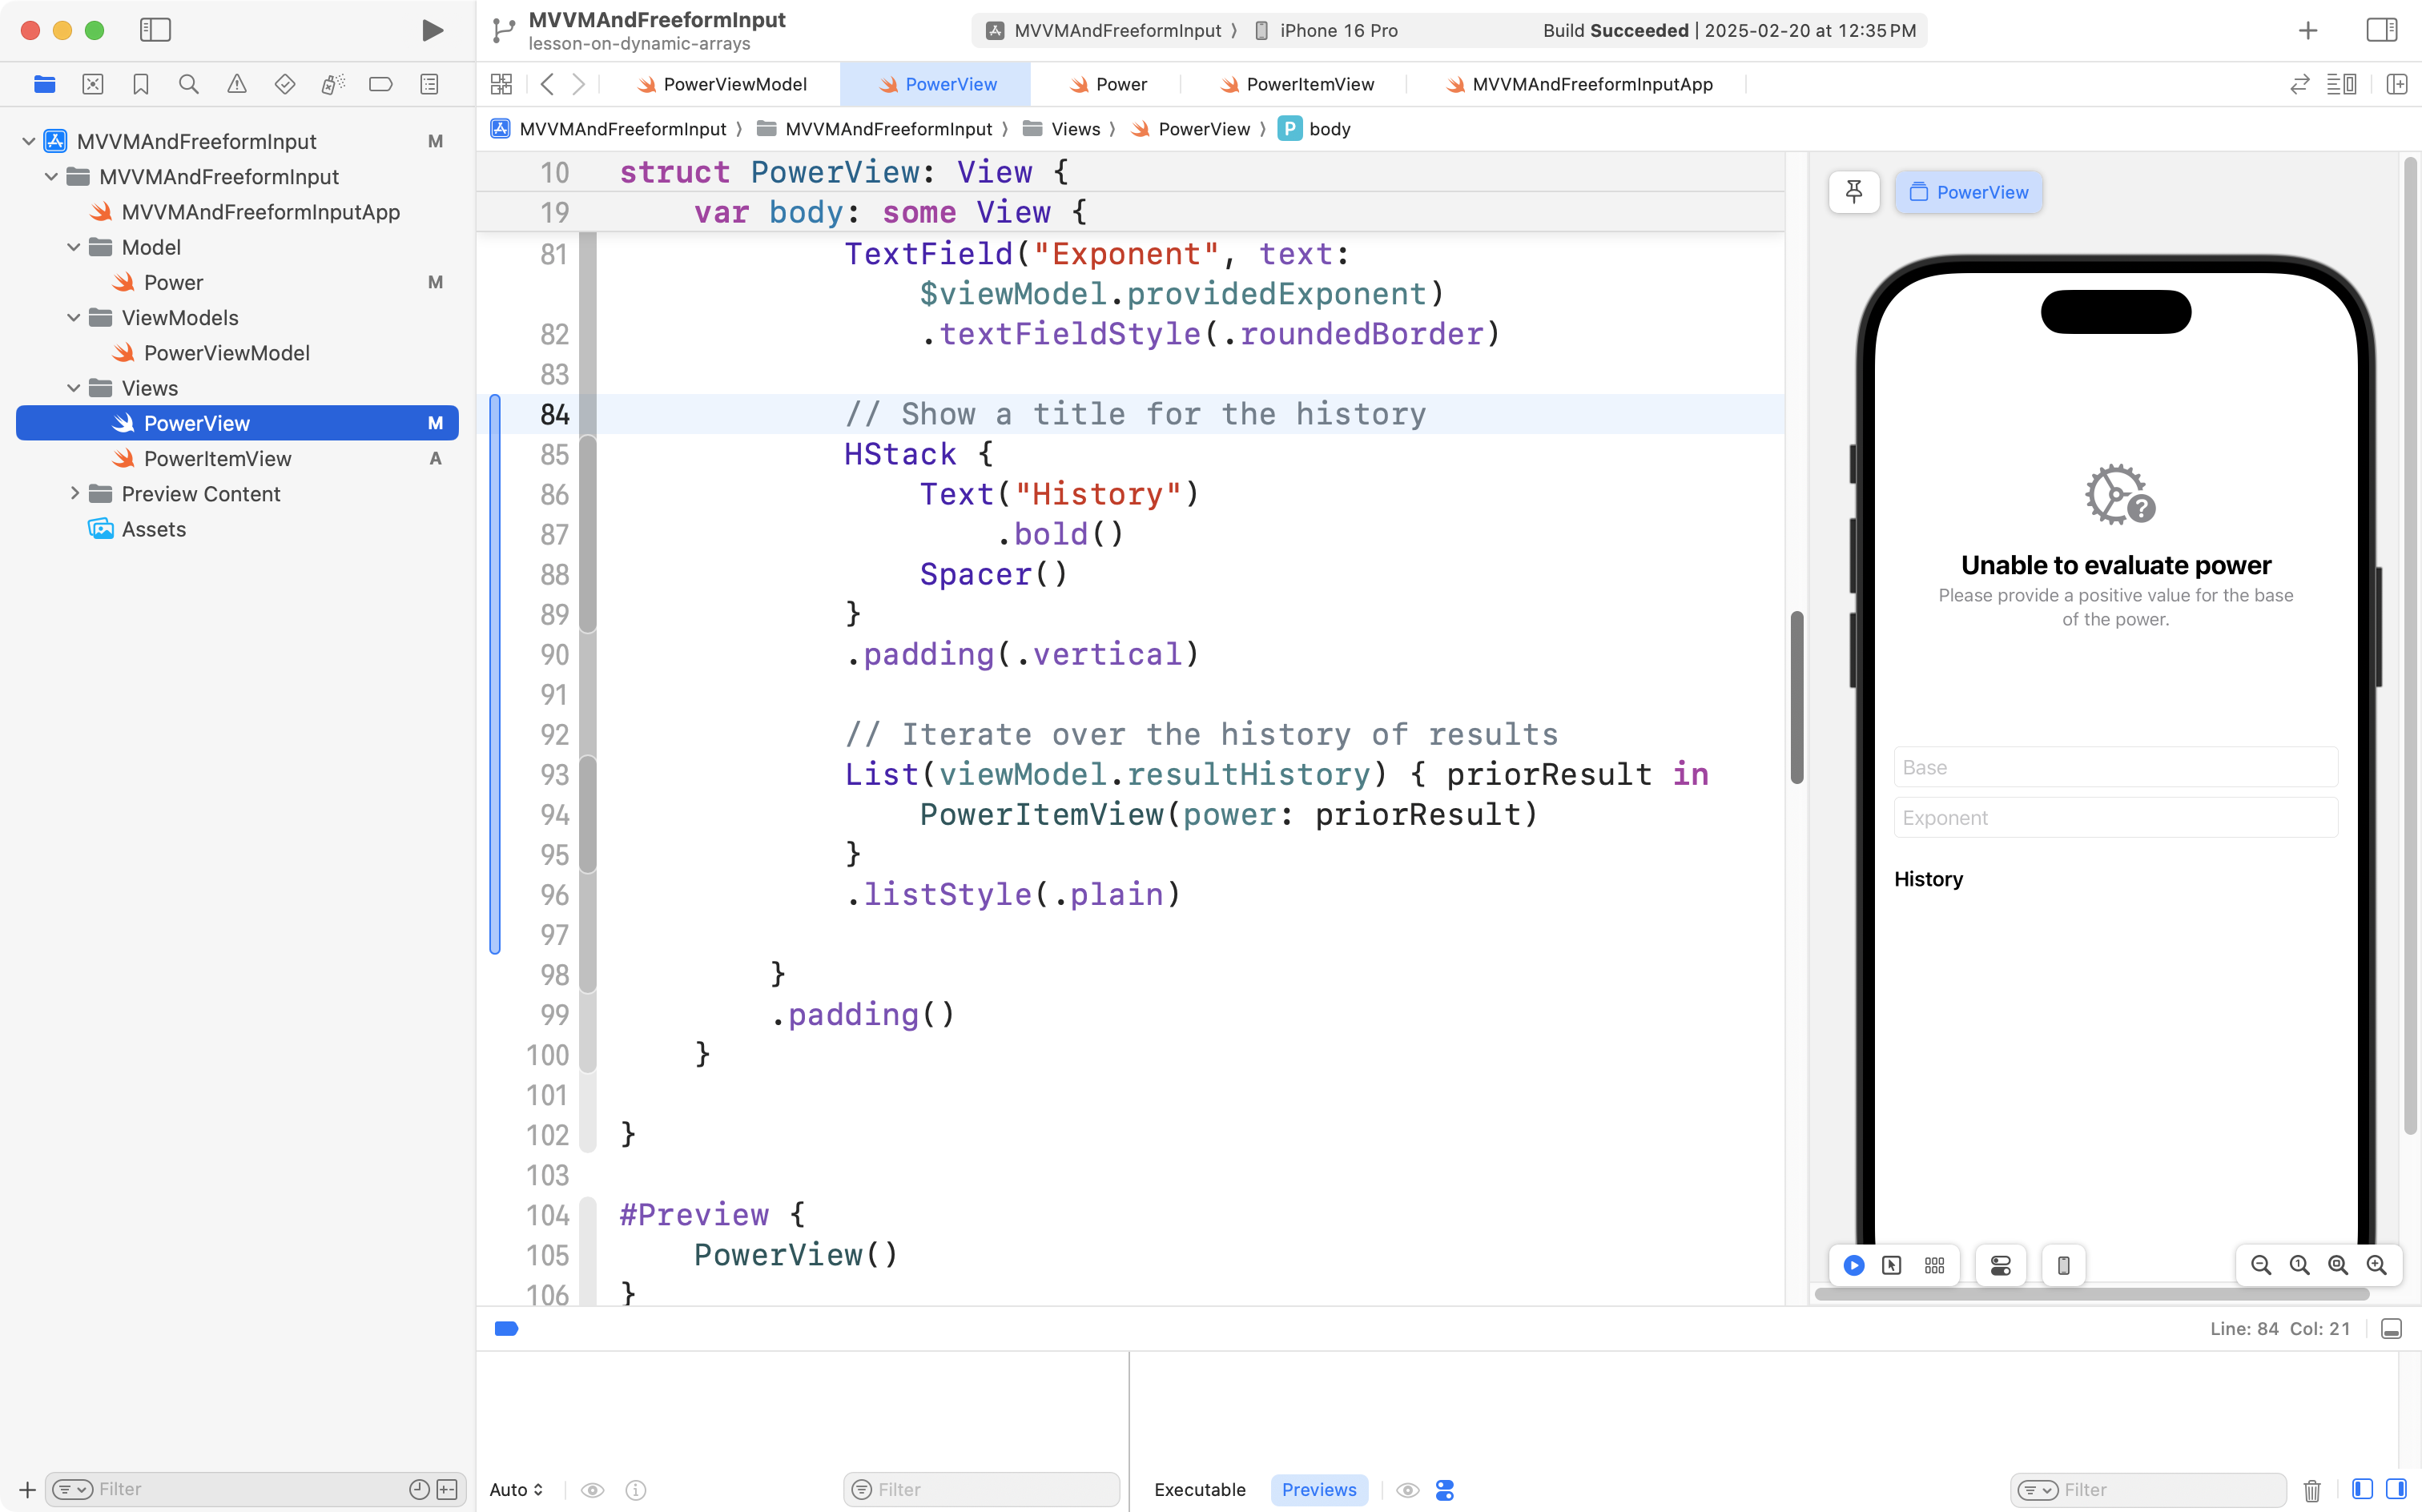
List(viewModel.resultHistory) { priorResult in
PowerItemView(power: priorResult)
}
.listStyle(.plain)Then locate the Spacer at the bottom of the body property in PowerView:
Replace the Spacer with the code from above, like this:
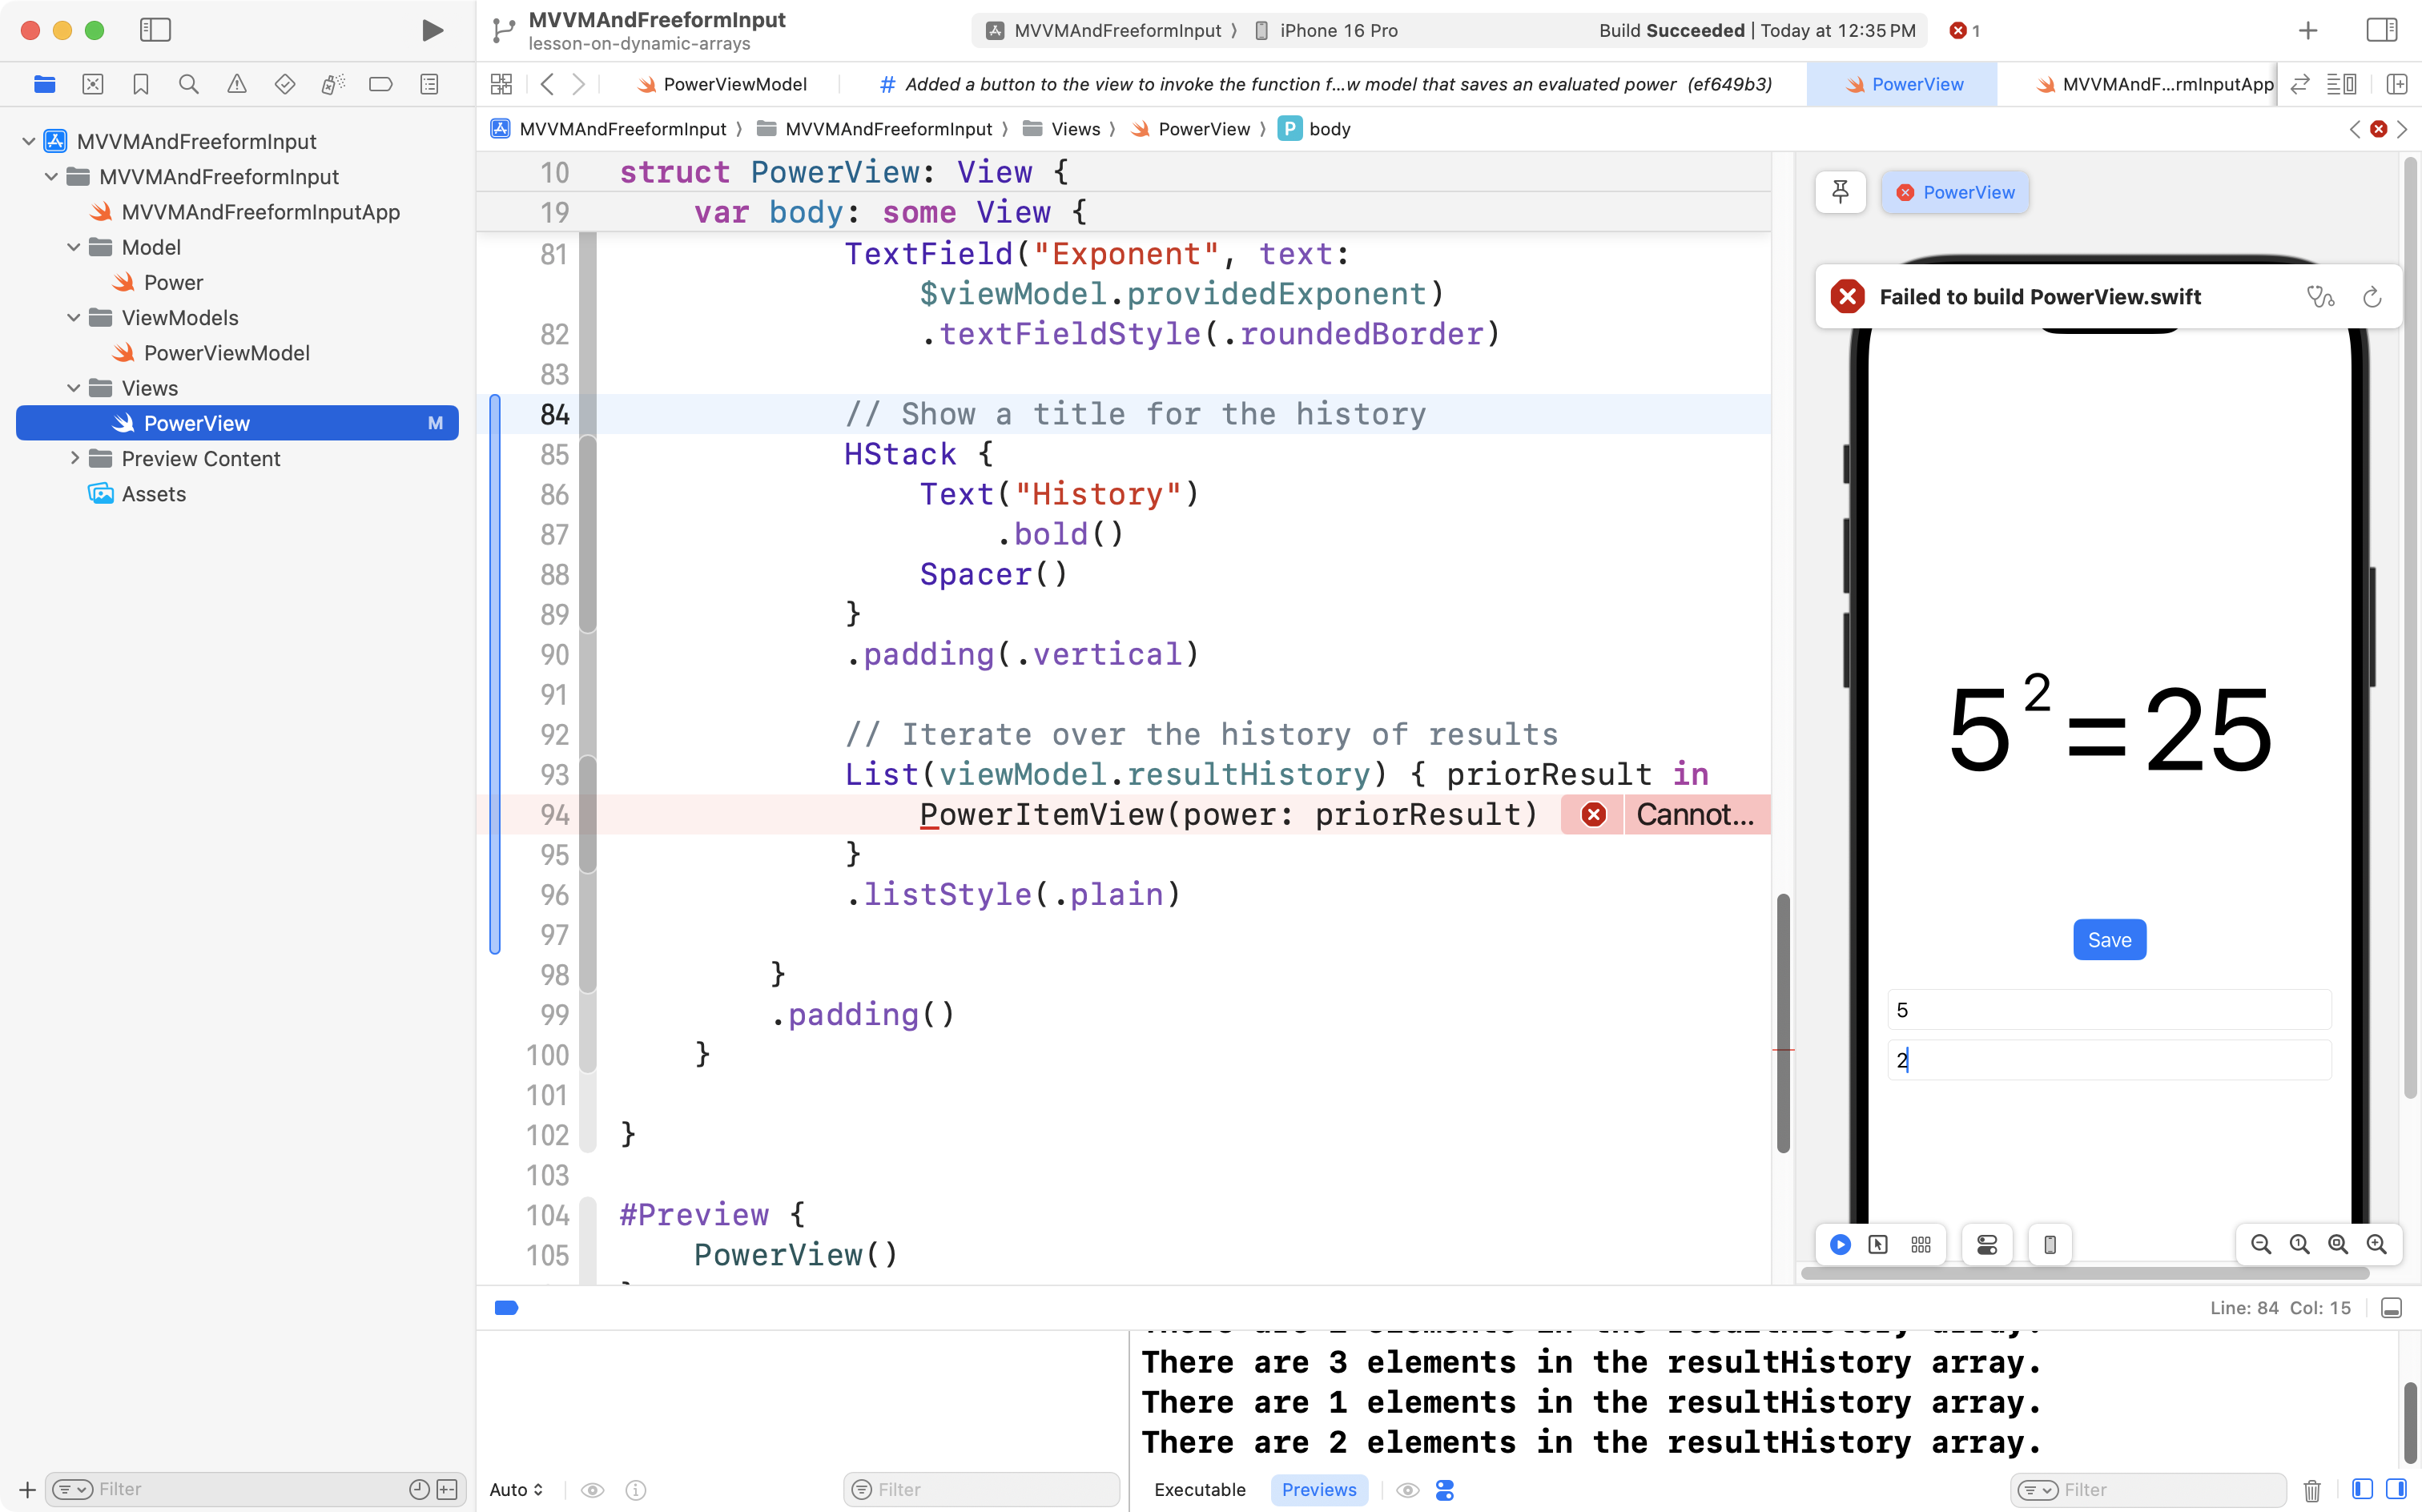
You will immediately see a compiler error, because there is currently no structure in your project named PowerItemView.
You already have plenty of experience creating helper views – the purpose of this tutorial to explain how to mutate and display an array at run-time in an app – so, please just copy this helper view code into your clipboard:
import SwiftUI

struct PowerItemView: View {

    // MARK: Stored properties
    let power: Power

    // MARK: Computed properties
    var body: some View {

        HStack {
            // Show the provided base, exponent, and result
            // in an arrangement that looks the same as how
            // we write a power on paper in math class
            HStack(alignment: .center) {
                HStack(alignment: .top) {

                    Text("\(power.base.formatted())")
                        .font(.largeTitle)

                    Text("\(power.exponent)")
                        .font(.title2)
                }
                HStack {

                    Text("=")
                        .font(.largeTitle)

                    Text("\(power.result.formatted())")
                        .font(.largeTitle)
                }
            }
            .lineLimit(1)
            .minimumScaleFactor(0.5)

            Spacer()
        }

    }
}

#Preview {
    PowerItemView(power: Power(base: 3, exponent: 2))
        .padding()
}
Then make a new SwiftUI View file named PowerItemView within the Views group:
… and then paste the code from your clipboard into the new view, replacing the default code that was provided by Xcode:
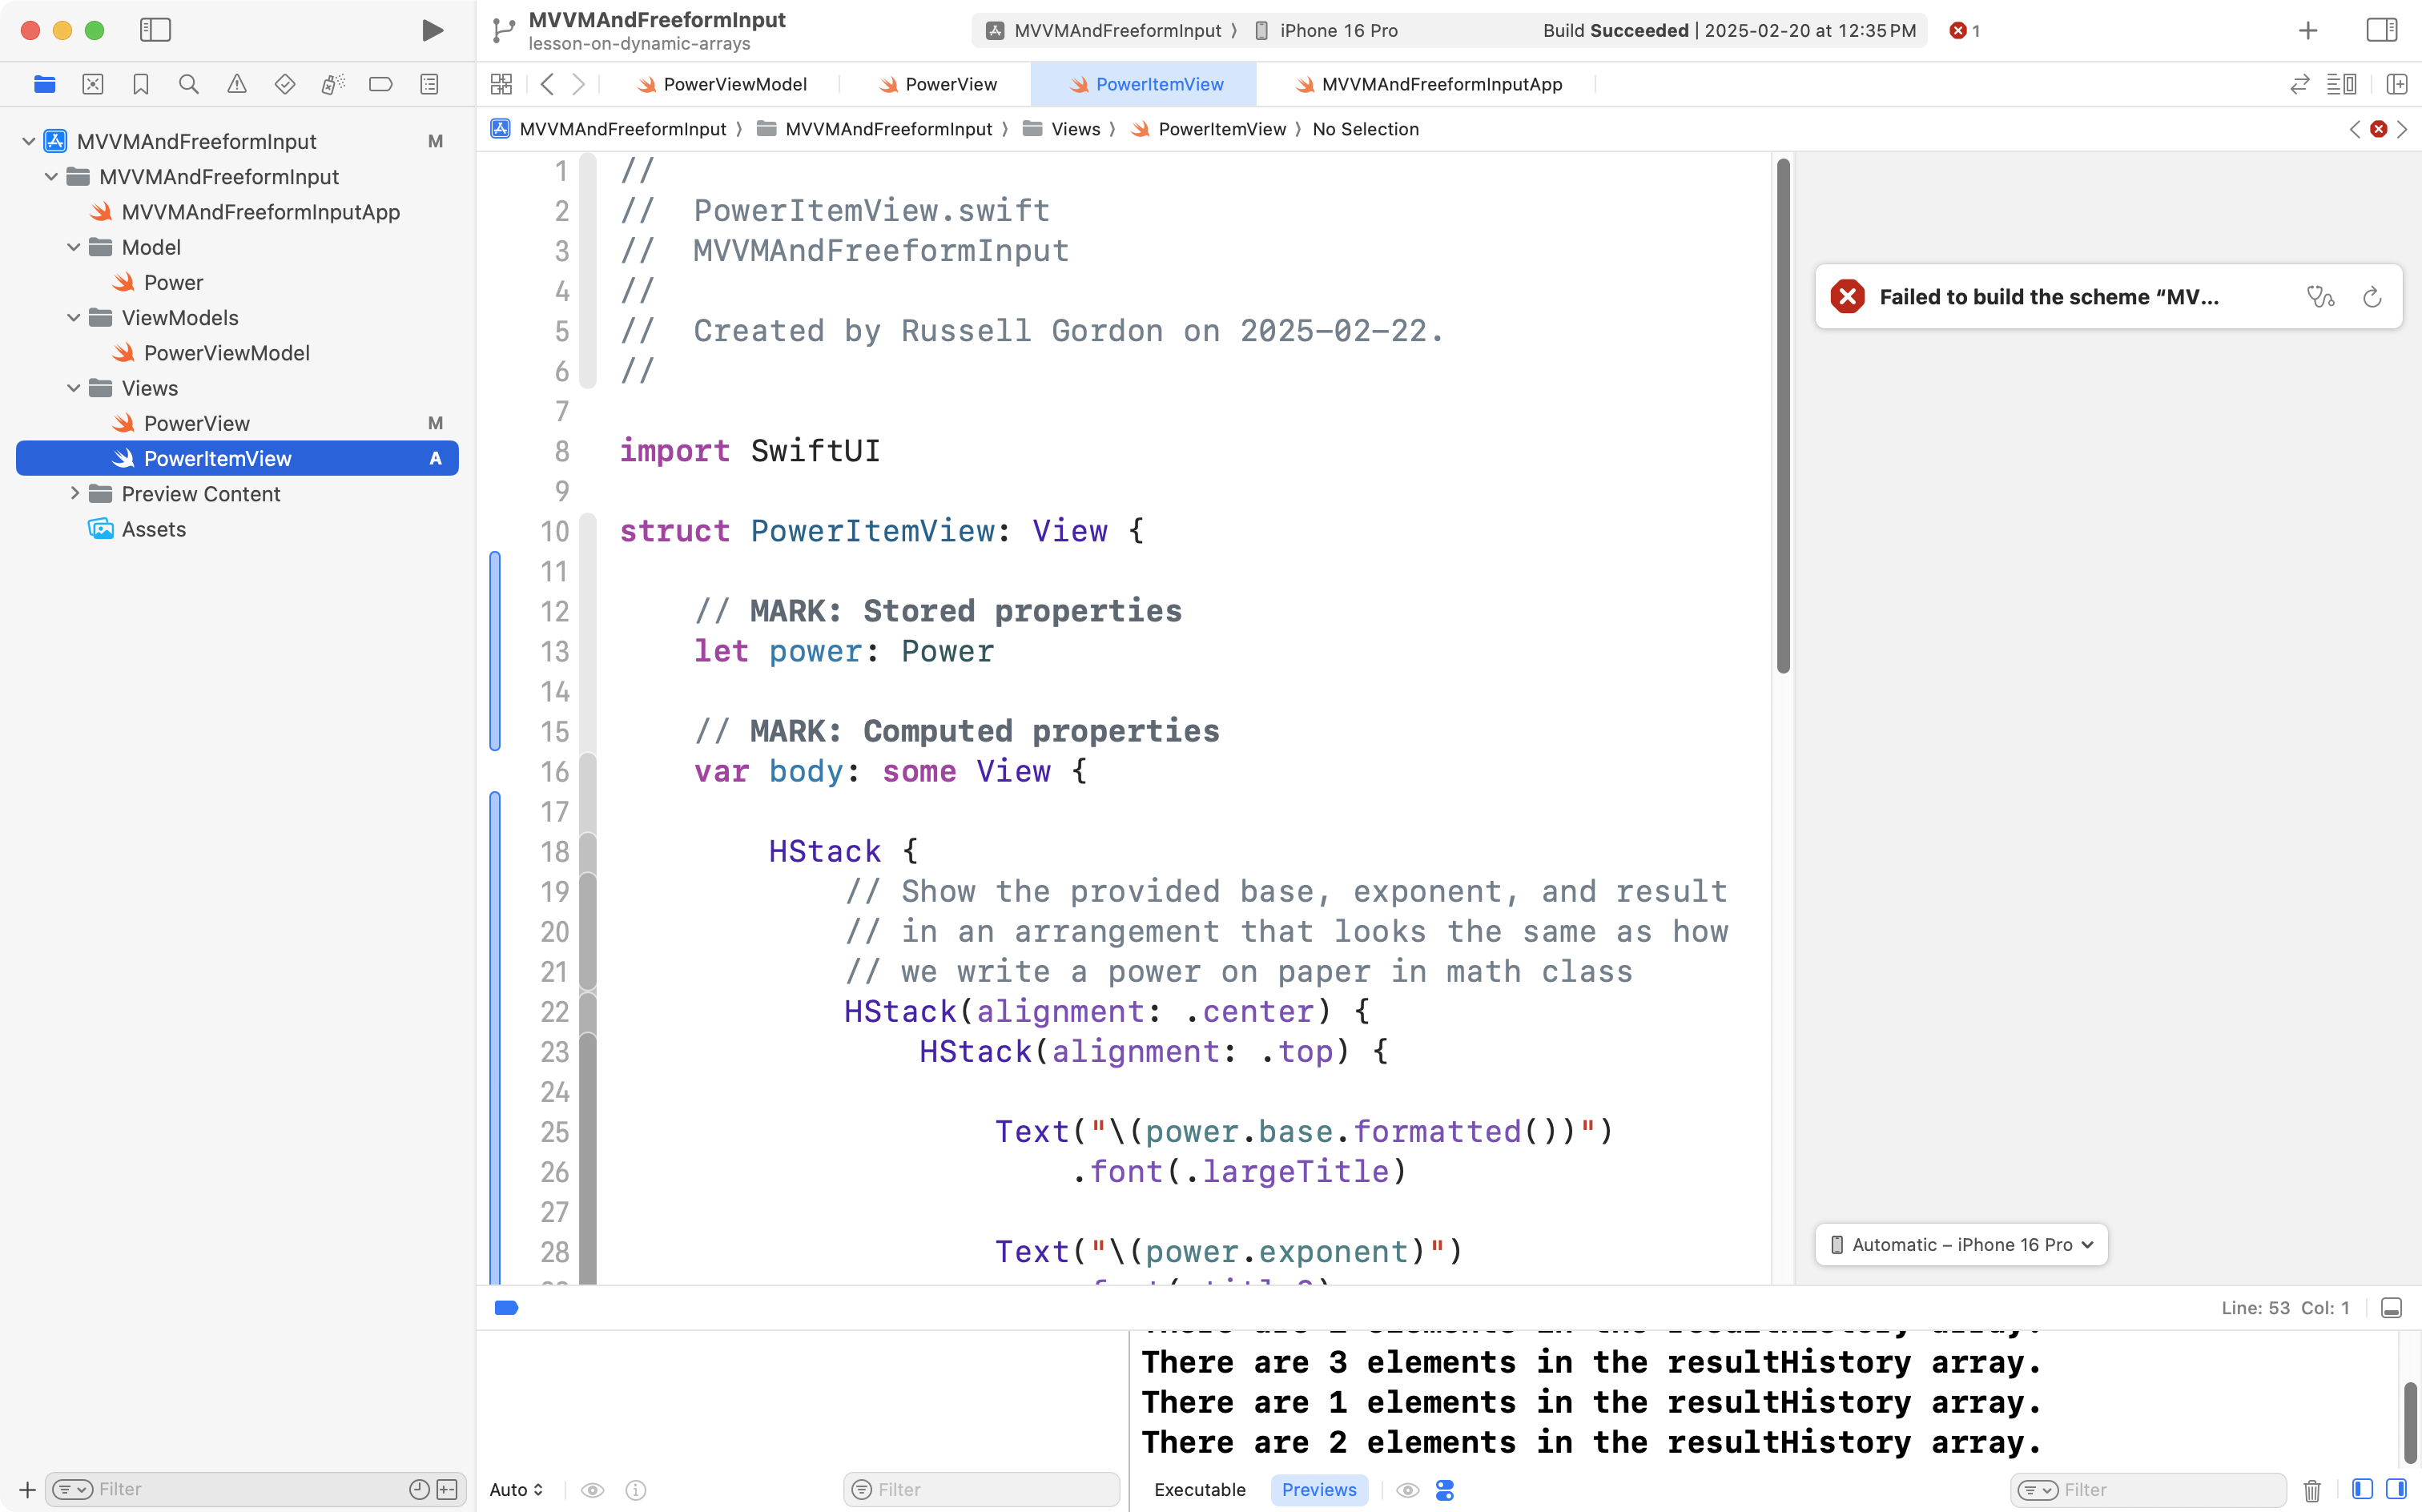
Now return to PowerView and the code that creates the scrollable list:
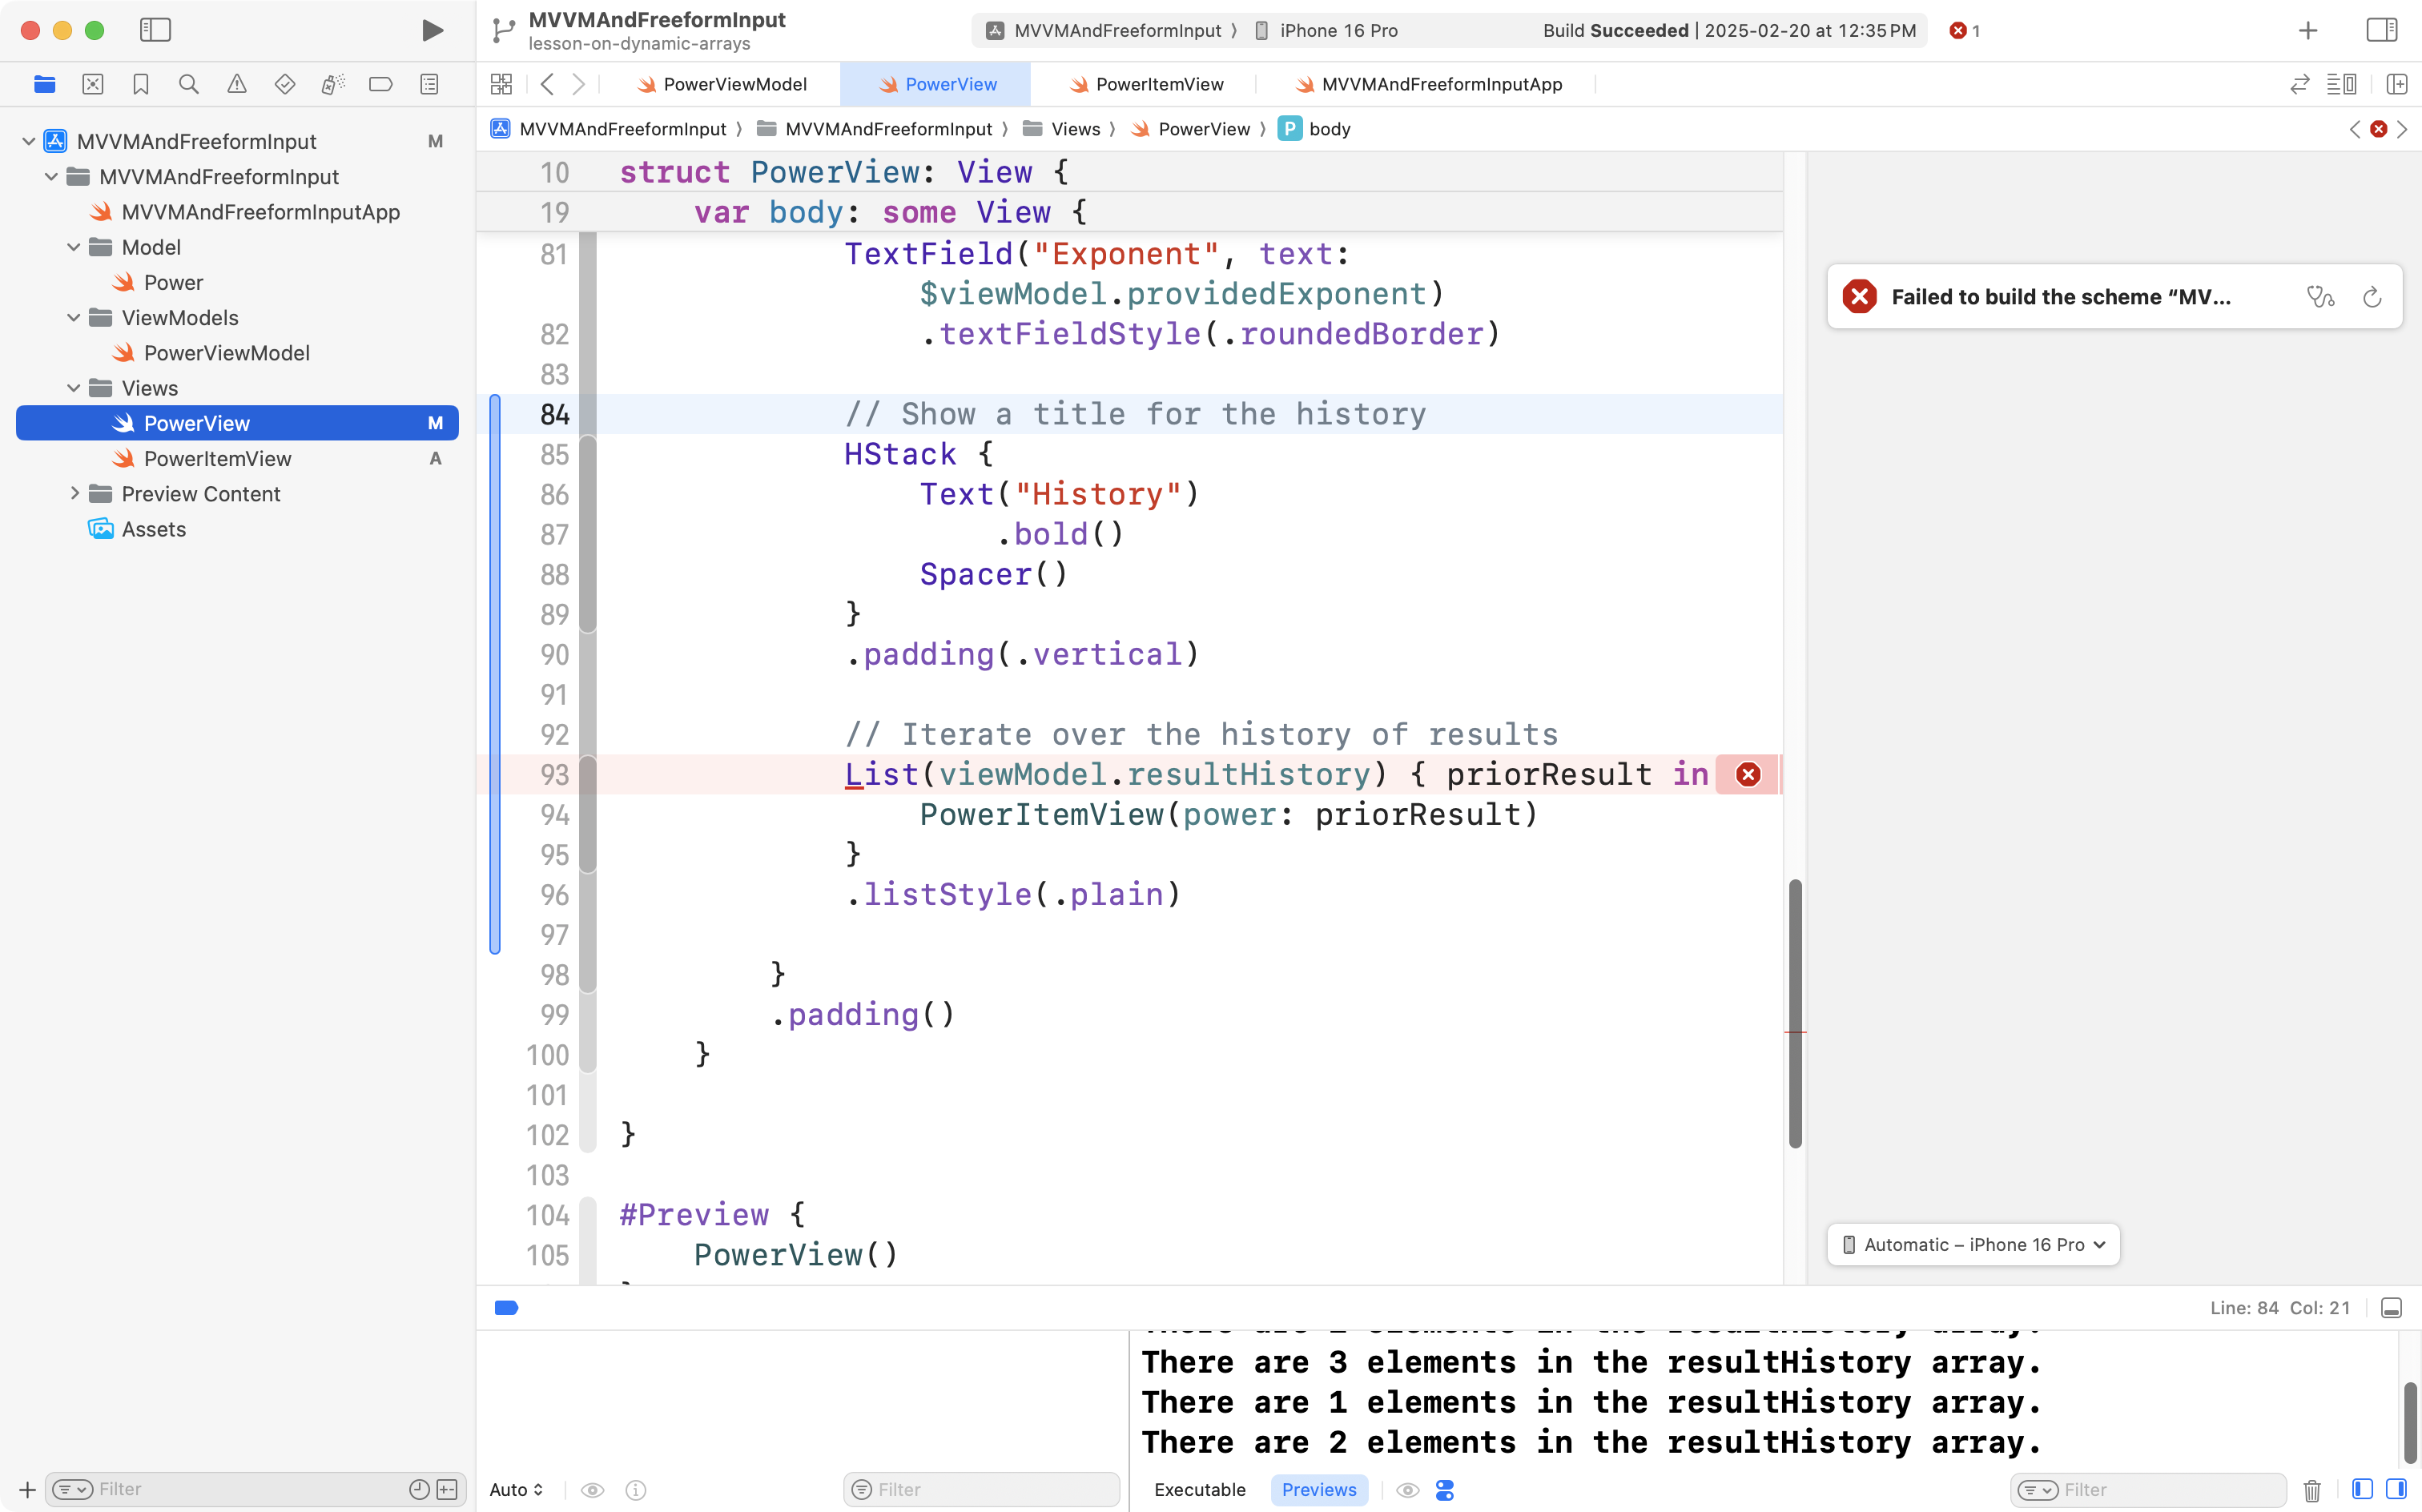
You should see that the error complaining about PowerItemView is gone, but, a new error has taken it’s place – there is a problem with the scrollable list.
Click the red bubble to see more details:
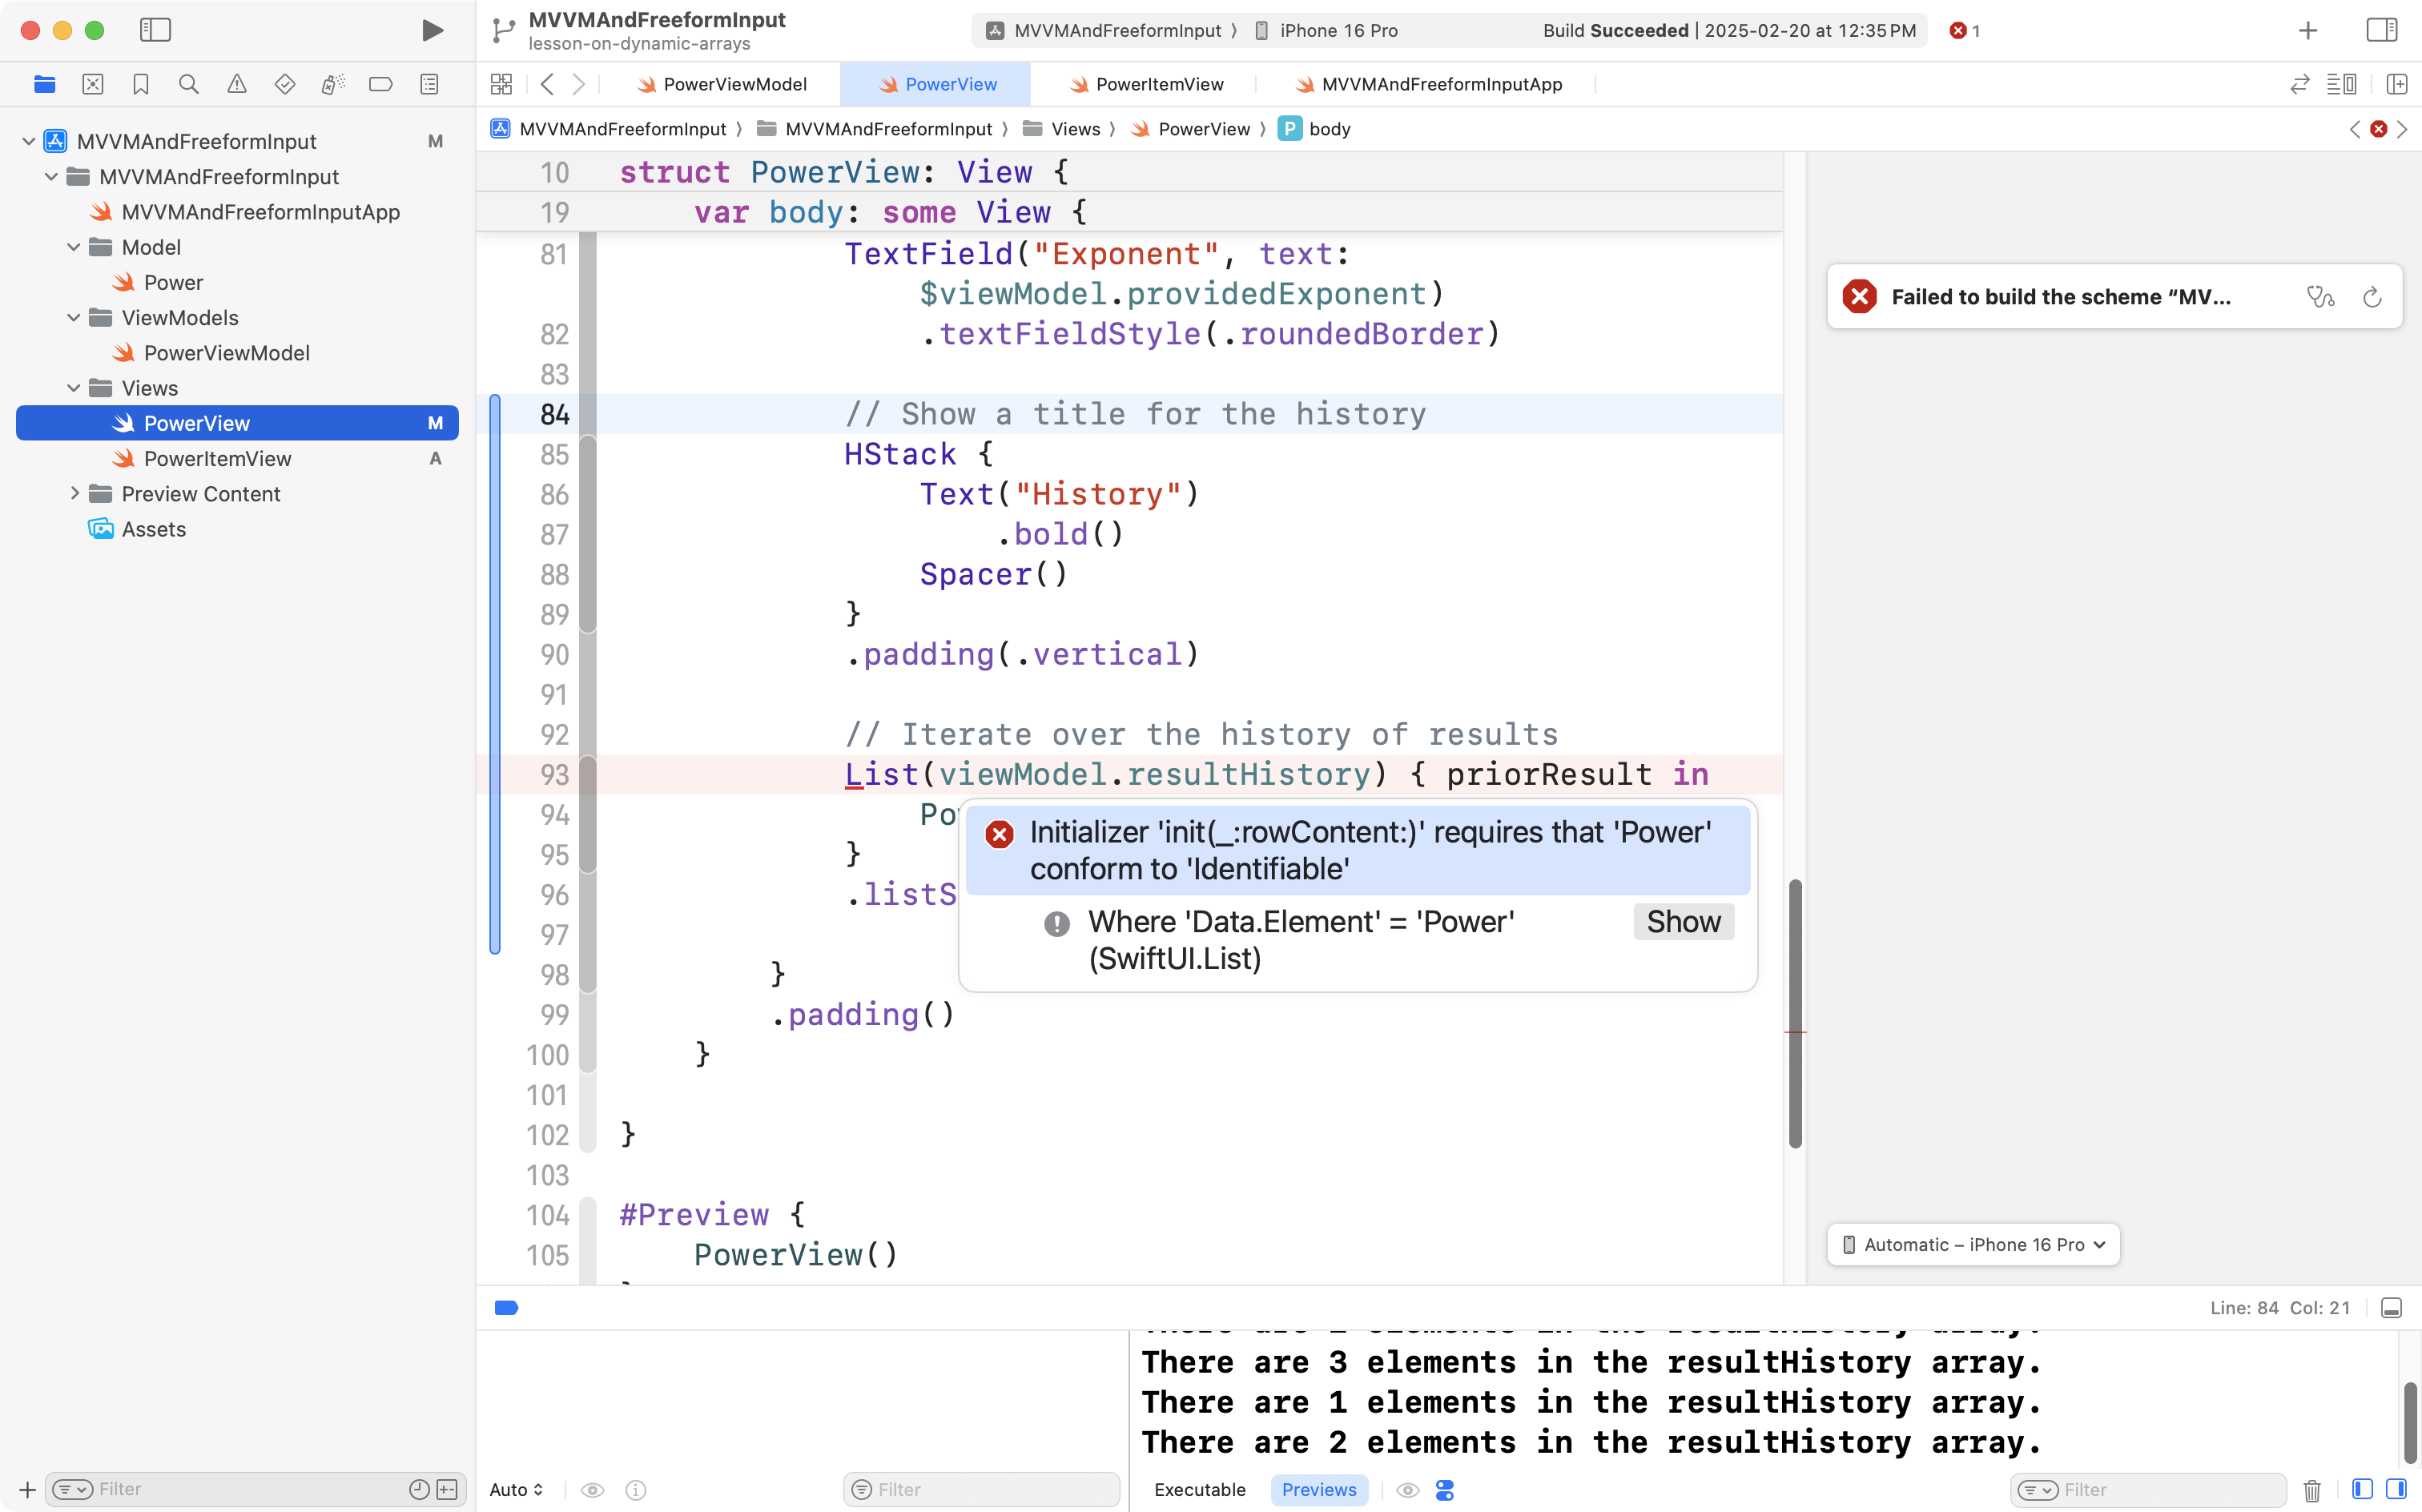
The problem is that our Power structure, in the model layer of our app, does not conform to the Identifiable protocol. Recall from earlier this year – any information shown in a scrollable list in a SwiftUI app must have a unique identifier.
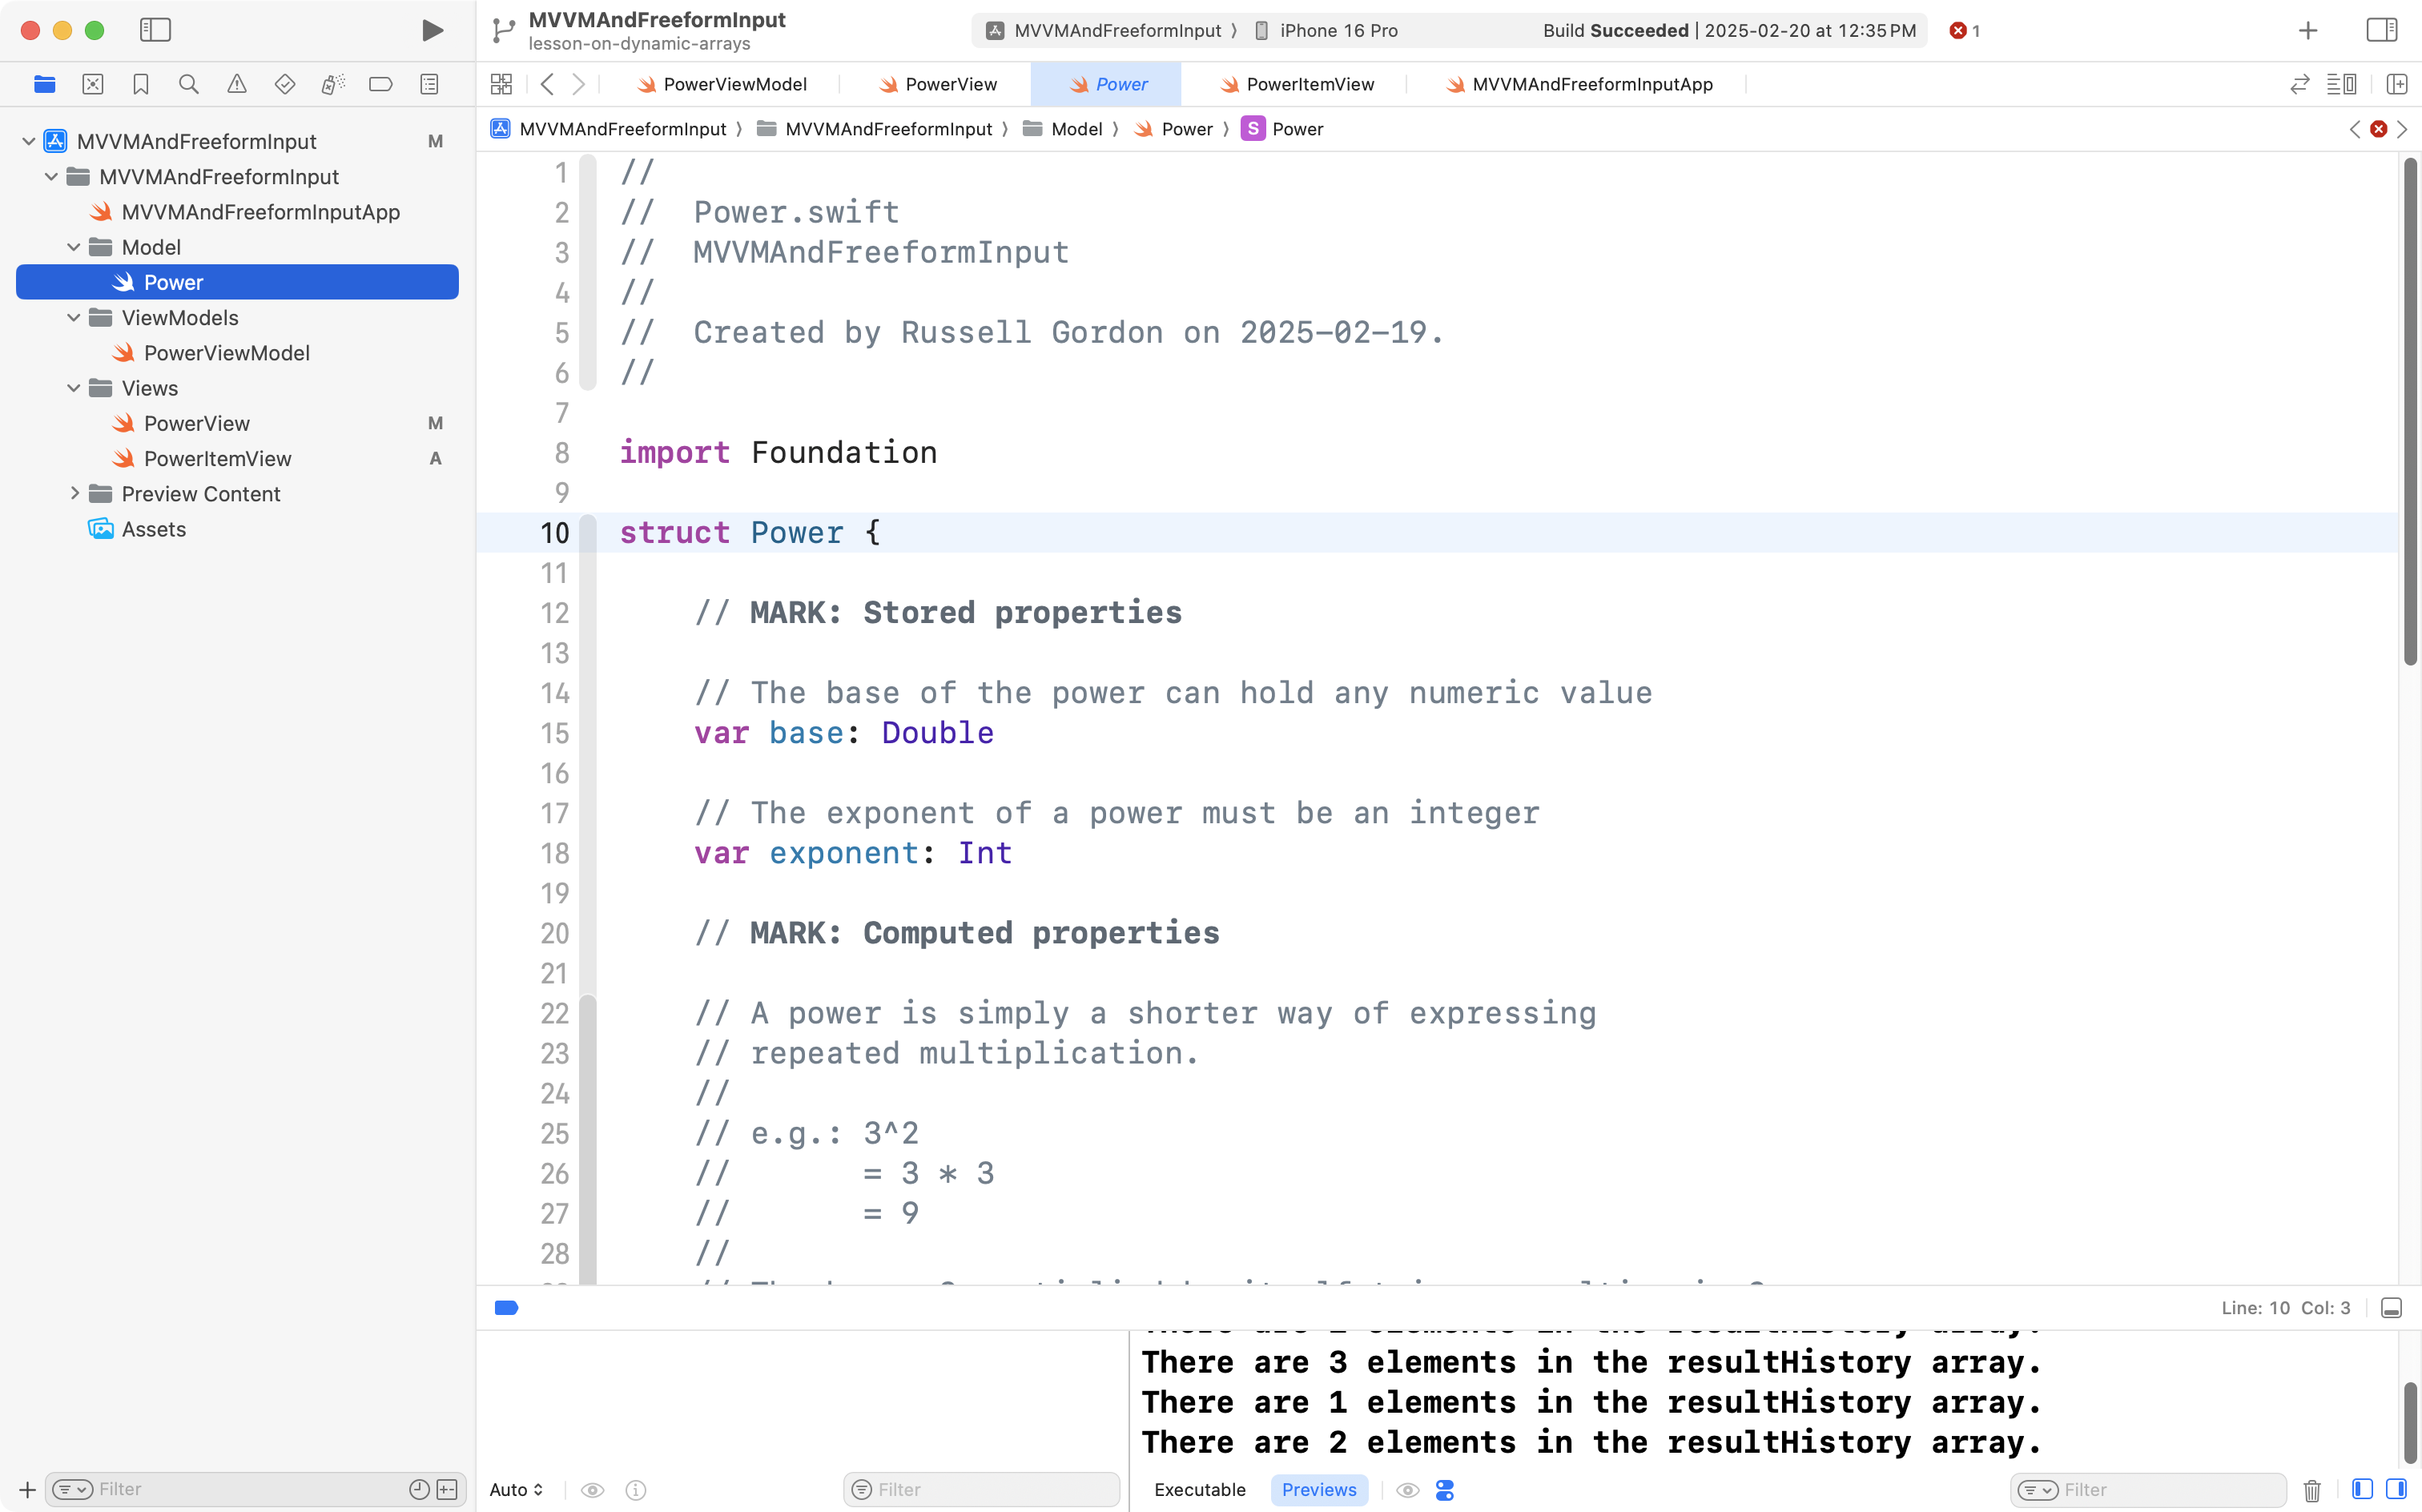
This is an easy problem to fix. Switch to the Power structure in your project:
Adjust the definition of the structure so that we promise to conform the structure to the Identifiable protocol:
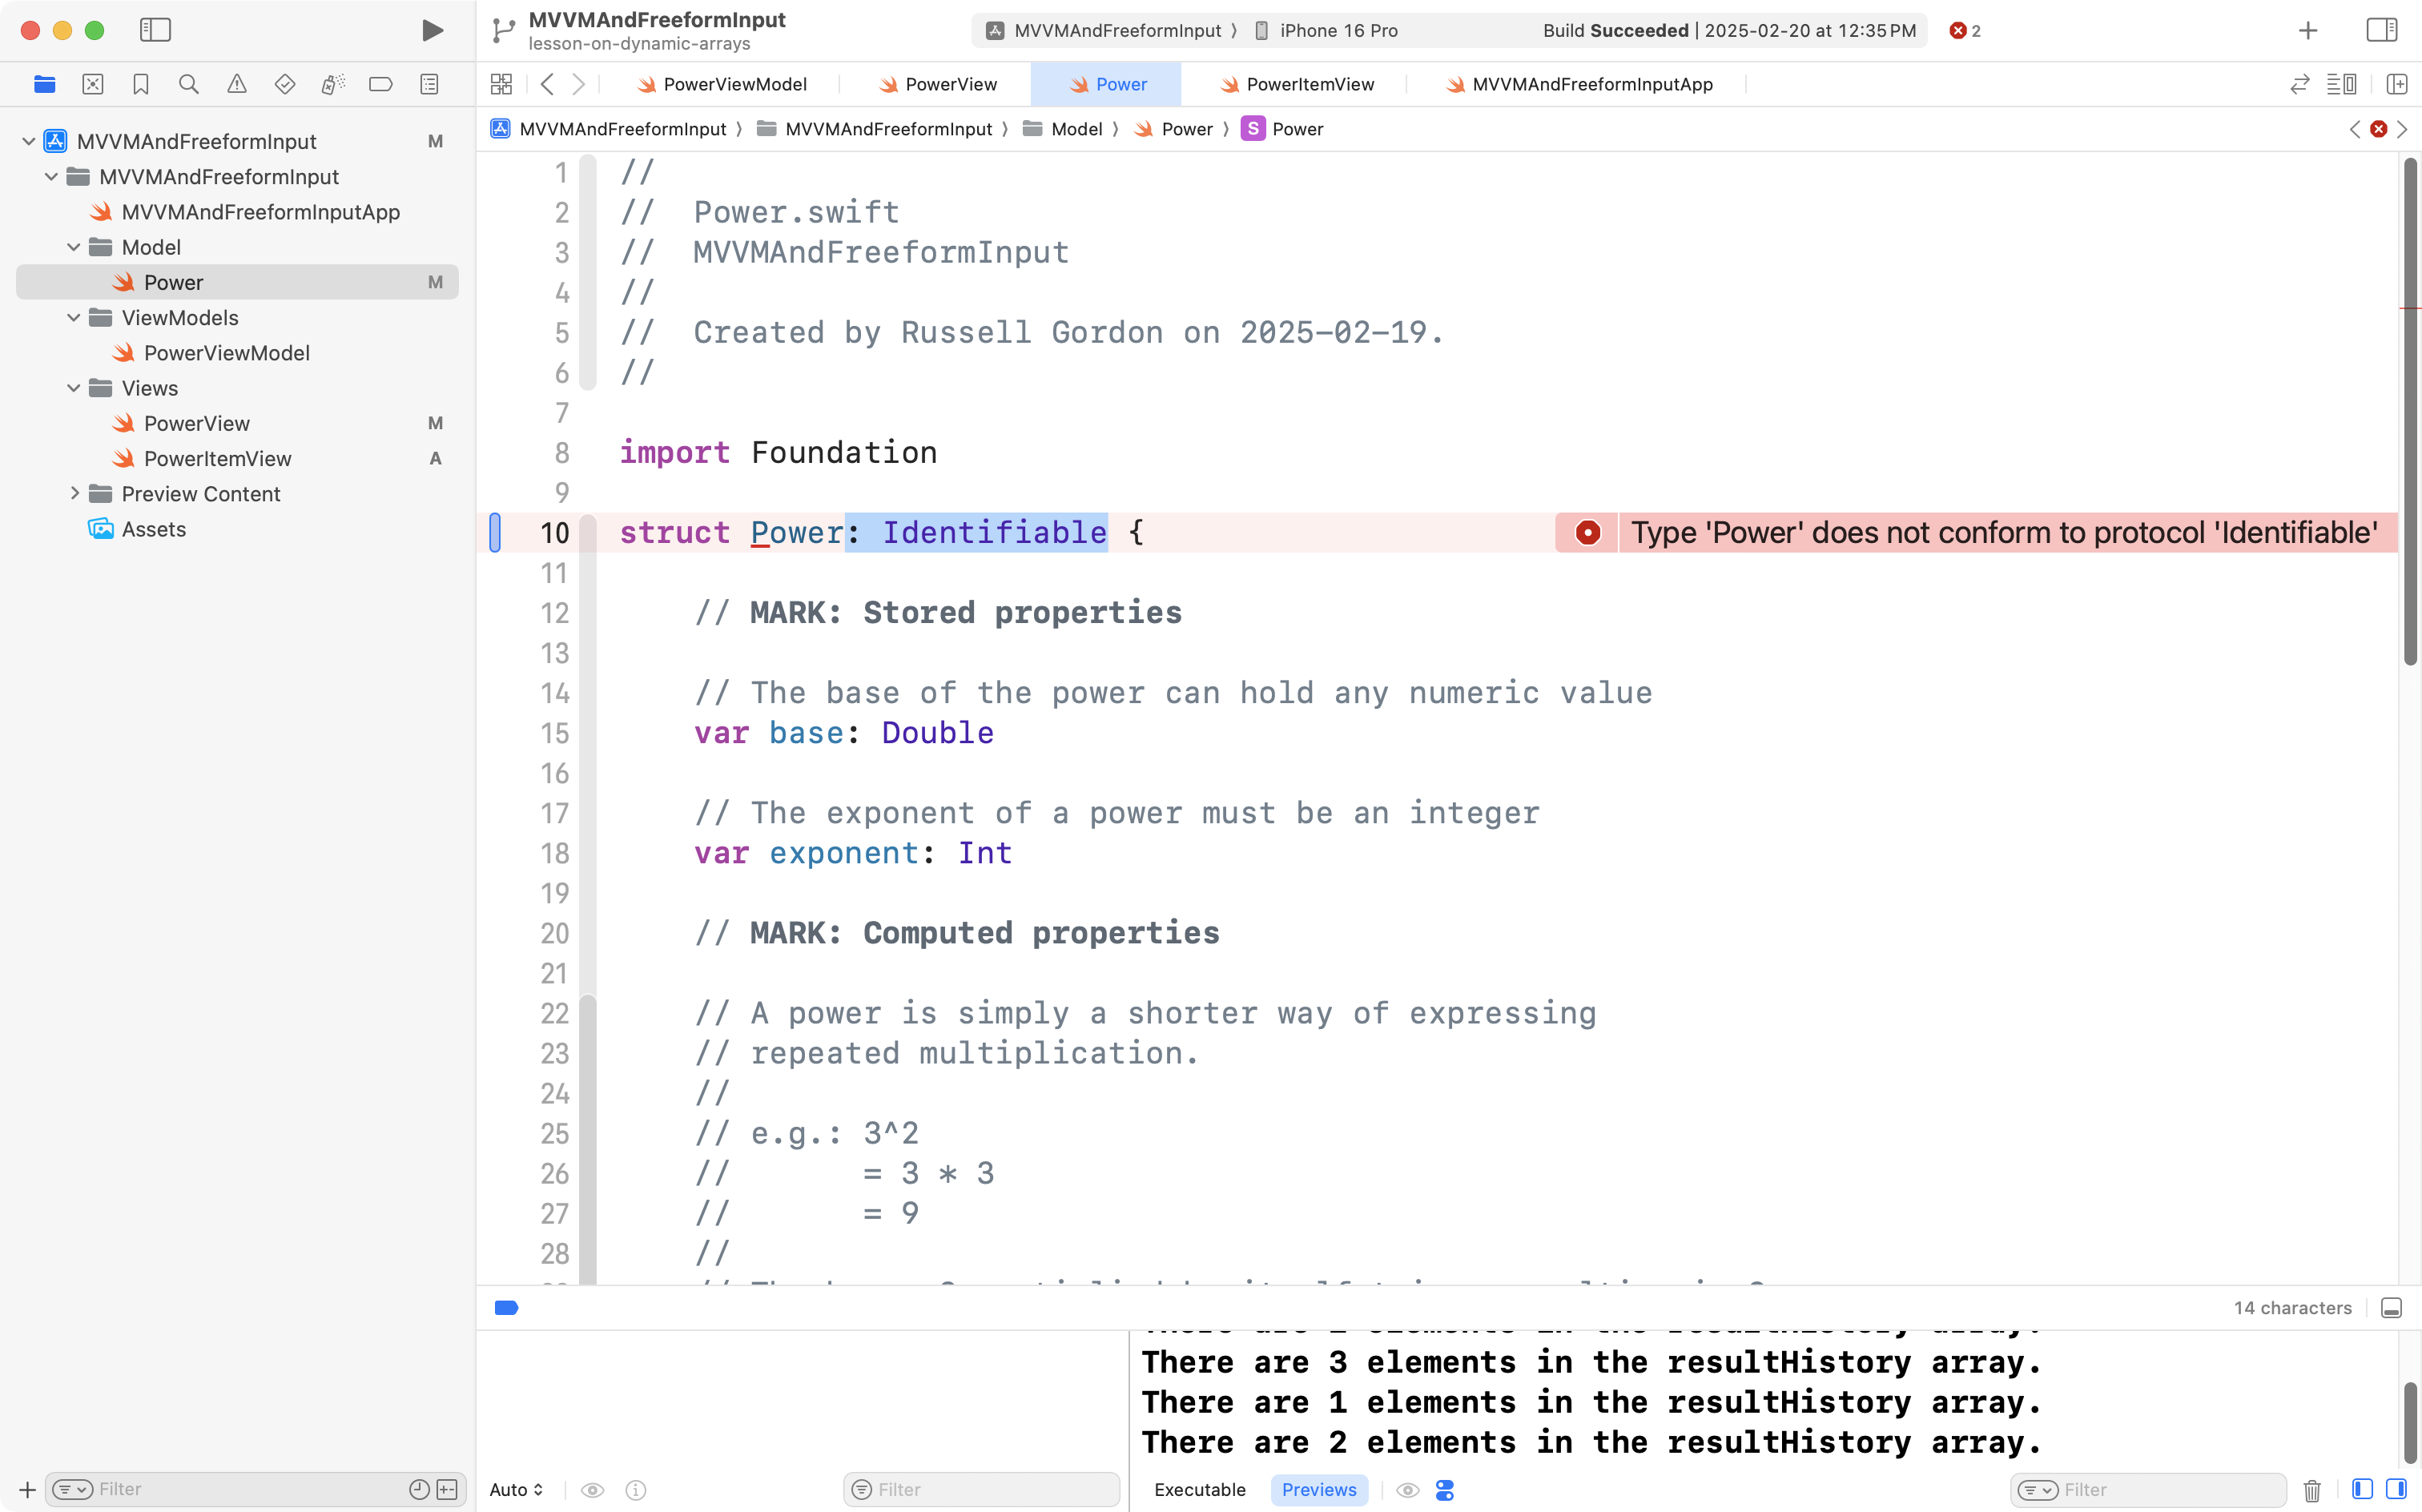
Then, we must in fact make the Power structure conform to the protocol – by giving it a stored property that holds a unique identifier:
Now that the compiler errors have been resolved, we can review what we have done.
First, return to PowerItemView, and if necessary, press Option-Command-P to restart Xcode Previews:
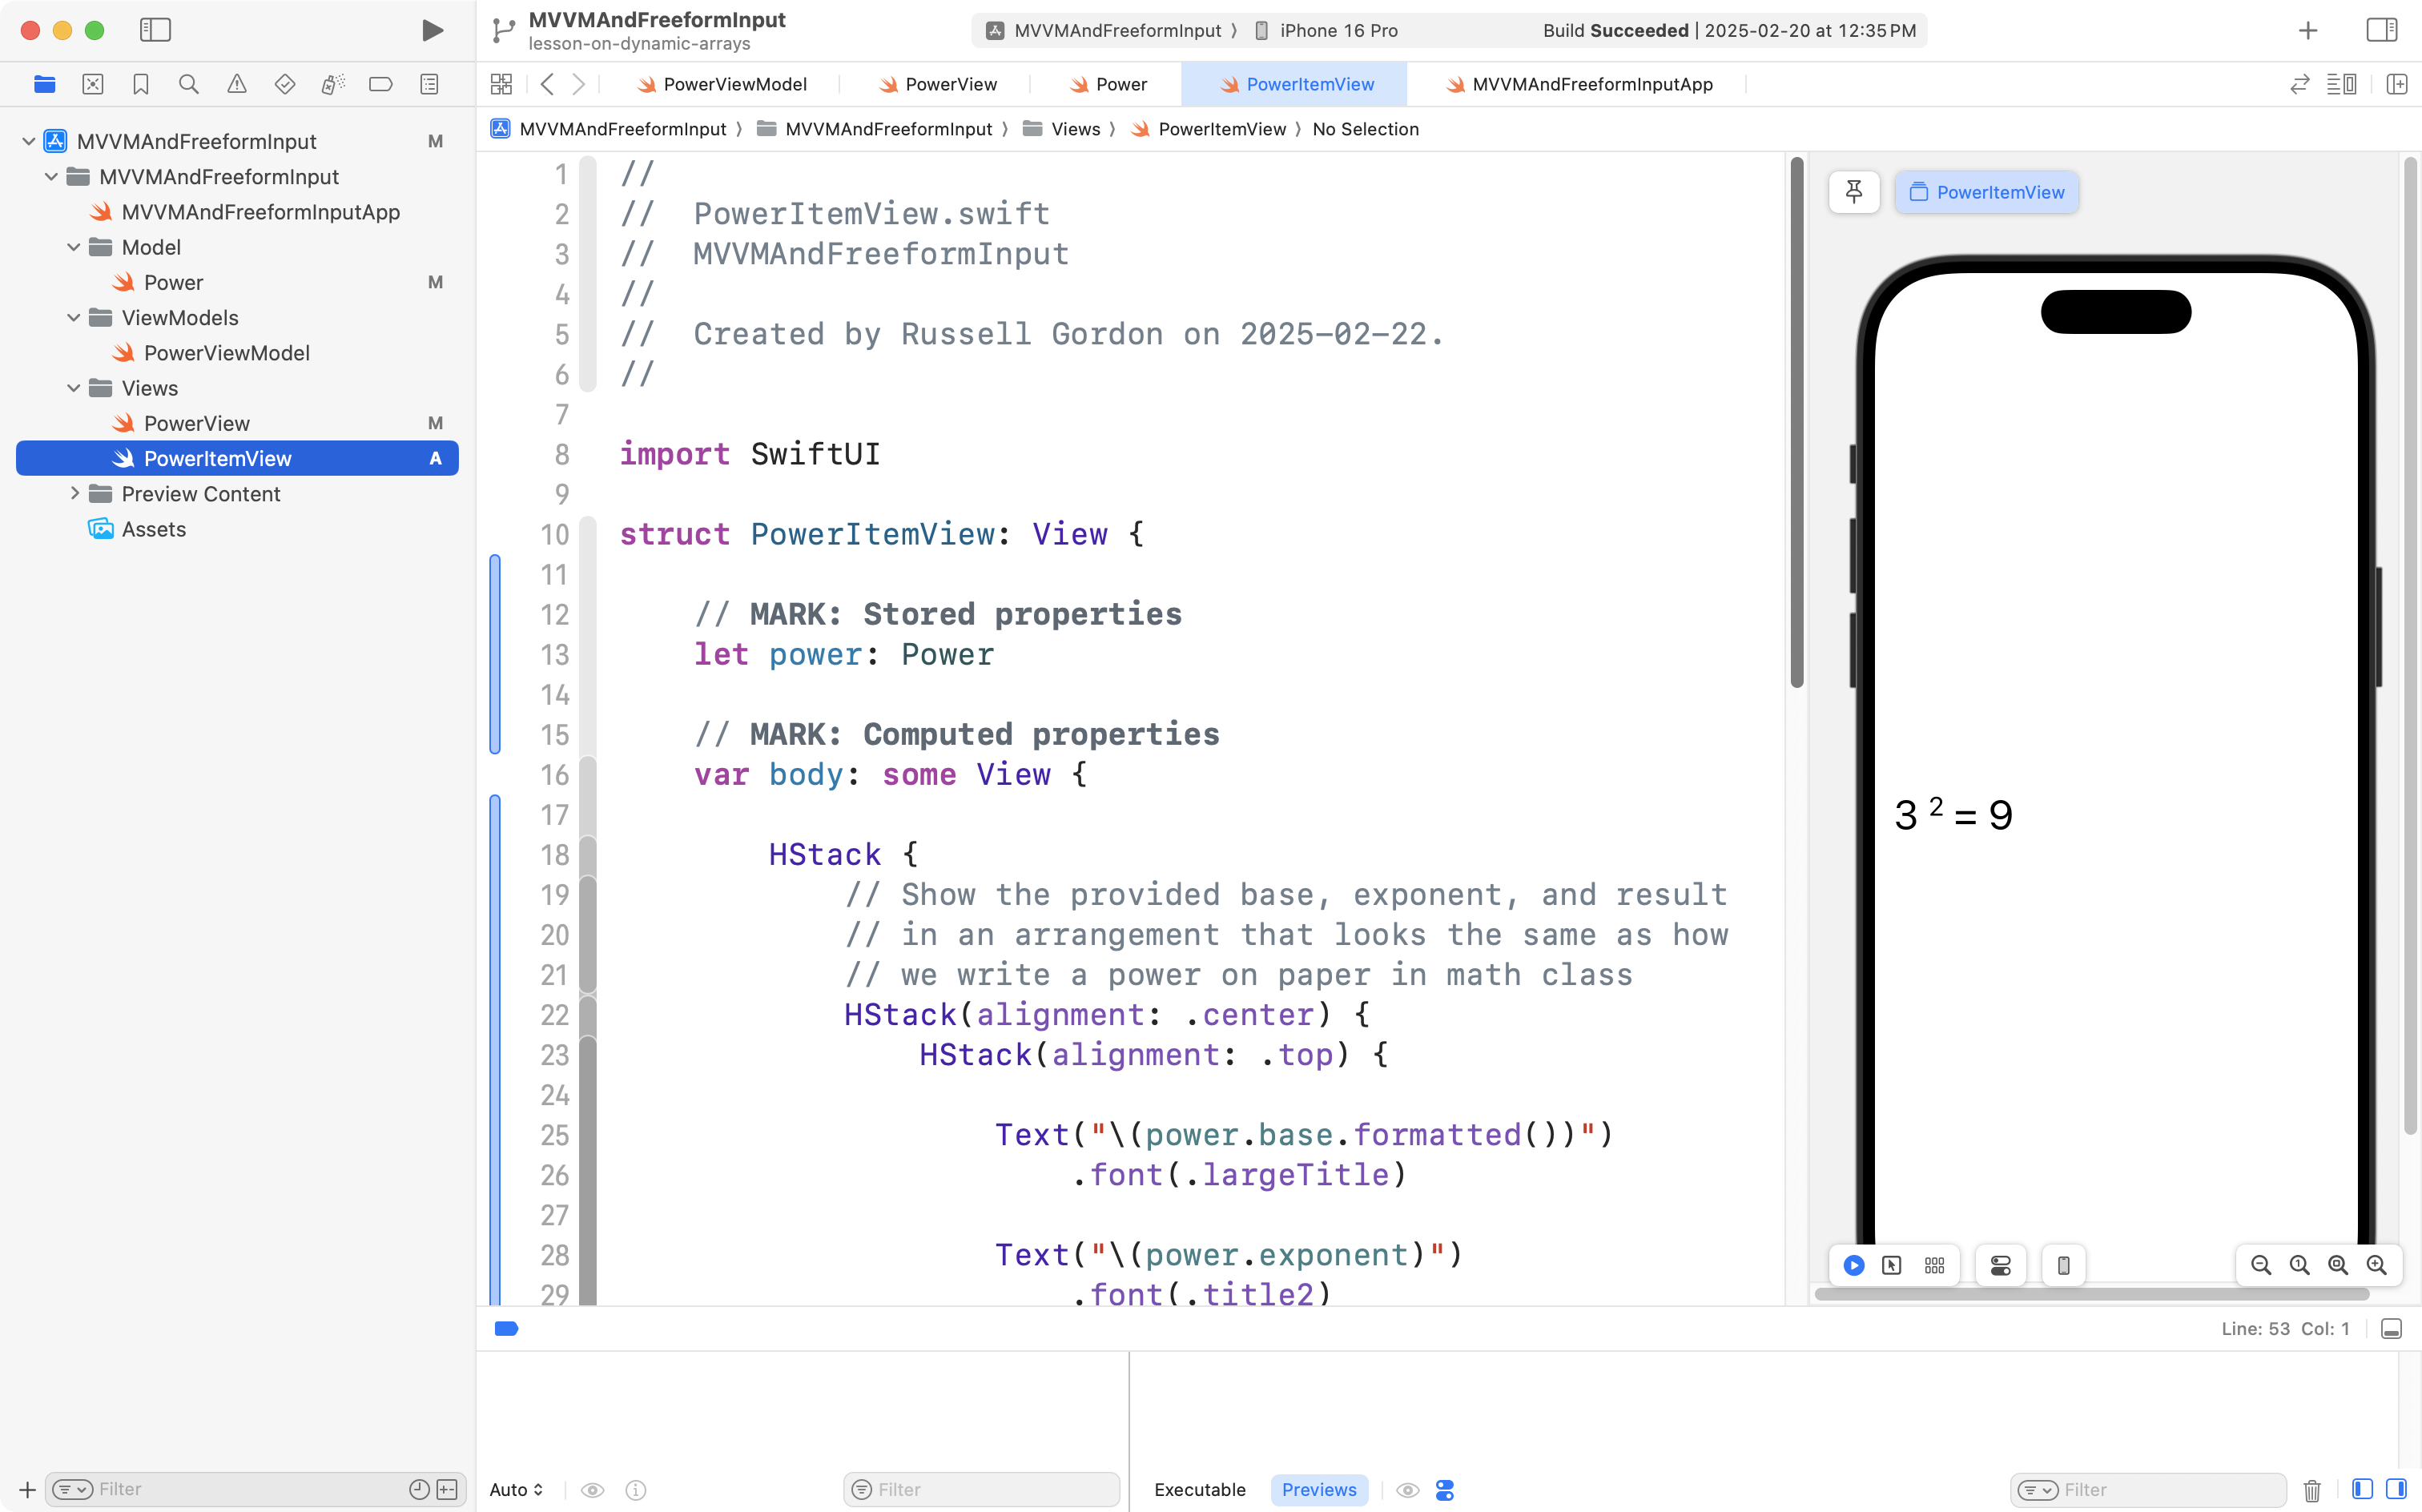
You should see a preview of the helper view’s user interface.
Scroll to the bottom of this file, where the preview is created:

PowerItemView has one parameter, or question, that must be answered for it to do it’s job – what power should it display? We are telling it to display an instance of the Power structure with a base of 3 and an exponent of 2.
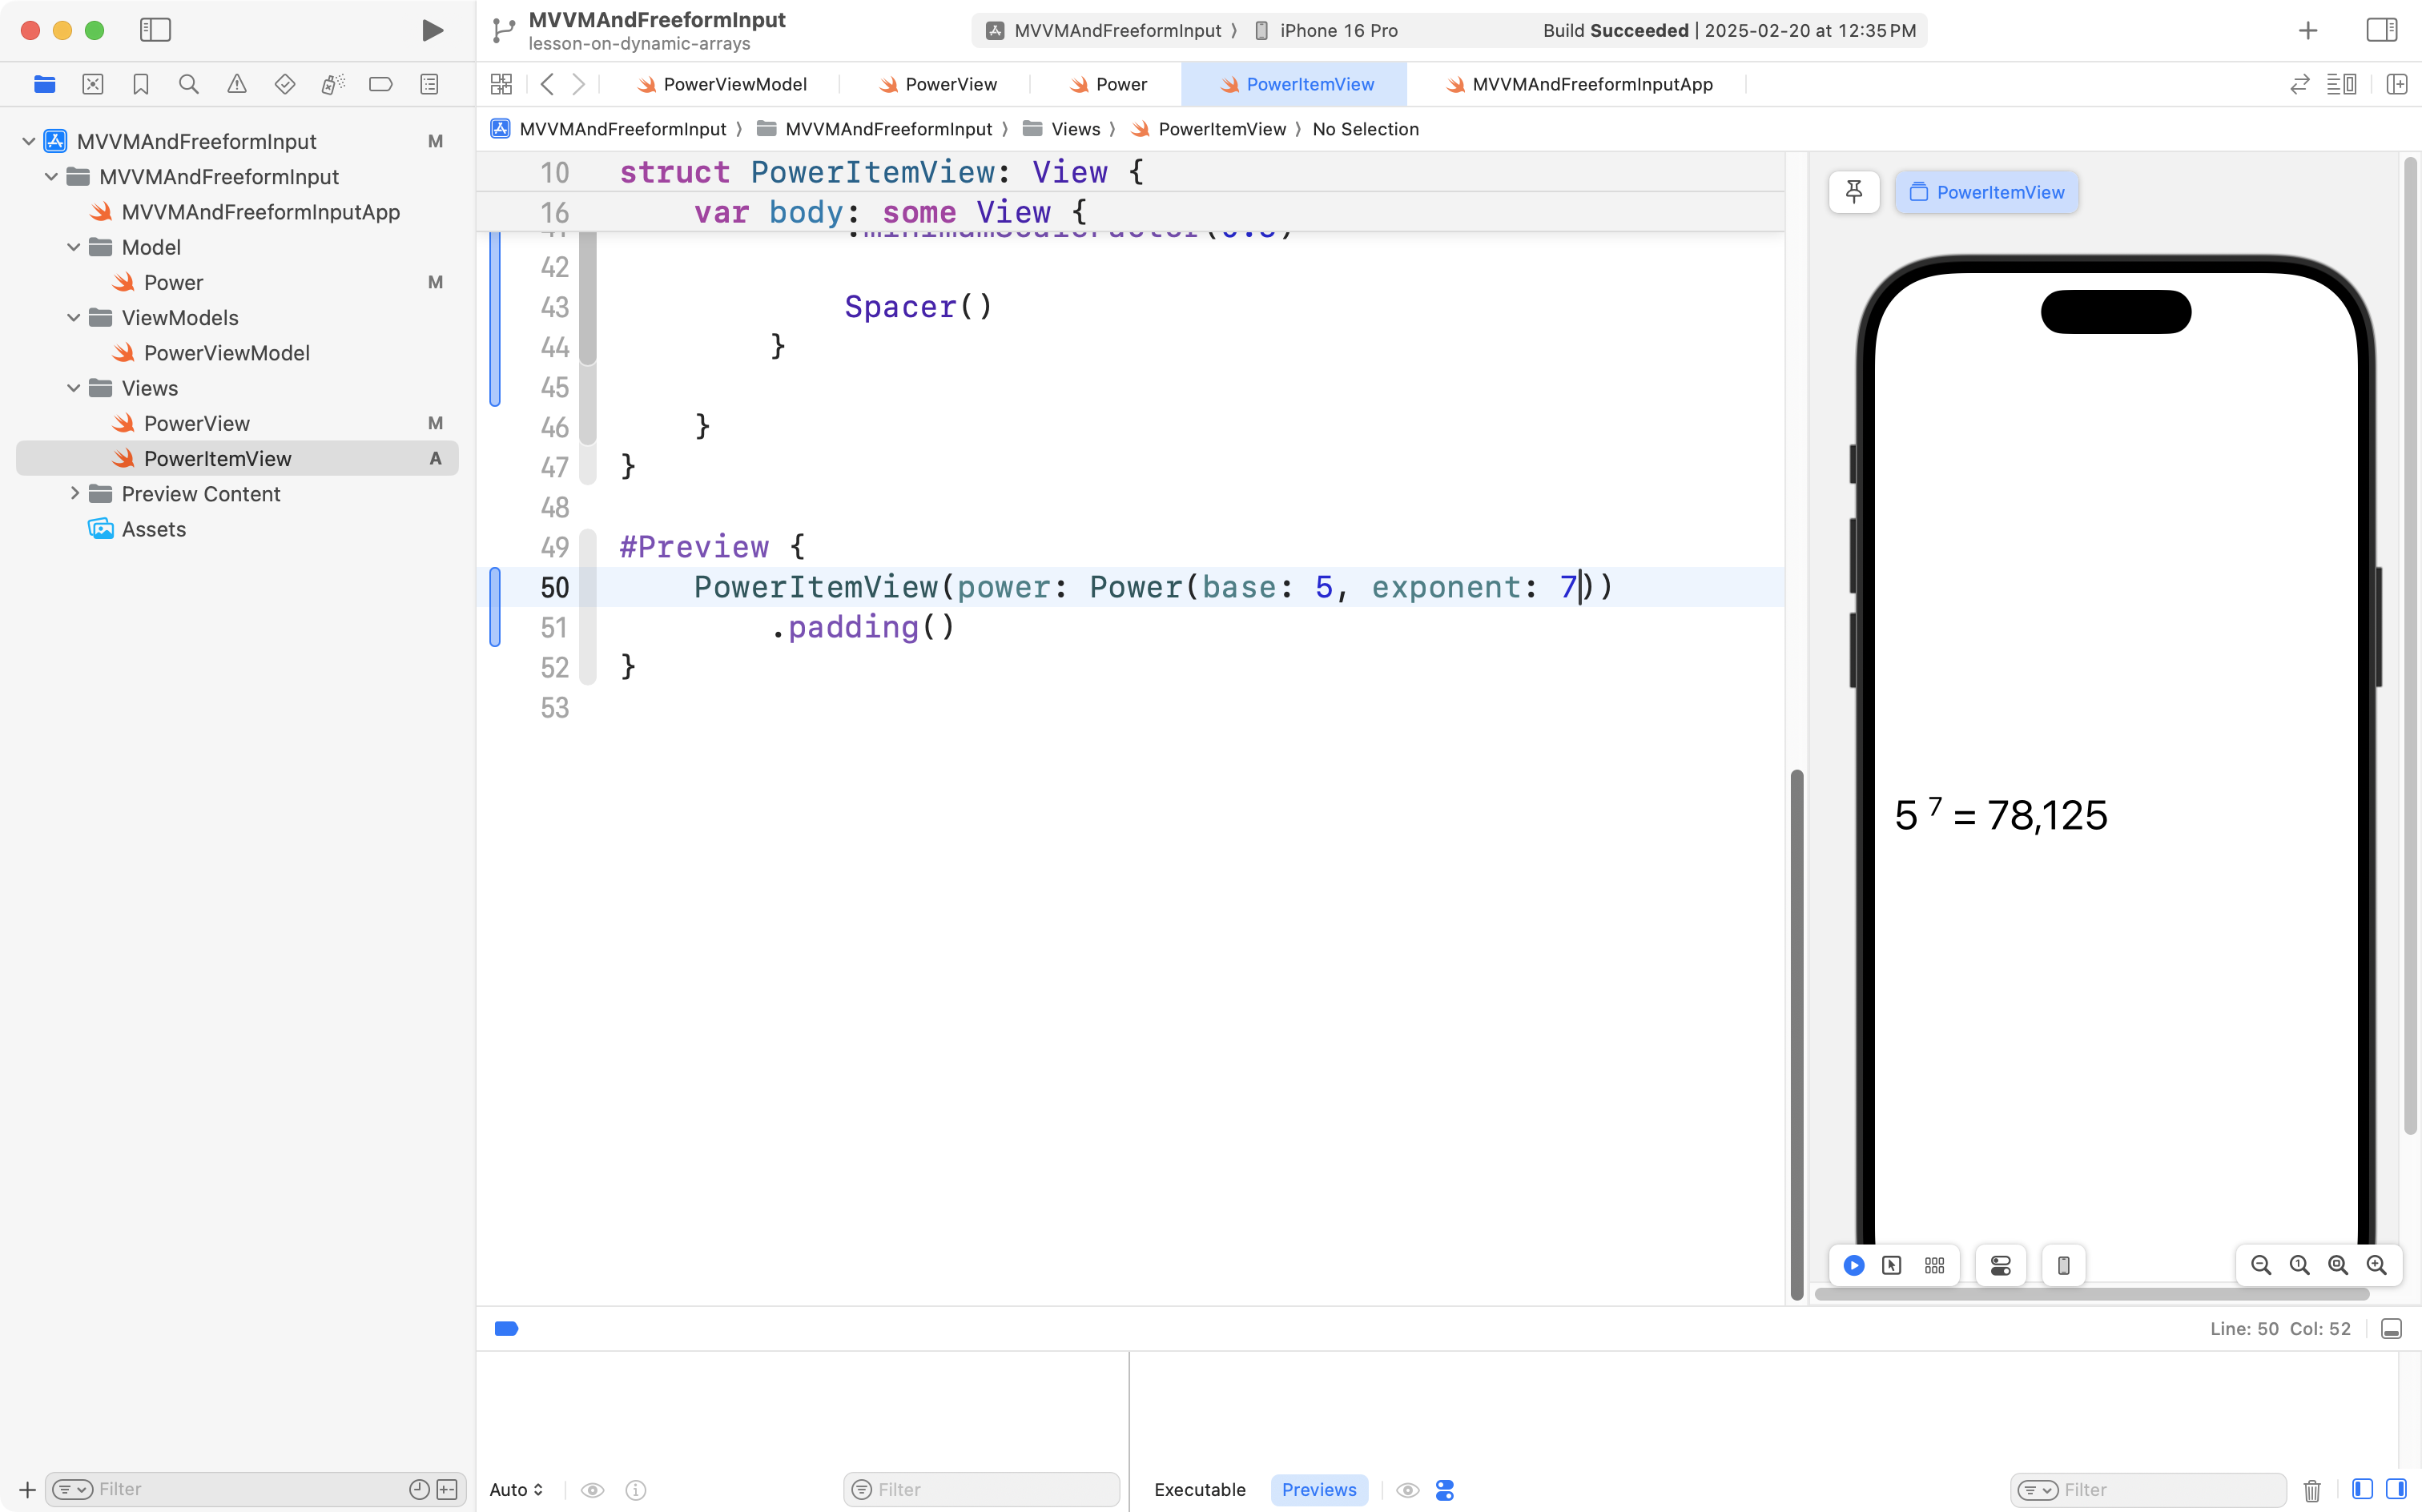
Try changing the arguments, or answers, to something else instead:
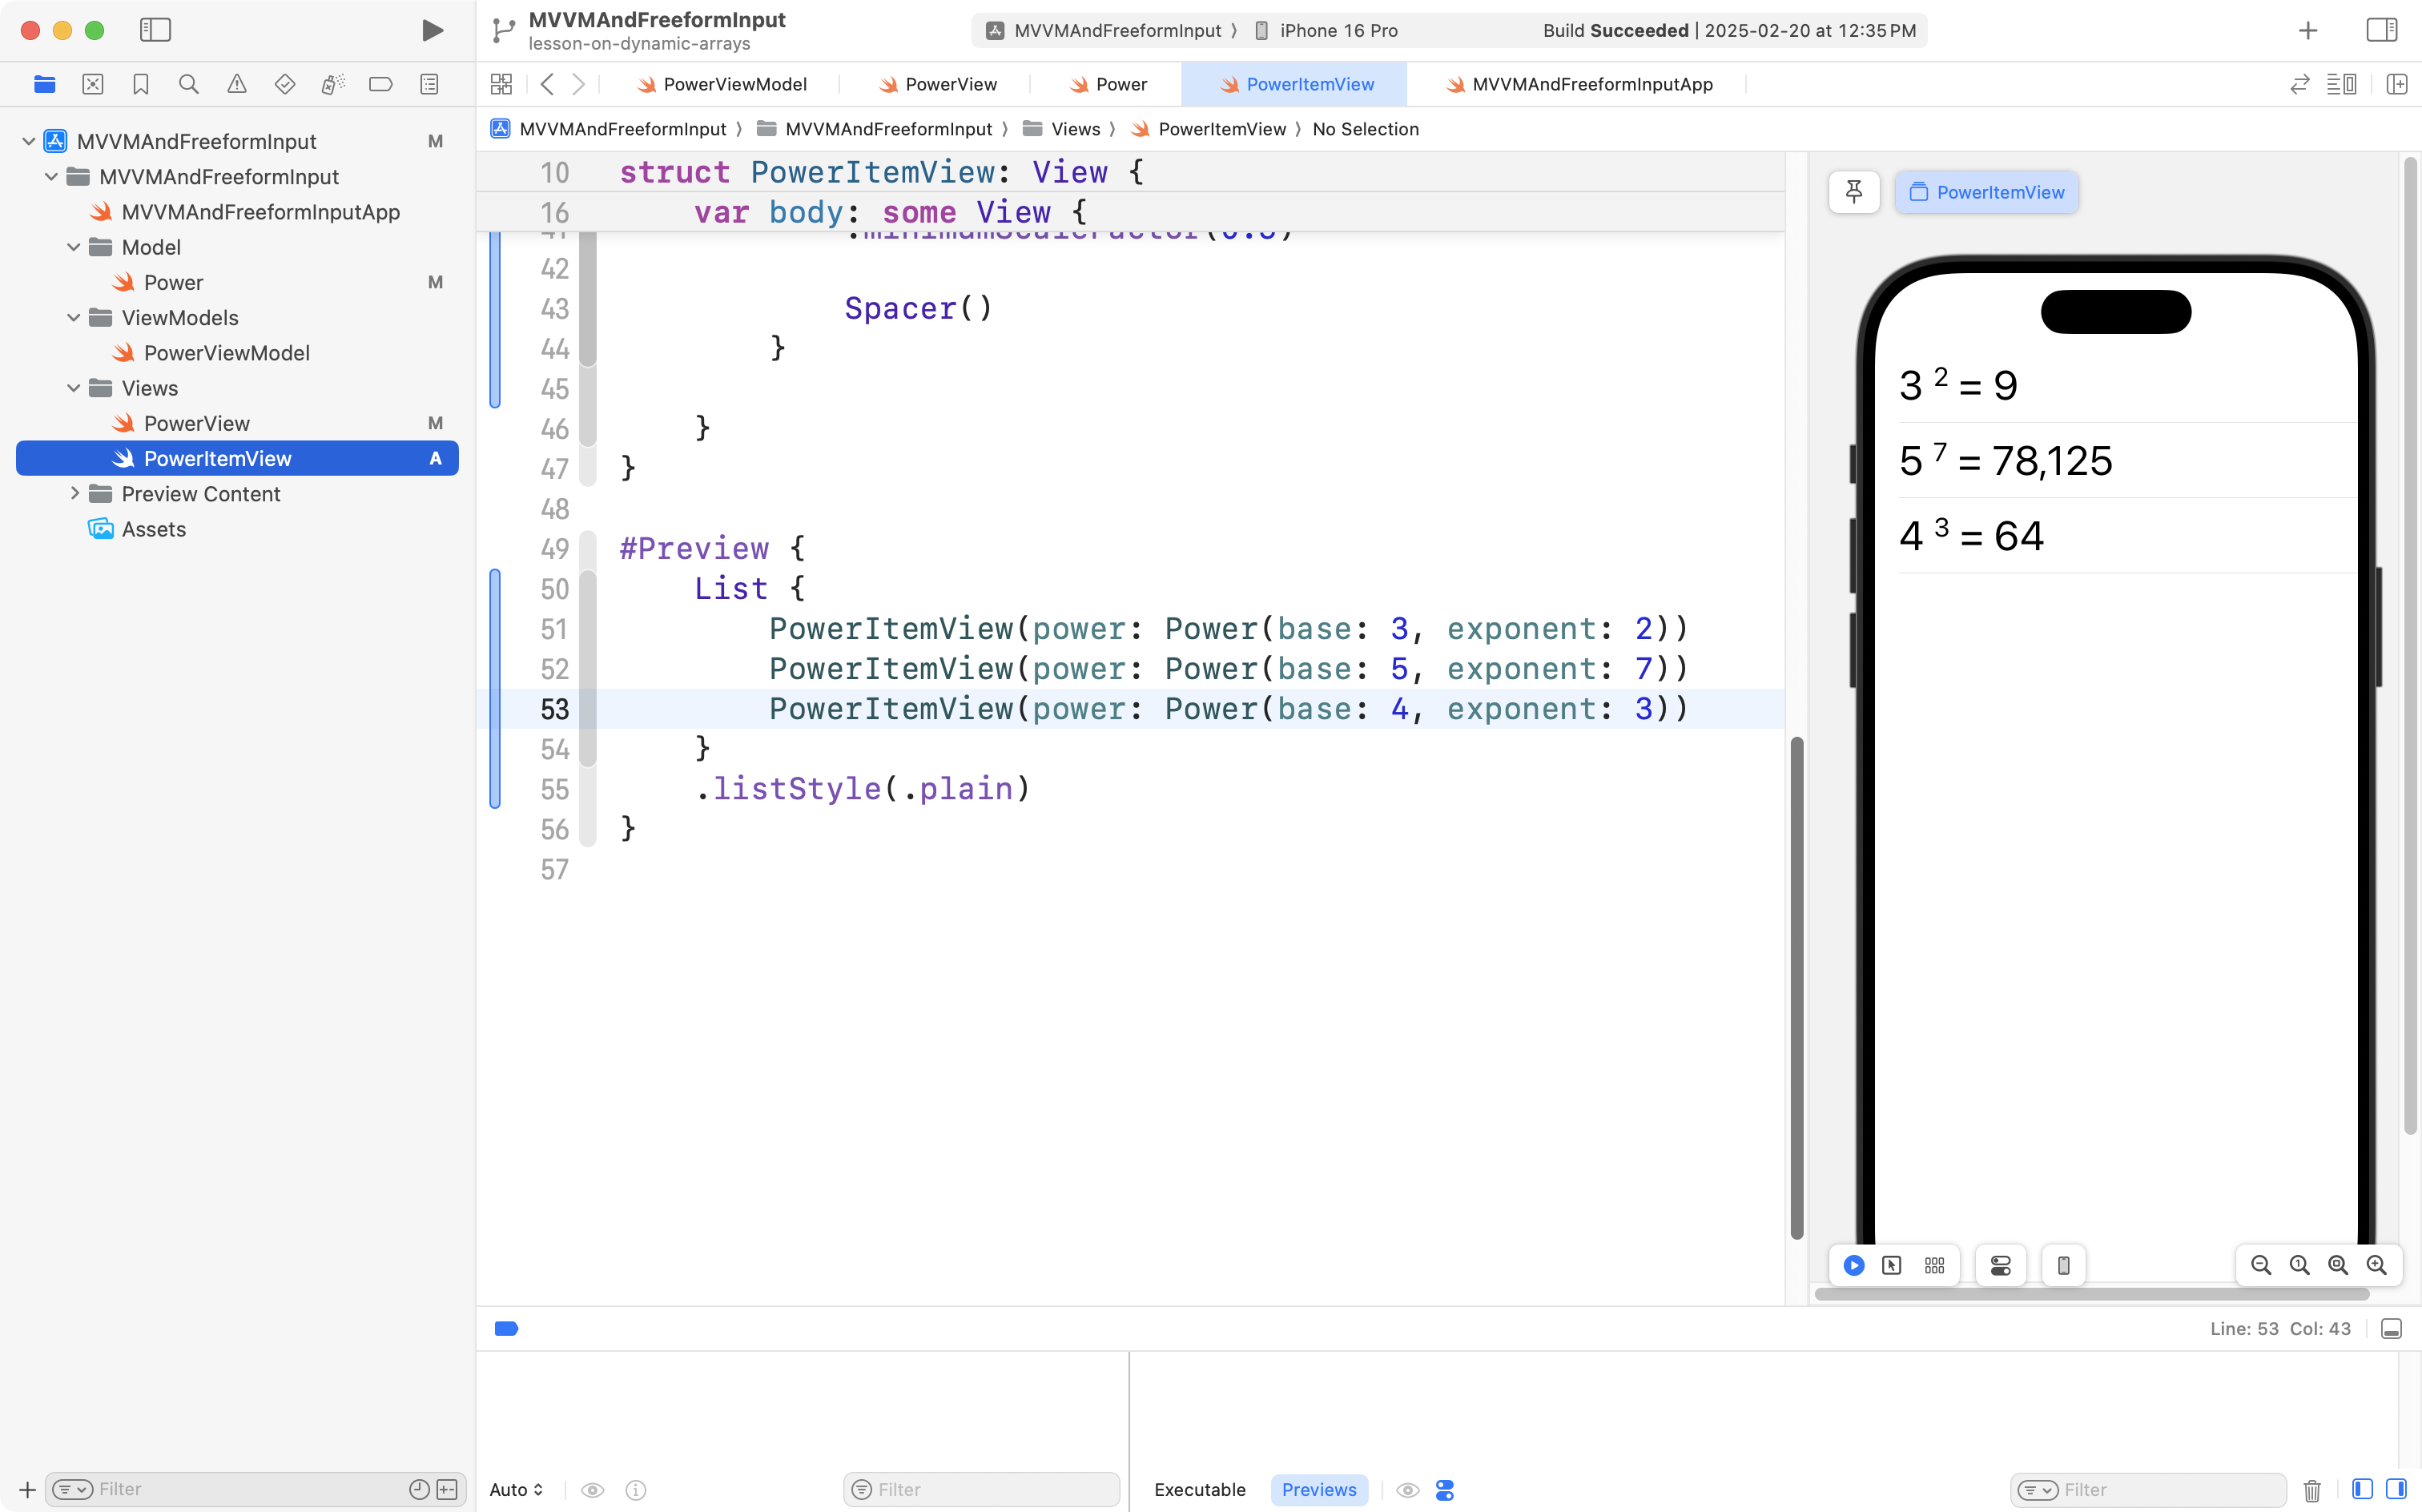
You can even create a preview of a scrollable list of several instances of the PowerItemView helper view:
Now, return to PowerView and you should see something like this:
Try evaluating several powers, and saving the results:
You should see that the scrollable list presents the contents of the resultHistory array from the view model.
This is a great time to commit and push your work, with the following message:
Made it possible to see the array of previously calculated results in a scrollable list.
User interface refinements
This last part of the tutorial is optional.
You may have noticed that the interface “jumps” a bit when valid input is provided. This is because of the addition of the button.
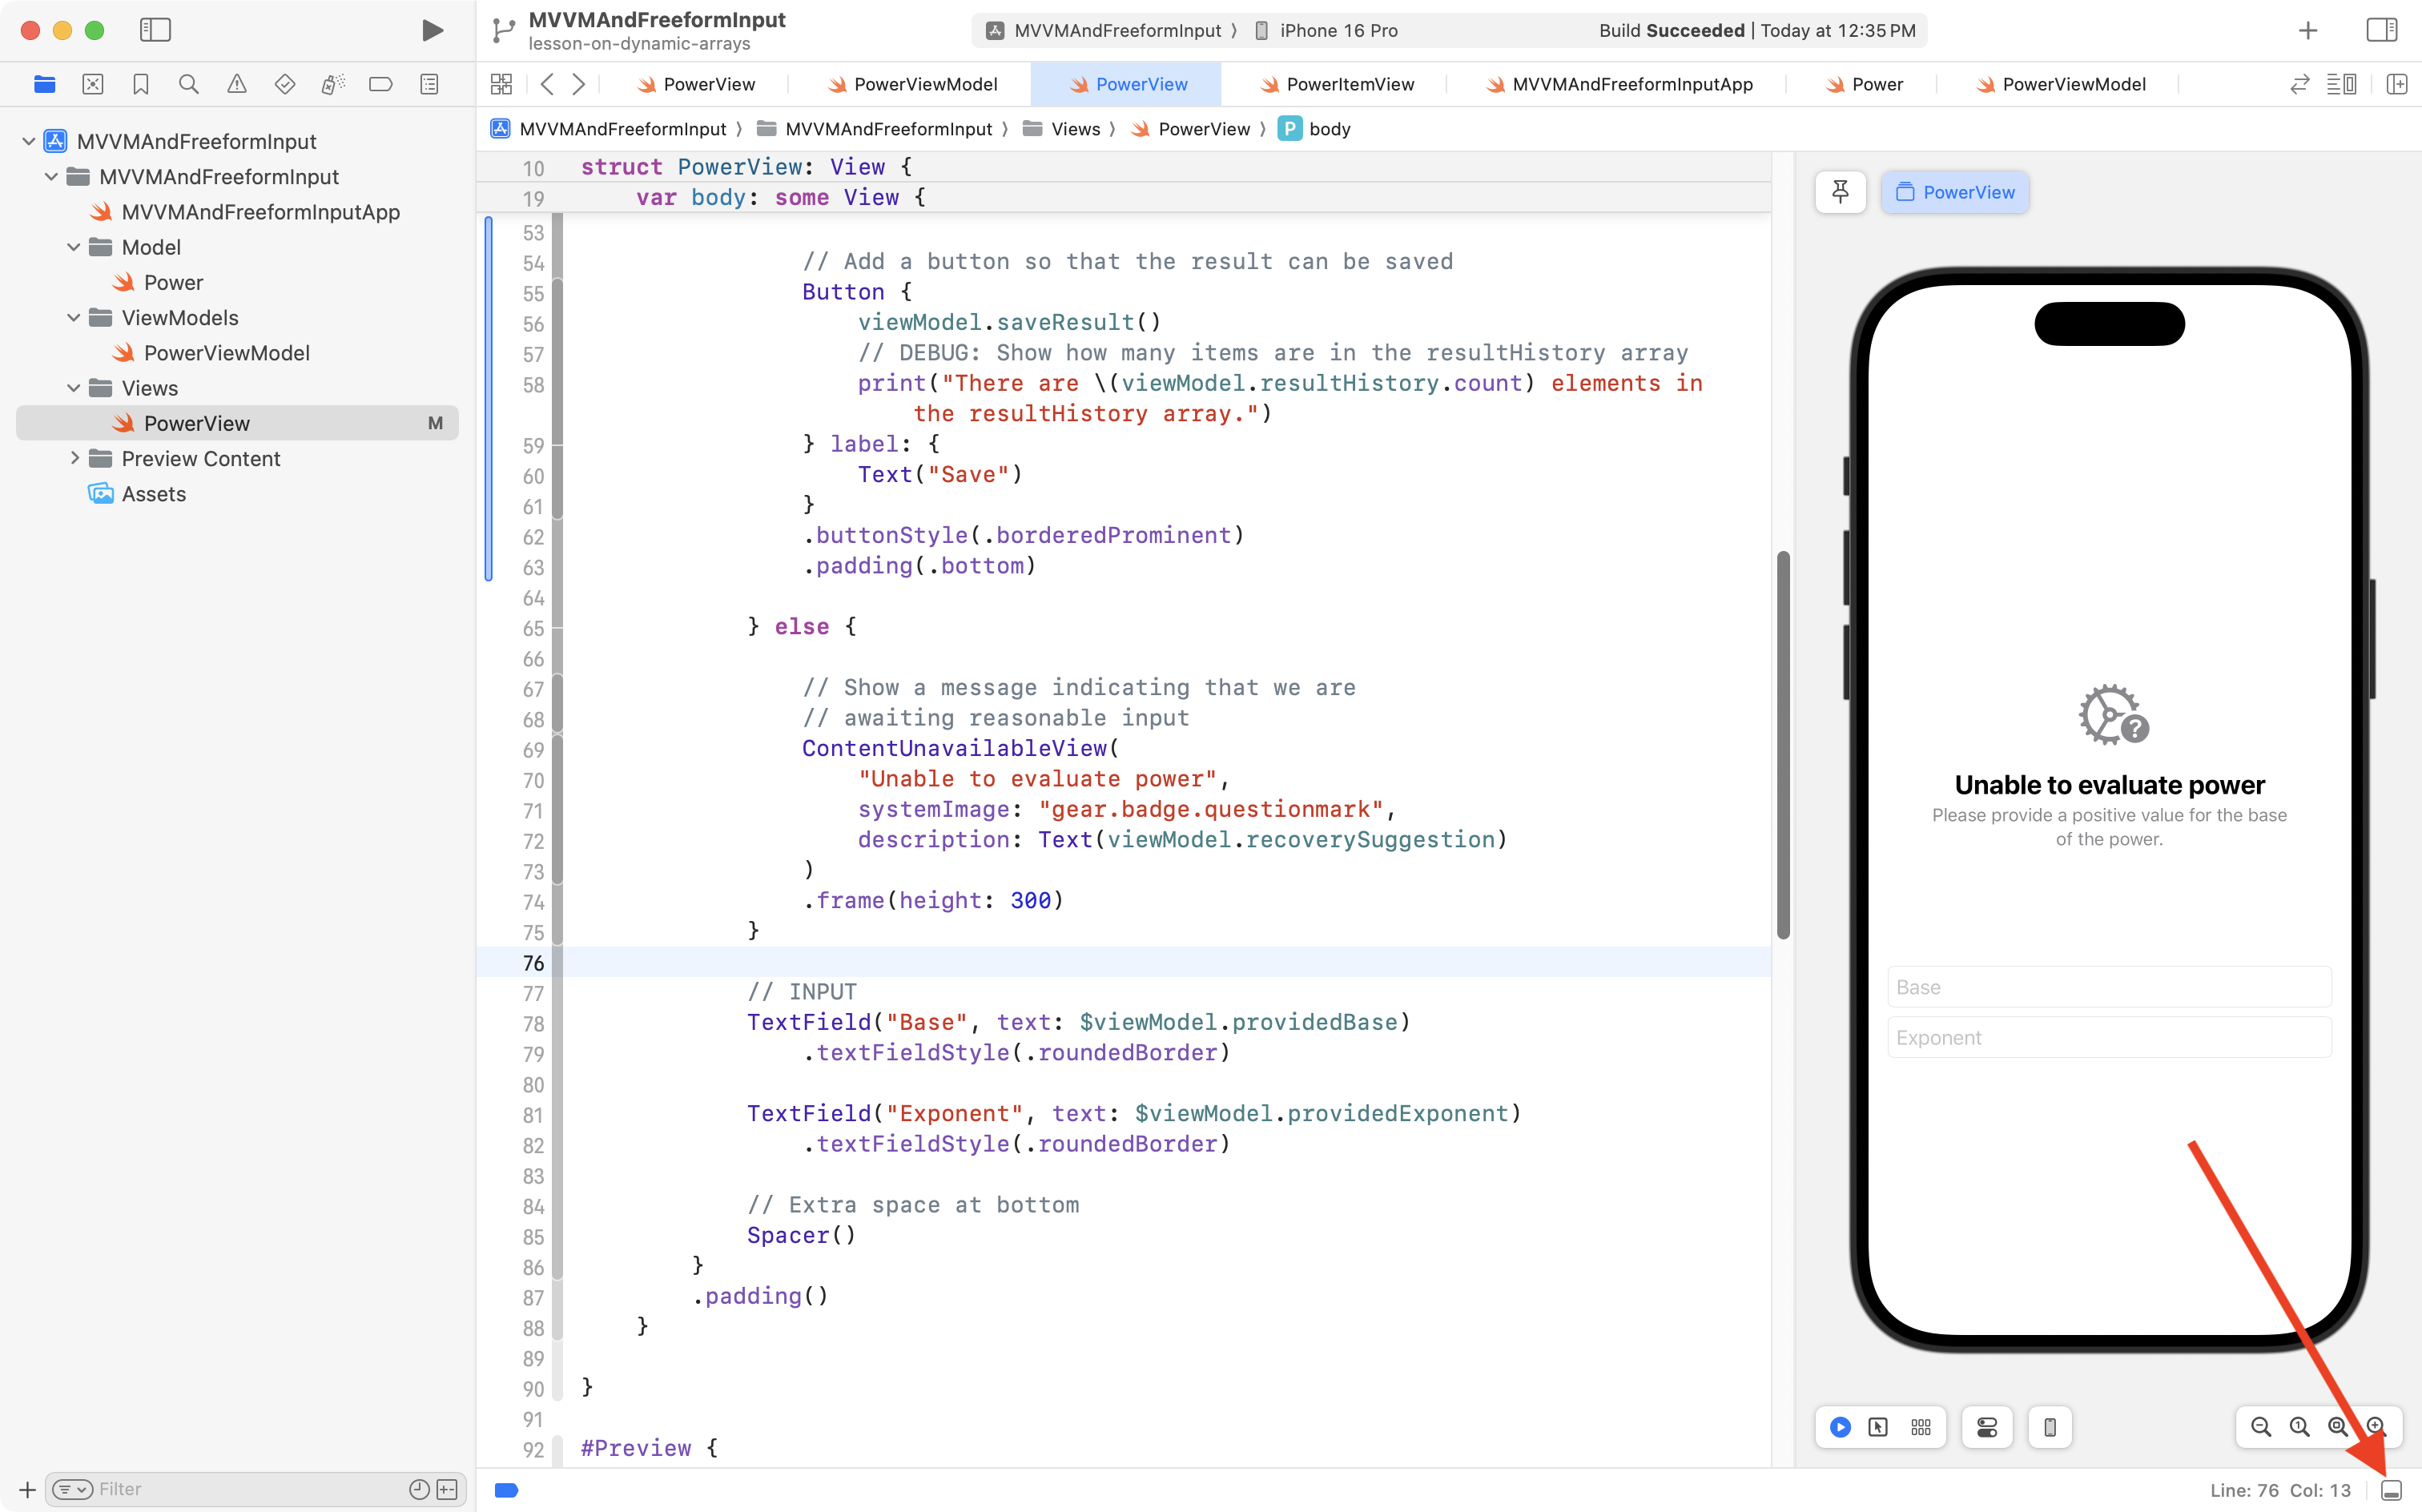
The height of the views that show the evaluated power and the height of the button is more than the height of the ContentUnavailableView.
If this kind of thing bothers you (and it should) then you can fix it by placing the views that display the evaluated power and button into a VStack, then setting the height of that VStack to be the same as the height of the ContentUnavailableView instance.
Here is a short video showing how to do this – a video has been used since the edits are a bit tricky to describe in writing:
Finally, if you want to show a navigation title, you can make the following edits as well:
Don’t forget to commit and push your work – this message is reasonable:
Added some interface refinements so that UI does not jump when a calculated result is saved to the list.
Exercise
To practice working with dynamic arrays (mutating, or changing an array at runtime), try adjusting at least one of your previously authored arithmetic apps (addition, subtraction, multiplication, or division), so that you can:
- save calculations to a history
- view the saved calculations in a scrollable list
Reflection questions
When you write a portfolio entry for this lesson, please try responding to the questions below.
NOTE
Since thinking about what you learned today, and making the effort to articulate your ideas in writing is the point of responding to these questions, please do not use a large language model such as ChatGPT to come up with responses.
By thinking about your responses to these questions on your own, you will better prepare yourself for upcoming conversation-based evaluations in this module of the course. As a group, we will soon speak at greater length together about what these conversation-based evaluations are. Note that every student in the class will complete a conversation-based evaluation at least once before the end of this module.
- In your own words, explain the difference between a static array and a dynamic array.
- How can breakpoints help you understand the structure and contents of an array during runtime? Describe the steps you followed to inspect the
numbersarray using breakpoints. - What happens when you enter a non-numeric value as input for the number of additional elements to add to the array? Why does this occur? How do you prevent the program from crashing in this scenario?
- Compare the dynamic arrays you worked with in this tutorial to a real-world app you use (e.g., a shopping cart in an online store). How might the concepts of array mutation and user interaction apply in that context?